Chocolate Bunny in Photoshop
For this tutorial, we will the image of a “Porcelain Rabbit” for our “Background”.
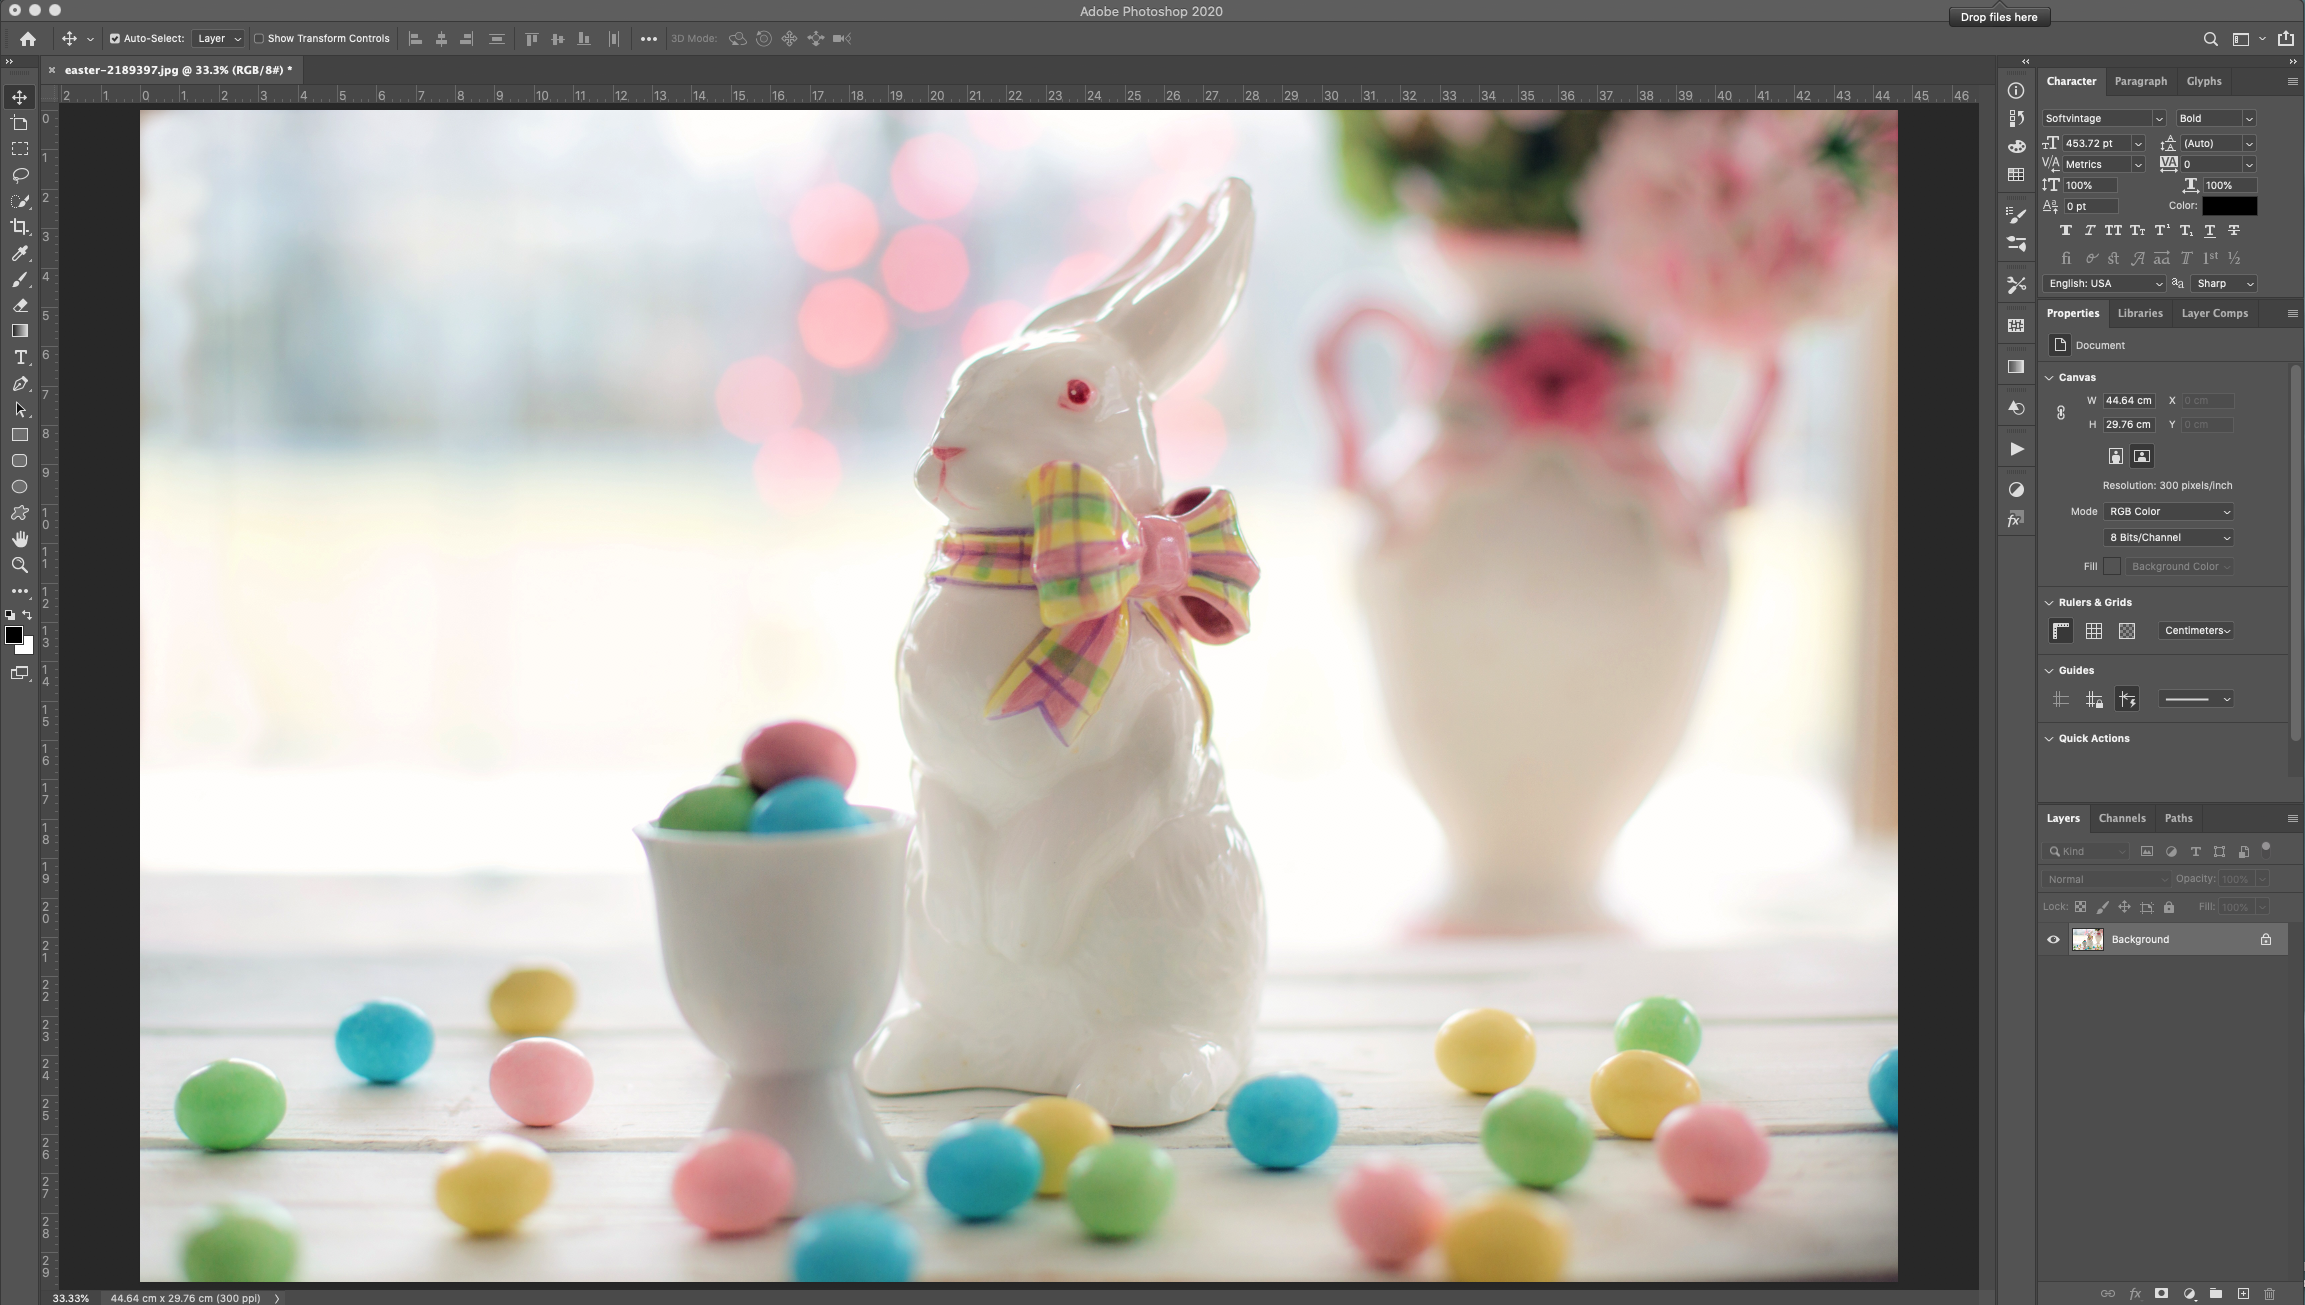
1 - In Photoshop, open the image you chose as “Background”.
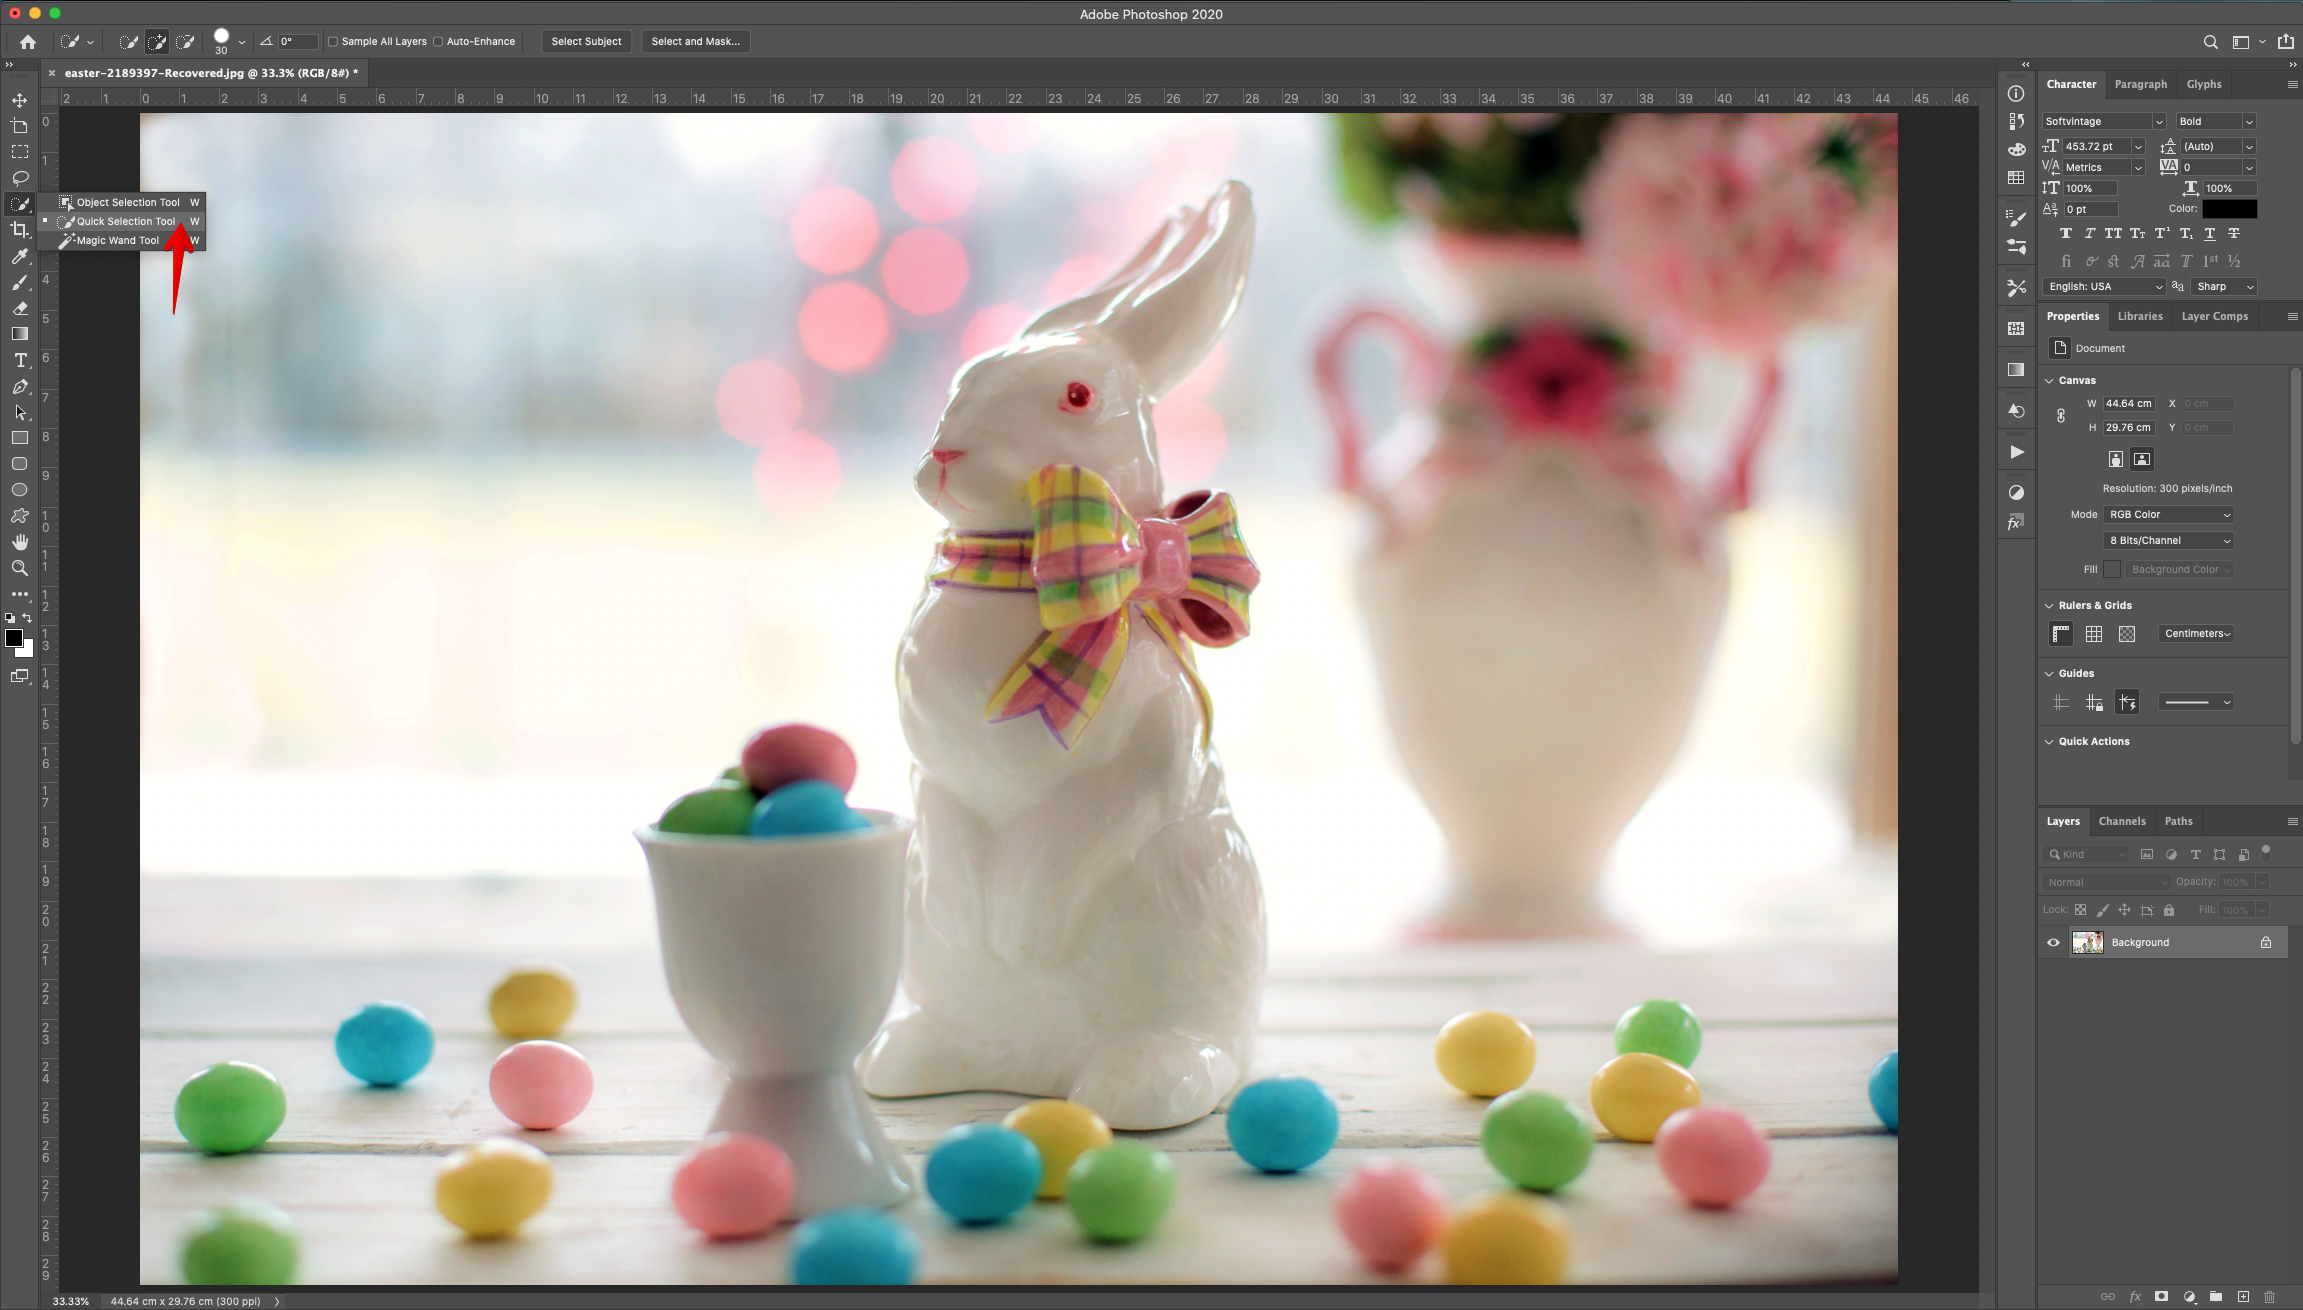
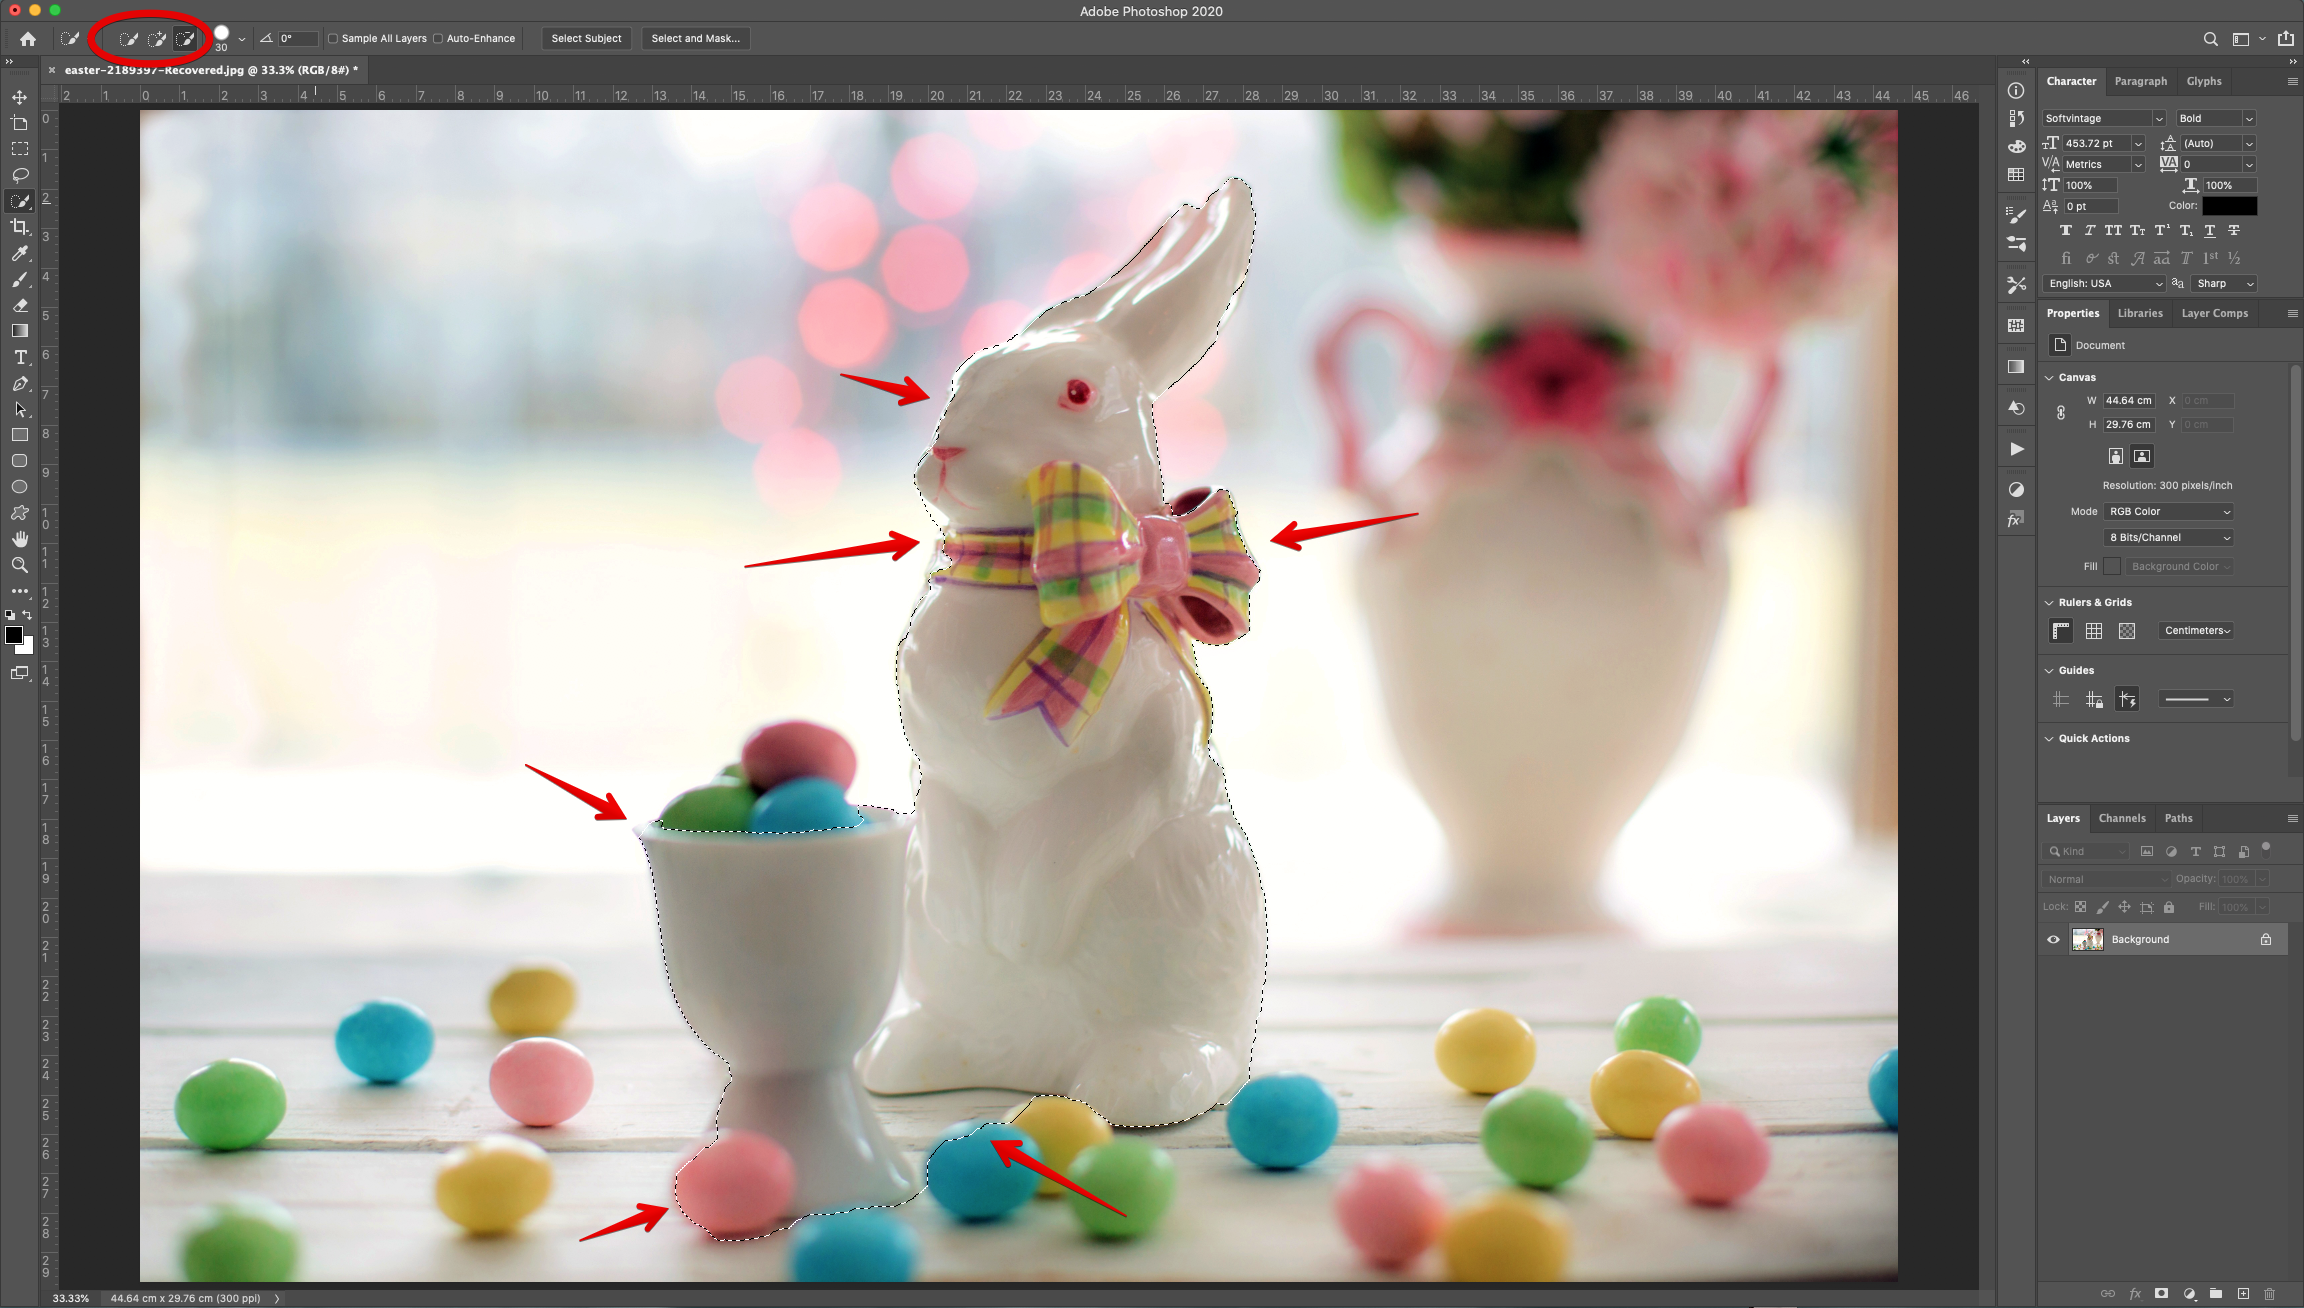
2 - Use the “Quick Selection Tool” (Q) to make a selection of the “Rabbit”. Use “Add” and “Subtract from selection” to refine it if needed.
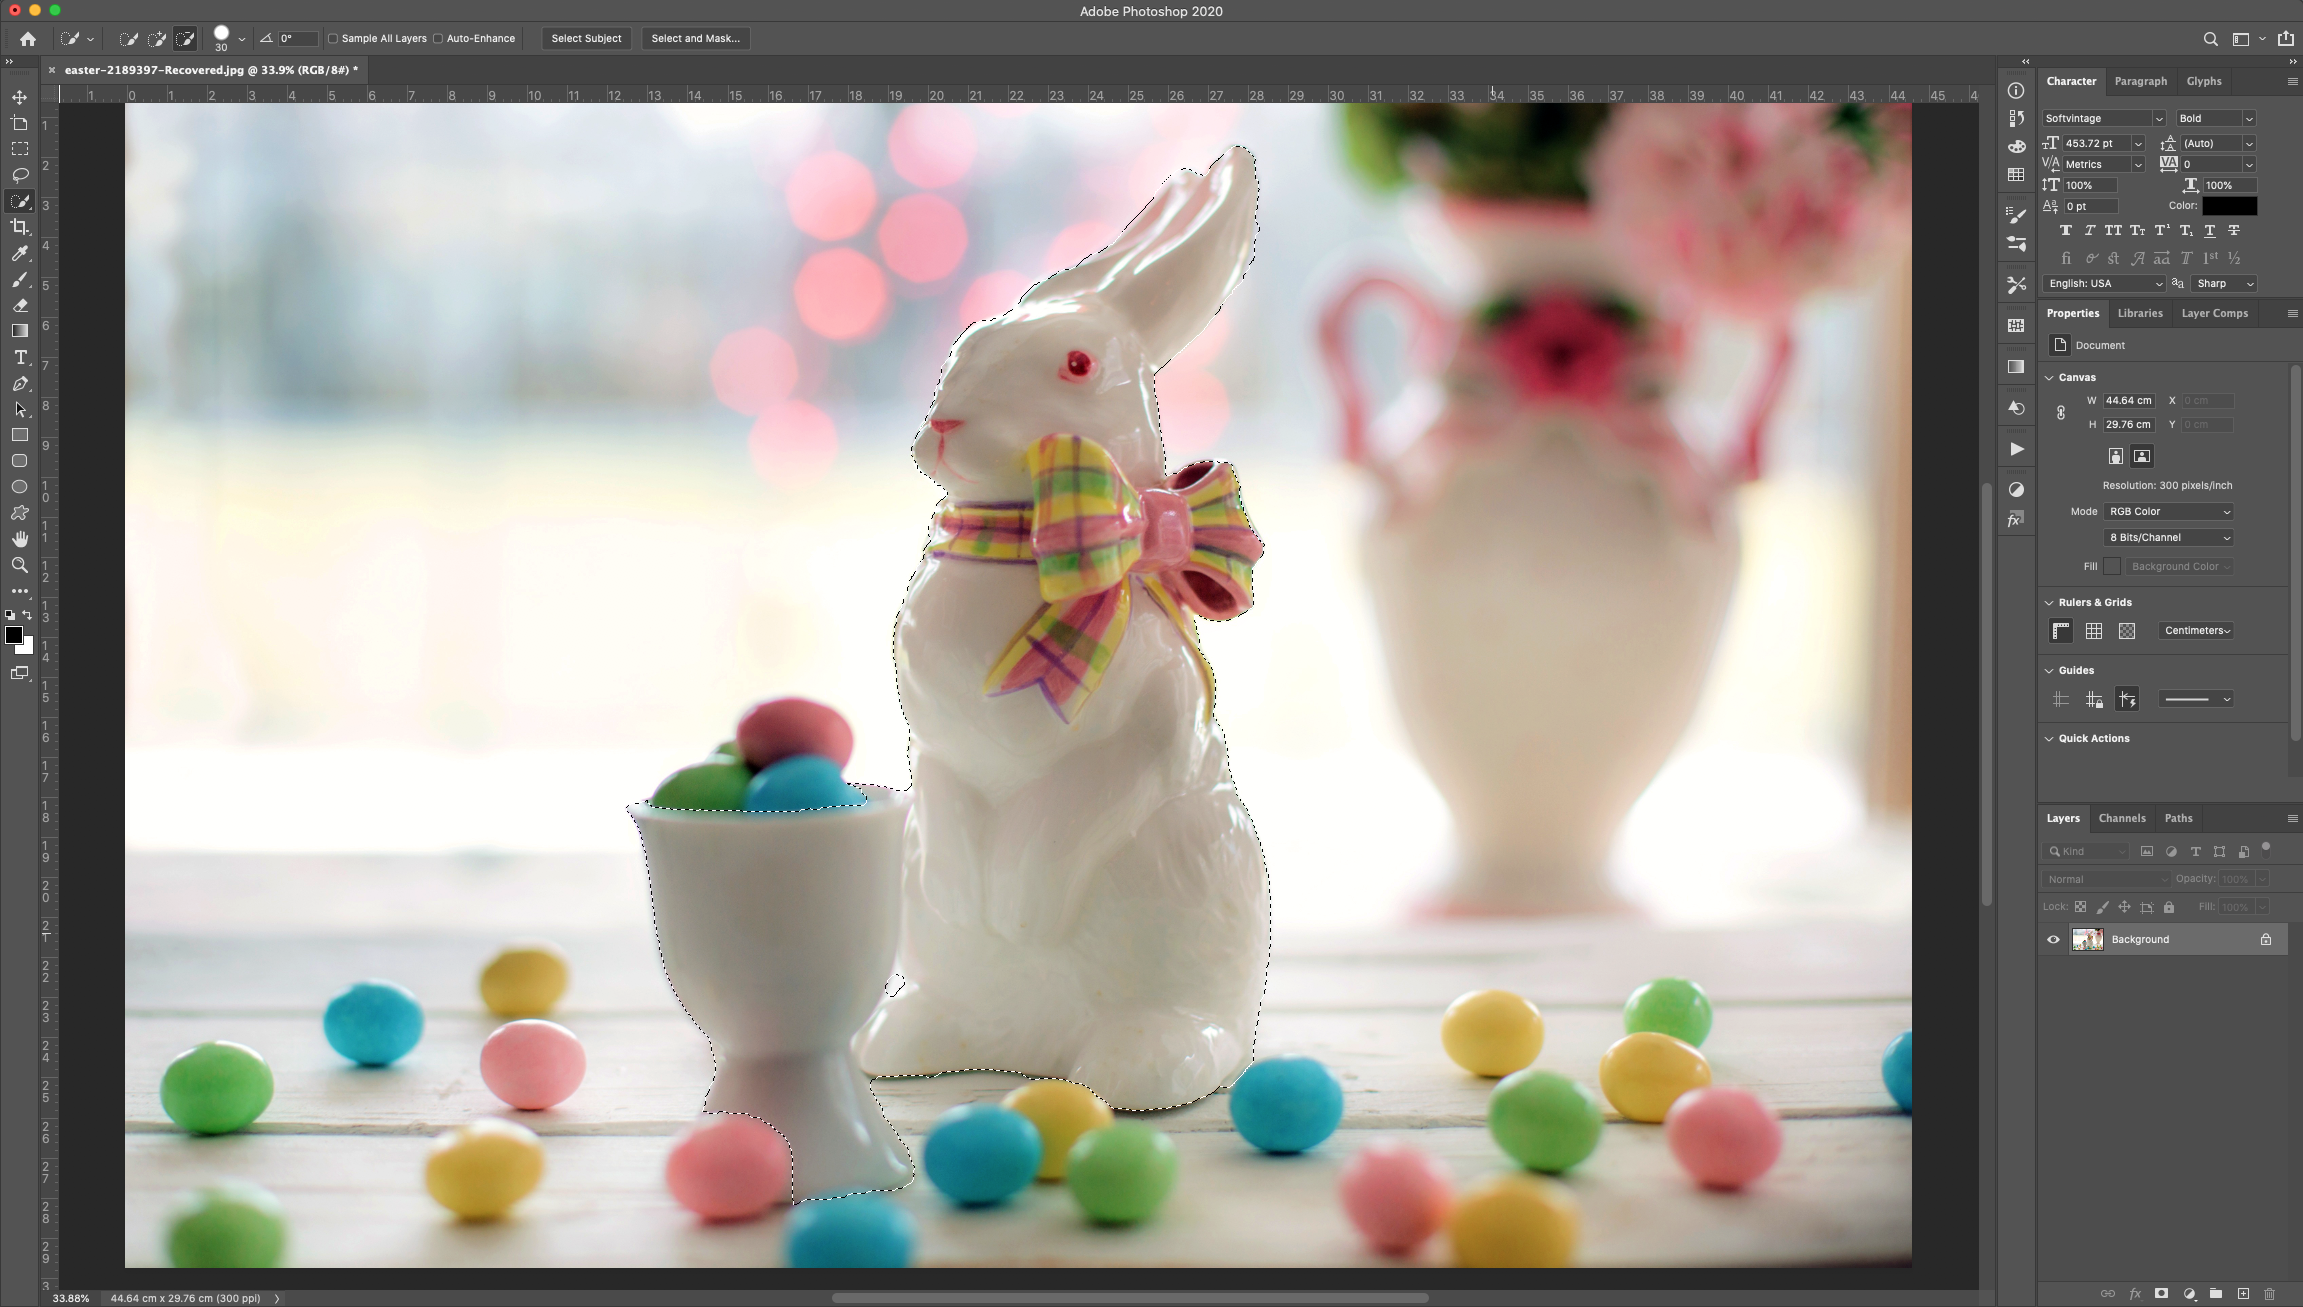
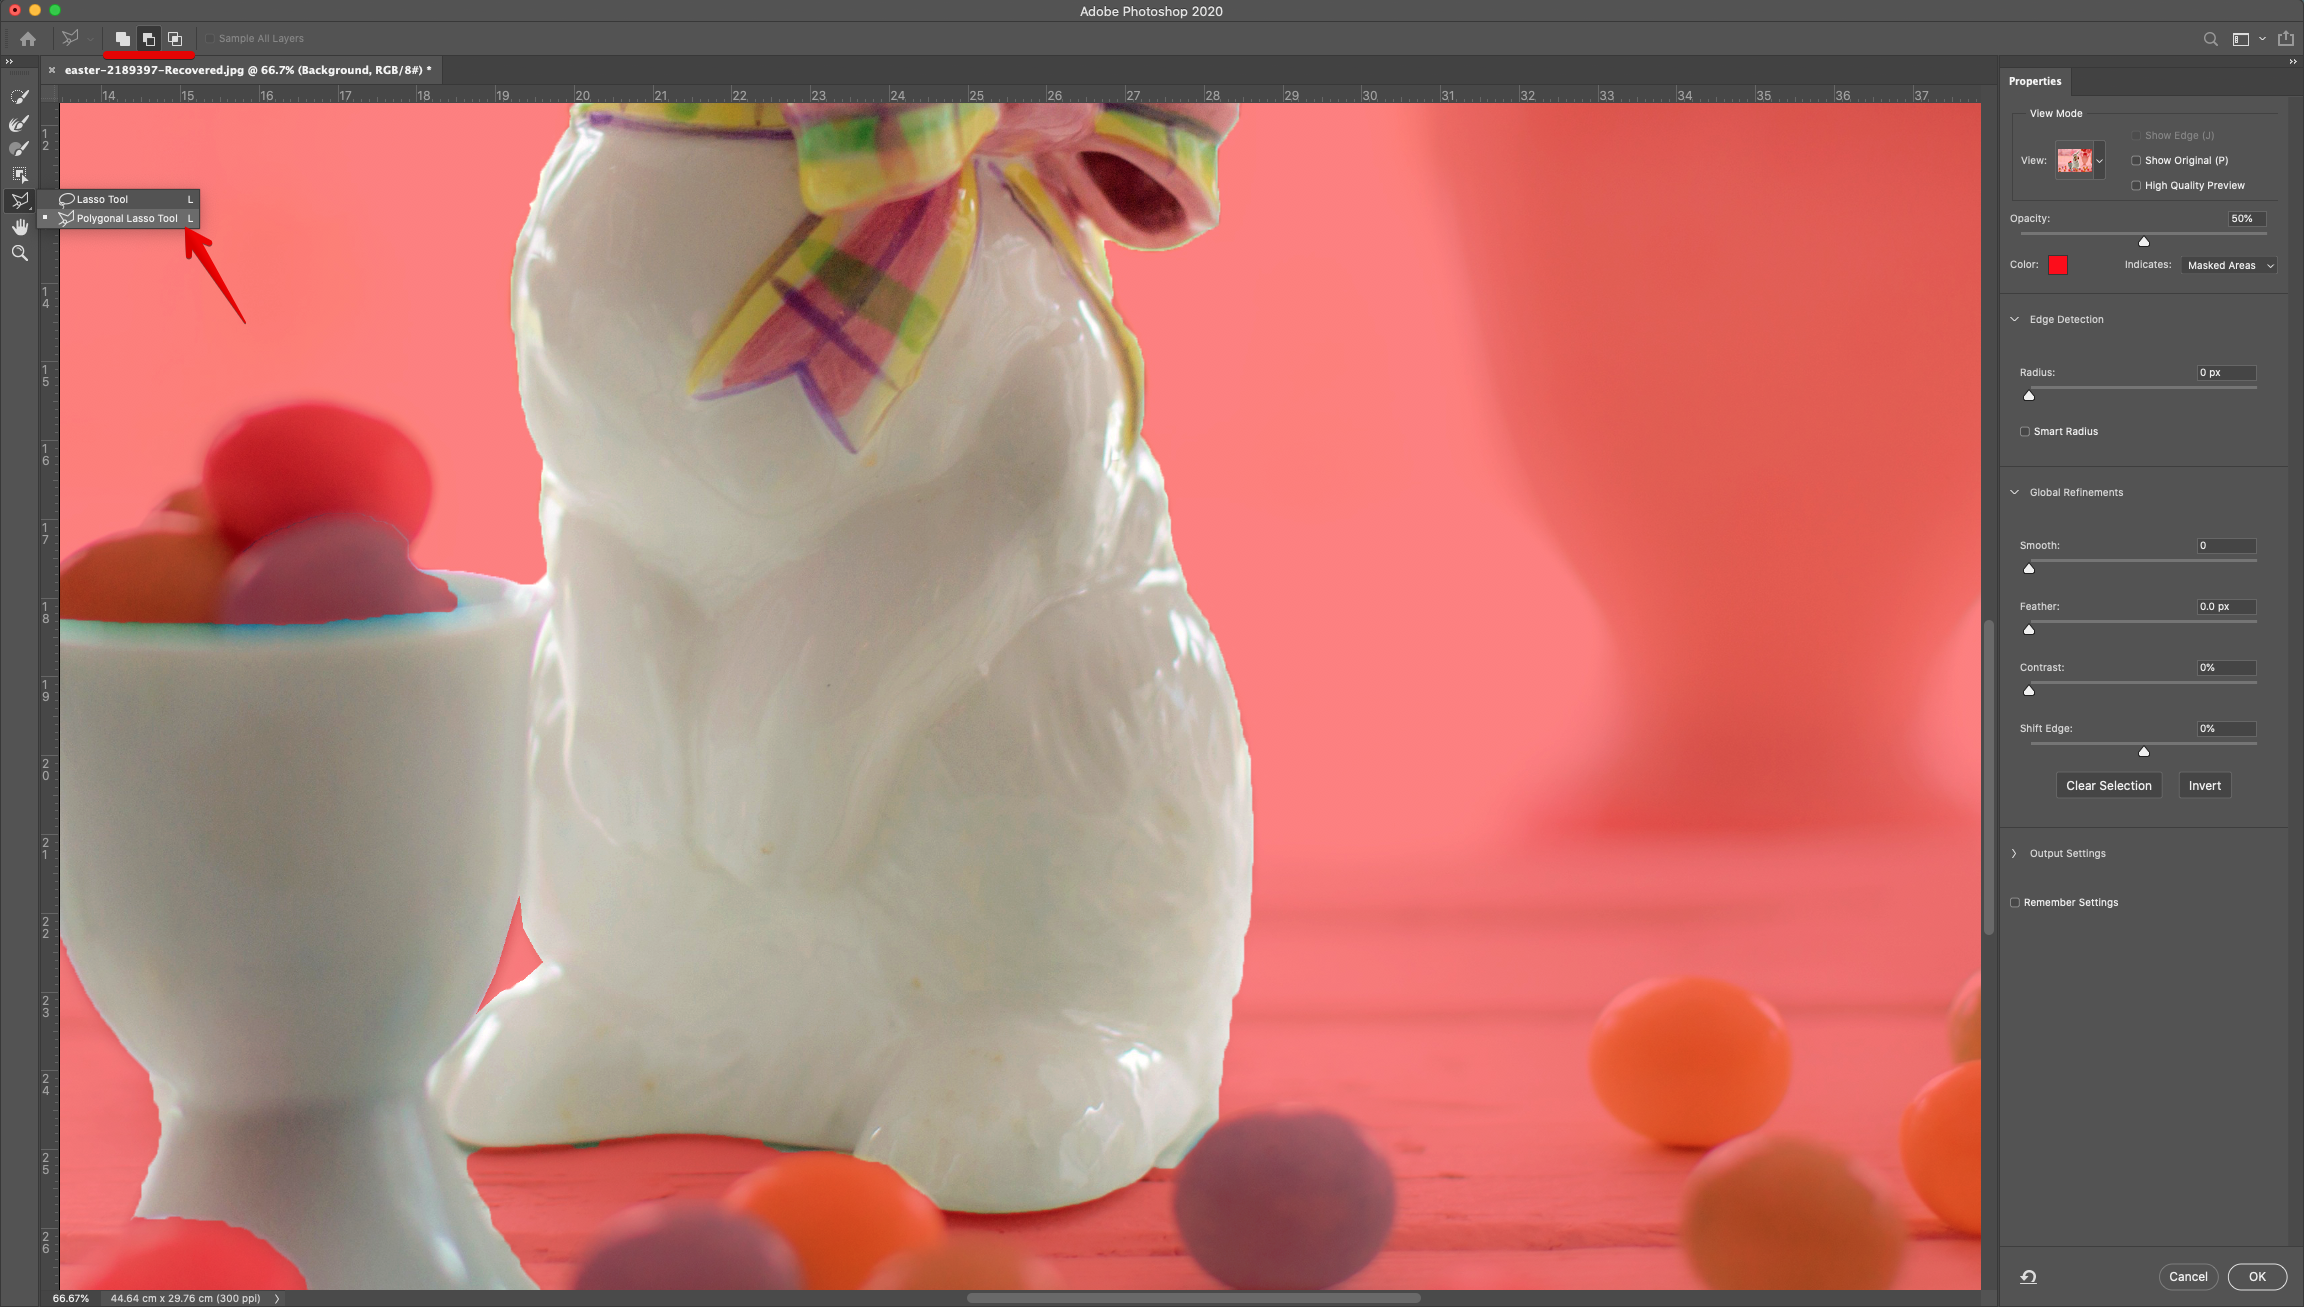
3 - Once you are happy with it click the “Select and Mask” button on the Top Menu to enter the “Mask Properties Panel” and tweak your selection. Use “Overlay” as “View” mode and adjust the “Opacity” value to your liking.


4 - We used the “Polygonal Lasso Tool” (L) alternating between Use “Add” and “Subtract” to clean the edges.

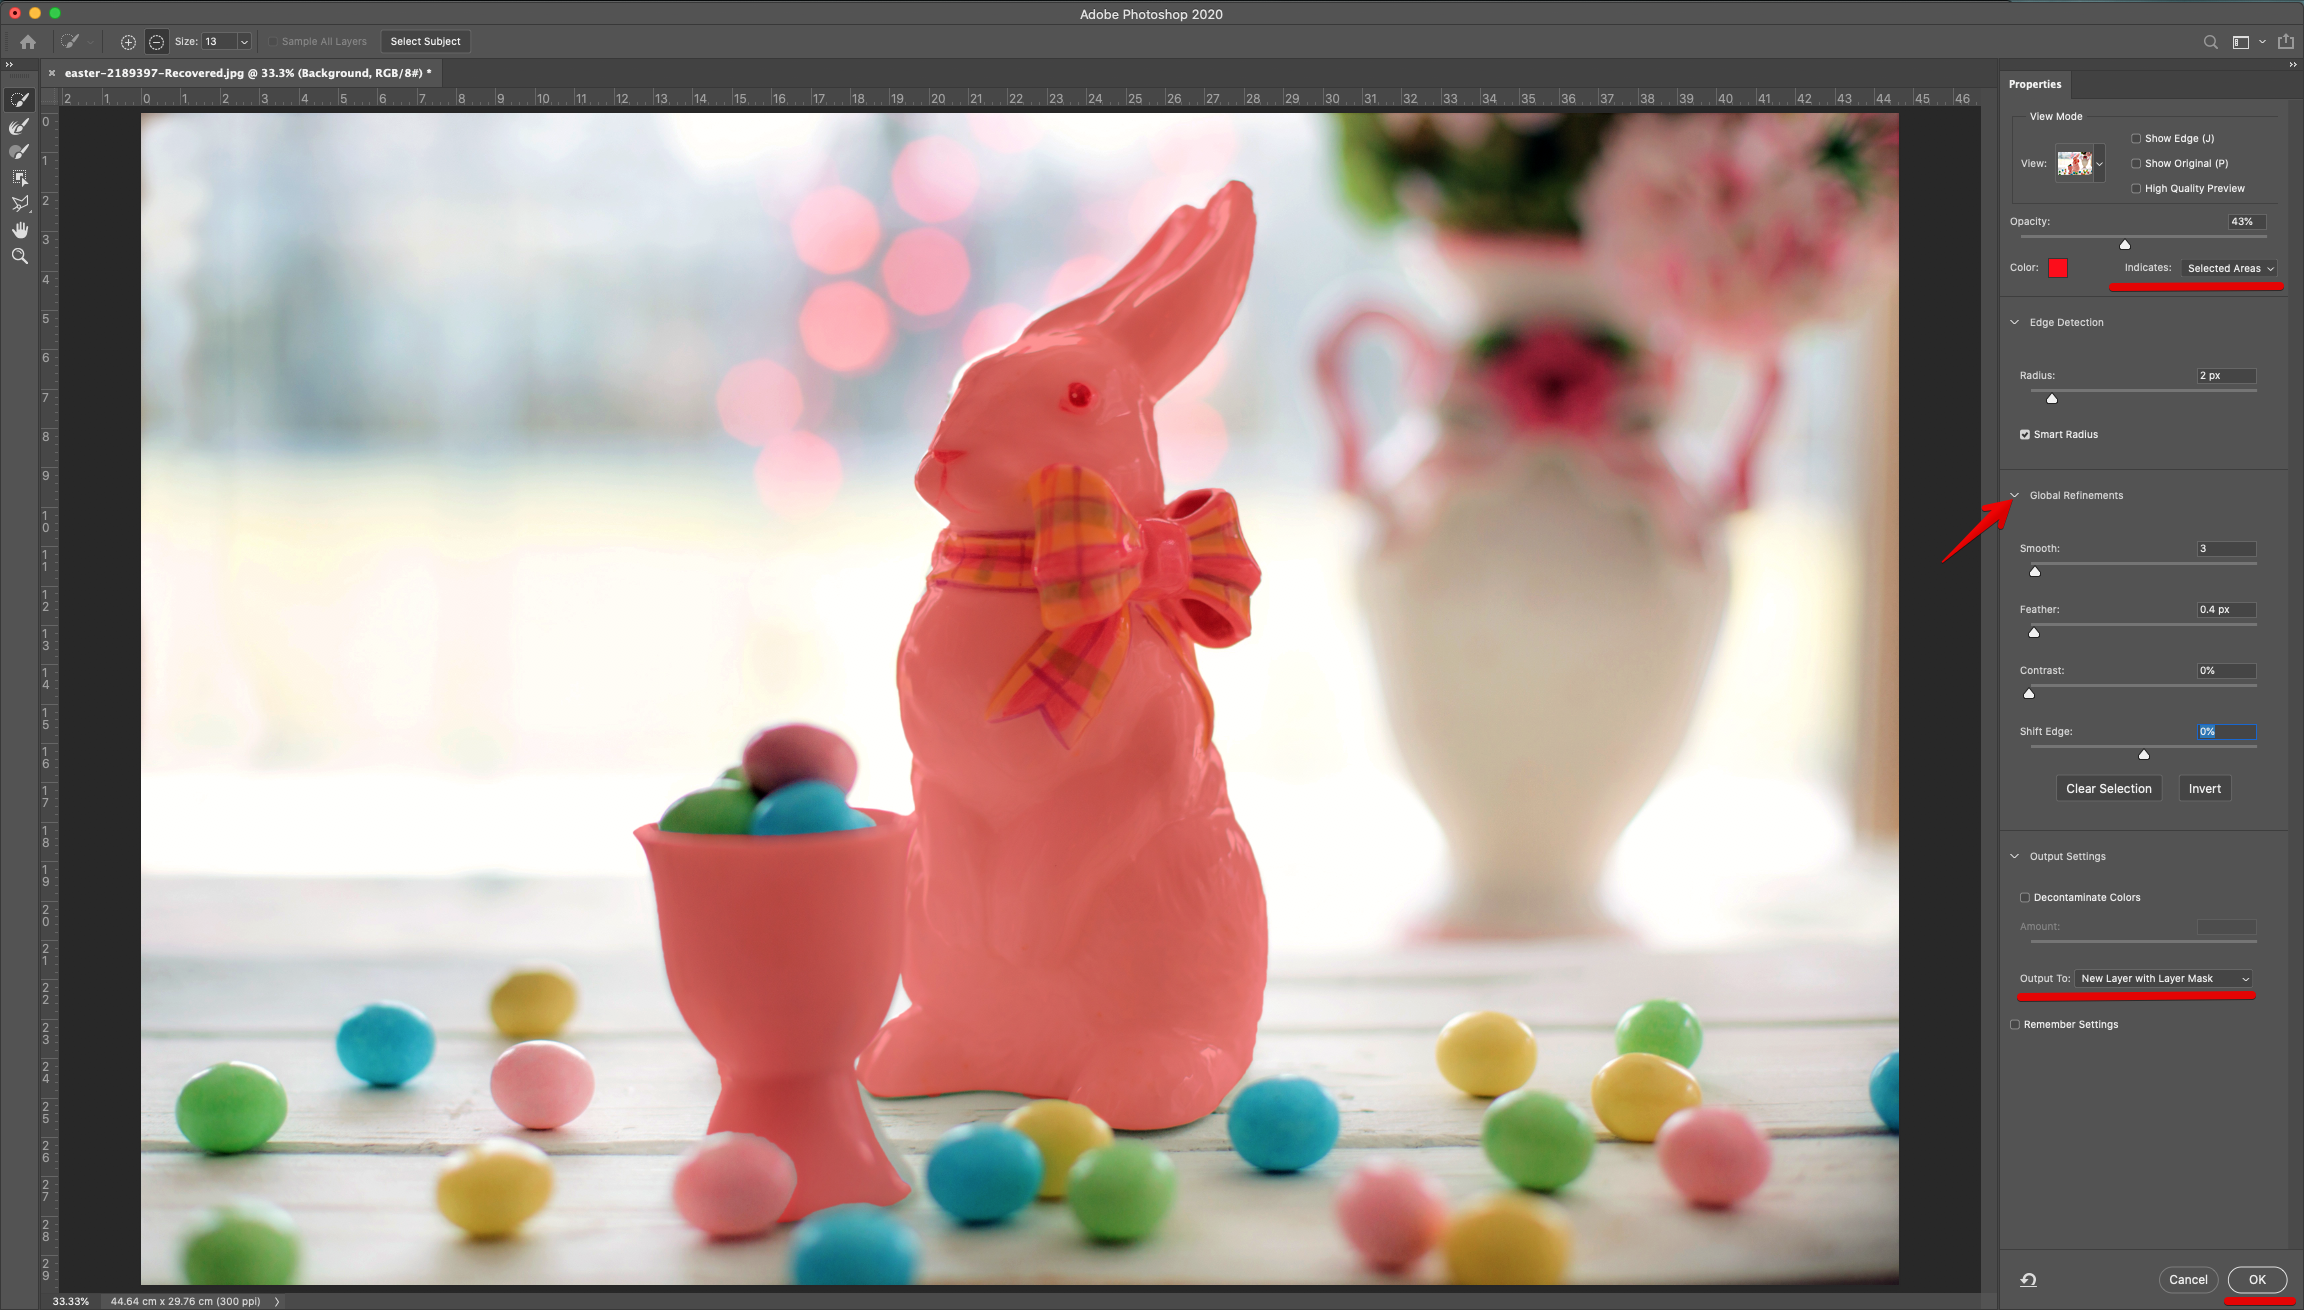
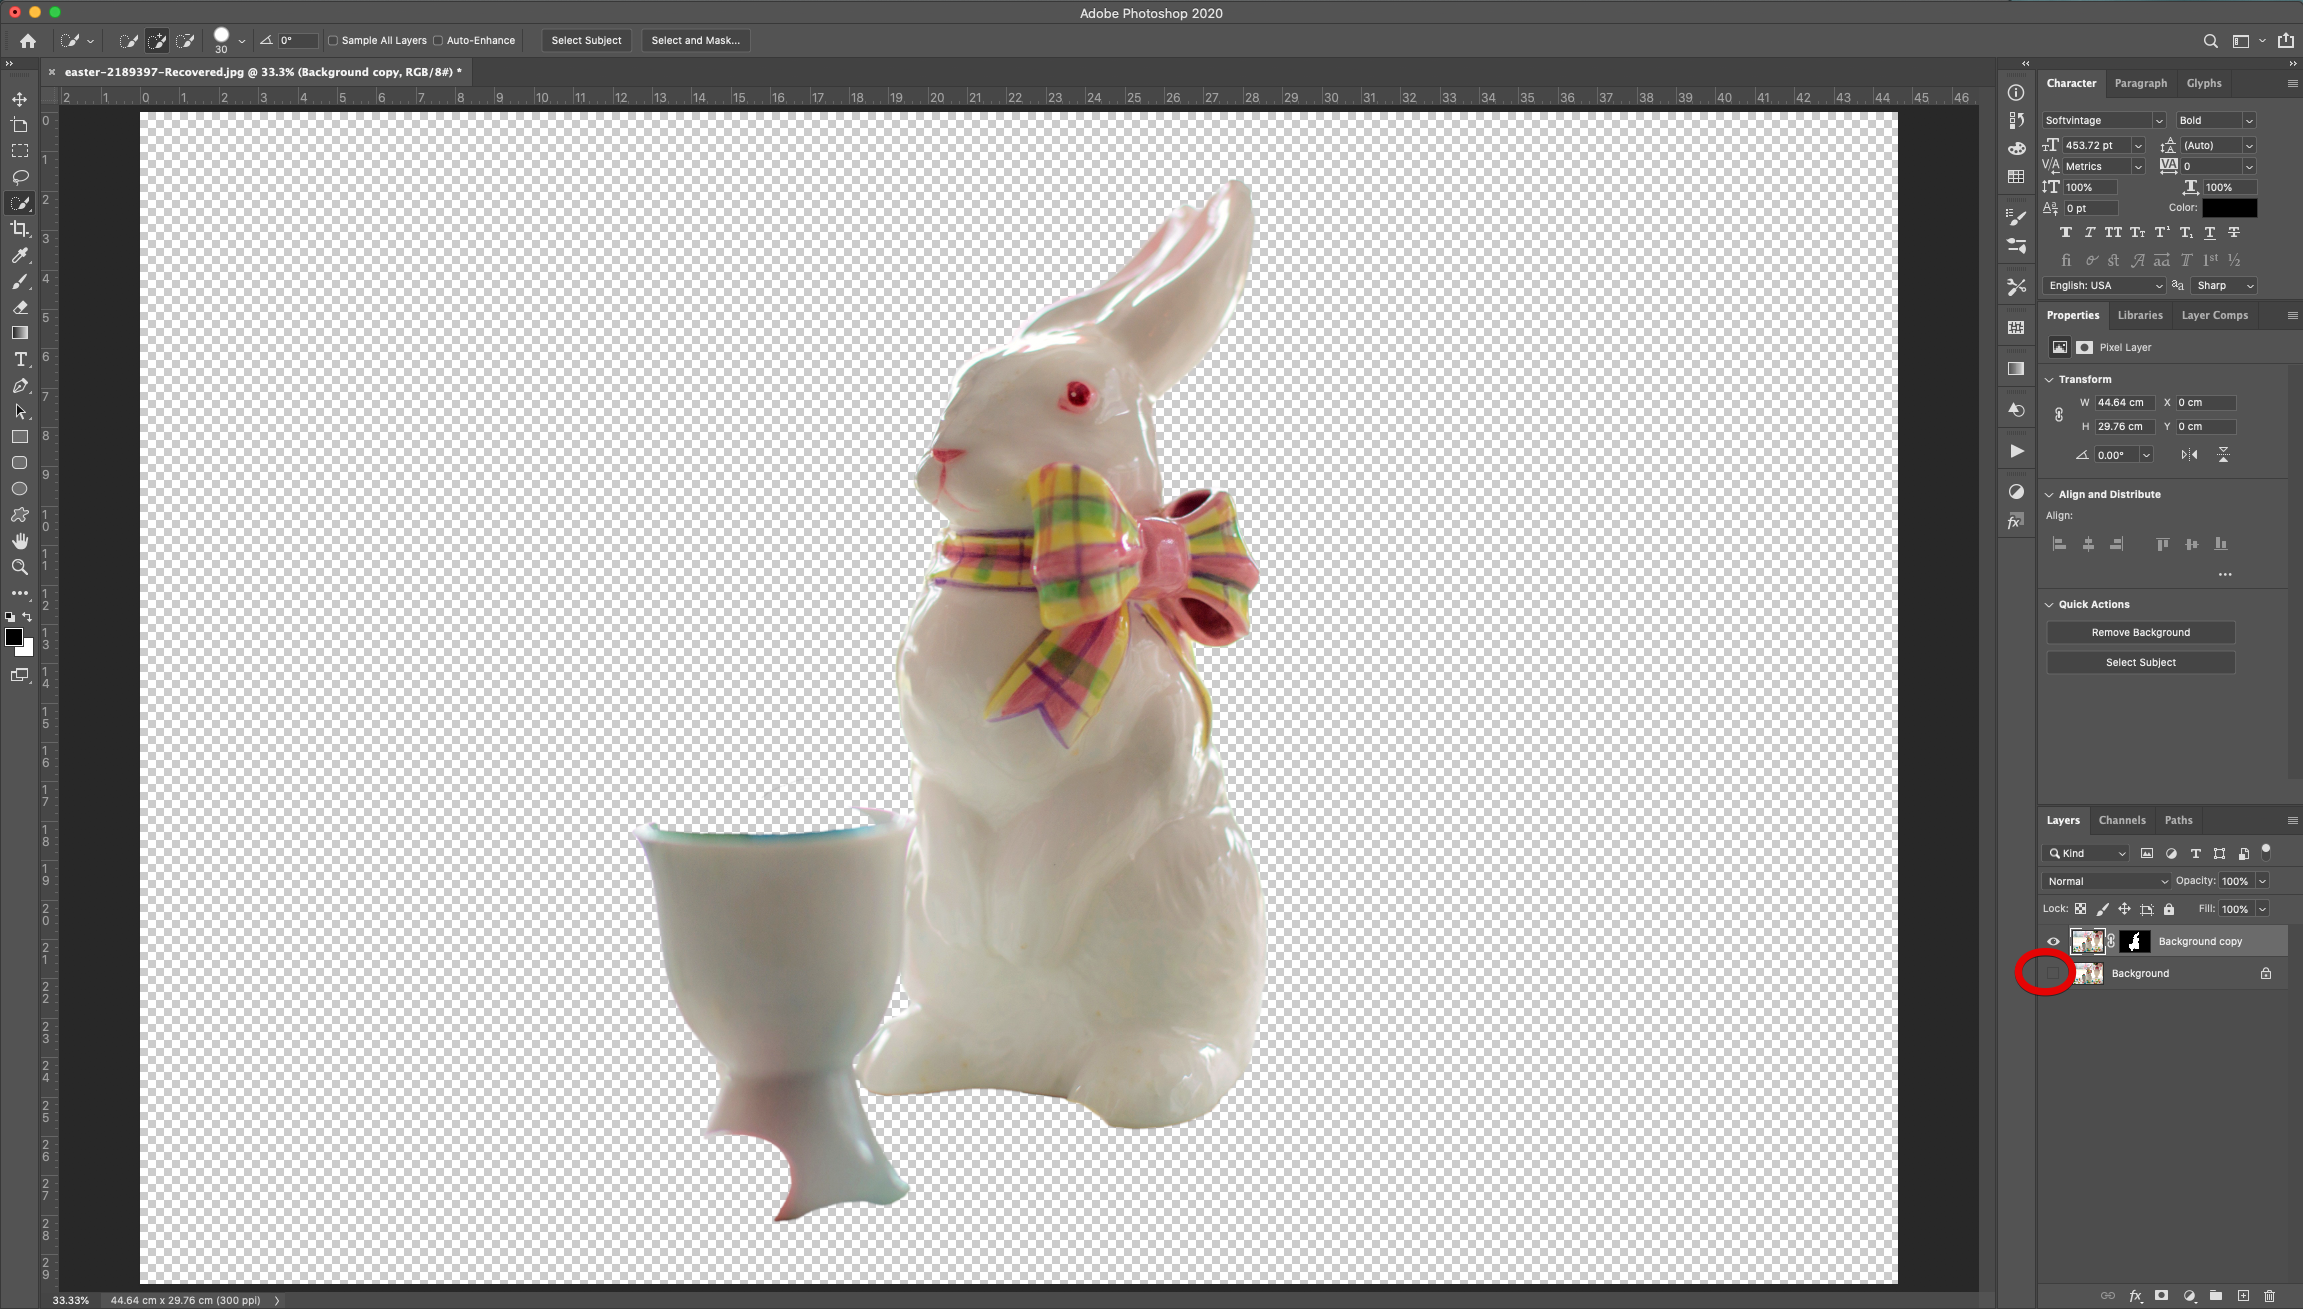
5 - You can also change what the “Mask” indicates from “Masked Areas” to “Selected Areas”. Add some “Global Refinements” like “Smooth”, “Feather”, etc. and then select “Output to New Layer with Mask” before clicking “OK”. You can hide the “Background” layer by clicking on the Small Eye icon on the left side of its Thumbnail.
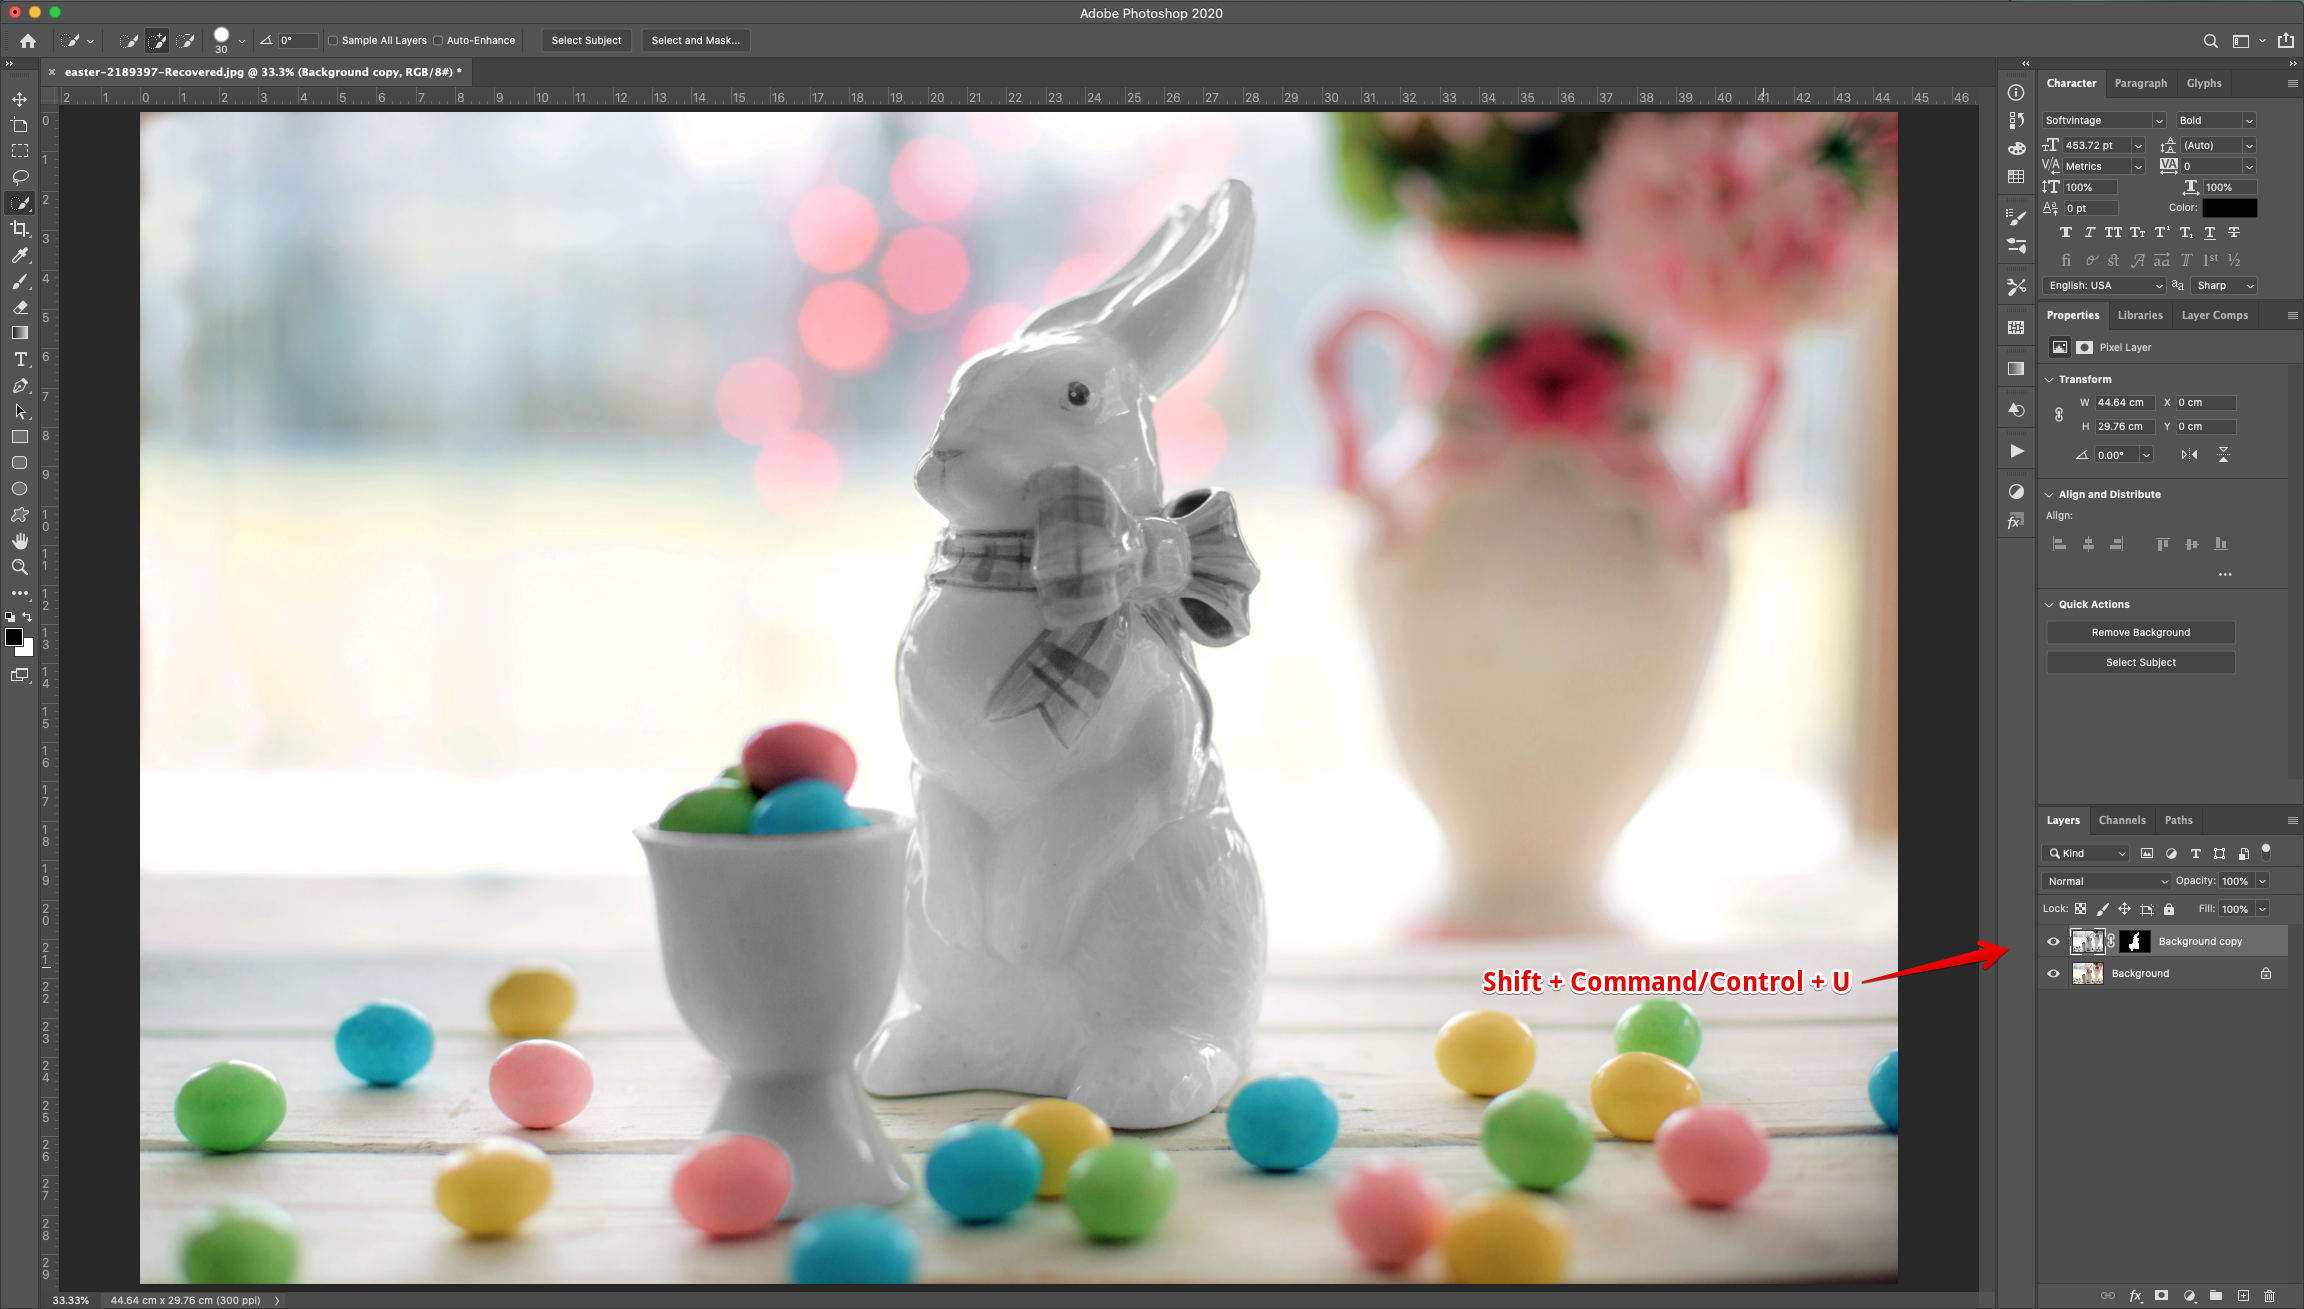
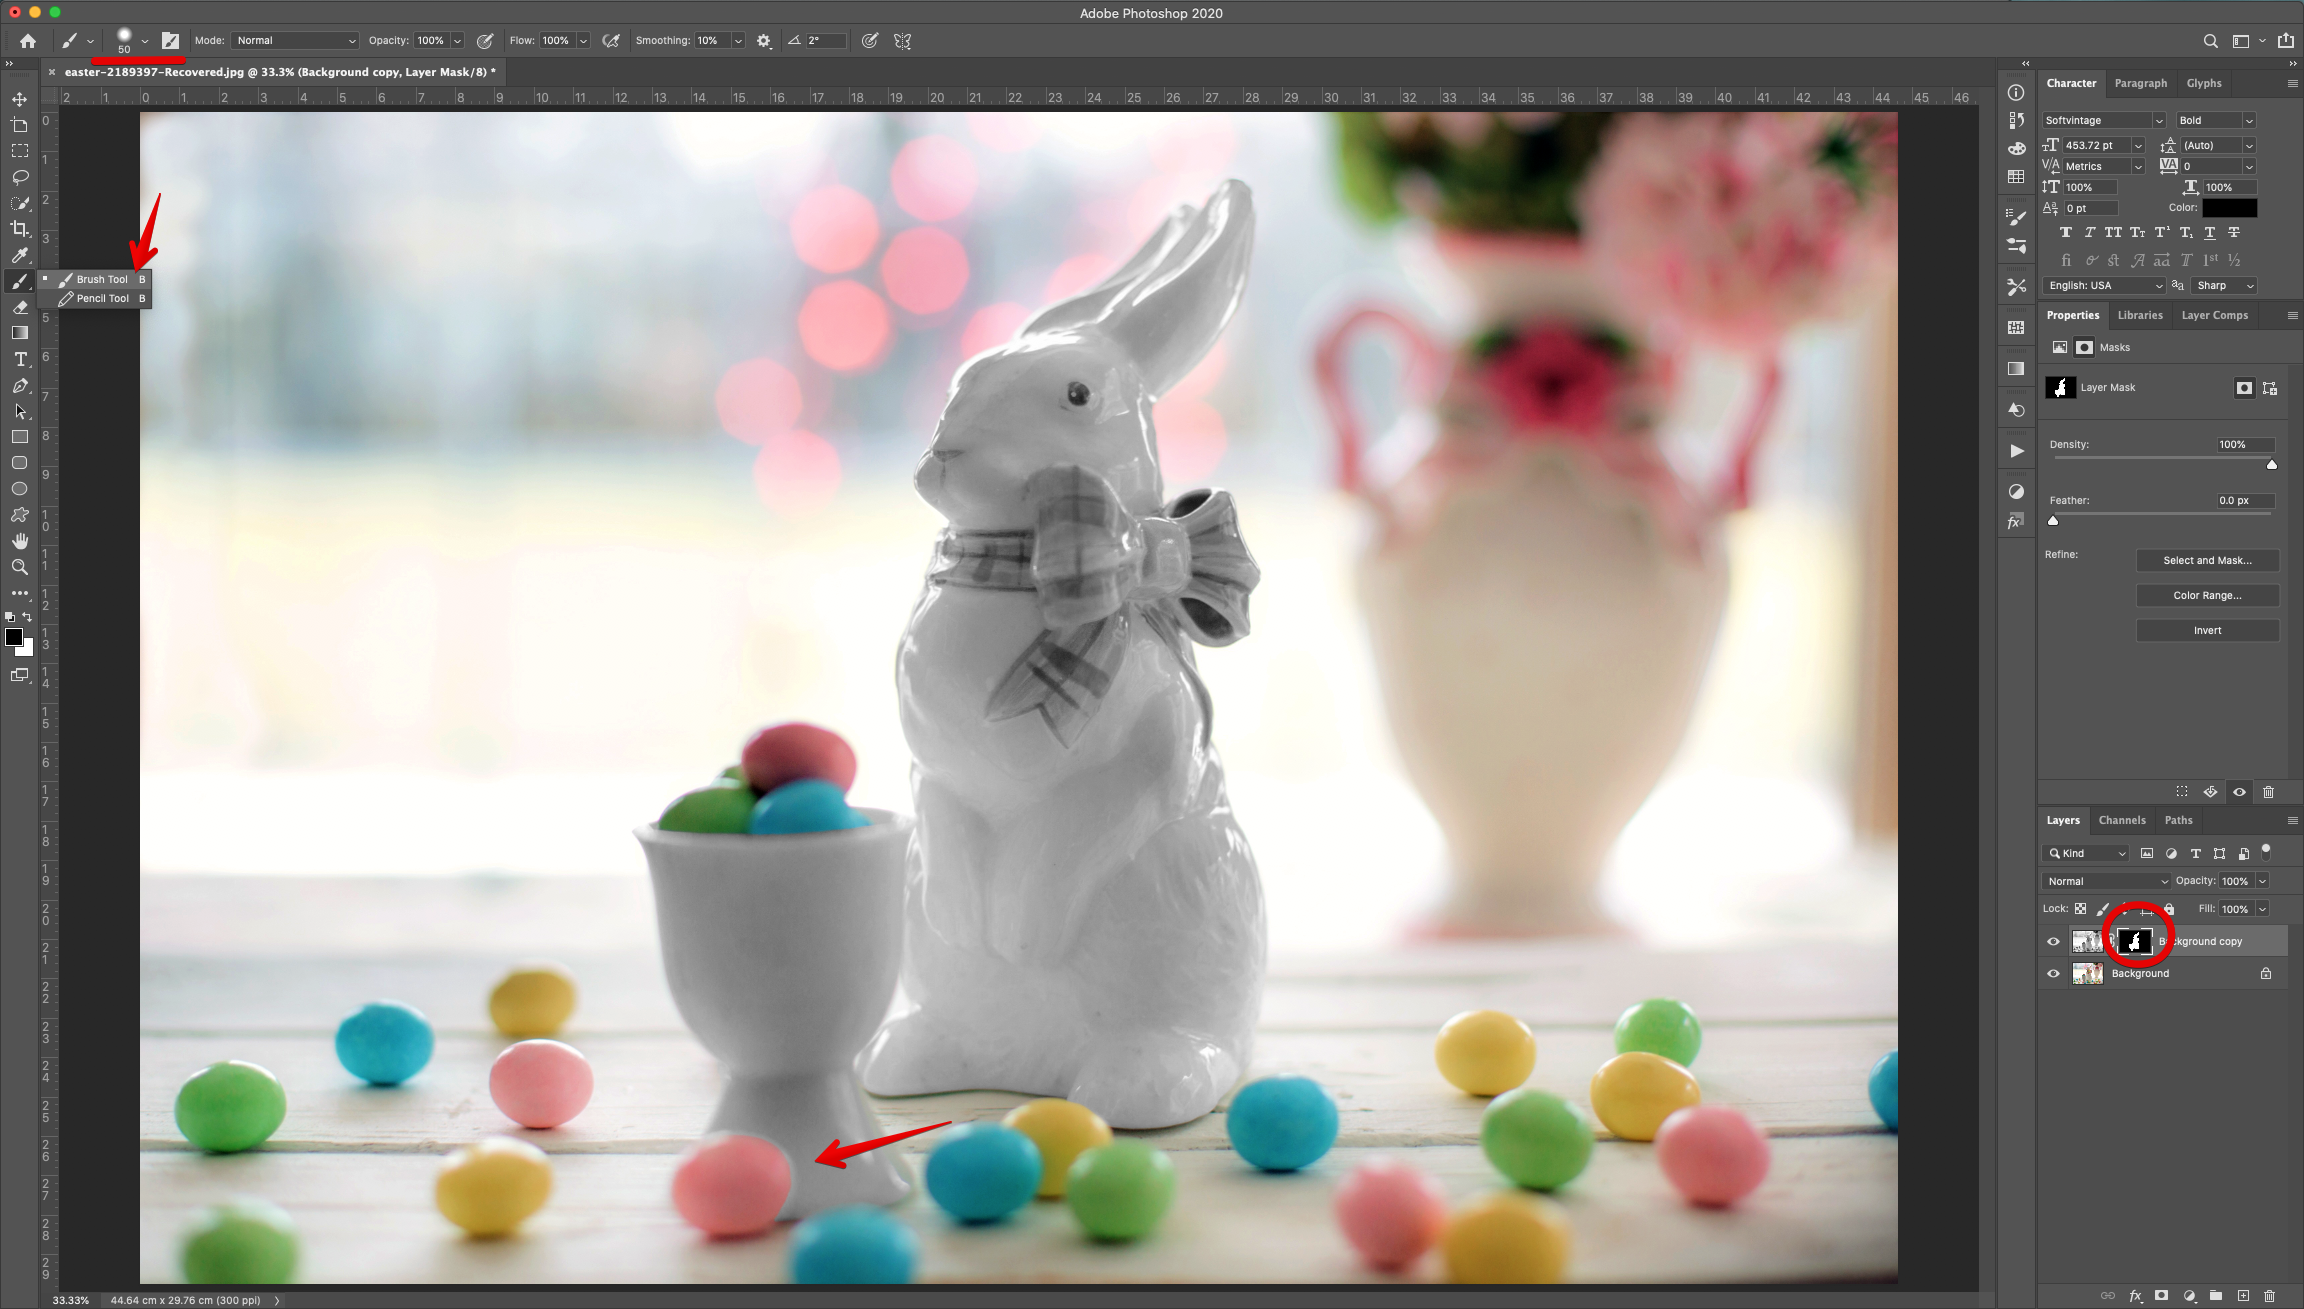
6 - “Desaturate” the masked layer by clicking “Shift + Command/Control + U”.
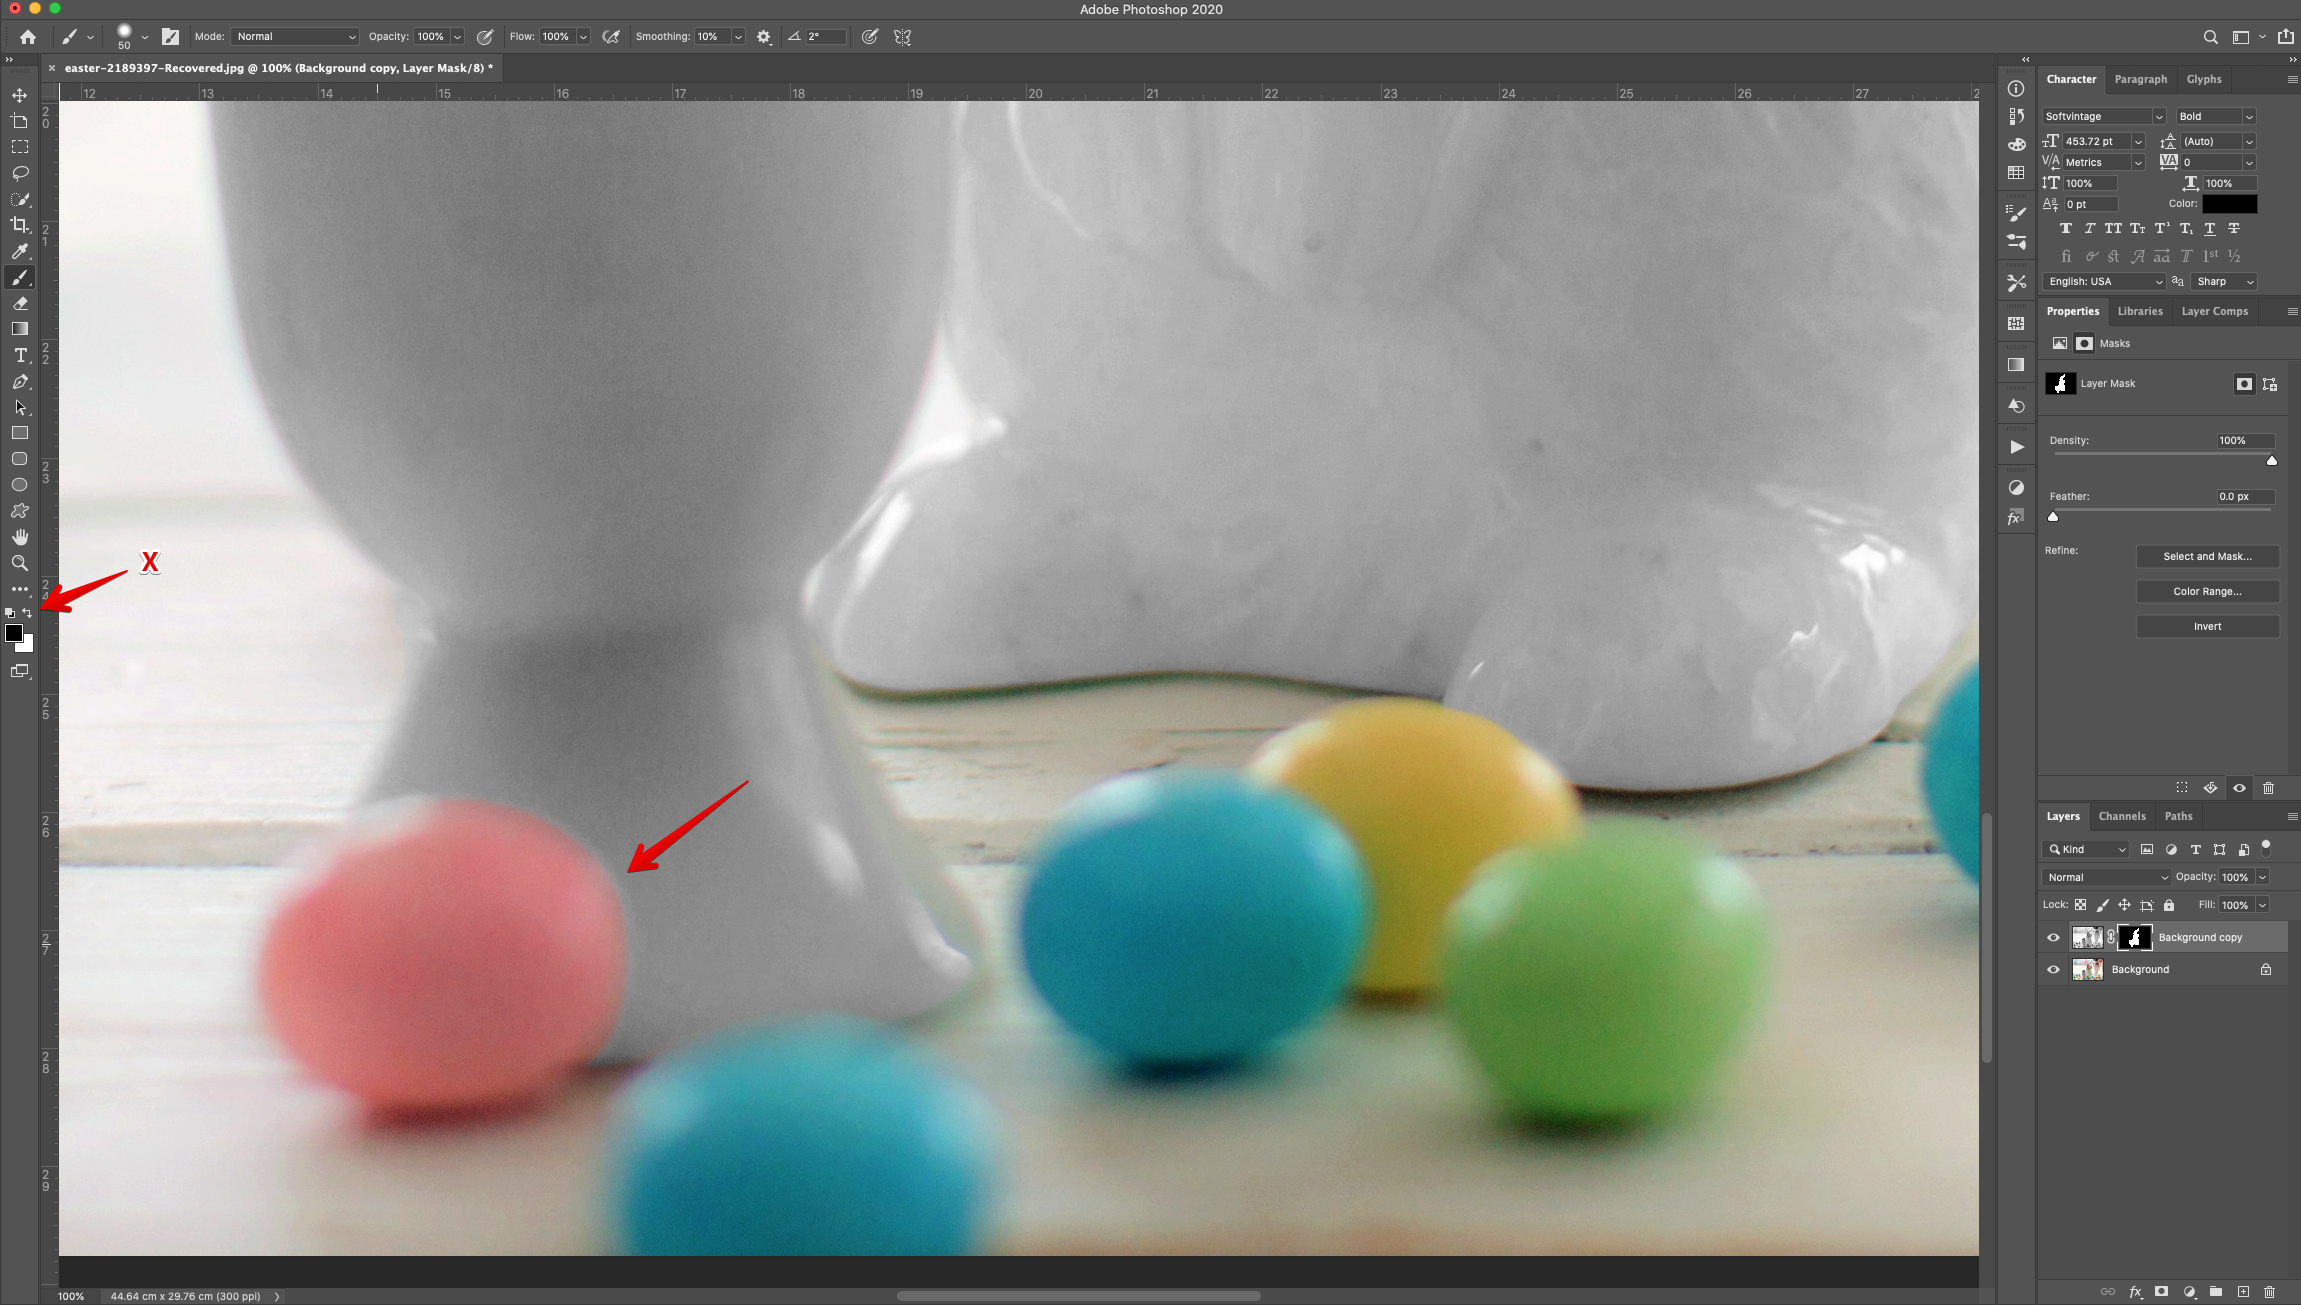
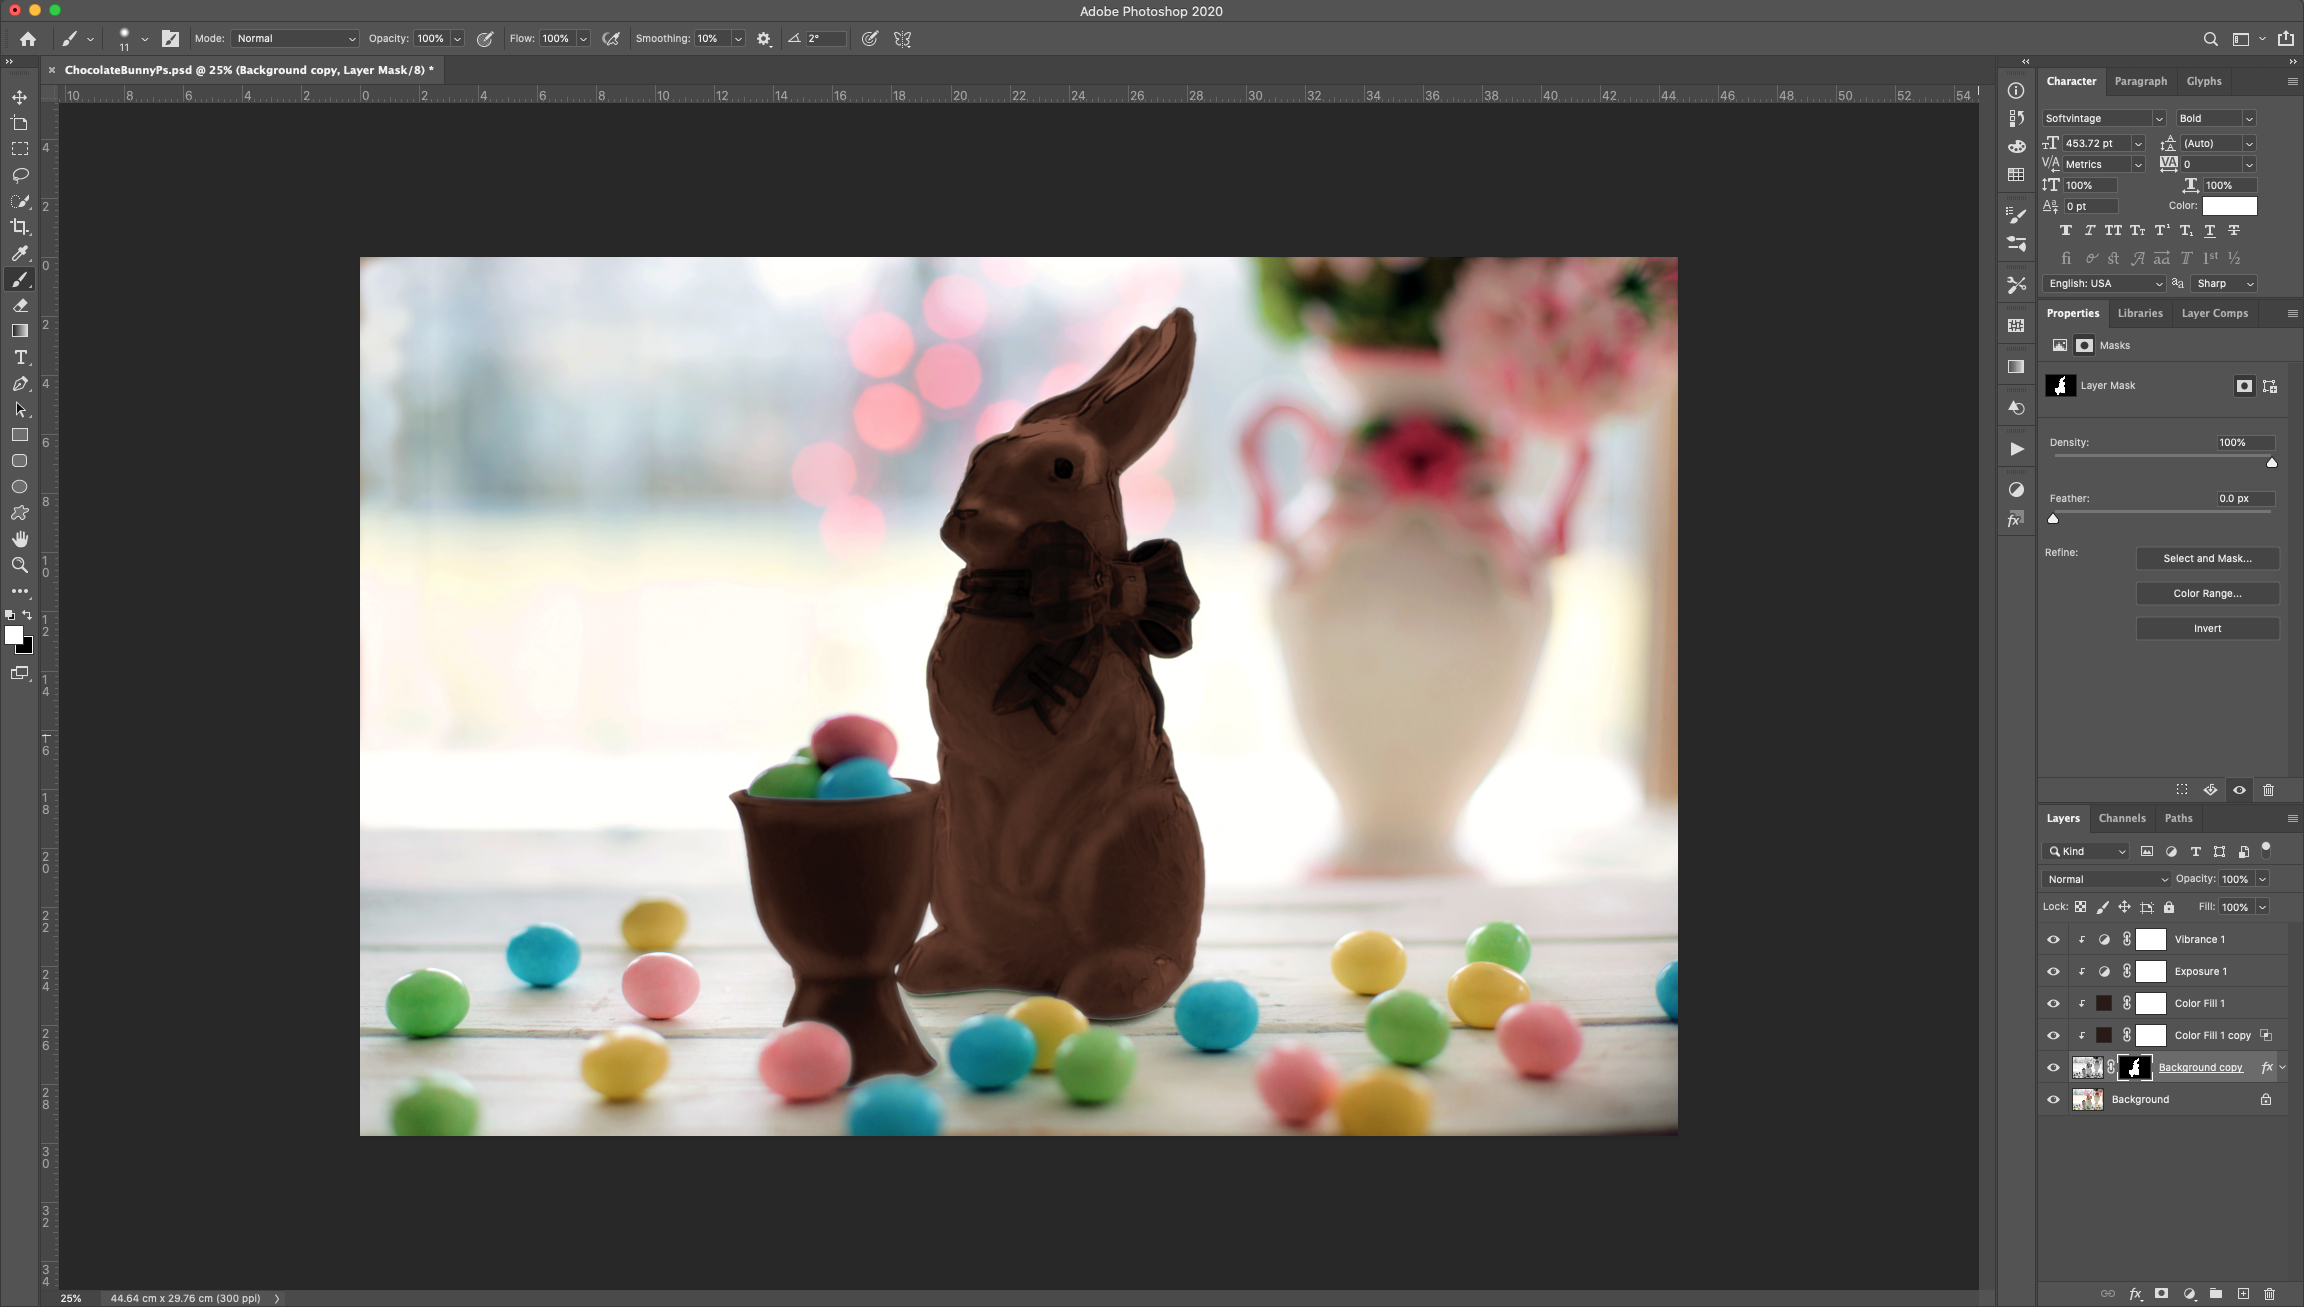
7 - To clean up the edges even further, use the “Brush Tool” (B), with a “Soft” brush (50 px and 0% “Hardness), make sure that the “Mask” Thumbnail is selected and that Black is your “Foreground” color to do so. You can bring out masked portions by “Swapping” “Foreground” and “Background” colors (using the “X” key).
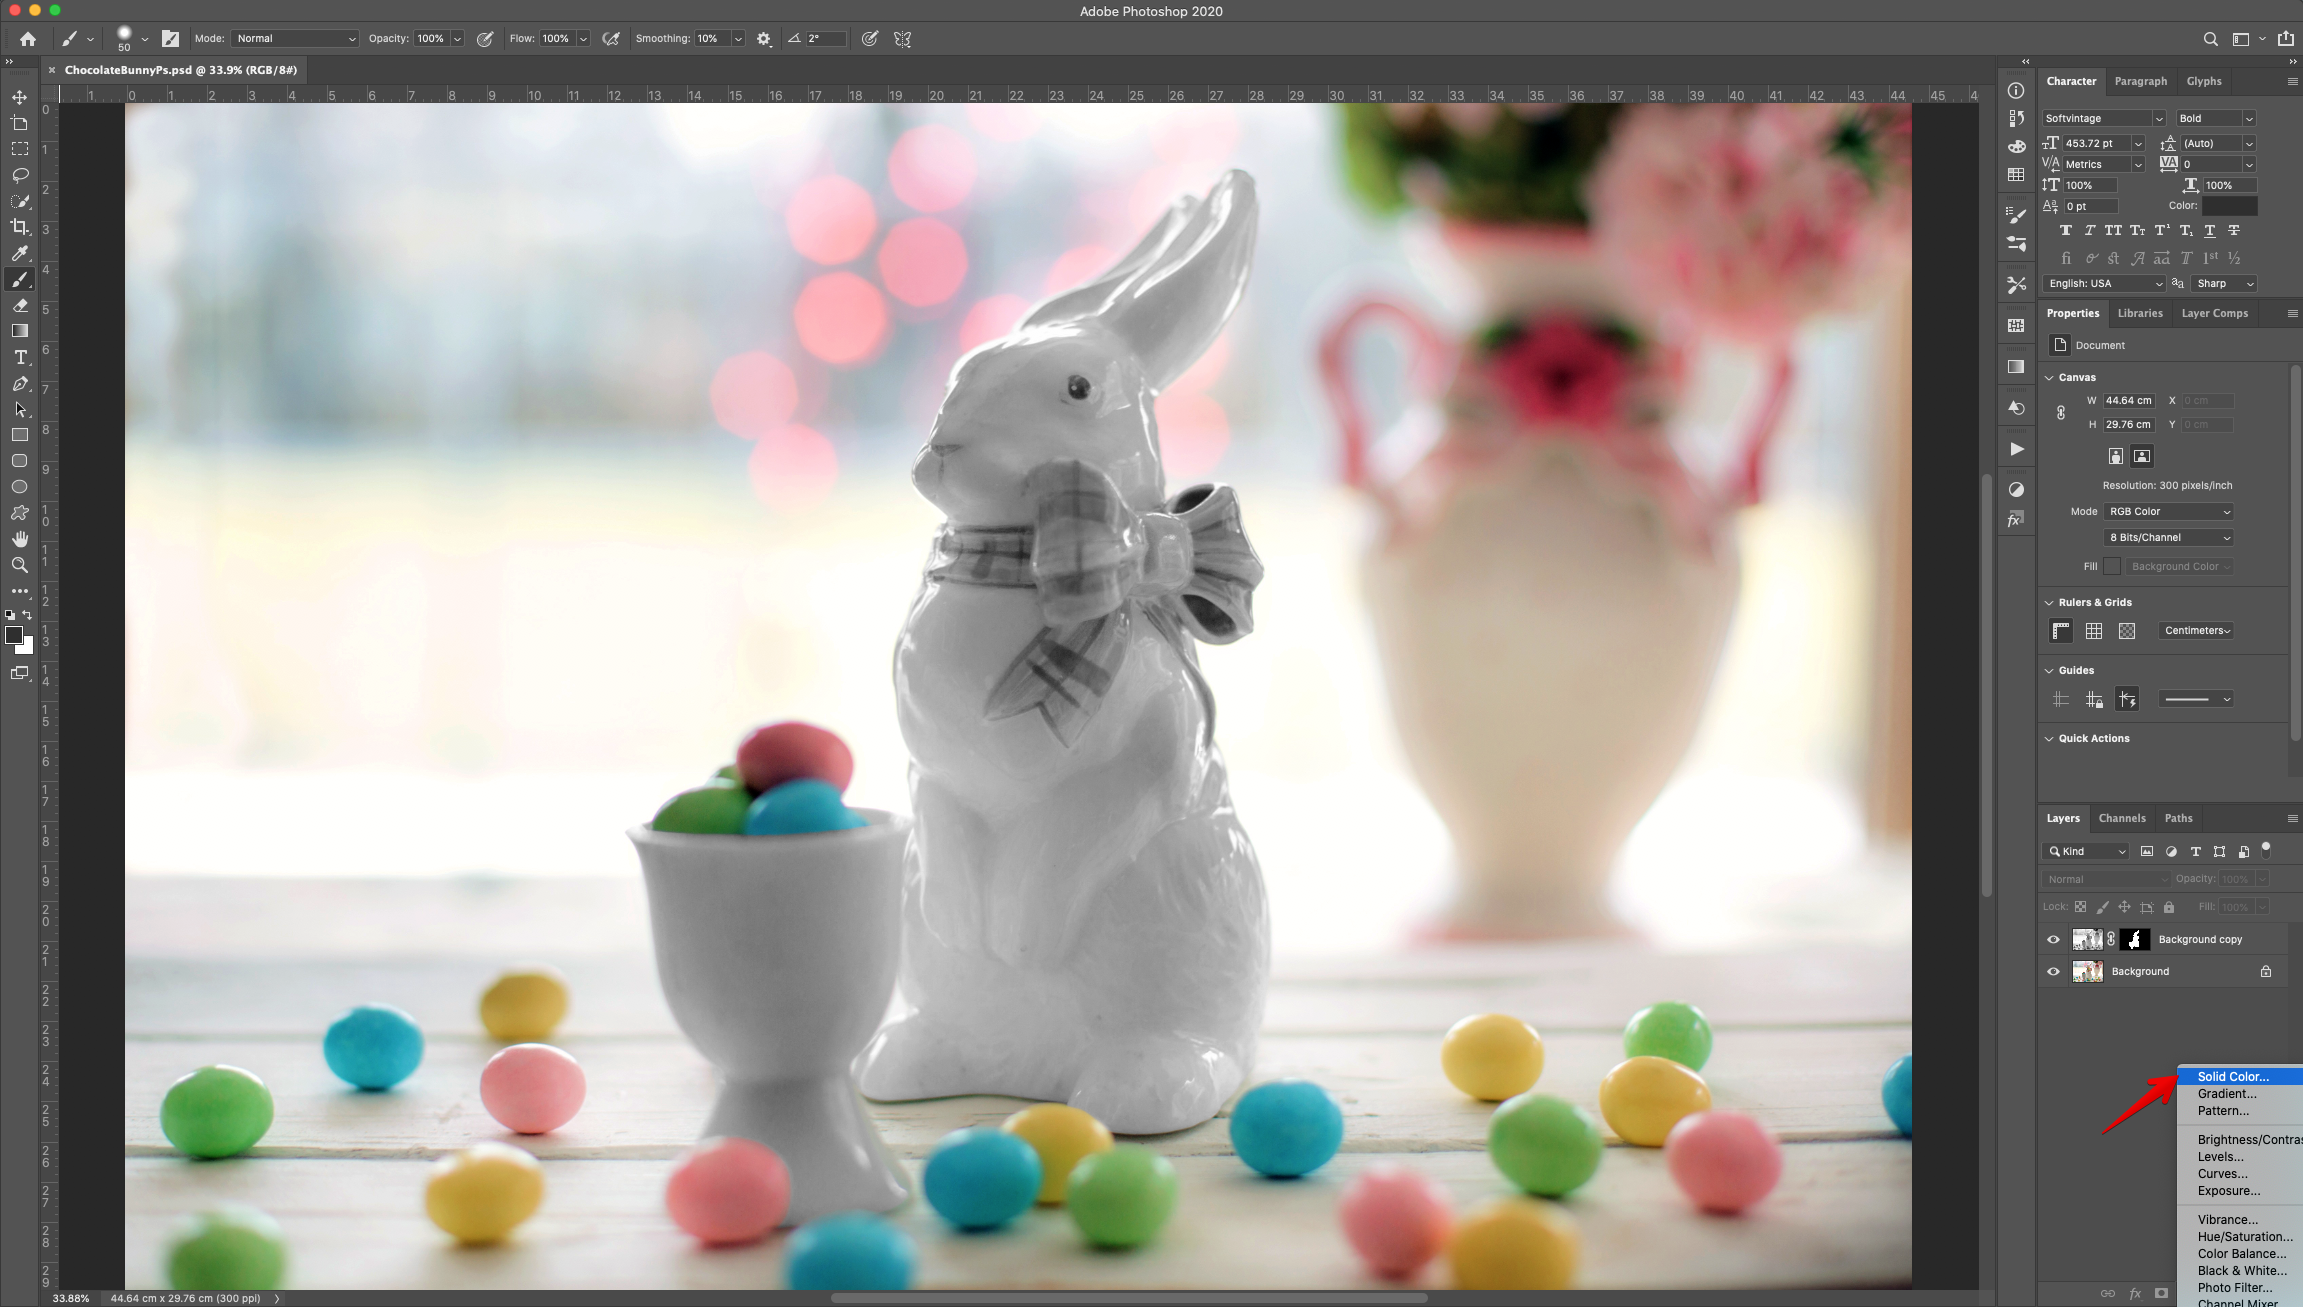
8 - Create a “New Color Fill Adjustment Layer” on top of everything. Click the small “Black and White” circle at the bottom of the “Layers Panel” and choose “Solid Color”. Use a deep Brown shade (#281b16).


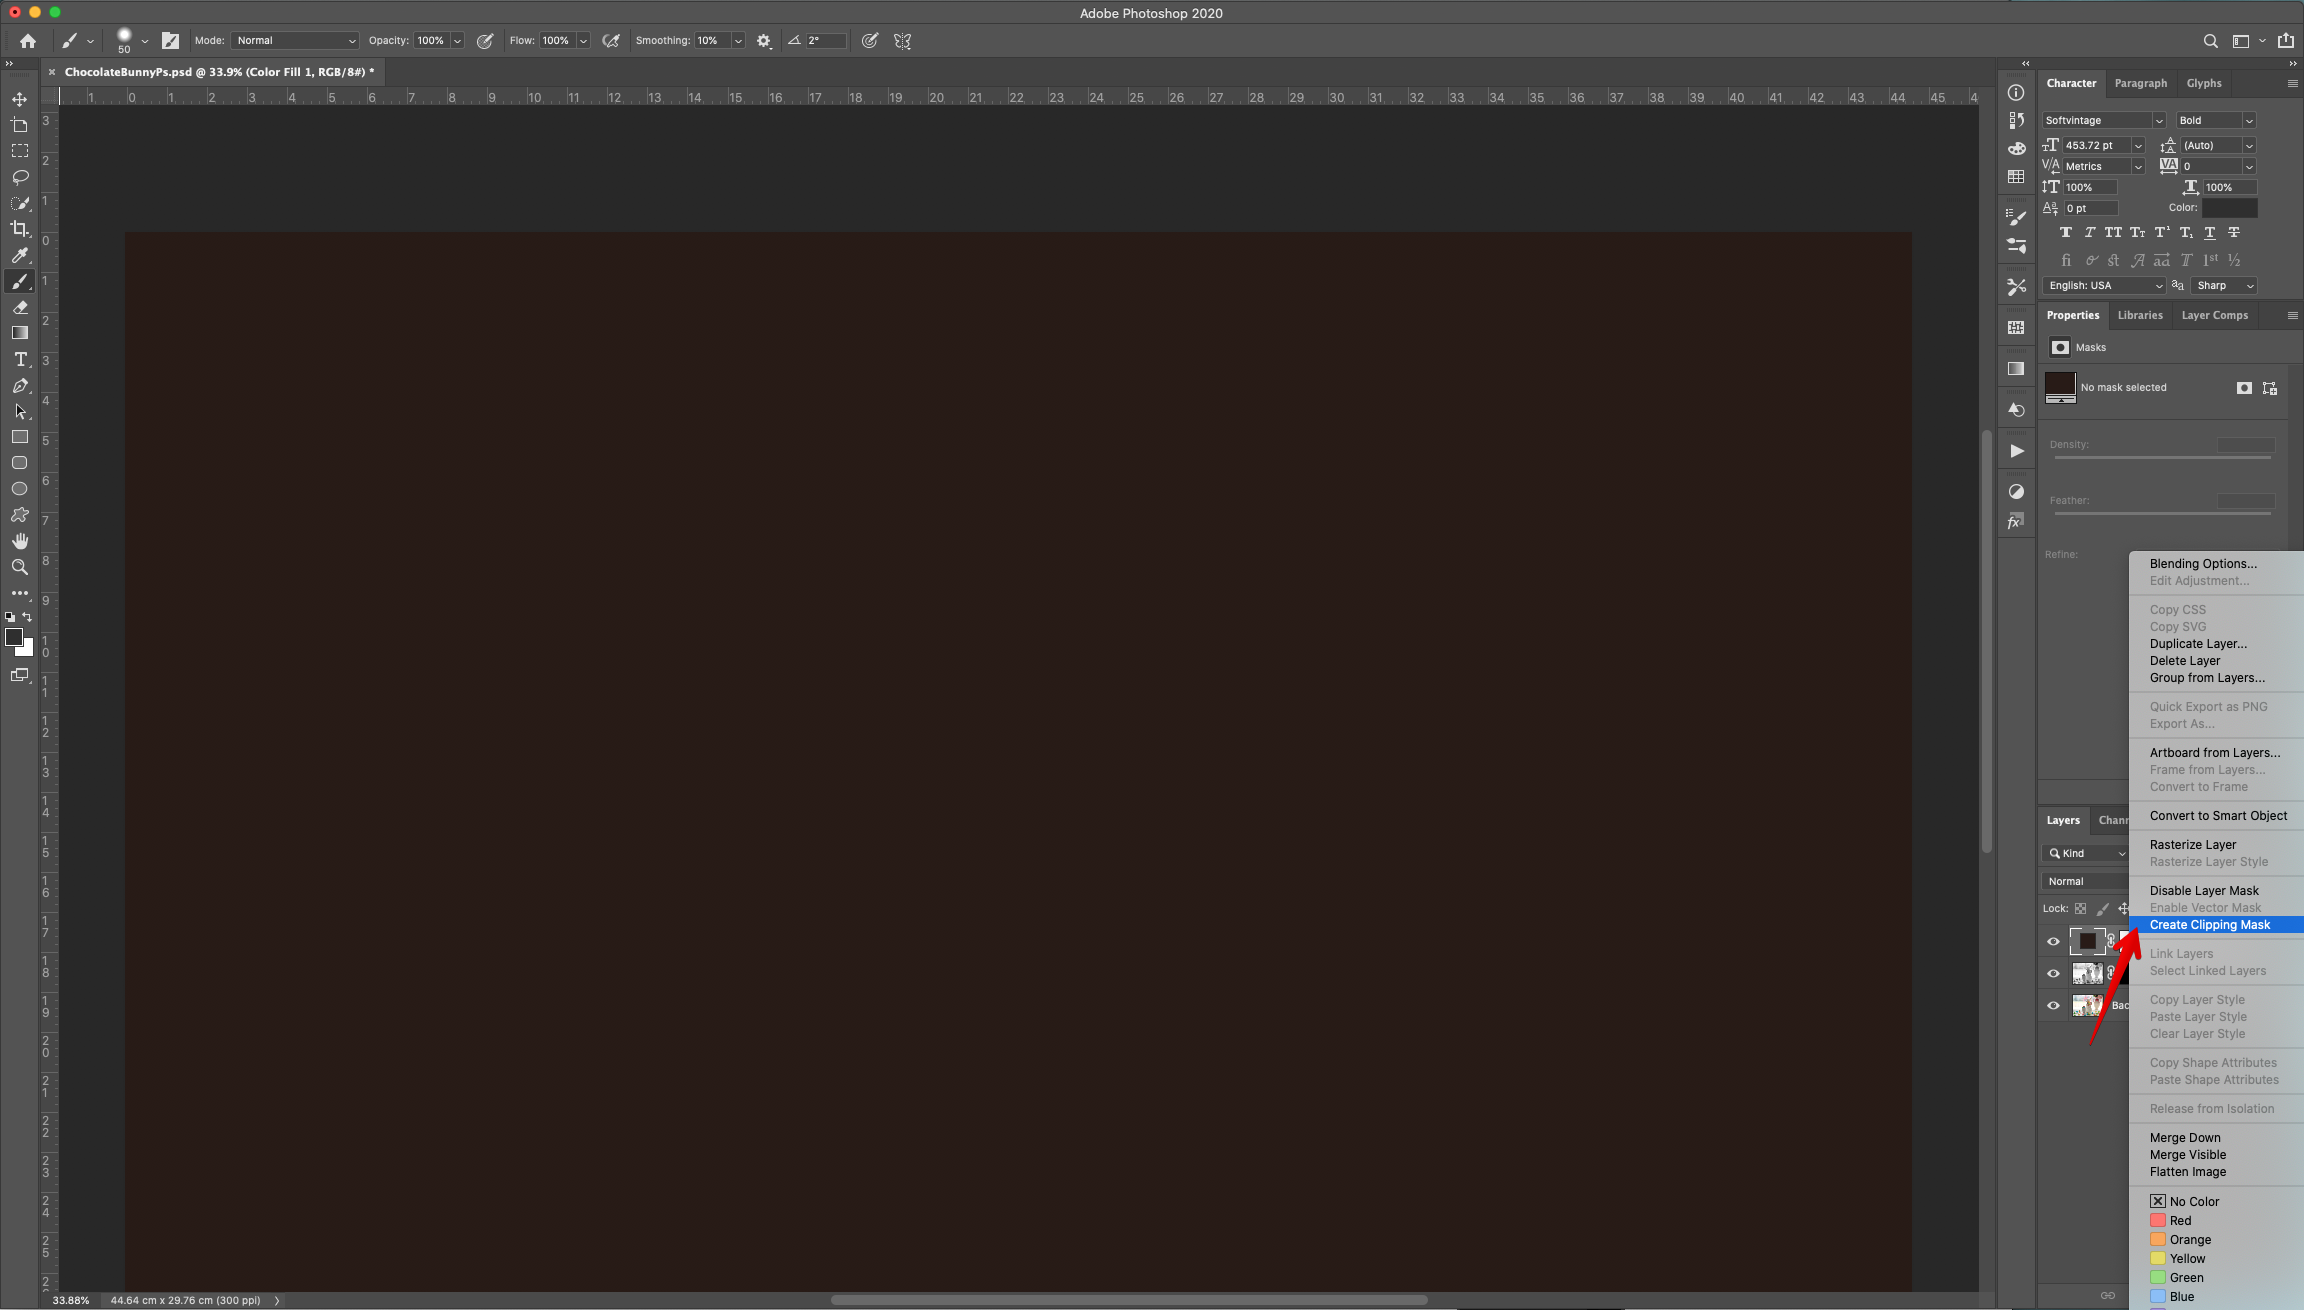
9 - Right-click on top of its Thumbnail and choose “Create Clipping Mask” to clip the color layer to the masked one only.
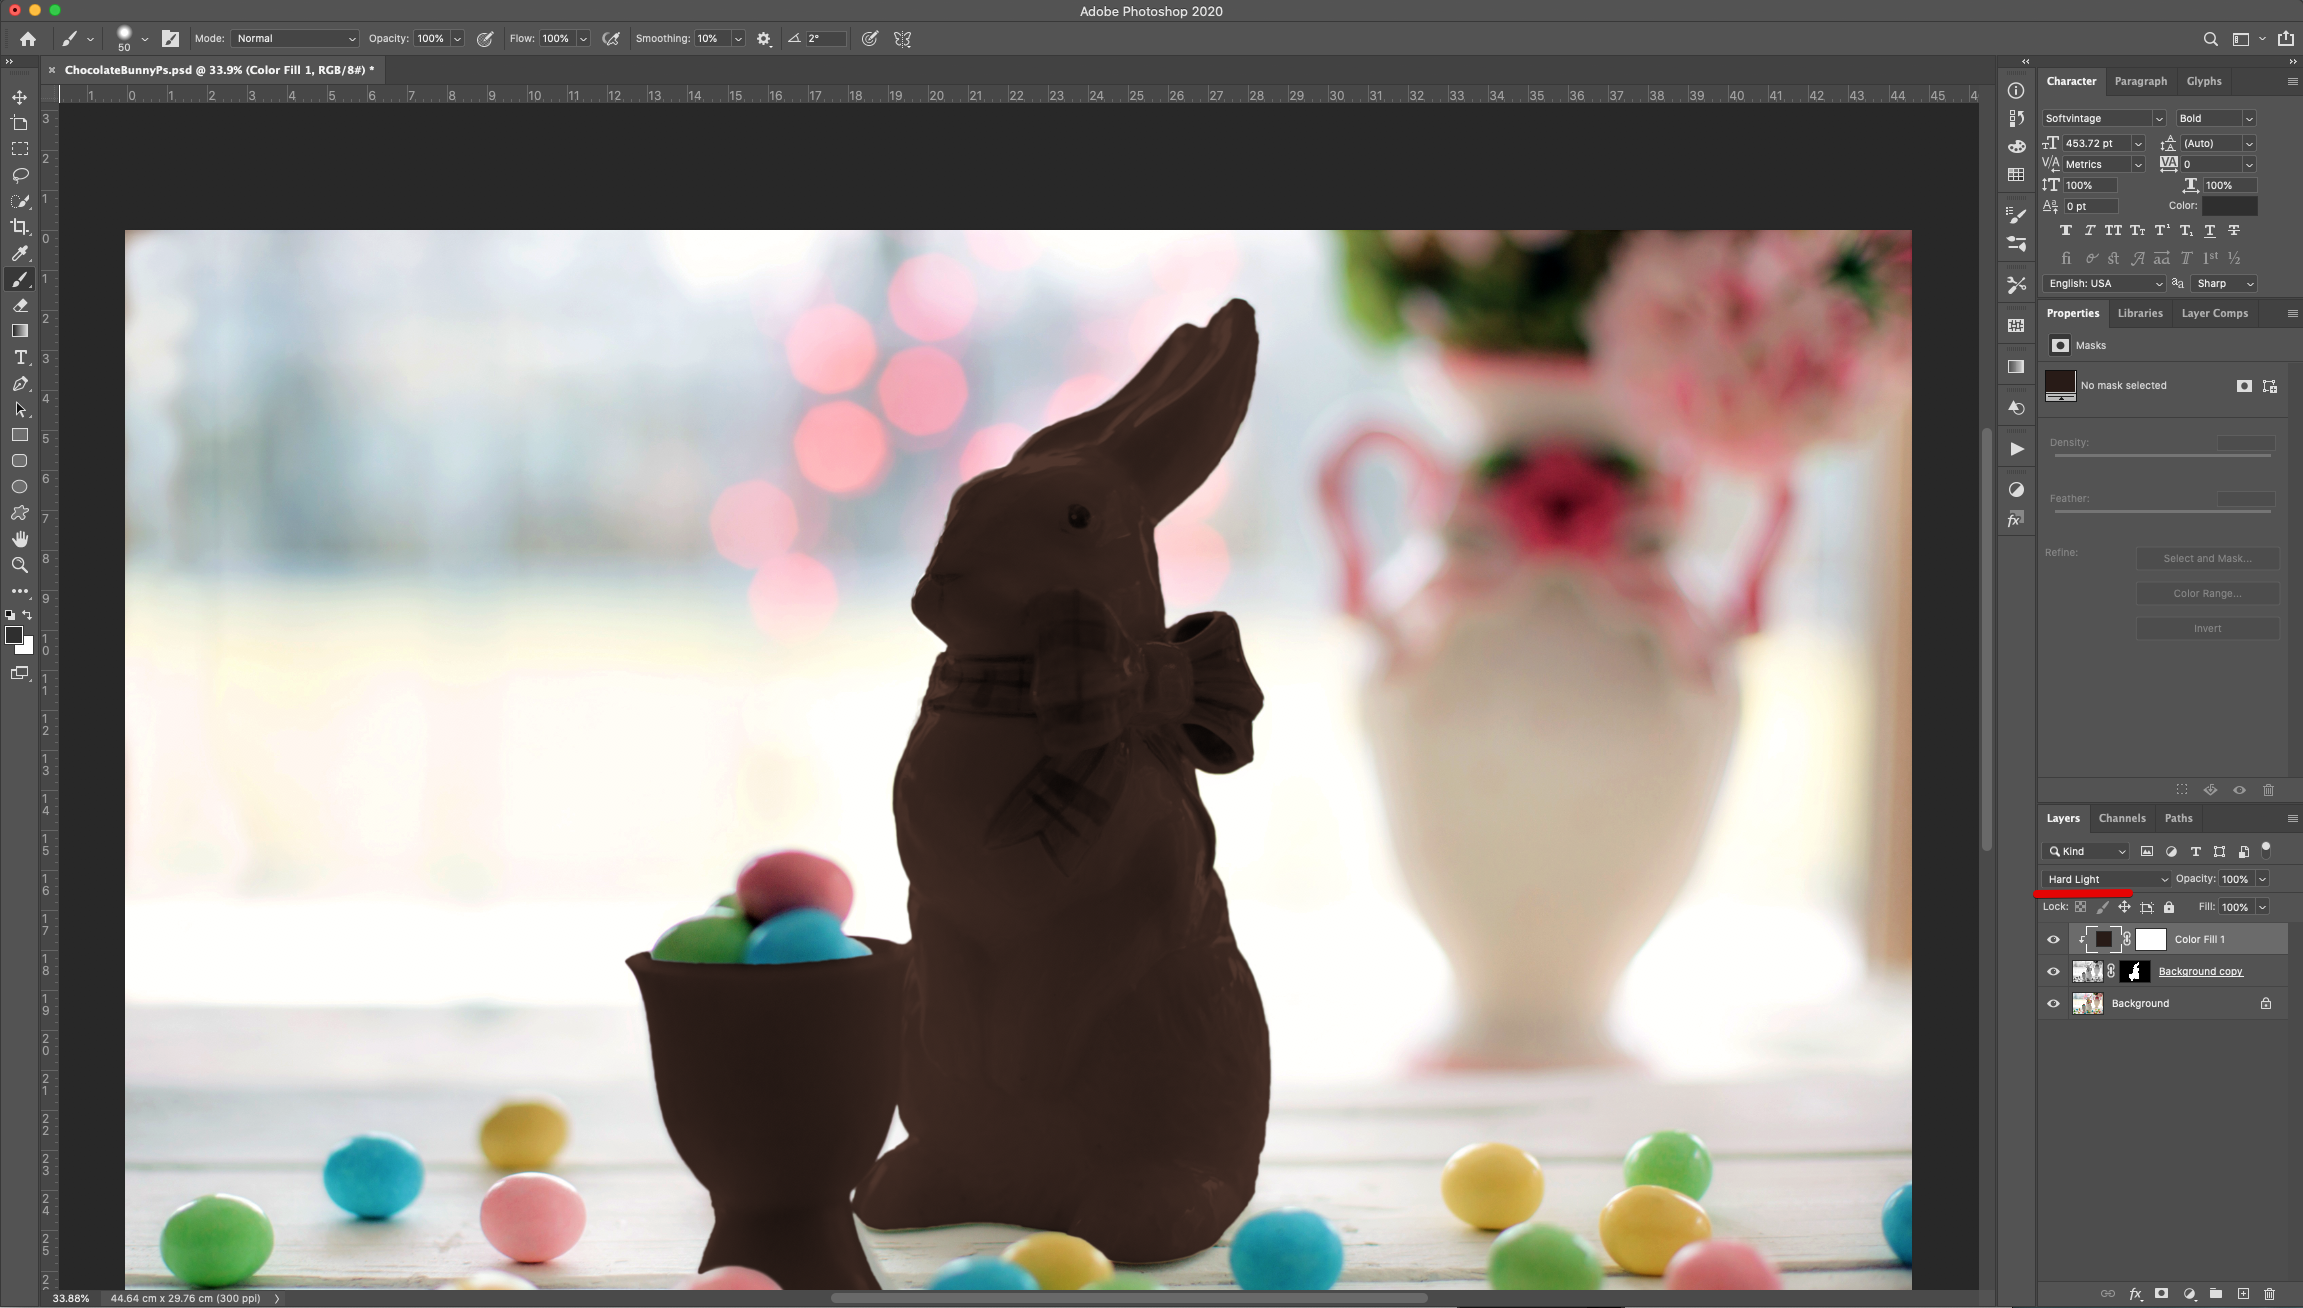
10 - Change the “Blending Mode” to “Hard Light”.
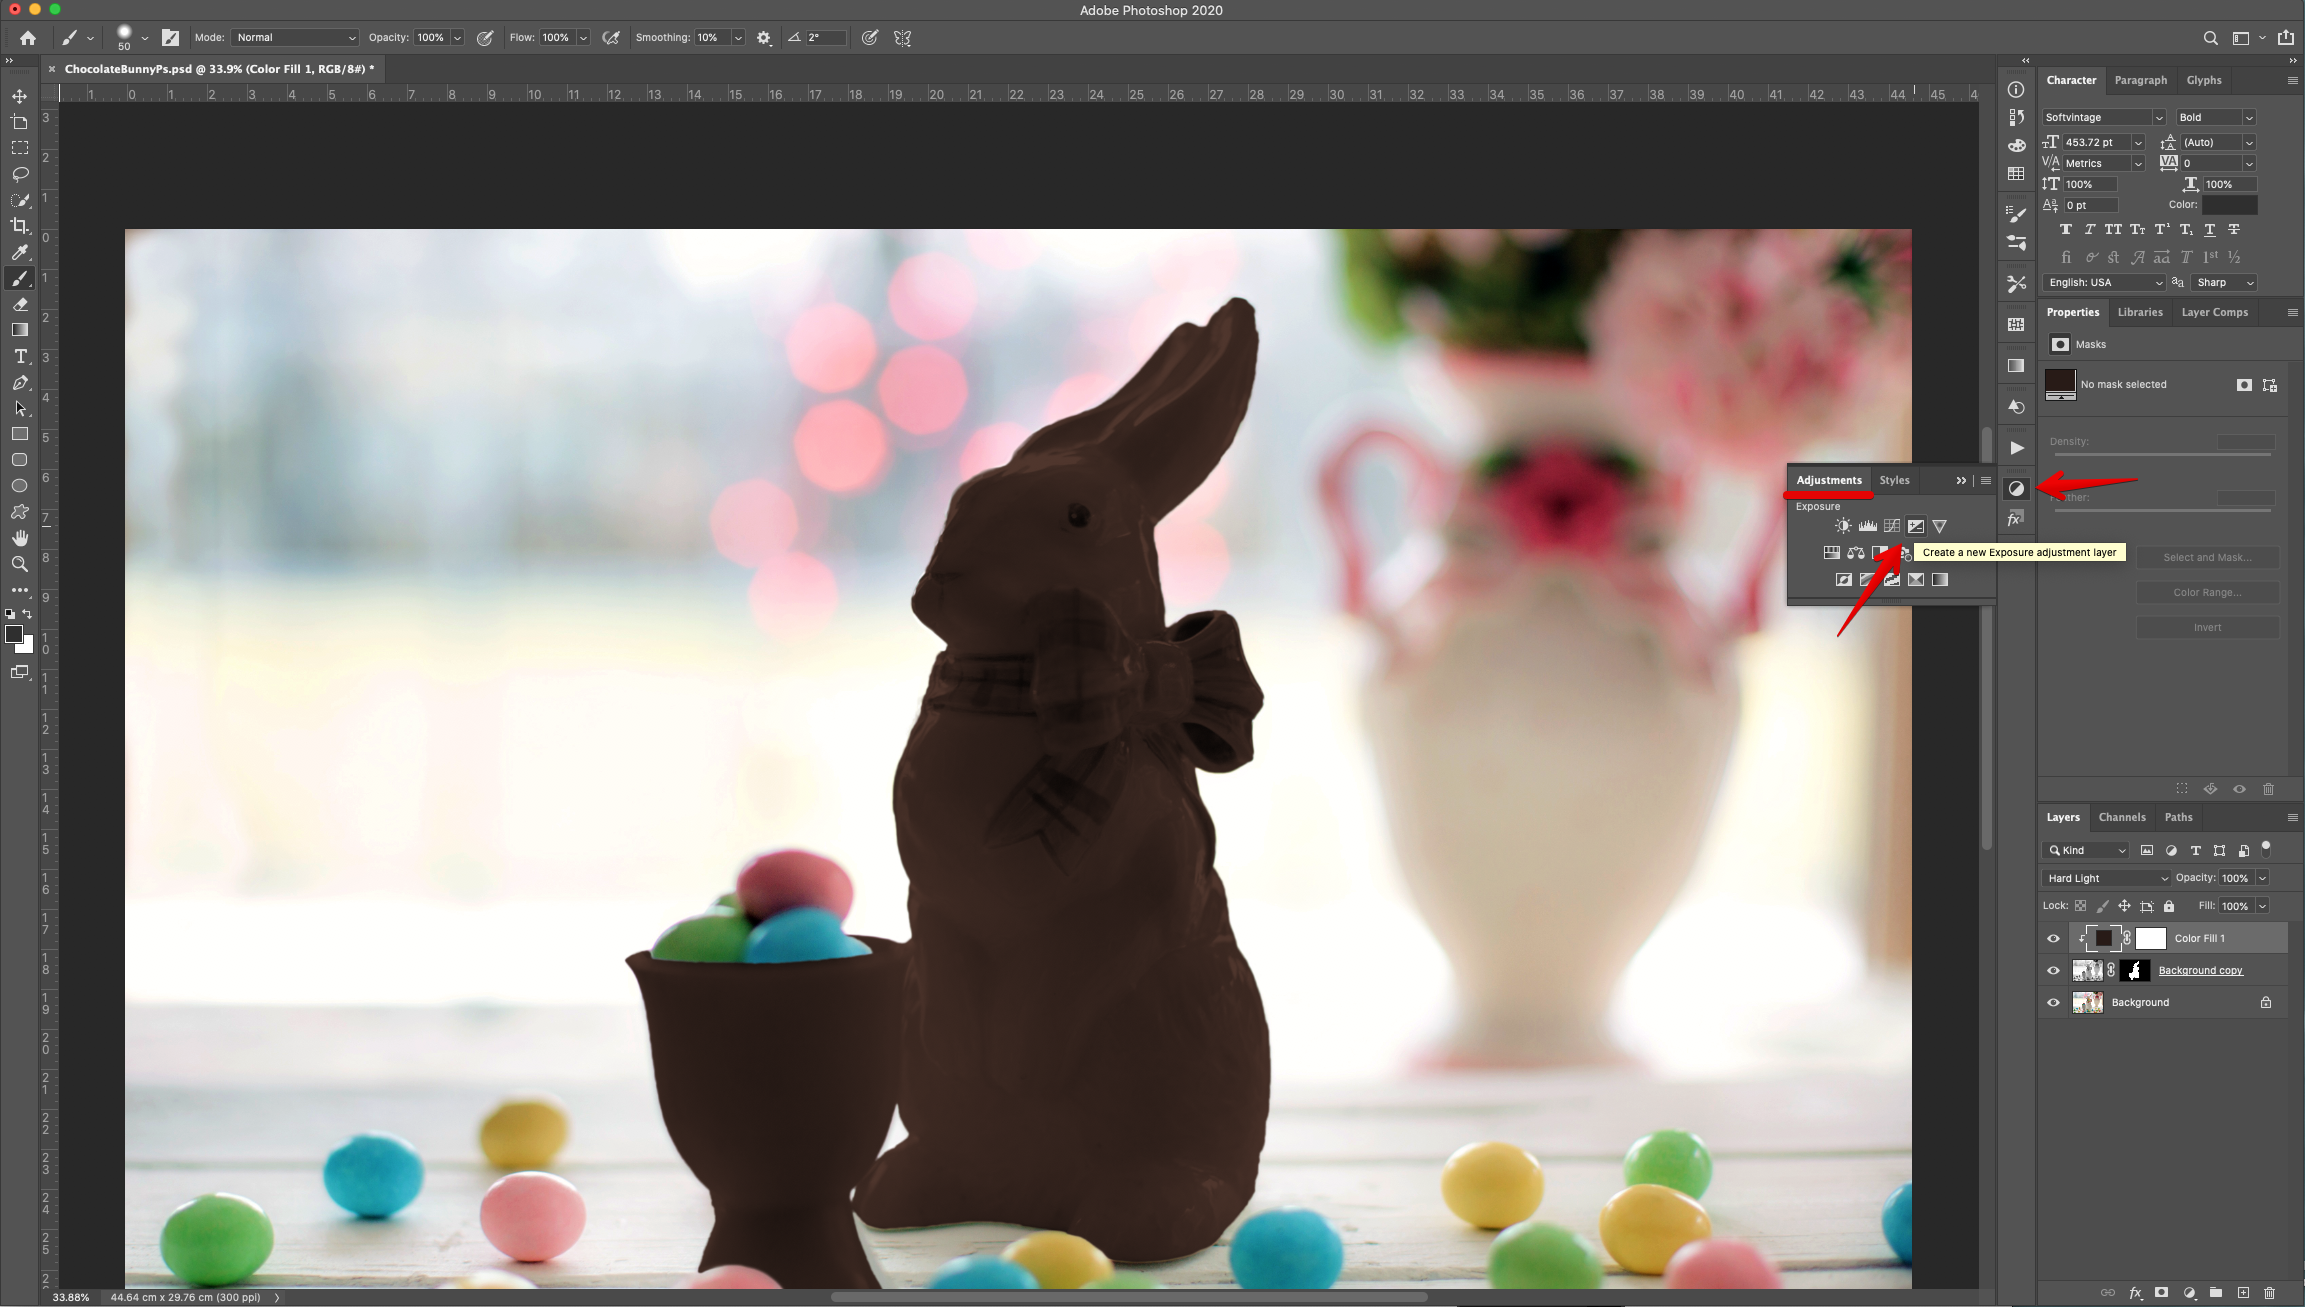
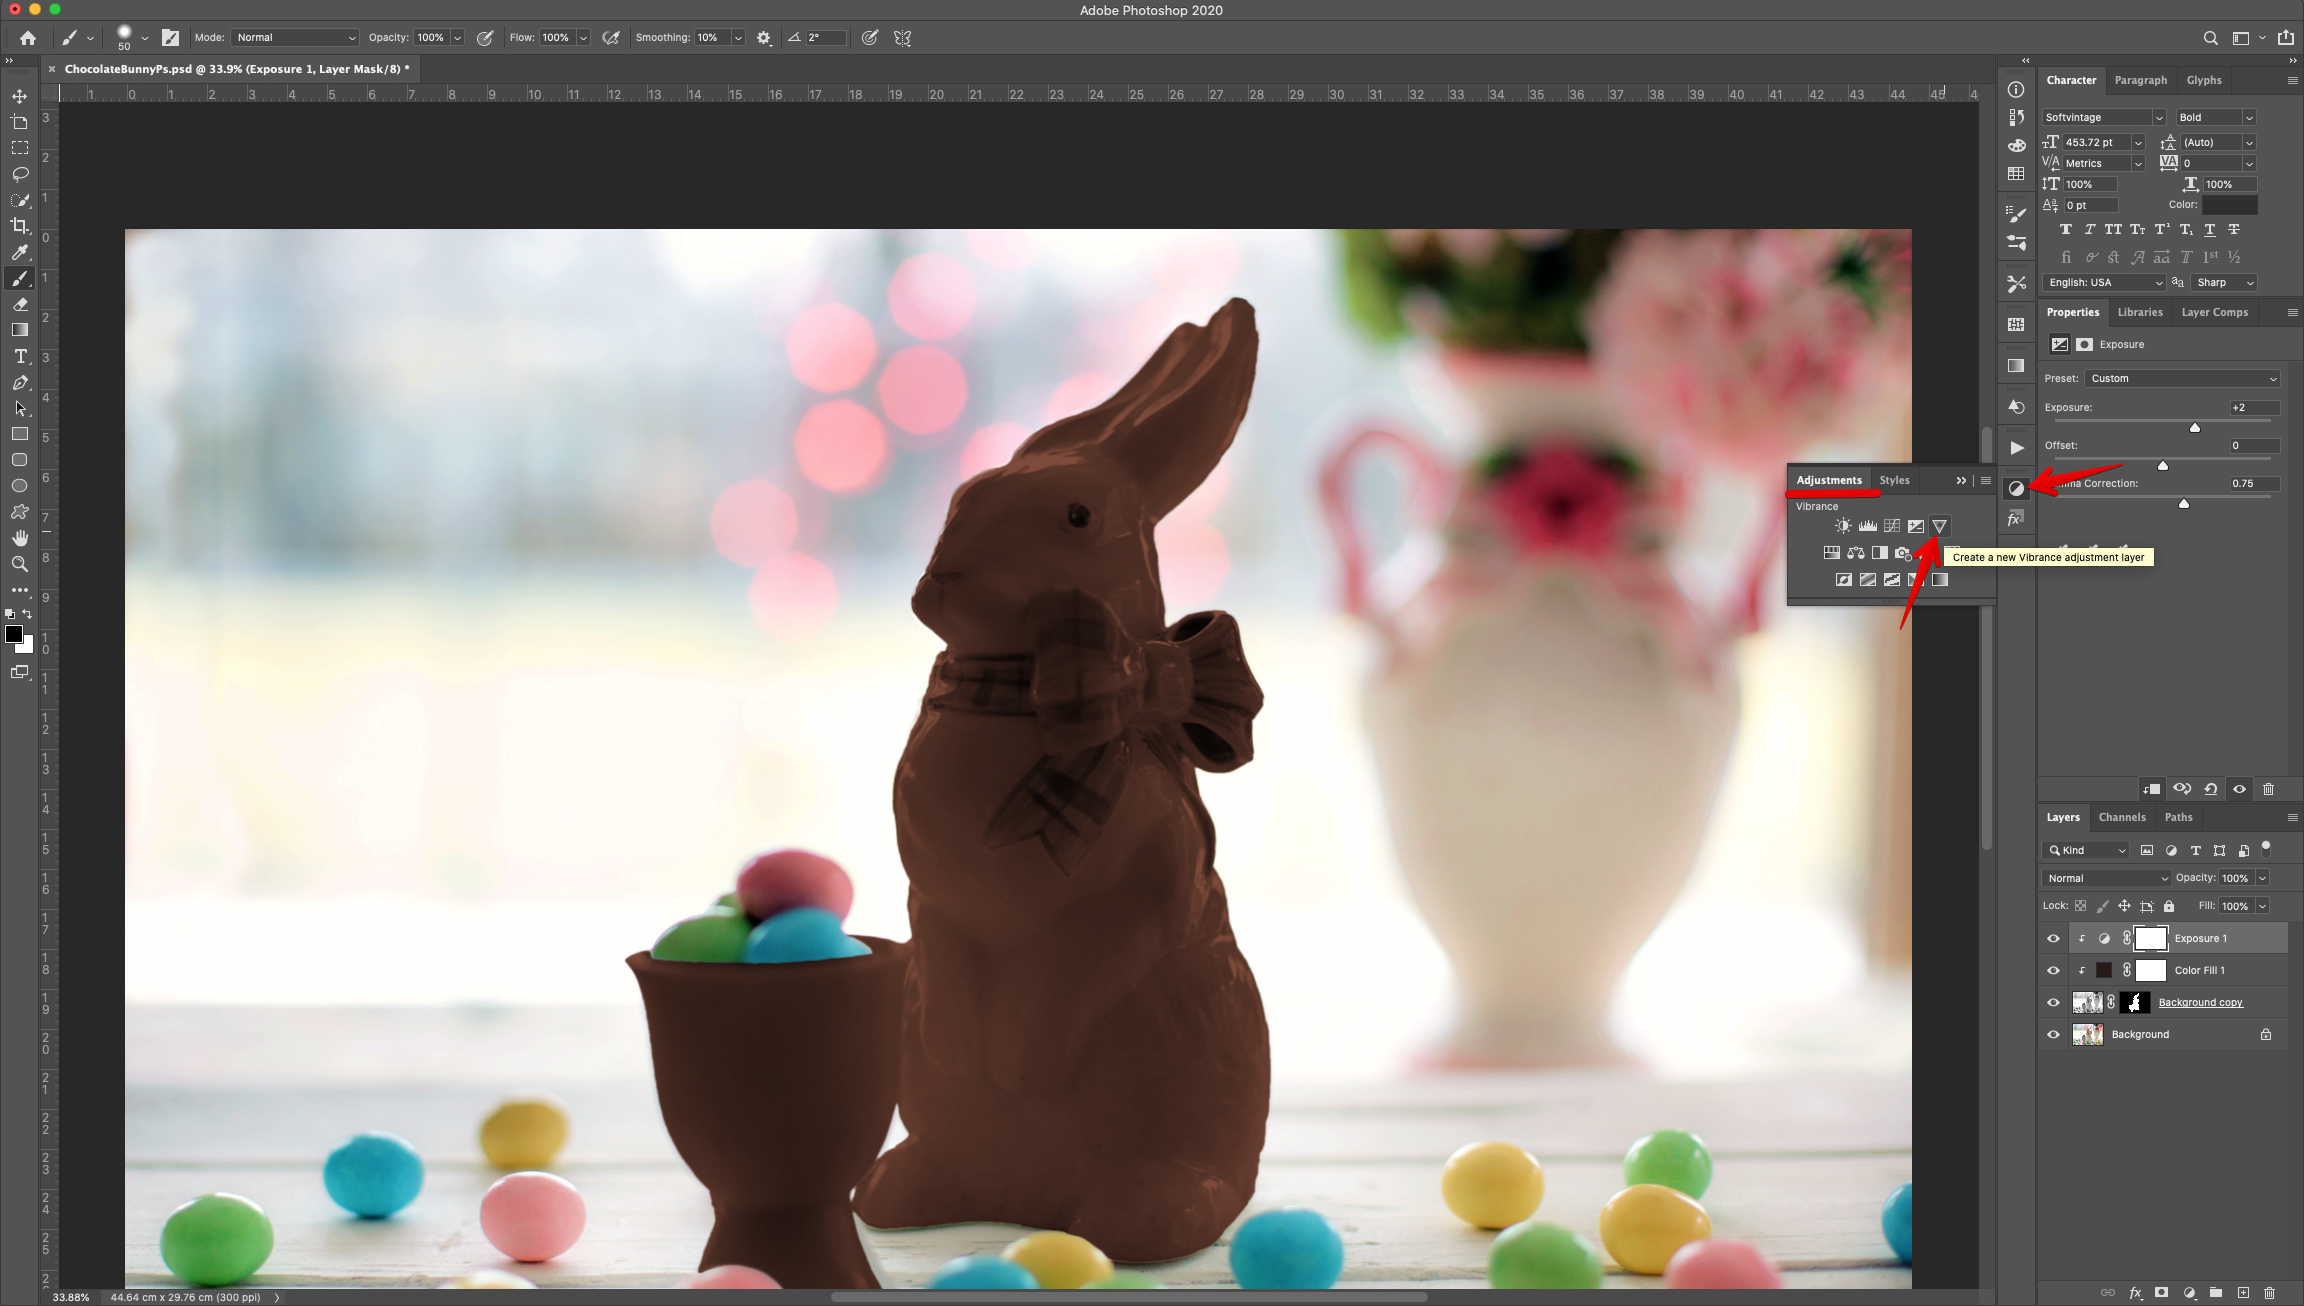
11 - Create a new “Exposure Adjustment Layer” on top of everything, clip it down by clicking the small button at the bottom of the “Adjustments Panel” and tweak the values so the image looks better (we used +2, 0 0.75).

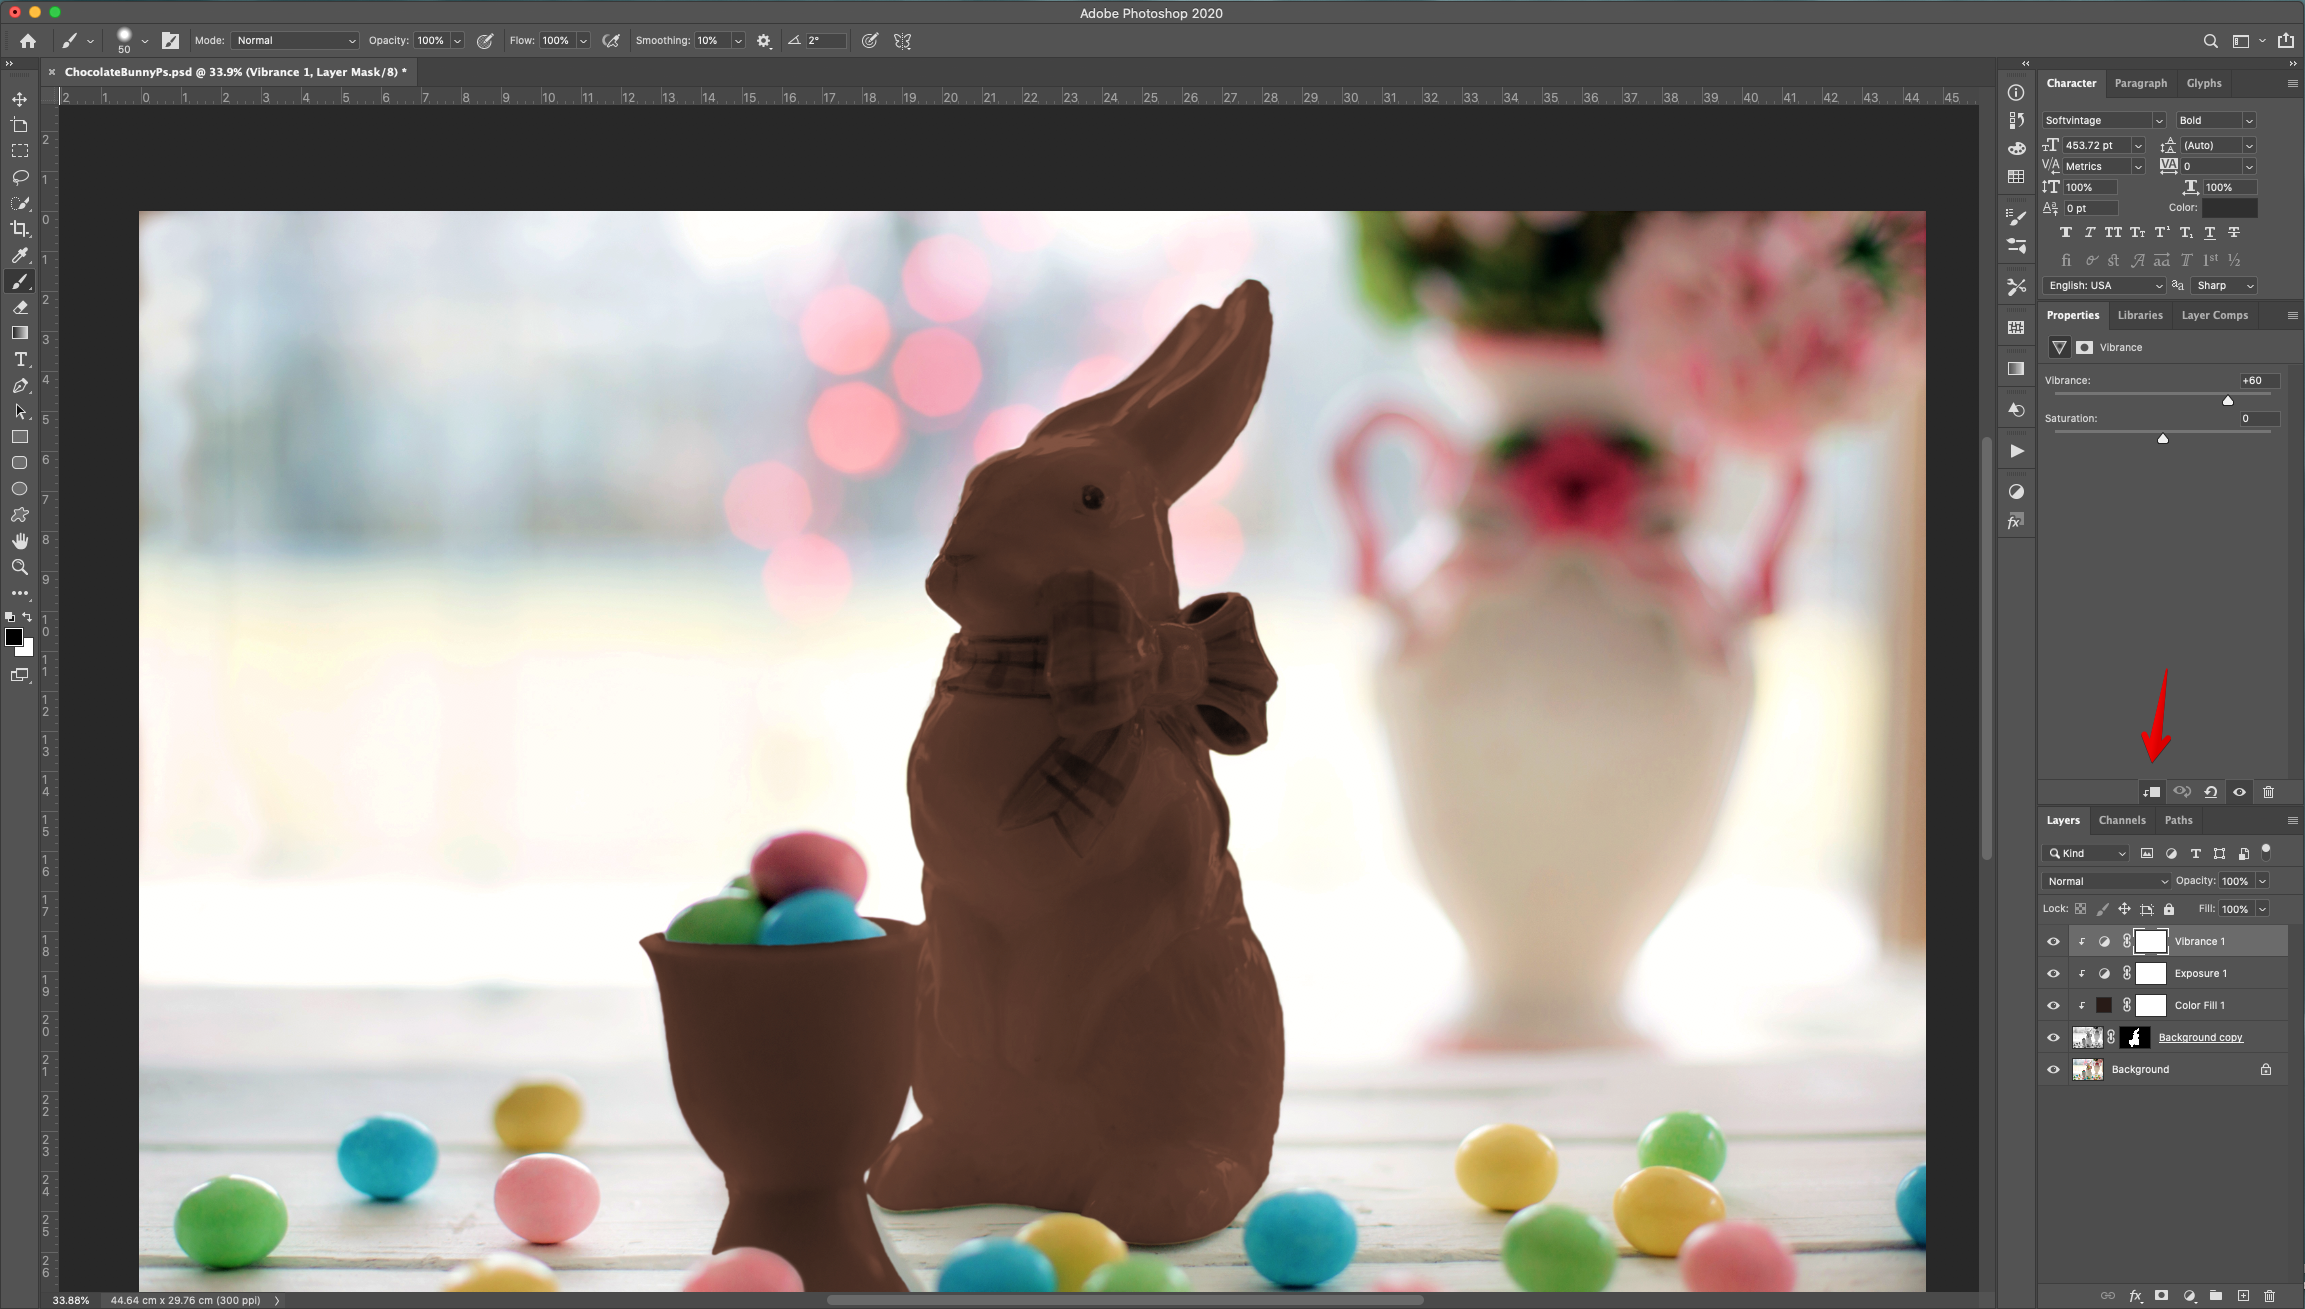
12 - Create a new “Vibrance Adjustment Layer”, clip it down by clicking the small button at the bottom of the “Adjustments Panel” and increase the “Vibrance” value (we used 60%).
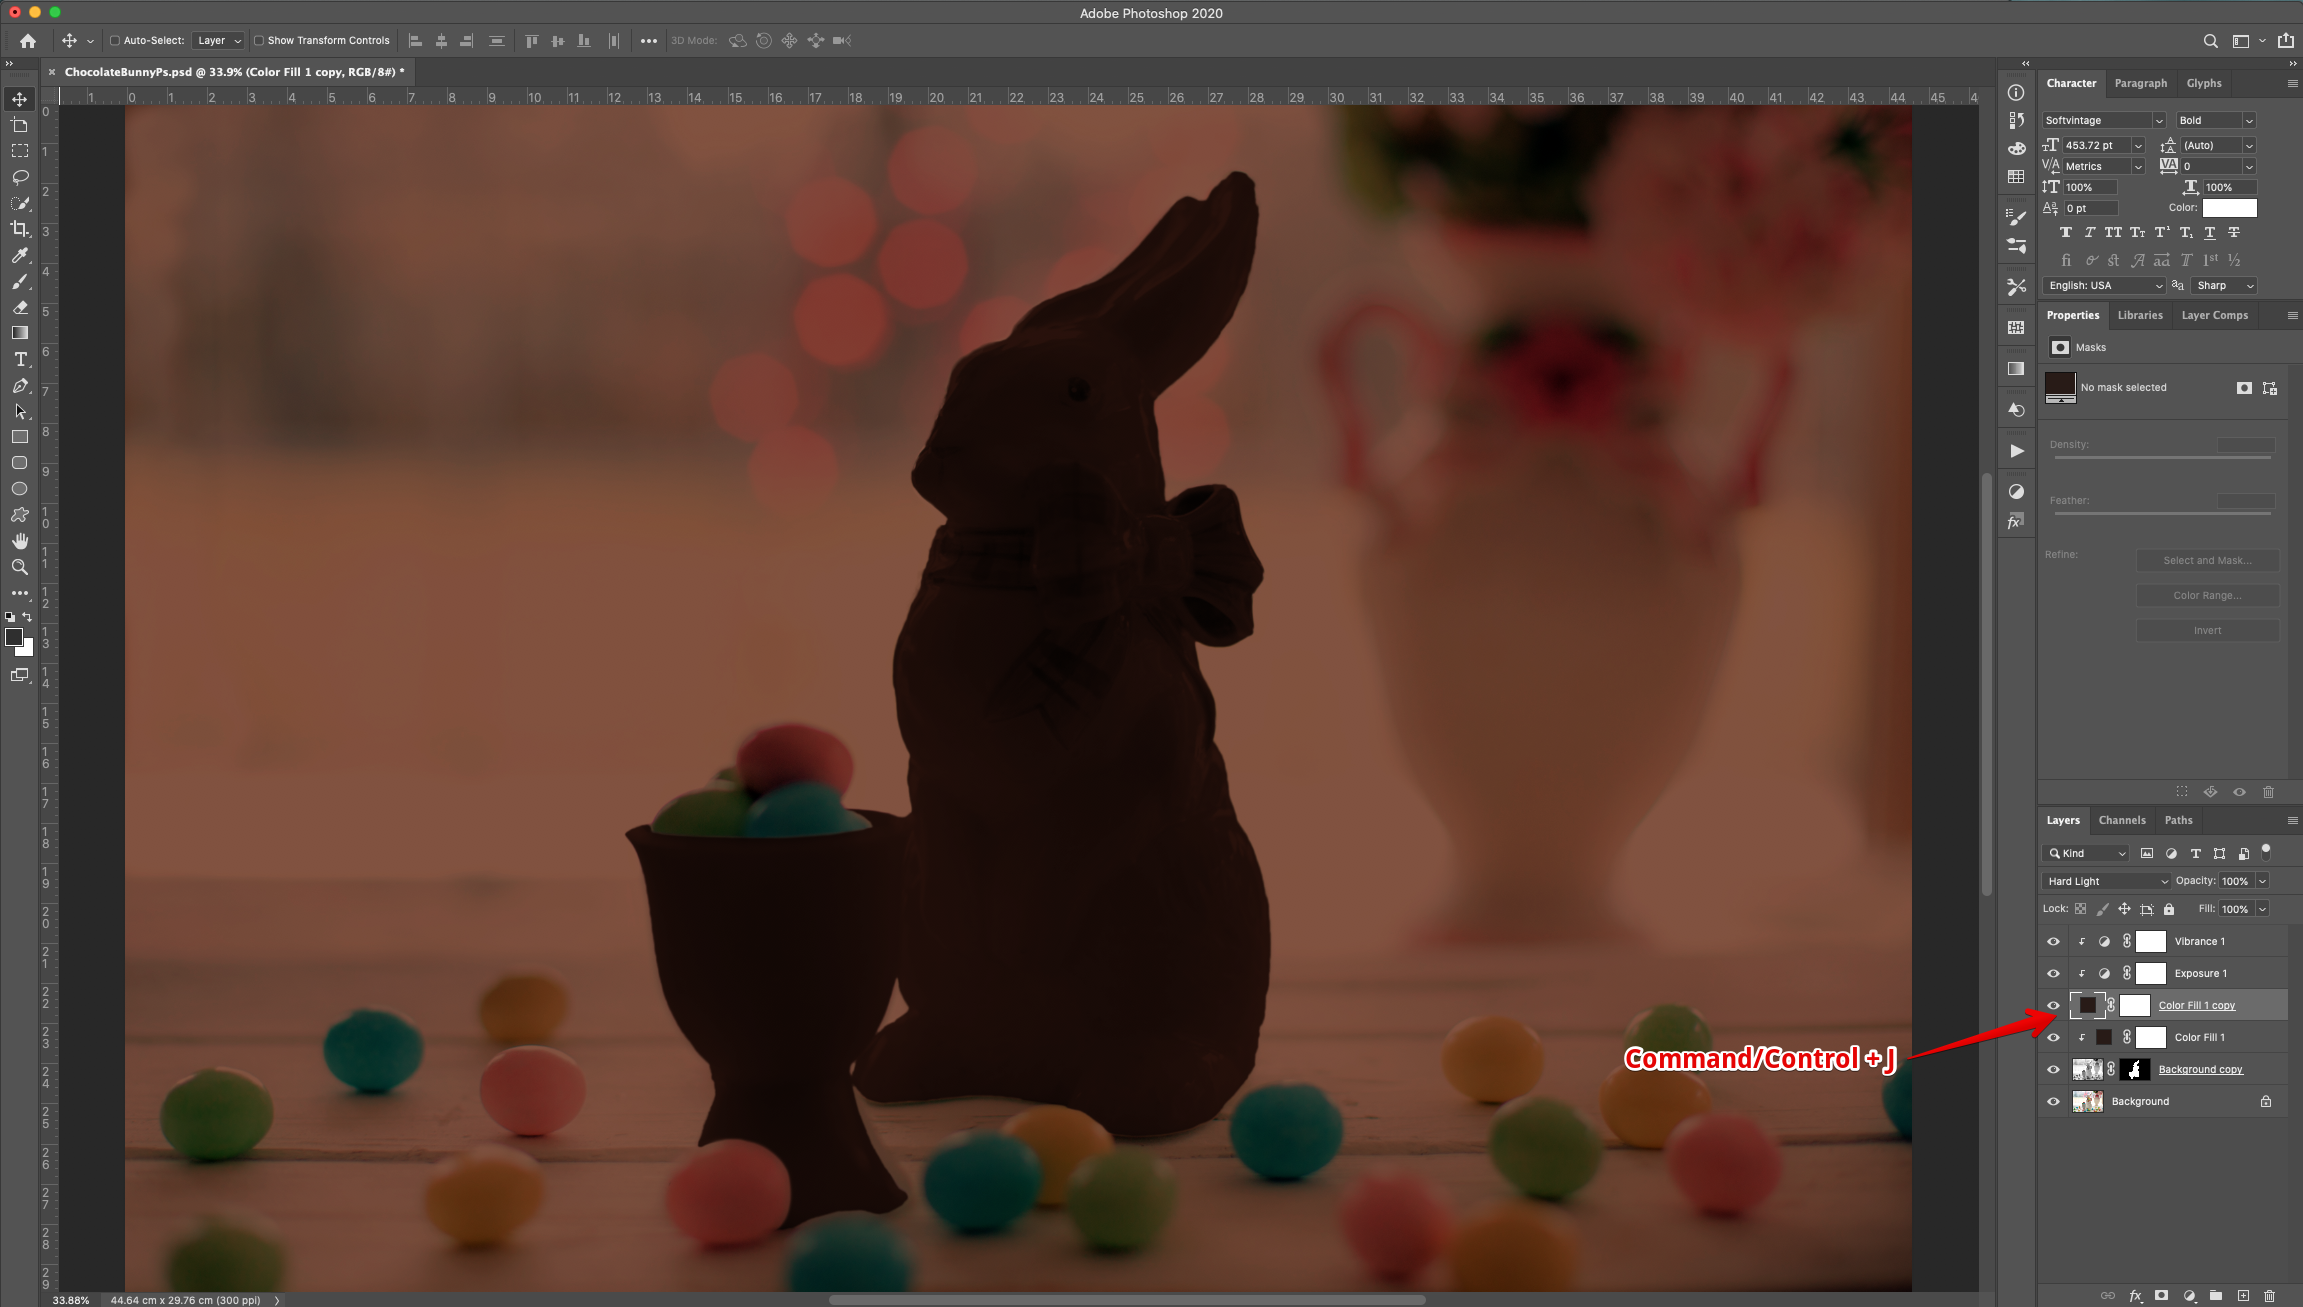
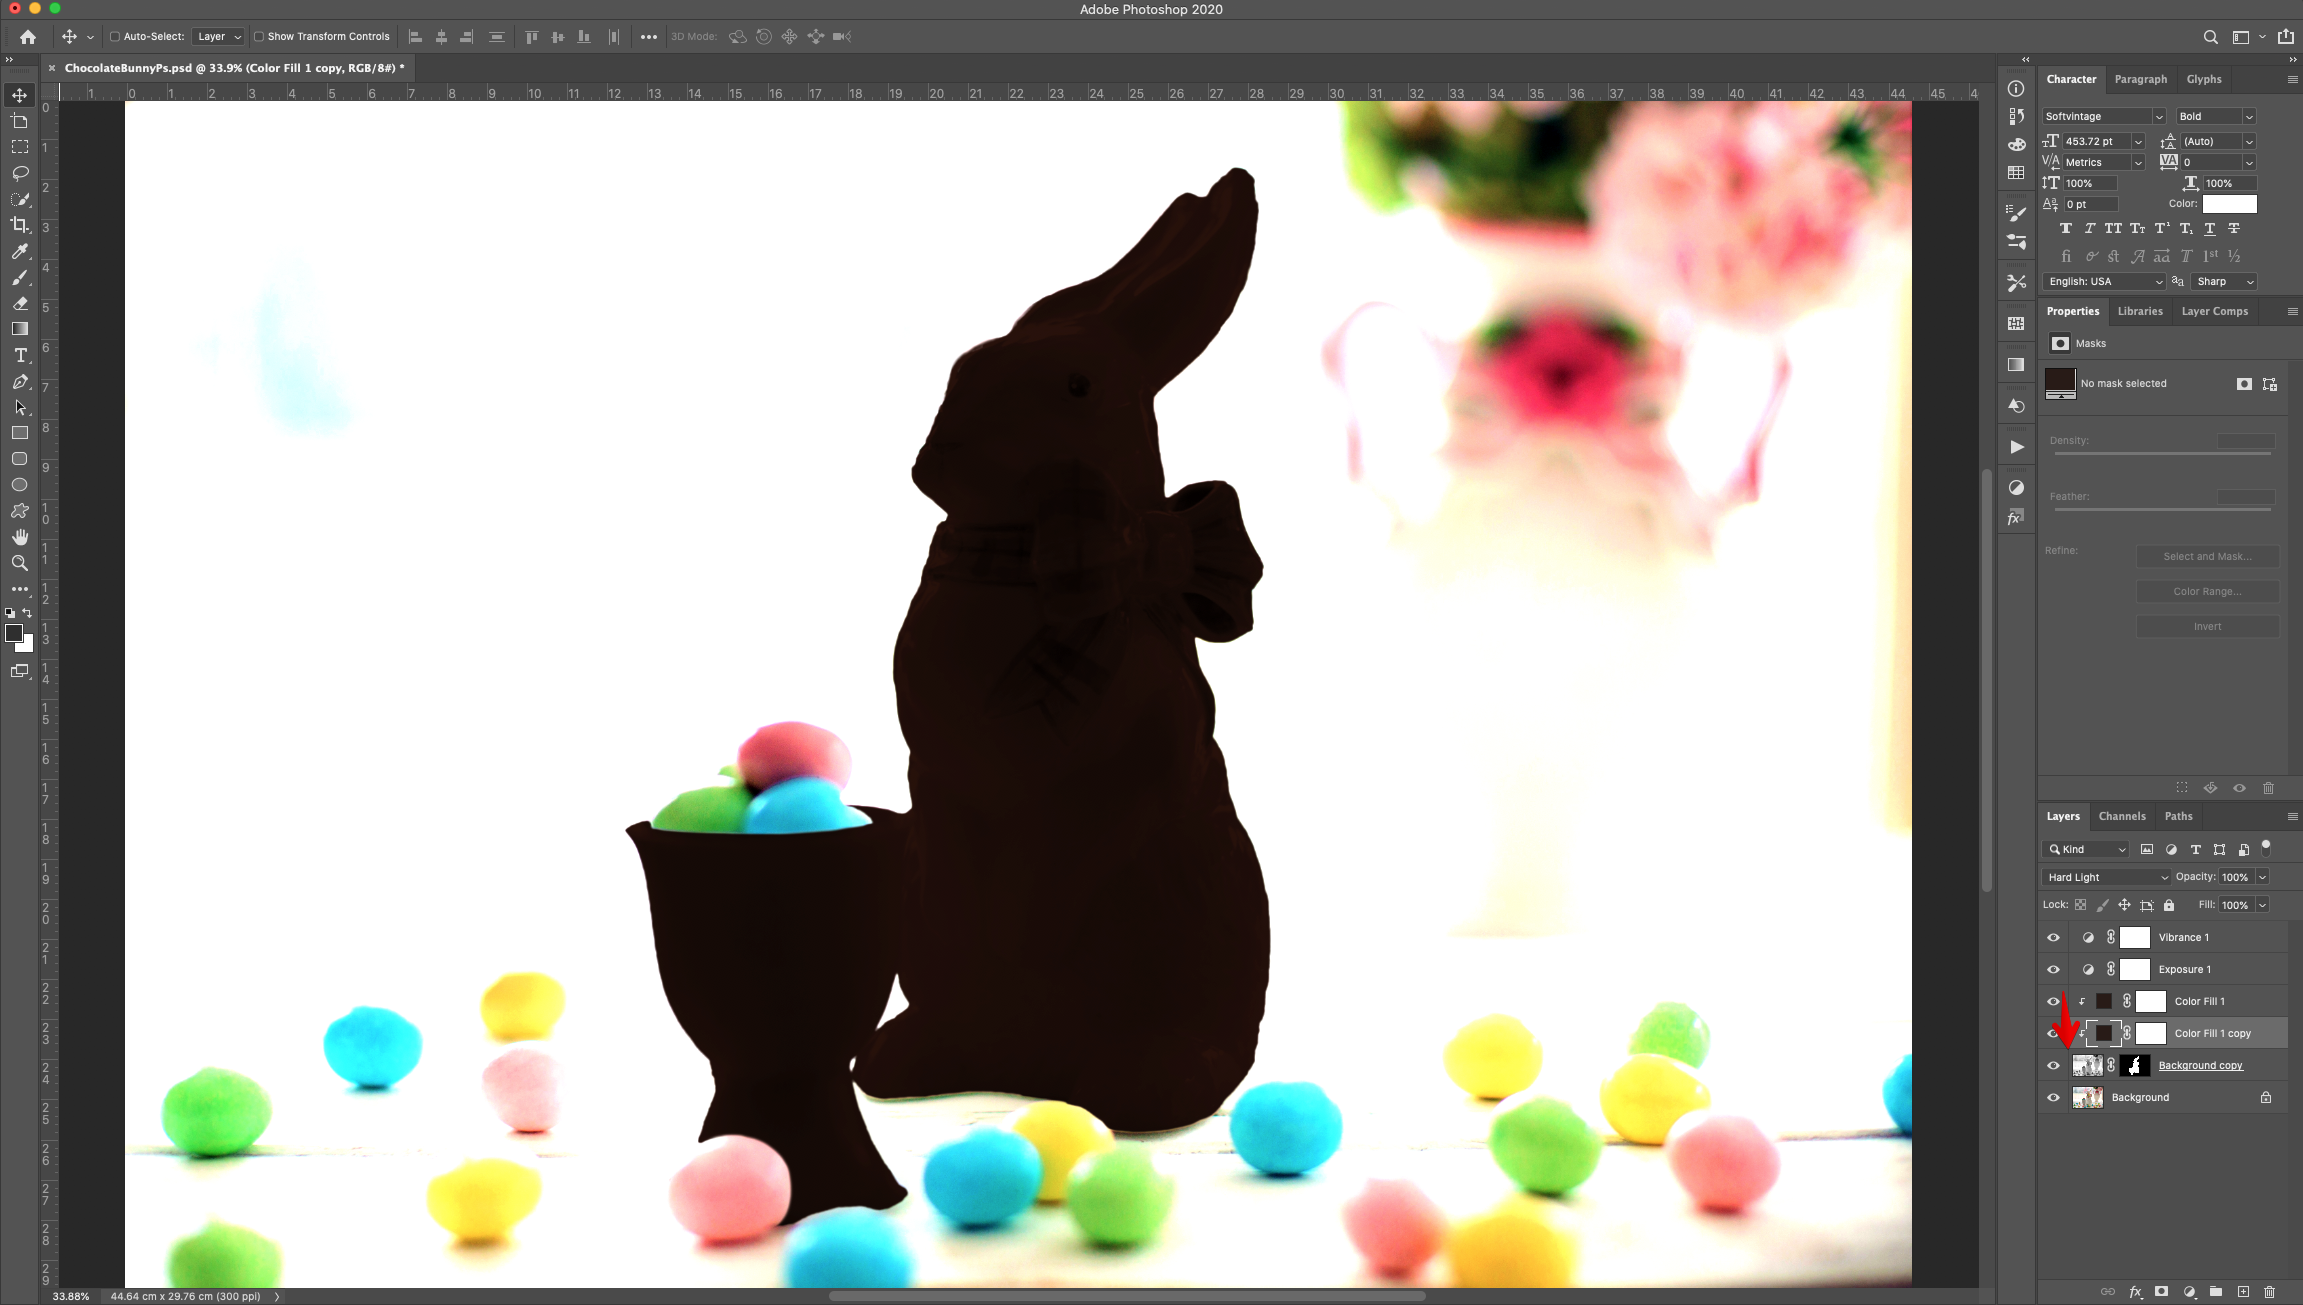
13 - Duplicate the “Color Fill Layer” (Command/Control + J), drag its Thumbnail to place it under the original one.
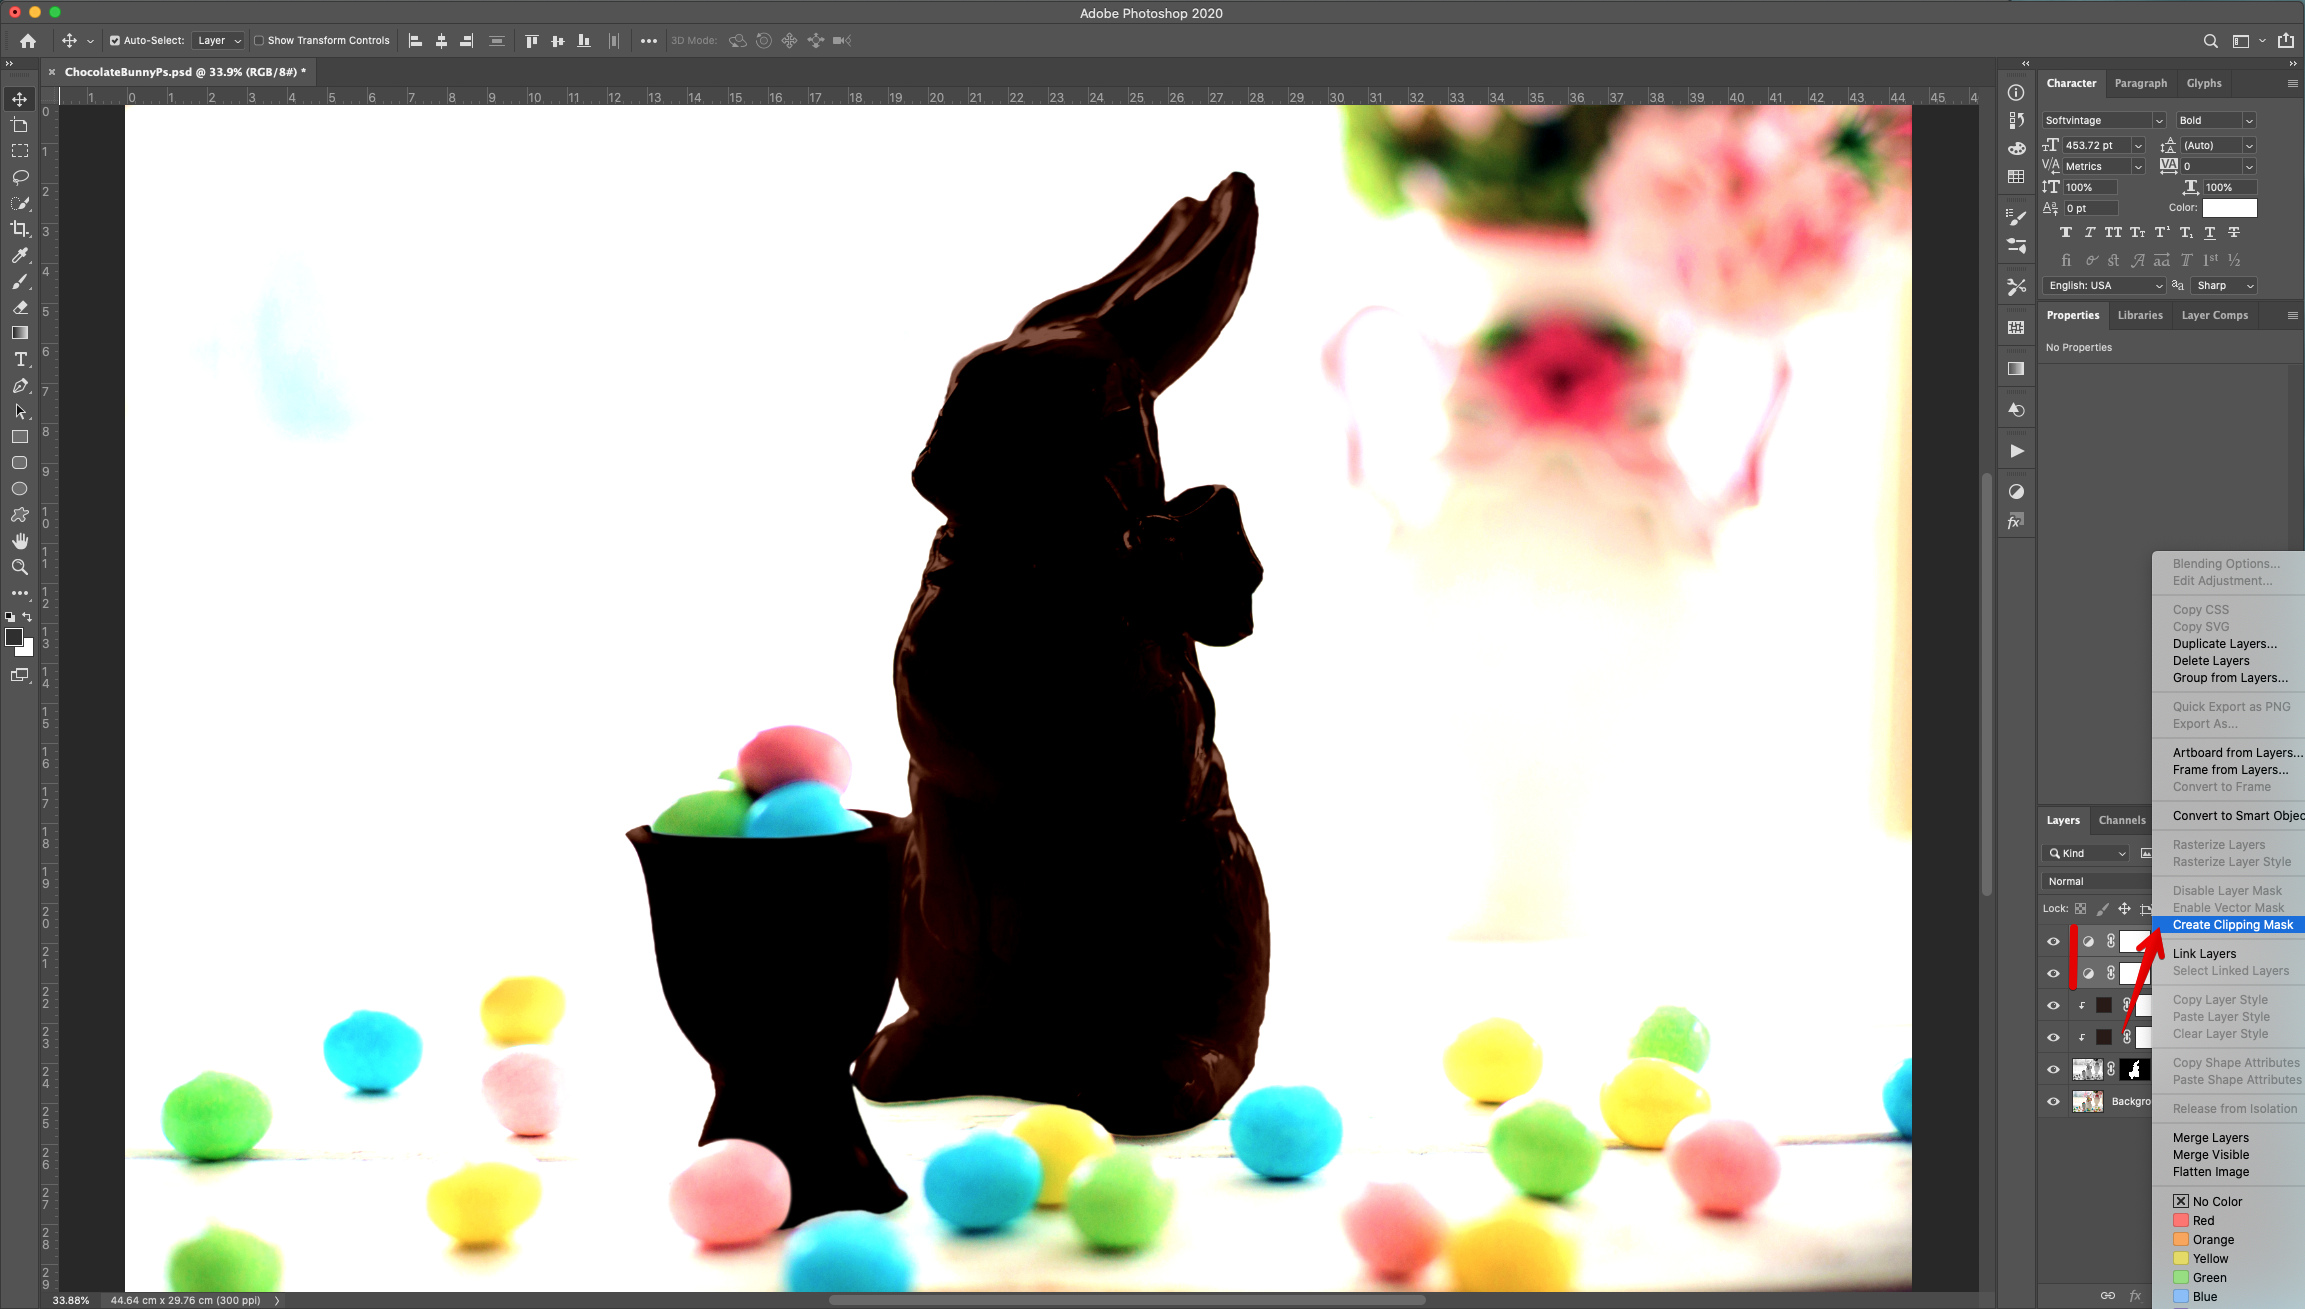
14 - Make sure every layer that needs to is “Clipped Down” (of not, right-click on top of its Thumbnail and choose “Create Clipping Mask” again).
15 - Double-click on top of the duplicate “Color Fill Layer” (the bottom one) to open the “Layer Styles Panel” and in the “Blending Options” tab, head to the “Blend if” section and click on the Left-most lever of the “This Layer” while holding the “Alt/Option” key to split it. Drag the Right side to the right to show some detail.
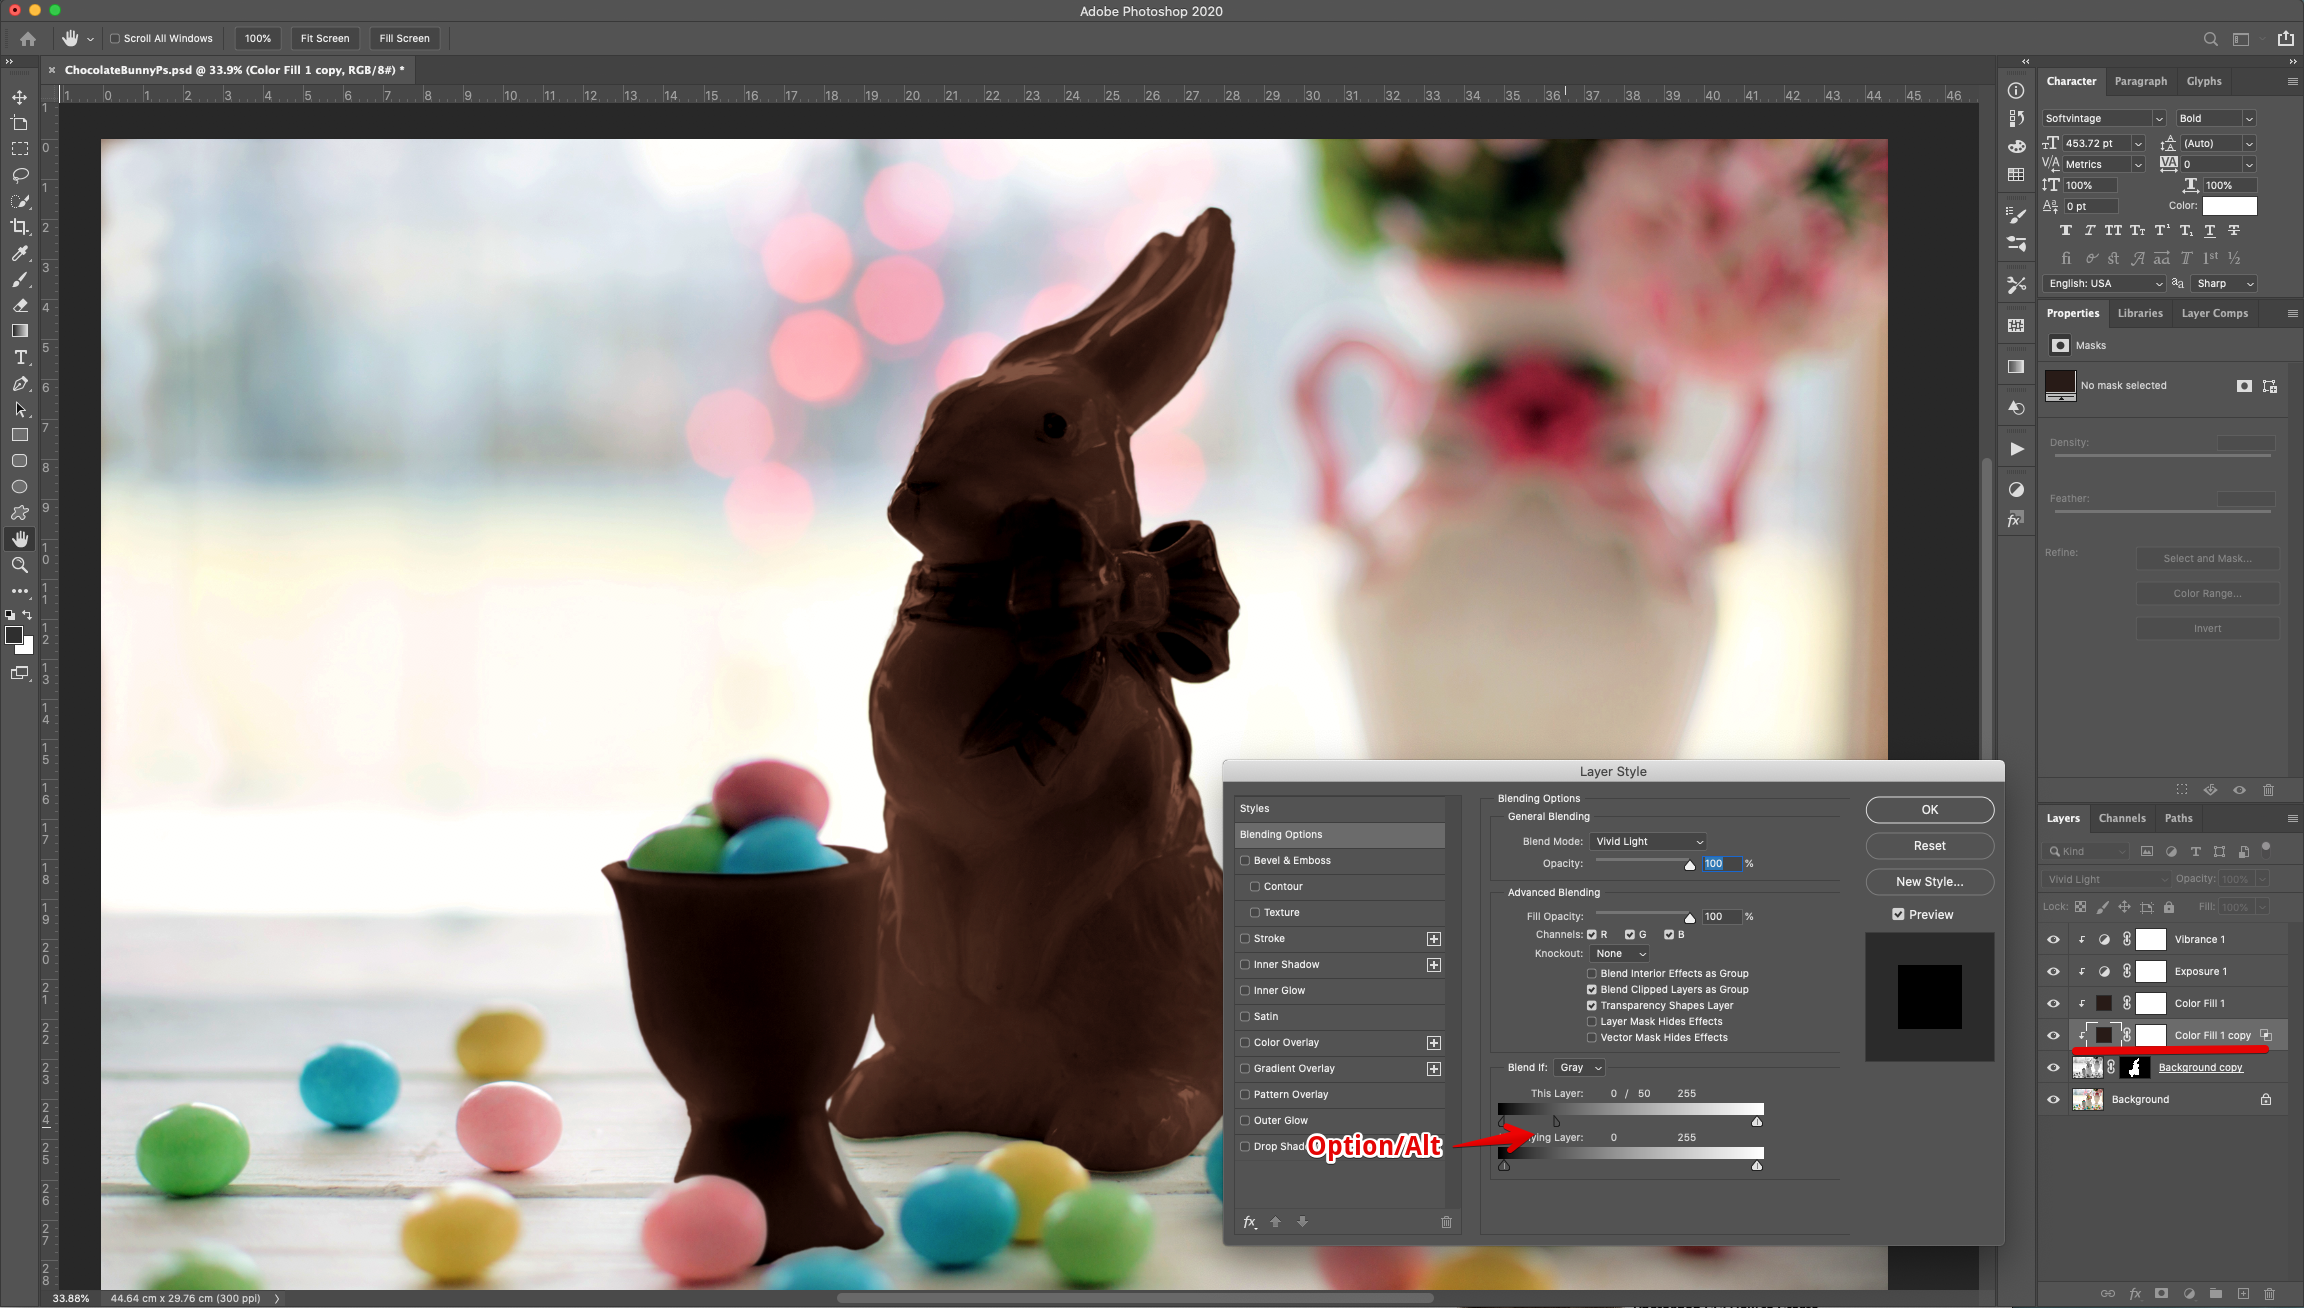
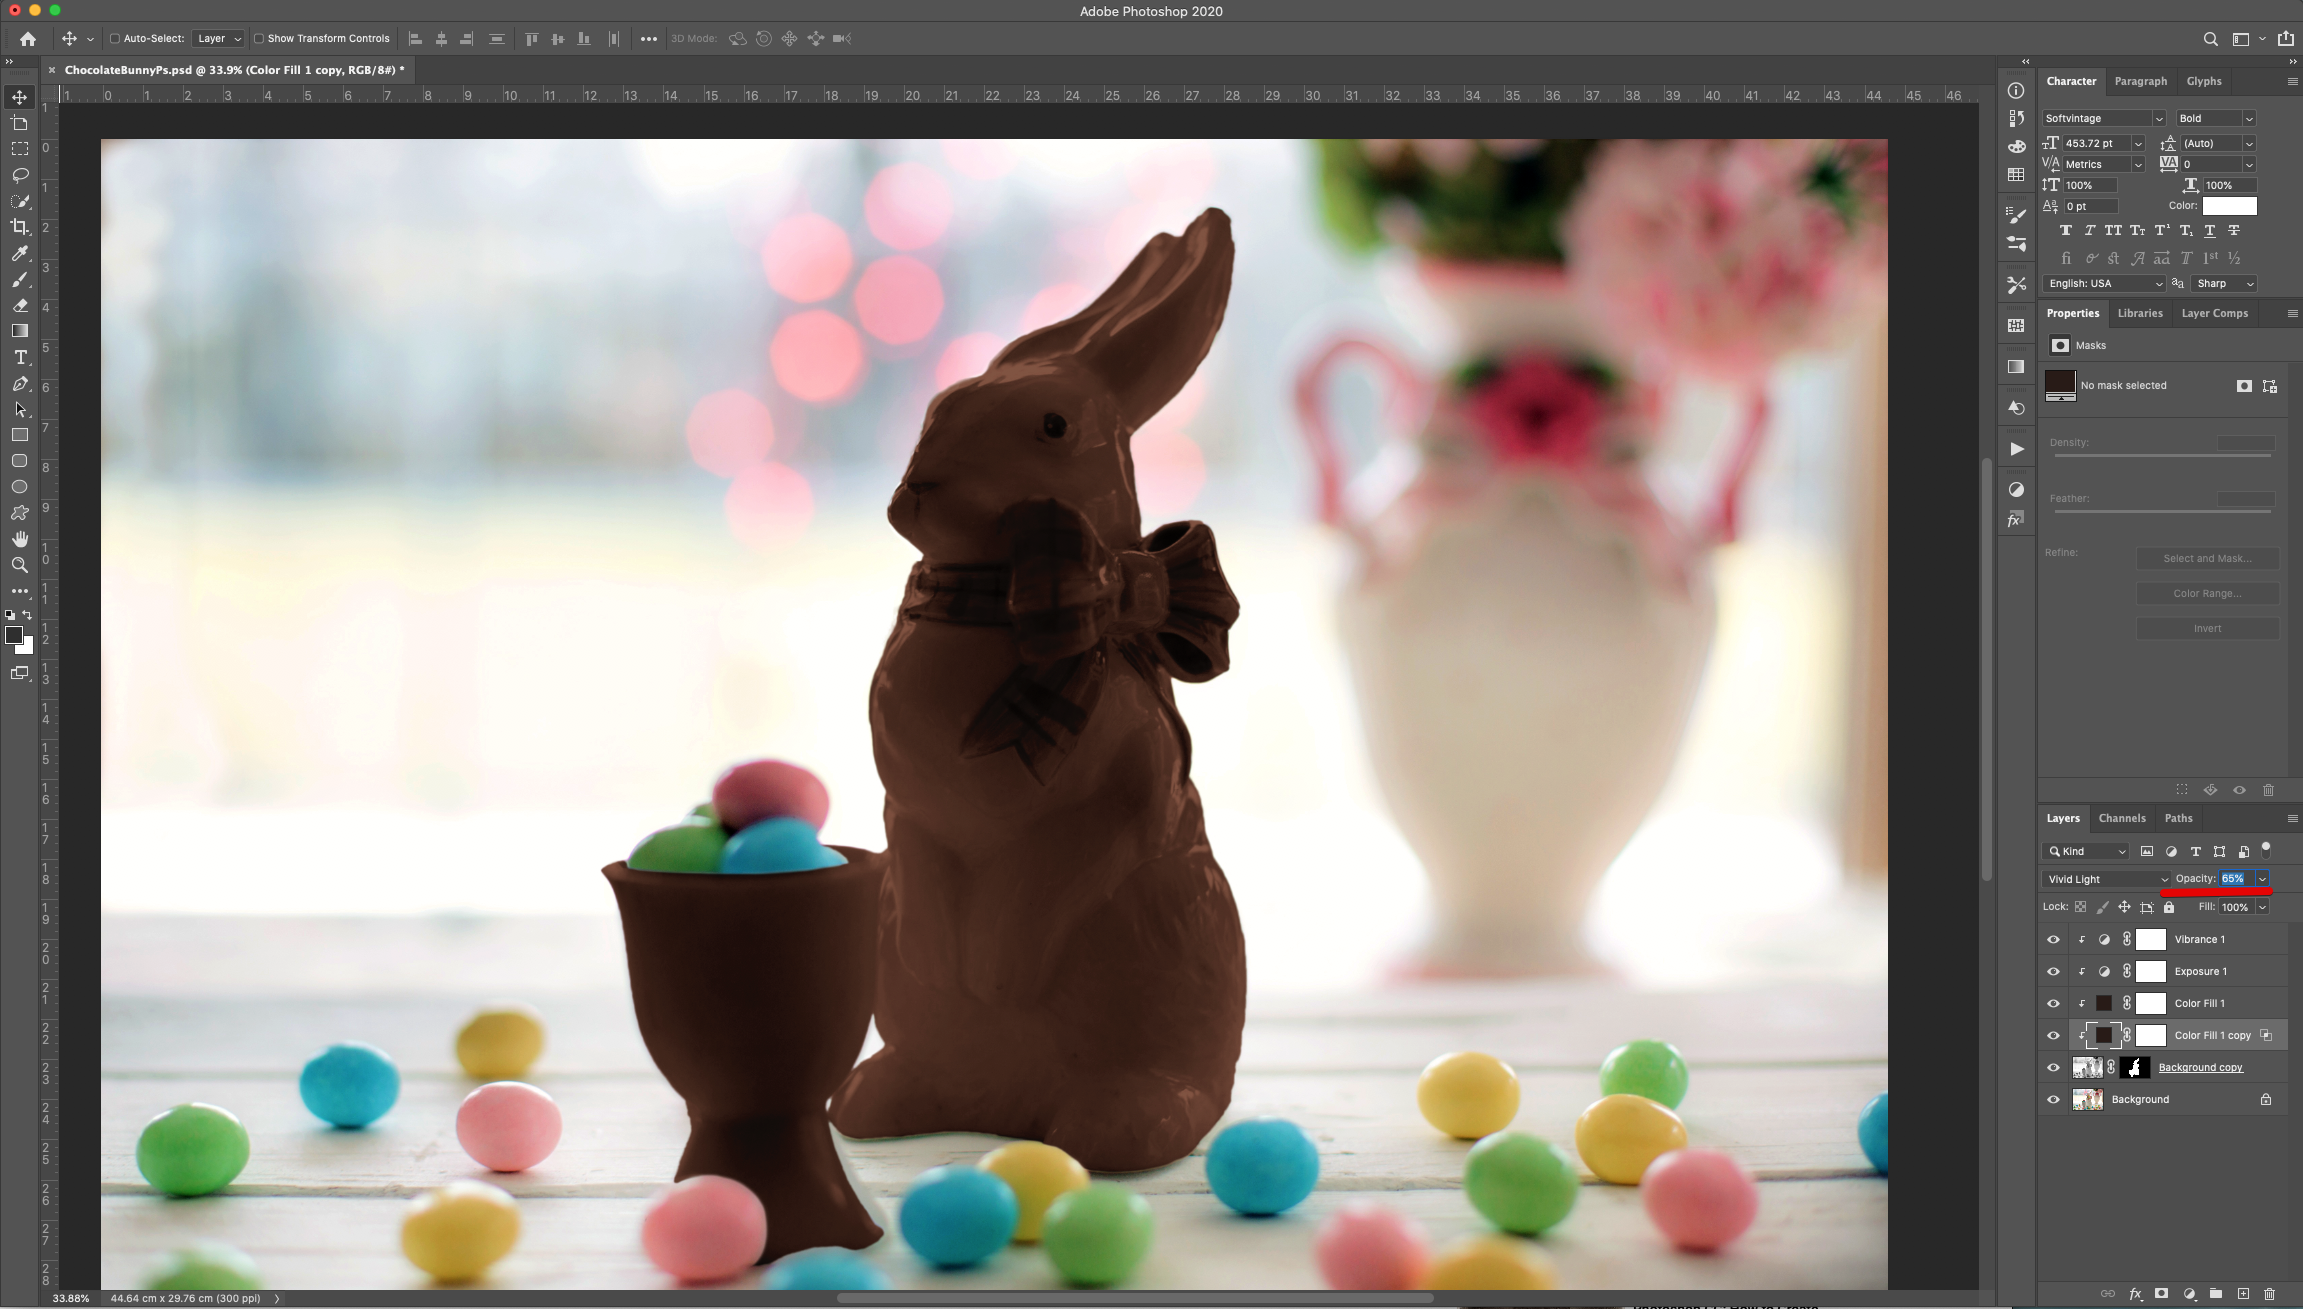
16 - Change the “Blending Options” of the layer to “Vivid Light” and lower the “Opacity” to 65%.
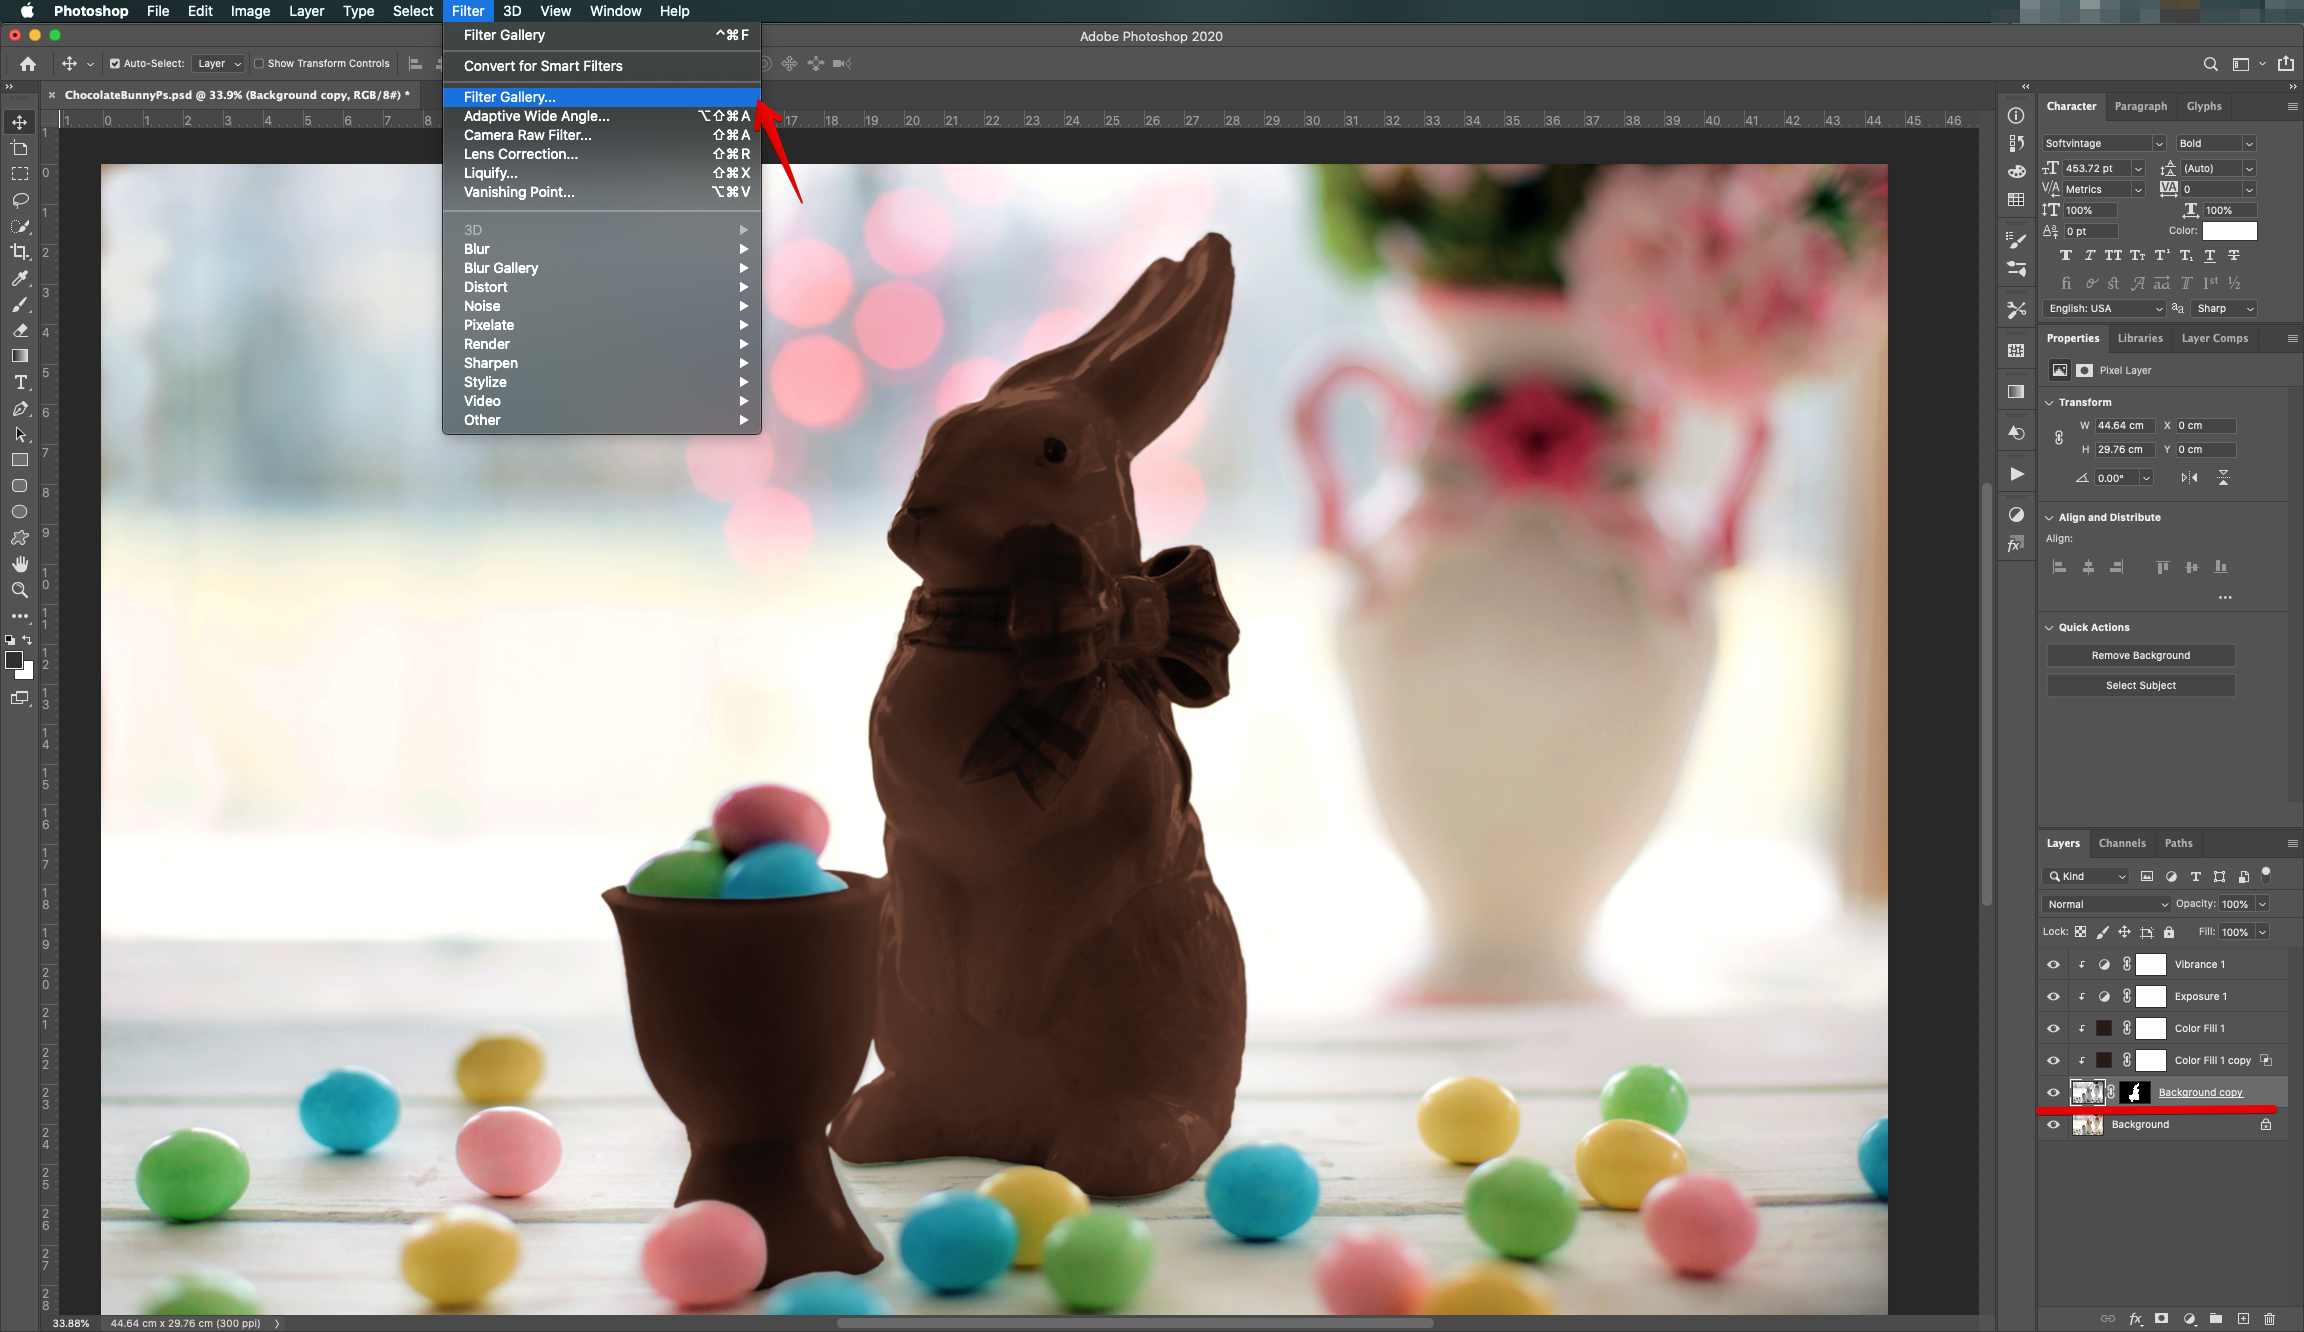
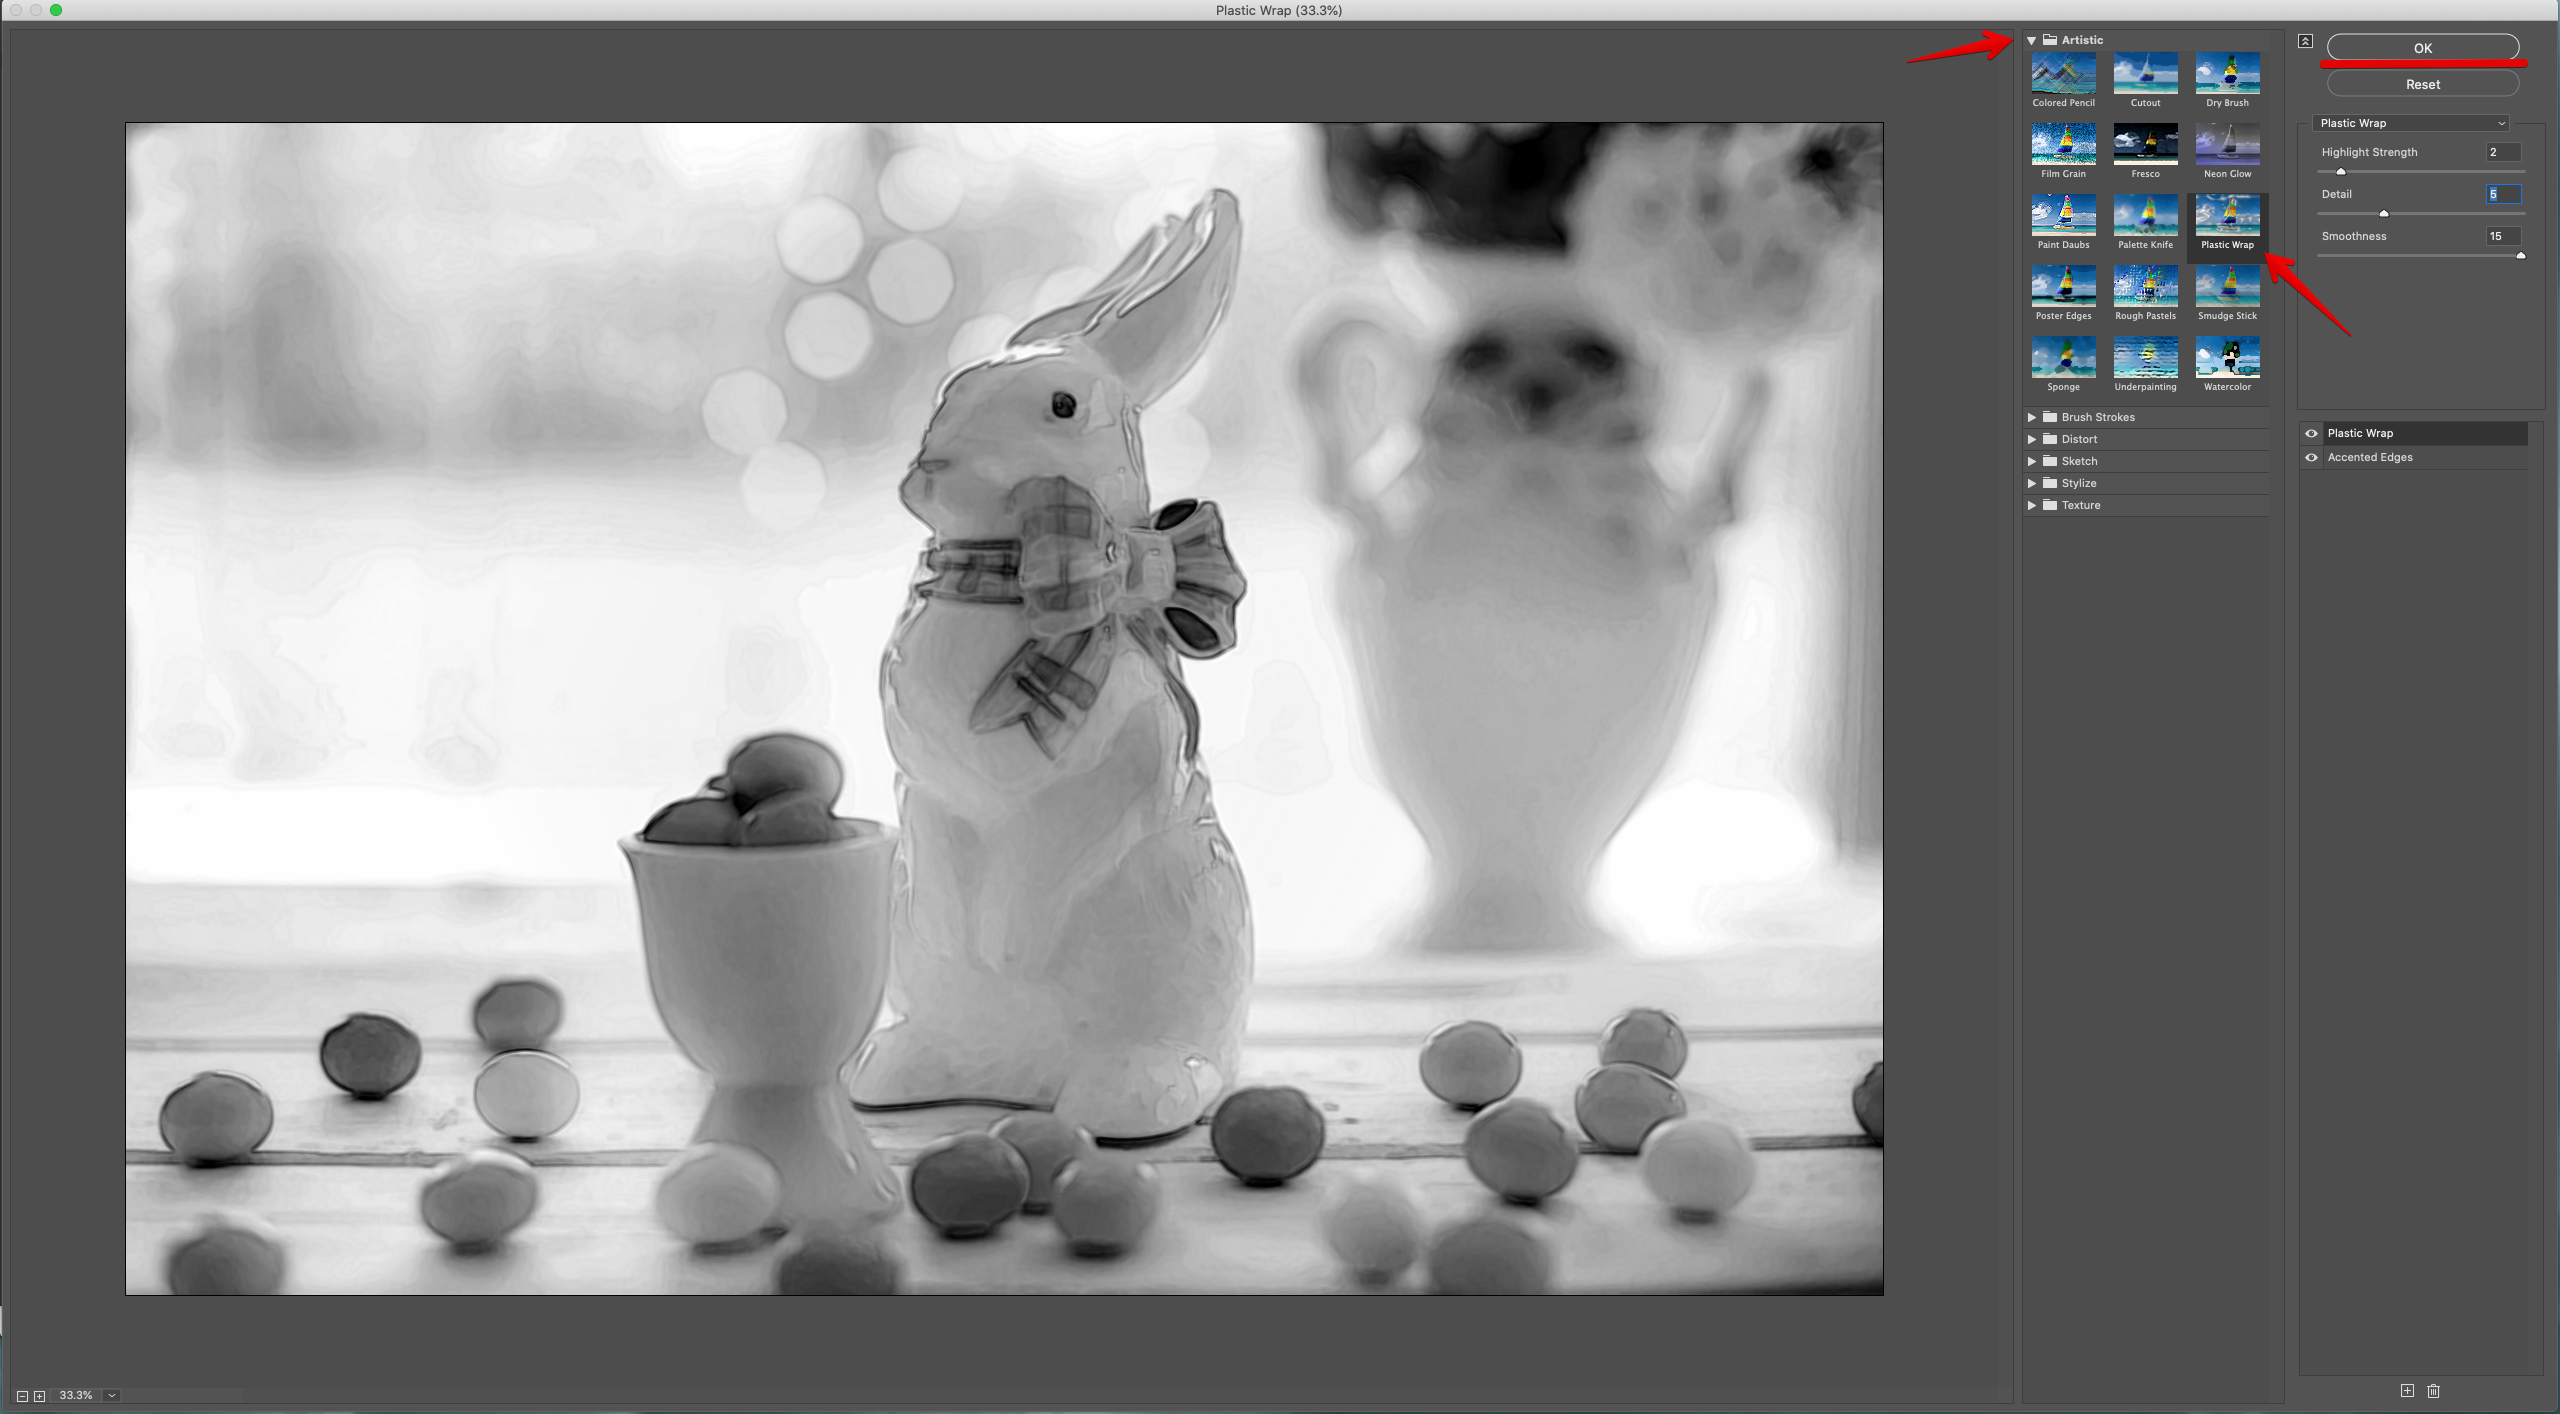
17 - Select the Masked layer, had to Filter > Filter Gallery > Artistic > Plastic Wrap and use the following values (2, 5 and 15).
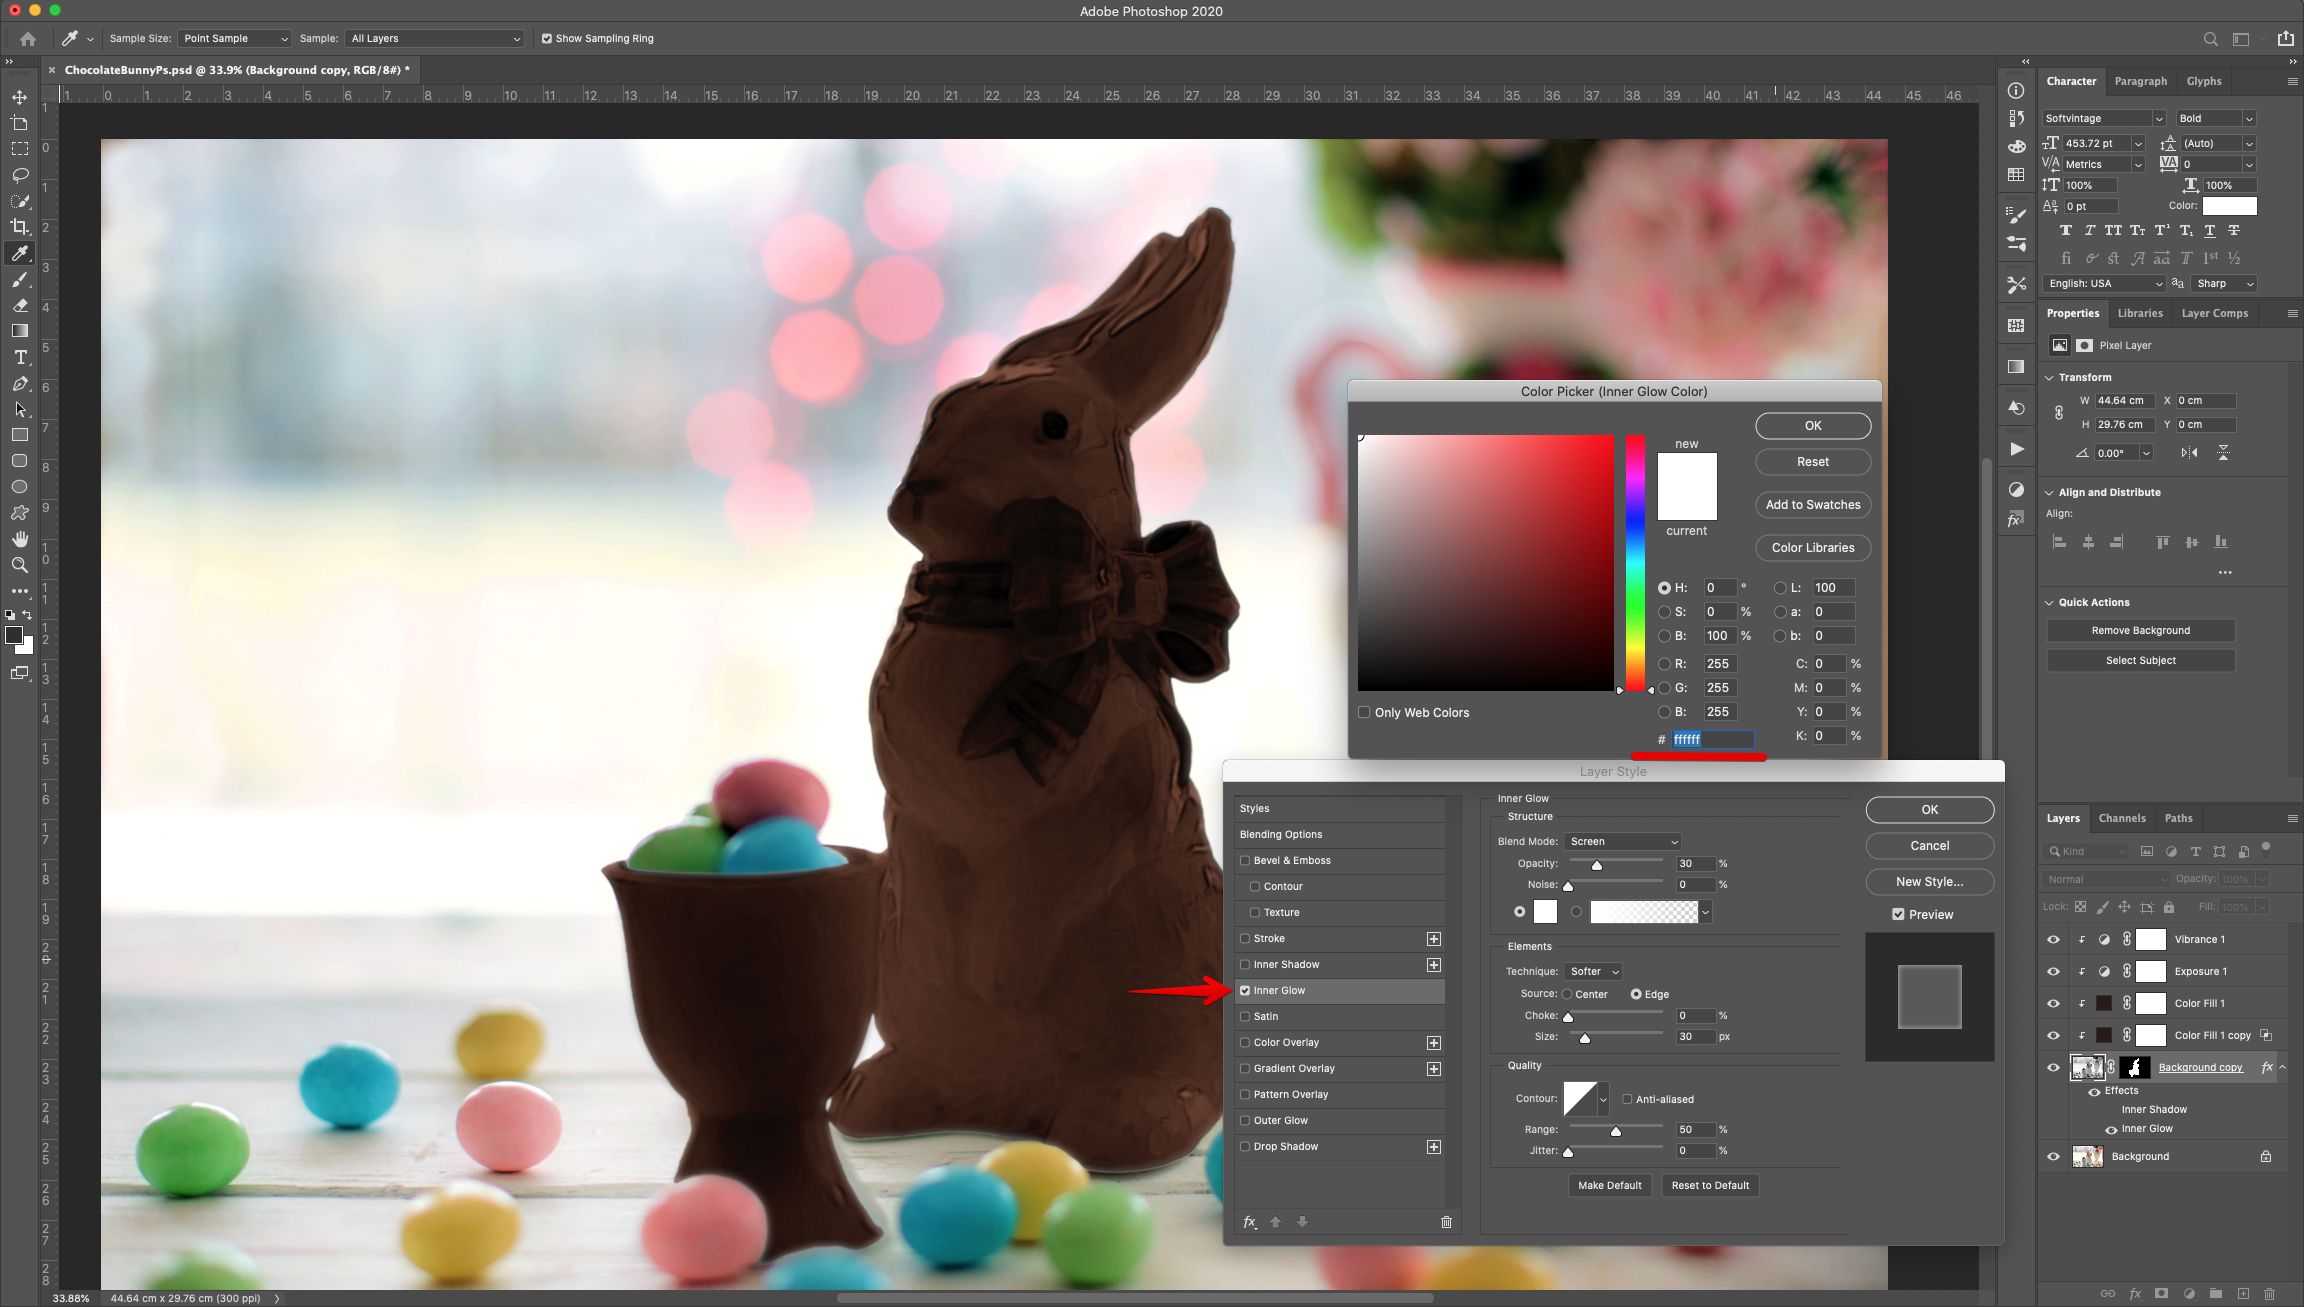
18 - Double-click on top of its Thumbnail to apply the following “layer Styles”:
Inner Glow: (#ffffff)
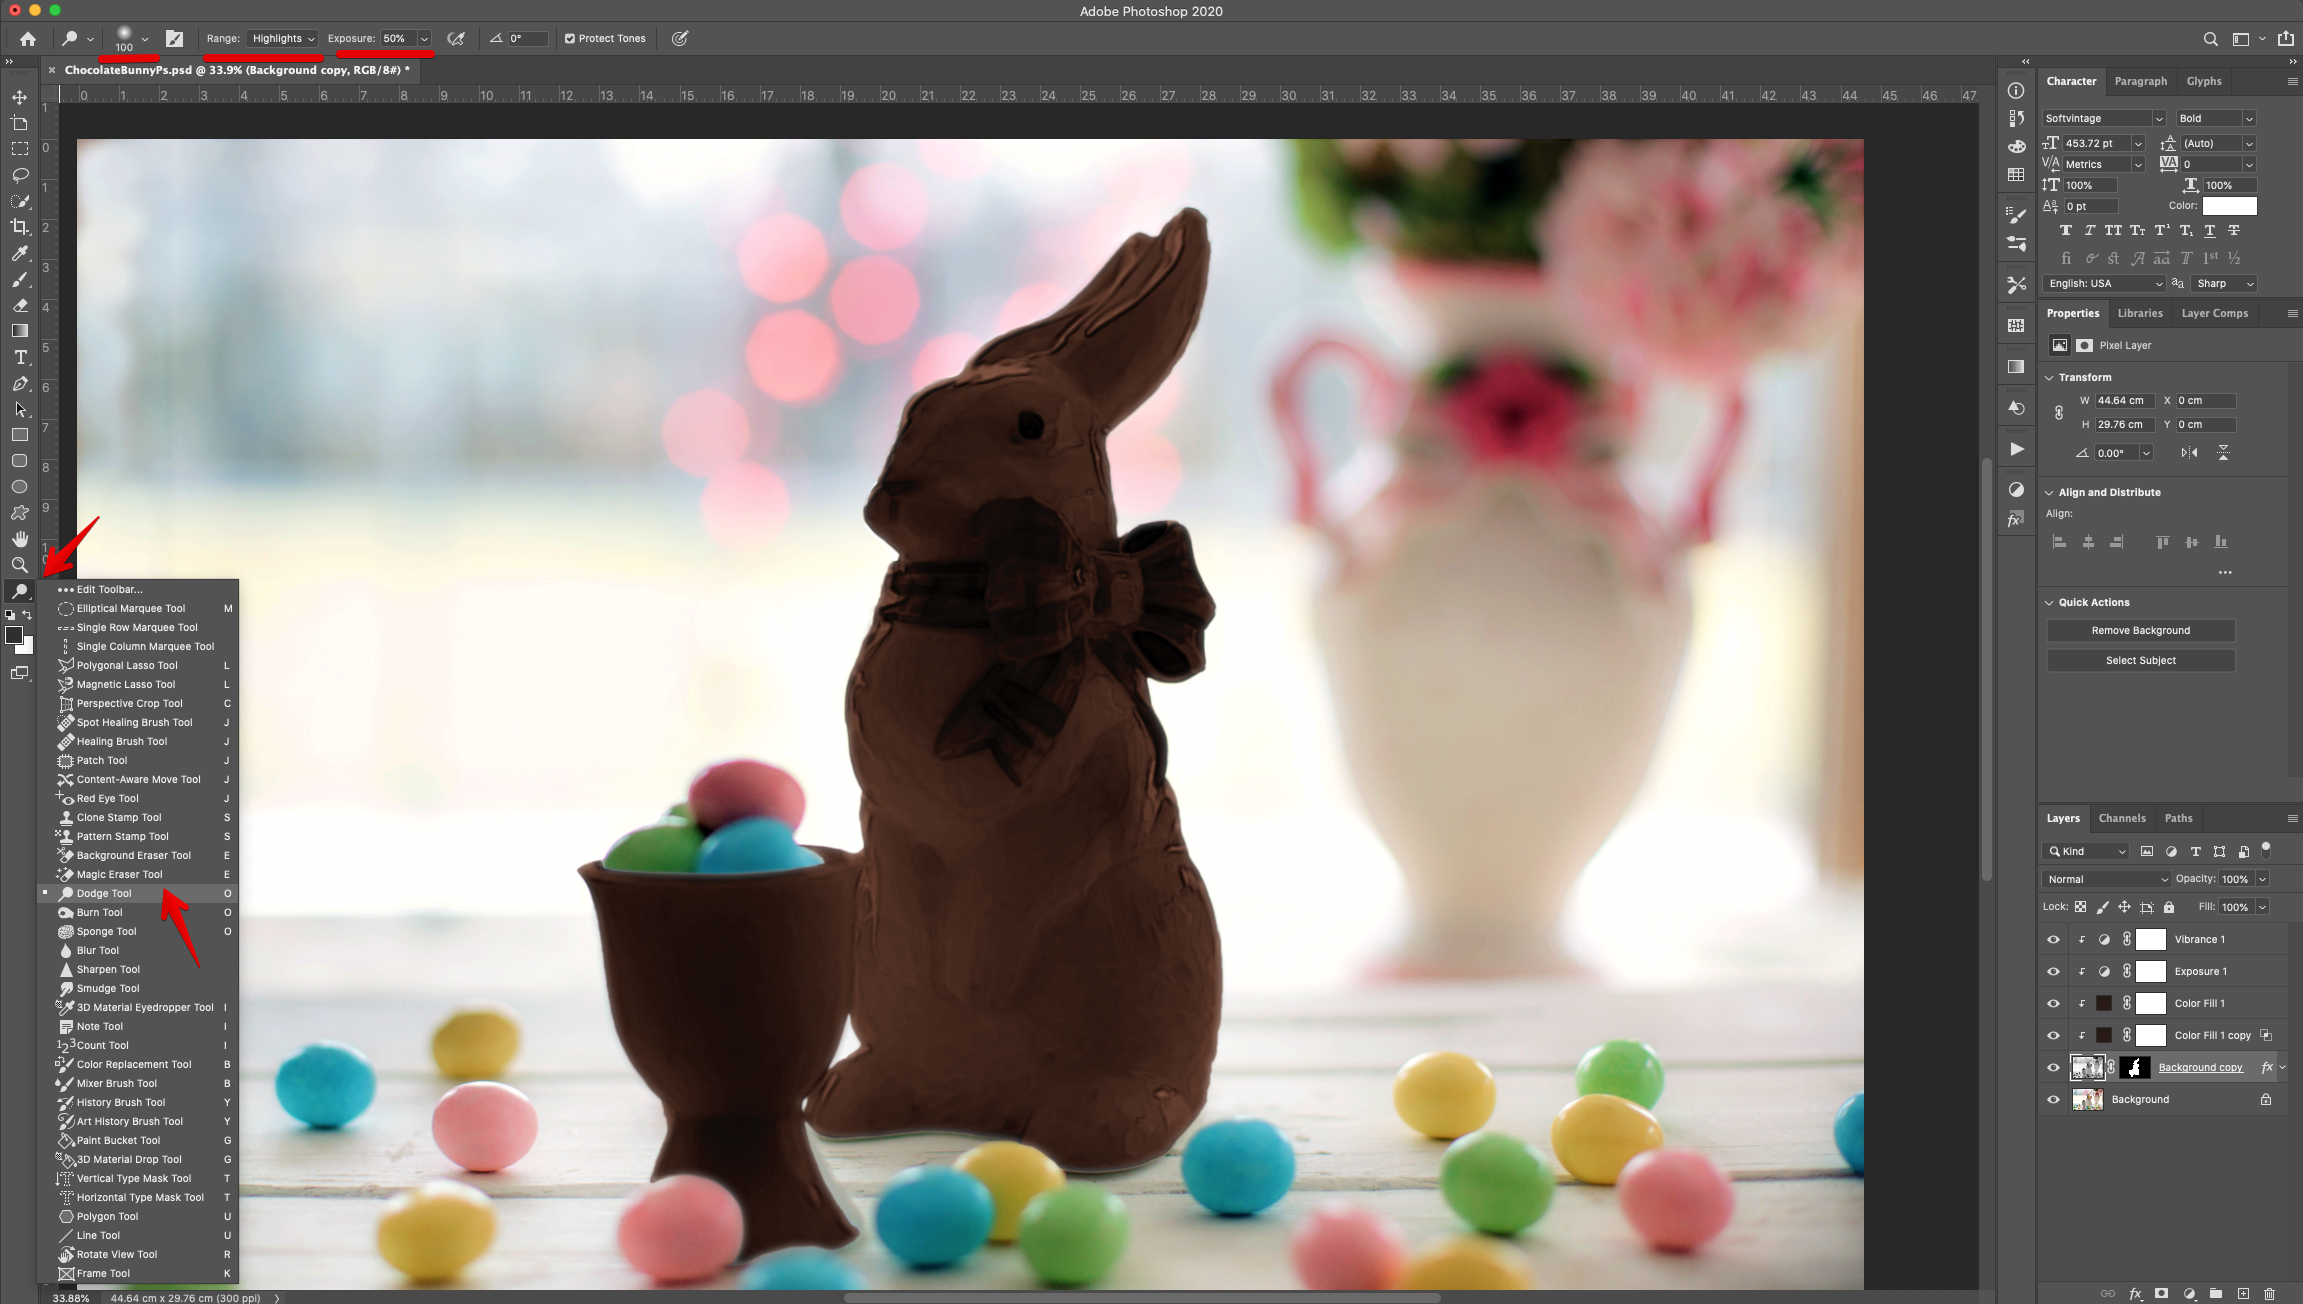
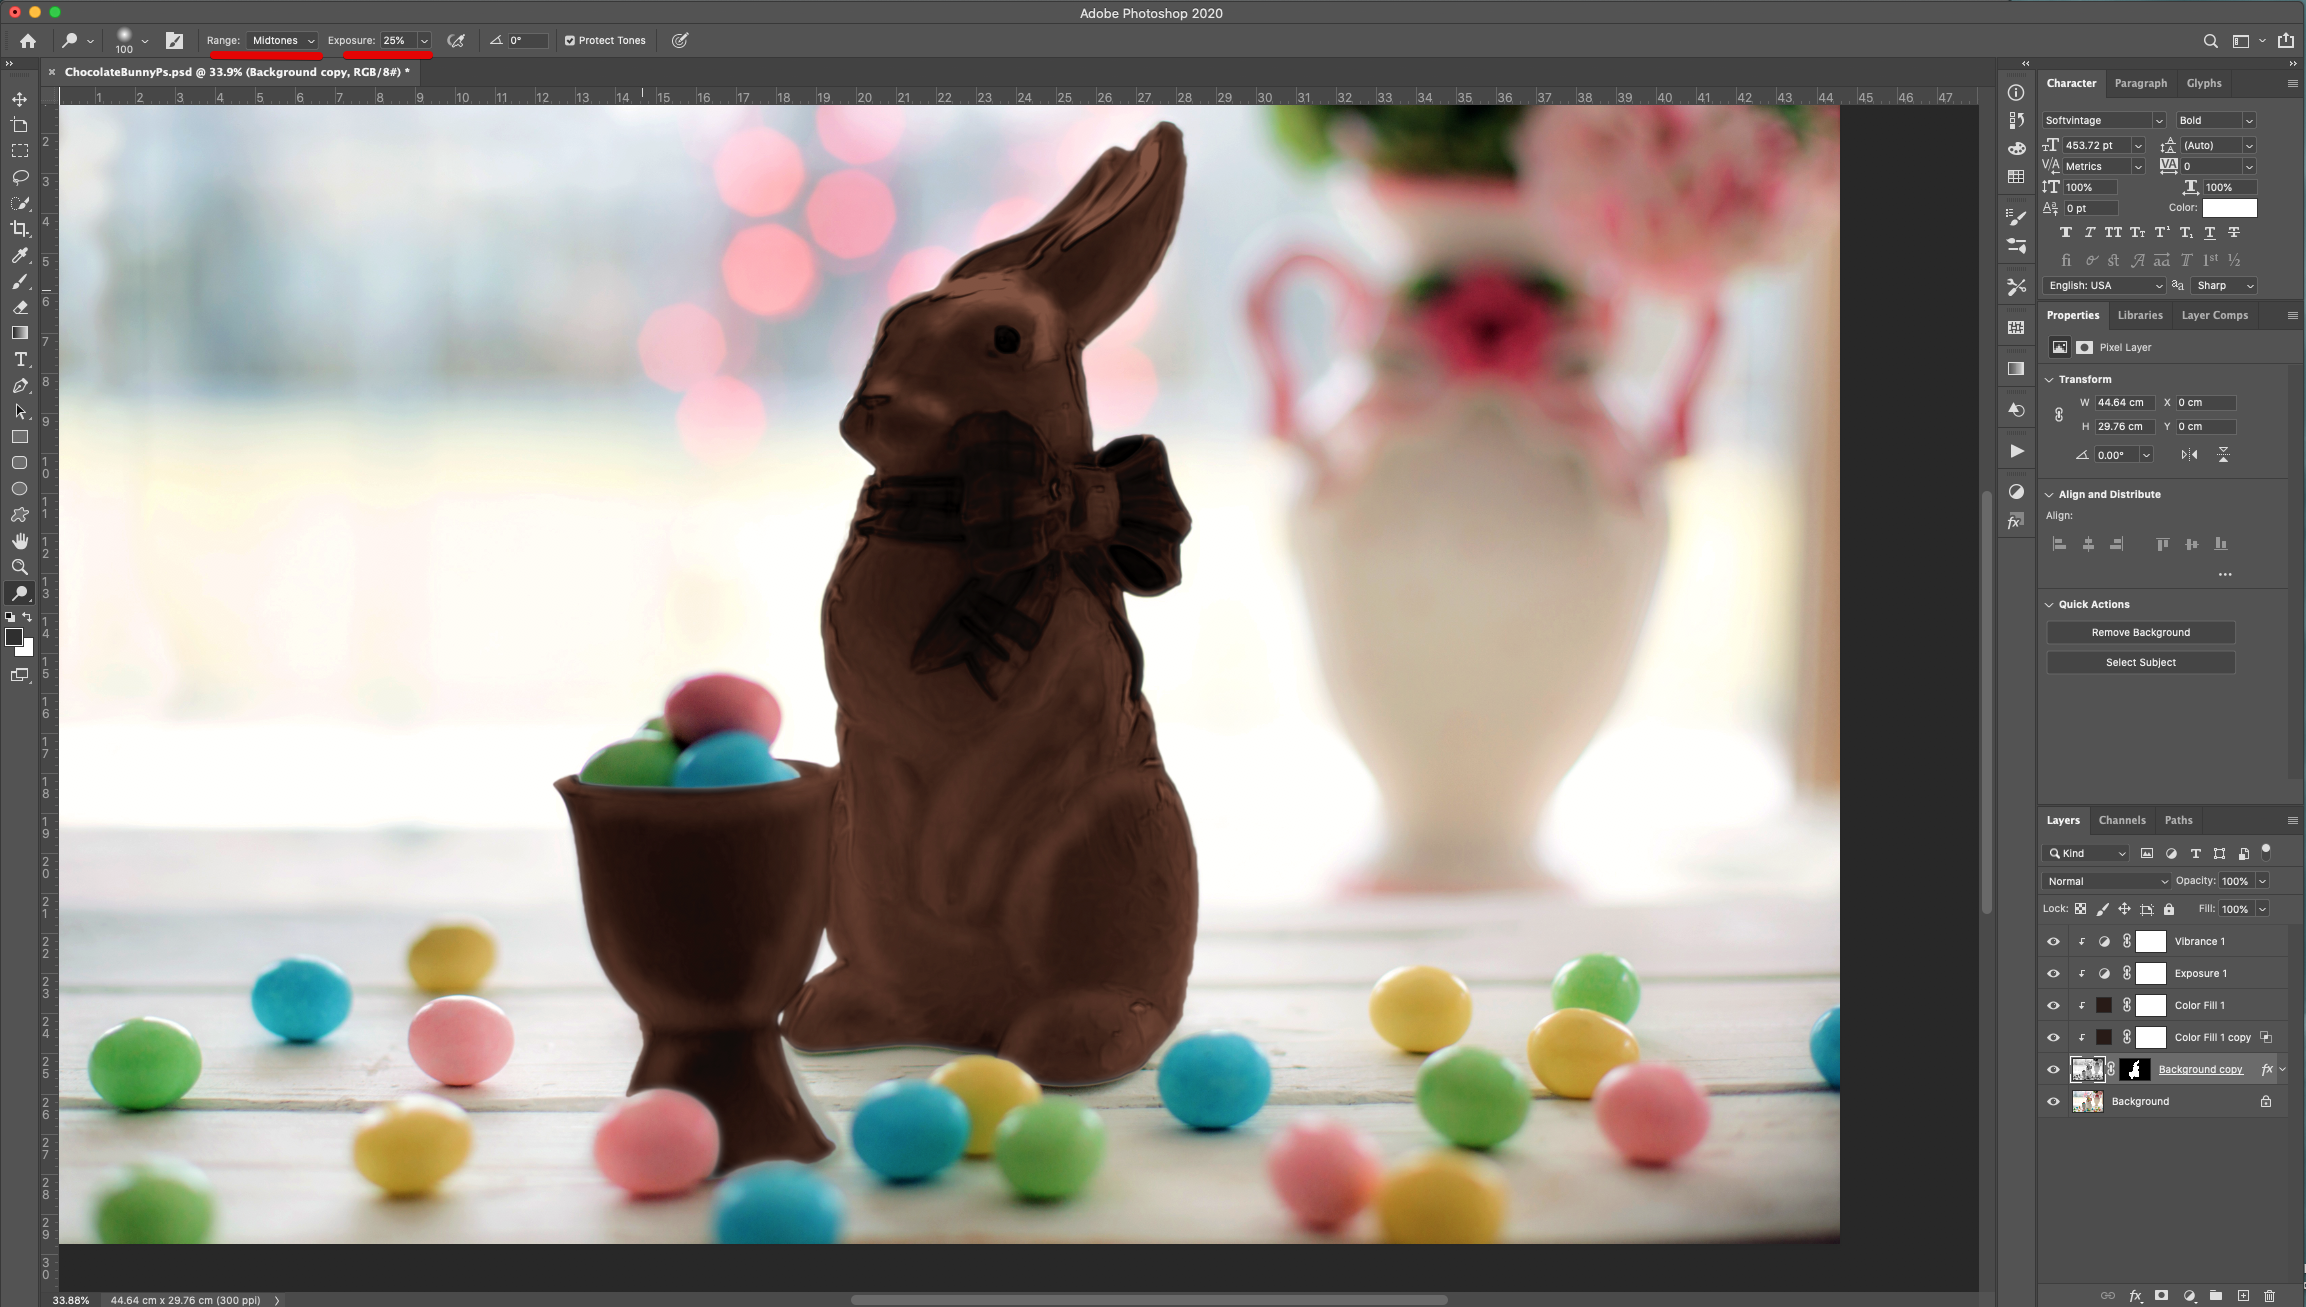
19 - Select the Thumbnail (make sure you are working on the “Image” not the “Mask”) and use the “Dodge Tool” (O) with a “Soft” brush (100 px and 0% “Hardness”). Select “Highlights” and use a 50% “Exposure” value to bring out the “Highlights” in the image.
20 - Check it out!
1 - In Photoshop, open the image you chose as “Background”.
2 - Use the “Quick Selection Tool” (Q) to make a selection of the “Rabbit”. Use “Add” and “Subtract from selection” to refine it if needed.
3 - Once you are happy with it click the “Select and Mask” button on the Top Menu to enter the “Mask Properties Panel” and tweak your selection. Use “Overlay” as “View” mode and adjust the “Opacity” value to your liking.
4 - We used the “Polygonal Lasso Tool” (L) alternating between Use “Add” and “Subtract” to clean the edges.
5 - You can also change what the “Mask” indicates from “Masked Areas” to “Selected Areas”. Add some “Global Refinements” like “Smooth”, “Feather”, etc. and then select “Output to New Layer with Mask” before clicking “OK”. You can hide the “Background” layer by clicking on the Small Eye icon on the left side of its Thumbnail.
6 - “Desaturate” the masked layer by clicking “Shift + Command/Control + U”.
7 - To clean up the edges even further, use the “Brush Tool” (B), with a “Soft” brush (50 px and 0% “Hardness), make sure that the “Mask” Thumbnail is selected and that Black is your “Foreground” color to do so. You can bring out masked portions by “Swapping” “Foreground” and “Background” colors (using the “X” key).
8 - Create a “New Color Fill Adjustment Layer” on top of everything. Click the small “Black and White” circle at the bottom of the “Layers Panel” and choose “Solid Color”. Use a deep Brown shade (#281b16).
9 - Right-click on top of its Thumbnail and choose “Create Clipping Mask” to clip the color layer to the masked one only.
10 - Change the “Blending Mode” to “Hard Light”.
11 - Create a new “Exposure Adjustment Layer” on top of everything, clip it down by clicking the small button at the bottom of the “Adjustments Panel” and tweak the values so the image looks better (we used +2, 0 0.75).
12 - Create a new “Vibrance Adjustment Layer”, clip it down by clicking the small button at the bottom of the “Adjustments Panel” and increase the “Vibrance” value (we used 60%).
13 - Duplicate the “Color Fill Layer” (Command/Control + J), drag its Thumbnail to place it under the original one.
14 - Make sure every layer that needs to is “Clipped Down” (of not, right-click on top of its Thumbnail and choose “Create Clipping Mask” again).
15 - Double-click on top of the duplicate “Color Fill Layer” (the bottom one) to open the “Layer Styles Panel” and in the “Blending Options” tab, head to the “Blend if” section and click on the Left-most lever of the “This Layer” while holding the “Alt/Option” key to split it. Drag the Right side to the right to show some detail.
16 - Change the “Blending Options” of the layer to “Vivid Light” and lower the “Opacity” to 65%.
17 - Select the Masked layer, had to Filter > Filter Gallery > Artistic > Plastic Wrap and use the following values (2, 5 and 15).
18 - Double-click on top of its Thumbnail to apply the following “layer Styles”:
Inner Glow: (#ffffff)
19 - Select the Thumbnail (make sure you are working on the “Image” not the “Mask”) and use the “Dodge Tool” (O) with a “Soft” brush (100 px and 0% “Hardness”). Select “Highlights” and use a 50% “Exposure” value to bring out the “Highlights” in the image.
20 - Check it out!
by @lornacane


