By Design Bundles
How to use Glyphs in Affinity Designer
It is very easy to access and use glyphs in Affinity Designer. Glyphs are added extras that come with your font. These can include swirls, hearts, shapes and so much more depending on the font. For programs like Affinity Designer, we need to use the Character Map to add Glyphs. So, let’s get started as we show you how to use glyphs in Affinity Designer.

We have chosen to use a romantic script font called Hello Winter for this tutorial. You can also browse through our wide range of modern script fonts on Font Bundles.
The font has already been downloaded and we unzipped the files on our computer. If you need further information on installing fonts, be sure to check out how to install fonts on a PC or Mac.
Step 1 - Use the Text Tool
Once your font has been installed, open Affinity Designer and click on New Document. Choose your document settings then click Create.
To show how to use glyphs in Affinity Designer, we will be using the Artistic Text tool. On the left side toolbar, select the Artistic Text tool, then click + drag out your text in the document. Now, type out your text. We also centered the text using the Center button in the top toolbar.

Step 2 - Change the Font
You can select to change the font using the Font Family top left of the screen. You can either type in the font you want or use the drop down menu.

As each font is different, you may need to adjust the size using the sizing handles. Click once on the text to activate the handles, then click + drag one corner out. If you want to adjust the wording, double click the text to enter Text Edit Mode.

Step 3 - Access Glyphs with Character Map
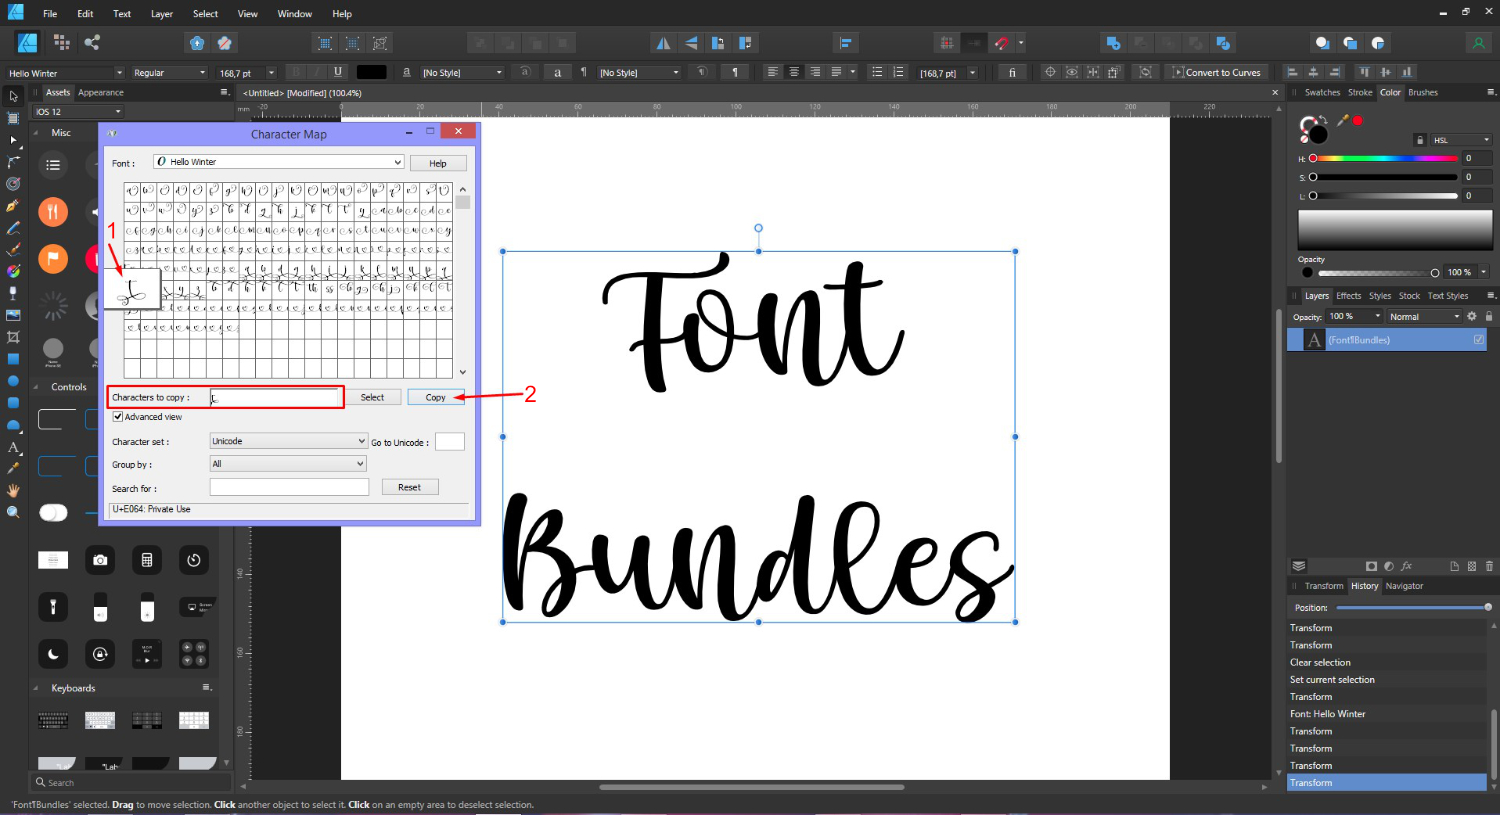
We need to access the Character Map on our Windows PC in order to use glyphs in Affinity Designer. Once open, we clicked on the drop down menu next to Font and selected our chosen font.

Now, make sure that Advanced view is ticked. Next, click on Group by and choose Unicode Subrange. When a new window pops up, scroll all the way down until you get Private Use Characters. Click on this so the glyphs are easily available.

From the list of glyphs in the blocked area, click on one to get a larger preview. We will need to add this to the Character to copy box before we can copy the glyph. You can do this either by double clicking the glyph, or selecting the glyph and clicking on Select.
When you have chosen your glyph, in our case we selected the “T”, click on Copy.
Step 4 - Add Glyphs to Text
Go back to Affinity Designer and double click on the text to enter Text Edit Mode. Highlight the letter that you want to replace with the glyph.
In Affinity Designer, there is a special way of pasting the glyph into your text. It helps in pasting the glyph in the same size as the rest of the text. Go to Edit > Paste Special.

A new window will pop up where you need to select Unicode Text.

We replaced the letter “T” in “Font” with our swirly glyph and also changed the letter “S”. As you can see in the image, the swirly “T” is overlapping on the “Bundles” wording.

We fixed the overlapping by changing the text spacing under the Character Panel. We have an in depth tutorial on text basics in Affinity Designer if you would like to know more.
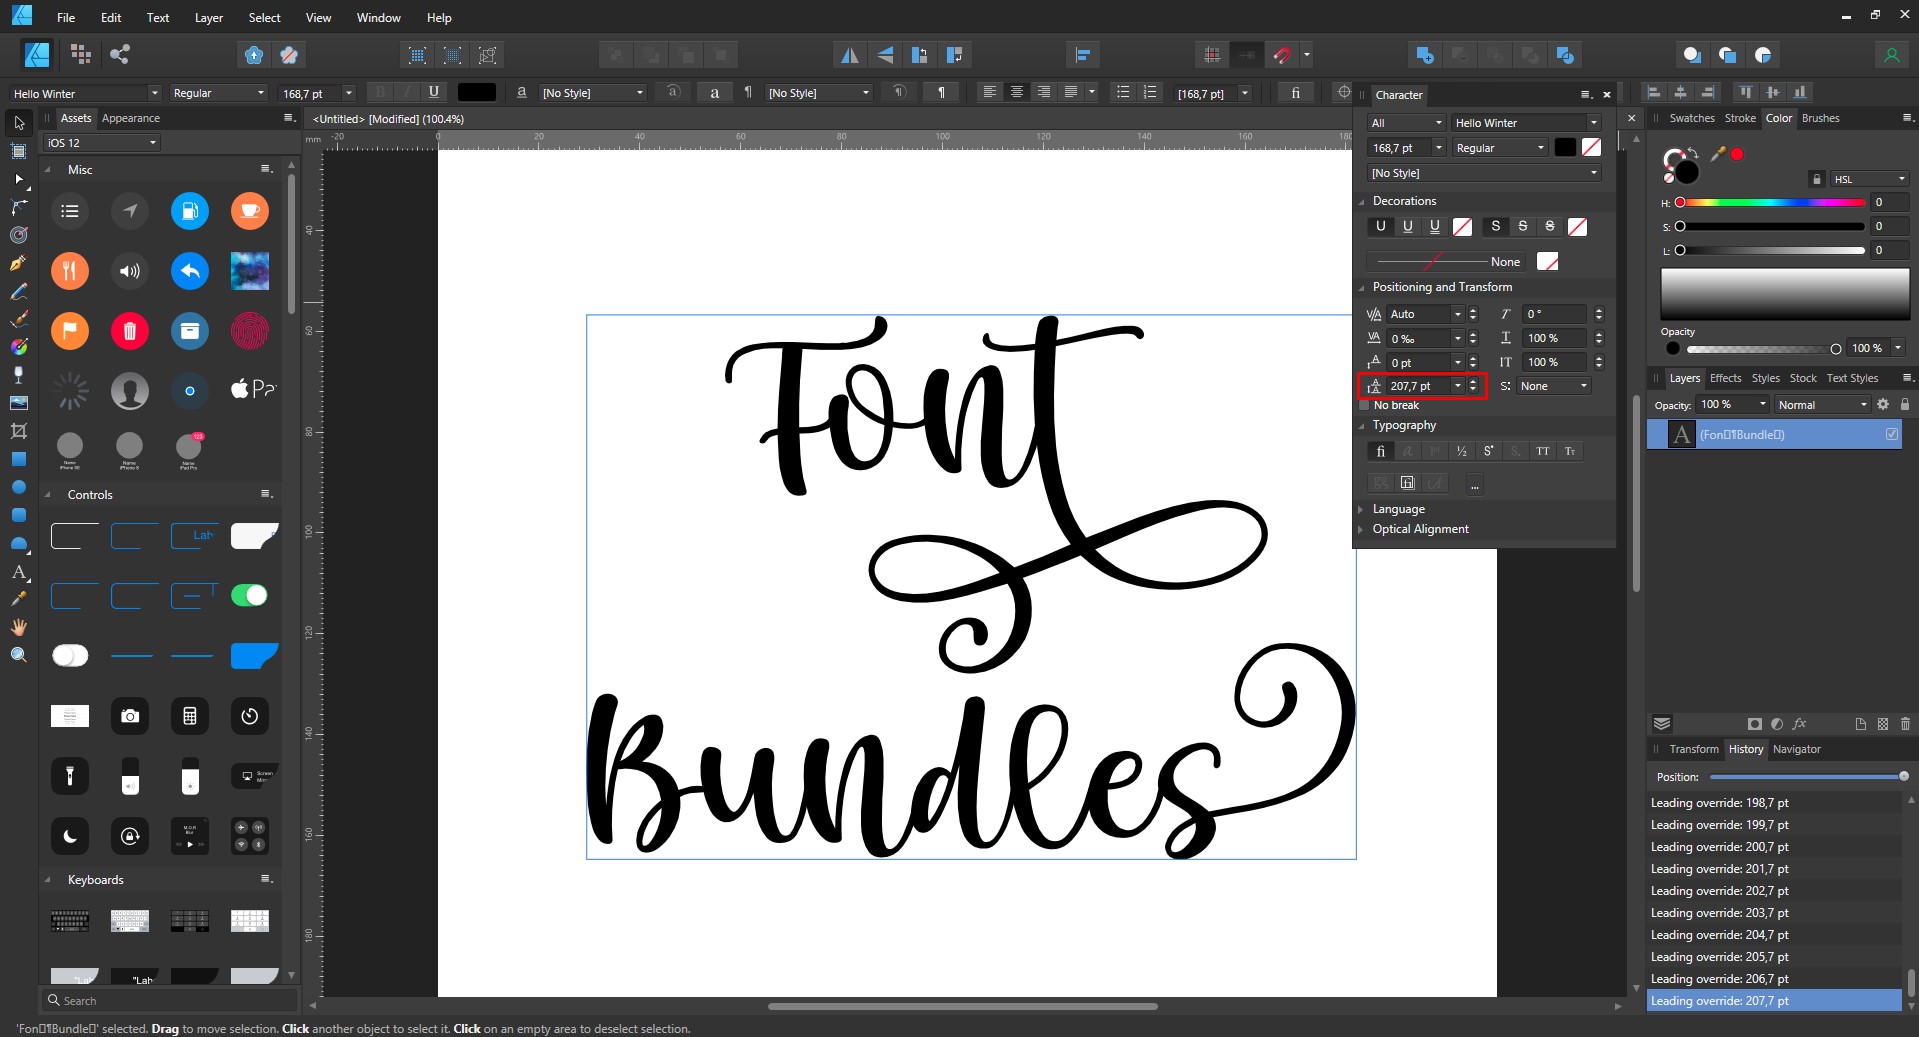
Experiment with the positioning of your text to get different results. Here we placed all the text on the same line.

When using glyphs in Affinity Designer, you can add character to your text and create some flair. Glyphs can be found with most purchased fonts, giving your text a modern style that visually creates impact.