By Design Bundles
How to Use the Transparency Tool in Affinity Designer
Today we will learn how to use the Transparency Tool in Affinity Designer. This tool allows you to apply and edit transparency gradients on vectors and text objects. You can use different types of gradients, and also set different levels of transparency. It will help you add more depth by creating some interesting 3D looks on your designs.

For this tutorial, we will be using this cartoon vector illustration, but feel free to choose from our great variety of vector illustrations.
There are two ways in which you can adjust the Transparency of objects. You can adjust the transparency of the whole object (Solid transparency) or just a portion using gradients (Gradient transparency).
Let us explore both of these options below
Adjust Solid Transparency of Objects
If you want to adjust the overall transparency of an entire object or group of objects, use this method.
Step 1 - Select Your Object or Group
Select the object or group of objects that you want to apply a transparent look to. Here we used the Transparency Tool (Y) and selected it from the toolbar.

If you want, you can also use the Move Tool (V), but this is only in the case of solid transparency. Both options for changing overall transparency will use the Opacity slider under the Color Panel.
Step 2 - Adjust the Opacity
Once you have selected the object or group, adjust the Opacity by moving the slider in the Color or Swatches Panels. Make sure that None is set as the Type option on the top menu.
In the image below we adjusted the solid transparency of the main balloon outline.

Adjust Gradient Transparency of Objects
If you want to apply transparency independent of the color instead, you need to use the Transparency tool (Y). It affects the gradient transparency of both the fill and stroke of objects. This works in a similar way to the Fill Tool (G) but with no options for color.
Once the Transparency tool is selected, select the object or objects from the layers panel.
Now, you can adjust the Transparency tool settings to fit your needs. You will be able to access most of them from the top menu.

Select Type of Transparency Gradient
The Type option drop-down box gives you the different transparency types you can select from.

When you click on one of the Gradient options, it will automatically be added to the image. You can also click + drag out the gradient. If you are not happy with the placement, just click and drag again.
Now, on your selection, the gradient transparencies will show as a path that goes from solid to transparent. This path is connected by icons (circles and lines). The black circles or stops represent the most opacity. The white ones represent the most transparency.
In the image below we selected the Linear Gradient, then clicked + dragged the gradient out.

Reverse Transparency
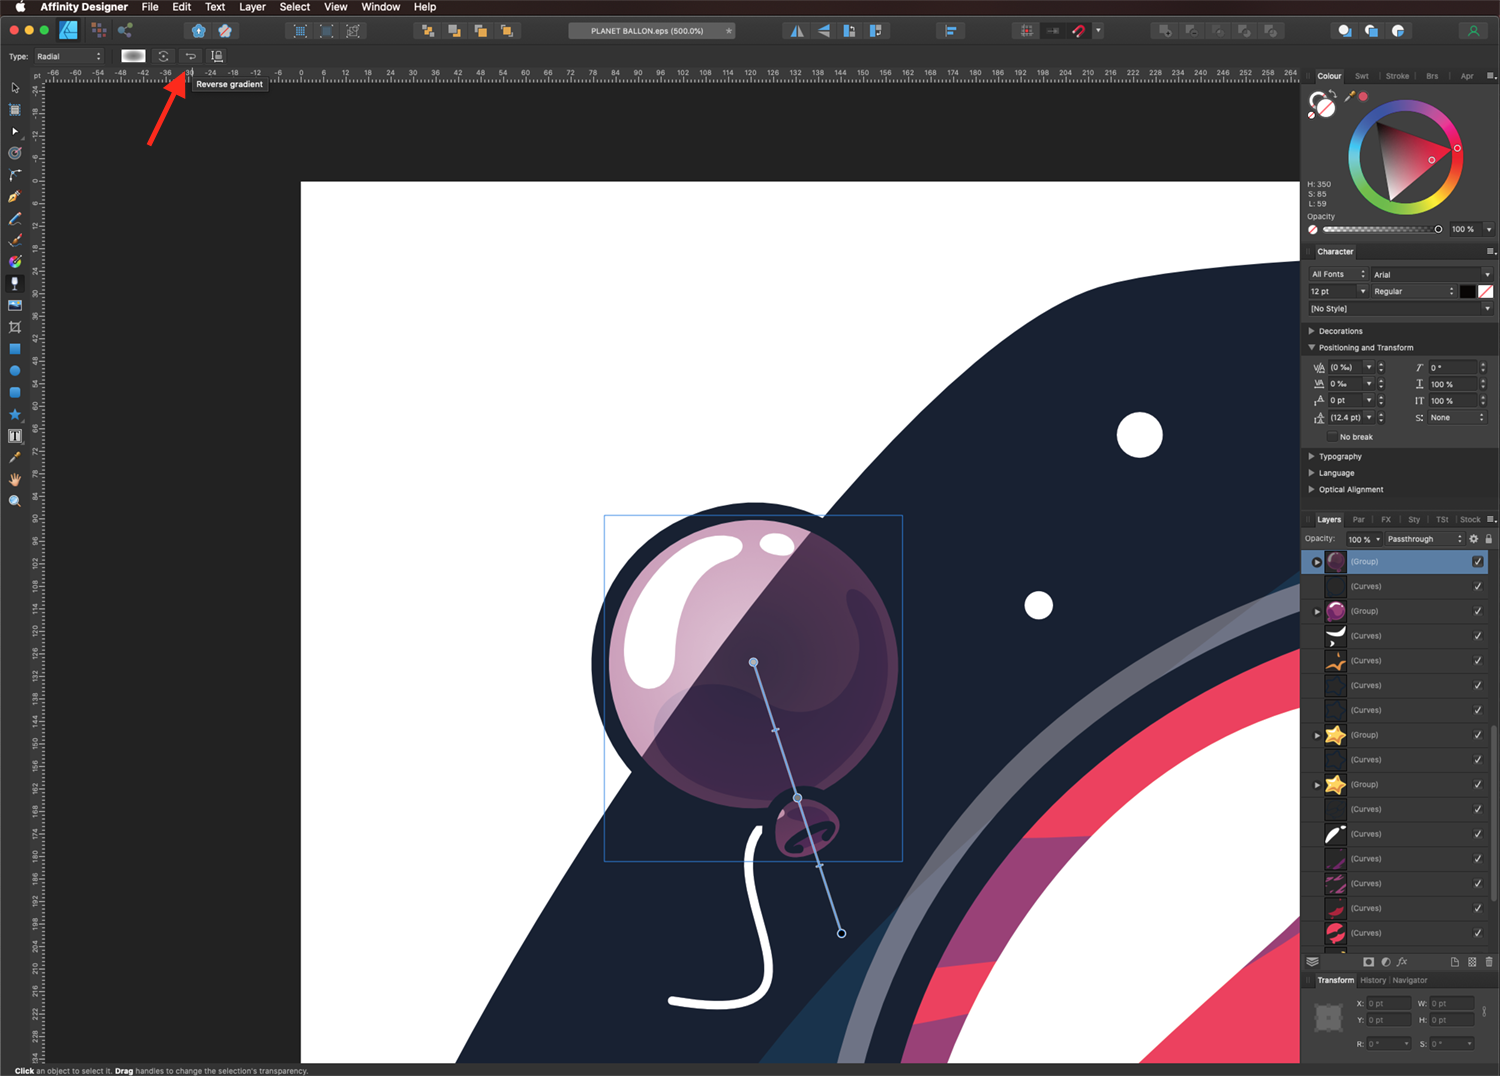
You can reverse your transparency gradient by selecting the Reverse option. This will swap the position of the first and last circles or stops. All intermediate ones will also be repositioned accordingly.
A Radial gradient was applied to the purple balloon below. We then reversed the gradient so that the most transparent stop started from the center.
Move and Resize Transparency Gradient
You can move and/or rotate the circles or stops around your image. You can also make them longer or shorter to adjust the angle and length of the transparency.

Adjust Transparency for each Circle
Select one of the circles. Now, you can go to the Transparency pop-up on the top menu or use the Color Panel. Then adjust the amount of opacity of that point in the gradient.

Adjust Midpoint between Gradient Stops
You can also adjust the midpoint location of the gradient. Do this by selecting and moving the small line icon located between two circles or stops.

Add More Transparency Stops
If you click once on the line, you will be able to add more transparency circles or stops. This, adds more levels of transparency to your object.
To adjust the setting of these stops, just click on the Transparency pop-up without deselecting.
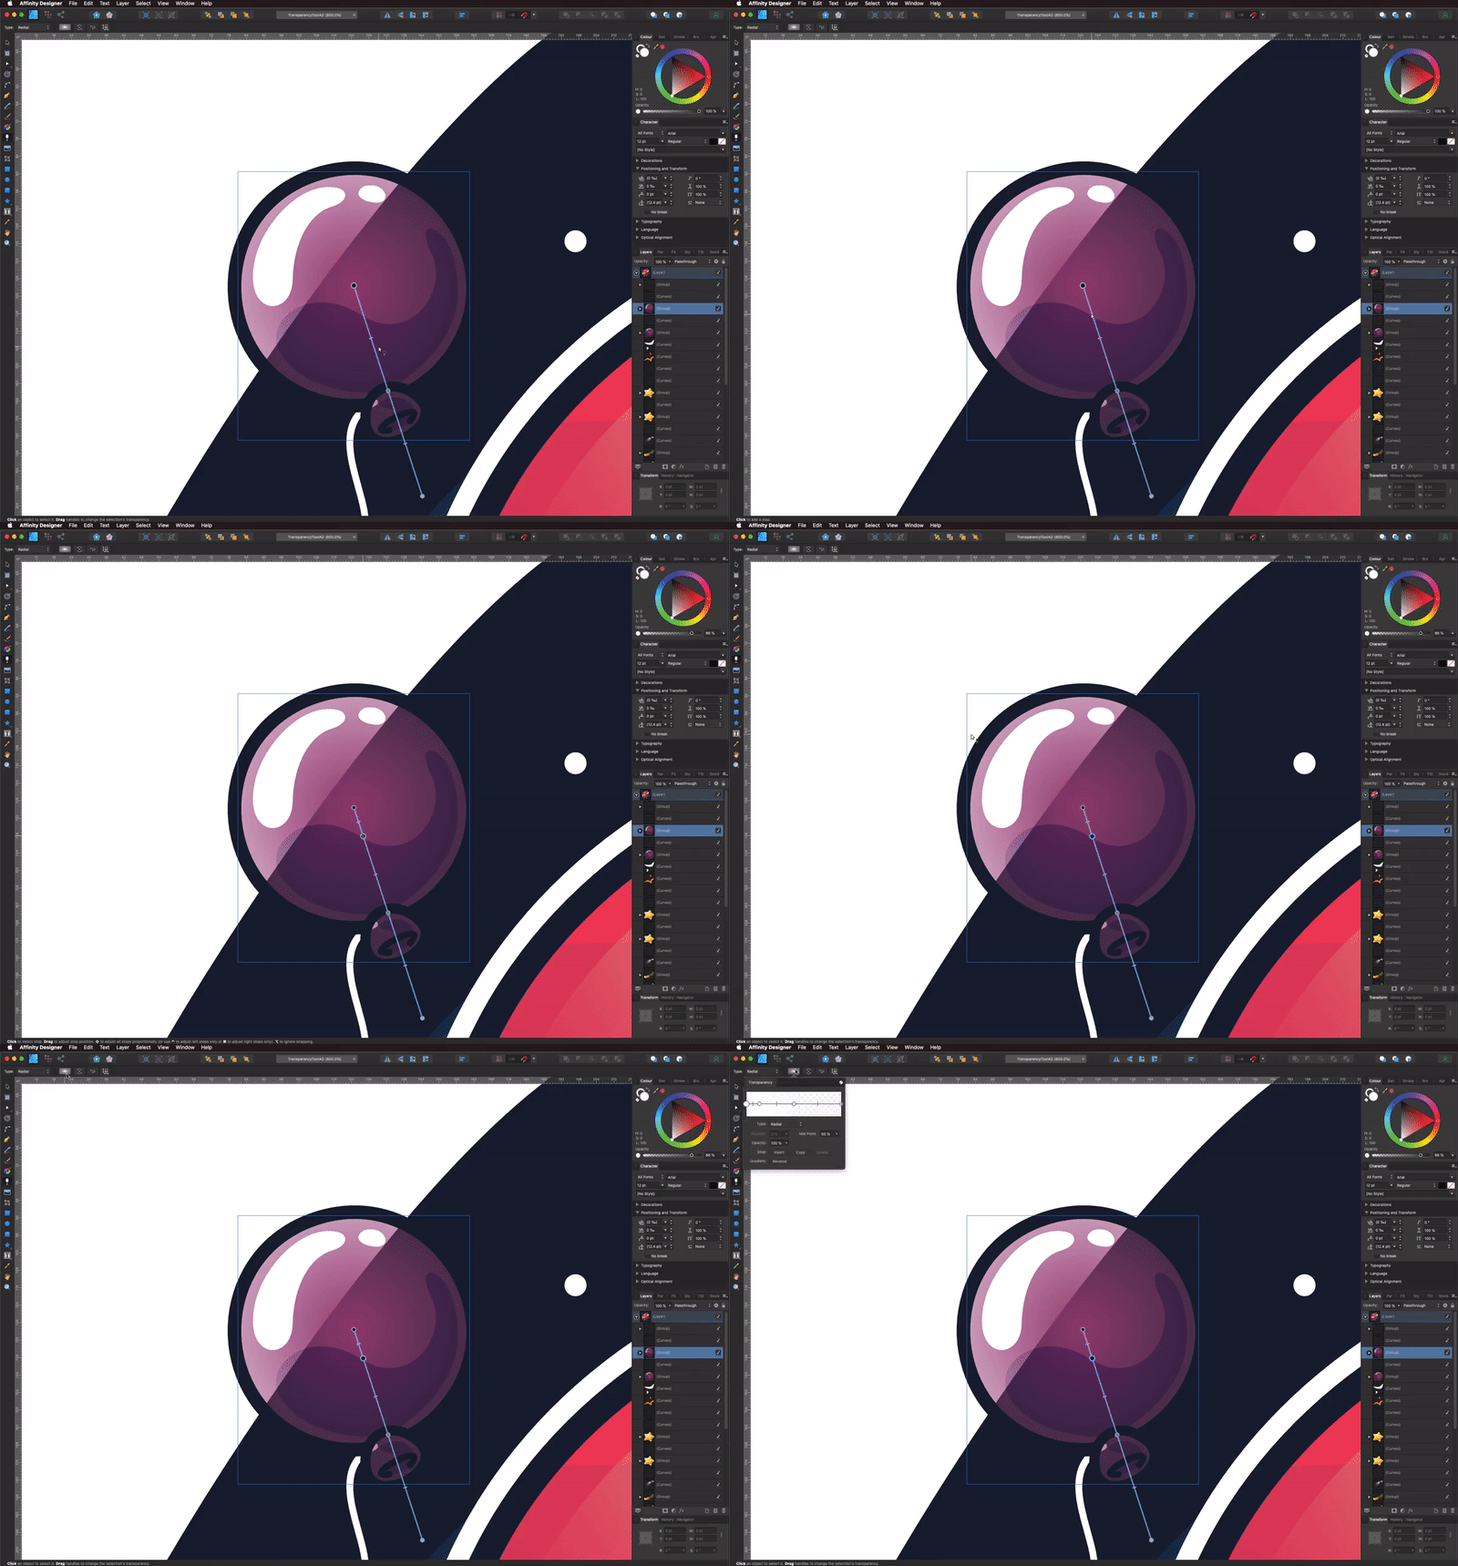
Here’s our final image. We added more depth by using transparency gradients on some of the other elements.

The Transparency tool in Affinity Designer can create some very cool effects. You can create transparent shapes such as bubbles, balloons, and much more. Feel free to experiment using what you have learned in this tutorial by applying it to your designs.