By Design Bundles
Cricut Tutorials8 min
Automatic Kerning in Cricut Design Space
Today we will be focusing on how to Automatically kern font in Cricut Design Space V 6.9. It's super easy to do and will definitely save you some time.
So, you may be wondering; what exactly is kerning?
Kerning is simply the space between two letters. That space can be adjusted automatically if the system you are working with allows it, or manually by moving the letters around. Fortunately, Cricut Design Space can do this automatically now, and we are going to show you how!
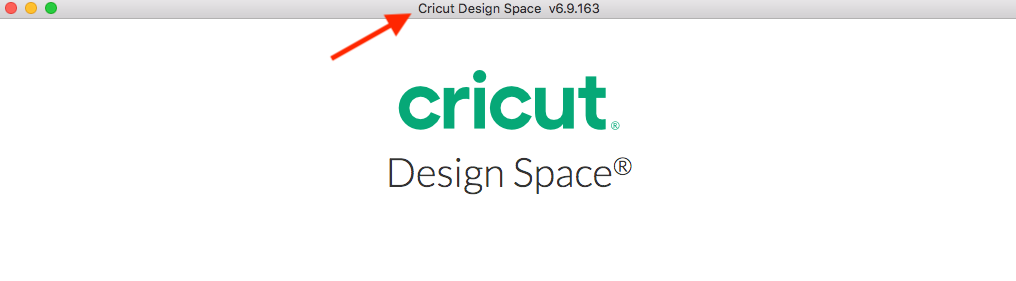
Open Cricut Design Space (version 6.9 or newer) on your desktop. You will be able to see what version you have all the way on top of your Cricut Design Space screen. If you have an older version you may have to uninstall and reinstall Design Space, once more. Please be aware that this Kerning feature is only available on Design Space desktop at this time, so you will not be able to us this feature on any mobile devices.
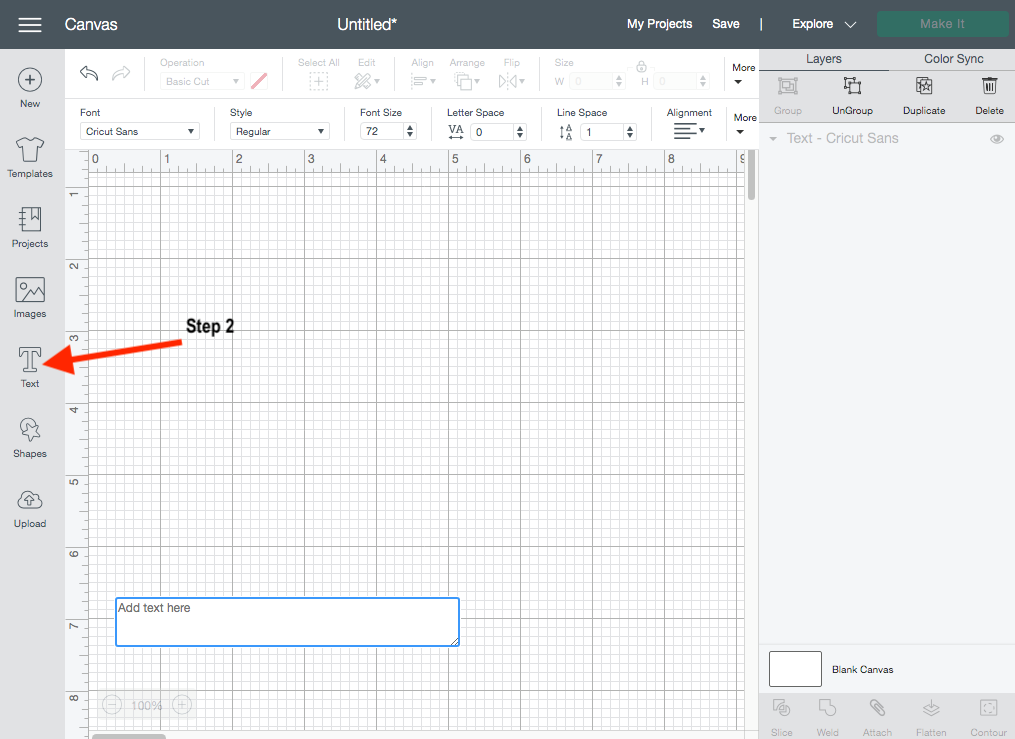
Click on the big "T" on the left side of your Cricut Design Space screen.
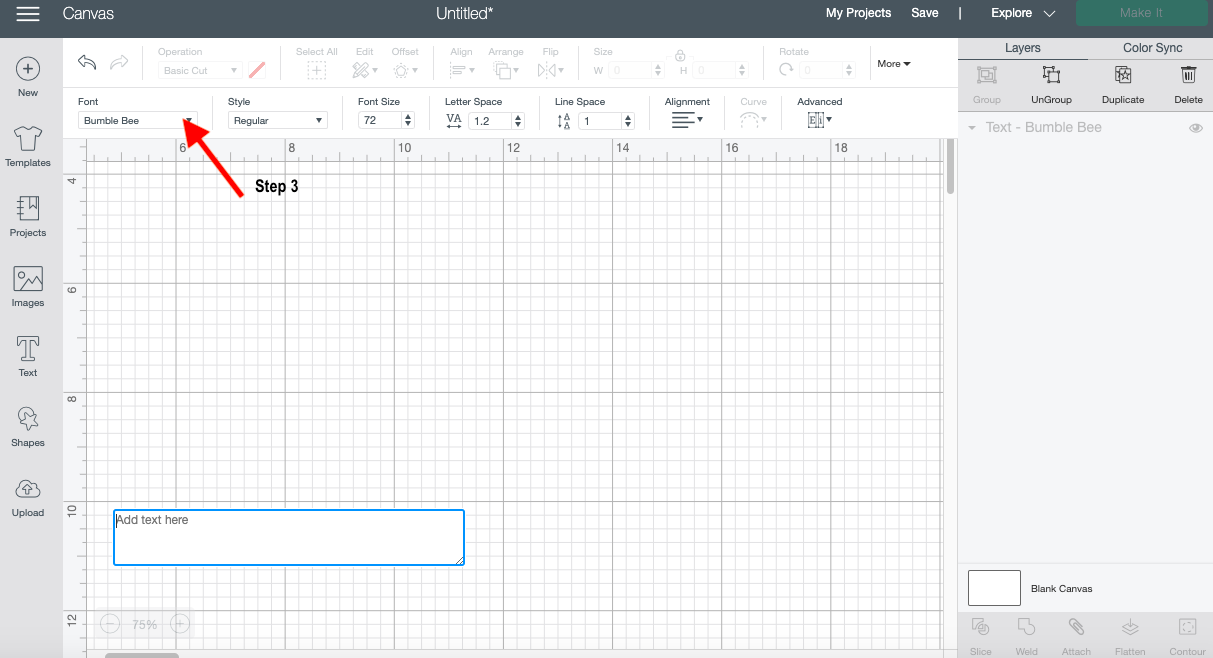
Navigate to your font tab. You can find this on your second toolbar located at the top of your Design Space screen.
Under the fonts tab check "only Kern Fonts". This will automatically give you all the fonts with optimal spacing that you have currently. You can search through Cricut and System kern fonts individually as well.

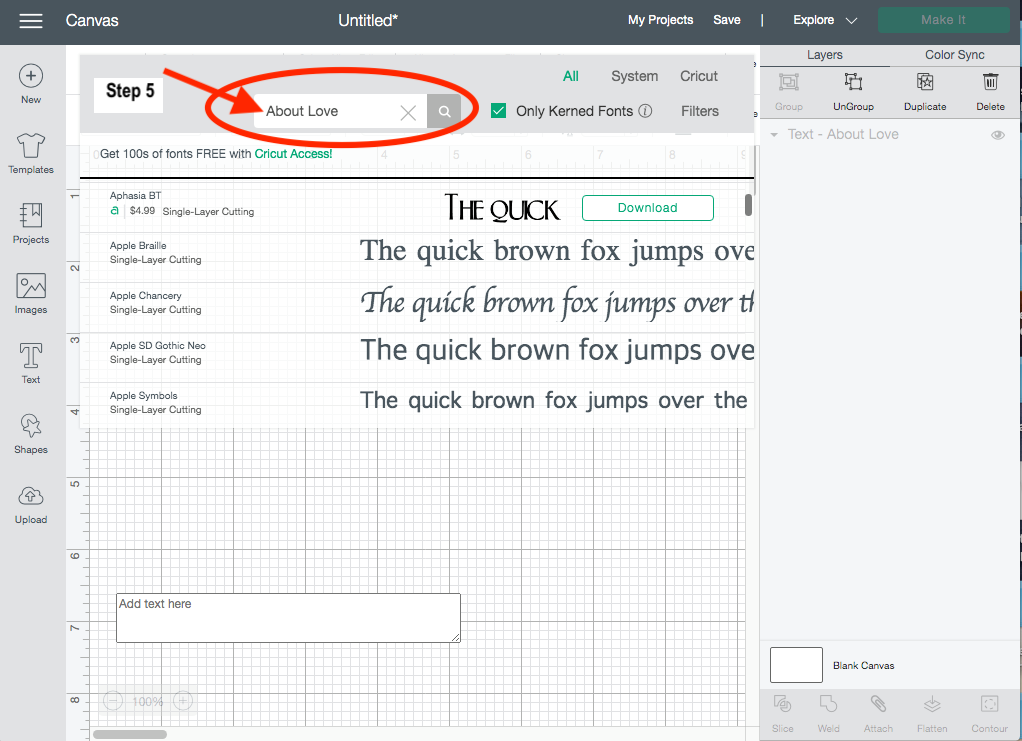
Scroll through the kerned fonts that you have available or simply type in the name of the font in the search bar. Click on the magnifying glass right next to the search bar to get the results. Today I'll be searching and using a font that I downloaded from Font Bundles called About Love by RStudio. If you still haven't found the right font yet and looking for a few more to add to your collection, Font Bundles has a great variety of script fonts.
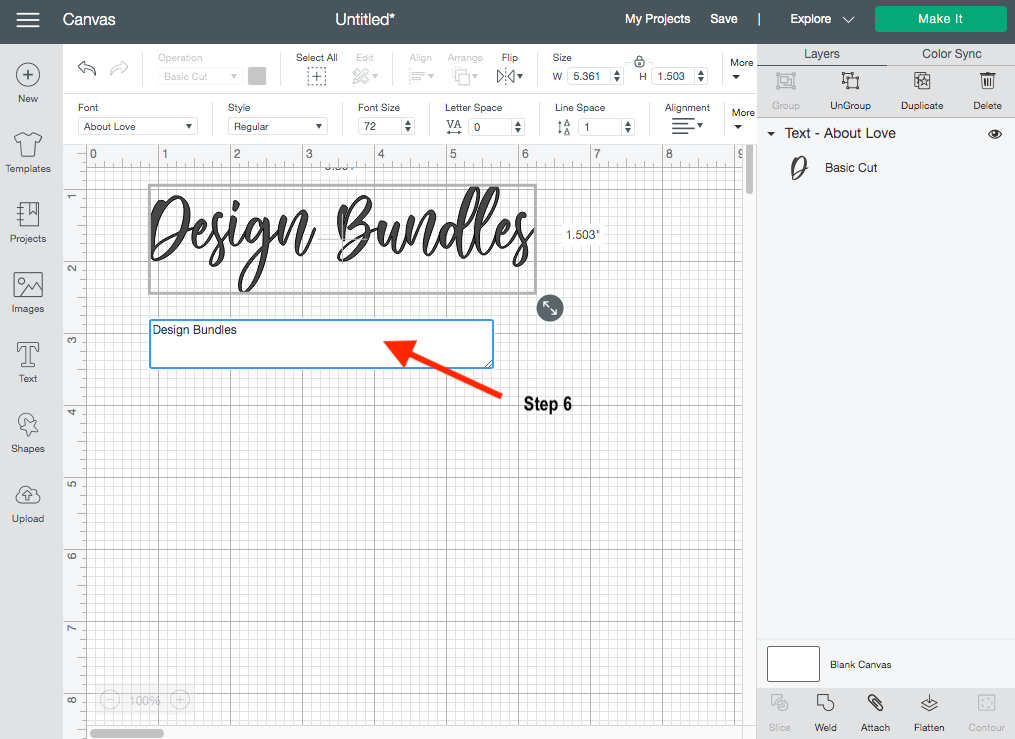
Type out your text in the rectangle box that is on your Cricut Screen. Your font will automatically kern using this new Kerning Feature in Cricut Design Space. There is no need to do anything else but cut. This feature saves you time that you would normally use on adjusting the distance between each letter manually. The letters bonds together and becomes a perfect cut for your project.
This is how you can easily kern fonts in Cricut Design Space.
Check out our other tutorials to learn how to upload SVGs to Cricut and how to make sticker sheets in Design Space.
So, you may be wondering; what exactly is kerning?
Kerning is simply the space between two letters. That space can be adjusted automatically if the system you are working with allows it, or manually by moving the letters around. Fortunately, Cricut Design Space can do this automatically now, and we are going to show you how!
Step 1. Open Cricut Design Space
Open Cricut Design Space (version 6.9 or newer) on your desktop. You will be able to see what version you have all the way on top of your Cricut Design Space screen. If you have an older version you may have to uninstall and reinstall Design Space, once more. Please be aware that this Kerning feature is only available on Design Space desktop at this time, so you will not be able to us this feature on any mobile devices.
Step 2. Open your text tool
Click on the big "T" on the left side of your Cricut Design Space screen.
Step 3. Open Font Tab
Navigate to your font tab. You can find this on your second toolbar located at the top of your Design Space screen.
Step 4. Check "Only Kern Fonts"
Under the fonts tab check "only Kern Fonts". This will automatically give you all the fonts with optimal spacing that you have currently. You can search through Cricut and System kern fonts individually as well.
Step 5. Locate the kern font you want to use.
Scroll through the kerned fonts that you have available or simply type in the name of the font in the search bar. Click on the magnifying glass right next to the search bar to get the results. Today I'll be searching and using a font that I downloaded from Font Bundles called About Love by RStudio. If you still haven't found the right font yet and looking for a few more to add to your collection, Font Bundles has a great variety of script fonts.
Step 6. Type out Your Text
Type out your text in the rectangle box that is on your Cricut Screen. Your font will automatically kern using this new Kerning Feature in Cricut Design Space. There is no need to do anything else but cut. This feature saves you time that you would normally use on adjusting the distance between each letter manually. The letters bonds together and becomes a perfect cut for your project.
This is how you can easily kern fonts in Cricut Design Space.
Check out our other tutorials to learn how to upload SVGs to Cricut and how to make sticker sheets in Design Space.
Related Tutorials
Cricut Tutorials
How to Manually Adjust Kerning in Cricut Design Space App
Cricut Tutorials
How to Create a Layered Image in Cricut Design Space
In this tutorial, you will learn how to create a layered image in Cricut Design Space.
Cricut Tutorials
How To Use The Slice Tool In Cricut Design Space To Split Images
Learn how easily to Split Images in Cricut Design Space using the Slice Tool.
Cricut Tutorials
How to Use a PDF File in Cricut Design Space
In this tutorial we guide you through the steps on using a PDF file in Cricut Design Space.
Cricut Tutorials
Editing Images in Cricut Design Space
Crop, Erase or completely change a design with multiple tools for editing made easy.
Cricut Tutorials
How to Edit Default Material Settings in Cricut Design Space
Learn how to easily change your default material settings in Cricut Design Space!