By Design Bundles
Font Tutorials7 min
Accessing Font Glyphs in Inkscape
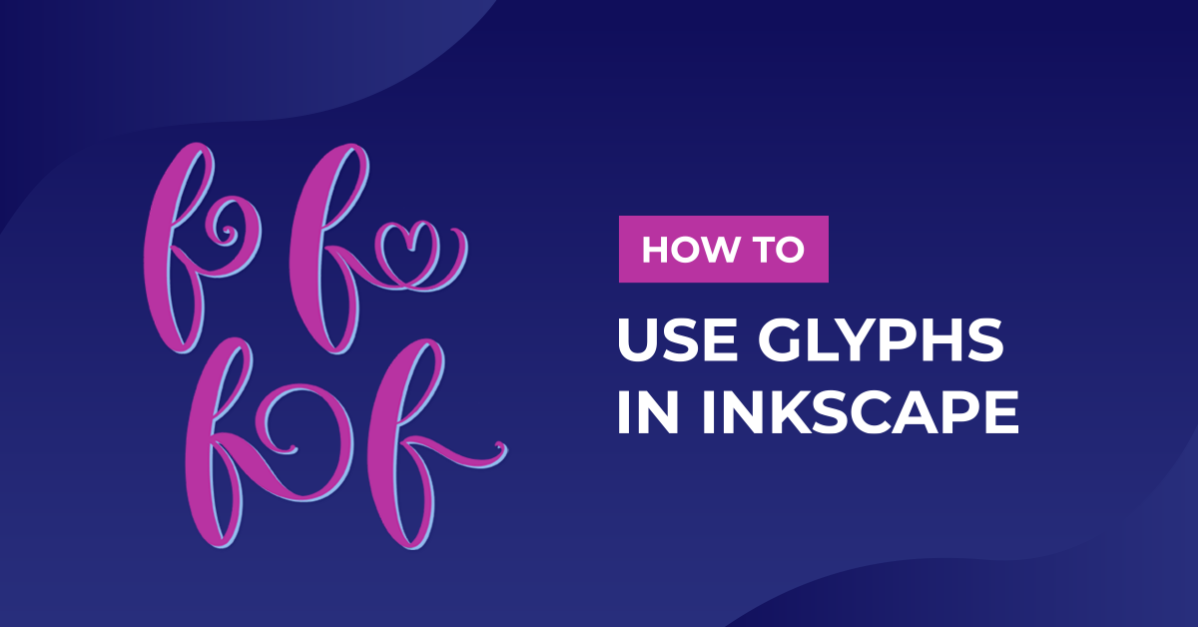
Many fonts now come with extra swirls and text known as glyphs. These glyphs can be used to add flair and style to an already beautiful design. However, accessing glyphs in Inkscape may be difficult for someone who is just starting out. So today, we will walk through the steps on how to access and use glyphs in Inkscape. This will give you a broader range of what you can with a font.
Before using your fonts in Inkscape, you must install them onto your device. We have easy-to-follow guides on installing fonts to Mac or PC, if needed. Today I’ll be using a stylish calligraphy font in this tutorial, but you can use any Calligraphic font from our selection on Font Bundles for your project.
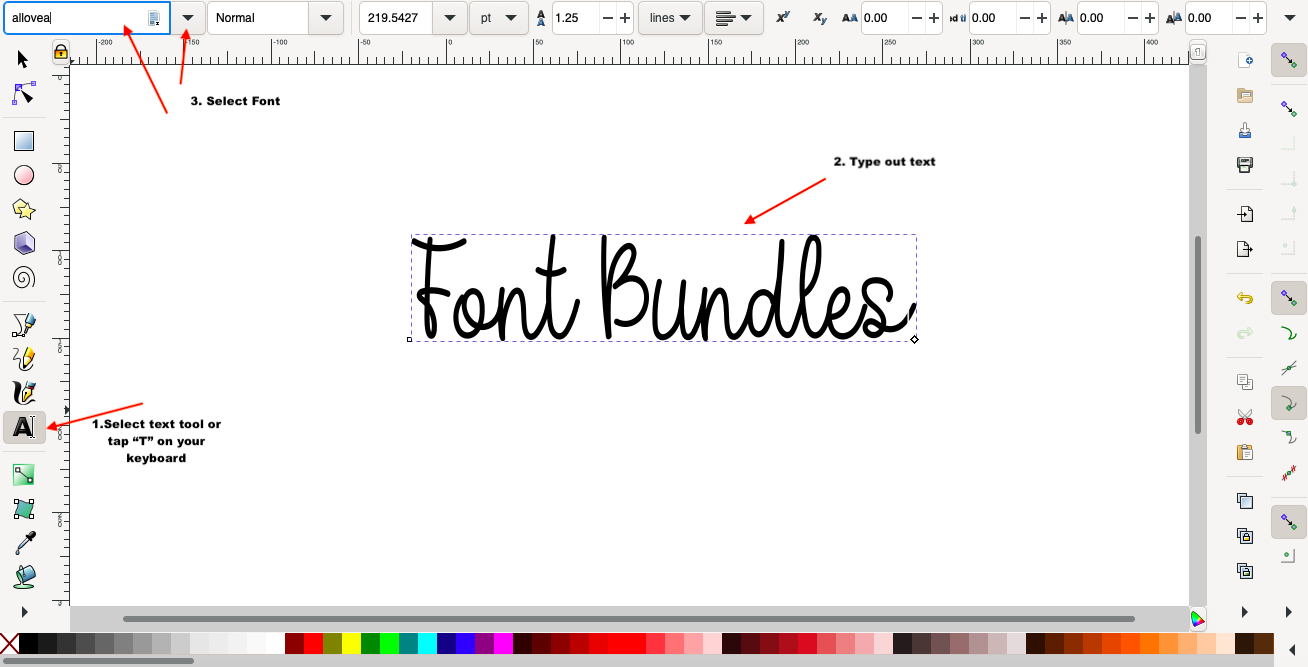
First, access the text tool by selecting the big “A” on the left side of your canvas screen. You can also press the letter “T” on your Keyboard. Next, click anywhere on the artboard to type out the text. After typing out the text, use the Font tab at the top left of the screen.
Select the font you would like to use in the project. You can type in the name of the desired font in the search bar. Alternatively click the Down arrow next to it to scroll through the available fonts.
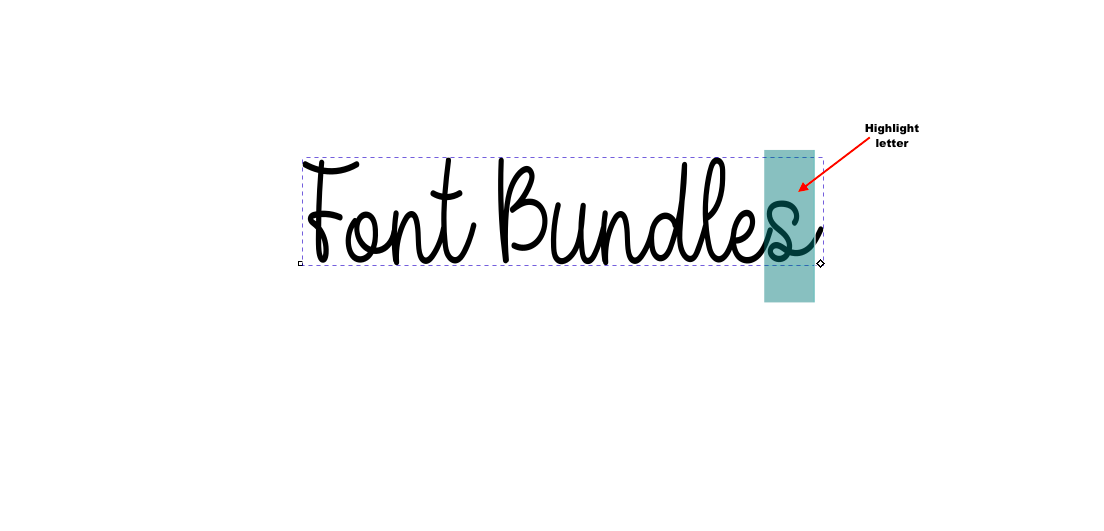
Next, highlight the letter within your text you would like to change.
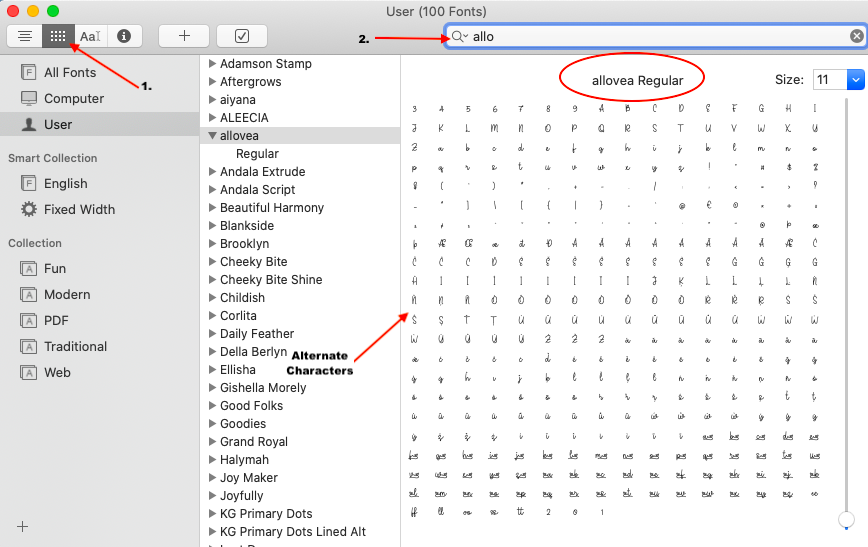
To use glyphs in Inkscape, you will first have to open the Character map (PC) or Font Book (Mac). If using Font Book, make sure repertoire mode is turned on. Turning on repertoire mode will allow you to view all alternate characters connected to that specific font.
If you are using a PC, you will copy the glyphs from your Character Map.
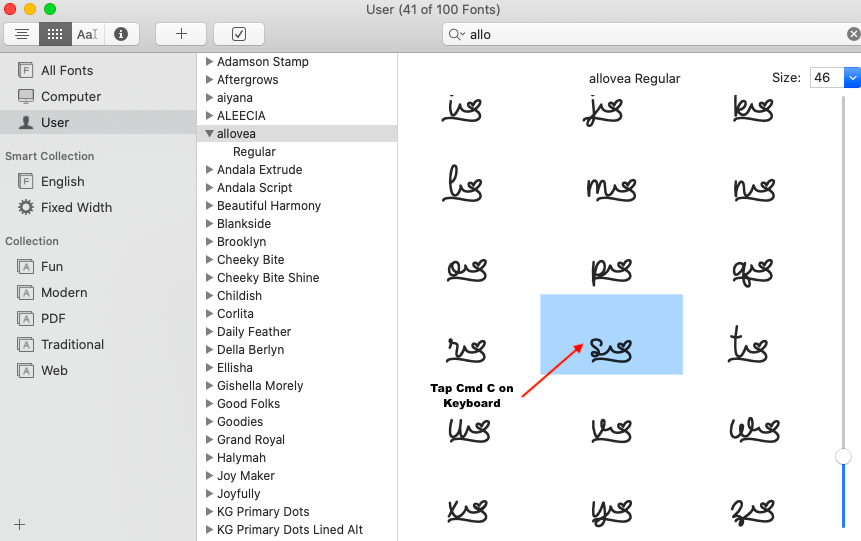
Next, search for the glyph you would like to use in the project. Once you find the perfect one, click Ctrl C (PC) or Cmd C (Mac) to copy the Glyphs. Head back to Inkscape to paste in your glyph.
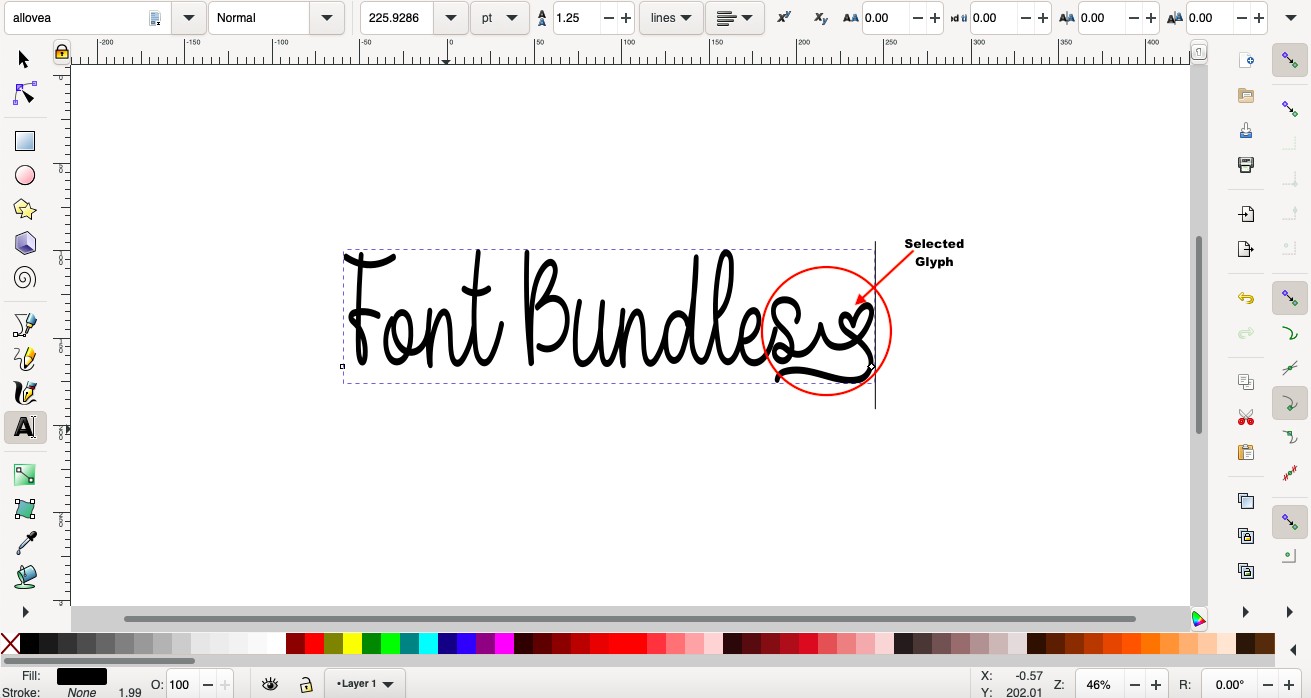
You can now paste the selected glyph into Inkscape by clicking Cmd V. The glyph will replace the letter that you highlighted in the first step.
If you would like to learn more, make sure to check out our other guides on how to create perspective type, and how to add patterns to text in Inkscape.
Before using your fonts in Inkscape, you must install them onto your device. We have easy-to-follow guides on installing fonts to Mac or PC, if needed. Today I’ll be using a stylish calligraphy font in this tutorial, but you can use any Calligraphic font from our selection on Font Bundles for your project.
Step 1 - Type out Text and Change Font
First, access the text tool by selecting the big “A” on the left side of your canvas screen. You can also press the letter “T” on your Keyboard. Next, click anywhere on the artboard to type out the text. After typing out the text, use the Font tab at the top left of the screen.
Select the font you would like to use in the project. You can type in the name of the desired font in the search bar. Alternatively click the Down arrow next to it to scroll through the available fonts.
Next, highlight the letter within your text you would like to change.
Step 2 - Use Glyphs
To use glyphs in Inkscape, you will first have to open the Character map (PC) or Font Book (Mac). If using Font Book, make sure repertoire mode is turned on. Turning on repertoire mode will allow you to view all alternate characters connected to that specific font.
If you are using a PC, you will copy the glyphs from your Character Map.
Next, search for the glyph you would like to use in the project. Once you find the perfect one, click Ctrl C (PC) or Cmd C (Mac) to copy the Glyphs. Head back to Inkscape to paste in your glyph.
You can now paste the selected glyph into Inkscape by clicking Cmd V. The glyph will replace the letter that you highlighted in the first step.
Repeat the previous steps until you are satisfied with your design. Once you have the desired look, you can weld the letters together. We have a great guide on how to weld text in Inkscape if necessary.

If you would like to learn more, make sure to check out our other guides on how to create perspective type, and how to add patterns to text in Inkscape.
Related Tutorials
Font Tutorials
Accessing Font Glyphs with Font Book on Mac
In this tutorial, learn how to access Font Glyphs on a Mac using Font Book.
Silhouette Tutorials
How to use Samantha Font and Accessing Glyphs
Font Tutorials
Accessing Lovely Melissa Font Glyphs
Silhouette Tutorials
Accessing Fonts and Glyphs with the Silhouette Curio
Font Tutorials
How to Access and Use Font Glyphs on a Windows PC
Learn how to access and use font glyphs on a Windows PC with this tutorial.
Font Tutorials