By Design Bundles
Inkscape Tutorials8 min
How to Add Patterns to Text in Inkscape
Adding patterns to text is an easy way to create designs for stickers or sublimation. With digital paper you can create a beautiful textured fill. We will show you how to quickly add patterns to text in Inkscape.
In this tutorial, we are using Mermaid Glitter Digital Paper and the Benji font by Missy Meyer.
Step 1 - Type out text
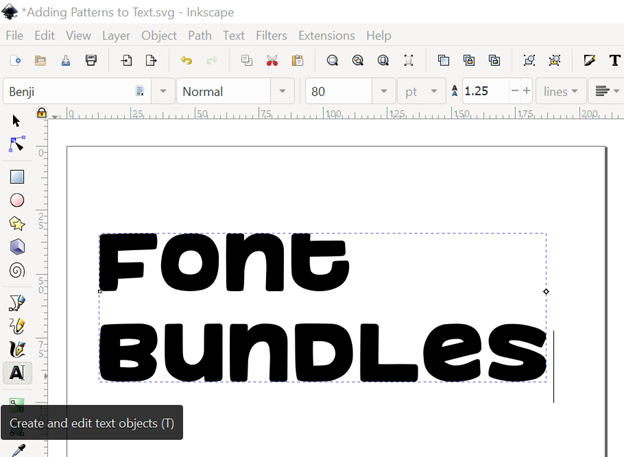
Let us begin by clicking on the text tool in the left toolbar. Choose your font and type out any word or phrase you want. We typed out “Font Bundles” using the Benji font.
Step 2 - Change the word or phrase from text to a path
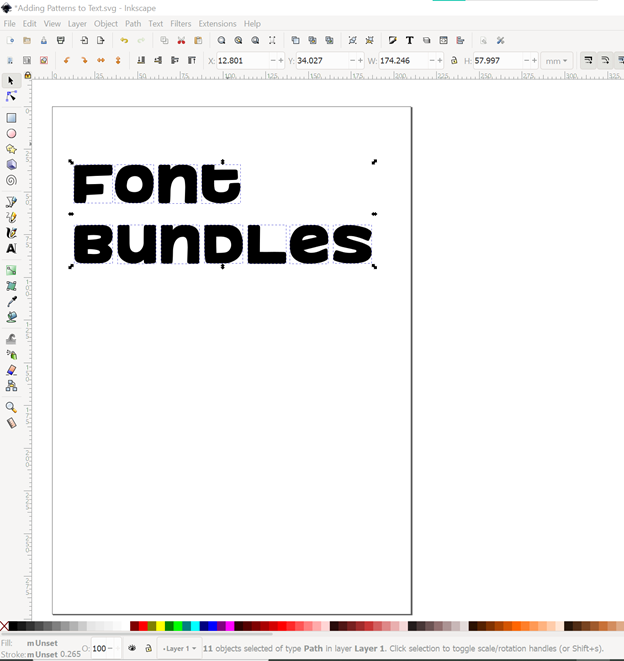
We want to convert the text to a path. Click on “Font Bundles” to select the text. Next go to Path > Object to Path. Then go to Object > Ungroup. To ensure this step is done correctly, the bottom of Inkscape should show the number of “objects selected of type path” instead of “text”.
Hold down the Ctrl key and drag the corner to resize the letters, if desired.
Step 3 - Use Union to make all items one path
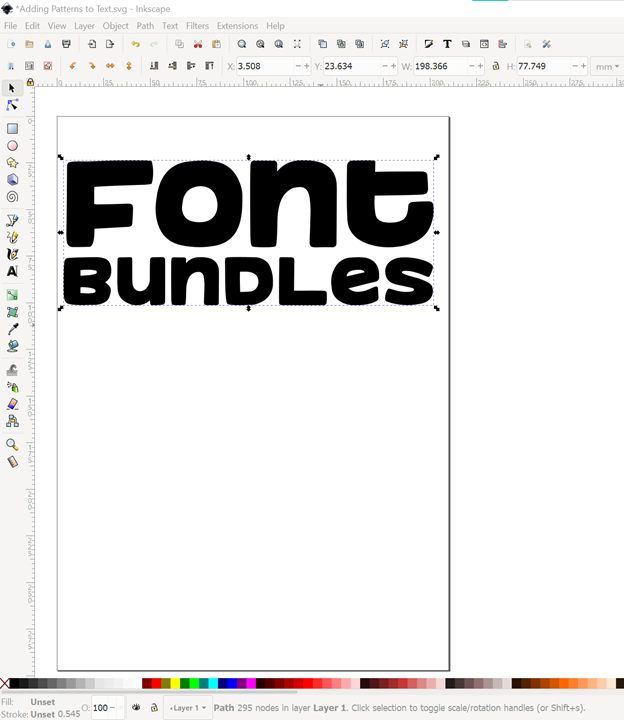
Select all items or letters and go to Path > Union to make them all one object. To ensure this step is done correctly, the bottom of Inkscape should show “Path” and then the number of nodes.
Step 4 - Import and adjust the digital paper
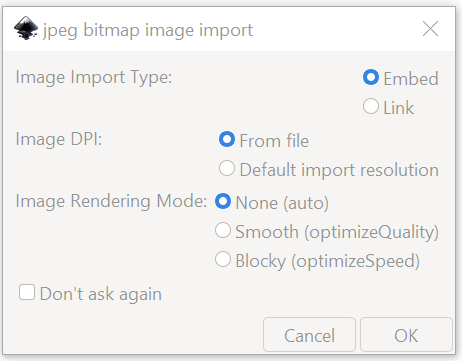
Now we will import the selected digital paper. Go to File > Open. Find the digital paper you want to use and click the “Open” button. We will be using one of the papers from the Mermaid Glitter Digital Paper bundle. You will automatically see the Image Import window popup in Inkscape. You can leave the selections as is or make adjustments. Next, click “Ok” to open the digital paper in a new window.
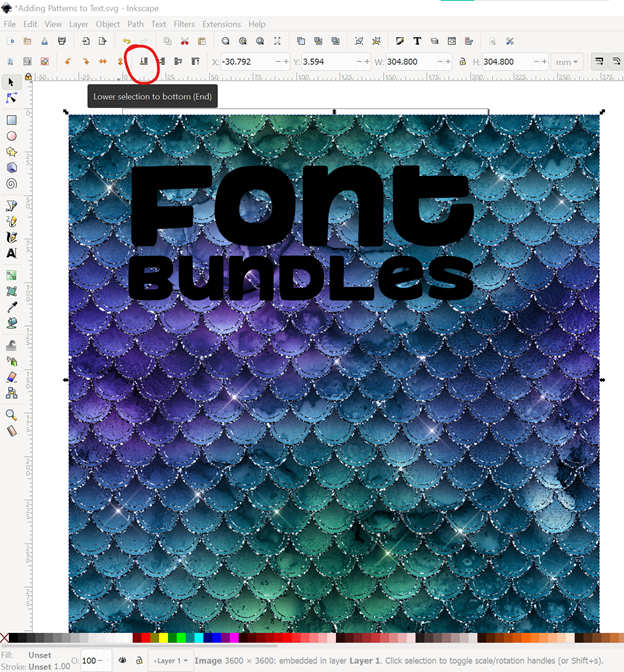
Select the digital paper and copy (Ctrl + C) and paste (Ctrl + V) it onto your canvas with your text. The digital paper will be covering the text. Select the digital paper and click on the “Lower Selection to Bottom” icon. This will move the digital paper behind the text.
Hold down the Ctrl key and drag the corner to resize the digital paper, if desired.
Step 5 - Clip the pattern to the text
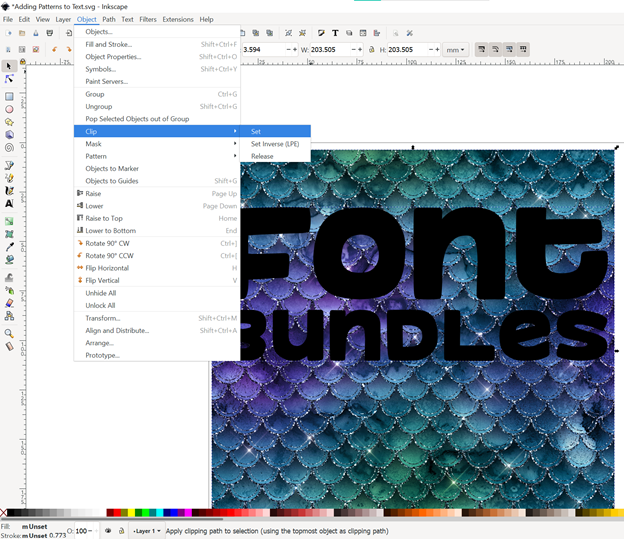
We want the digital pattern to be clipped to the text instead of being behind it. Select both the digital paper and the text, then go to Object > Clip > Set.
To ensure this step is done correctly, the bottom of Inkscape should say image embedded and “clipped”.
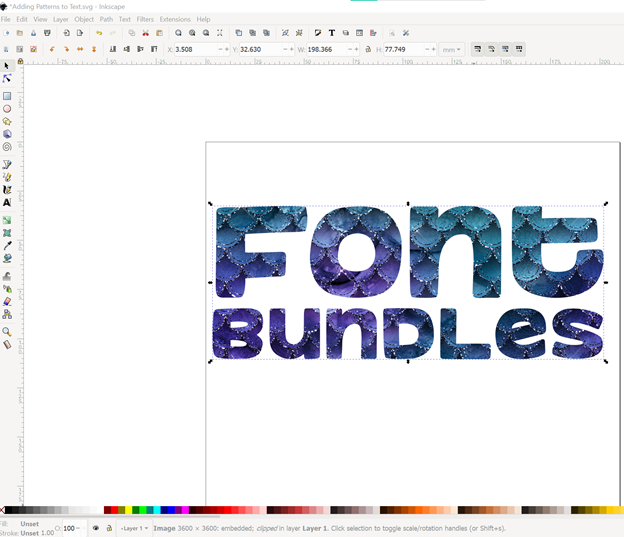
You have now created a lovely texture filled font. We hope you enjoyed this tutorial. If you are new to Inkscape, we recommend starting out with Inkscape Beginner Tutorials such as using font glyphs, warping text to the shape of an object, and adjusting kerning and spacing.
Related Tutorials
Inkscape Tutorials
How to Curve Text in Inkscape
Discover how to easily curve and transform your text in Inkscape with 5 easy steps.
Inkscape Tutorials
How to warp text into the shape of an object in Inkscape
Discover how to warp text into the shape of an object in Inkscape.
Affinity Tutorials
How to Add Text in Affinity Photo
Learn how to Add Text in Affinity Photo with this step by step tutorial.
Font Tutorials
Kerning, Spacing and Changing Your Text in Inkscape
Learn how to edit your text in Inkscape with this step by step beginner tutorial!
Inkscape Tutorials
How to Type Text Vertically in Inkscape
Discover how to type text vertically in this Inkscape tutorial. Beginner friendly and only 2 steps!
Silhouette Tutorials
How to Add an Outline Around Any Text in Silhouette Studio
Discover how to add an outline to any text in this Silhouette Studio tutorial. Quick read!