By Design Bundles
Silhouette Tutorials3 min
How to Create a Basic Pencil Holder in Silhouette Alta
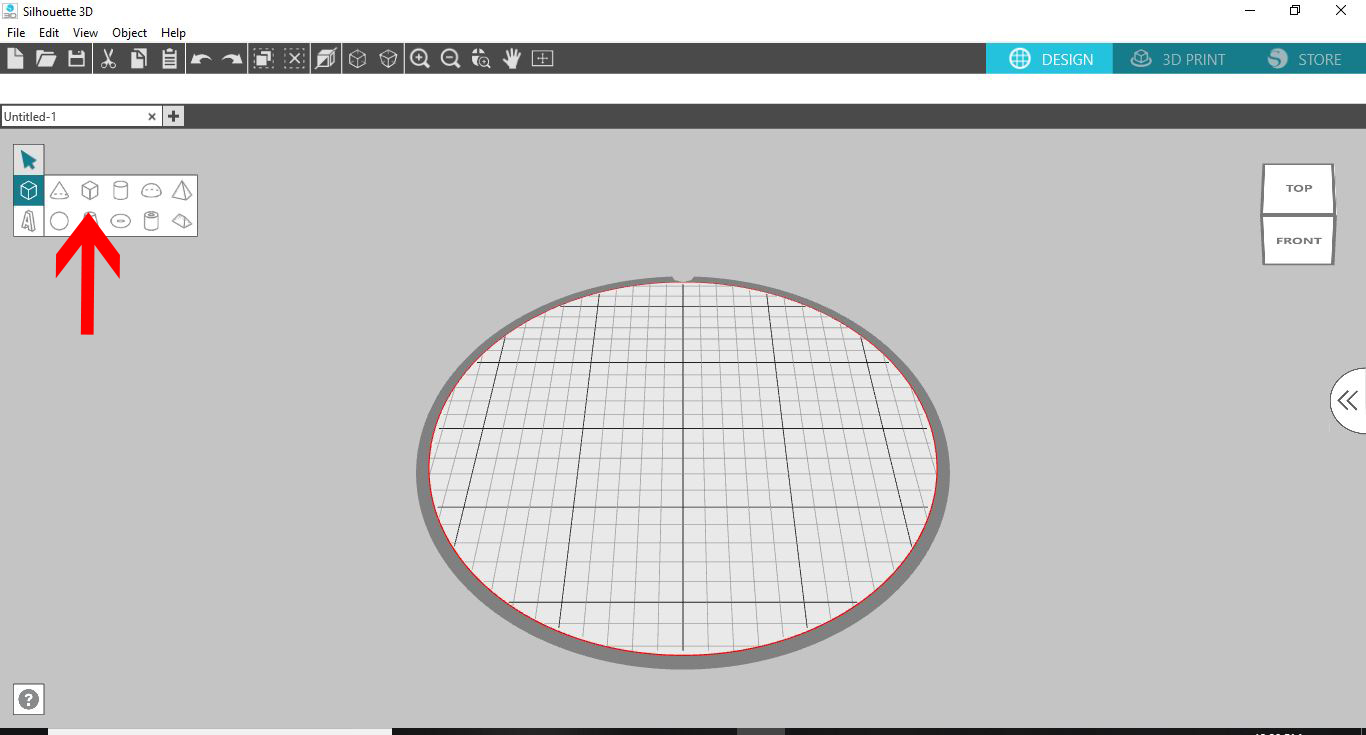
1- Open Silhouette Alta software. Click on the shape icon.
2- Select the cube shape.
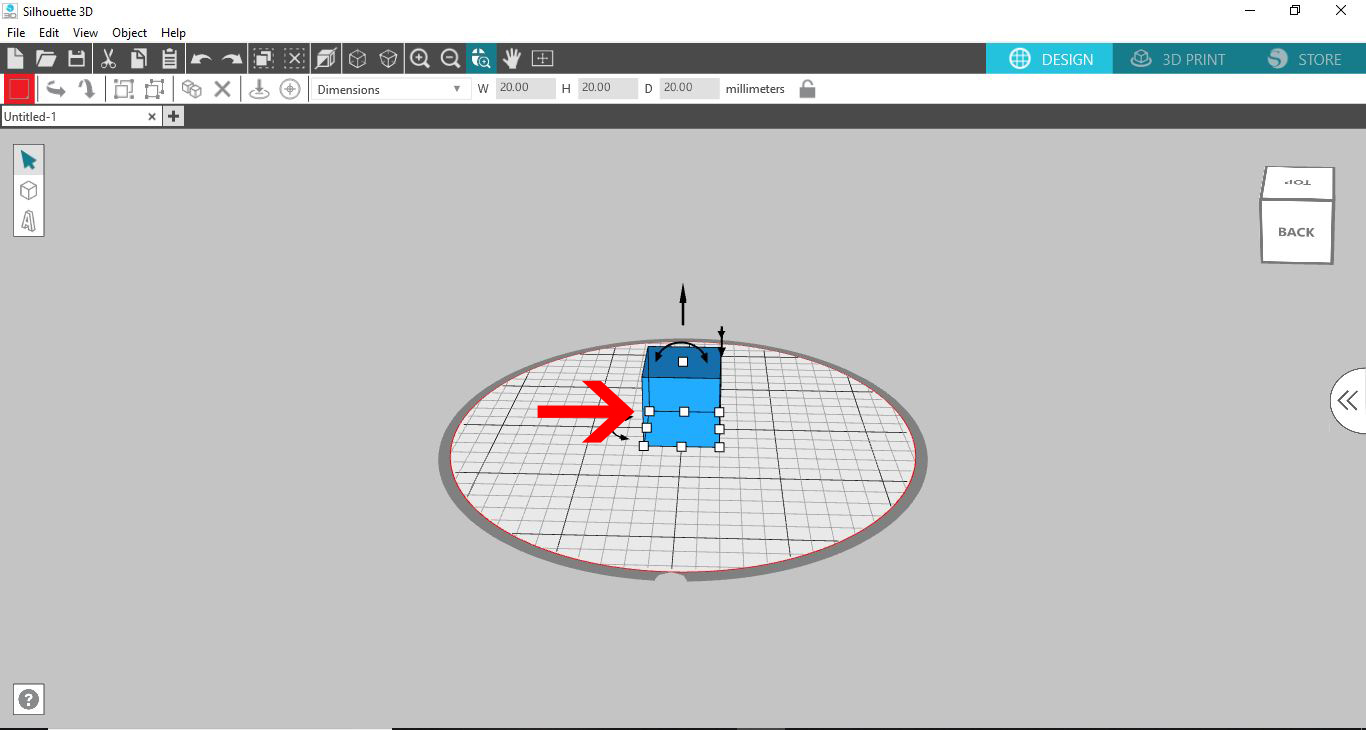
3- Select the cube.
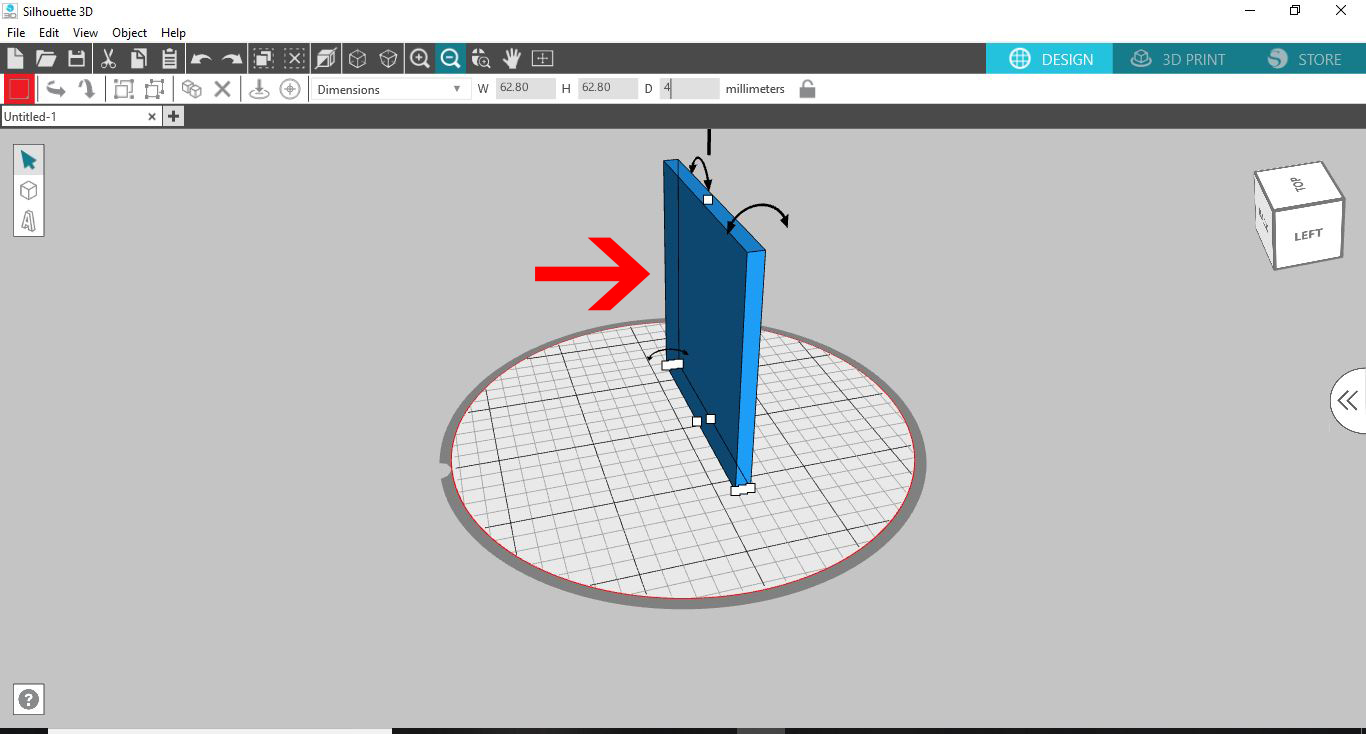
4- Adjust the size of the cube and the thickness to make a thin wall.
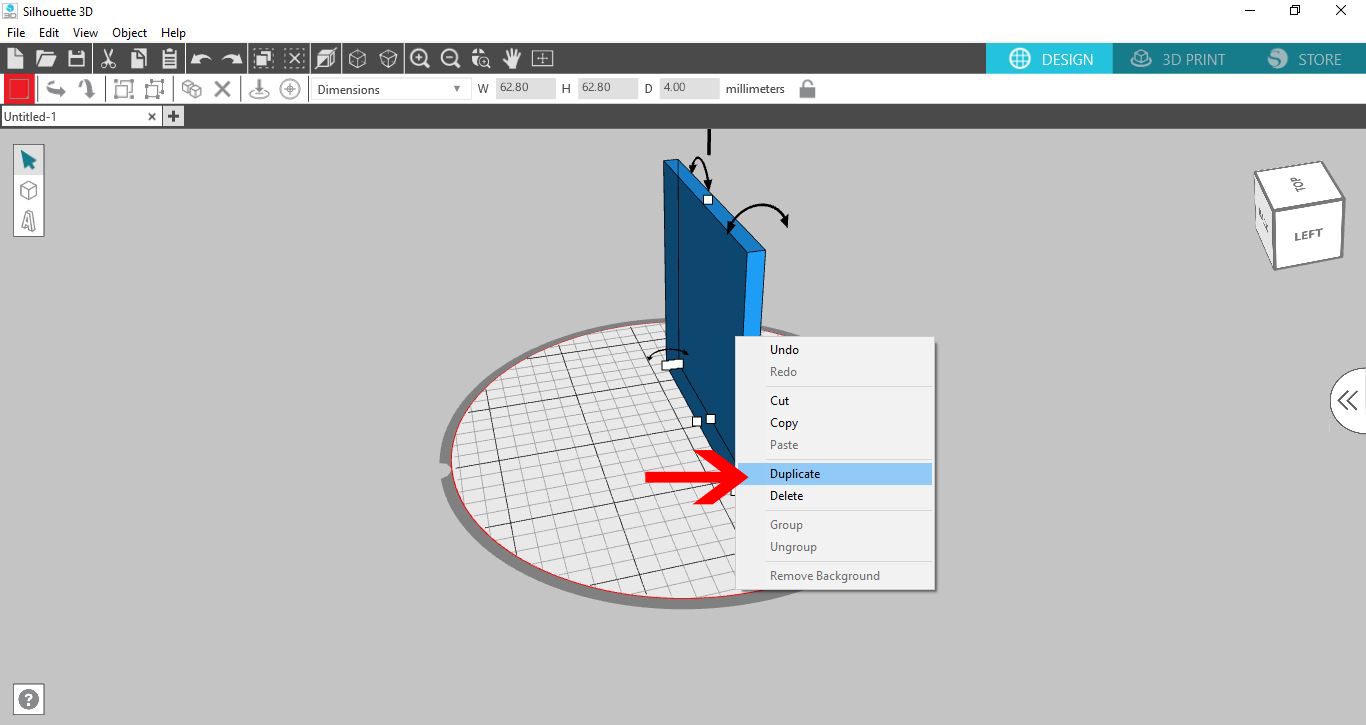
5- Select the wall and right click. Duplicate.
6- Duplicate 3 more times. Select one of the walls.
7- Move each wall to create a rectangle. Make sure each one is flush on the corners.
8- Duplicate one of the walls.
9- Rotate the wall so it is flat to create the base of the pencil holder. Line it up under the walls.
10- Click on the select all icon.
11- Right click and group the walls and base.
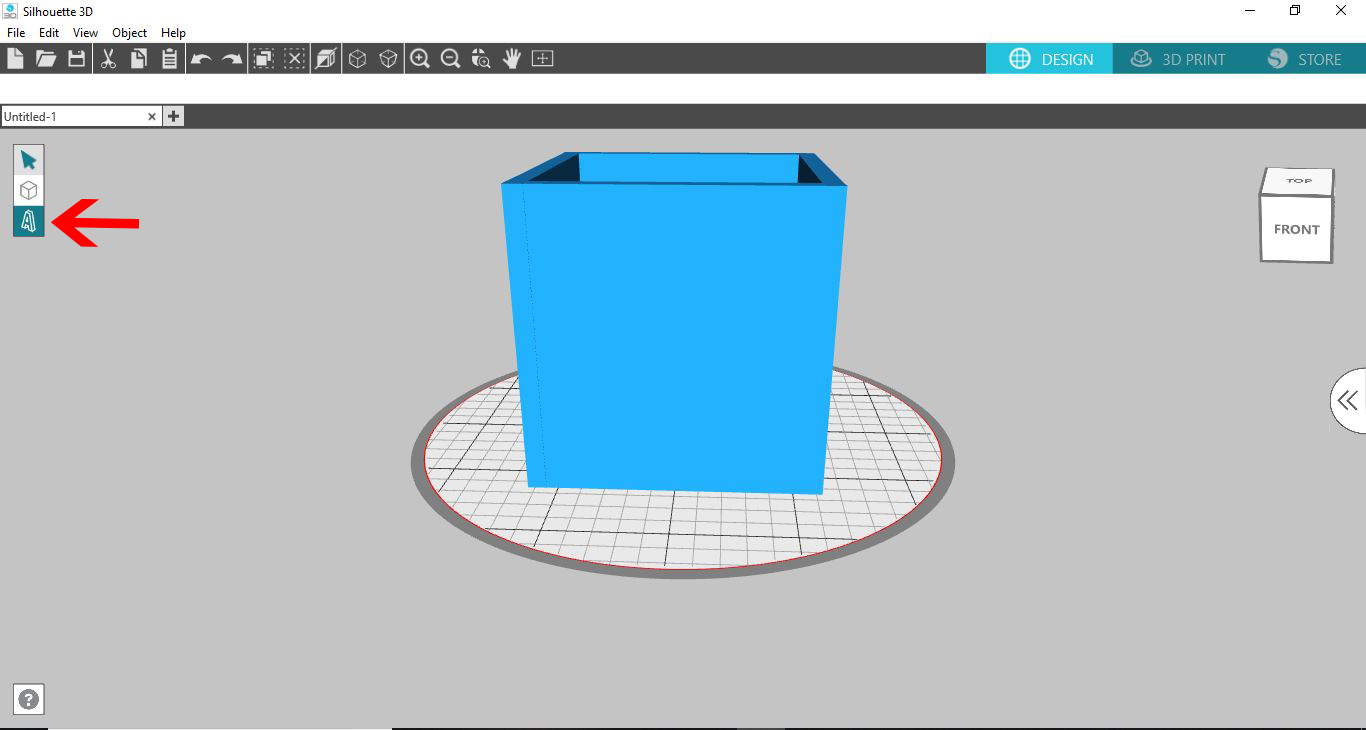
12- Select the text icon to personalize the pencil holder.
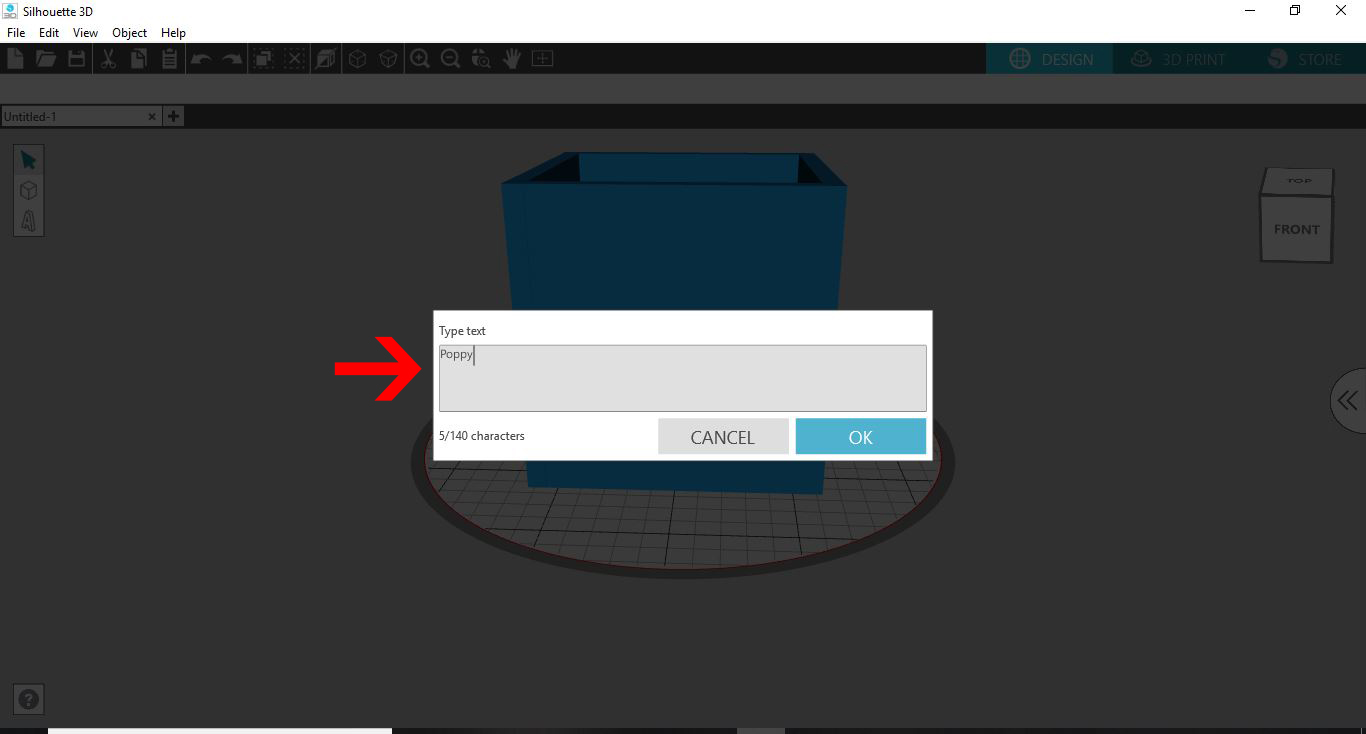
13- Type your text.
14- Select the text and select your font. I am selecting the font Garlic Butter by Missy Meyer Fonts.
15- Move your text so it is attached to your pencil holder.
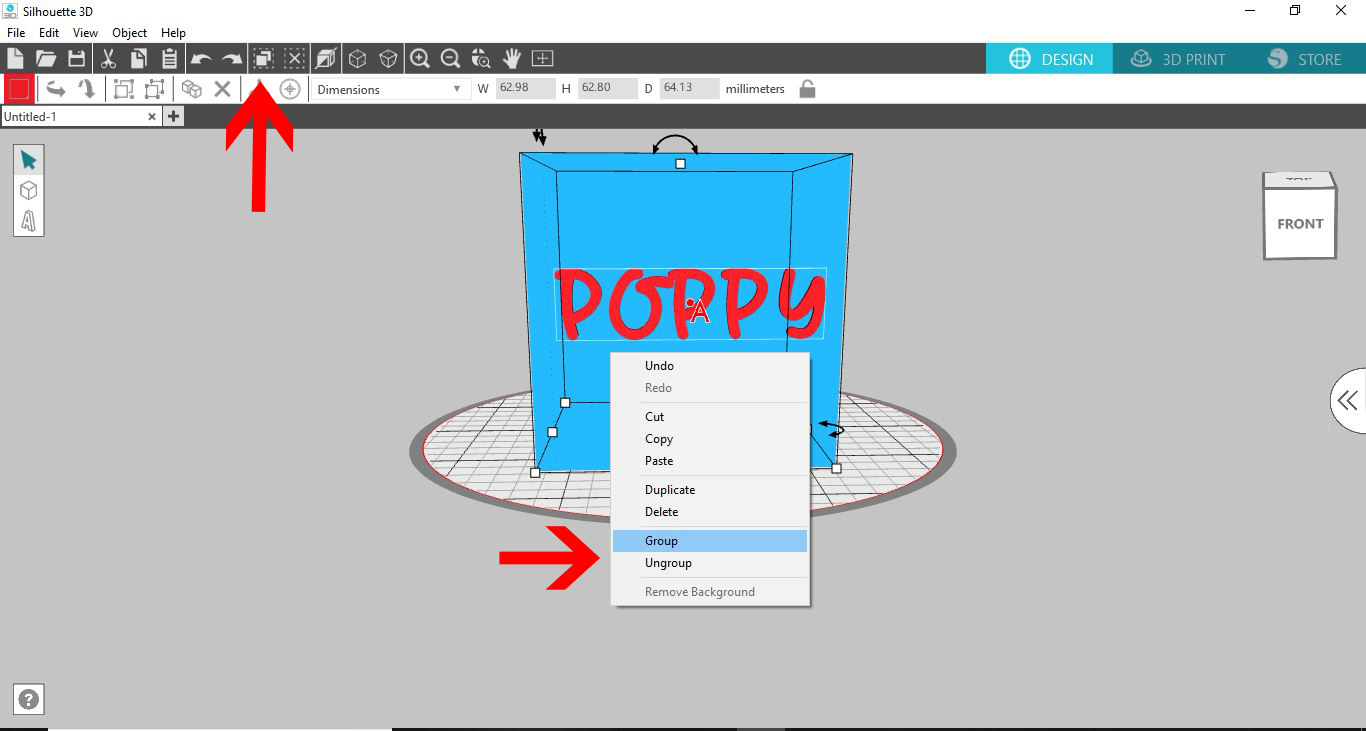
16- Click the select all icon then right-click and group.
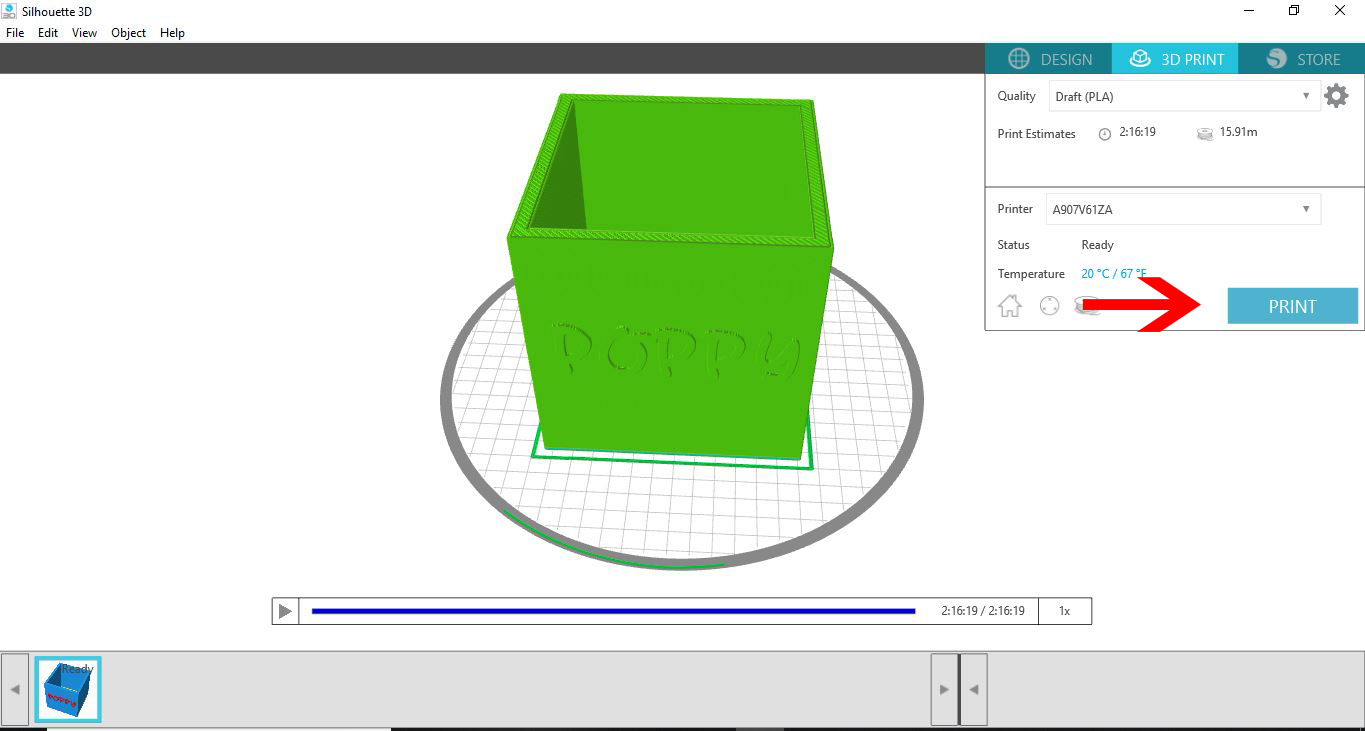
17- Click on the 3D print icon then adjust your print settings and click print.
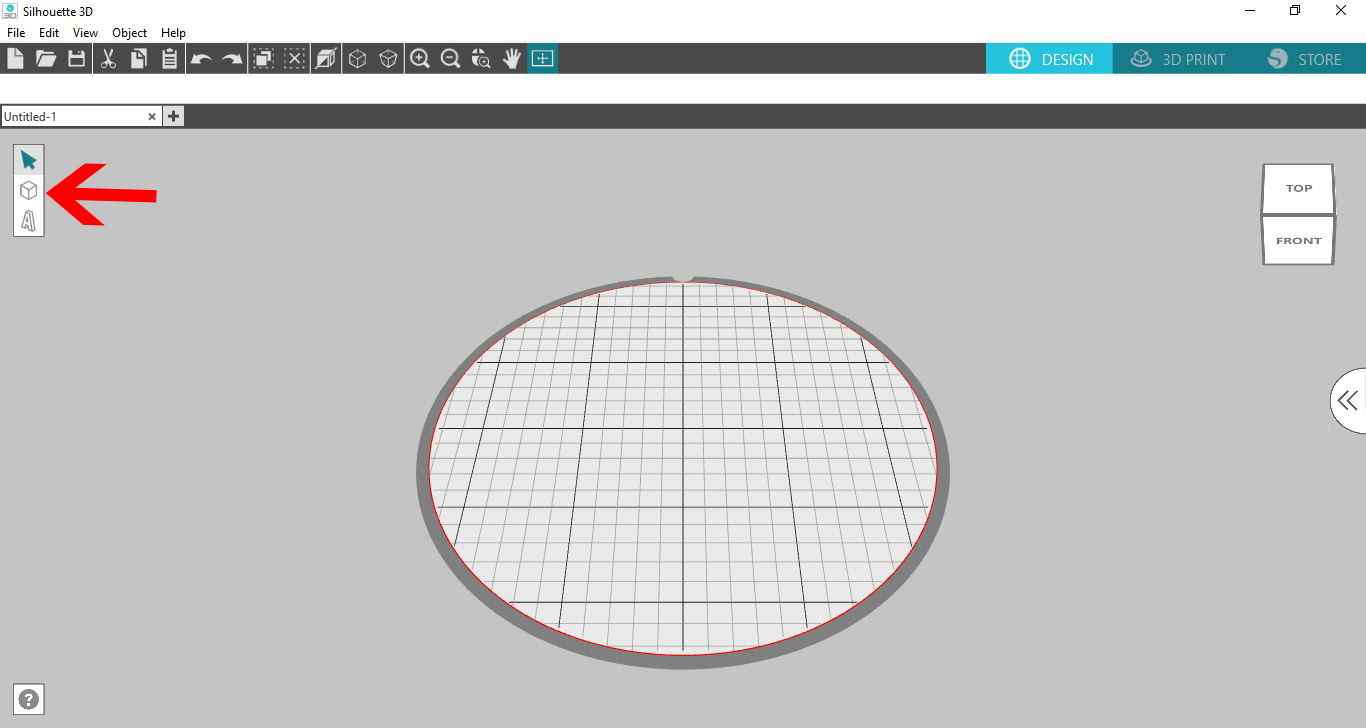
2- Select the cube shape.
3- Select the cube.
4- Adjust the size of the cube and the thickness to make a thin wall.
5- Select the wall and right click. Duplicate.
6- Duplicate 3 more times. Select one of the walls.
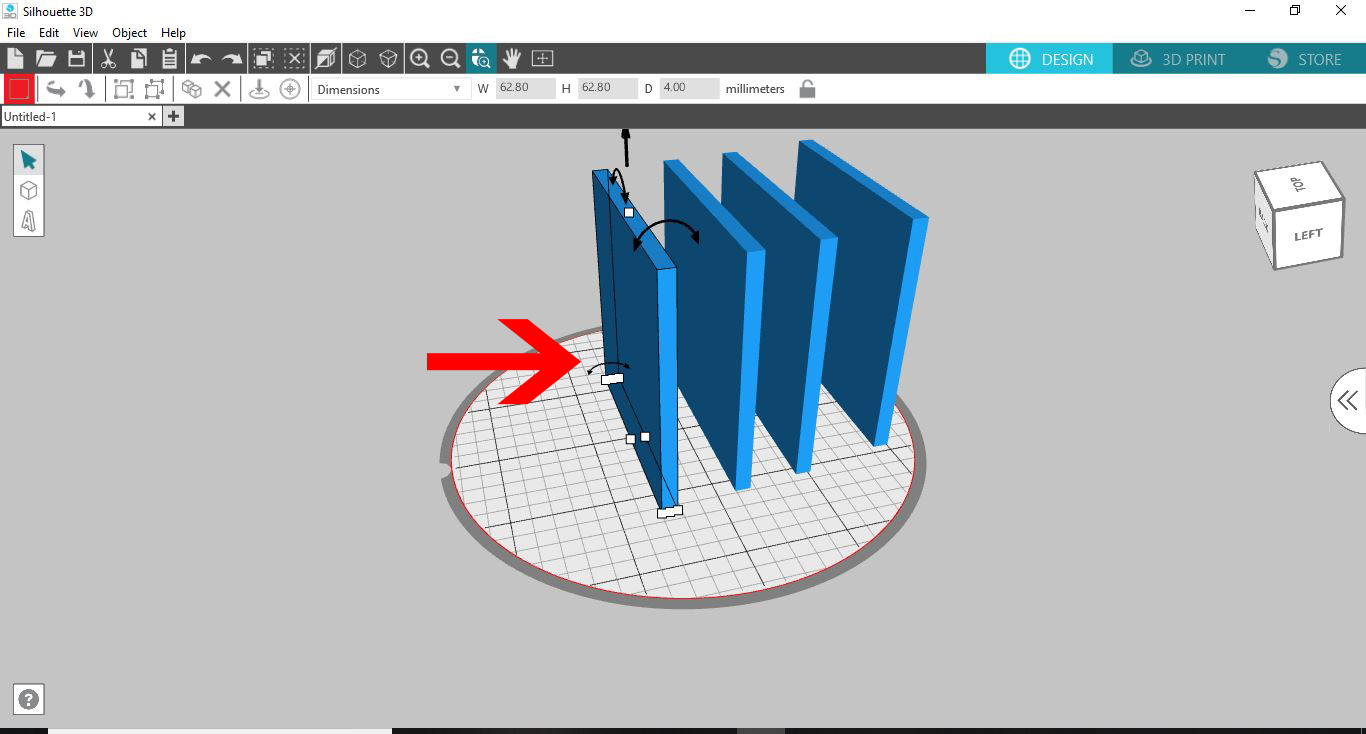
7- Move each wall to create a rectangle. Make sure each one is flush on the corners.
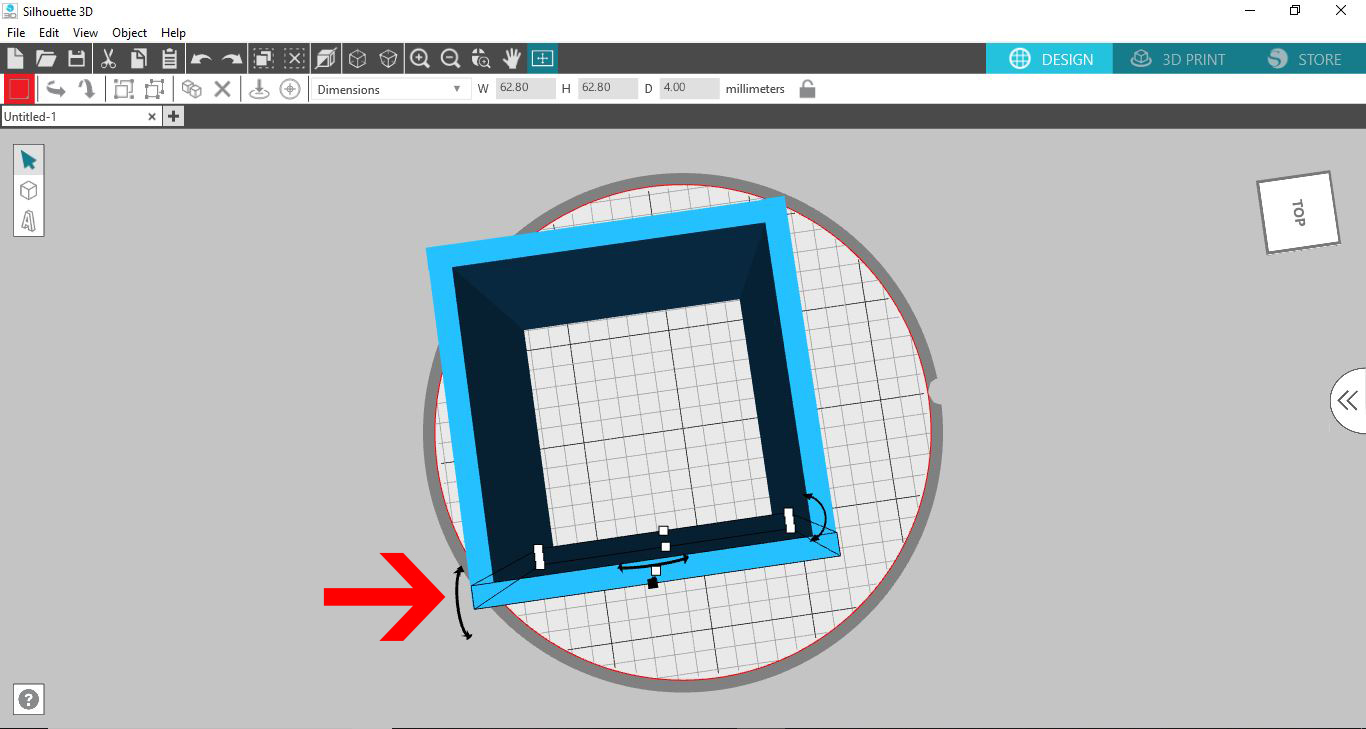
8- Duplicate one of the walls.
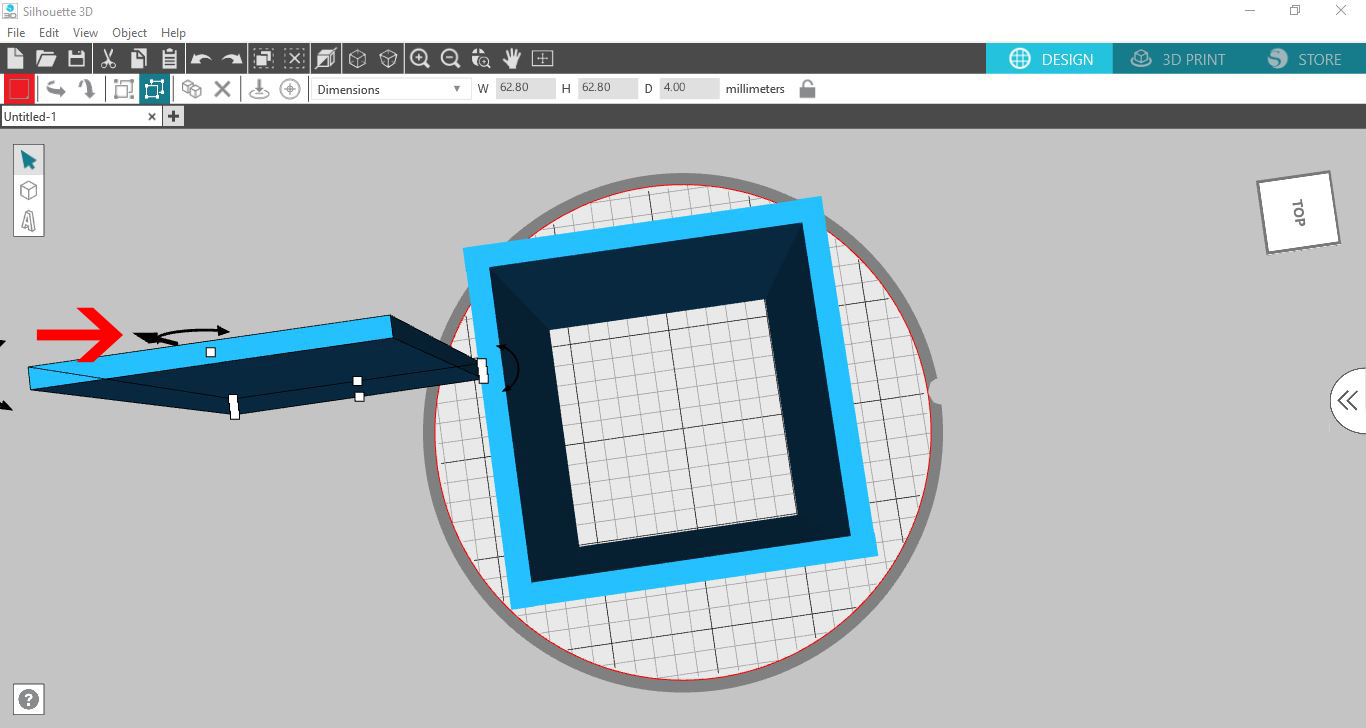
9- Rotate the wall so it is flat to create the base of the pencil holder. Line it up under the walls.
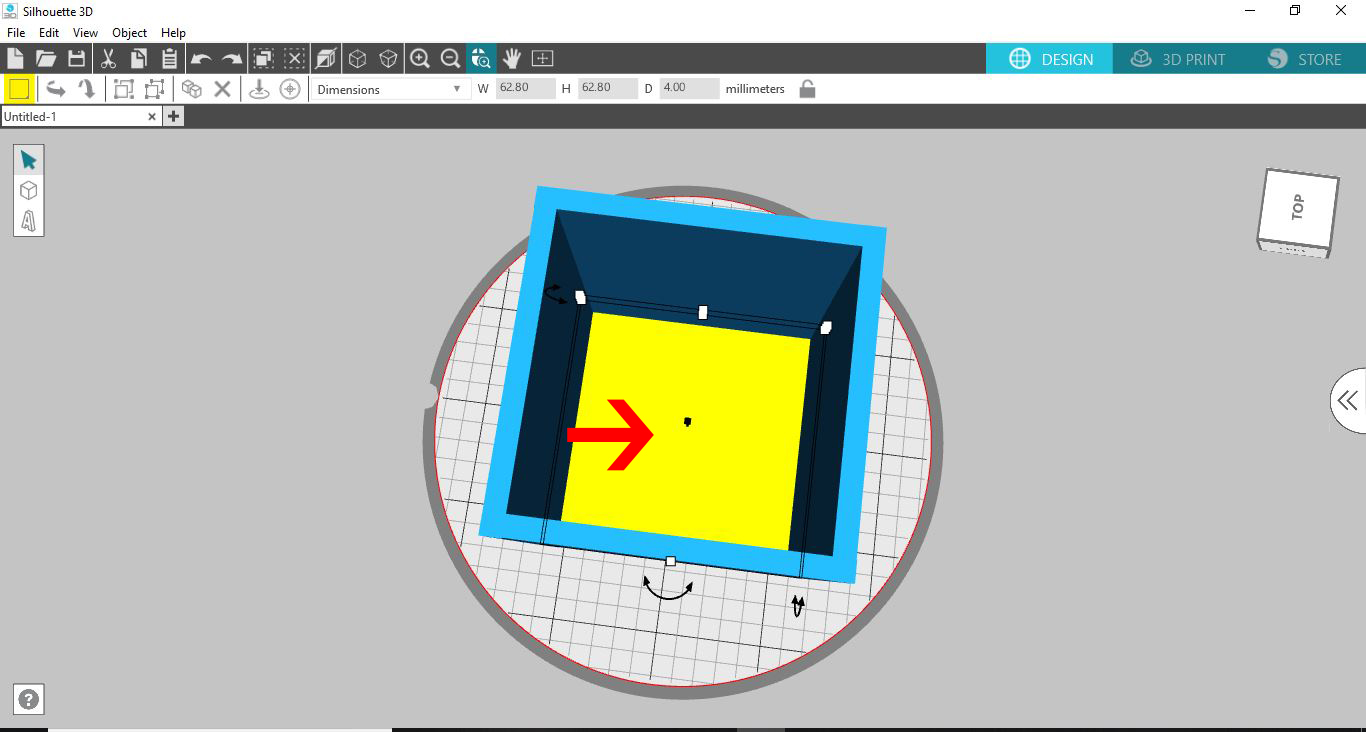
10- Click on the select all icon.
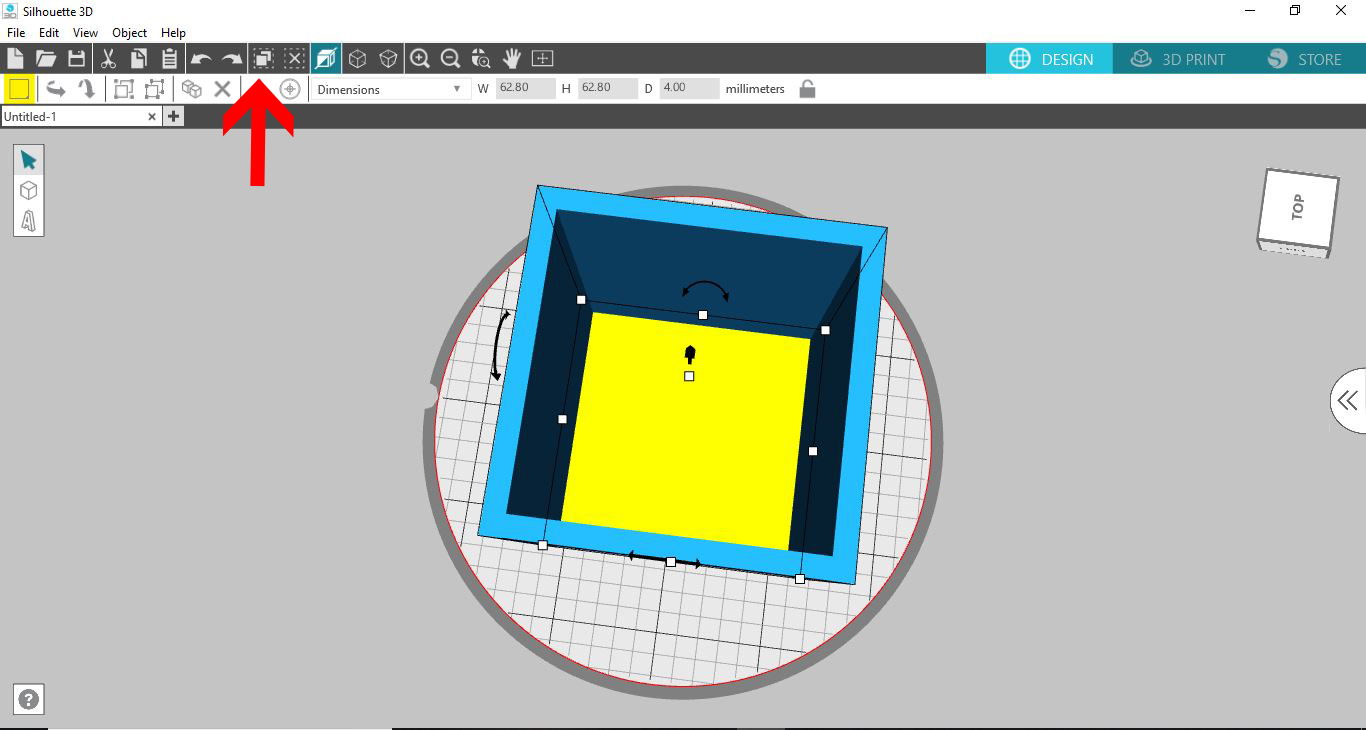
11- Right click and group the walls and base.
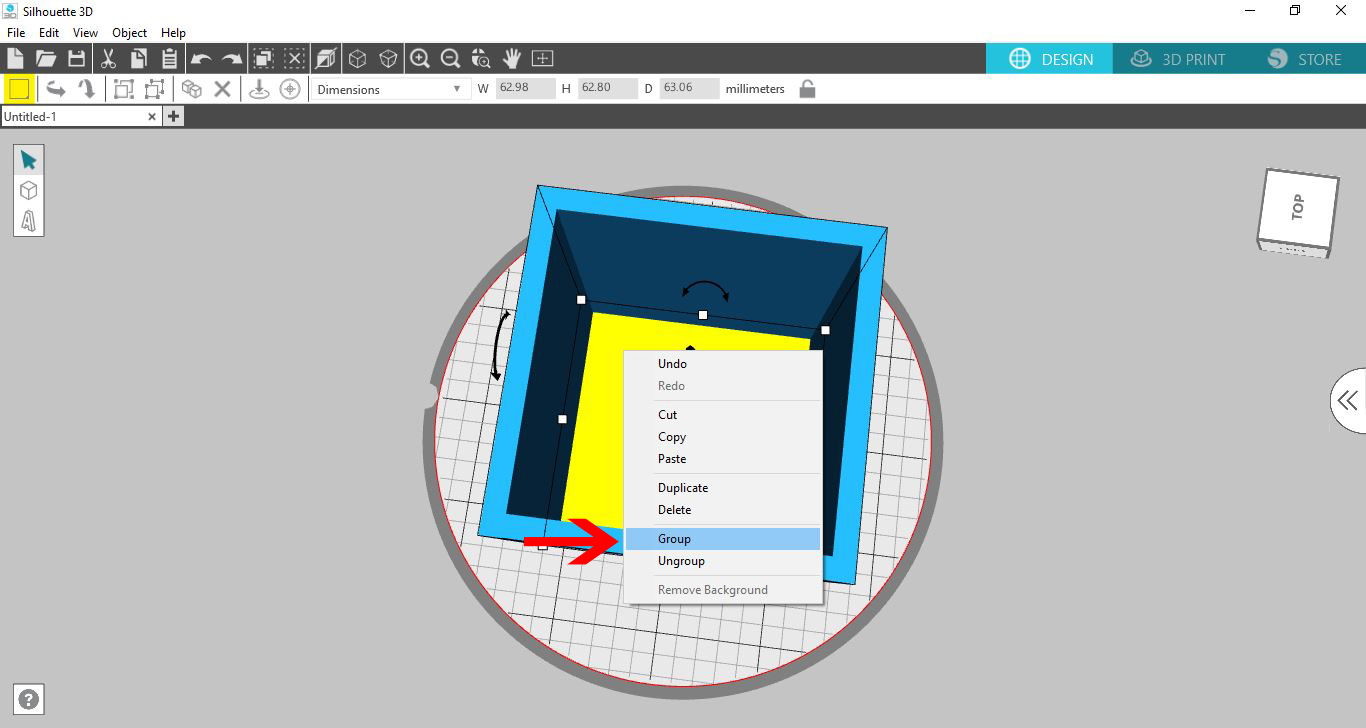
12- Select the text icon to personalize the pencil holder.
13- Type your text.
14- Select the text and select your font. I am selecting the font Garlic Butter by Missy Meyer Fonts.
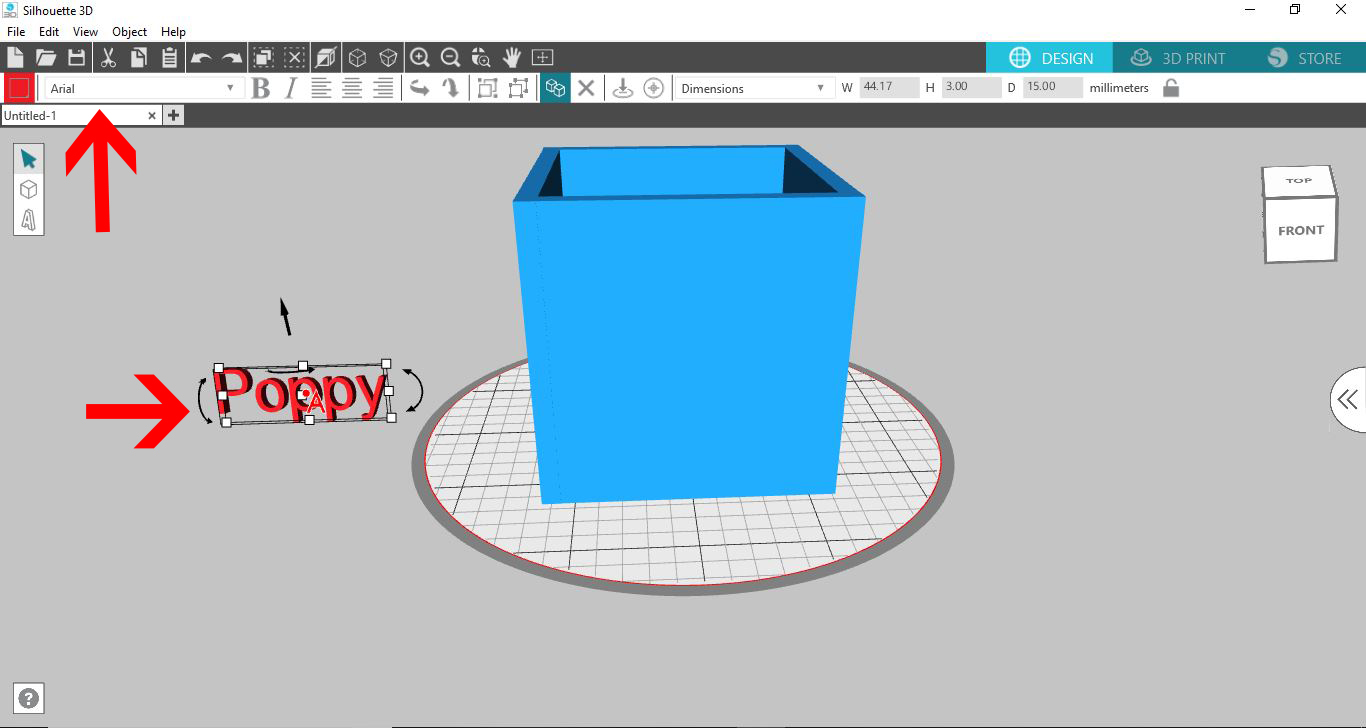
15- Move your text so it is attached to your pencil holder.
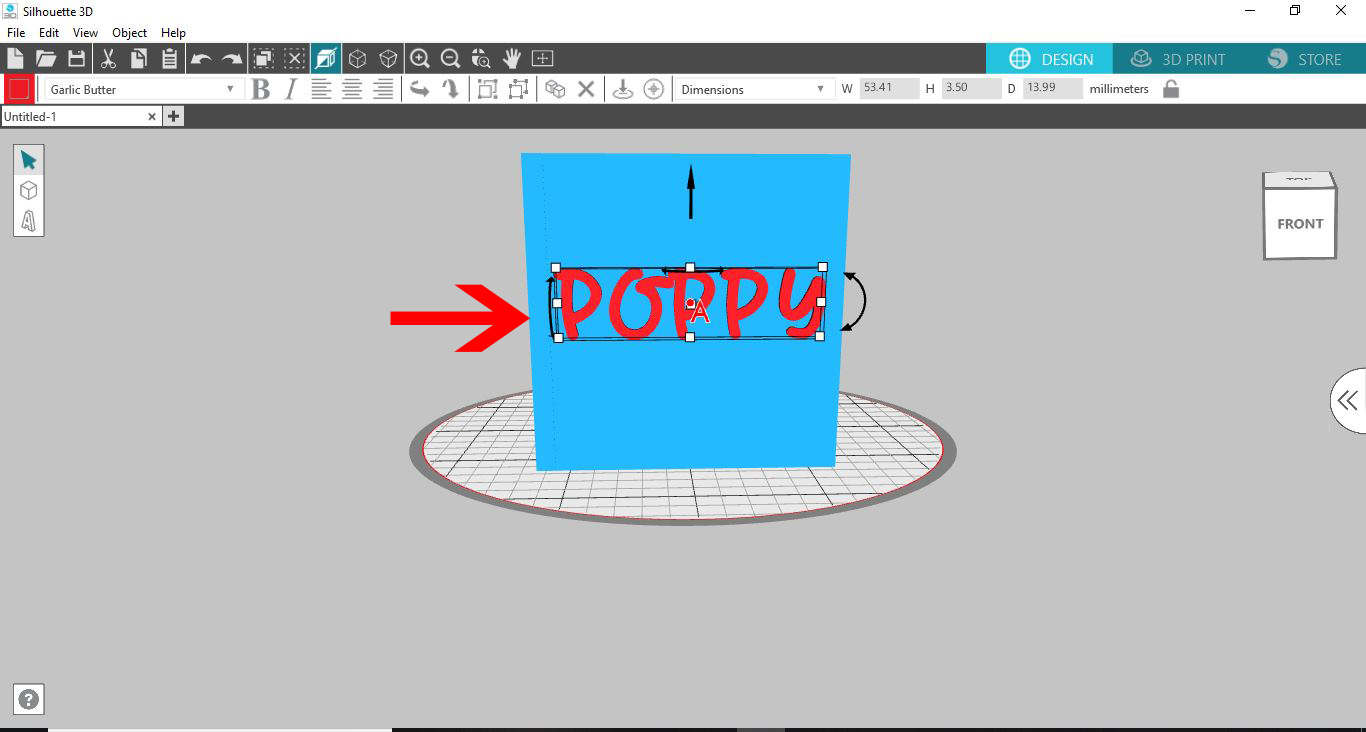
16- Click the select all icon then right-click and group.
17- Click on the 3D print icon then adjust your print settings and click print.
Related Tutorials
Silhouette Tutorials
How to Create a Basic Cookie Cutter in Silhouette Alta 3D Printer
Silhouette Tutorials
How to Create a Basic Stencil in Silhouette Alta
Silhouette Tutorials
How to Create a Basic Stencil Box in Silhouette Alta
Silhouette Tutorials
Using Silhouette Studio to Create Text for the Silhouette Alta 3D Printer Software
Silhouette Tutorials
How to Make a Basic Jewelry Box in Silhouette Alta
Silhouette Tutorials