By Design Bundles
Illustrator Tutorials13 min
Bazinga Text in Illustrator
For this tutorial we will use the Free Font “BadaBoom BB” and a vector “Lightning” to complement the text. You may want to get a reference image too.
1 - In Illustrator, create a “New Document”.
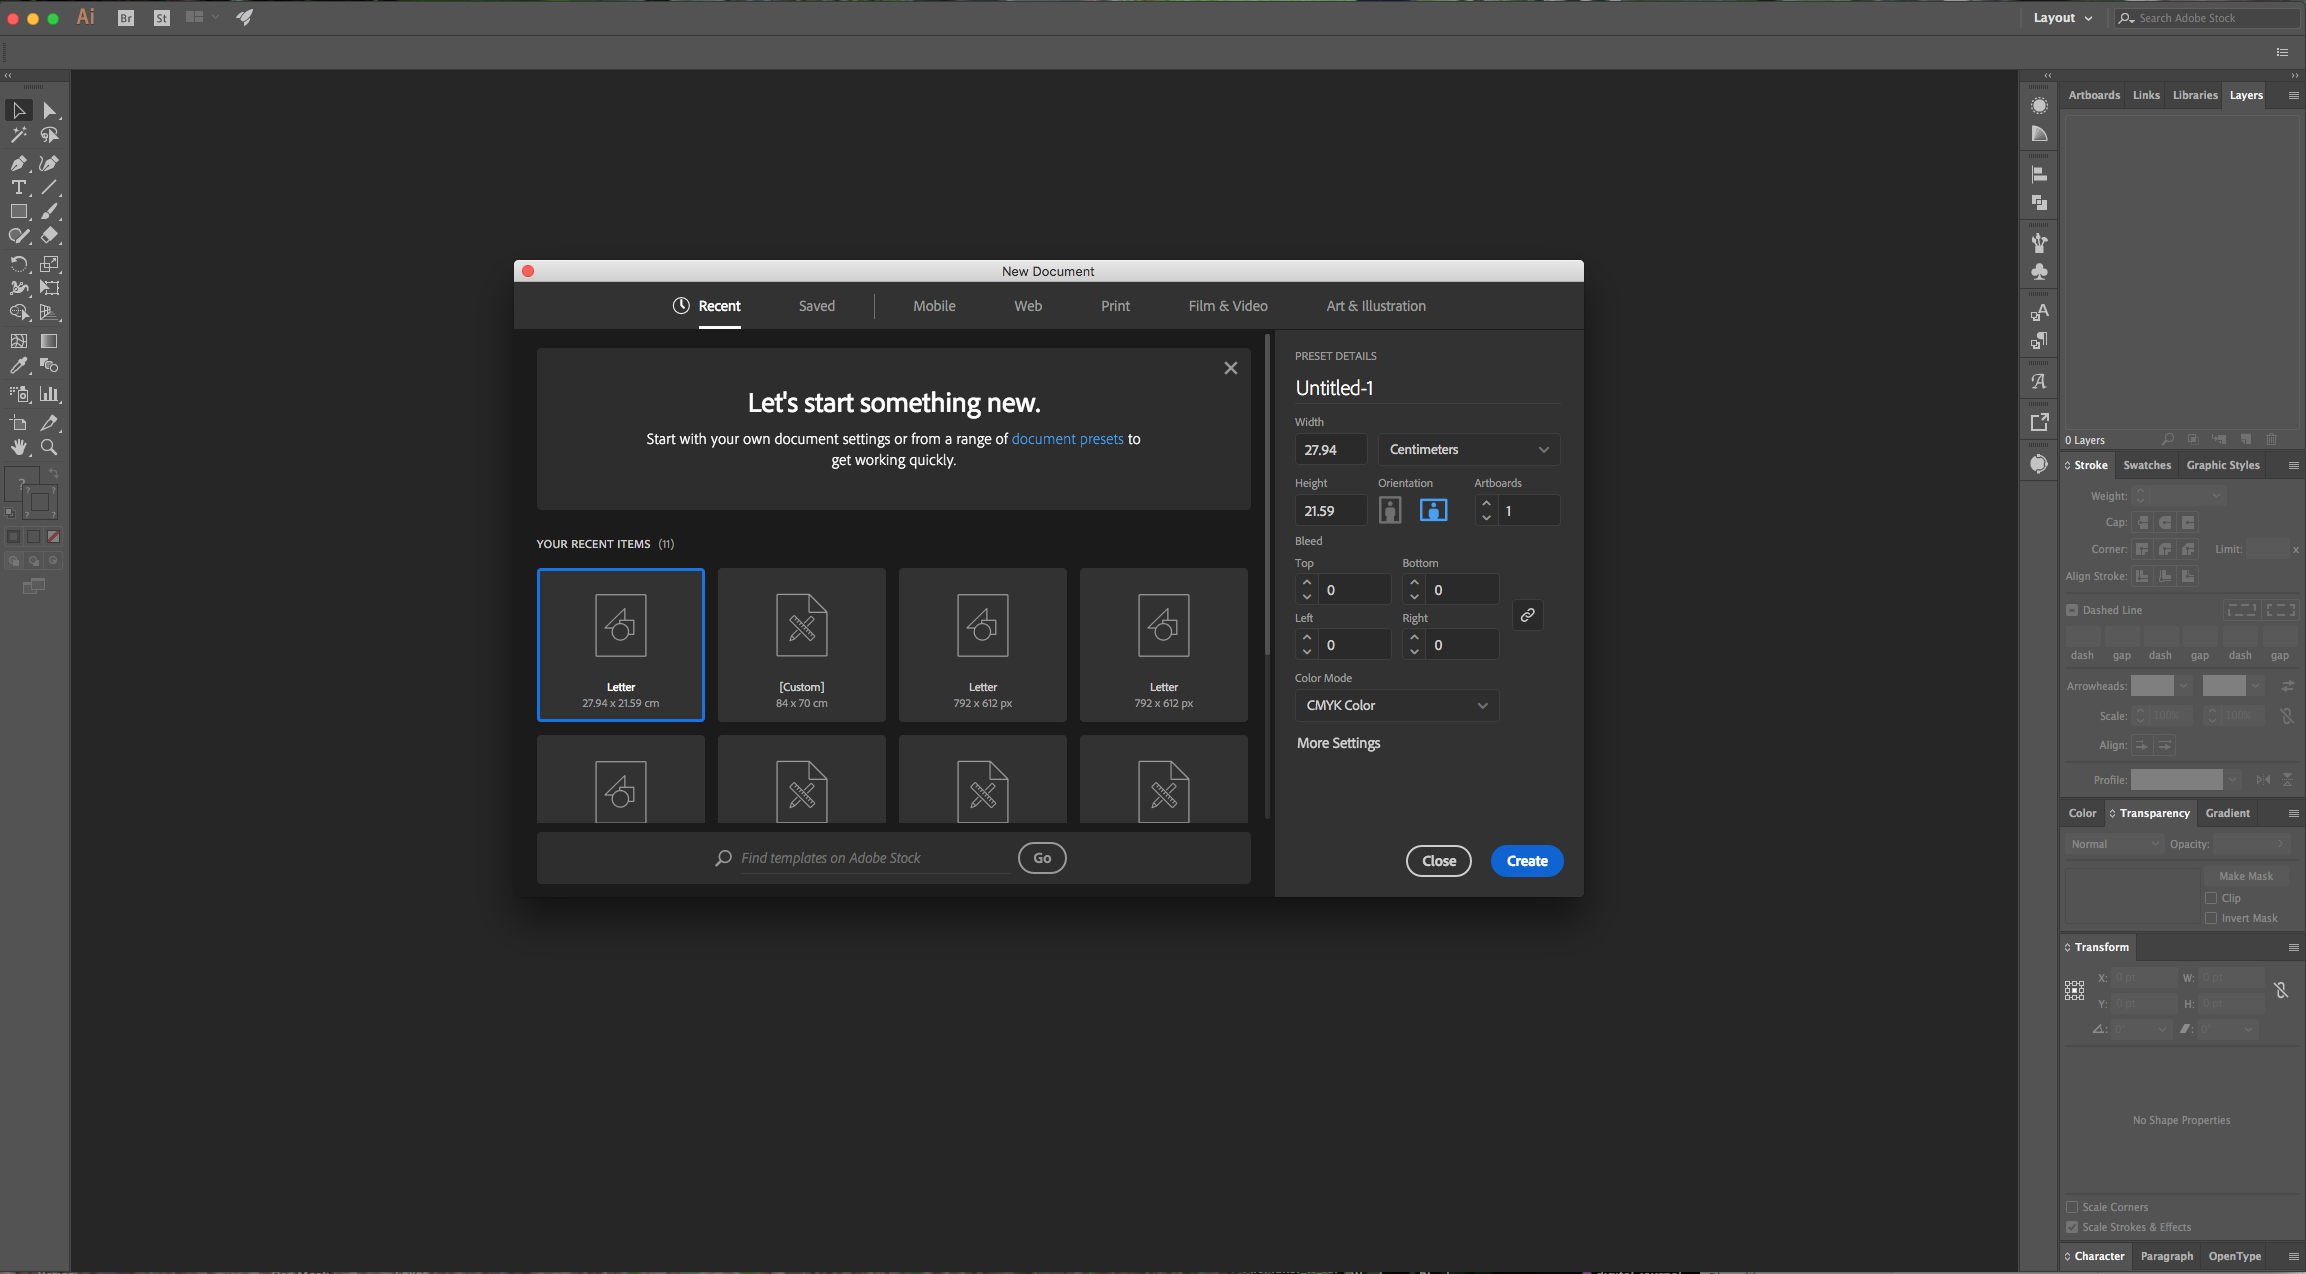
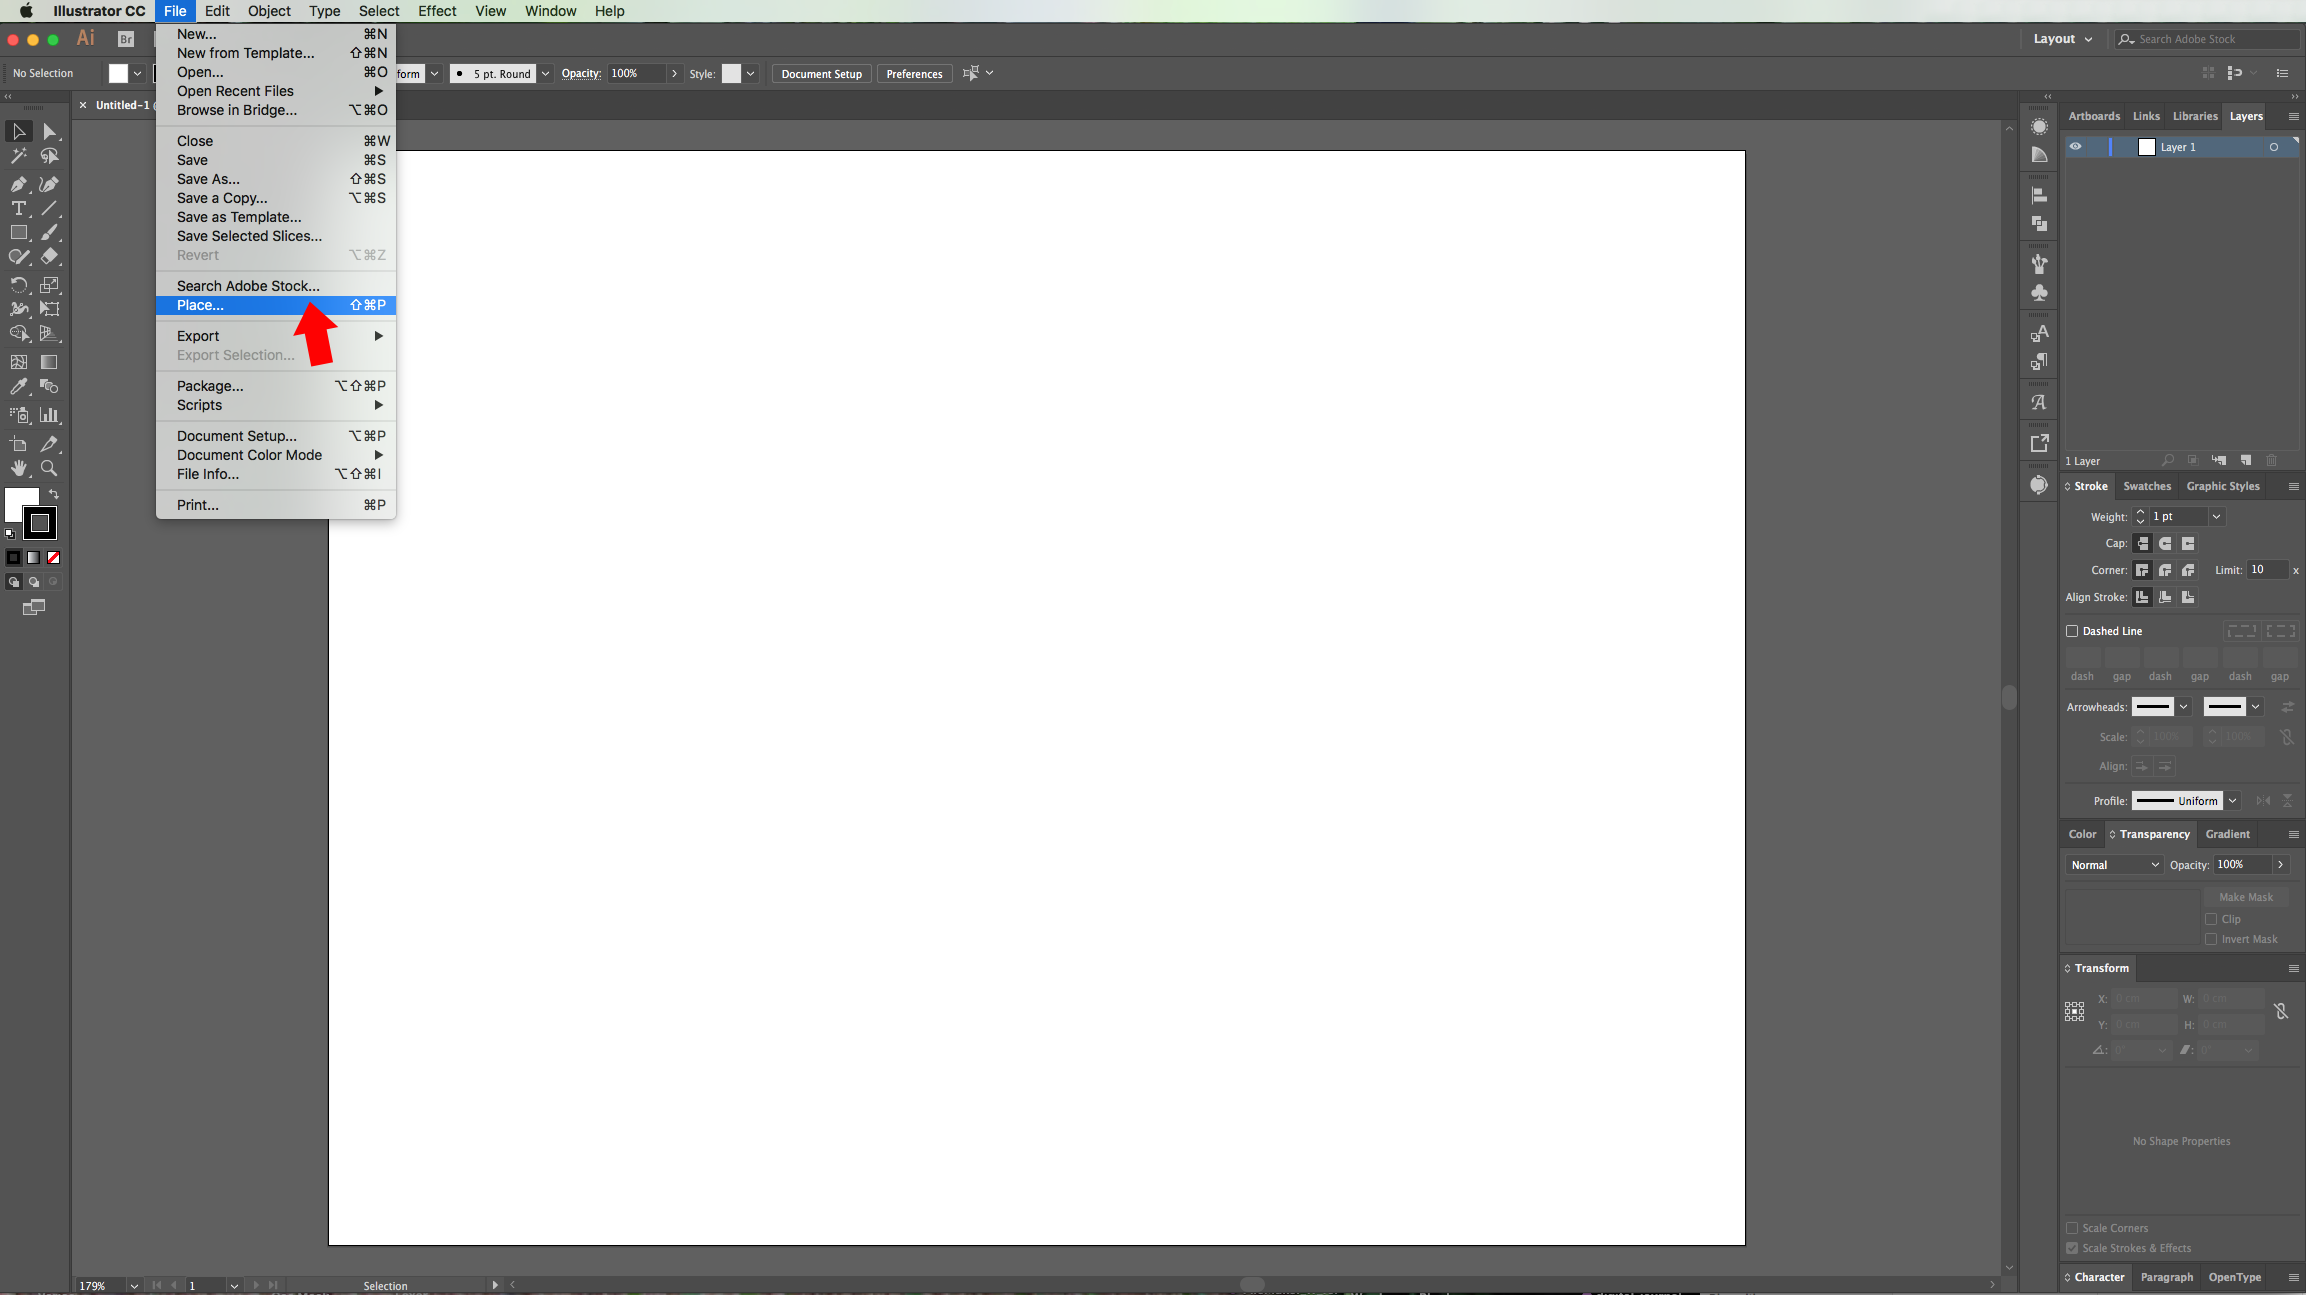
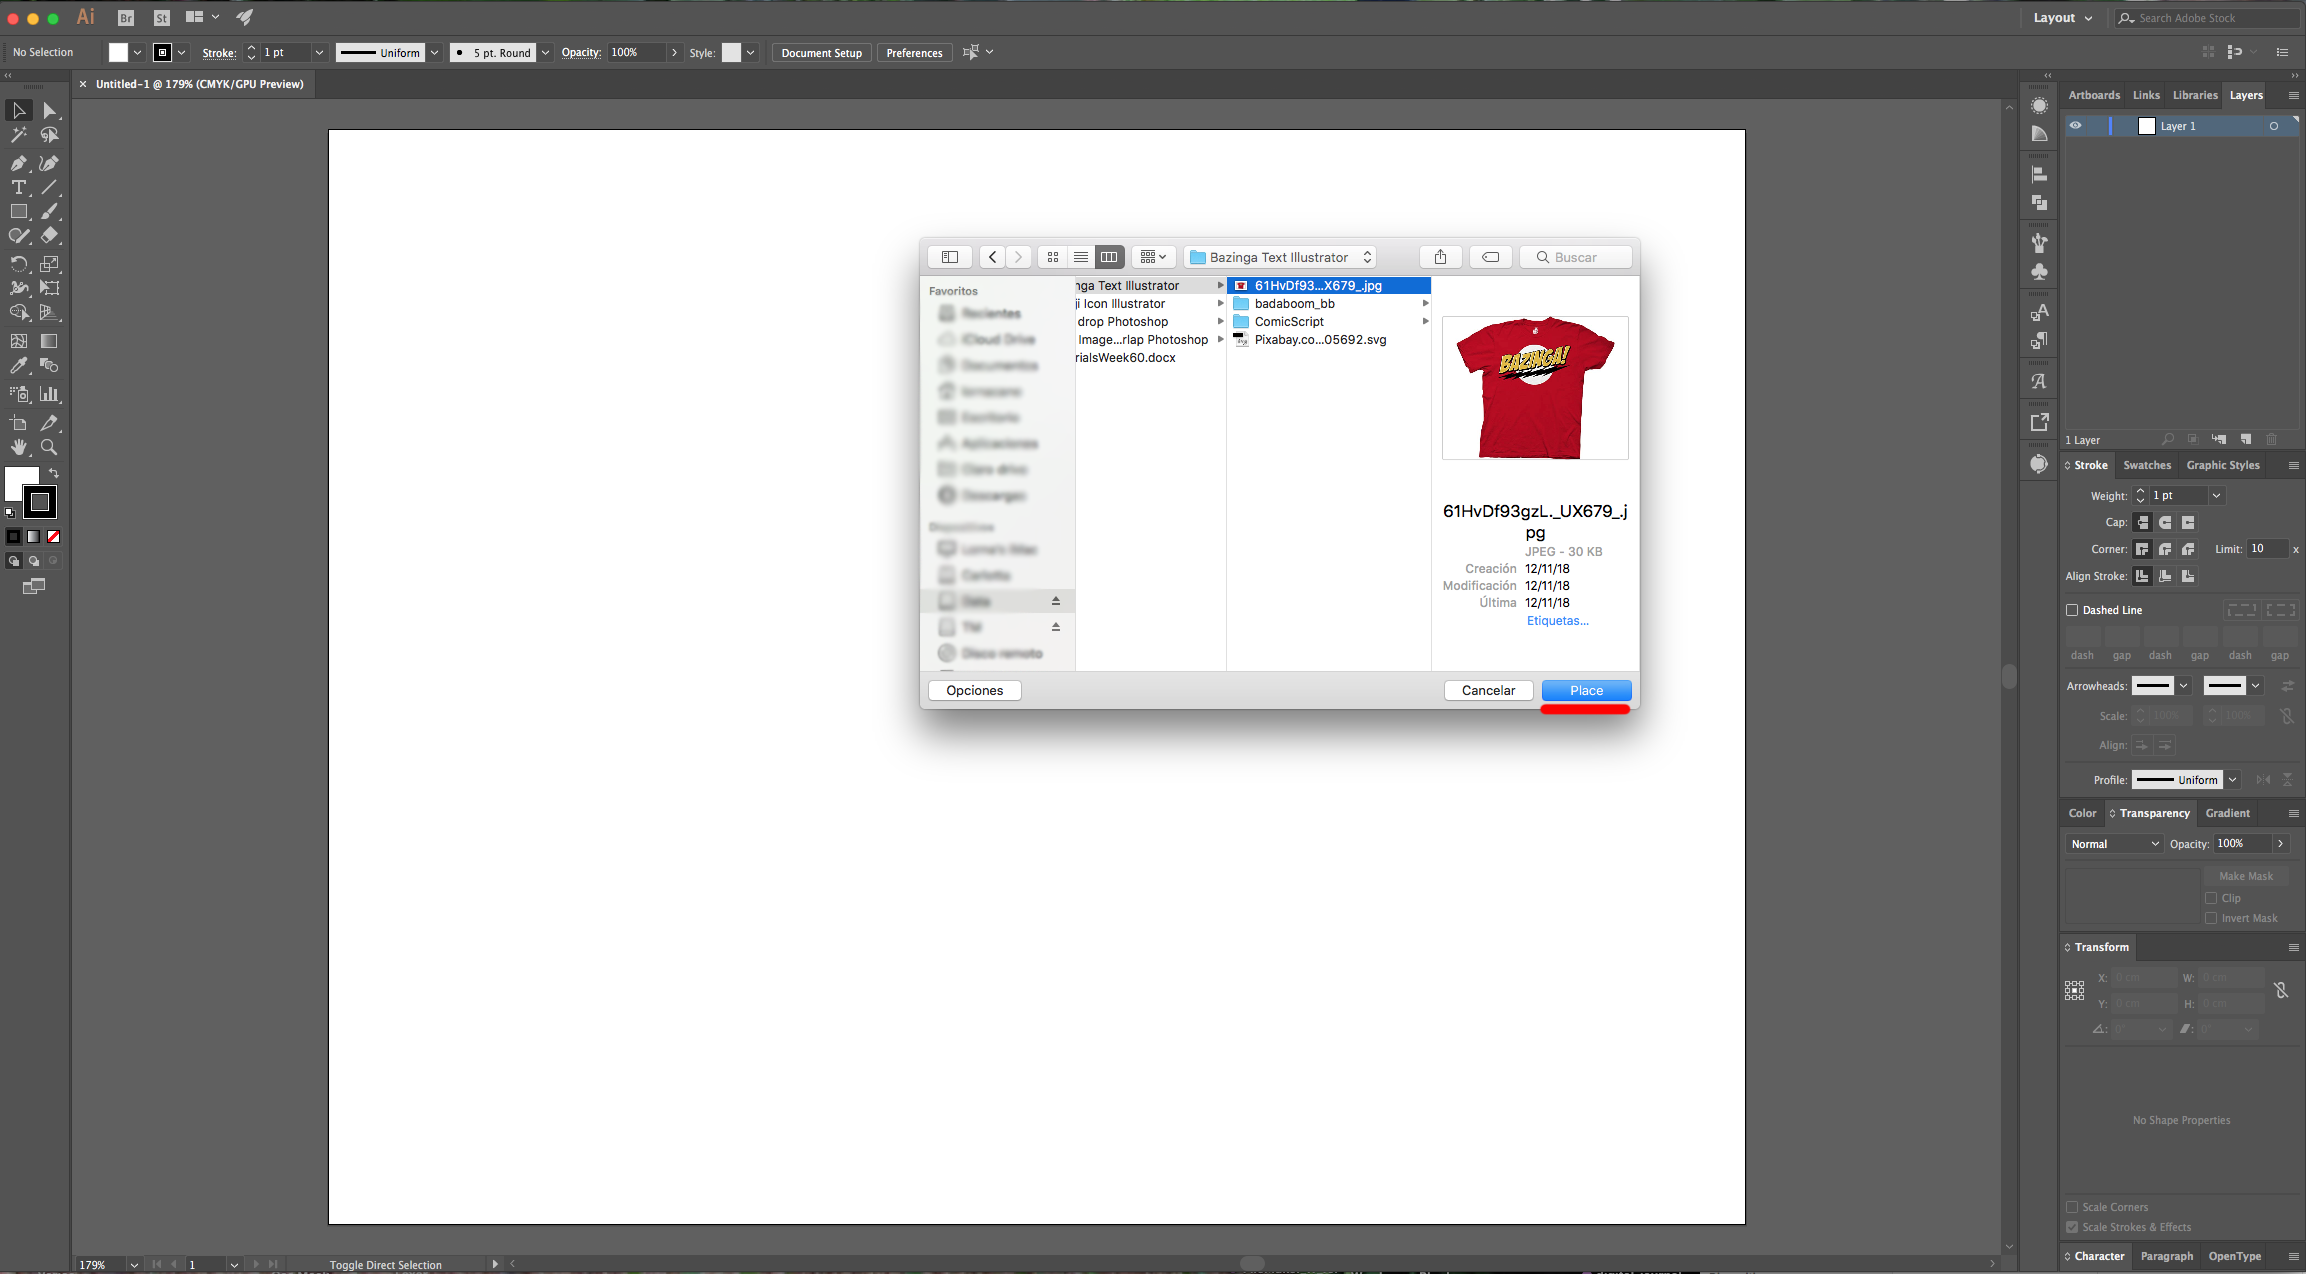
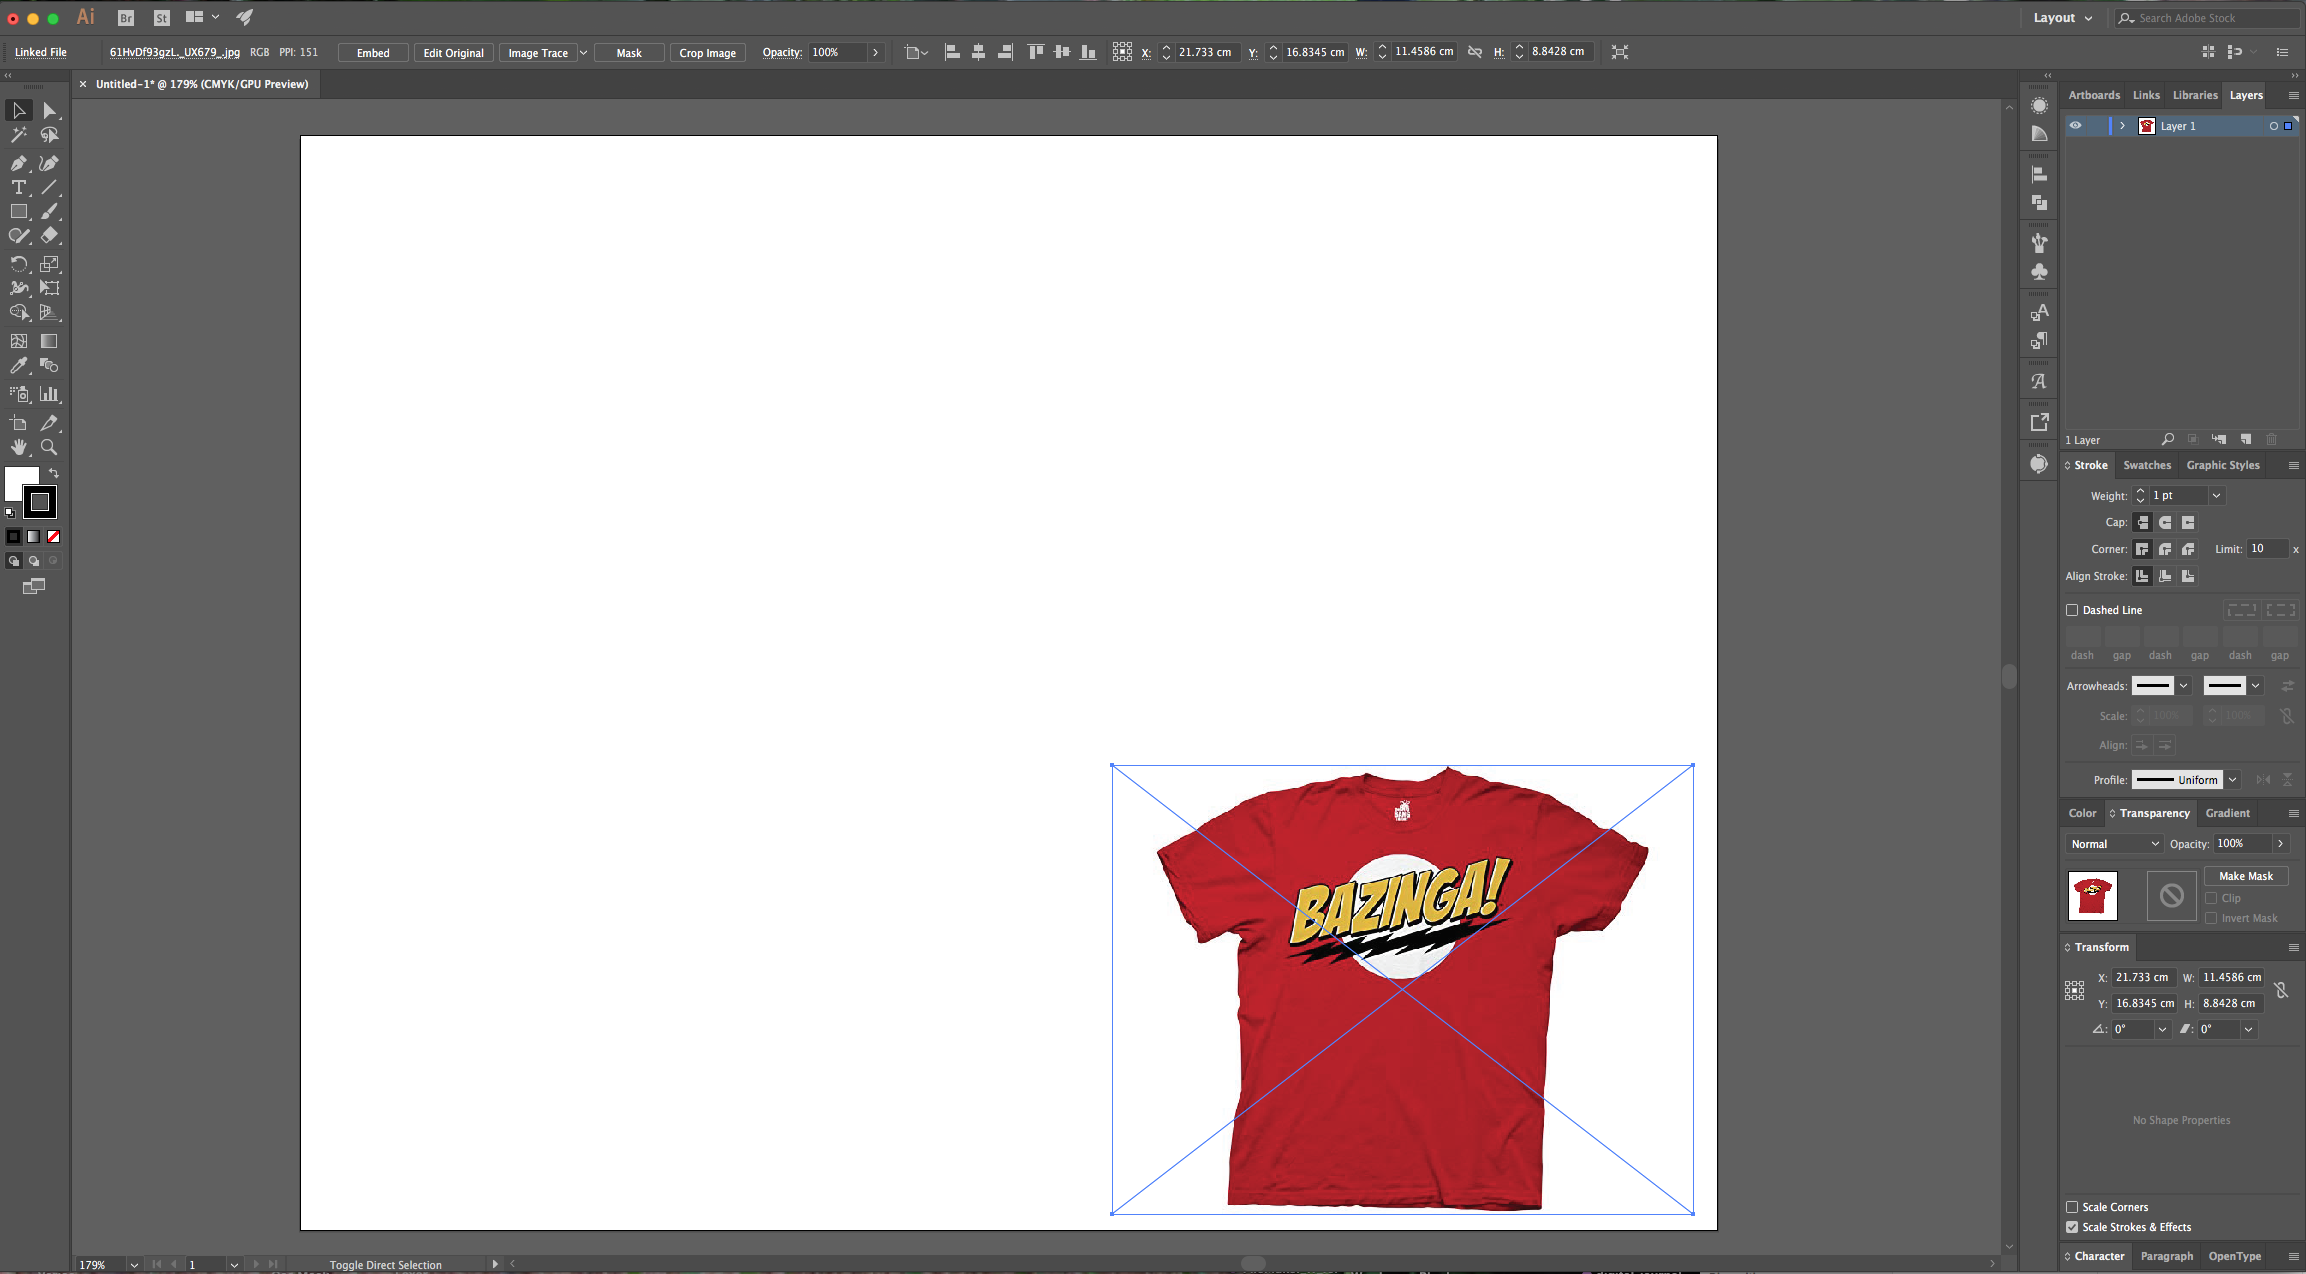
2 - Go to File > Place (Shift + Command/Control + P) and import your reference image. Resize it if needed.
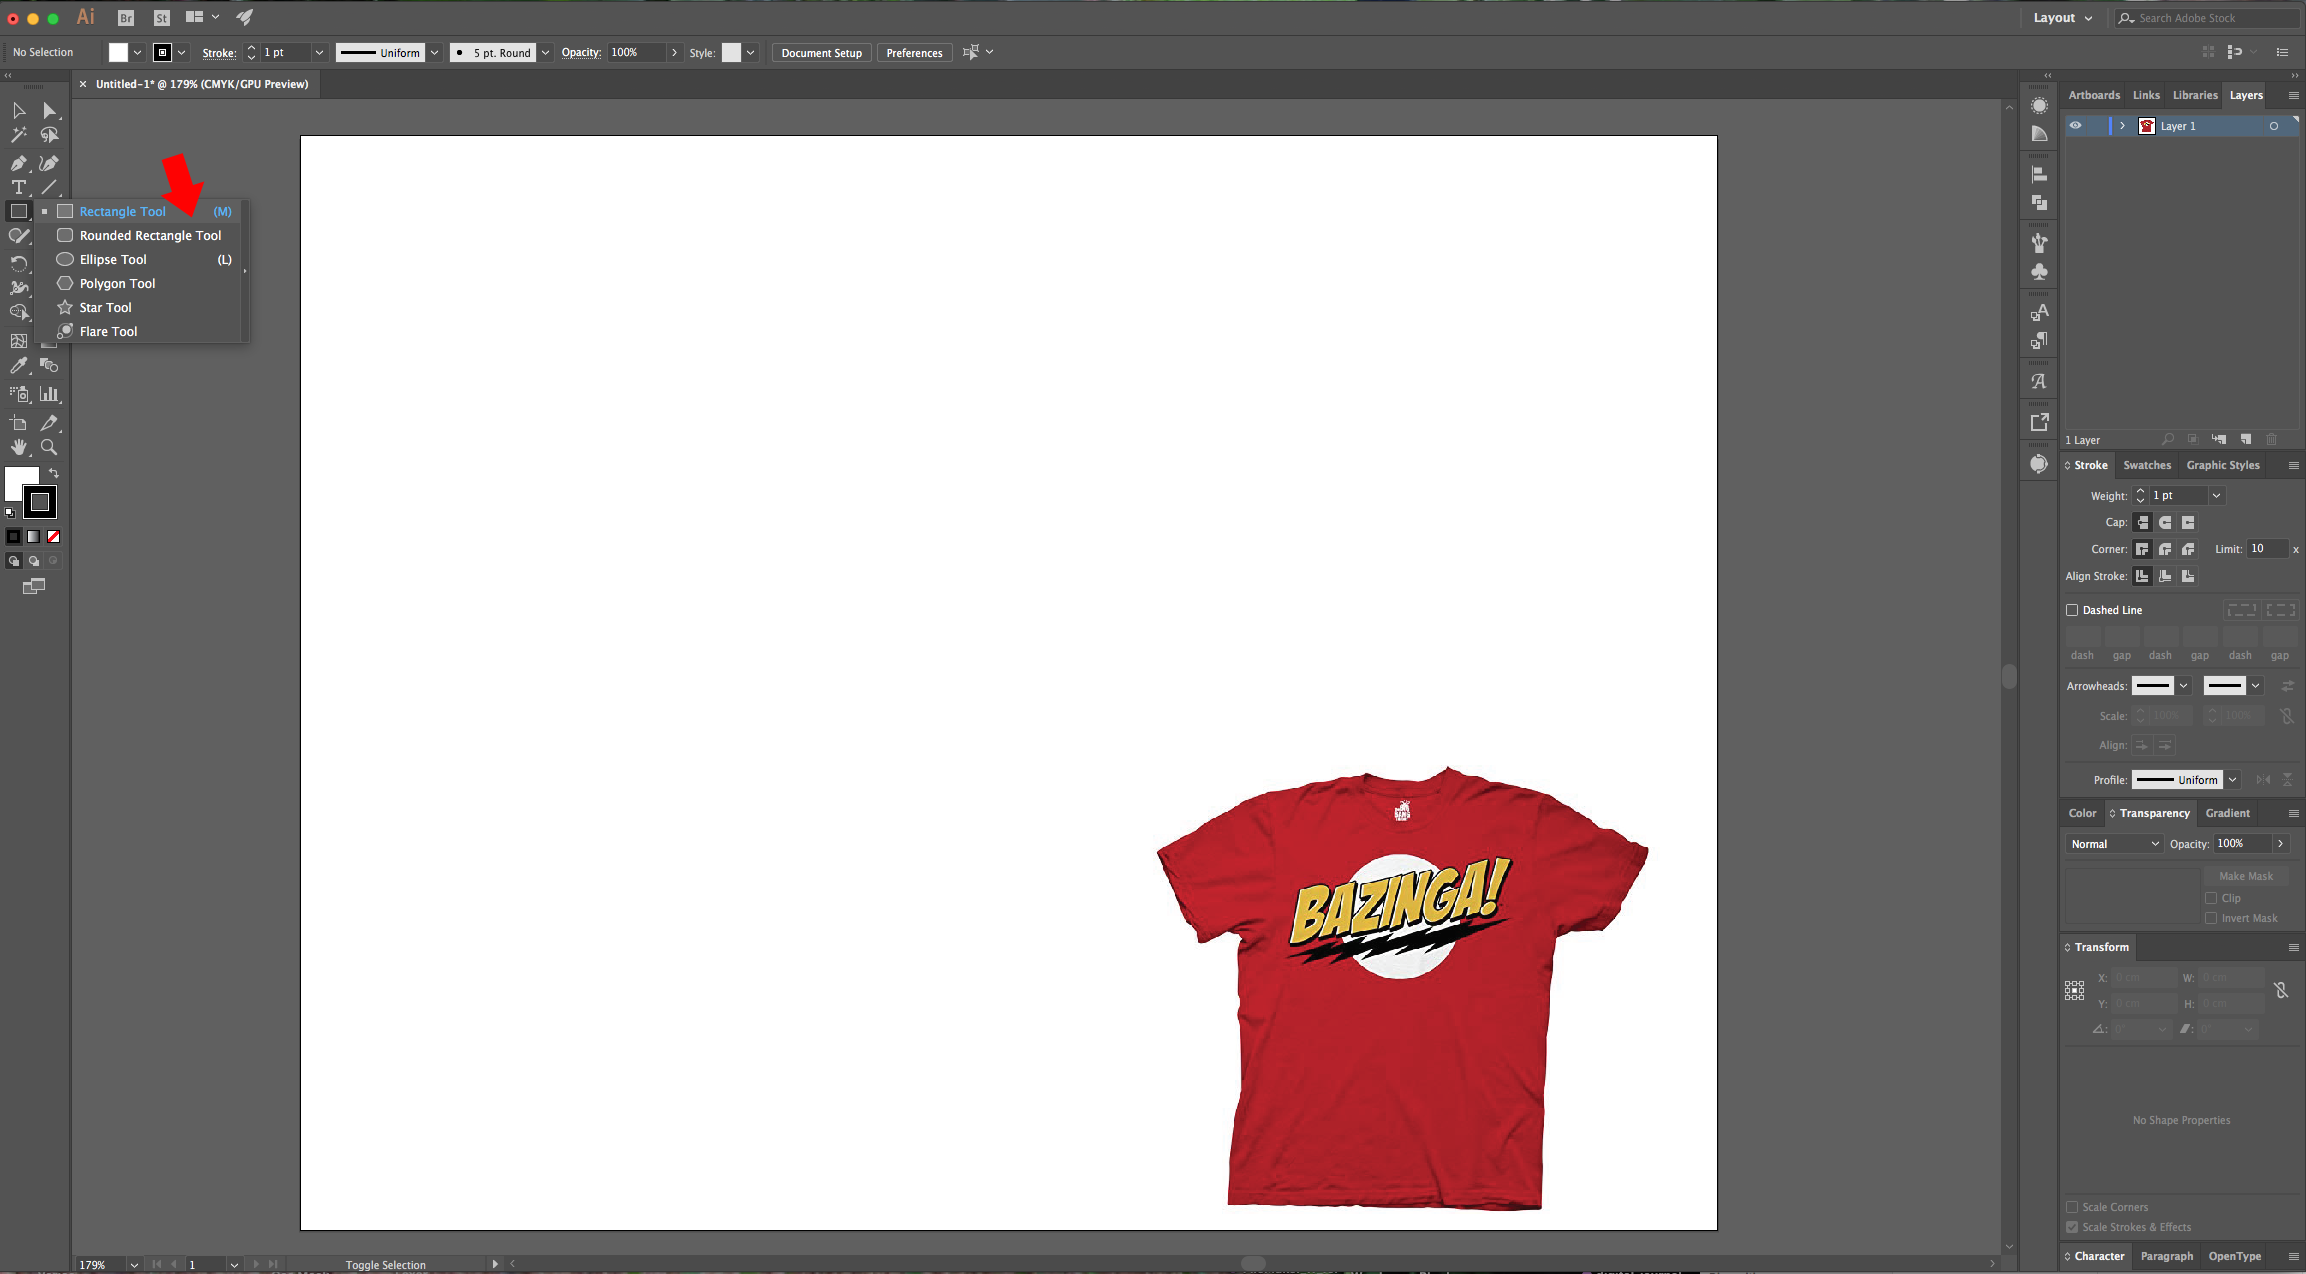
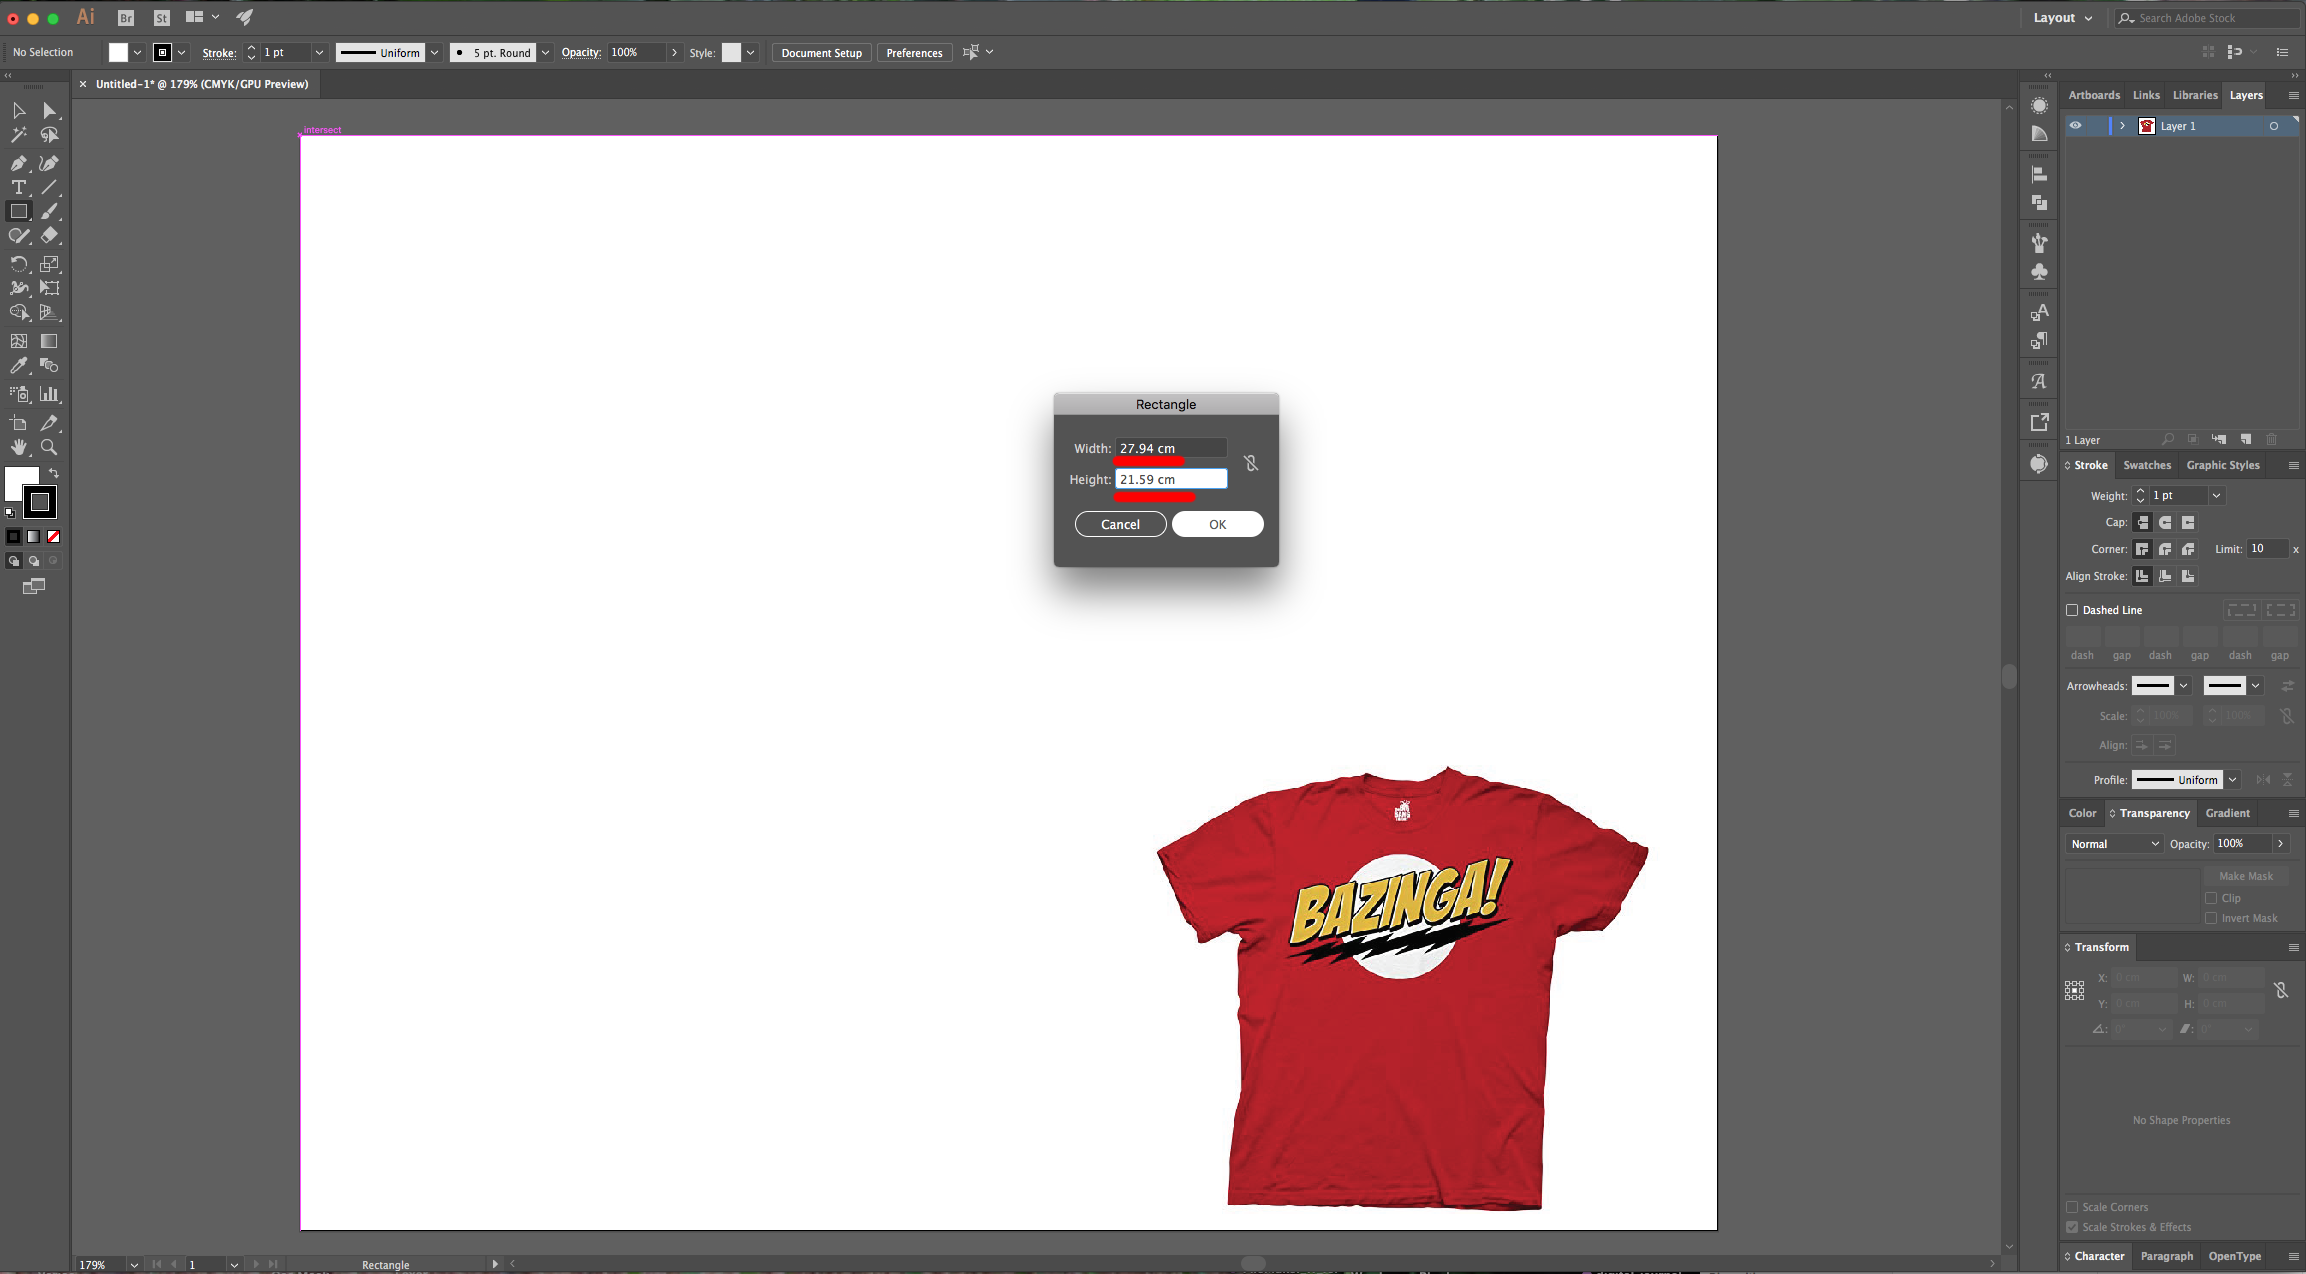
3 - Select the “Rectangle Tool” (M), click on the Top Left corner of your Document and input the same measurements of your document (27.94 x 25.59 cm) to cover the entire Canvas and fill it with Red from the “Swatches Panel”.
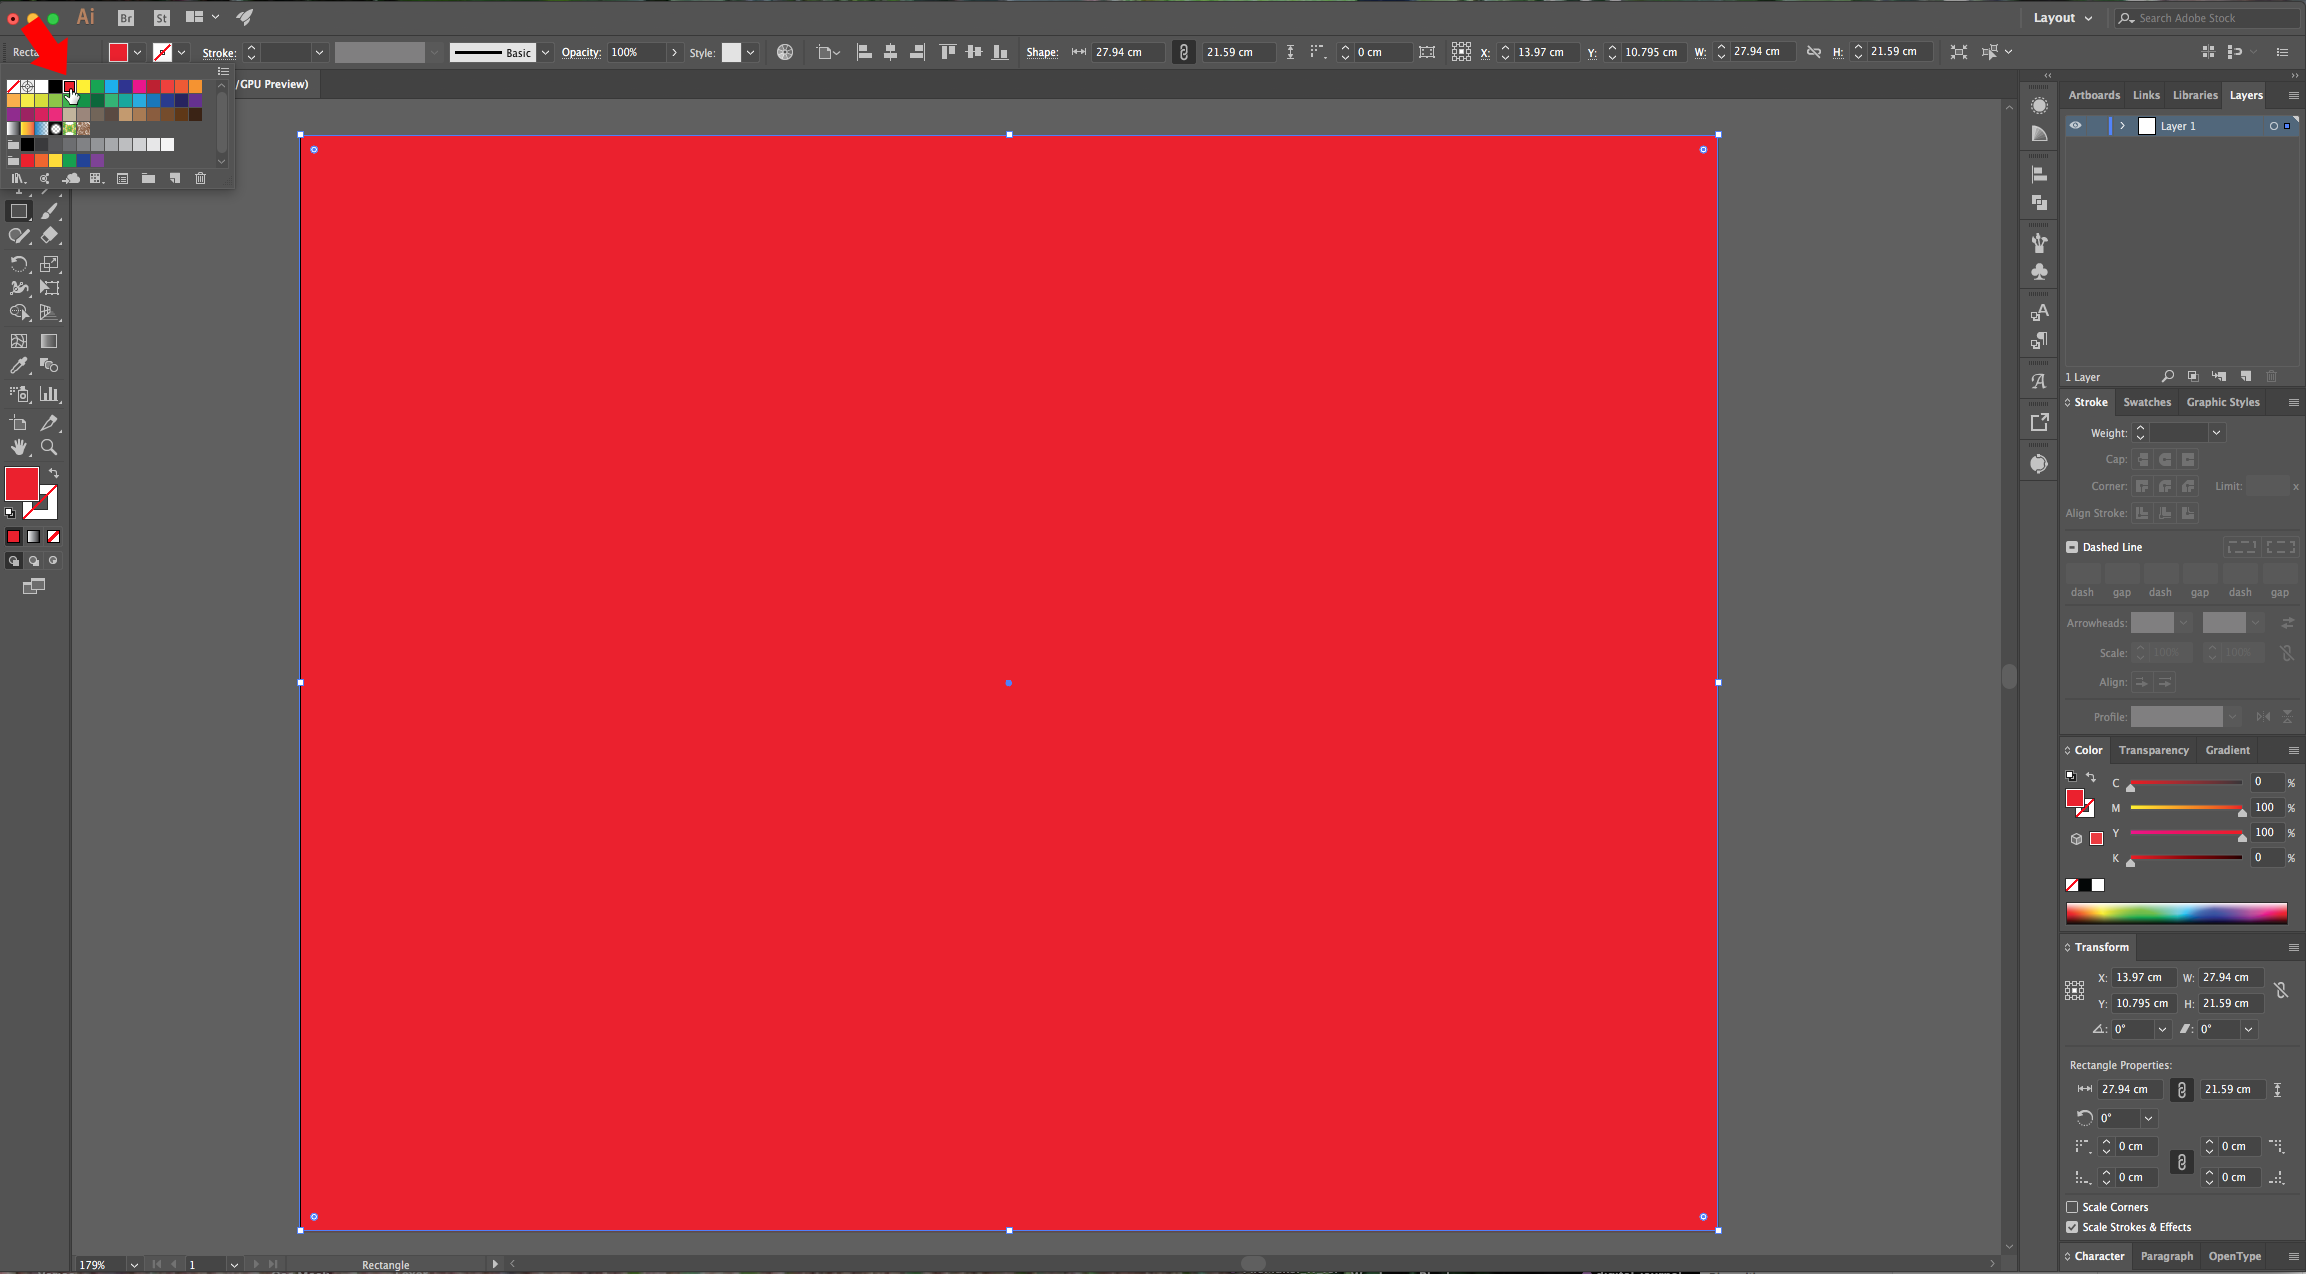
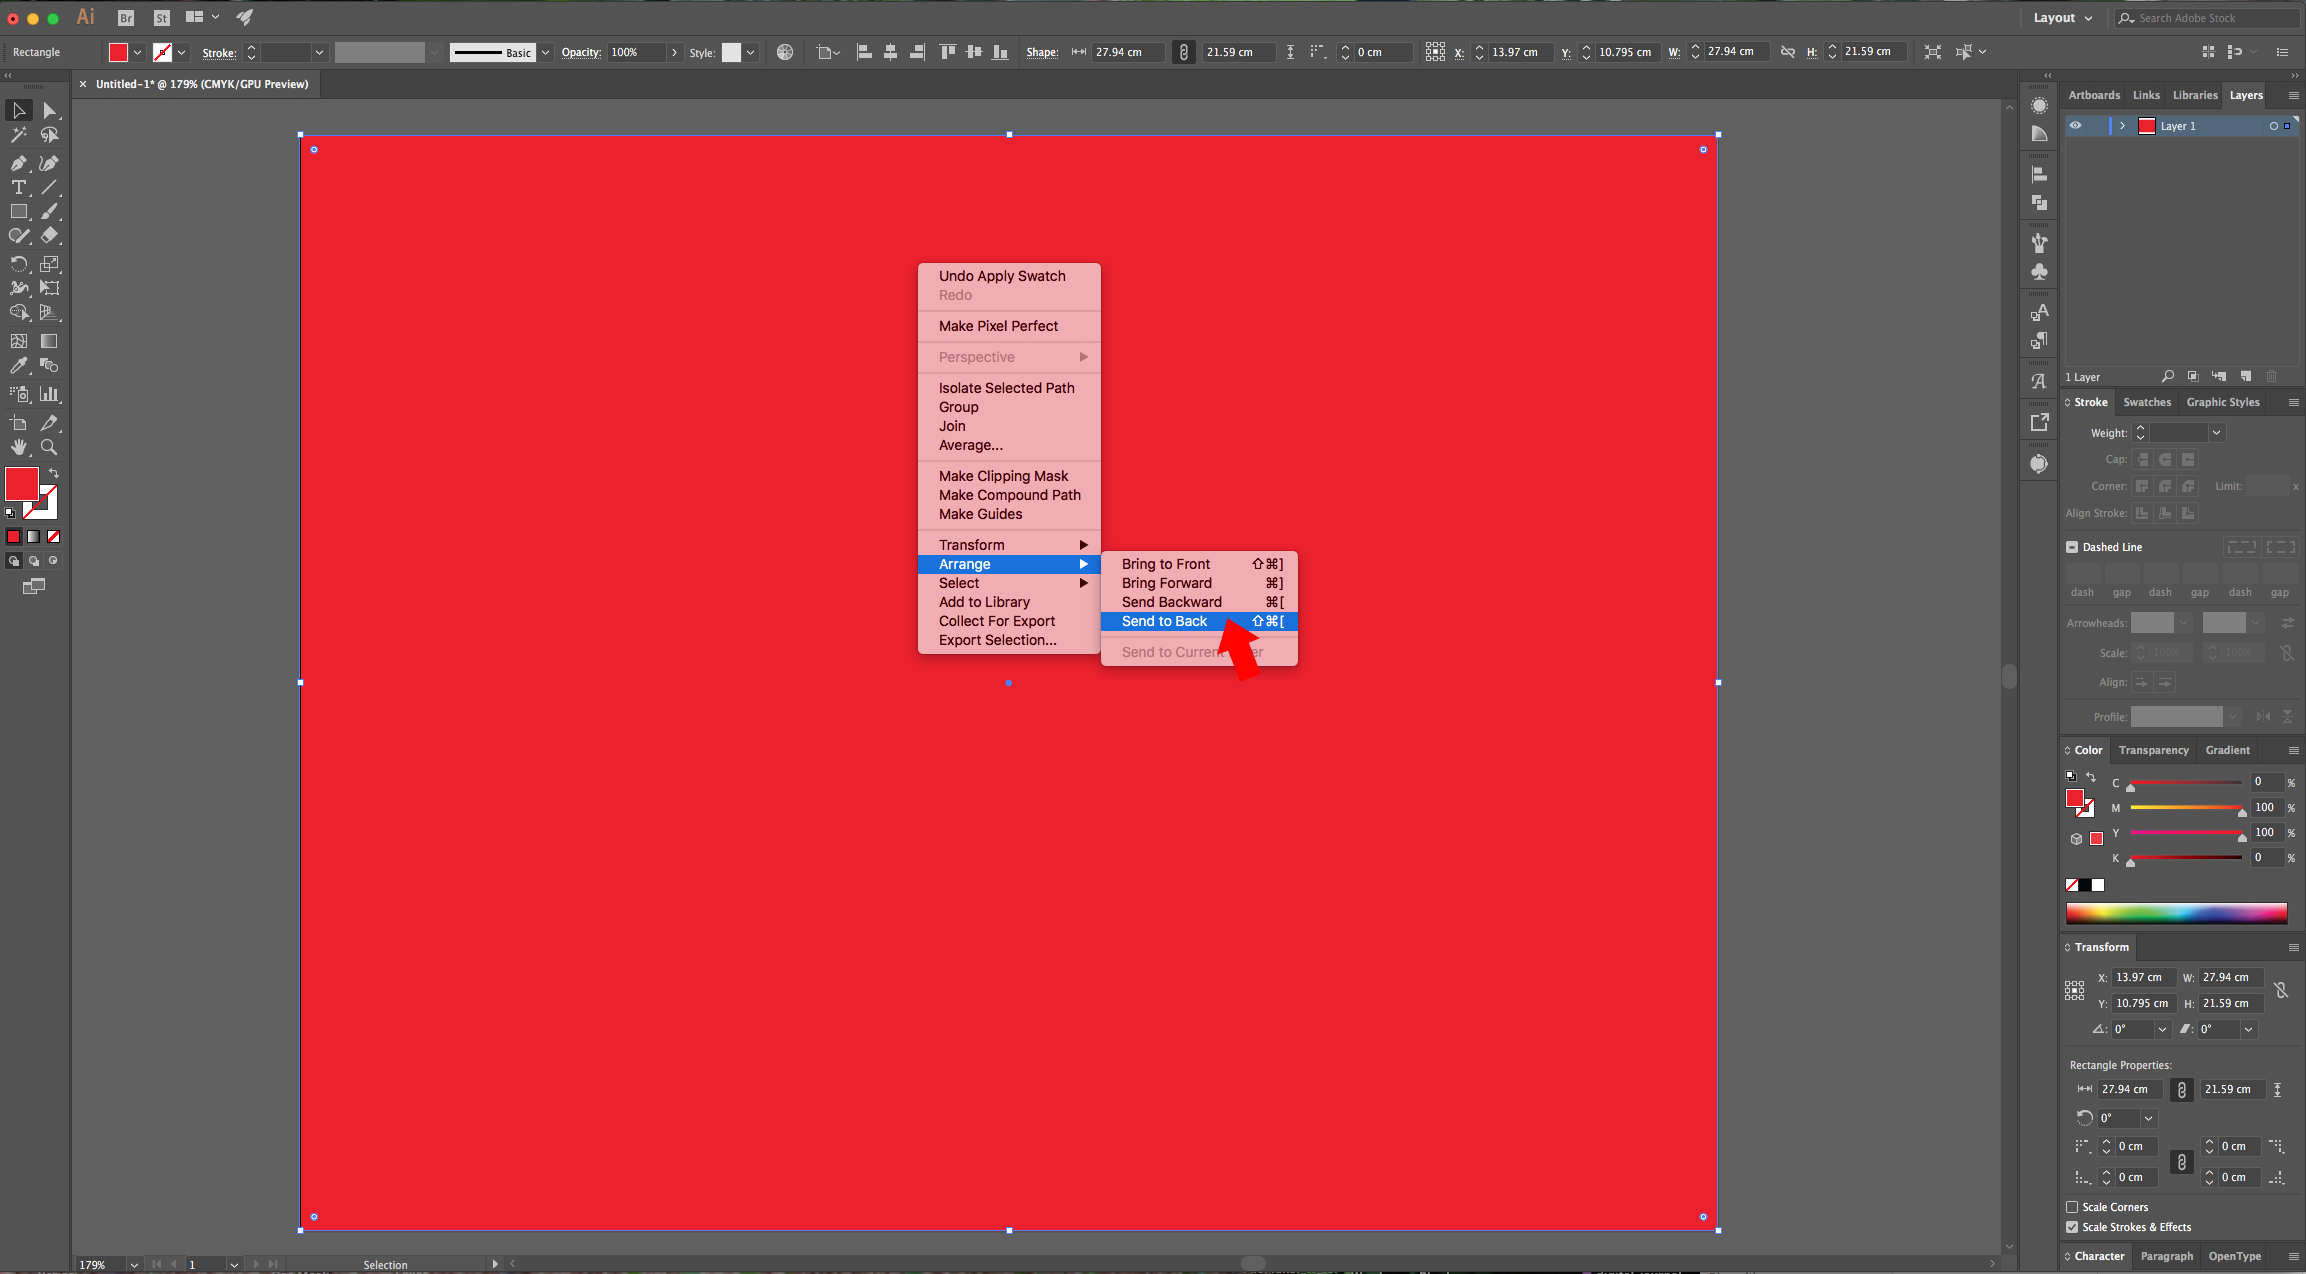
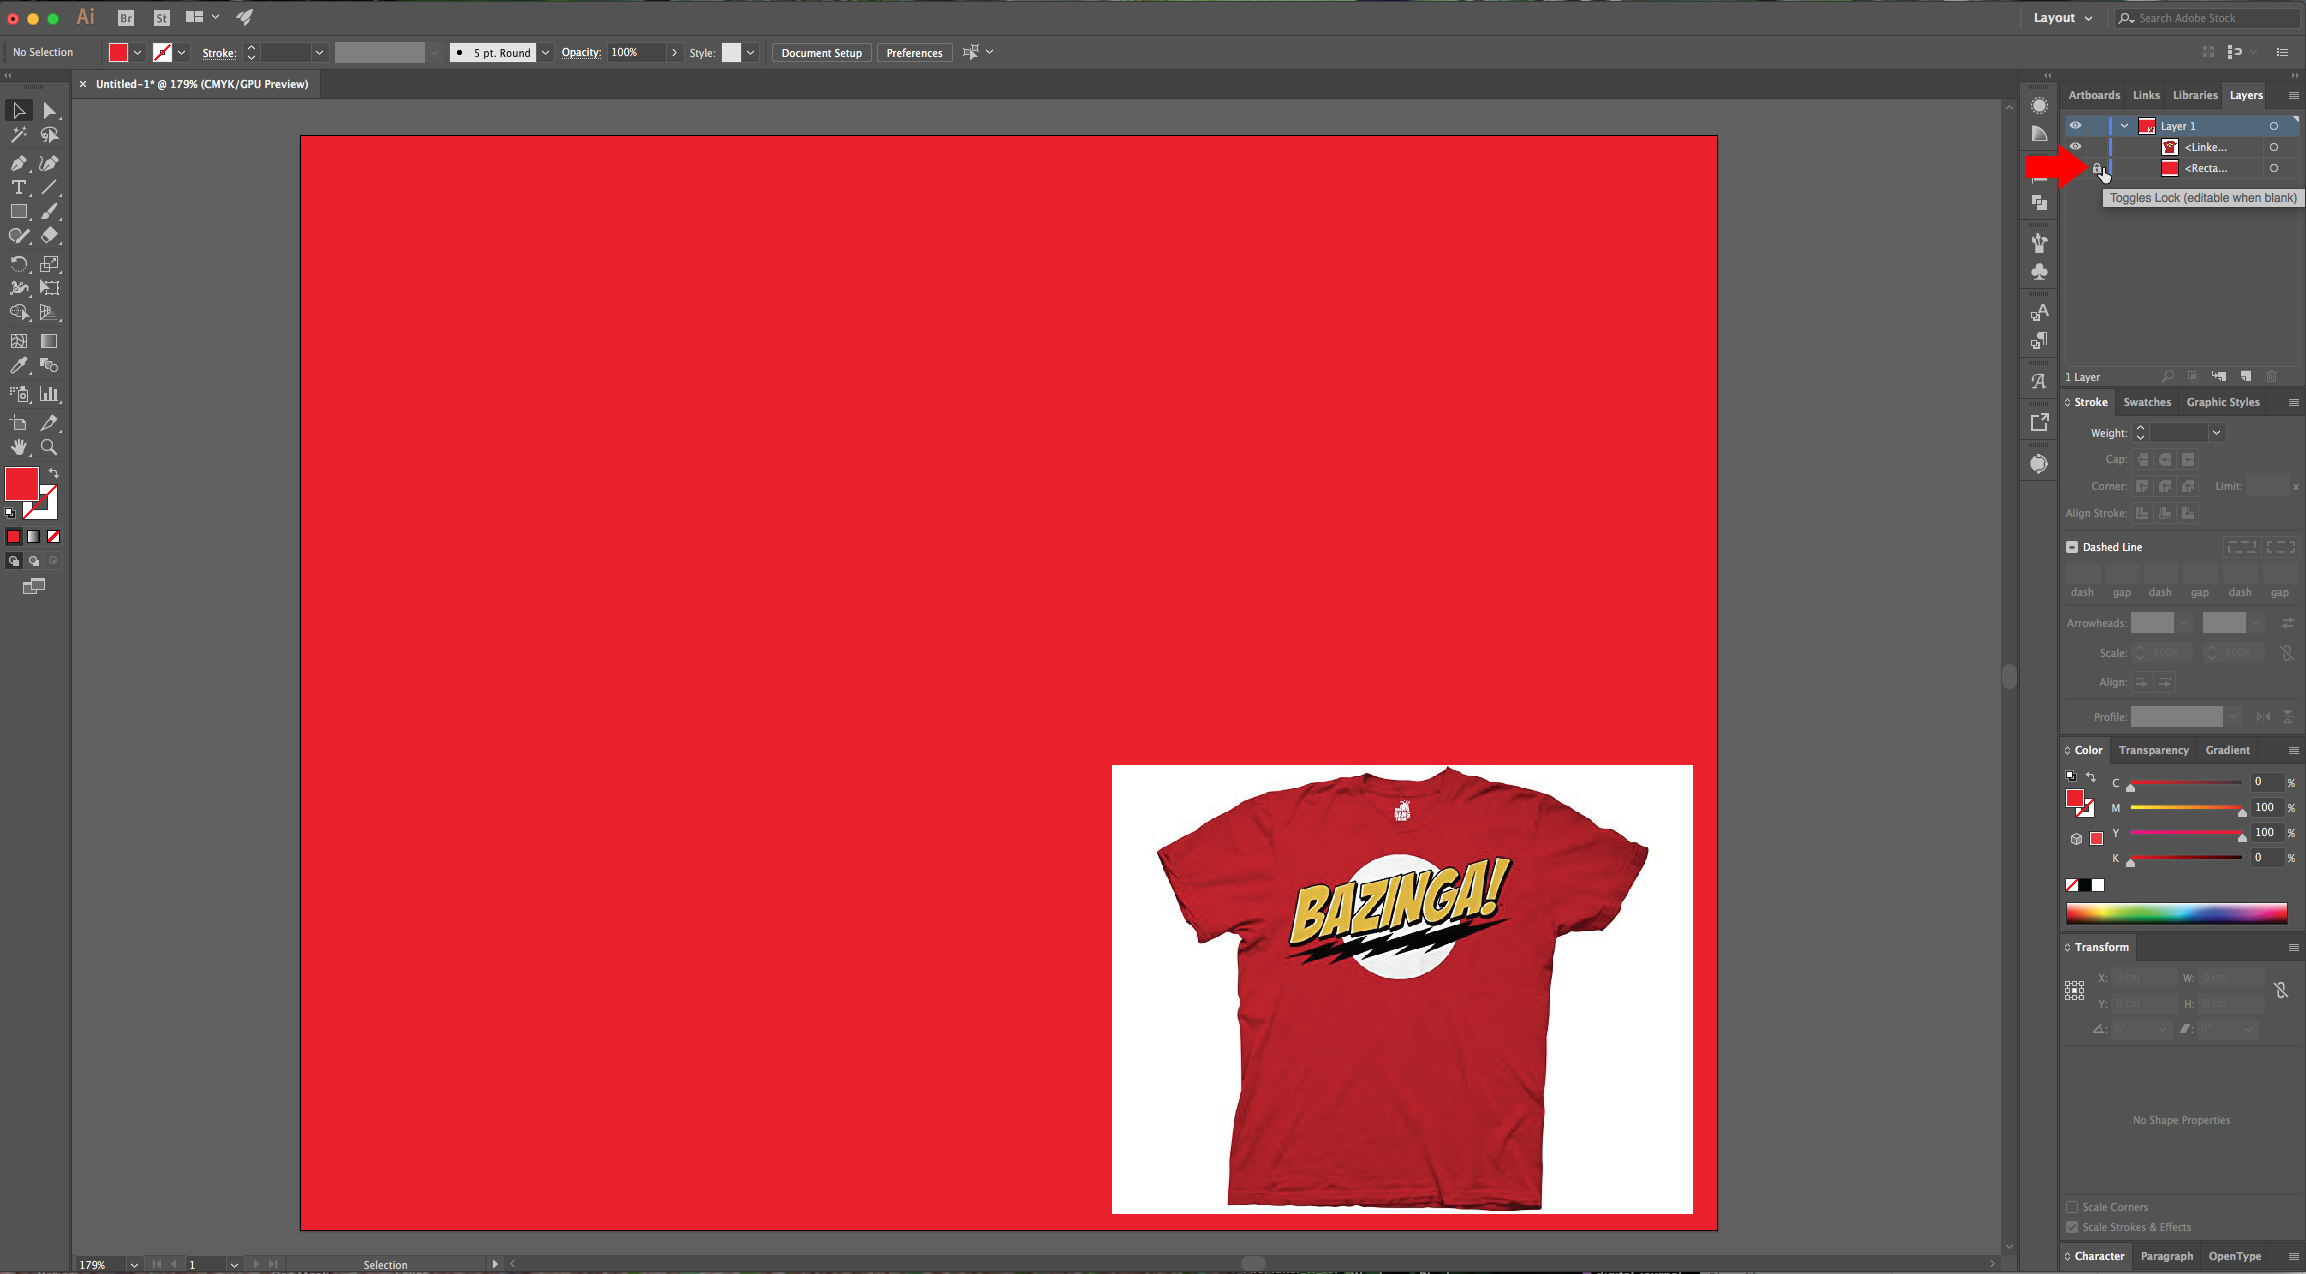
4 - Right-click on top of it and choose Arrange > Send to Back. Lock your Background Shape by clicking on the small padlock to its left in the “Layers Panel”.
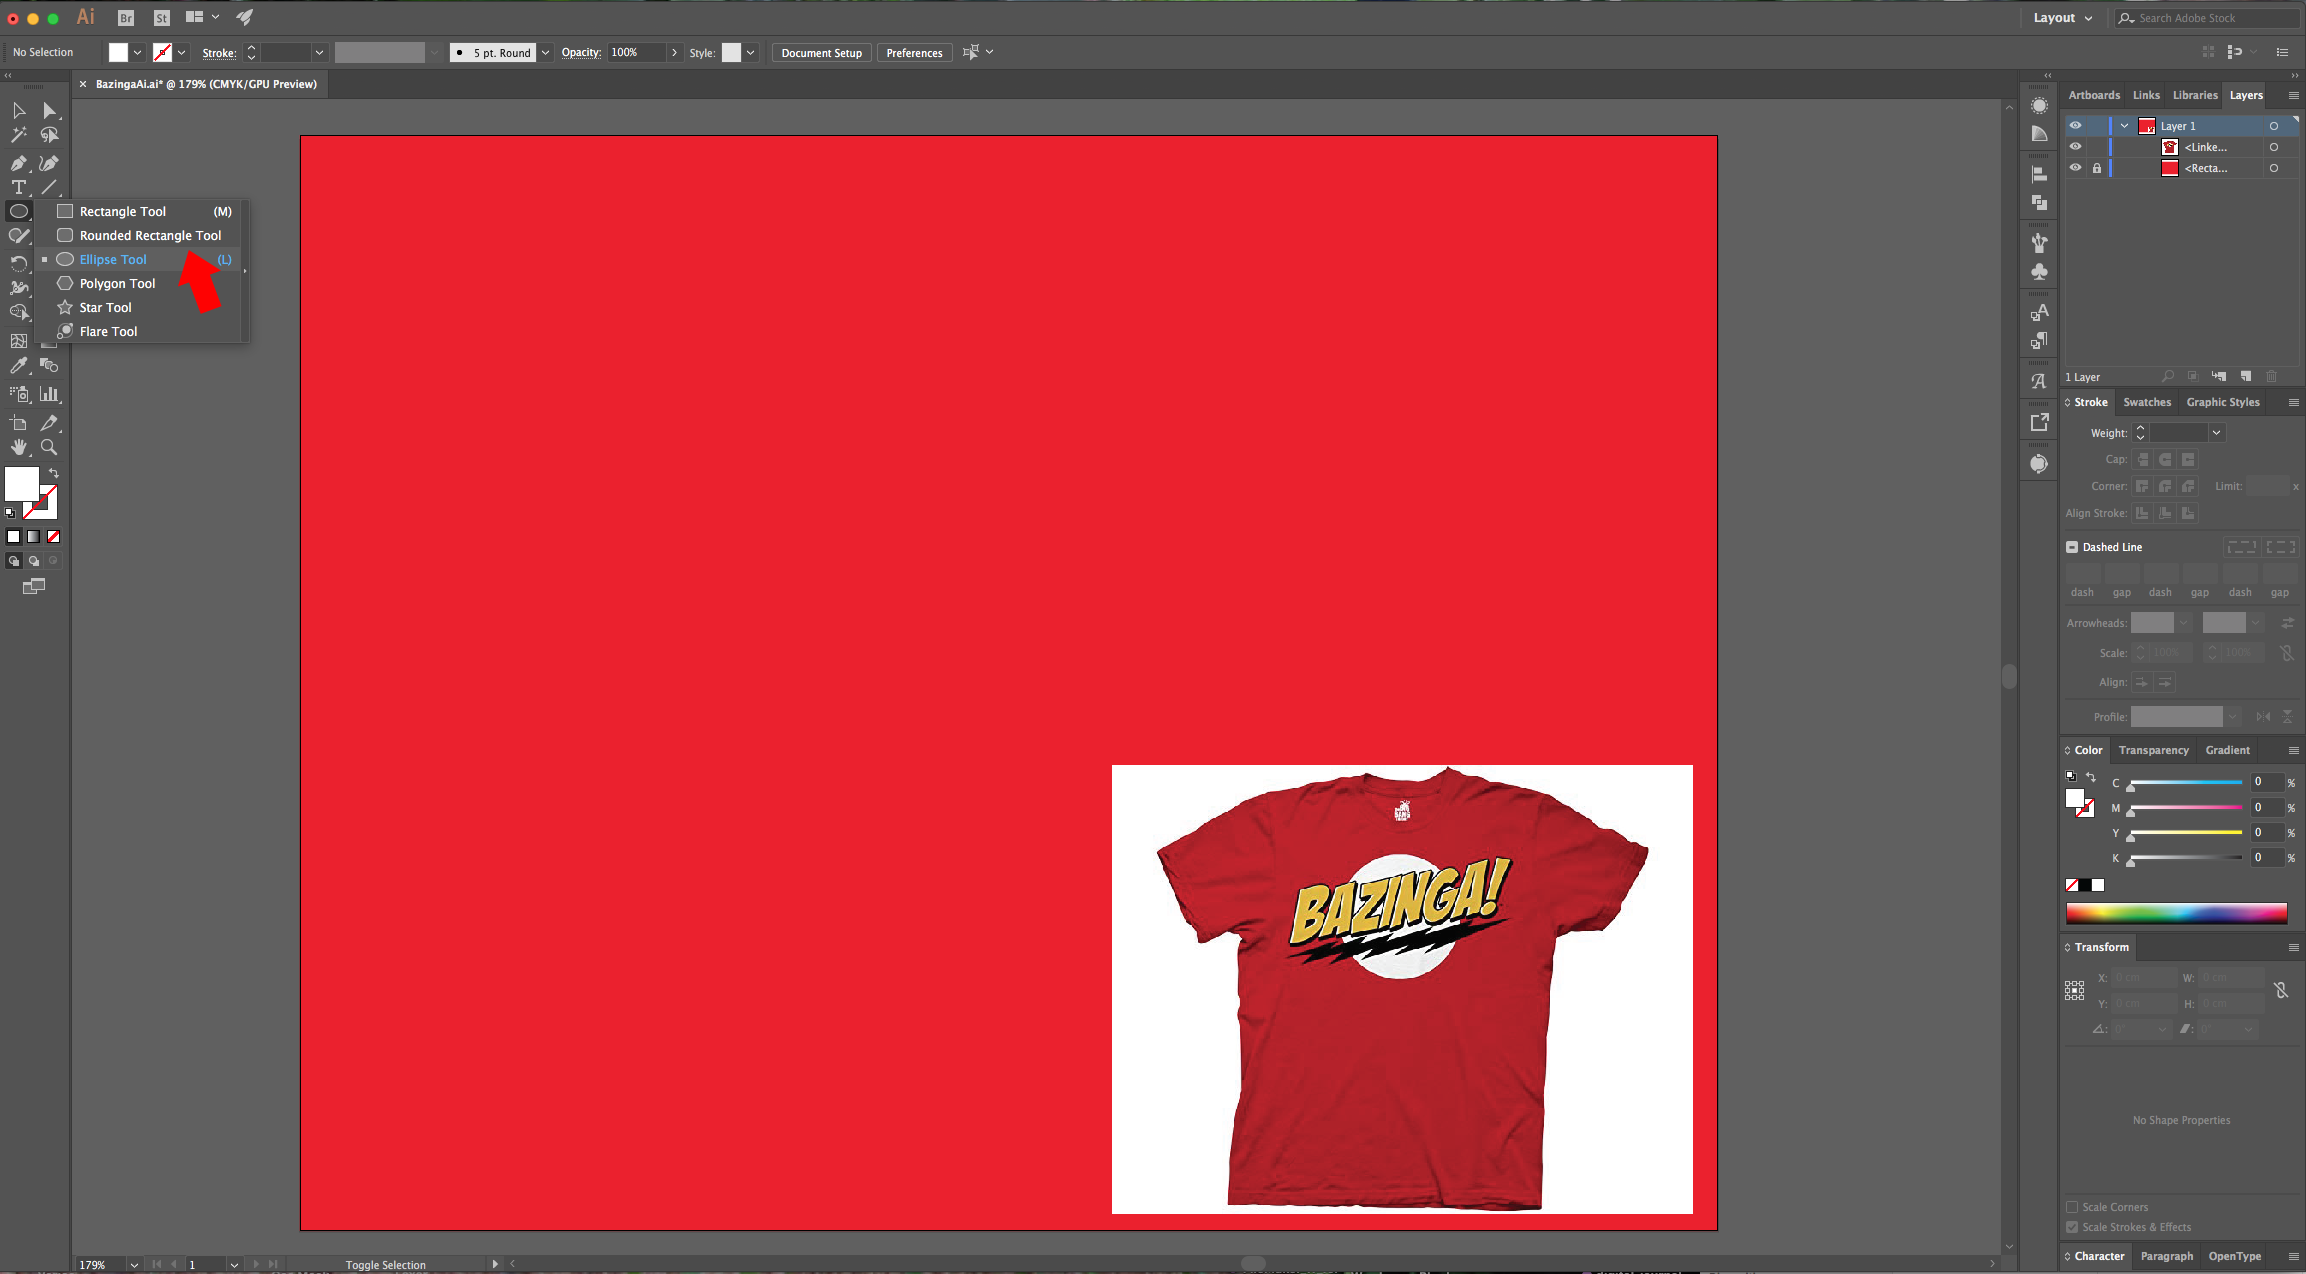
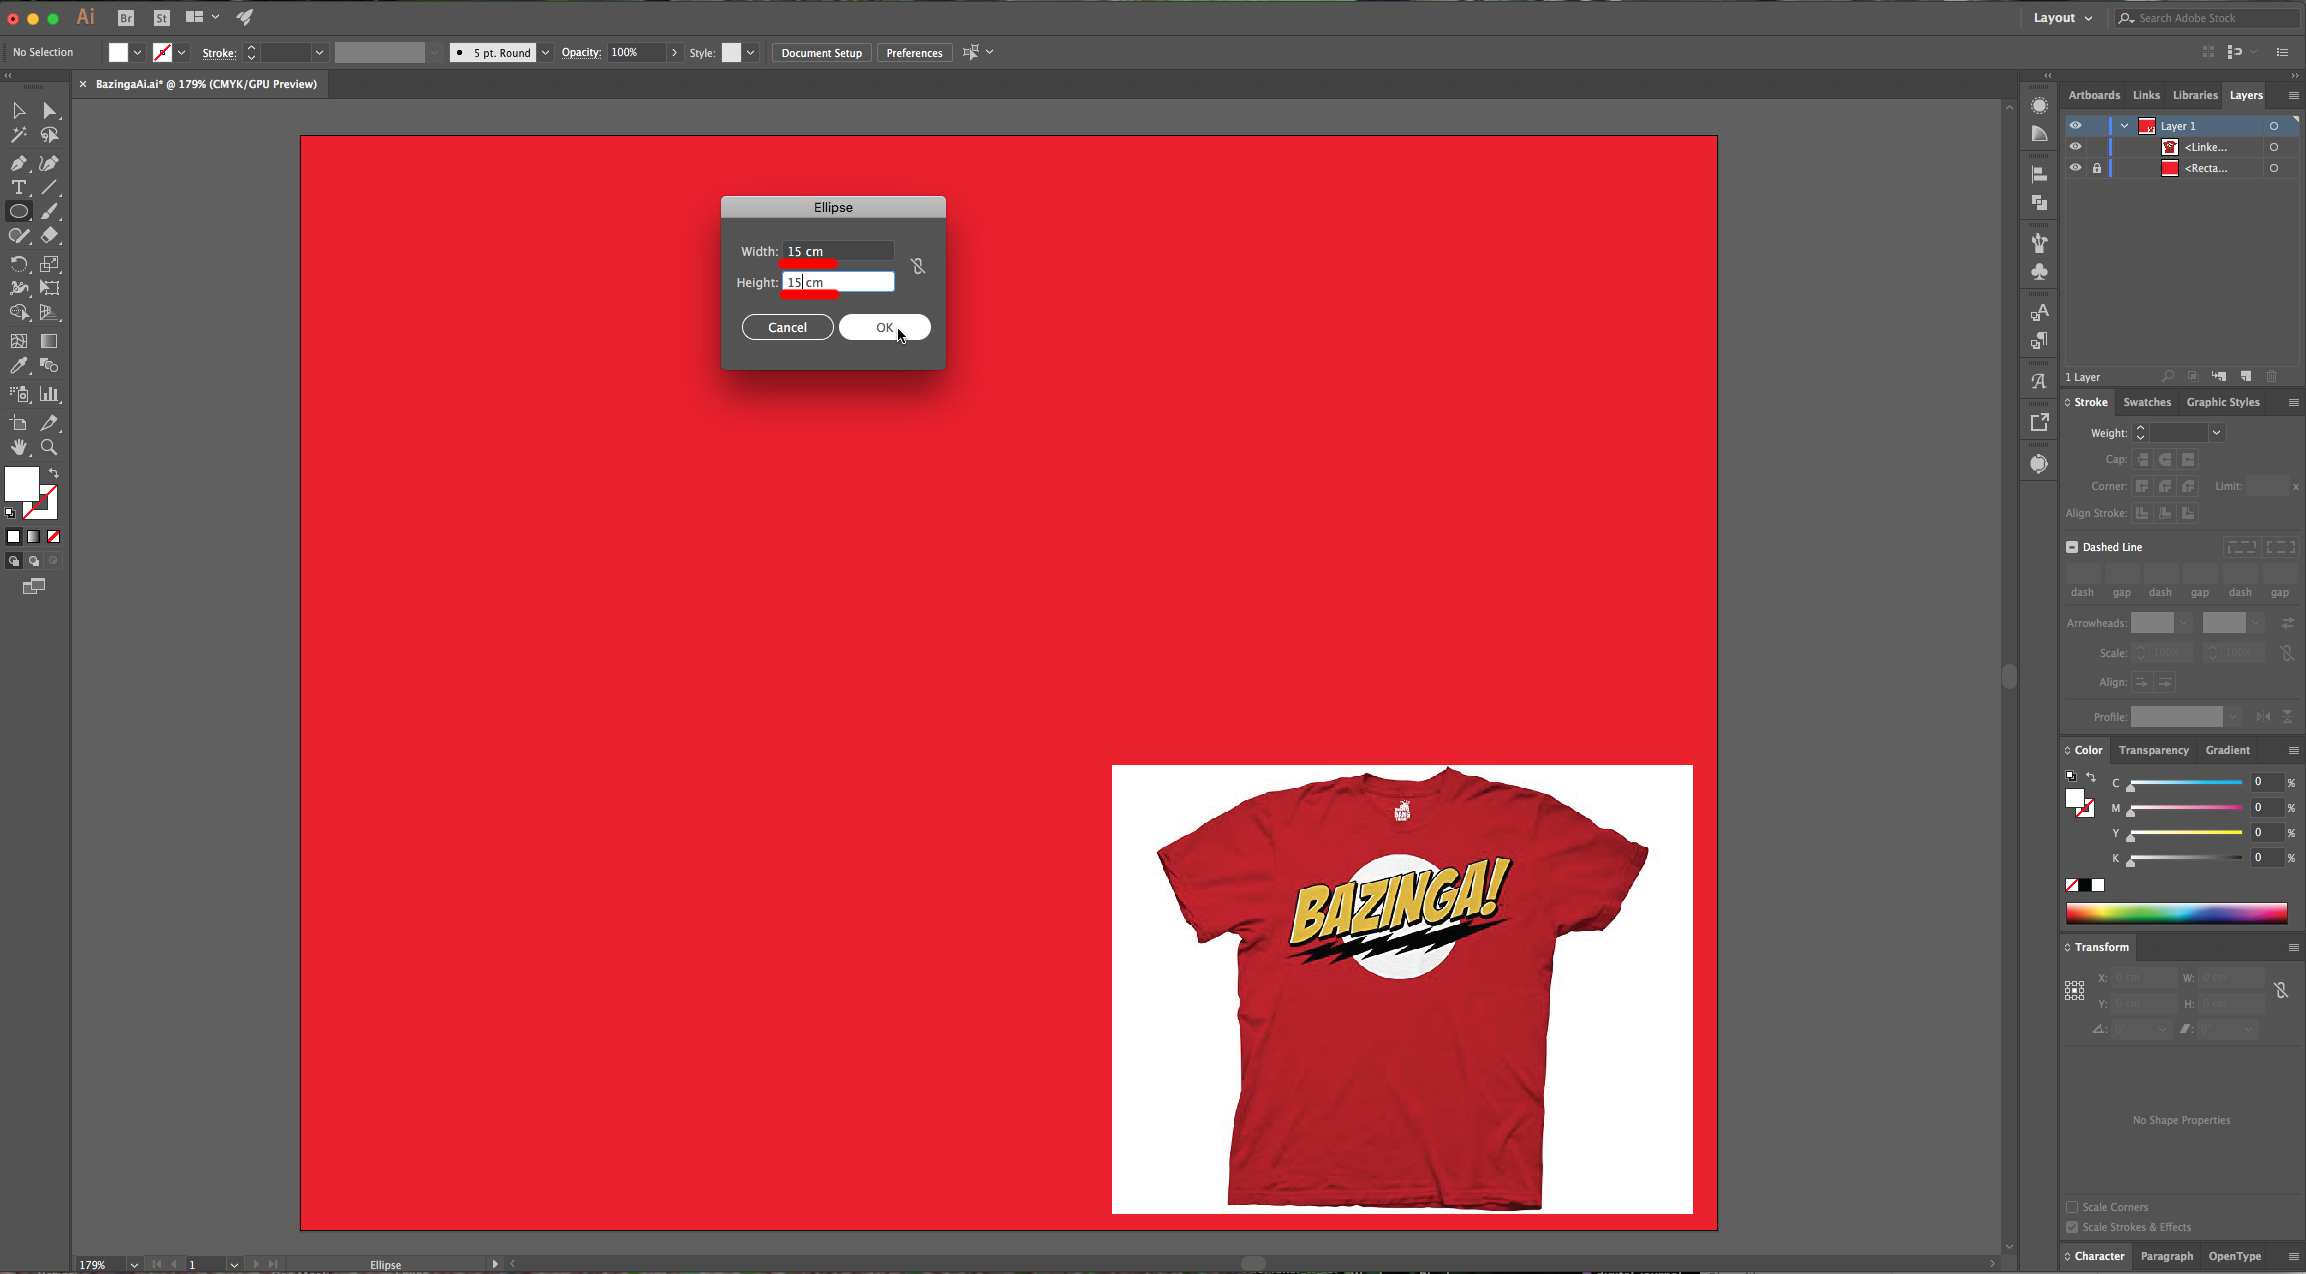
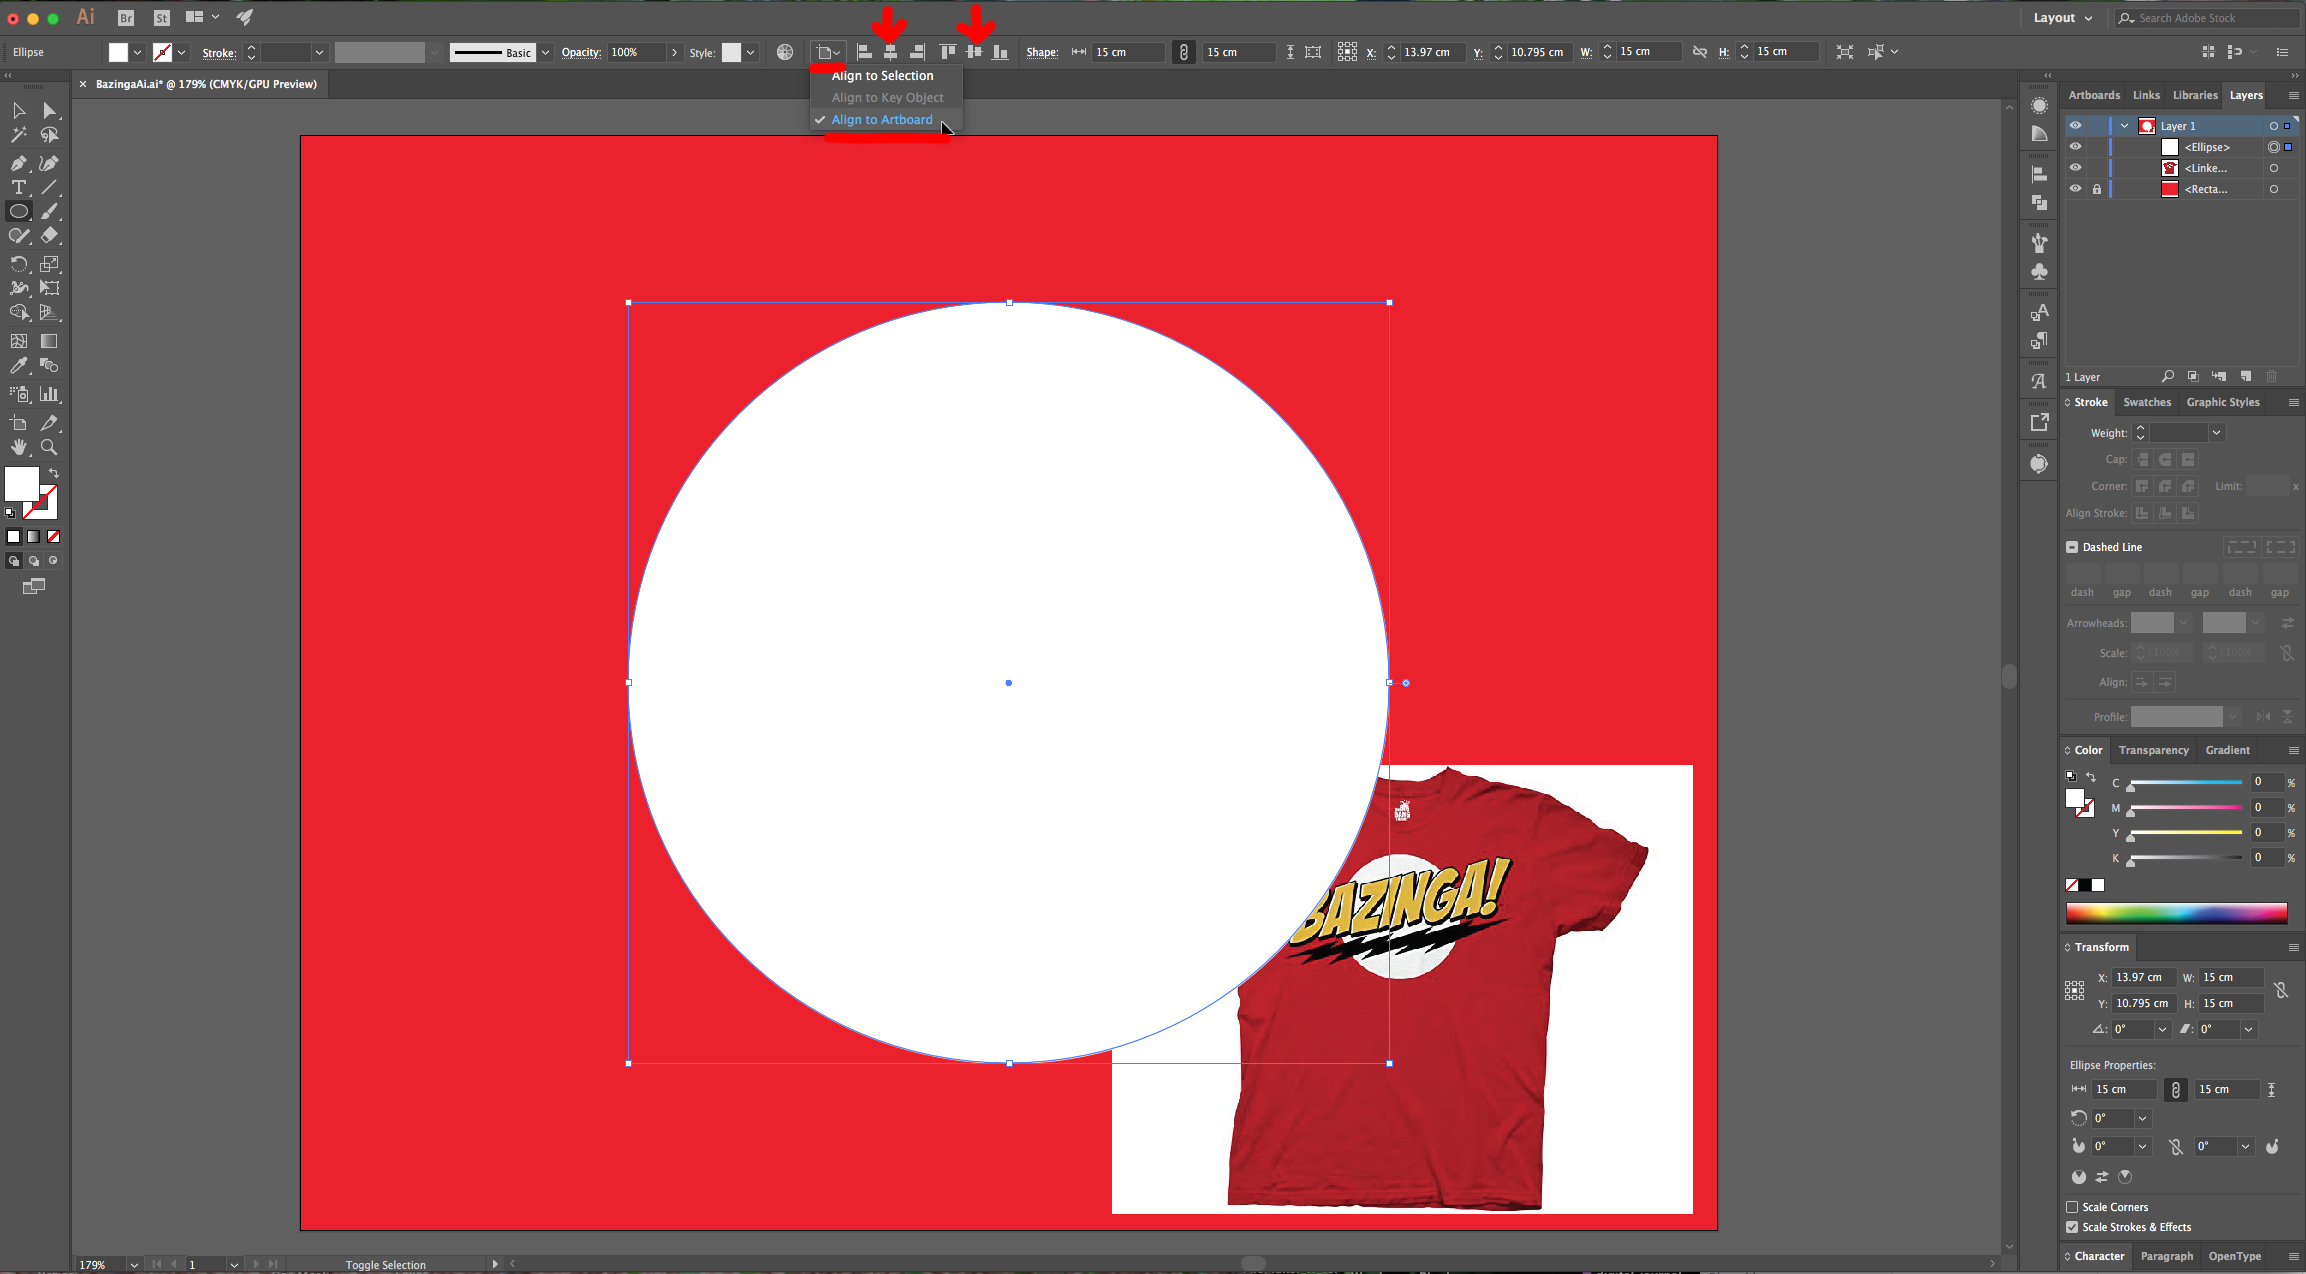
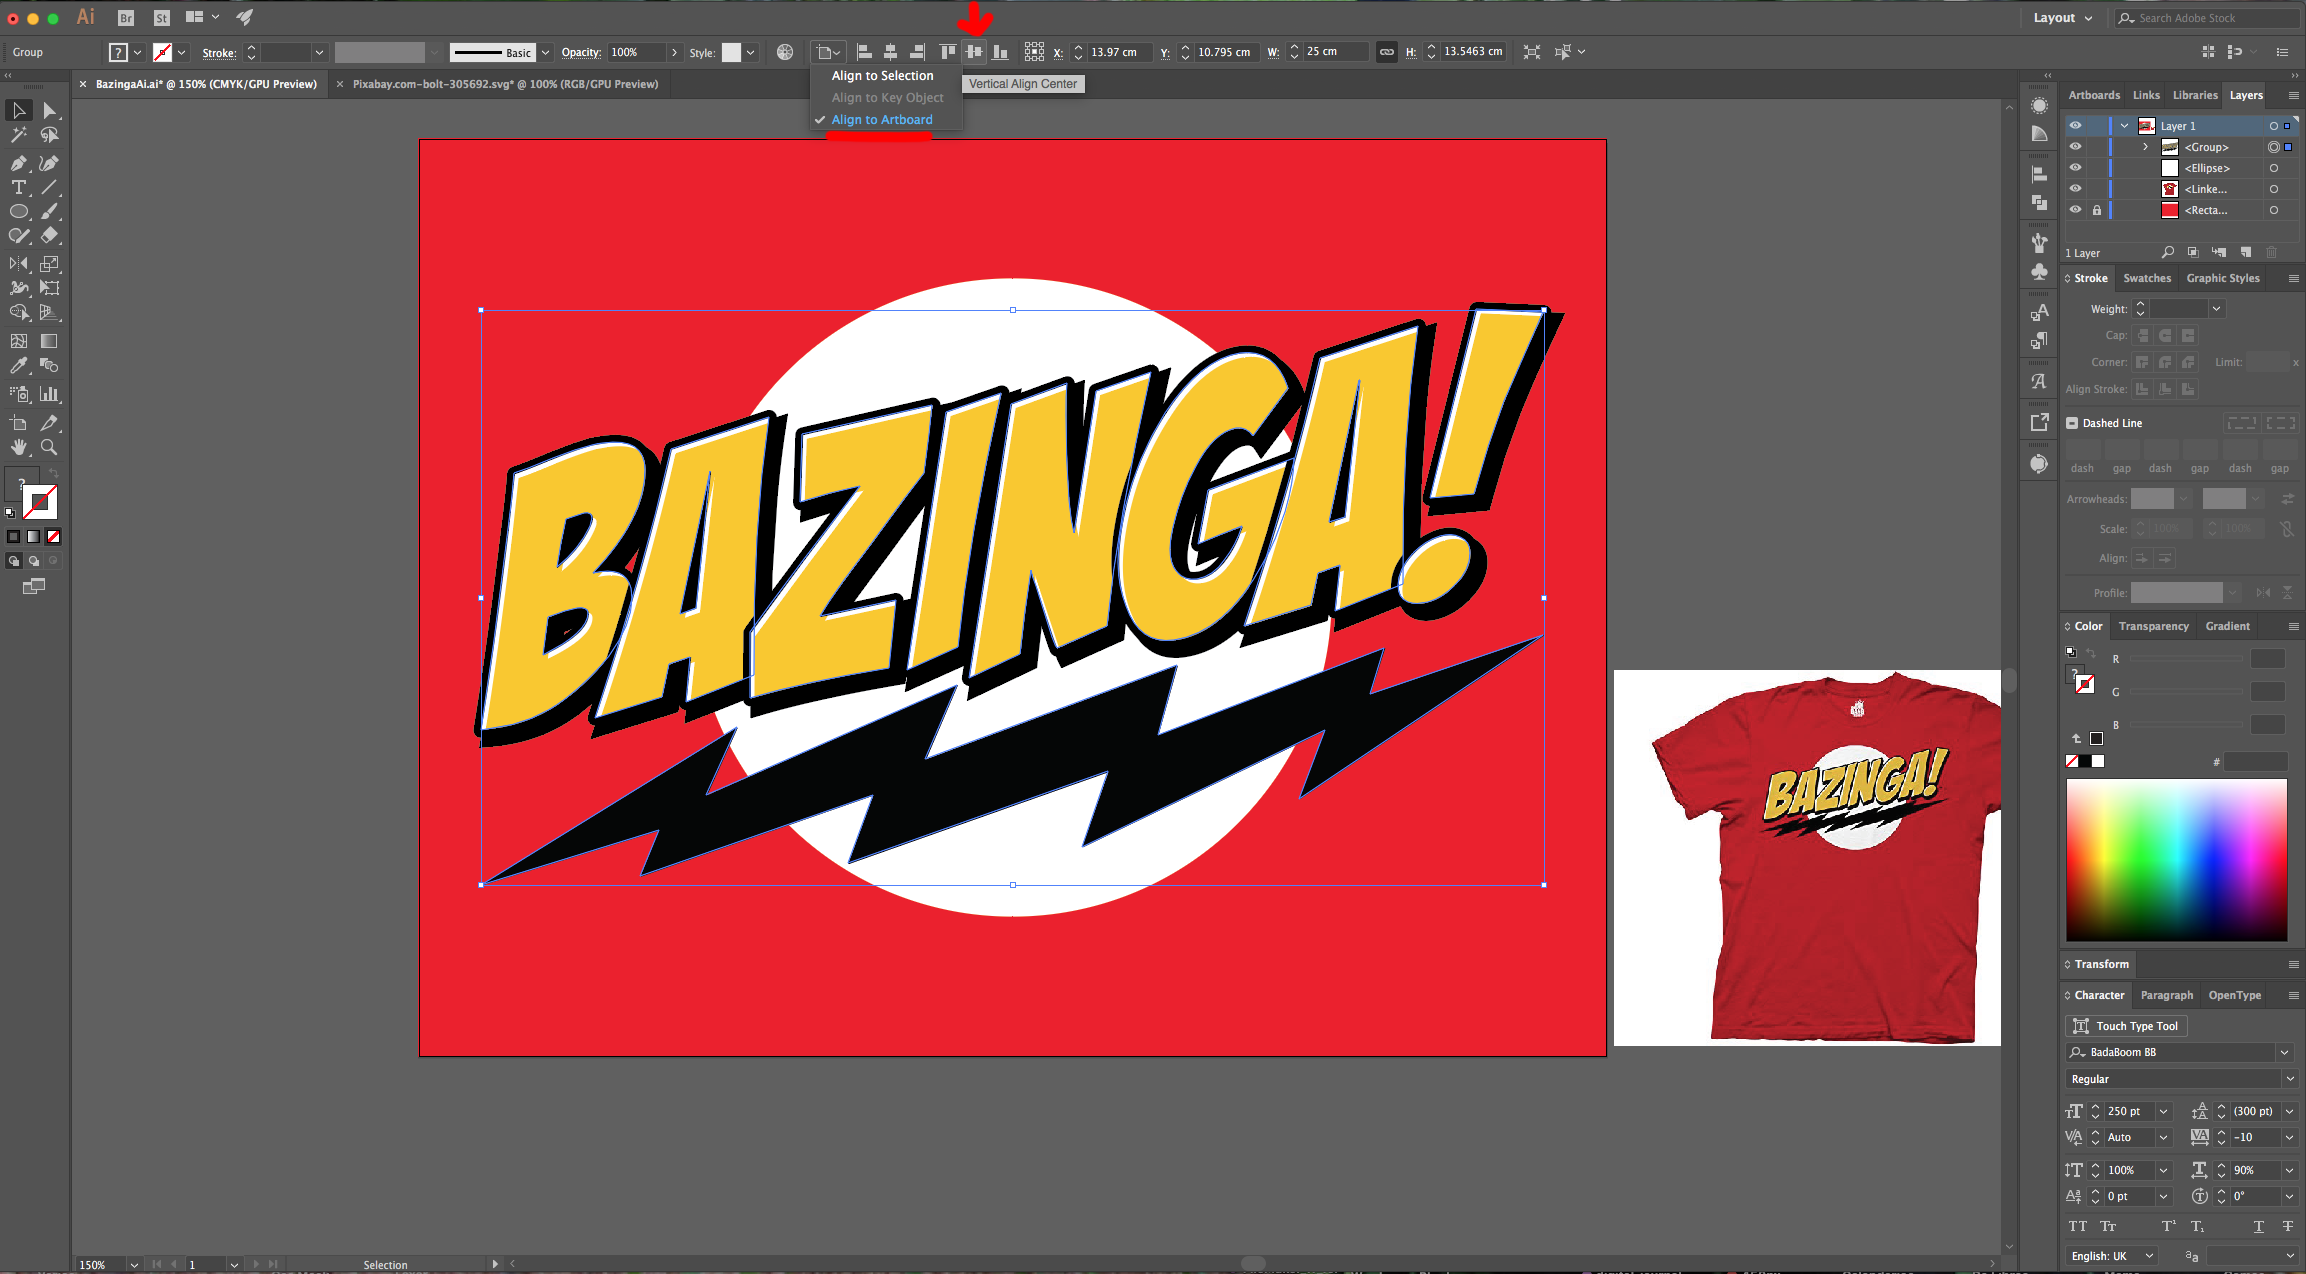
5 - Select the “Ellipse Tool” (L), click inside your document and create a 15 x 15 cm Circle. Fill it with White and center it using the “Horizontal and Vertical Align Center” options on your Top Menu making sure that “Align to Artboard” is selected. Or use the same options in the “Align Panel”.
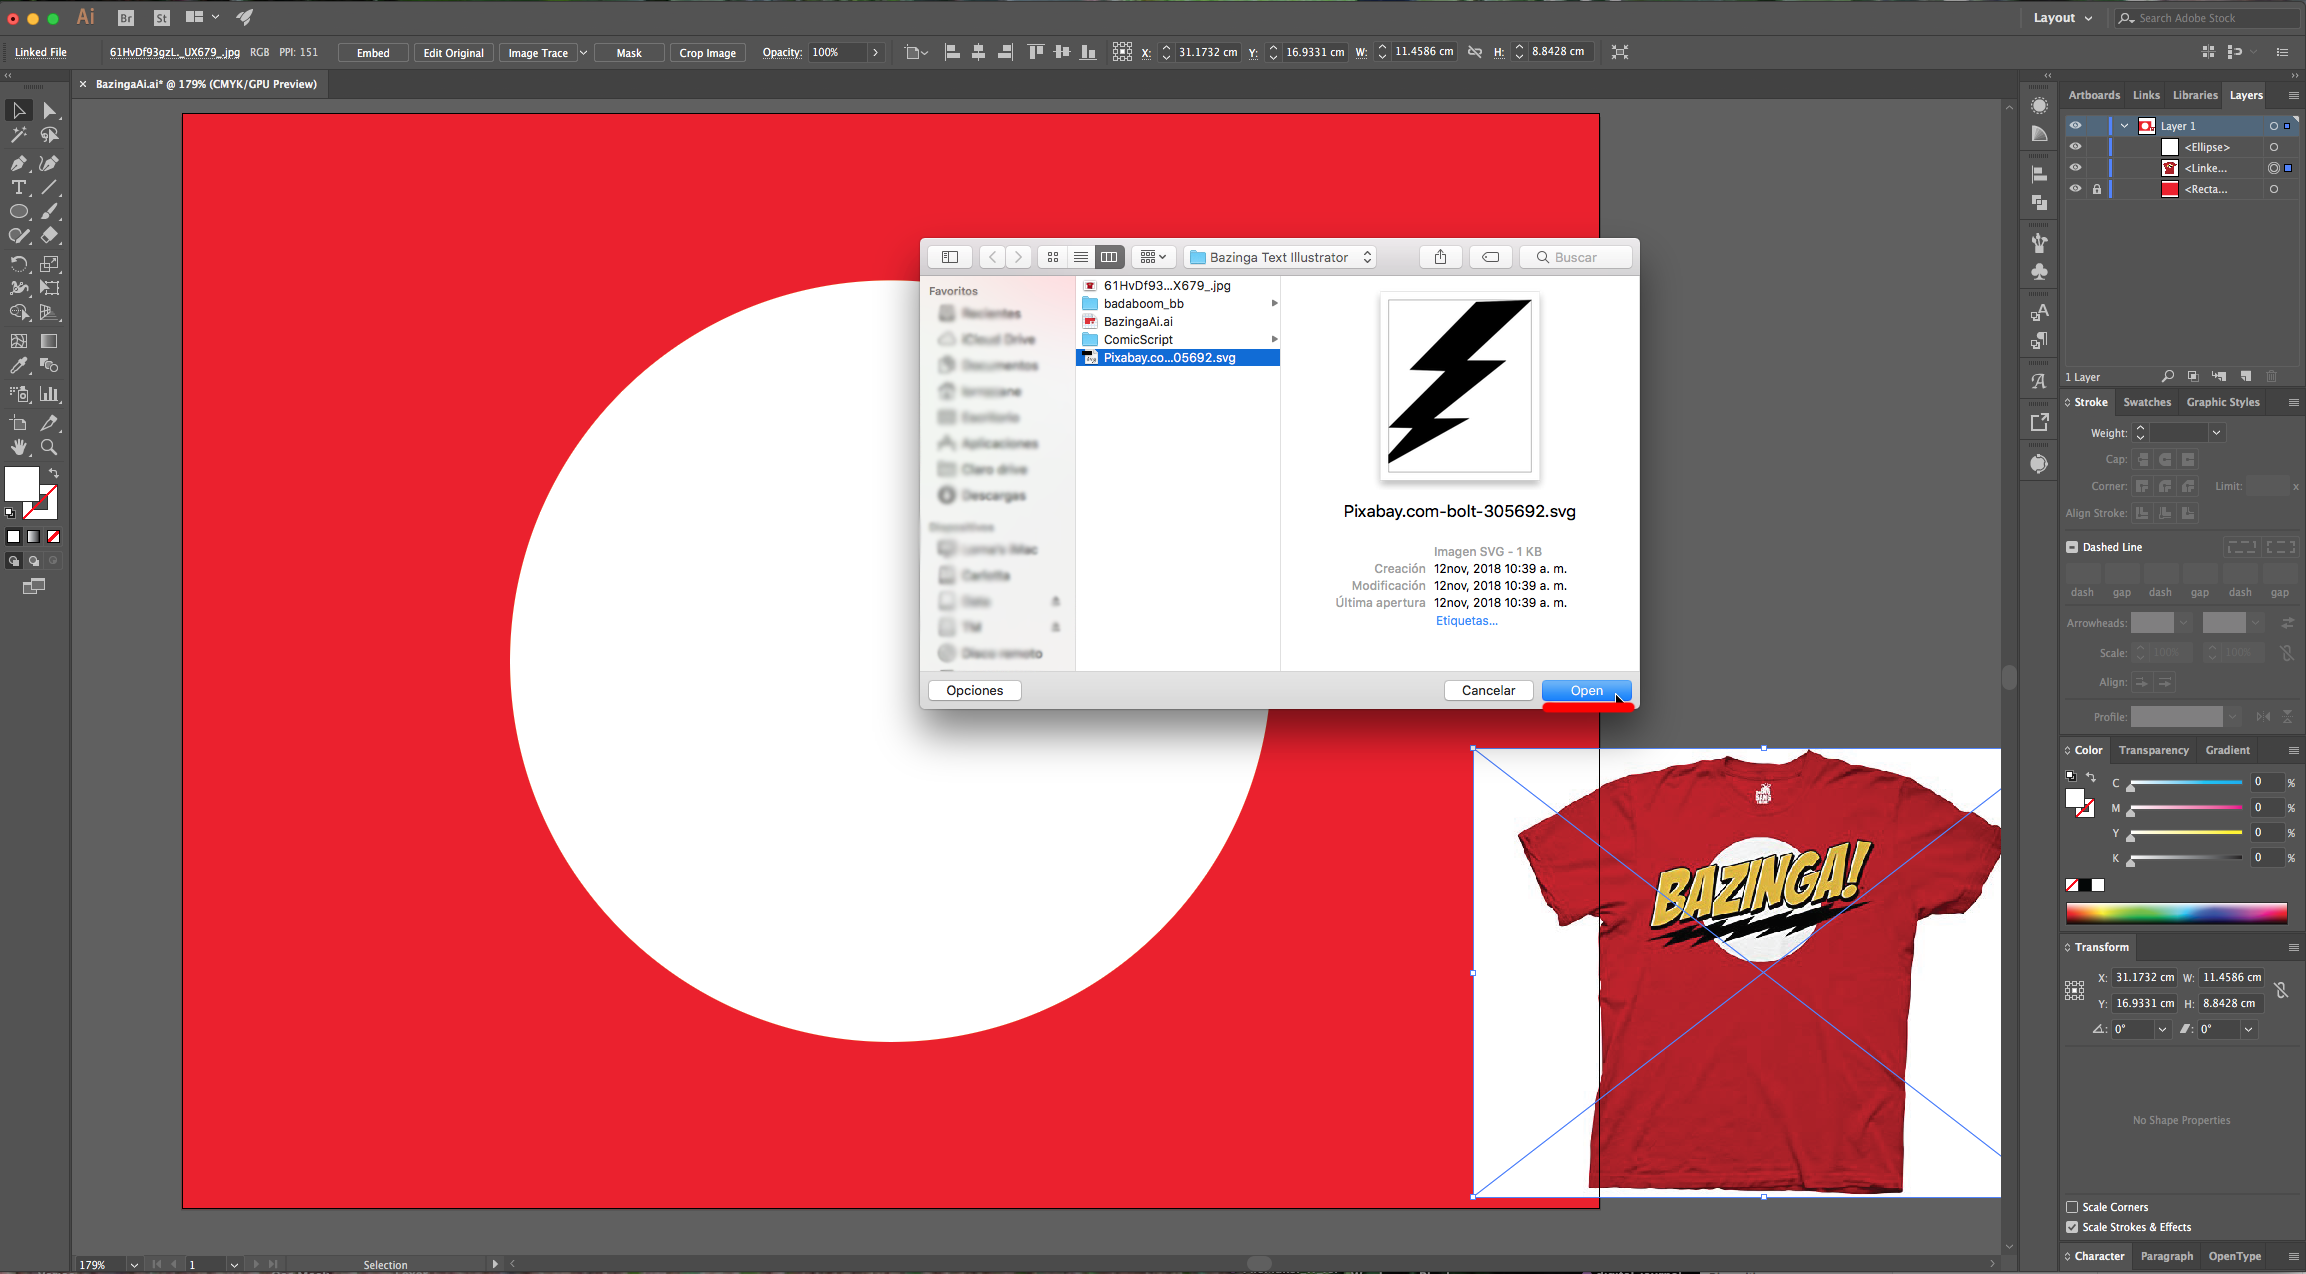
6 - Open the “Lightning” vector file, “Copy” it (Command/Control + C) and “Paste” it into your document (Command/Control + V).
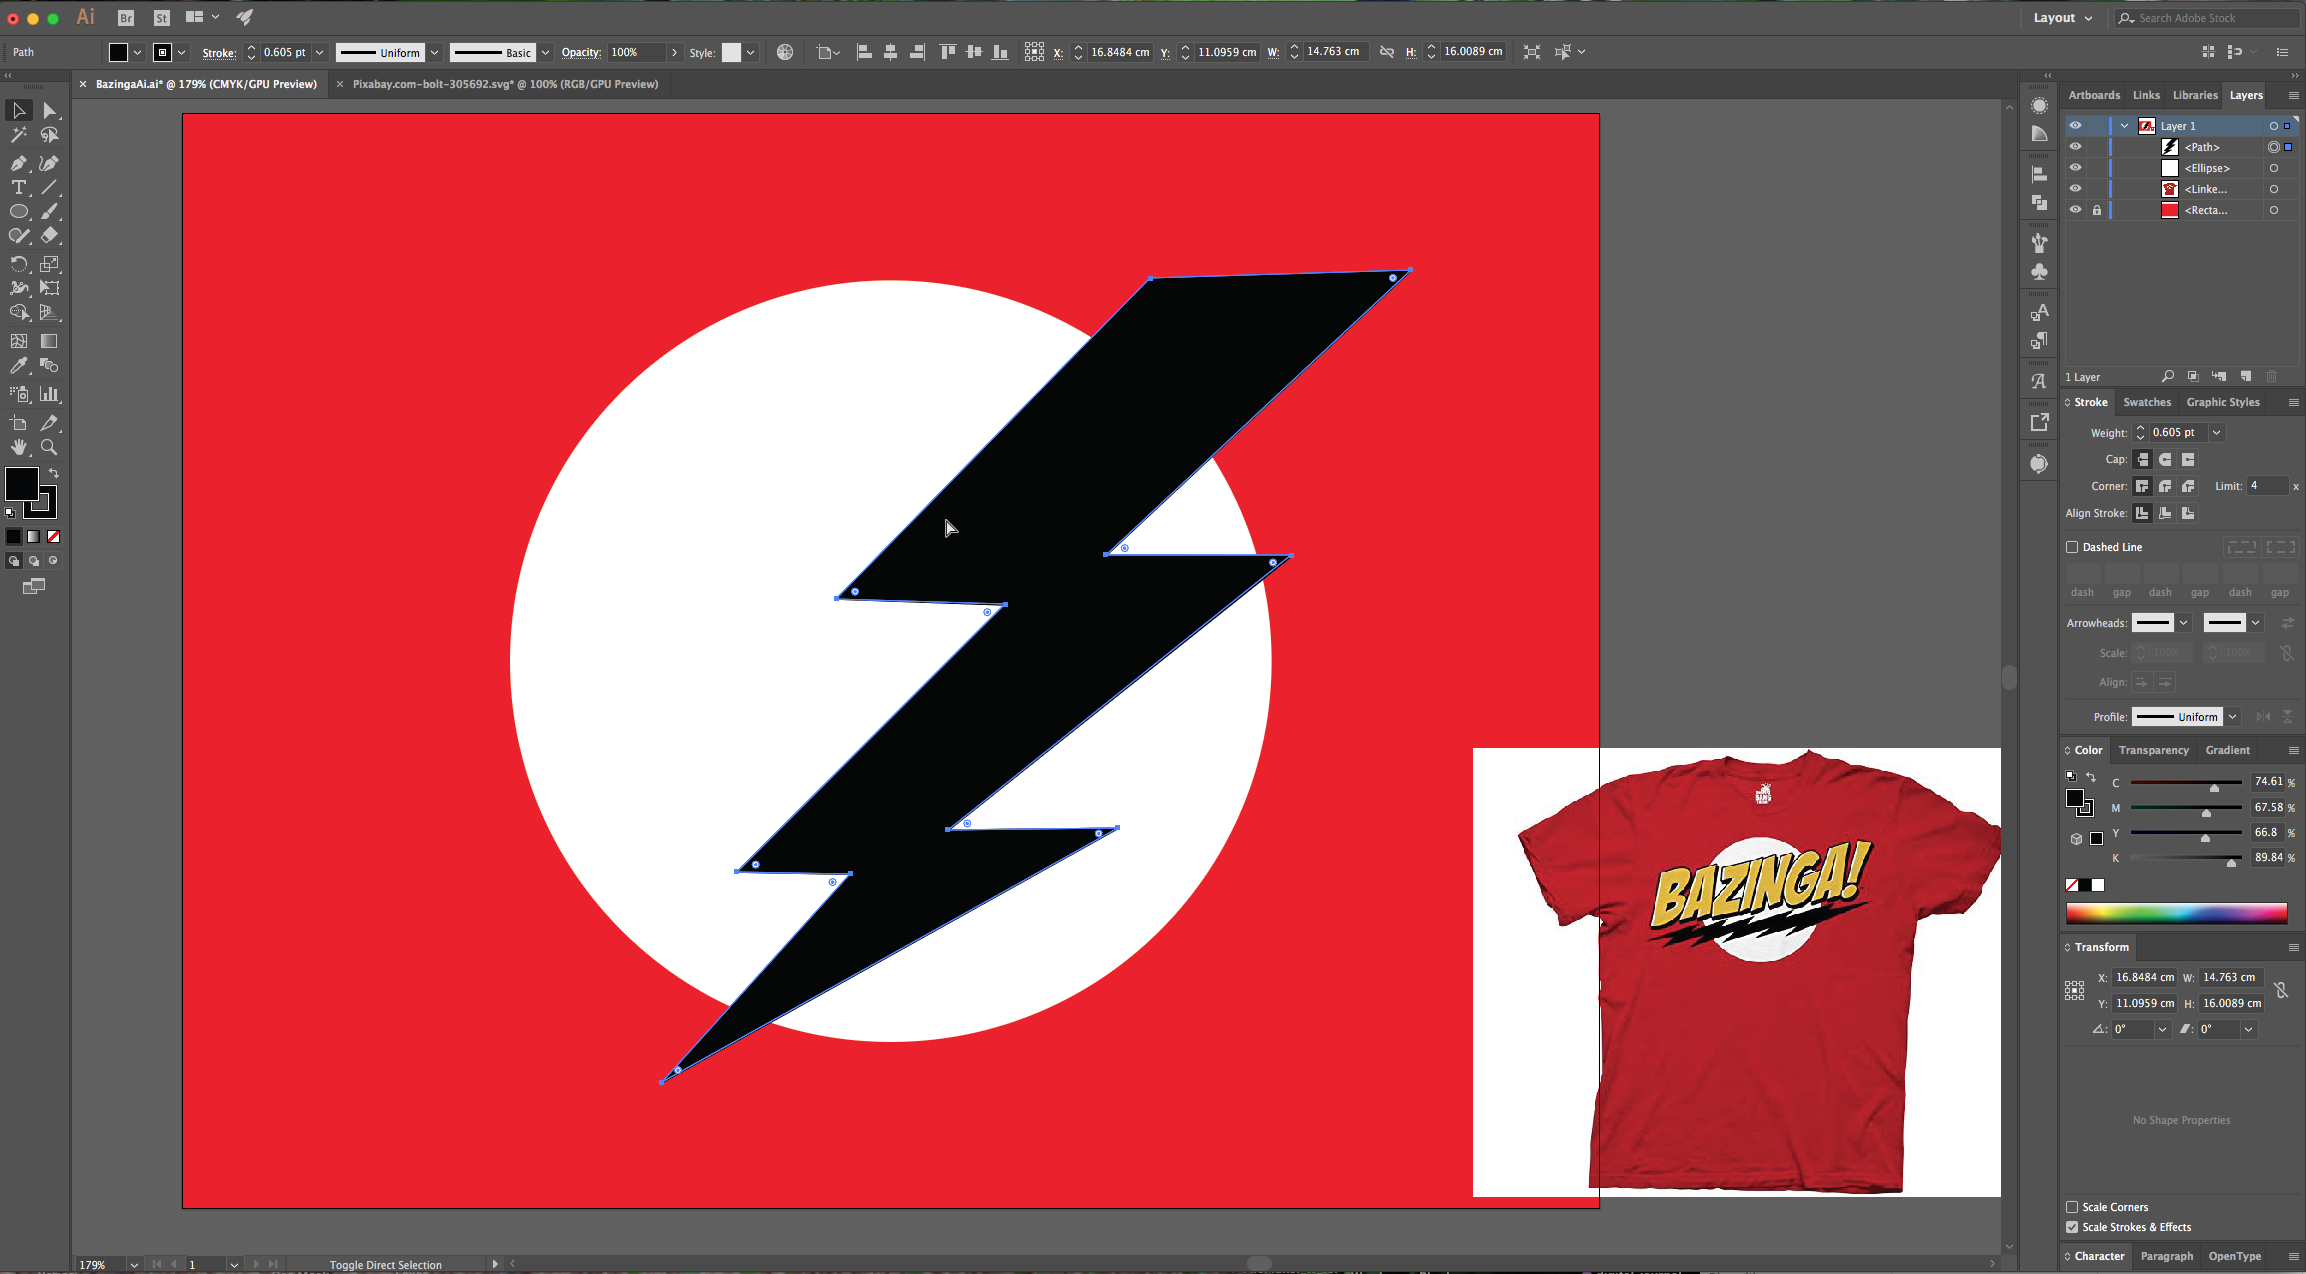
7 - Our lightning is vertical and has just one end, so we will need to modify it. Go to the “Appearance Panel” and click on the “Effects Menu” at the bottom-left. Go to Distort & Transform > Transform… use a 256° “Rotate” Angle, check the “Reflect Y” box. Go to Object > Expand Appearance.
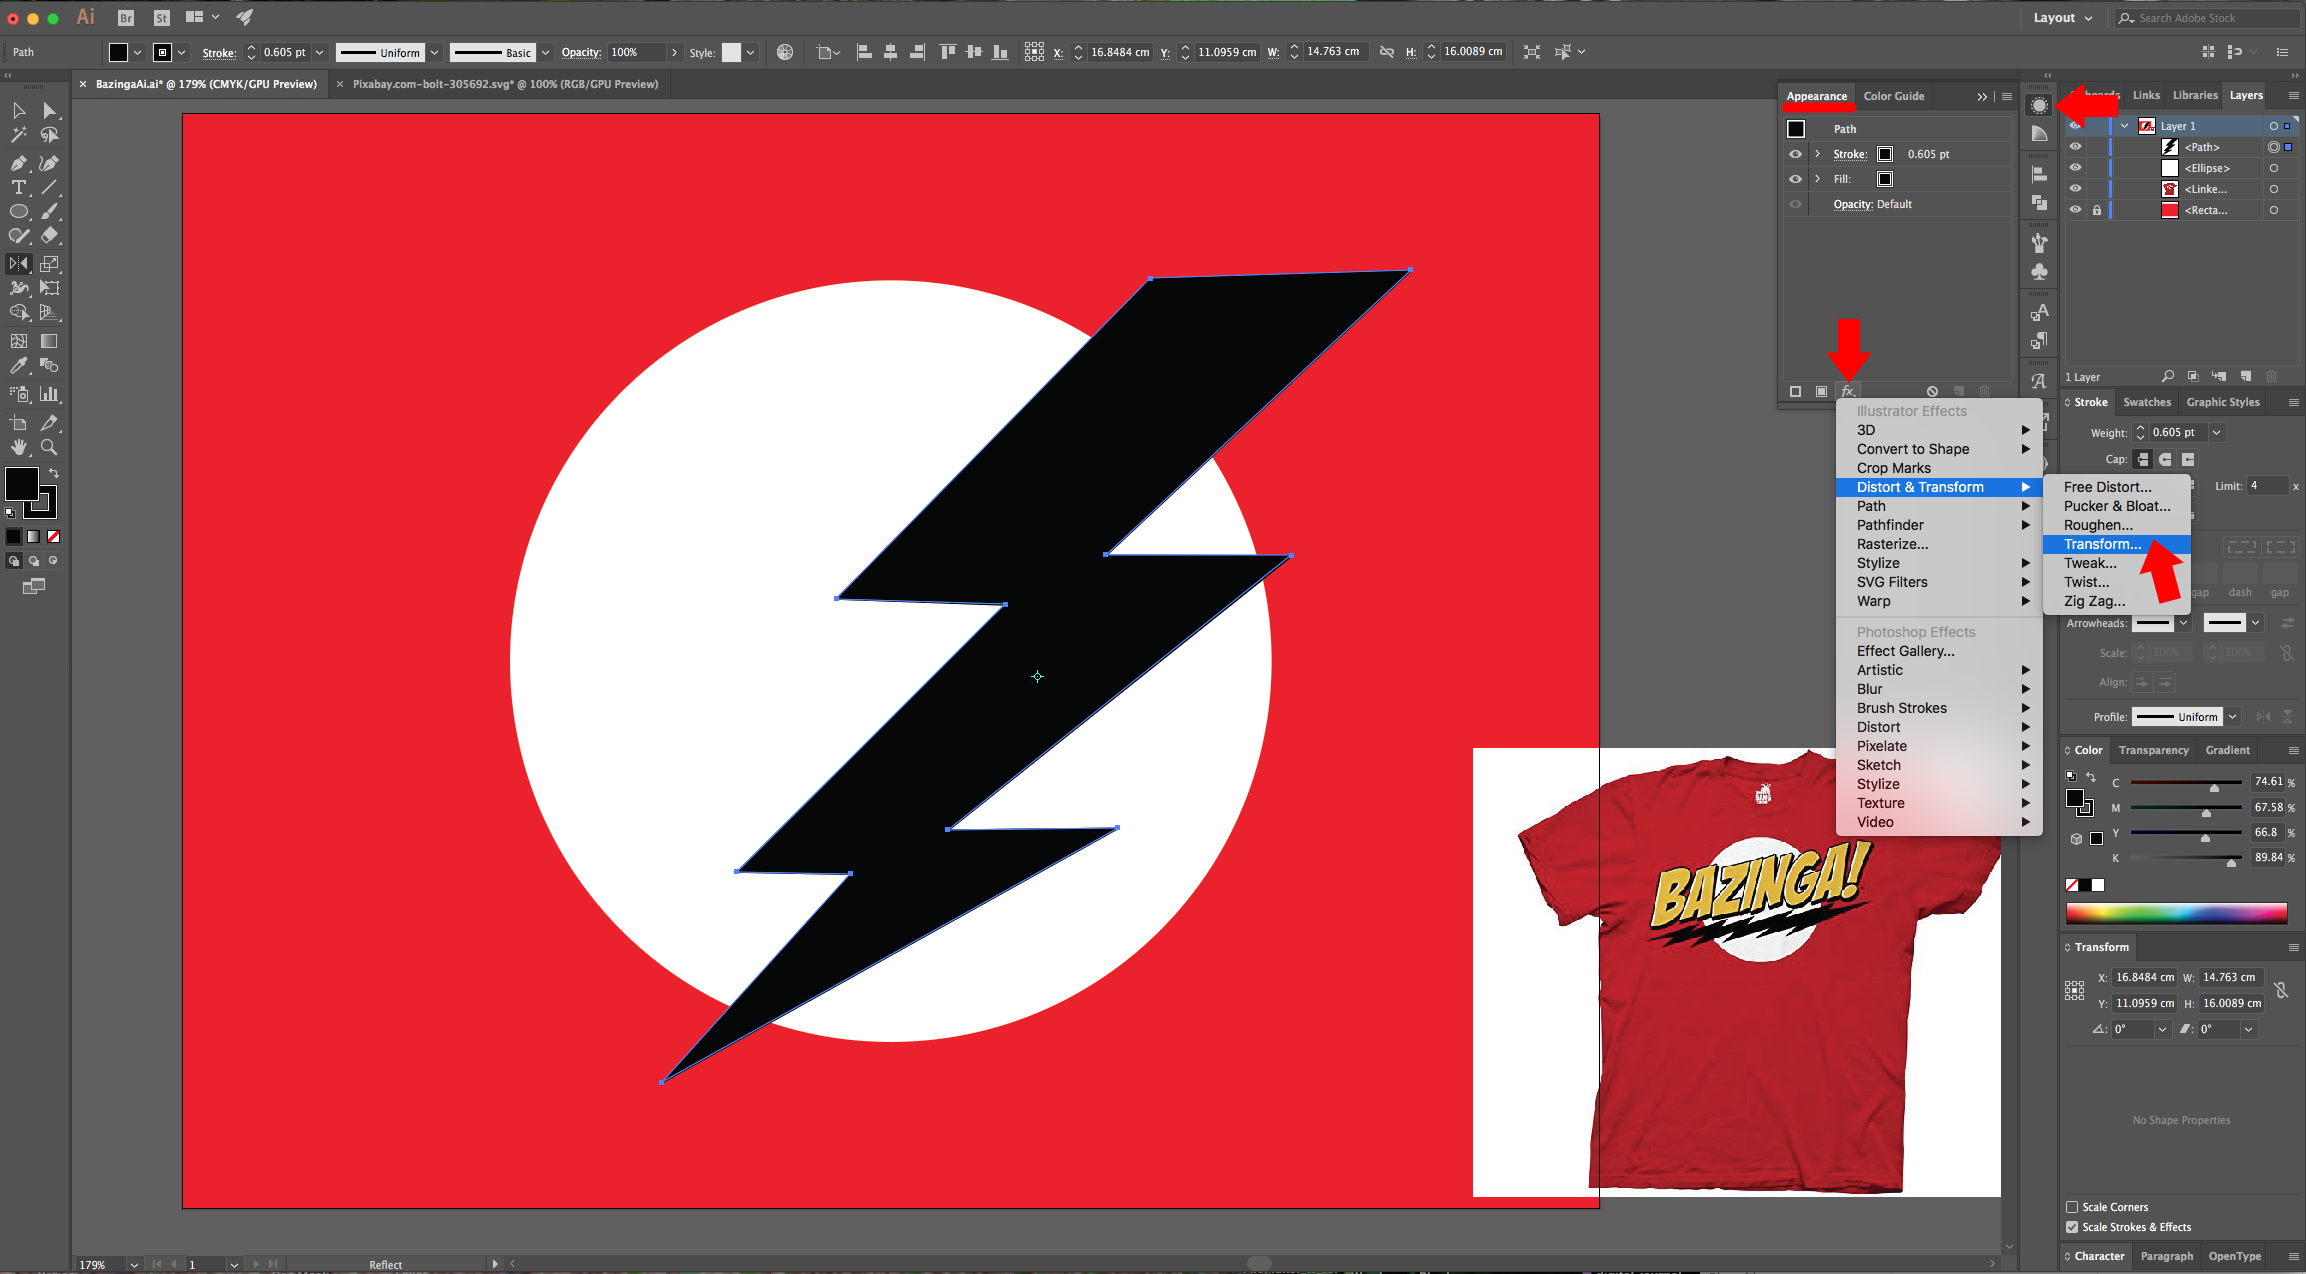
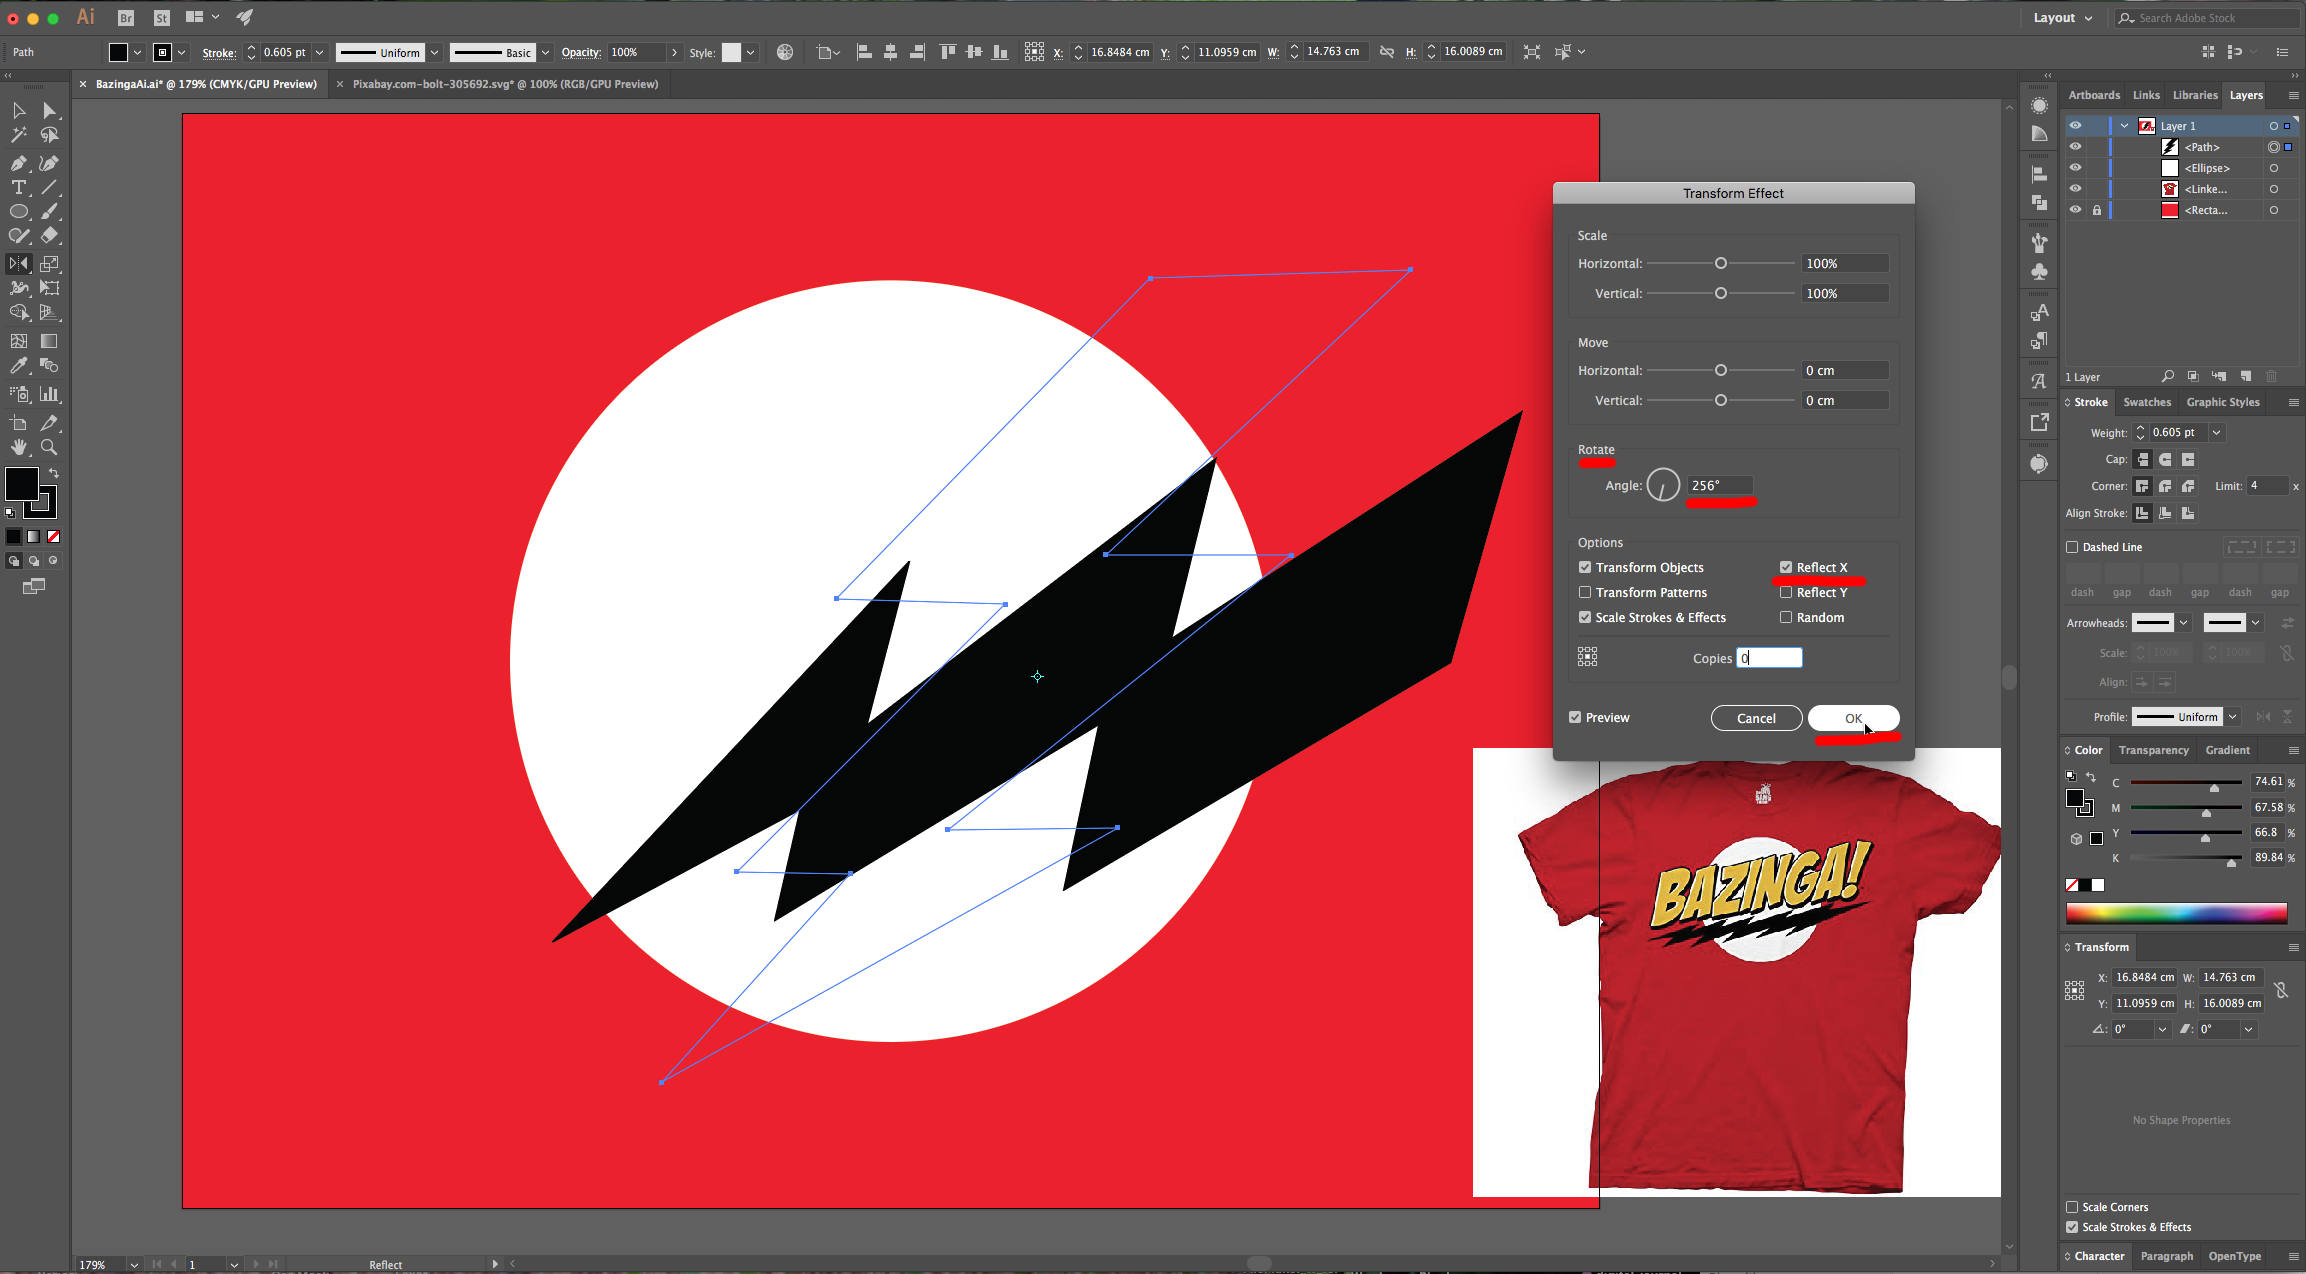
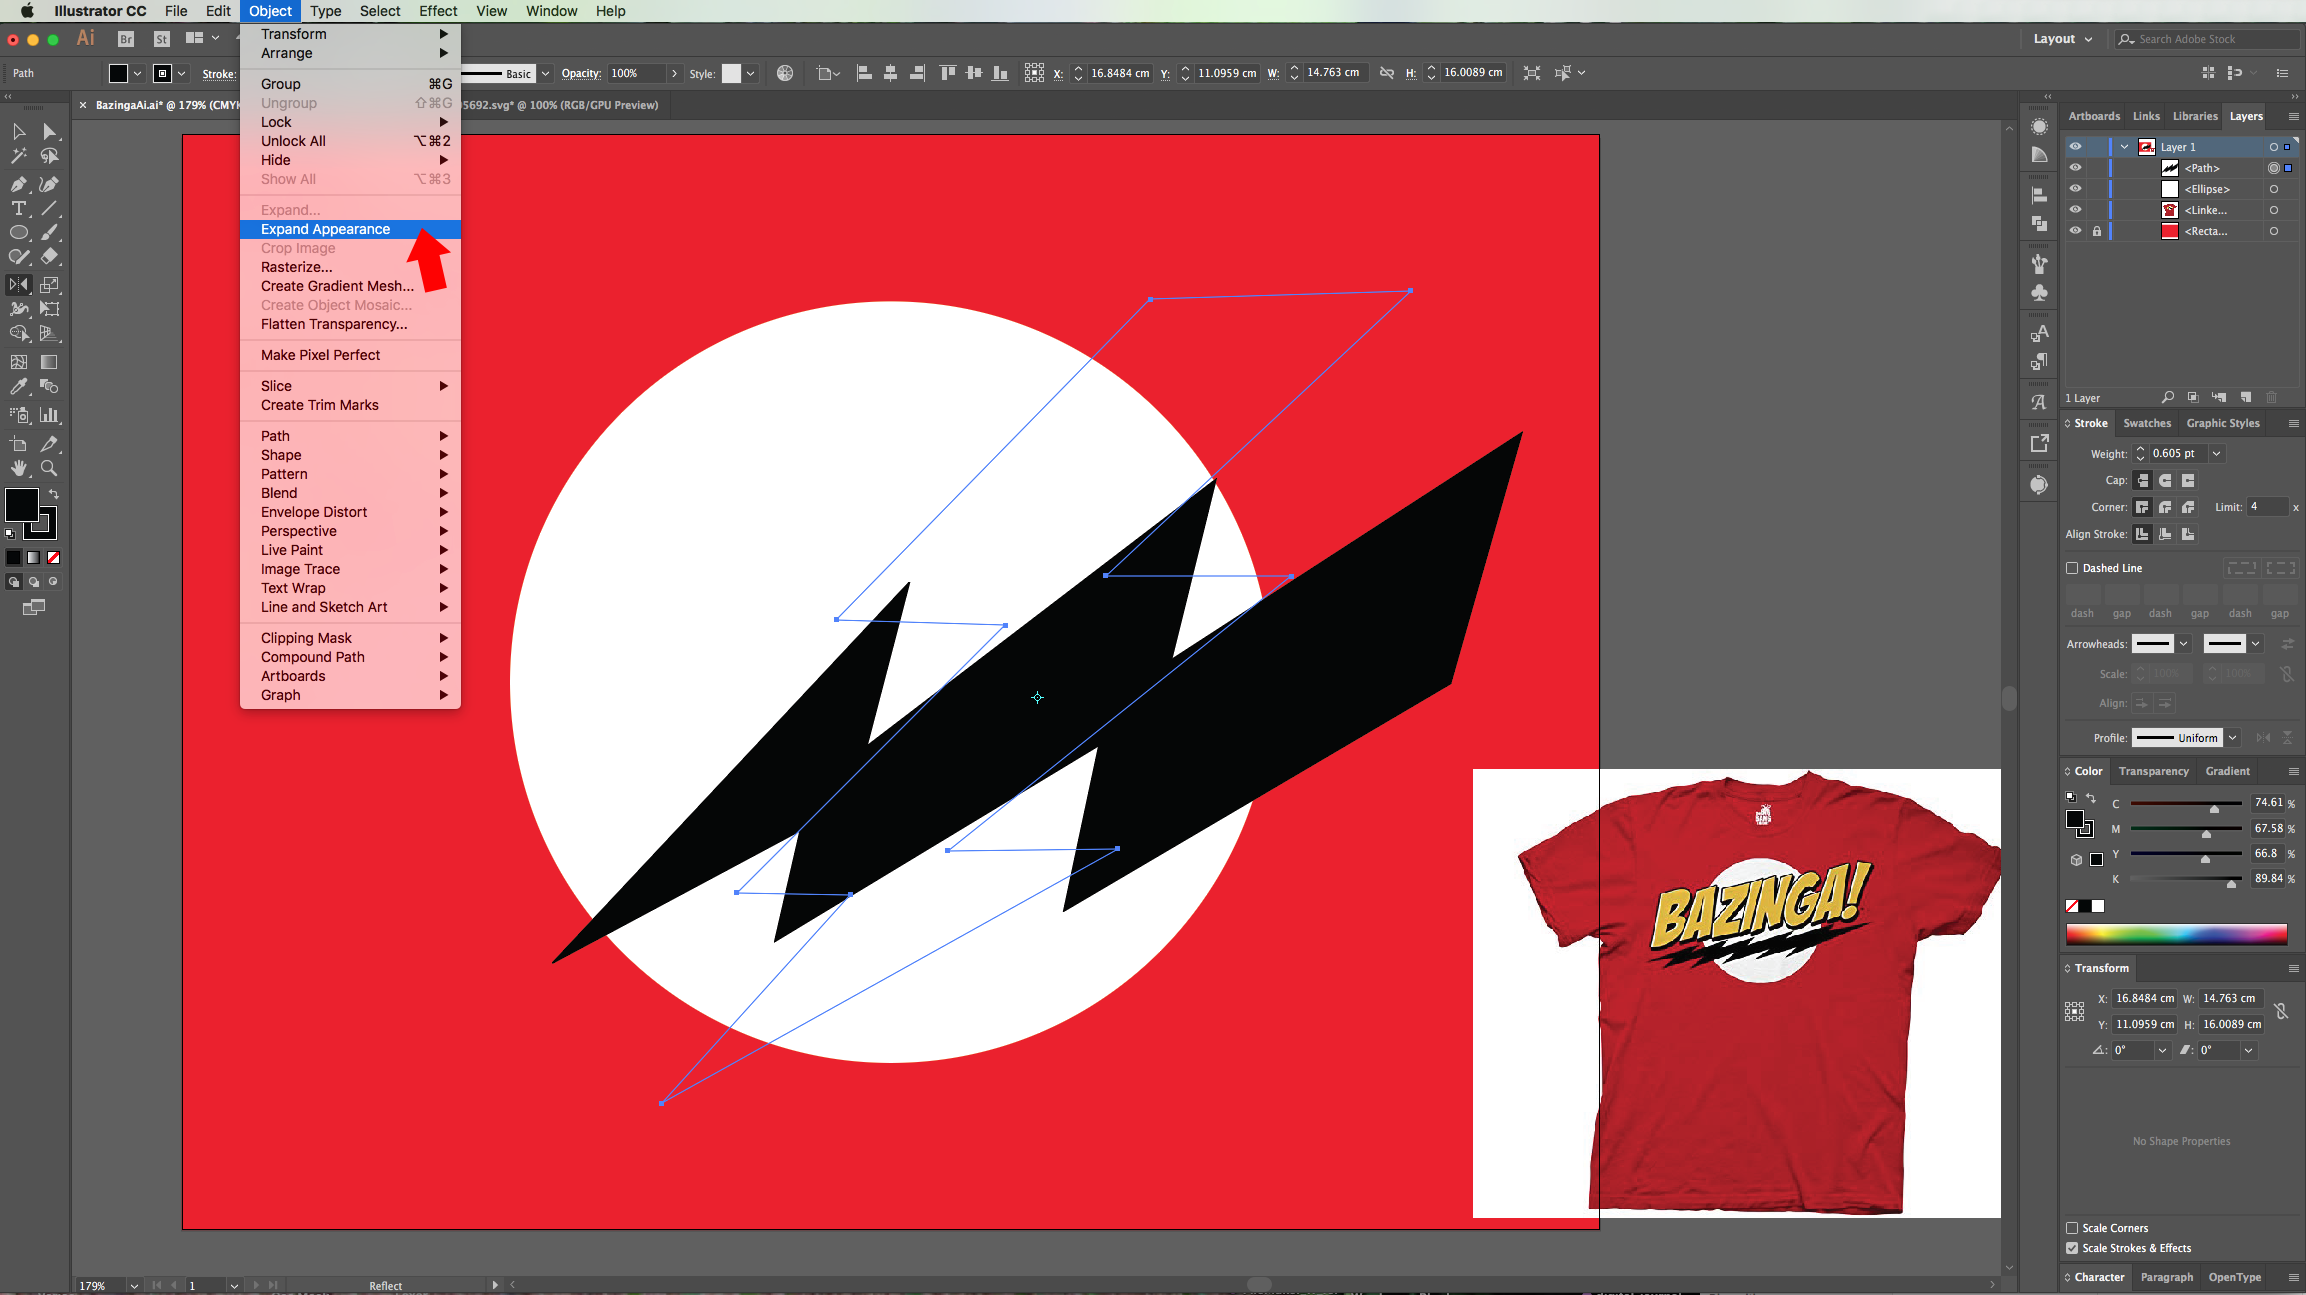
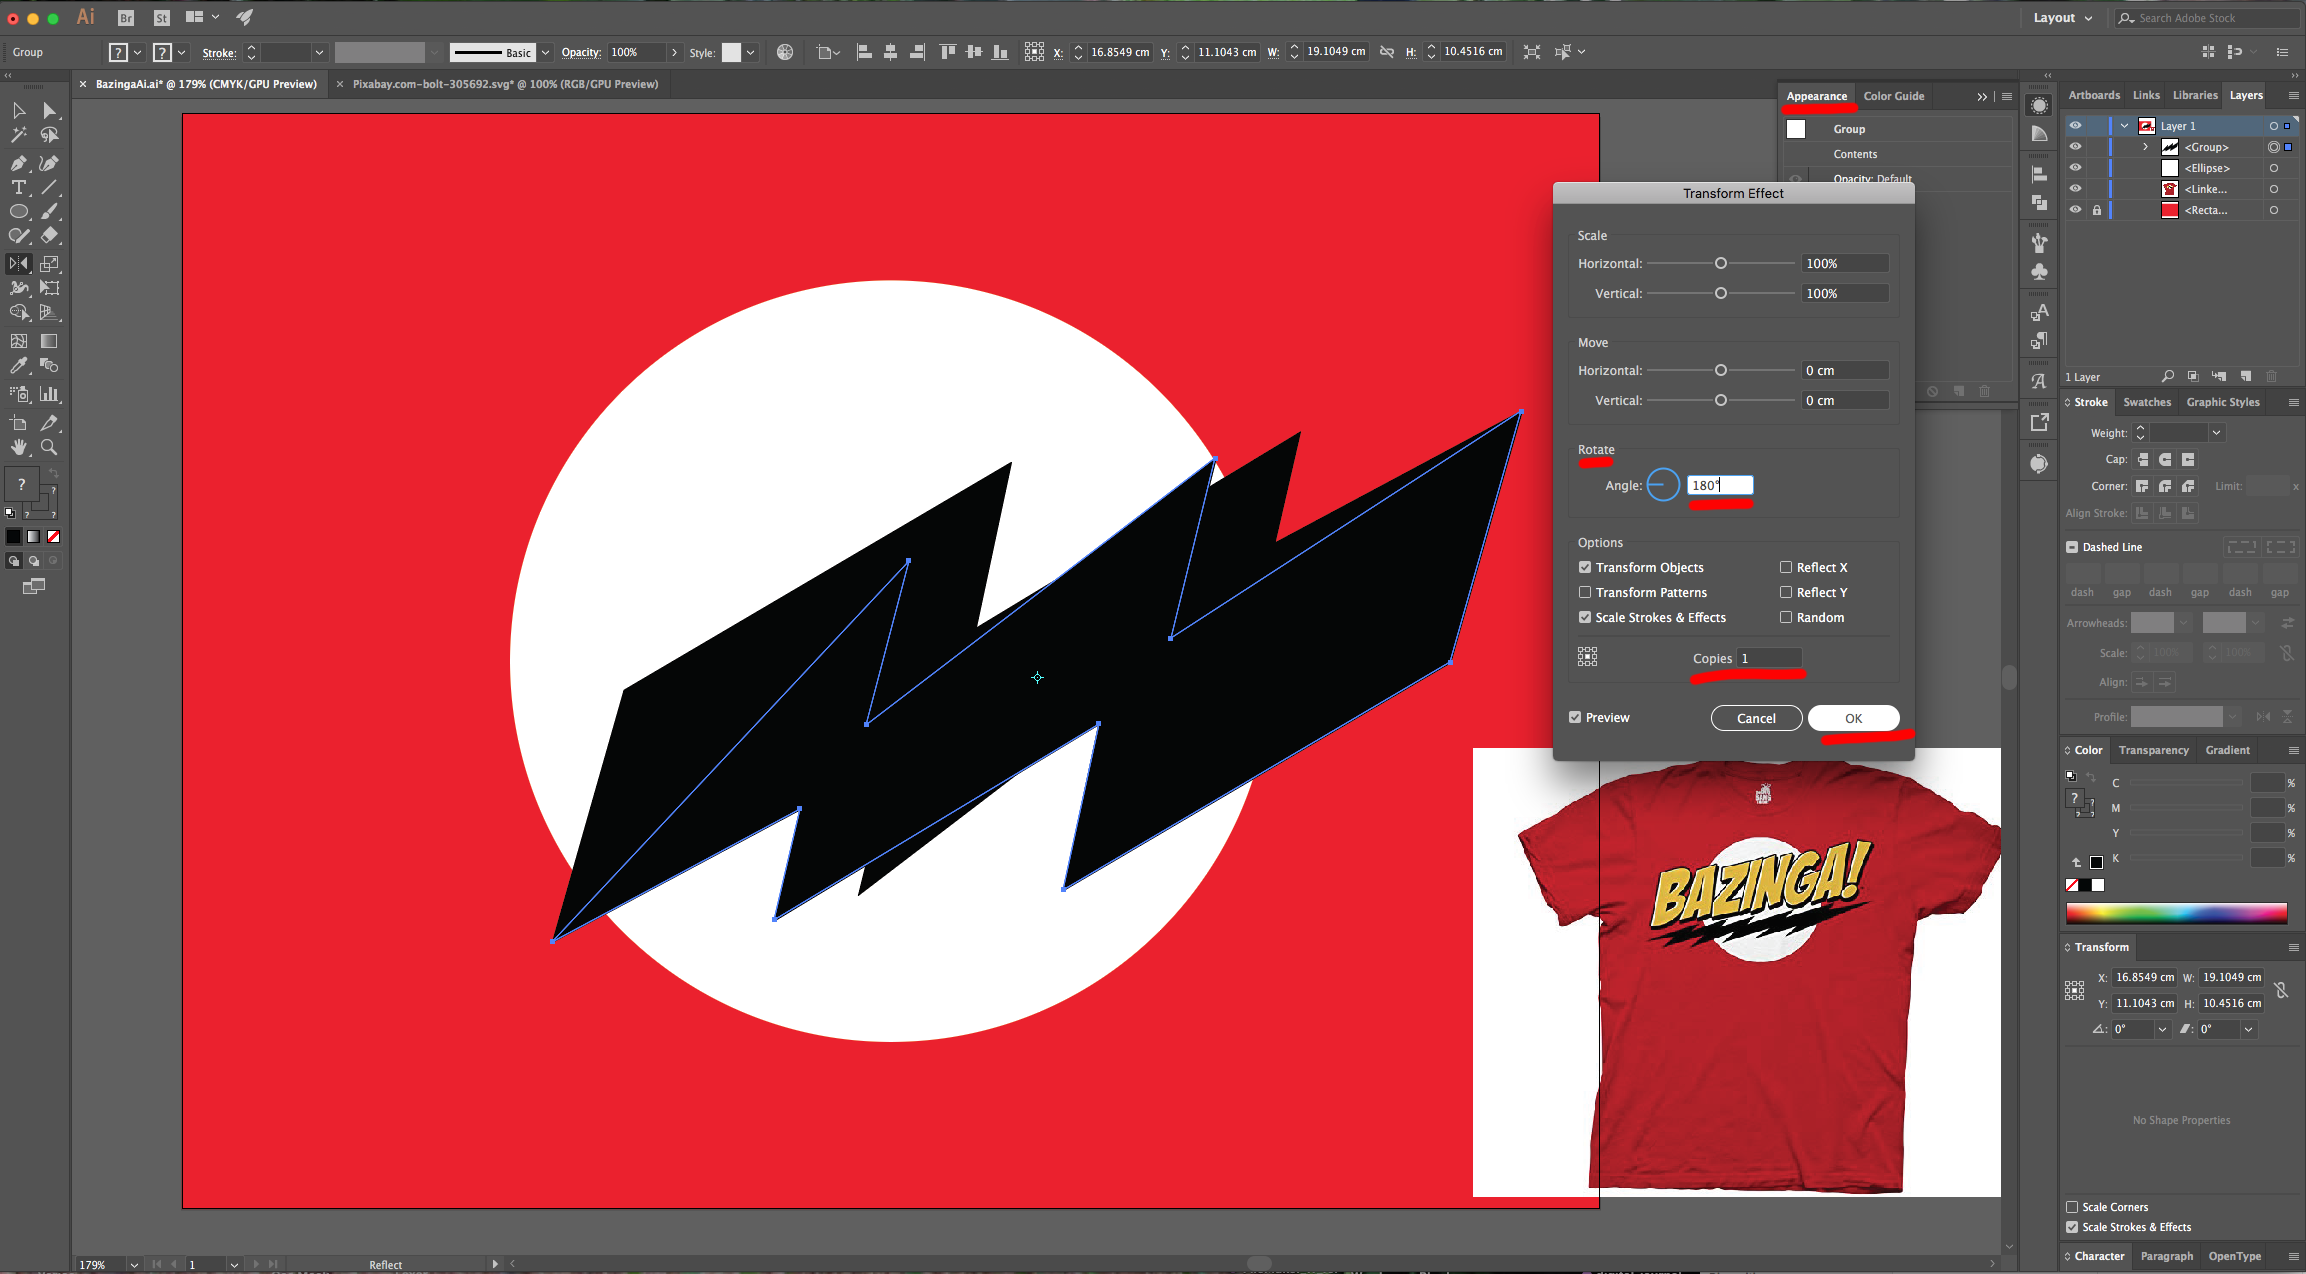
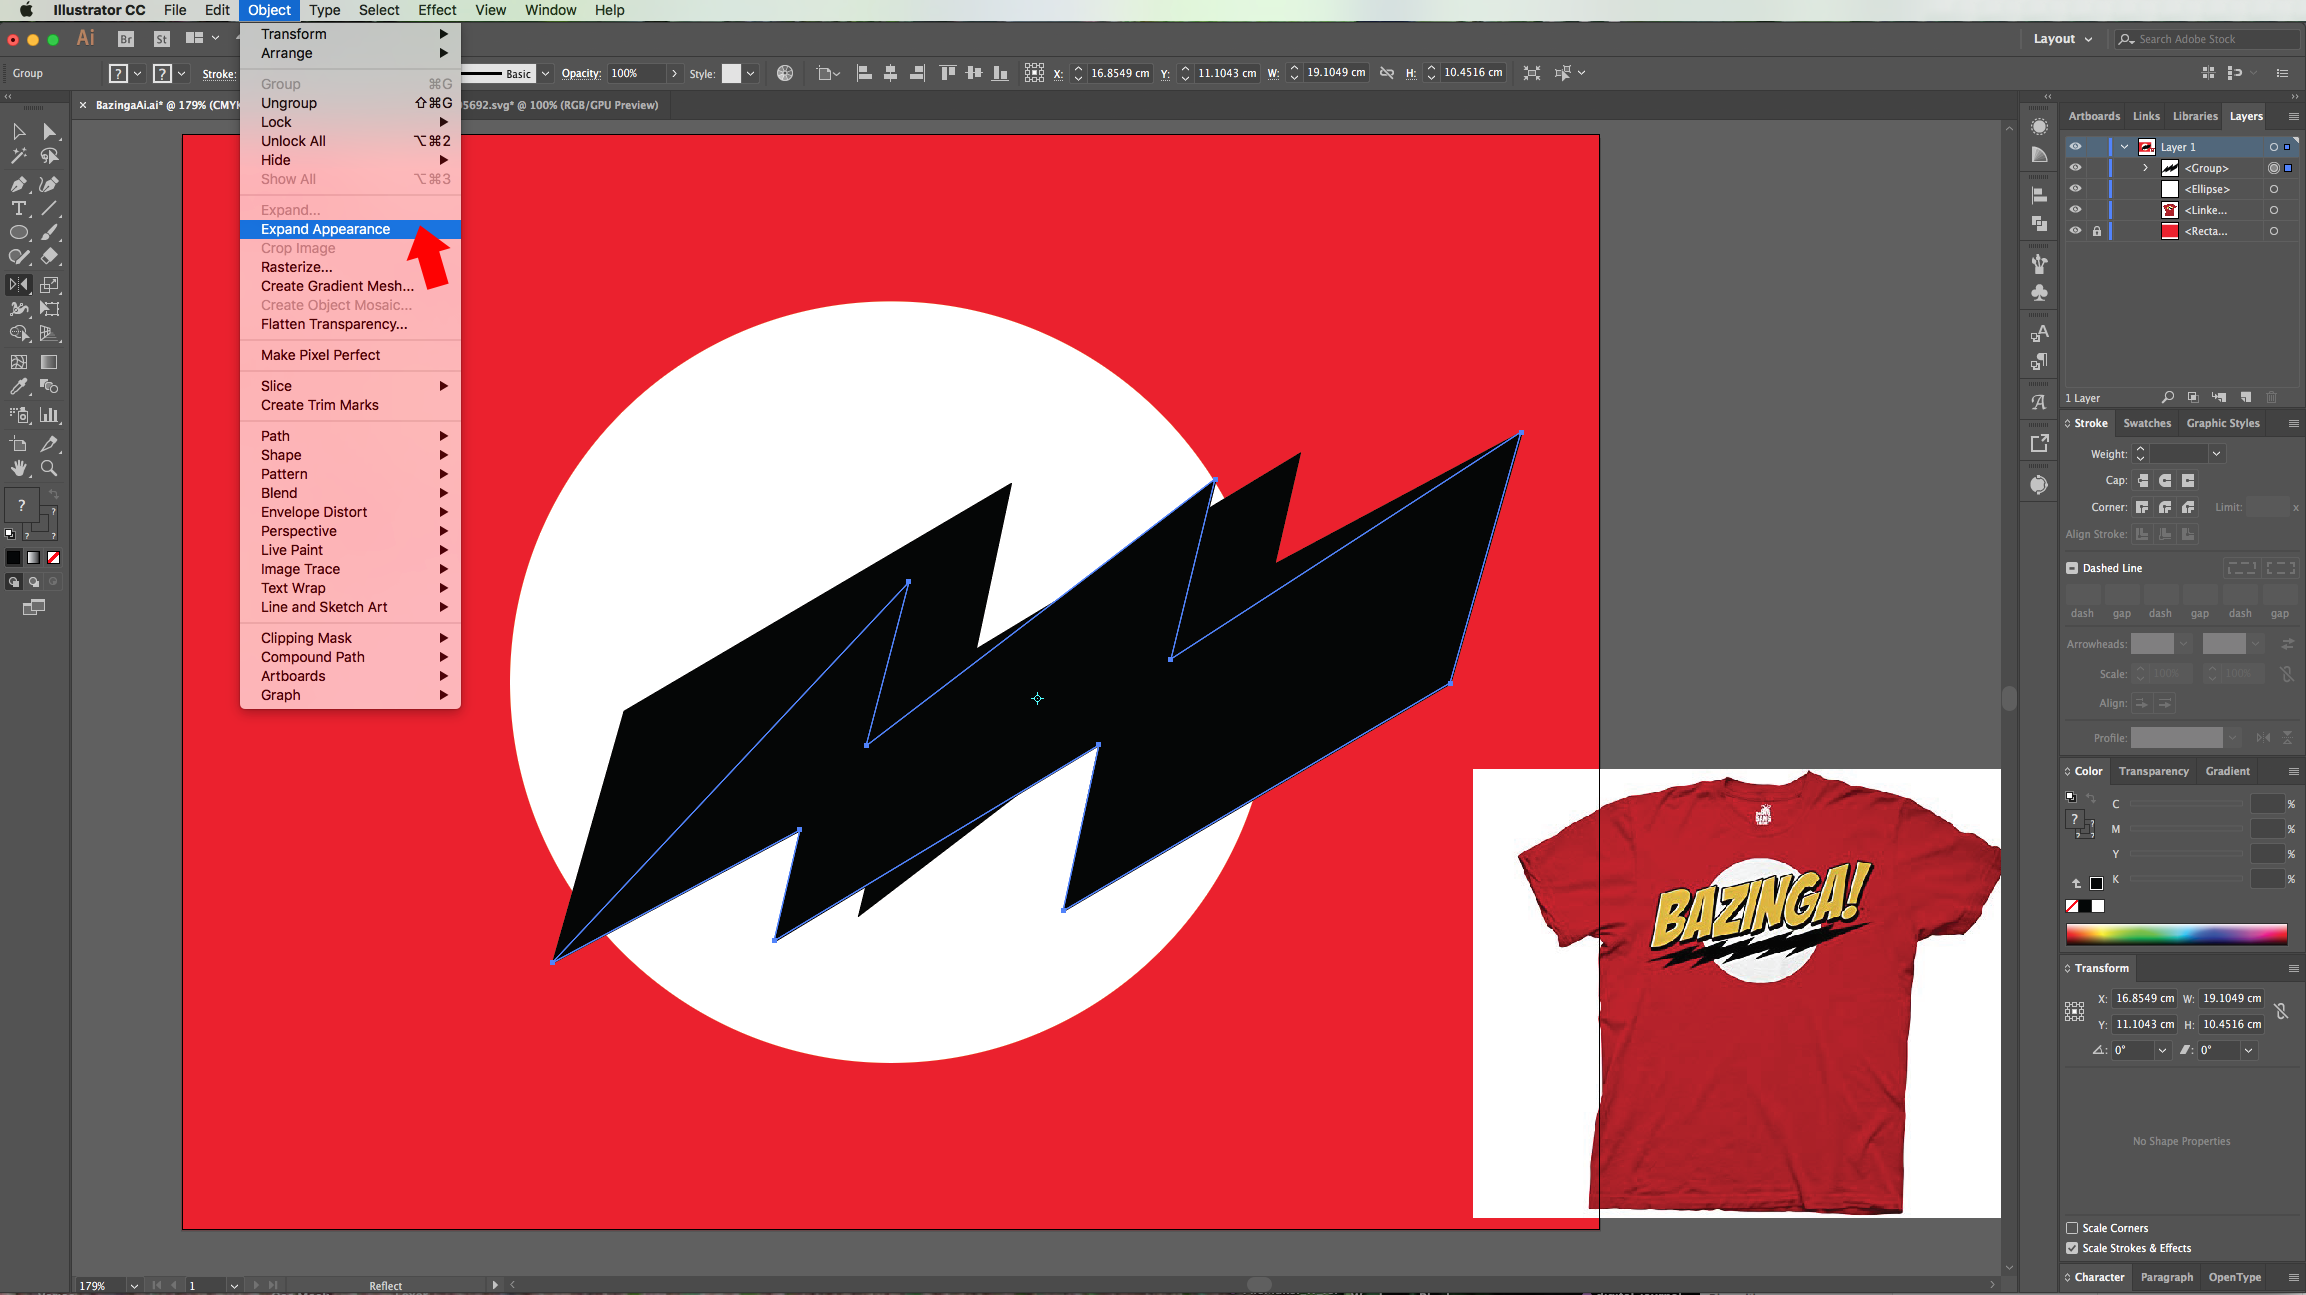
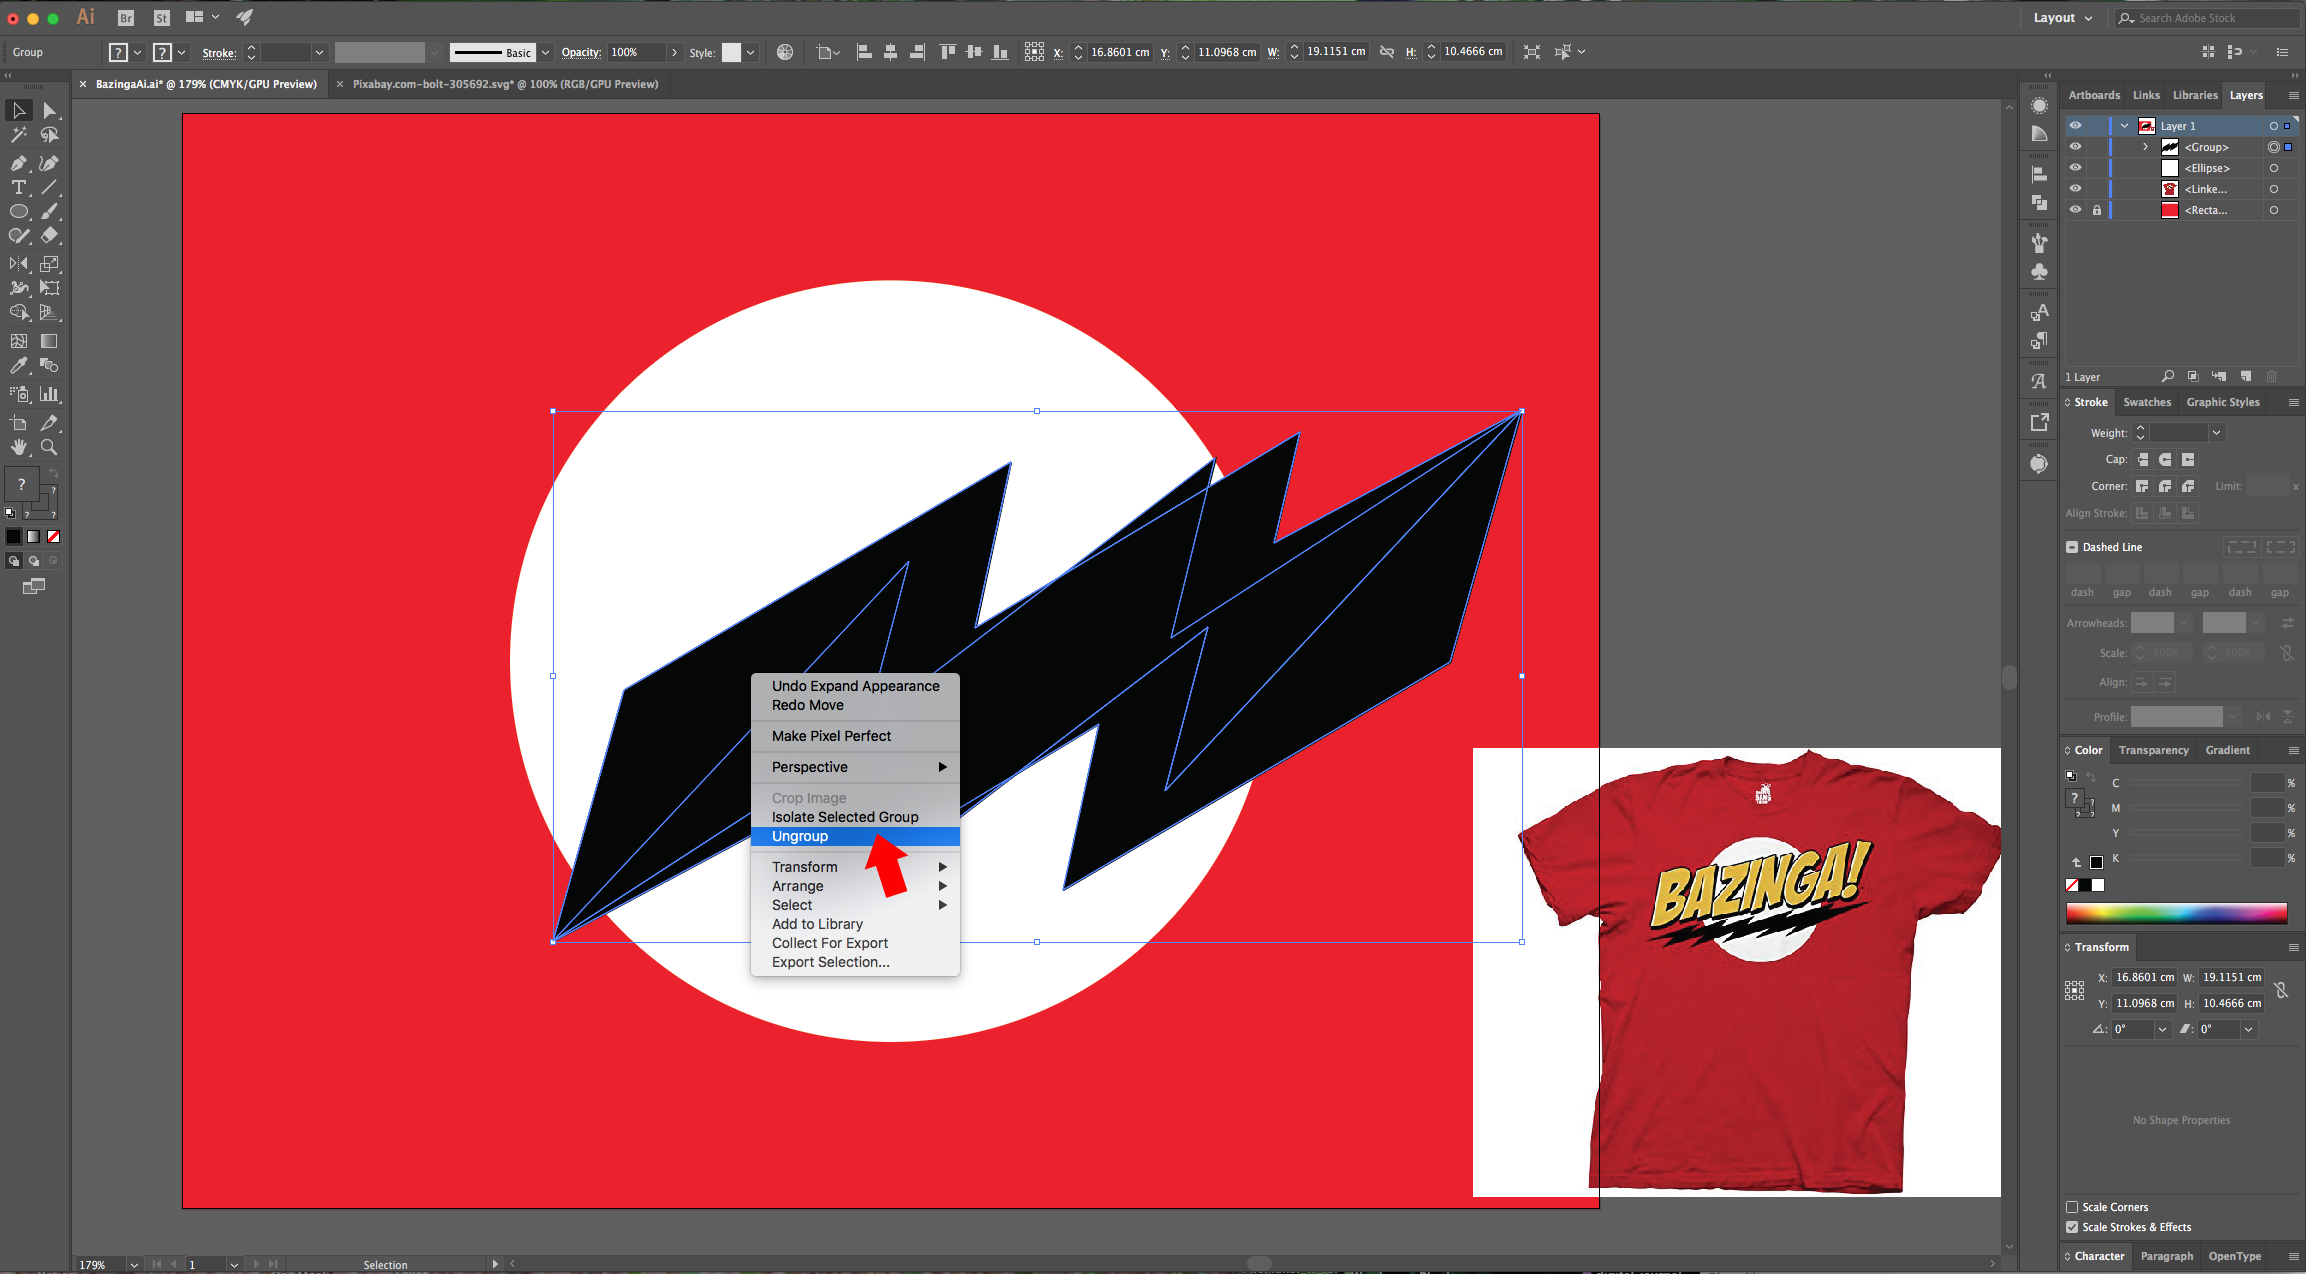
8 - Go back to the “Appearance Panel” to apply another “Effect”. Go to Distort & Transform > Transform… use a 180° “Rotate” Angle, and make 1 “Copy”. Go to Object > Expand Appearance.
9 - Use the “Direct Selection Tool” (A) to individually select the Anchor Points that need to be re-arranged.
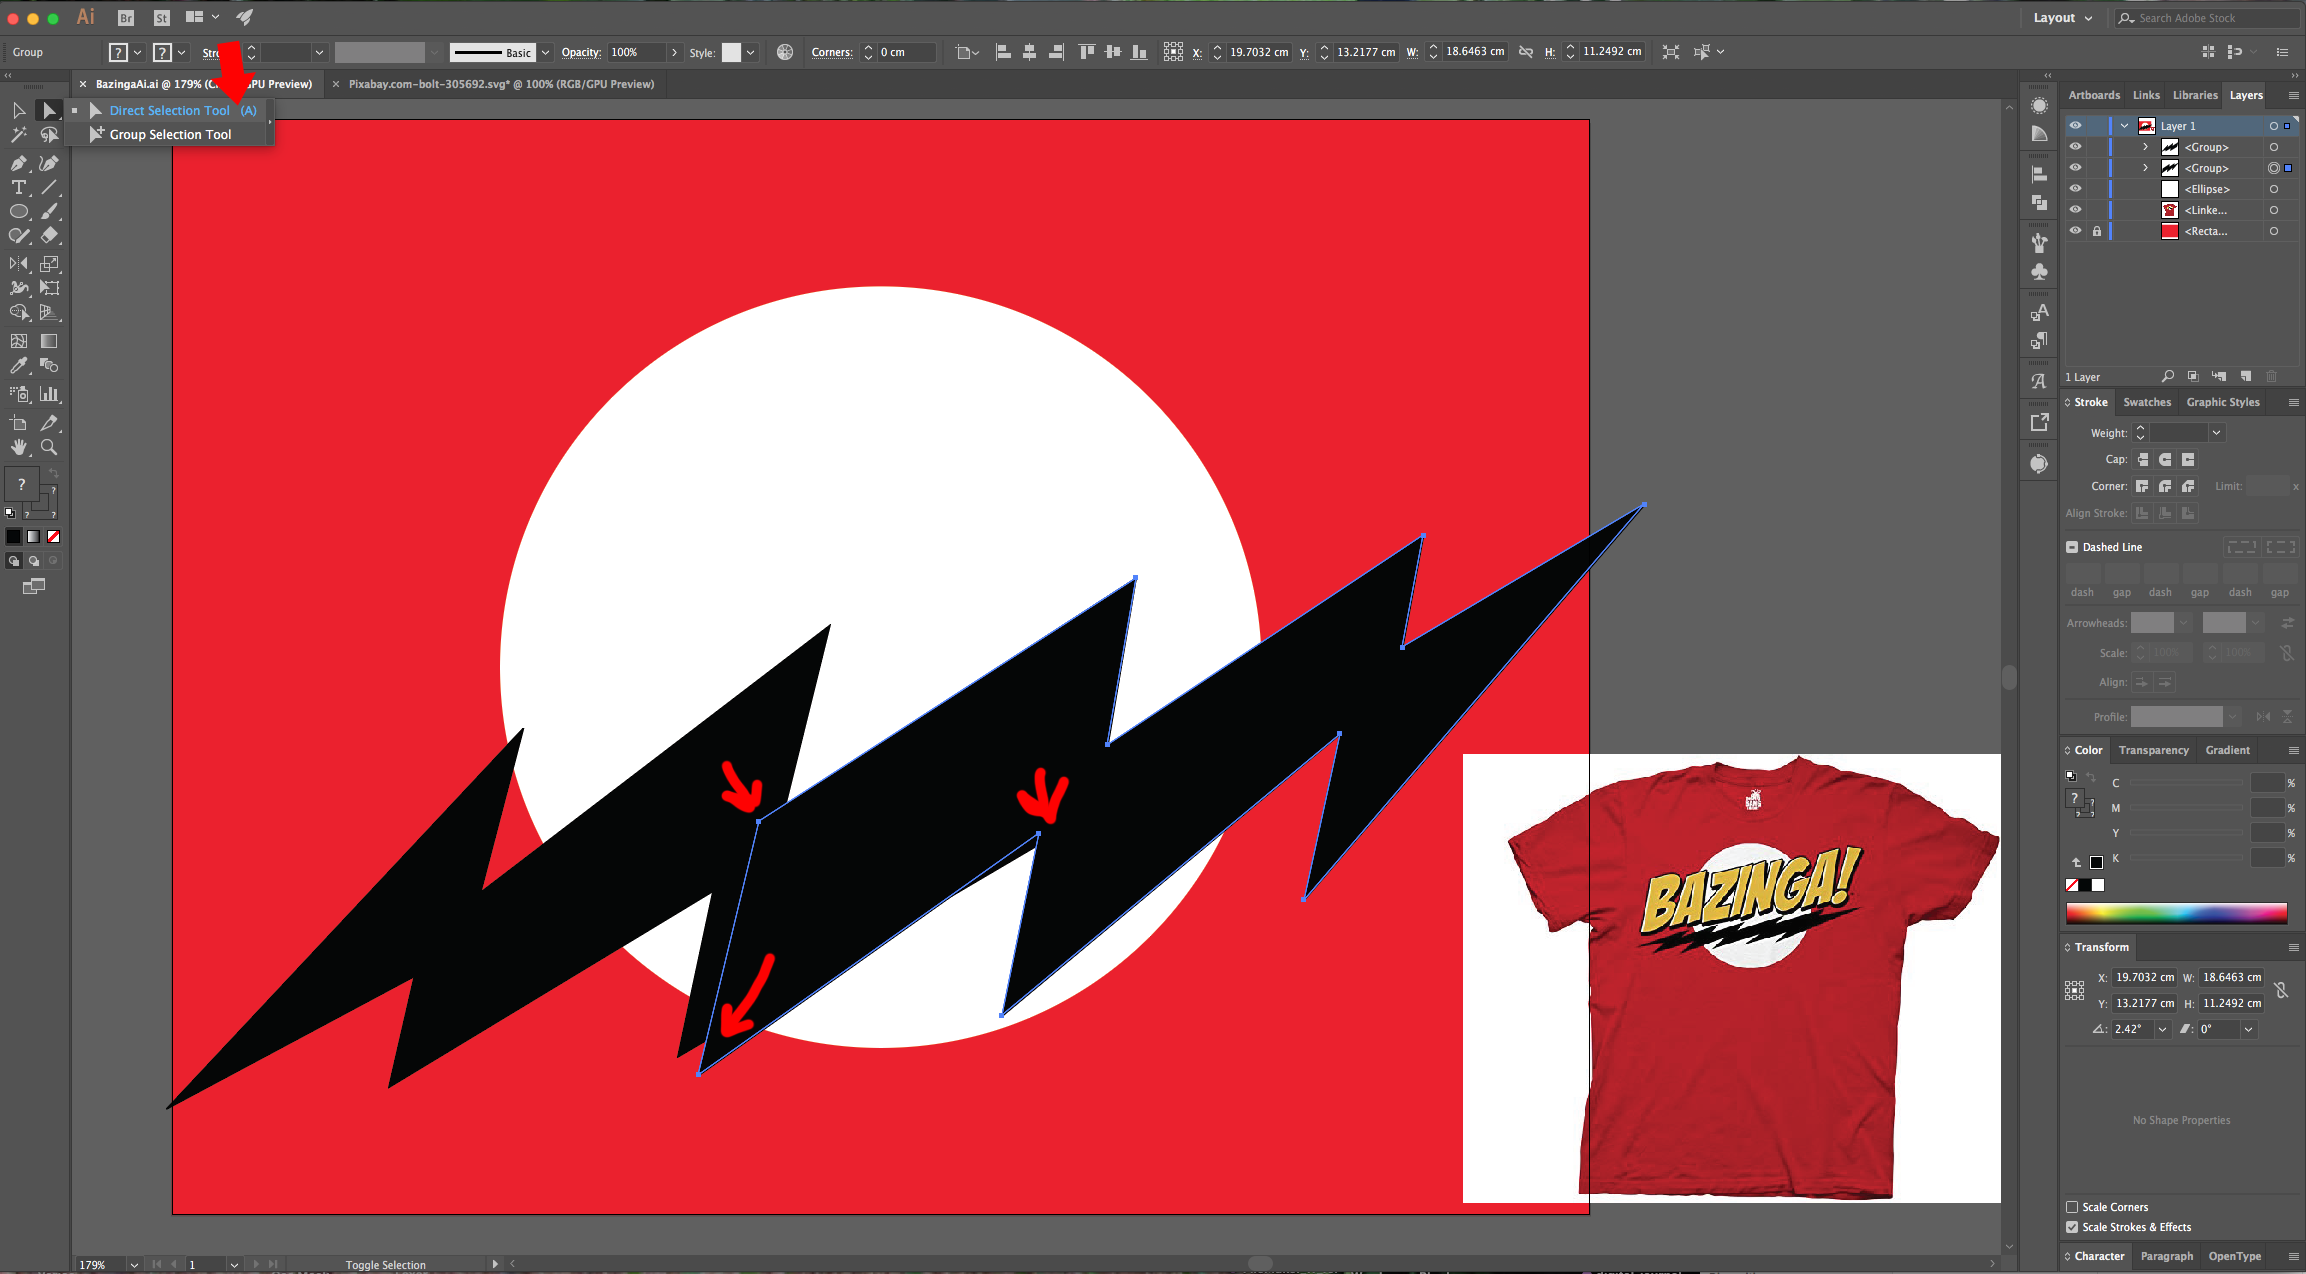
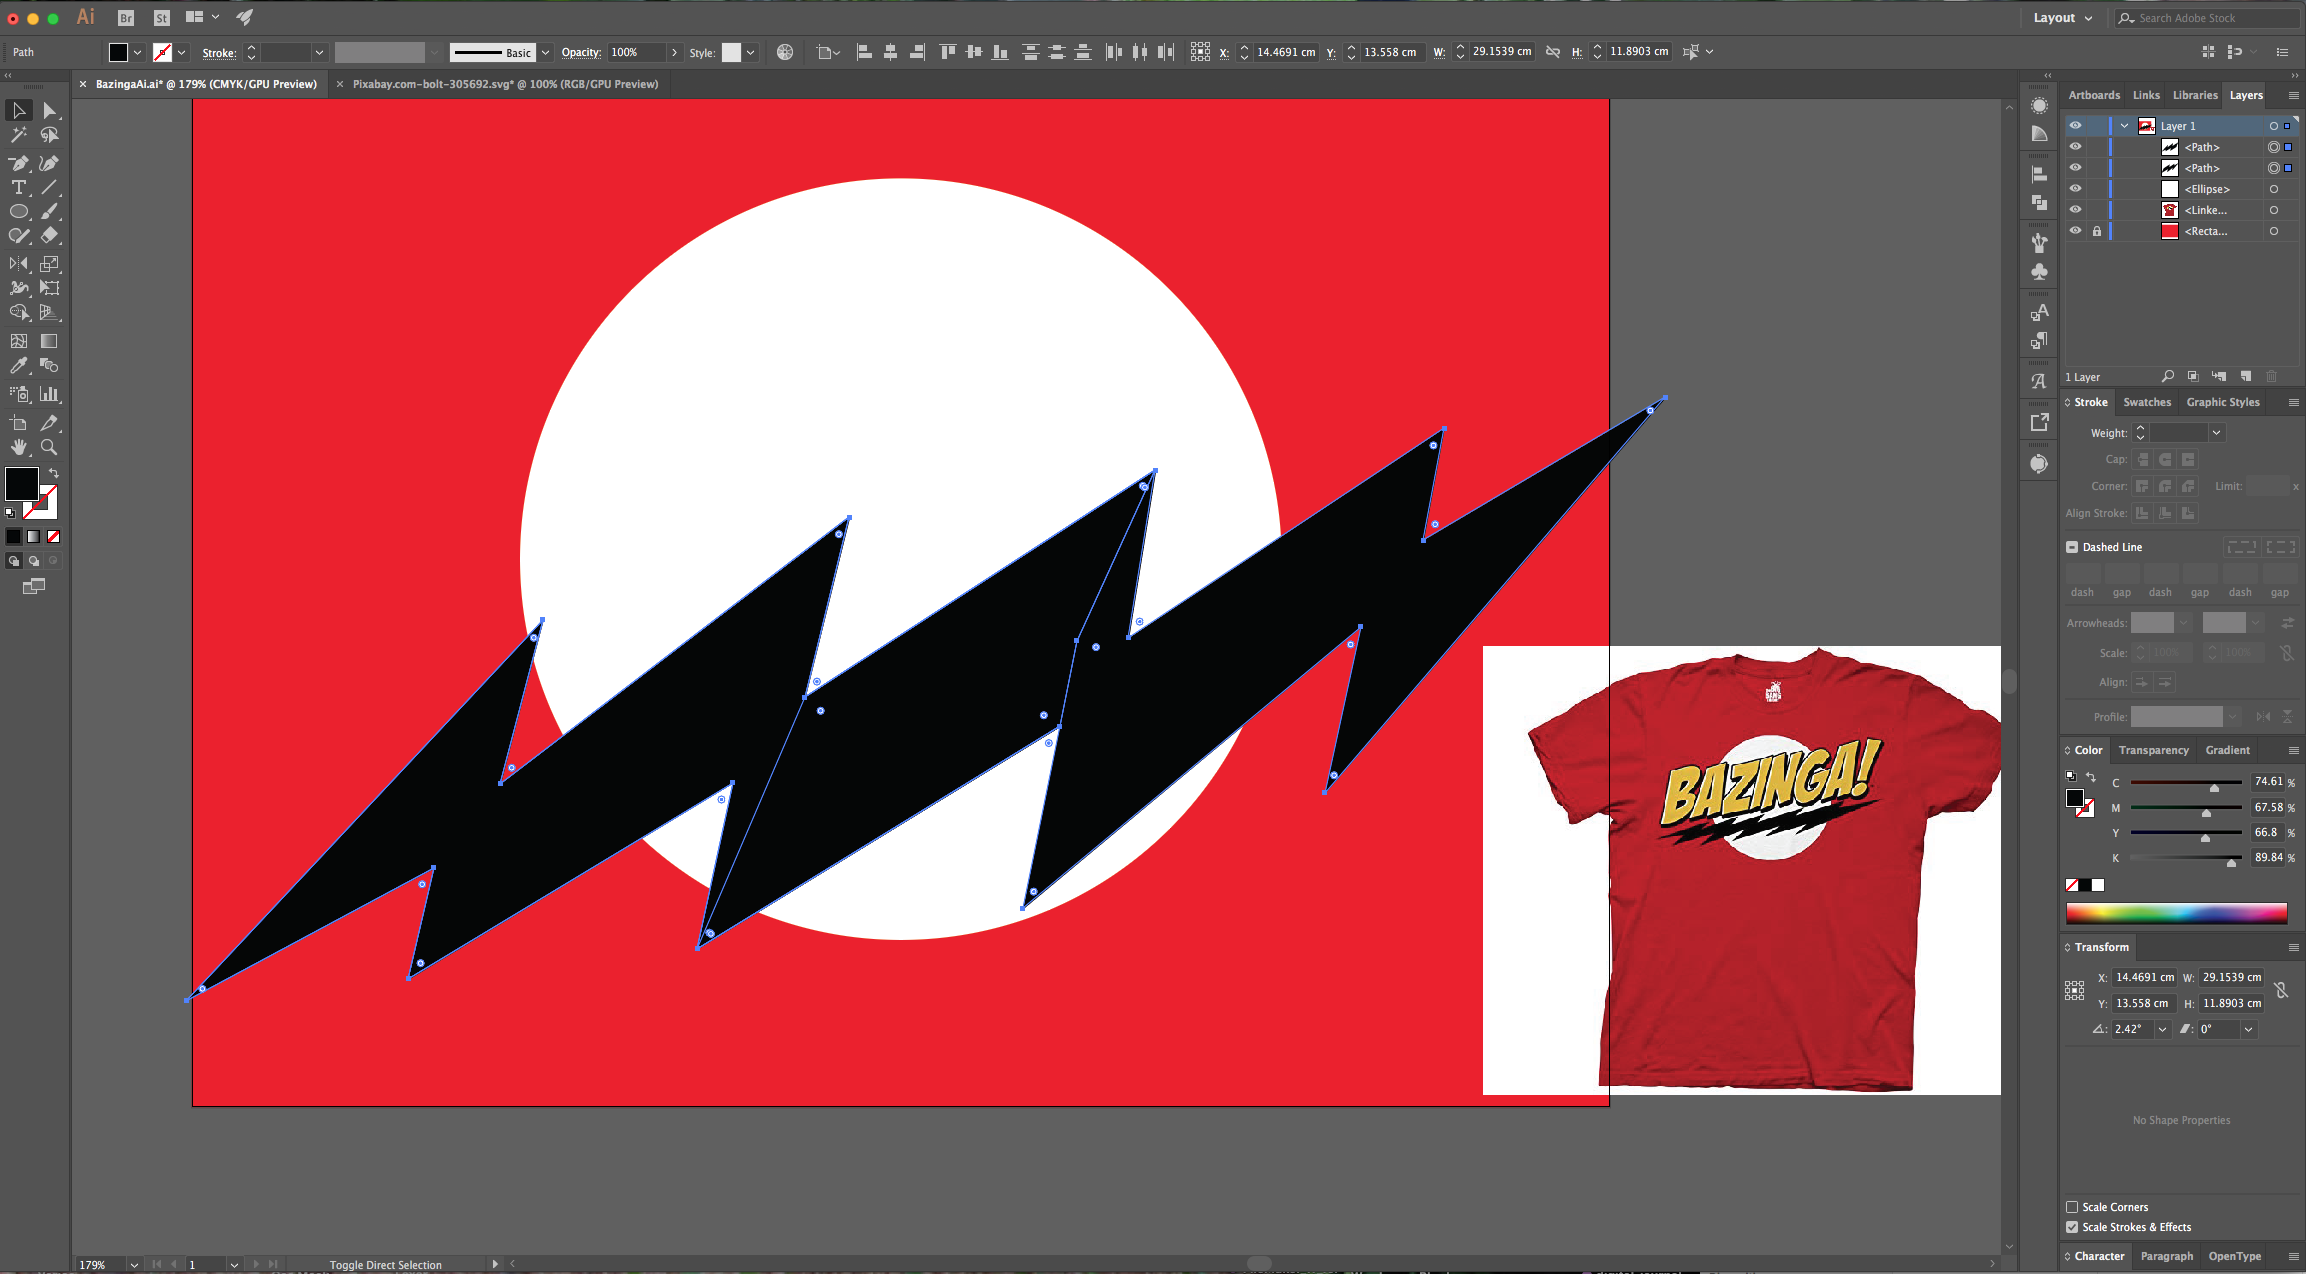
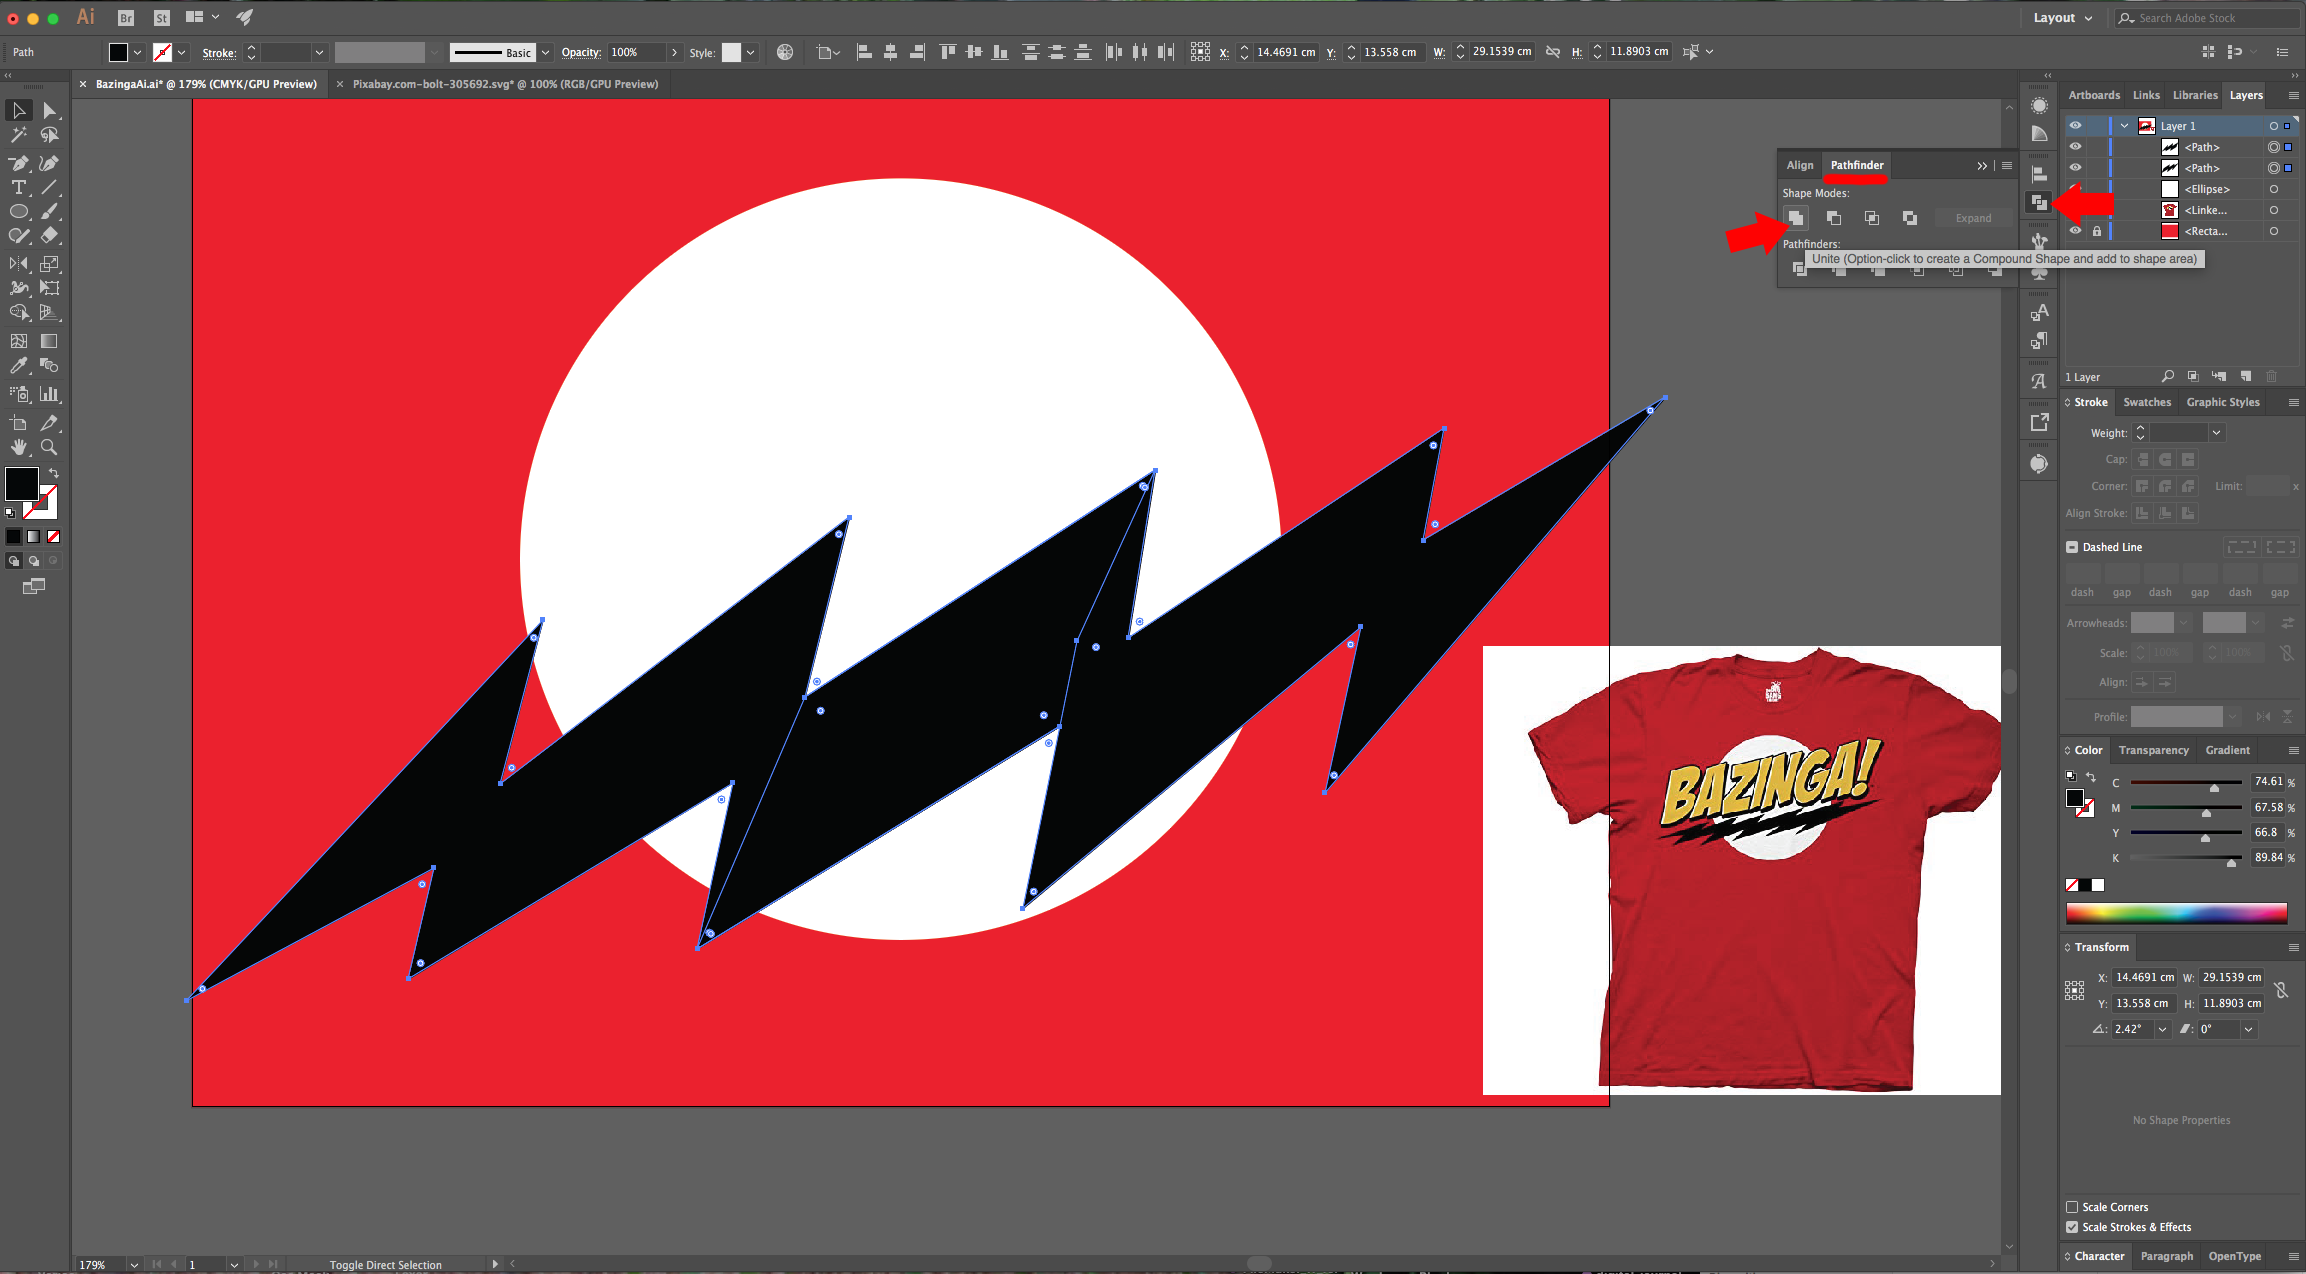
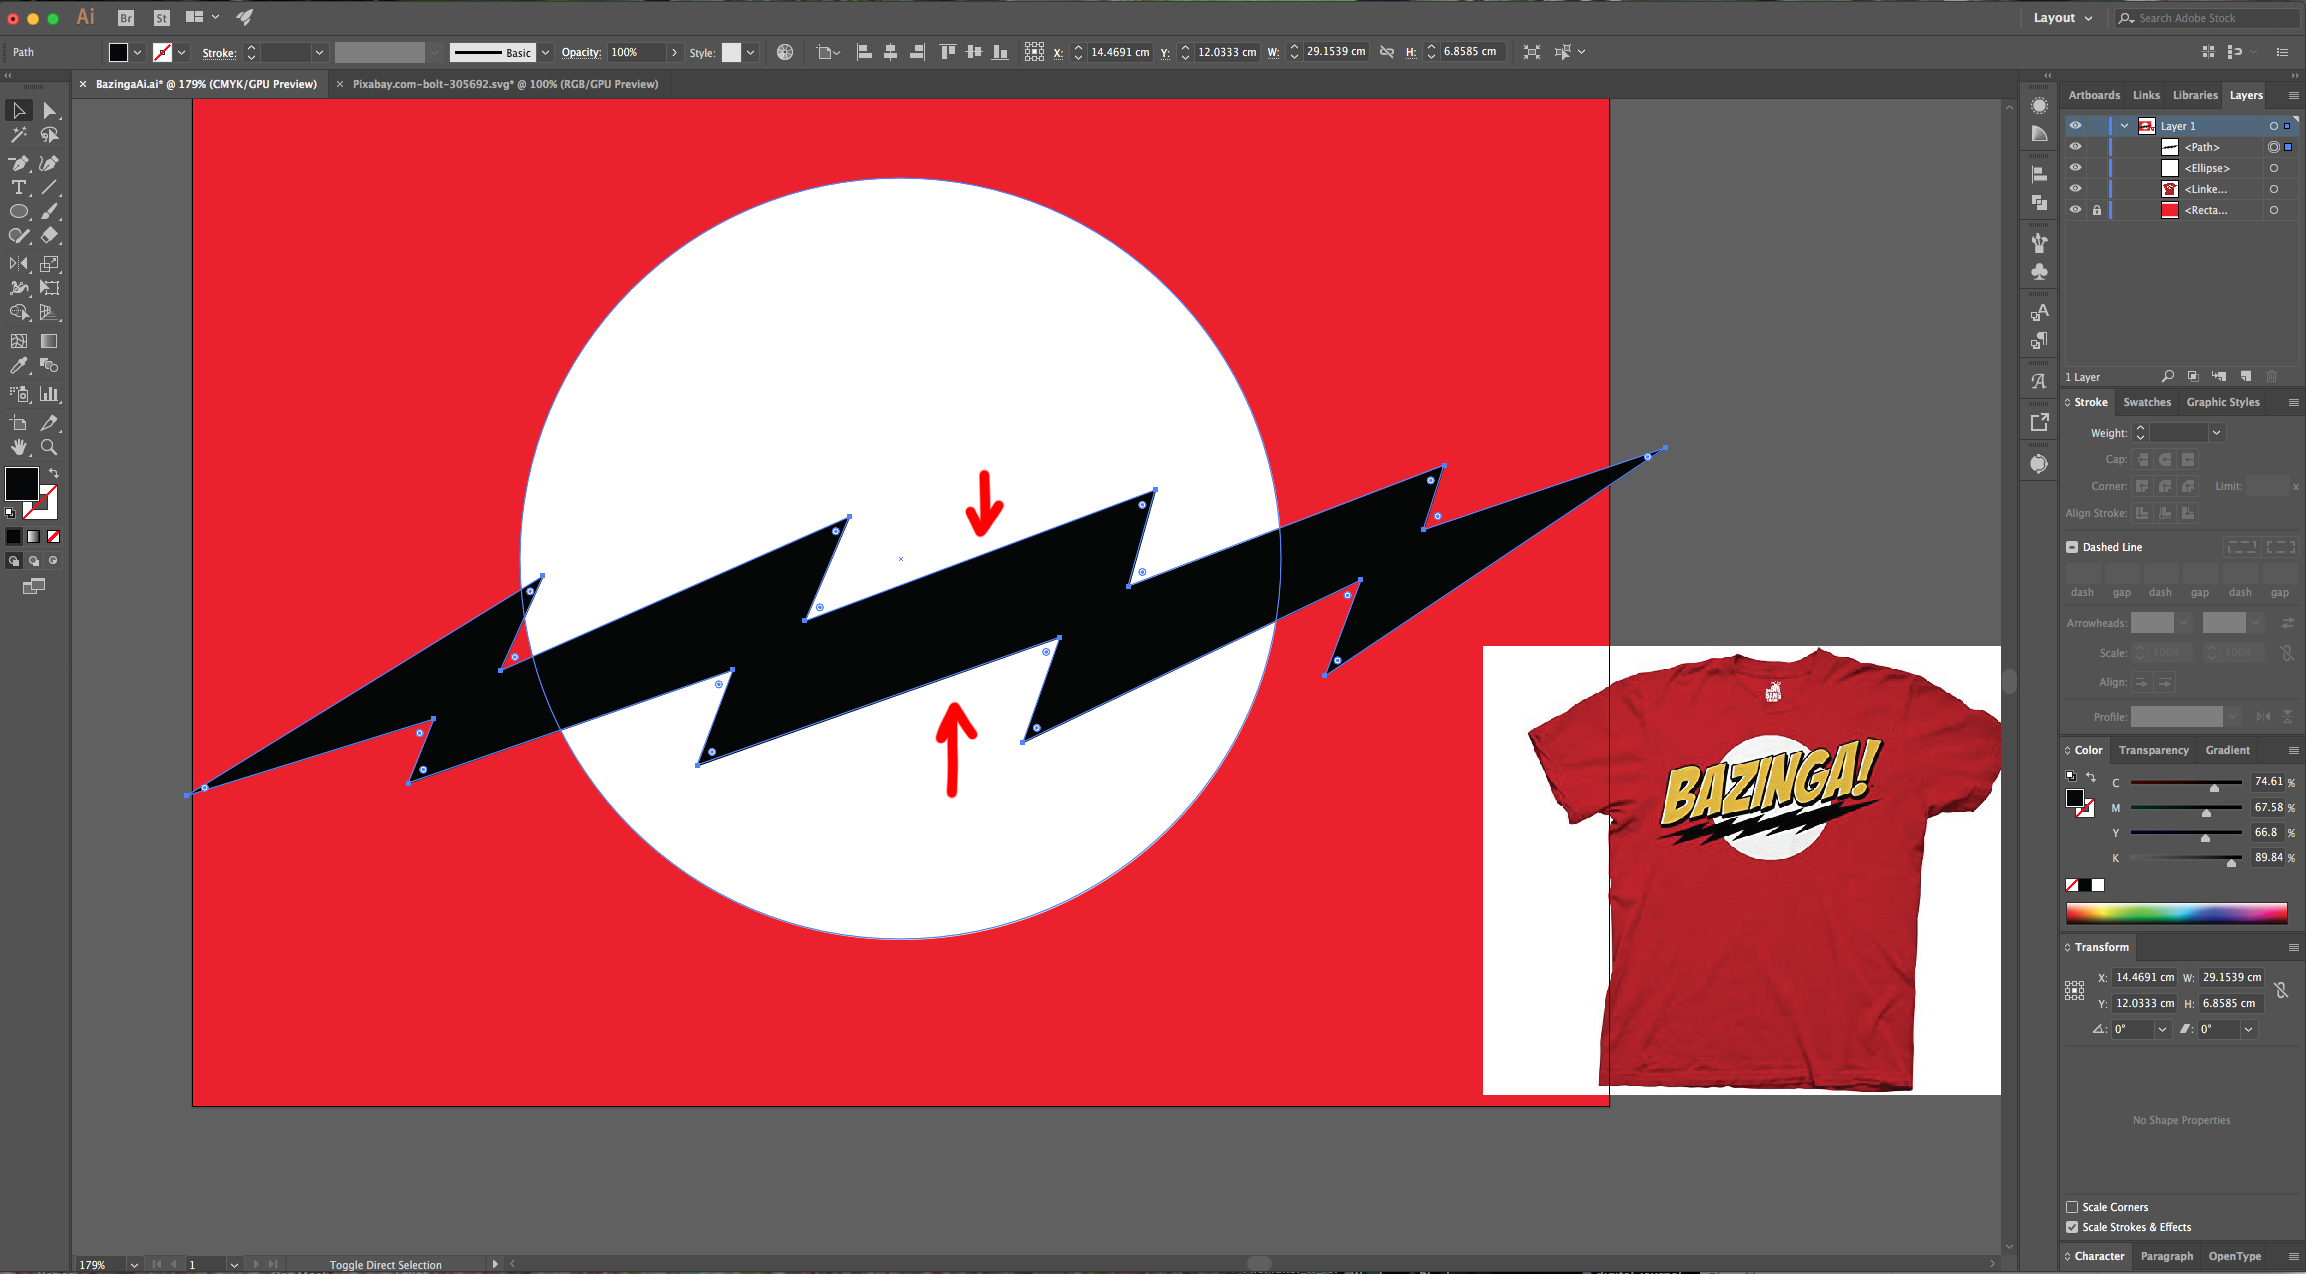
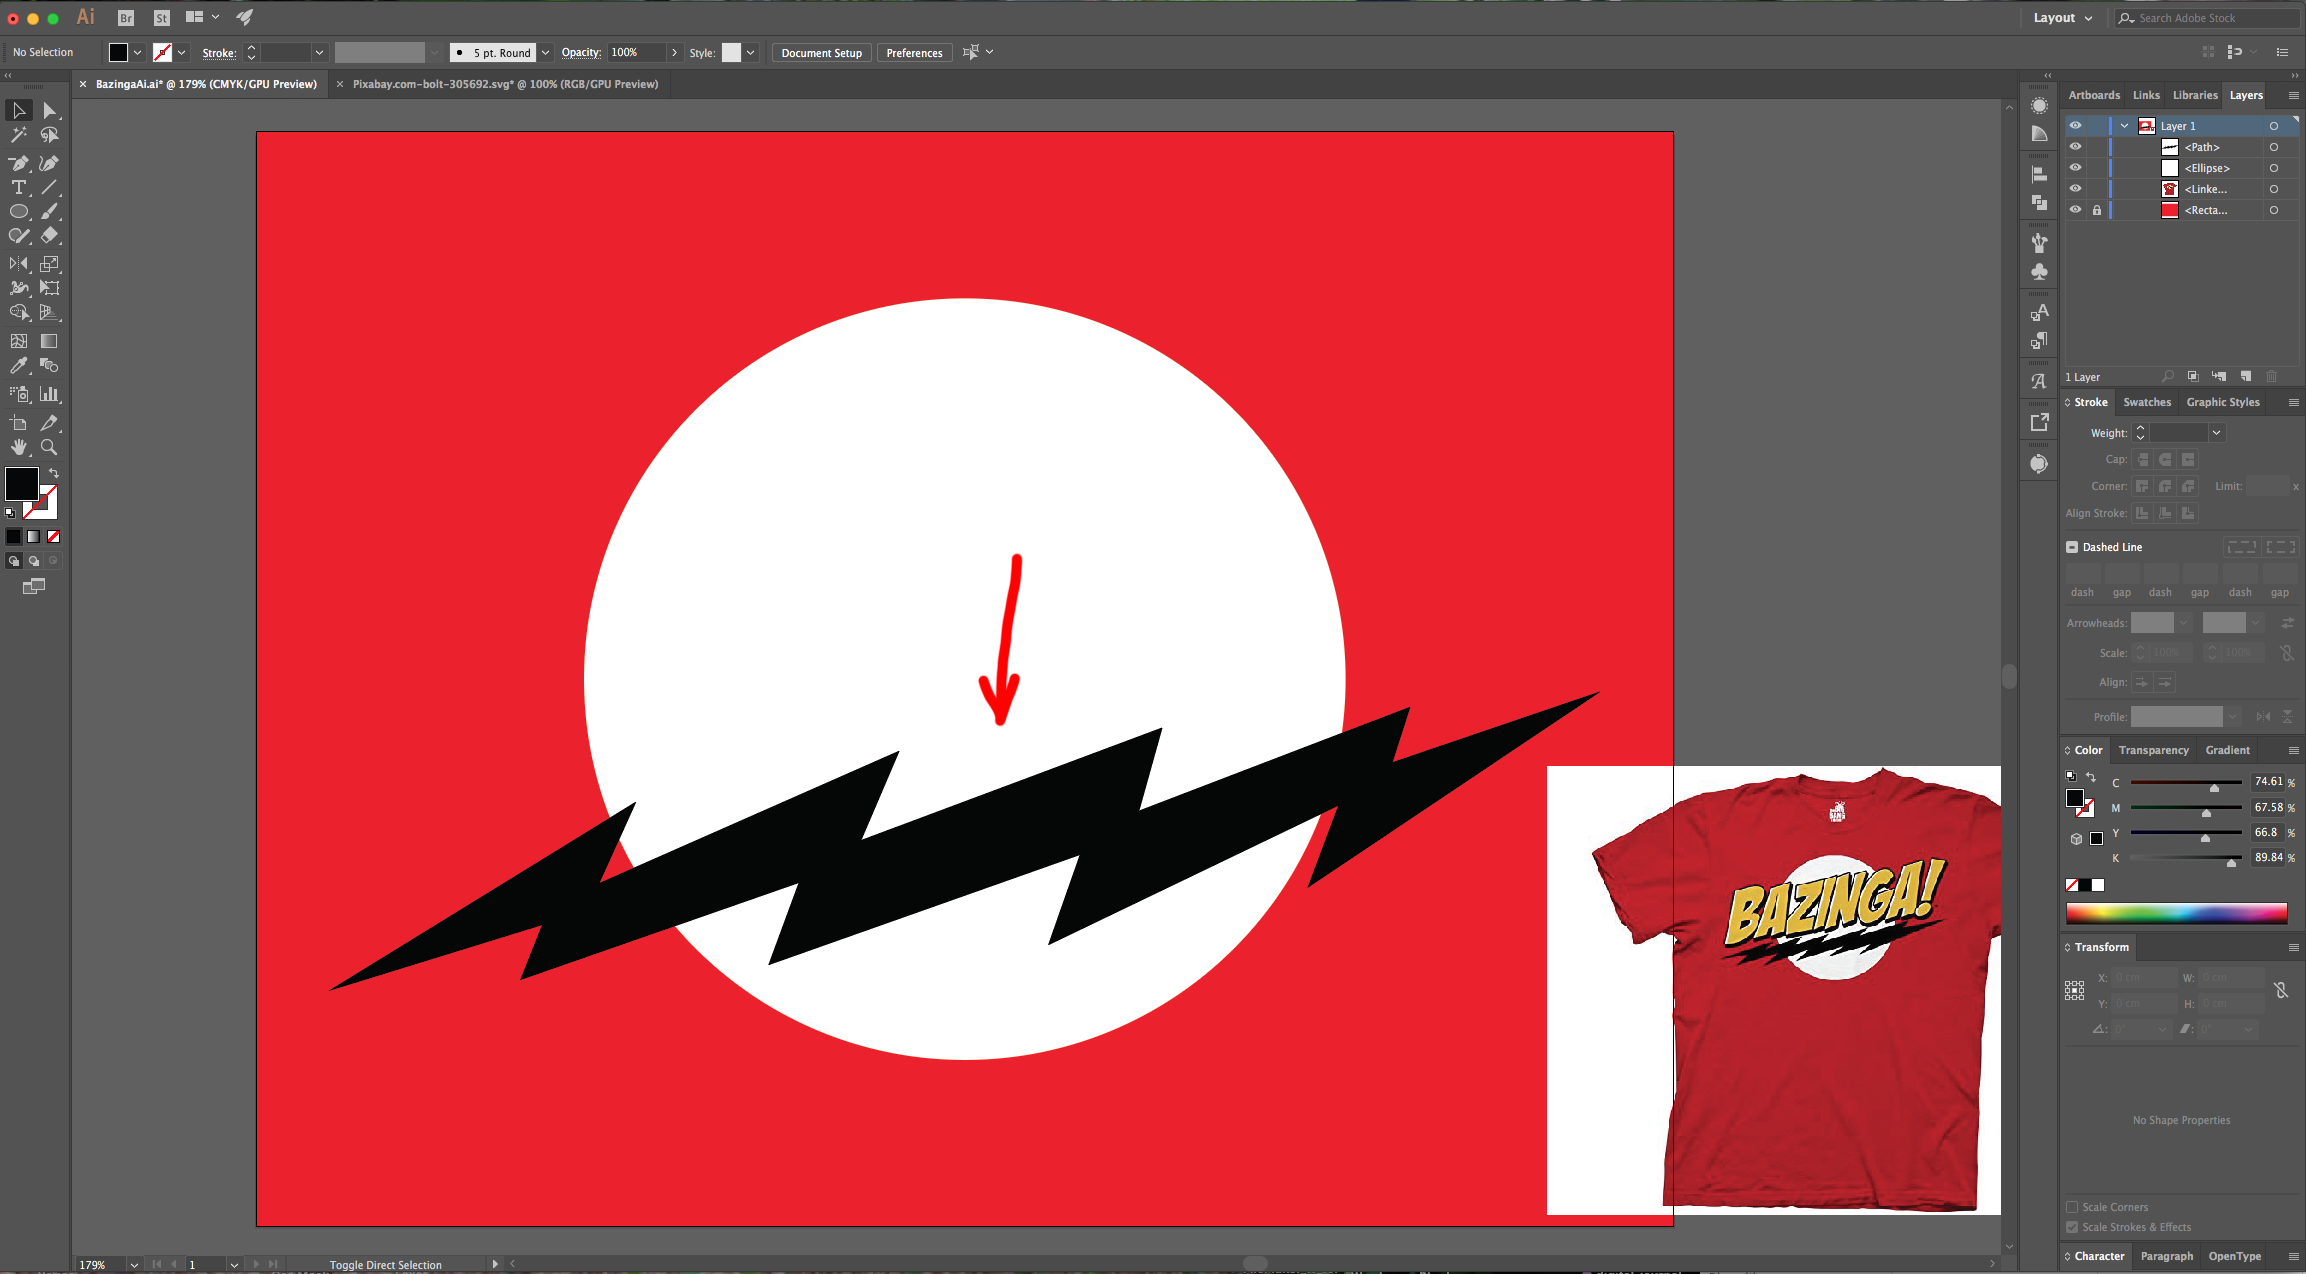
10 - Once you are done, select both instances of the lightning bolt, go to the “Pathfinder Panel” and choose “Unite”, thin down your Shape and move it down a bit to place it in the lower part of the circle.
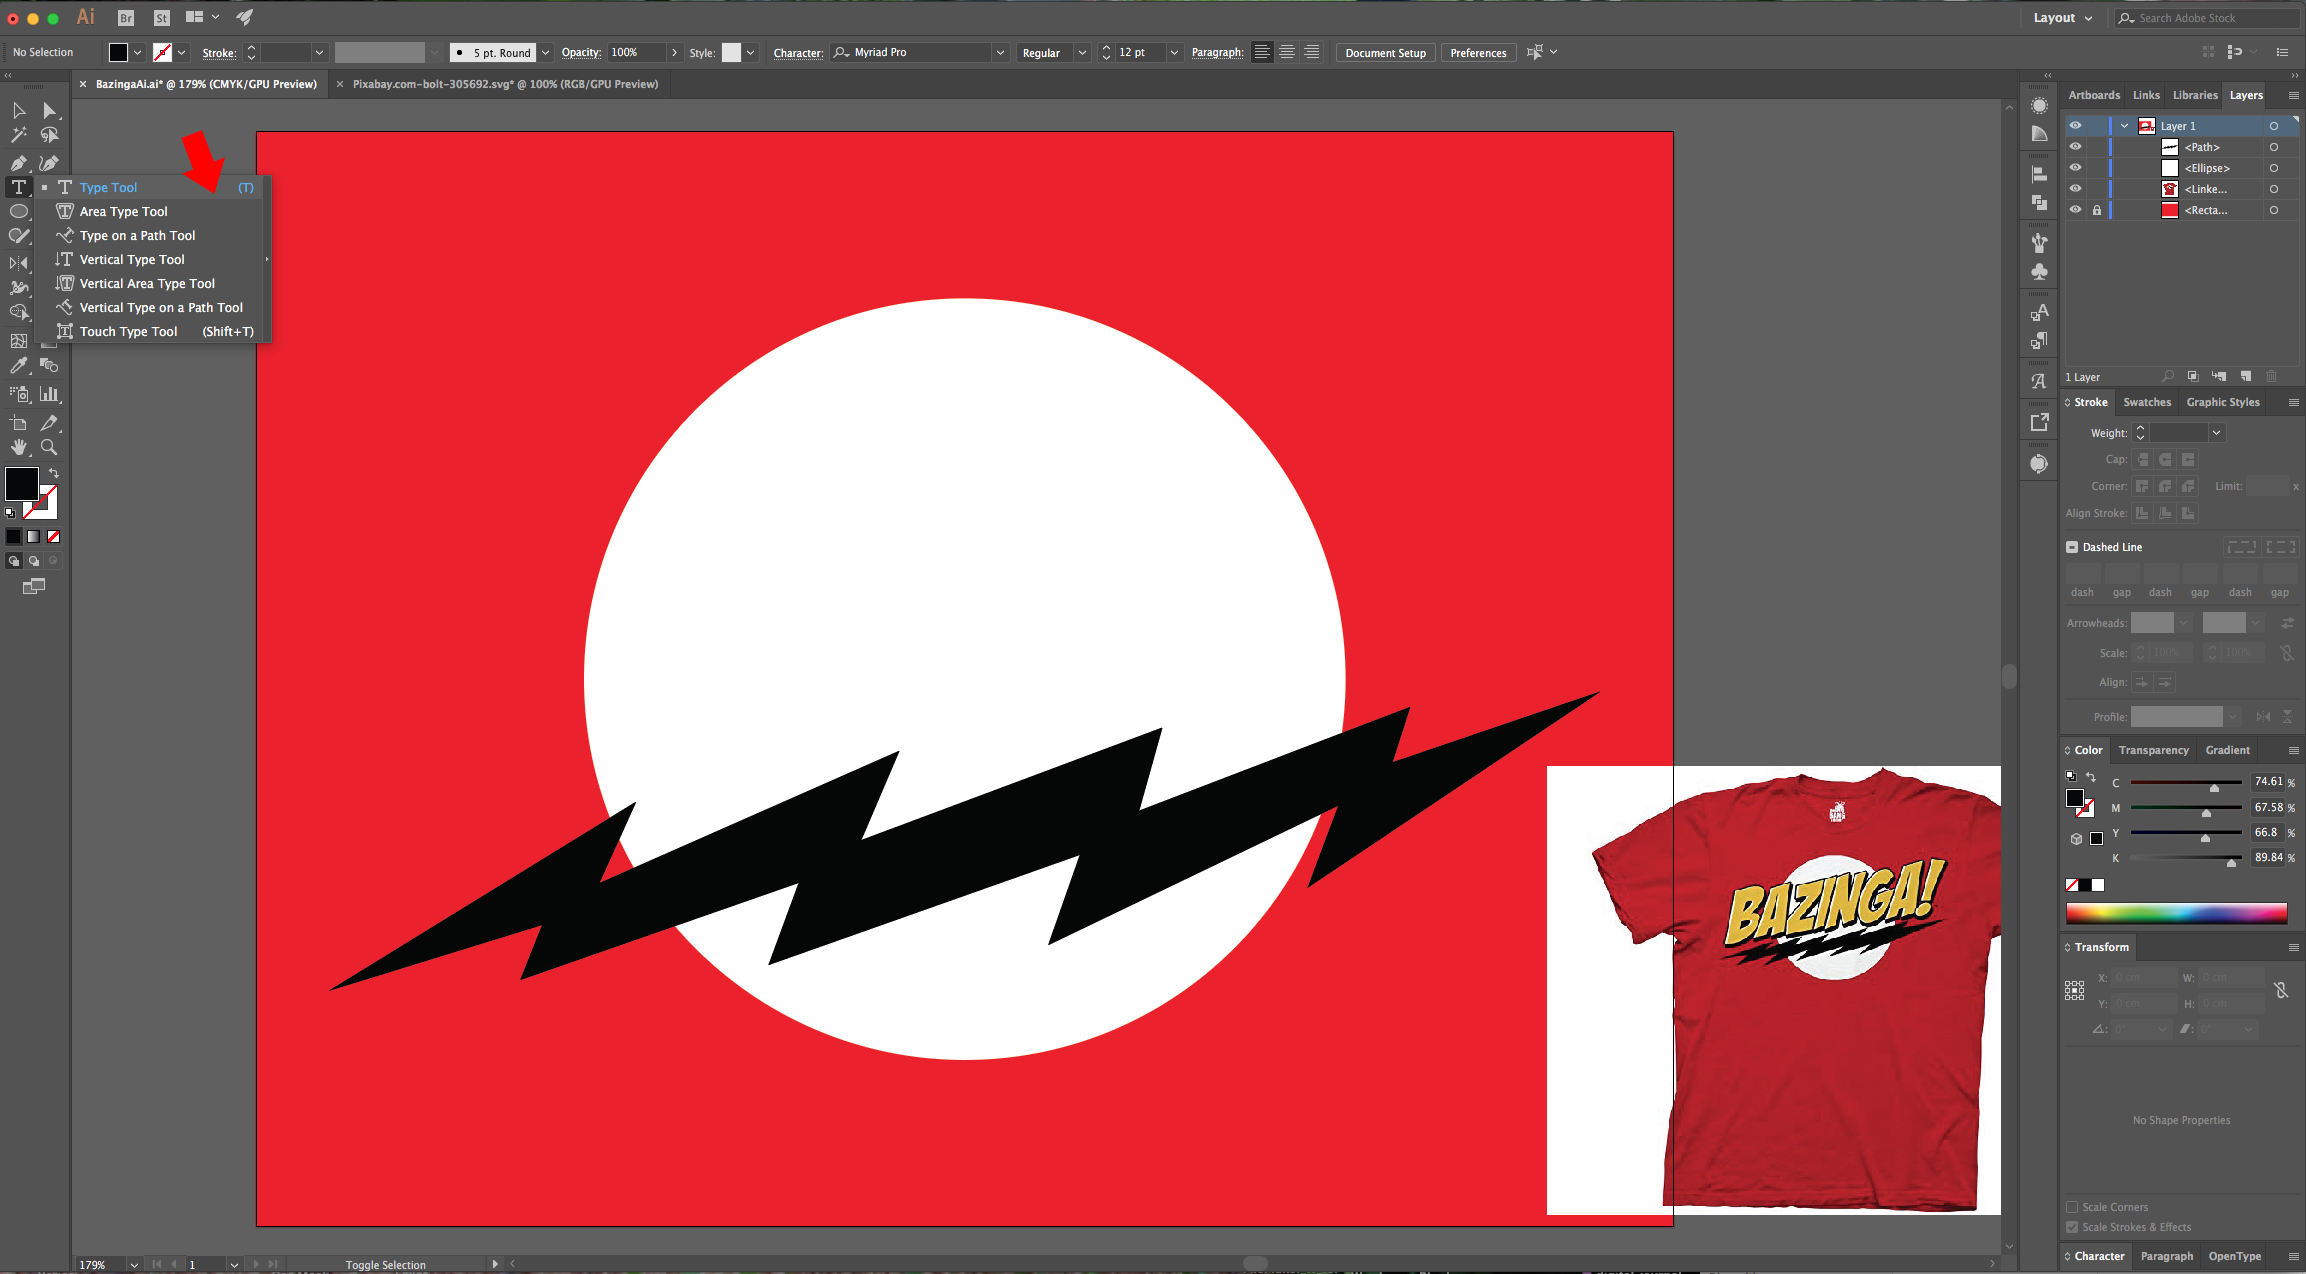
11 - Select the “Type Tool” (T) choose your font (we used BadaBoom BB) and type your text. Make it about 250 pt in “Size” and fill it with Black. In the “Character Panel” change the “Tracking” to 90%.
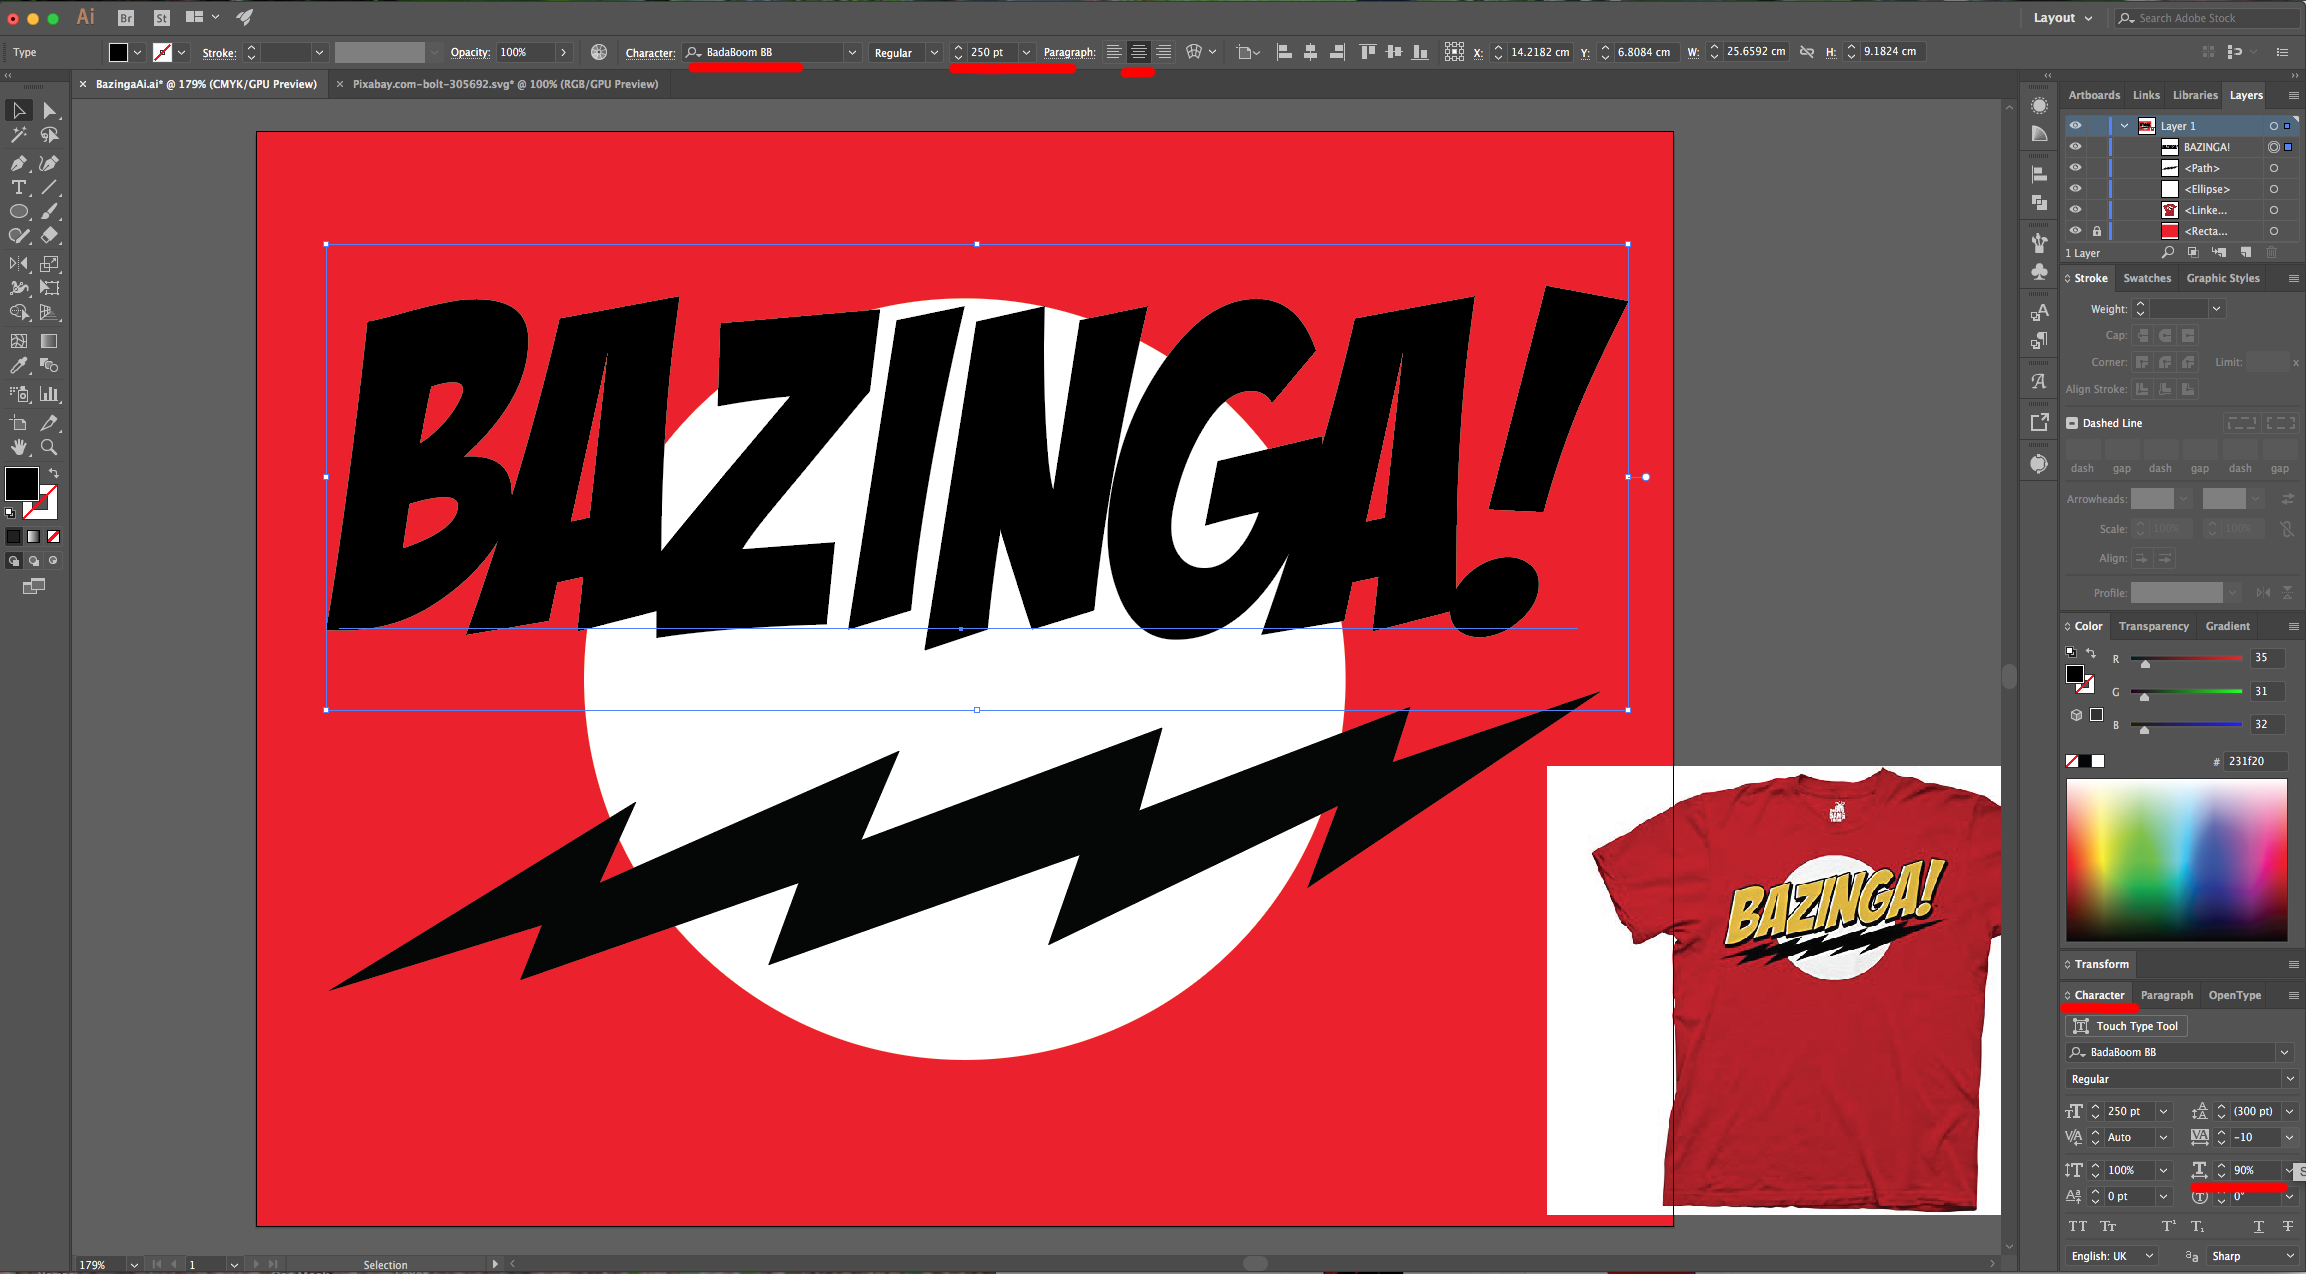
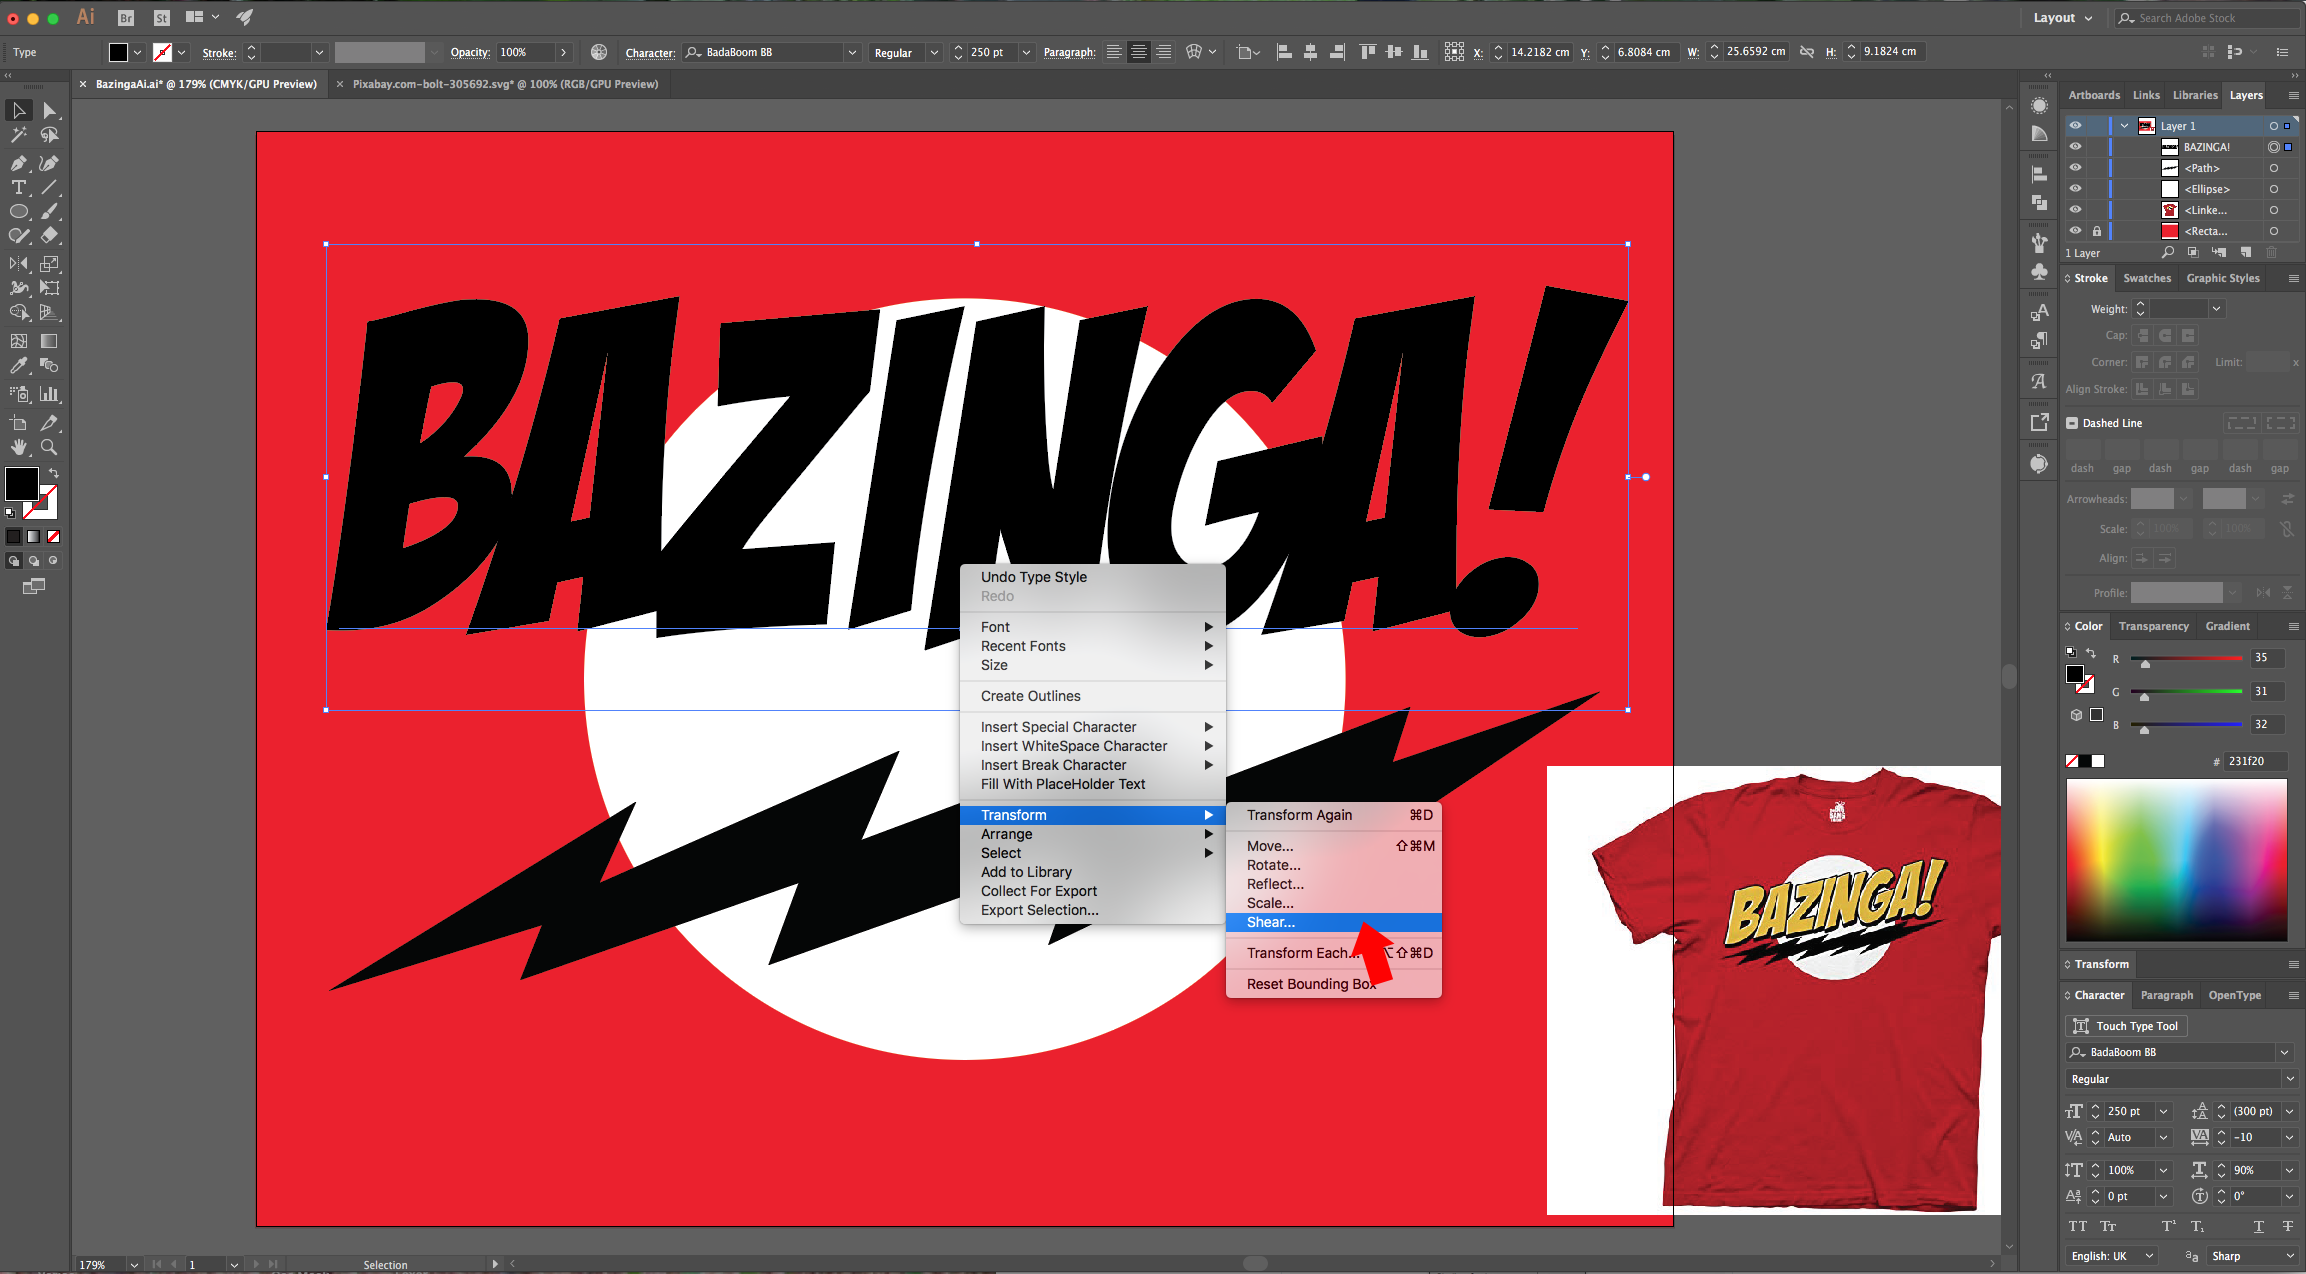
12 - Right-click on top of your text and choose Transform > Shear… Use a “Shear Angle” of -8° with a “Vertical Axis”.
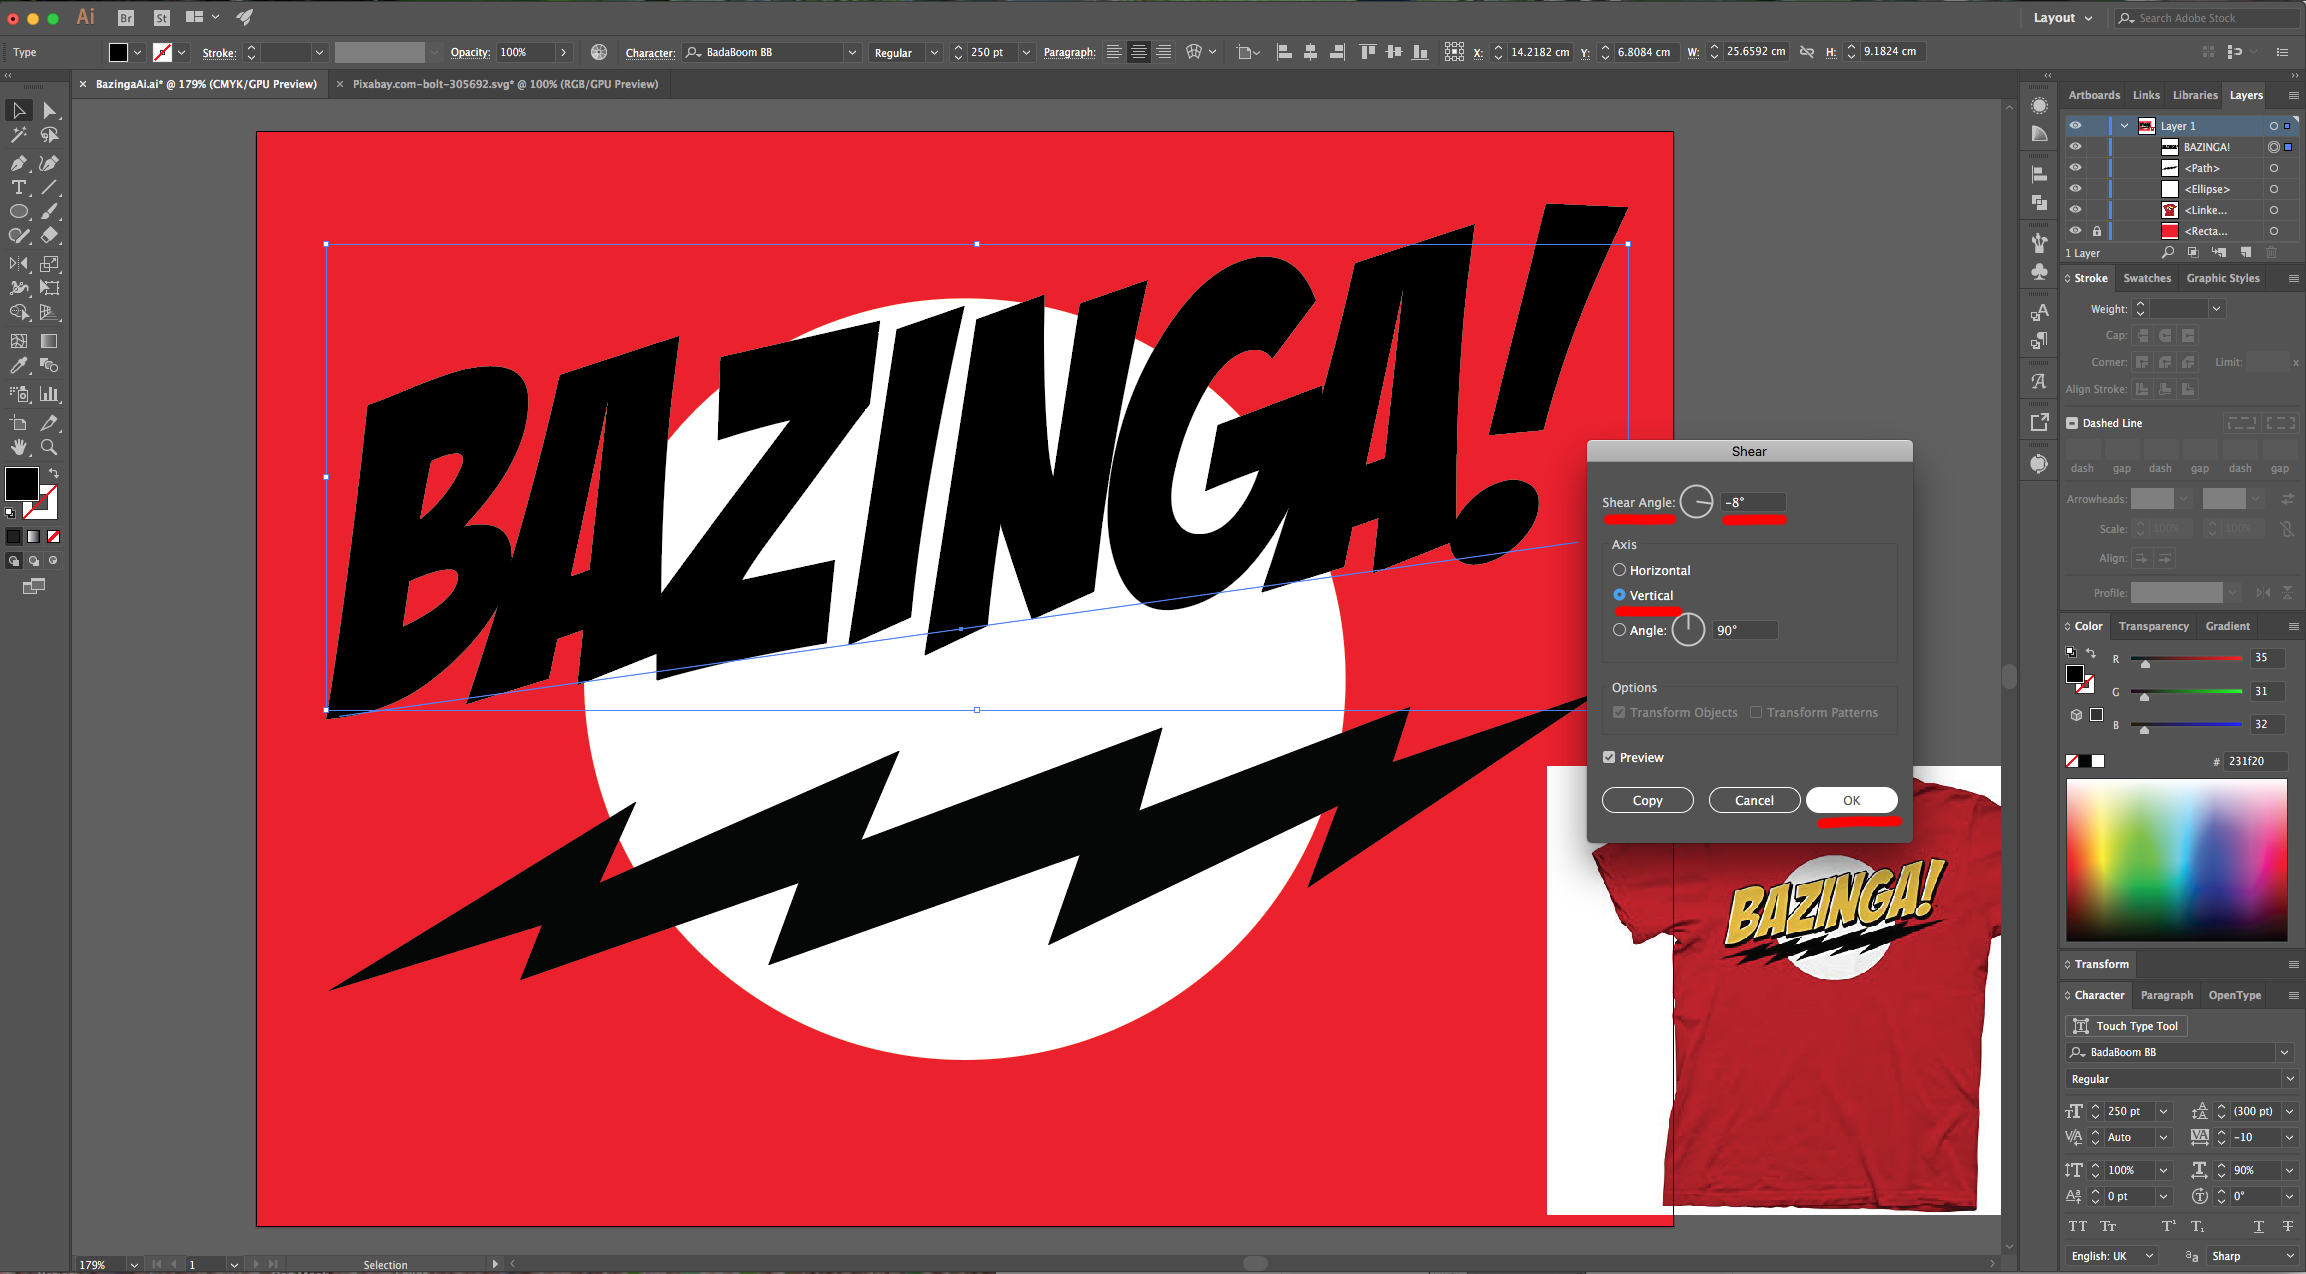
13 - Center your text using the “Horizontal and Vertical Align Center” options on your Top Menu making sure that “Align to Artboard” is selected. Or use the same options in the “Align Panel”. Move the “Lighting Bolt” if needed to position it as similar as possible to the one in the reference image.
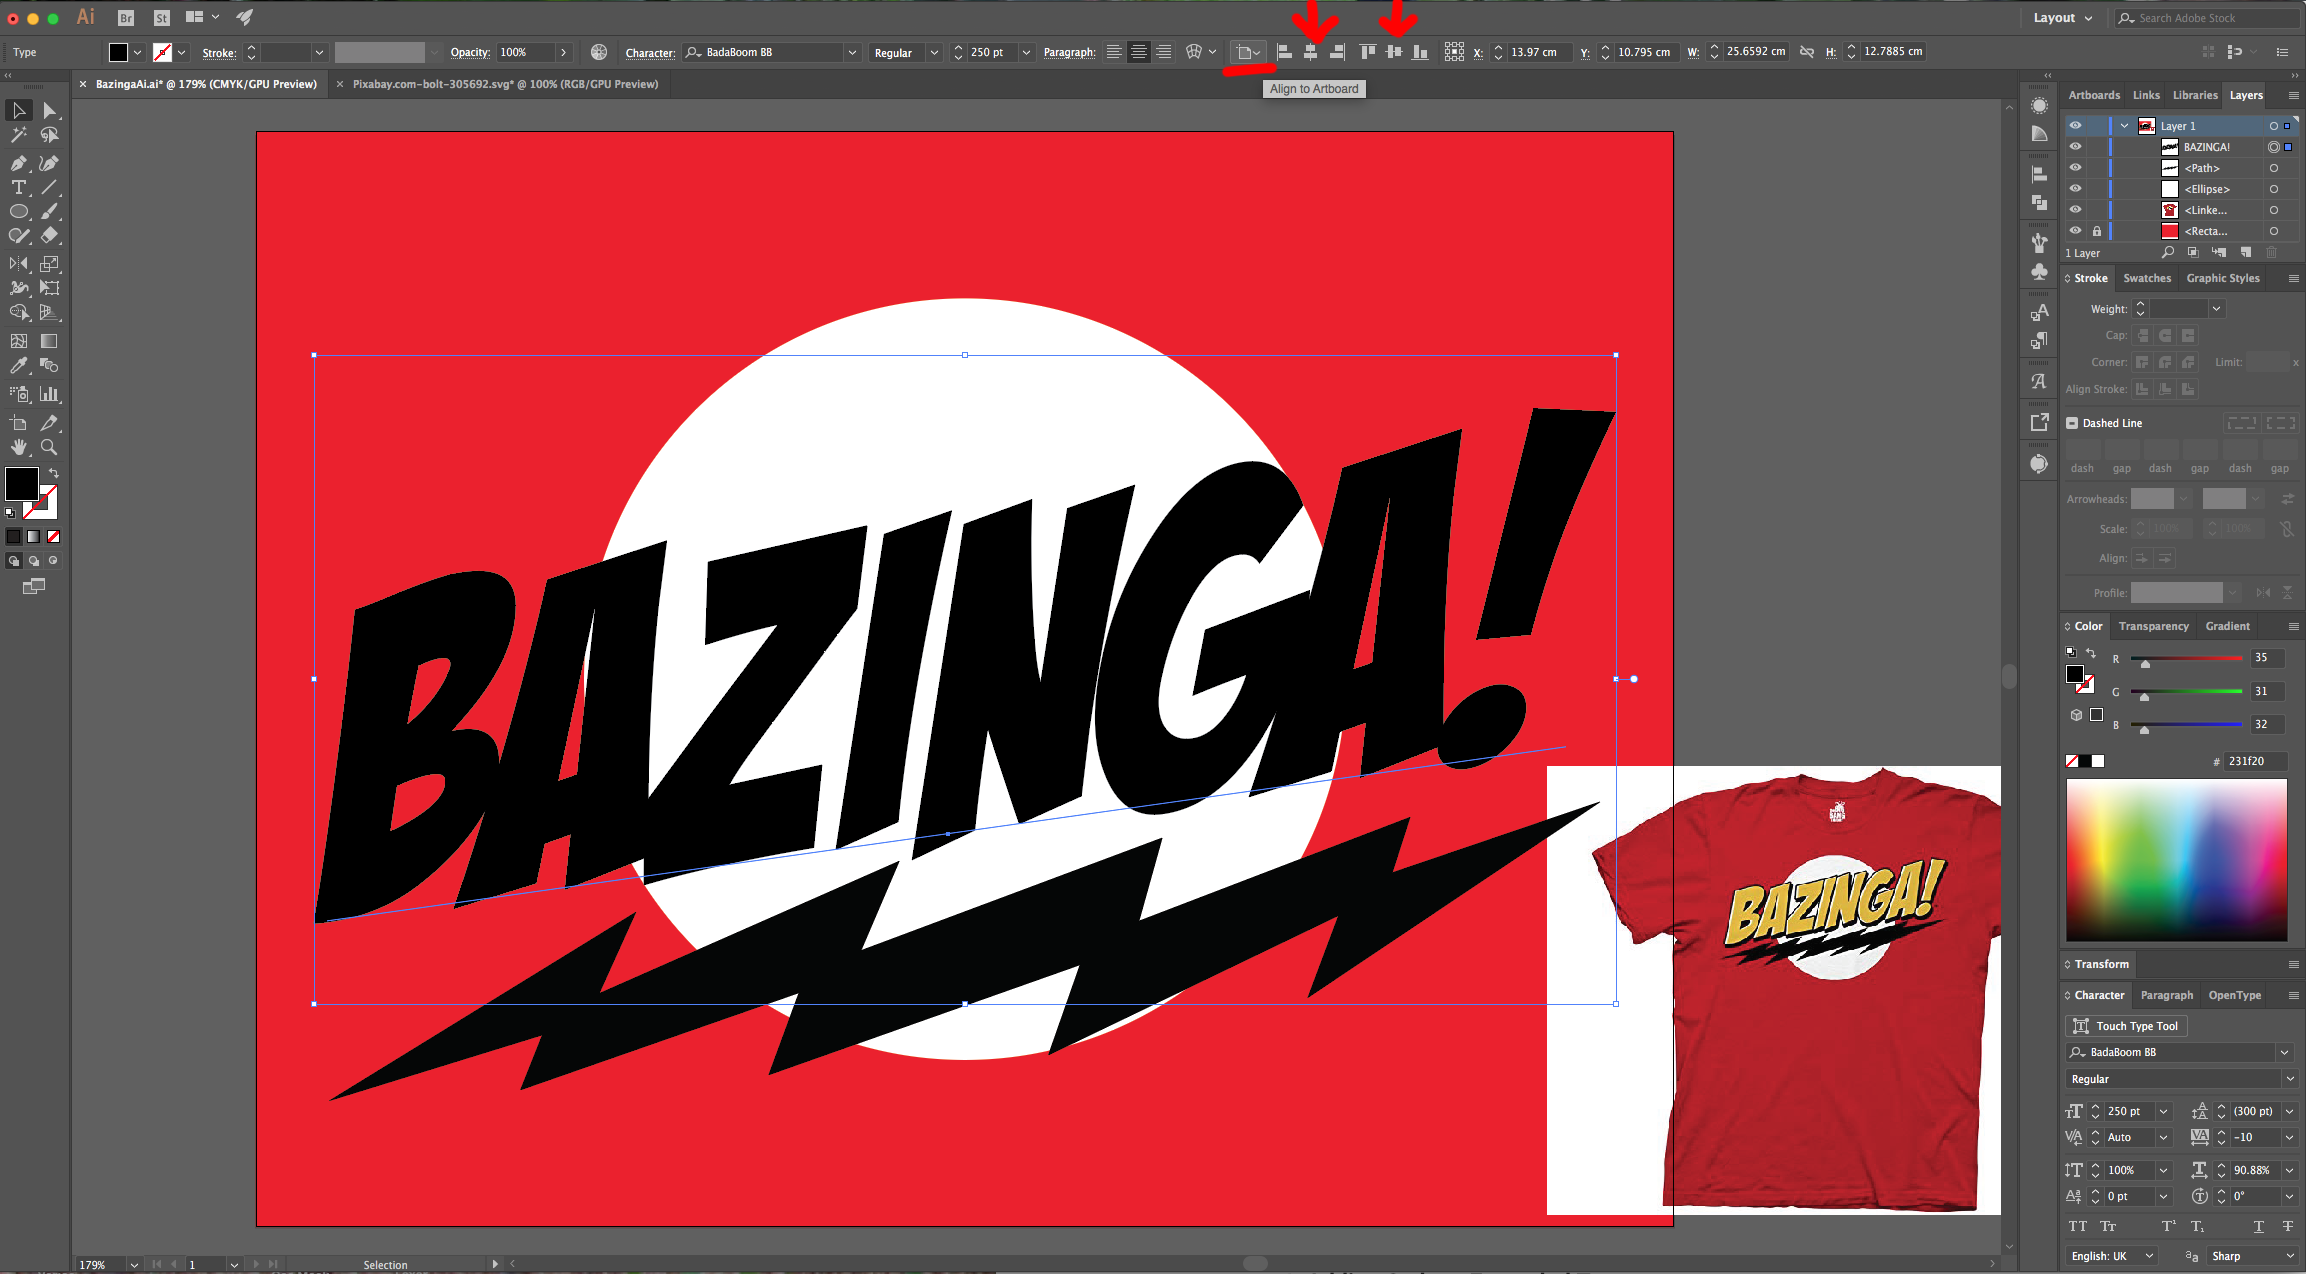
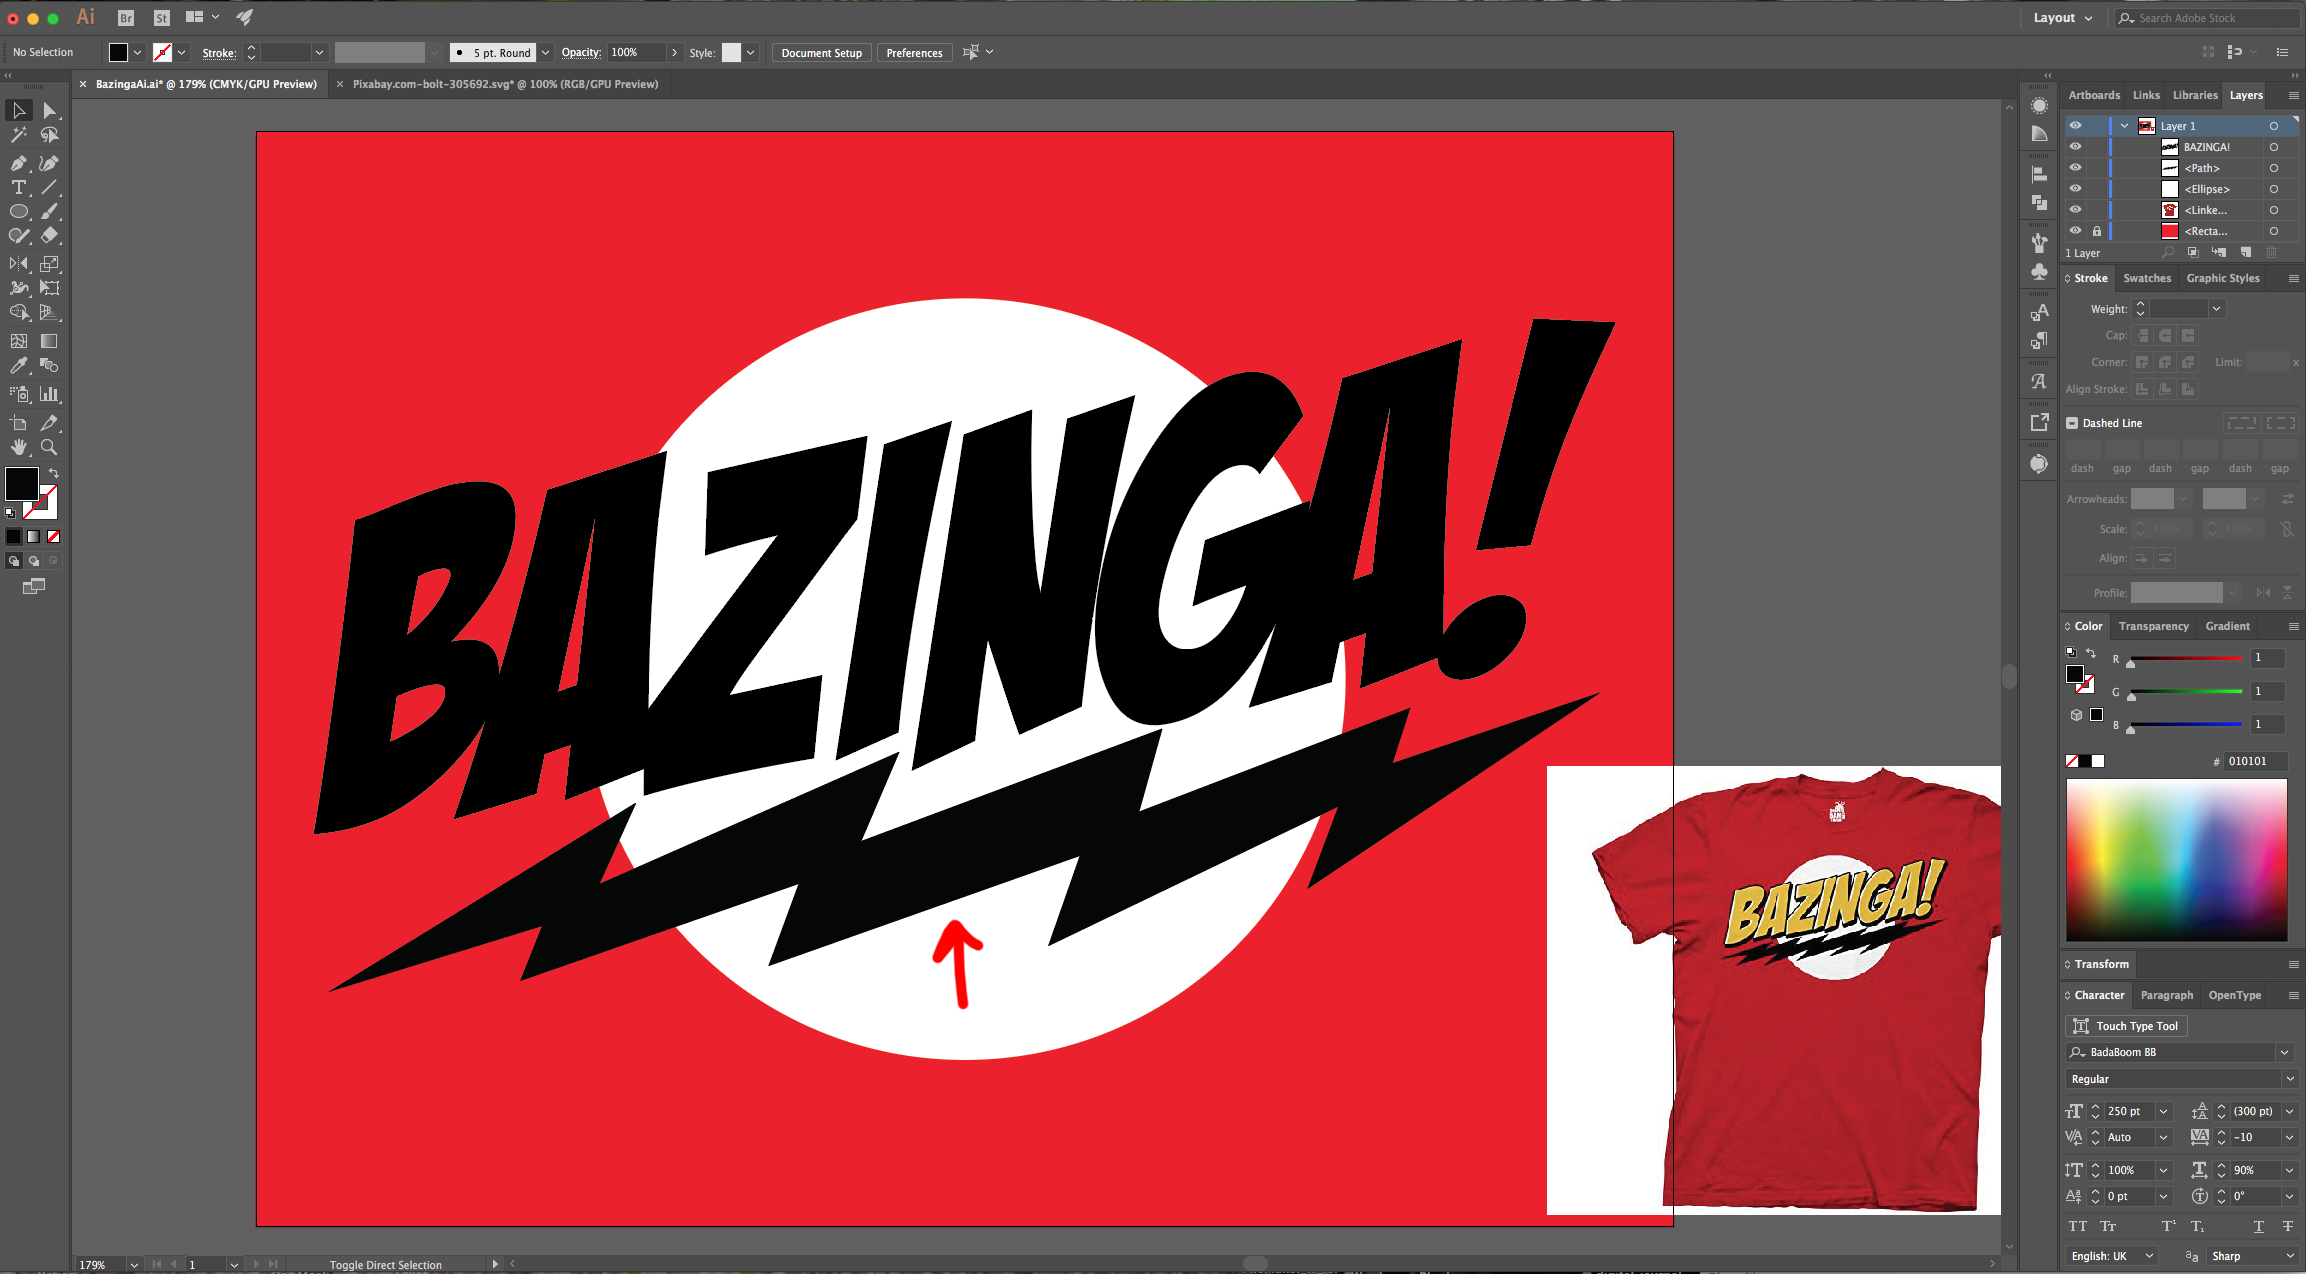
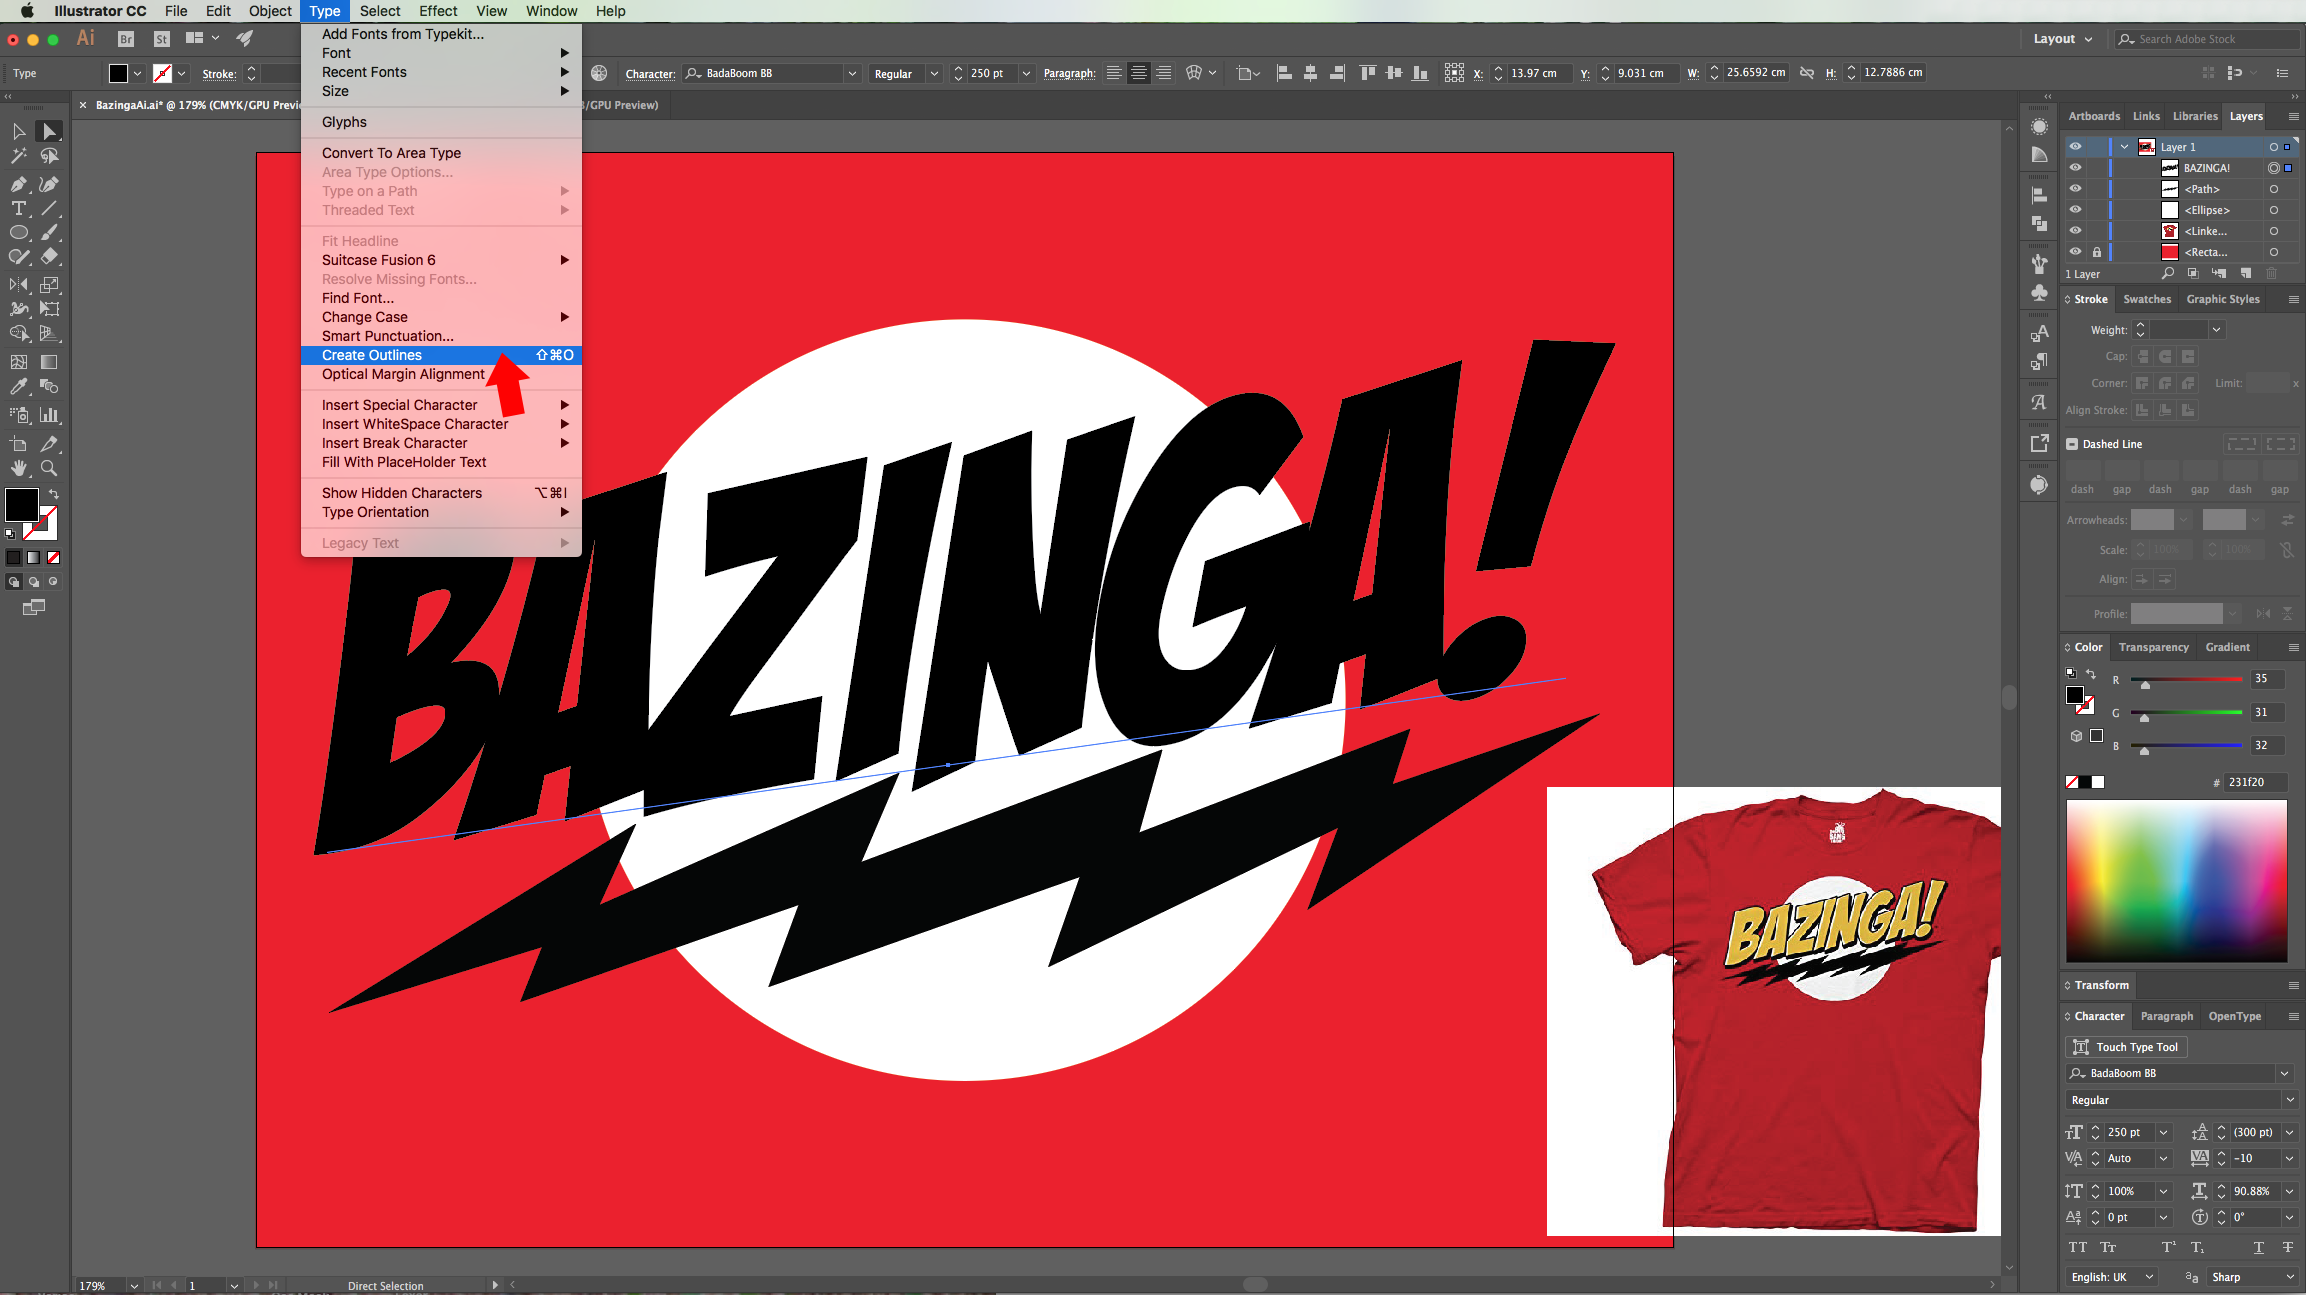
14 - Select your text and go to Type > Create Outlines… (Shift + Command/Control + O) then, right-click on top and choose “Ungroup”.
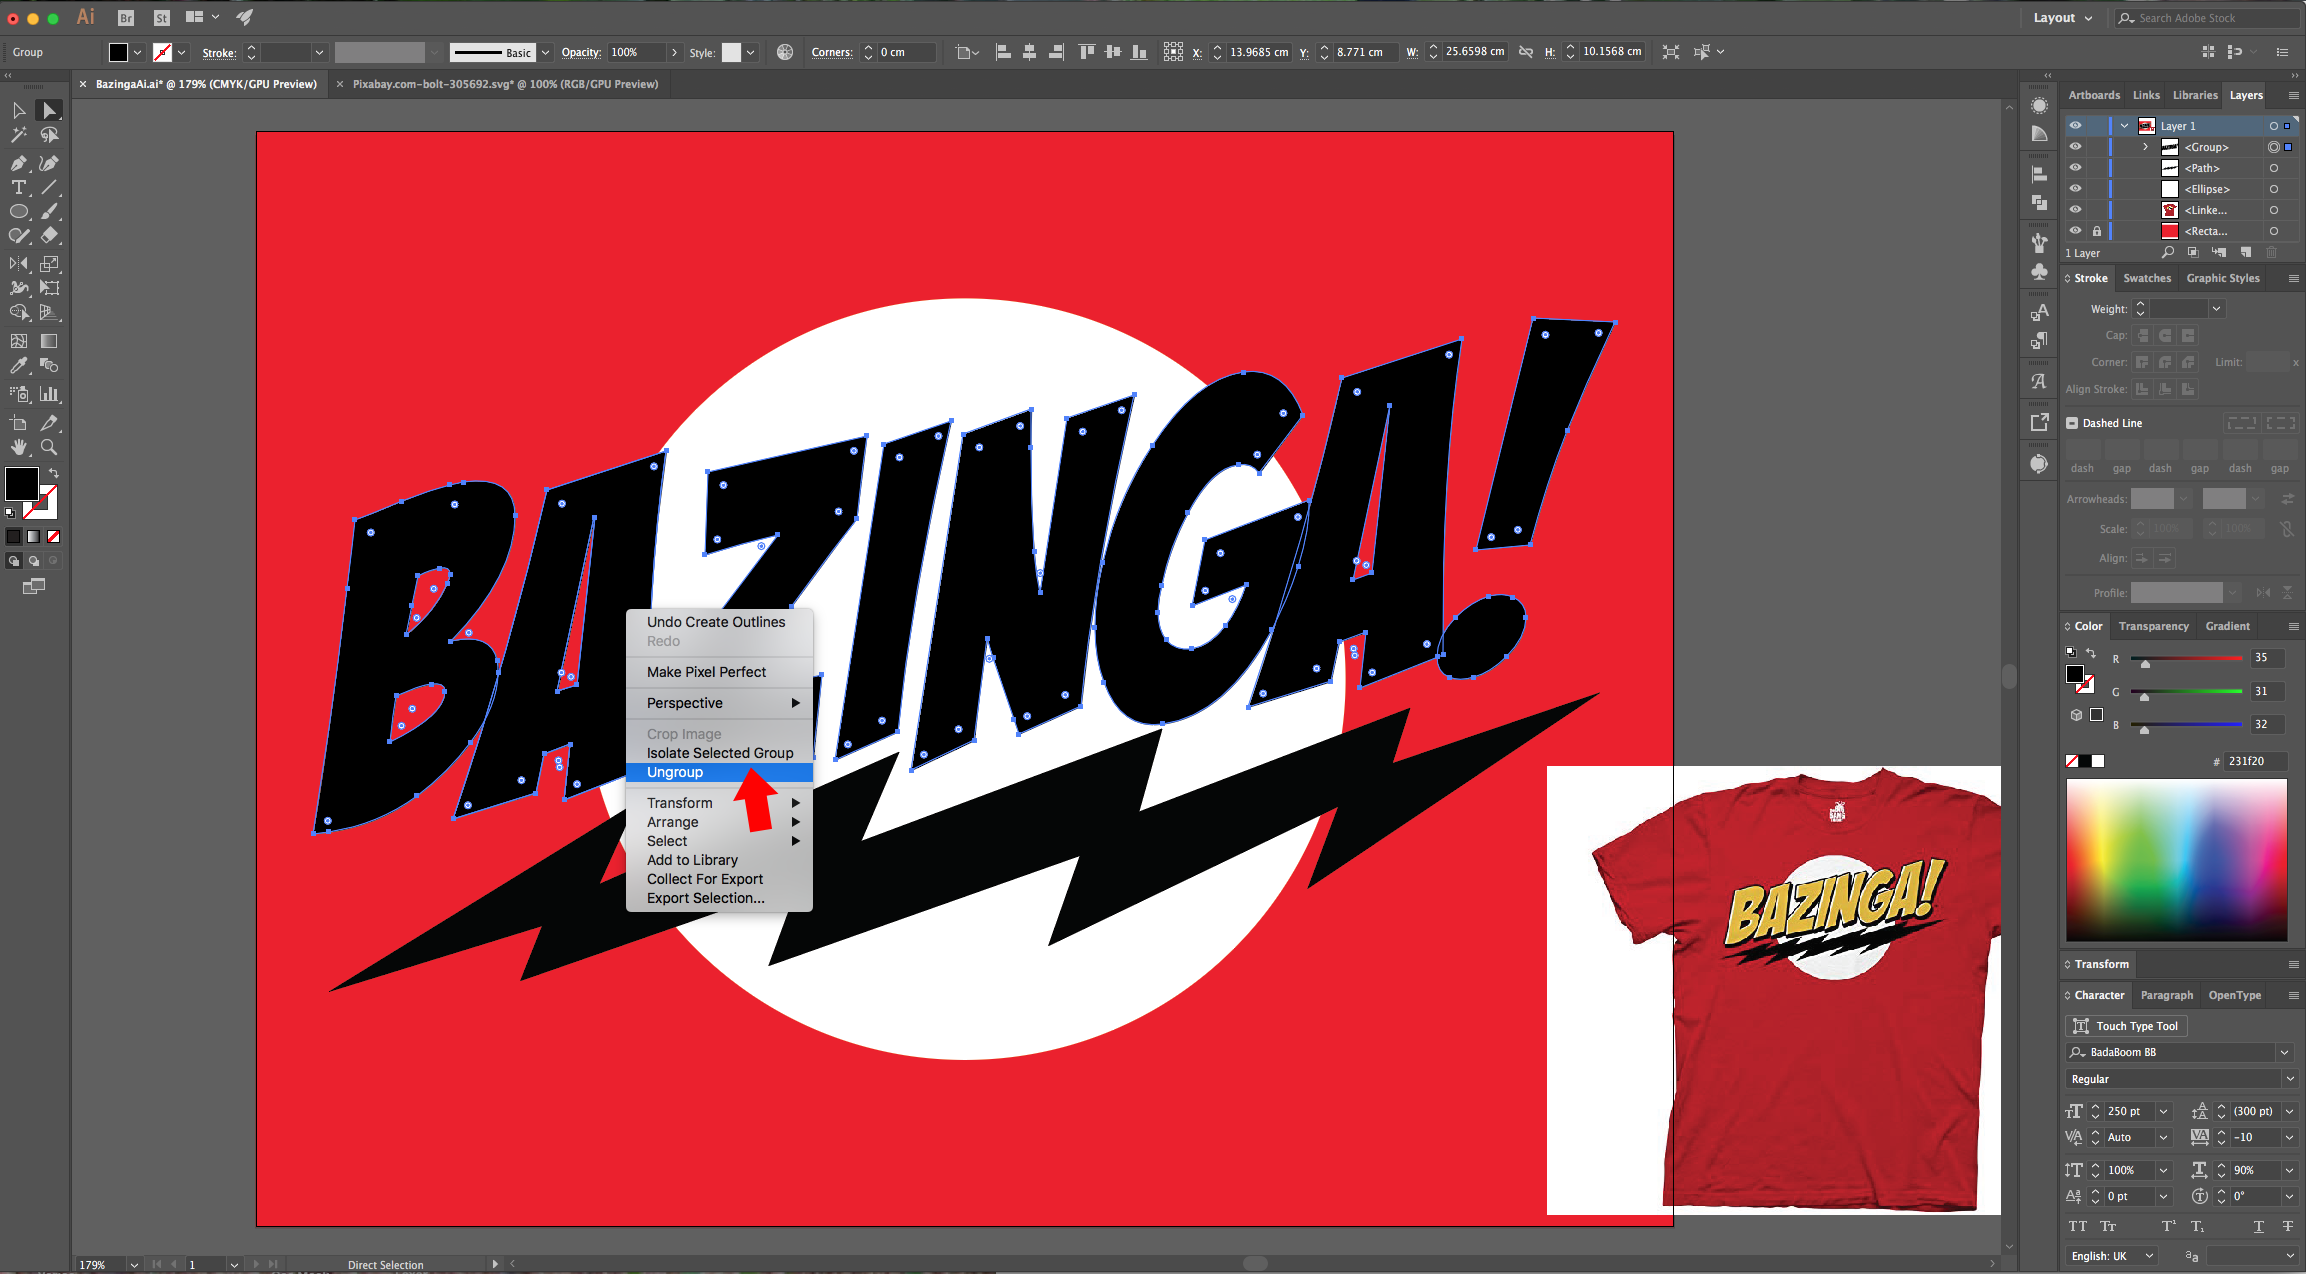
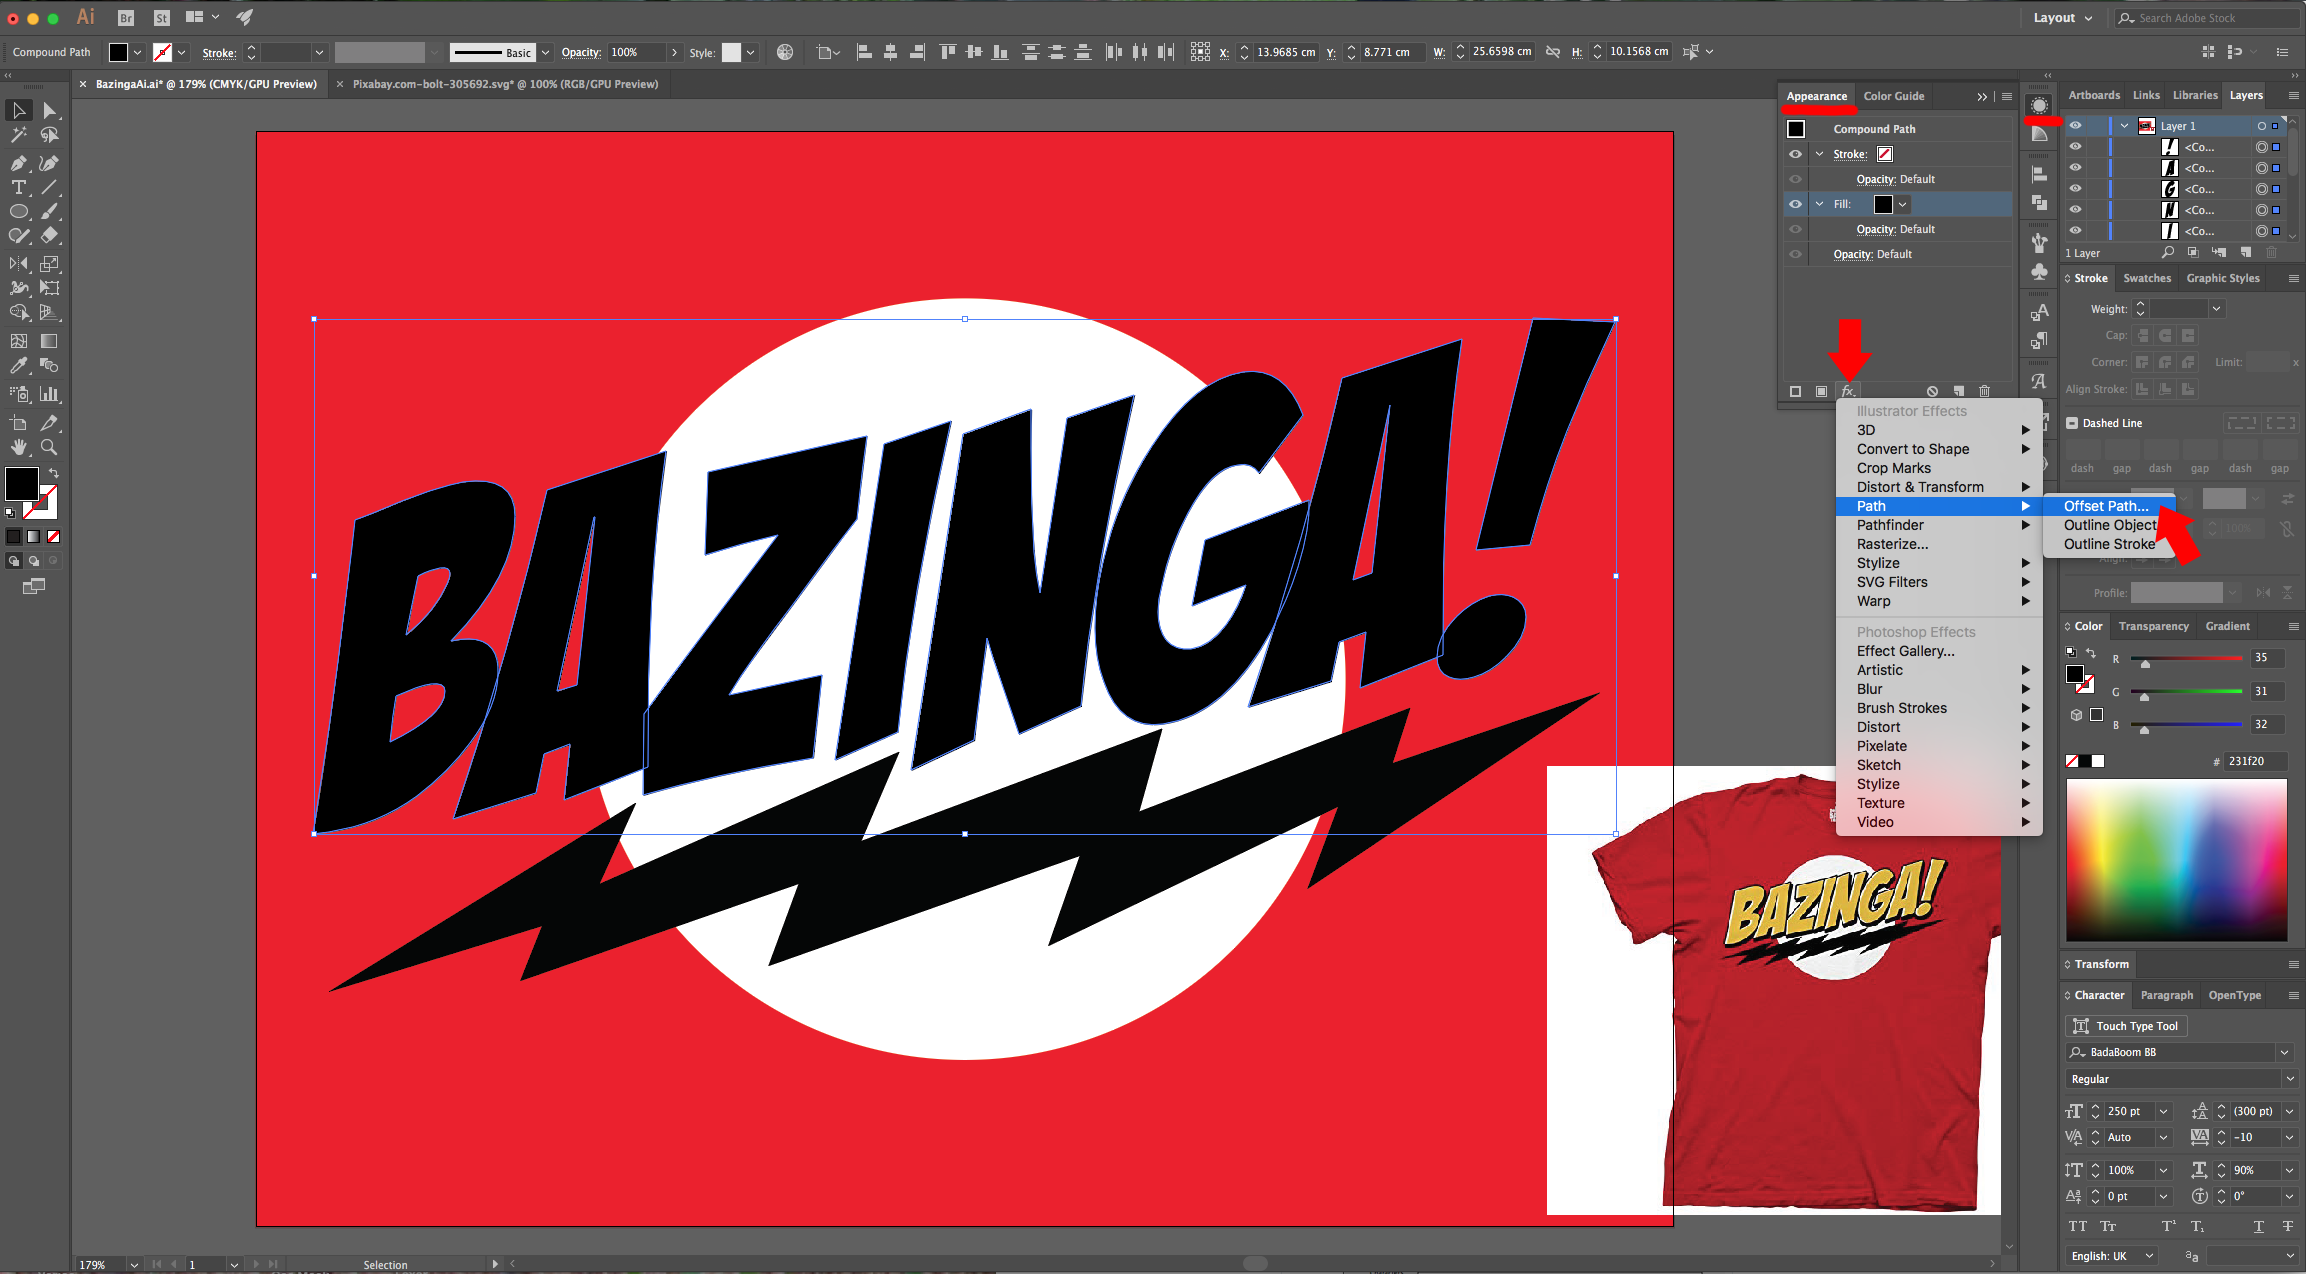
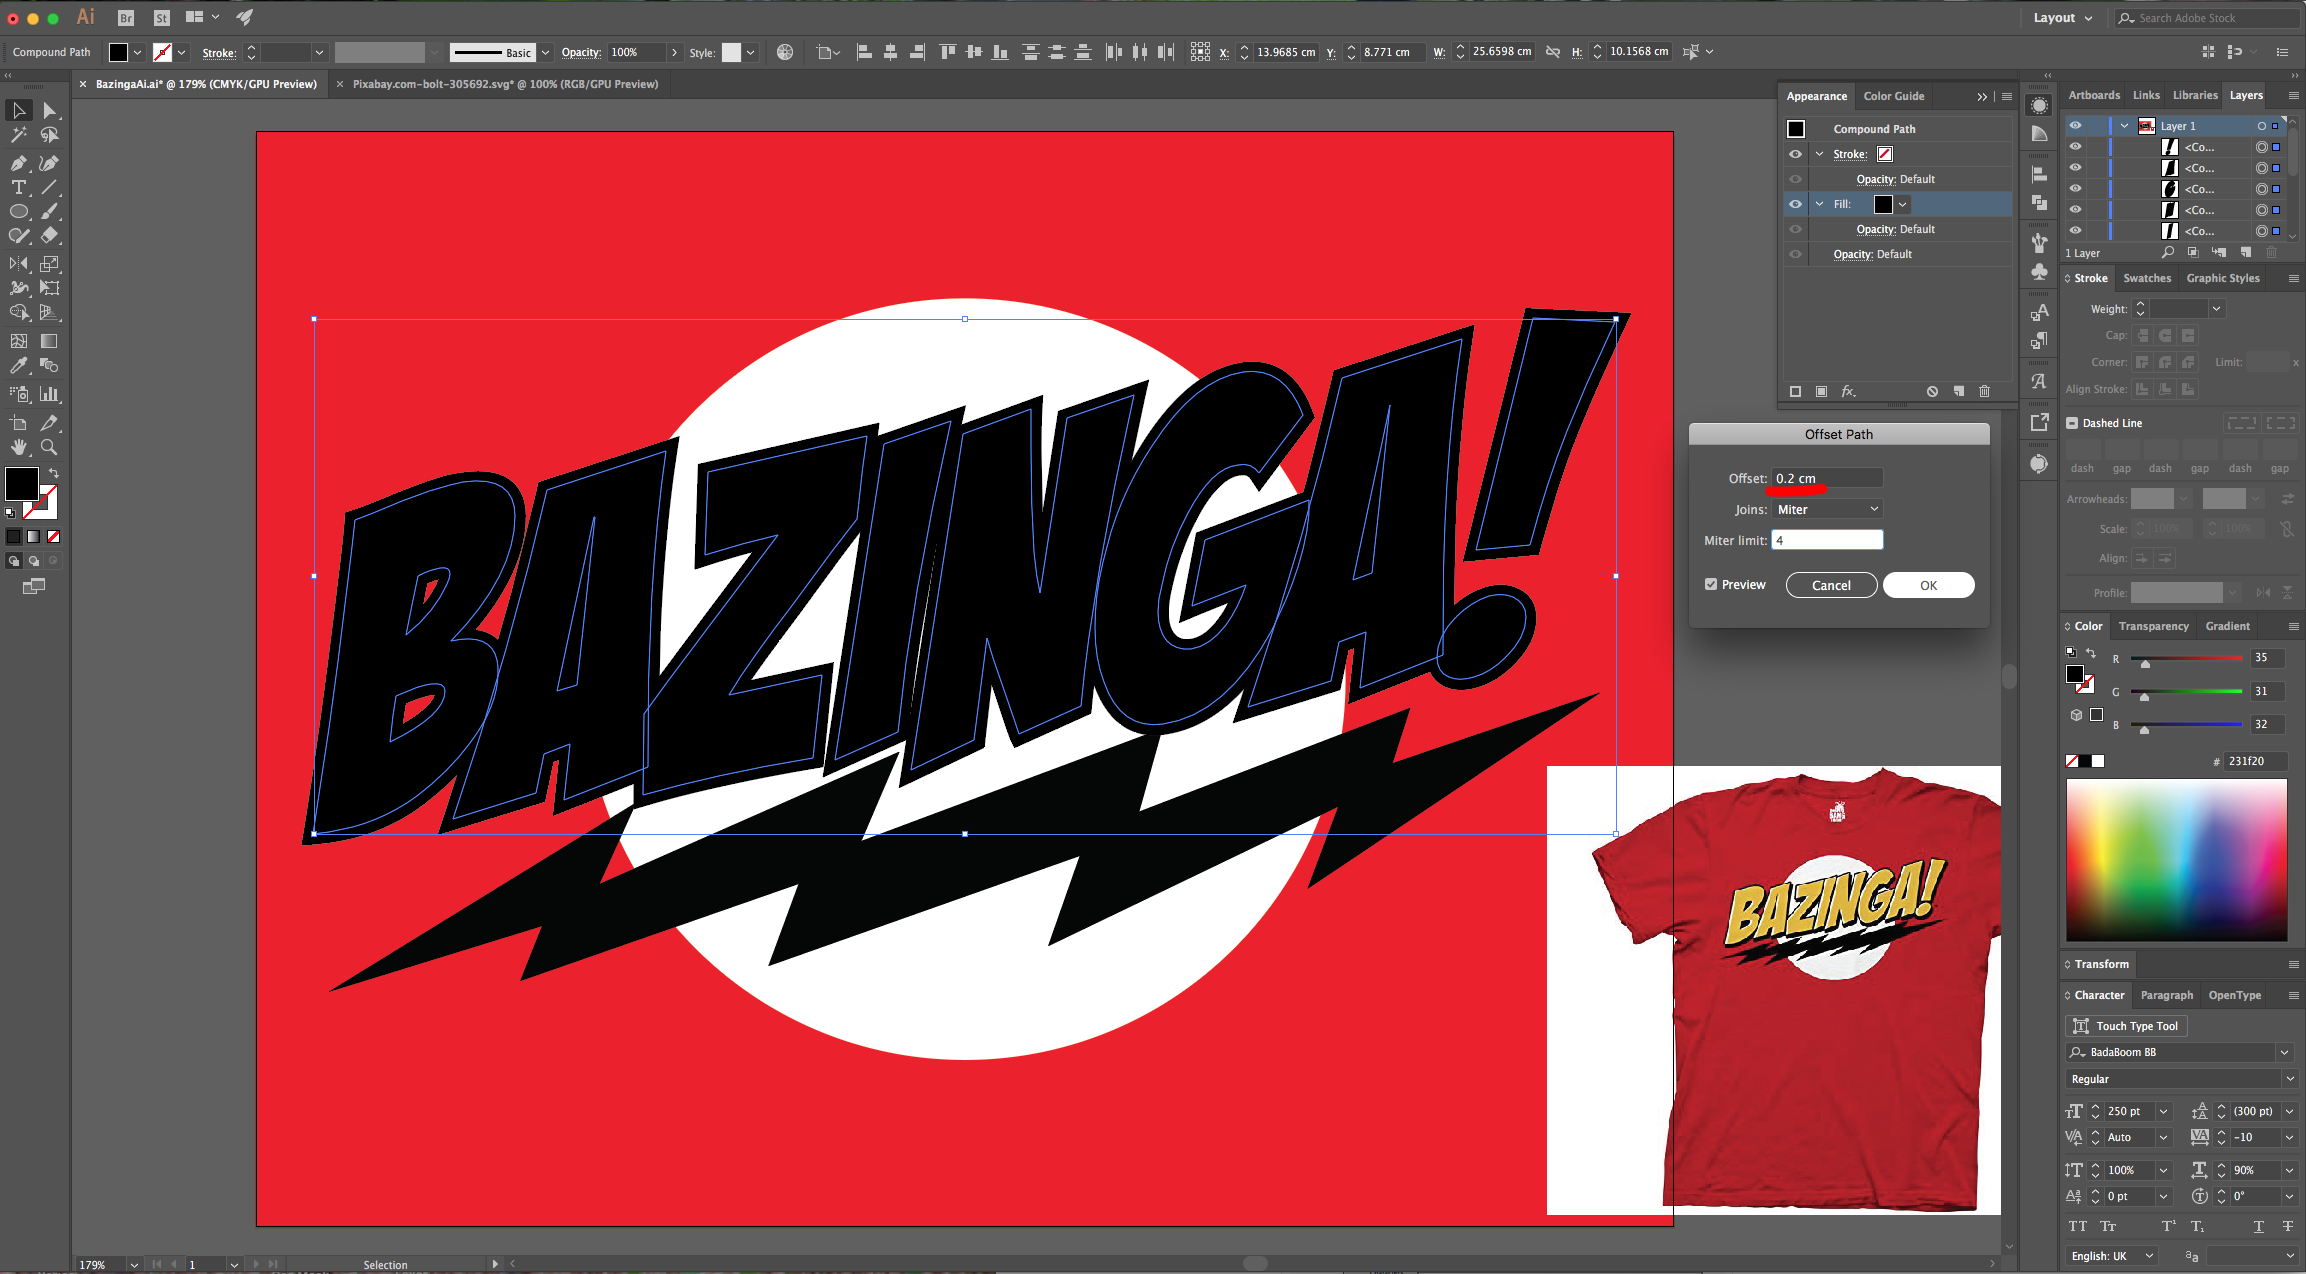
15 - Go to the “Appearance Panel” to apply another “Effect”. Go to Path > Offset Path… use a 0.2 cm “Offset”.
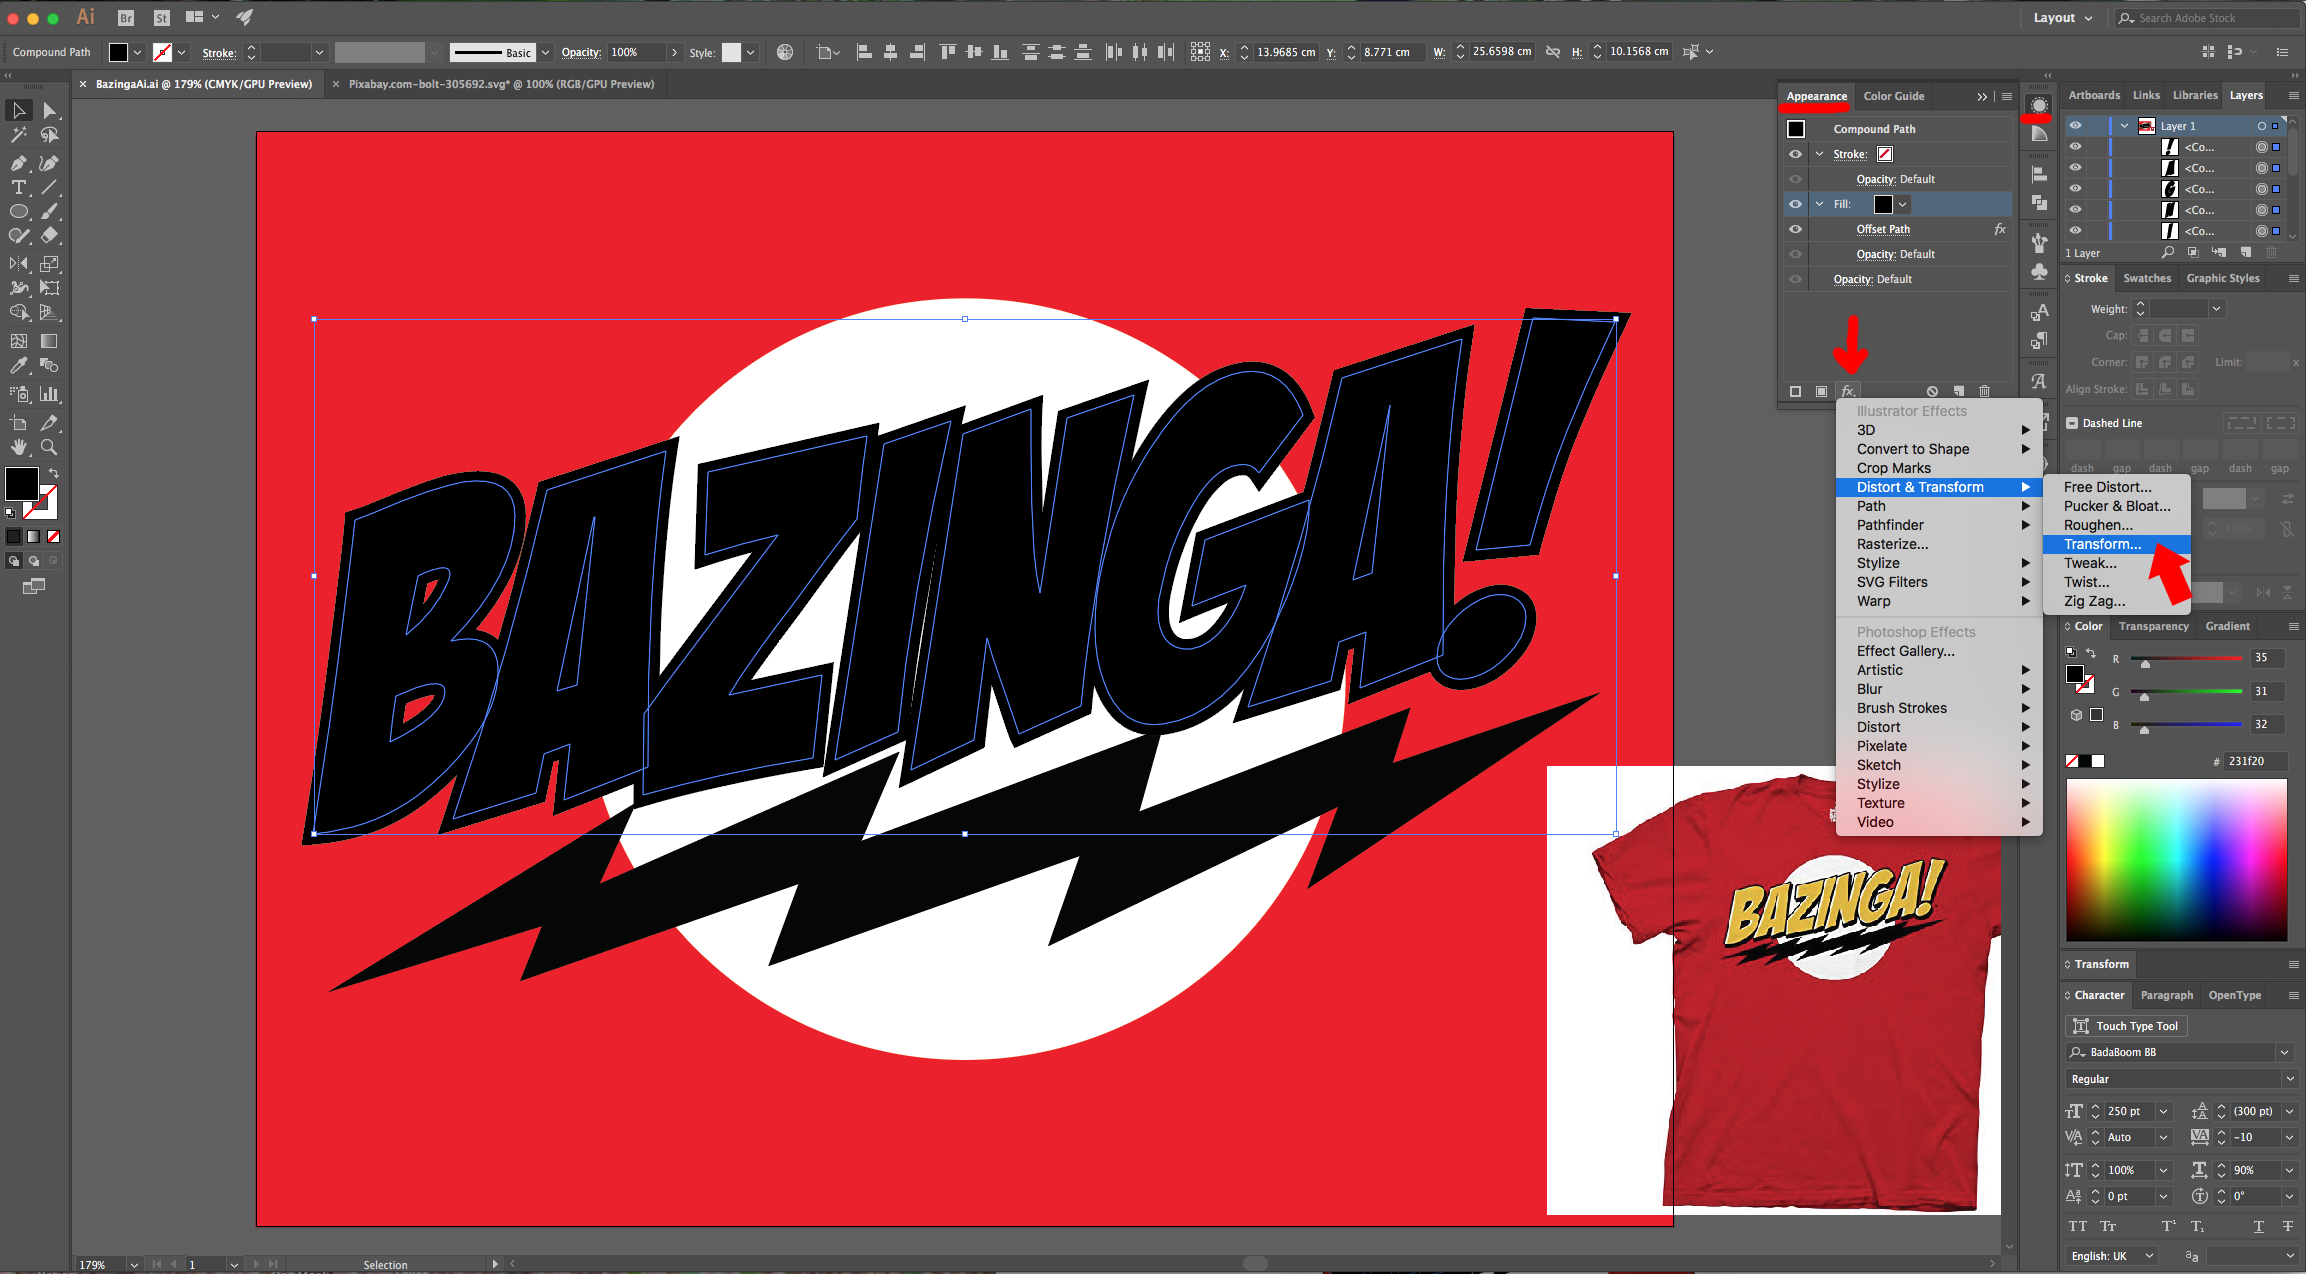
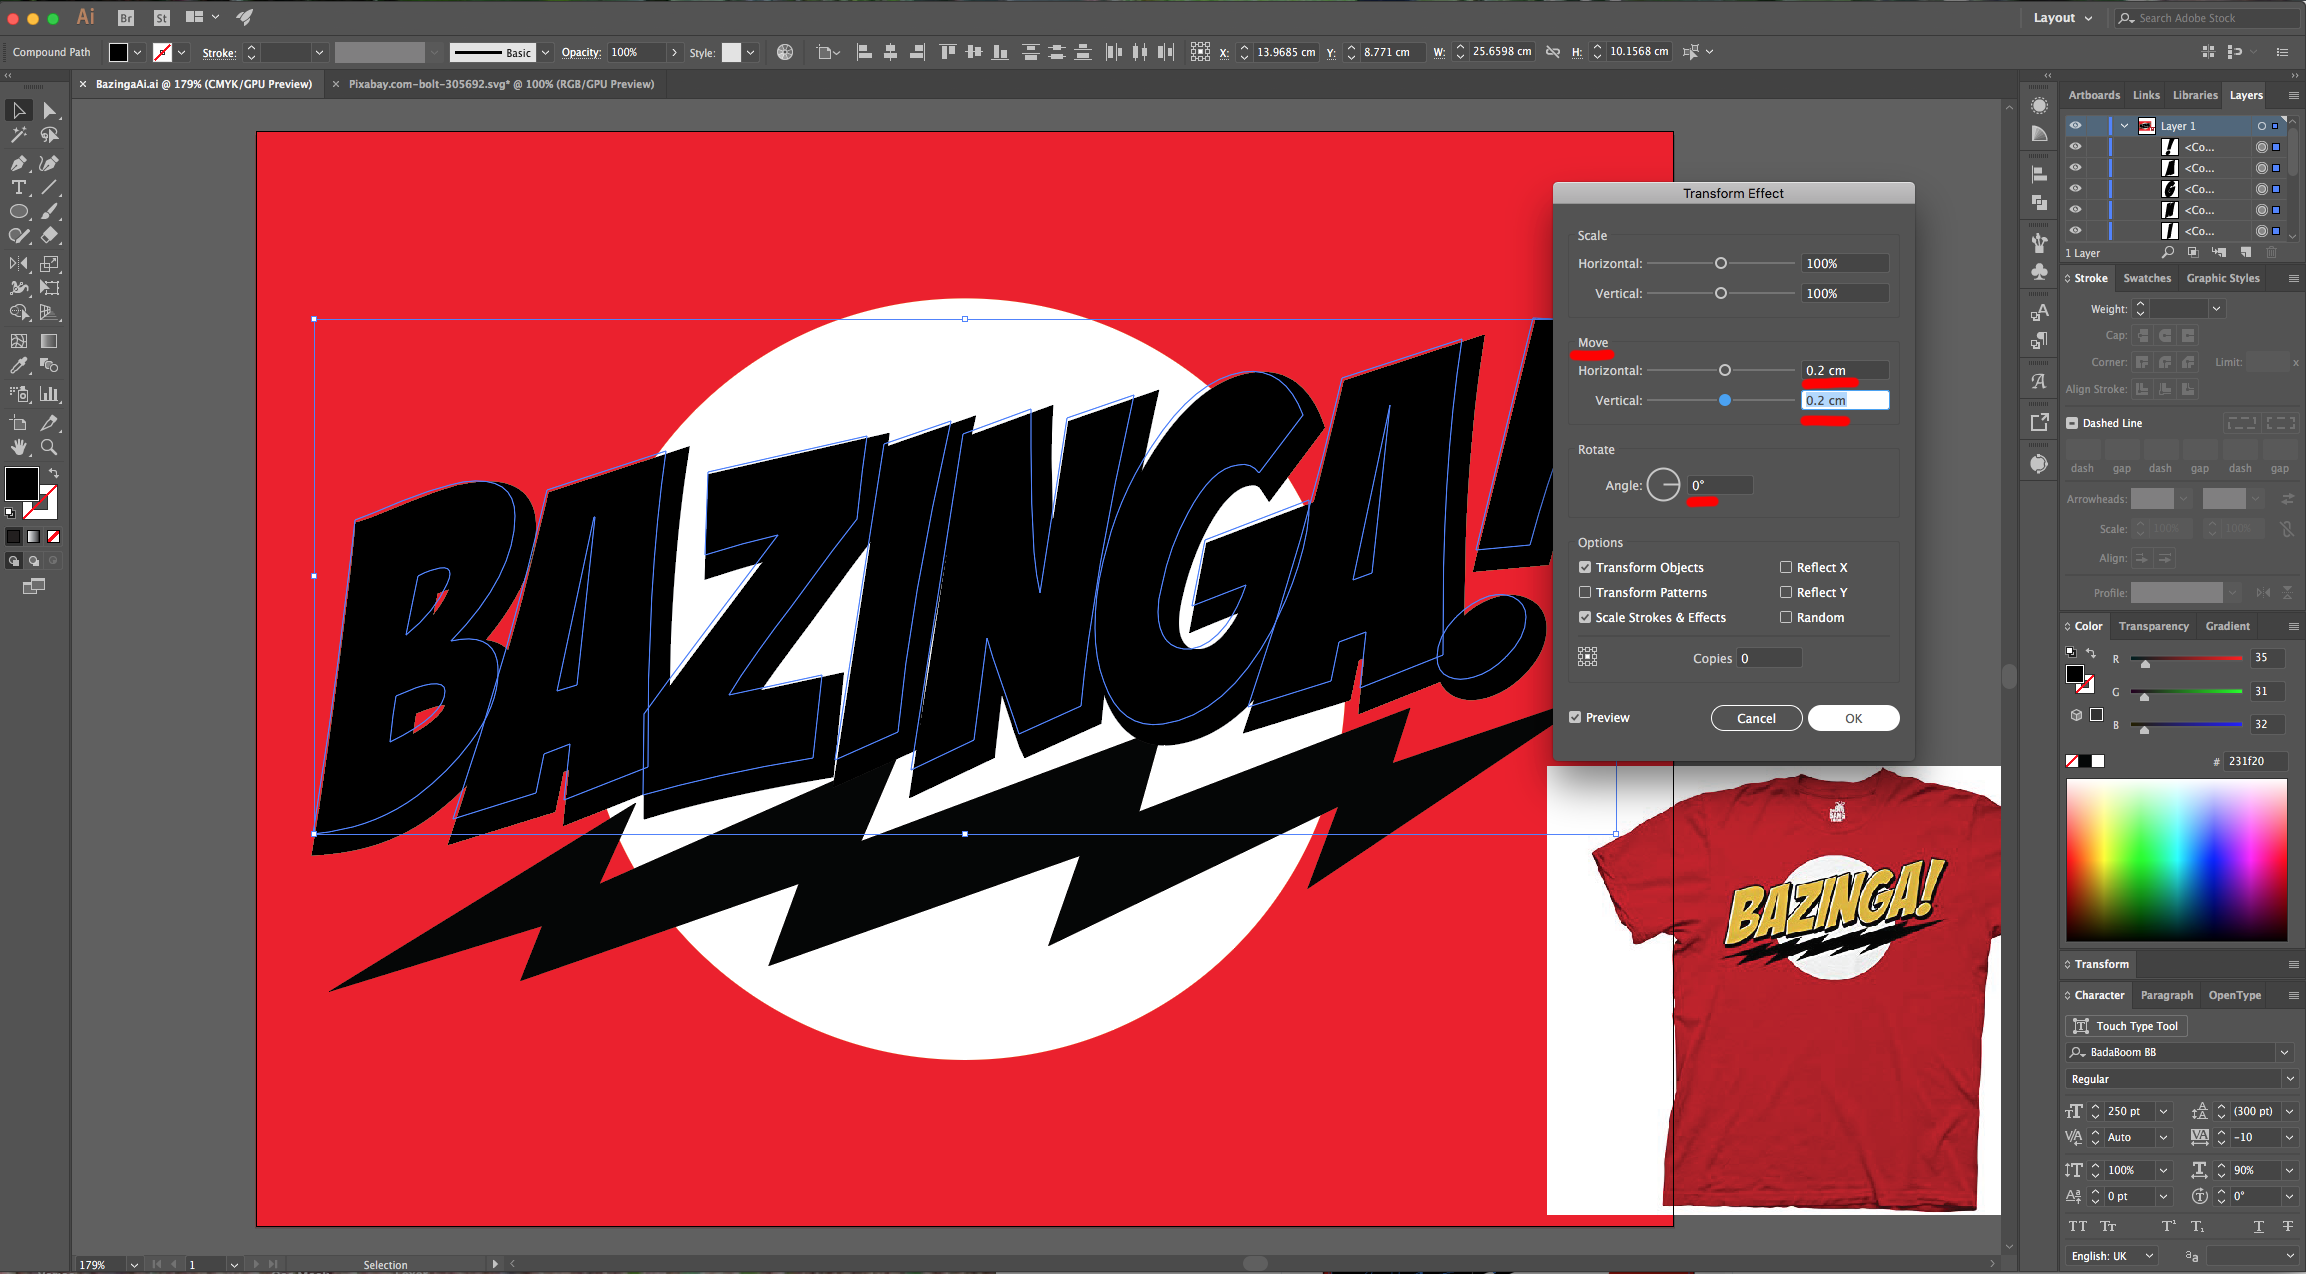
16 - Apply another “Effect”. Go to Distort & Transform > Transform… use an “Horizontal” and “Vertical” Move of 0.2 cm with a 0° Angle.
17 - Back in the “Appearance Panel”, click on the small button at the bottom of the Panel to “Add New Fill” and make sure it is on top of the original one and use White as “Fill” color.
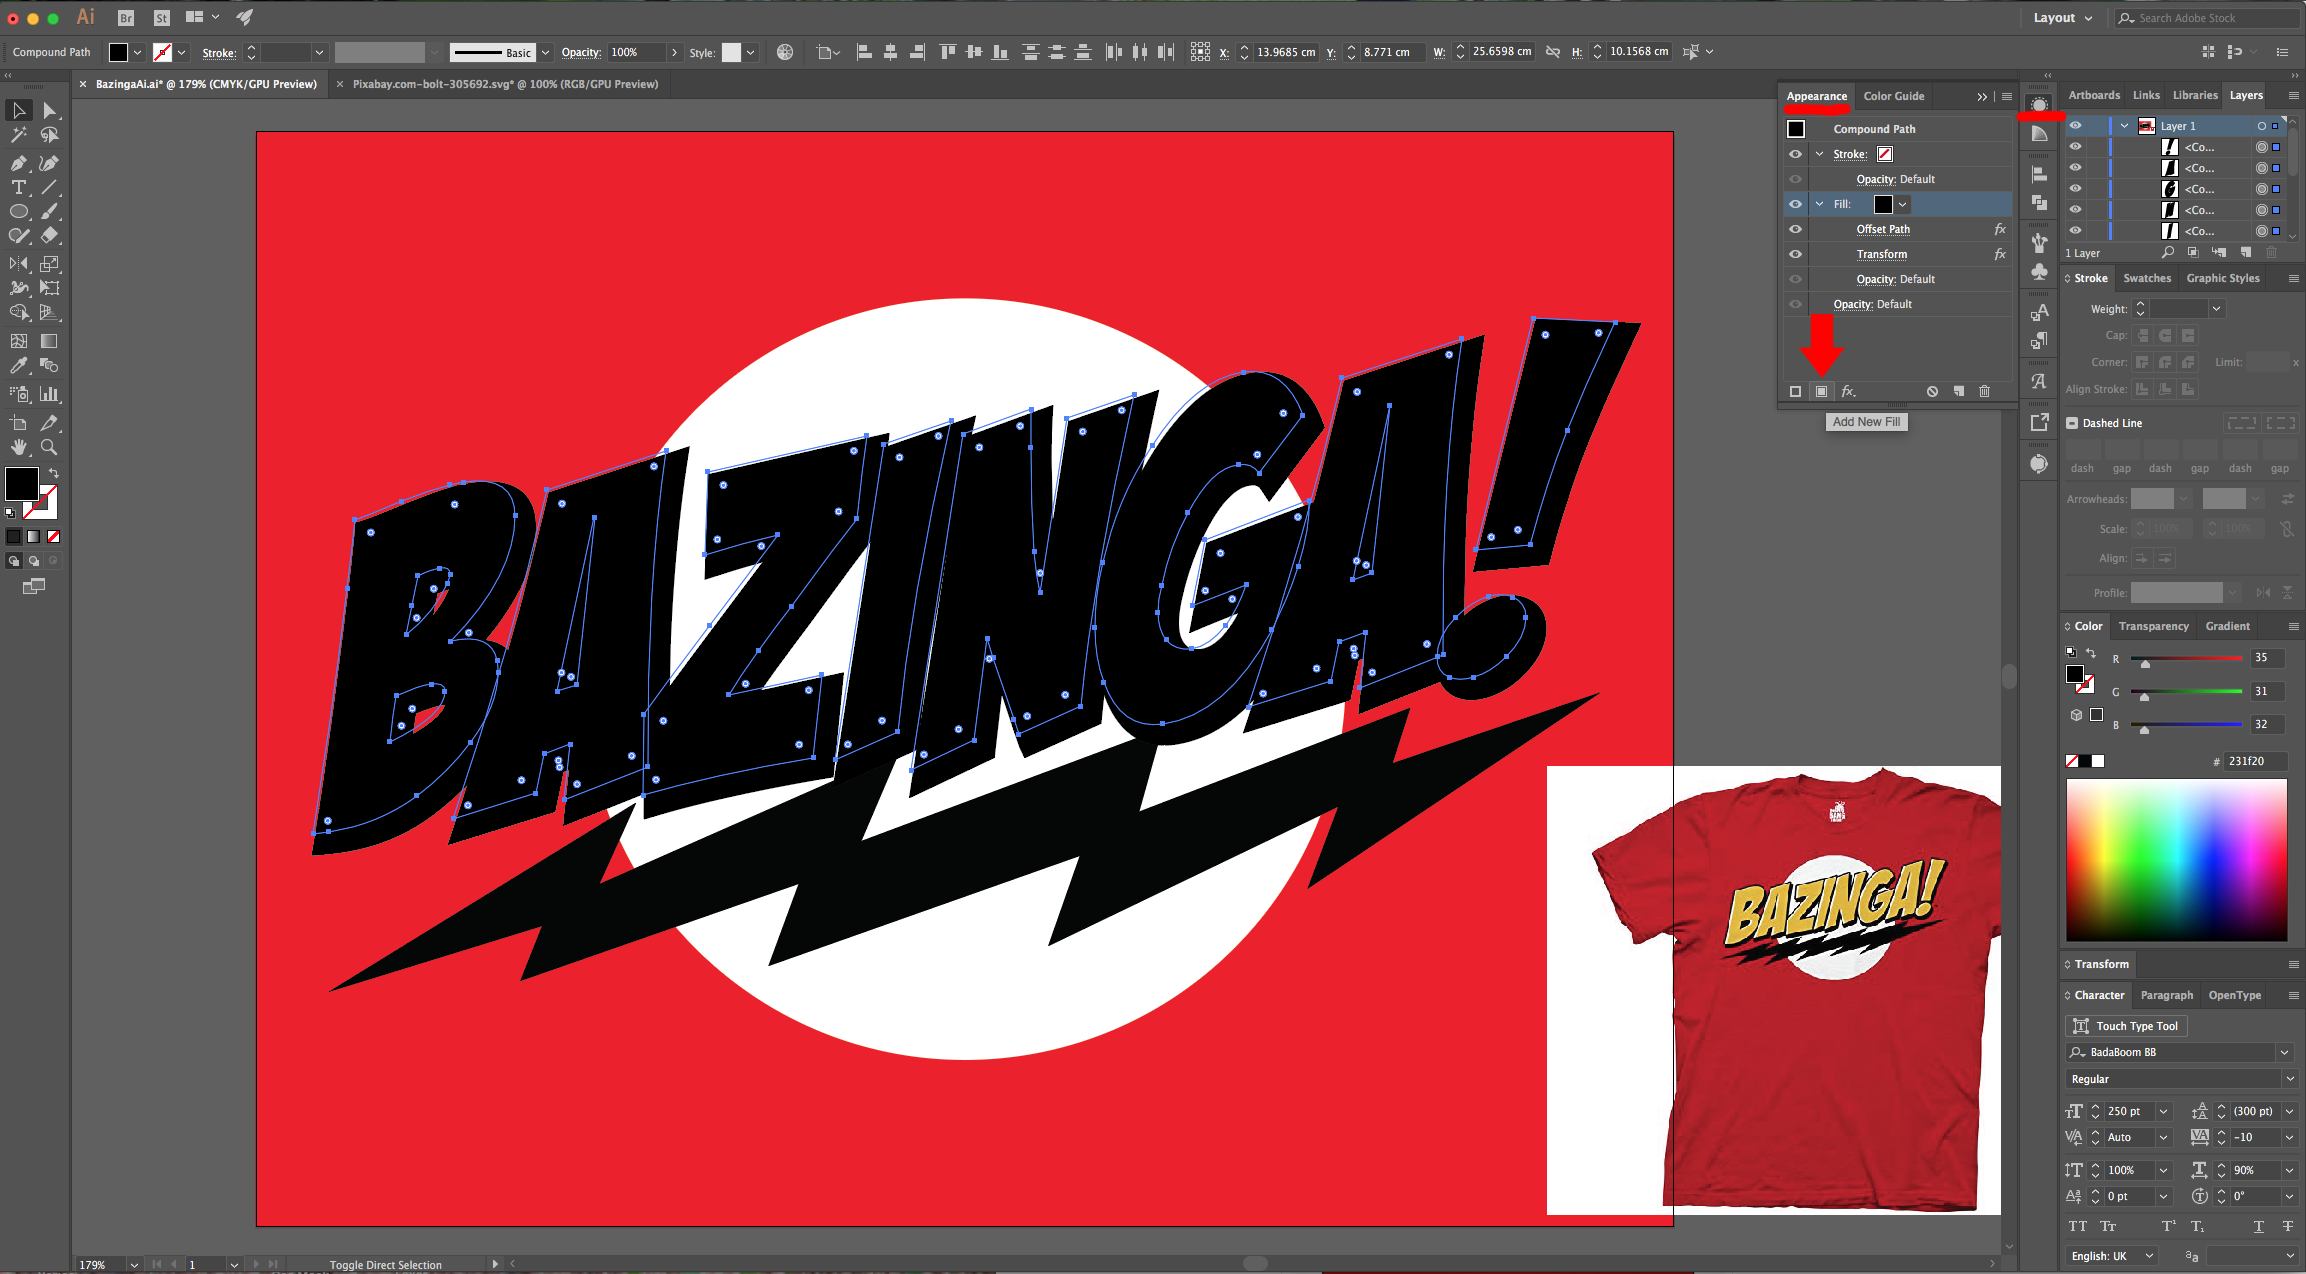
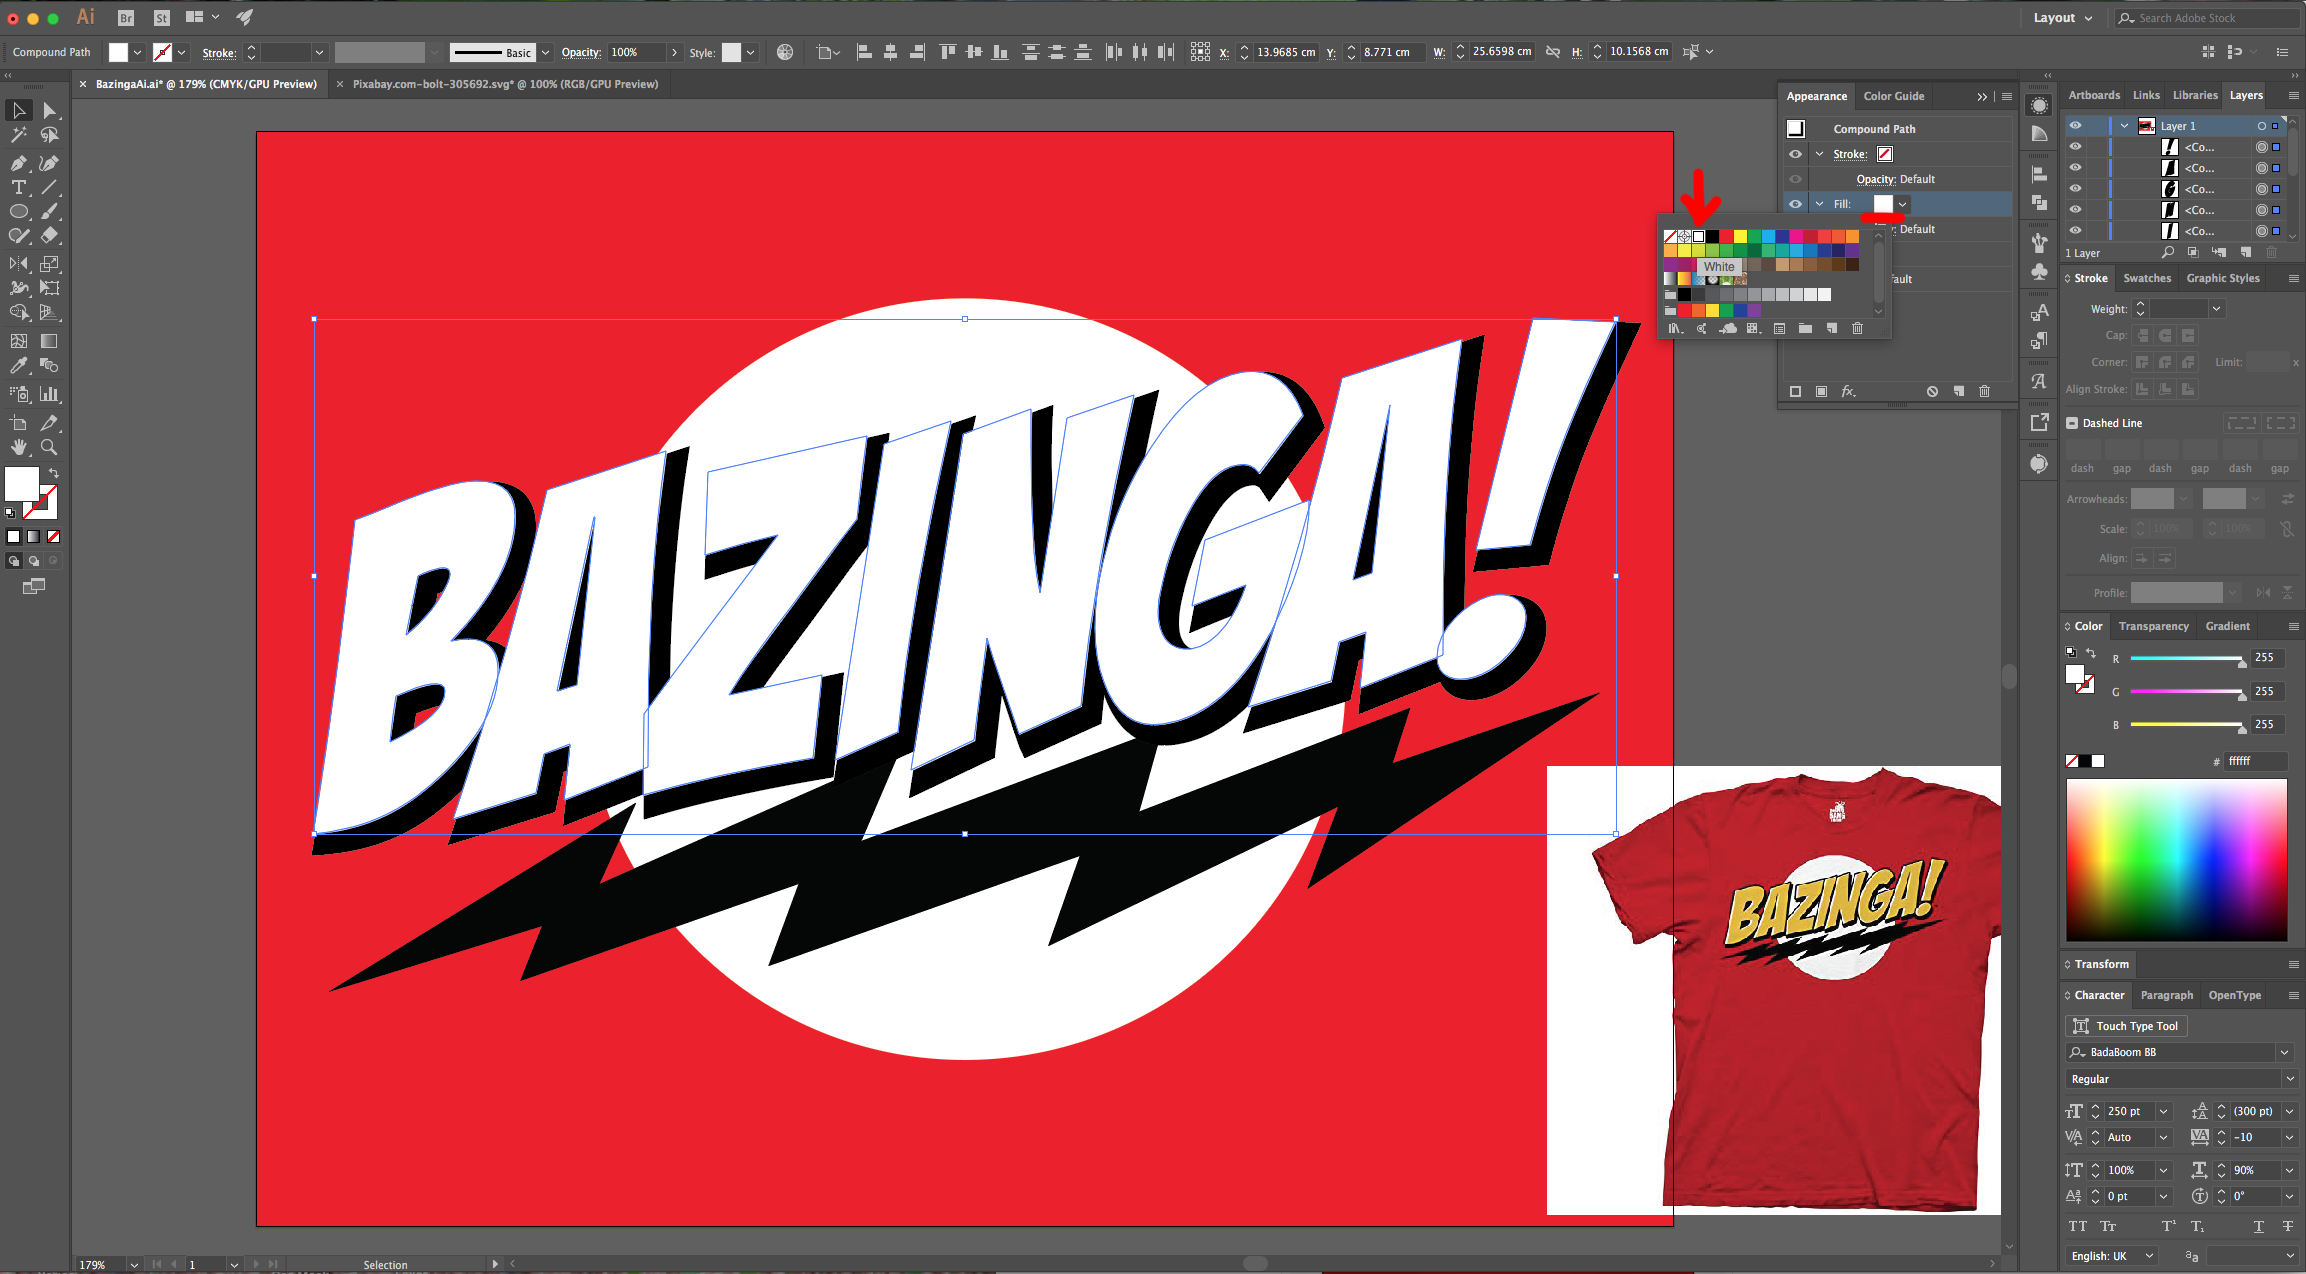
18 - Create another “Fill”, make sure it is on top and this time use a Yellow shade as “Fill” color (we used #ffc800). Making sure this new fill is still selected apply a “Transform Effect” using an “Horizontal” and “Vertical” Move of 0.1 cm with a 0° Angle.
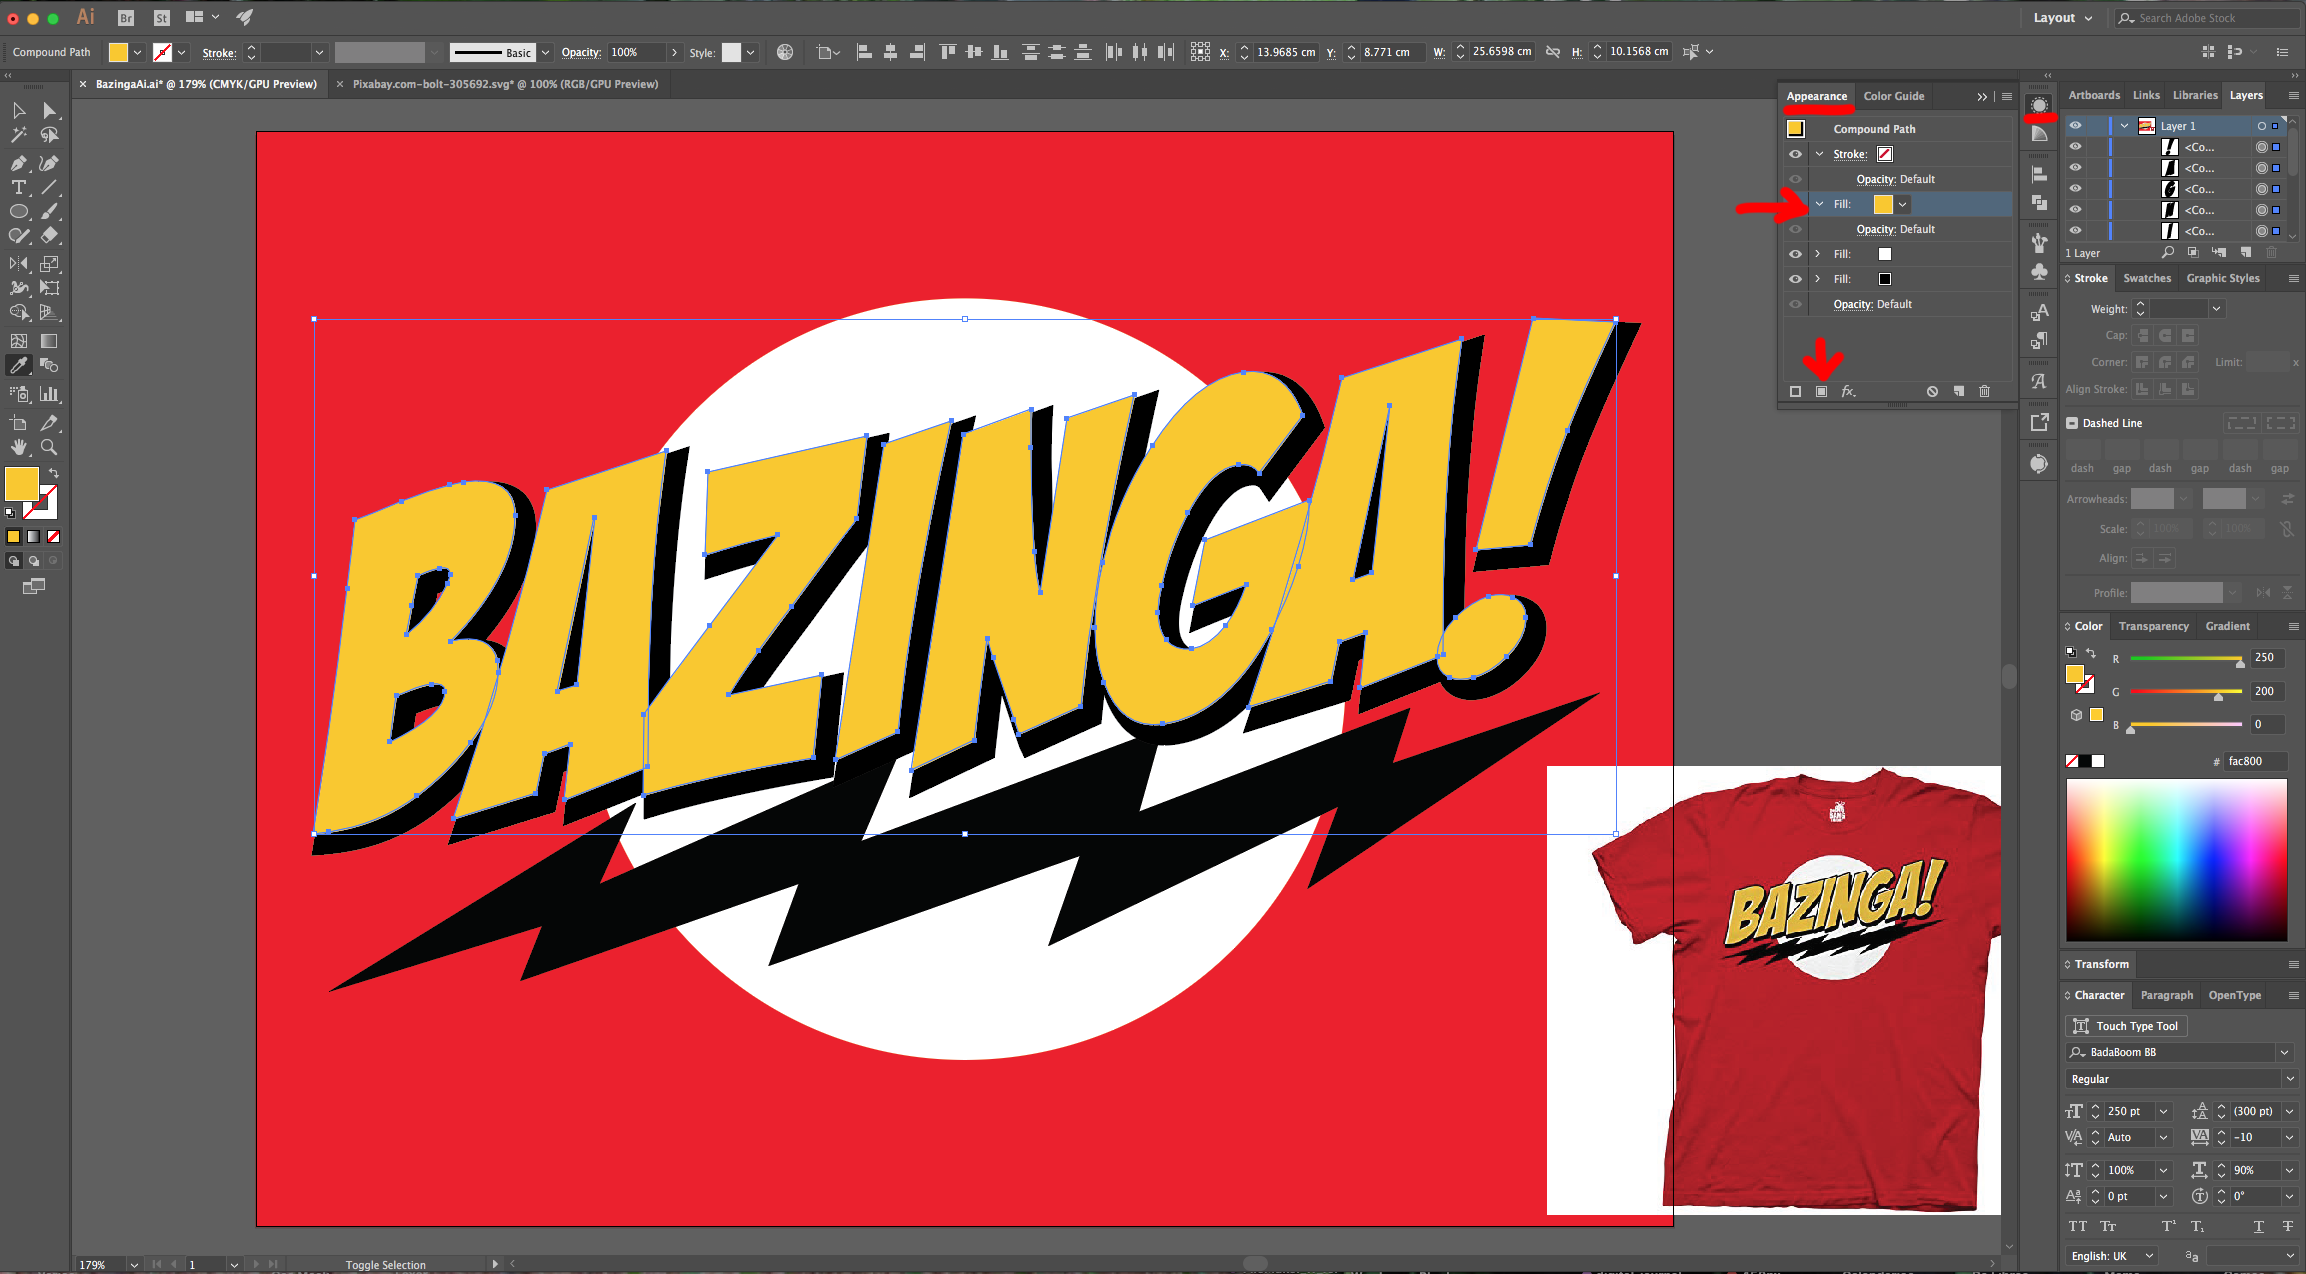
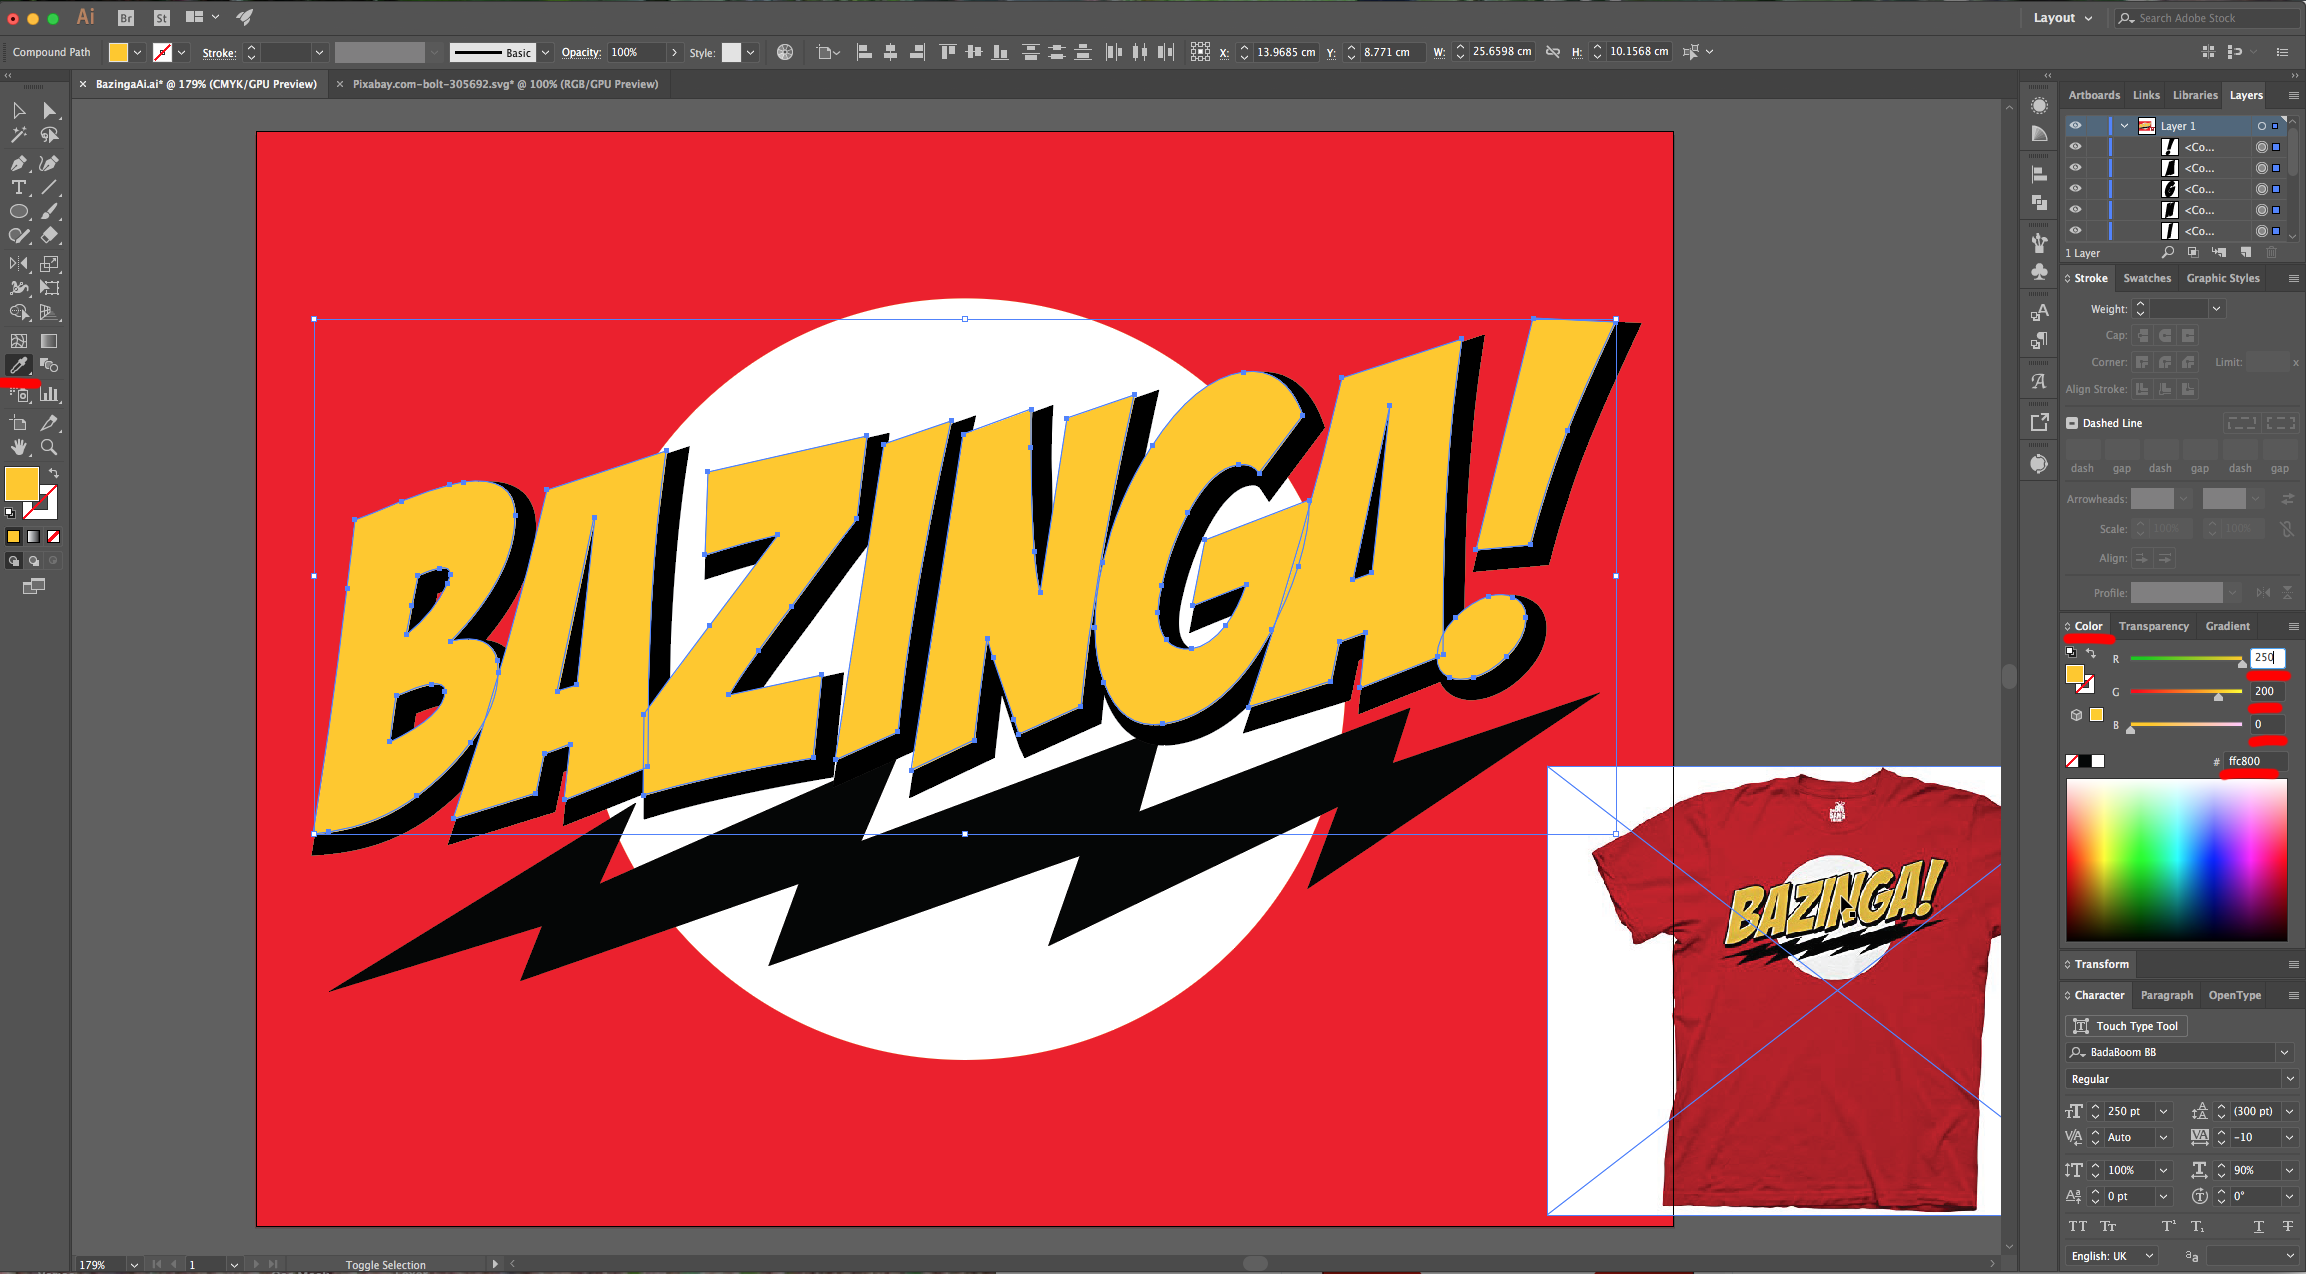
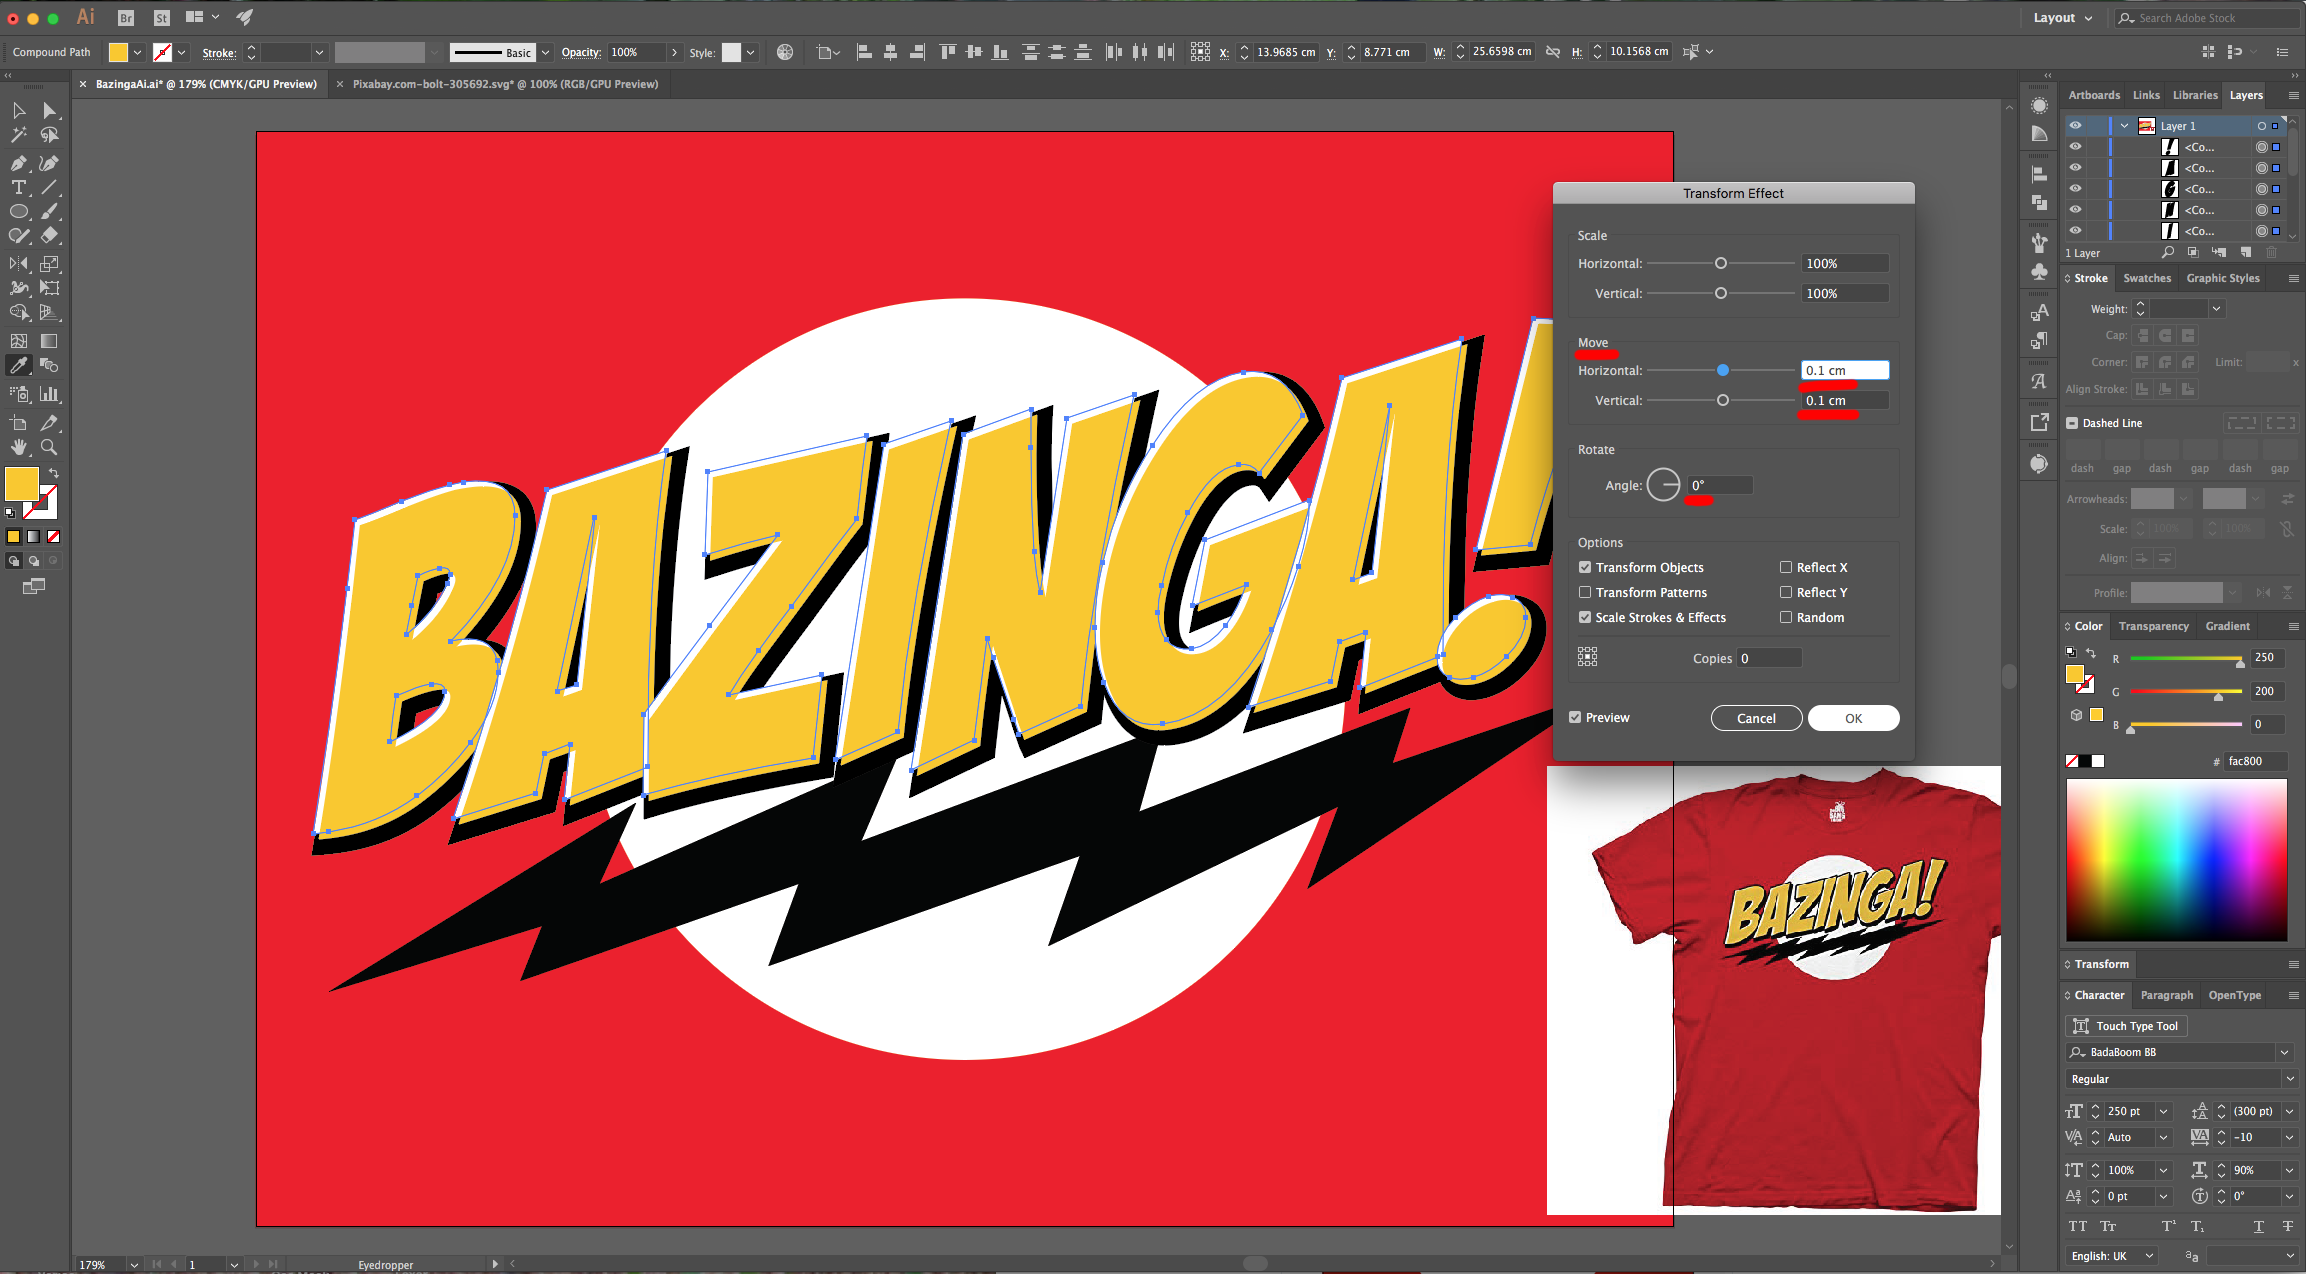
19 - Now, “Add a New Stroke” in the “Appearance Panel” make sure it is on top and use Black as “Stroke” color, a 5 pt “Weight”, make the “Cap” and “Corner” “Round” and “Align Stroke” it “Inside”.
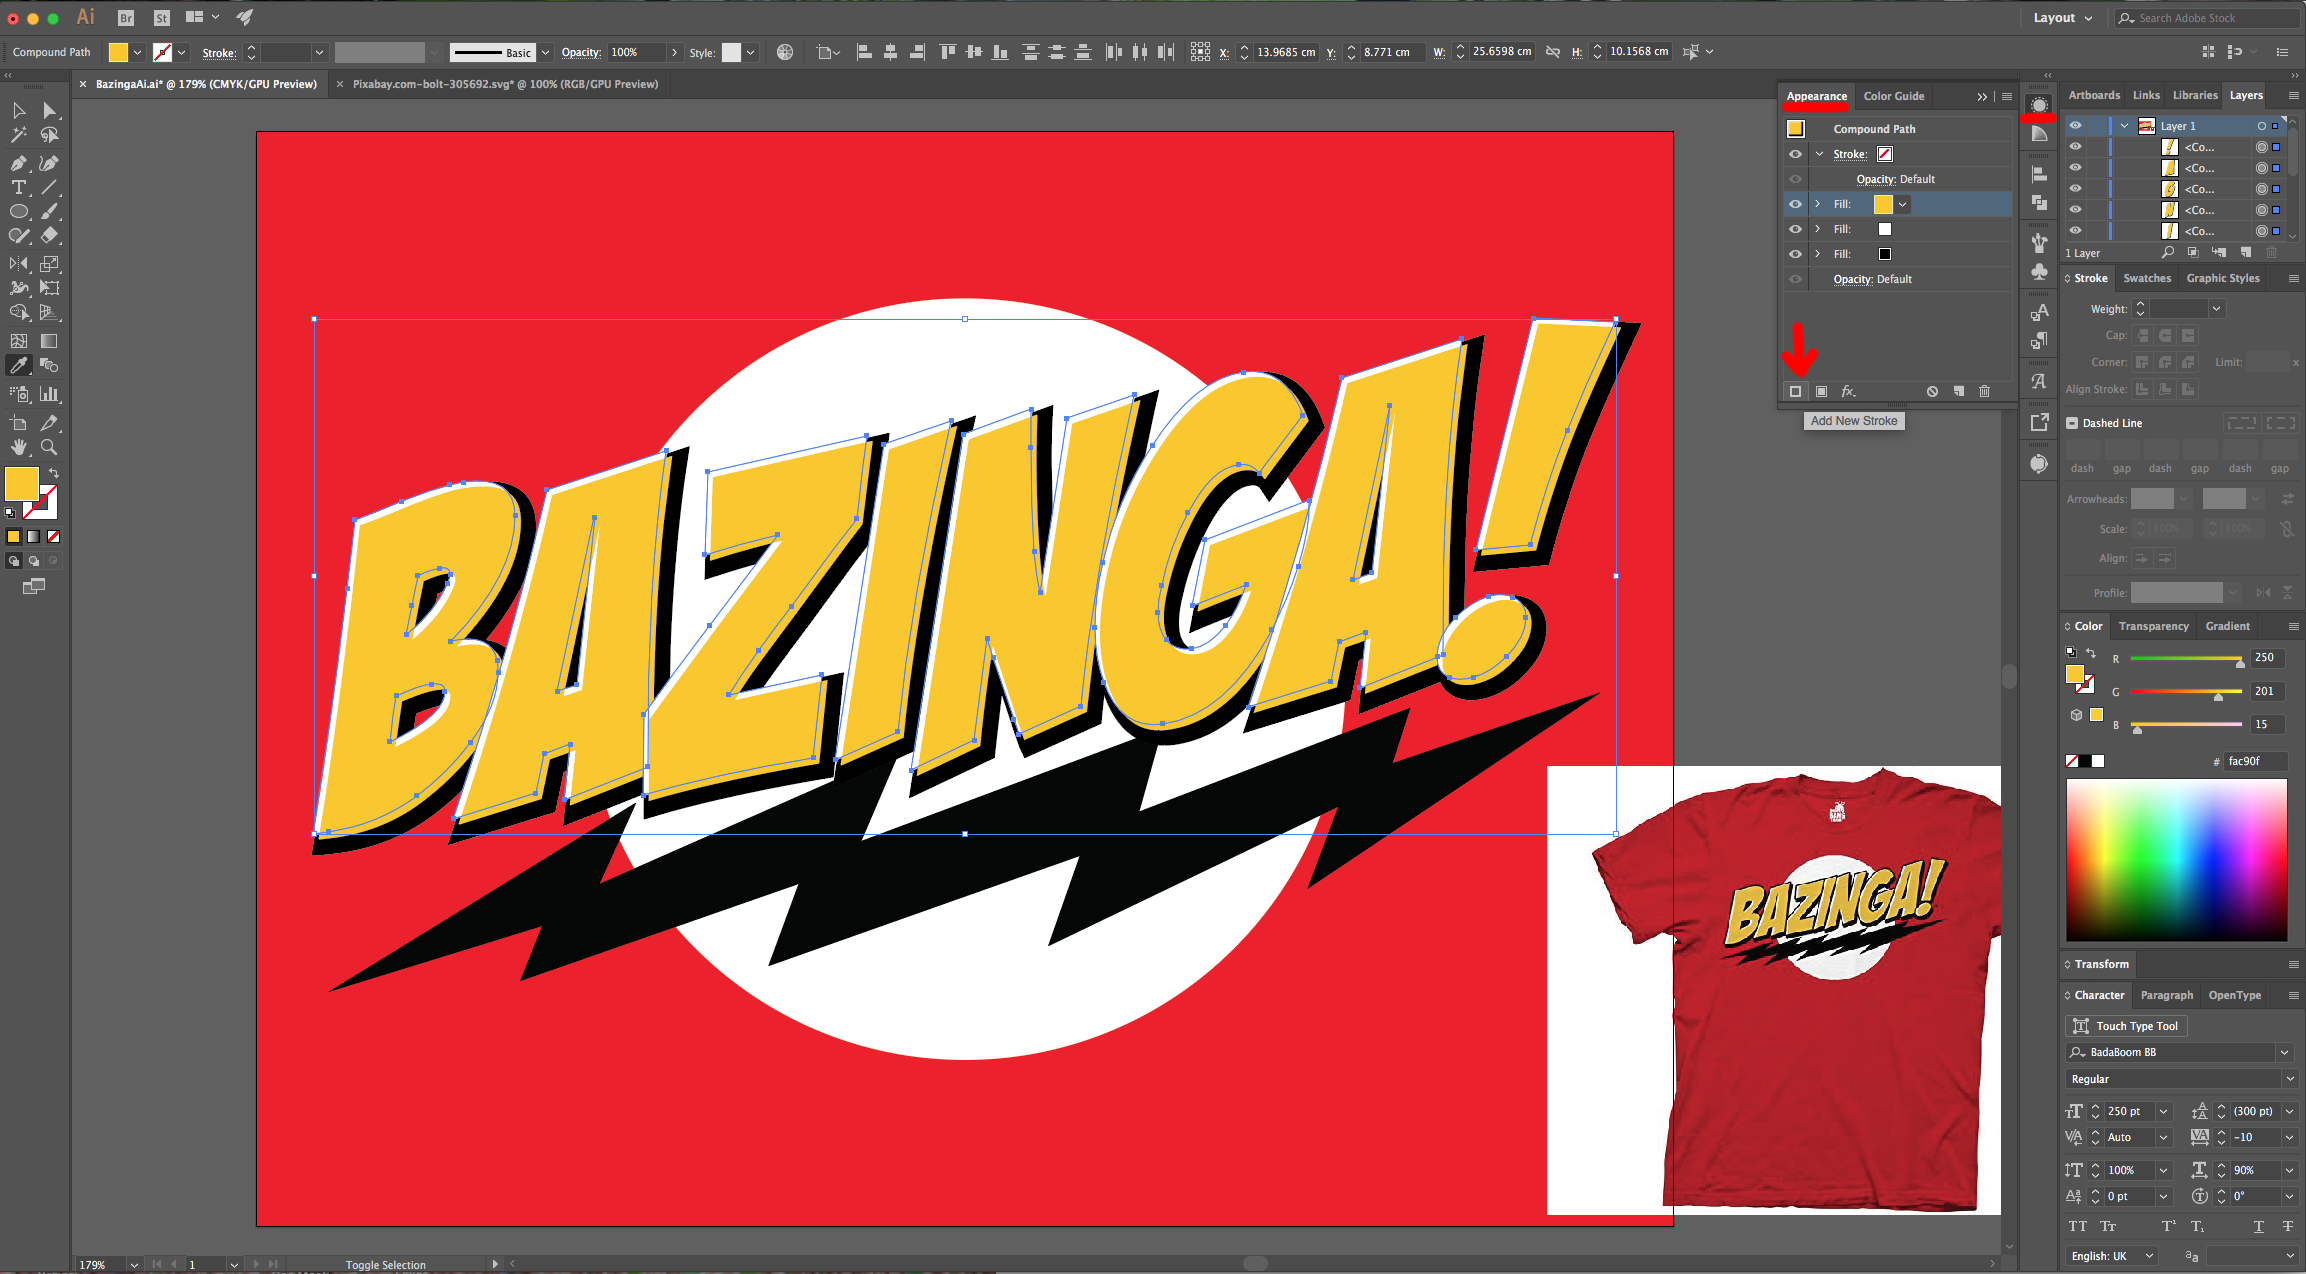
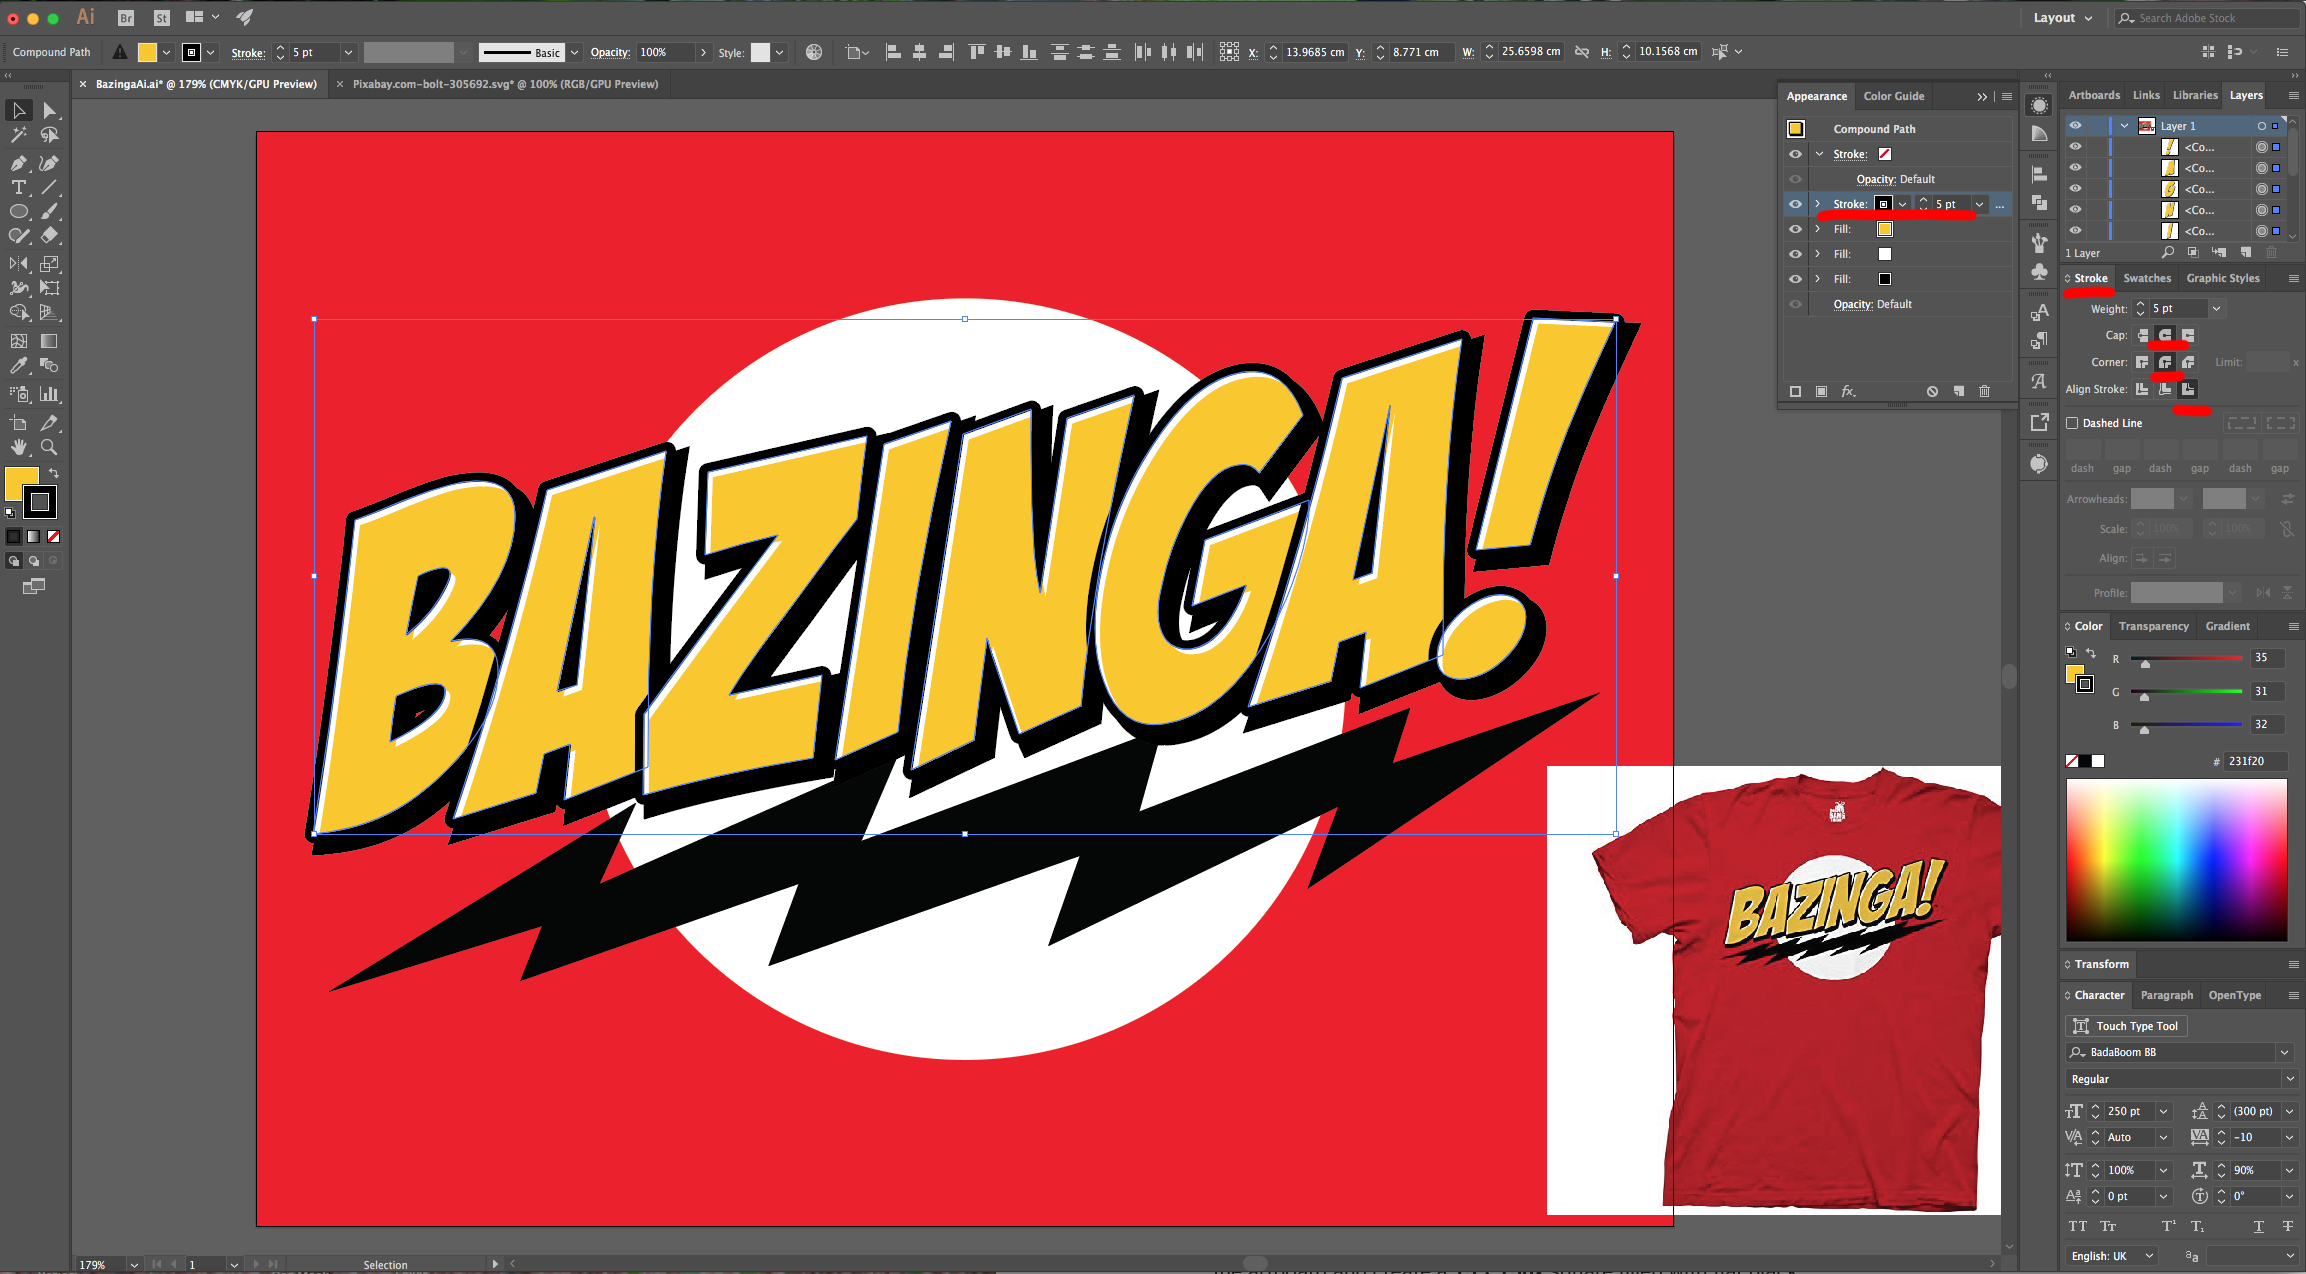
20 - Select all your Text and go to Object > Group (Command/Control + G). Make sure the “With” is even in the Top Menu (we made it 25 cm) and do the same with the “Lightning Bolt”.
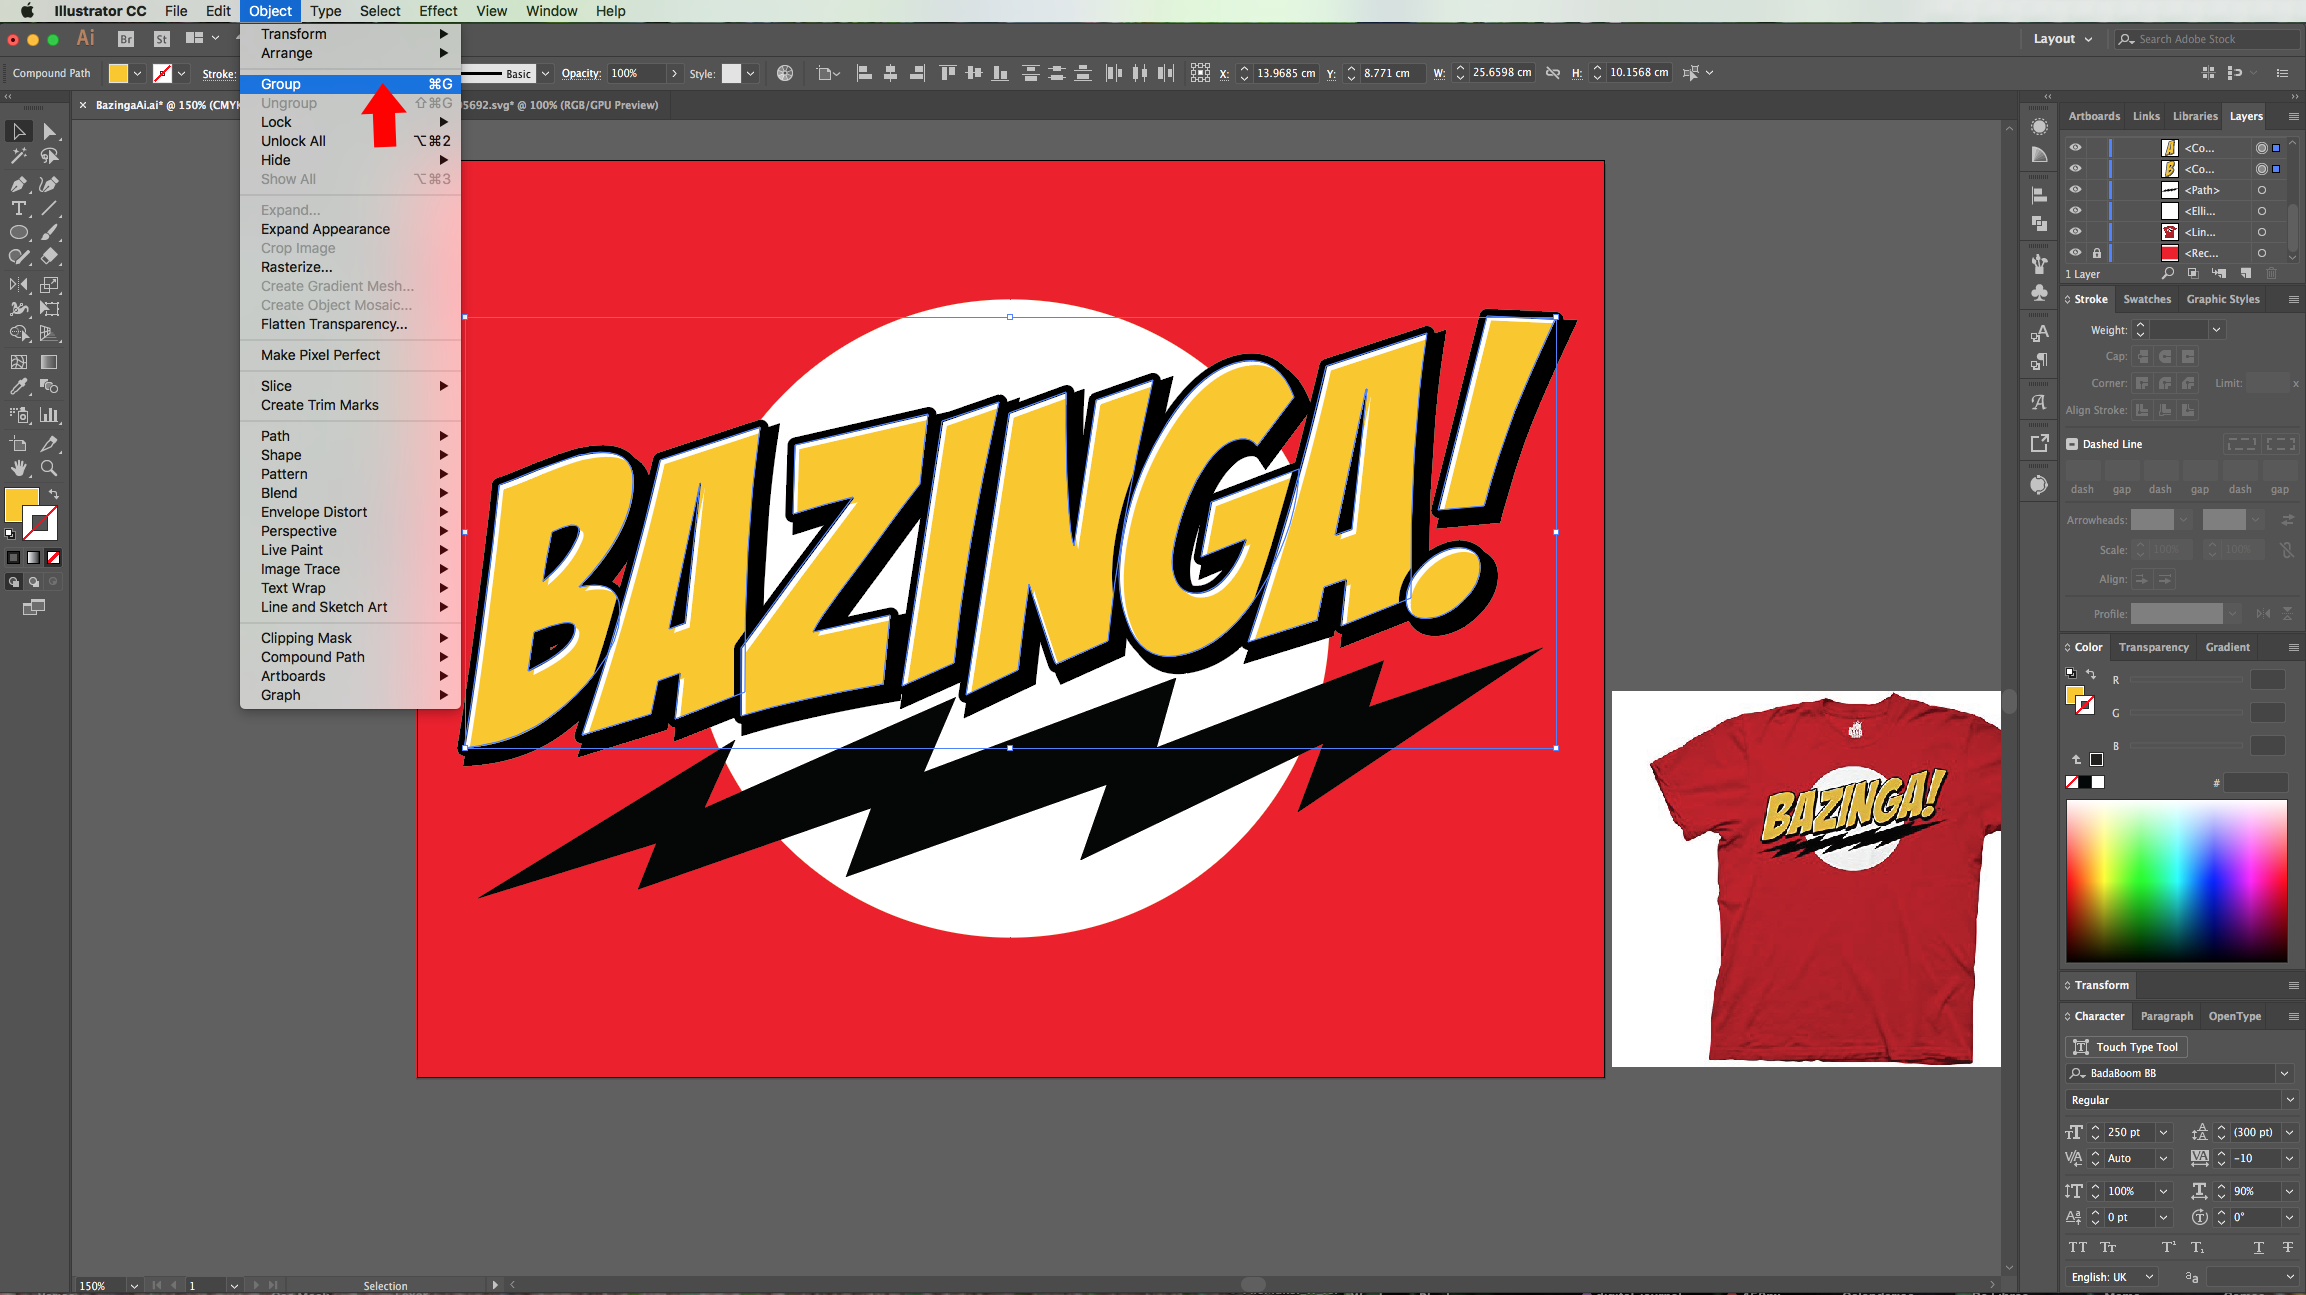
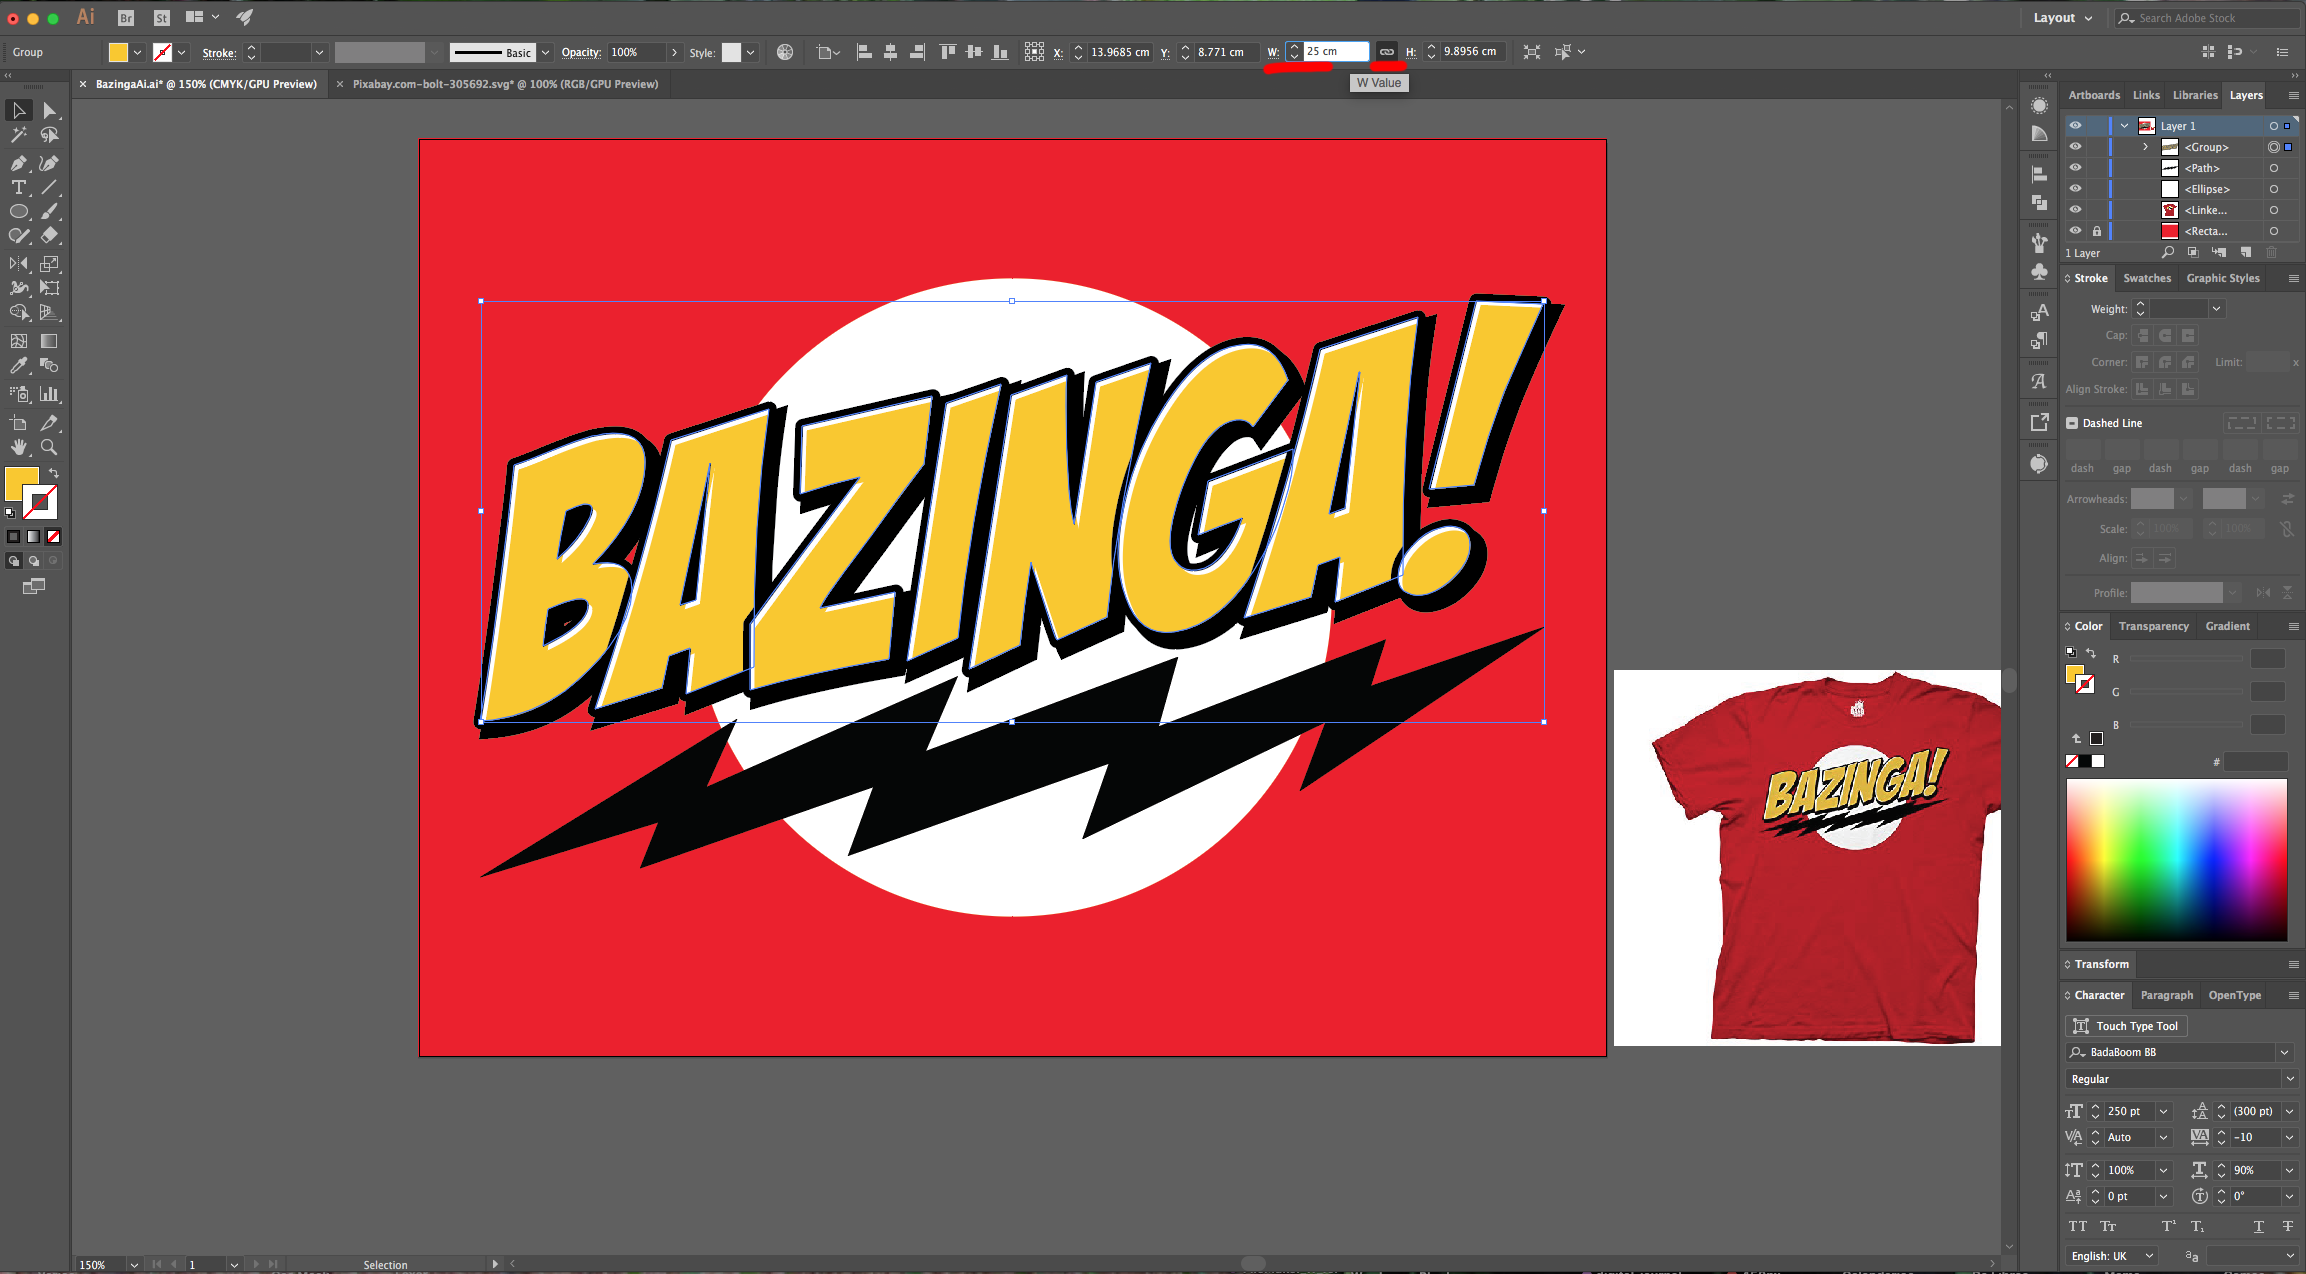
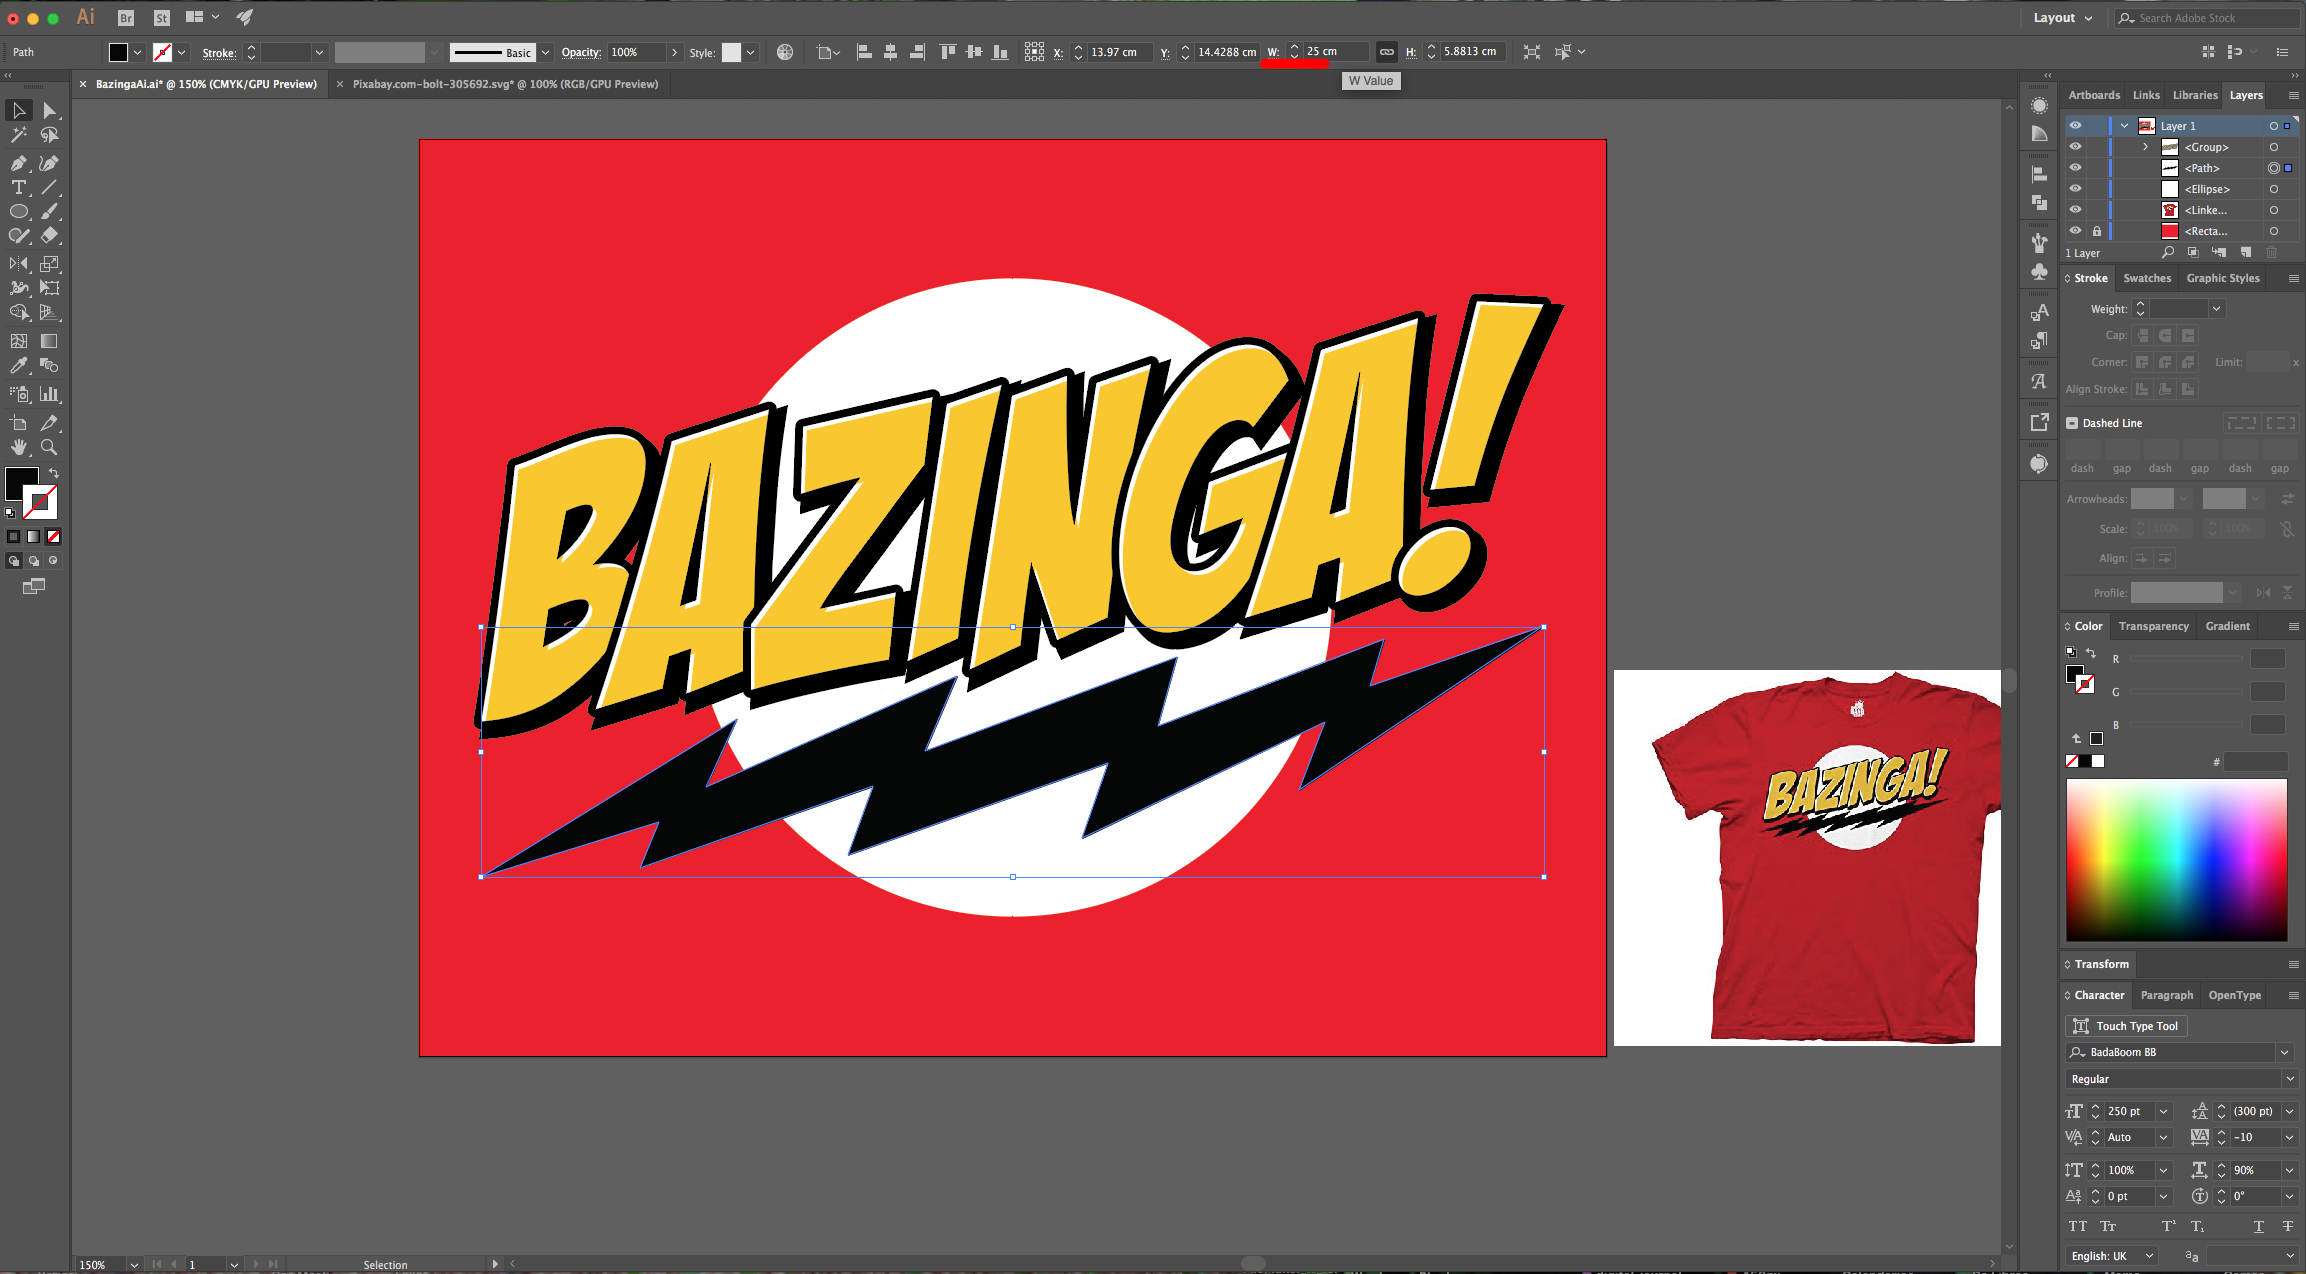
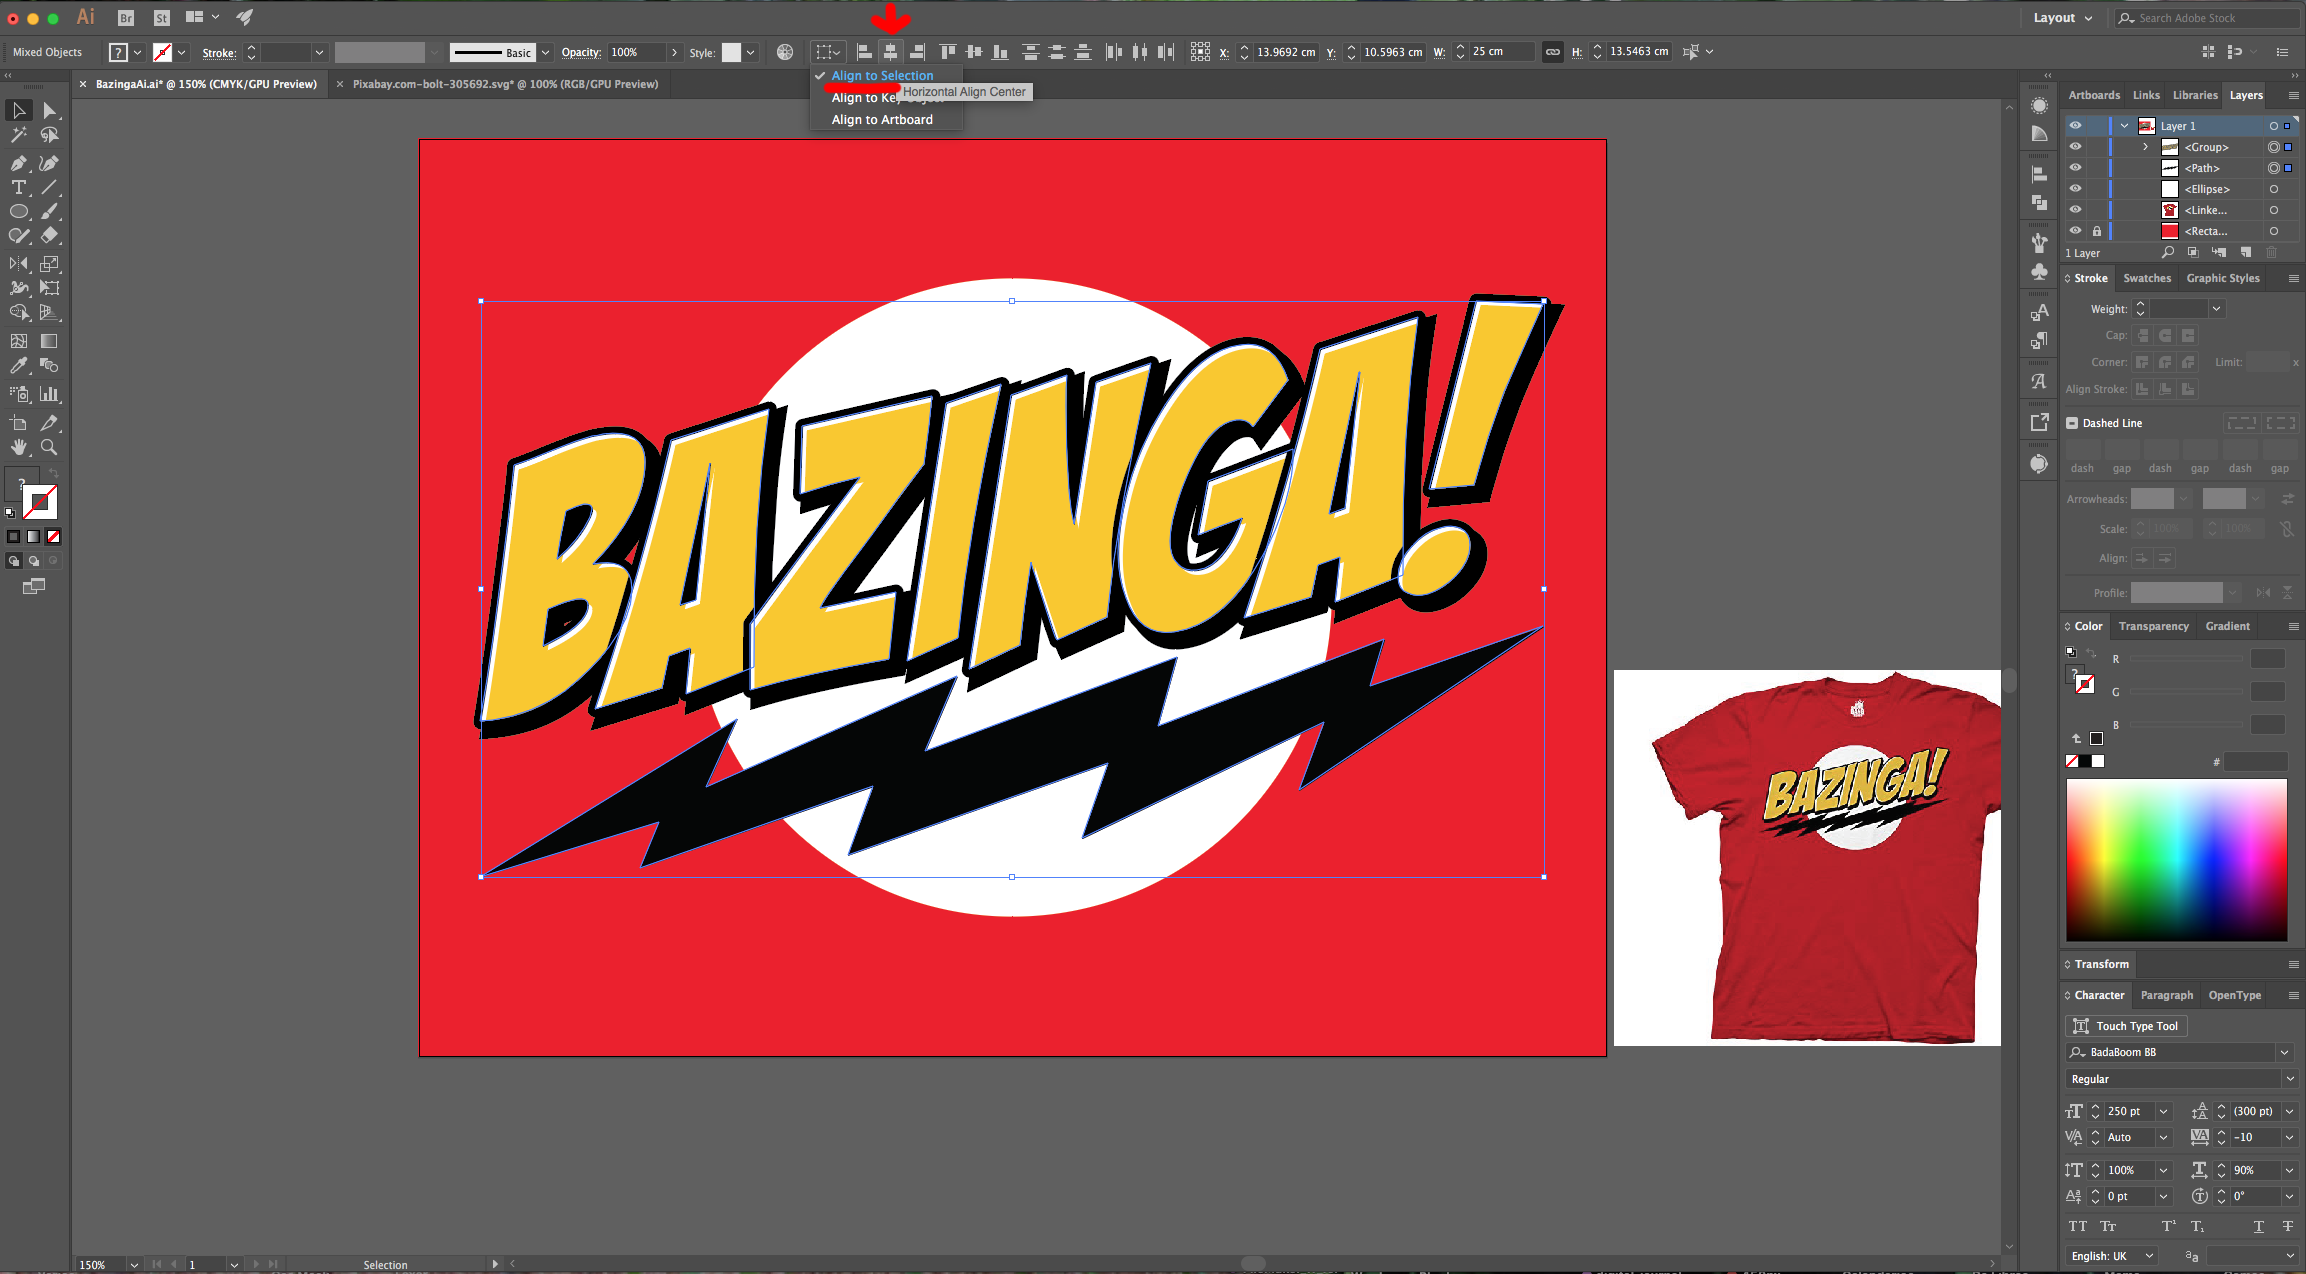
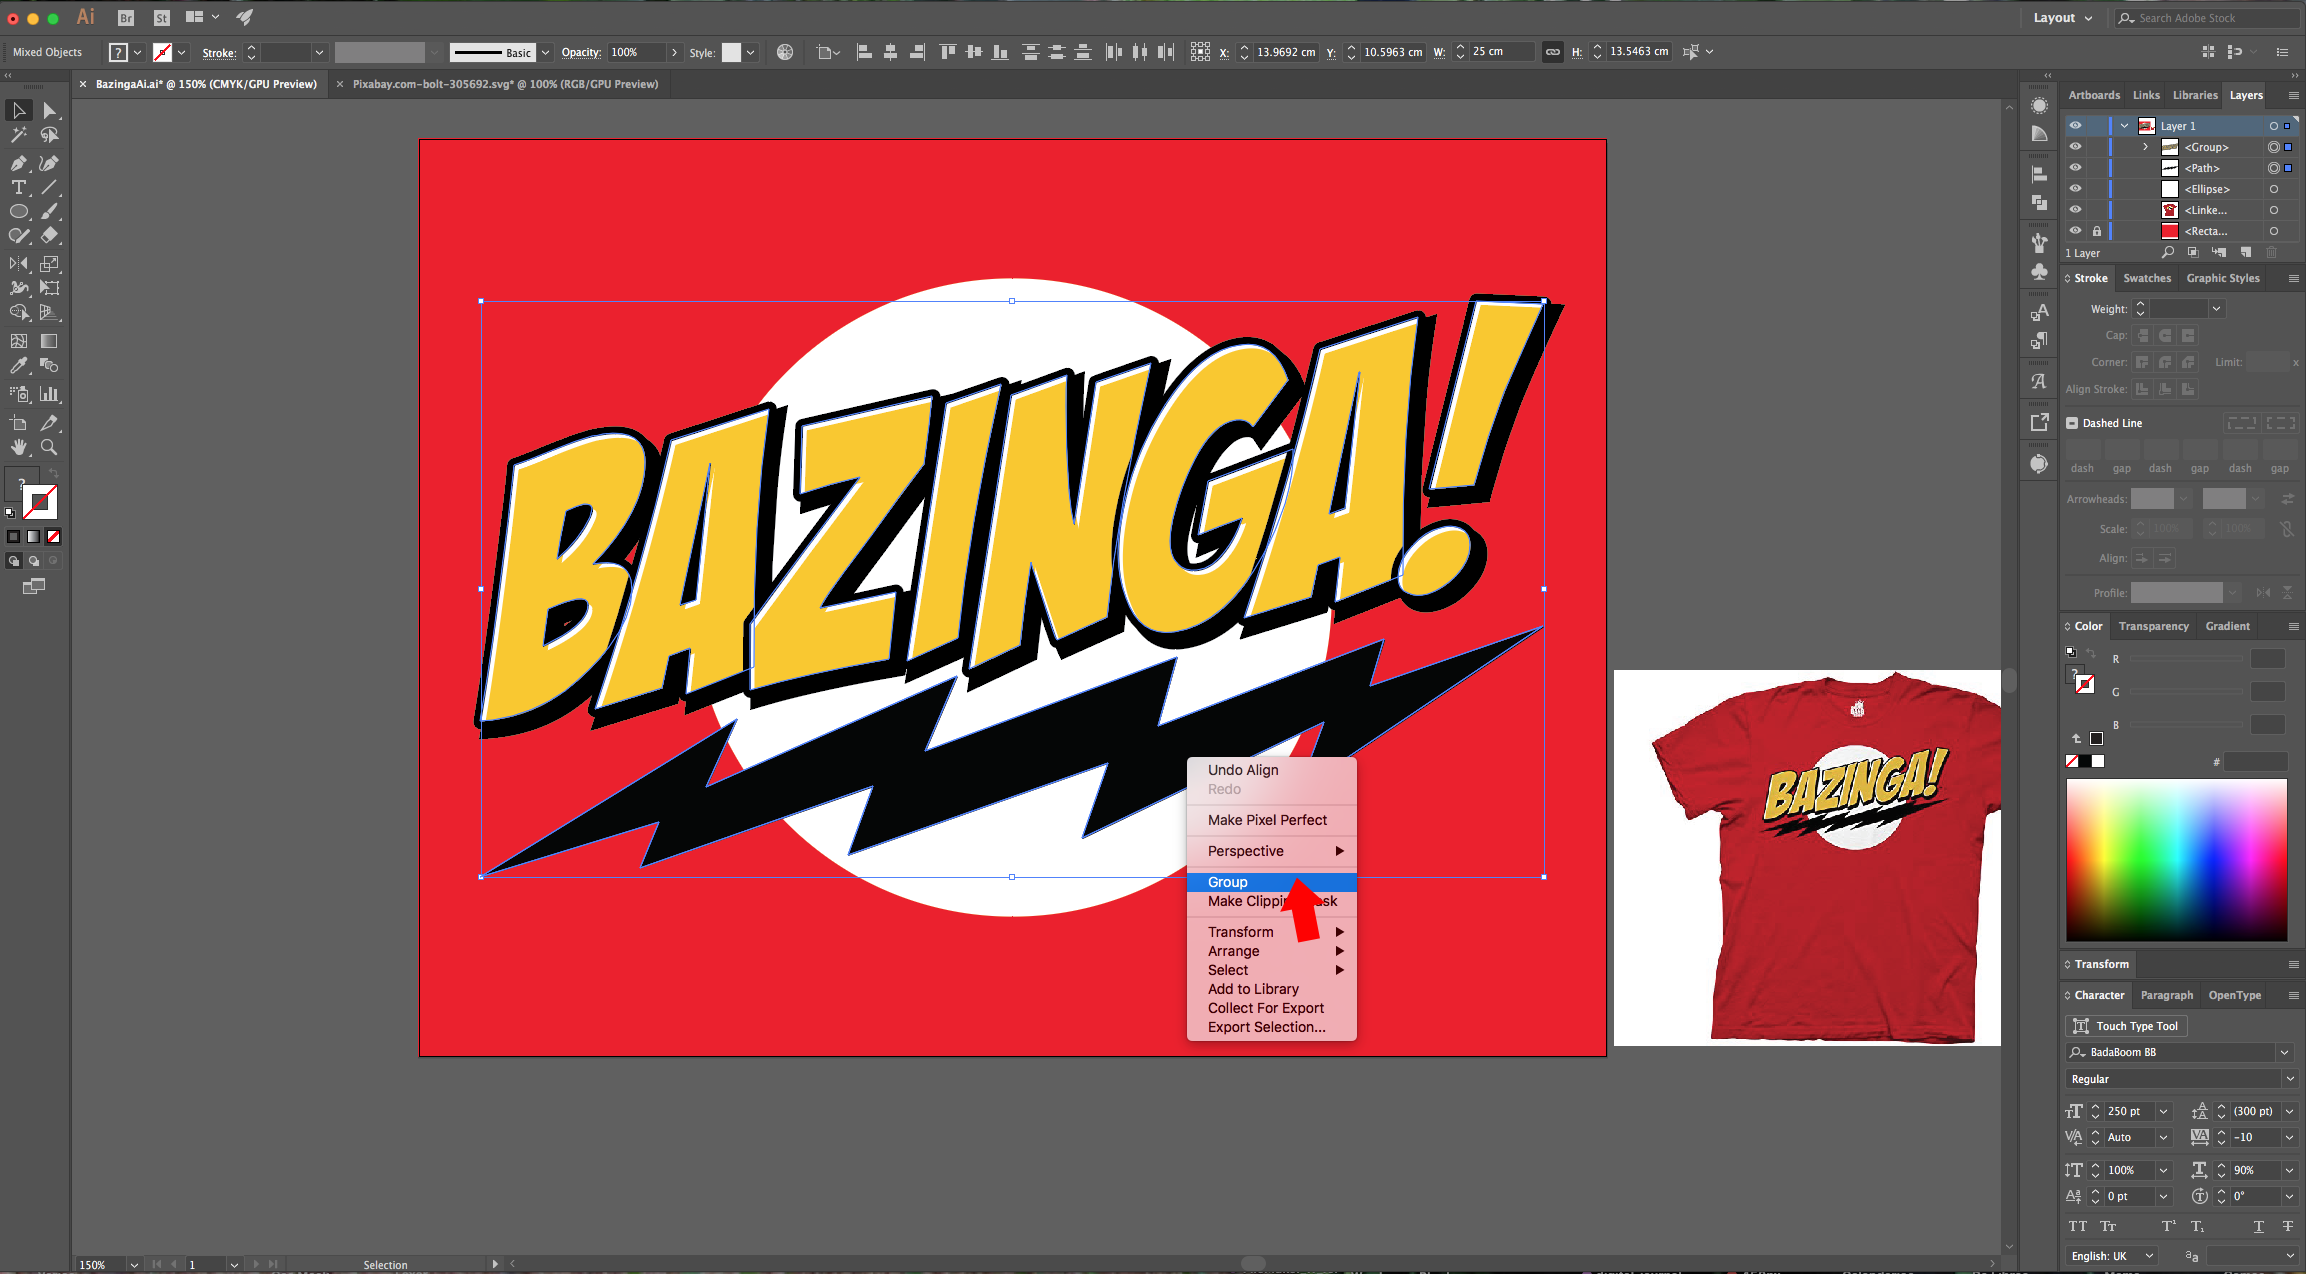
21 - Then select both your “Text” and “Lighting Bolt” and use the “Horizontal Align Center” option on your Top Menu making sure that “Align to Selection” is selected to align them properly. Right-click on top of them and choose “Group” to group them together. Then center them using the “Horizontal and Vertical Align Center” options on your Top Menu making sure that “Align to Selection” is selected this time. Or use the same options in the “Align Panel”.
22 - Your Artwork should look similar to this.
1 - In Illustrator, create a “New Document”.
2 - Go to File > Place (Shift + Command/Control + P) and import your reference image. Resize it if needed.
3 - Select the “Rectangle Tool” (M), click on the Top Left corner of your Document and input the same measurements of your document (27.94 x 25.59 cm) to cover the entire Canvas and fill it with Red from the “Swatches Panel”.
4 - Right-click on top of it and choose Arrange > Send to Back. Lock your Background Shape by clicking on the small padlock to its left in the “Layers Panel”.
5 - Select the “Ellipse Tool” (L), click inside your document and create a 15 x 15 cm Circle. Fill it with White and center it using the “Horizontal and Vertical Align Center” options on your Top Menu making sure that “Align to Artboard” is selected. Or use the same options in the “Align Panel”.
6 - Open the “Lightning” vector file, “Copy” it (Command/Control + C) and “Paste” it into your document (Command/Control + V).
7 - Our lightning is vertical and has just one end, so we will need to modify it. Go to the “Appearance Panel” and click on the “Effects Menu” at the bottom-left. Go to Distort & Transform > Transform… use a 256° “Rotate” Angle, check the “Reflect Y” box. Go to Object > Expand Appearance.
8 - Go back to the “Appearance Panel” to apply another “Effect”. Go to Distort & Transform > Transform… use a 180° “Rotate” Angle, and make 1 “Copy”. Go to Object > Expand Appearance.
9 - Use the “Direct Selection Tool” (A) to individually select the Anchor Points that need to be re-arranged.
10 - Once you are done, select both instances of the lightning bolt, go to the “Pathfinder Panel” and choose “Unite”, thin down your Shape and move it down a bit to place it in the lower part of the circle.
11 - Select the “Type Tool” (T) choose your font (we used BadaBoom BB) and type your text. Make it about 250 pt in “Size” and fill it with Black. In the “Character Panel” change the “Tracking” to 90%.
12 - Right-click on top of your text and choose Transform > Shear… Use a “Shear Angle” of -8° with a “Vertical Axis”.
13 - Center your text using the “Horizontal and Vertical Align Center” options on your Top Menu making sure that “Align to Artboard” is selected. Or use the same options in the “Align Panel”. Move the “Lighting Bolt” if needed to position it as similar as possible to the one in the reference image.
14 - Select your text and go to Type > Create Outlines… (Shift + Command/Control + O) then, right-click on top and choose “Ungroup”.
15 - Go to the “Appearance Panel” to apply another “Effect”. Go to Path > Offset Path… use a 0.2 cm “Offset”.
16 - Apply another “Effect”. Go to Distort & Transform > Transform… use an “Horizontal” and “Vertical” Move of 0.2 cm with a 0° Angle.
17 - Back in the “Appearance Panel”, click on the small button at the bottom of the Panel to “Add New Fill” and make sure it is on top of the original one and use White as “Fill” color.
18 - Create another “Fill”, make sure it is on top and this time use a Yellow shade as “Fill” color (we used #ffc800). Making sure this new fill is still selected apply a “Transform Effect” using an “Horizontal” and “Vertical” Move of 0.1 cm with a 0° Angle.
19 - Now, “Add a New Stroke” in the “Appearance Panel” make sure it is on top and use Black as “Stroke” color, a 5 pt “Weight”, make the “Cap” and “Corner” “Round” and “Align Stroke” it “Inside”.
20 - Select all your Text and go to Object > Group (Command/Control + G). Make sure the “With” is even in the Top Menu (we made it 25 cm) and do the same with the “Lightning Bolt”.
21 - Then select both your “Text” and “Lighting Bolt” and use the “Horizontal Align Center” option on your Top Menu making sure that “Align to Selection” is selected to align them properly. Right-click on top of them and choose “Group” to group them together. Then center them using the “Horizontal and Vertical Align Center” options on your Top Menu making sure that “Align to Selection” is selected this time. Or use the same options in the “Align Panel”.
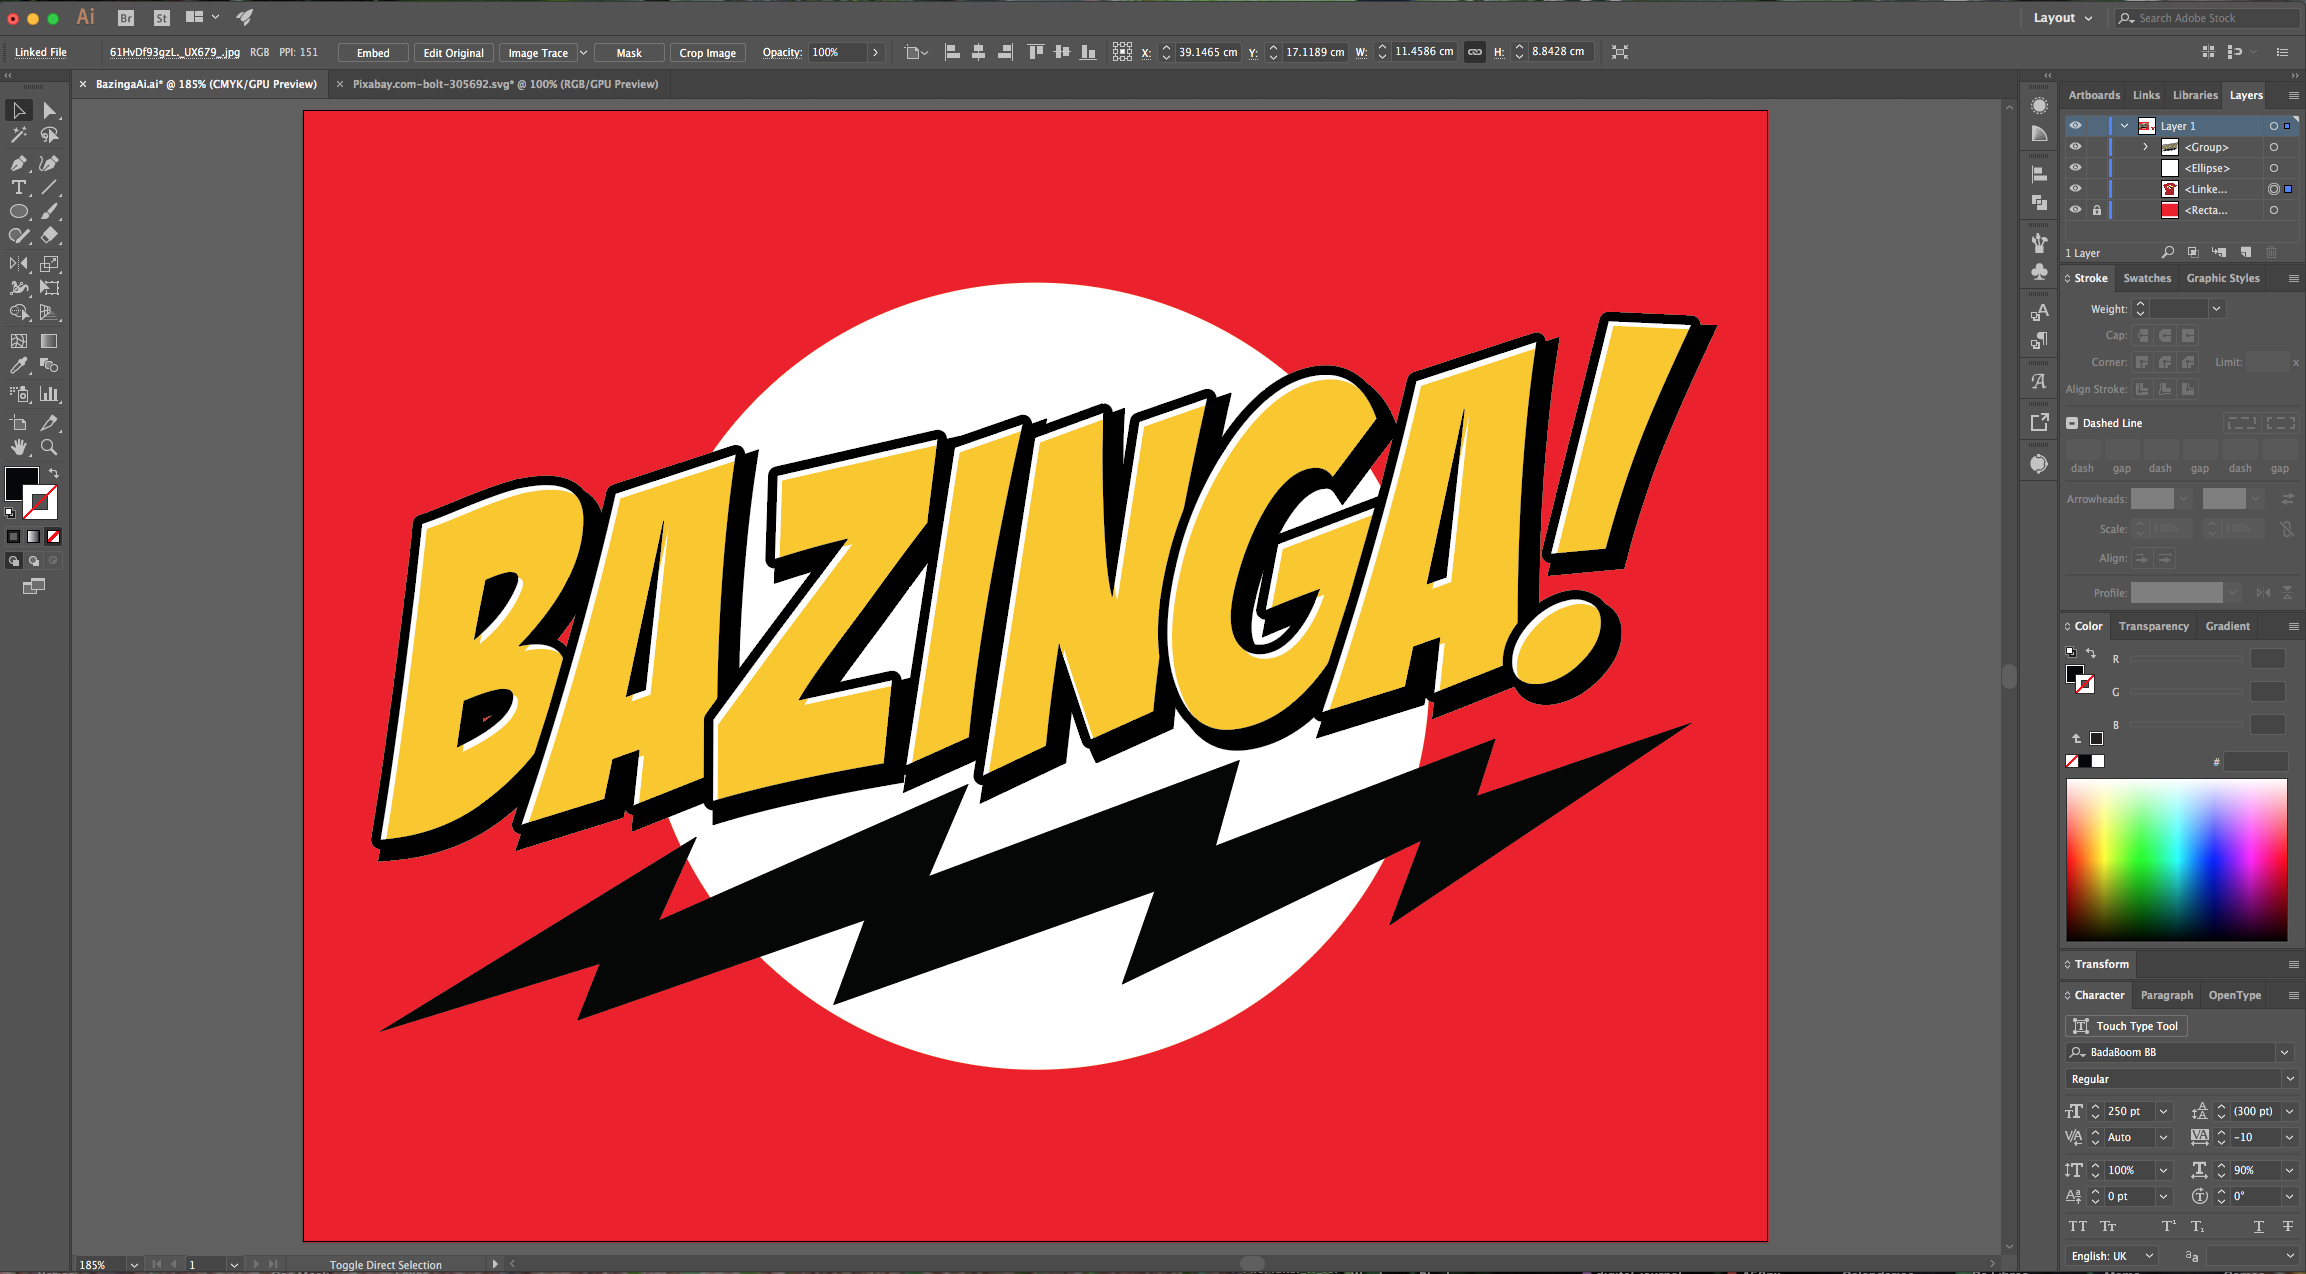
22 - Your Artwork should look similar to this.
by @lornacane
Related Tutorials
Illustrator Tutorials
Wavy Text in Illustrator
Learn how to create Wavy Text in Illustrator using two Methods in this tutorial.
Illustrator Tutorials
Place Images Inside Text in Adobe Illustrator
In this Adobe Illustrator tutorial, learn how to quickly place images inside text.
Illustrator Tutorials
How to Use Text Effects in Illustrator
Learn how to use Illustrator Text Effects in 1 click!
Illustrator Tutorials
Editing Text in Adobe Illustrator
With this step by step tutorial we'll show you everything you need to know about editing text.
Illustrator Tutorials
Overlapping Text in Illustrator
Learn how to easily overlap text in this Adobe Illustrator tutorial.
Illustrator Tutorials
How to Gradient Fill Text in Adobe Illustrator
In this tutorial we will show you how to gradient fill text in Adobe Illustrator.