By Kia Lor
How to Create Stacked Text in Illustrator
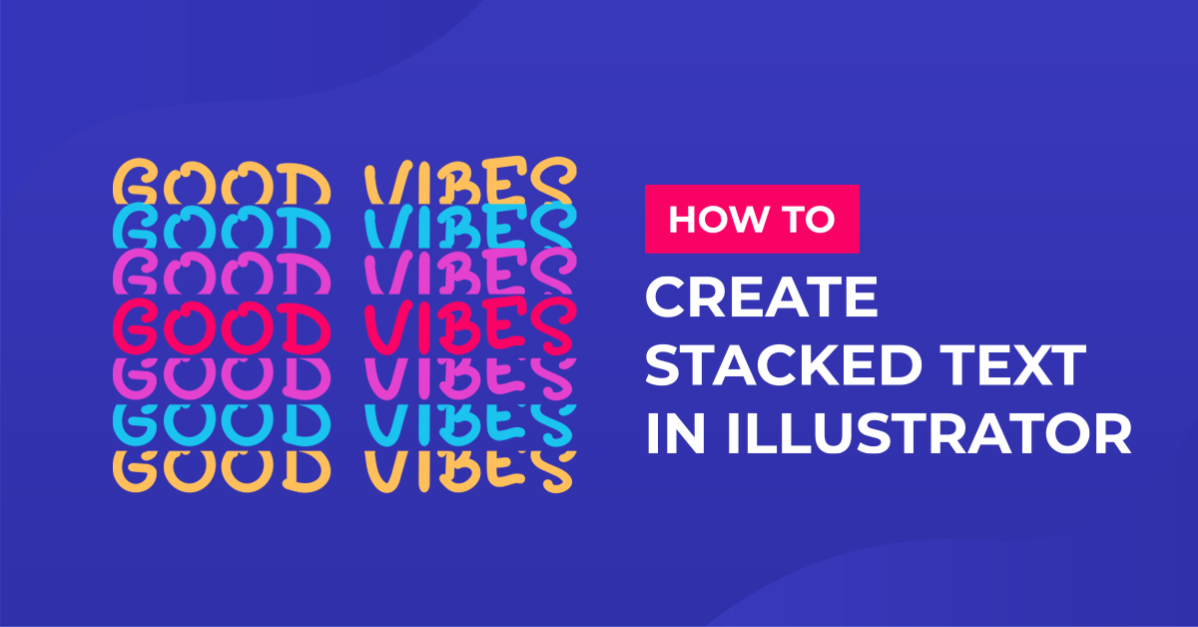
In this tutorial, we will be creating stacked text in Adobe Illustrator. This technique has been very popular and is an easy, outstanding way to bring attention to your text. It looks great on shirts, posters, bags, stickers, and so much more. As you can change what the text says and the colors, you can make it fit any occasion.

For this tutorial, we will be using a rounded uppercase font called The Monday from Font Bundles. You can pick a different font from one of these modern sans serif fonts, but make sure the font is bold as those work best for this technique.
First, we want to download and install the font.
Step 1 - Add and Edit Text
After creating a new artboard in Illustrator, click on the Text Tool (T). Tap on the artboard and type your text. Edit the font, spacing, and size if needed. Pick a fill color and set the stroke to none.

Make sure you are happy with your font and text, as you won't be able to change it after the next step.
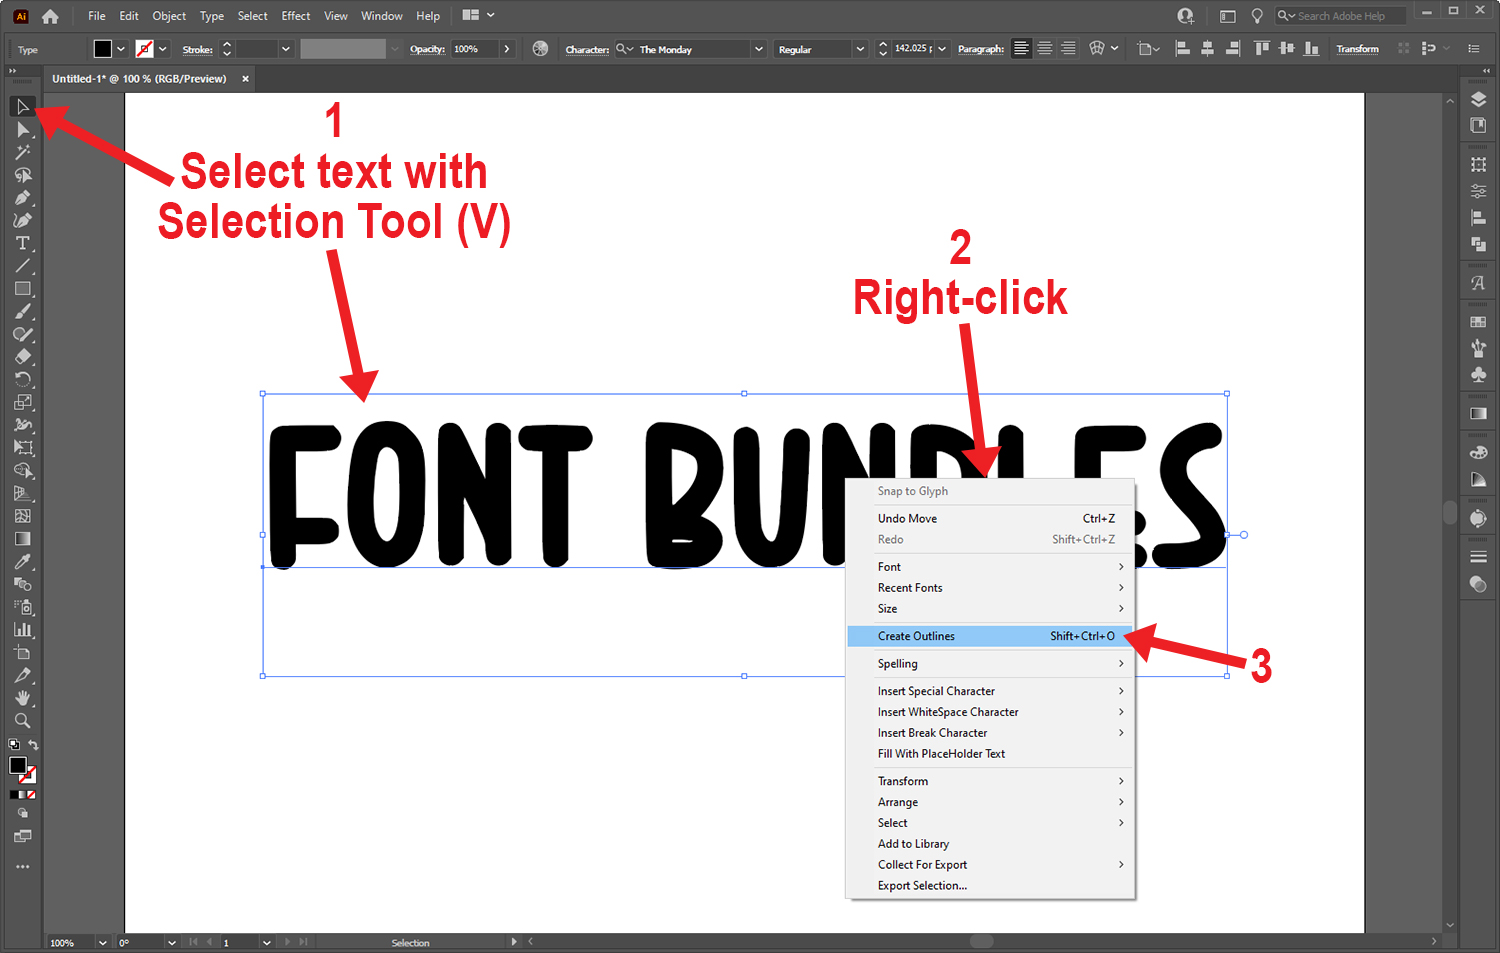
Select the text with the Selection Tool (V). Right-click and choose Create Outlines (Shift+Ctrl/Cmd+O). Your text now consists of shapes and is no longer a text object. You can't change the font, but you can still edit the color and size.
Step 2 - Create an Empty Rectangle That Covers the Text
Using the Rectangle Tool (M), create a rectangle that is at least as tall and wide as the text. Set the rectangle's fill to none by clicking the fill icon and then clicking the small none icon below. Repeat for the stroke if needed.

Step 3 - Split Rectangle Into a Grid
With the rectangle selected, go to Object > Path > Split Into Grid.

In the Split Into Grid dialog box, enable the preview by clicking its checkbox. While keeping an eye on the preview, input the number of rows you want to split the rectangle into. When you're happy with the number of rows, click OK.

Step 4 - Select Text and Grid and Use Divide
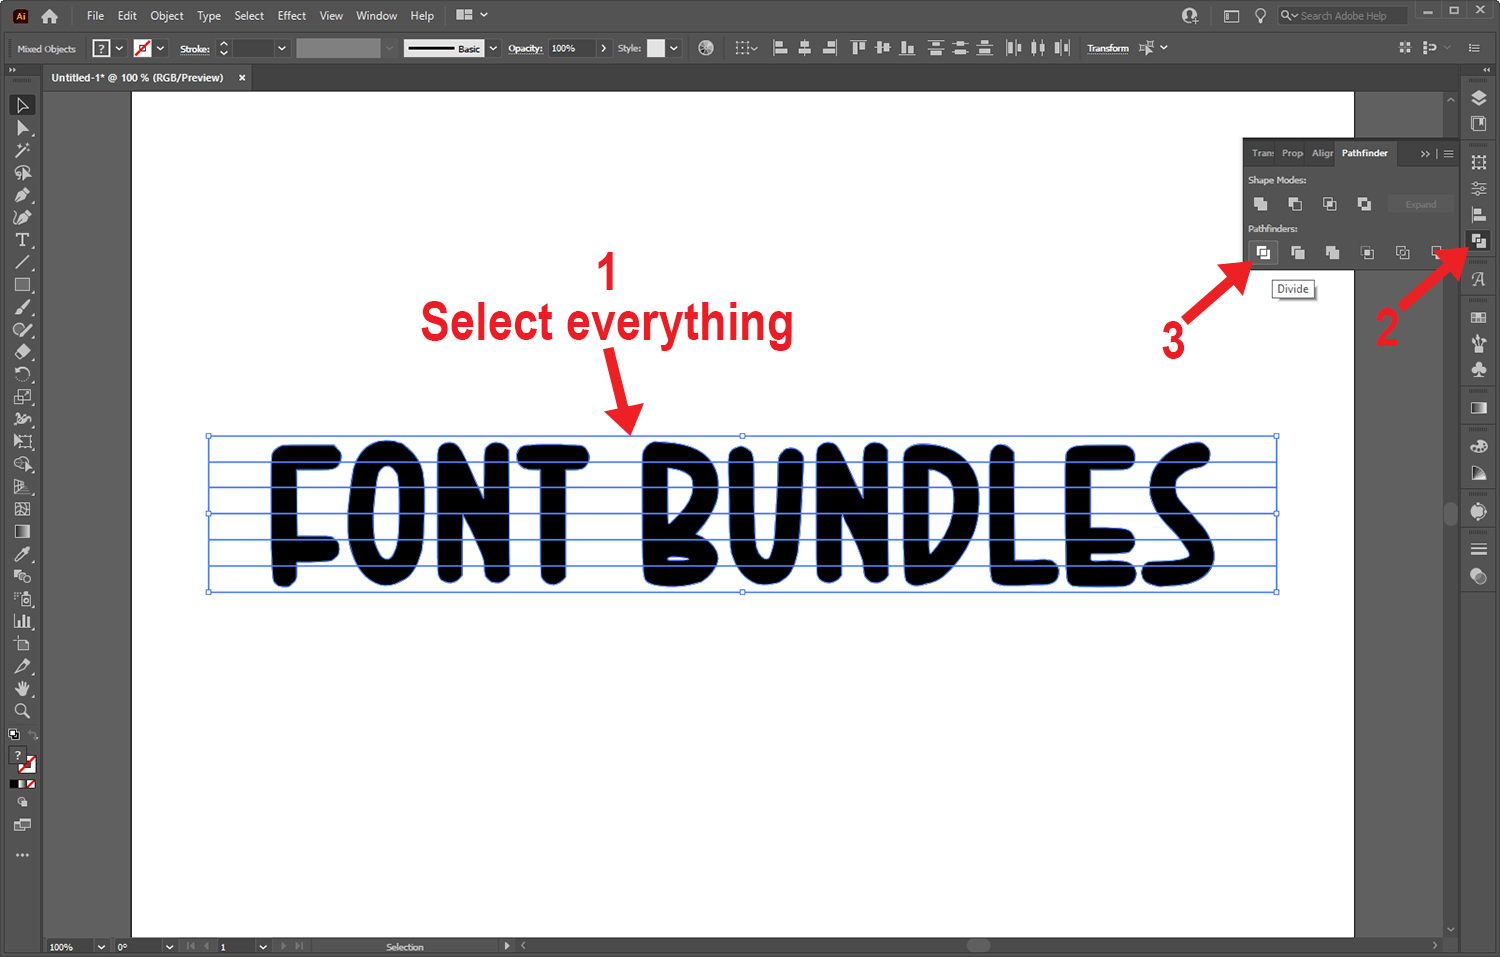
Select everything, open the Pathfinder panel and choose Divide.
With everything still selected, press Shift+Ctrl/Cmd+G to ungroup. Select one of the empty grid shapes and go to Select > Same > Fill Color in the top menu. Press Delete after all the empty shapes have been selected.

Step 5 - Duplicate the Divided Text
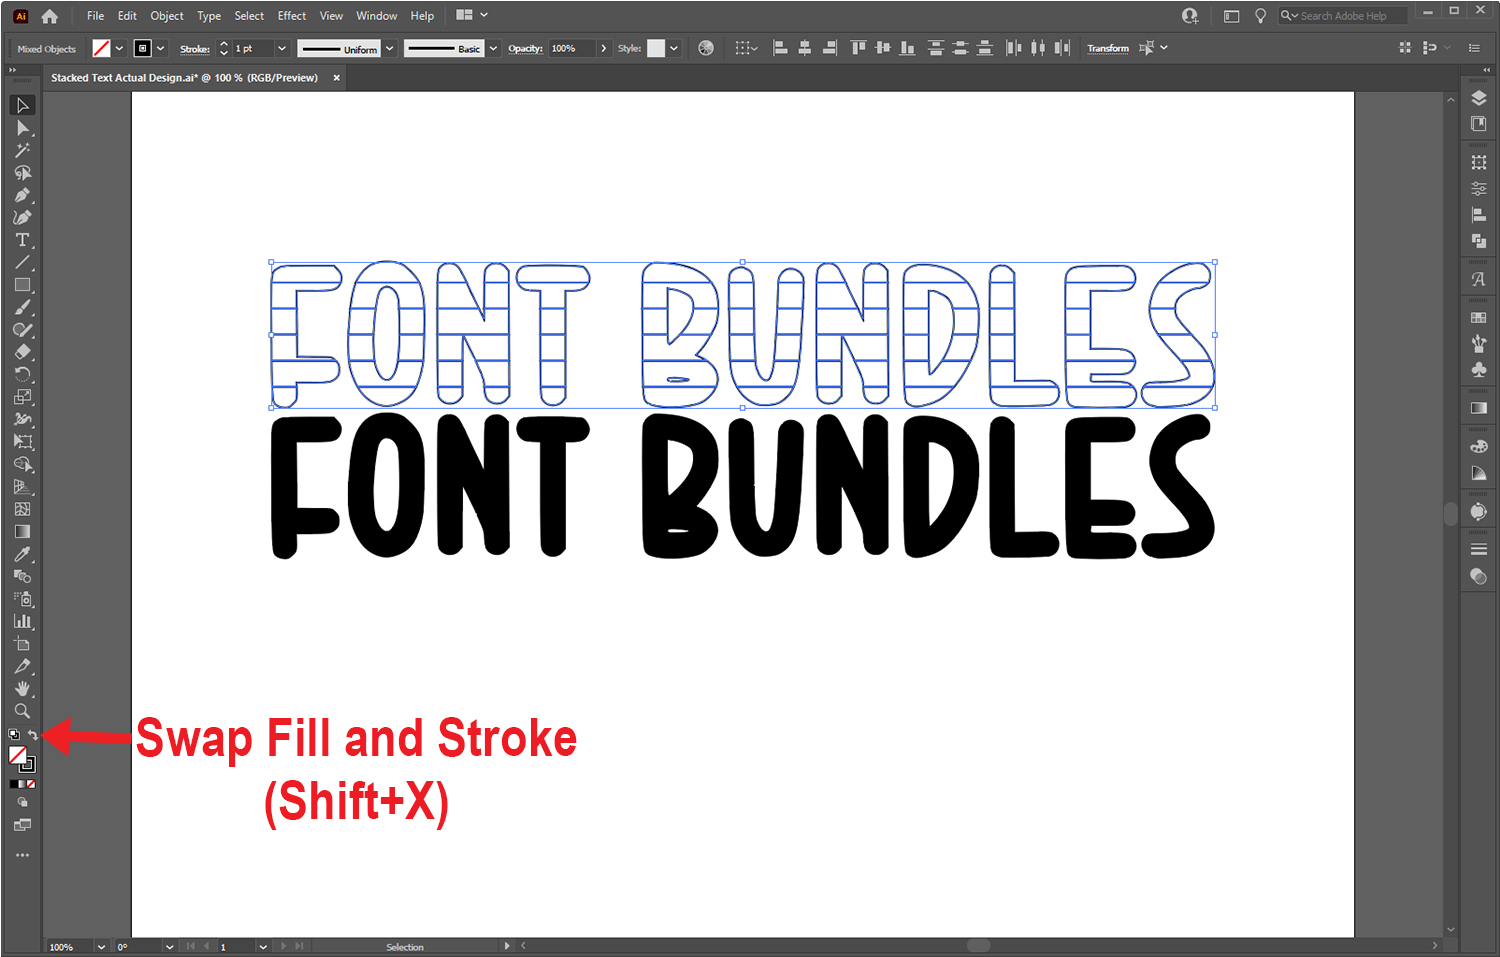
Select the text. Hold down Alt/Option+Shift, click the text, and drag the duplicate directly above the original. Then swap the fill and stroke by clicking on the small curved double-headed arrow (Shift+X) in the left toolbar above the fill and stroke icons.
Step 6 - Delete Row(s) From Duplicate Text and Merge the Rest
Decide how many rows you would like to delete from the duplicate. Because we moved the duplicate up, we want to delete rows from the bottom. Select the rows and press Delete.

After deleting, select the rest of the shapes of the duplicate text and use the Merge function in the Pathfinder panel to combine them.

Make as many copies of the duplicate as you would like, directly above, and space them out.
To add stacked text below the original, repeat steps 5 and 6, but move the duplicate below the original and delete rows from the top instead.
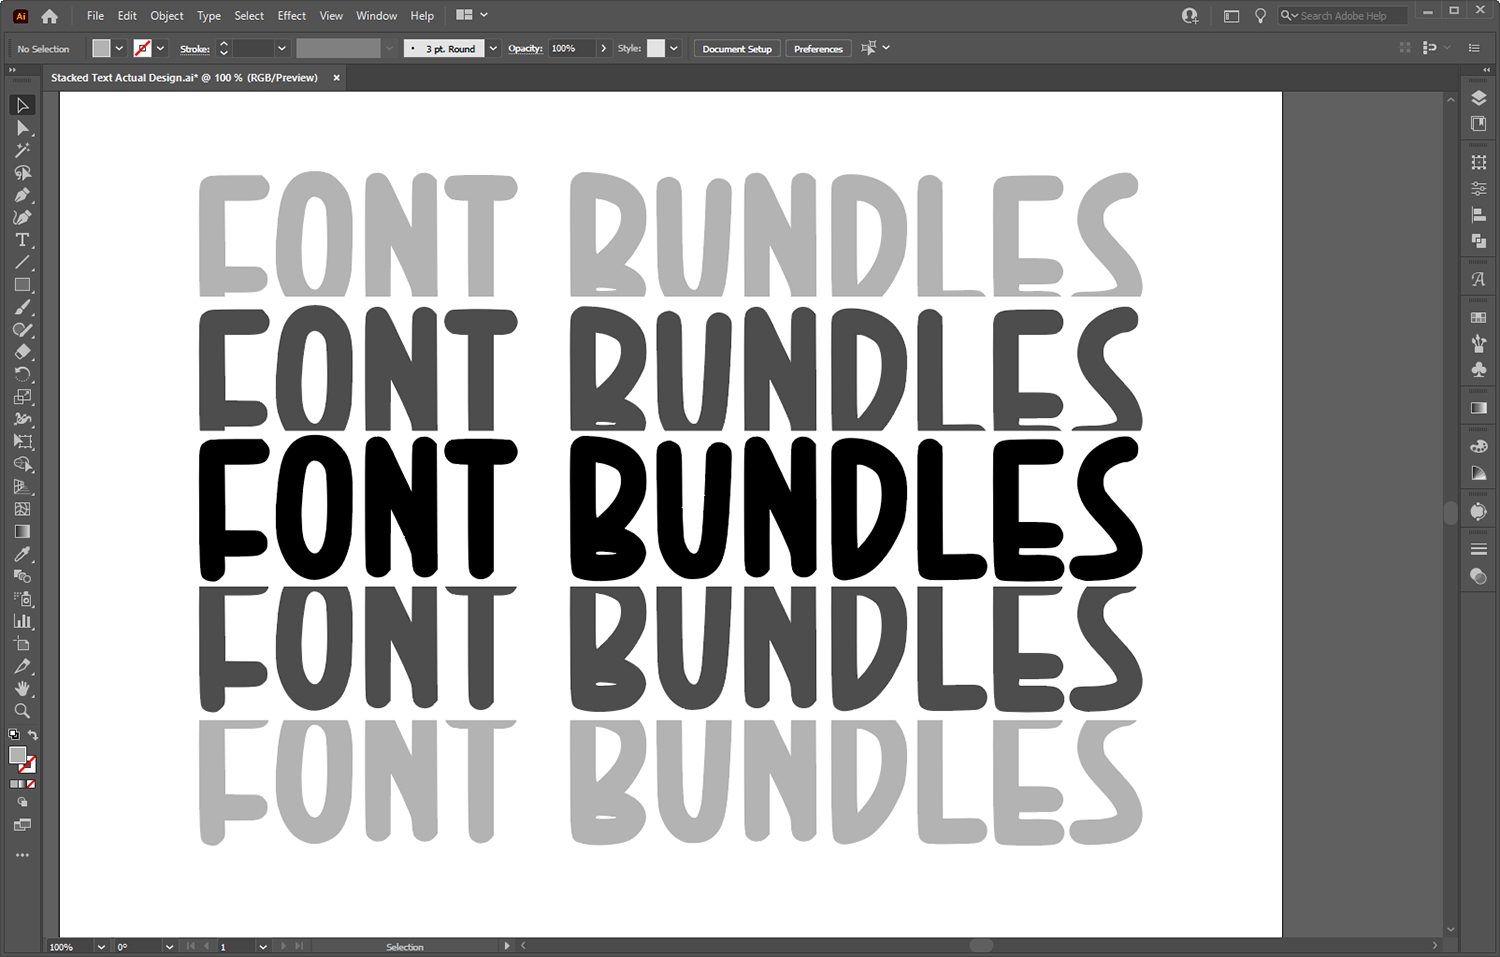
Finally, select the original text and merge the shapes. Stacked text of the same size above and below the original text will look like the following image.

You can edit the stroke thickness, stroke color, or even add a fill like shown below.
Stacked Text Variations
You can create many different looks following this tutorial. The stacked text can also have varying heights, and all you have to do is delete one more row than the previous duplicate. The following image shows stacked text with varying heights.

Another variation includes having the original text at the top or bottom. We have a couple of fun color-filled examples below.

Stacked text in Illustrator is simple to create and looks pretty awesome. If you've enjoyed this tutorial, take a look at our other text tutorials, such as how to create rainbow text, how to make ribbon text, and how to make wavy text in Illustrator.