
By Design Bundles
Illustrator Tutorials10 min
Text In and Around Letters in Illustrator
For this tutorial, we will use the Free Font “Rockwell Extra Bold” and some fake dummy text. You can find Fake Text Generators online.
1 - In Illustrator, create a “New Document”.
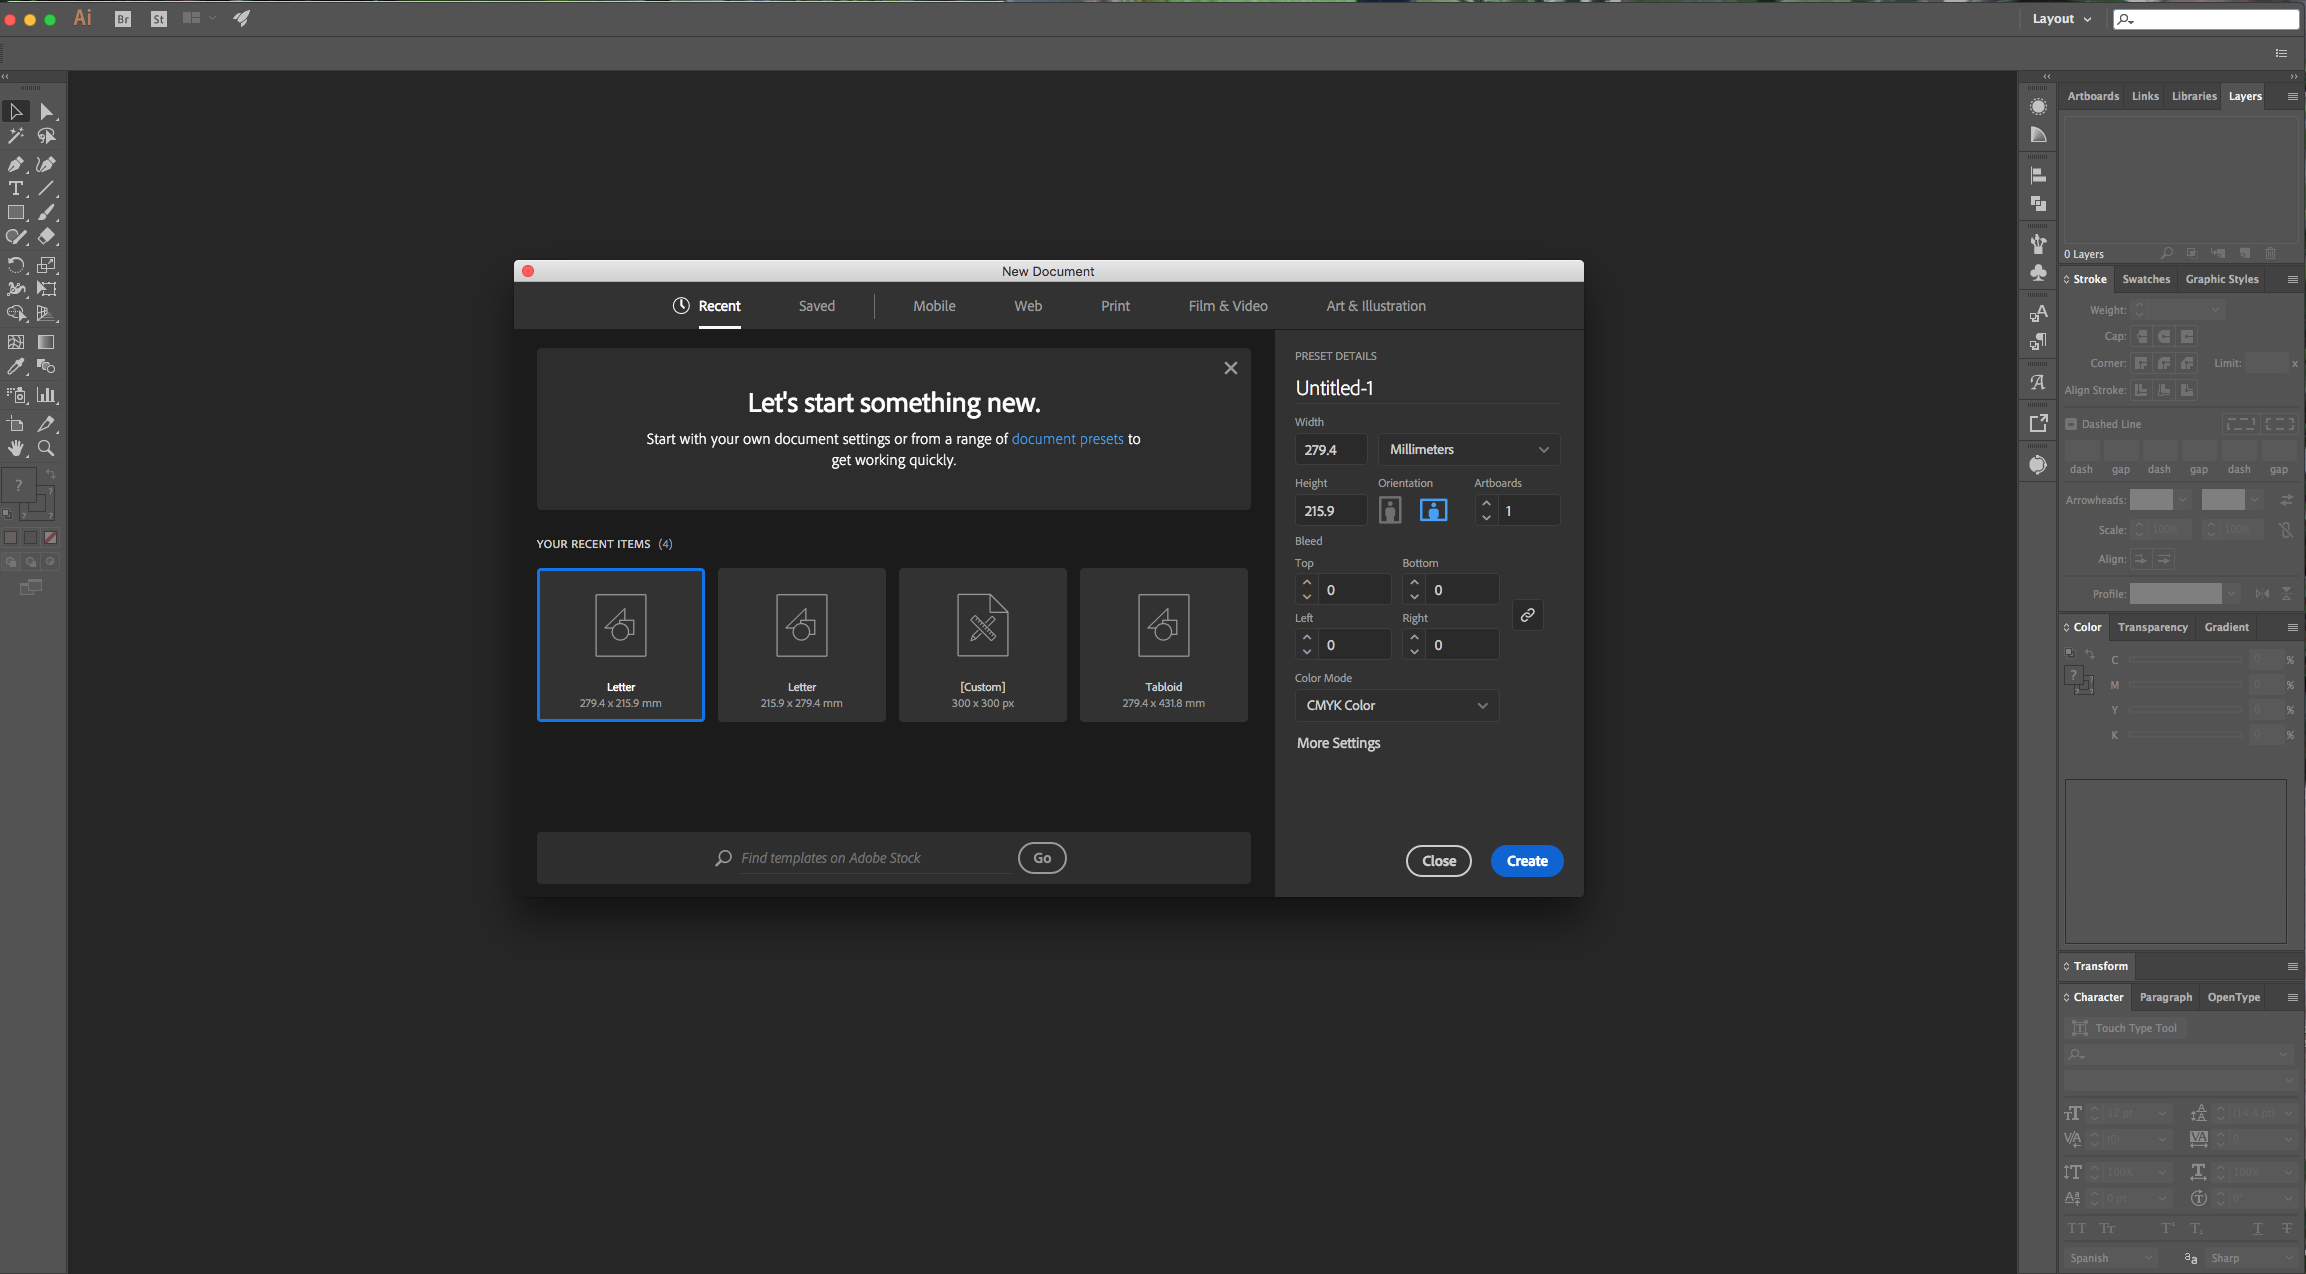
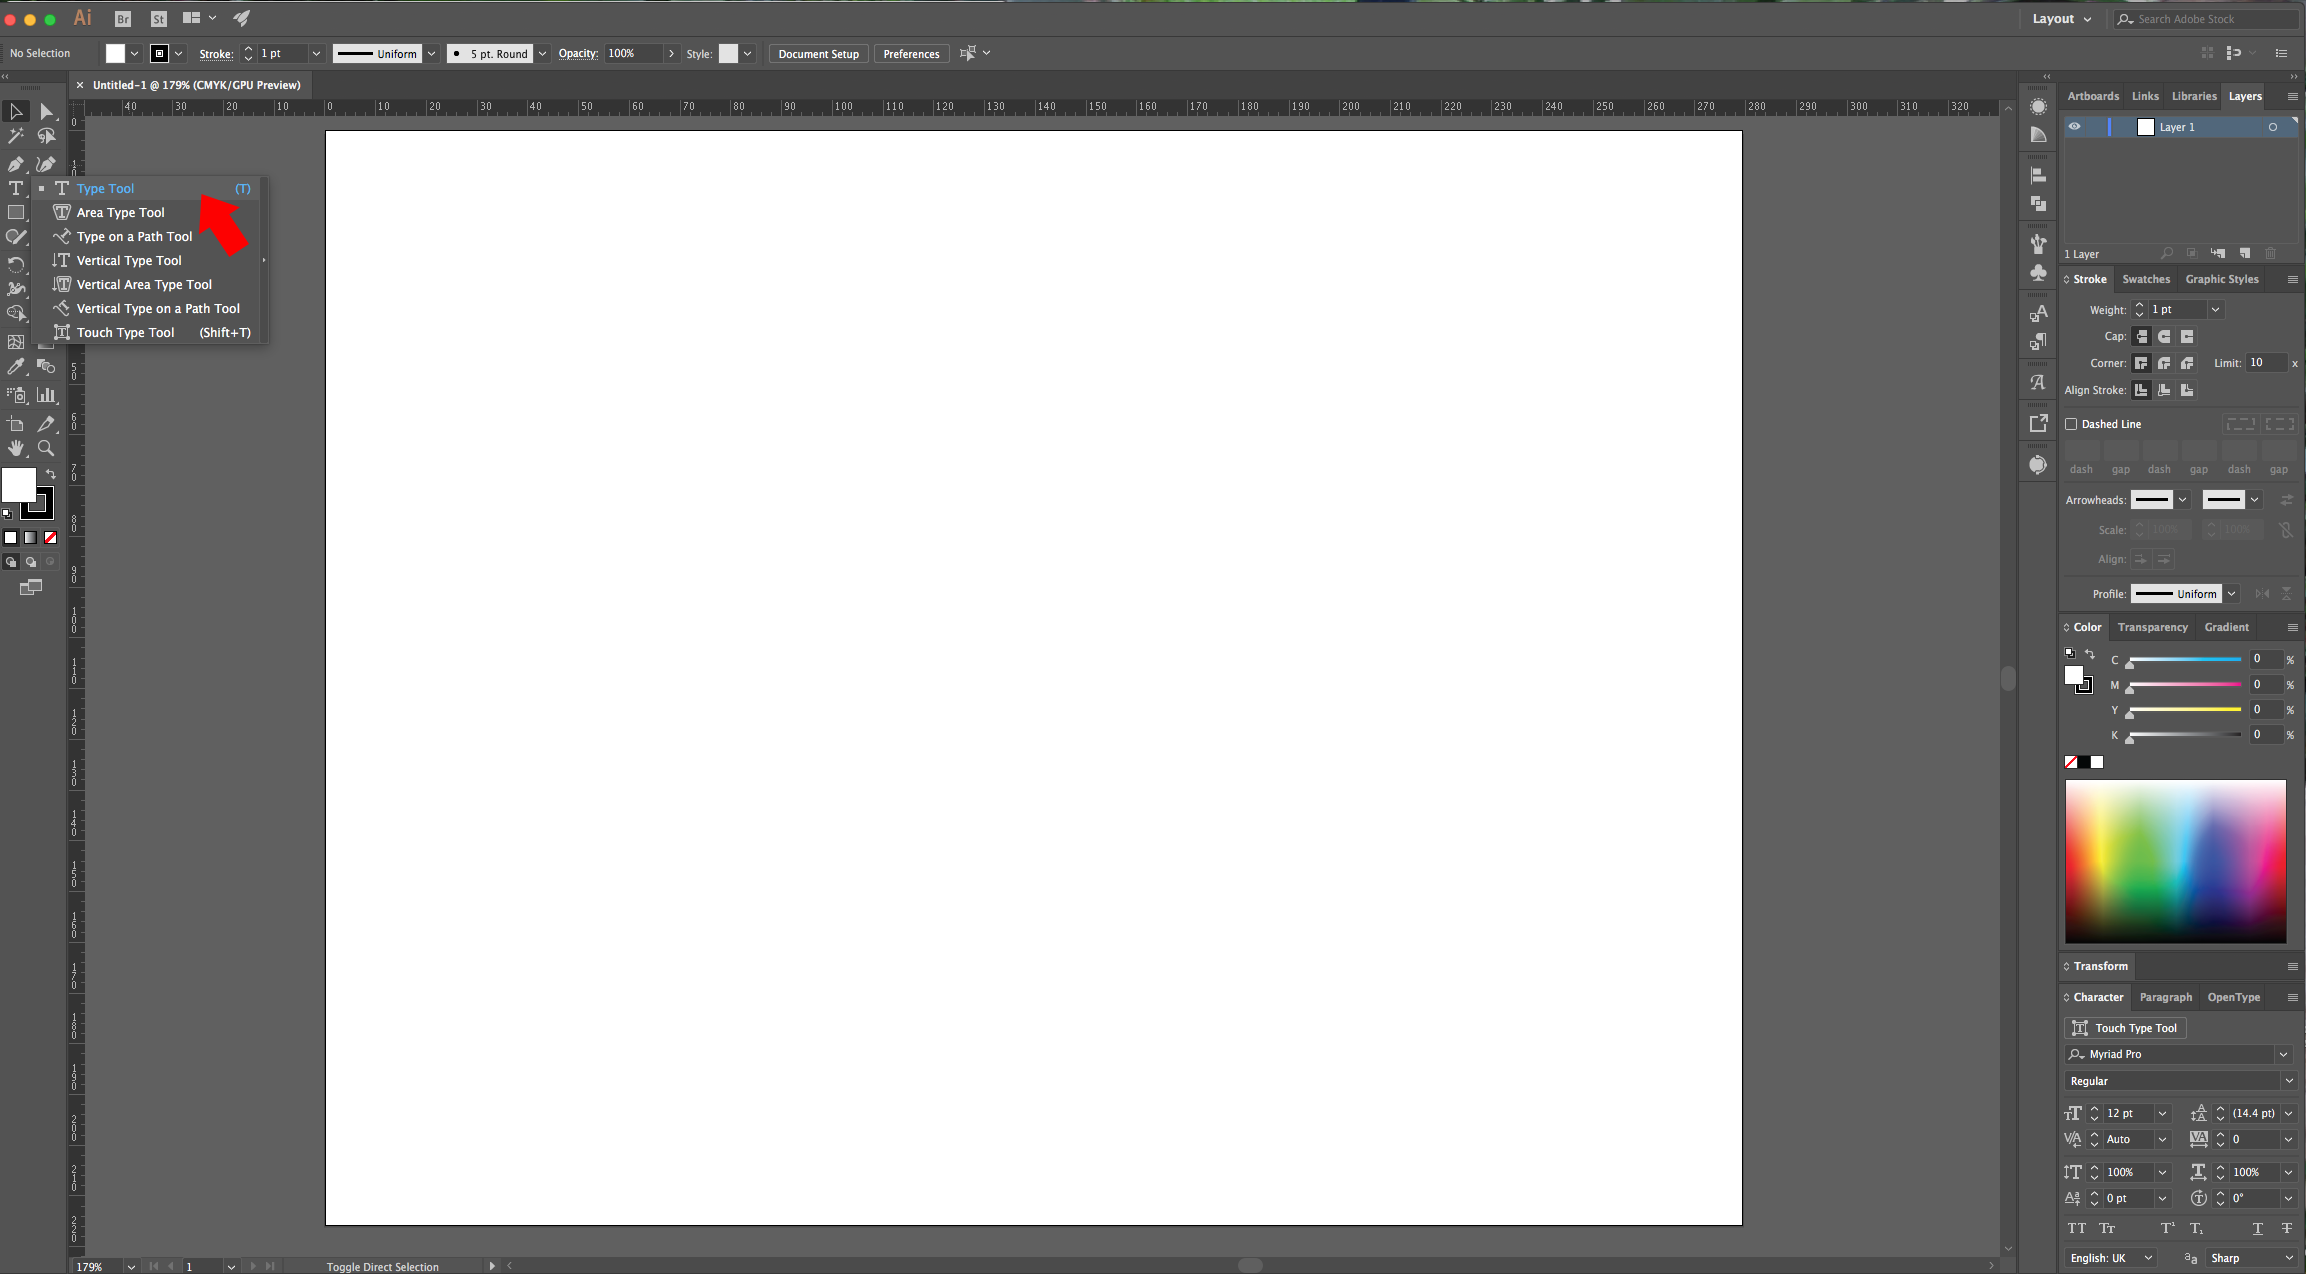
2 - Select the “Type Tool” (T), choose a heavy Font (we used Rockwell Extra Bold) and type your text. Fill it with a dark color.
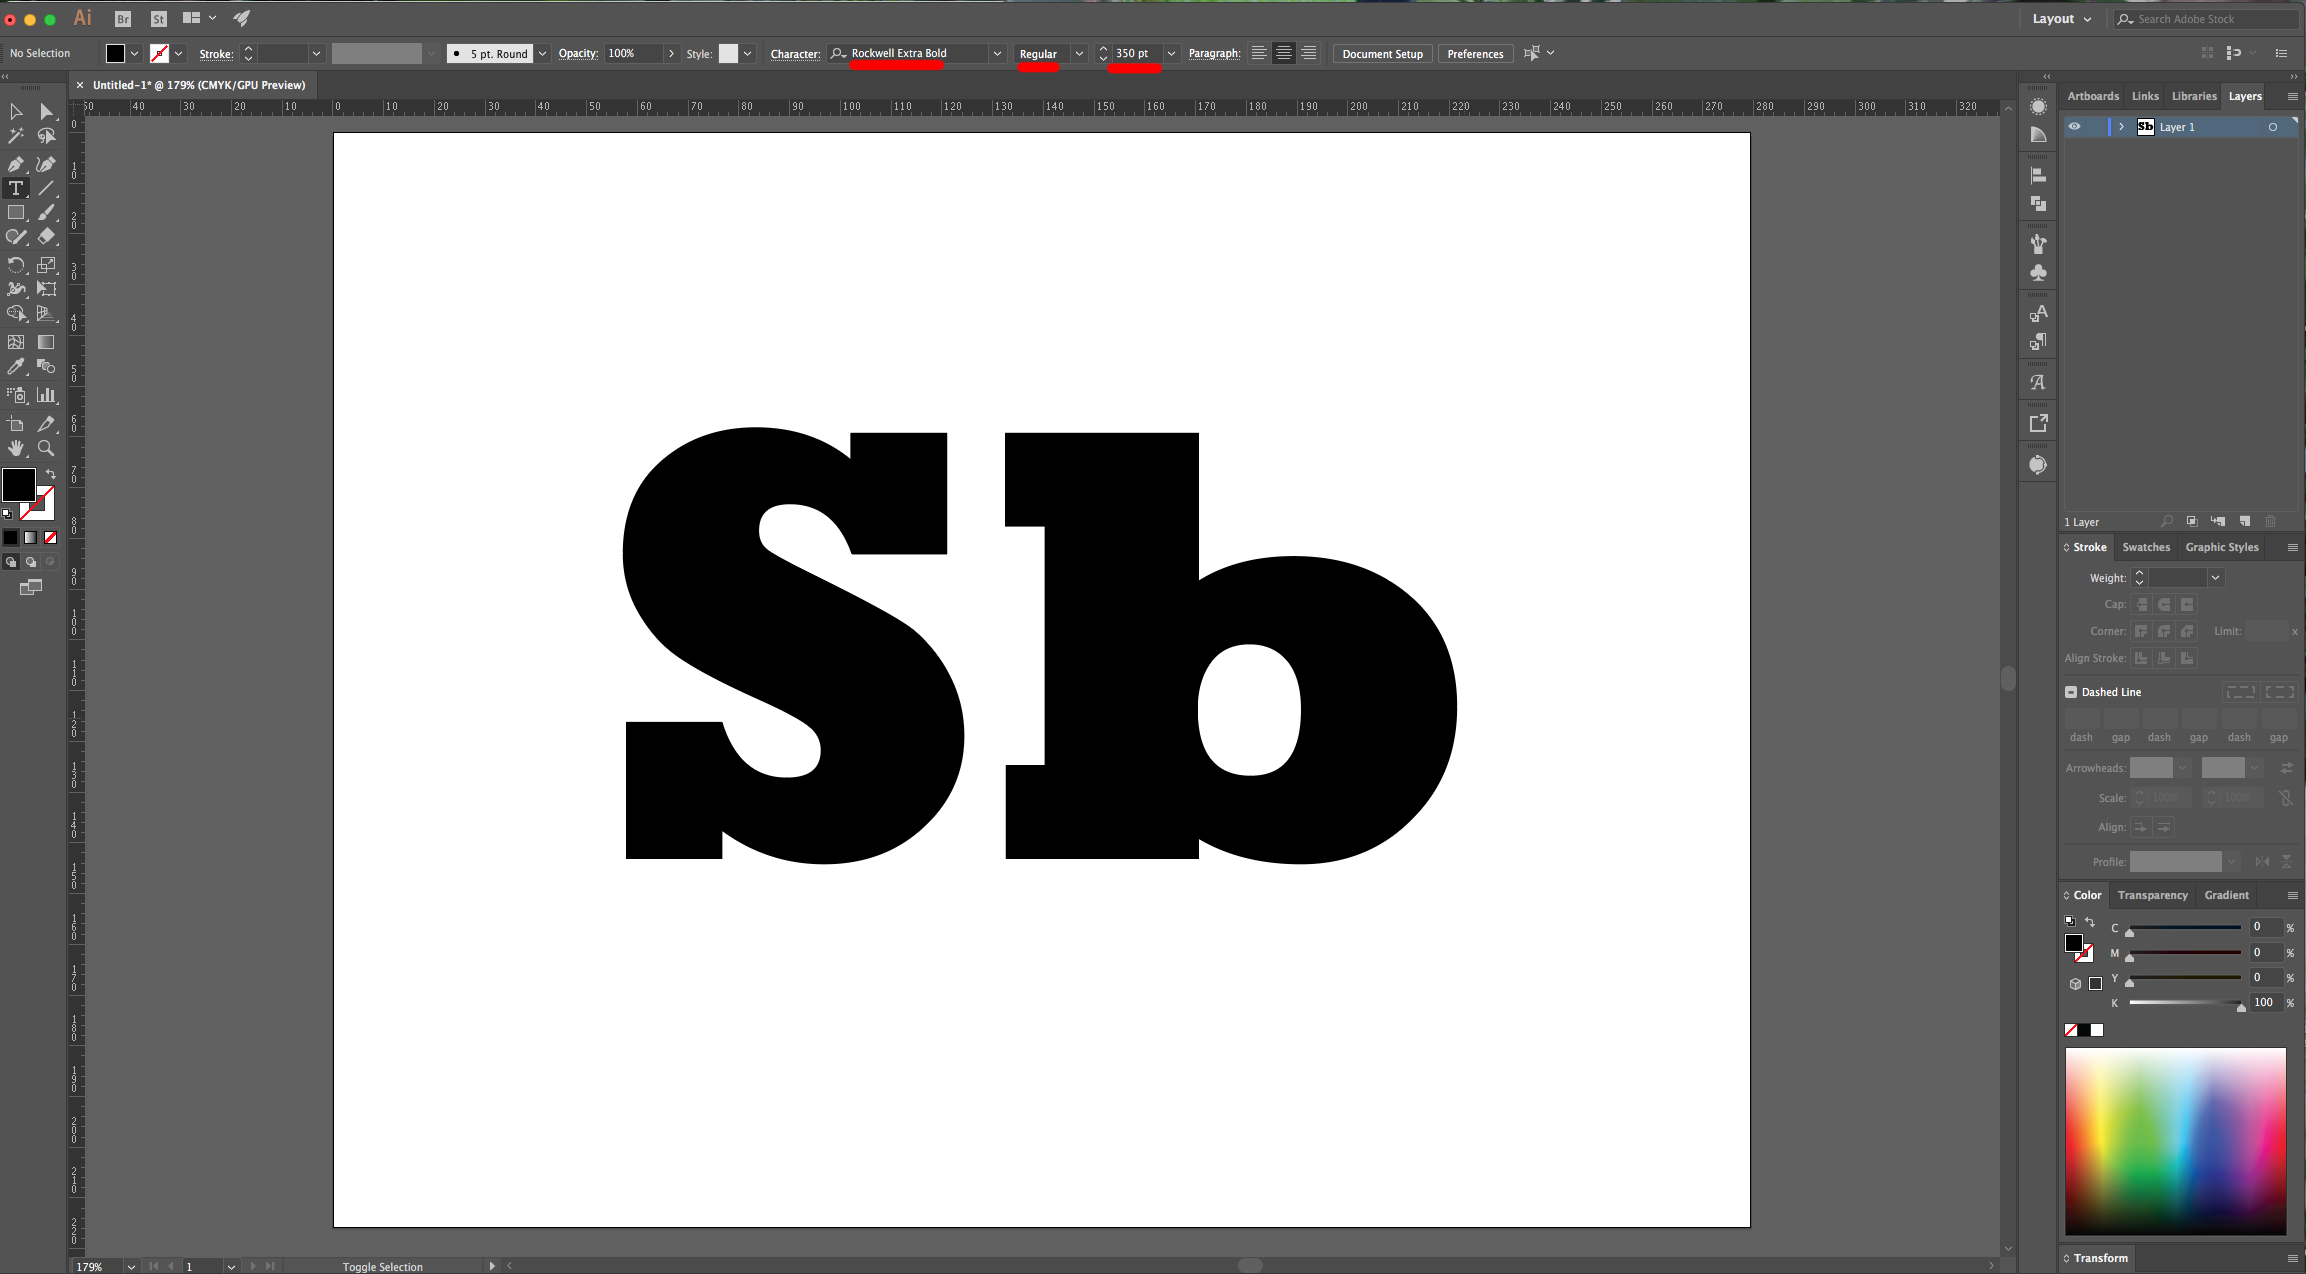
3 - Select your Text and center it by clicking on the “Align Horizontal and Vertical Center” buttons on the Top Menu. Make sure that “Align to Artboard” is selected.
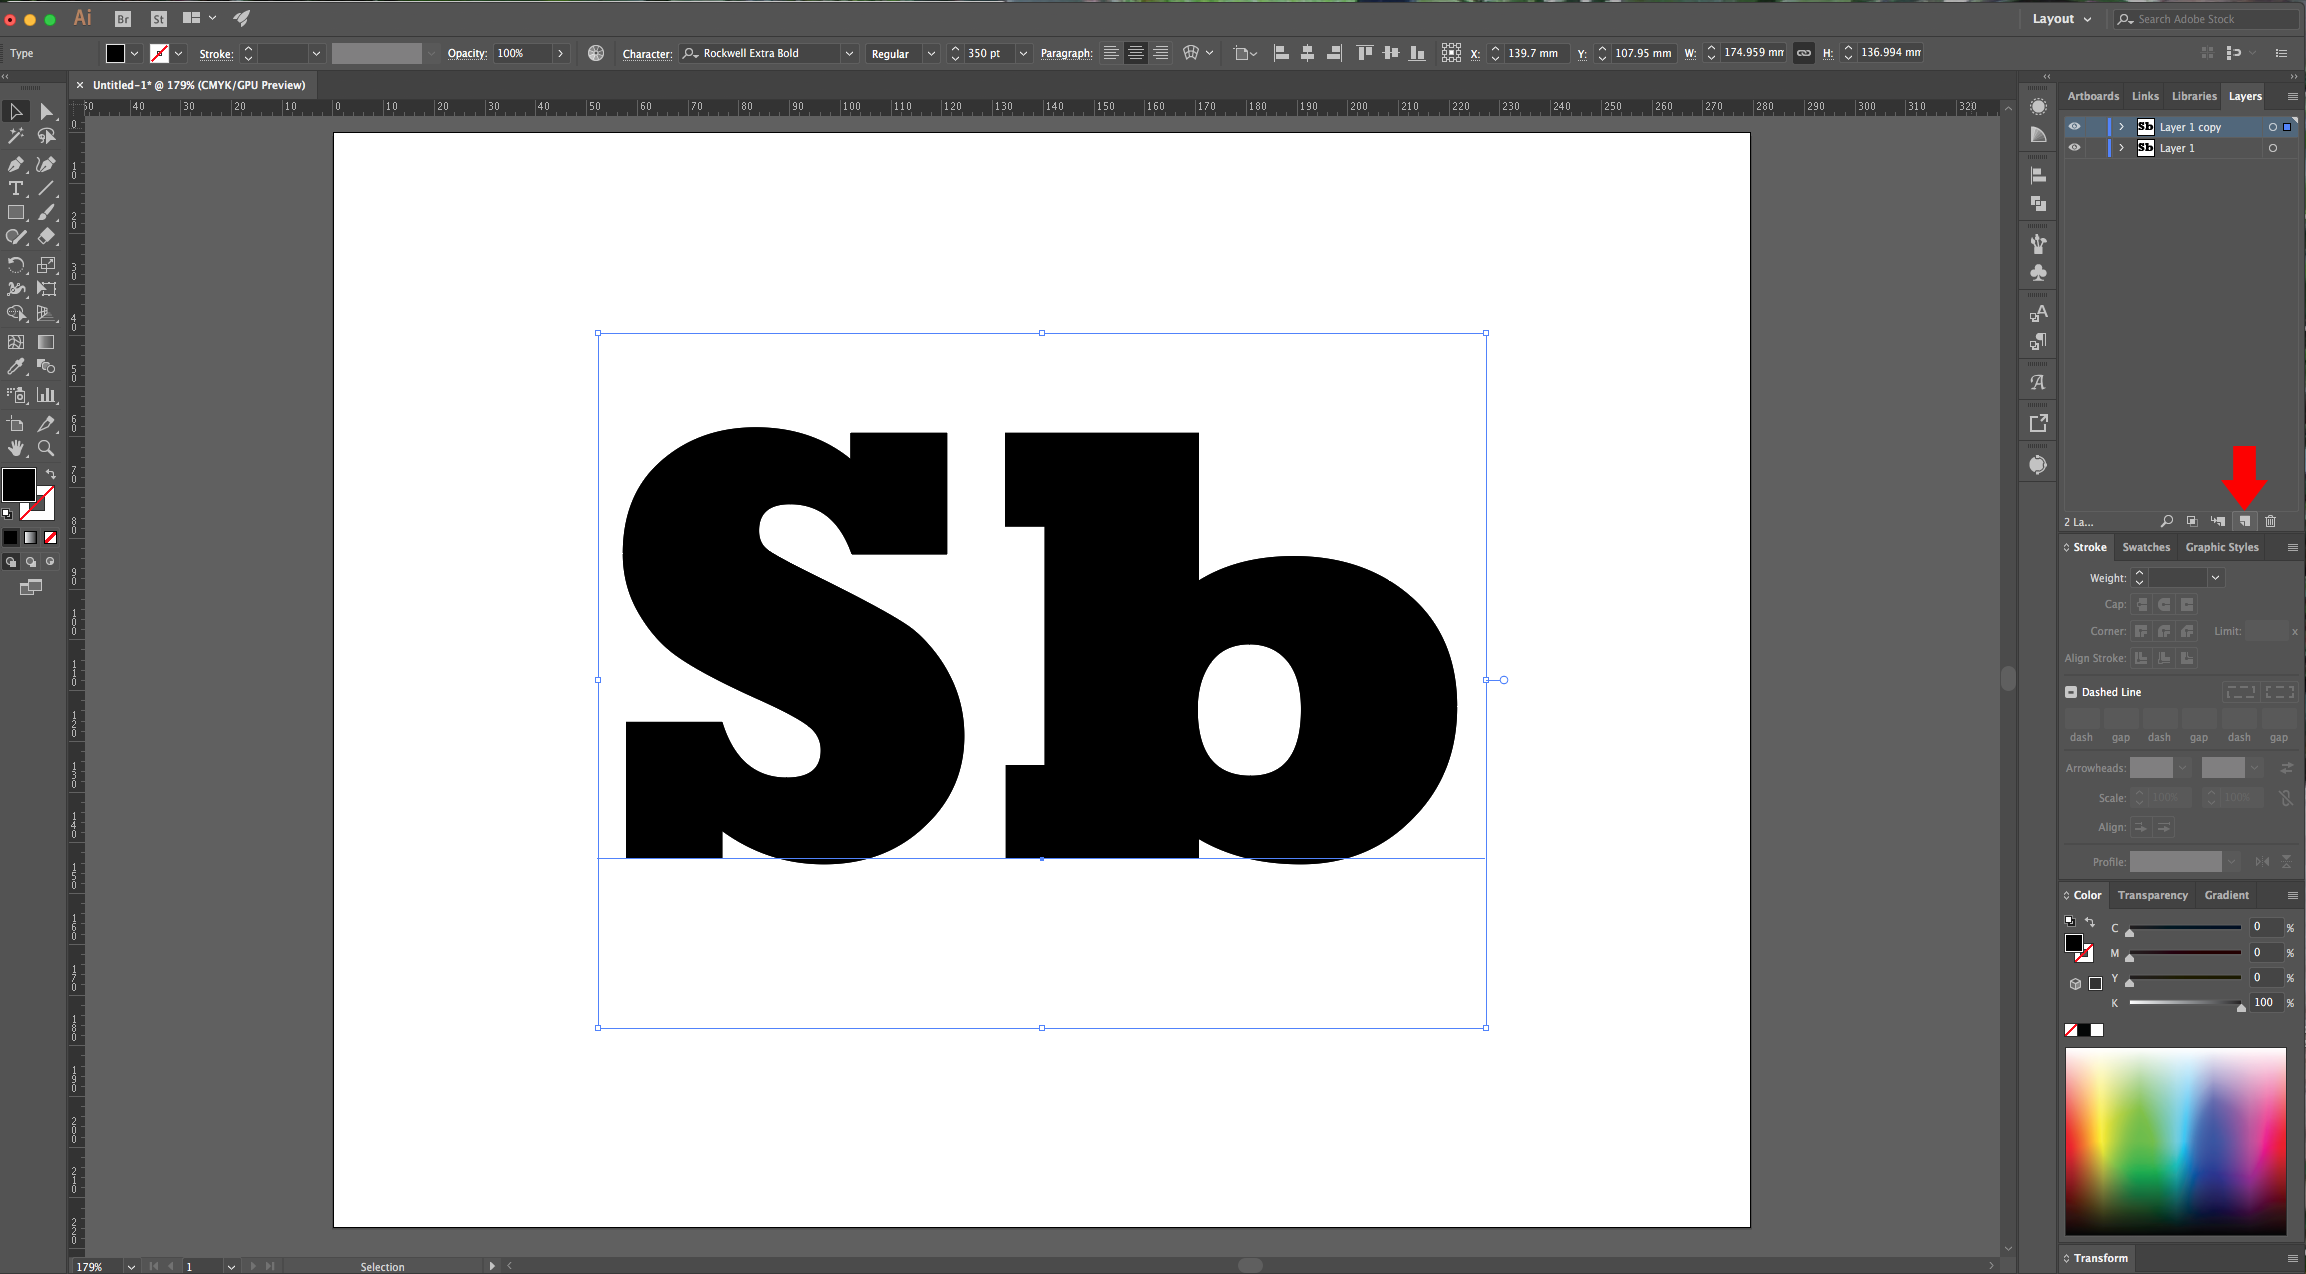
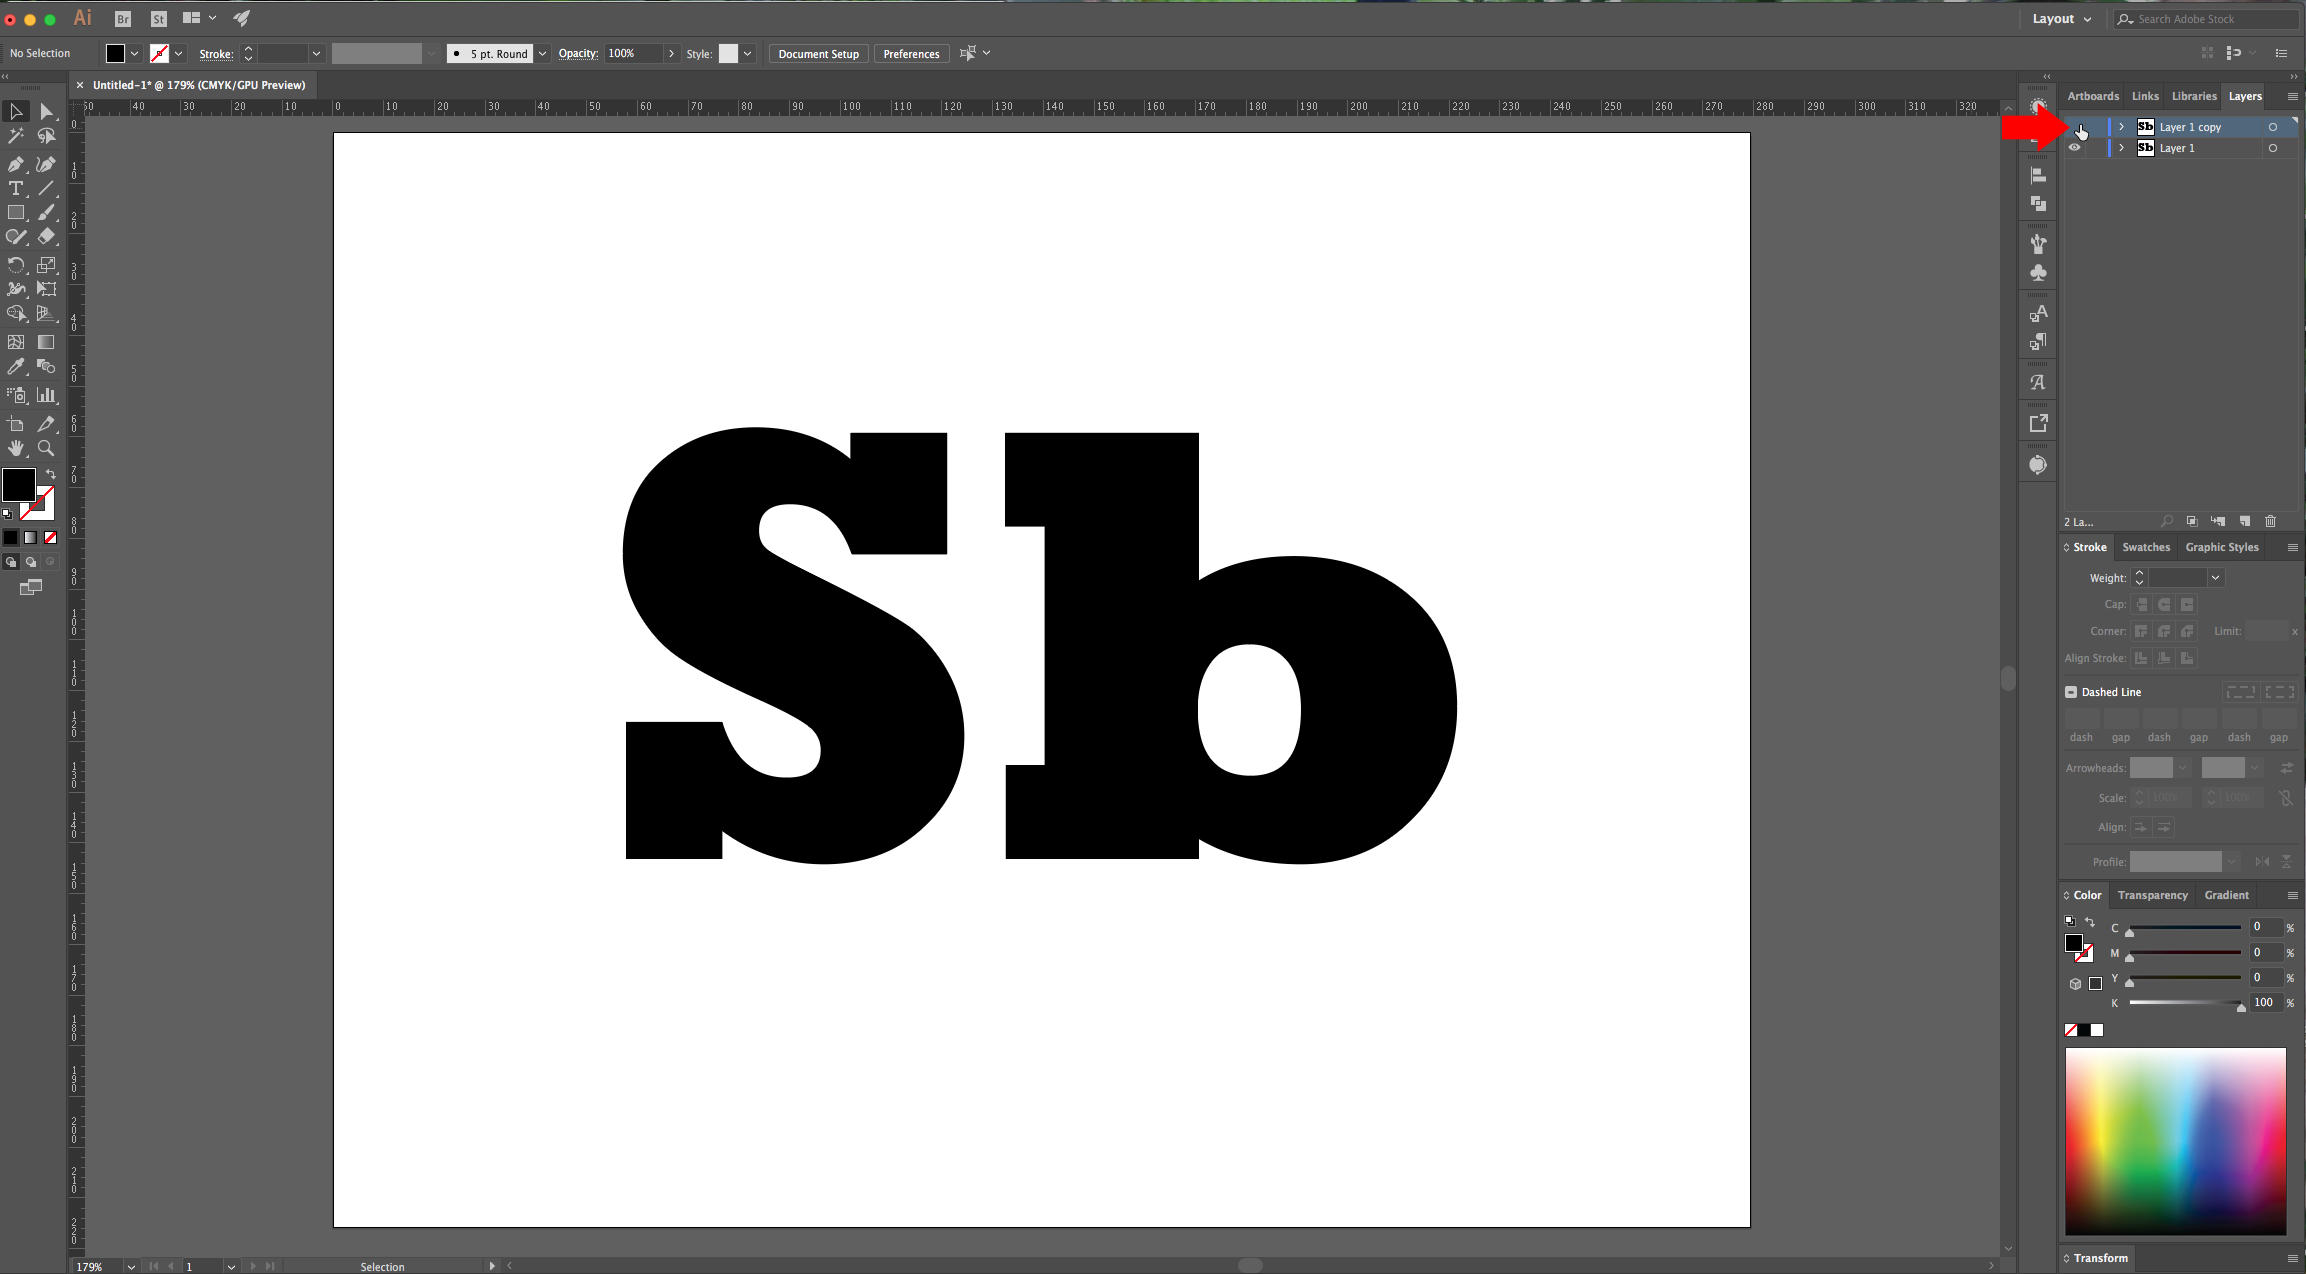
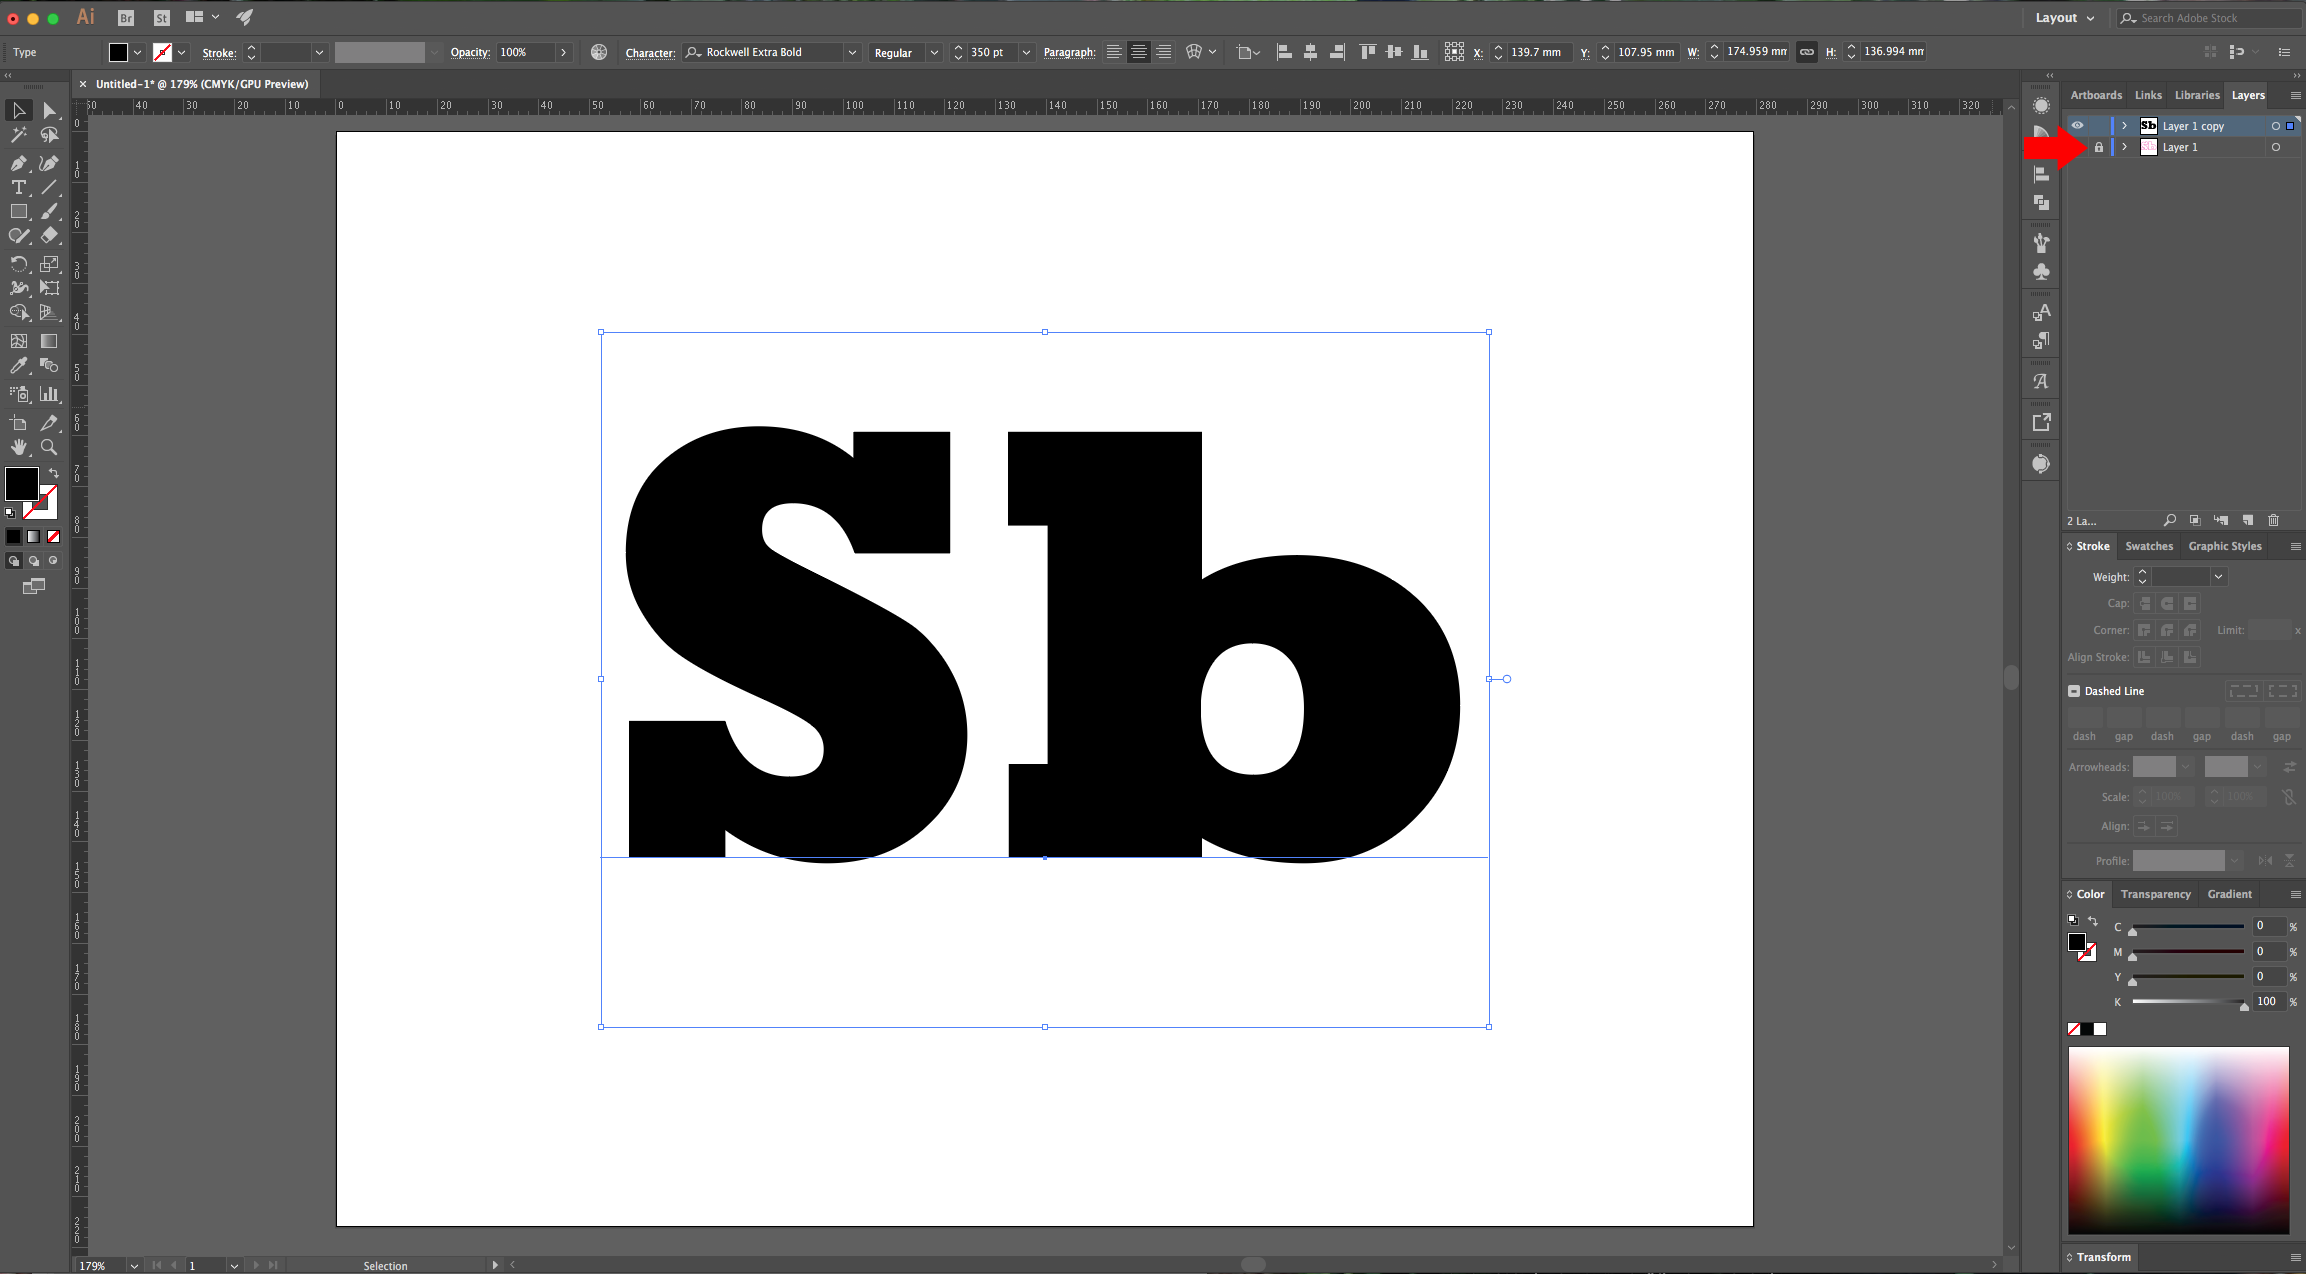
4 - Duplicate your Text Layer by dragging it onto the “Create New Layer” button at the bottom of the “Layers Panel”. Then, hide the “Top” Text Layer by clicking on the small “Eye” icon on the left side of its Thumbnail and lock the “Bottom” Text Layer by clicking next to the small eye icon and bringing out the small Padlock icon.
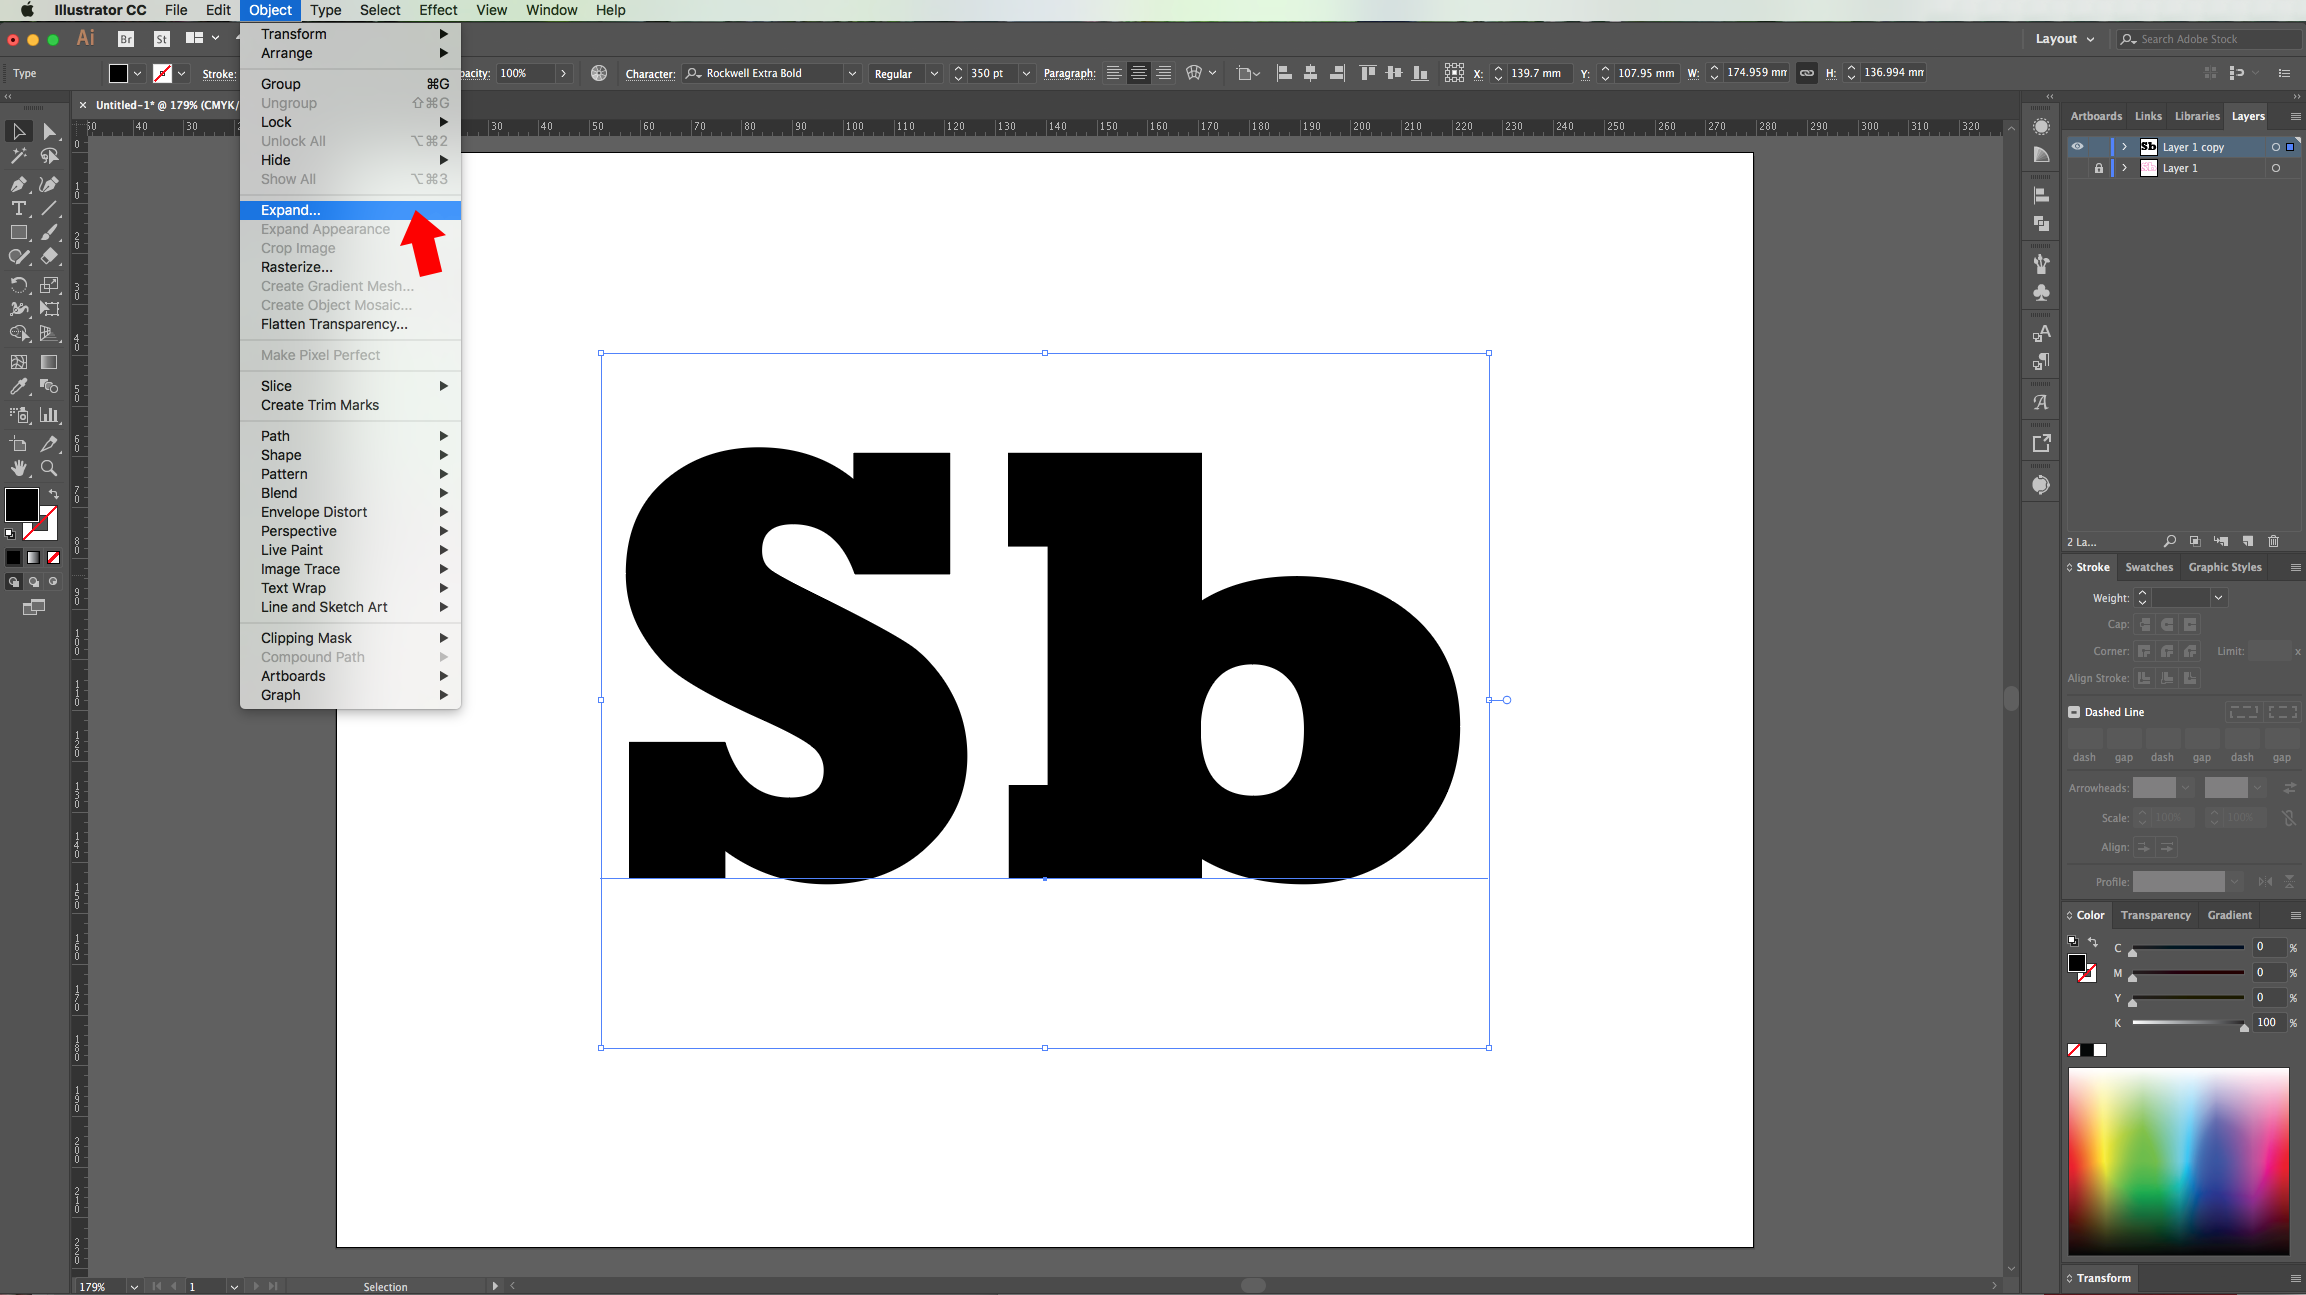
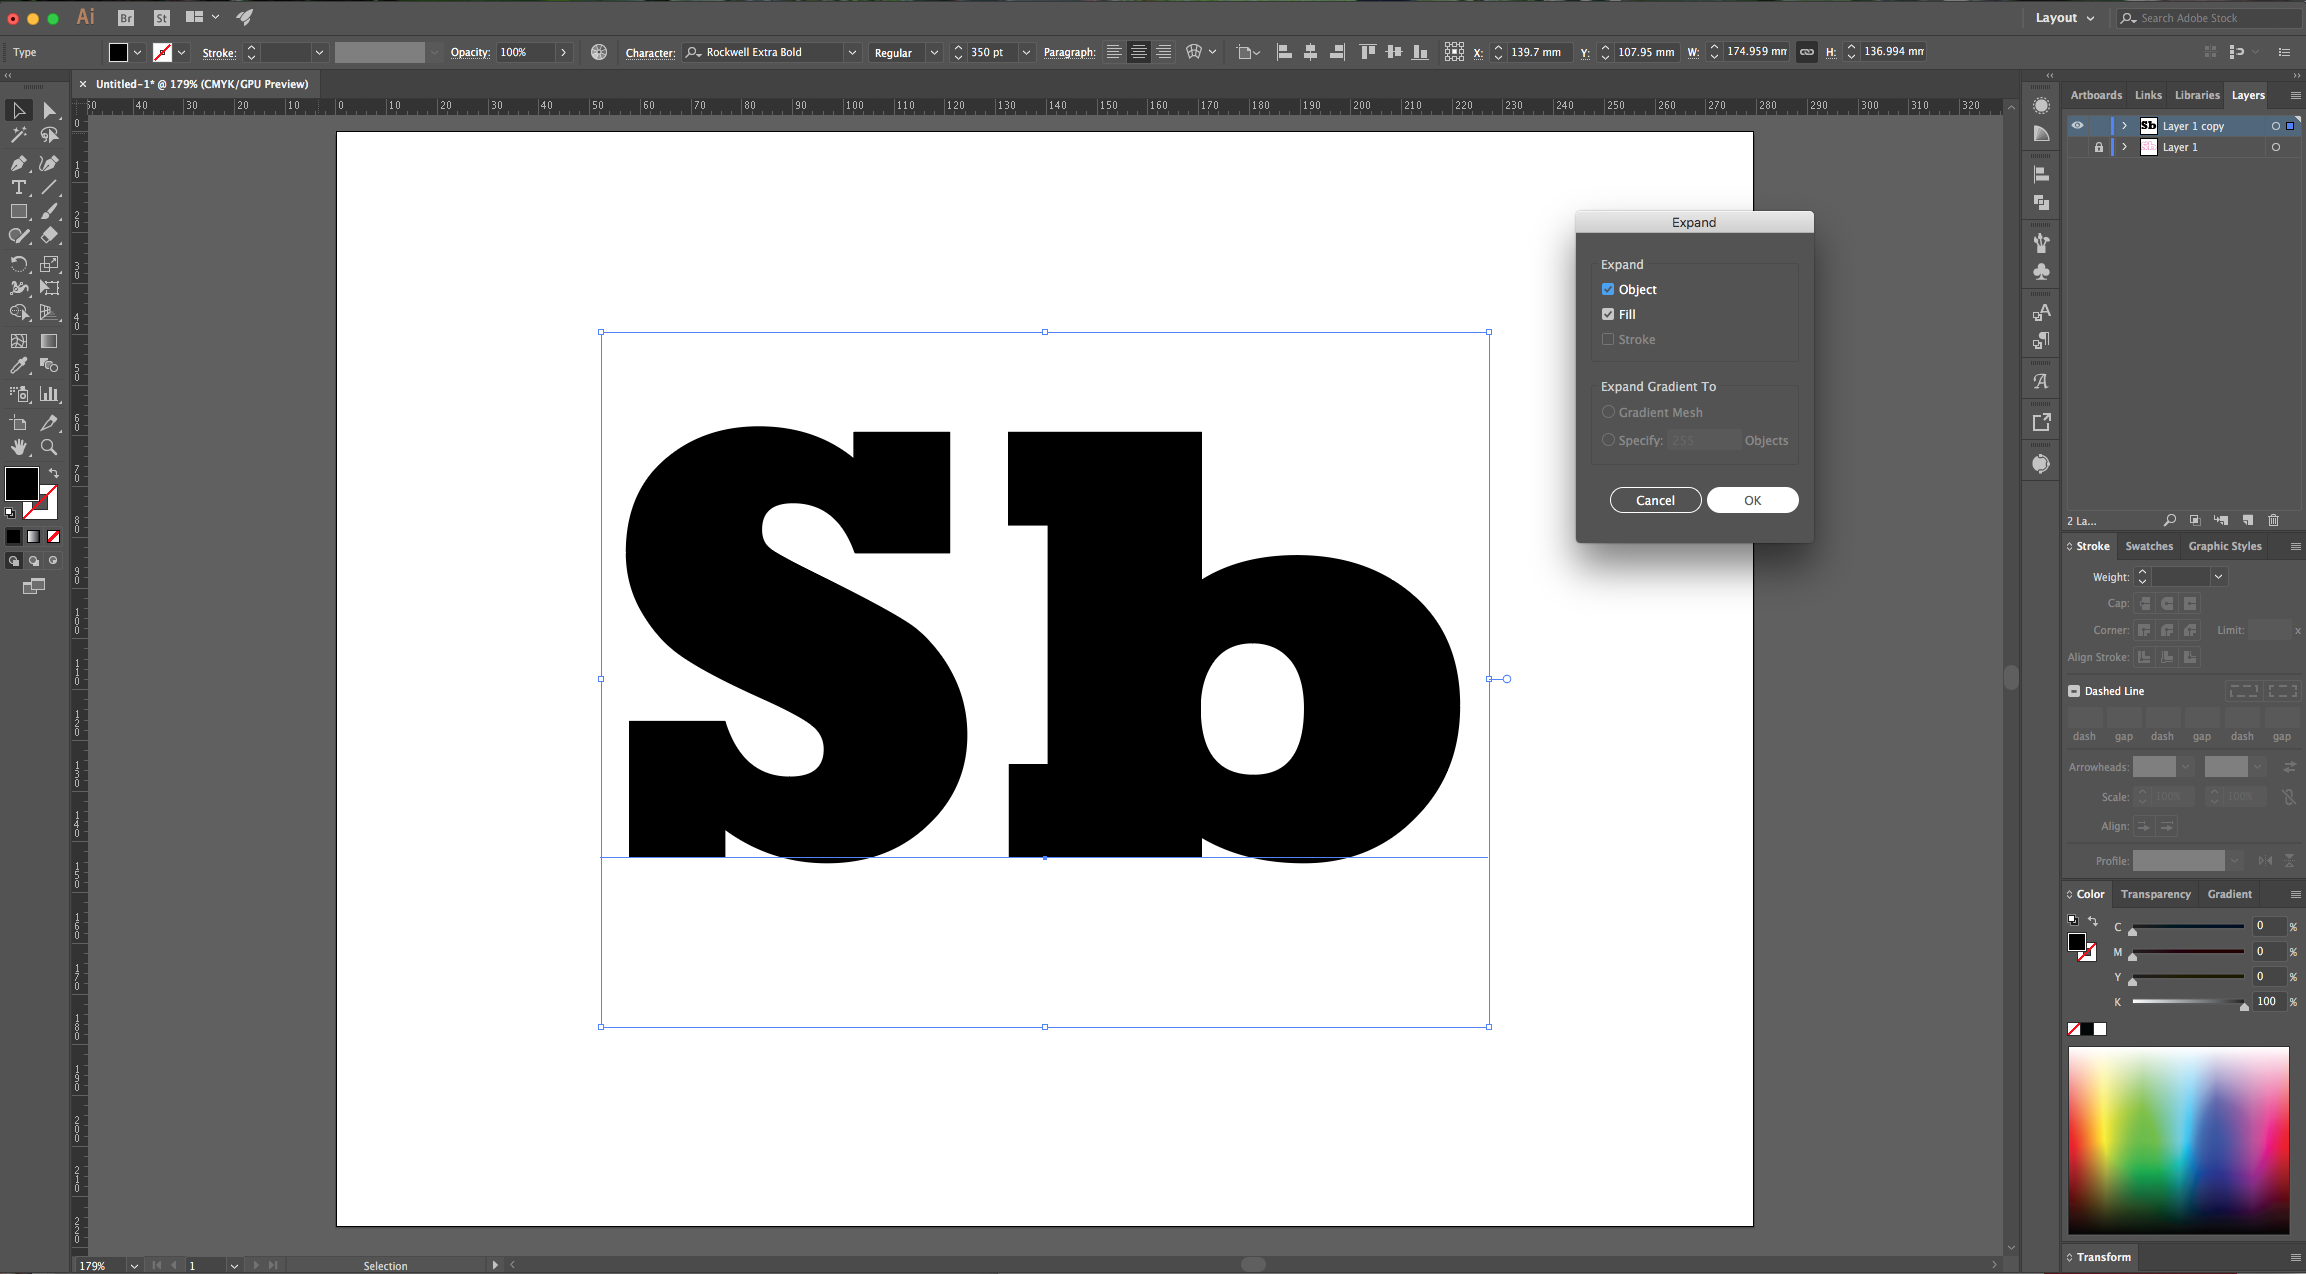
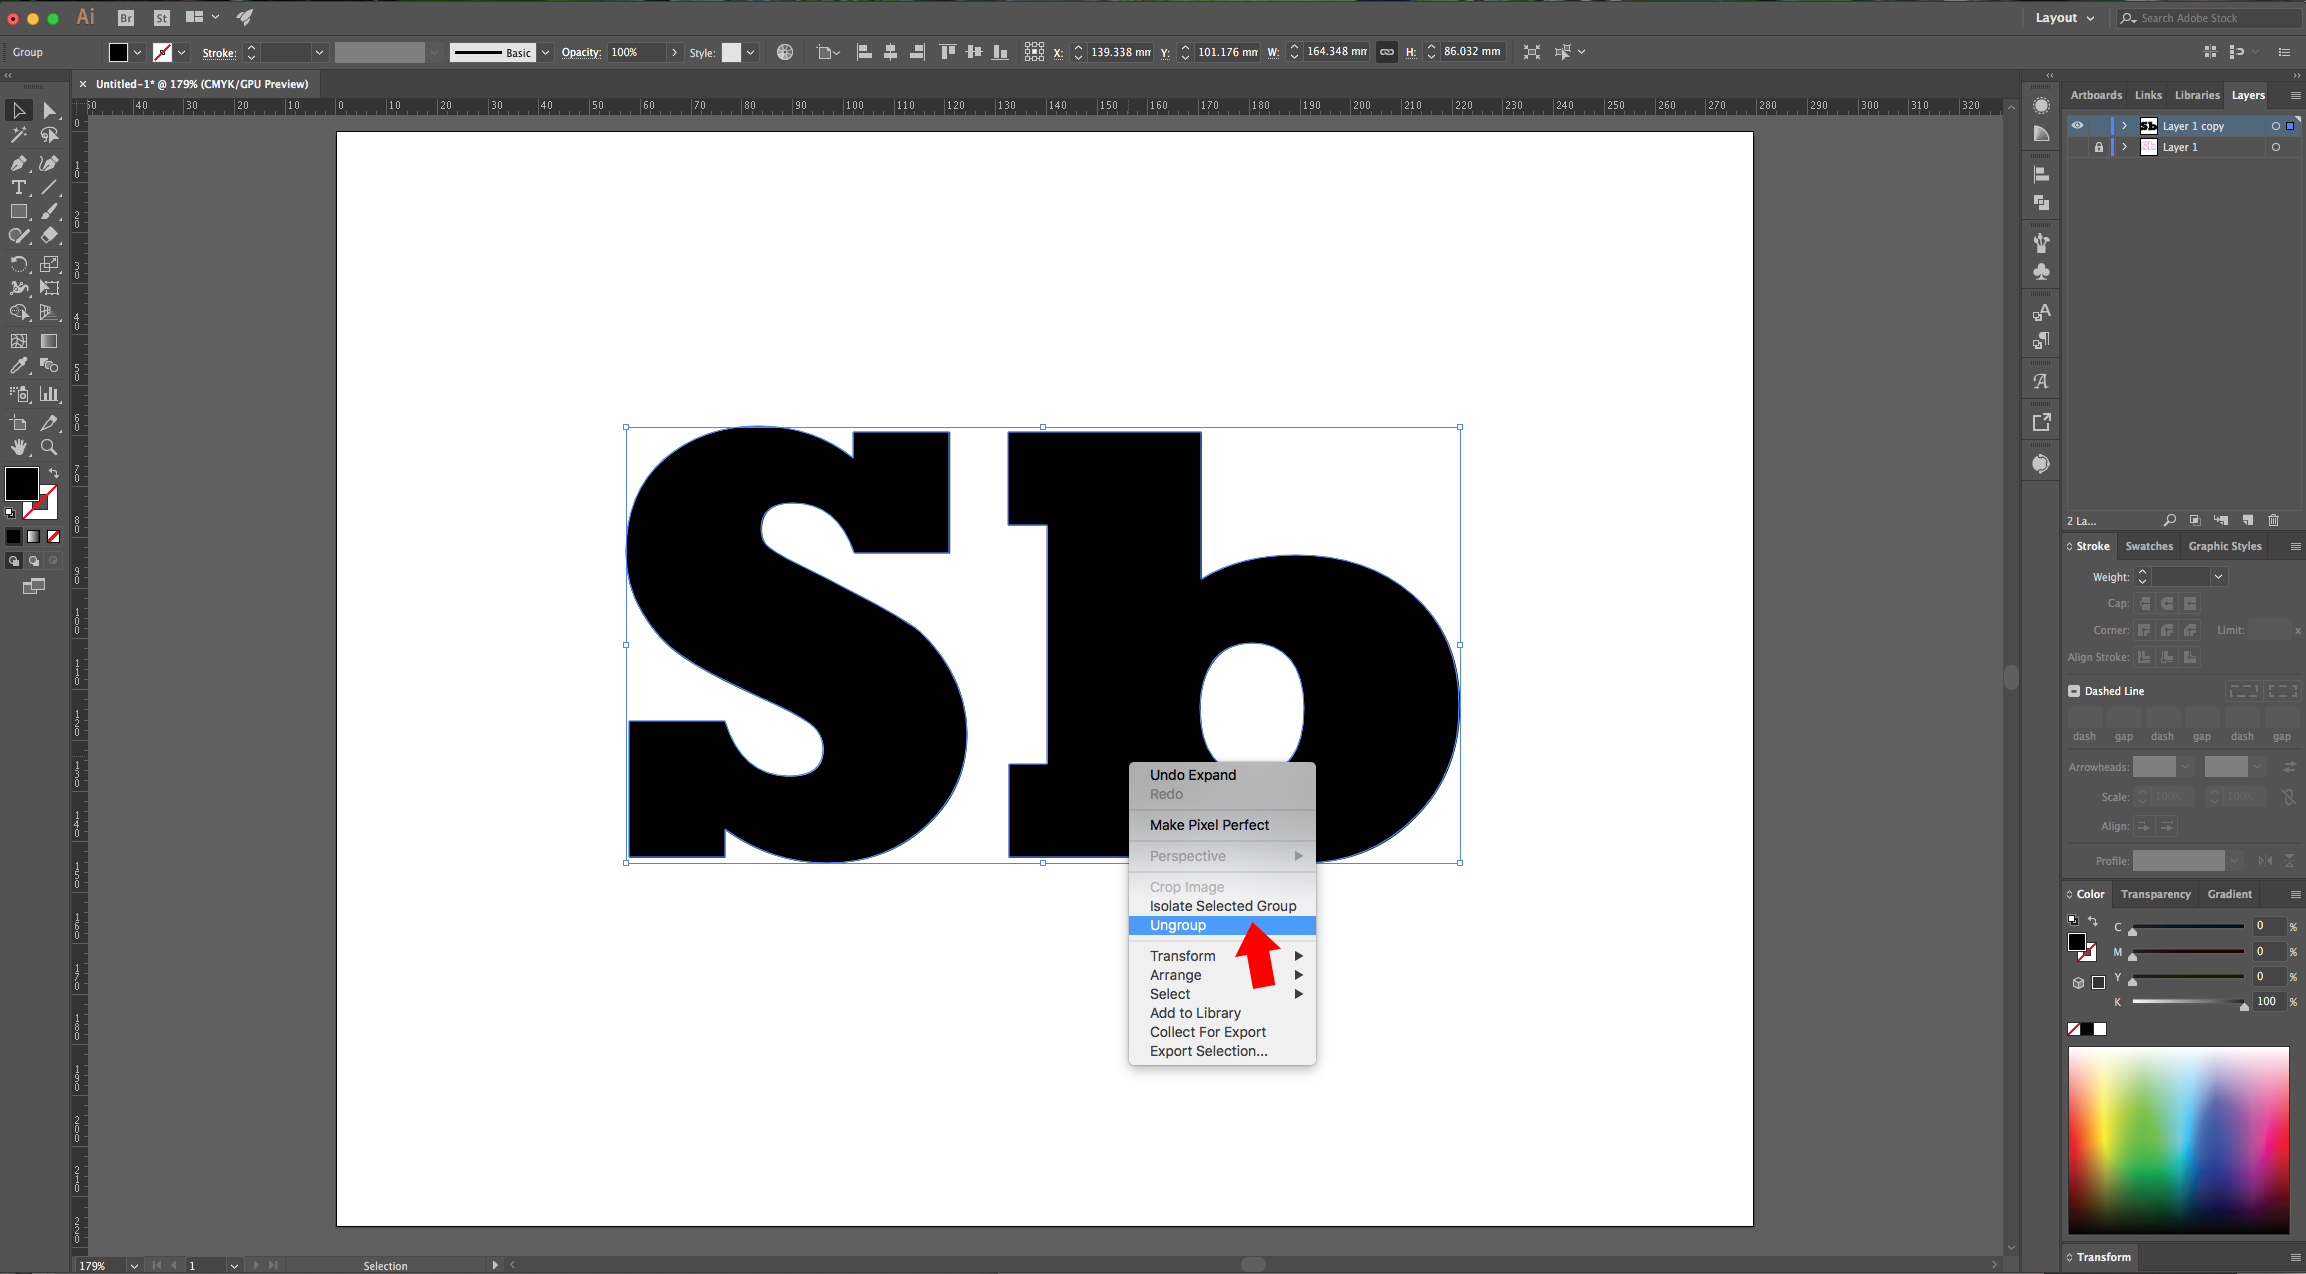
5 - Select your Text and go to Object > Expand and make sure that the “Fill” and “Stroke” boxes are checked. Then, right-click on top of your text and choose “Ungroup”.
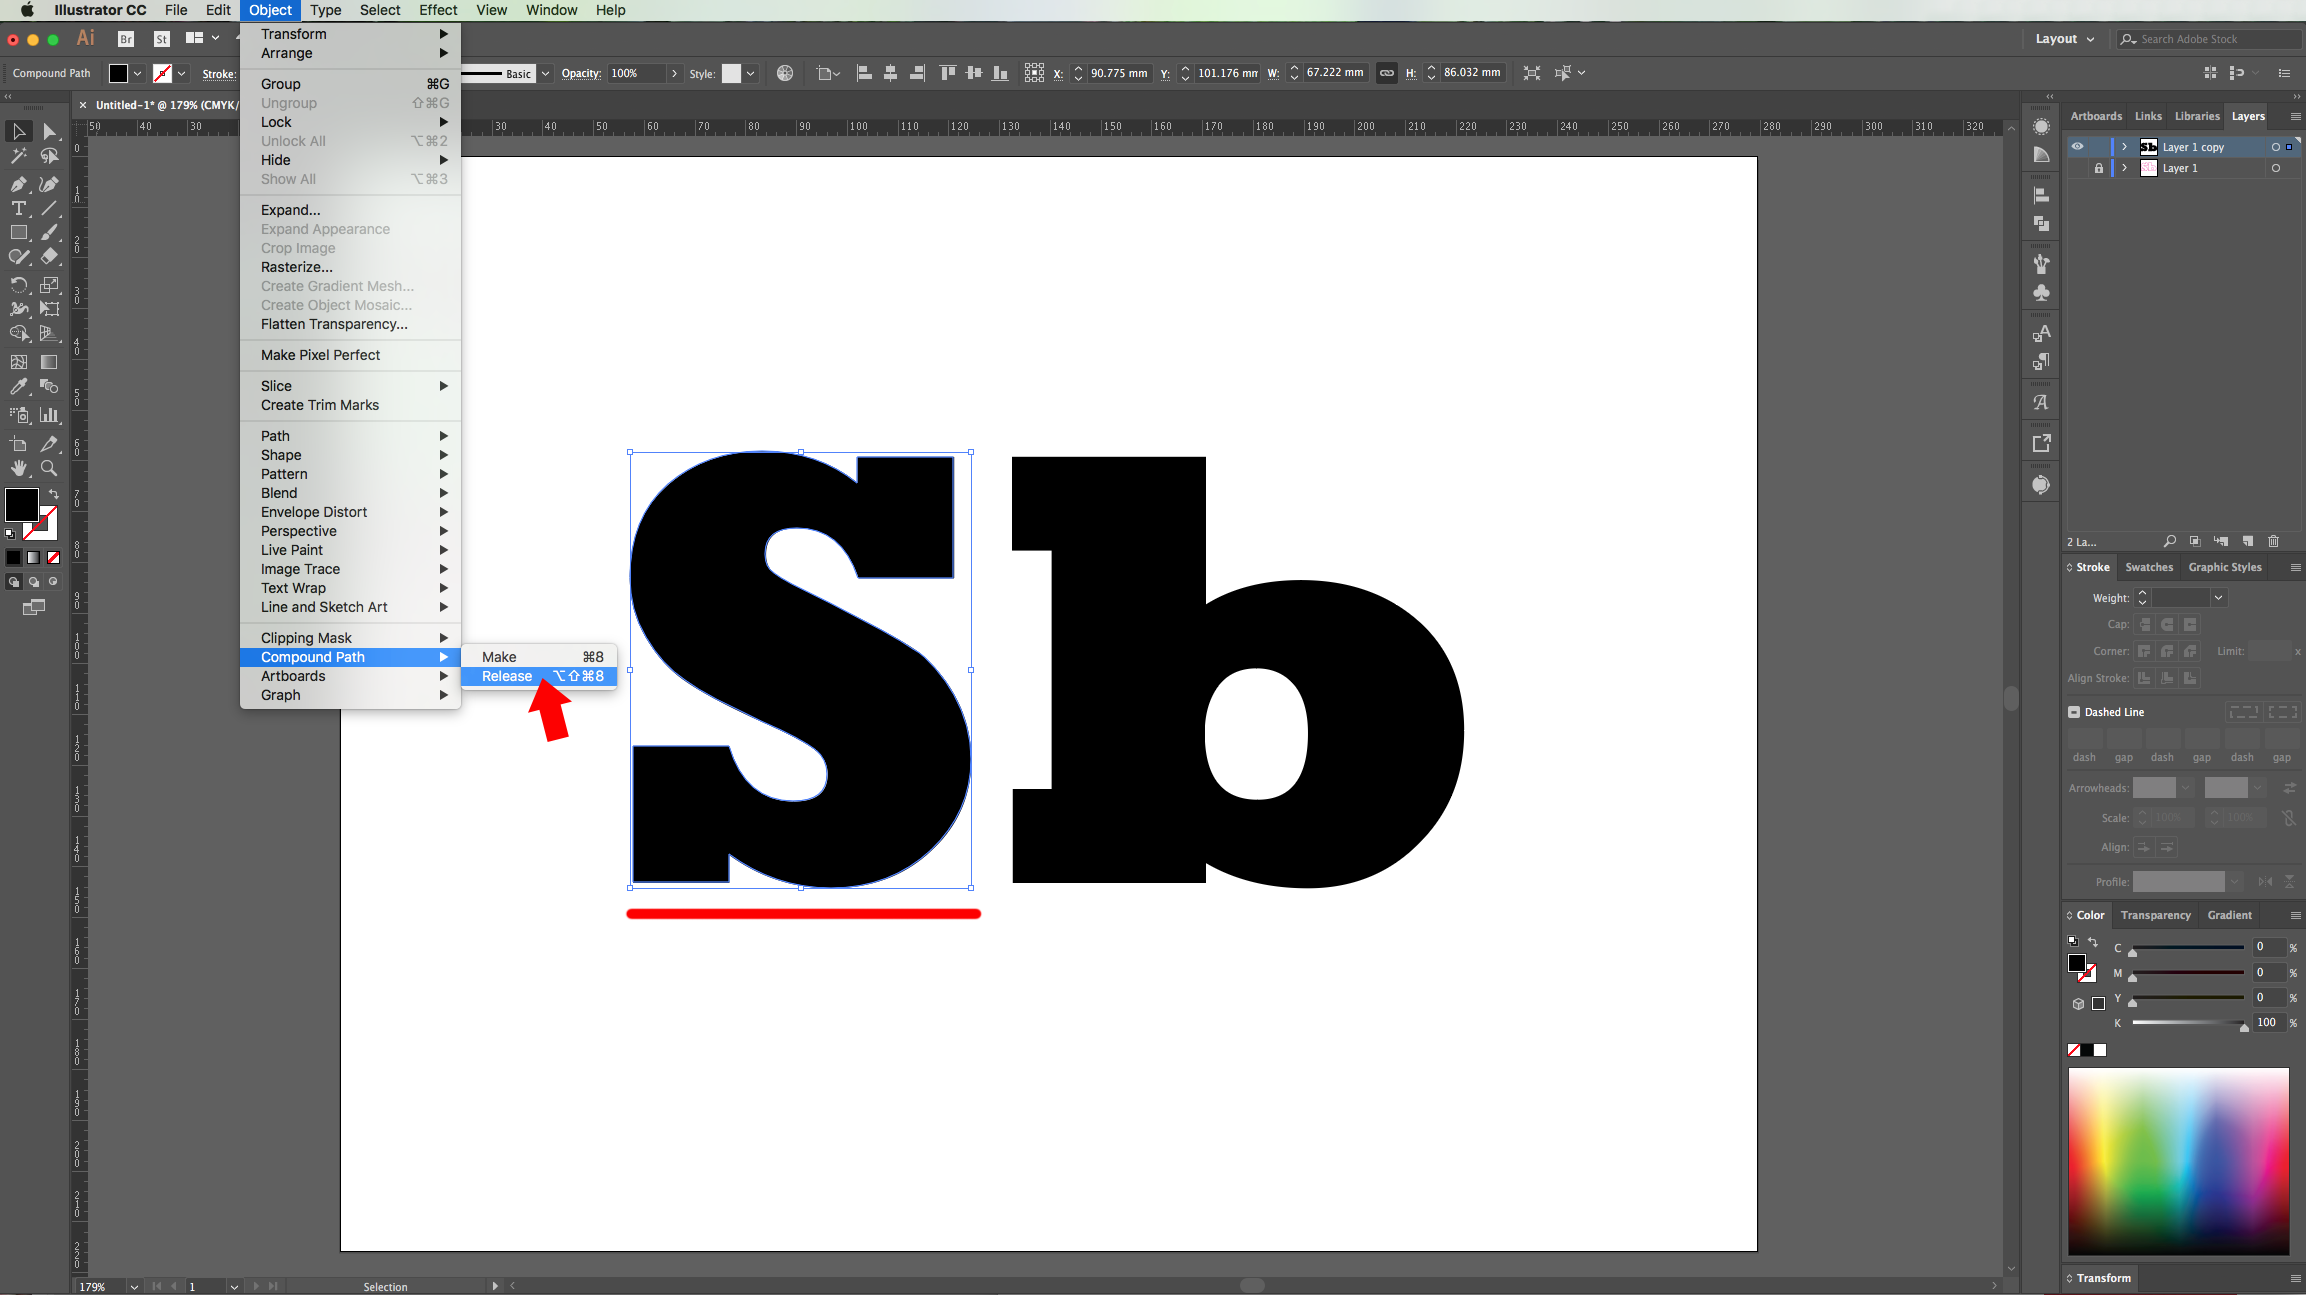
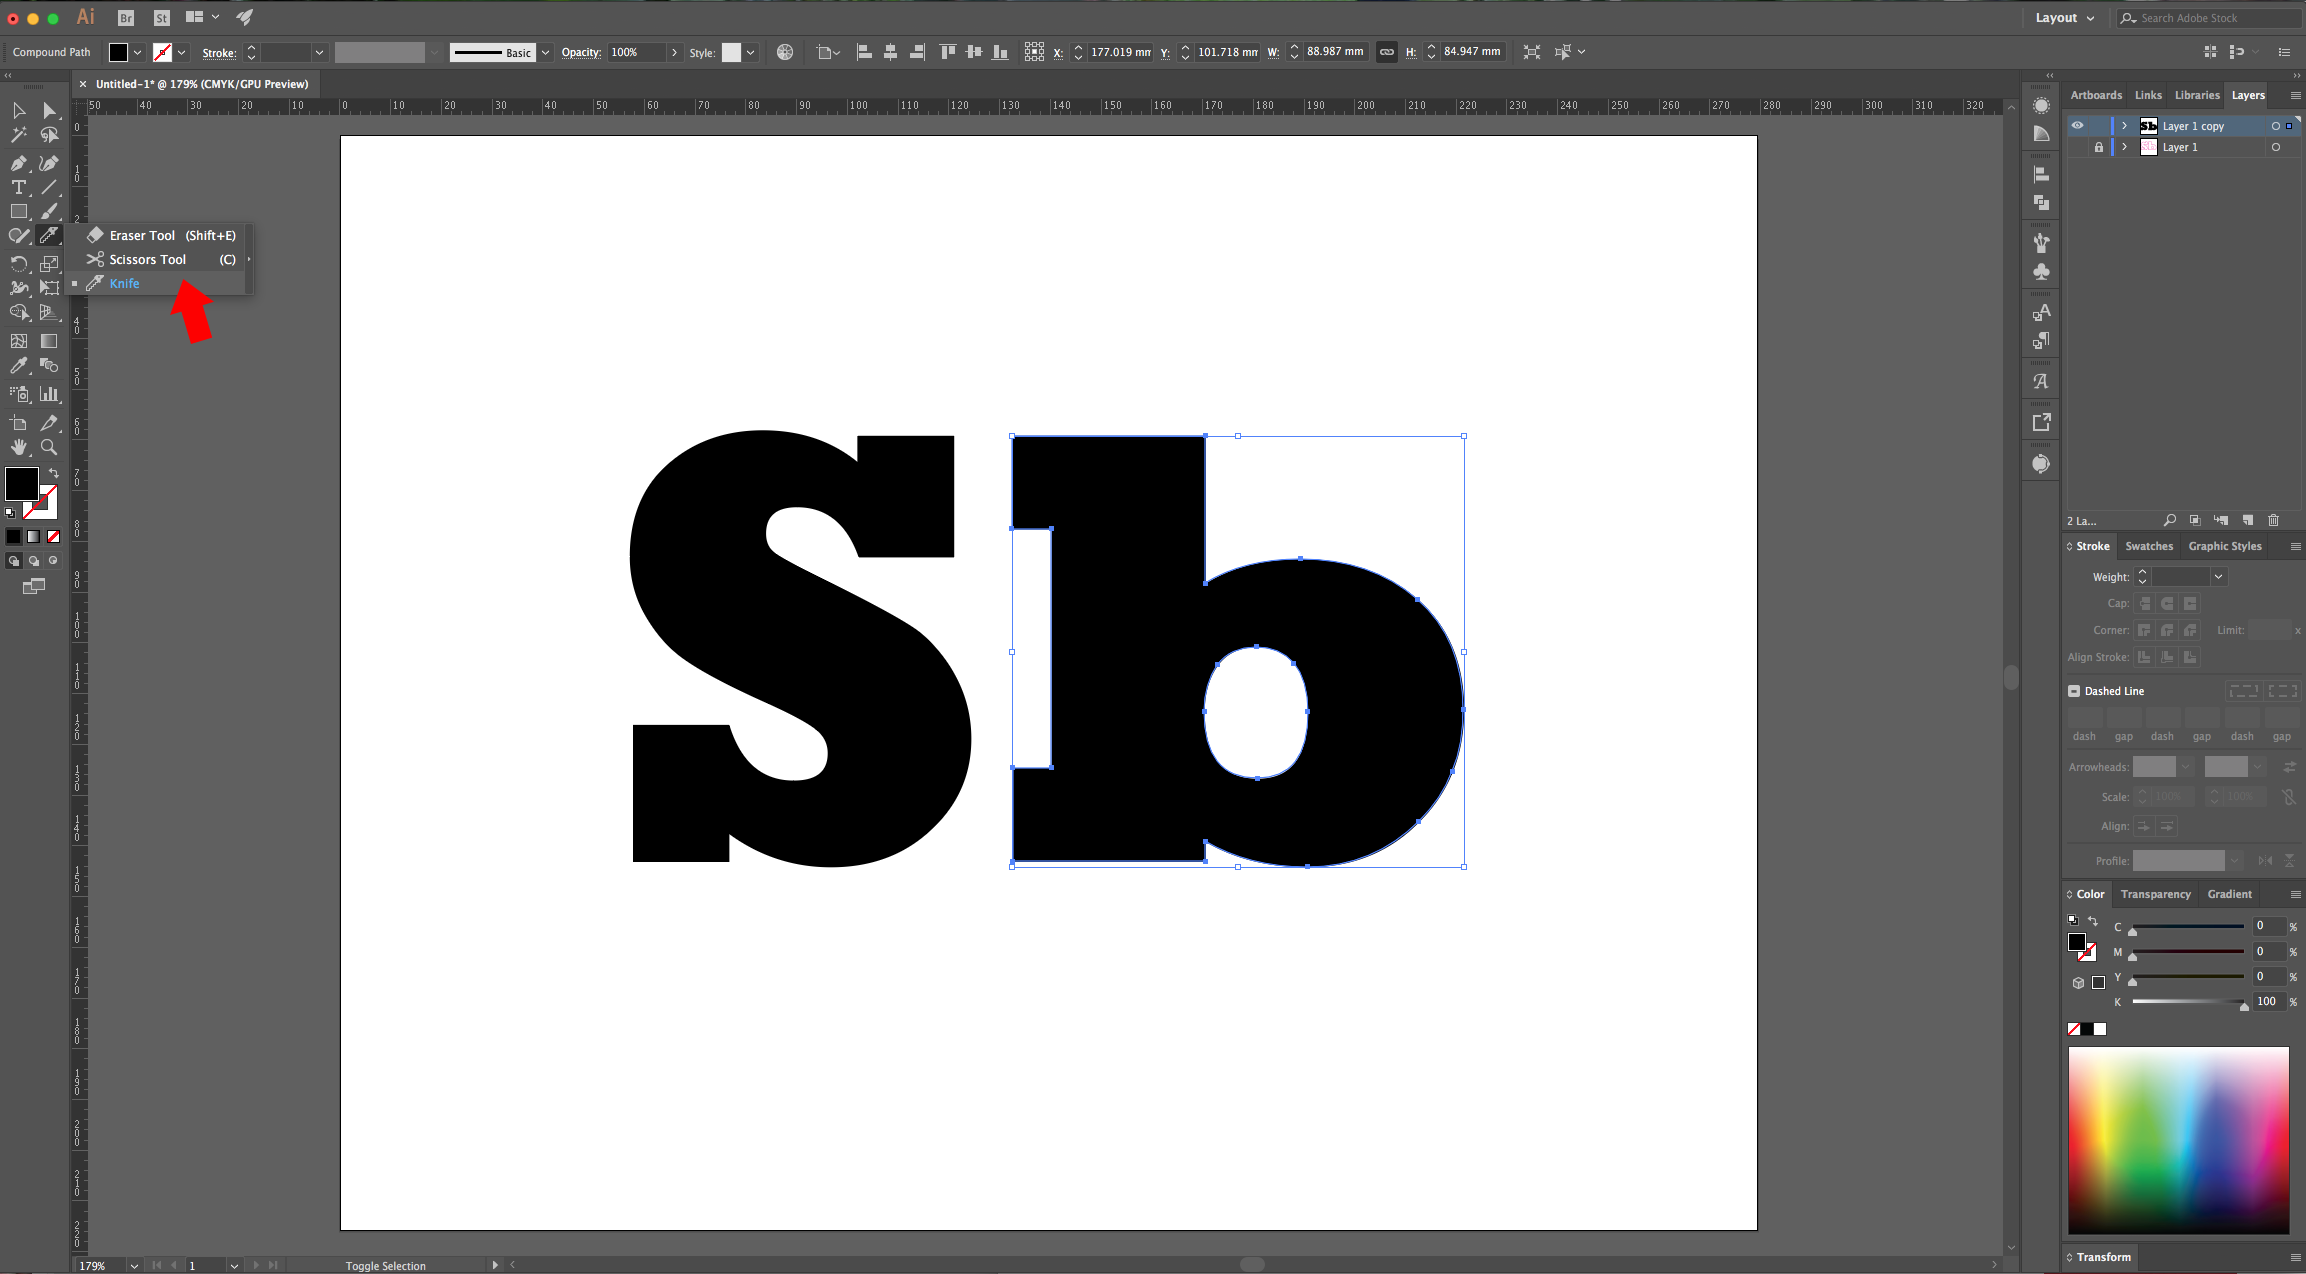
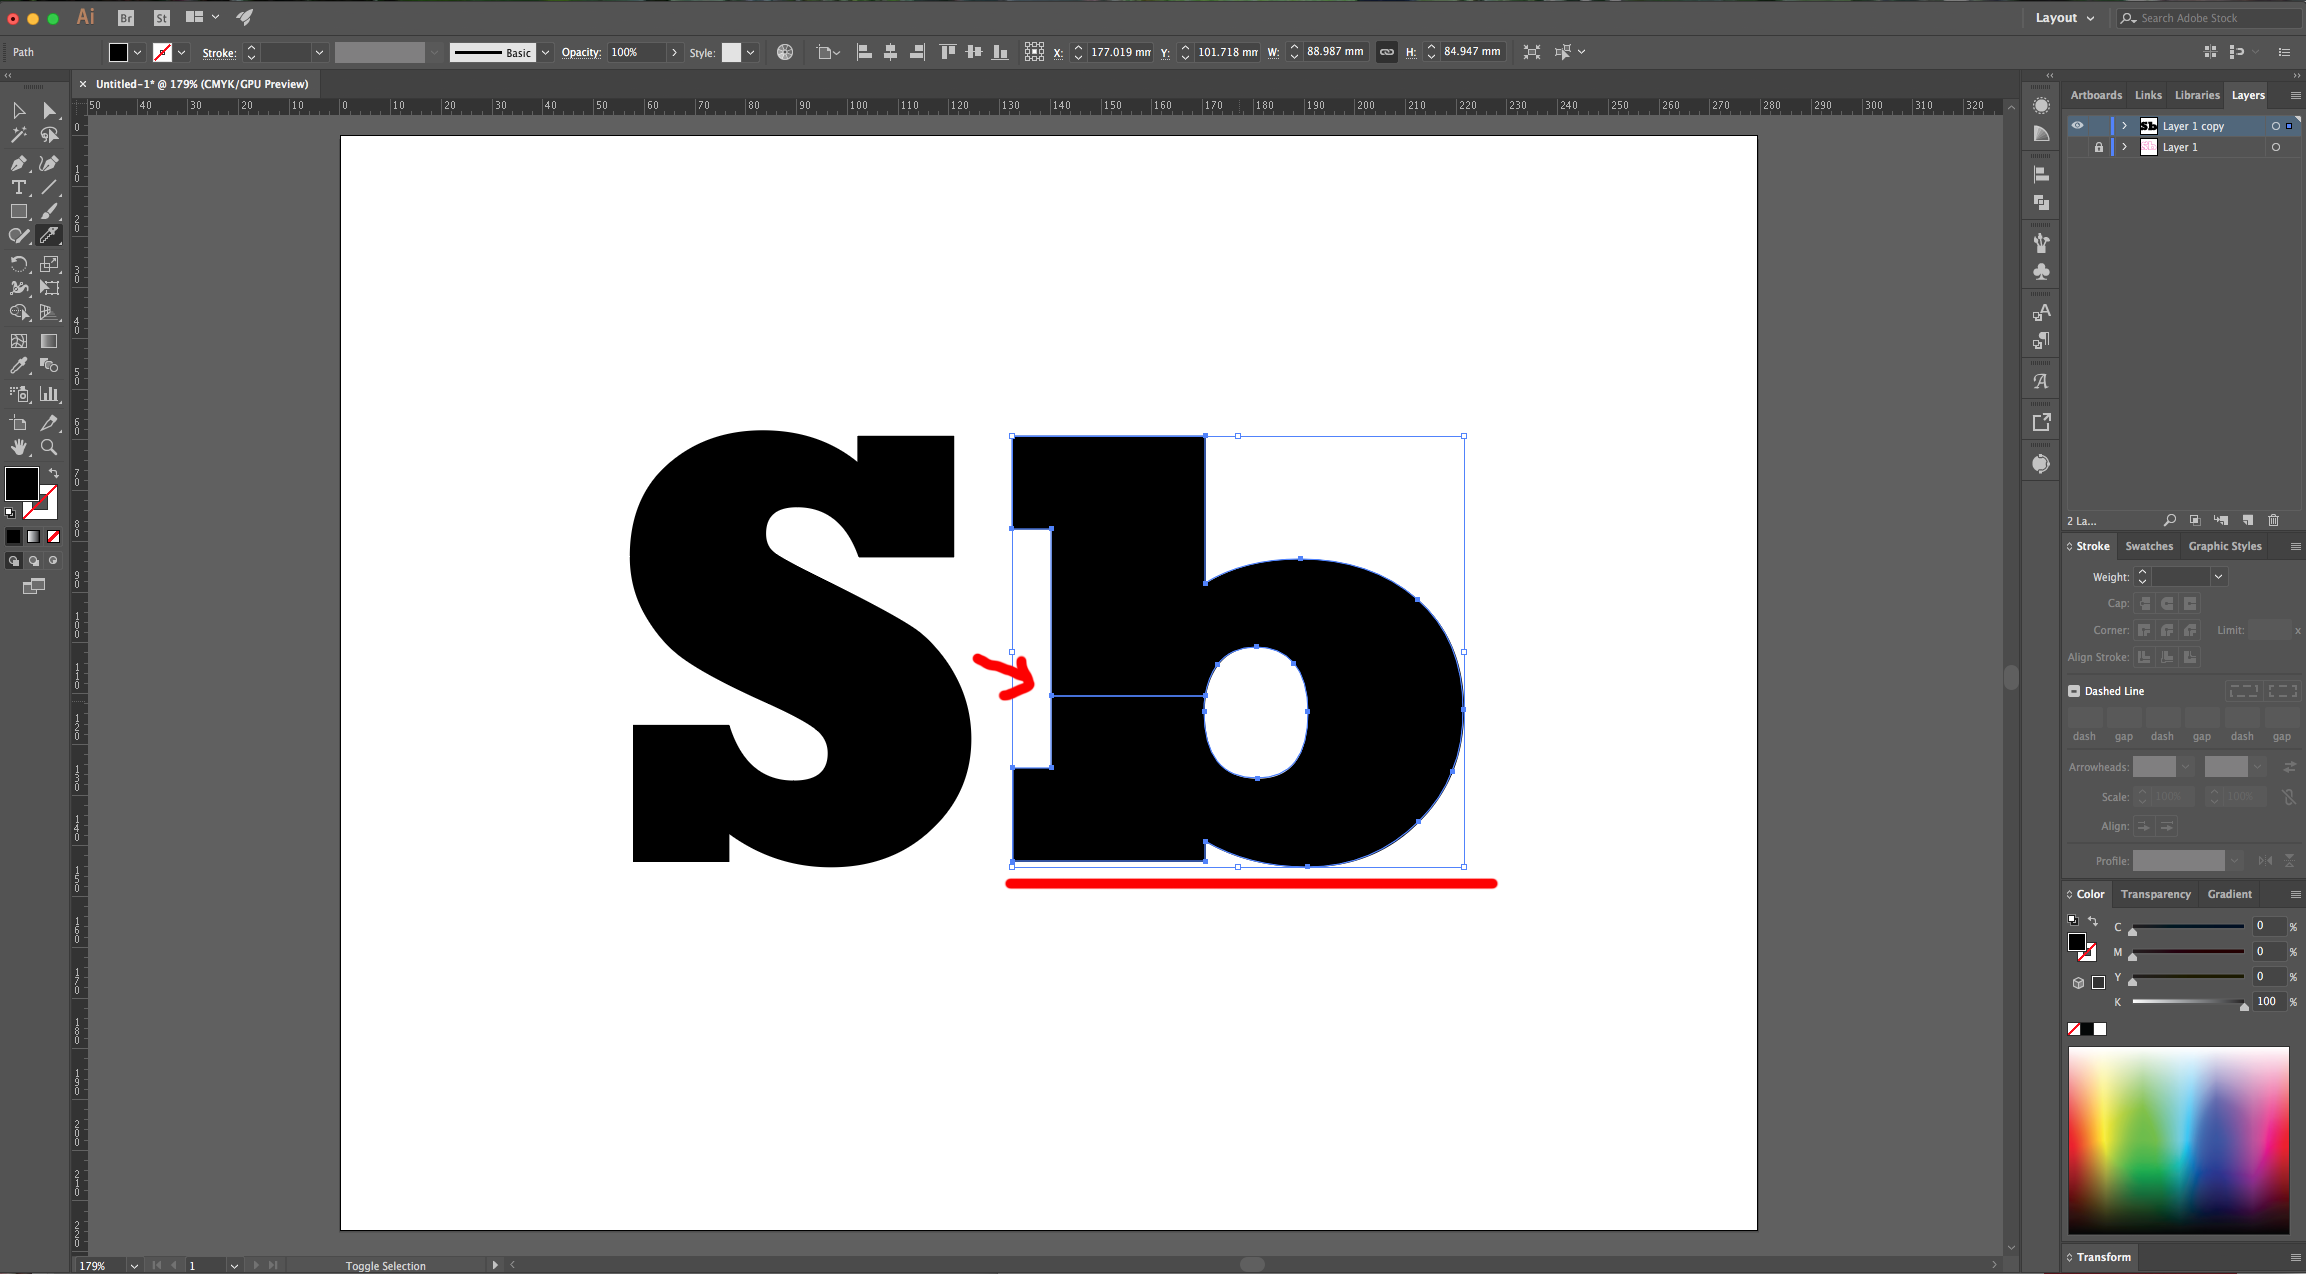
6 - Select the letters that have no Space or Hole inside and go to Object > Compound Path > Release (Alt/Option + Shift + Command/Control + 8). For the ones that do have a Space inside, select the “Knife Tool” and while holding the “Option/Alt + Shift” keys, draw a horizontal line that cuts through your letter on one side till your reach the gap.
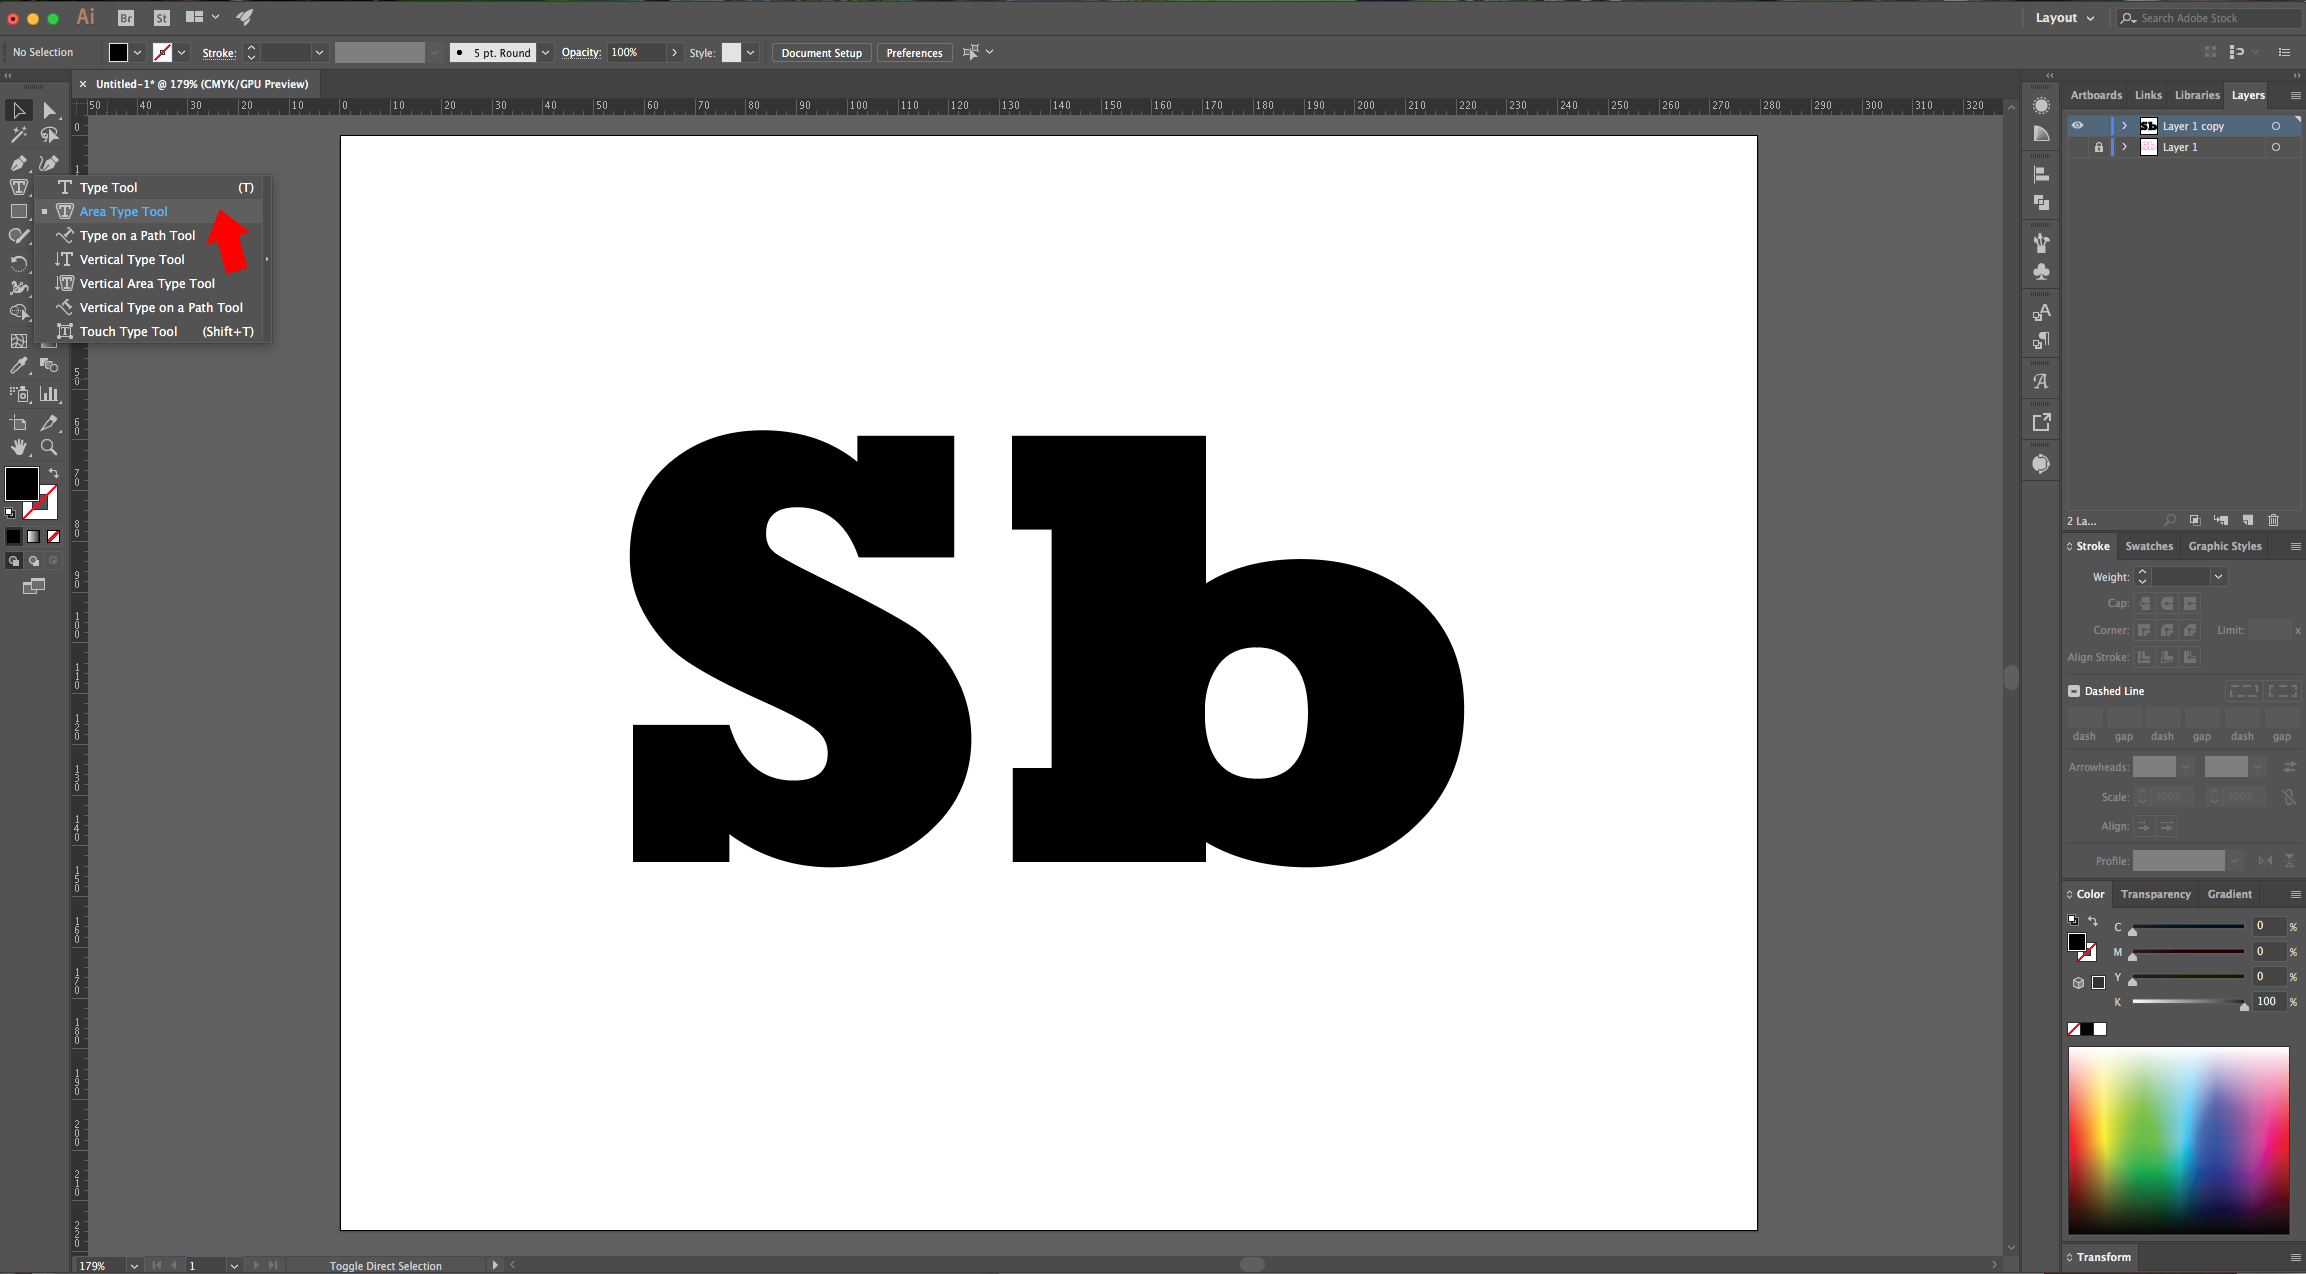
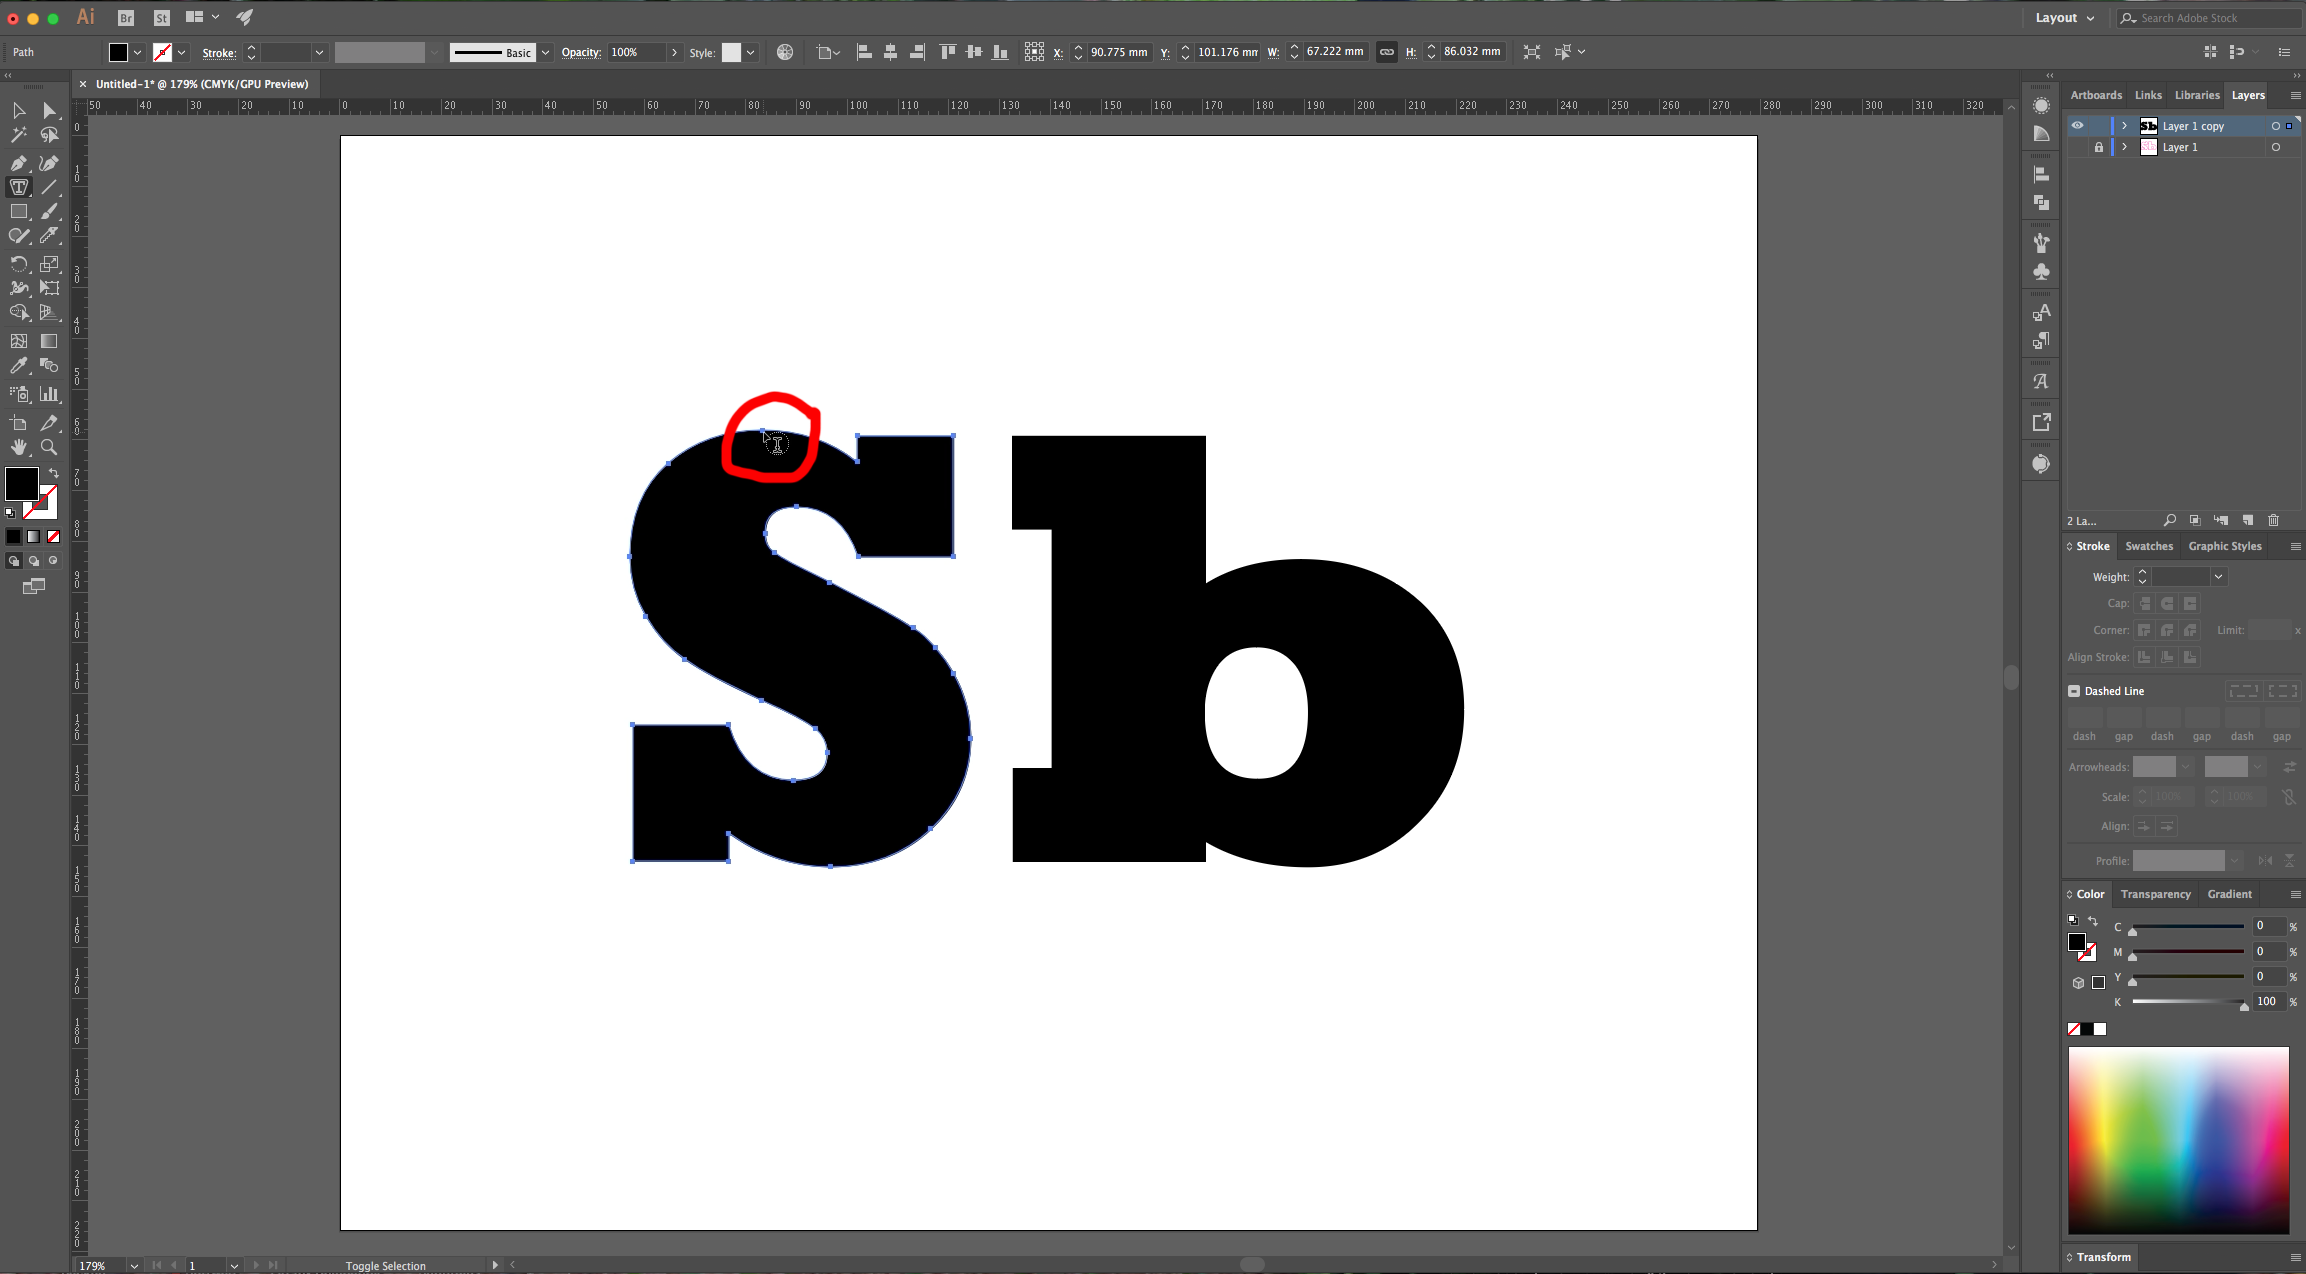
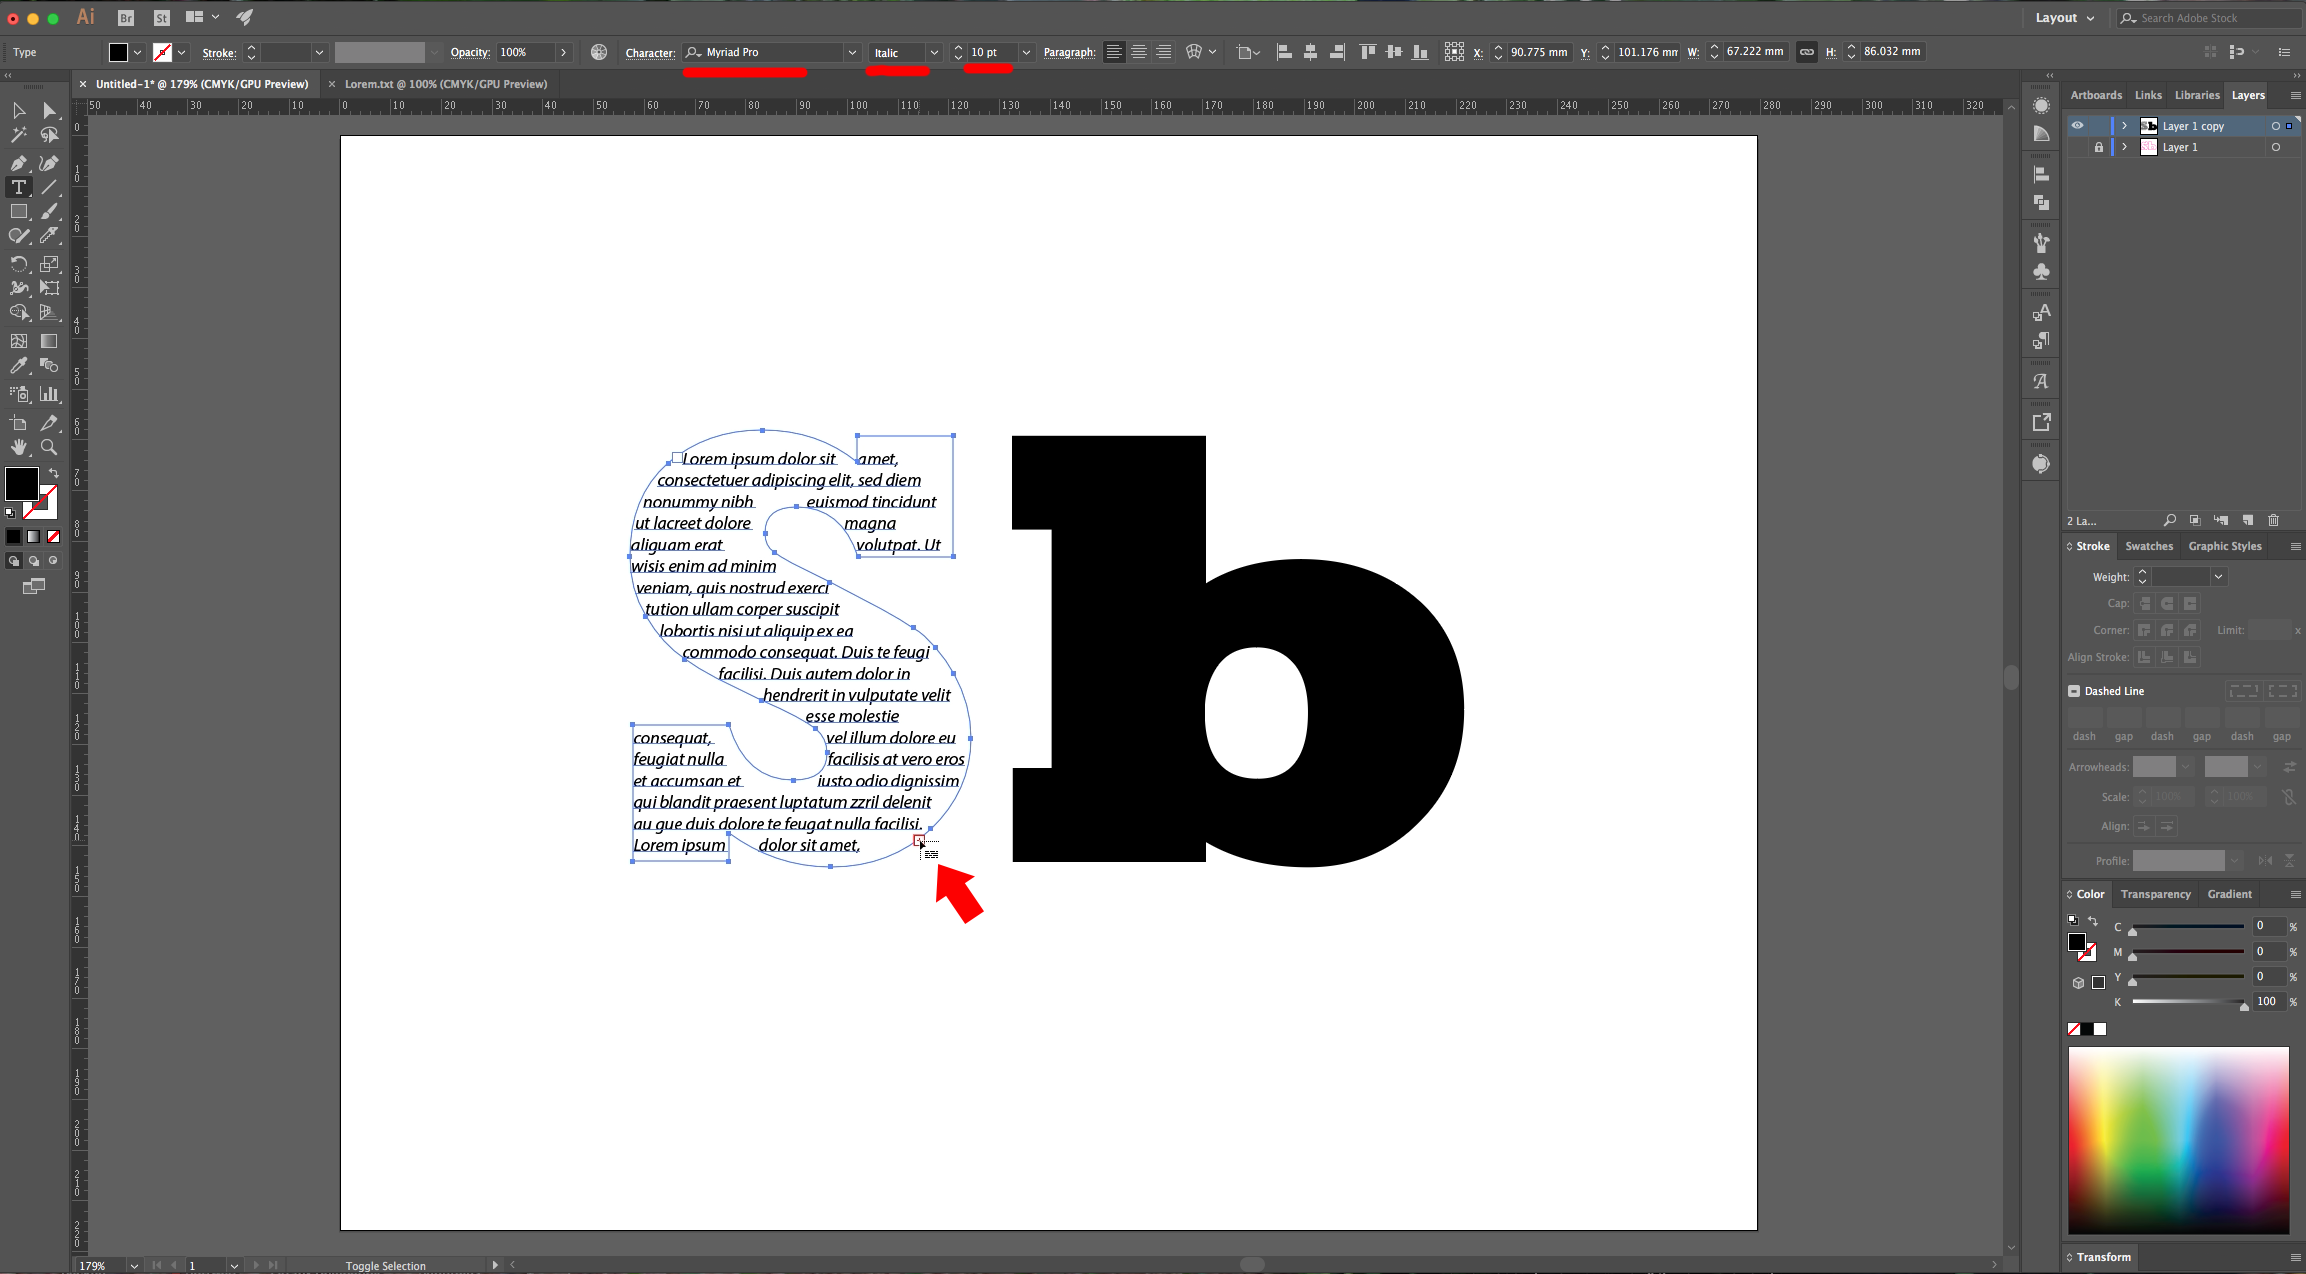
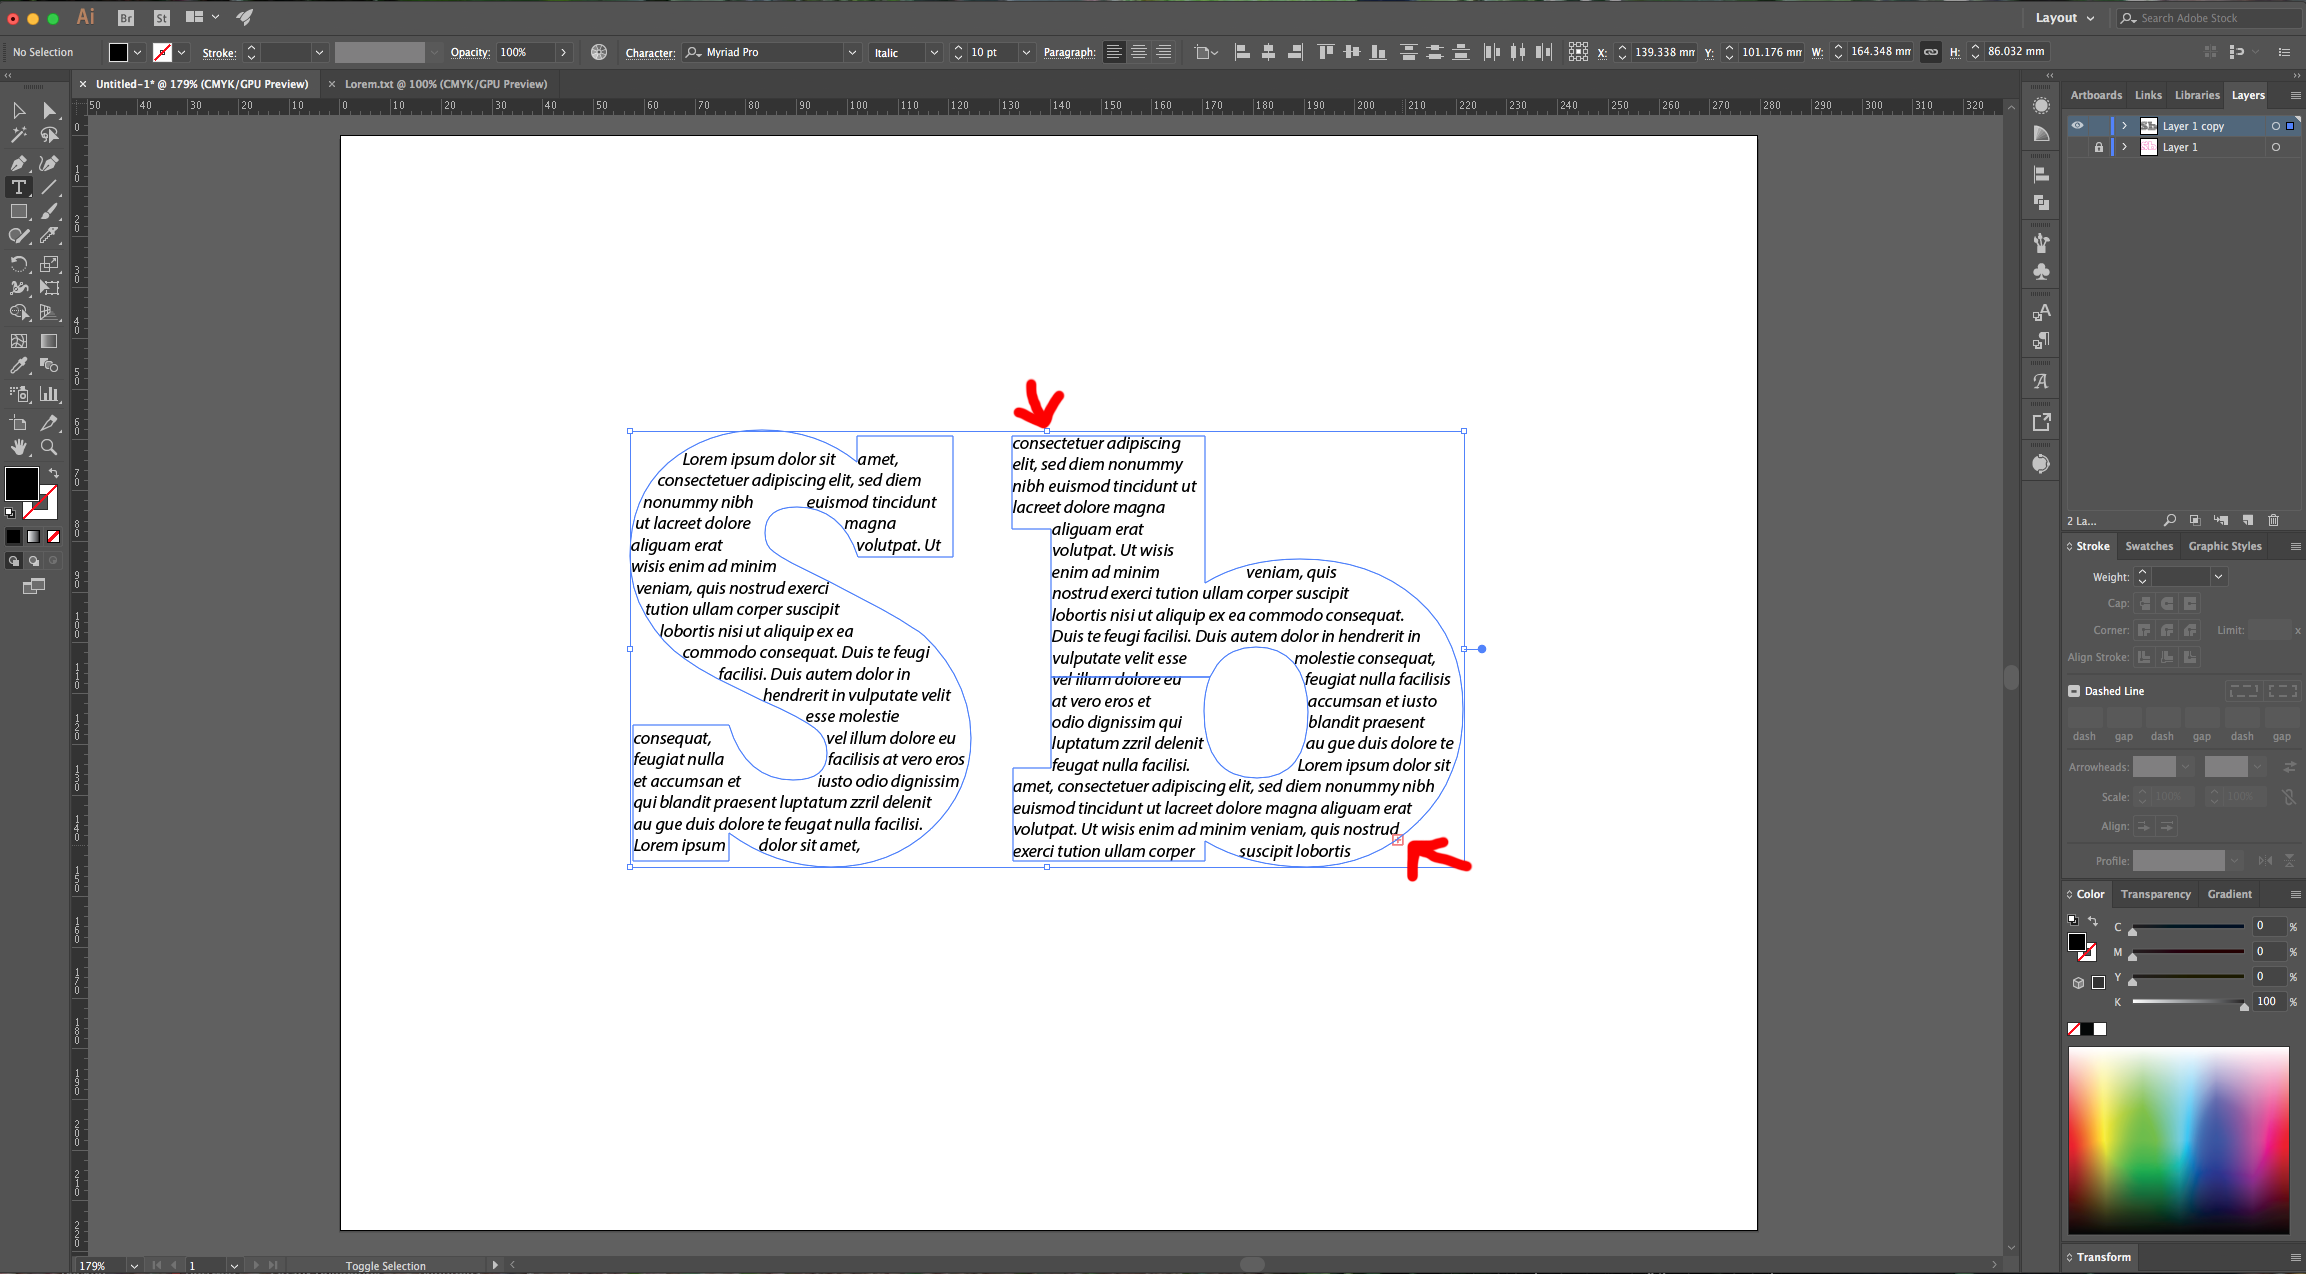
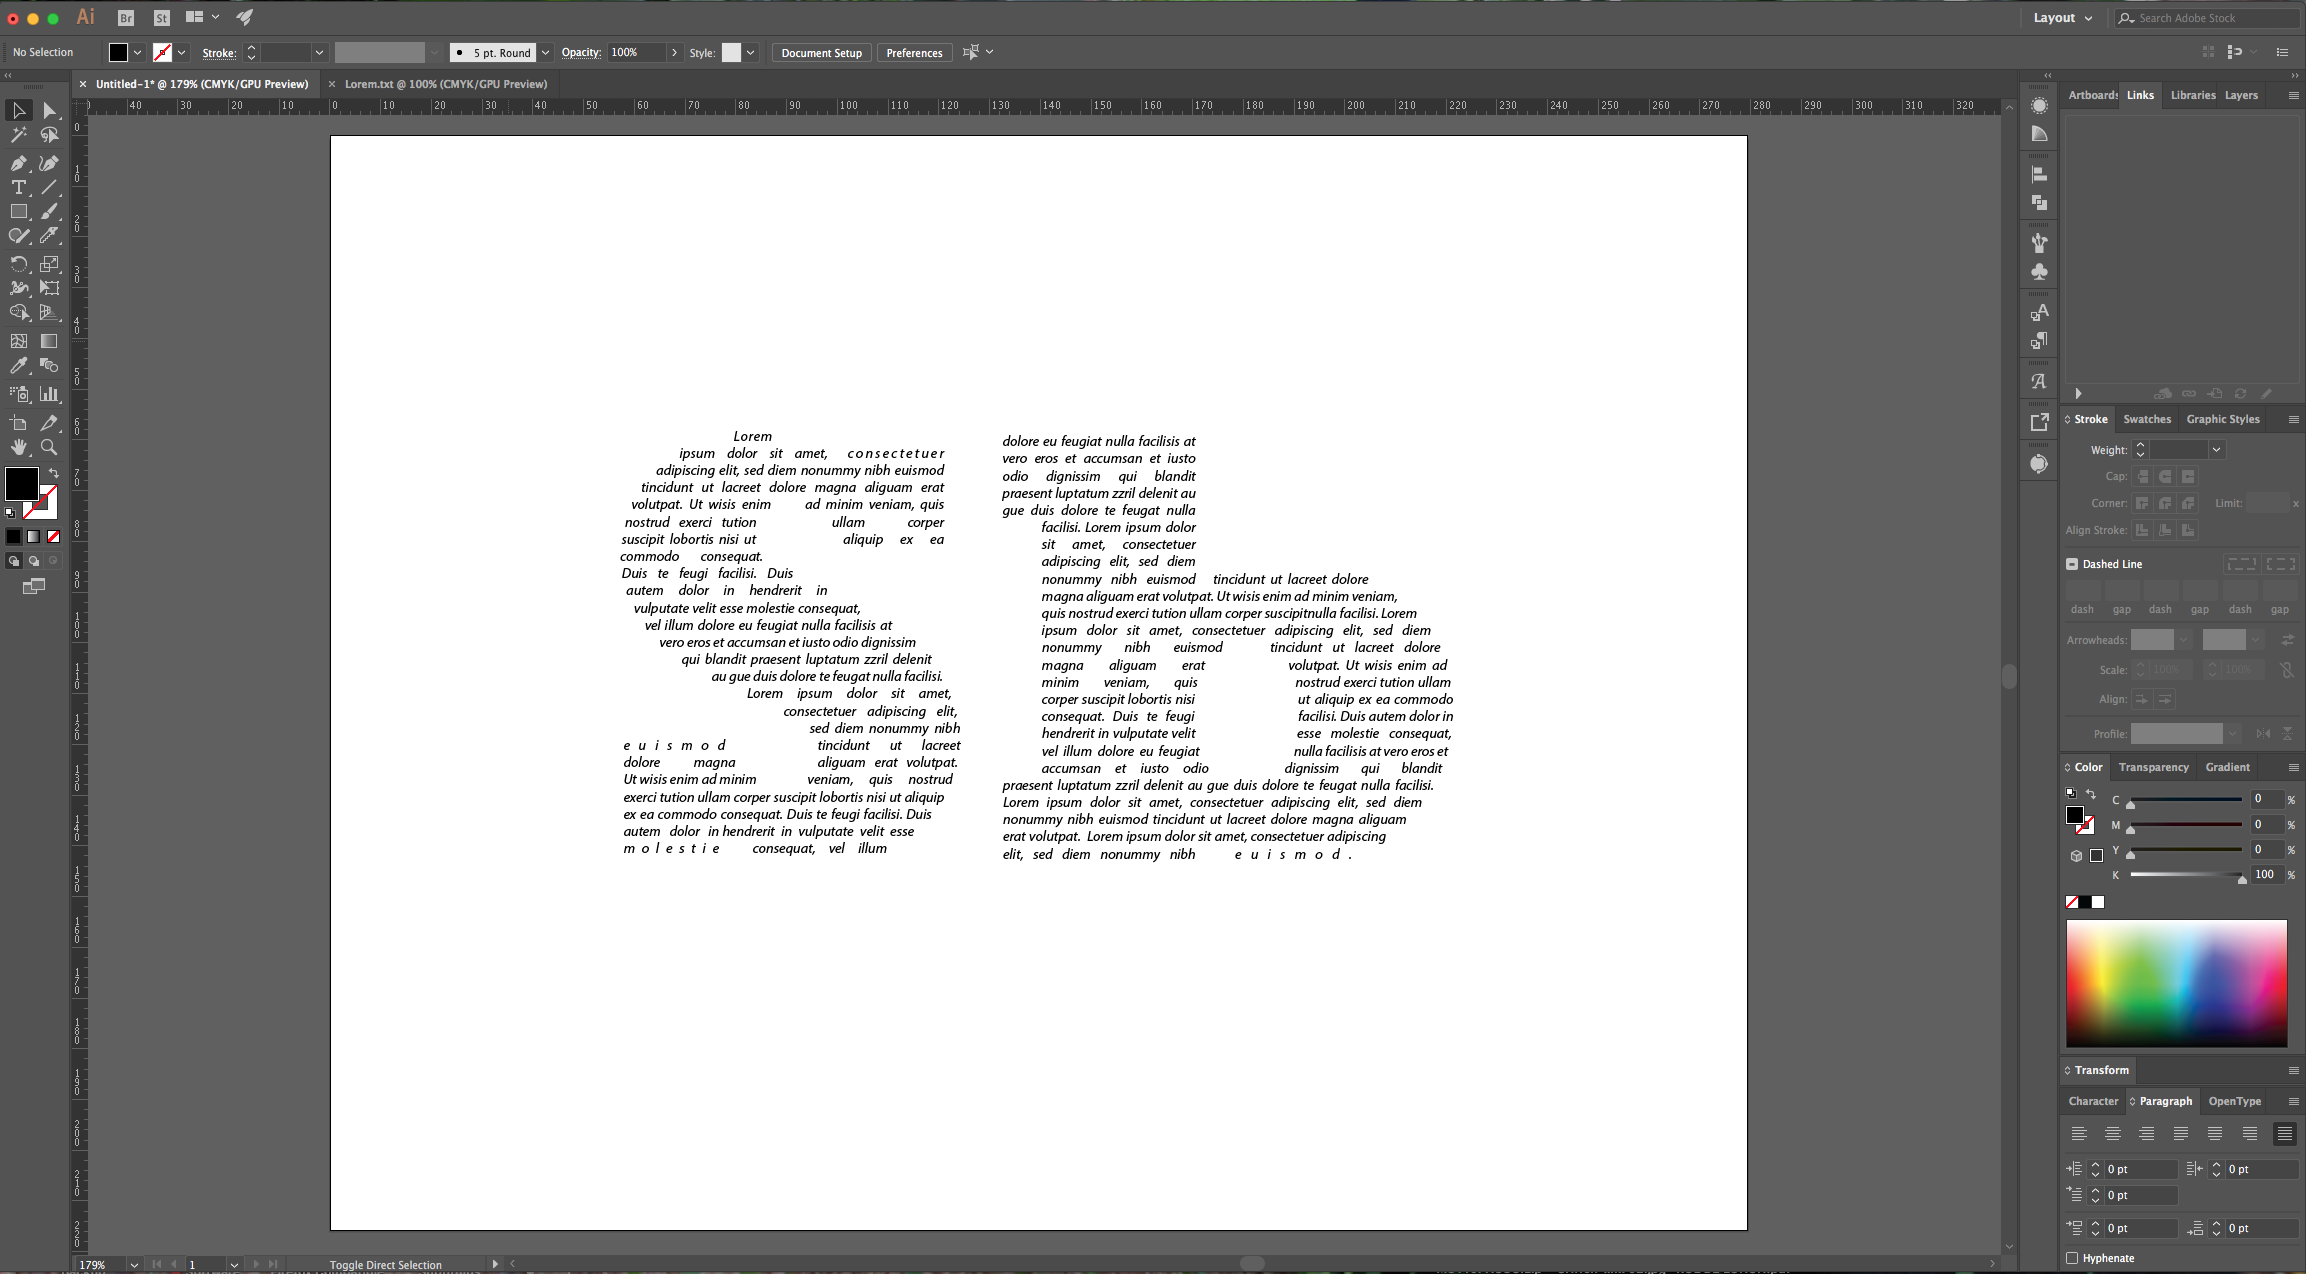
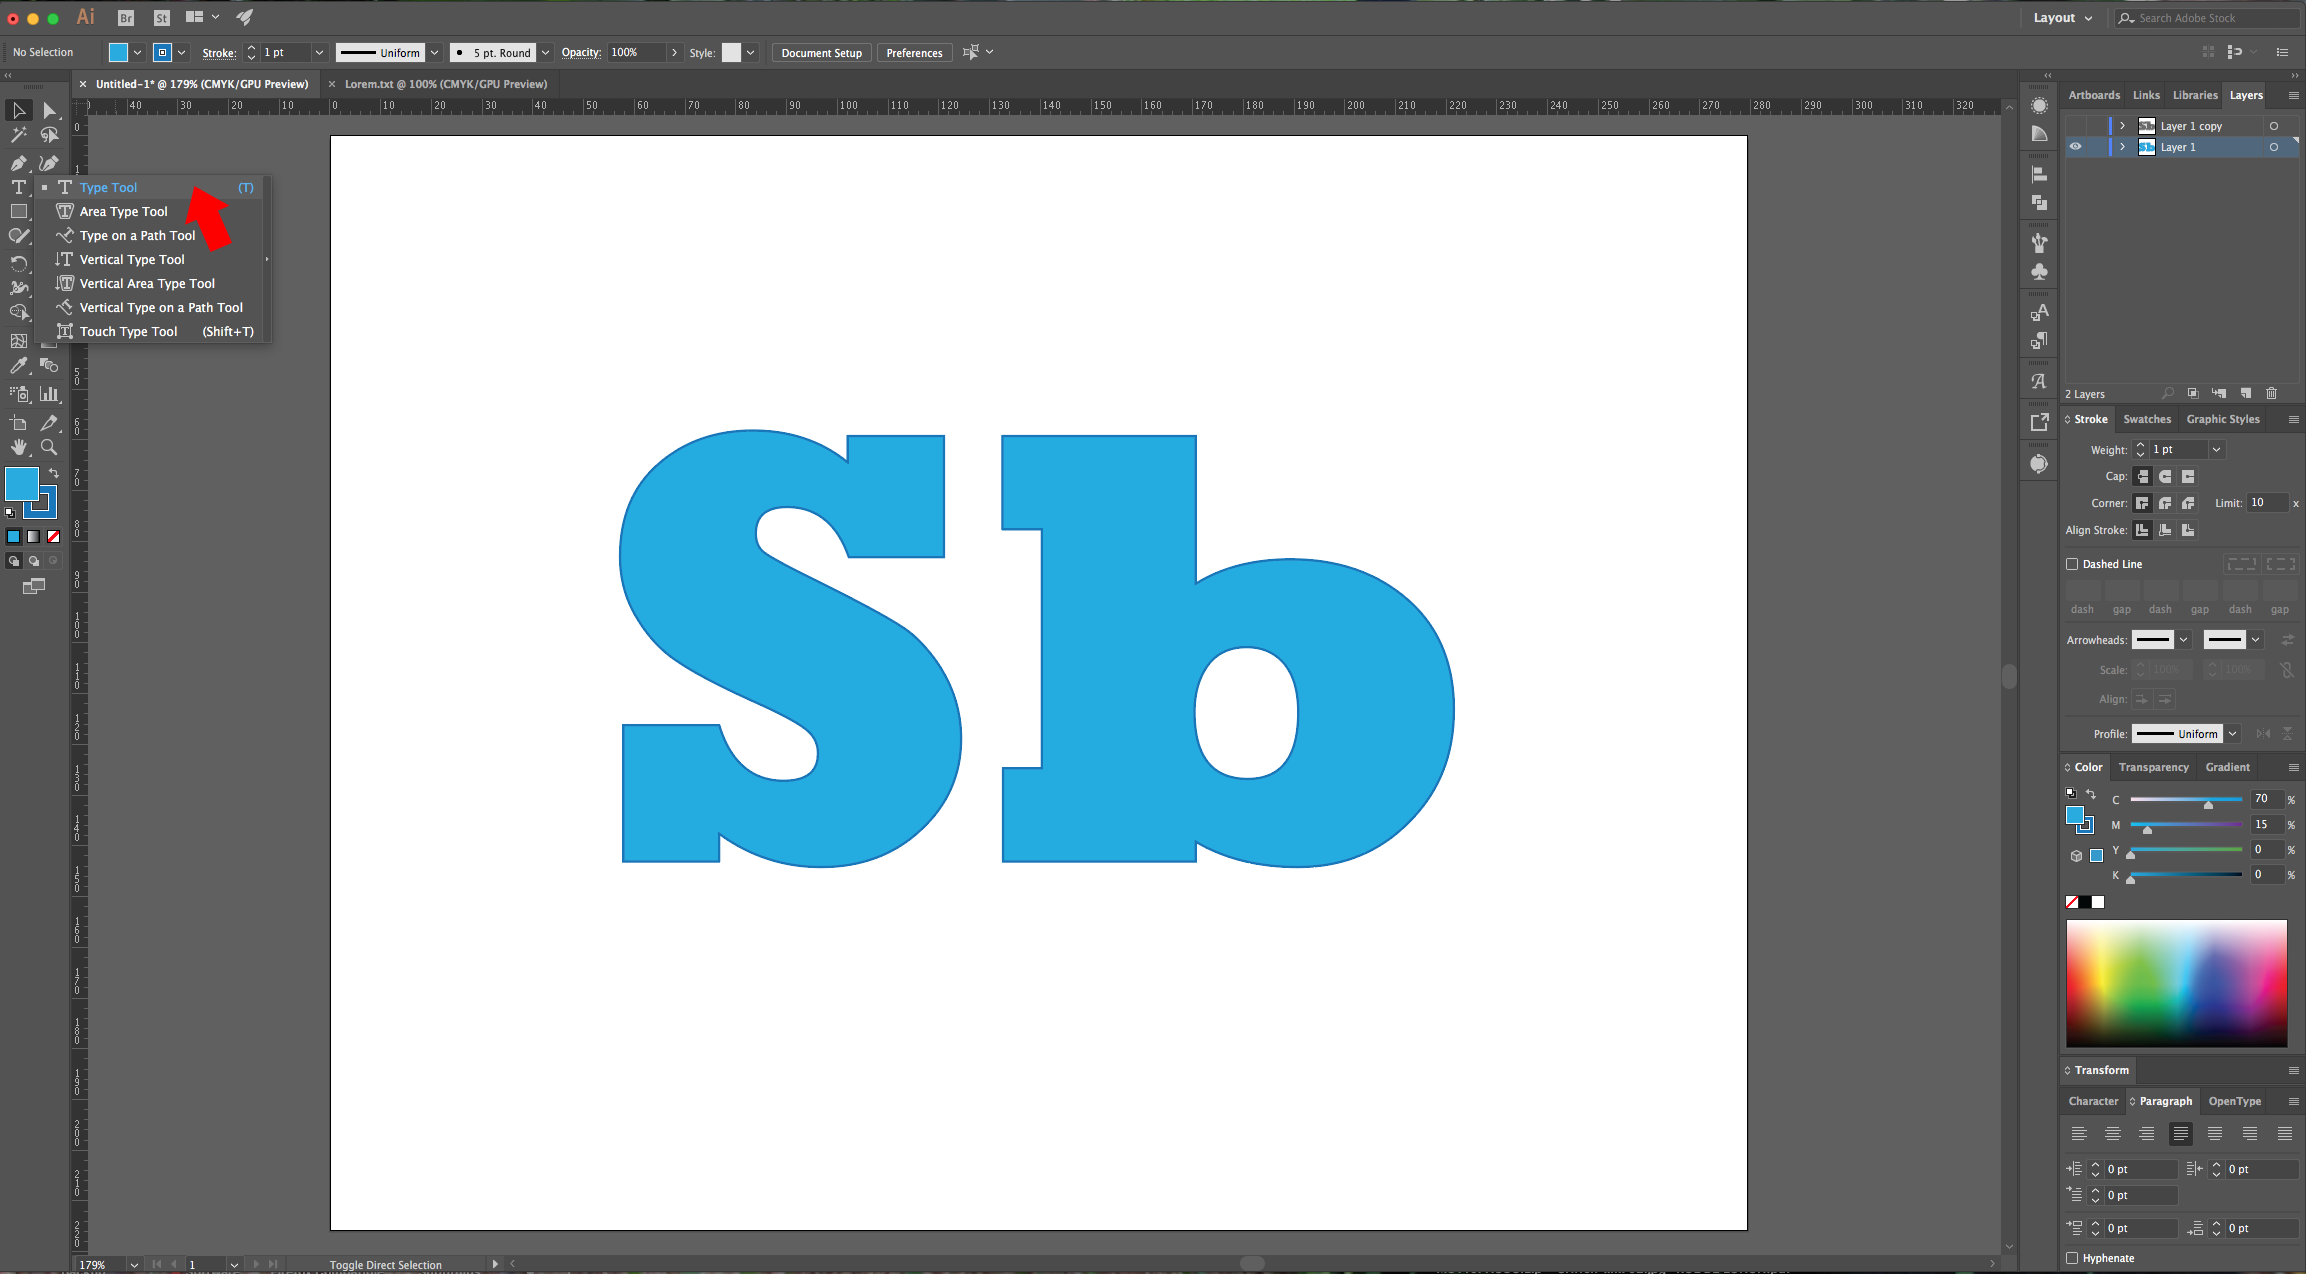
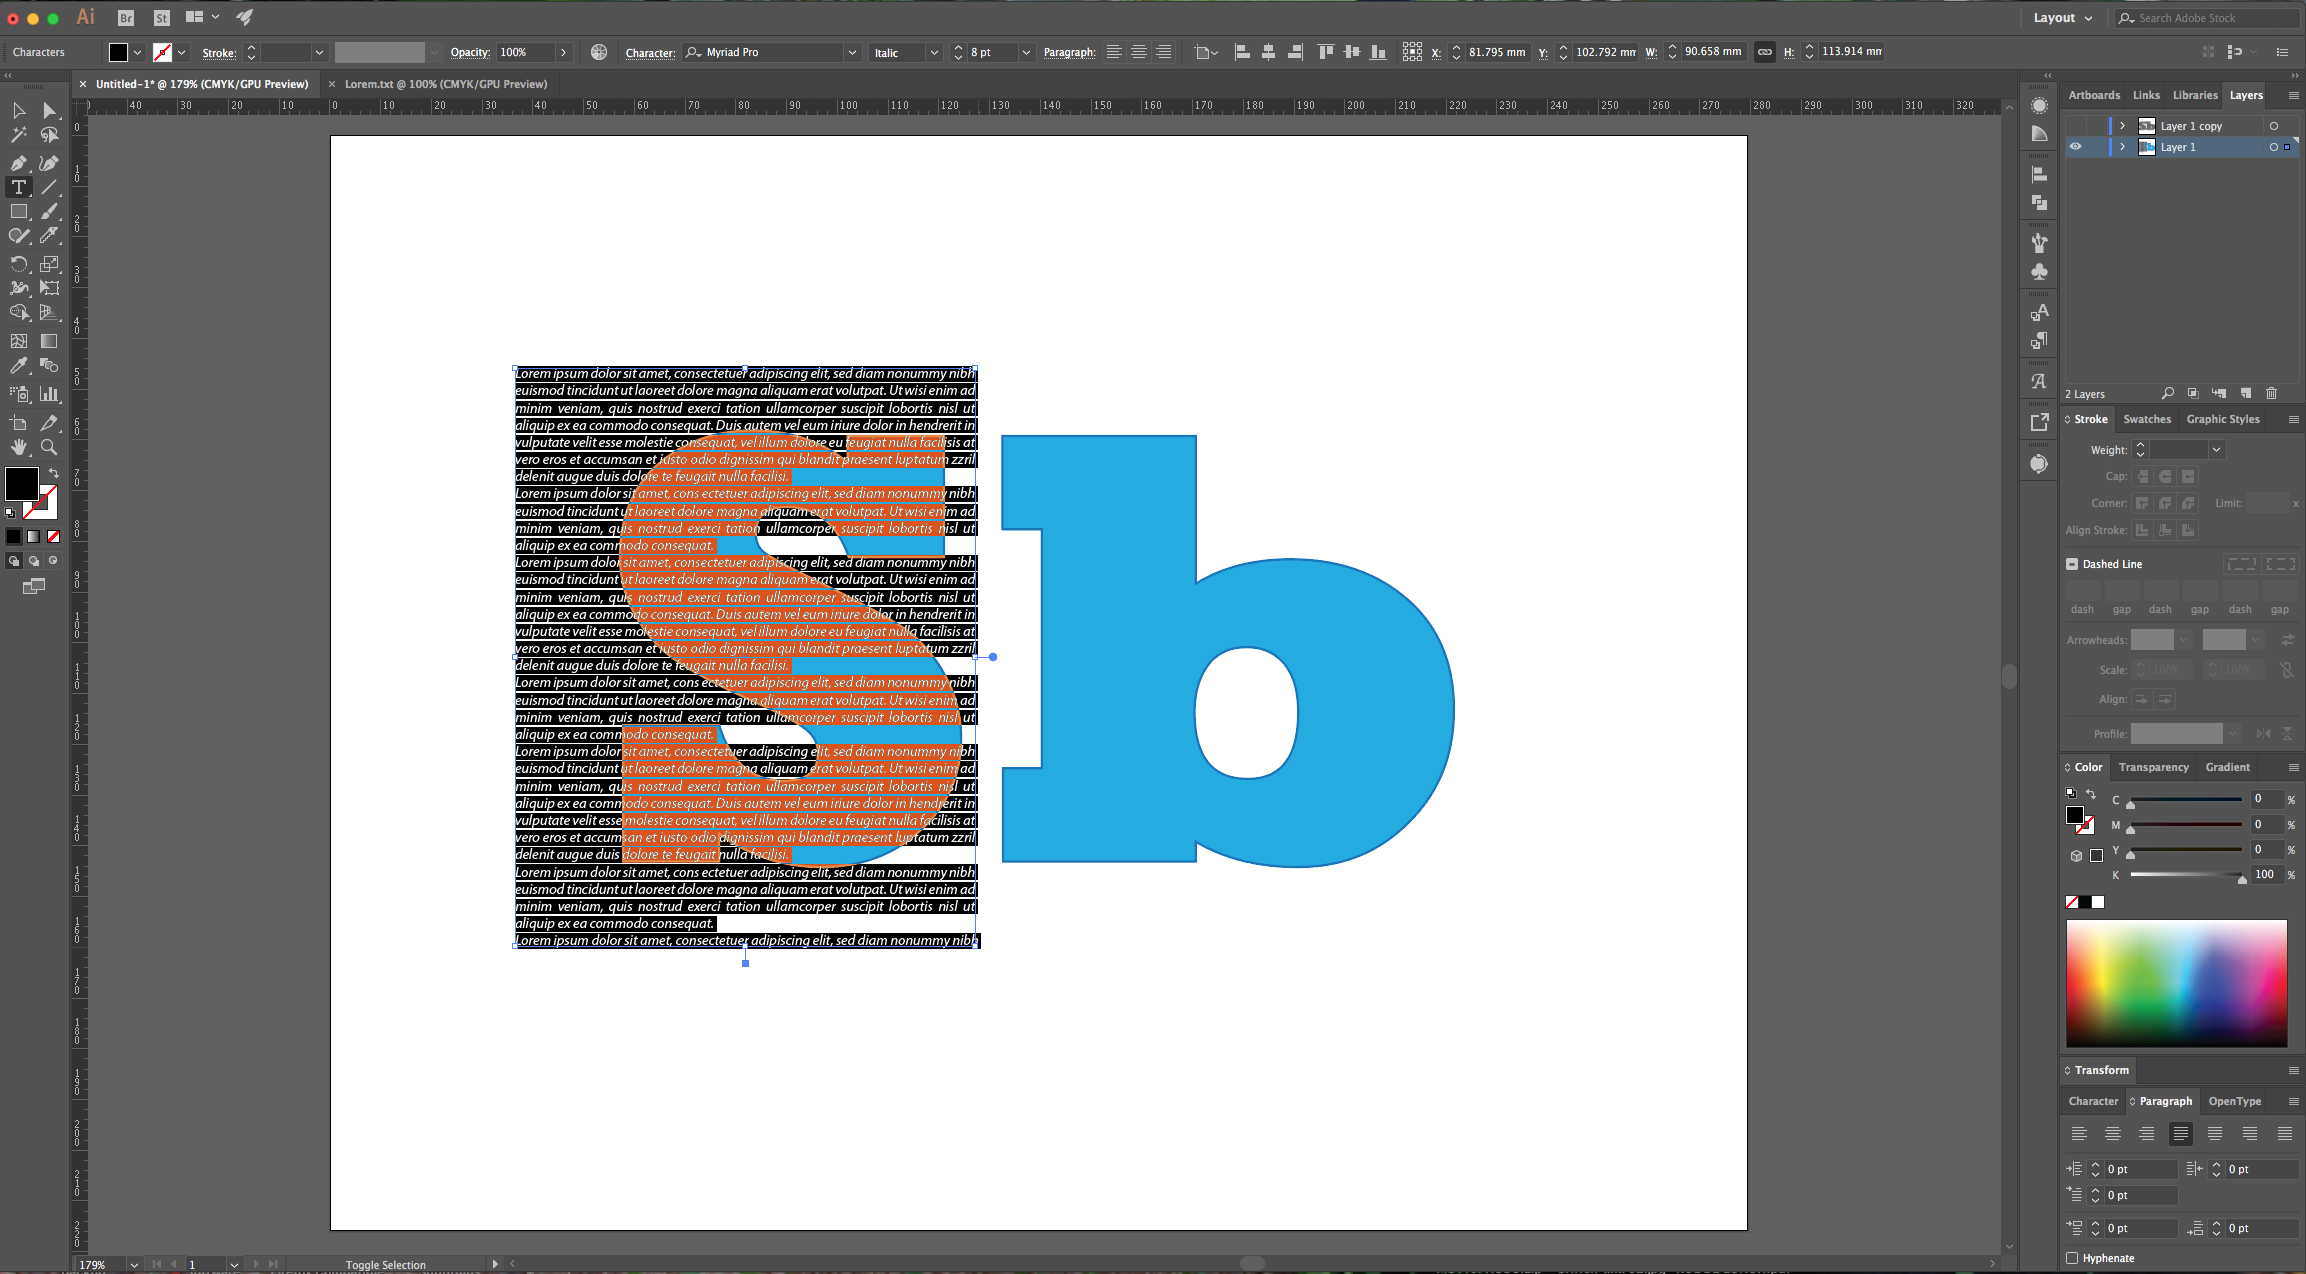
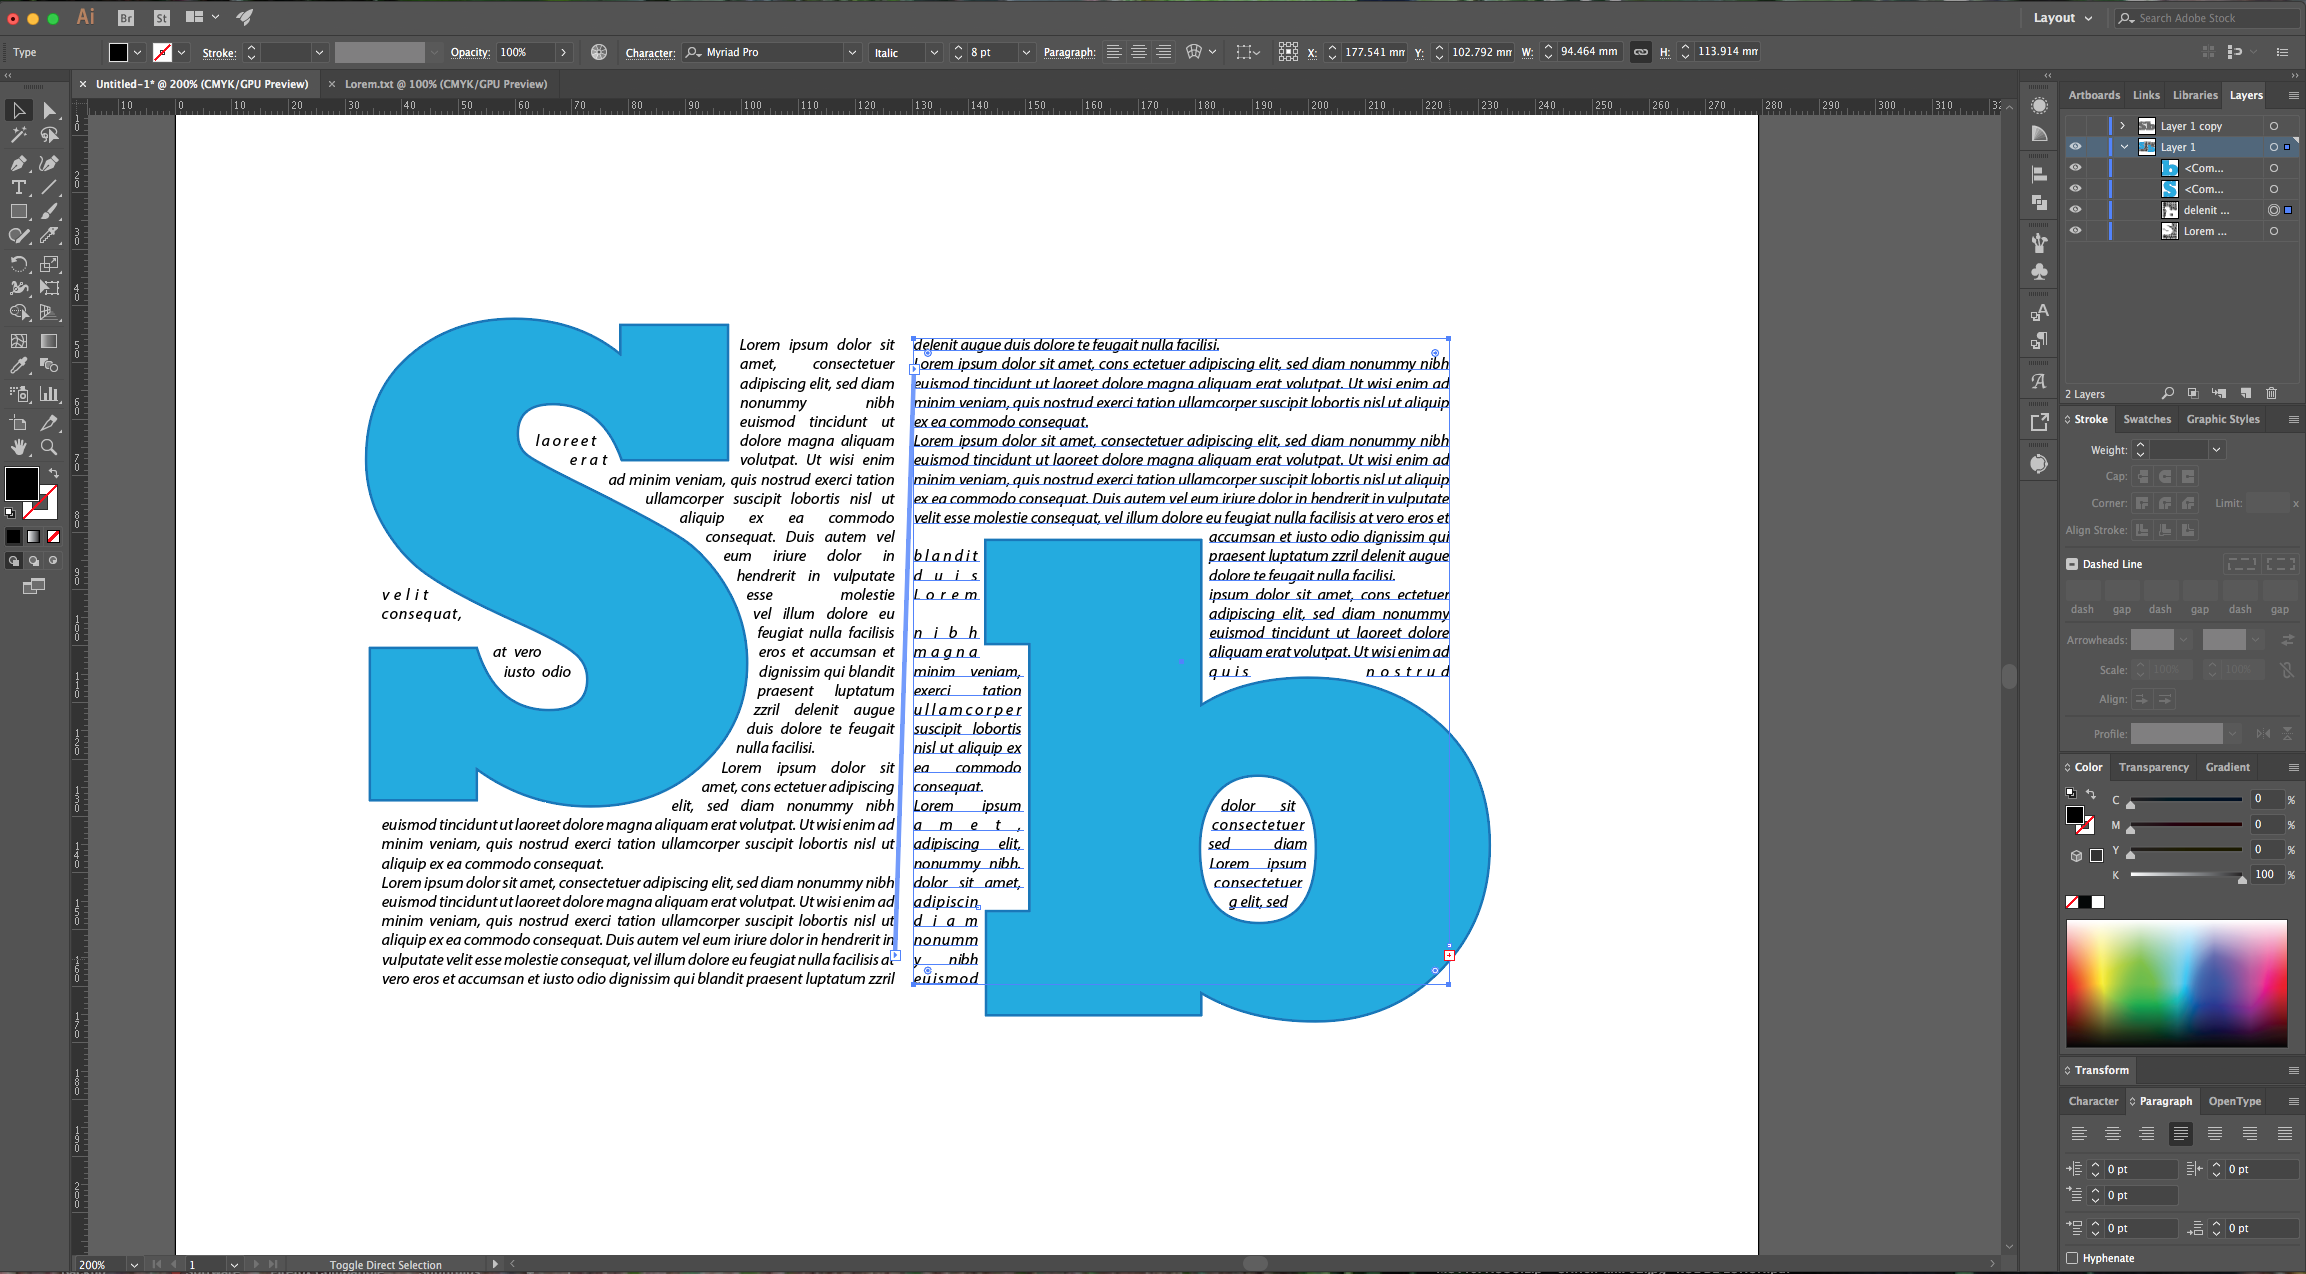
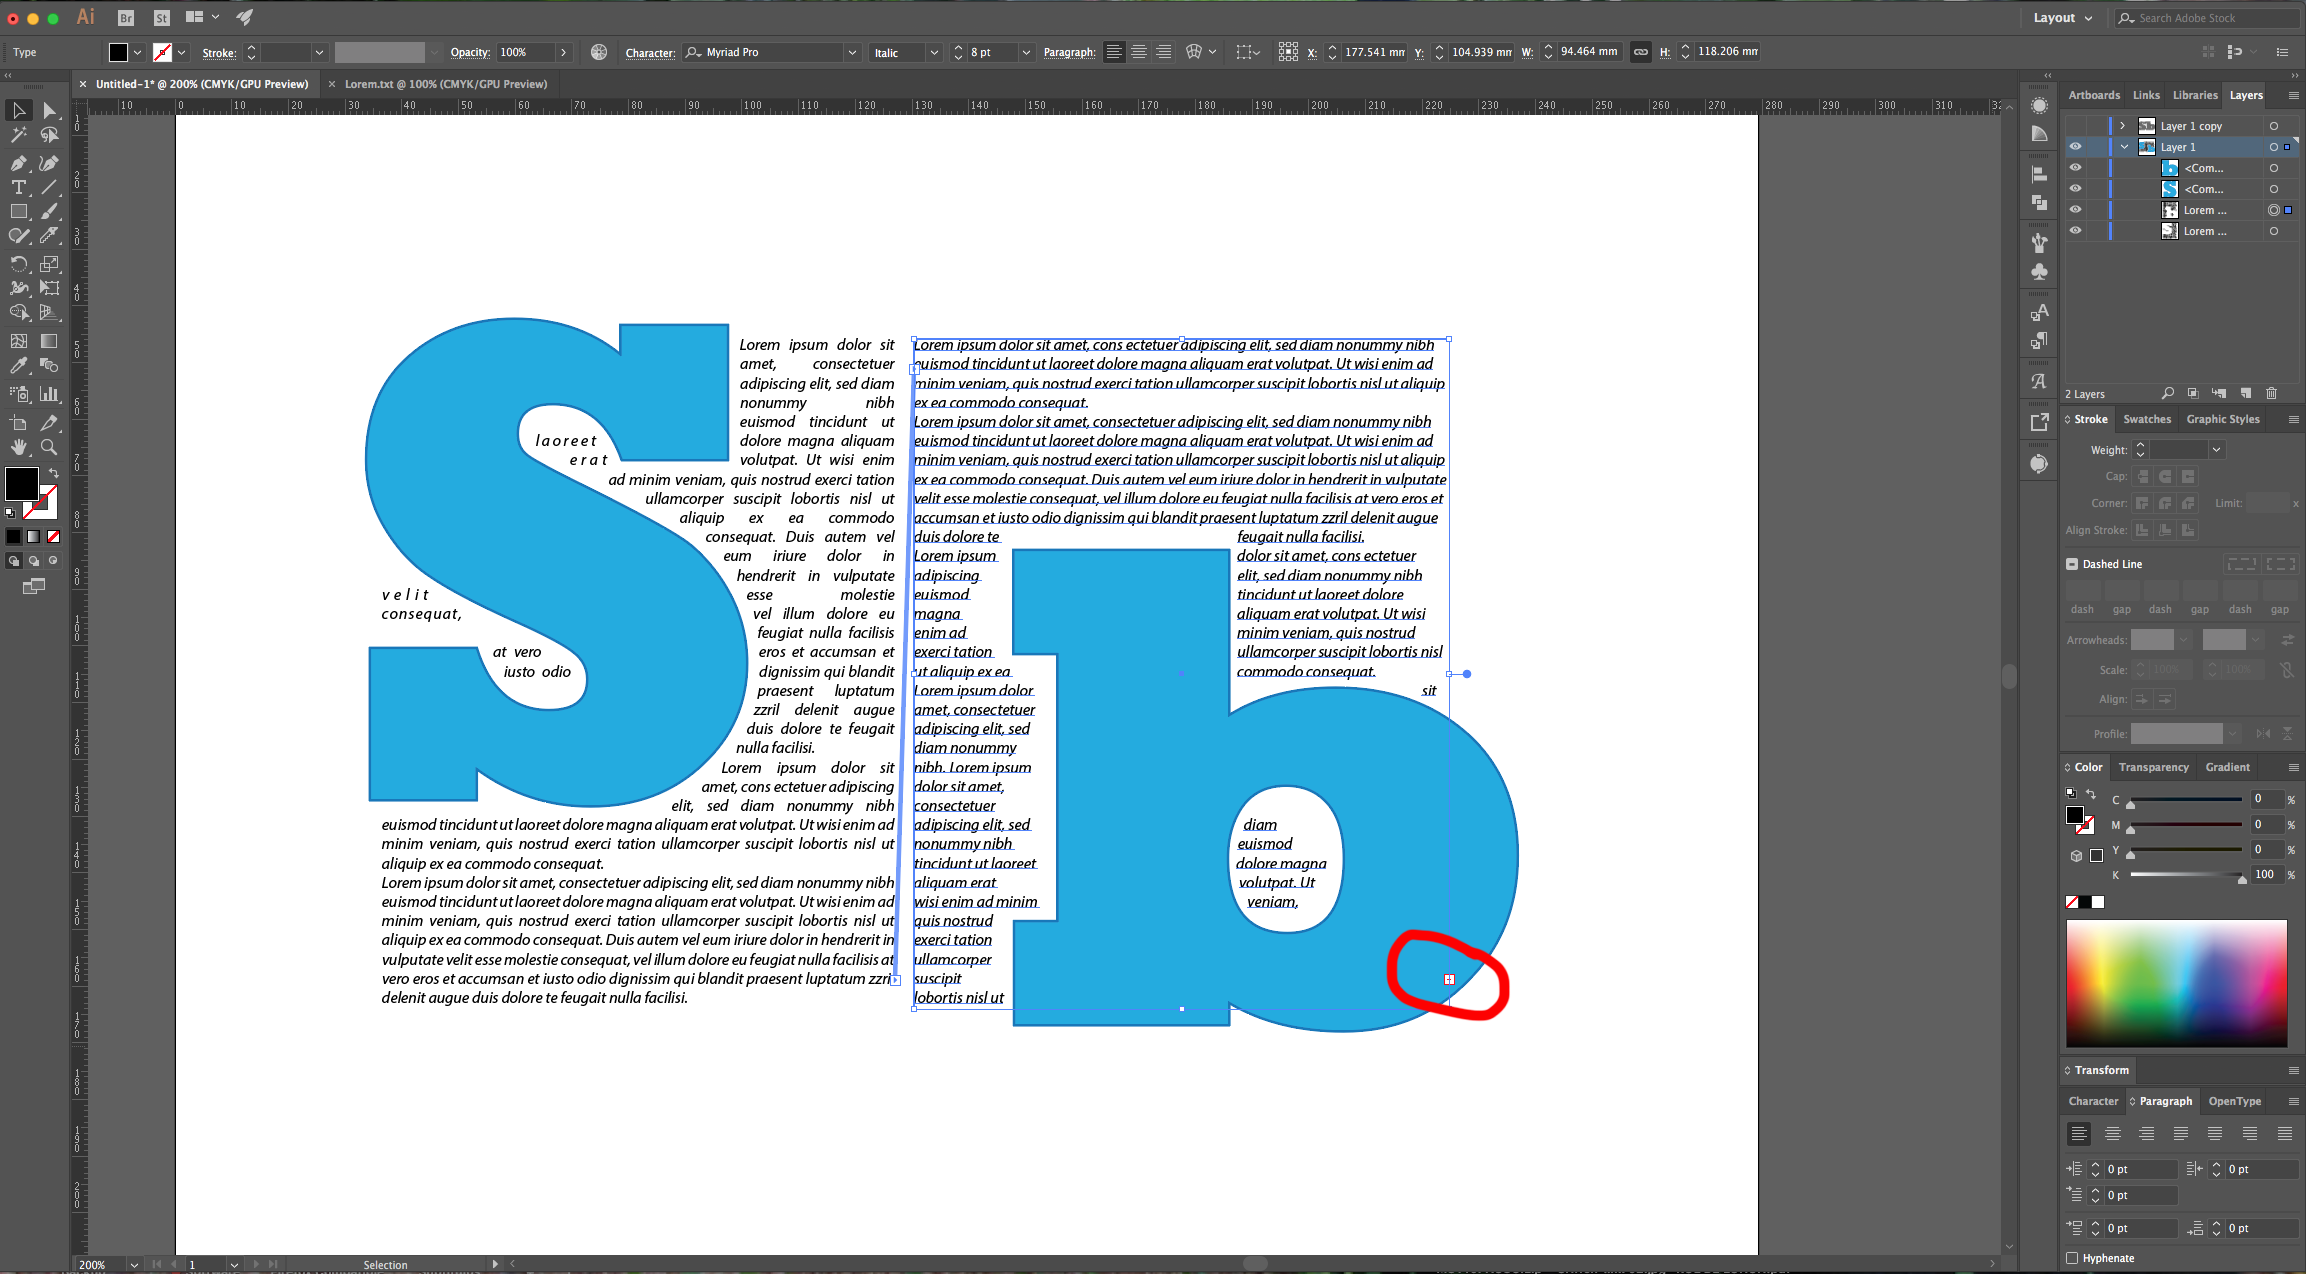
7 - Select the “Type Area Tool” and click on top of your first letter. “Copy” (Command/Control + C) and “Paste” (Command/Control + V) the text you wish to use inside. Change the “Character” and “Size” (we used Myriad Pro Italic, size 10 pt). If you need more text, just “Paste” some more at the end. Click on the small square at the bottom-right side of your text box (it should be red and with a Plus sign inside to indicate that there is more that is not showing) and then, click on top of the next letter to make the text flow (your cursor should change into a small page with text icon).
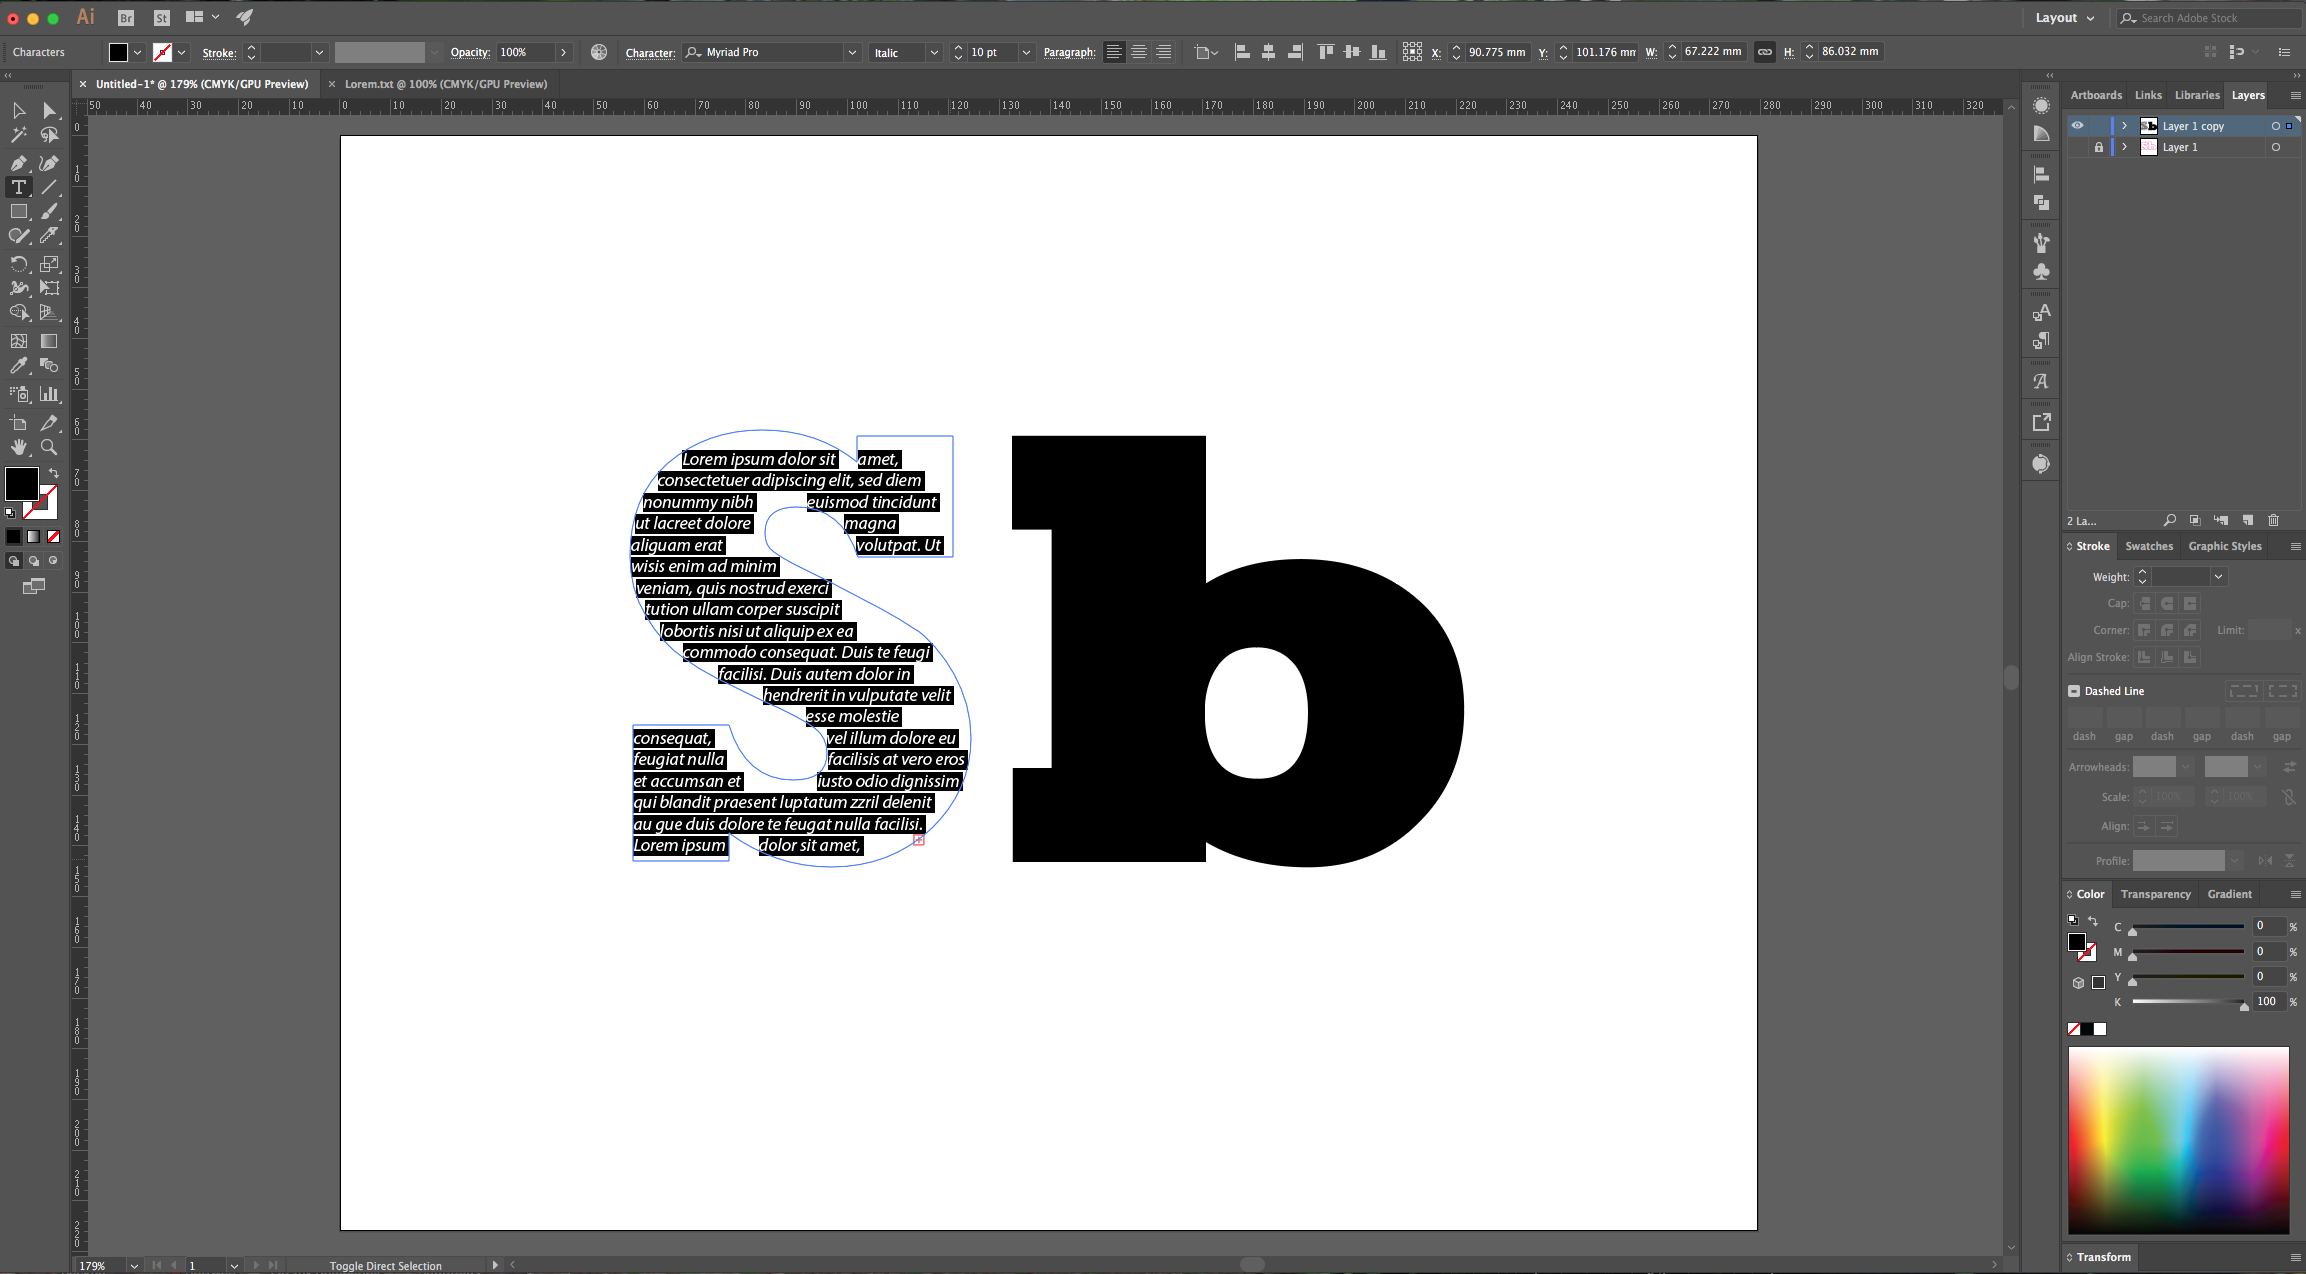
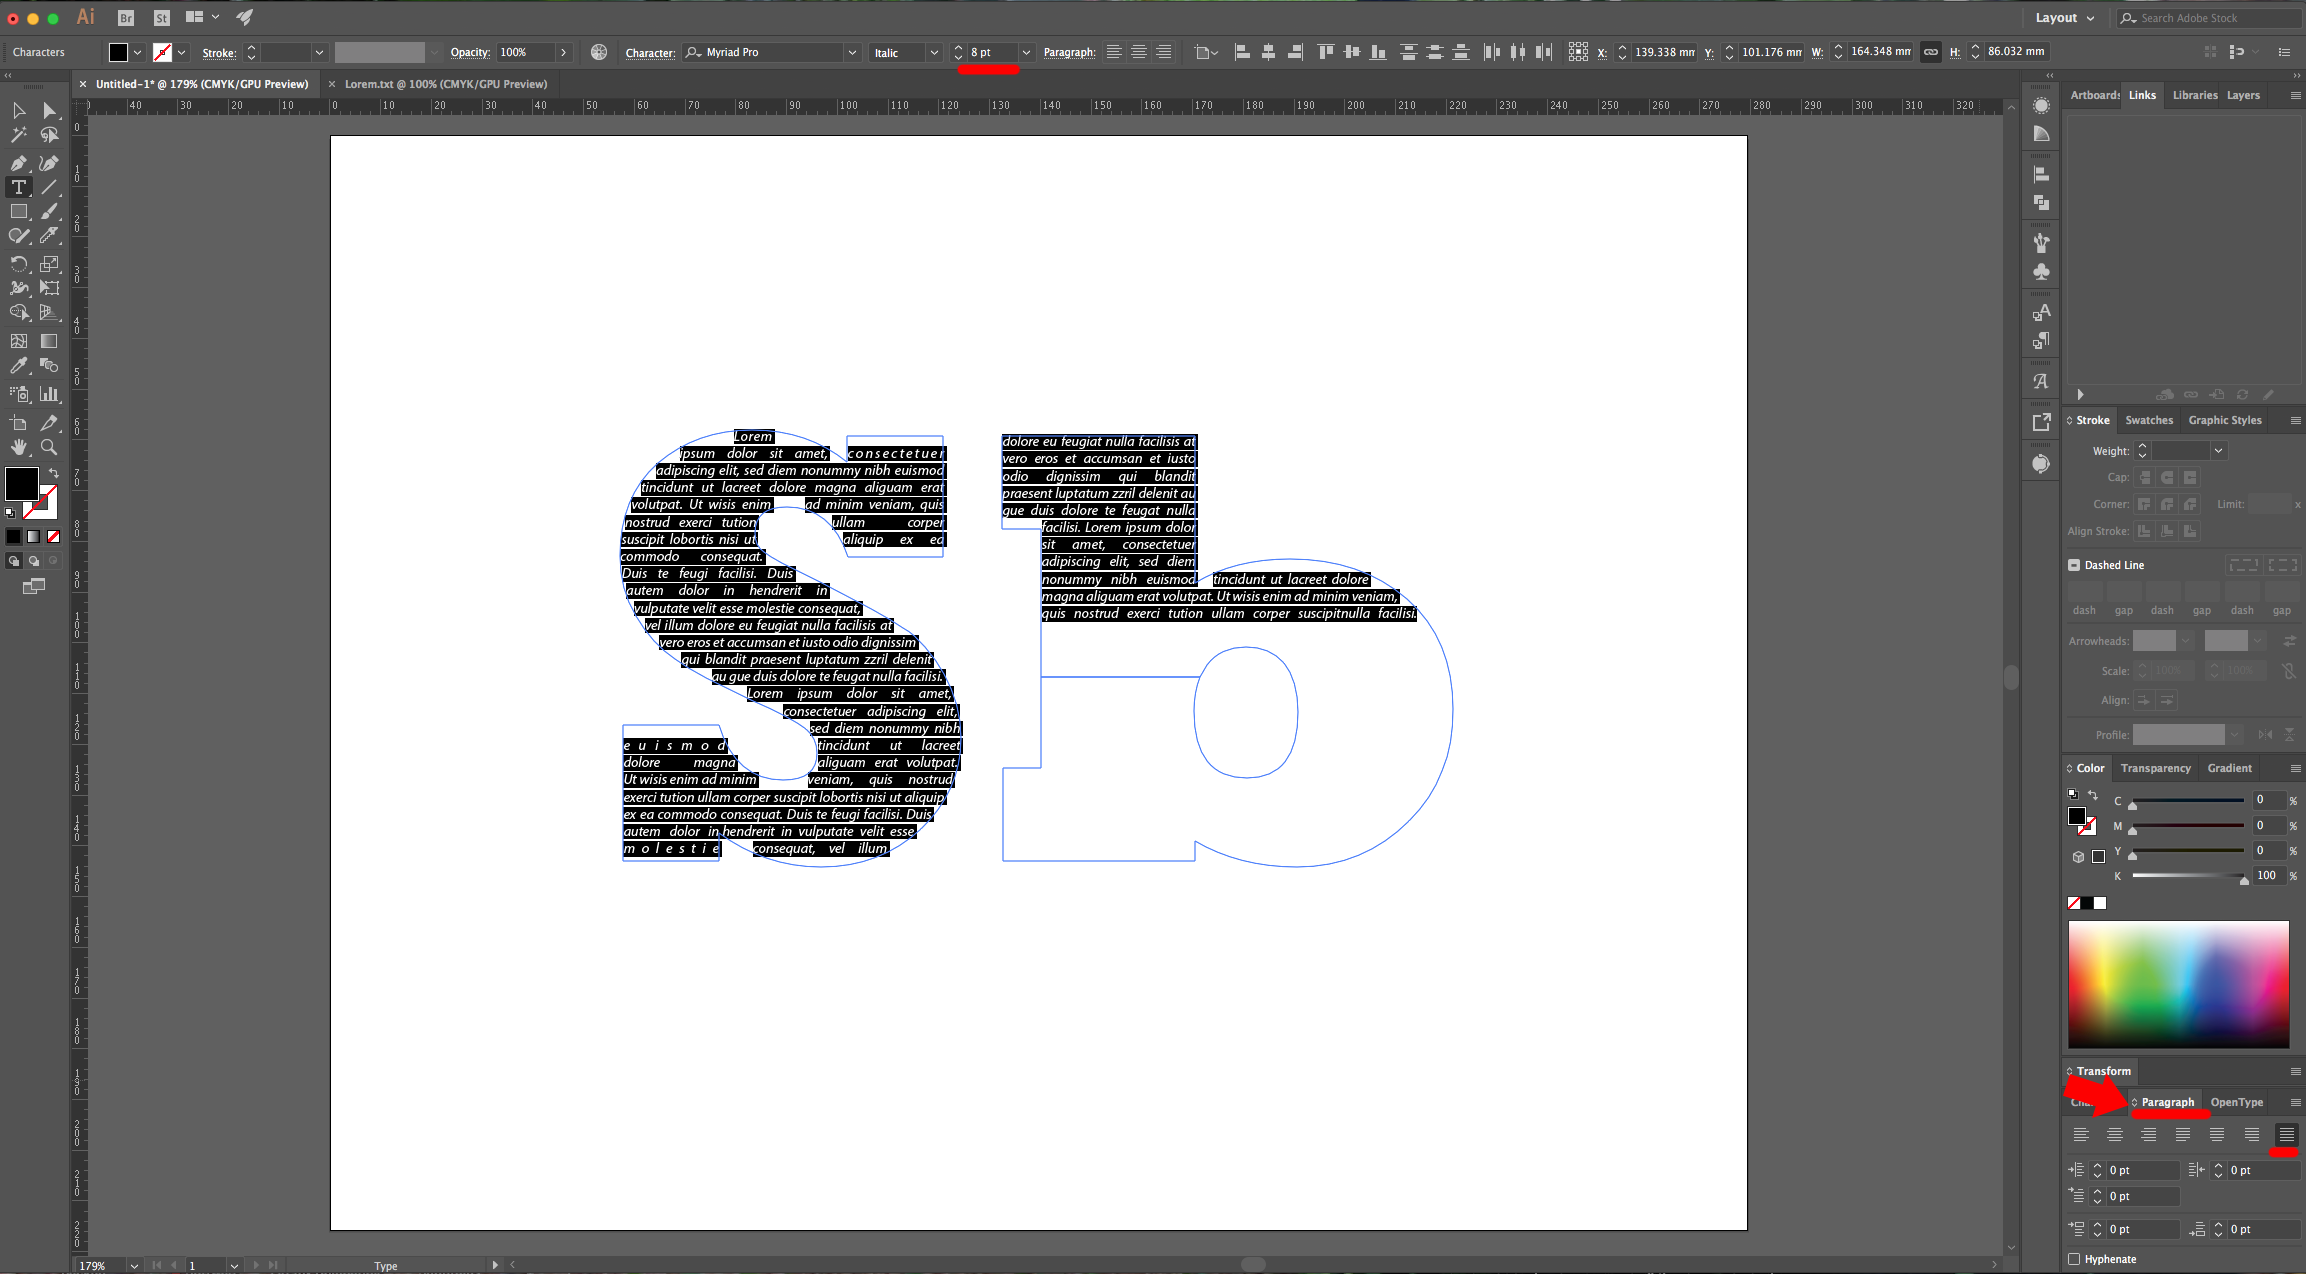
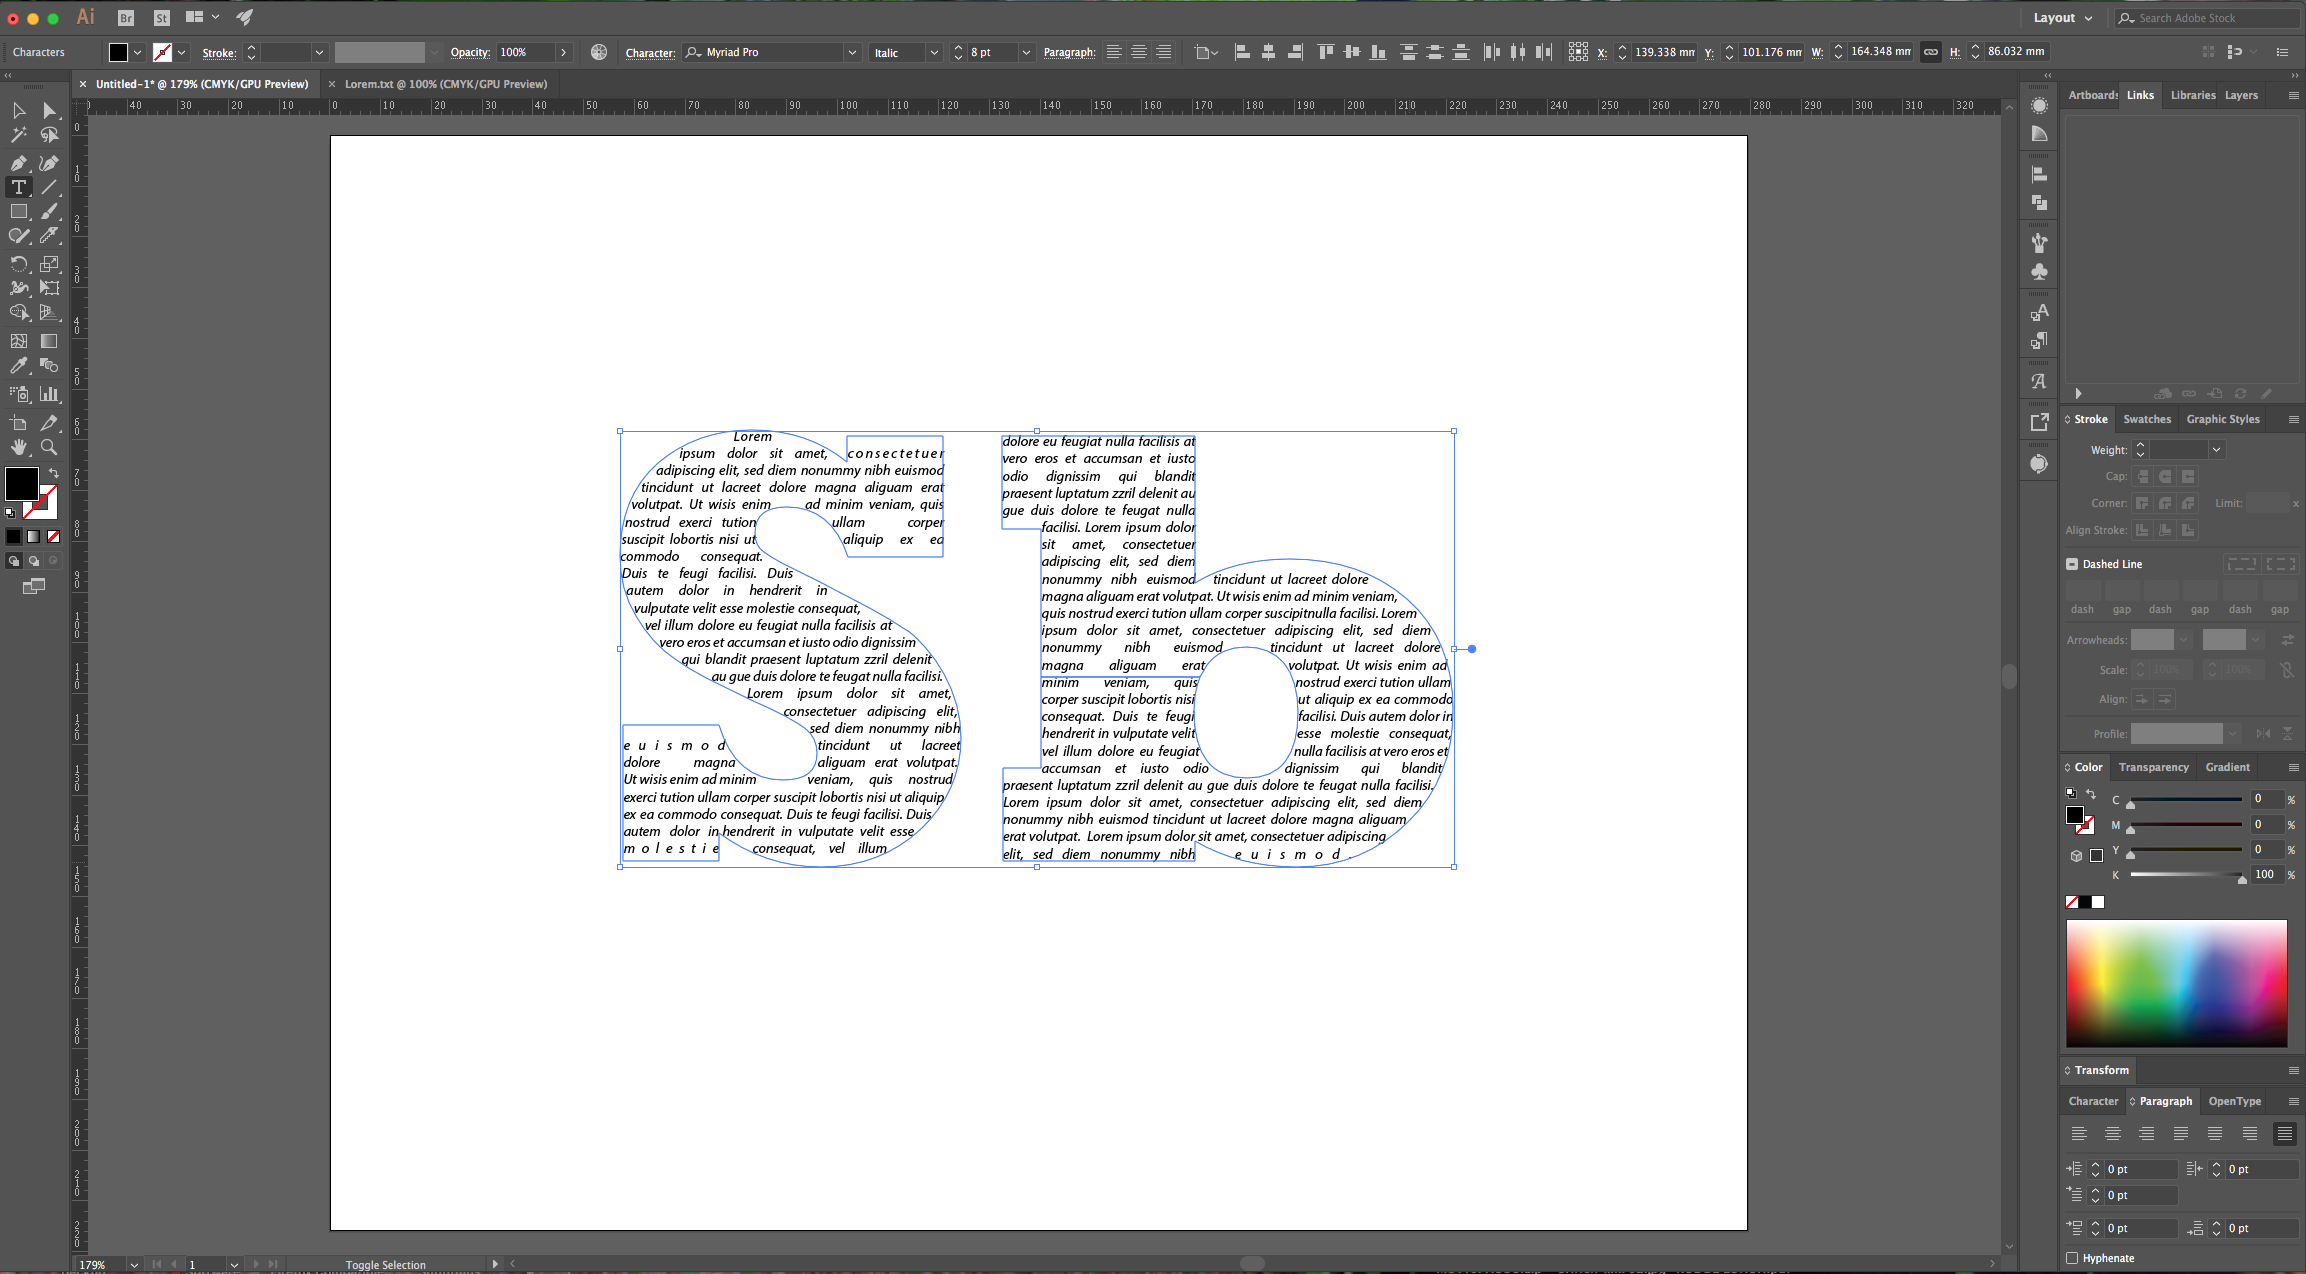
8 - Erase all the extra text and/or change the “Size” of your text to fit it better. Change the text “Alignment” to “Justify All Lines” in the “Paragraph Panel”.
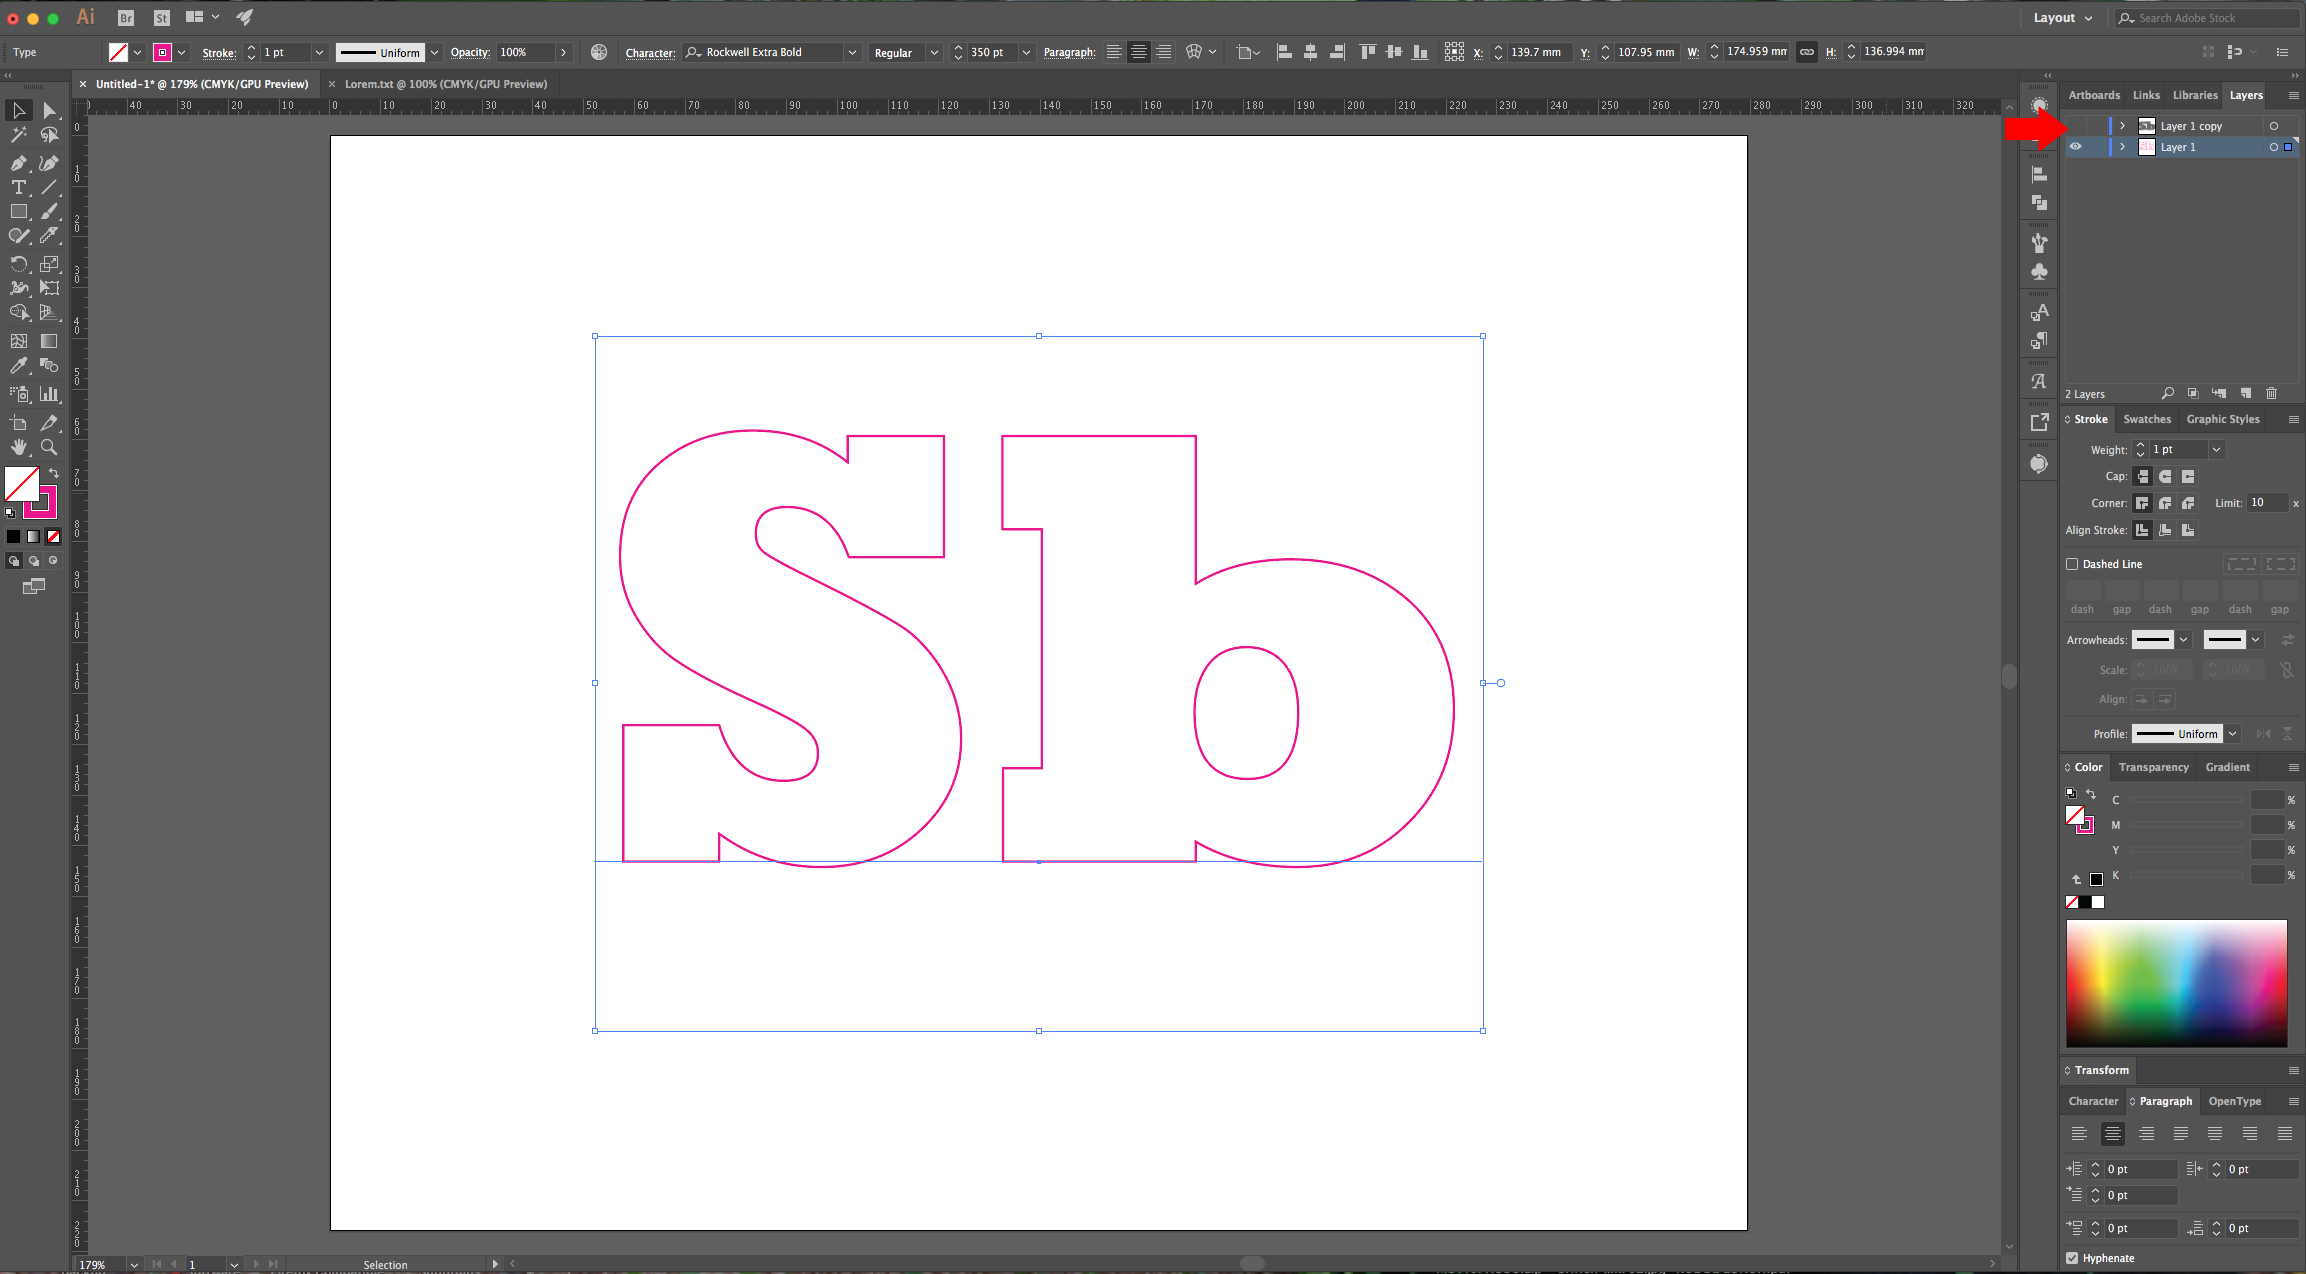
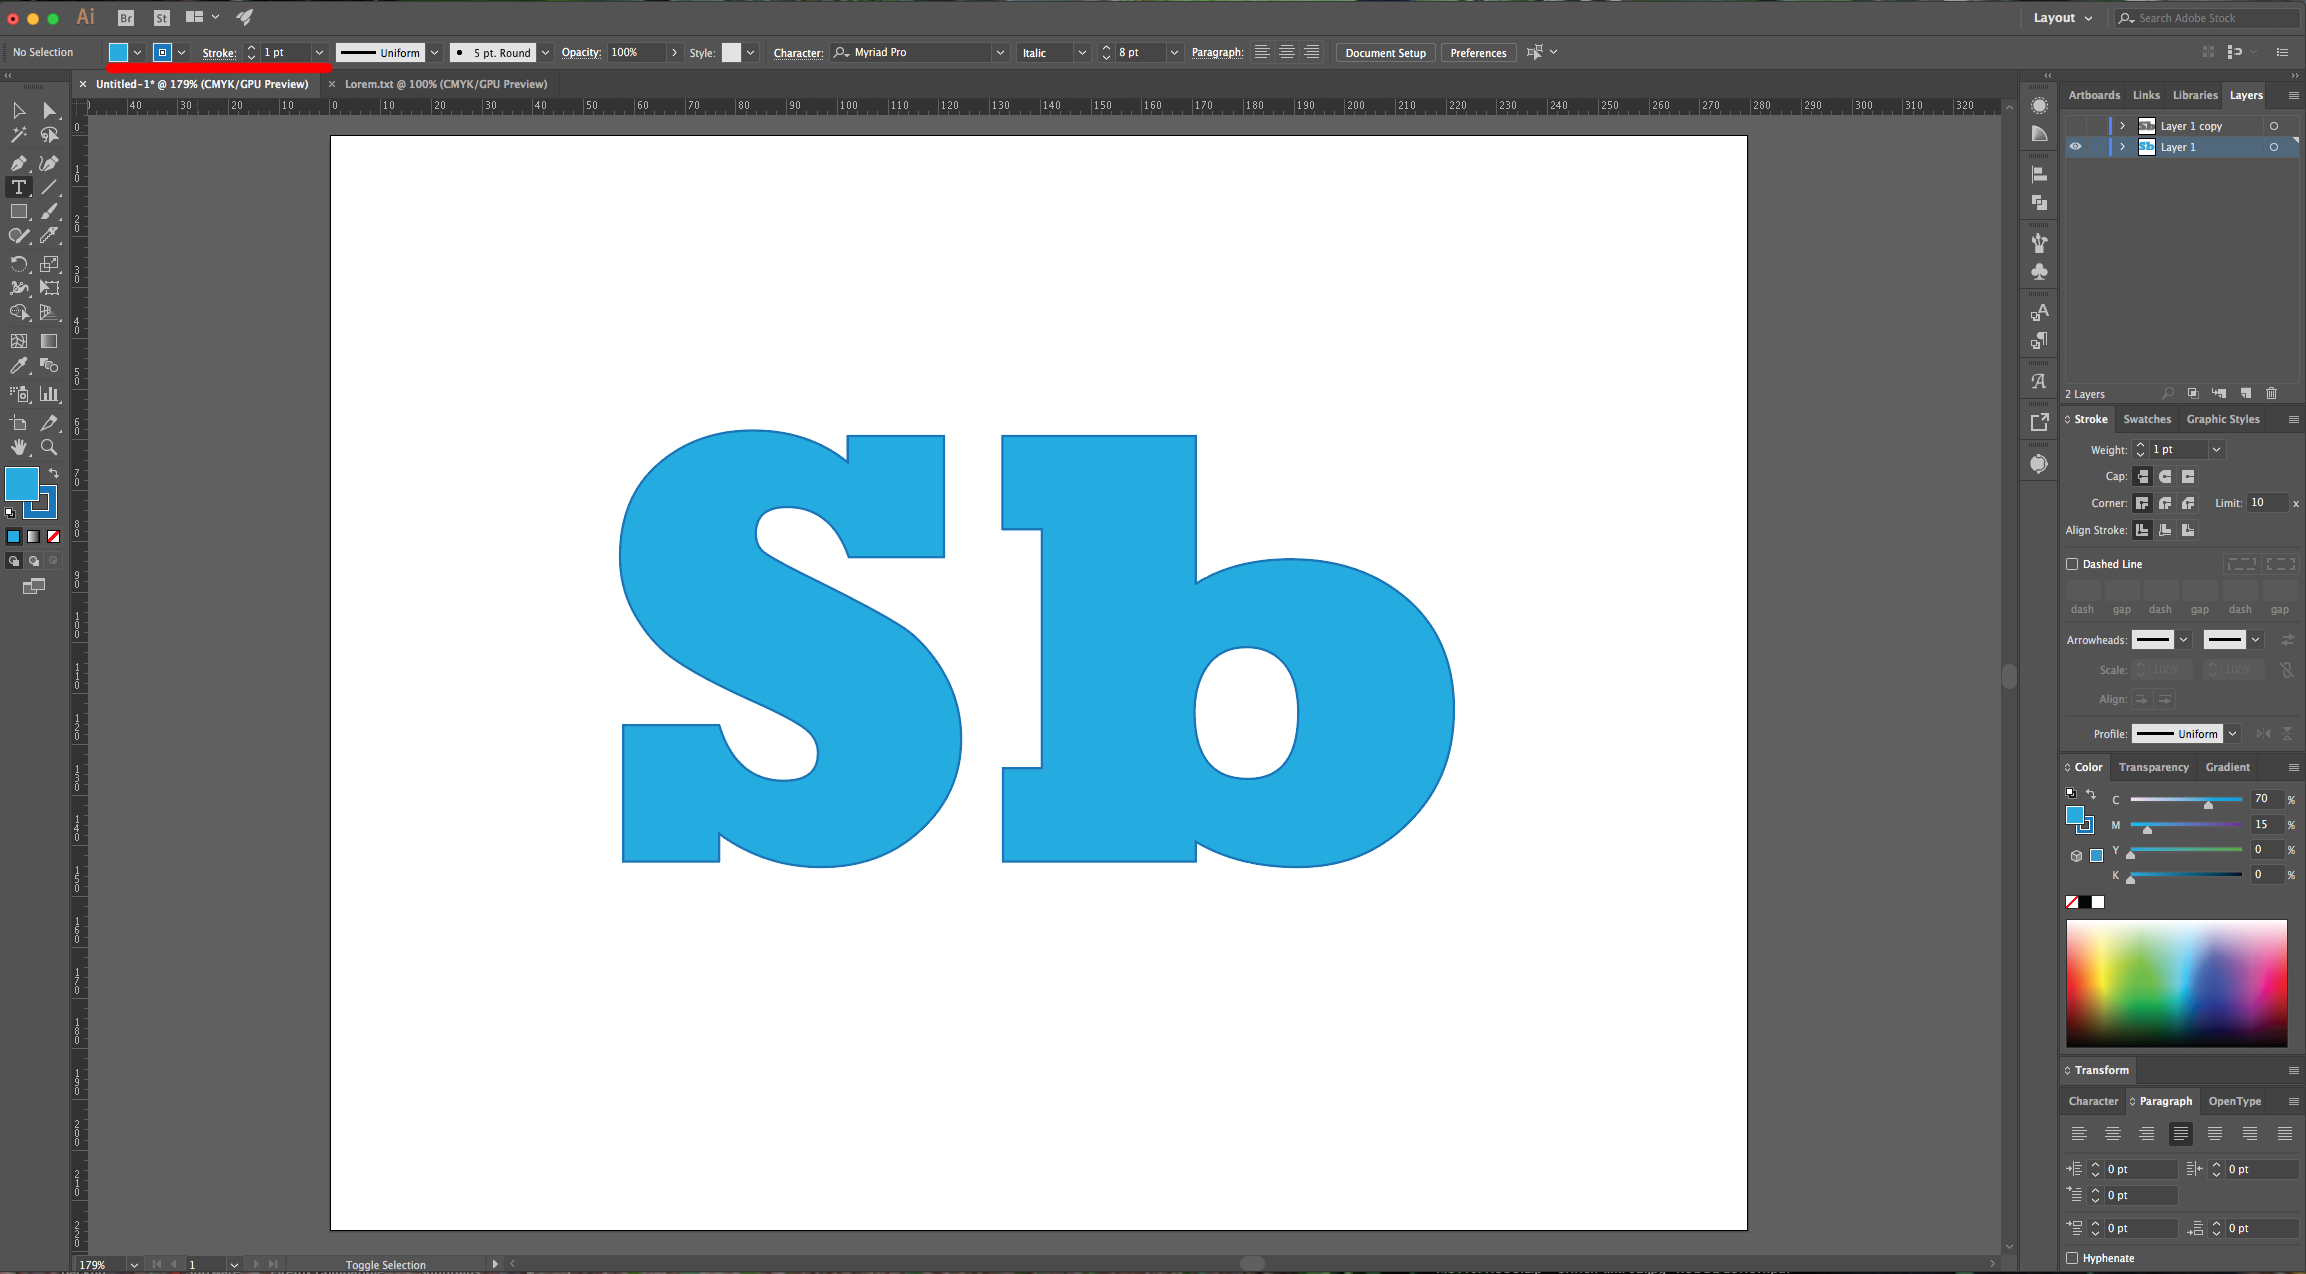
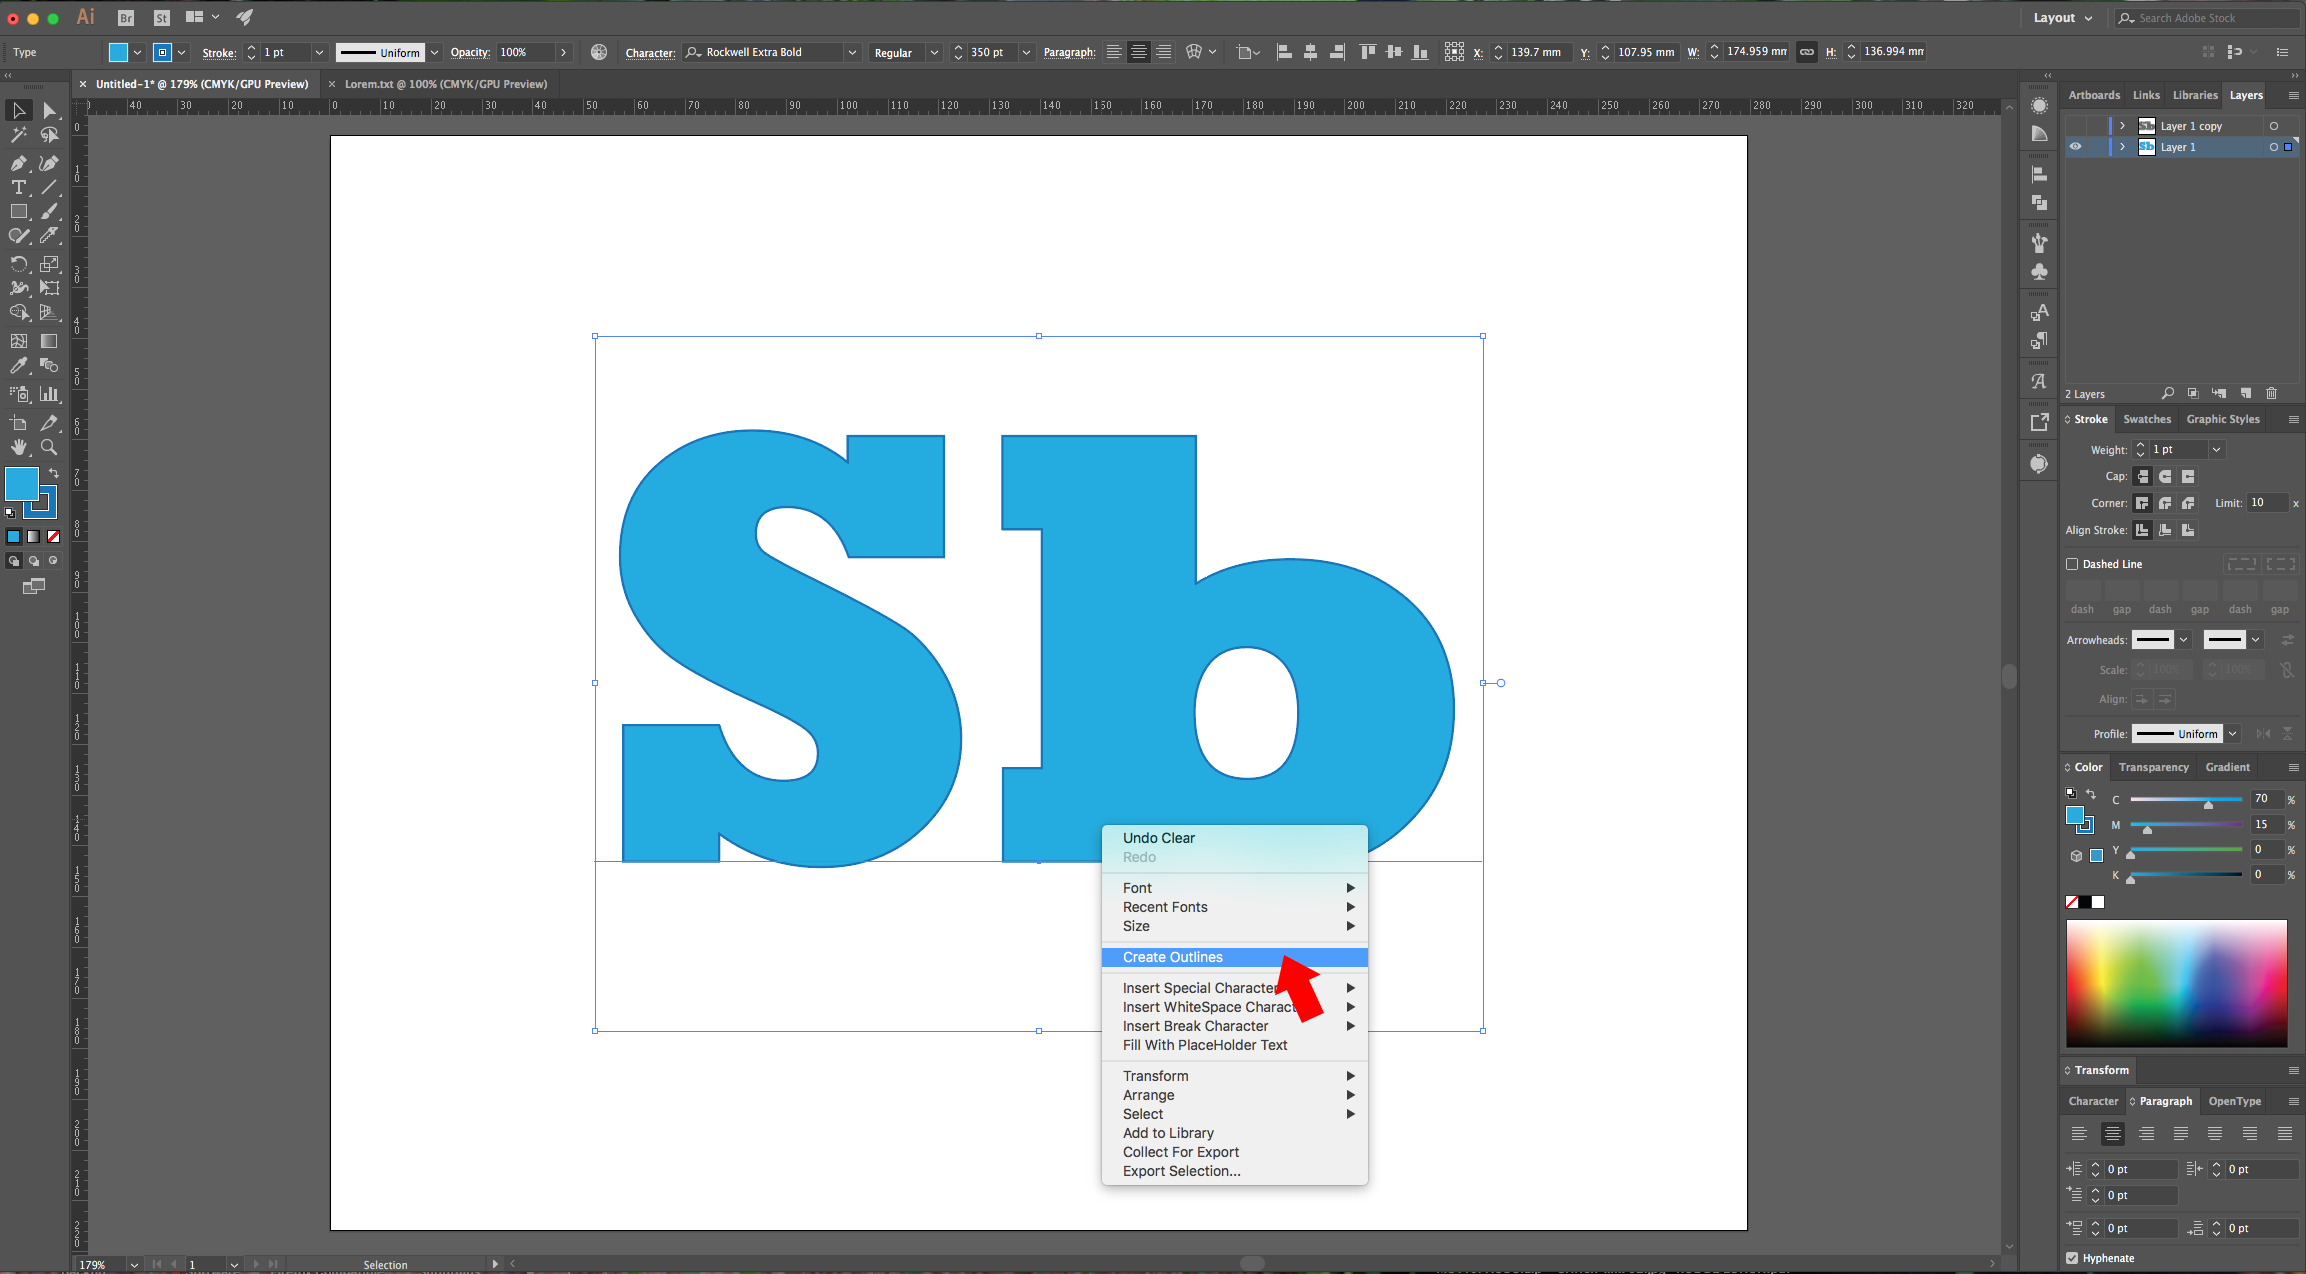
9 - Now, to add a box of text “Around” a shape. Turn off the layer you’ve been working in and turn on the other. Change the text “Fill” and “Stroke” colors if you want and right-click on top to choose “Create Outlines”.
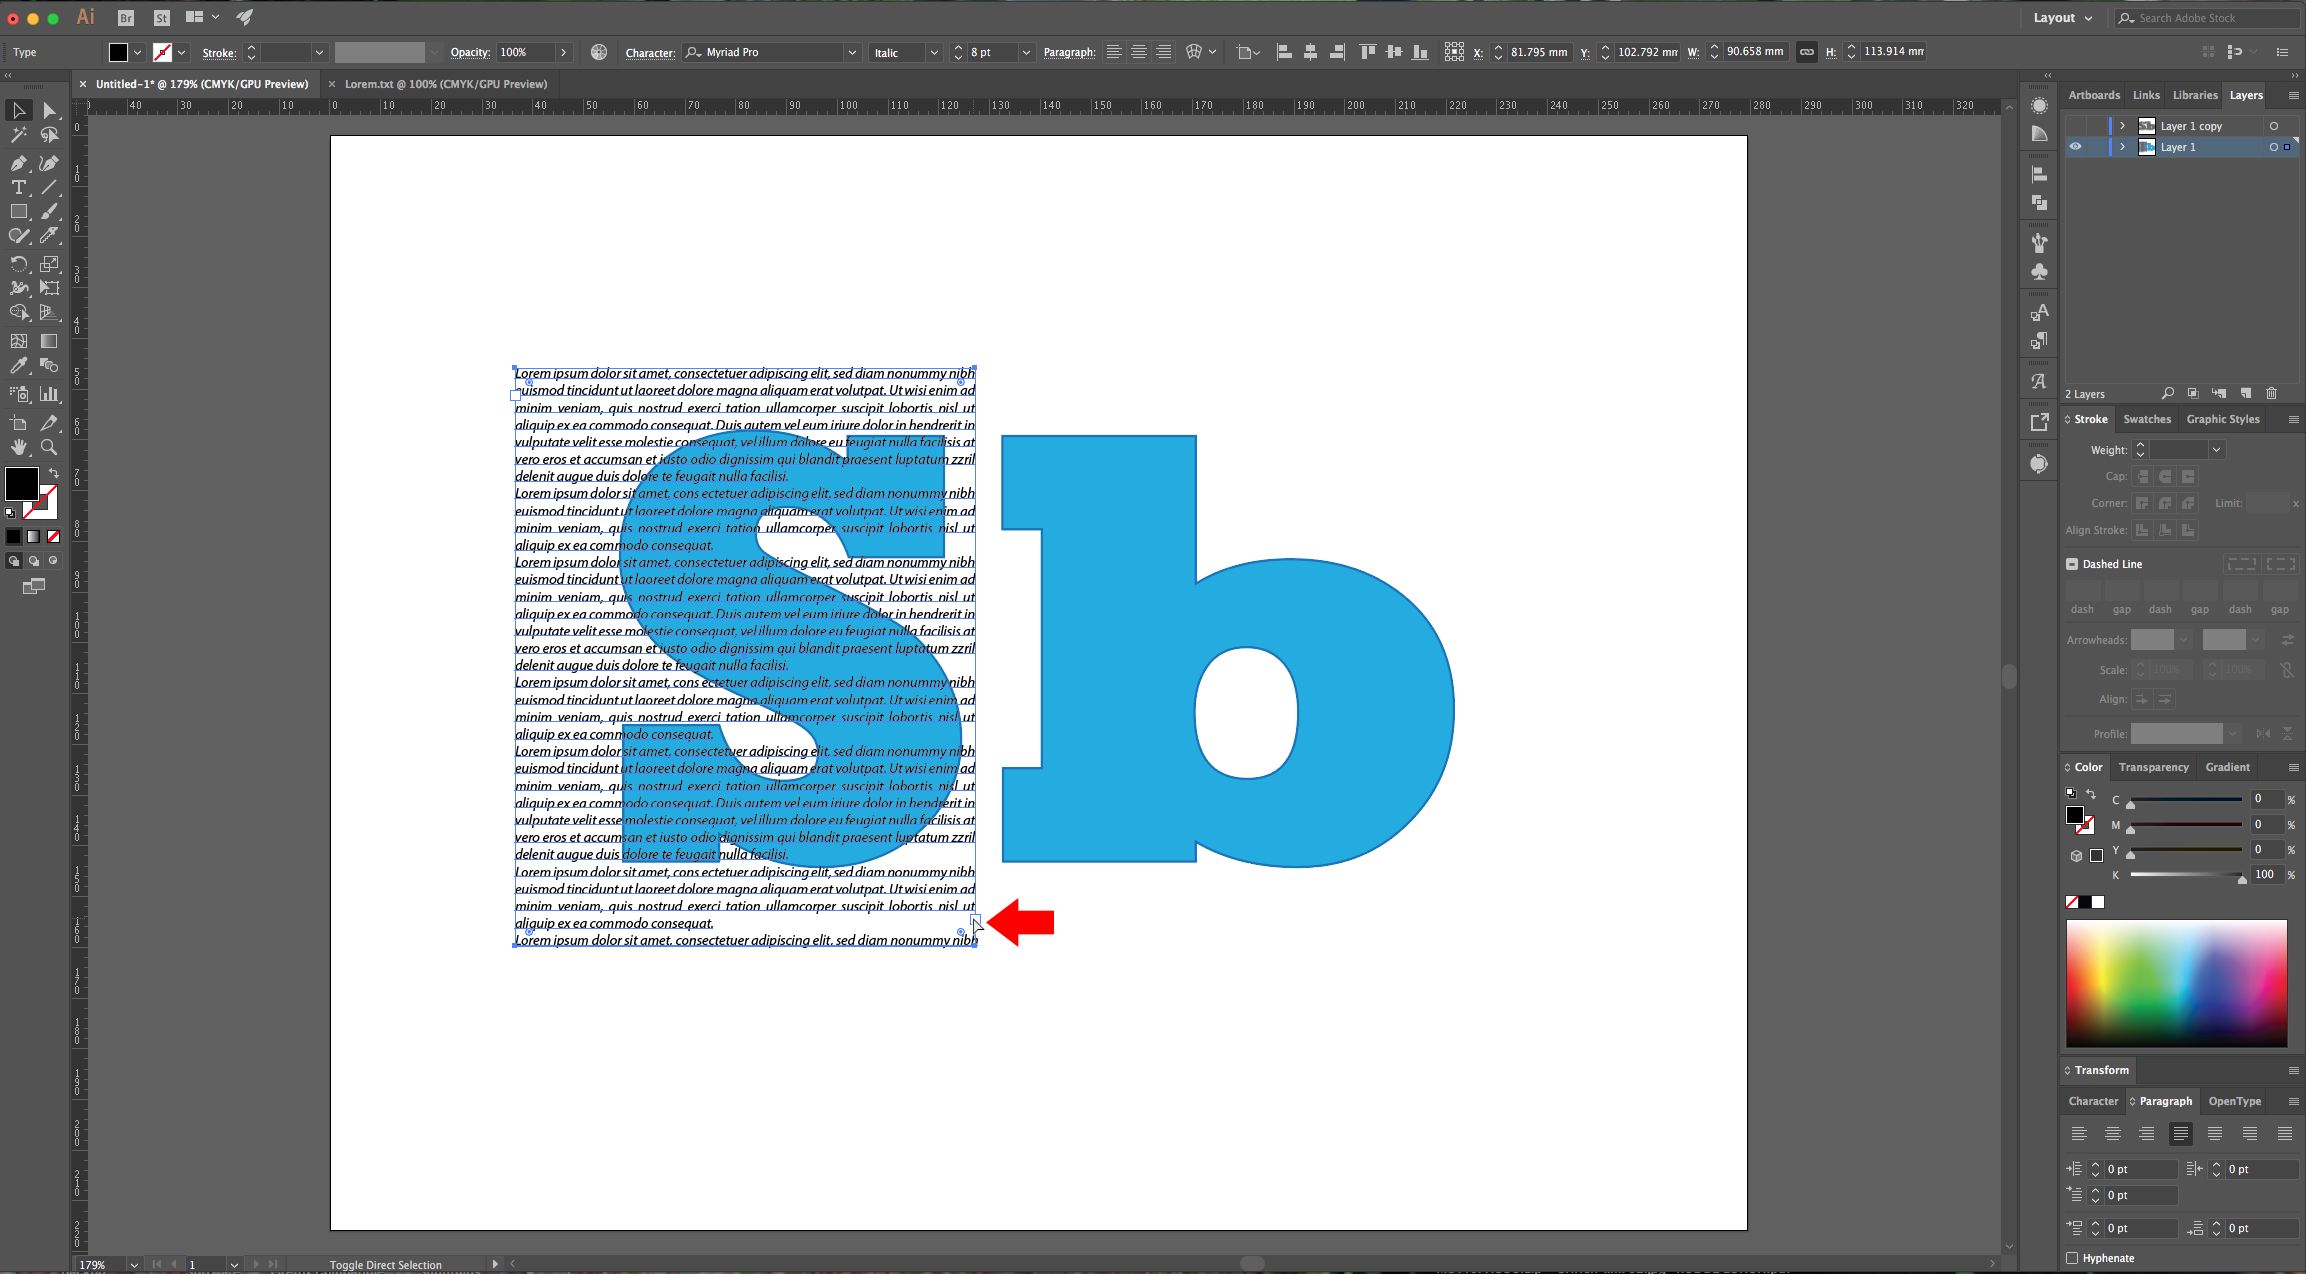
10 - Select the “Type Tool” (T) and “draw” a square or rectangular shape around one of your letters (if you still have the one you copied in your “Clipboard”, text should fill the “Textbox”). Click on the small square at the bottom-right side of your text box and make another “Box” covering the other letter. You may need to “Paste” some extra text to make it “Flow” to the other “Textbox”. This time we chose “Justify With Last Line Aligned Left” in the “Paragraph Panel”
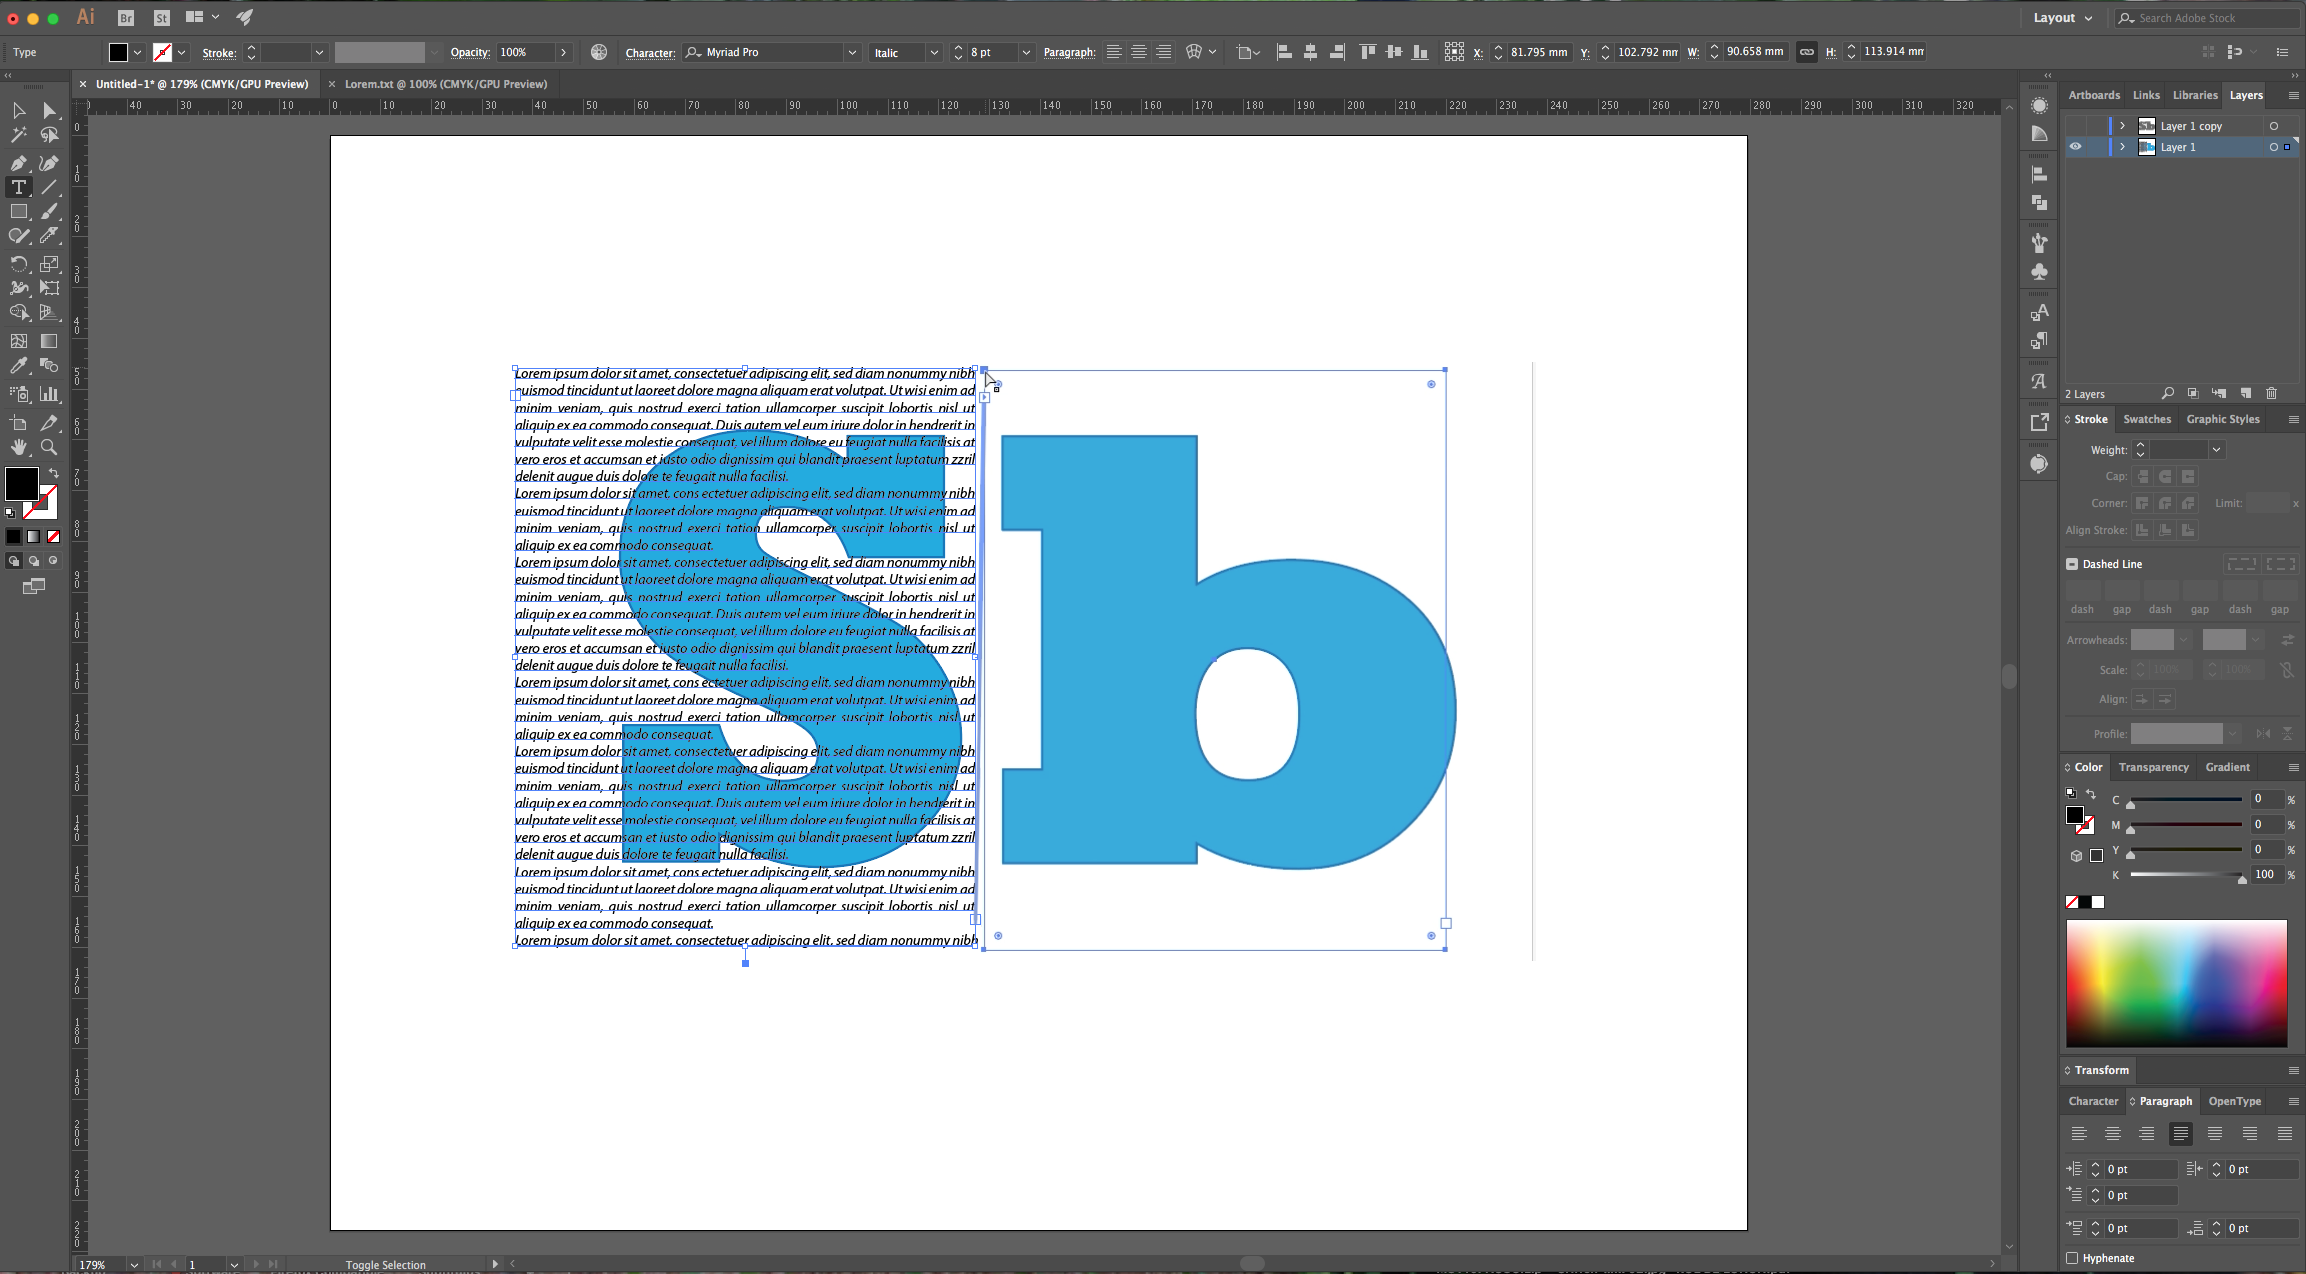
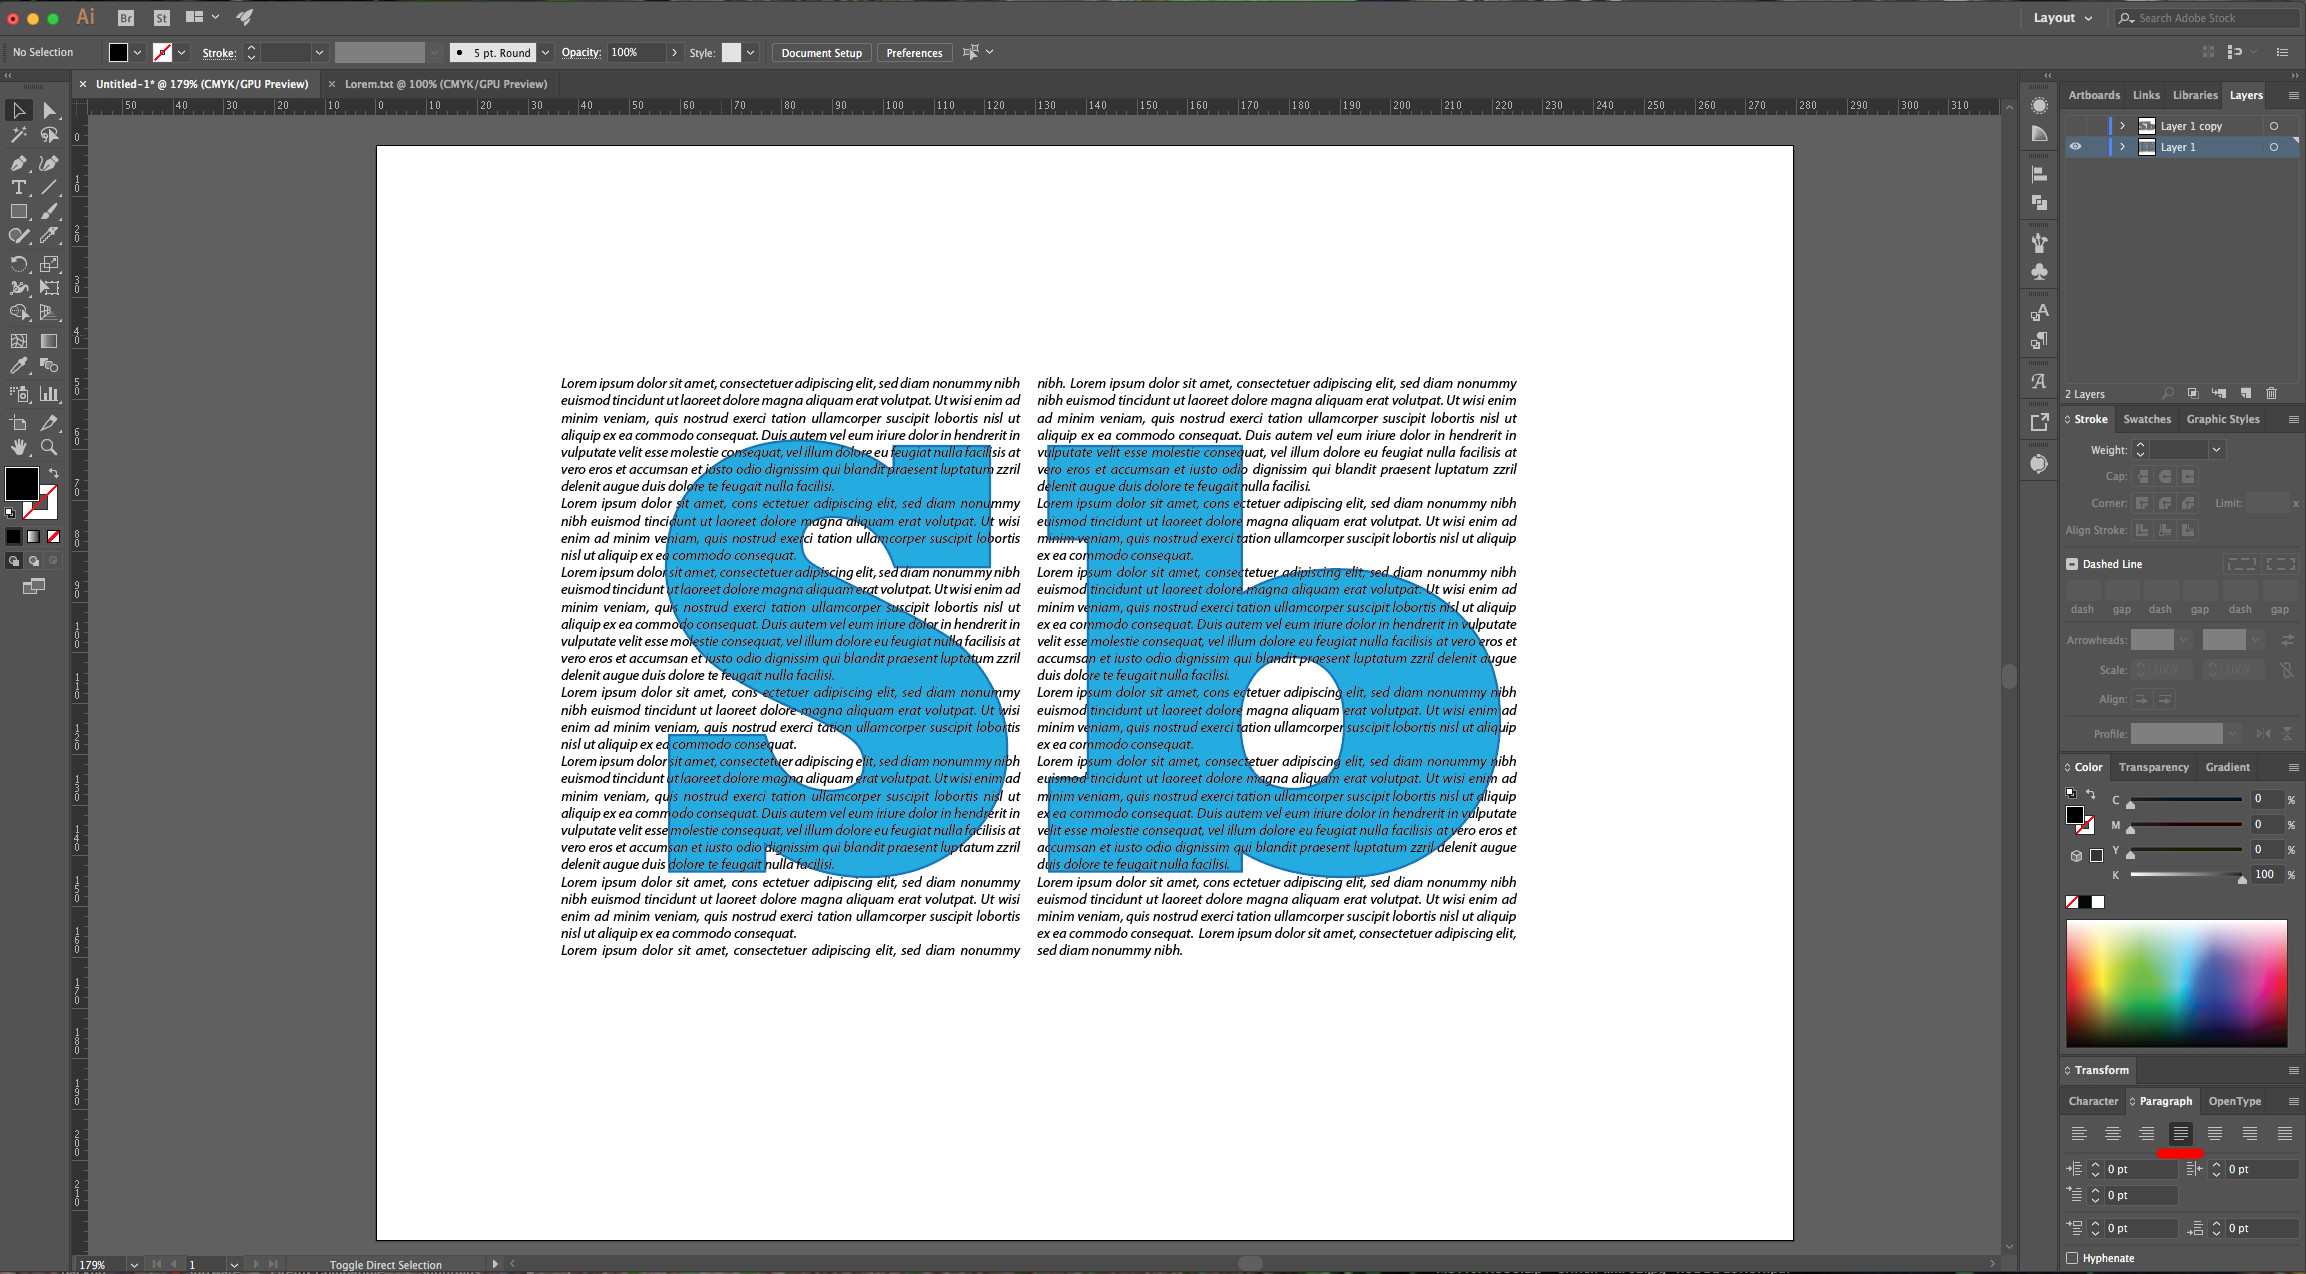
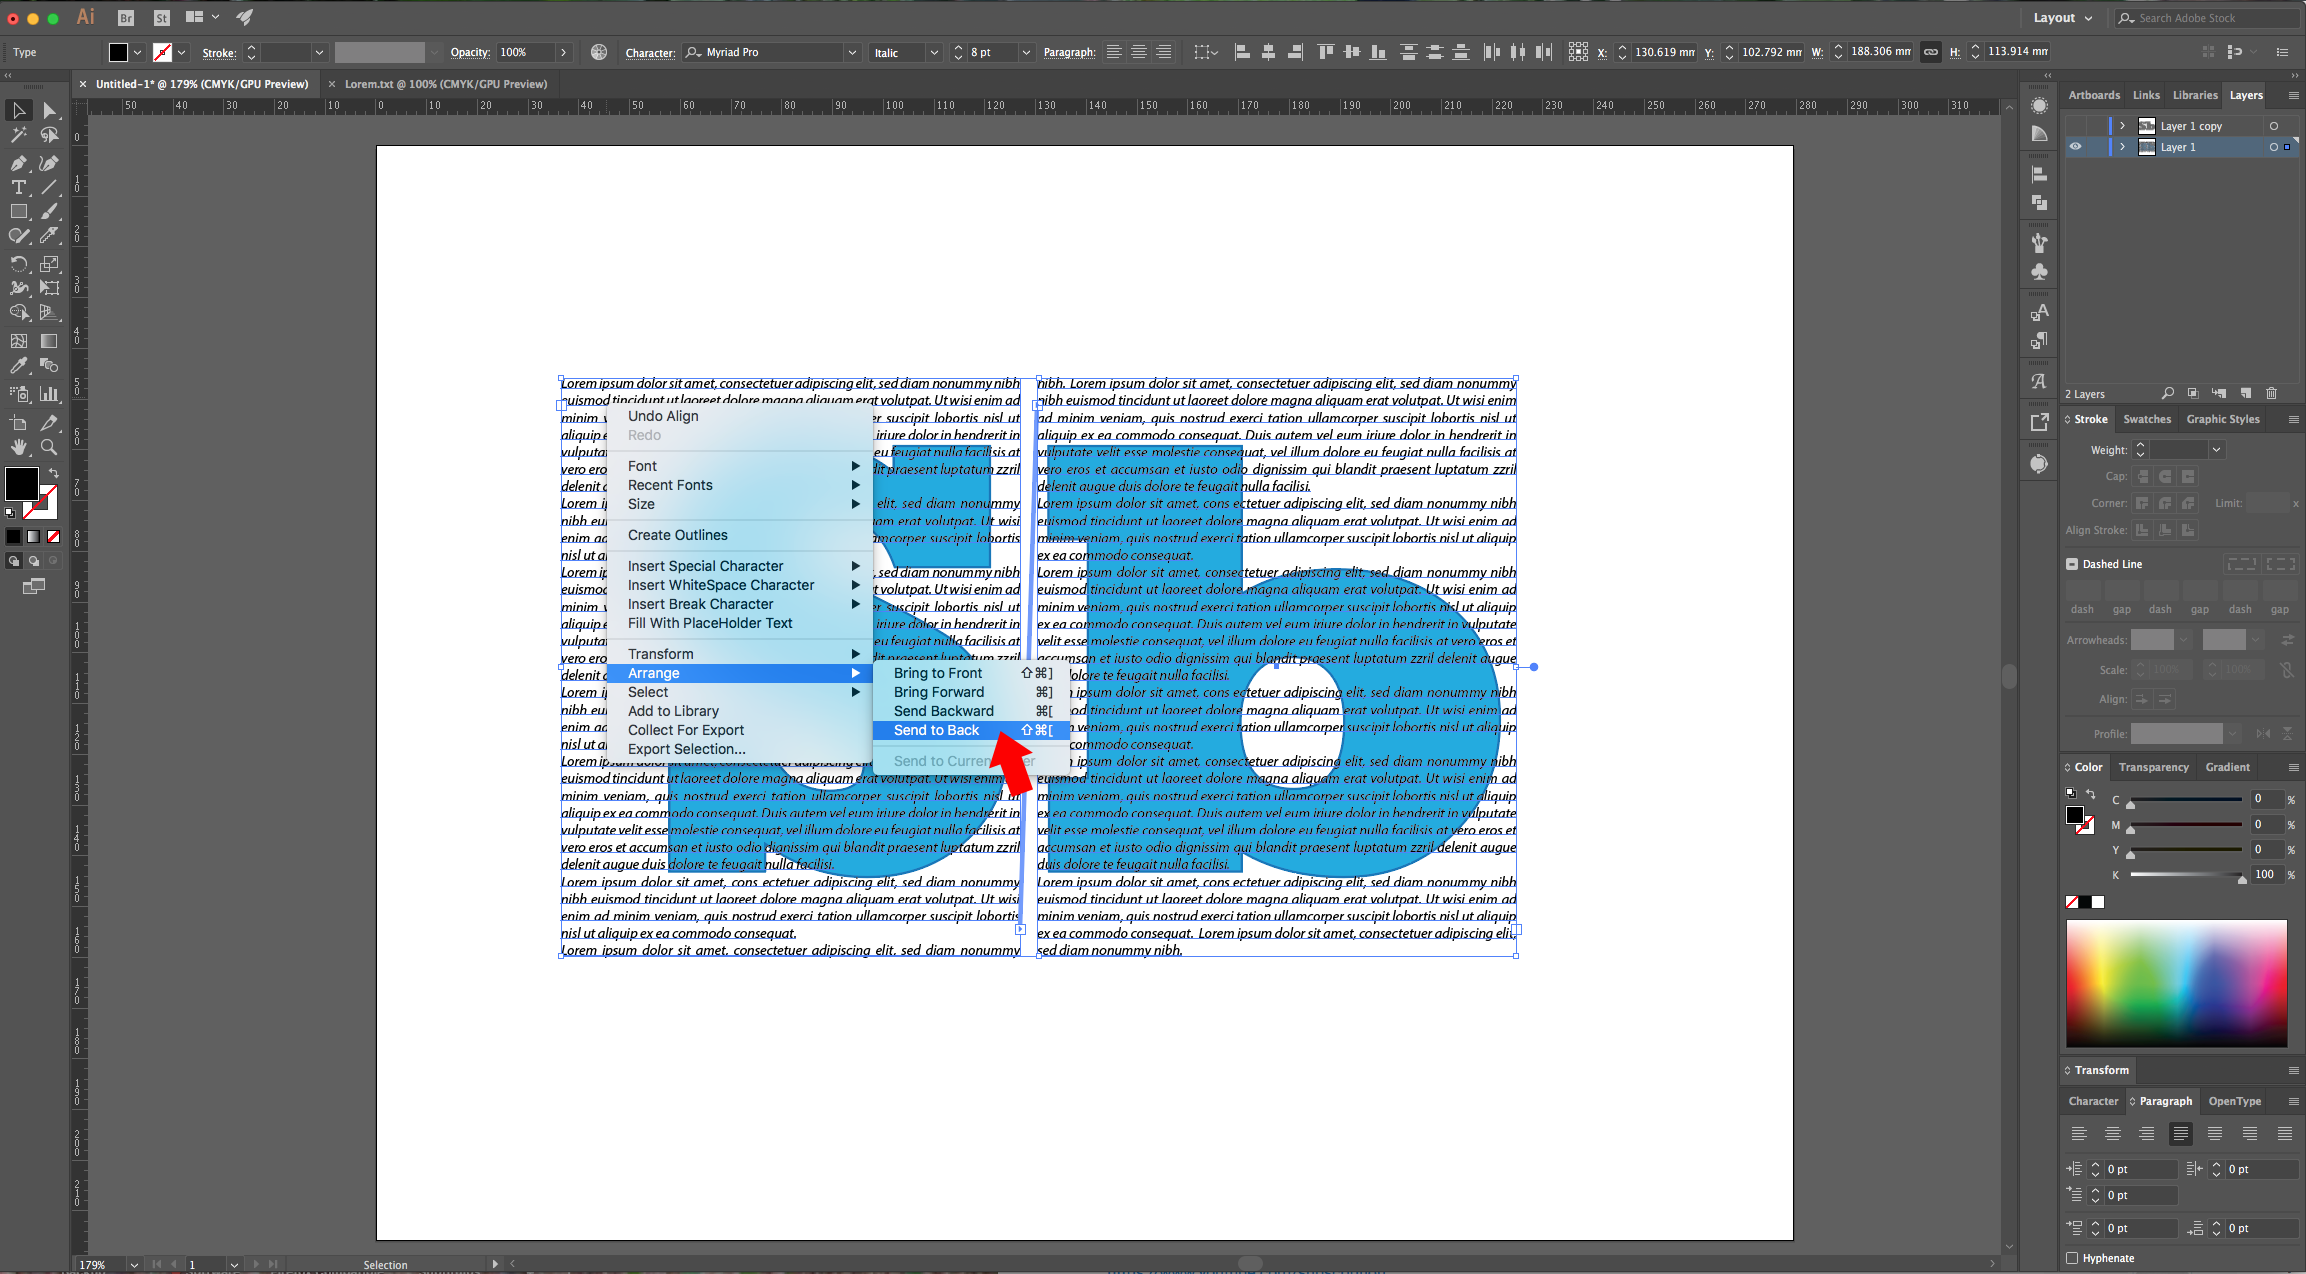
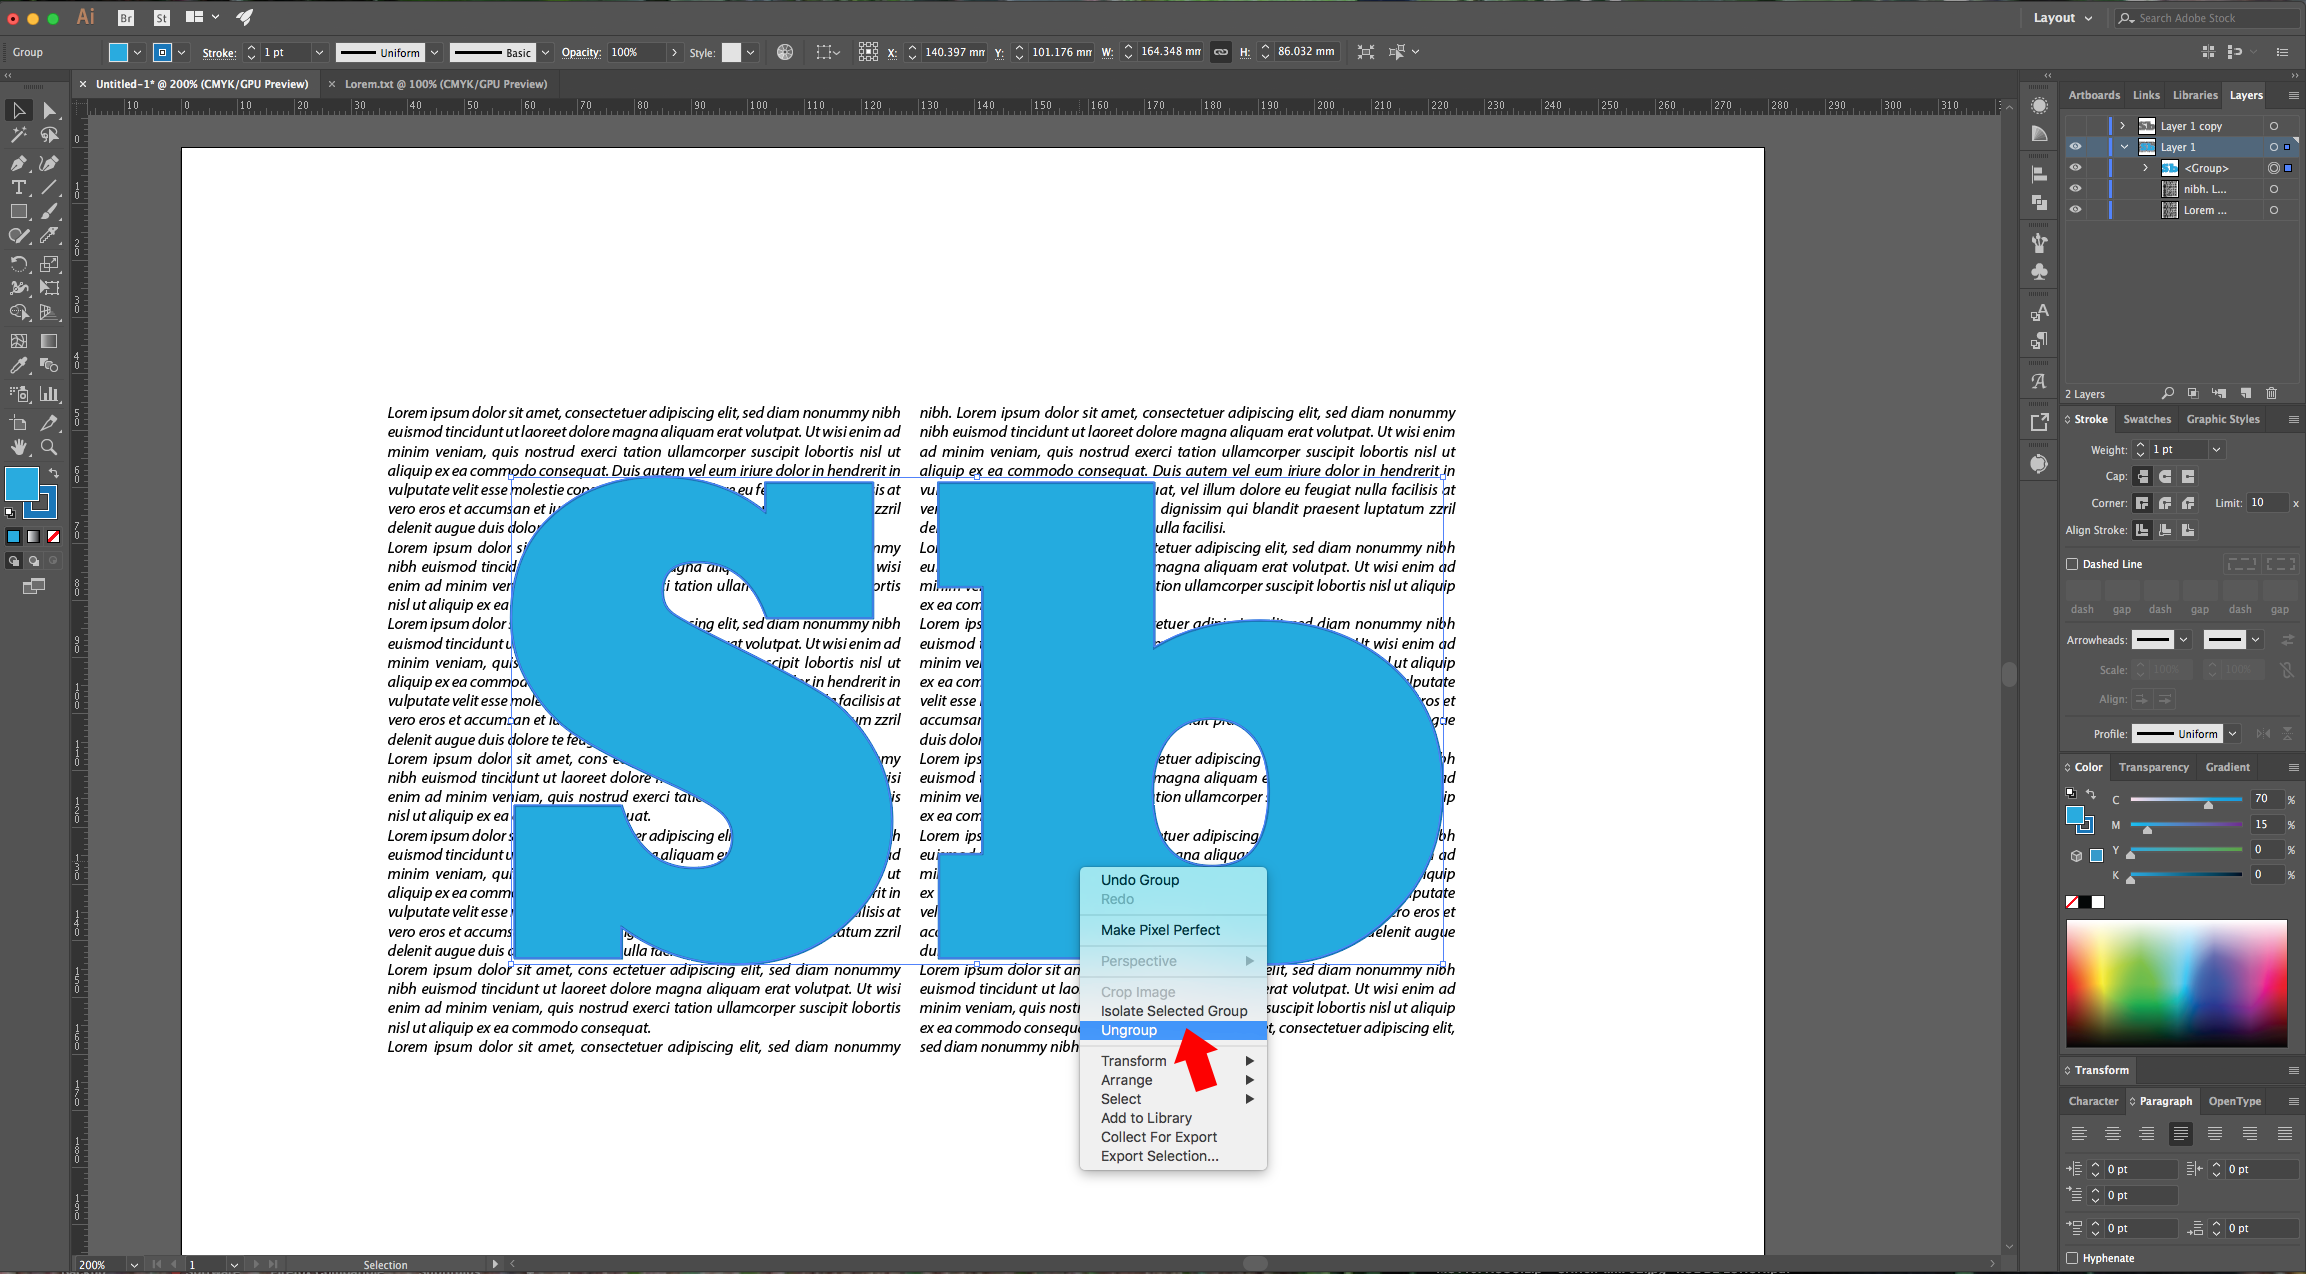
11 - Select your “Textboxes” and right-click on top of them, then choose Arrange > Send to Back. Right-click on top of your “Letters” (or Shape) and choose “Ungroup”.
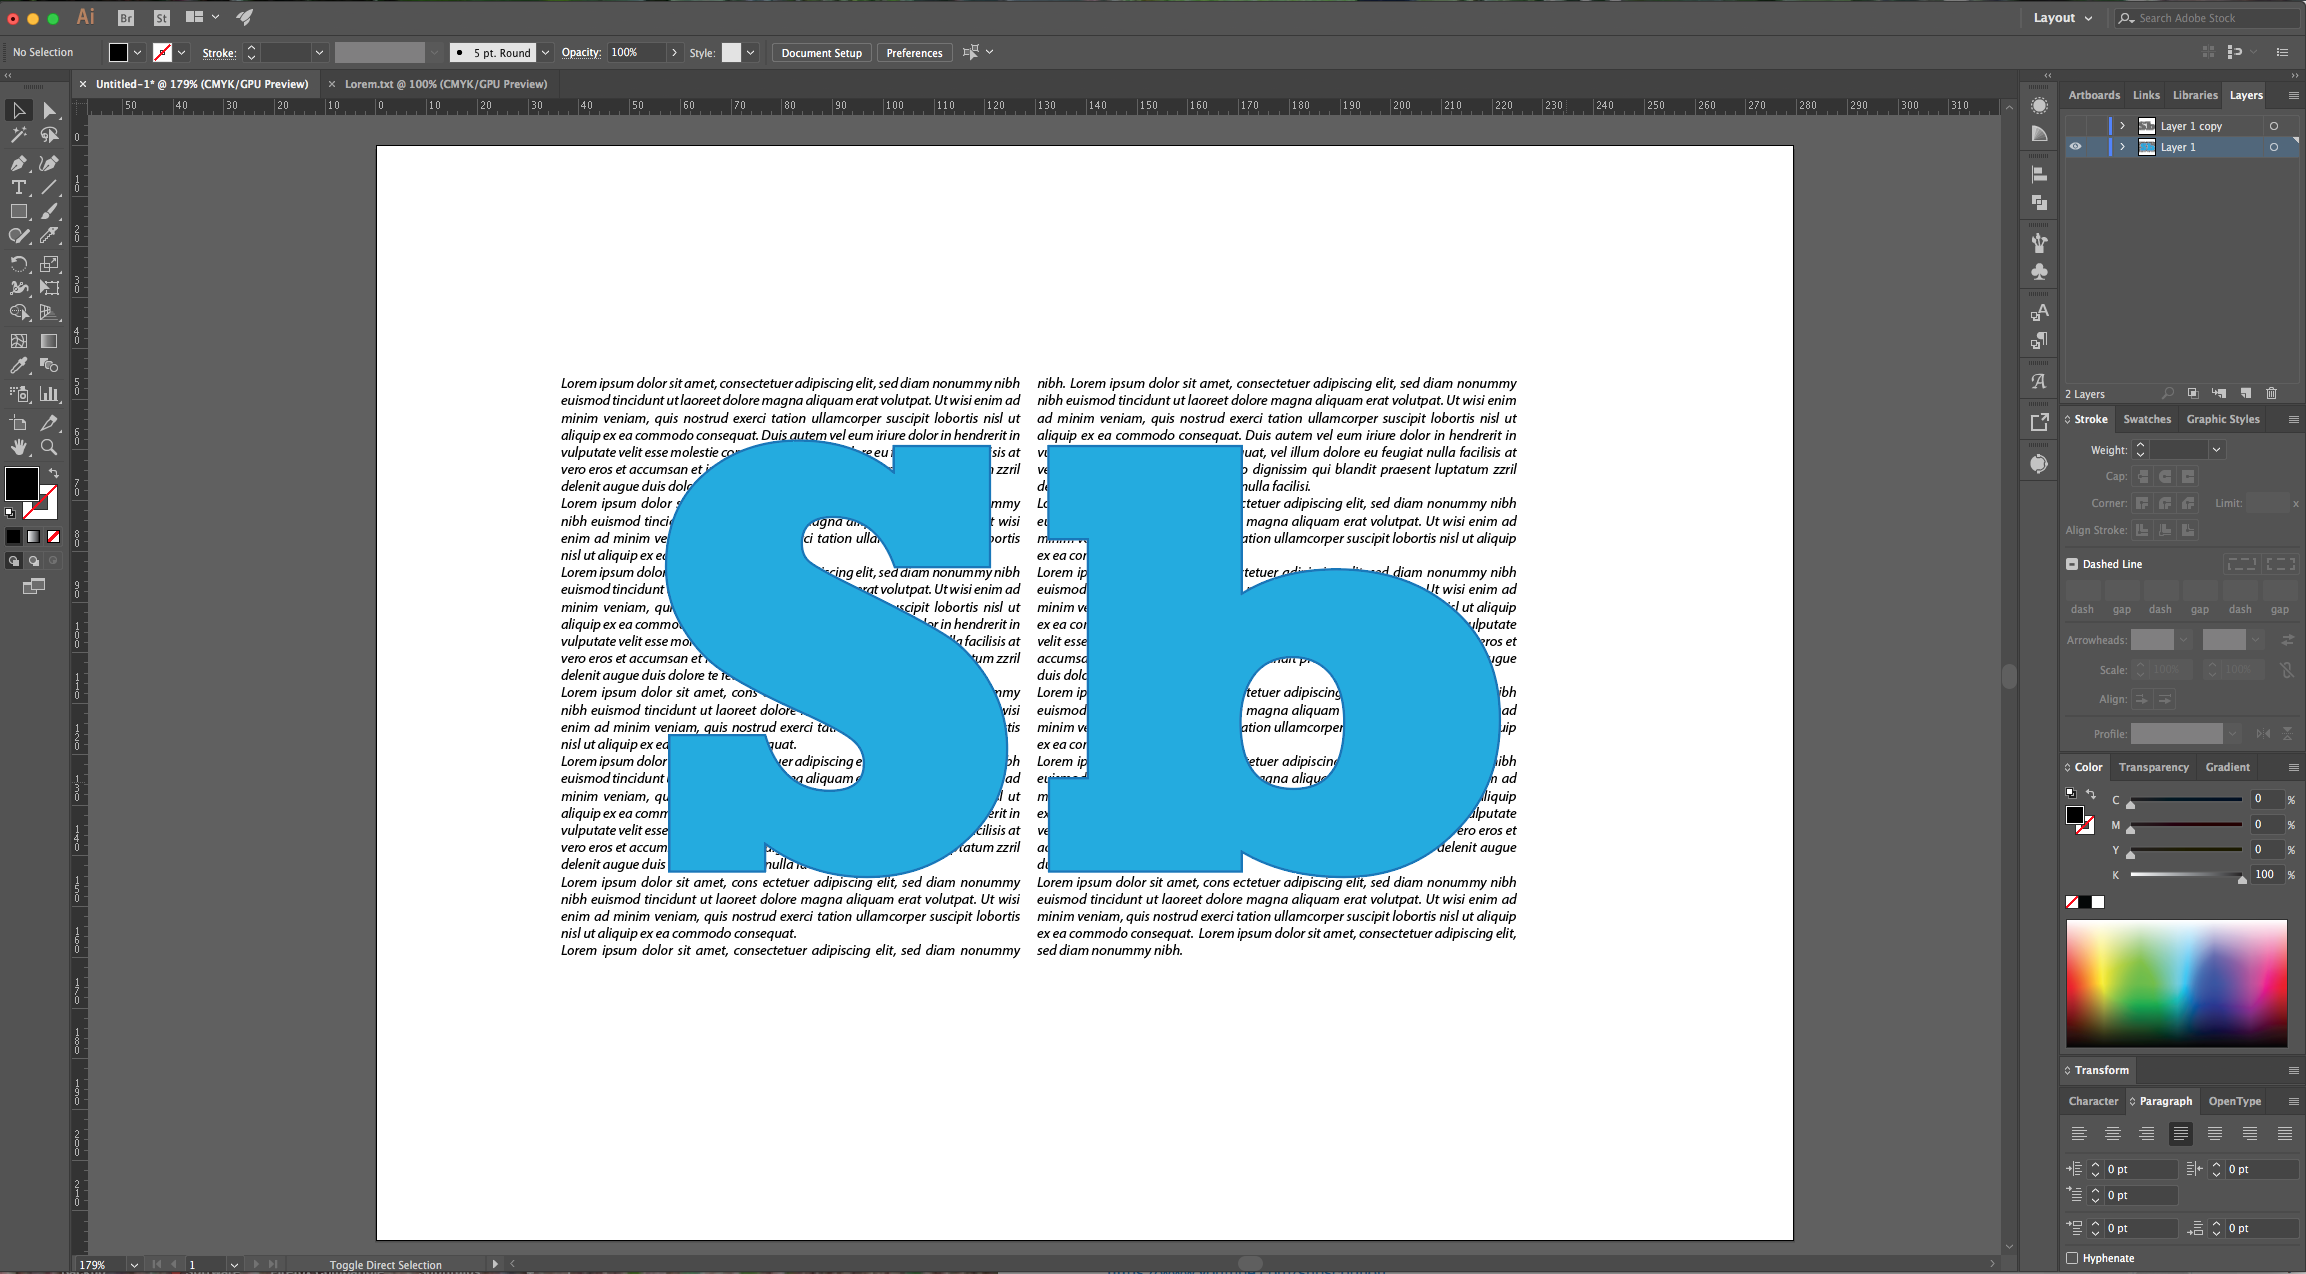
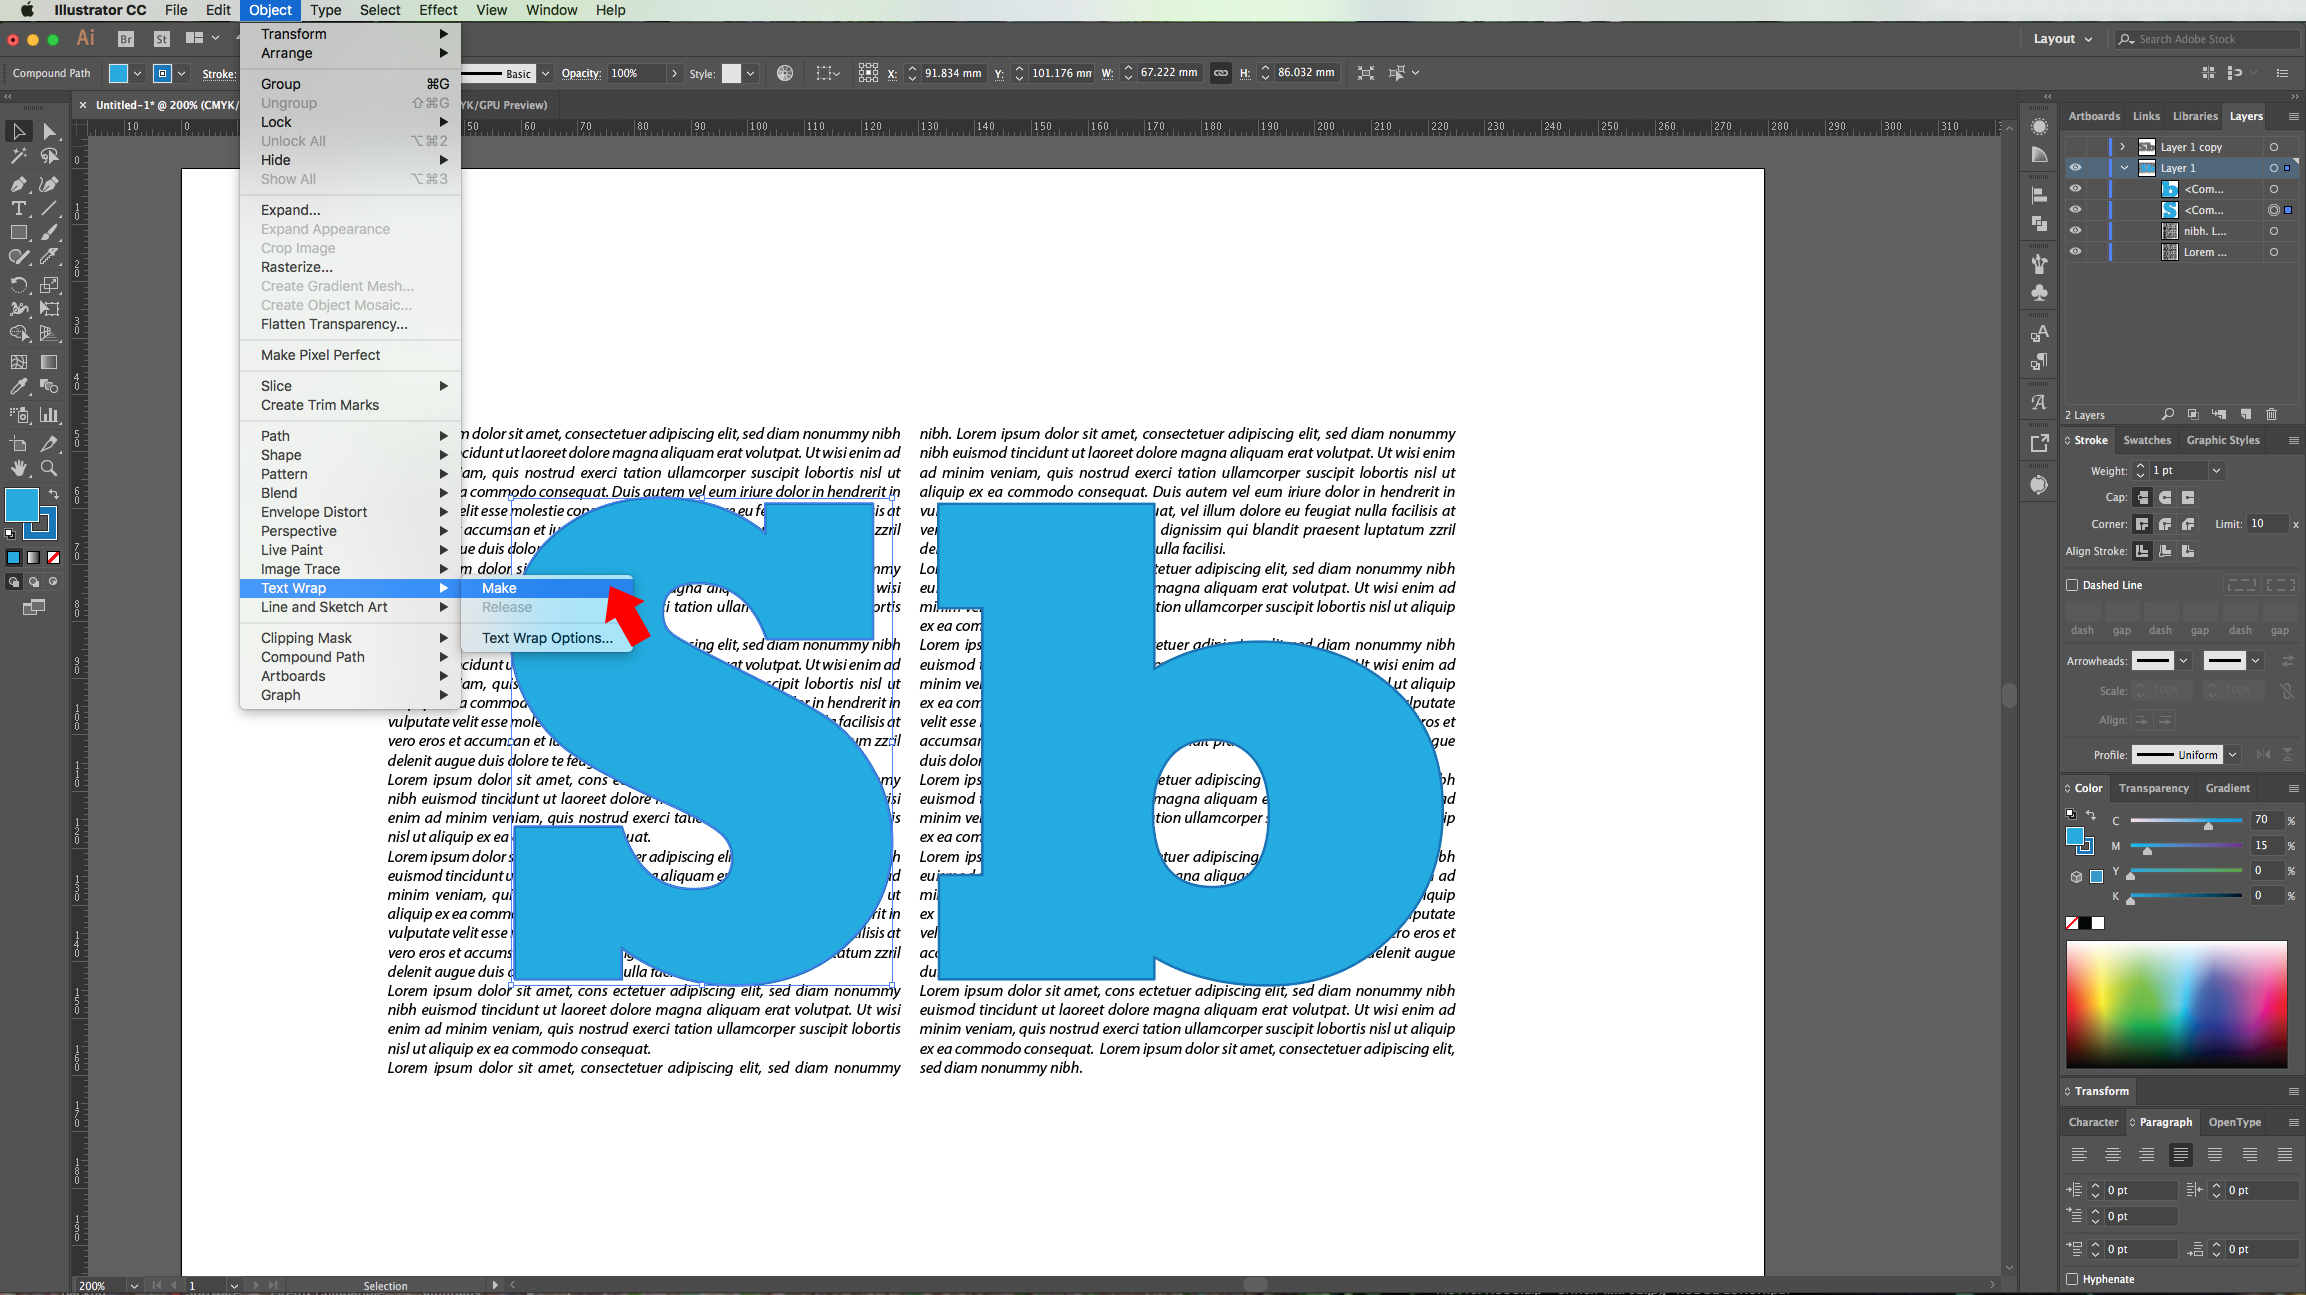
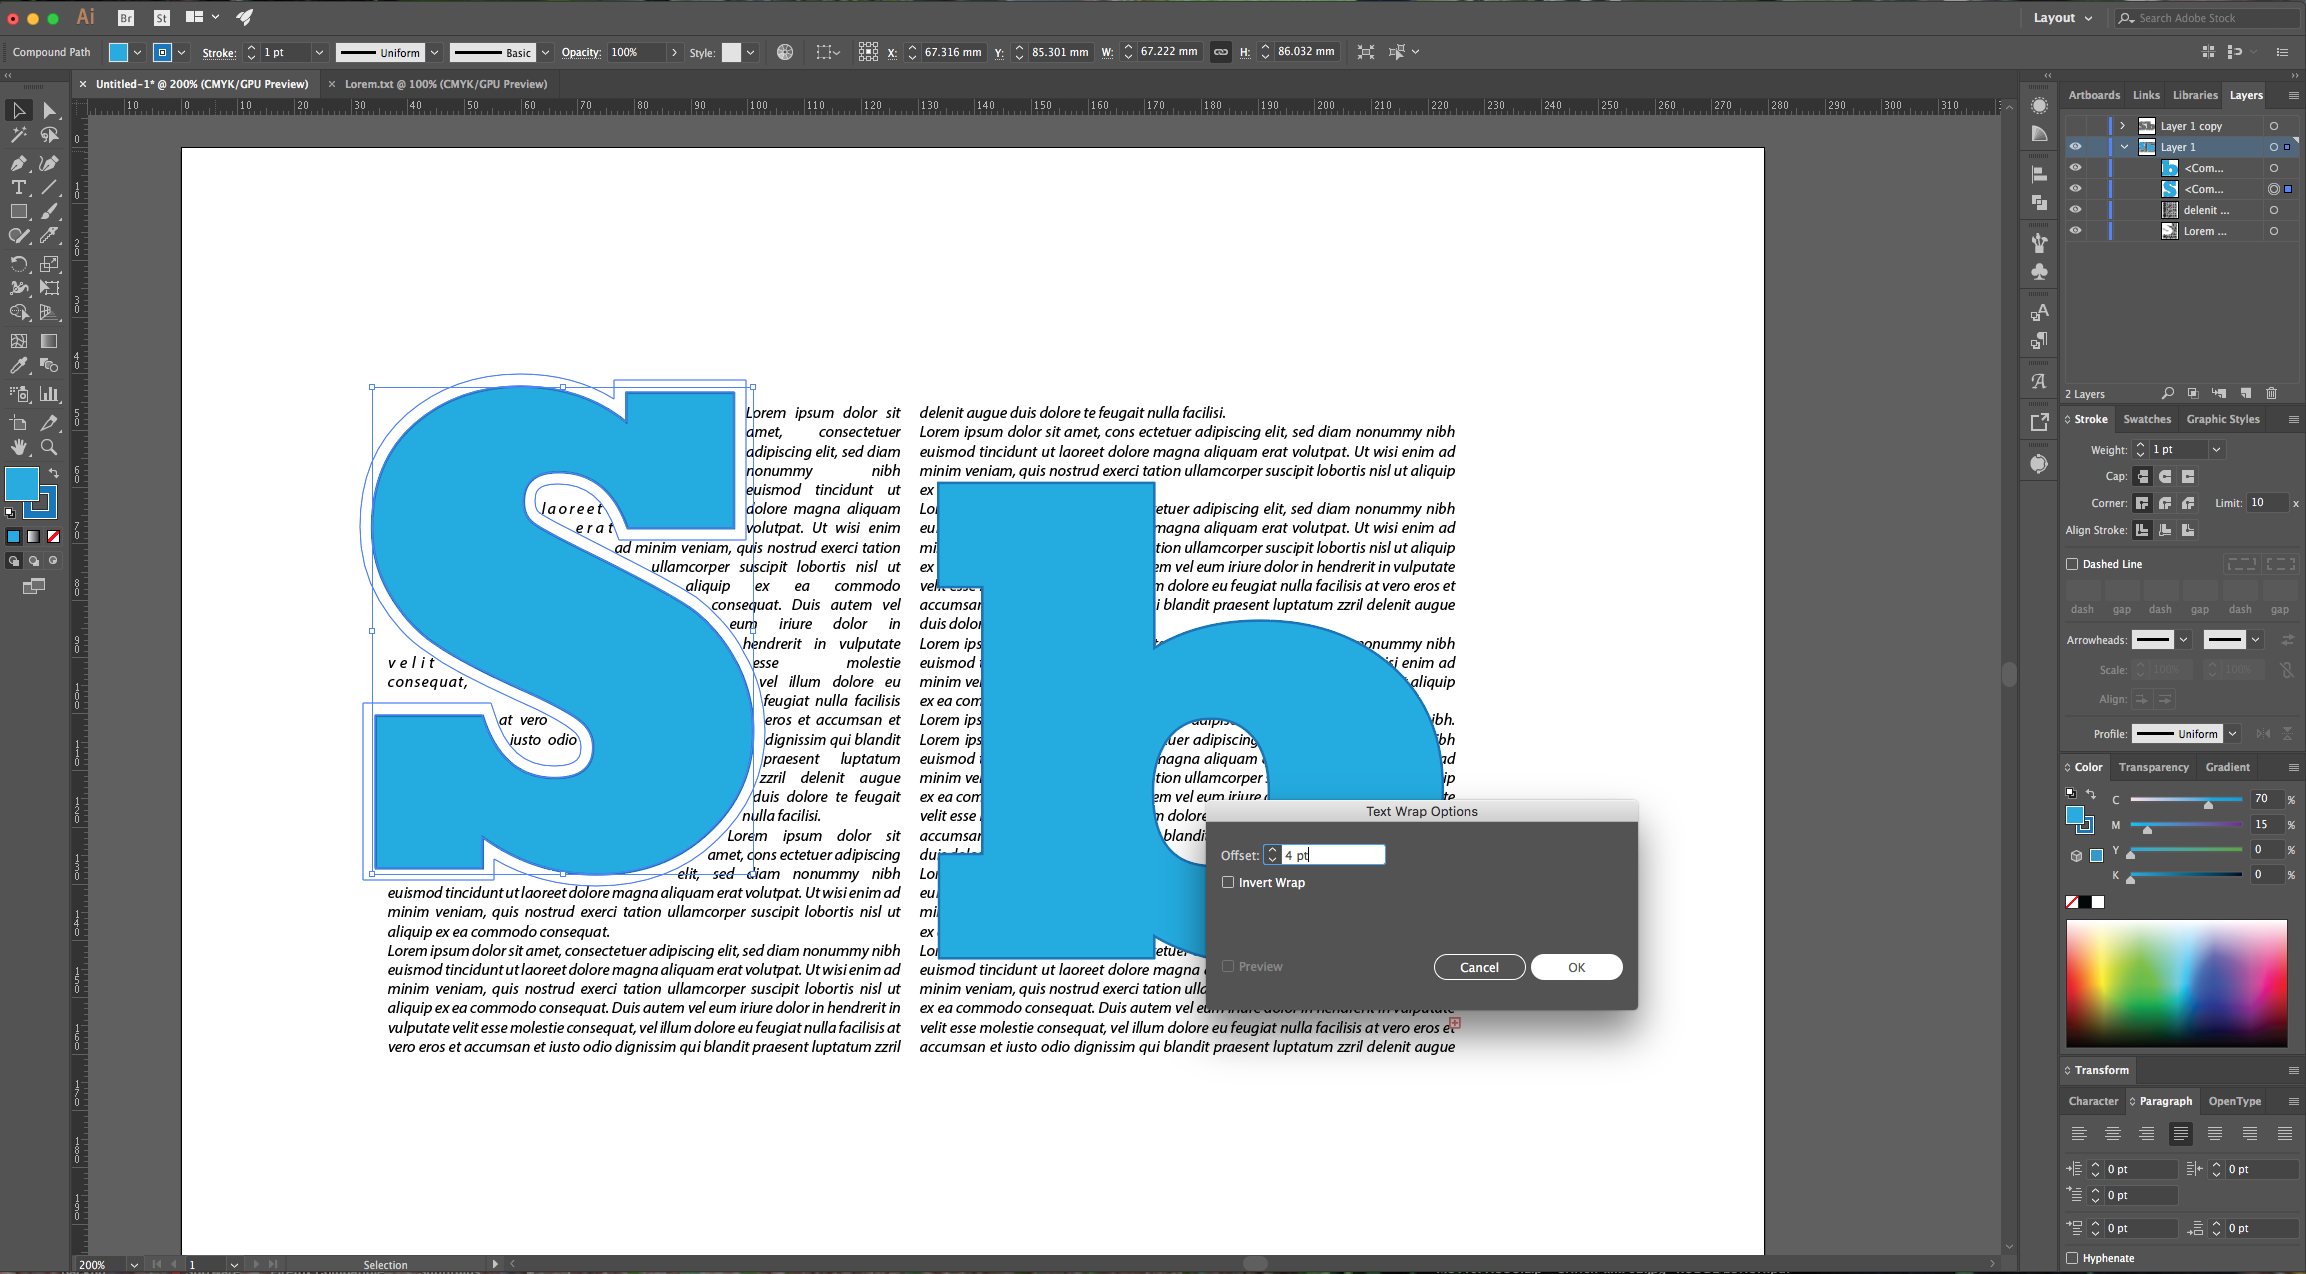
12 - Go to Object > Text Wrap > Make. You can move your Shape around and you can also change some of the wrapped text values if you want.
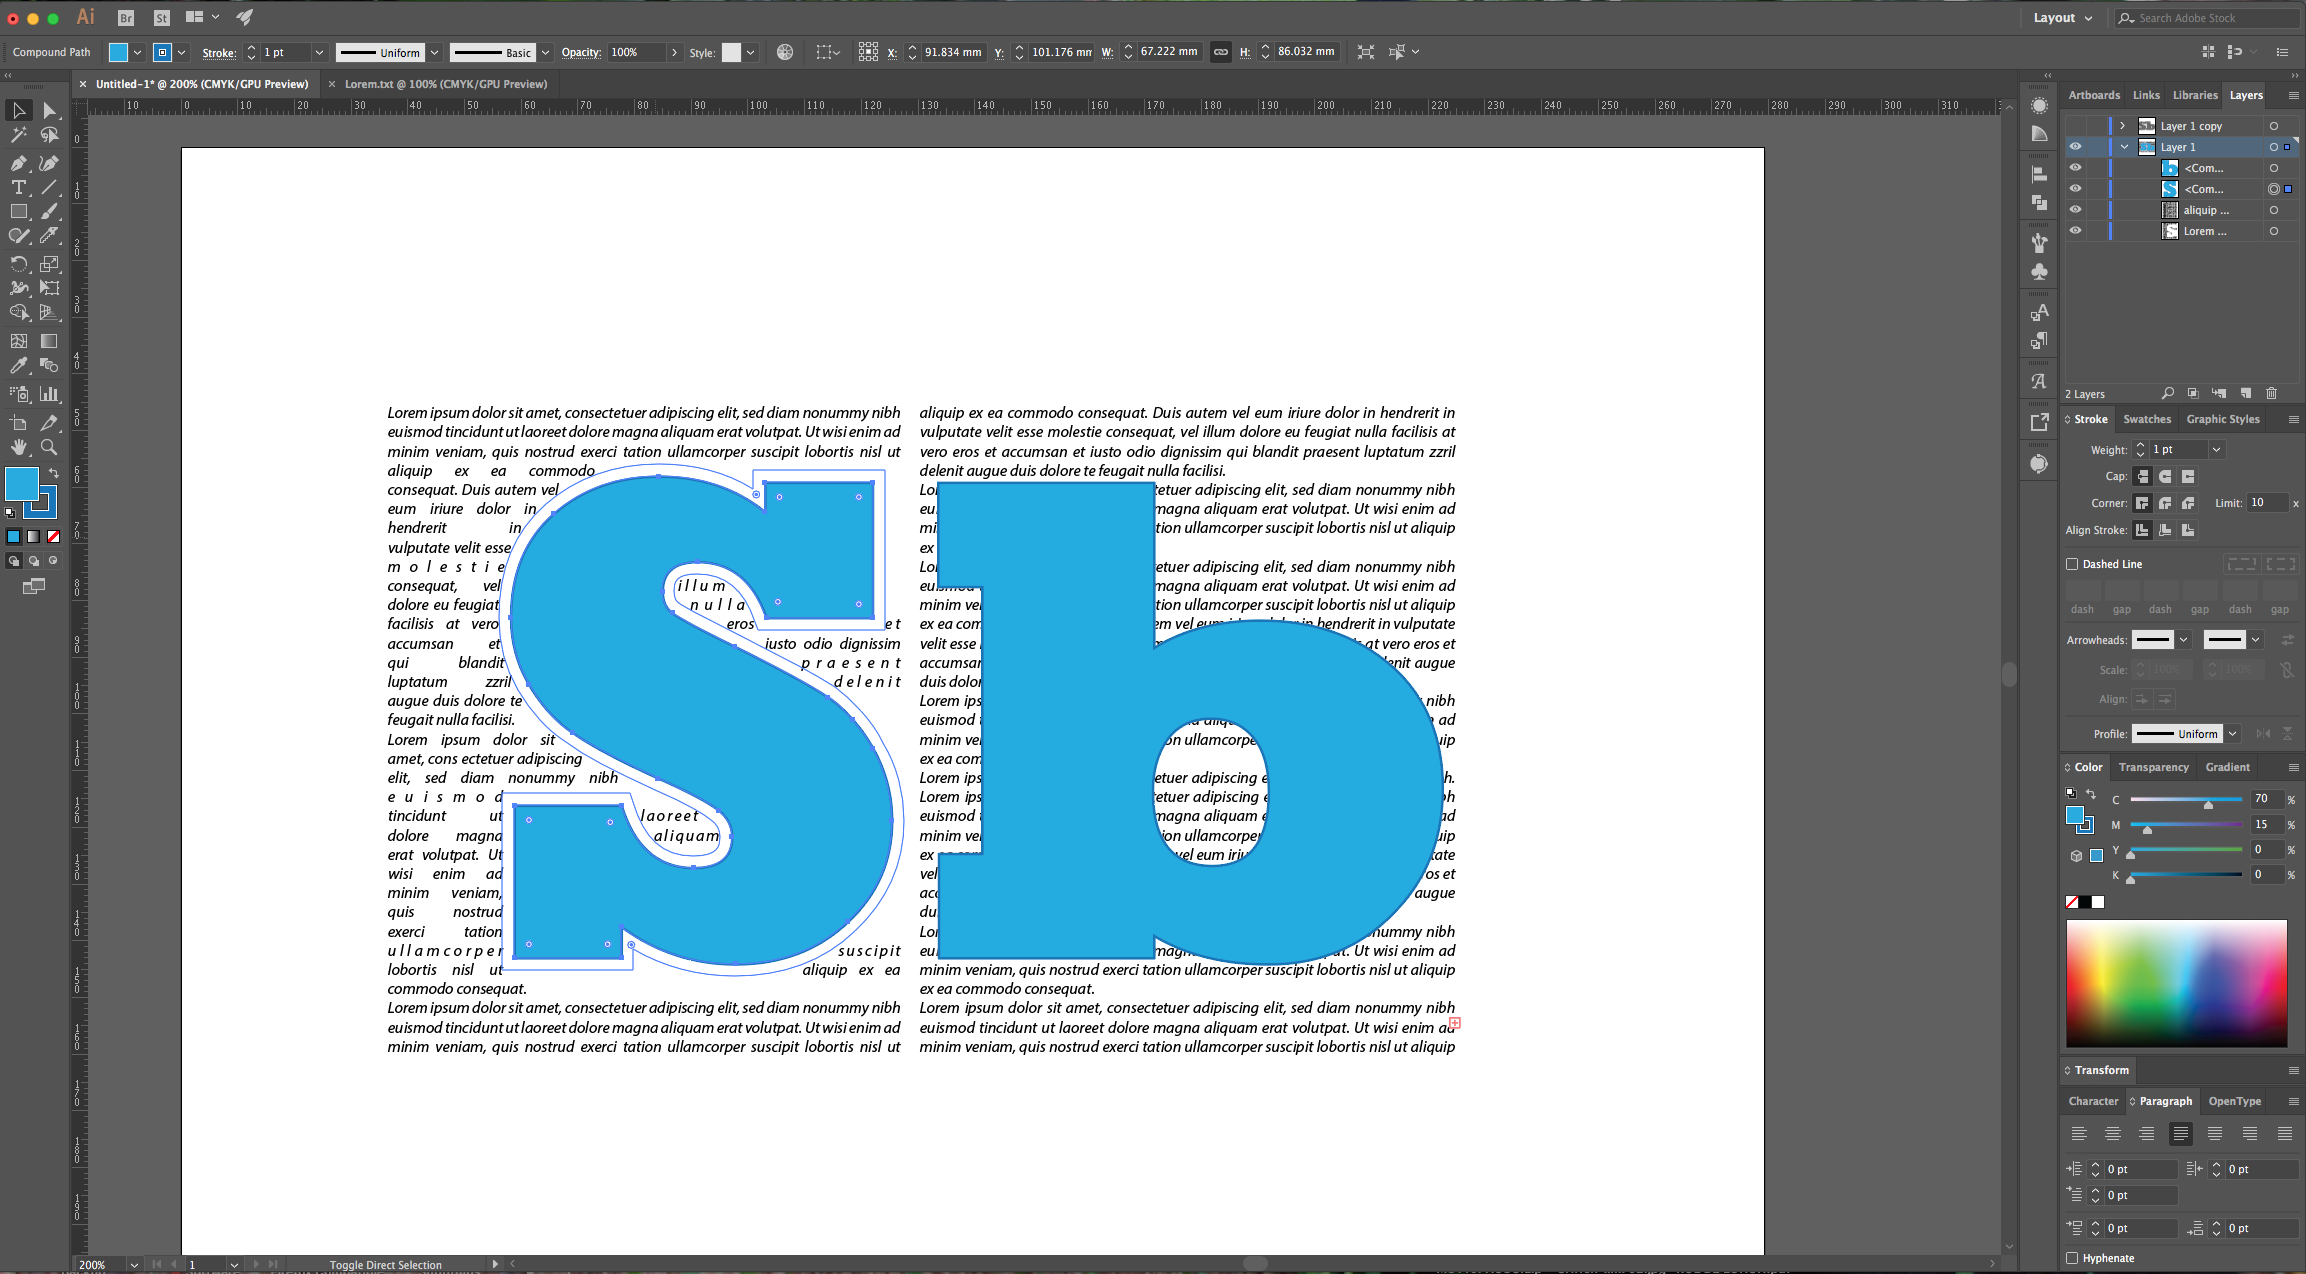
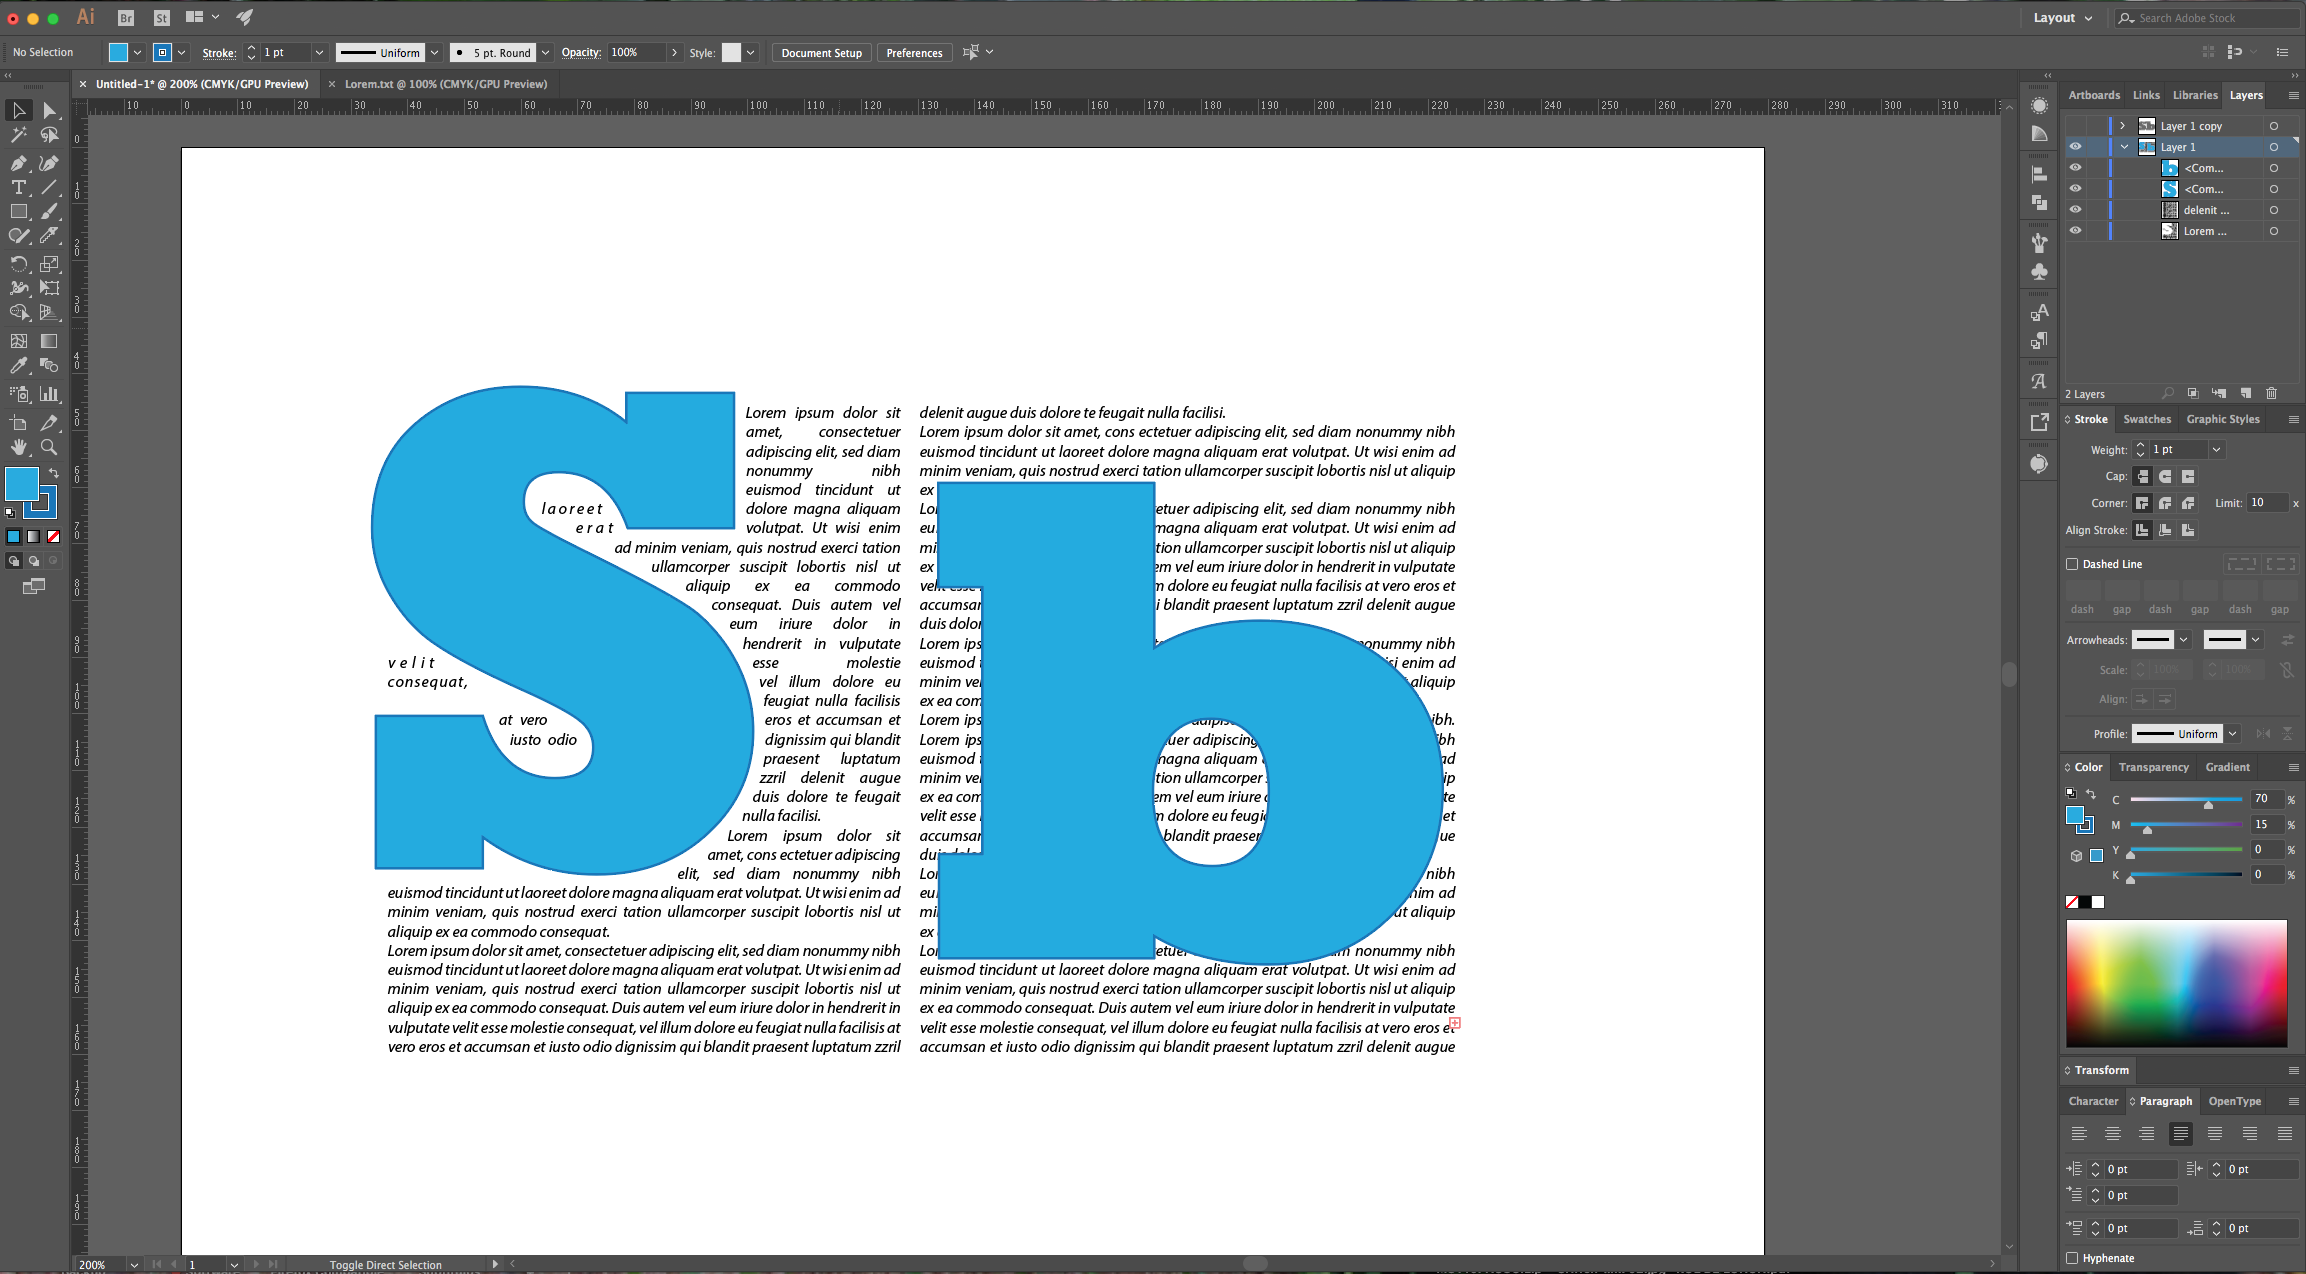
13 - If you want to change the “Offset” of the “Text Wrap”, go to Go to Object > Text Wrap > Text Wrap Options and change the value. Repeat with the other “Shapes” and “Textboxes”.
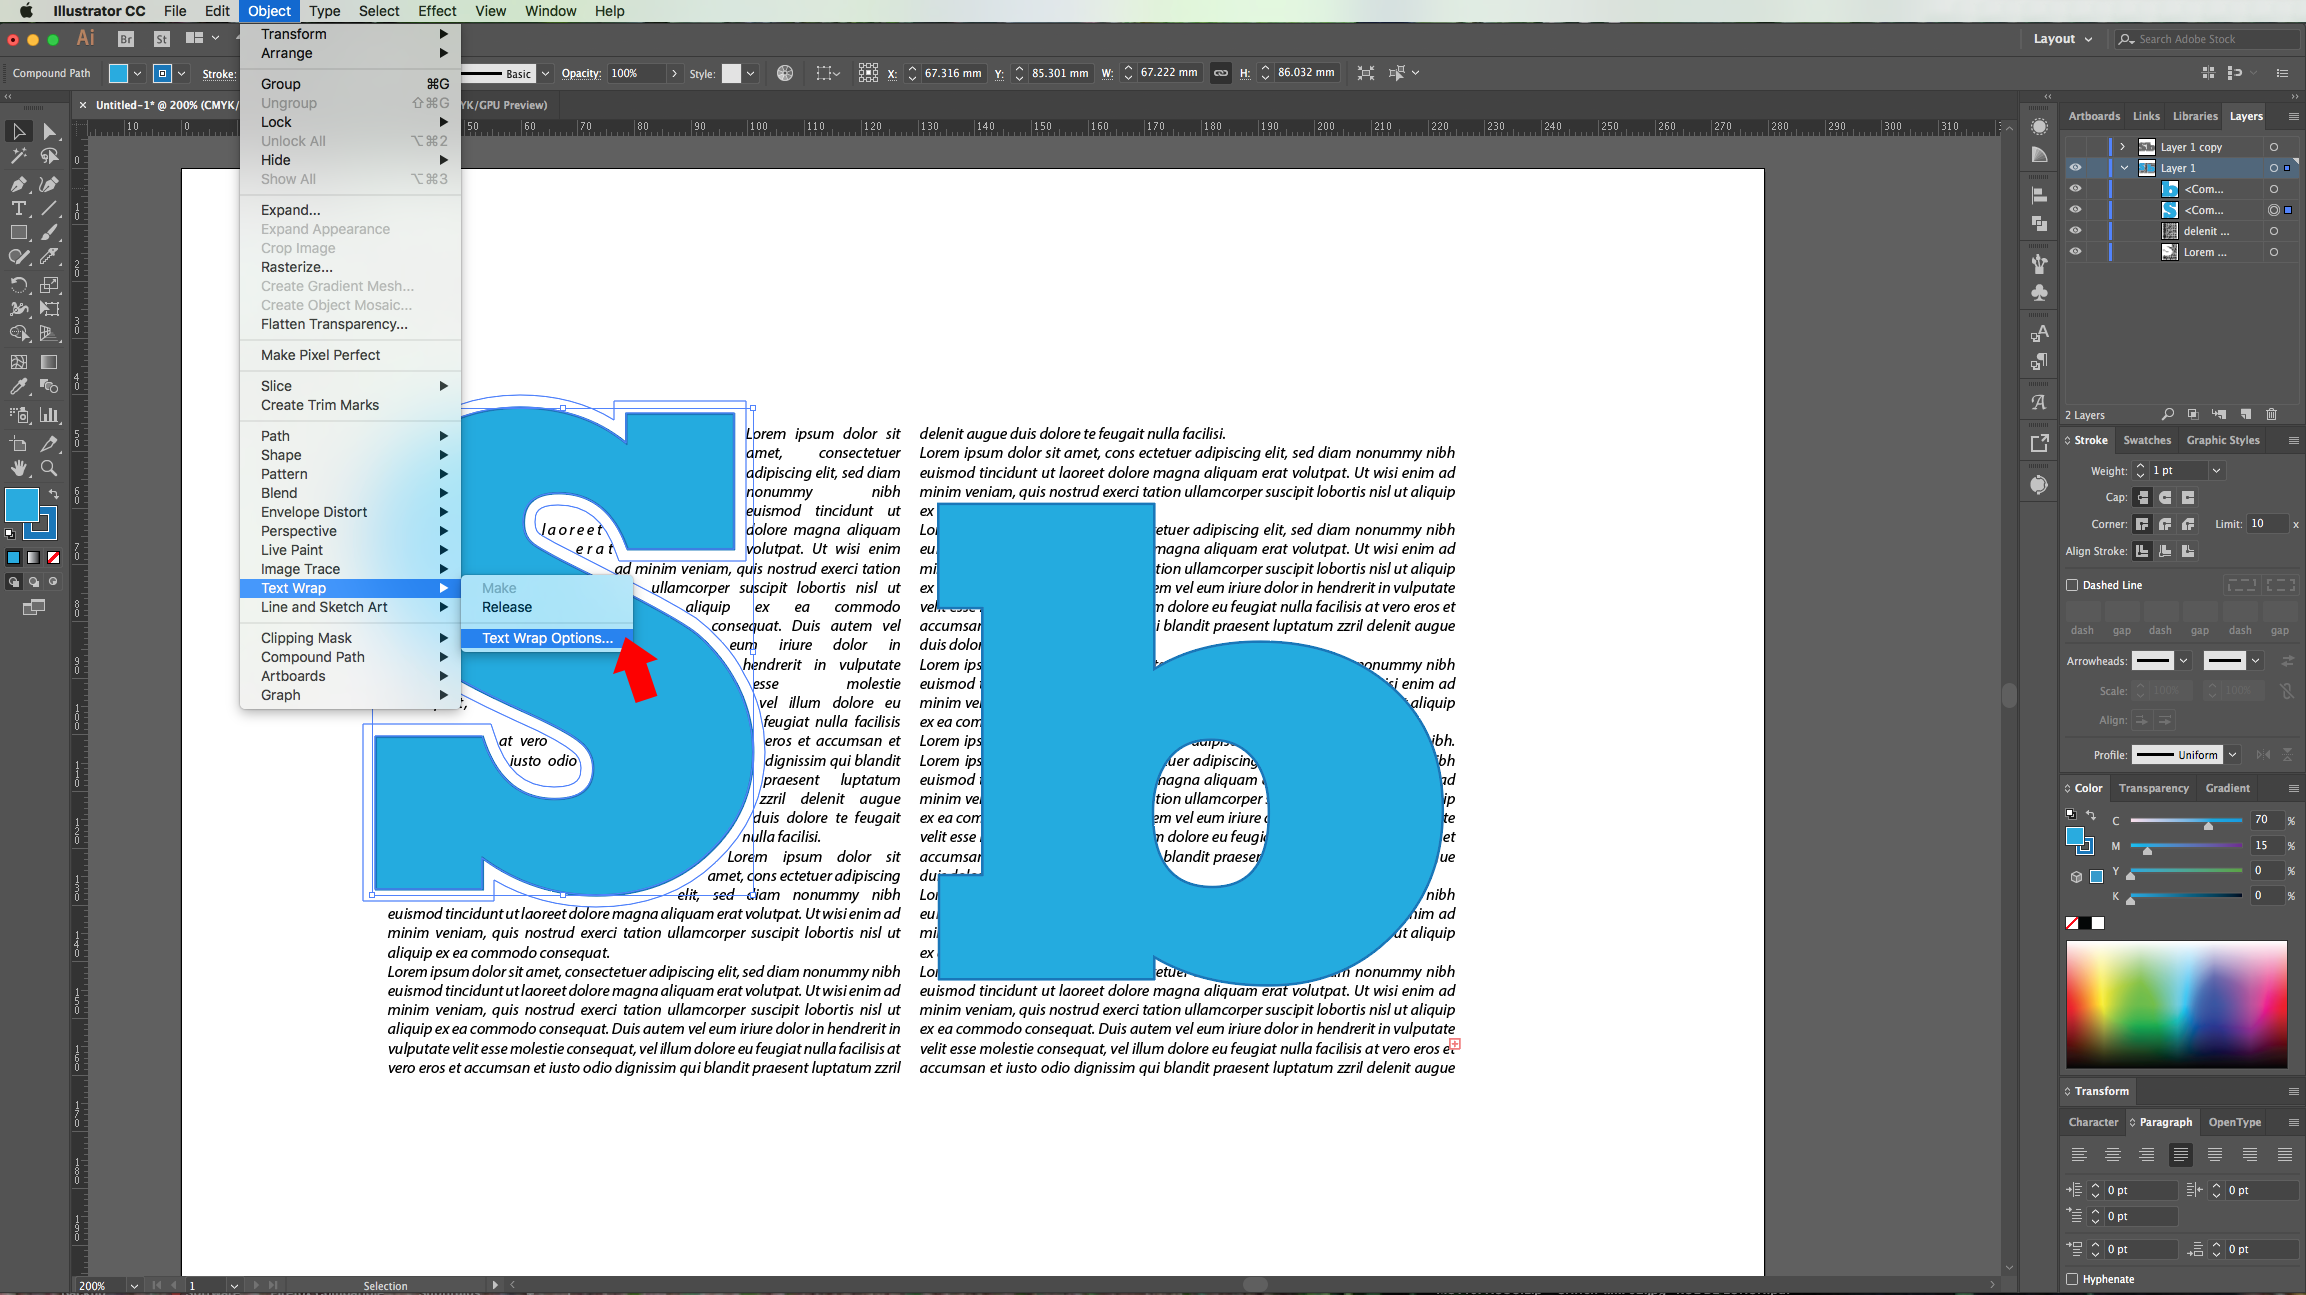
14 - Check it out.
1 - In Illustrator, create a “New Document”.
2 - Select the “Type Tool” (T), choose a heavy Font (we used Rockwell Extra Bold) and type your text. Fill it with a dark color.
3 - Select your Text and center it by clicking on the “Align Horizontal and Vertical Center” buttons on the Top Menu. Make sure that “Align to Artboard” is selected.
4 - Duplicate your Text Layer by dragging it onto the “Create New Layer” button at the bottom of the “Layers Panel”. Then, hide the “Top” Text Layer by clicking on the small “Eye” icon on the left side of its Thumbnail and lock the “Bottom” Text Layer by clicking next to the small eye icon and bringing out the small Padlock icon.
5 - Select your Text and go to Object > Expand and make sure that the “Fill” and “Stroke” boxes are checked. Then, right-click on top of your text and choose “Ungroup”.
6 - Select the letters that have no Space or Hole inside and go to Object > Compound Path > Release (Alt/Option + Shift + Command/Control + 8). For the ones that do have a Space inside, select the “Knife Tool” and while holding the “Option/Alt + Shift” keys, draw a horizontal line that cuts through your letter on one side till your reach the gap.
7 - Select the “Type Area Tool” and click on top of your first letter. “Copy” (Command/Control + C) and “Paste” (Command/Control + V) the text you wish to use inside. Change the “Character” and “Size” (we used Myriad Pro Italic, size 10 pt). If you need more text, just “Paste” some more at the end. Click on the small square at the bottom-right side of your text box (it should be red and with a Plus sign inside to indicate that there is more that is not showing) and then, click on top of the next letter to make the text flow (your cursor should change into a small page with text icon).
8 - Erase all the extra text and/or change the “Size” of your text to fit it better. Change the text “Alignment” to “Justify All Lines” in the “Paragraph Panel”.
9 - Now, to add a box of text “Around” a shape. Turn off the layer you’ve been working in and turn on the other. Change the text “Fill” and “Stroke” colors if you want and right-click on top to choose “Create Outlines”.
10 - Select the “Type Tool” (T) and “draw” a square or rectangular shape around one of your letters (if you still have the one you copied in your “Clipboard”, text should fill the “Textbox”). Click on the small square at the bottom-right side of your text box and make another “Box” covering the other letter. You may need to “Paste” some extra text to make it “Flow” to the other “Textbox”. This time we chose “Justify With Last Line Aligned Left” in the “Paragraph Panel”
11 - Select your “Textboxes” and right-click on top of them, then choose Arrange > Send to Back. Right-click on top of your “Letters” (or Shape) and choose “Ungroup”.
12 - Go to Object > Text Wrap > Make. You can move your Shape around and you can also change some of the wrapped text values if you want.
13 - If you want to change the “Offset” of the “Text Wrap”, go to Go to Object > Text Wrap > Text Wrap Options and change the value. Repeat with the other “Shapes” and “Textboxes”.
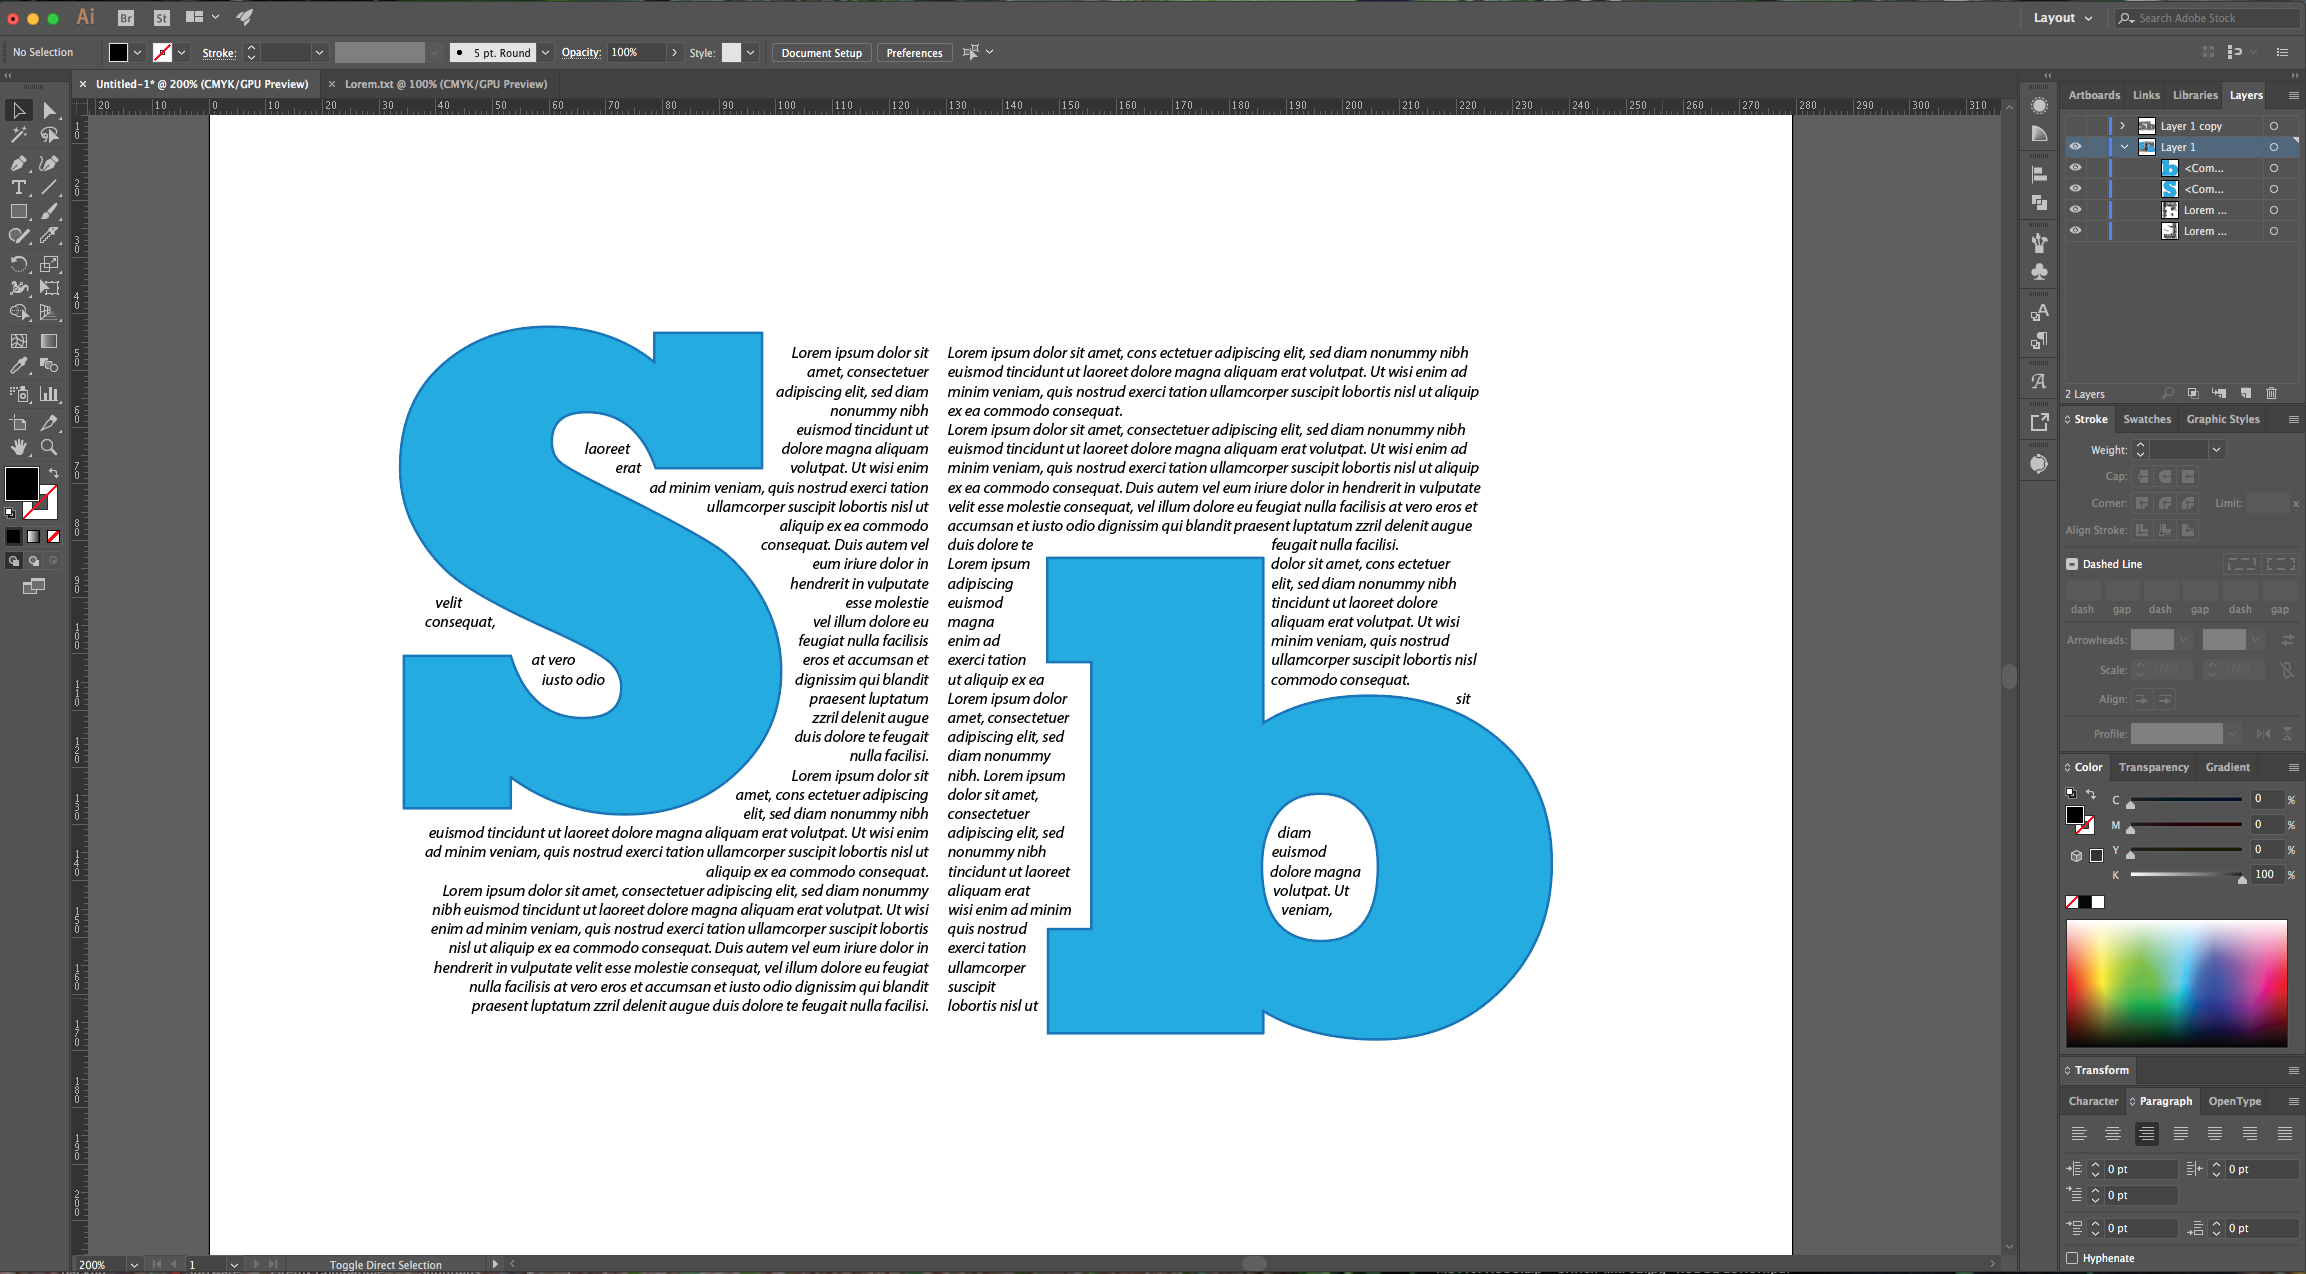
14 - Check it out.
by @lornacane
Related Tutorials
Illustrator Tutorials
Wavy Text in Illustrator
Learn how to create Wavy Text in Illustrator using two Methods in this tutorial.
Illustrator Tutorials
How to Duplicate Objects Around a Circle in Illustrator
Discover how to quickly duplicate objects around a circle in Adobe Illustrator.
Illustrator Tutorials
Place Images Inside Text in Adobe Illustrator
In this Adobe Illustrator tutorial, learn how to quickly place images inside text.
Silhouette Tutorials
How to Add an Outline Around Any Text in Silhouette Studio
Discover how to add an outline to any text in this Silhouette Studio tutorial. Quick read!
Illustrator Tutorials
How to Use Text Effects in Illustrator
Learn how to use Illustrator Text Effects in 1 click!
Illustrator Tutorials
Editing Text in Adobe Illustrator
With this step by step tutorial we'll show you everything you need to know about editing text.