By Design Bundles
Inkscape Tutorials13 min
How to Create a Mandala Heart in Inkscape
Inkscape is a free open source vector program for creating and editing SVG files. The flexible editing and drawing tools are very useful for constraining detailed designs, such as Mandalas, to simple shapes. A PNG file can be used with the Trace Bitmap feature to create a shape for the Mandala.
In this tutorial we are using a mandala SVG bundle from Tatiana Designs.
Step 1 - Open a heart PNG image and trace
A heart PNG image was used but any shape will work. Open Inkscape, click on File, select Open and choose your PNG image. Keep the Image Import settings as is and click Ok. Once open in the workspace resize the PNG as needed. We will need to trace the shape to use it with a Mandala.
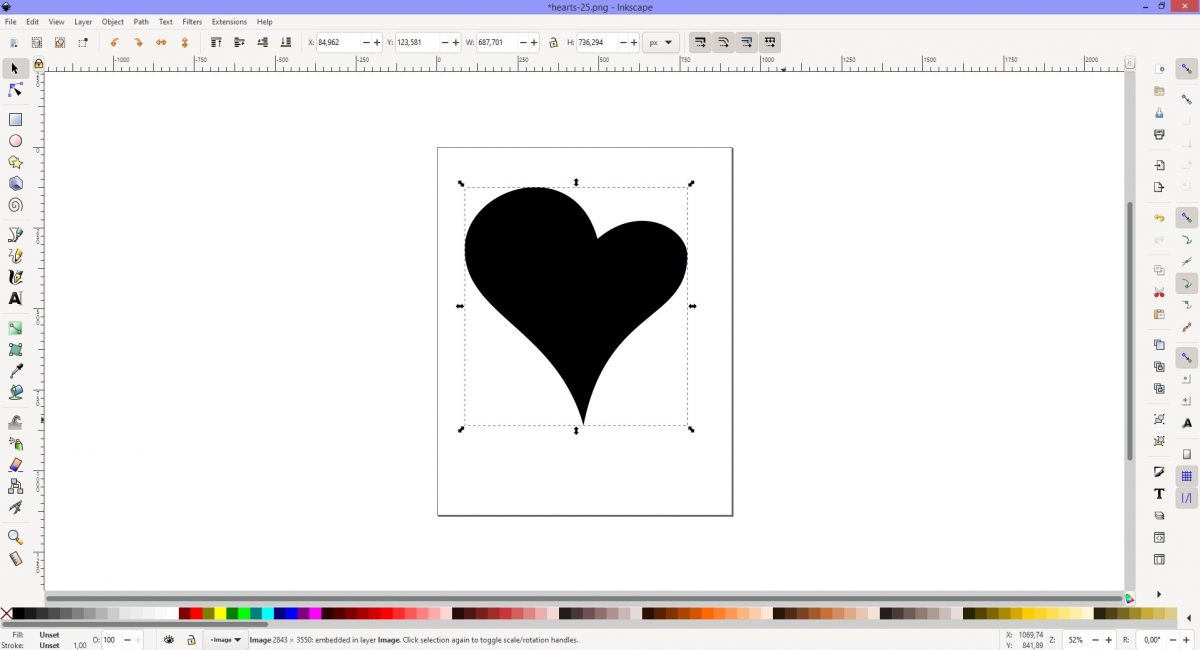
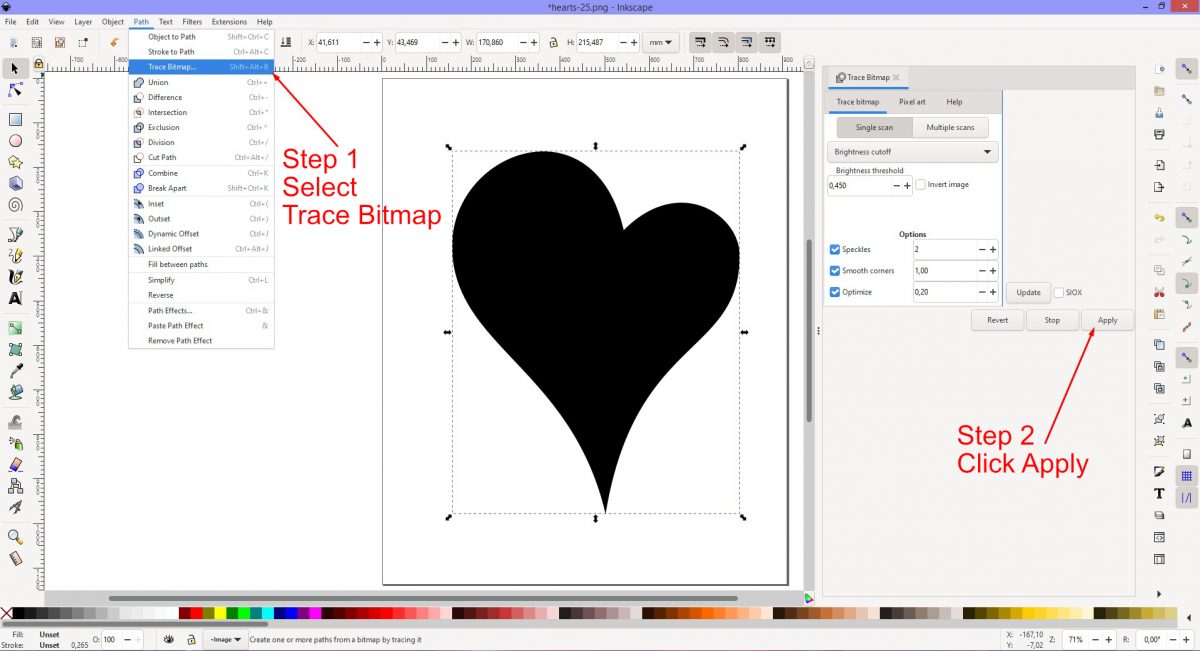
With the Heart shape selected click on Path at the top left of the screen and click on Trace Bitmap. The Trace Bitmap menu opens to the right side of the screen. Leave all settings as is and click Apply.
Step 2 - Duplicate the shape and add a stroke
After applying the Trace Bitmap function you can delete the PNG image. Select the traced heart shape, right click and choose Duplicate. Move the duplicate to the side and for reference change the color. A light pink was chosen.
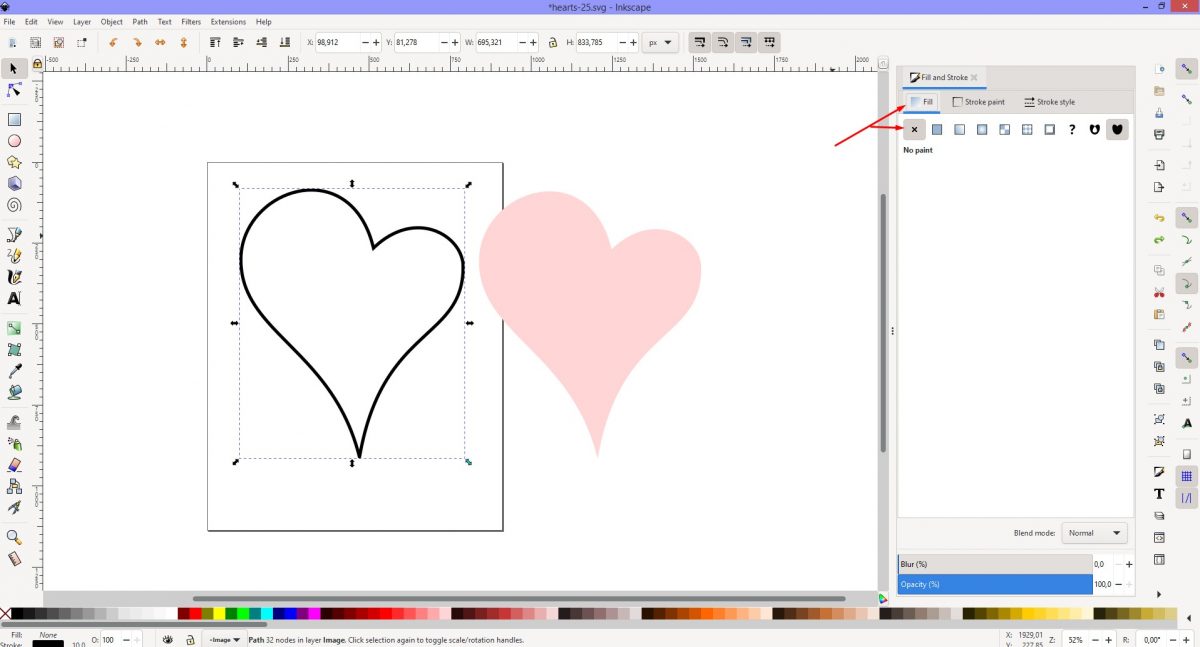
Click on the first heart (black filled design) to select it. Click on the Object menu and select Fill and Stroke to open the menu right side of the screen. Select the Fill button and click on the box with an X to remove the Fill.
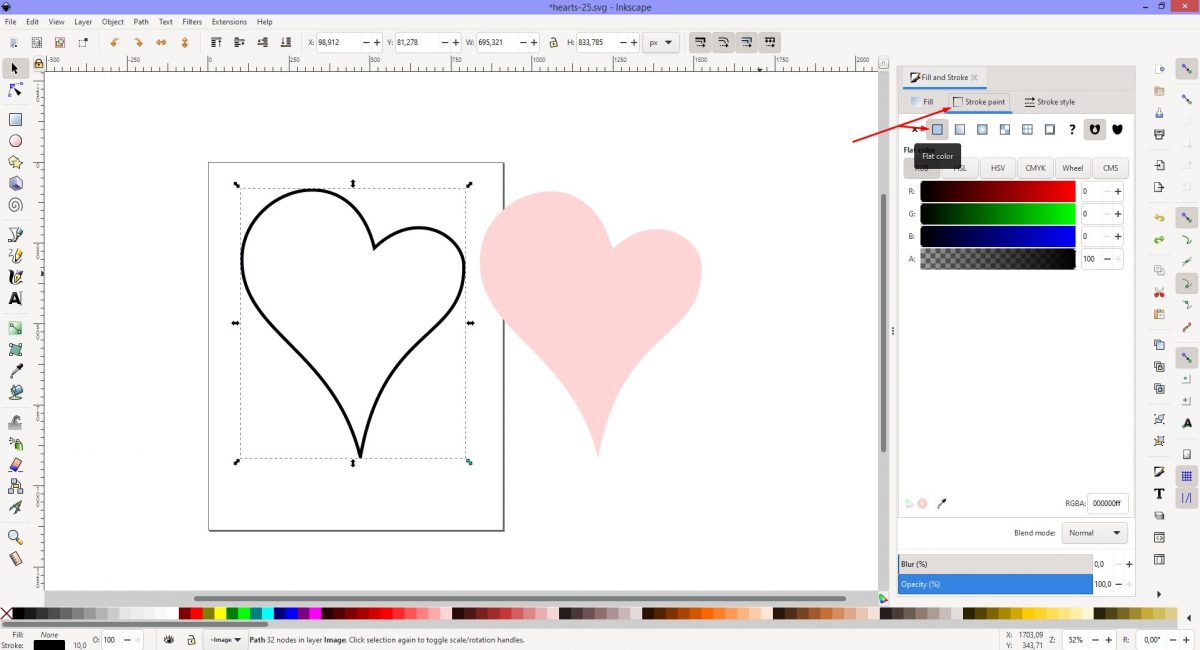
Next, click on the Stroke button next to the Fill button and click on the solid box to add a stroke.
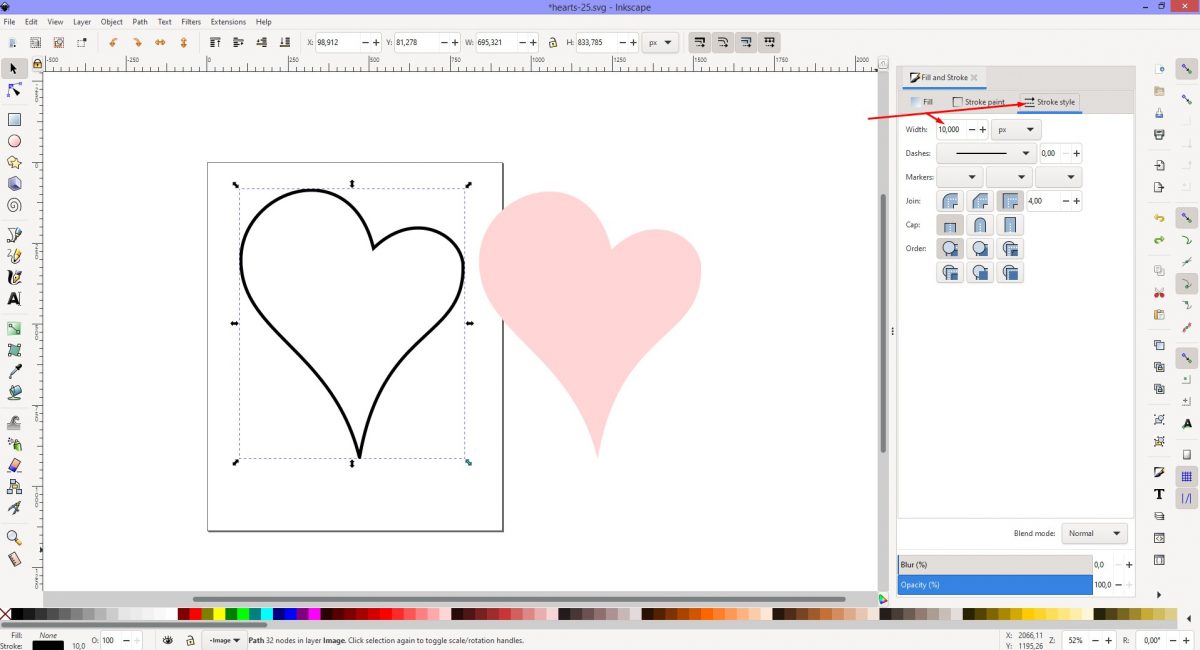
Lastly, click on the Stroke Style and change the width according to how you want. Width may depend on the size of the design.
Step 3 - Change the stroke to a path
While a stroke has been applied to the first heart, it is still a single line. It will therefore cut as a single line. Click on the View menu top left, then Display Mode and Outline. The images are displayed as they will cut.
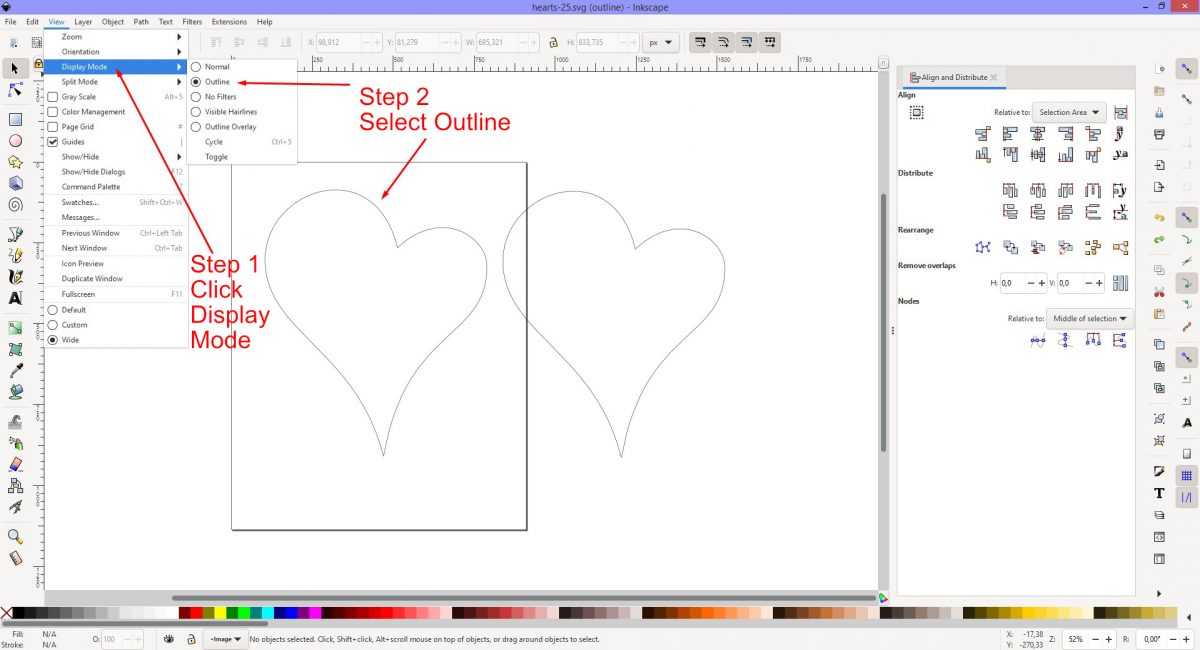
To make this heart shape a suitable cutting file, you need to change the stroke into a path. Click on the Path menu top left and choose Stroke to Path. The stroke will now be an outline.
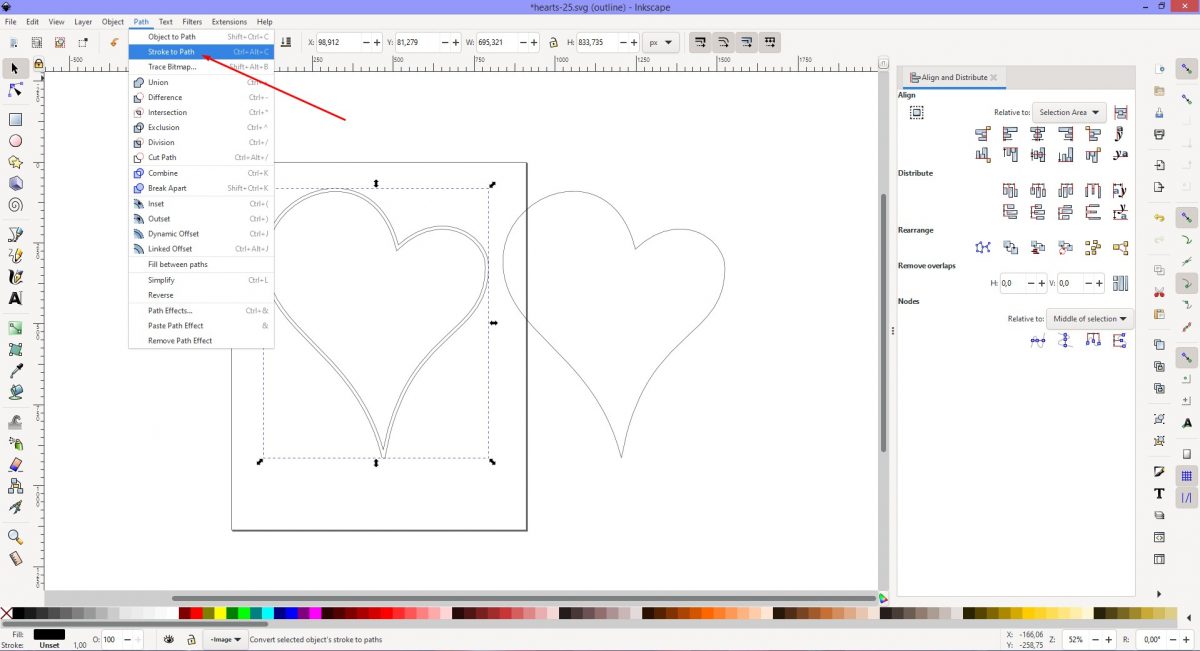
Change the Display view back to Normal by clicking the View menu, Display Mode and click Normal.
Step 4 - Align both heart images
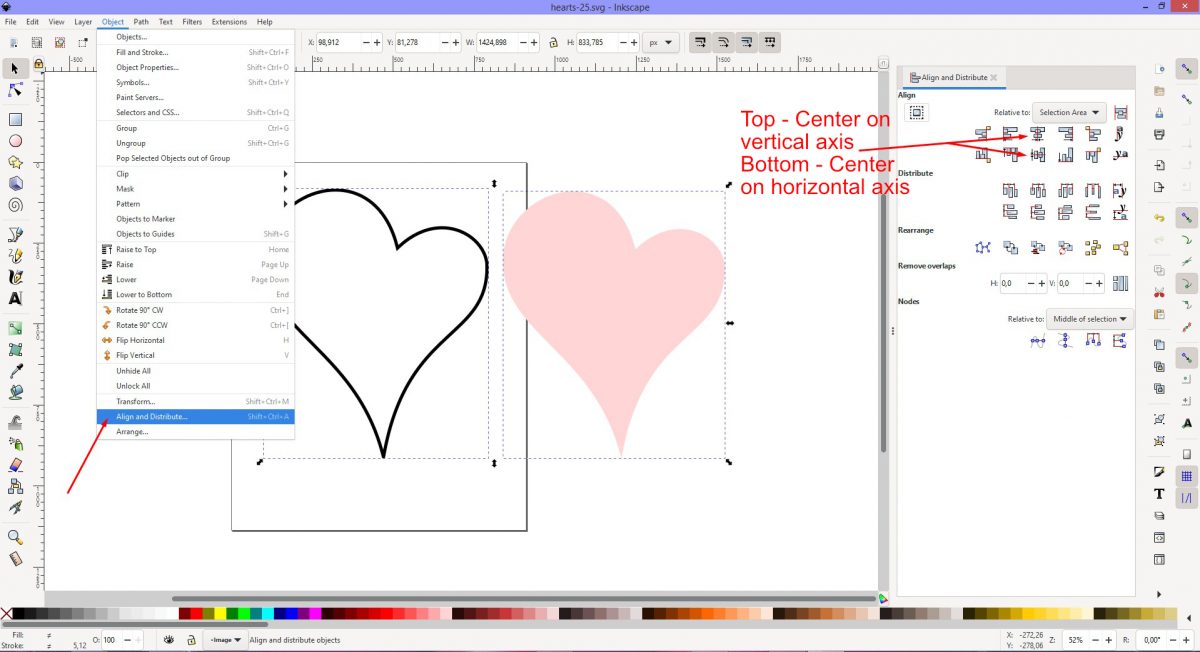
We want to align the hearts so they sit neatly together before adding the Mandala. Click and drag out a selection box over the two hearts to select them. Click the Object menu top left, select Align and Distribute right at the bottom.
In the Align and Distribute menu right side of the screen, first click Center on Vertical Axis and then click Center on Horizontal Axis.
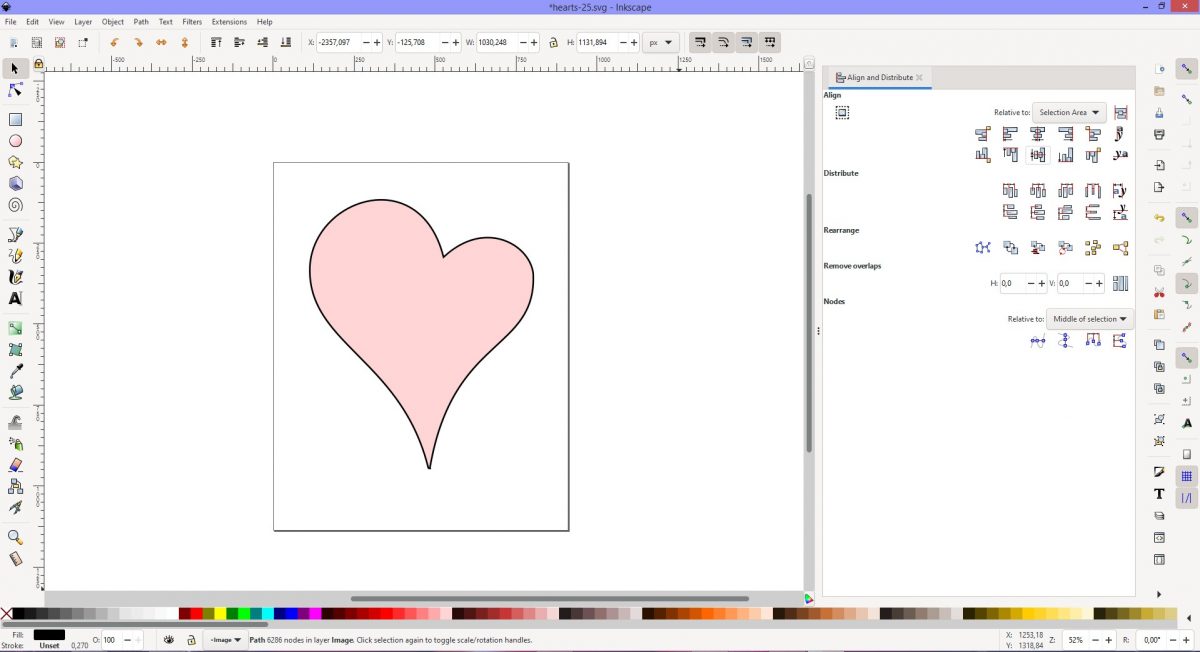
Step 5 - Open PNG Mandala and trace
Click File top left of the screen and choose Import. Locate a Mandala PNG image and click Open. Leave the Import settings as is and click Ok.
Repeat Step 1 to trace the image and delete the PNG. Reposition the traced Mandala design over the two heart shapes. Resize and reposition if needed.
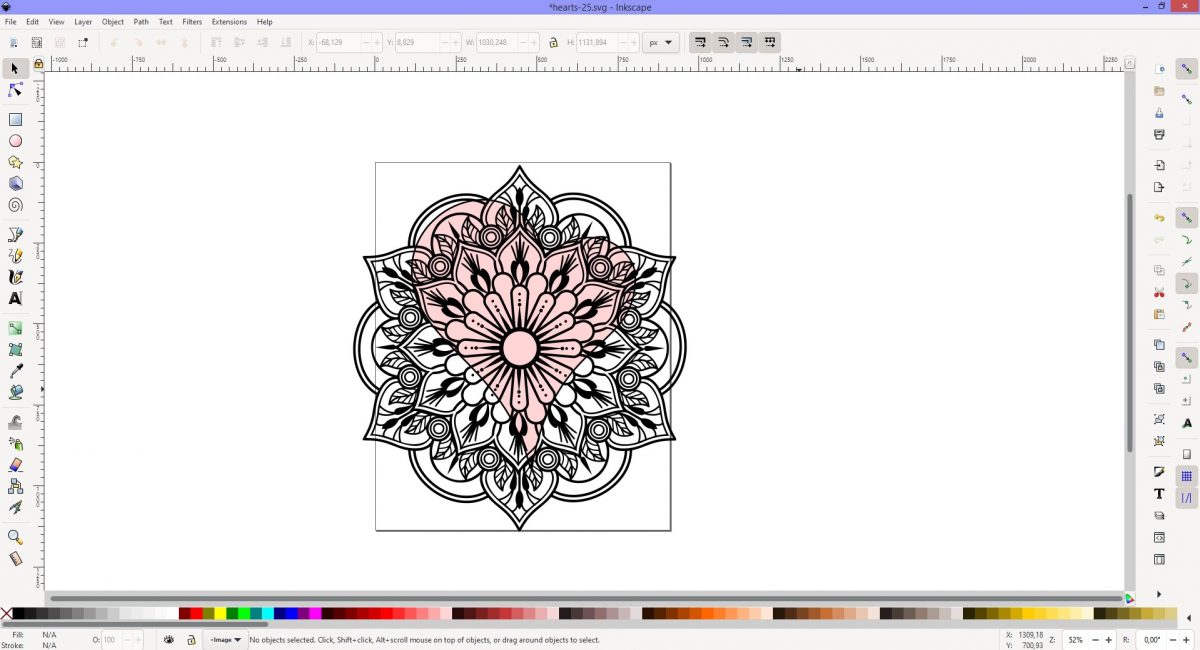
Step 6 - Intersecting the Mandala design
To constrain the Mandala in a heart shape, we need to select the pink heart and the Mandala design.
If selecting the pink heart is difficult, click the Mandala and press Ctrl and click over the pink heart. This will select the object beneath the Mandala. With the pink heart selected press Shift + Click on the Mandala to also select it.
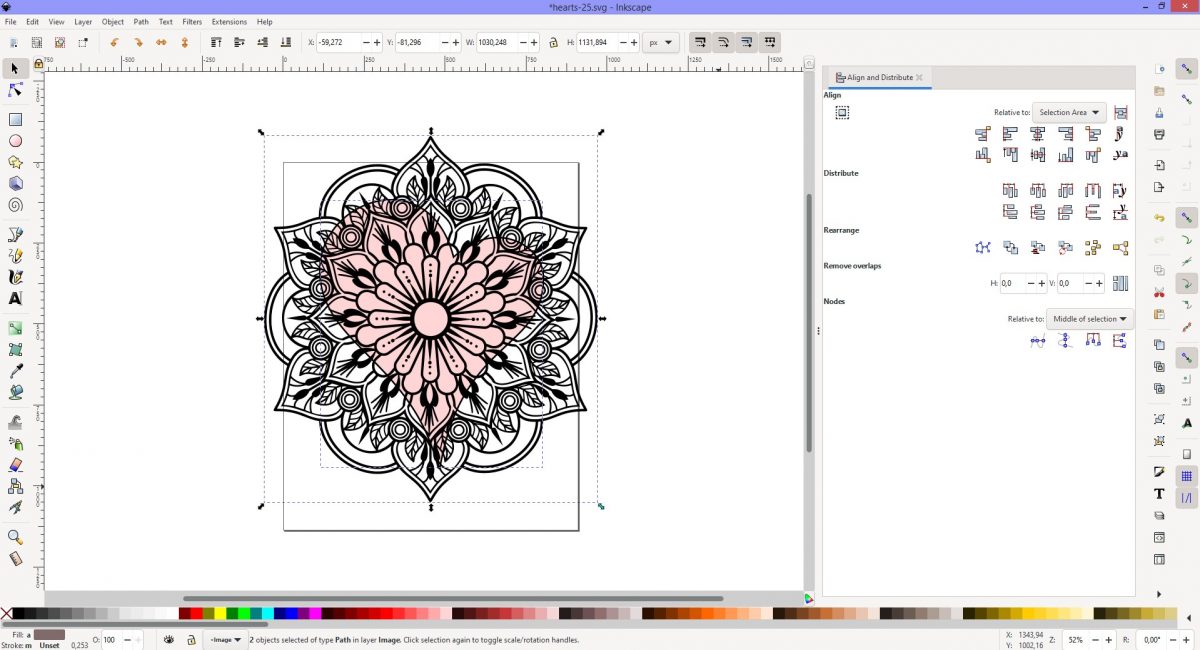
With both objects selected, click on Path and choose Intersection. The Mandala design is now constrained to the shape of the heart. It will also take on the color of the pink heart. Click to select and change the color to black.
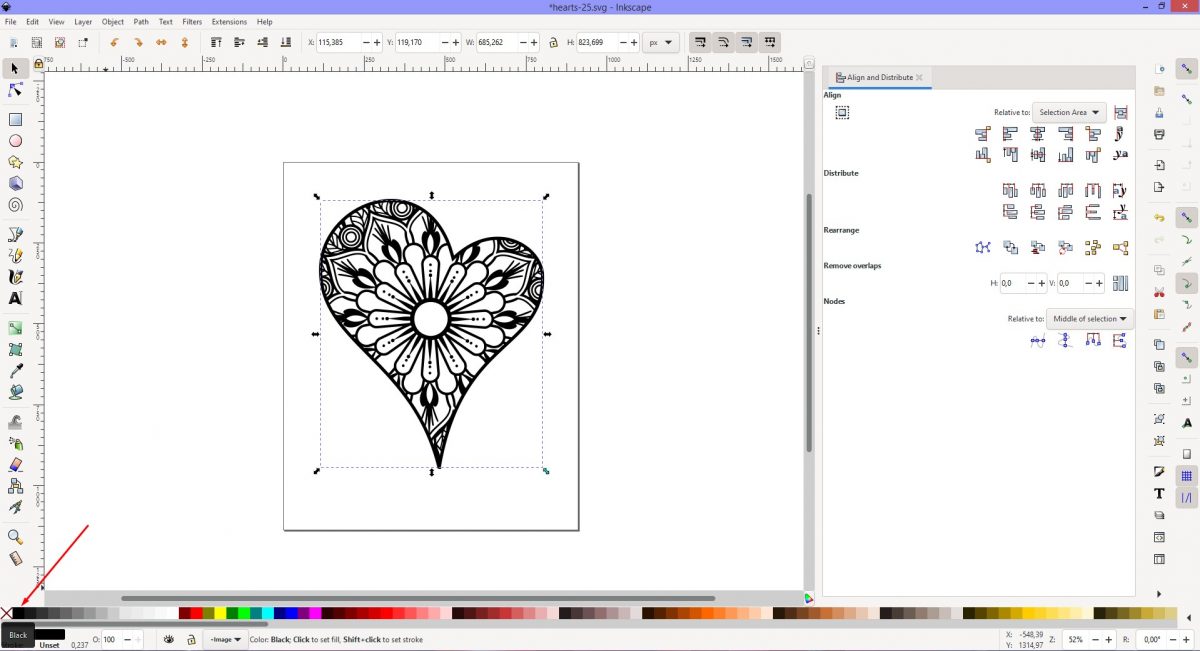
Step 7 - Combine both objects into one element
The design is just about ready but we need to combine both objects into one complete element. Drag a selection box around both the objects, click on the Path menu top left and choose Union. Both objects will be combined as one.
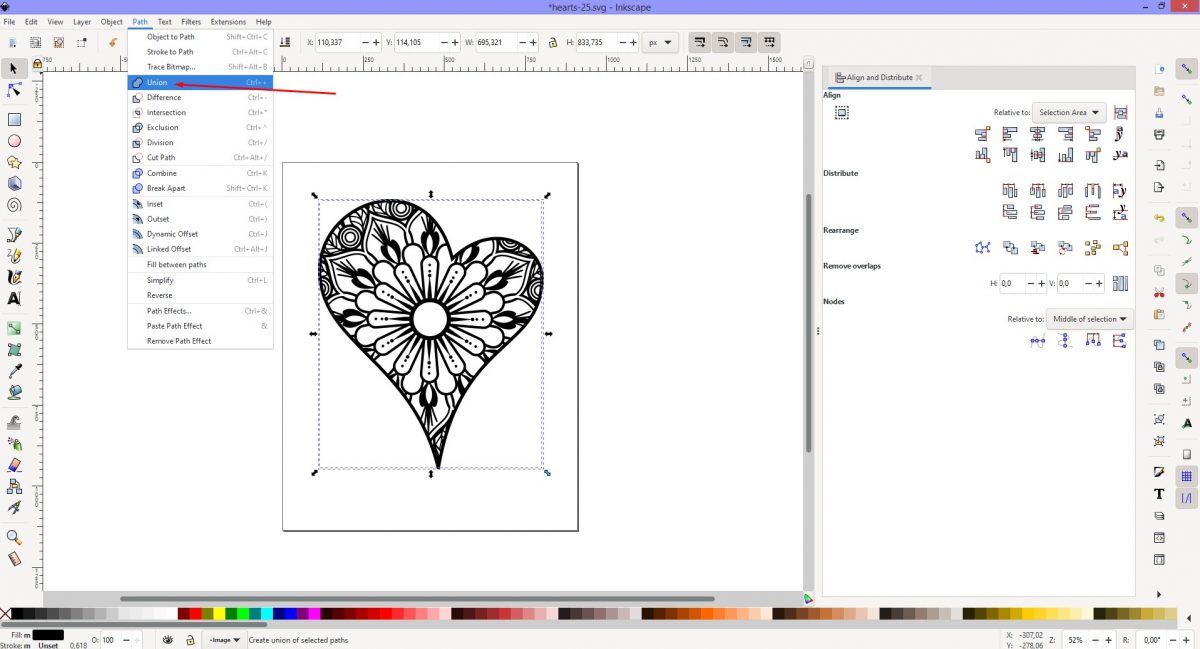
Save your design by clicking File, Save As and under Save As Type, select Plain SVG. Your lovely design is now complete and ready for use with your cutting machine.
Next up, check out our other tutorials such as creating an offset, or grouping and ungrouping in Inkscape.
Related Tutorials
Inkscape Tutorials
How to Create Decorative Borders in Inkscape
Discover how to create a decorative border with this step-by-step Inkscape tutorial.
Inkscape Tutorials
How to Create and Save Color Palettes in Inkscape
Discover how to create and save color palettes in Inkscape with this tutorial.
Inkscape Tutorials
How to Create Perspective Text in Inkscape
Add dimension to your design with Perspective Text in Inkscape with this step by step tutorial.
Inkscape Tutorials
How to Create an Offset in Inkscape
If you need a font to be thicker, we'll show you how to create an offset in Inkscape.
Inkscape Tutorials
How to Create a Neon Text Effect in Inkscape
Create a Neon Text Effect in Inkscape with this step-by-step tutorial!
Inkscape Tutorials
How to Create a Gold Text Effect in Inkscape
Create a Gold Text Effect in 4 steps with this beginner Inkscape tutorial.