By Design Bundles
Photoshop Tutorials12 min
Up and Down Cut Cardboard Text in Photoshop
For this tutorial, we will use a “Cardboard” Texture as Background and “Maskoolin” Free Font from Fontbundles.net.
1 - In Photoshop, open the image you chose as “Background”.
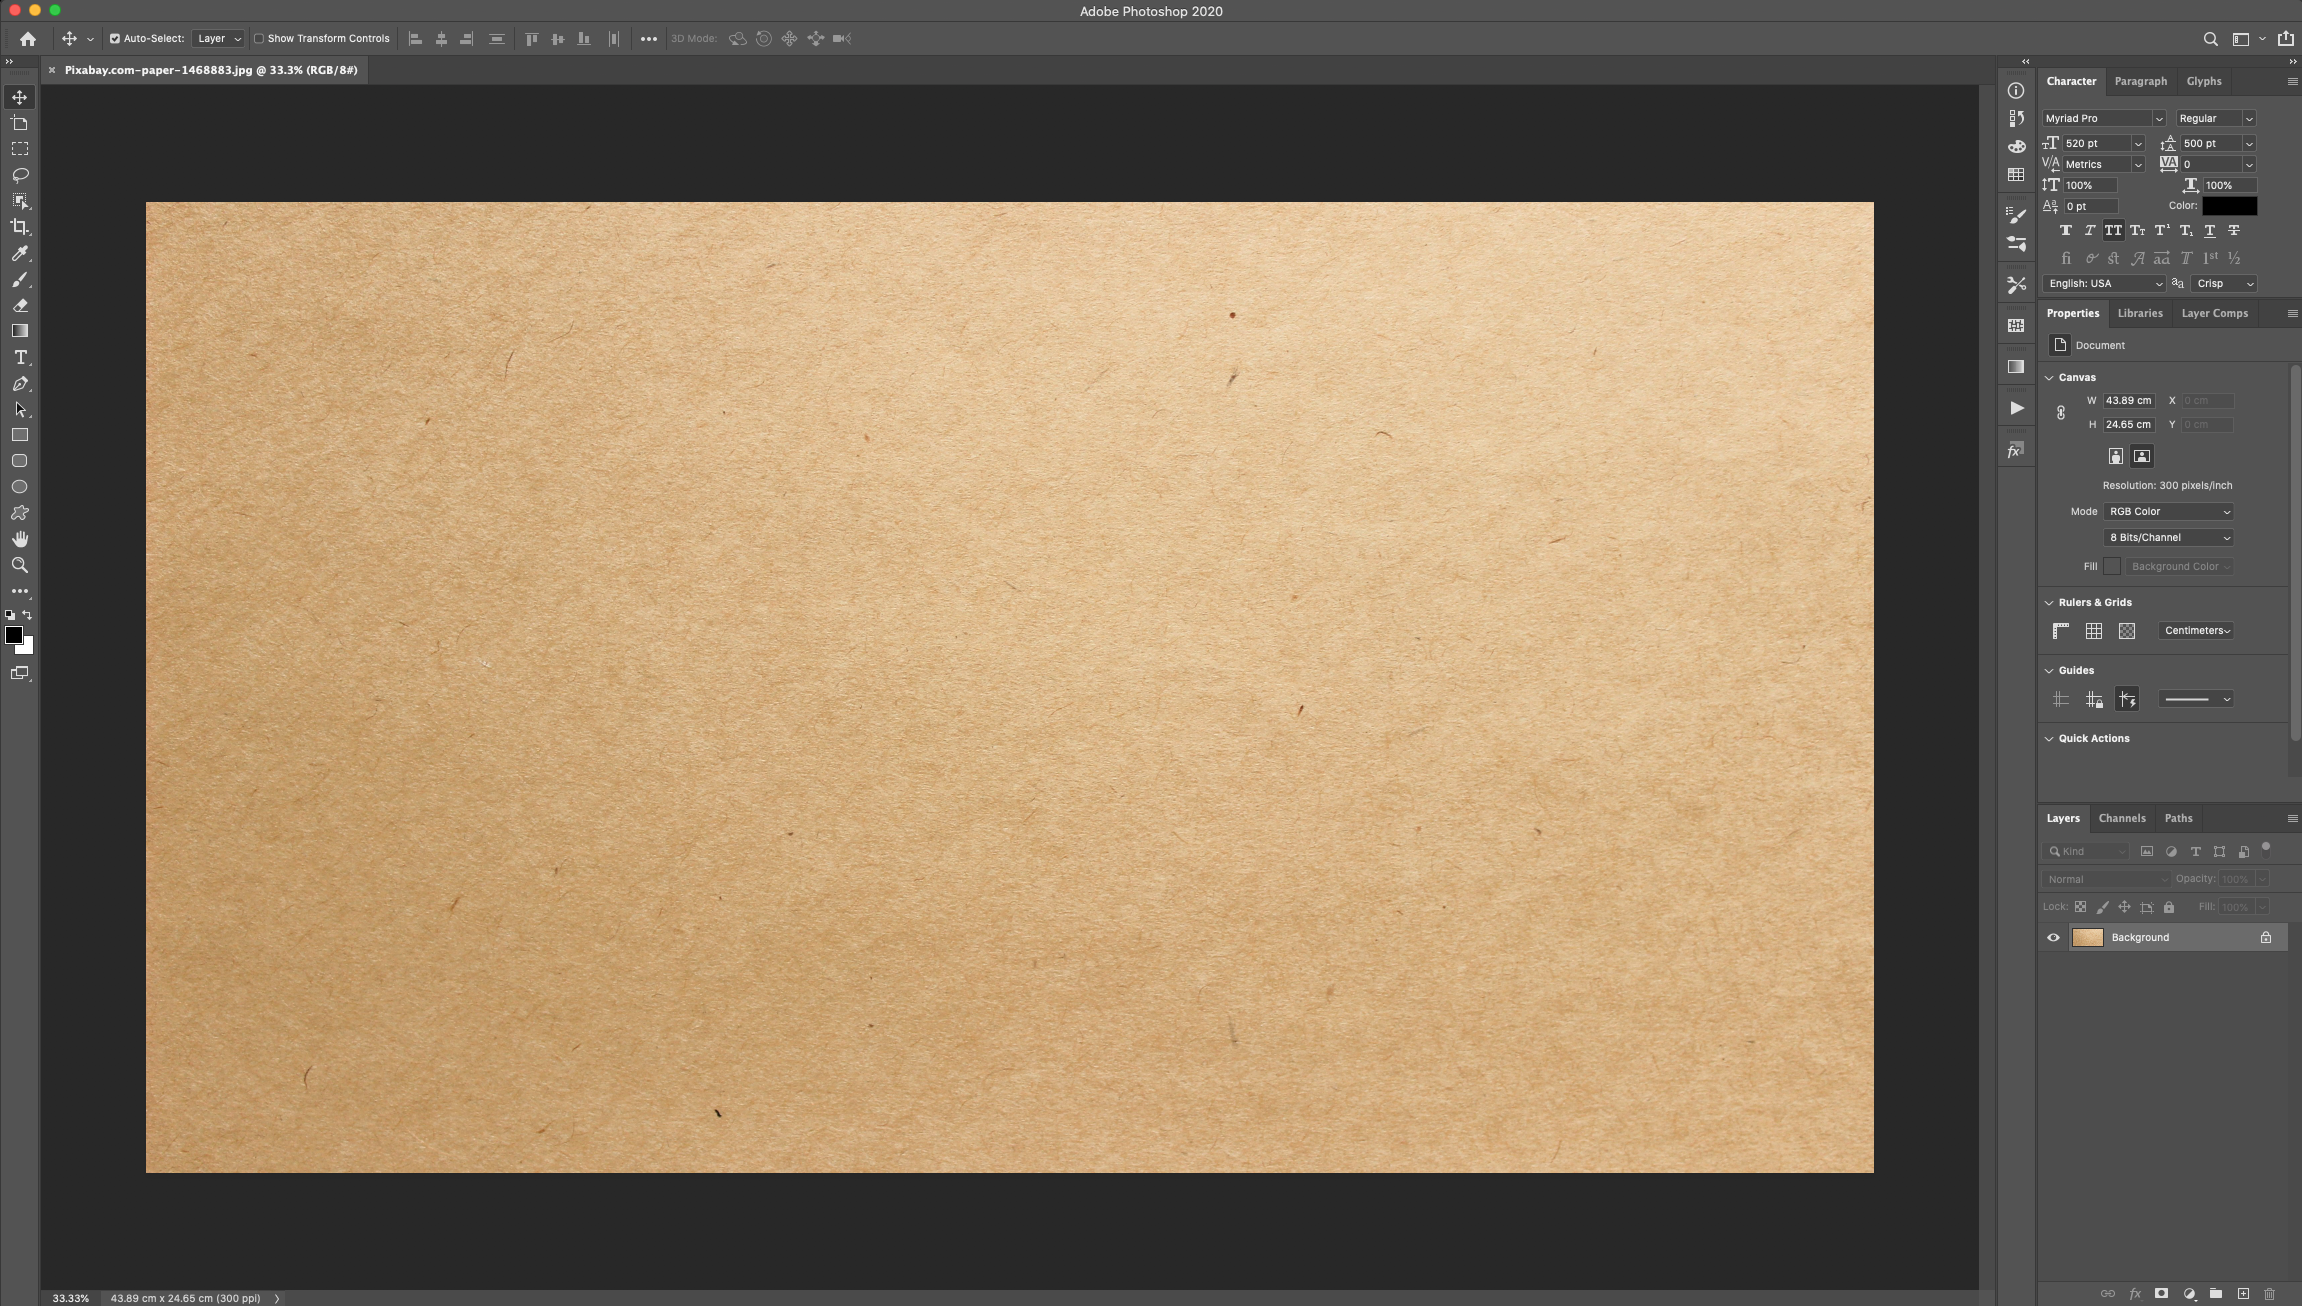
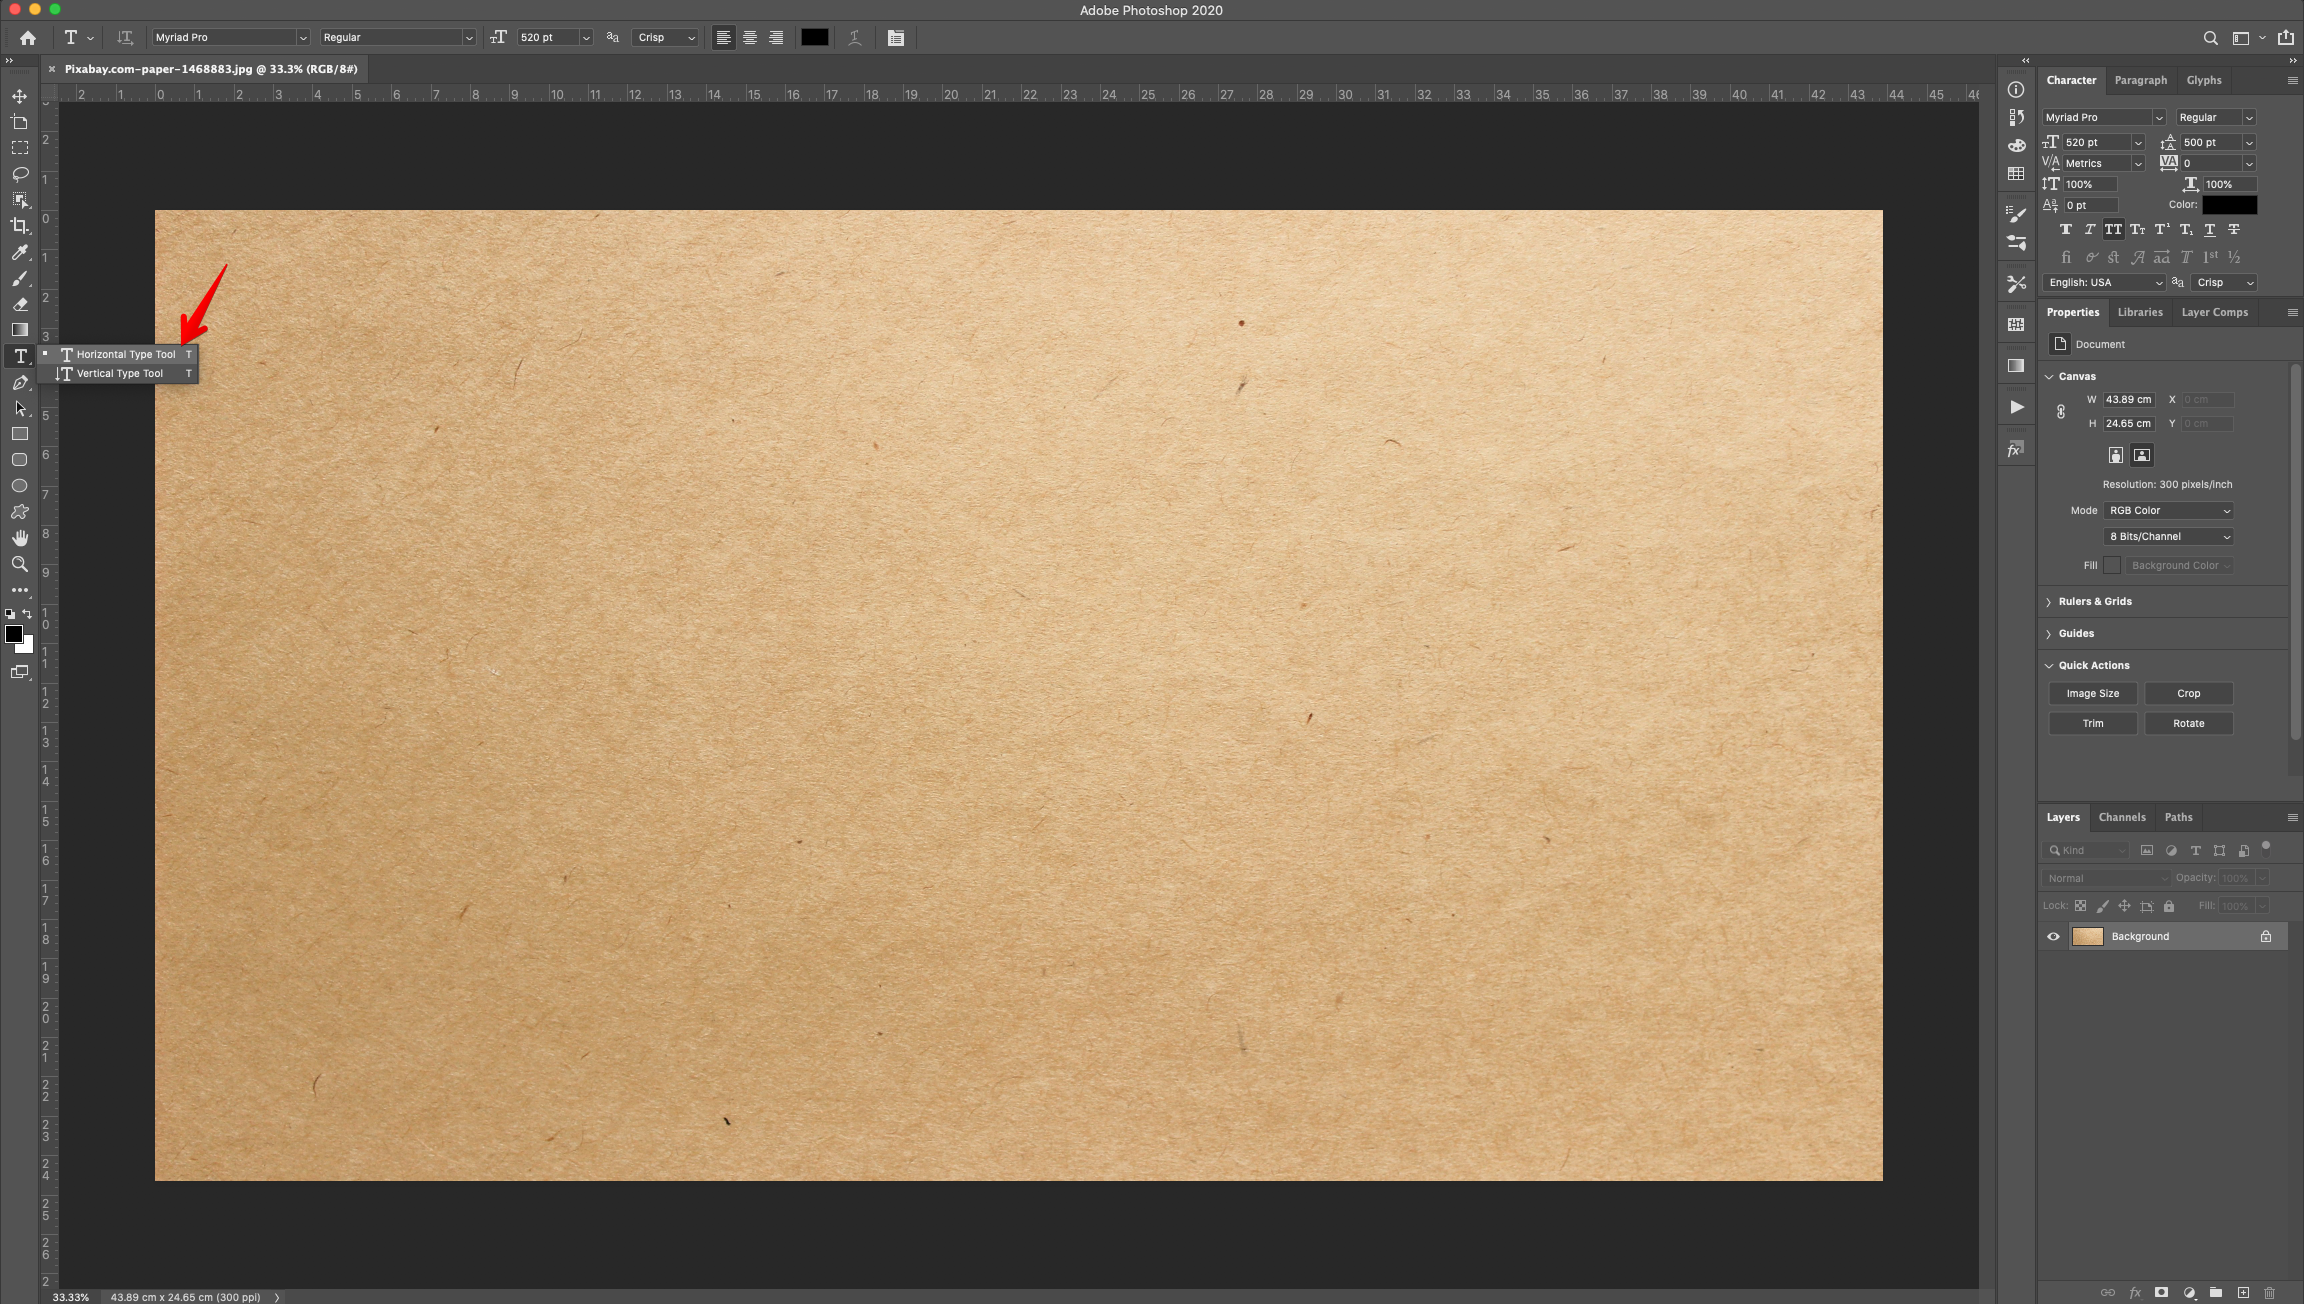
2 - Select the “Type Tool” (T), choose your font and type your text. You can use any color as “Fill” color. The size will depend on the word you are typing.
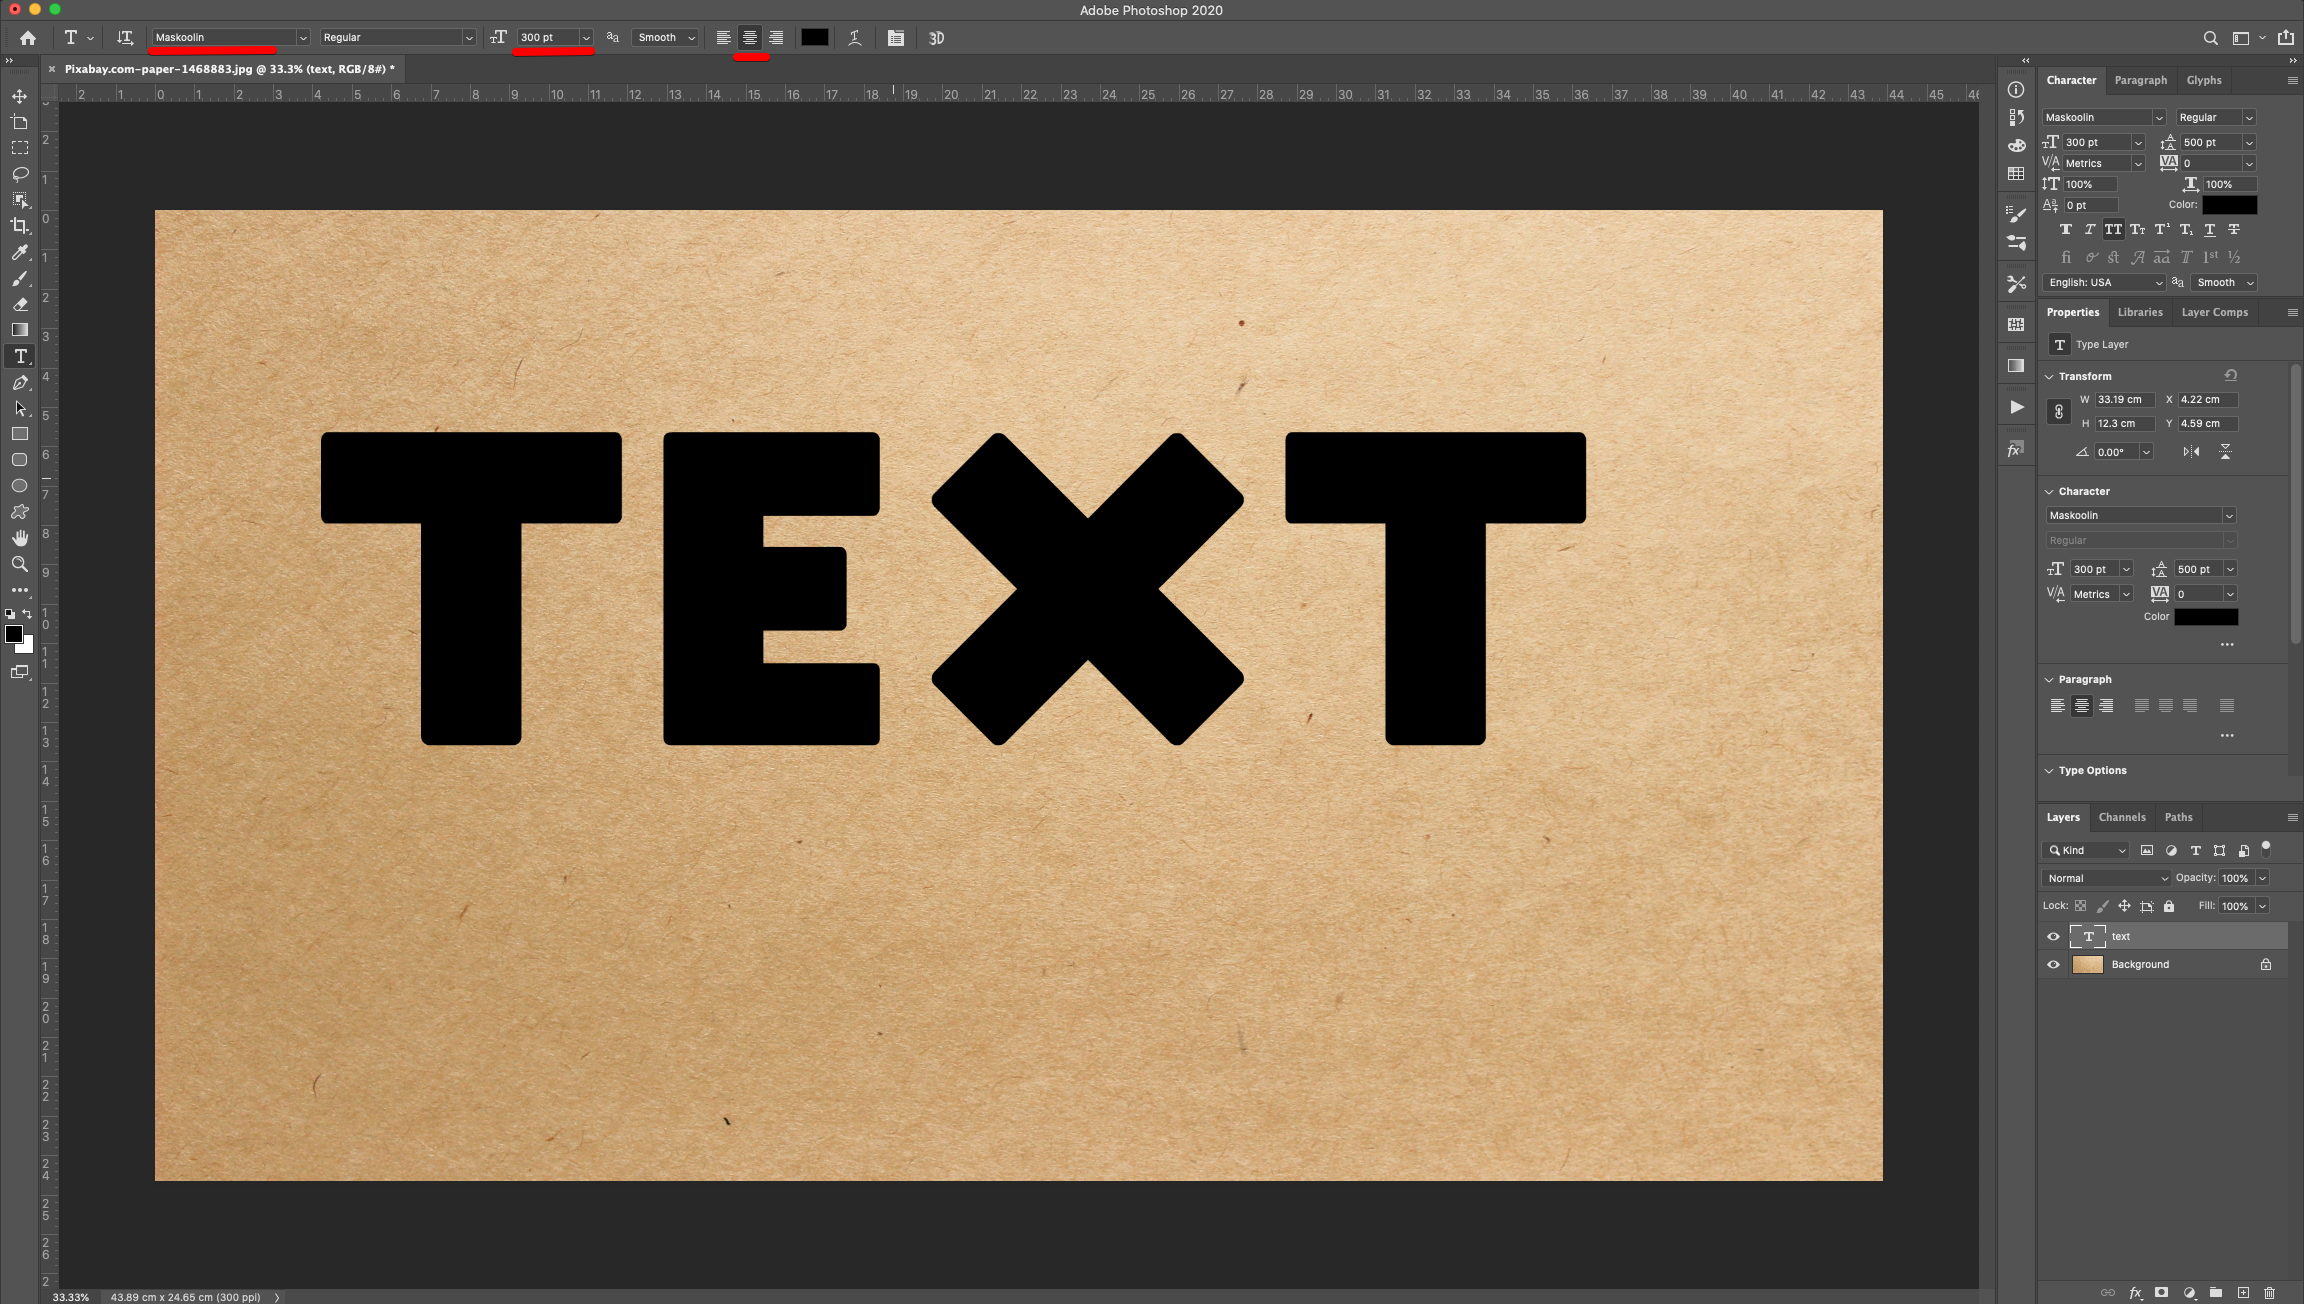
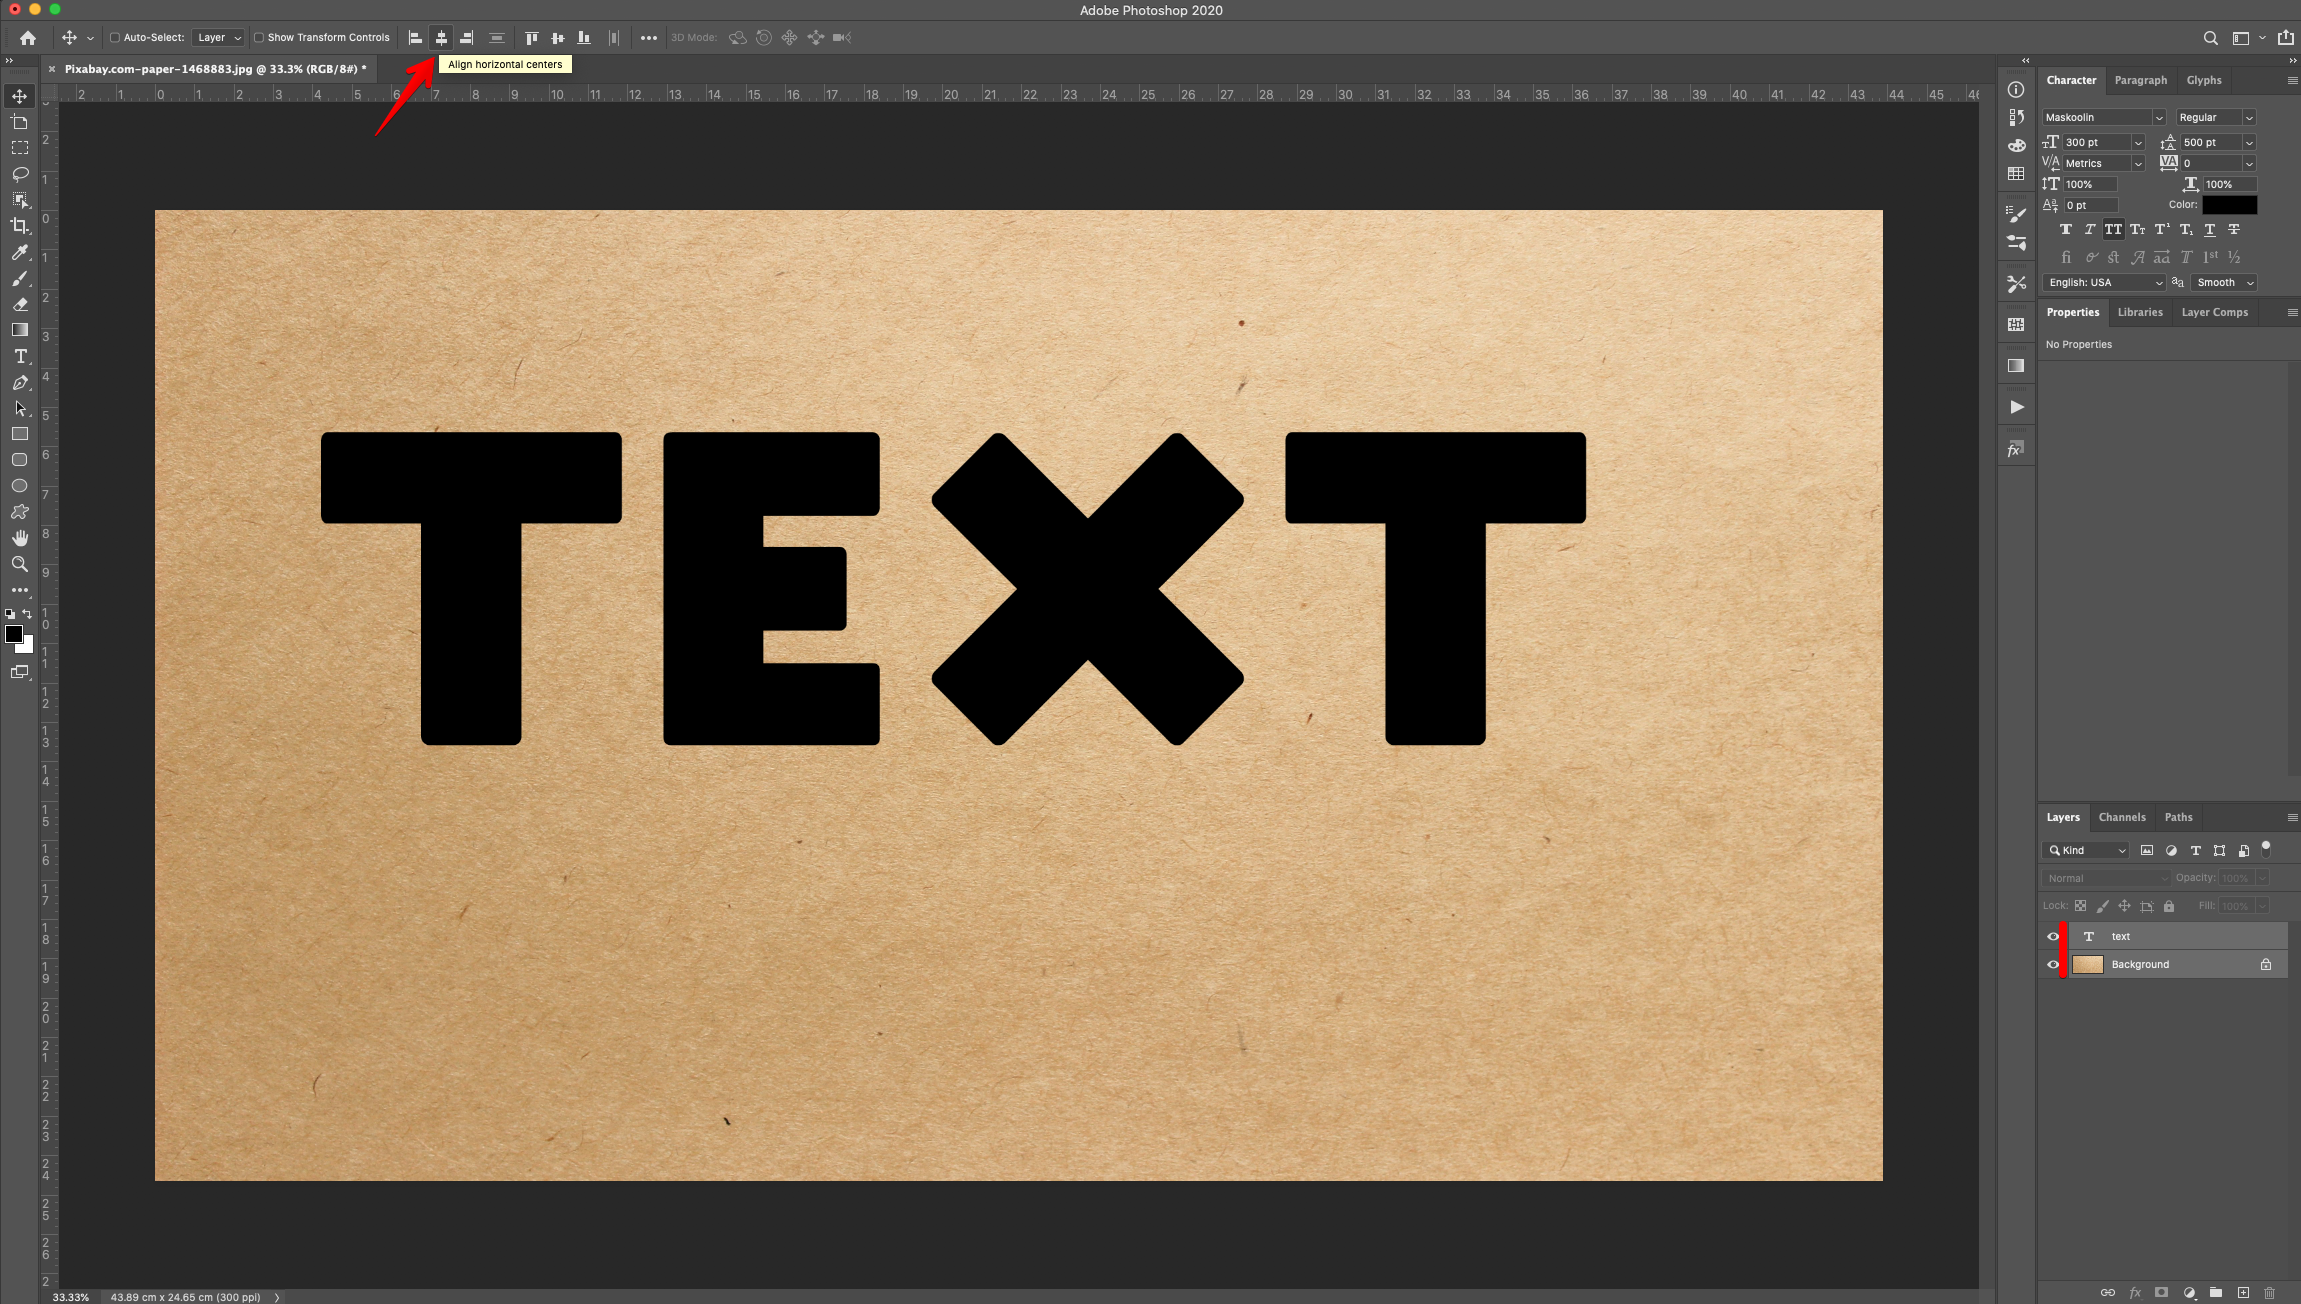
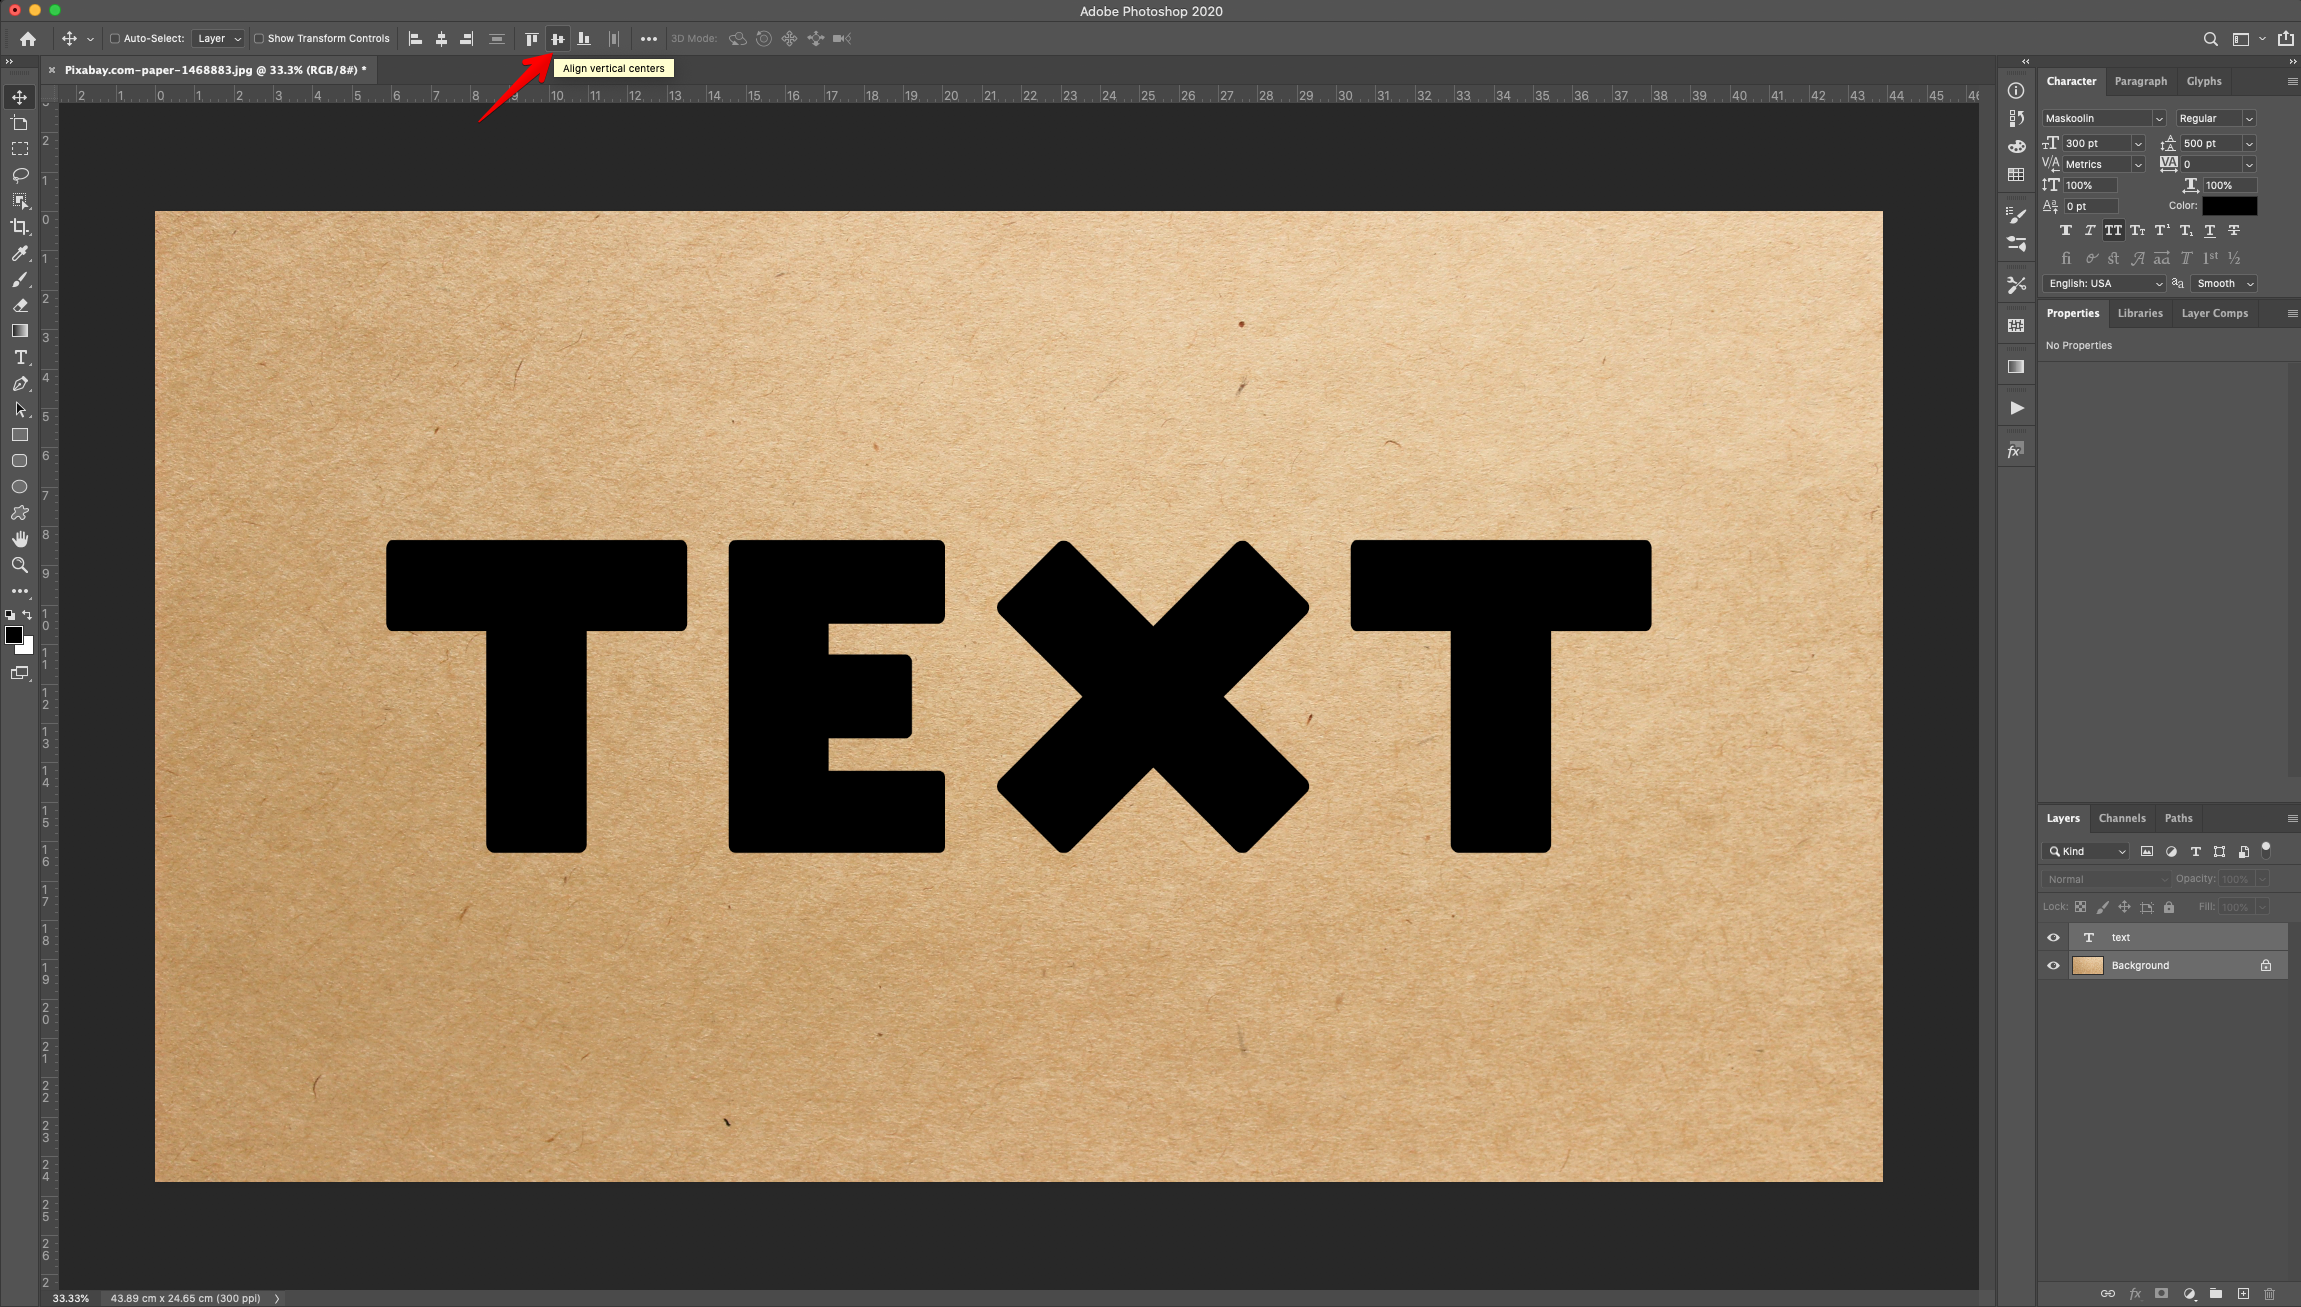
3 - Center the text by selecting both Layers (“Shift” key) and clicking the “Align Vertical and Horizontal Centers” buttons on the Top Menu.
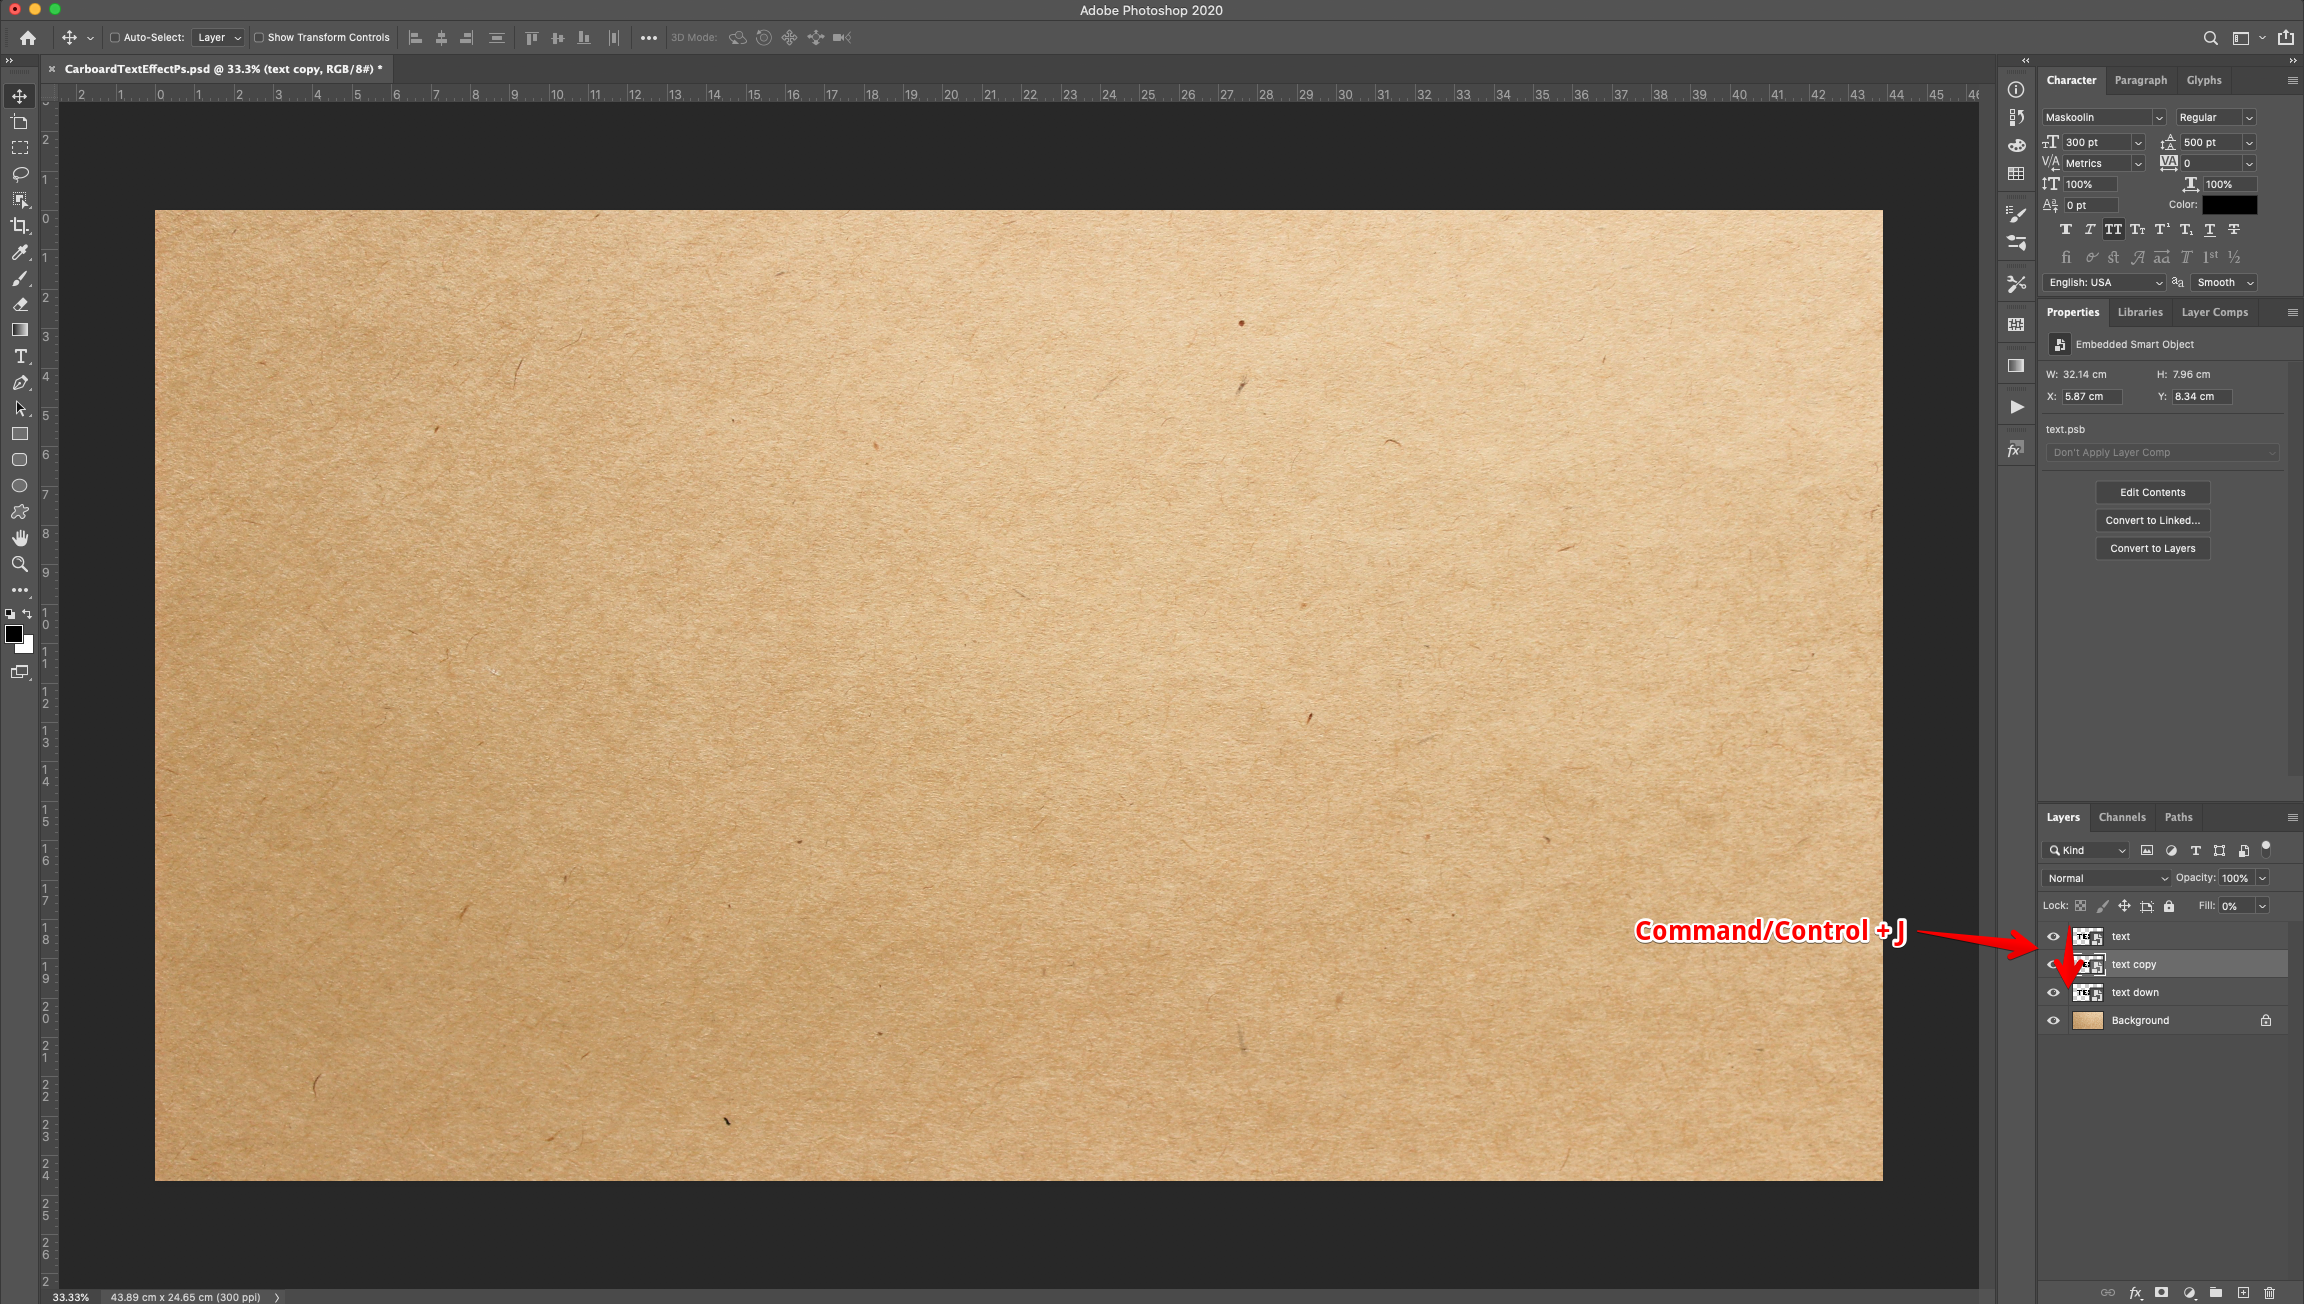
4 - Select the “Text” layer thumbnail and make a “Duplicate” (Command/Control + J). Name the Duplicate “Text Down” and place it under the original “Text”
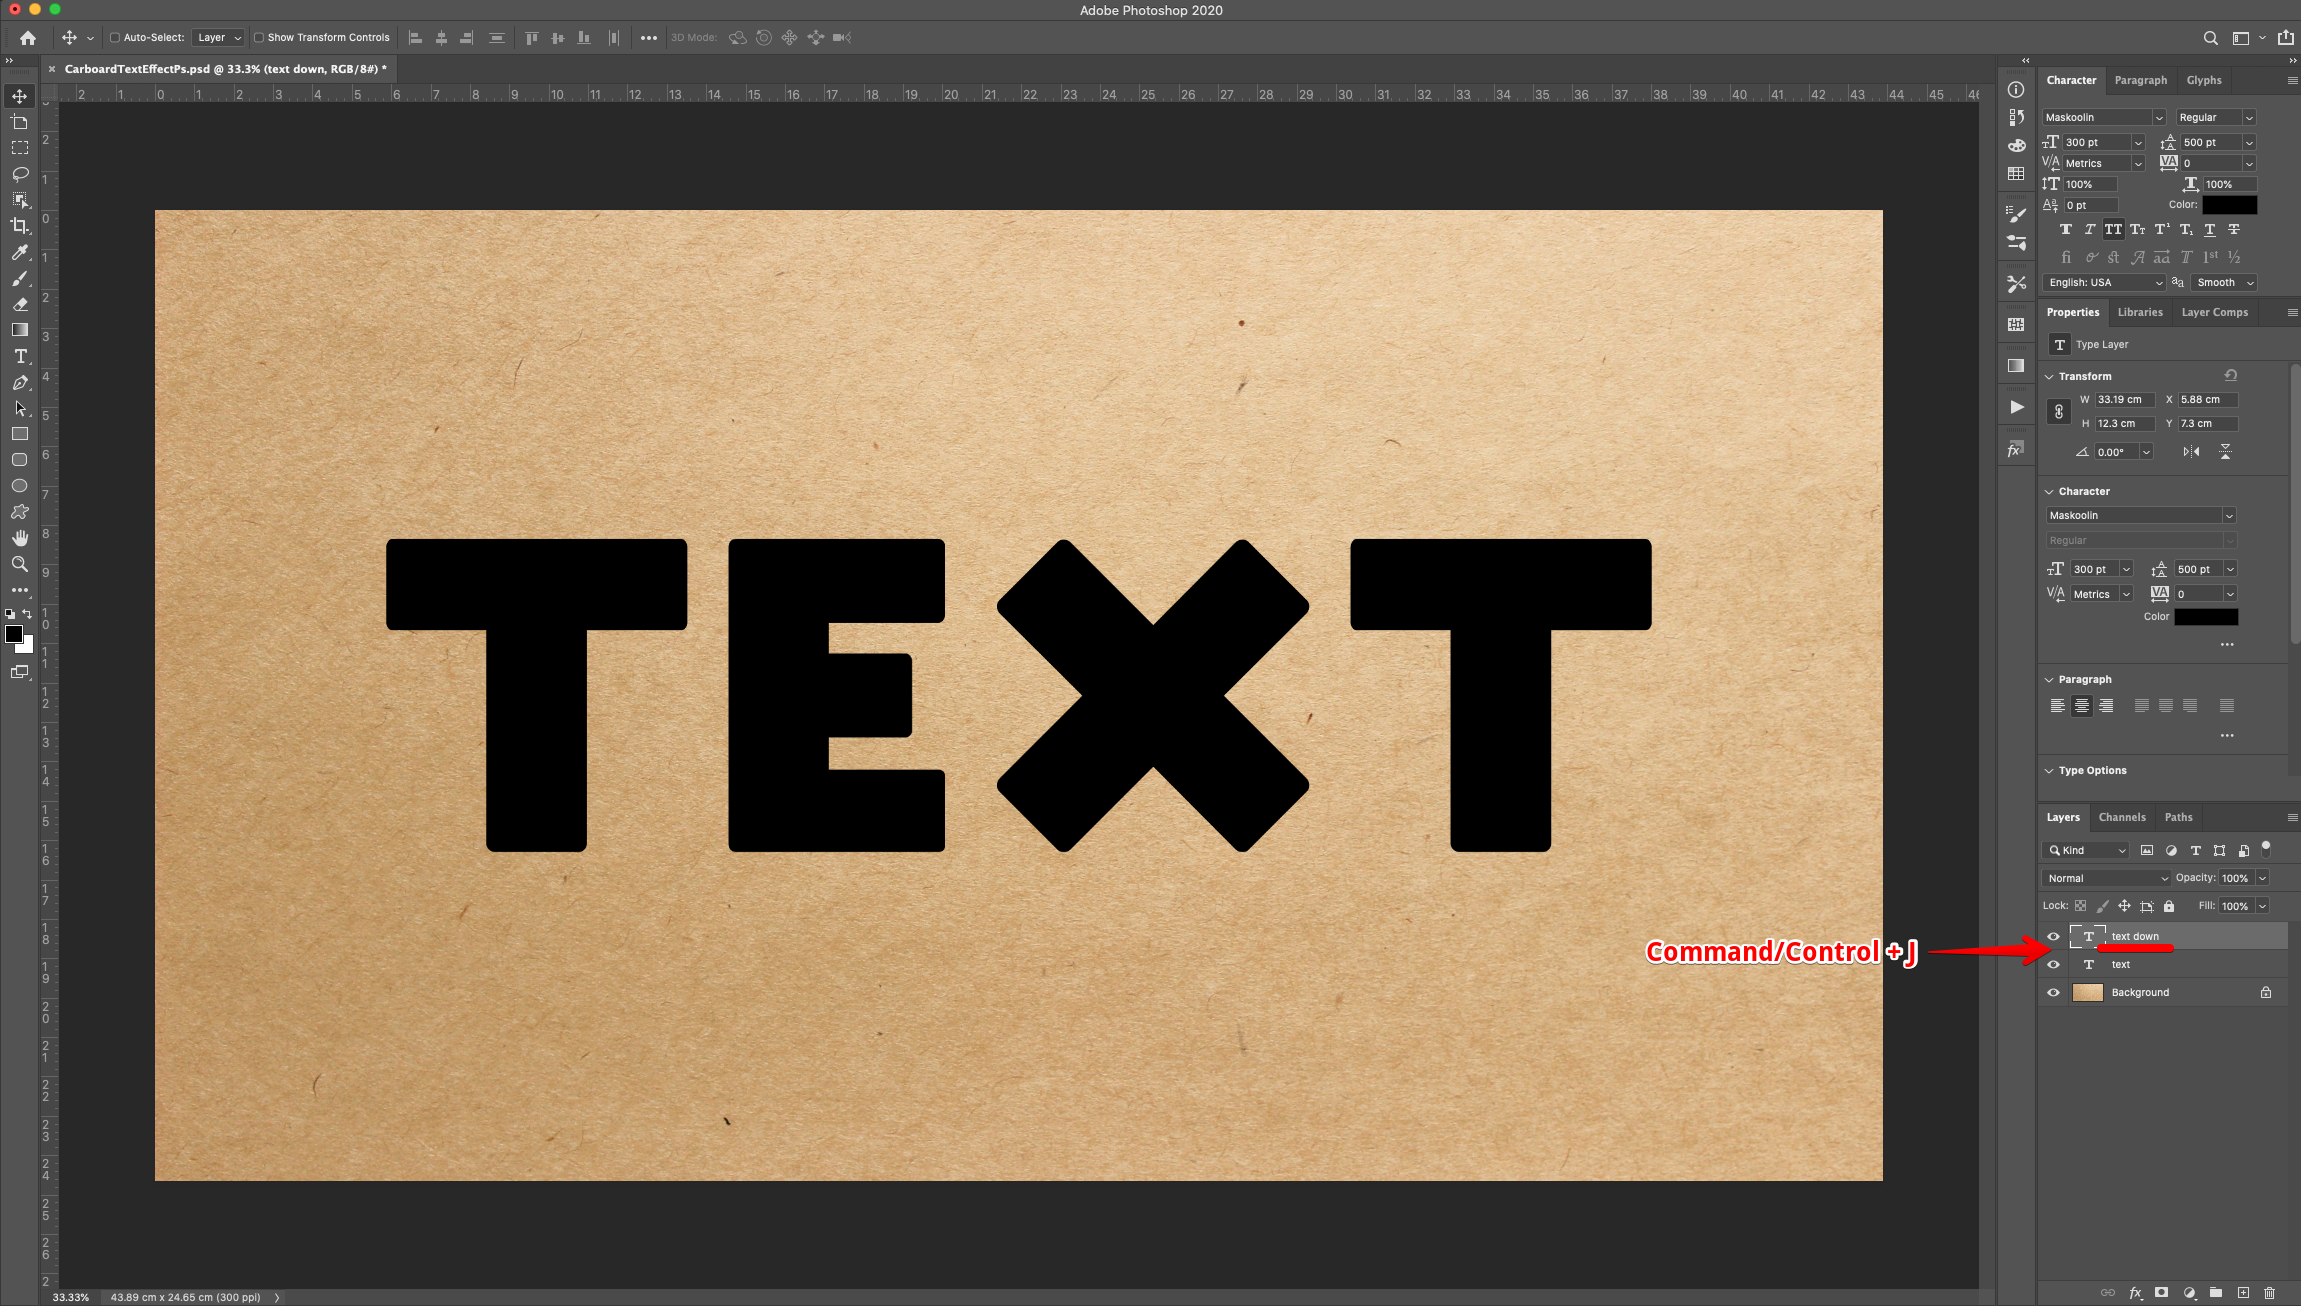
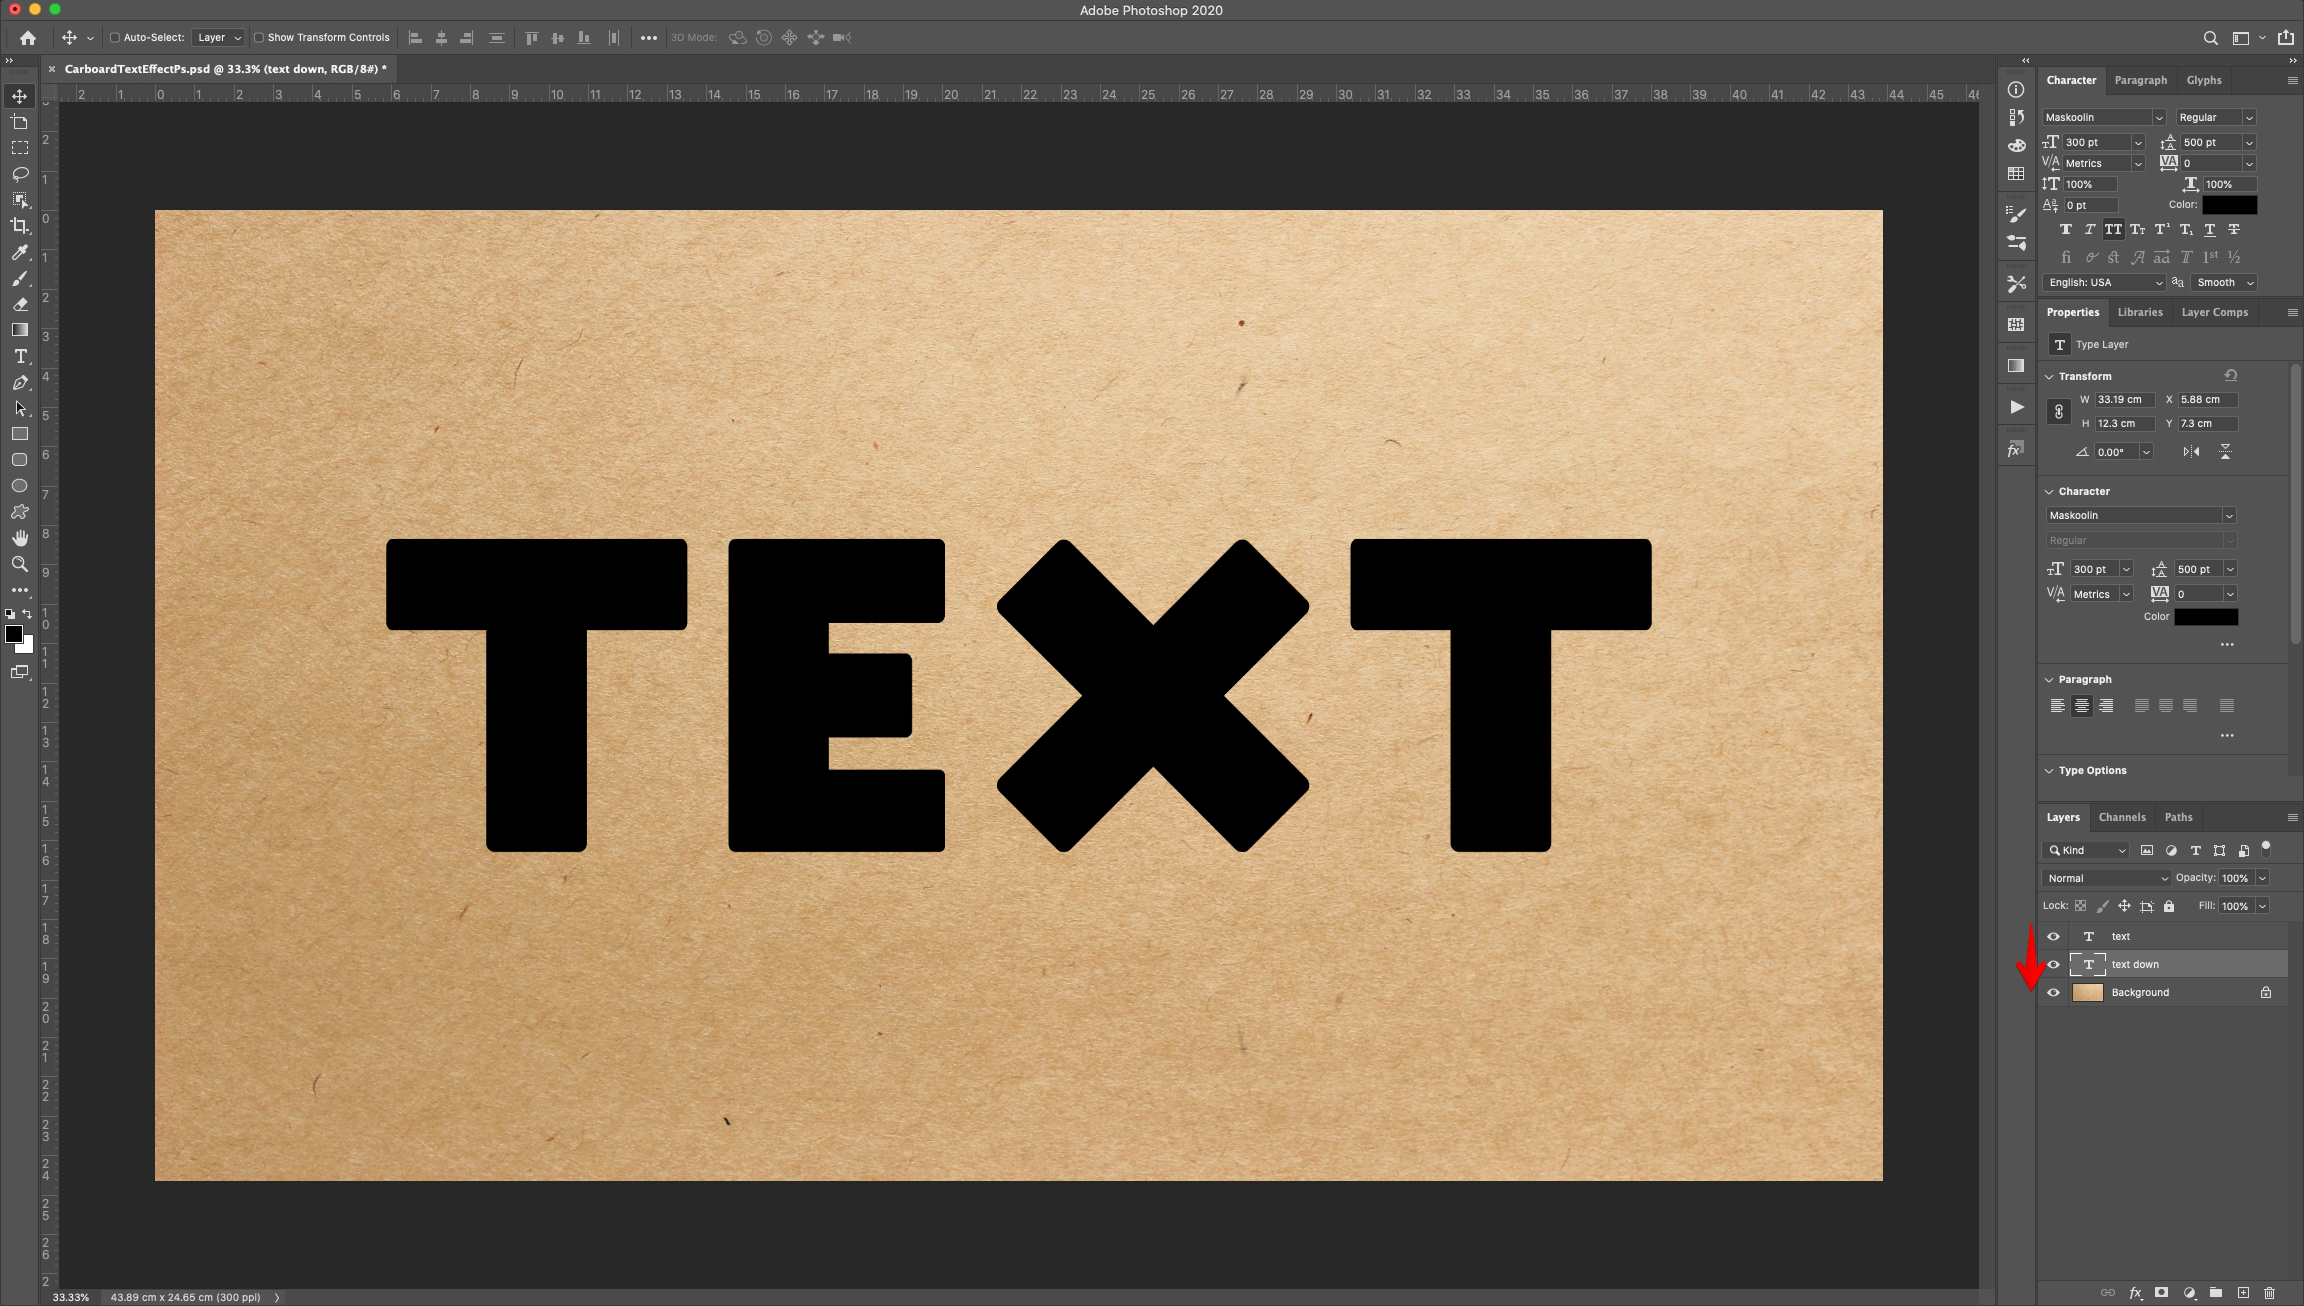
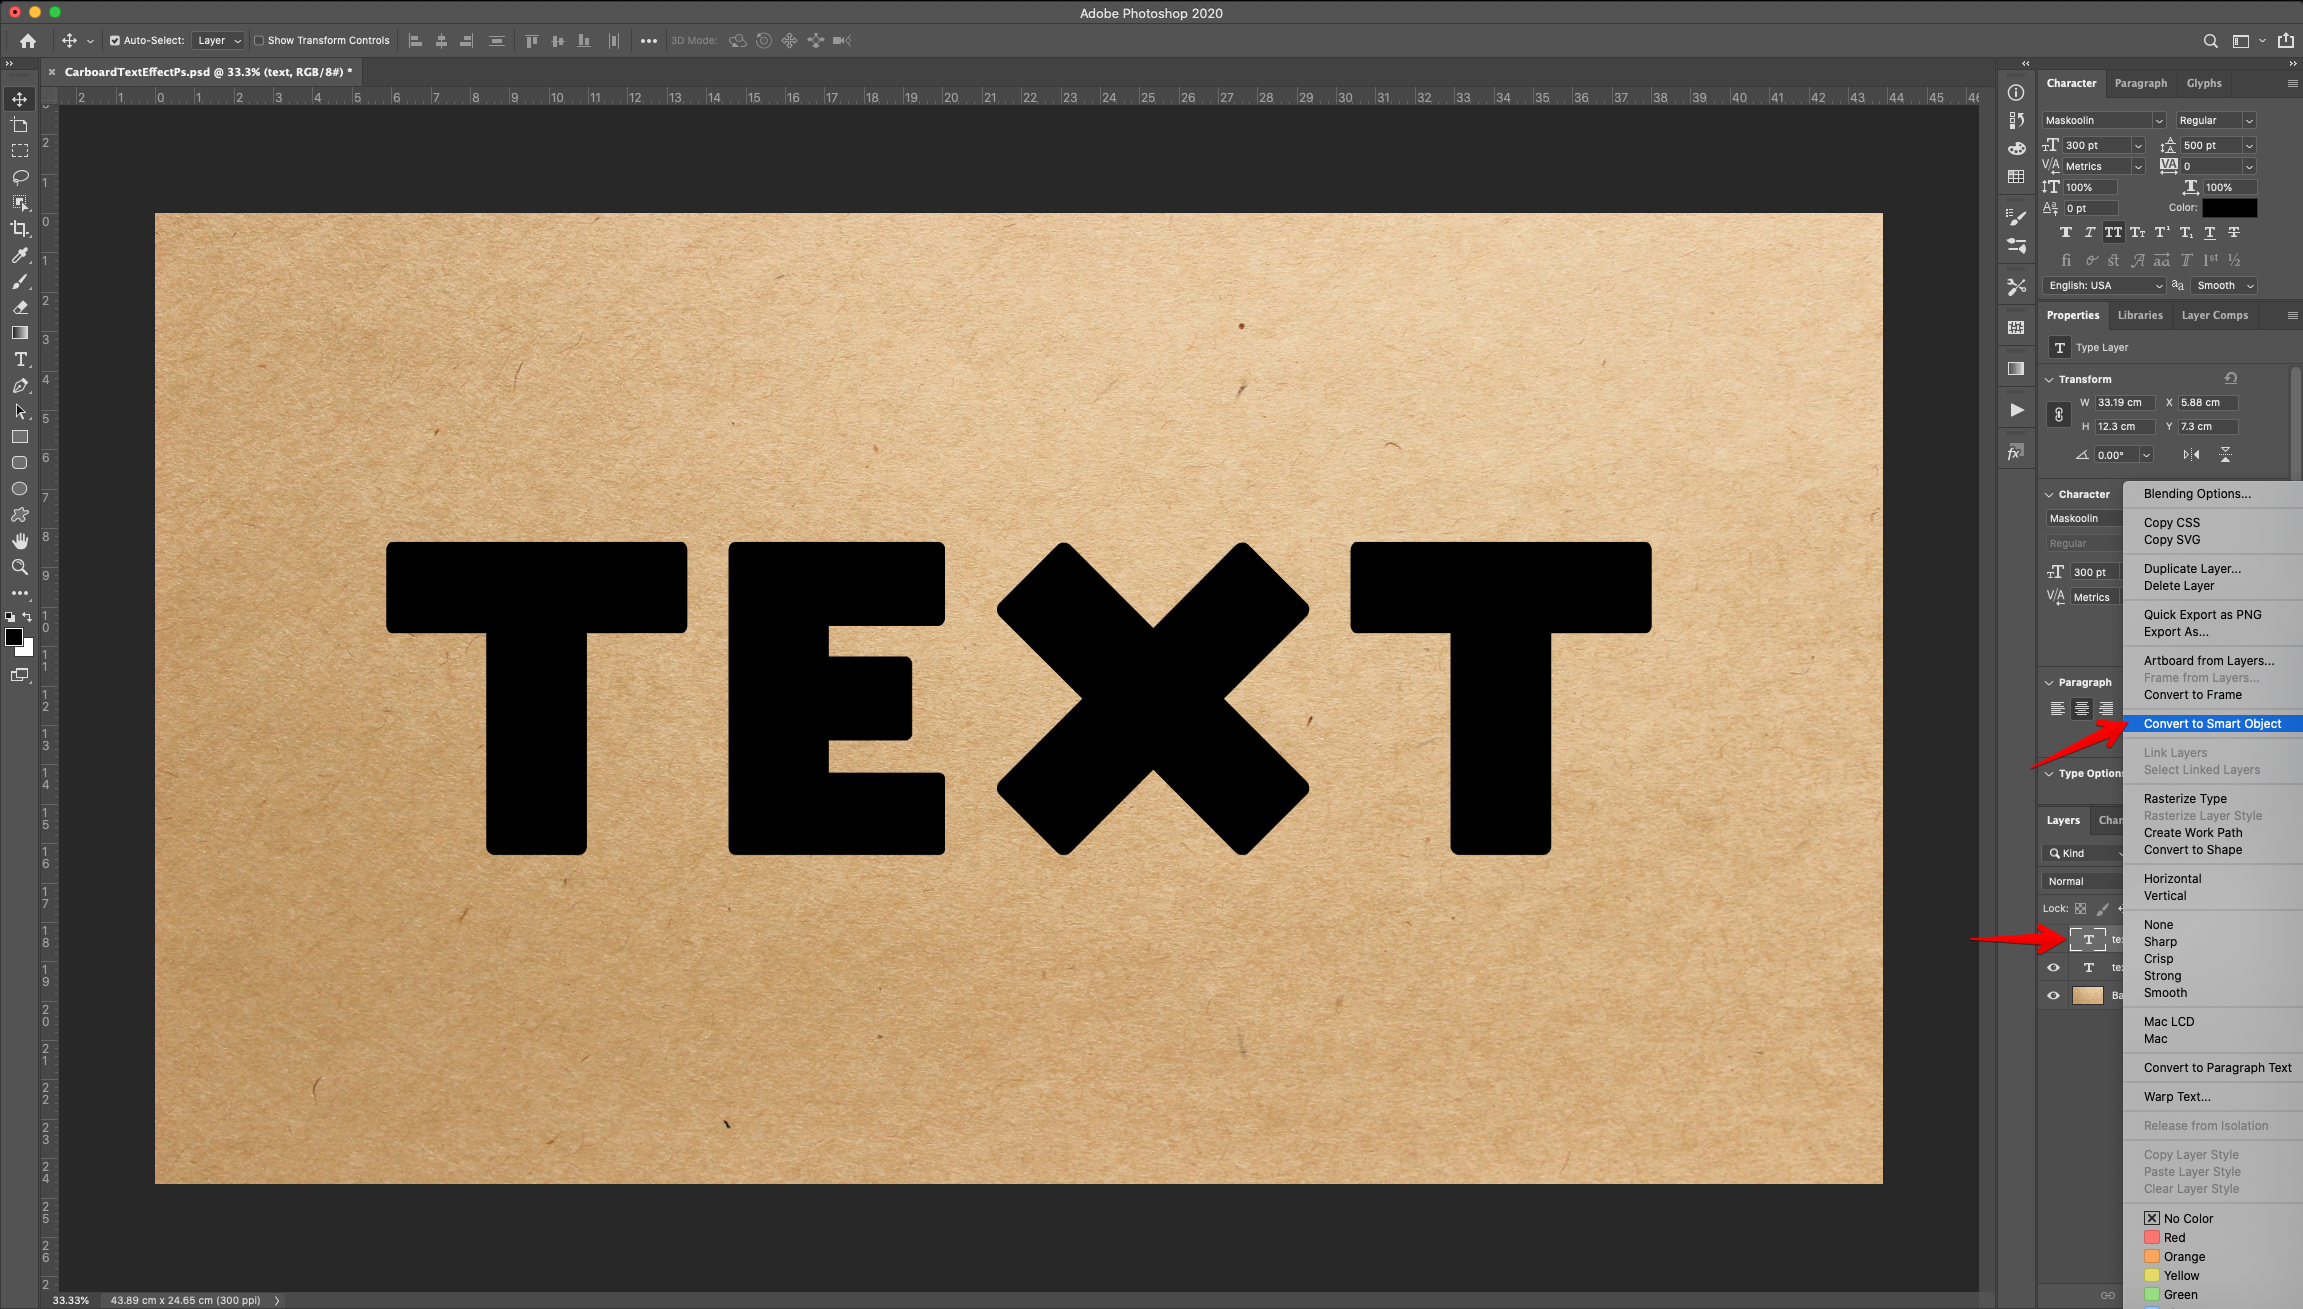
5 - Right-click on top of the “Text” Layer thumbnail and “Convert to Smart Object”. This way, you can change your text without losing the effect.
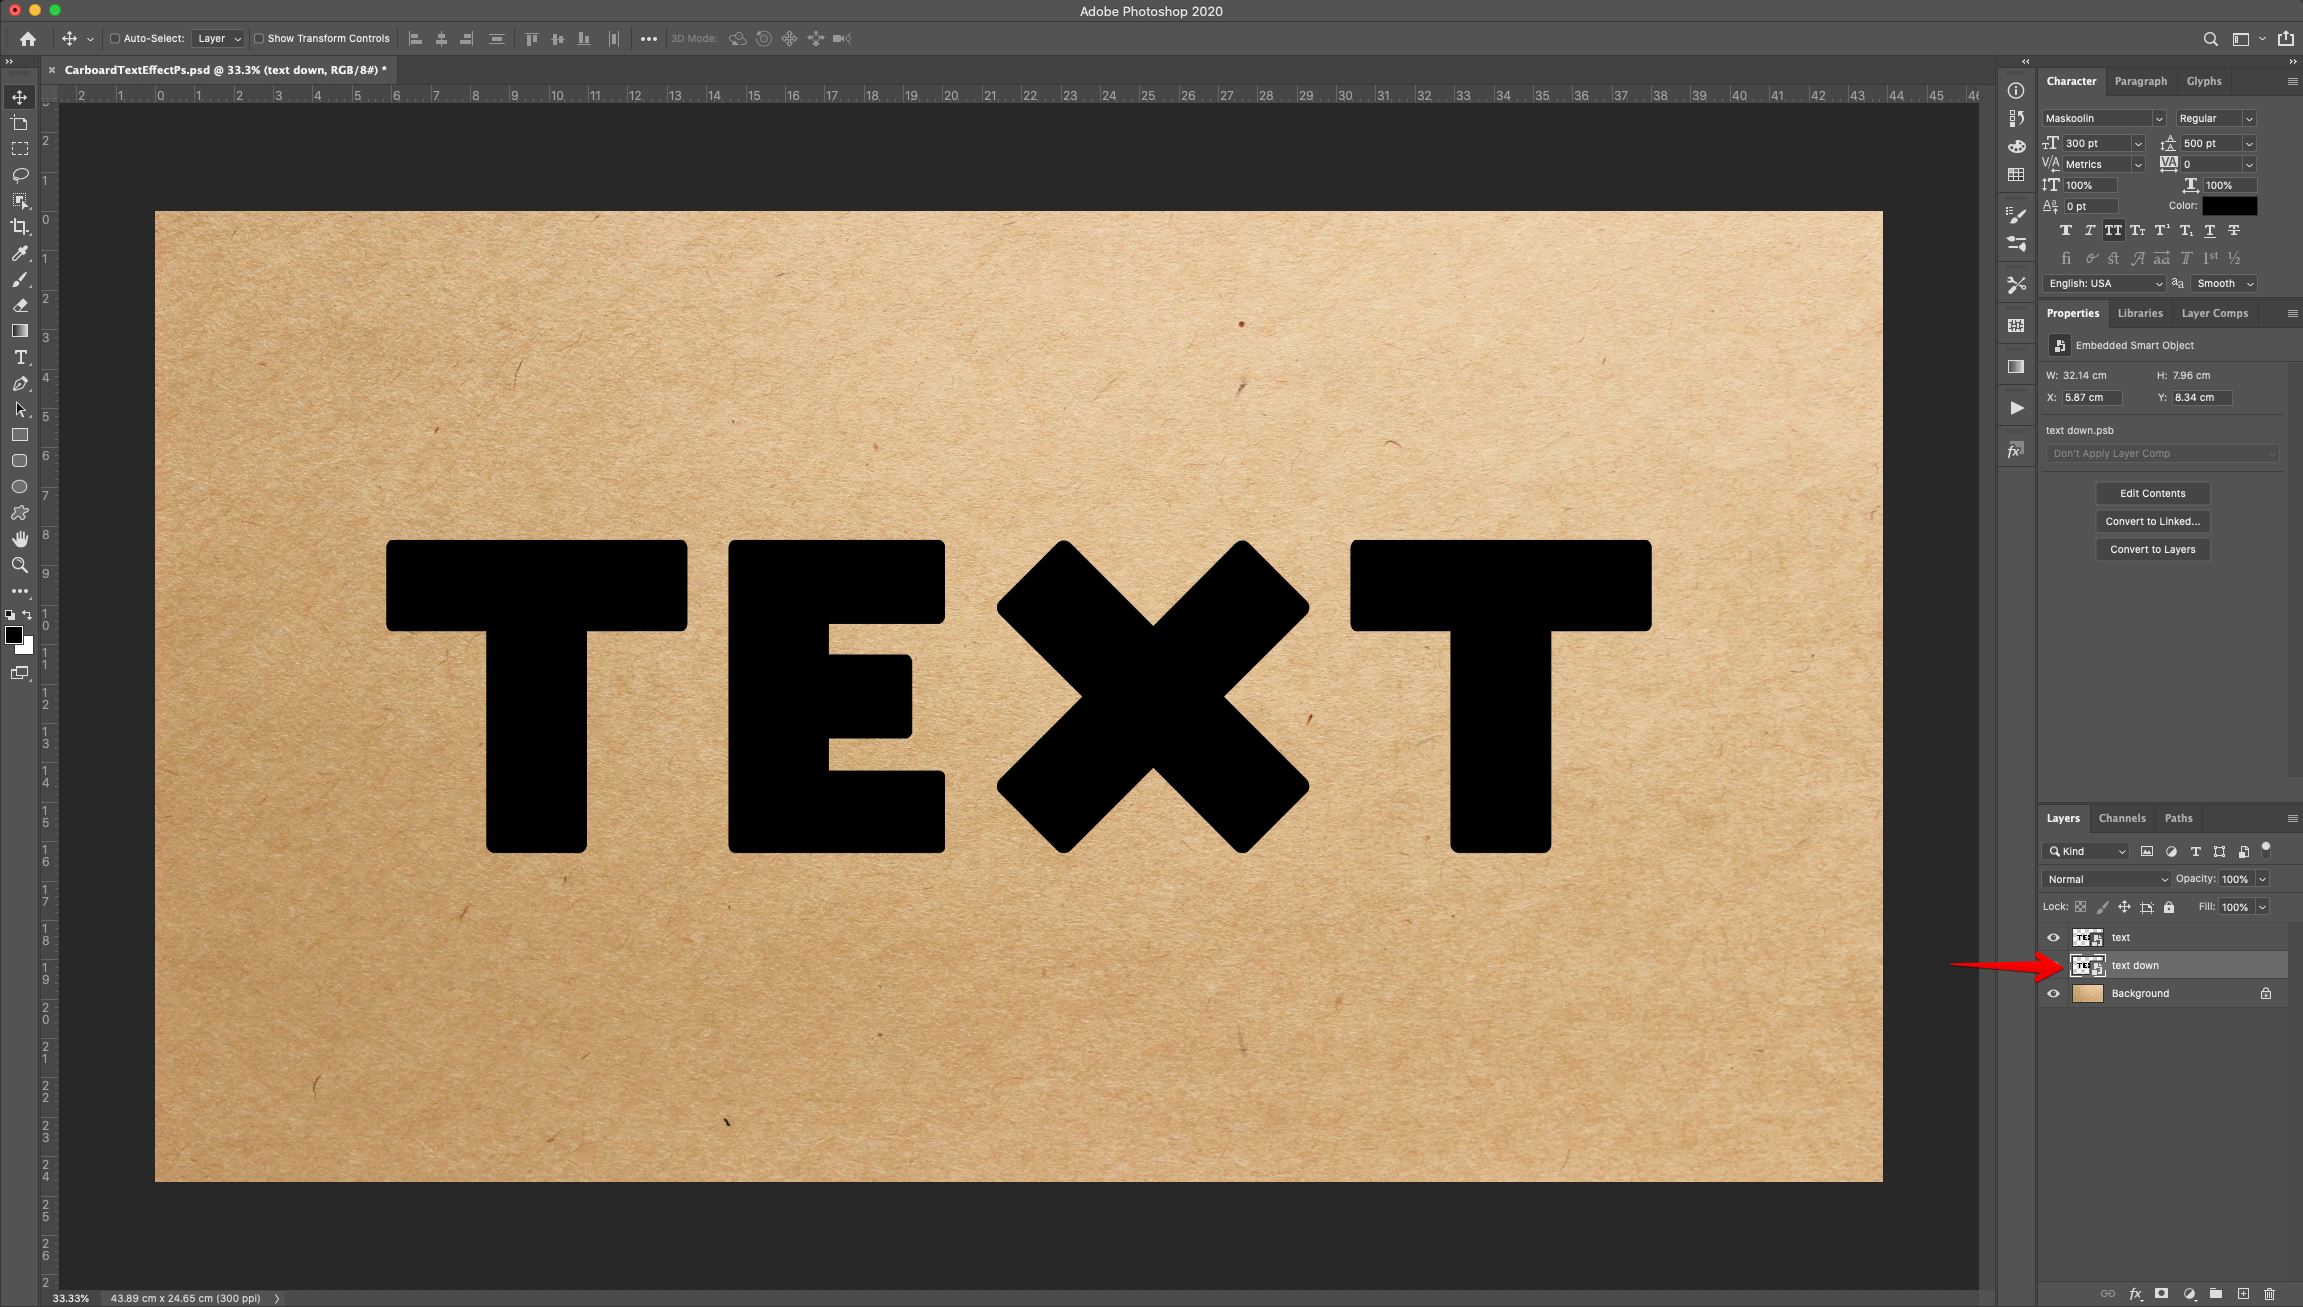
6 - Change the “Fill” of both “Text” Layers to 0%.
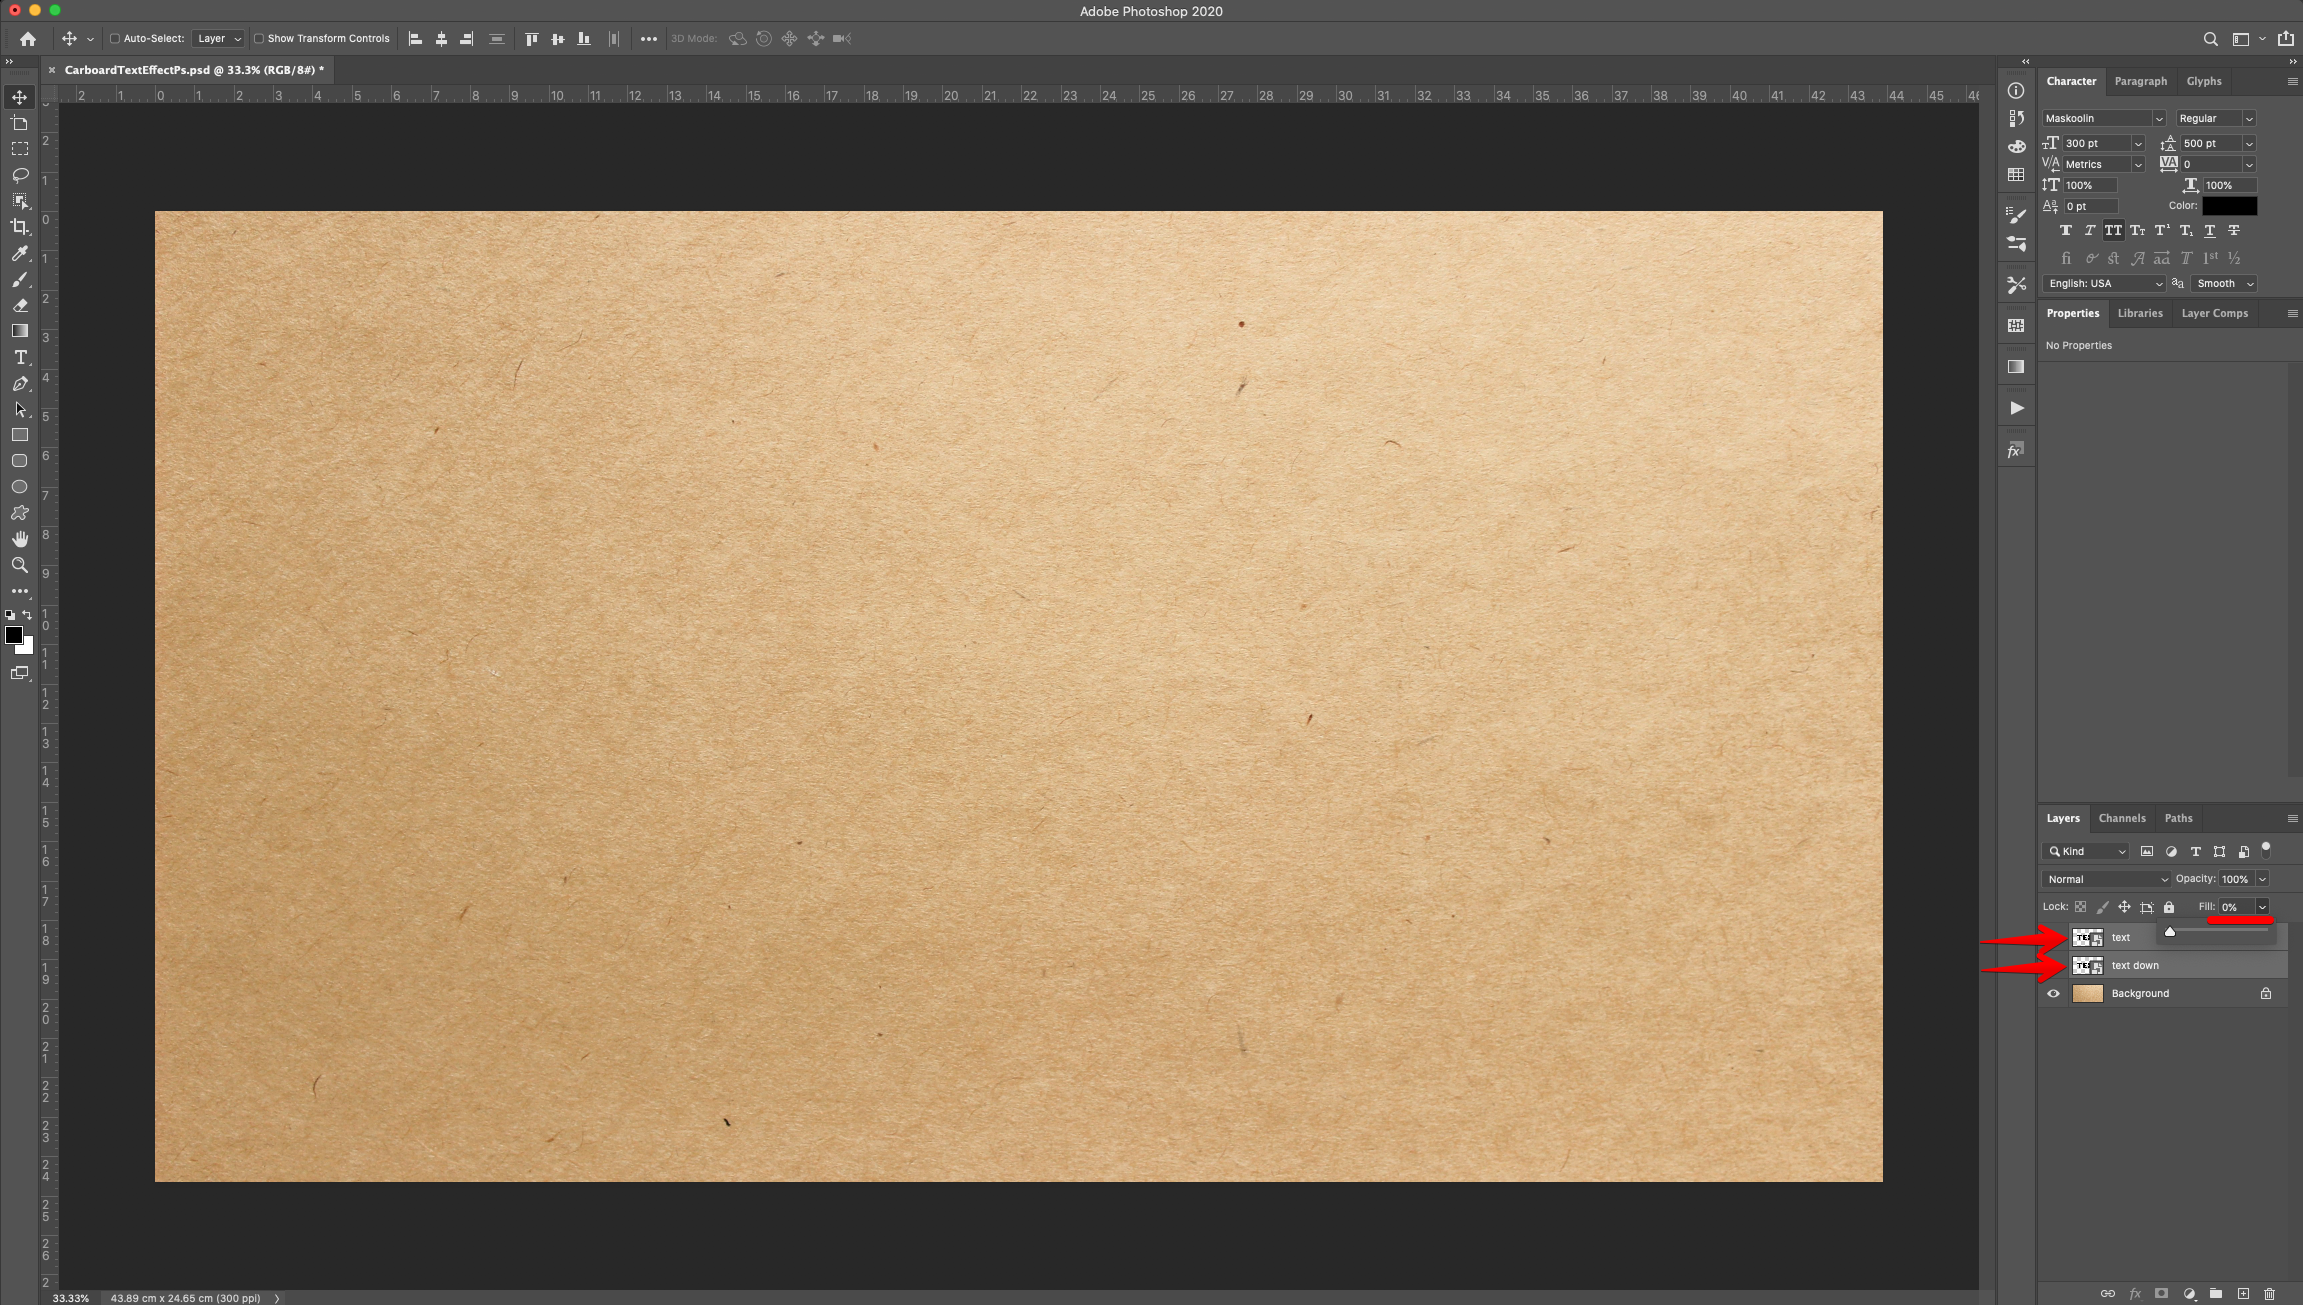
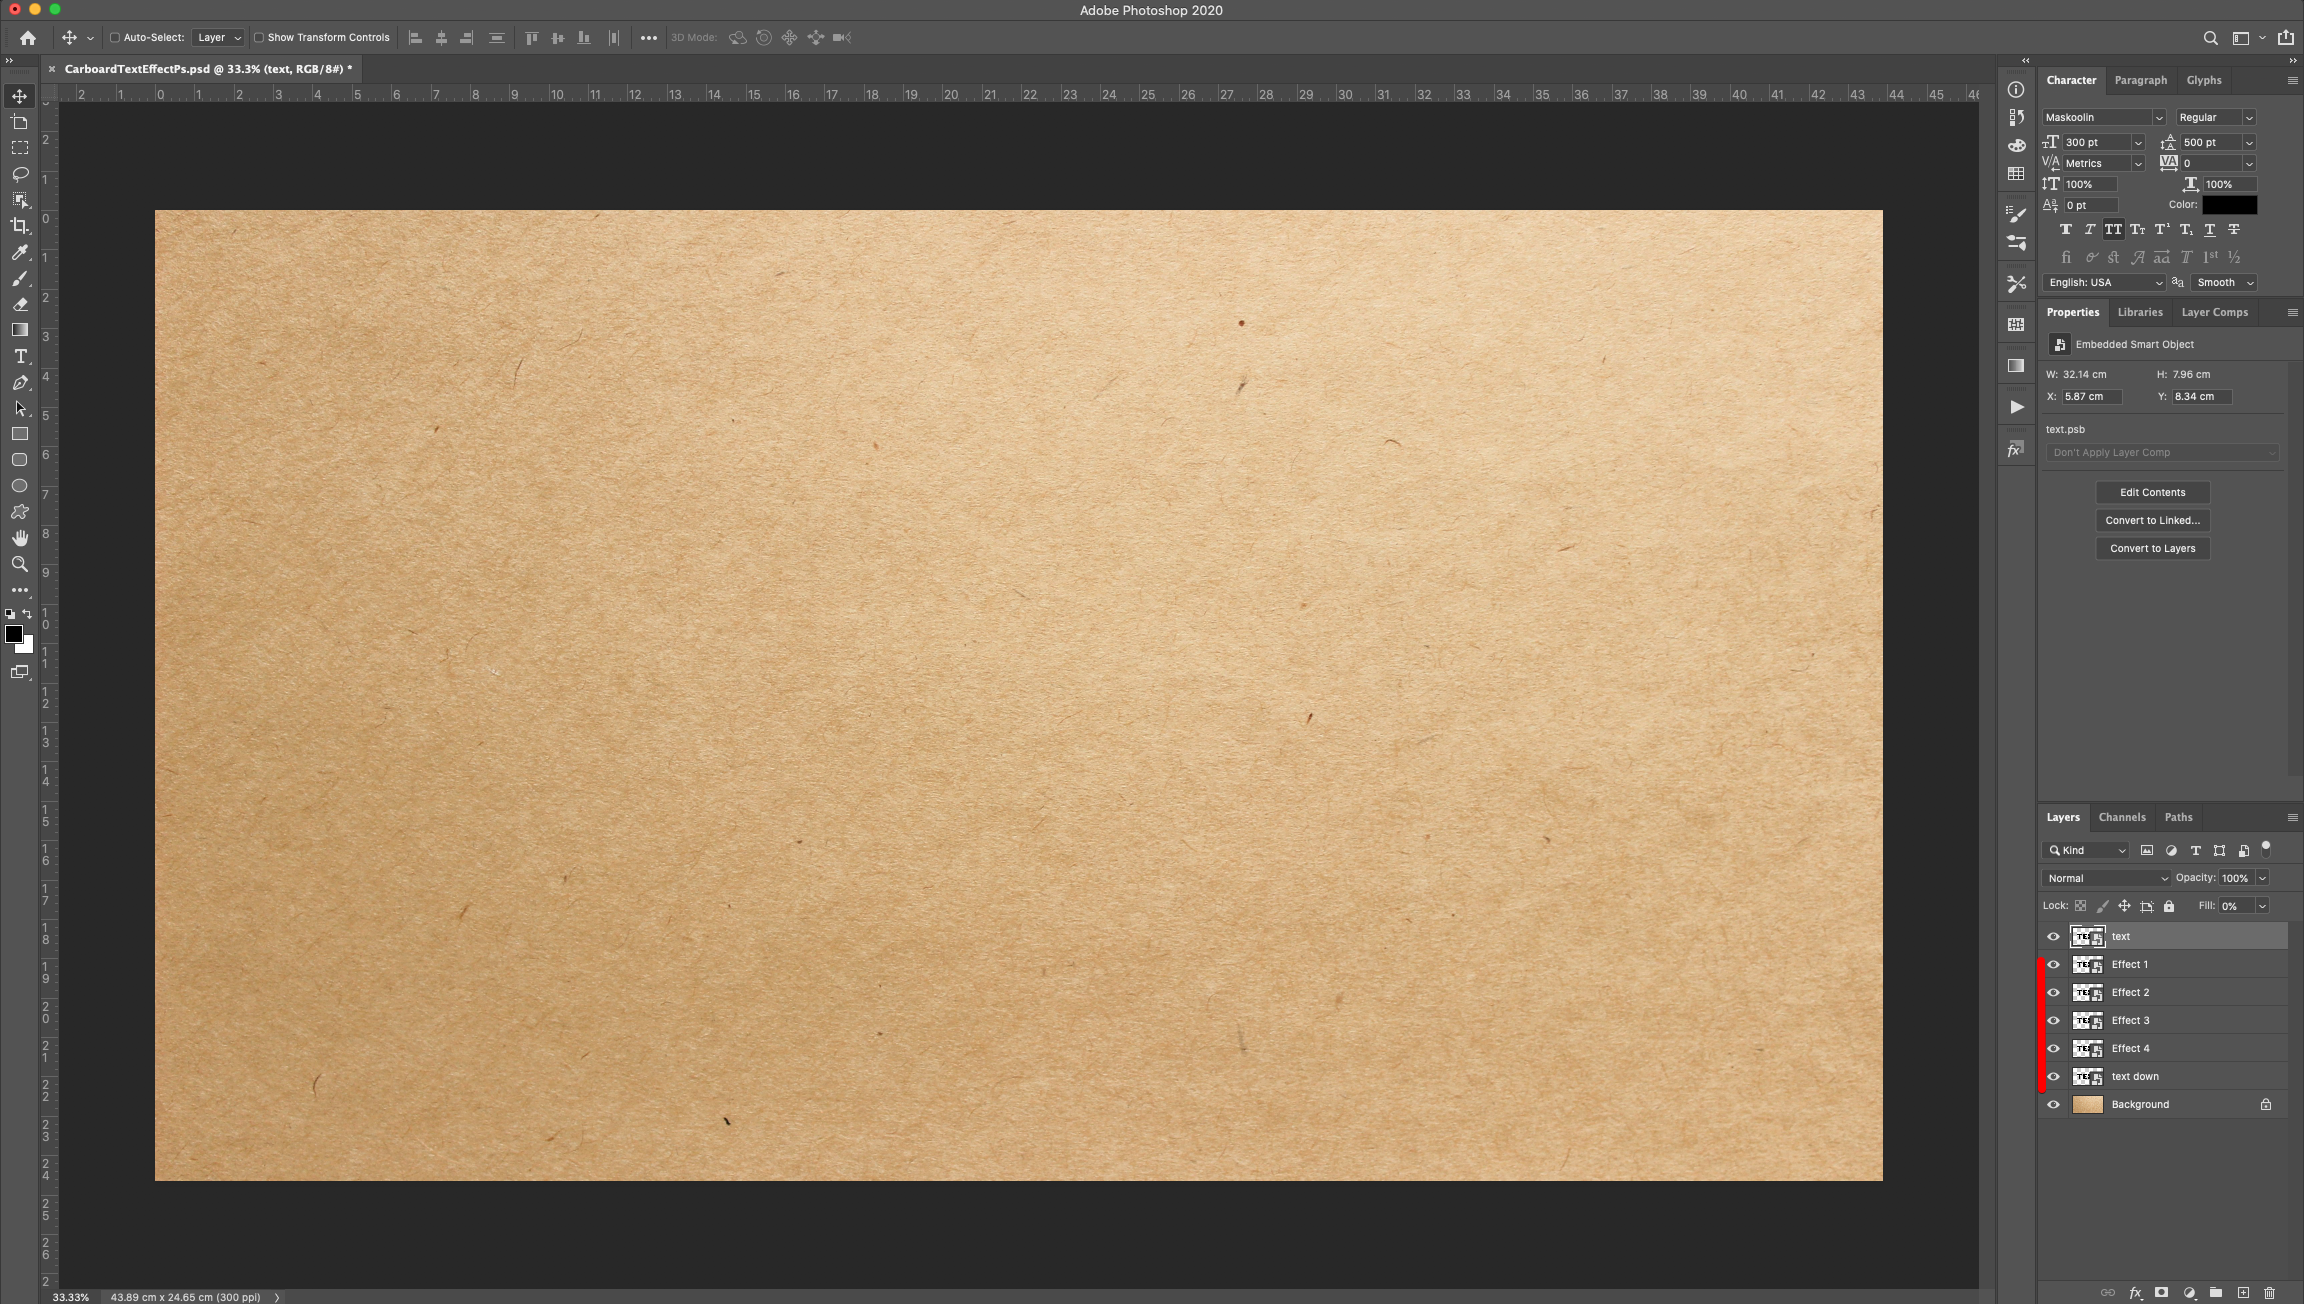
7 - Select the “Text” layer thumbnail and make four (4) more “Duplicates” (Command/Control + J). Name the Duplicate “Effect 1 to 4” and place them under the original “Text” Layer. Repeat with the “Text Down” Layer.
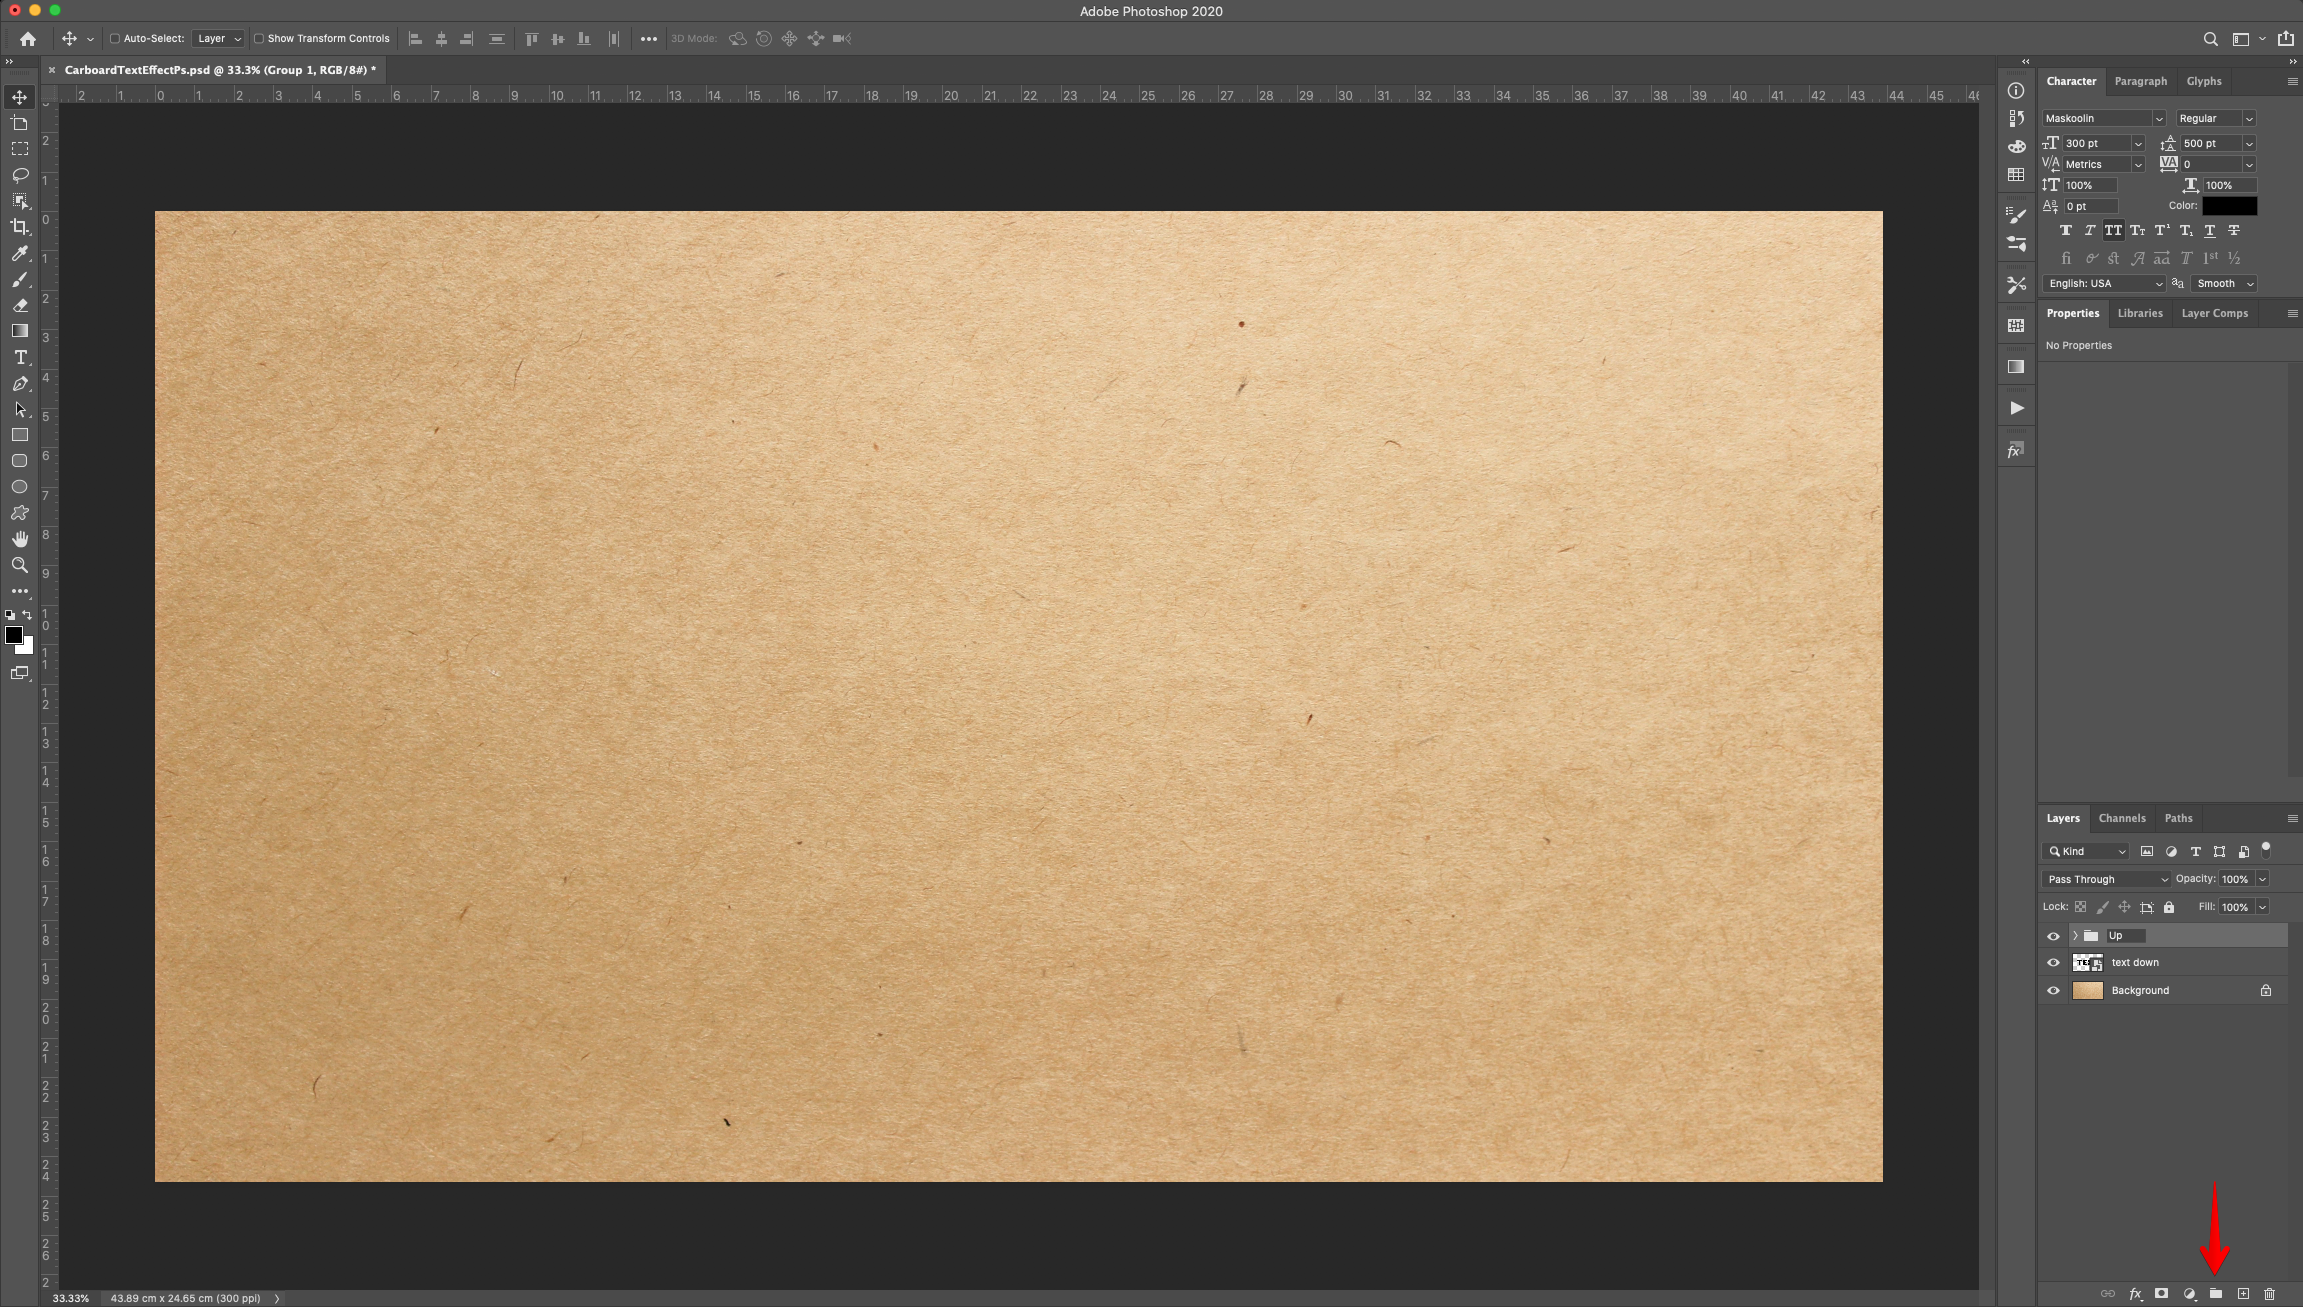
8 - Select the “Text” and its duplicate “Effect” Layers thumbnails and “Group” them together by dragging them to the Small Folder icon on the bottom of the “Layers Panel”. Name the group “Up”. Repeat with the “Text Down” Layer and its duplicate “Effect” layers. Name this group “Down”.
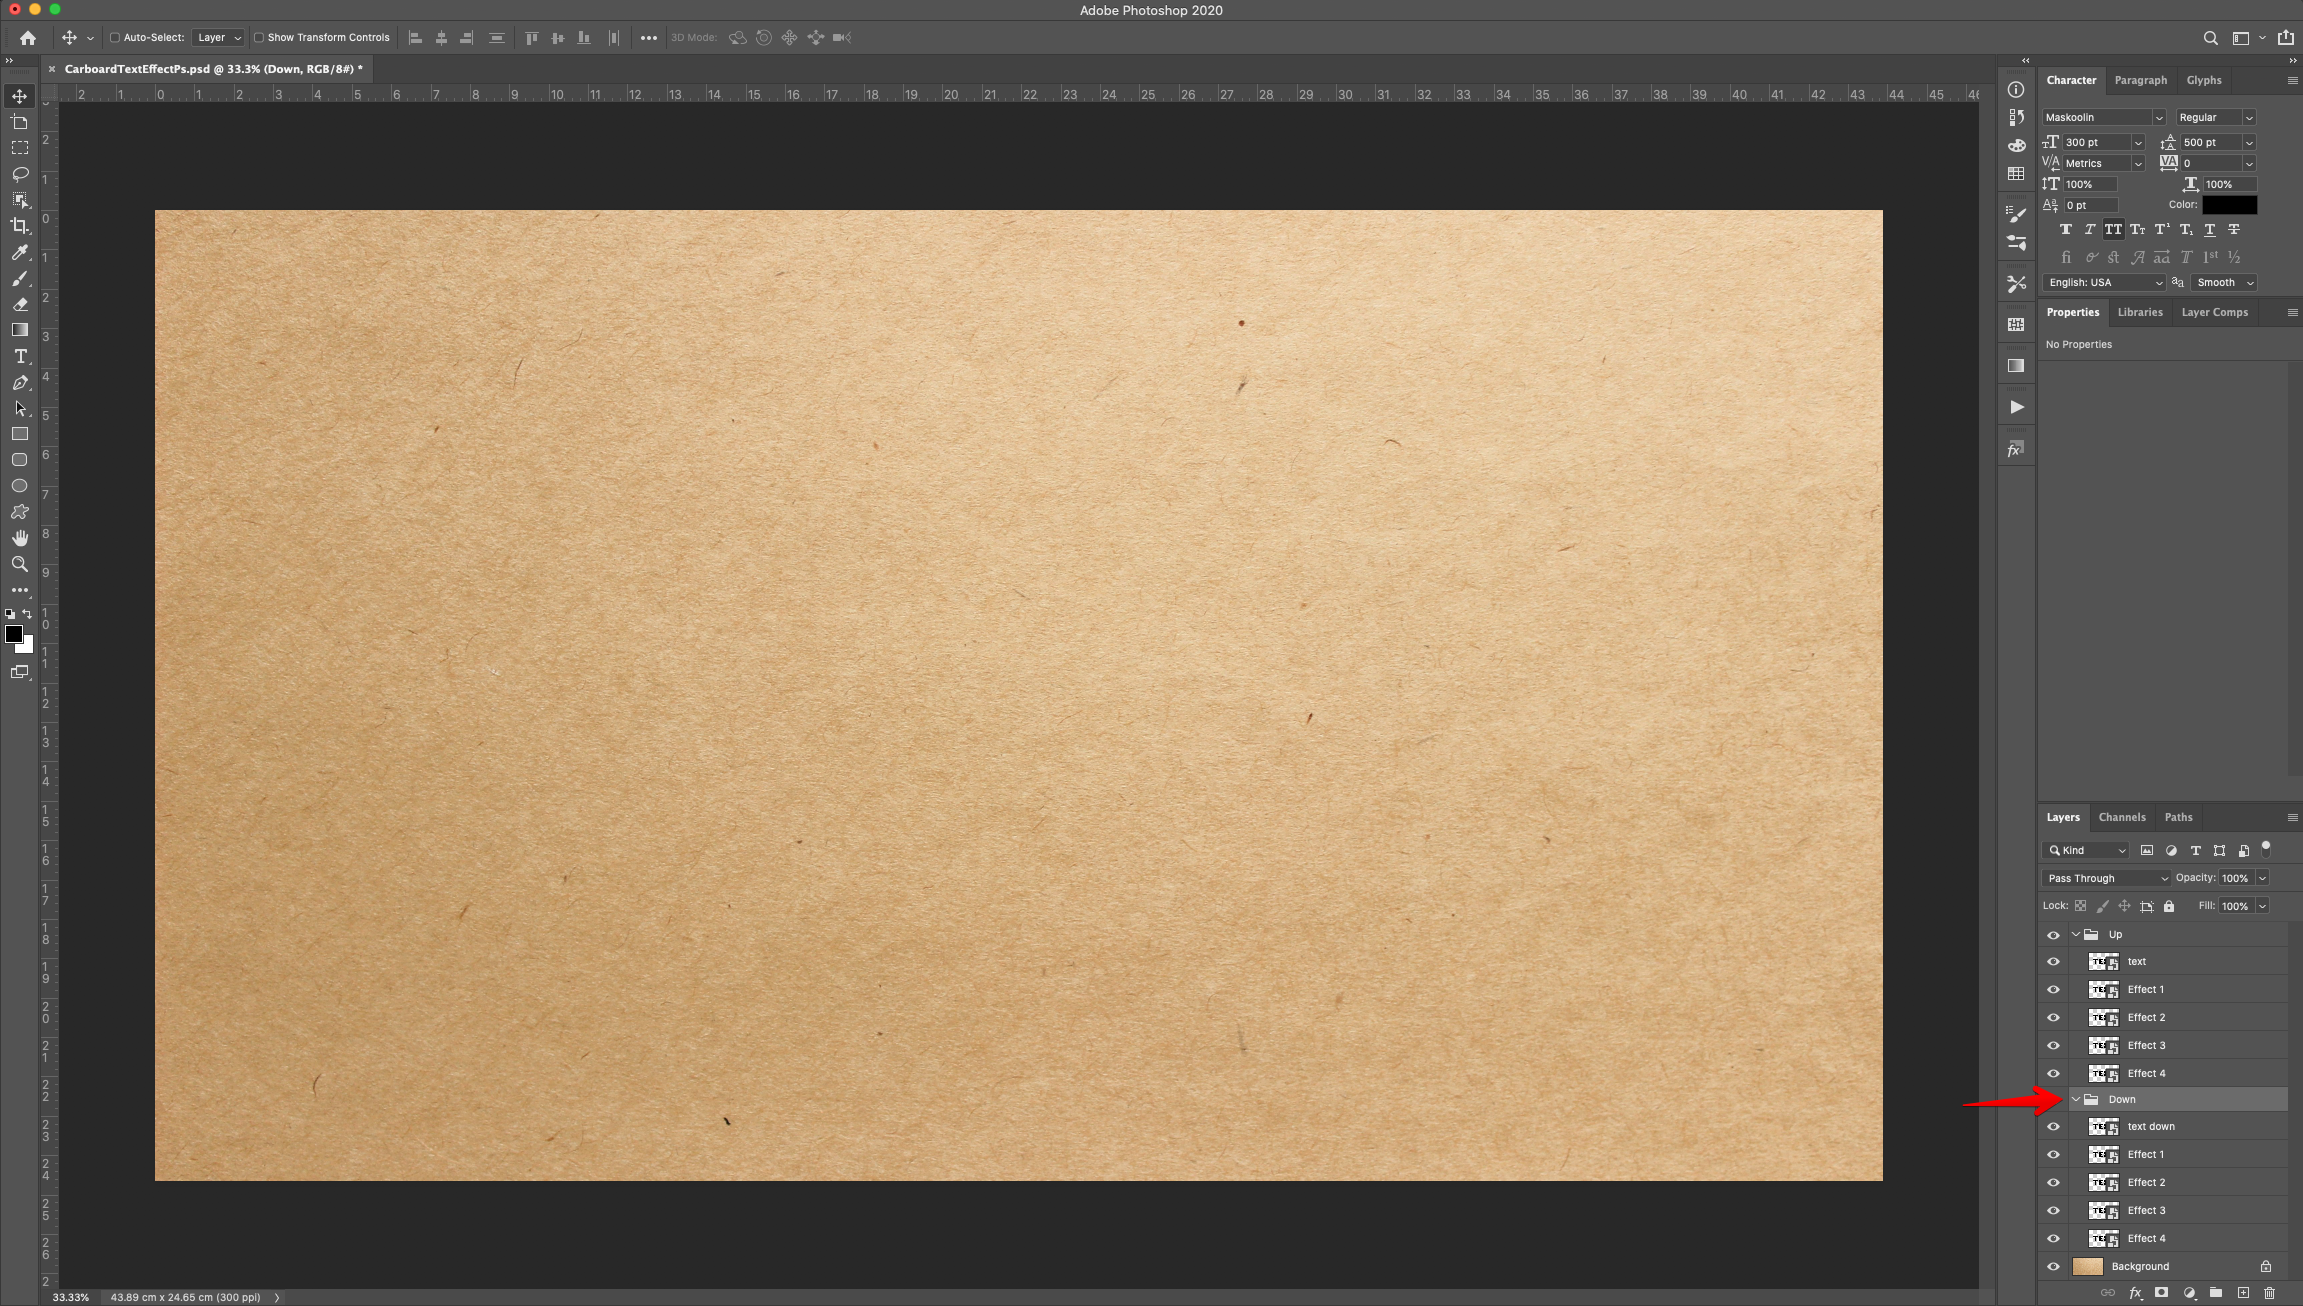
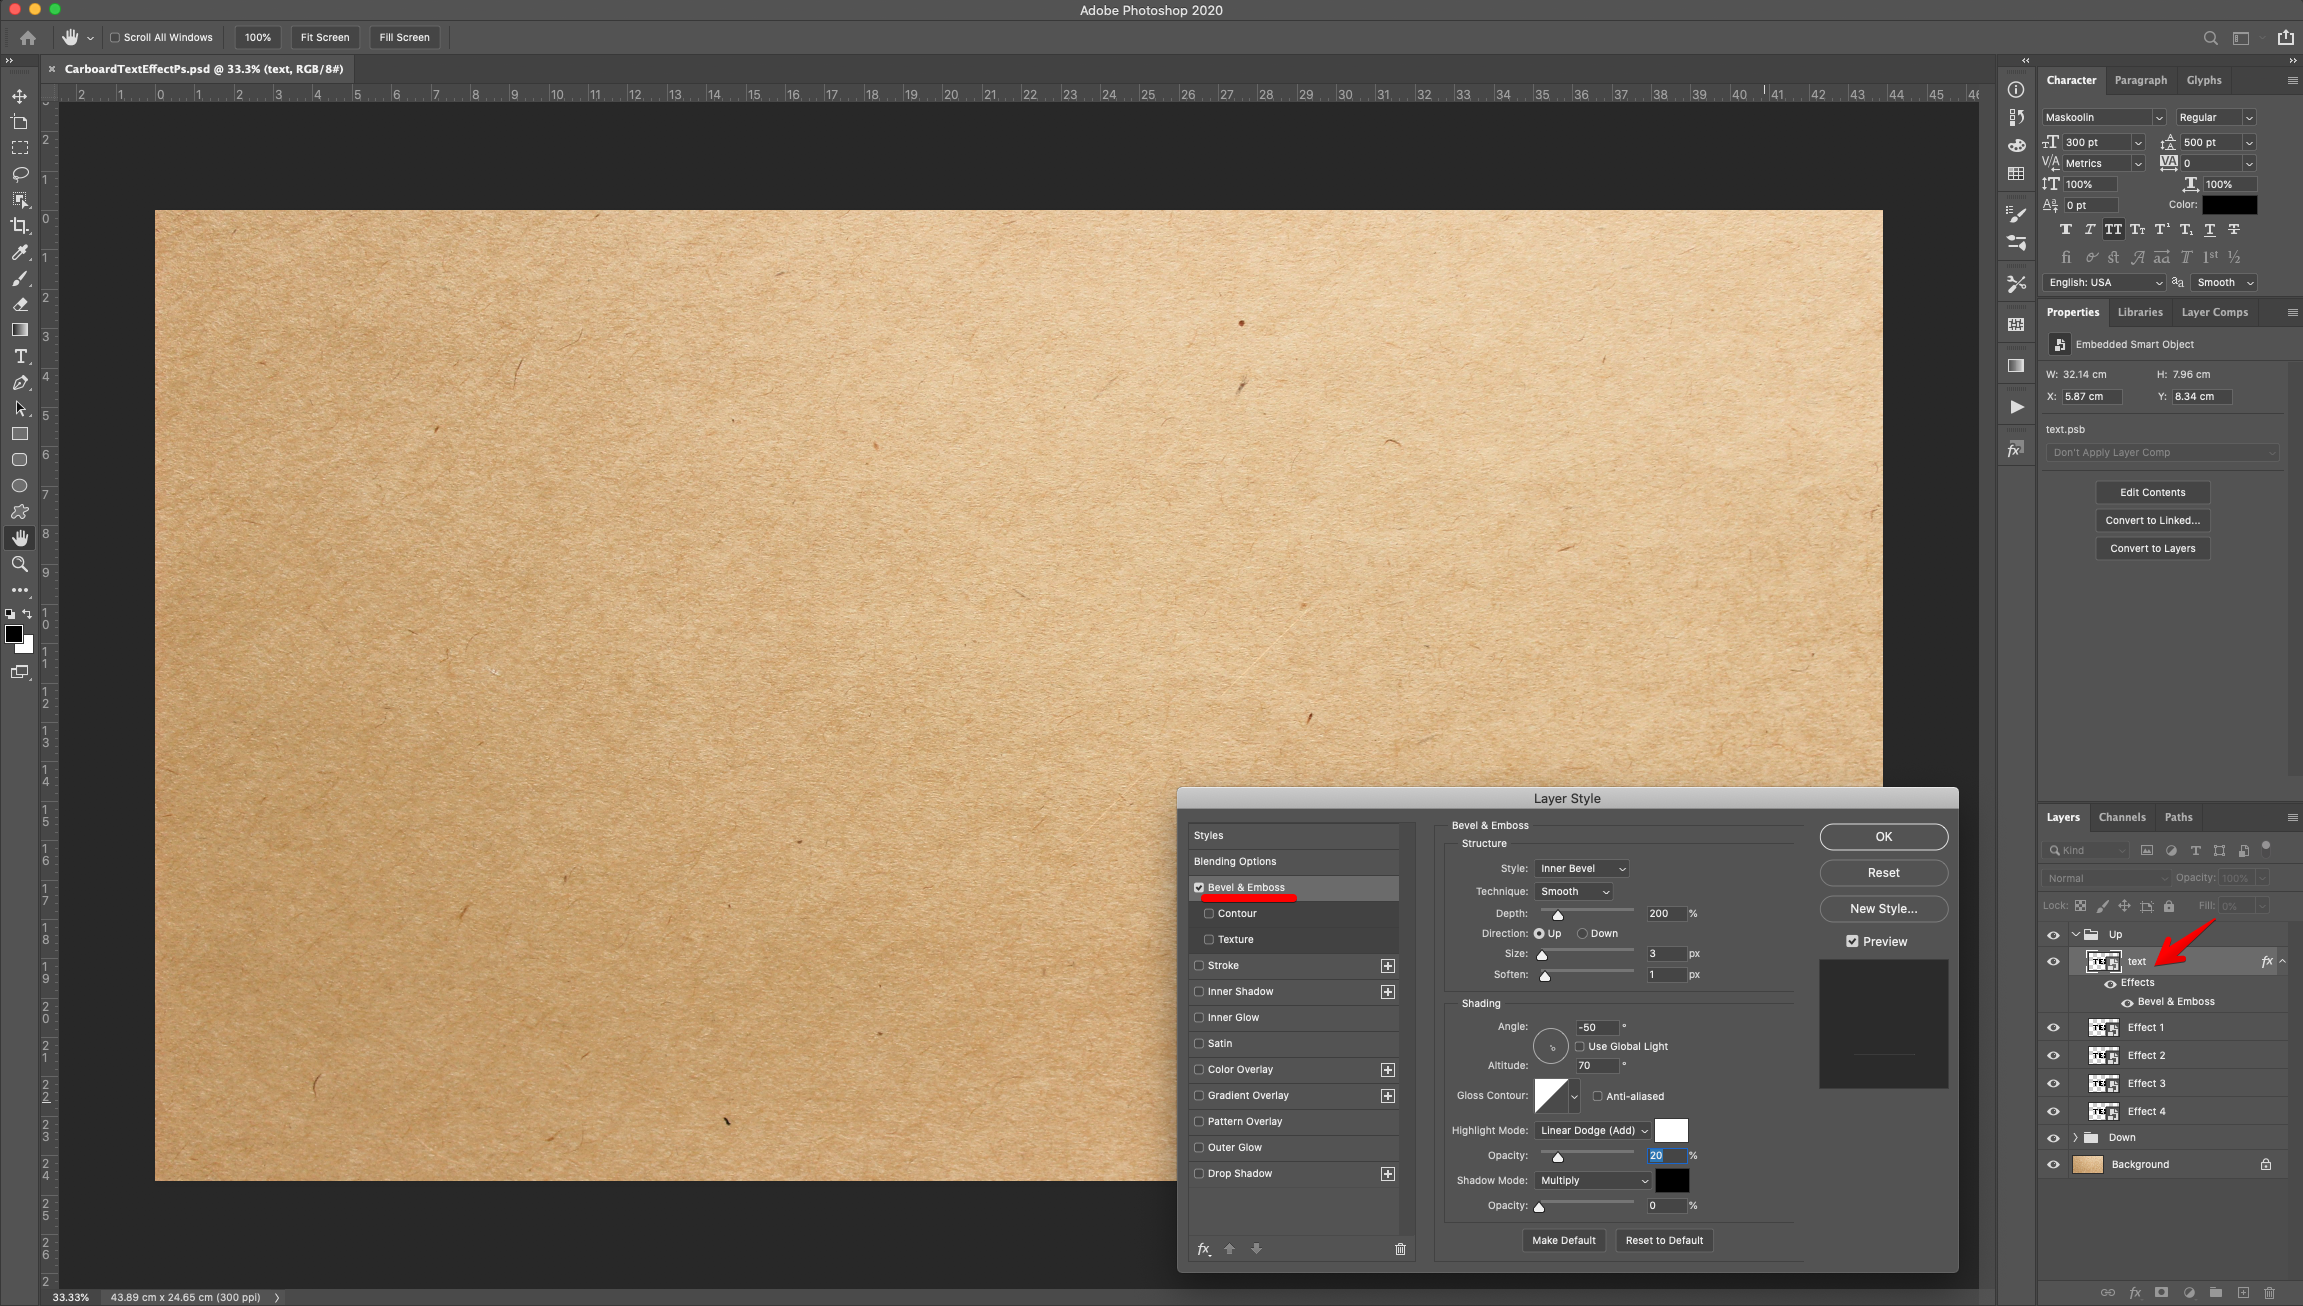
9 - Double-click on top of the “Text” layer Thumbnail (in the “Up” group) and apply the following “Layer Styles”:
Bevel & Emboss:
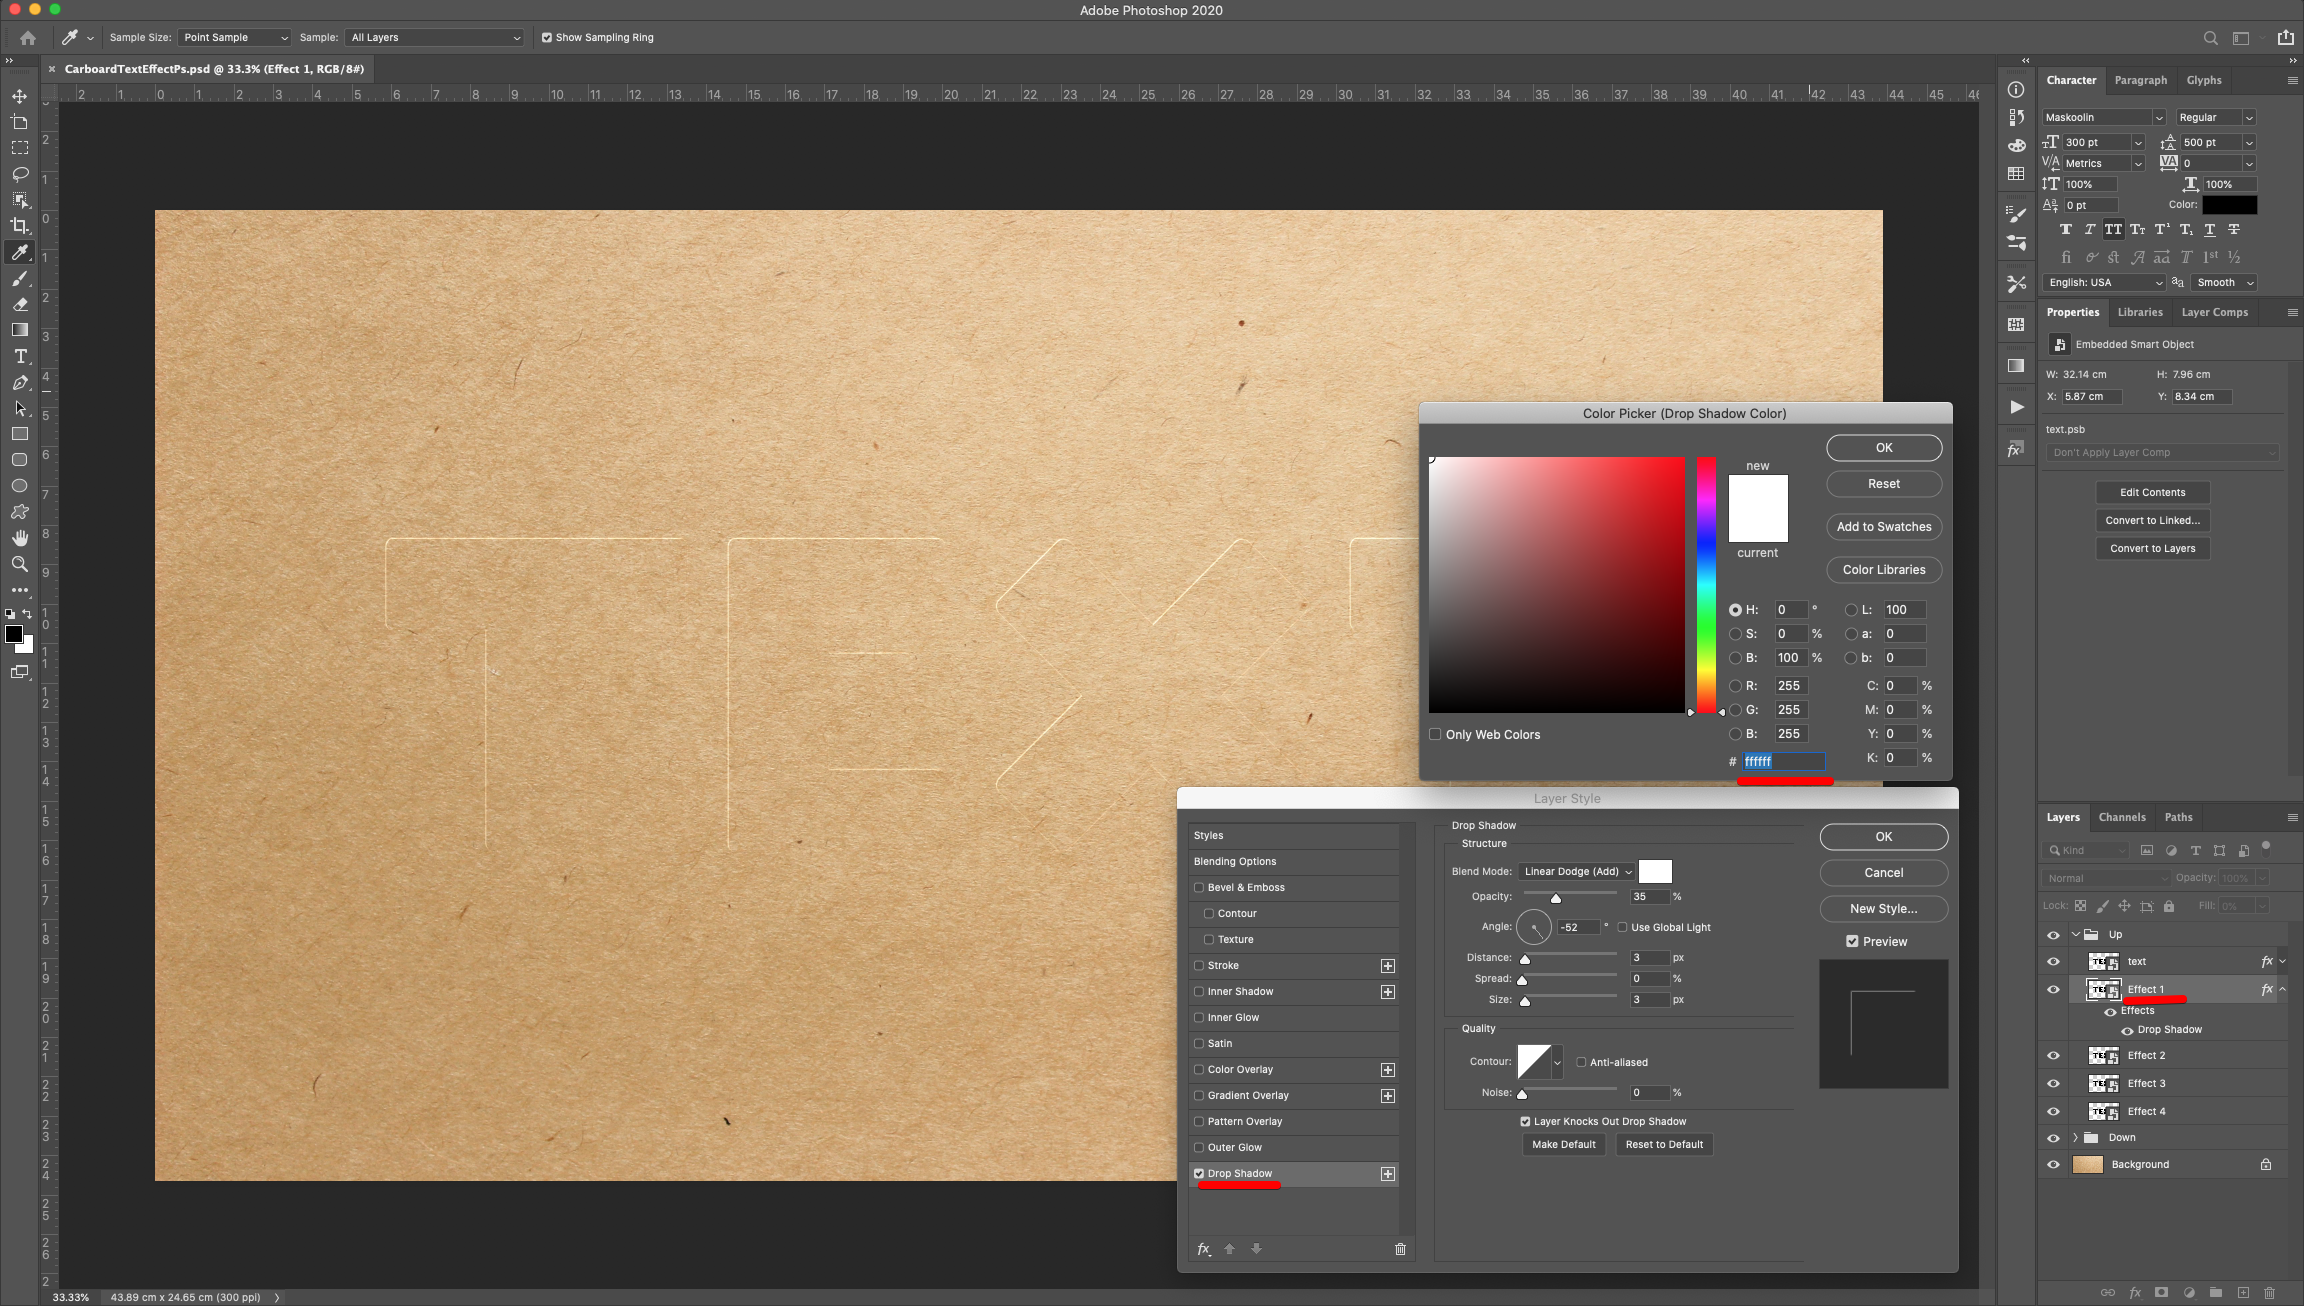
10 - Double-click on top of the “Effect 1” layer Thumbnail (in the “Up” group) and apply the following “Layer Styles”:
Drop Shadow: (#ffffff)
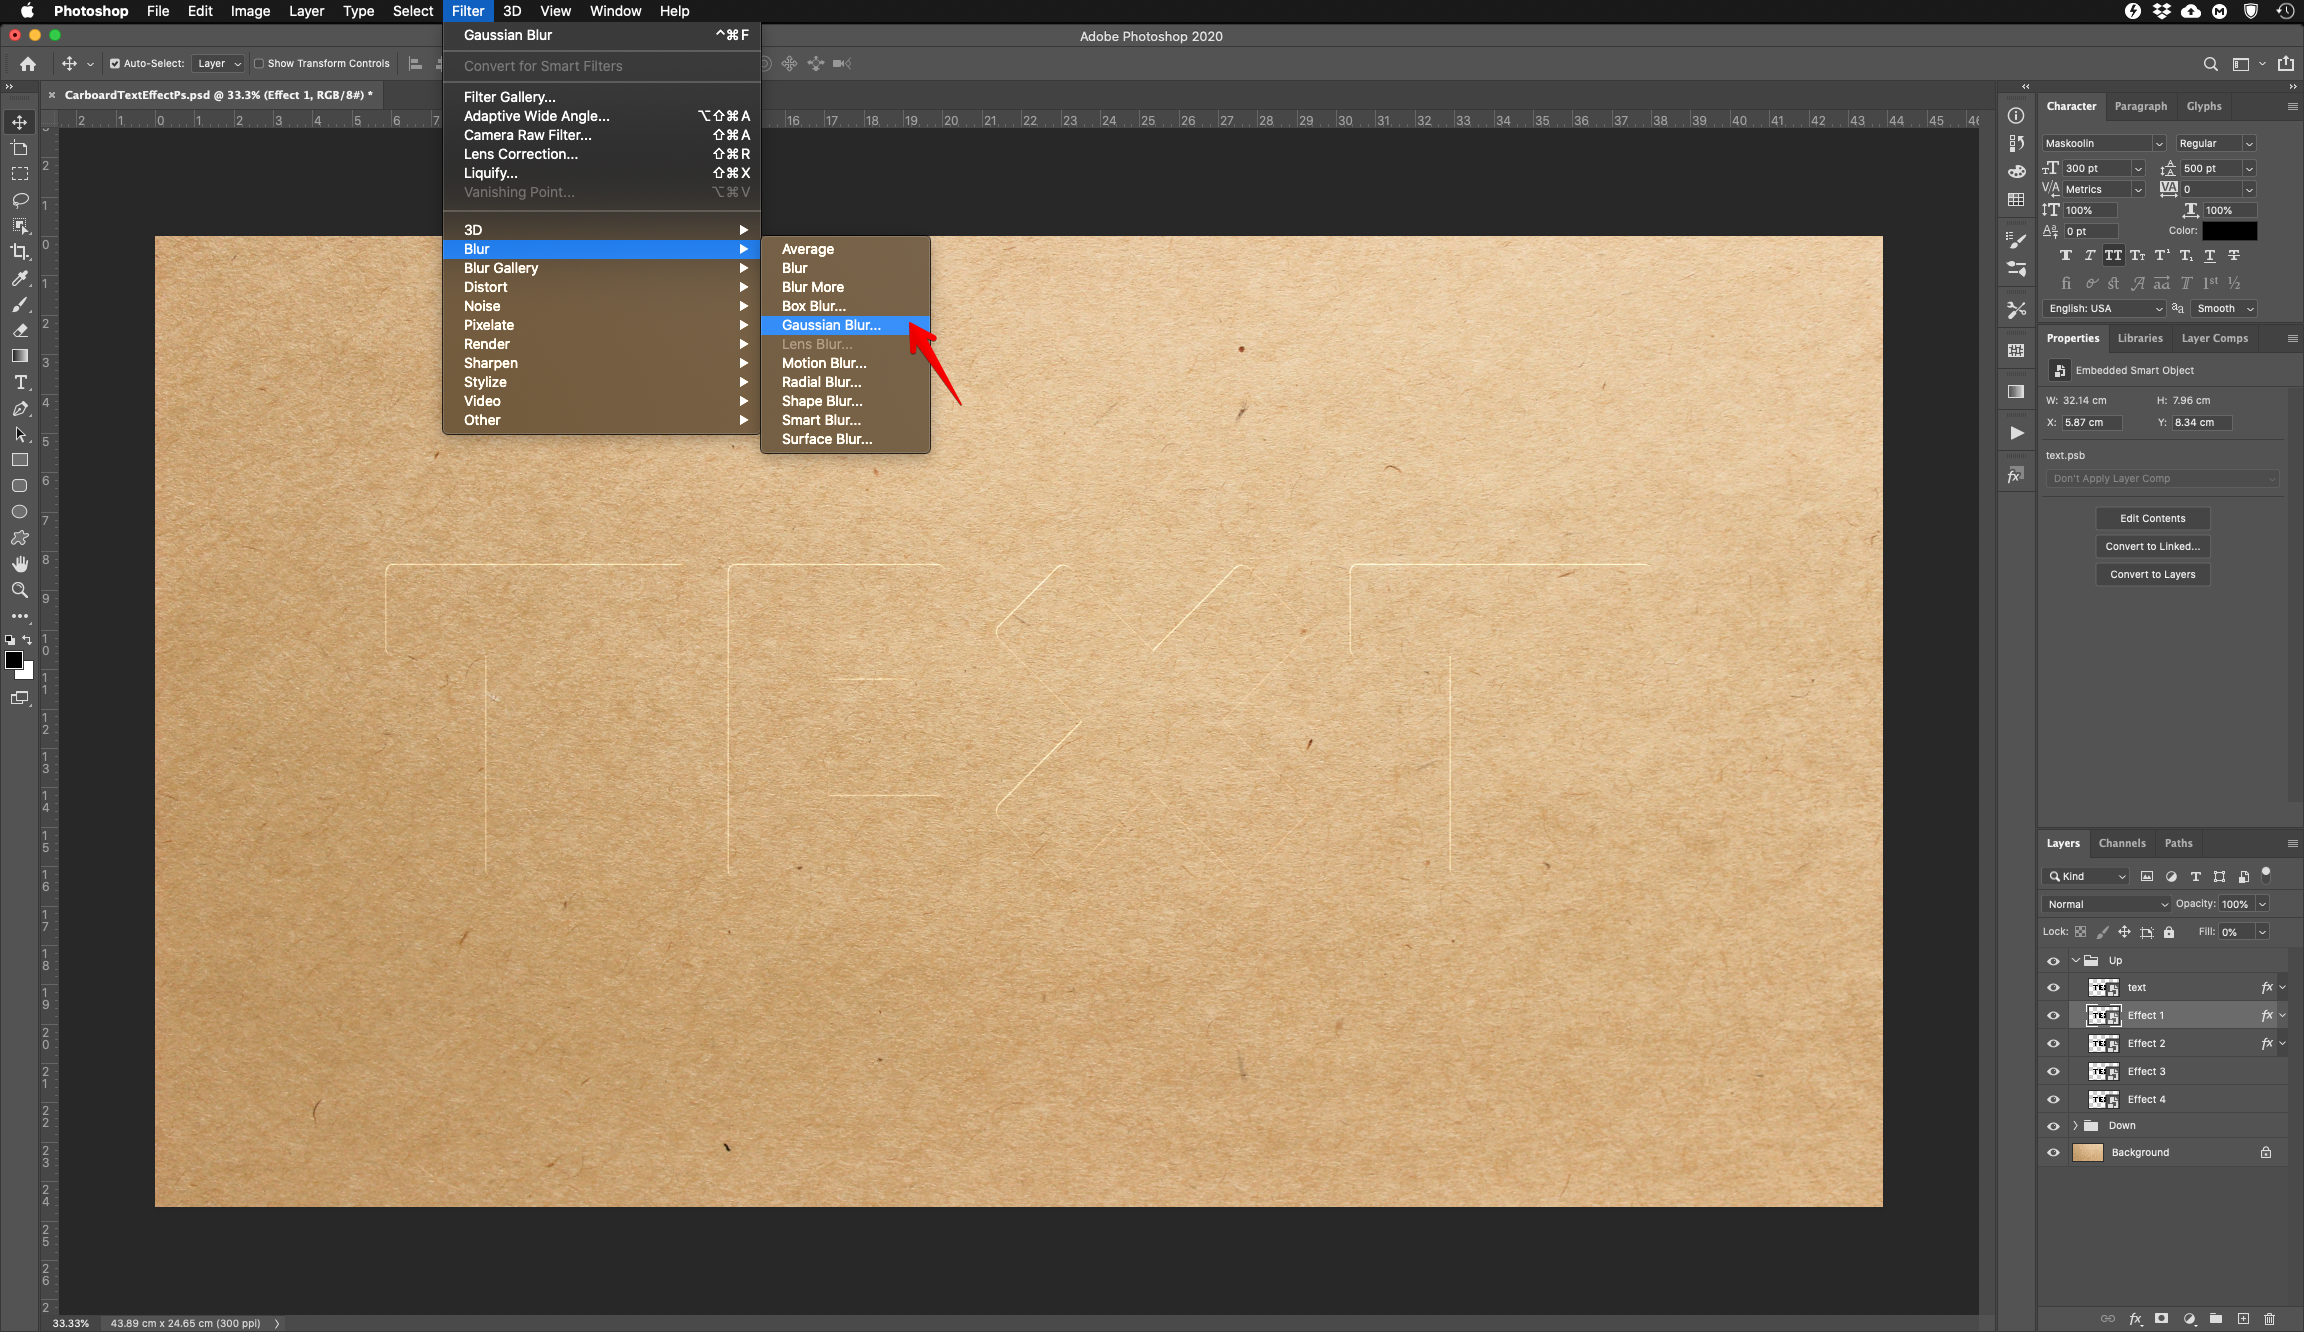
11 - Go to Filter > Blur > Gaussian Blur and use a “Radius” of 0.5 Pixels.
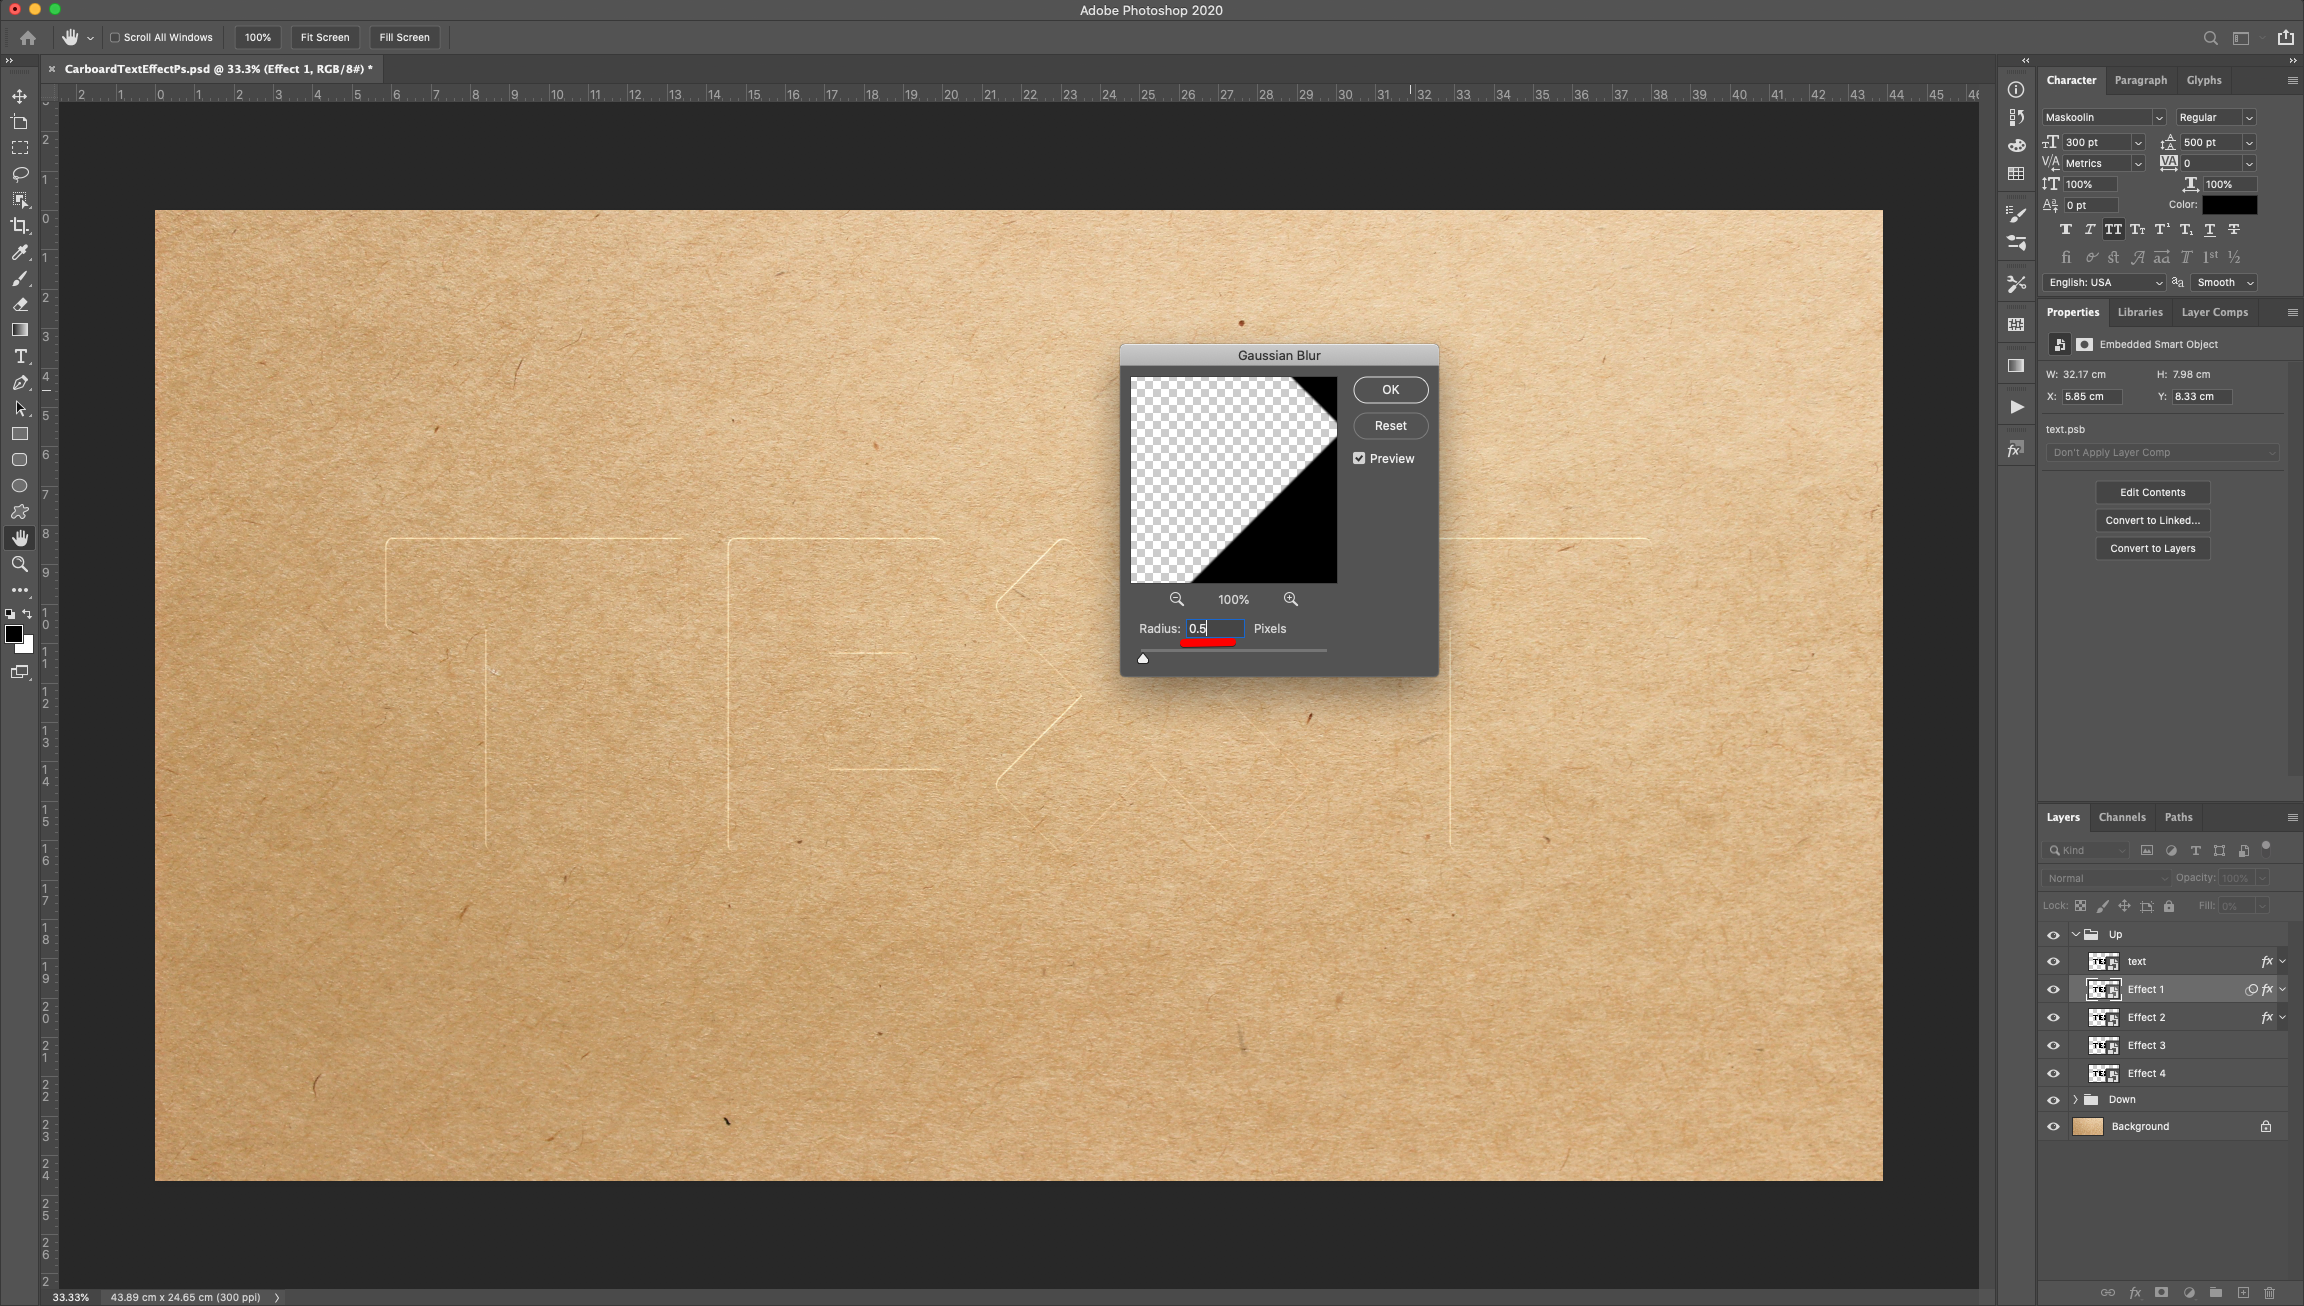
12 - Double-click on top of the “Effect 2” layer Thumbnail (in the “Up” group) and apply the following “Layer Styles”:
Drop Shadow: (#000000)
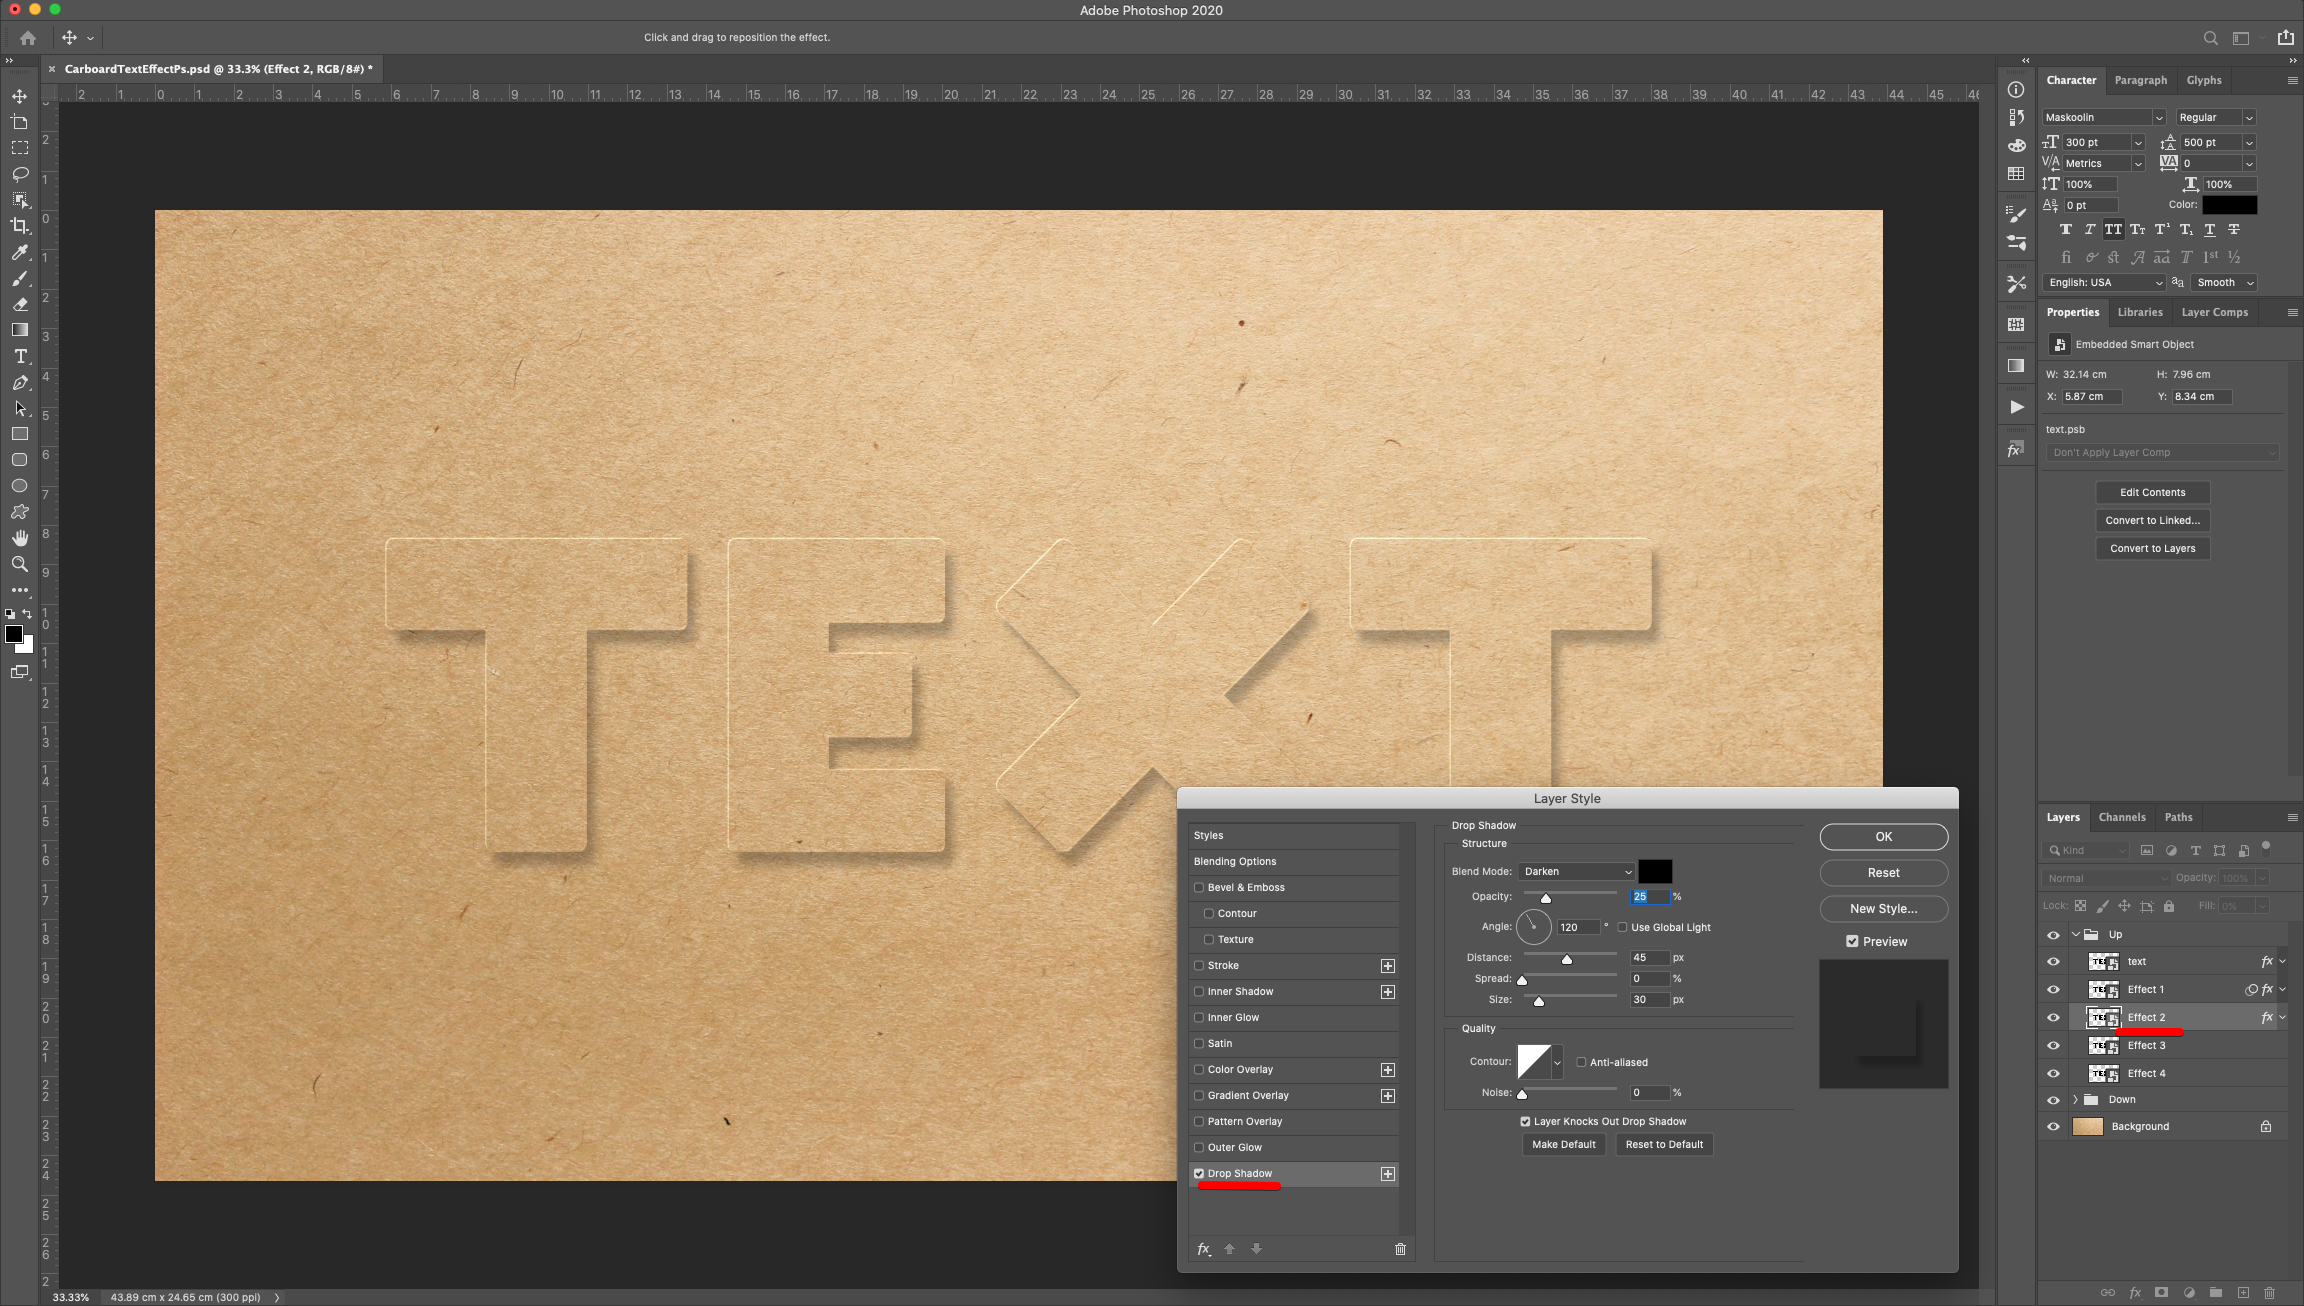
Go to Filter > Blur > Gaussian Blur and use a “Radius” of 0.5 Pixels.
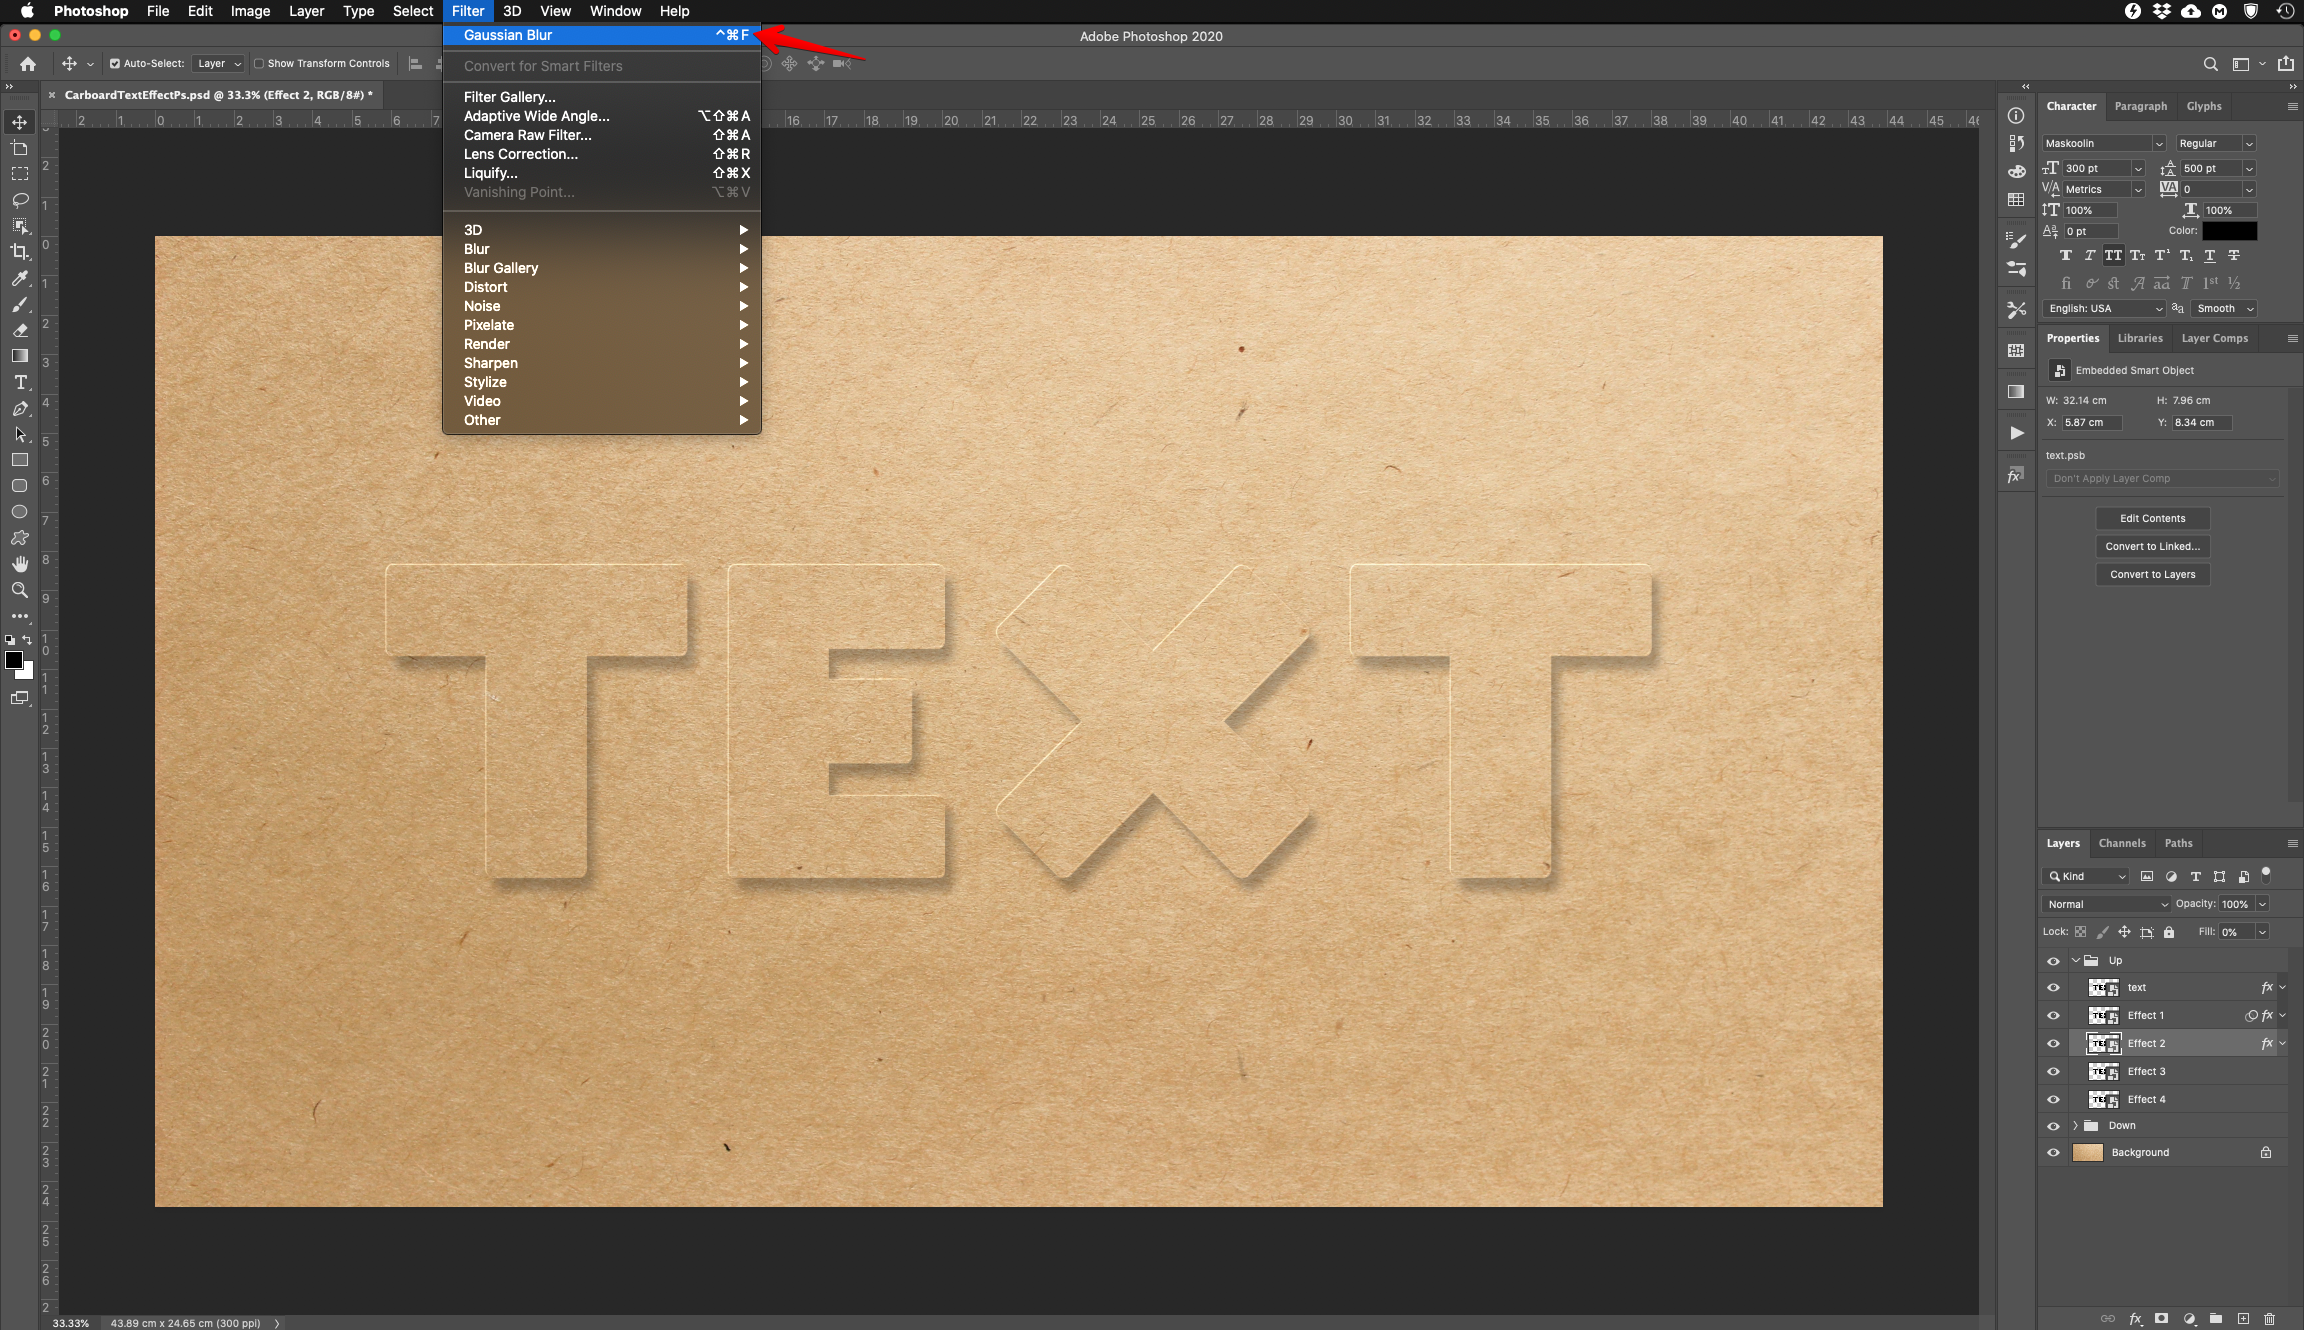
13 - Double-click on top of the “Effect 3” layer Thumbnail (in the “Up” group) and apply the following “Layer Styles”:
Bevel & Emboss:
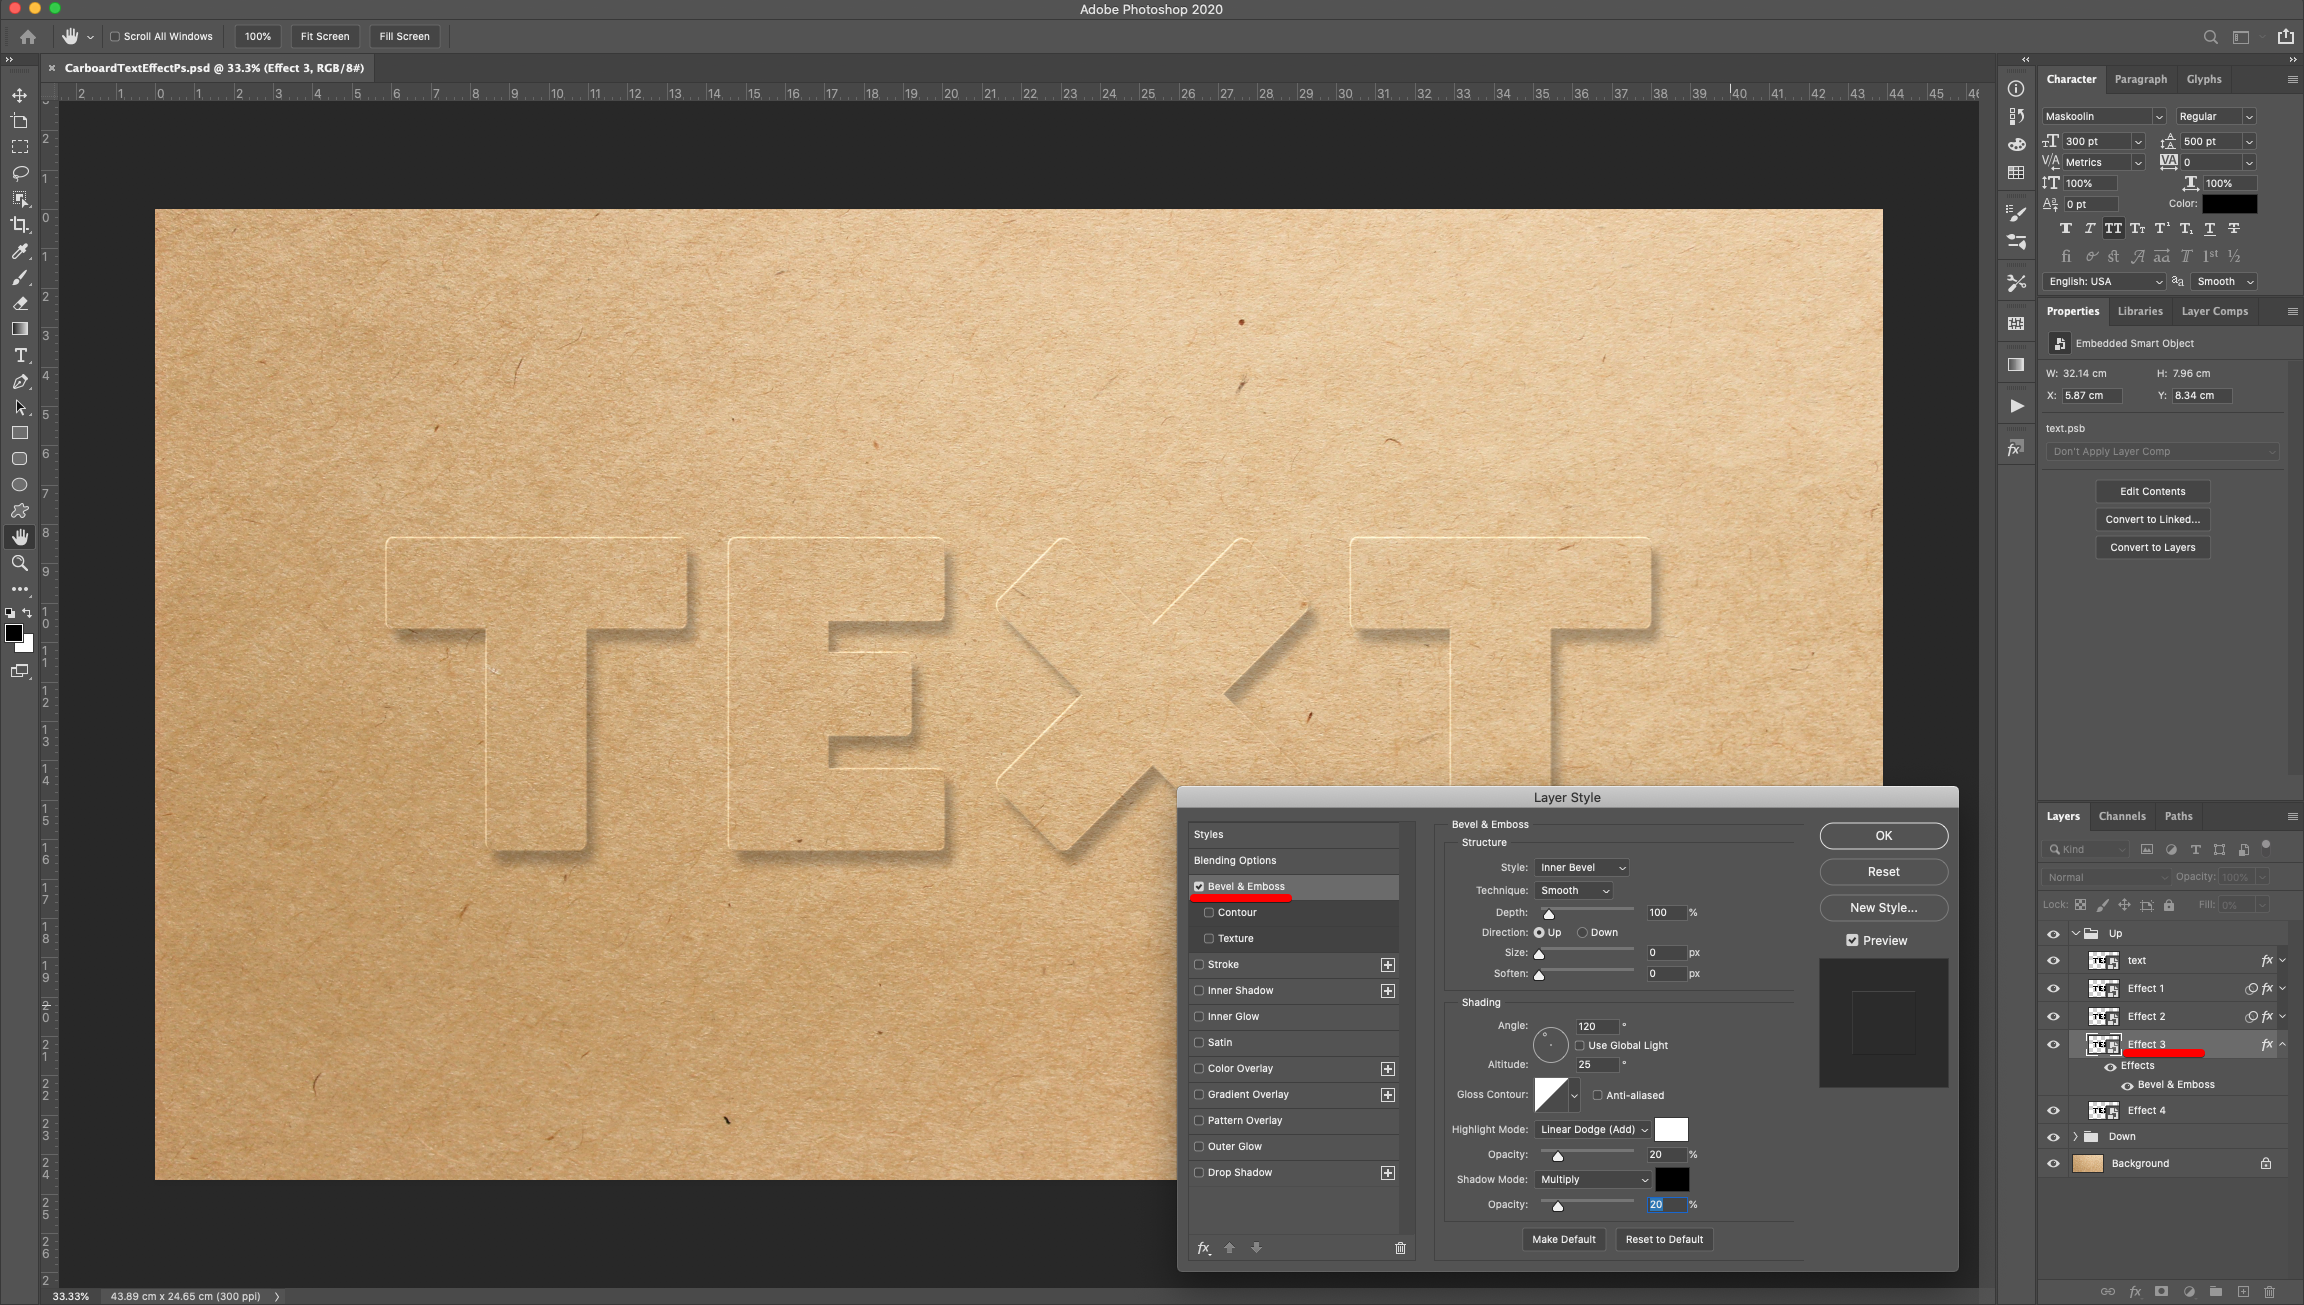
Texture: (Grey Granite)
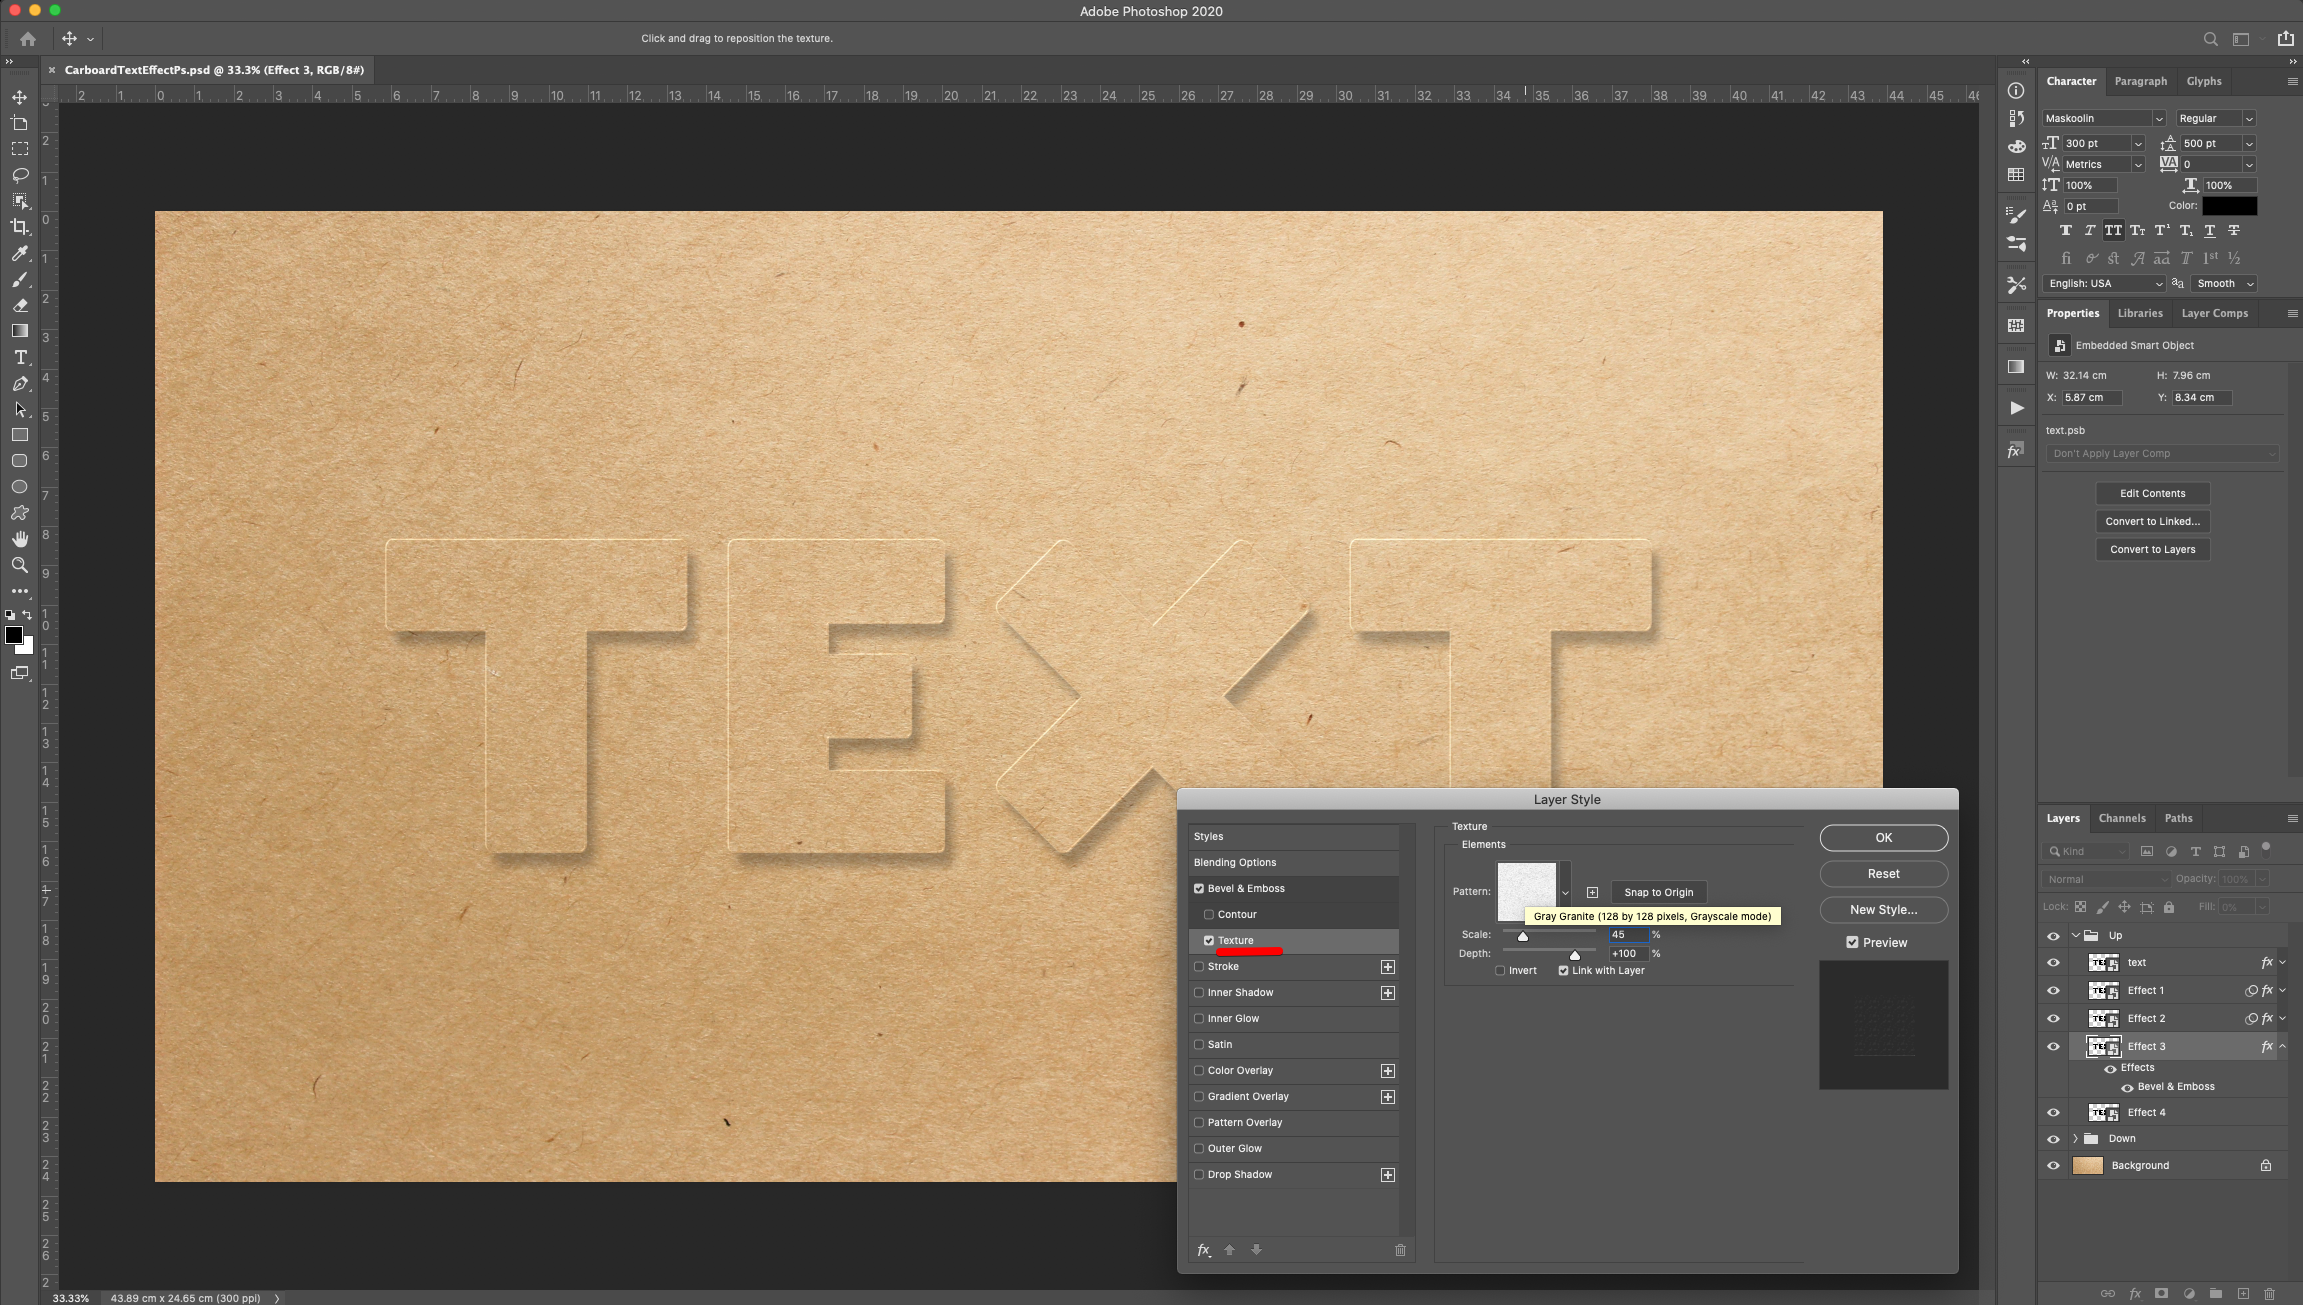
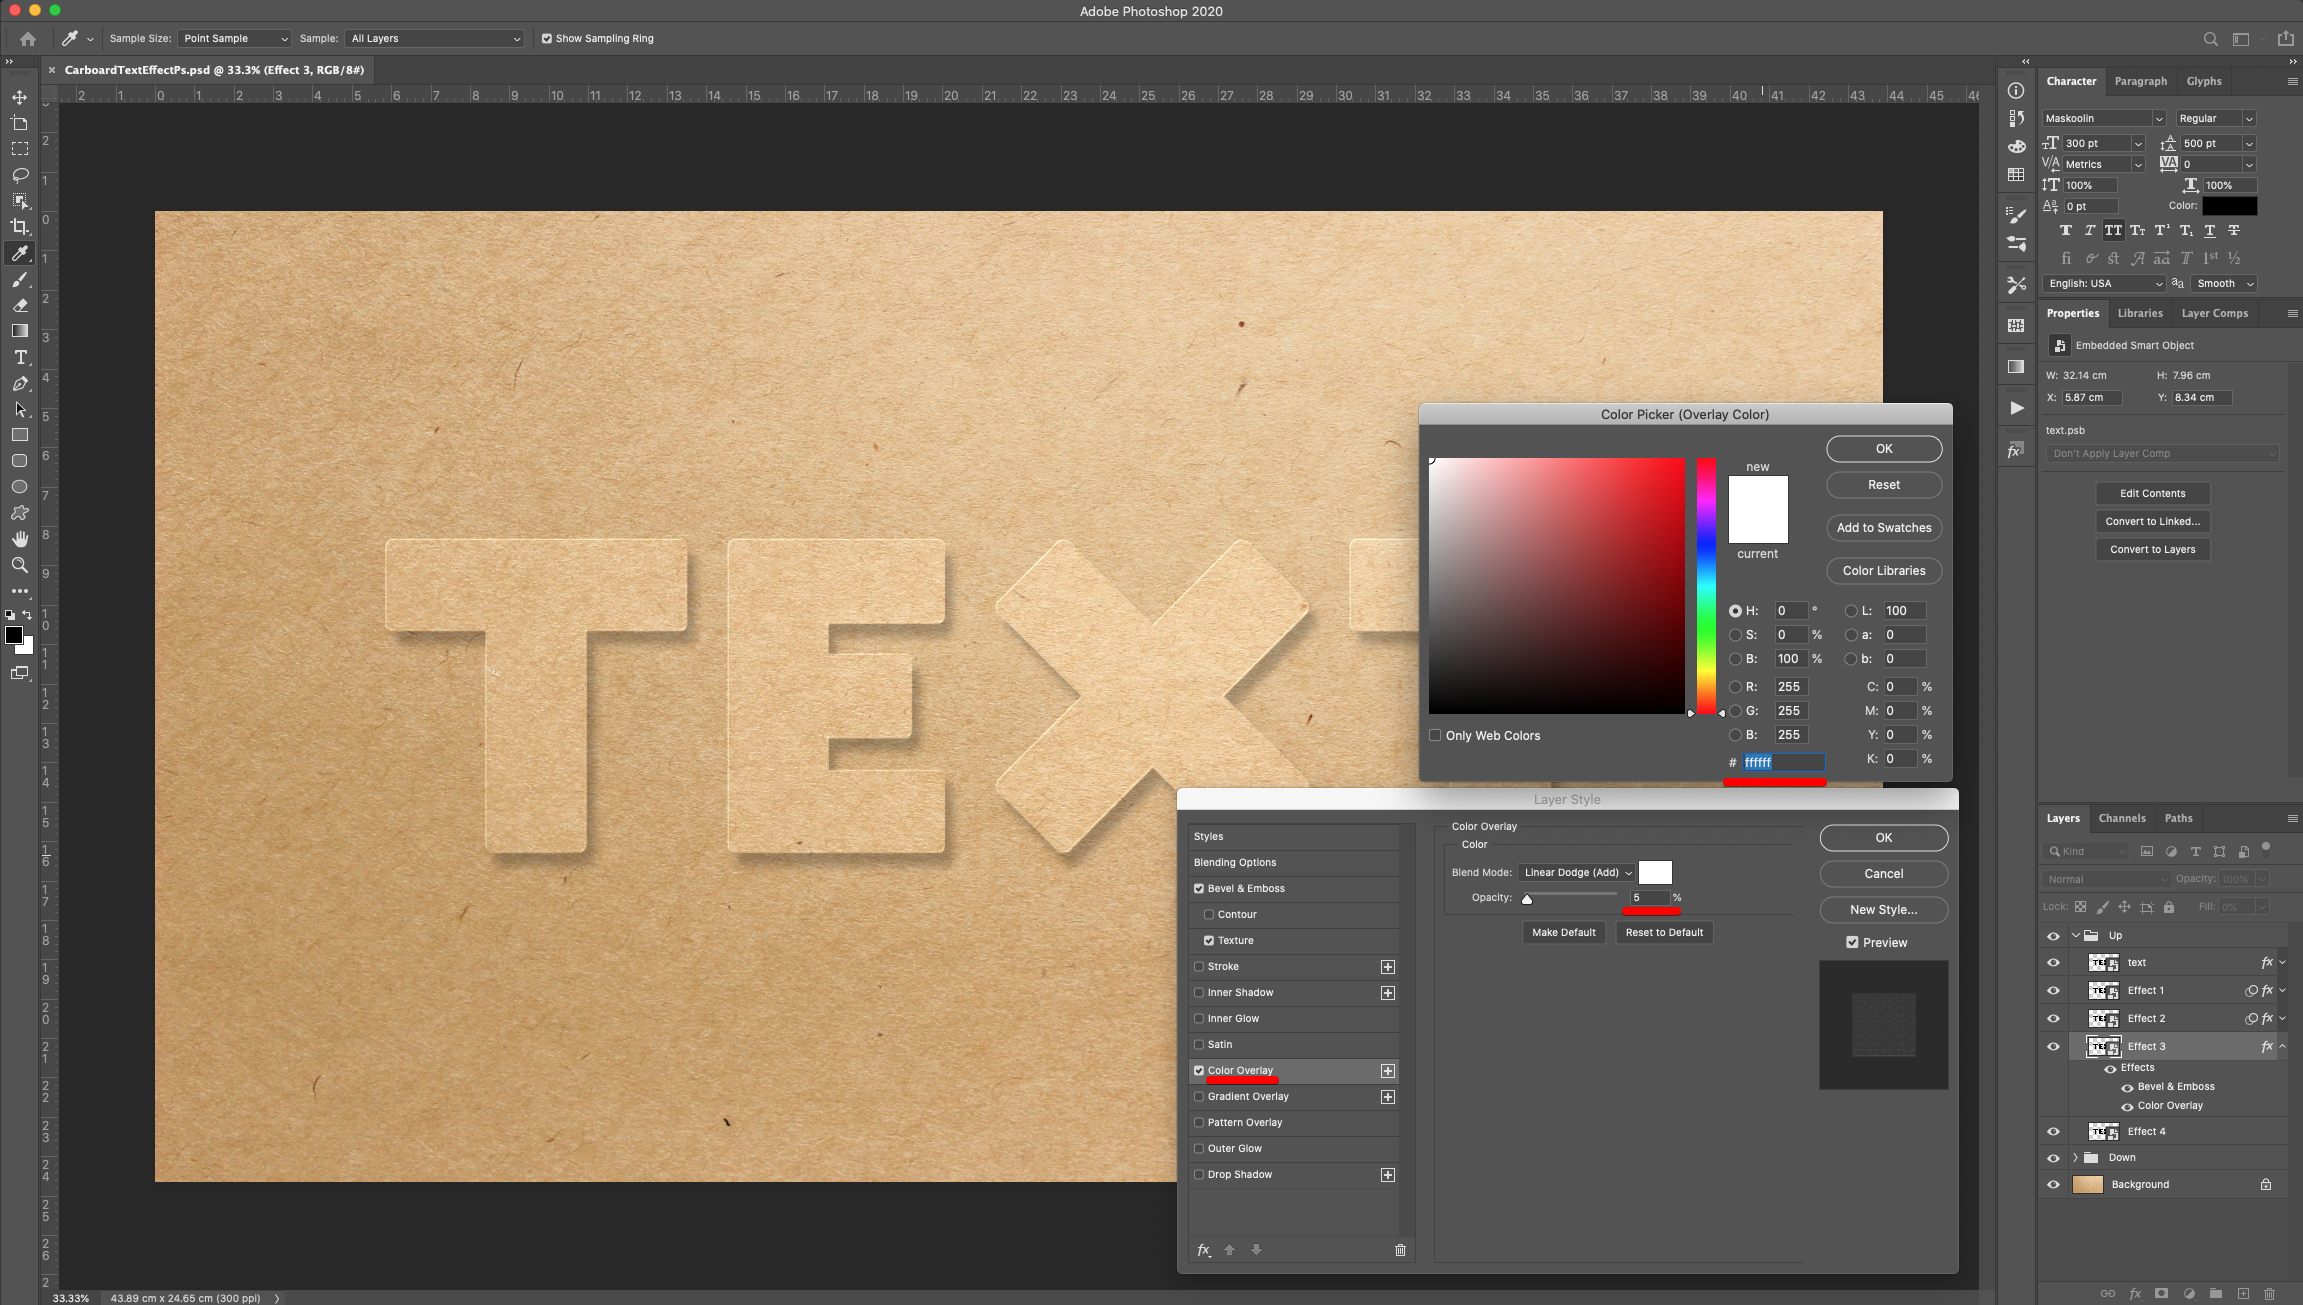
Color Overlay: (#ffffff)
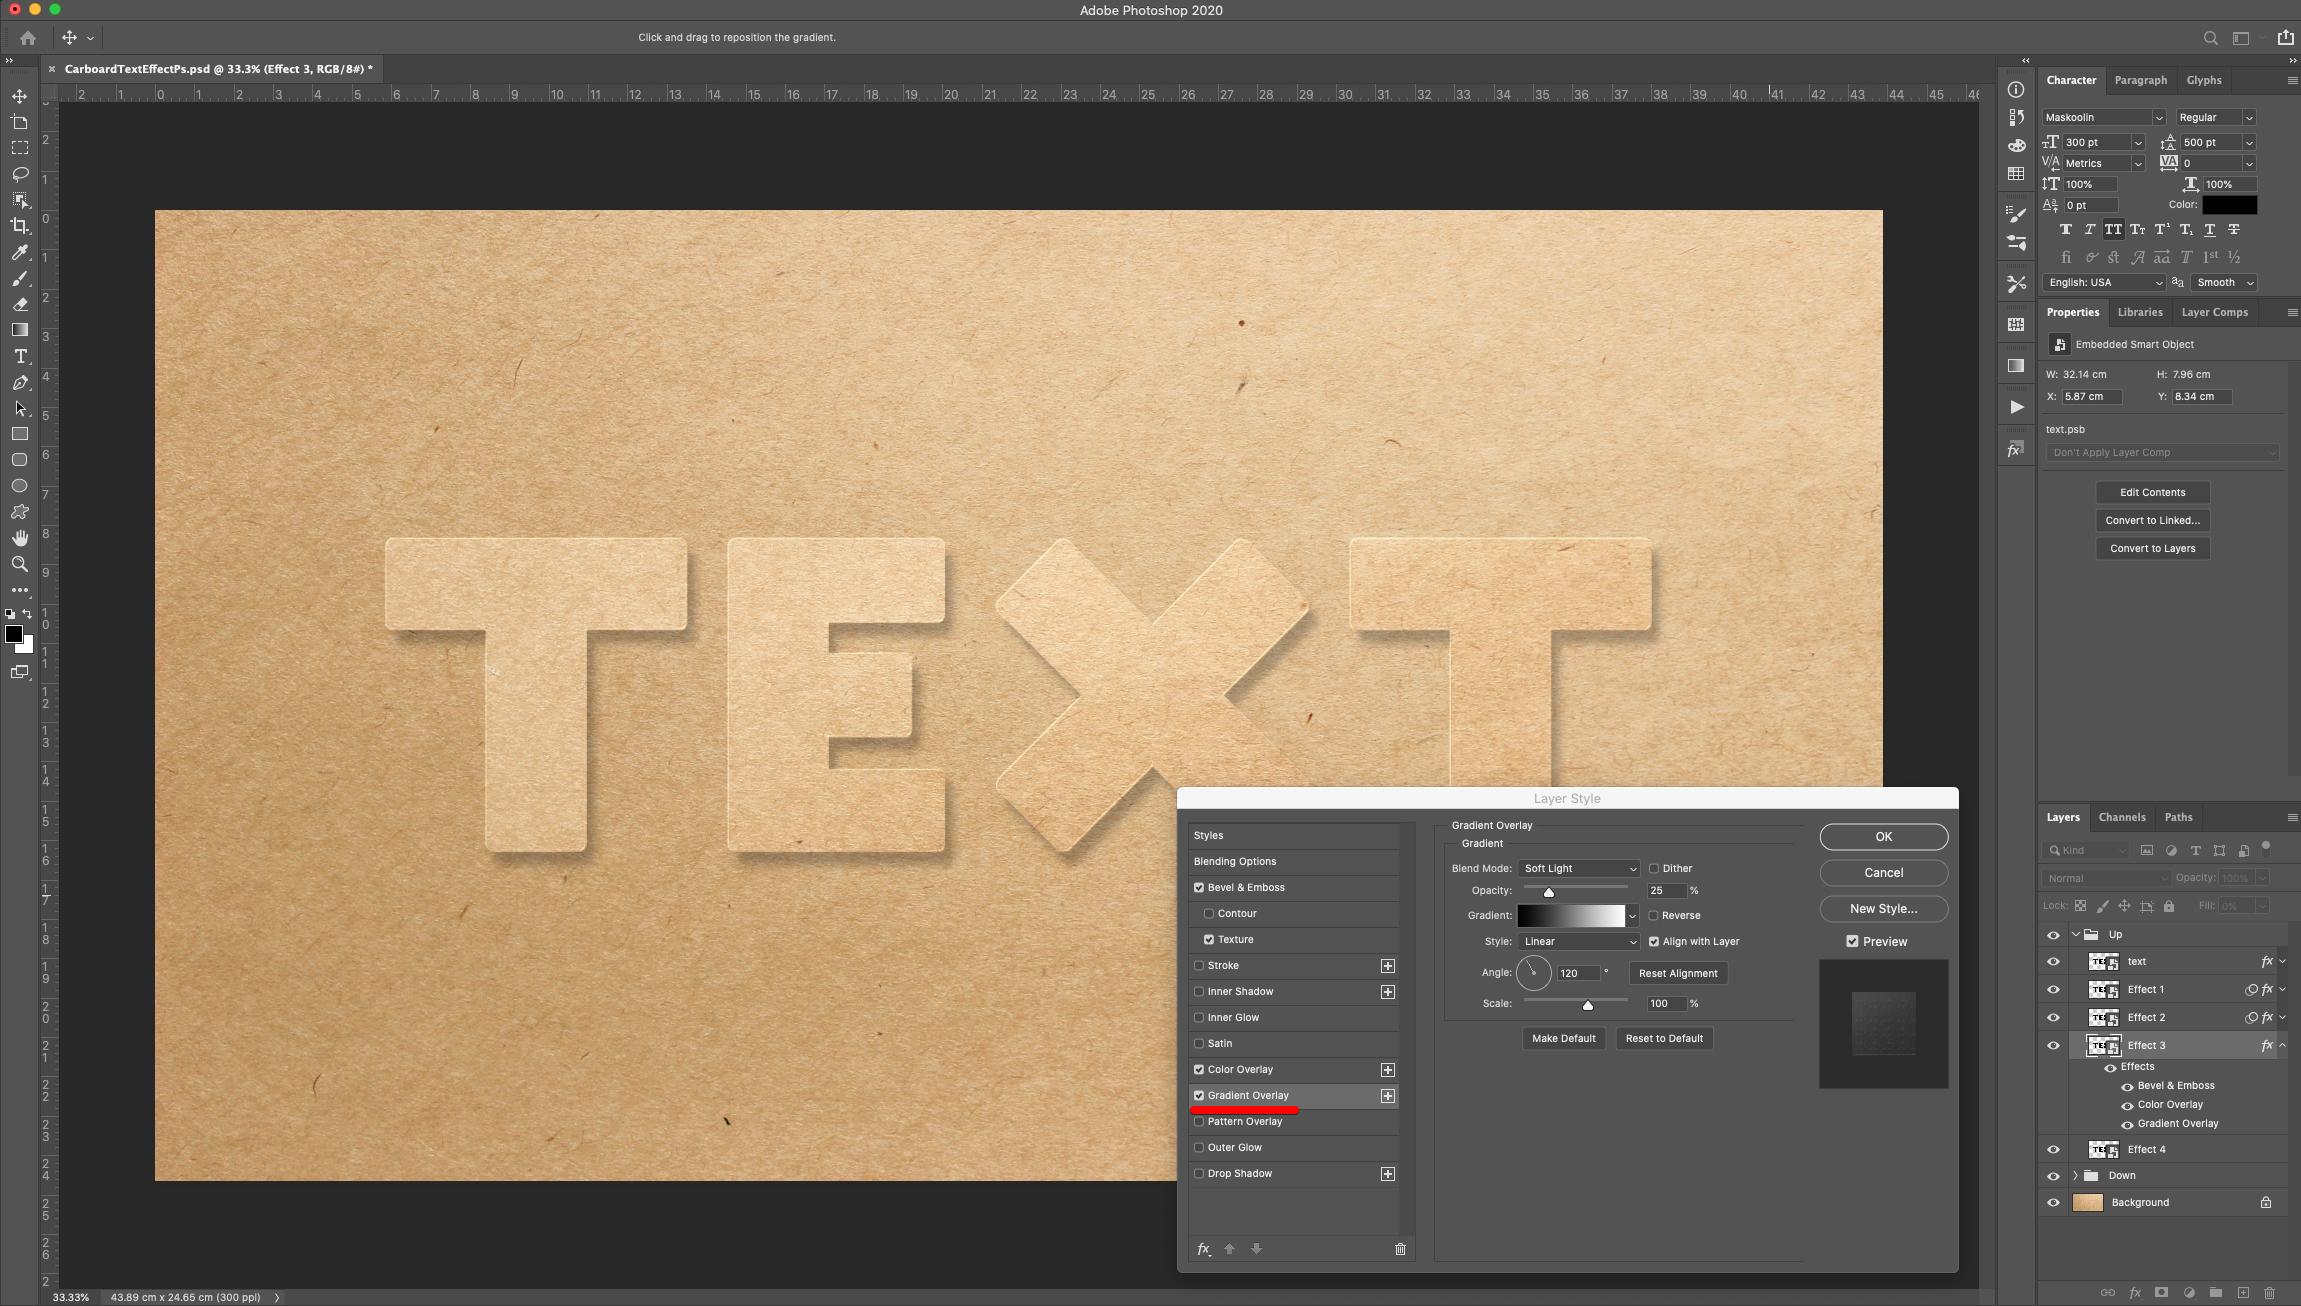
Gradient Overlay: (Foreground to Background)
Drop Shadow:
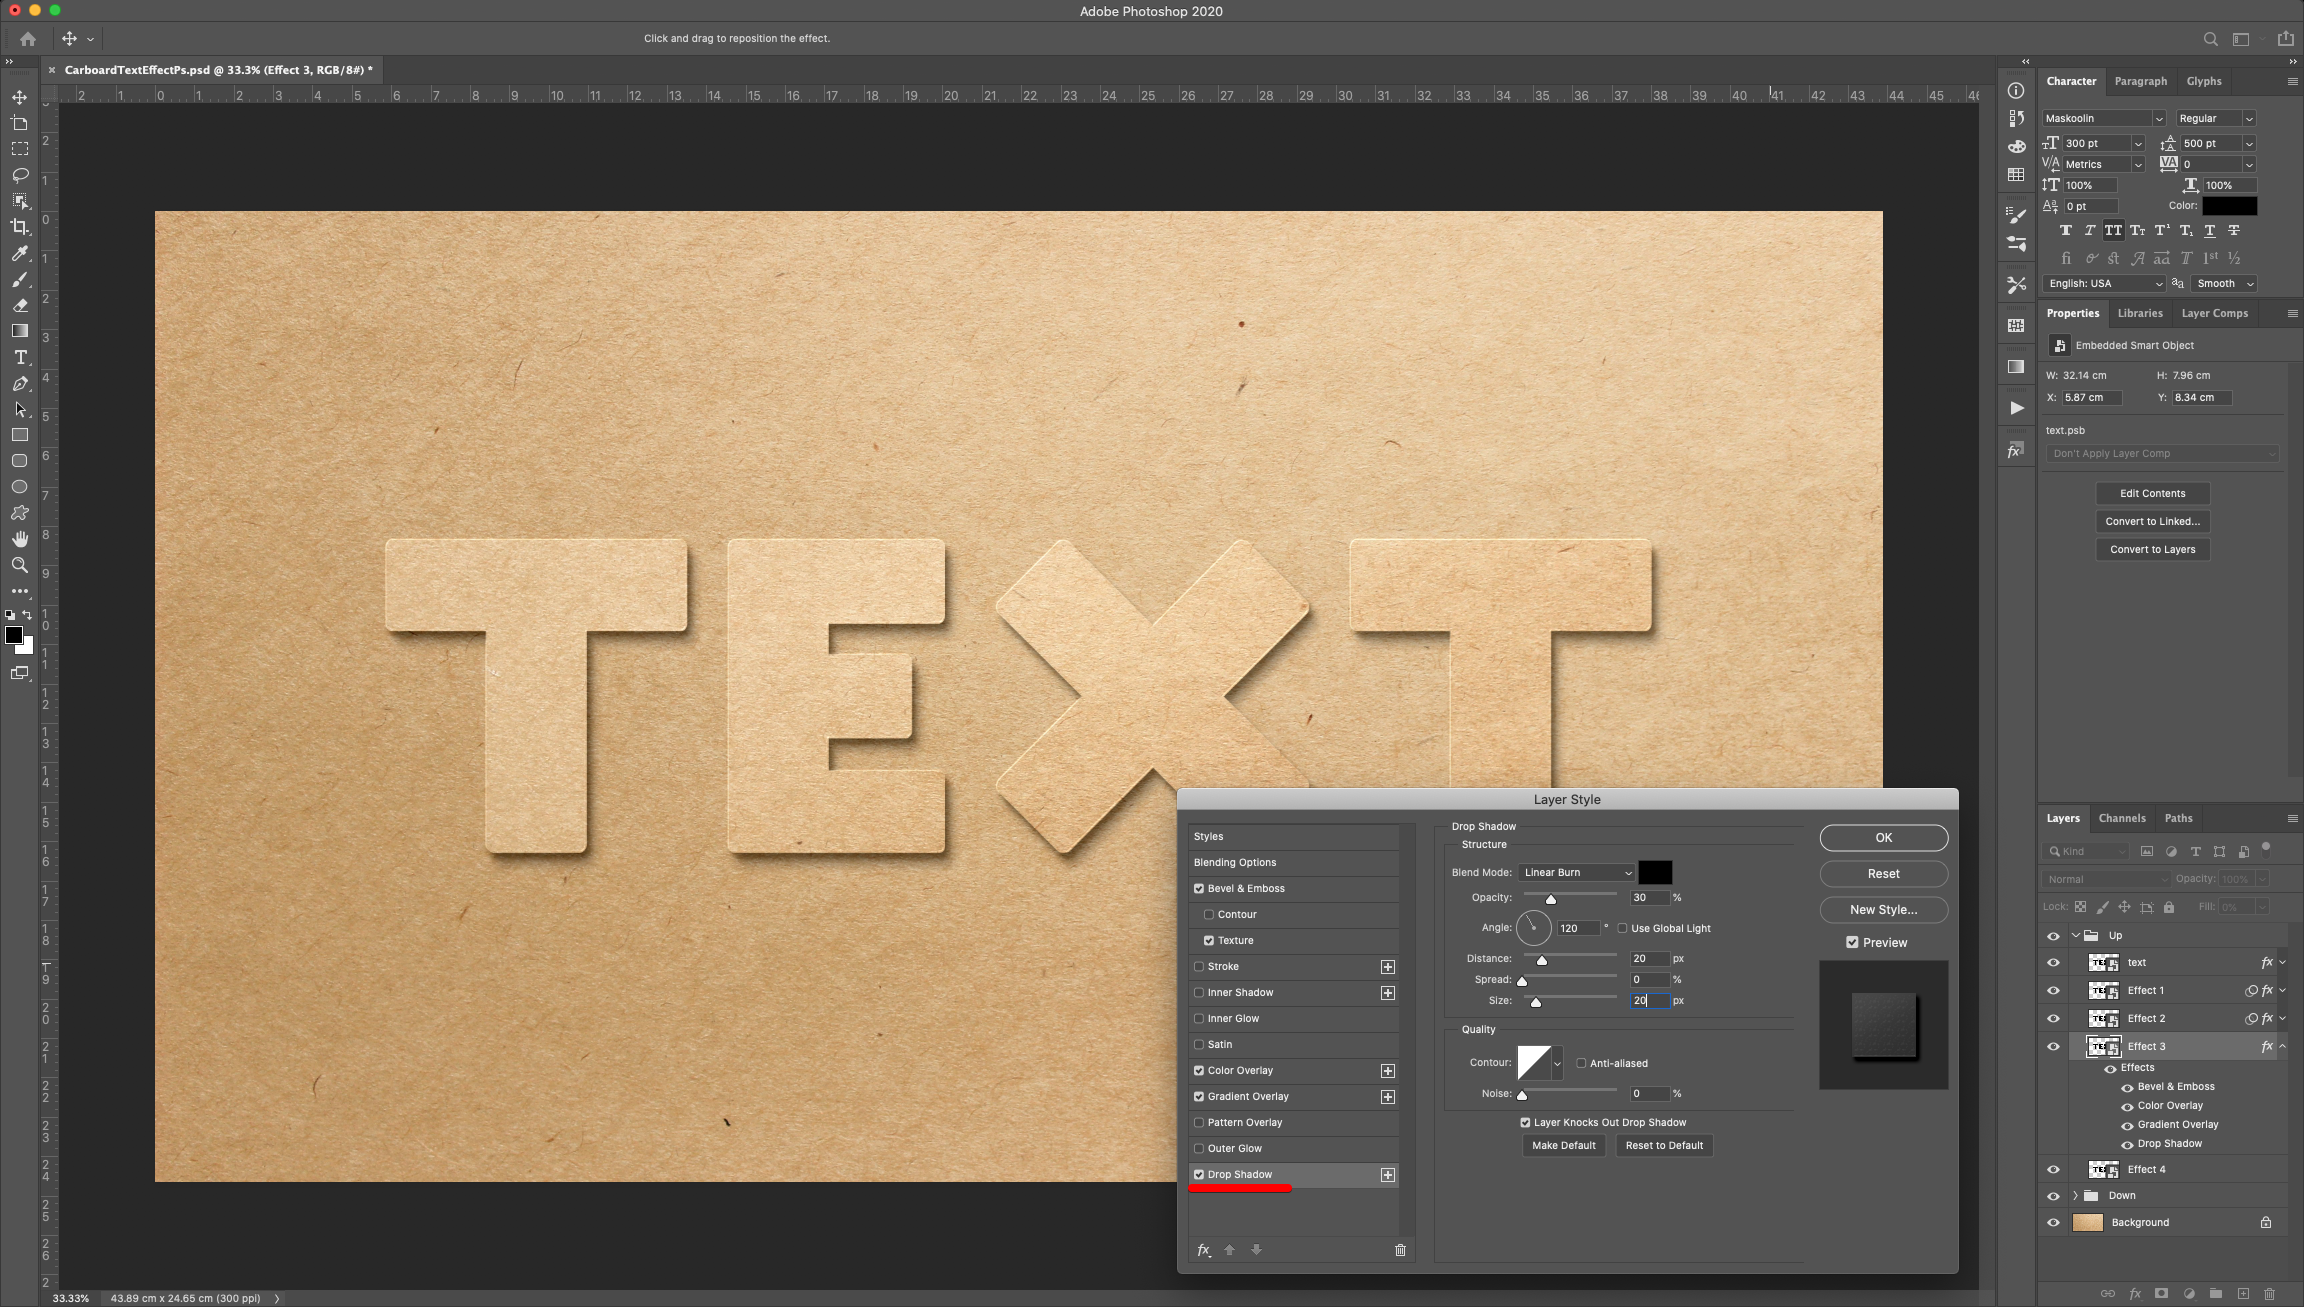
14 - Go to Filter > Blur > Gaussian Blur and use a “Radius” of 0.5 Pixels.
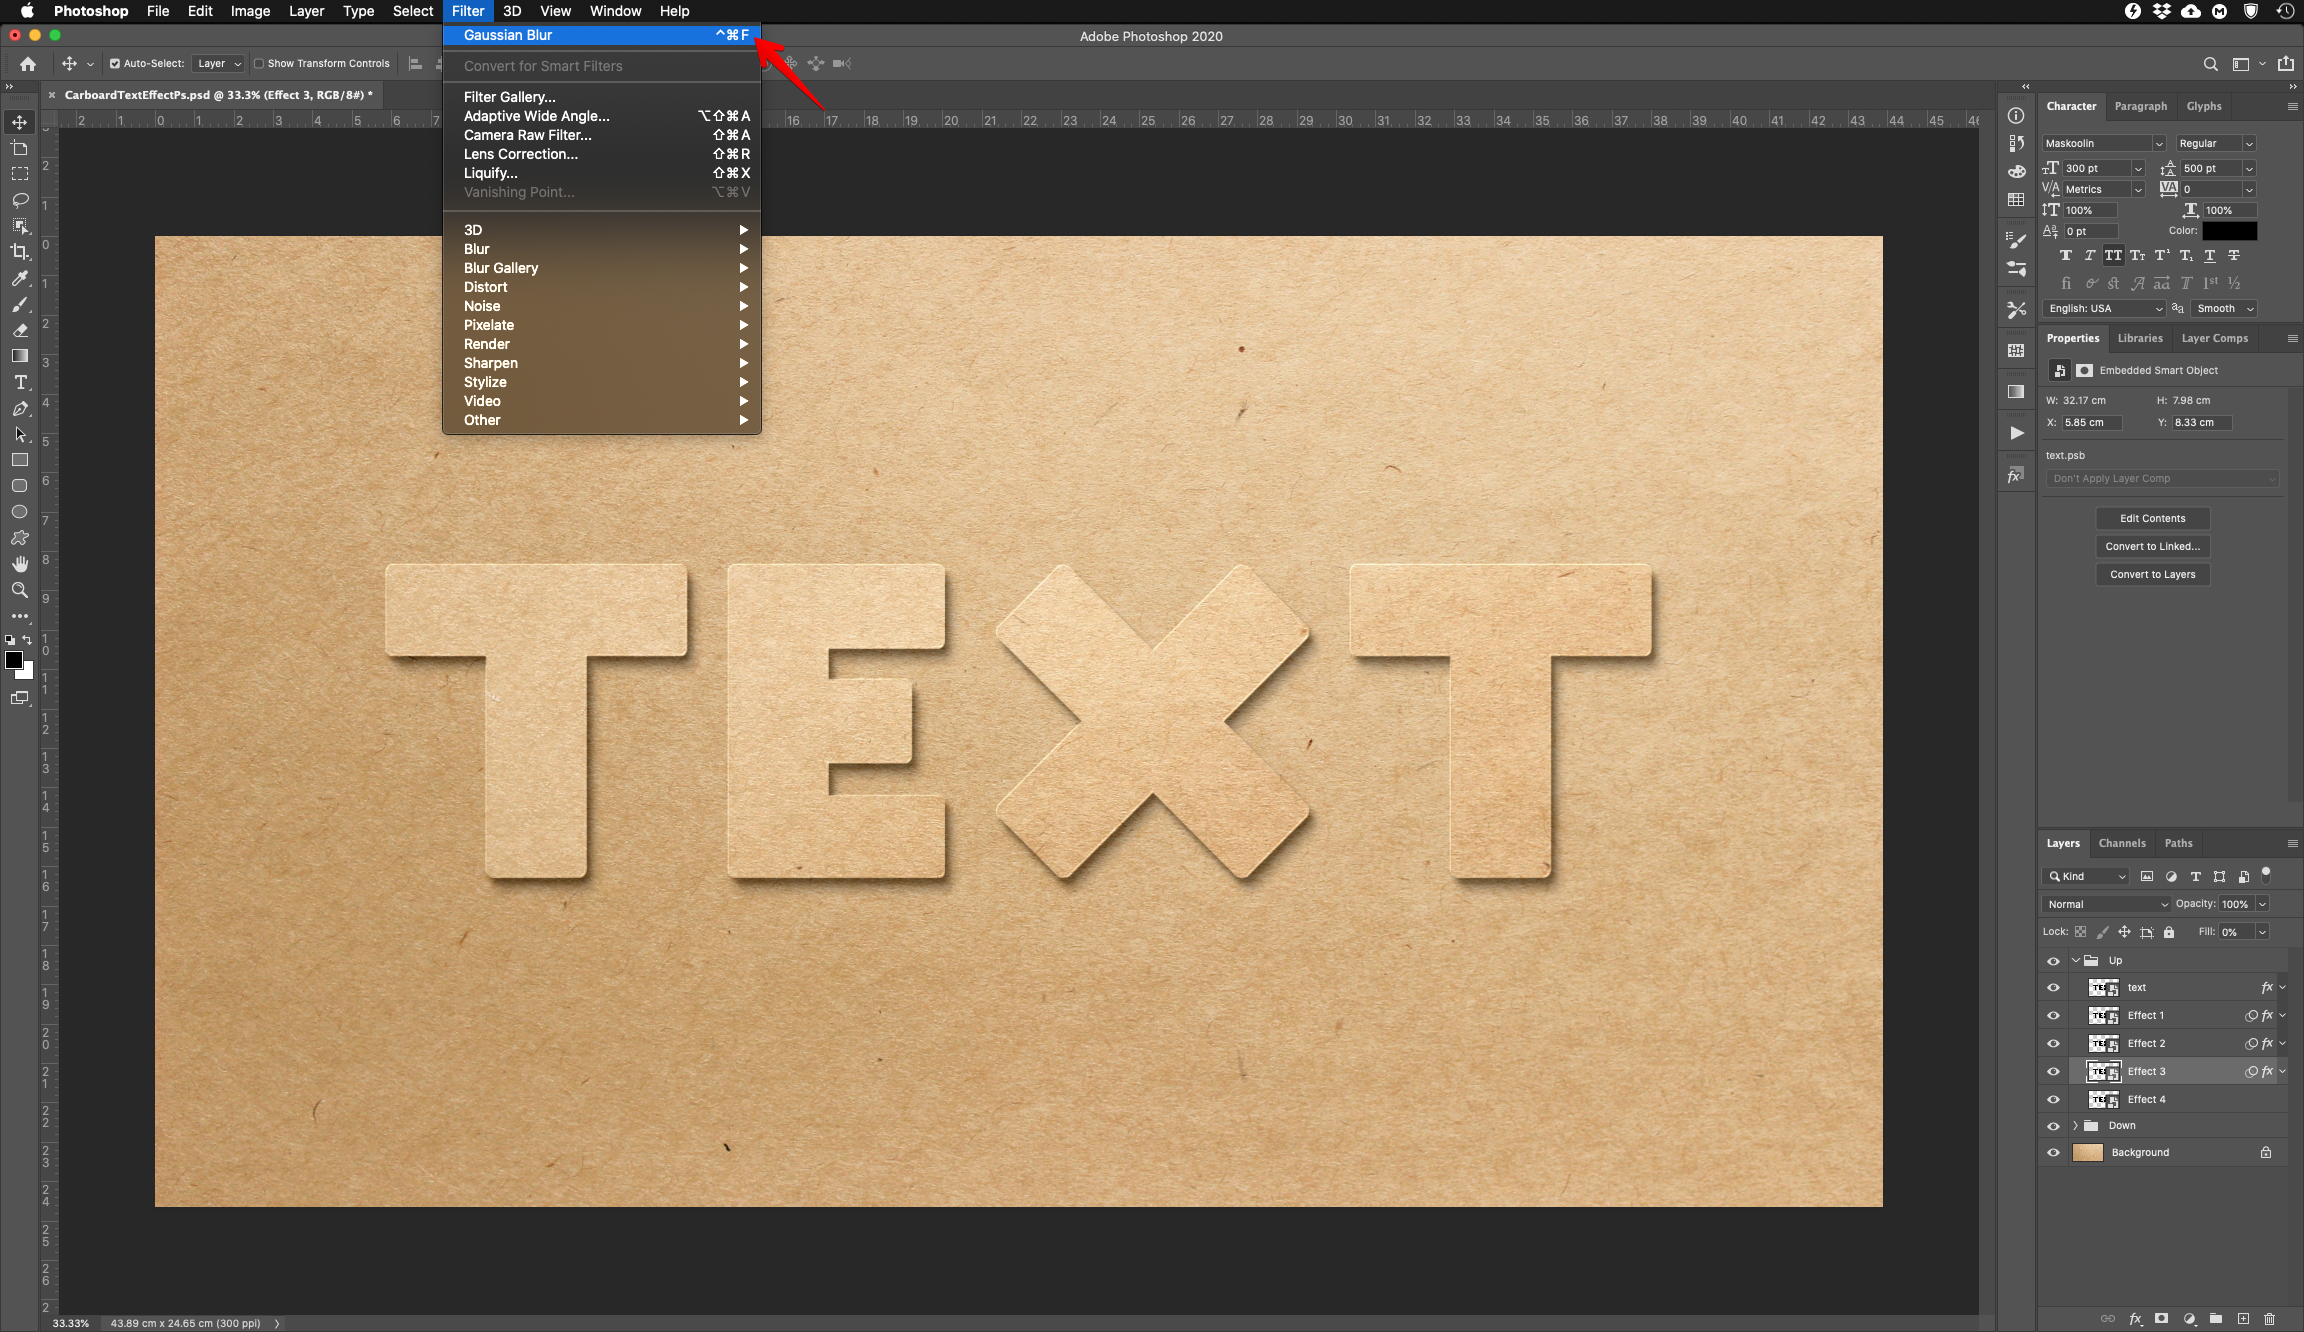
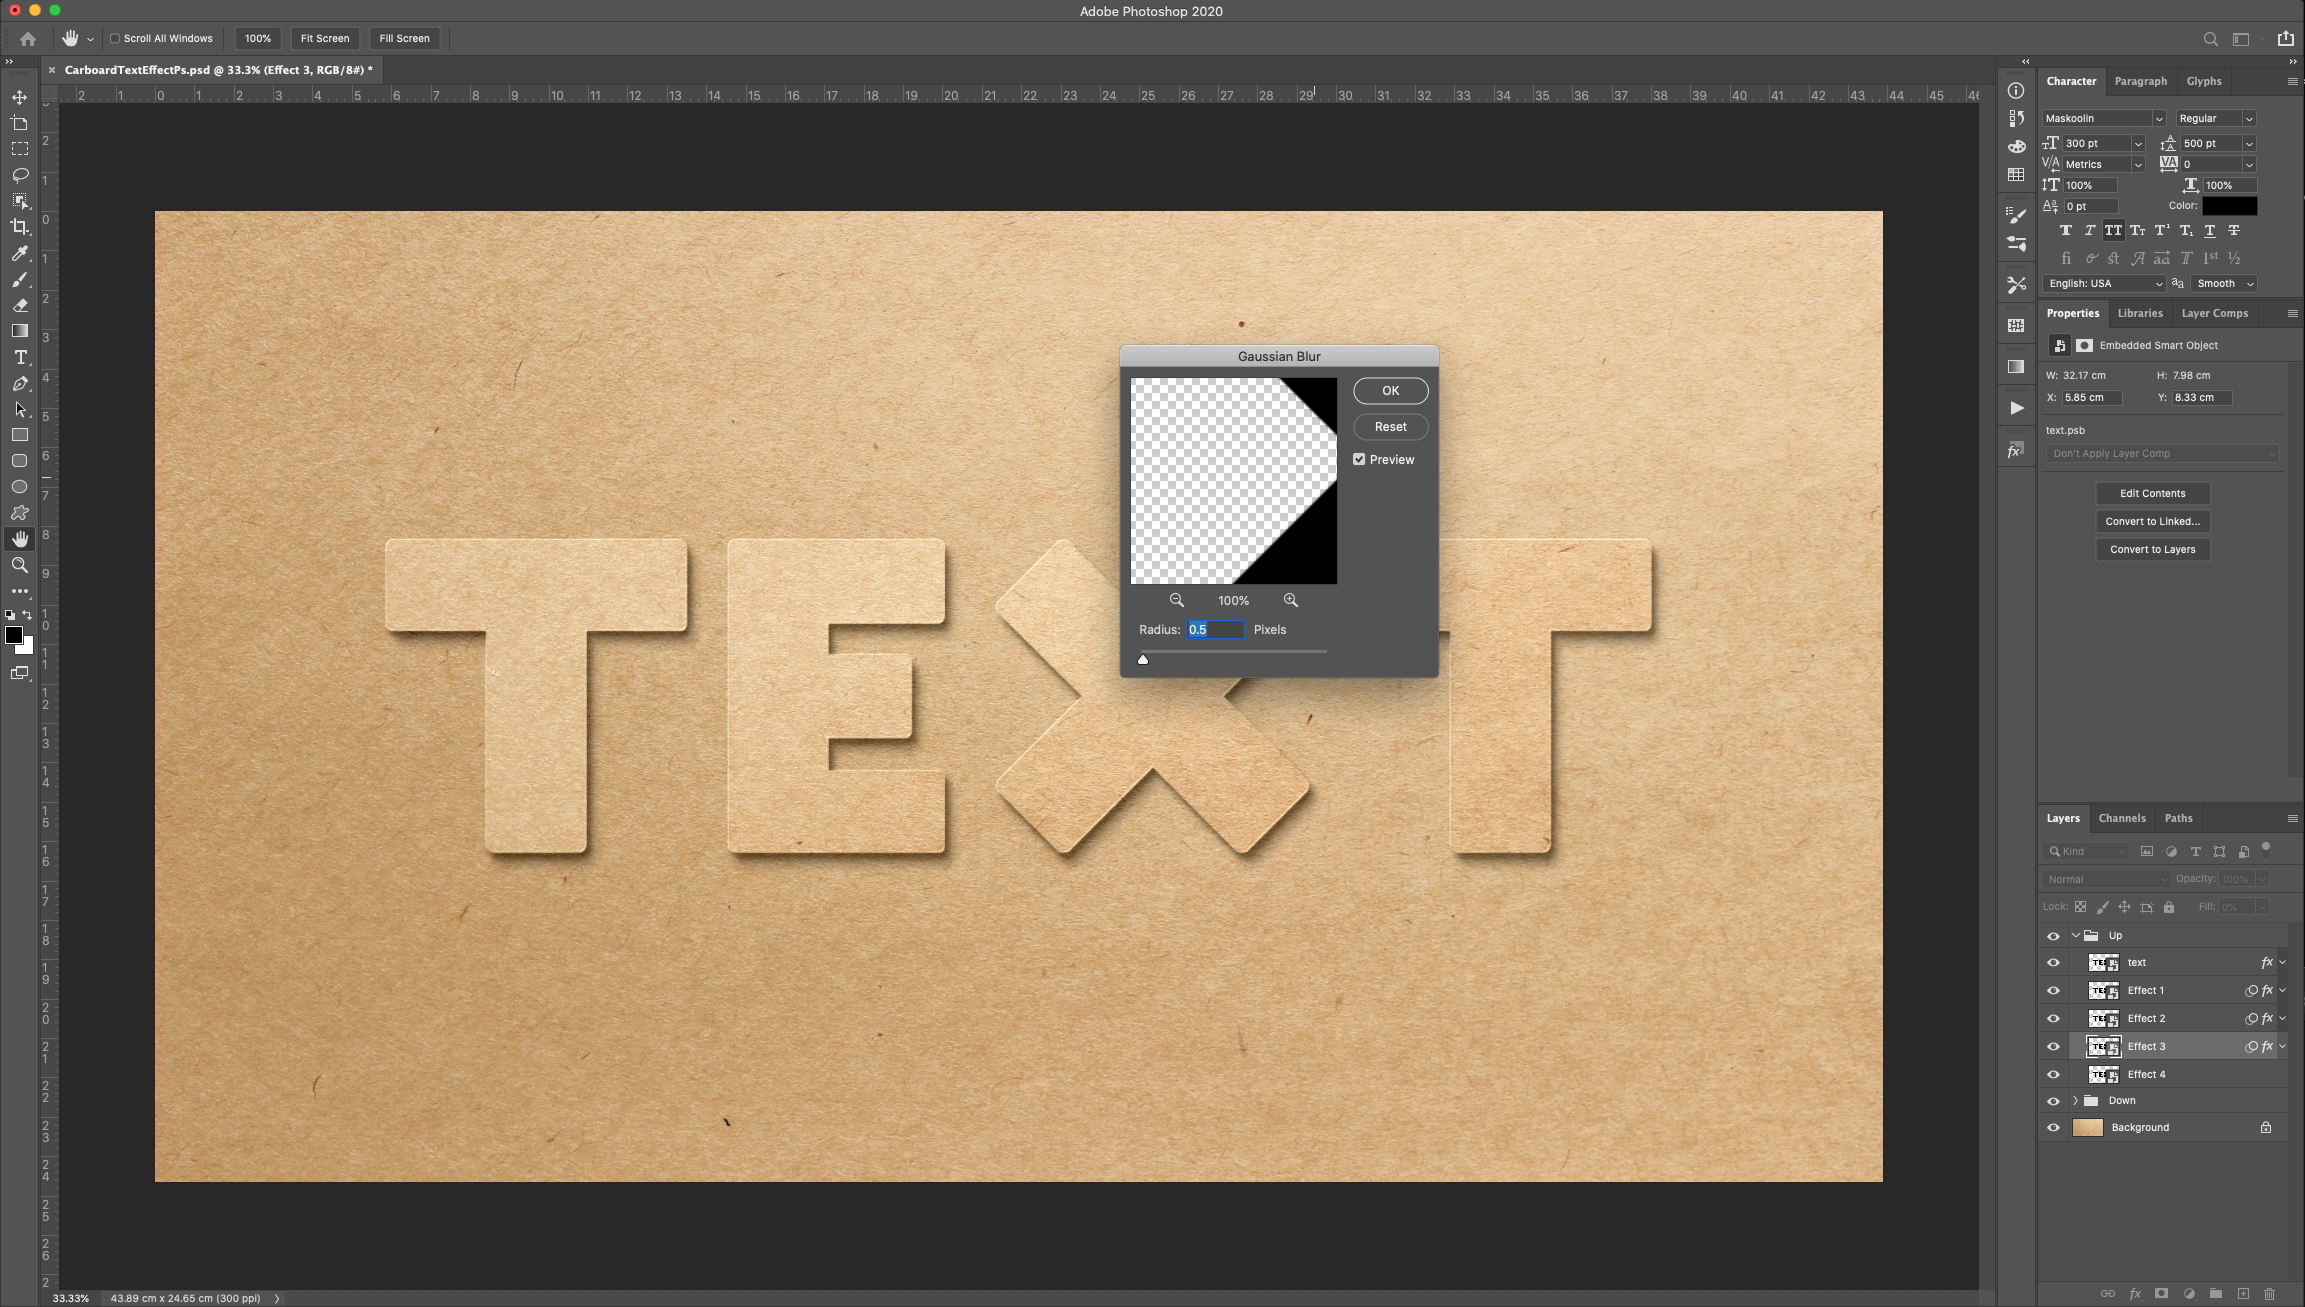
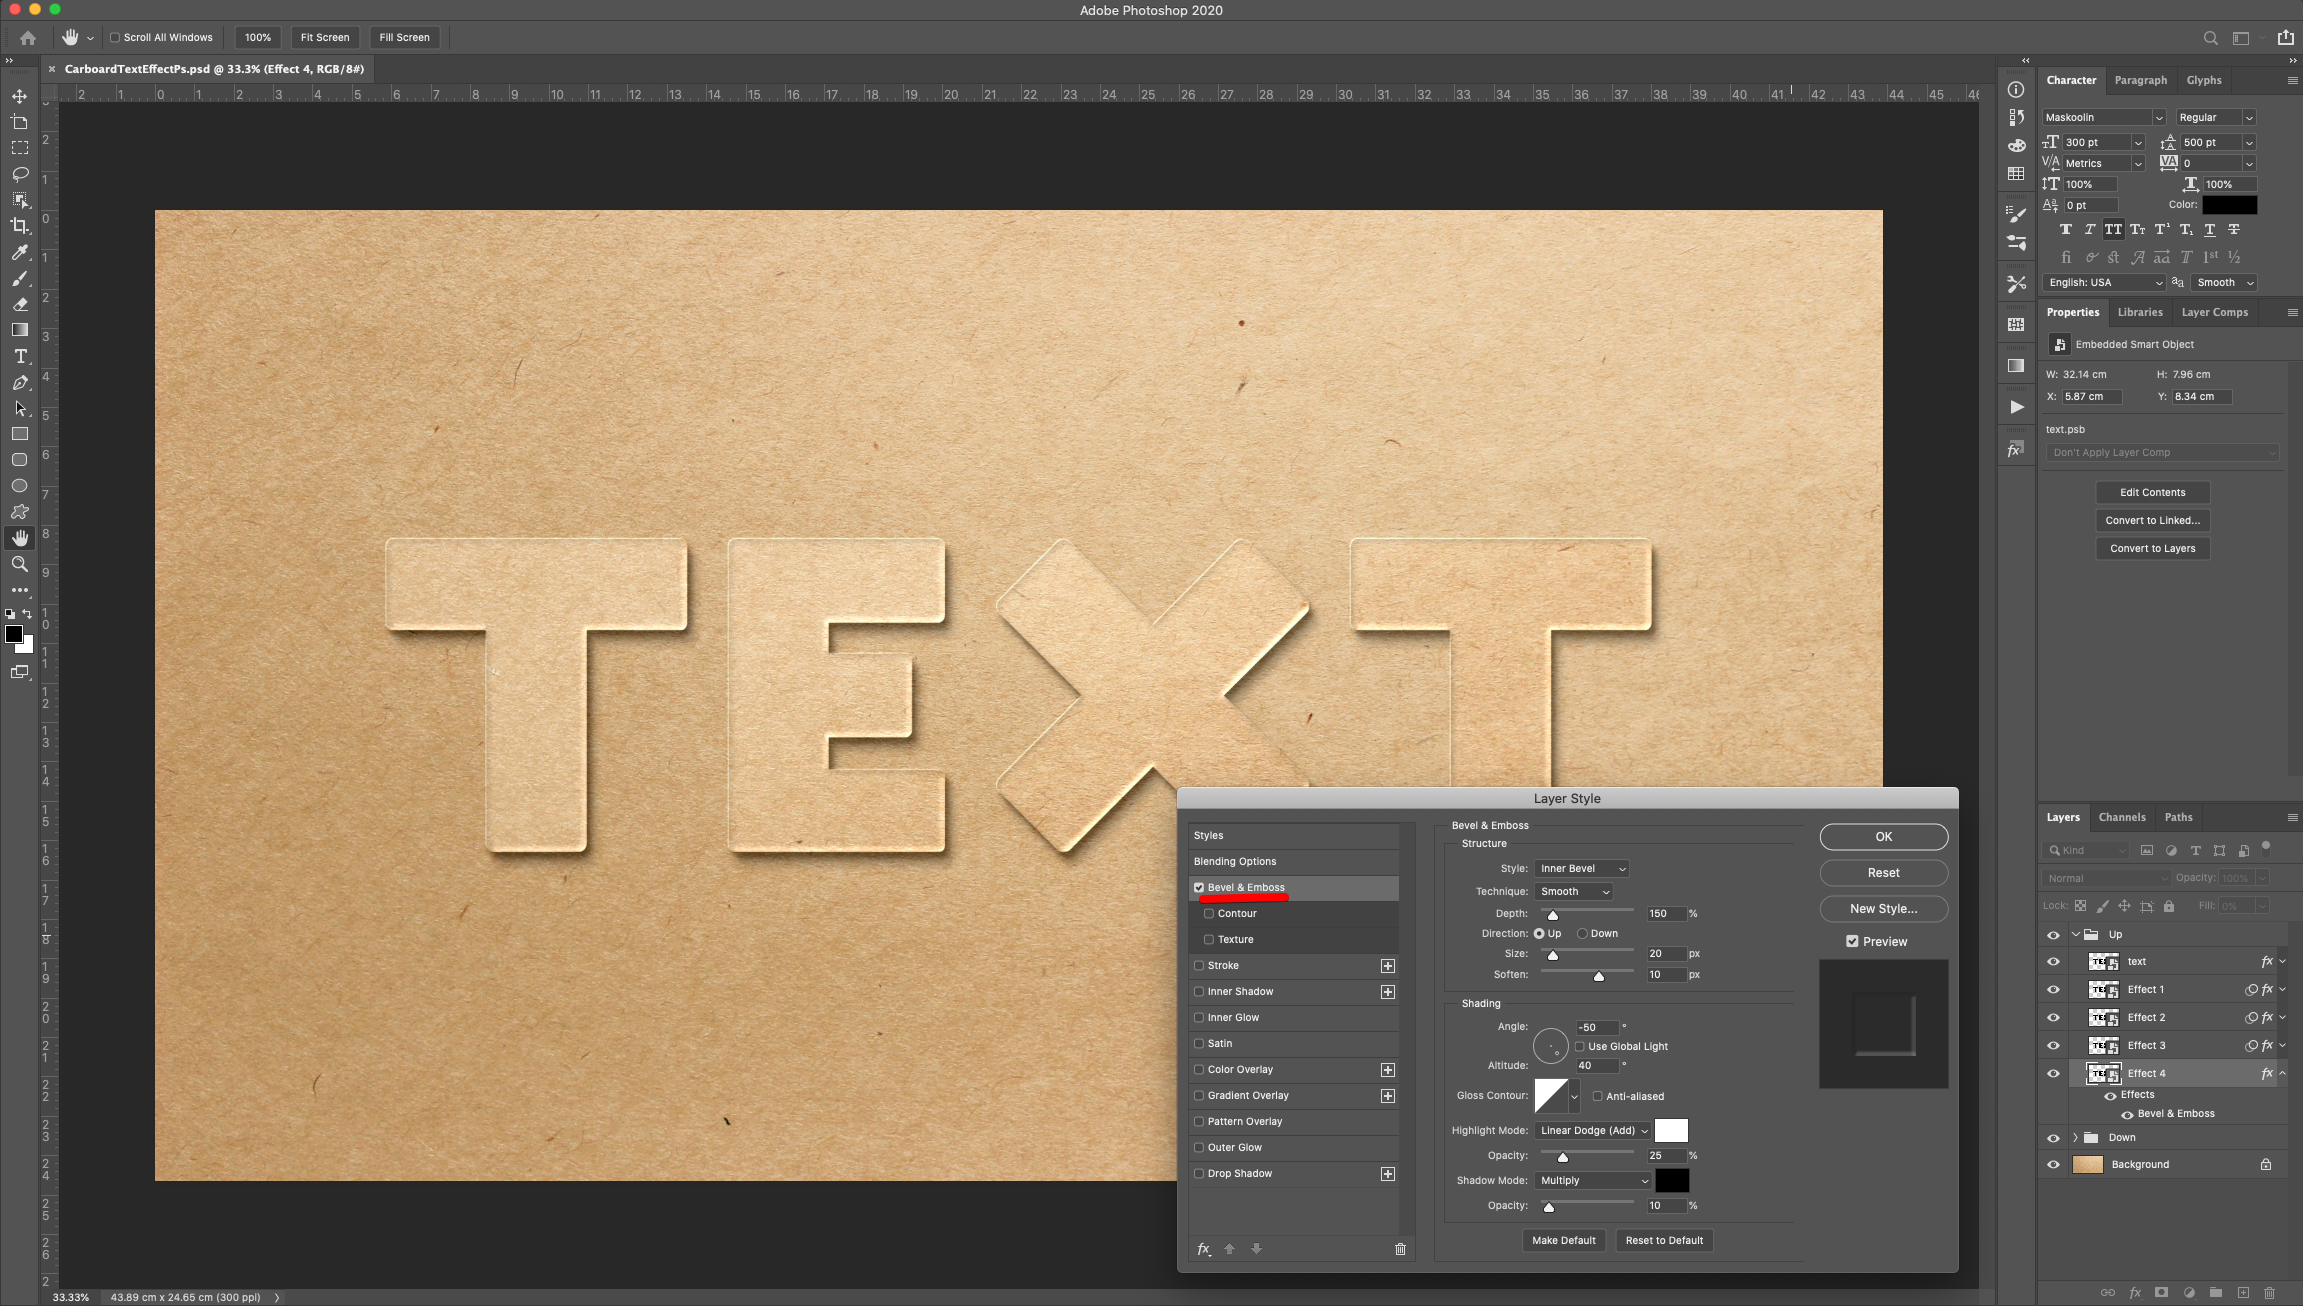
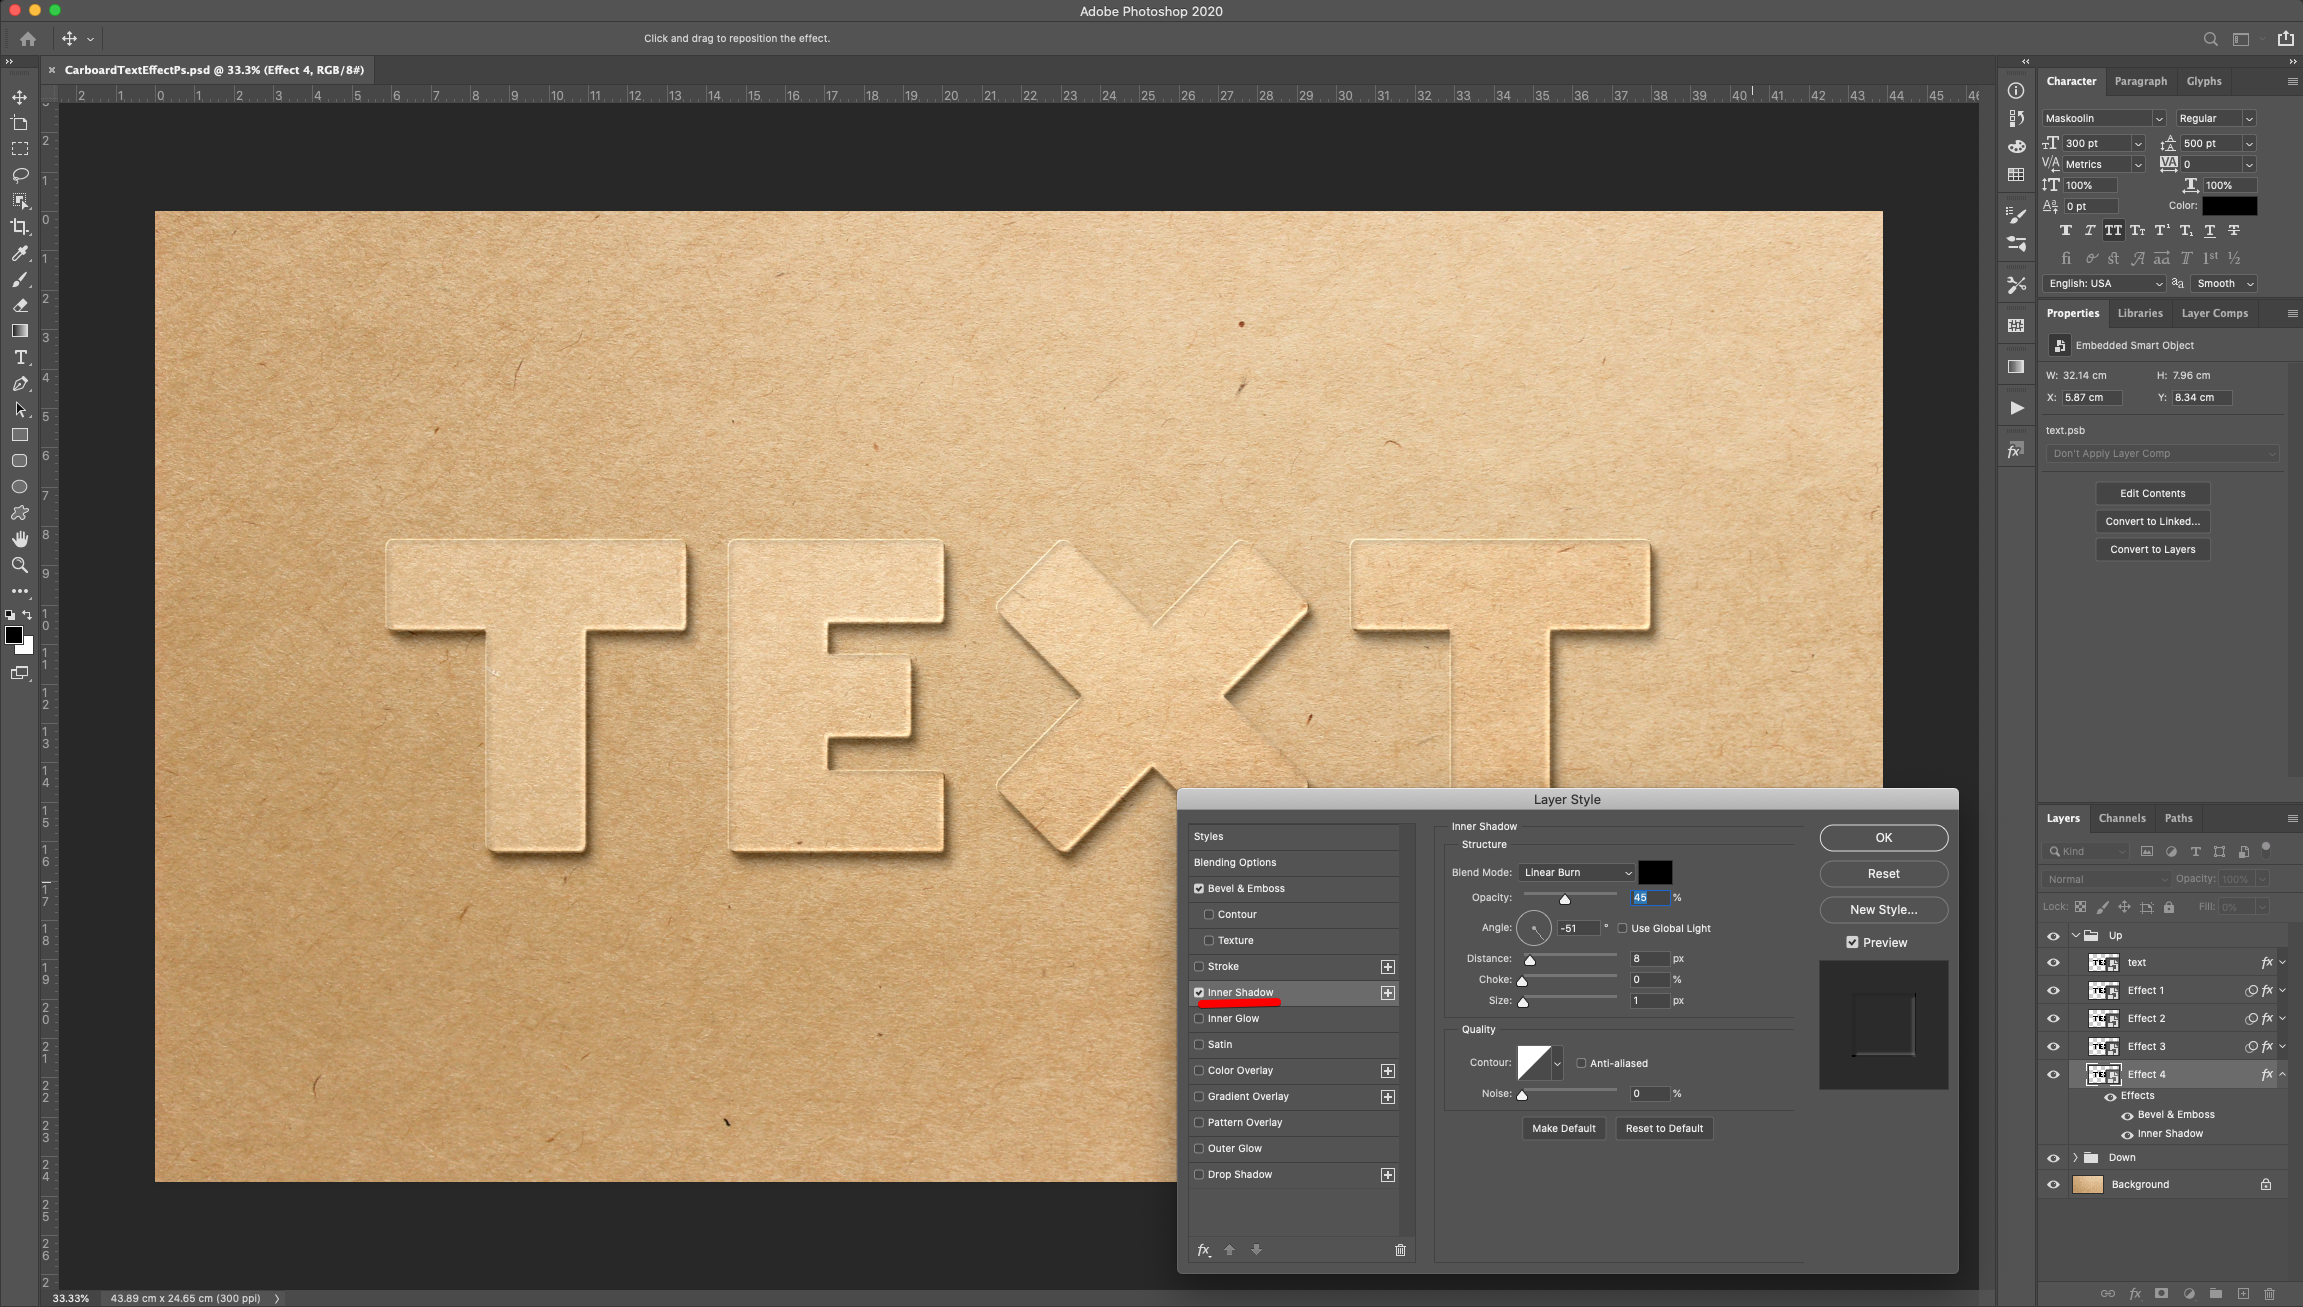
15 - Double-click on top of the “Effect 4” layer Thumbnail (in the “Up” group) and apply the following “Layer Styles”:
Bevel & Emboss:
Inner Shadow:
Drop Shadow:
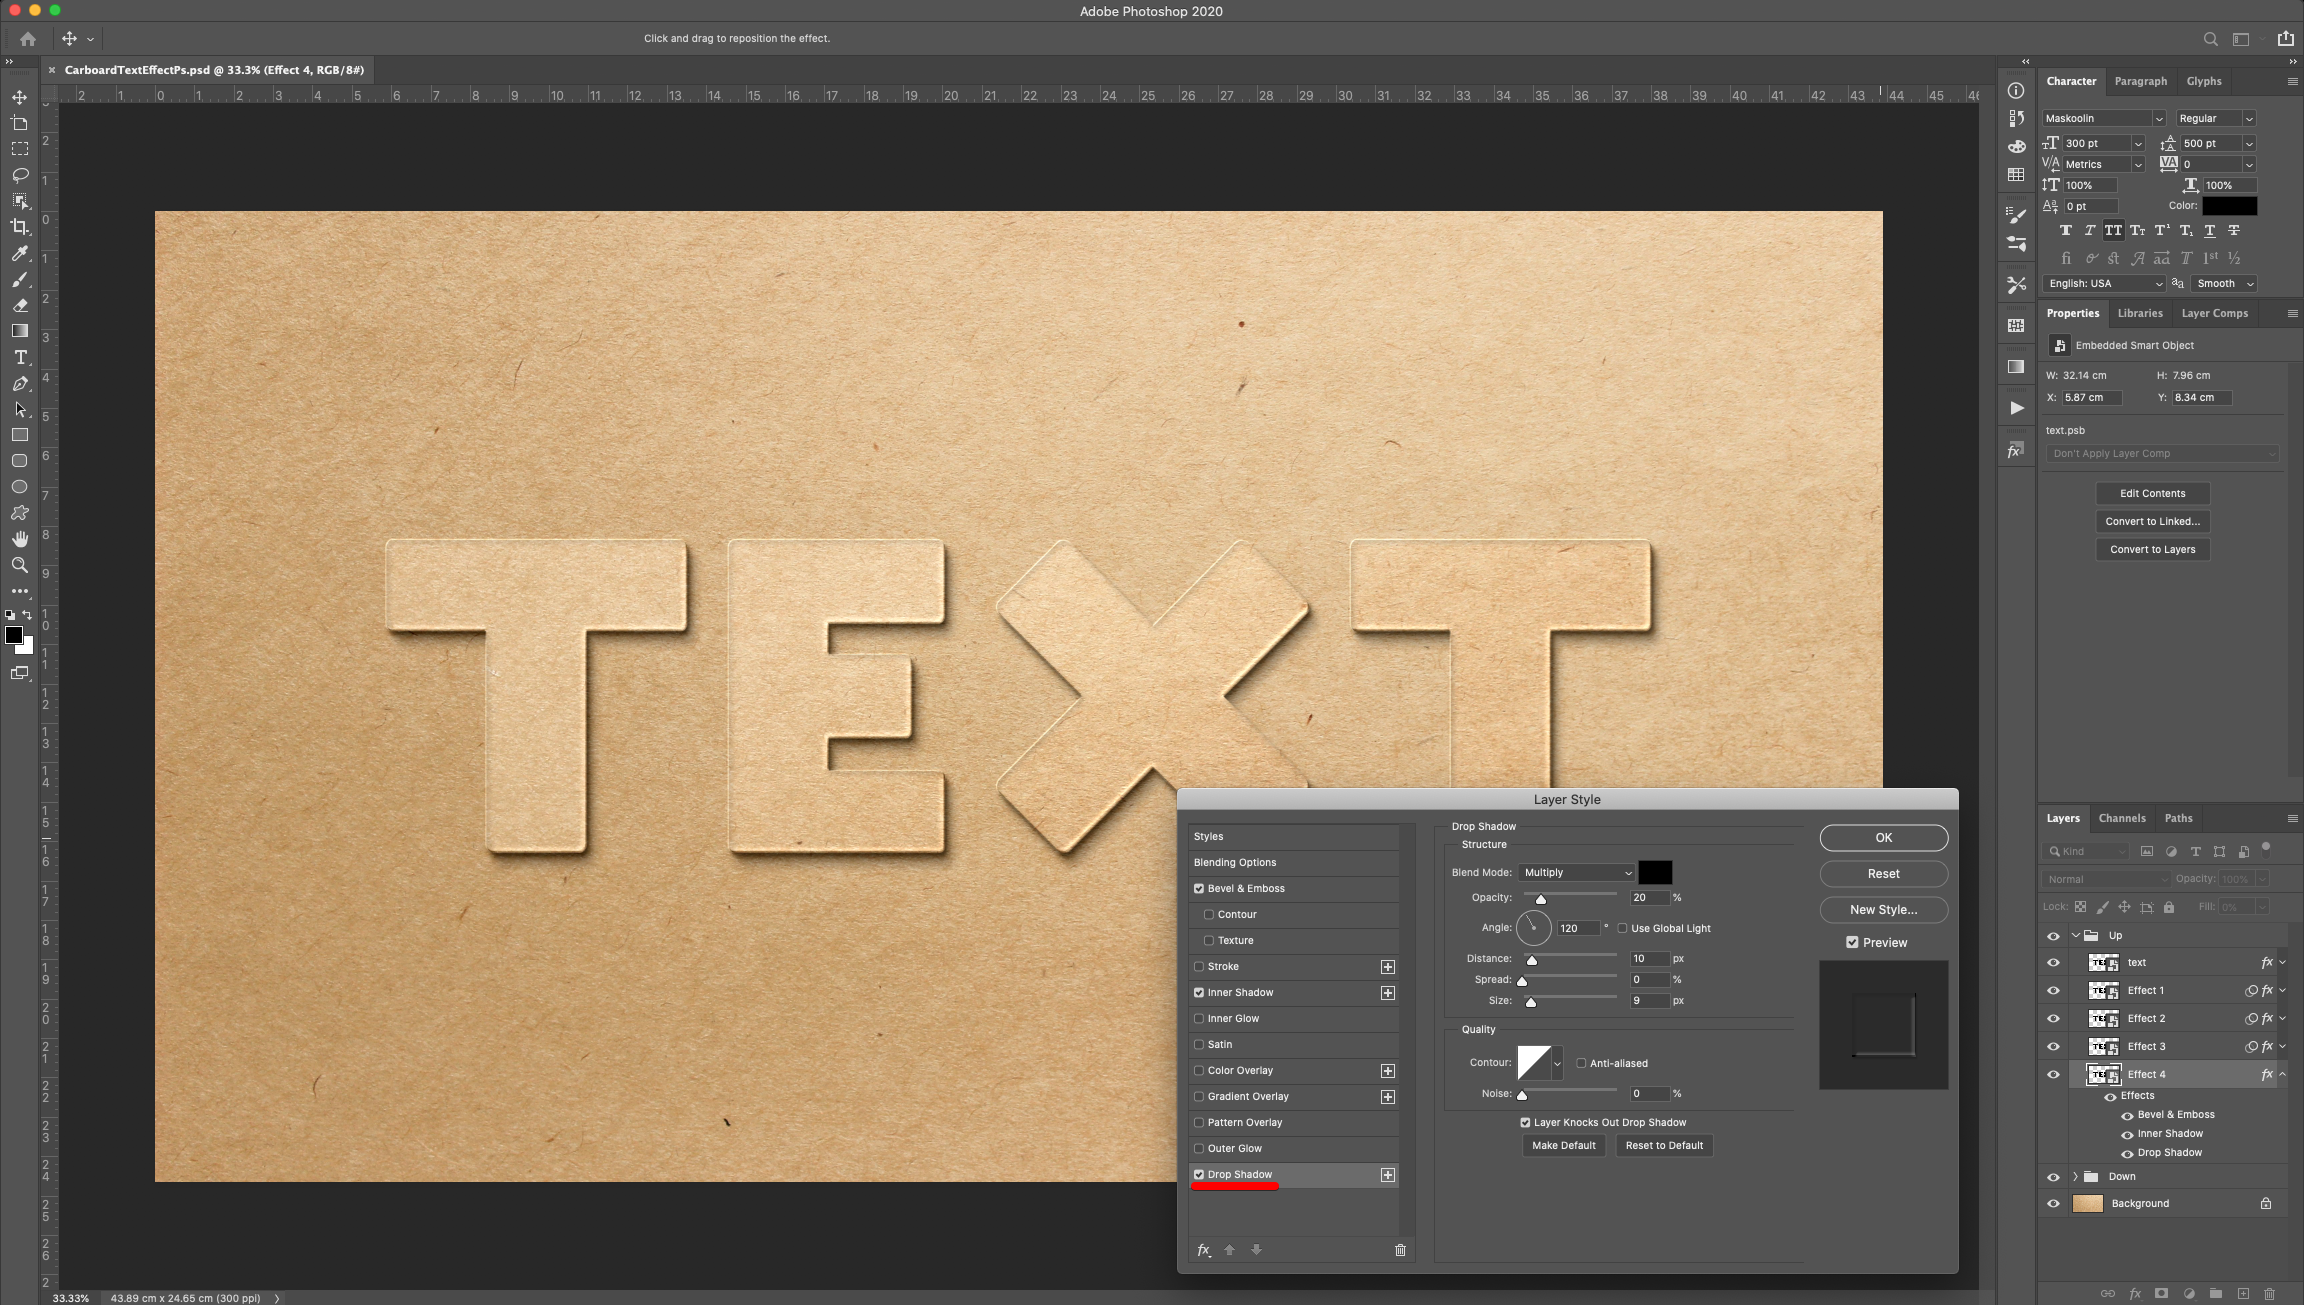
Go to Filter > Blur > Gaussian Blur and use a “Radius” of 0.5 Pixels.
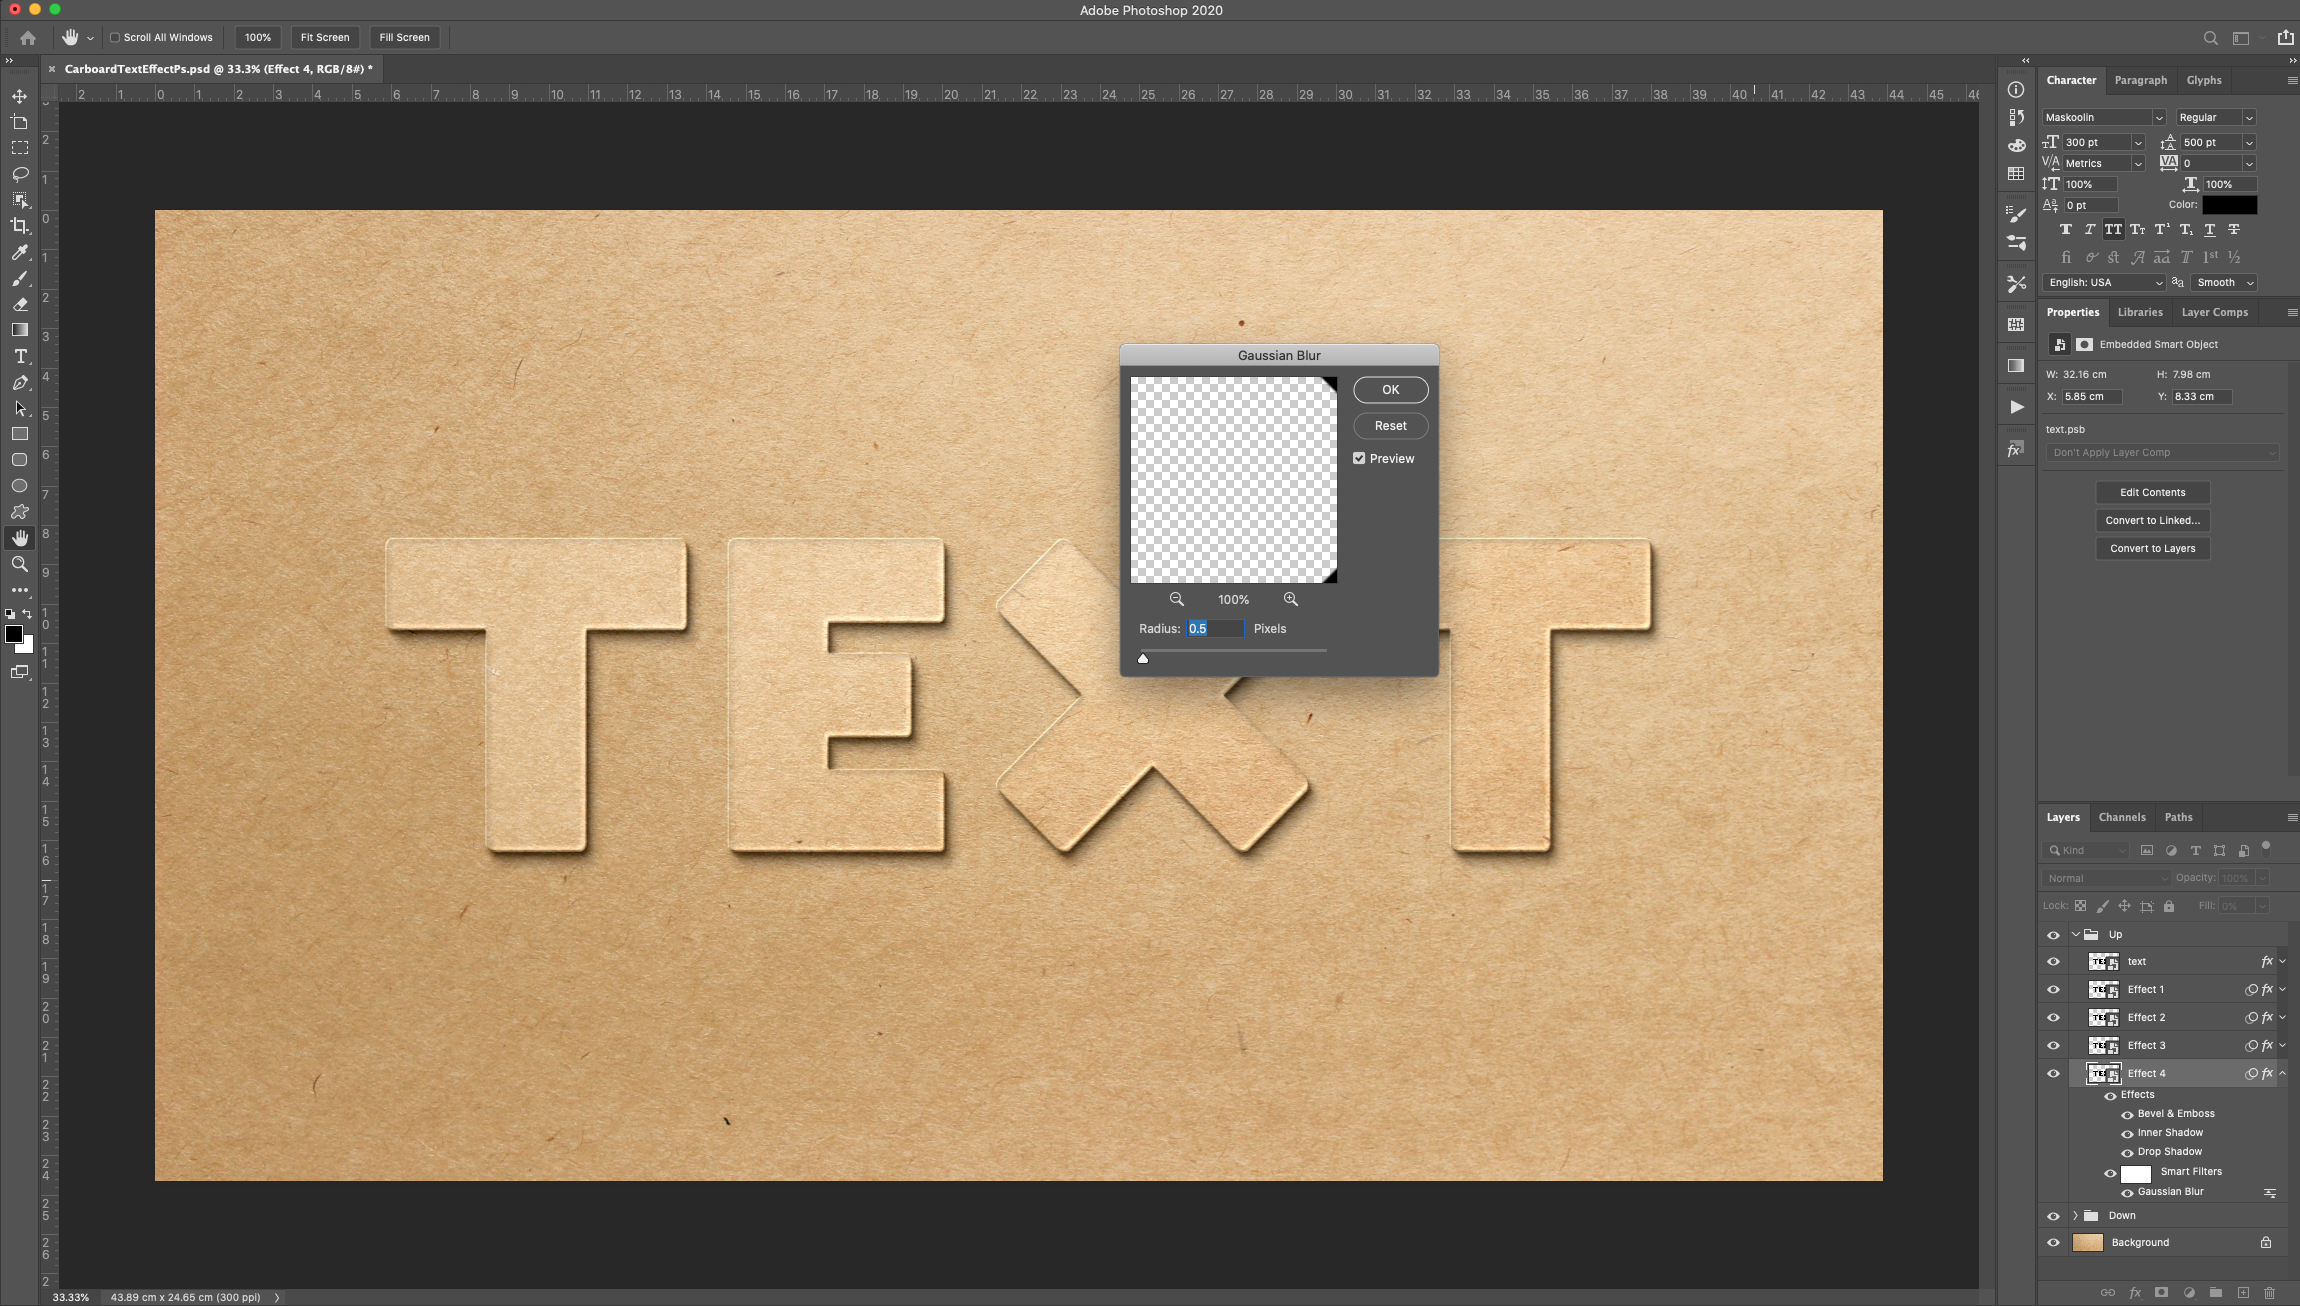
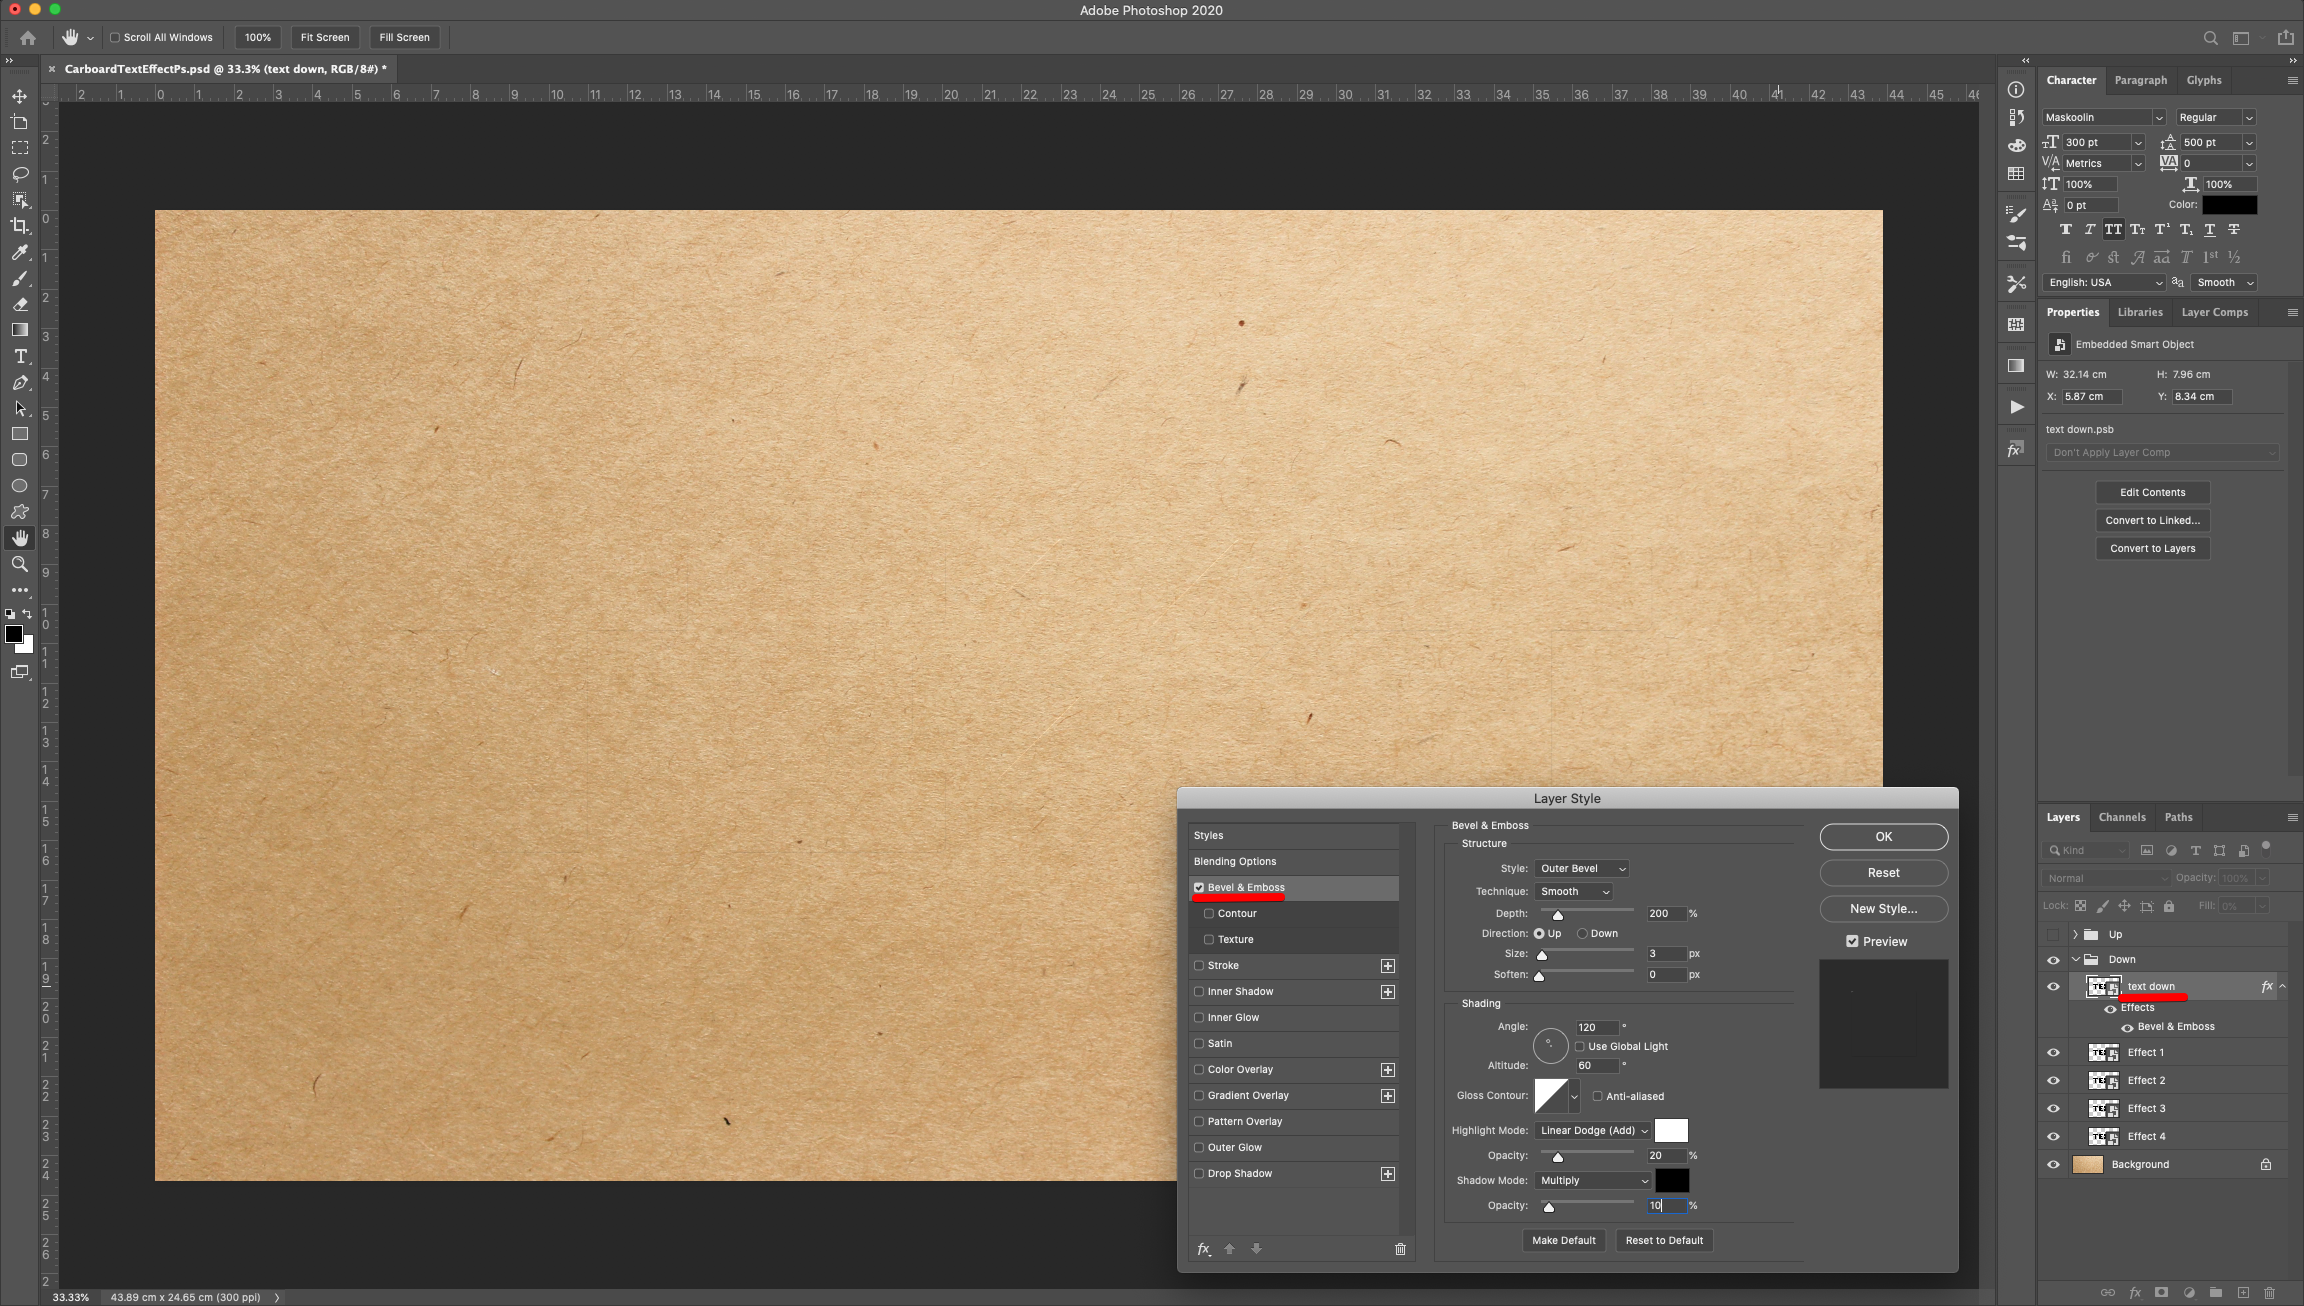
16 - “Hide” the “Up” group by clicking on the “Small Eye” icon on the left side of its thumbnail and open the “Down” group. Double-click on top of the “Text Down” layer Thumbnail (in the “Down” group) and apply the following “Layer Styles”:
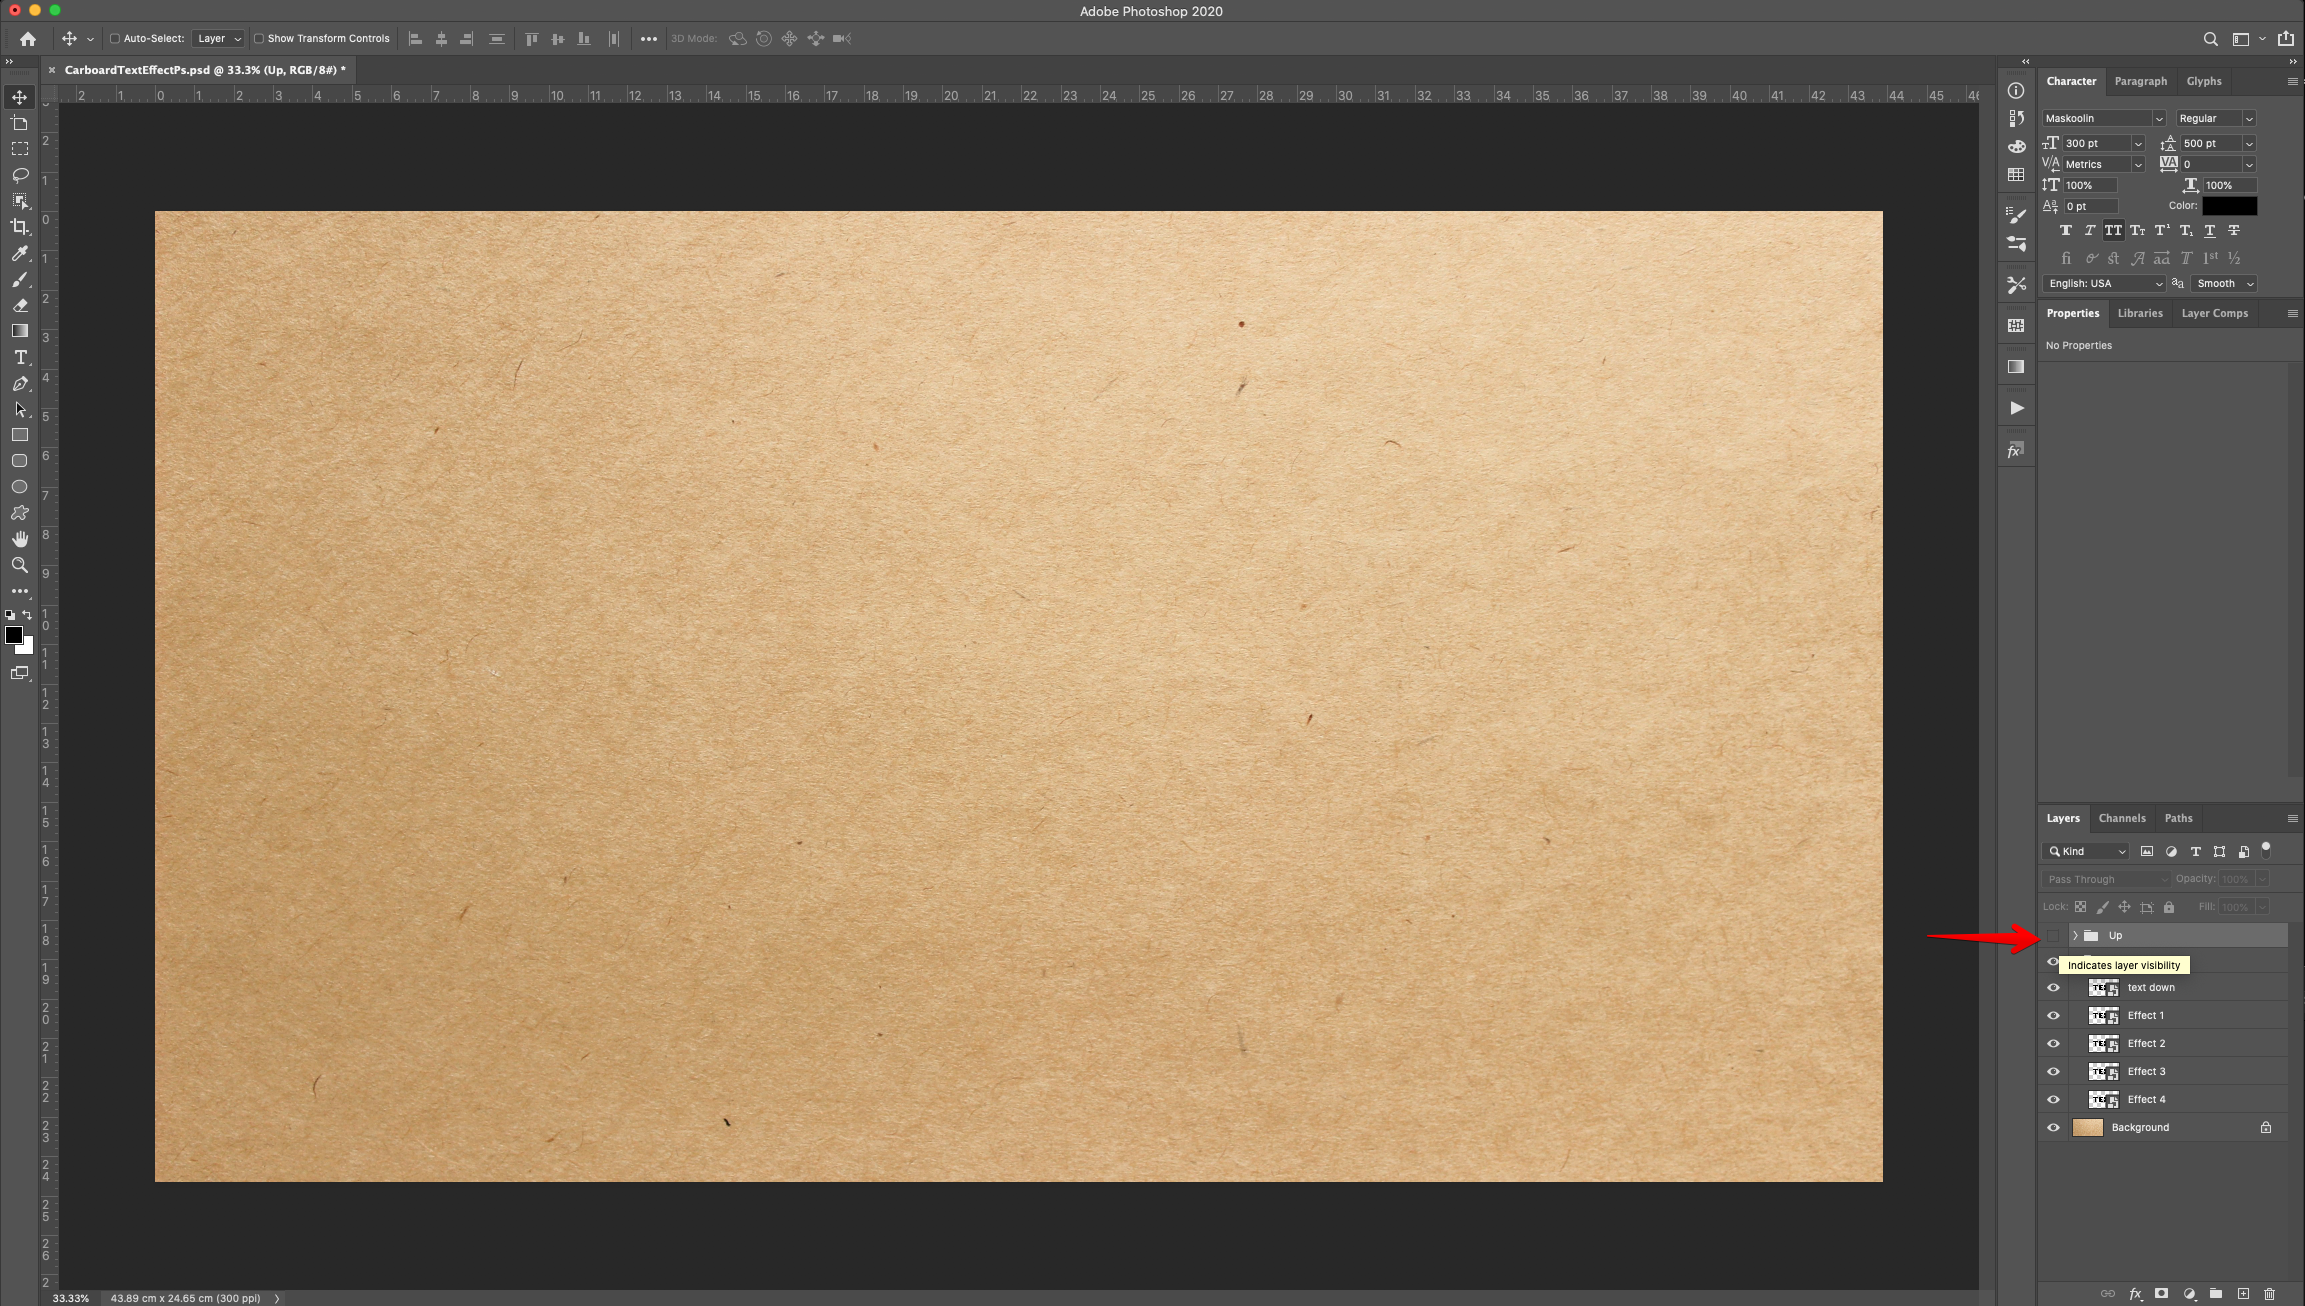
Bevel & Emboss:
17 - Double-click on top of the “Effect 1” layer Thumbnail (in the “Down” group) and apply the following “Layer Styles”:
Bevel & Emboss:
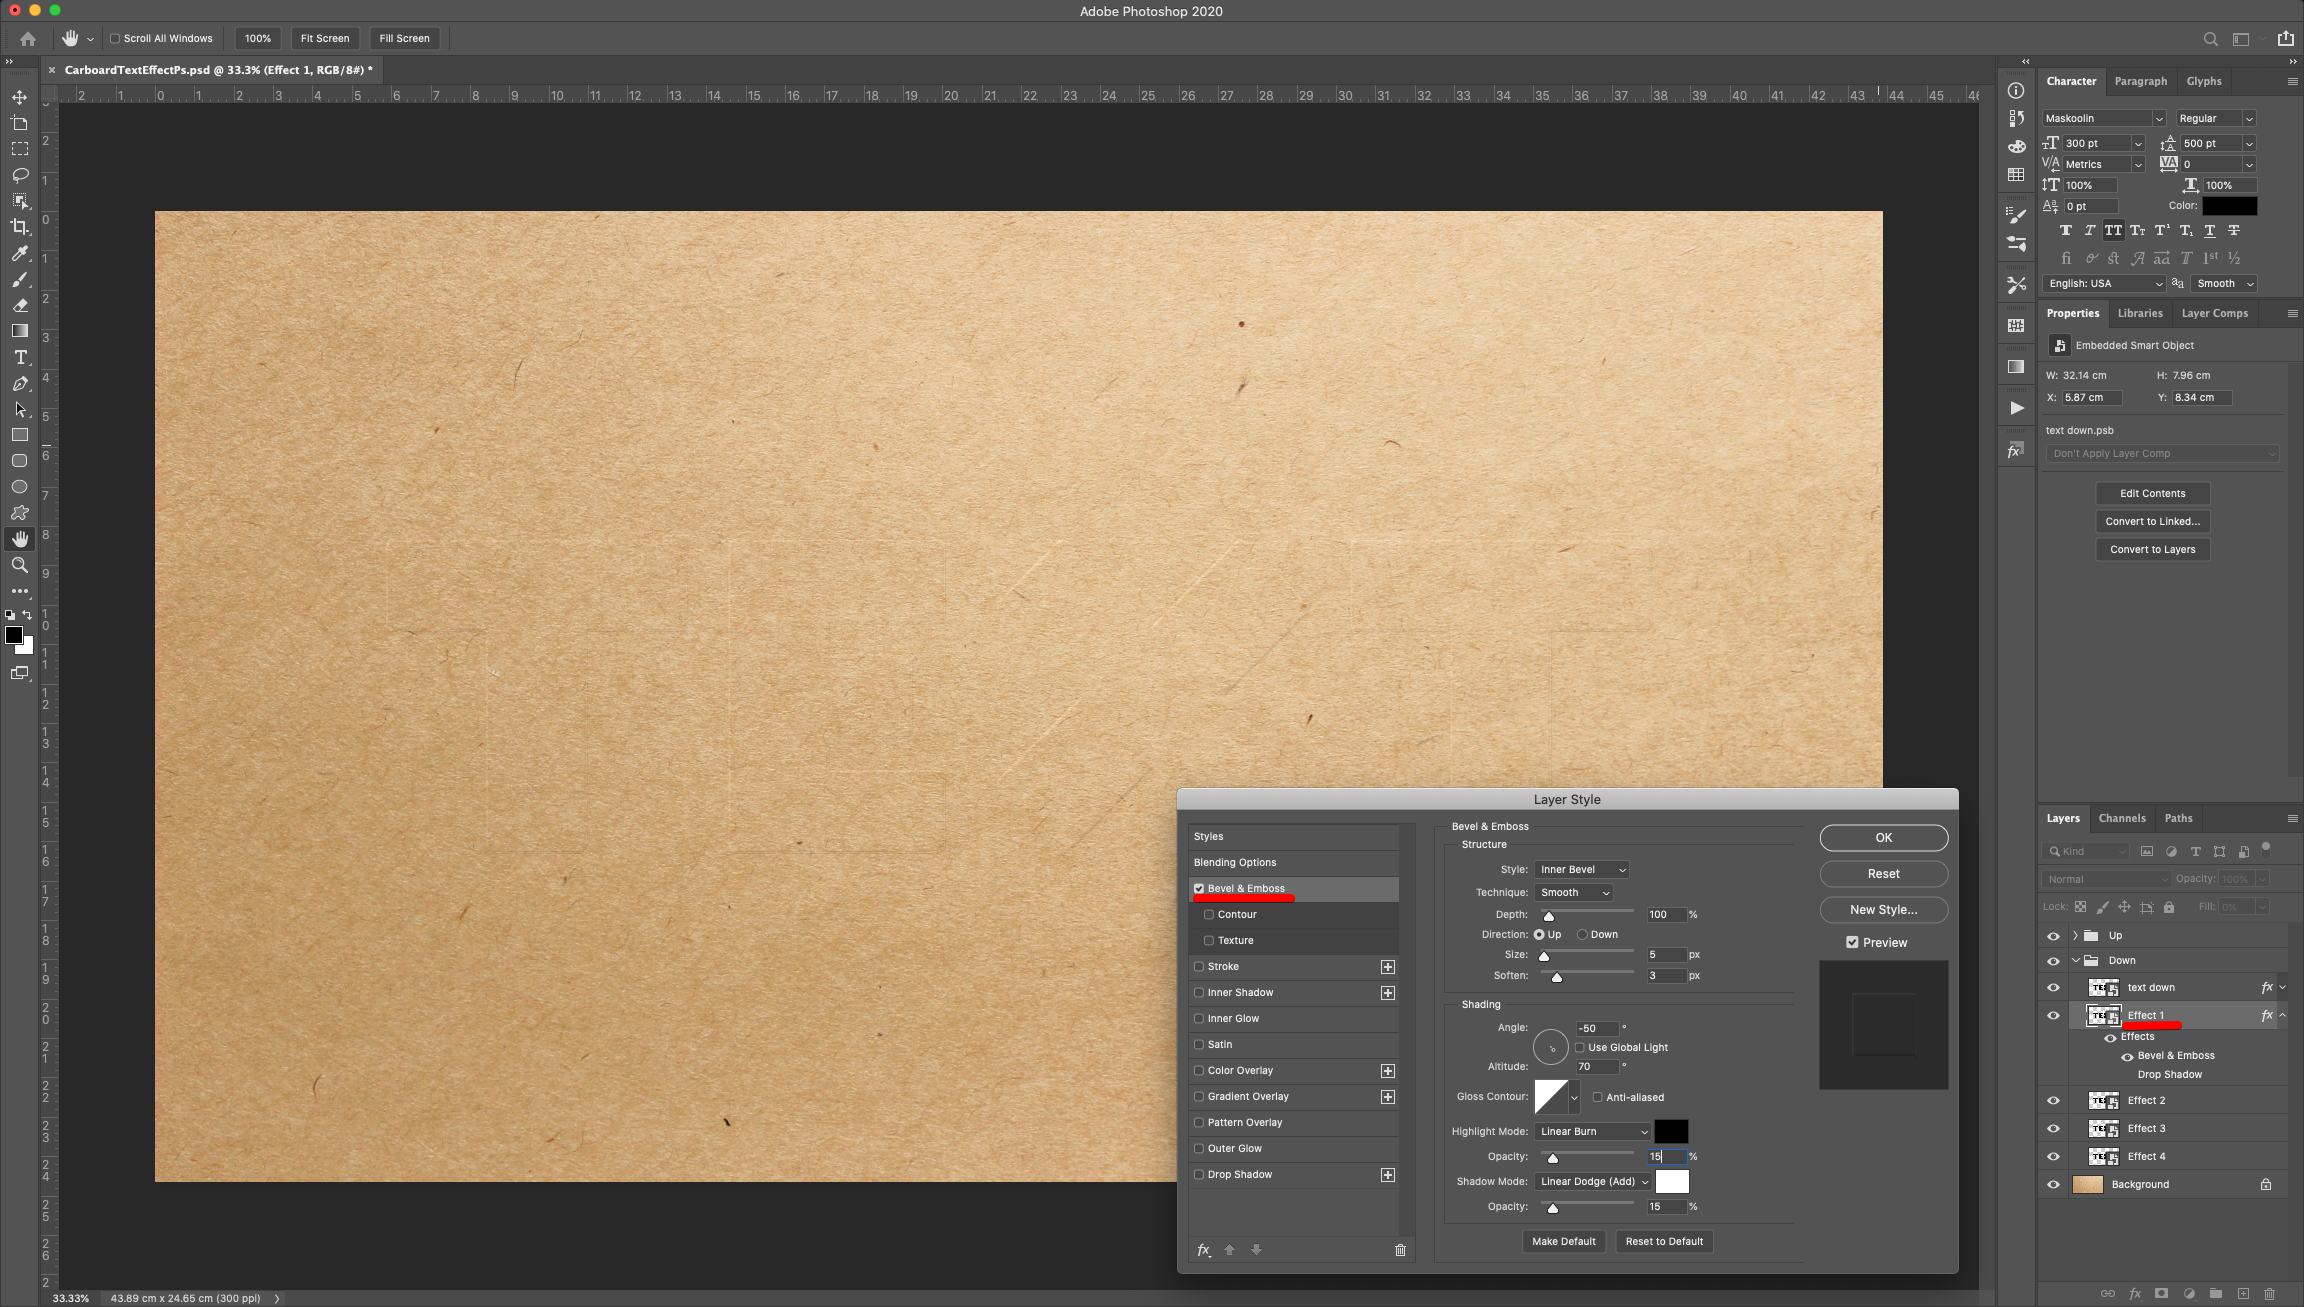
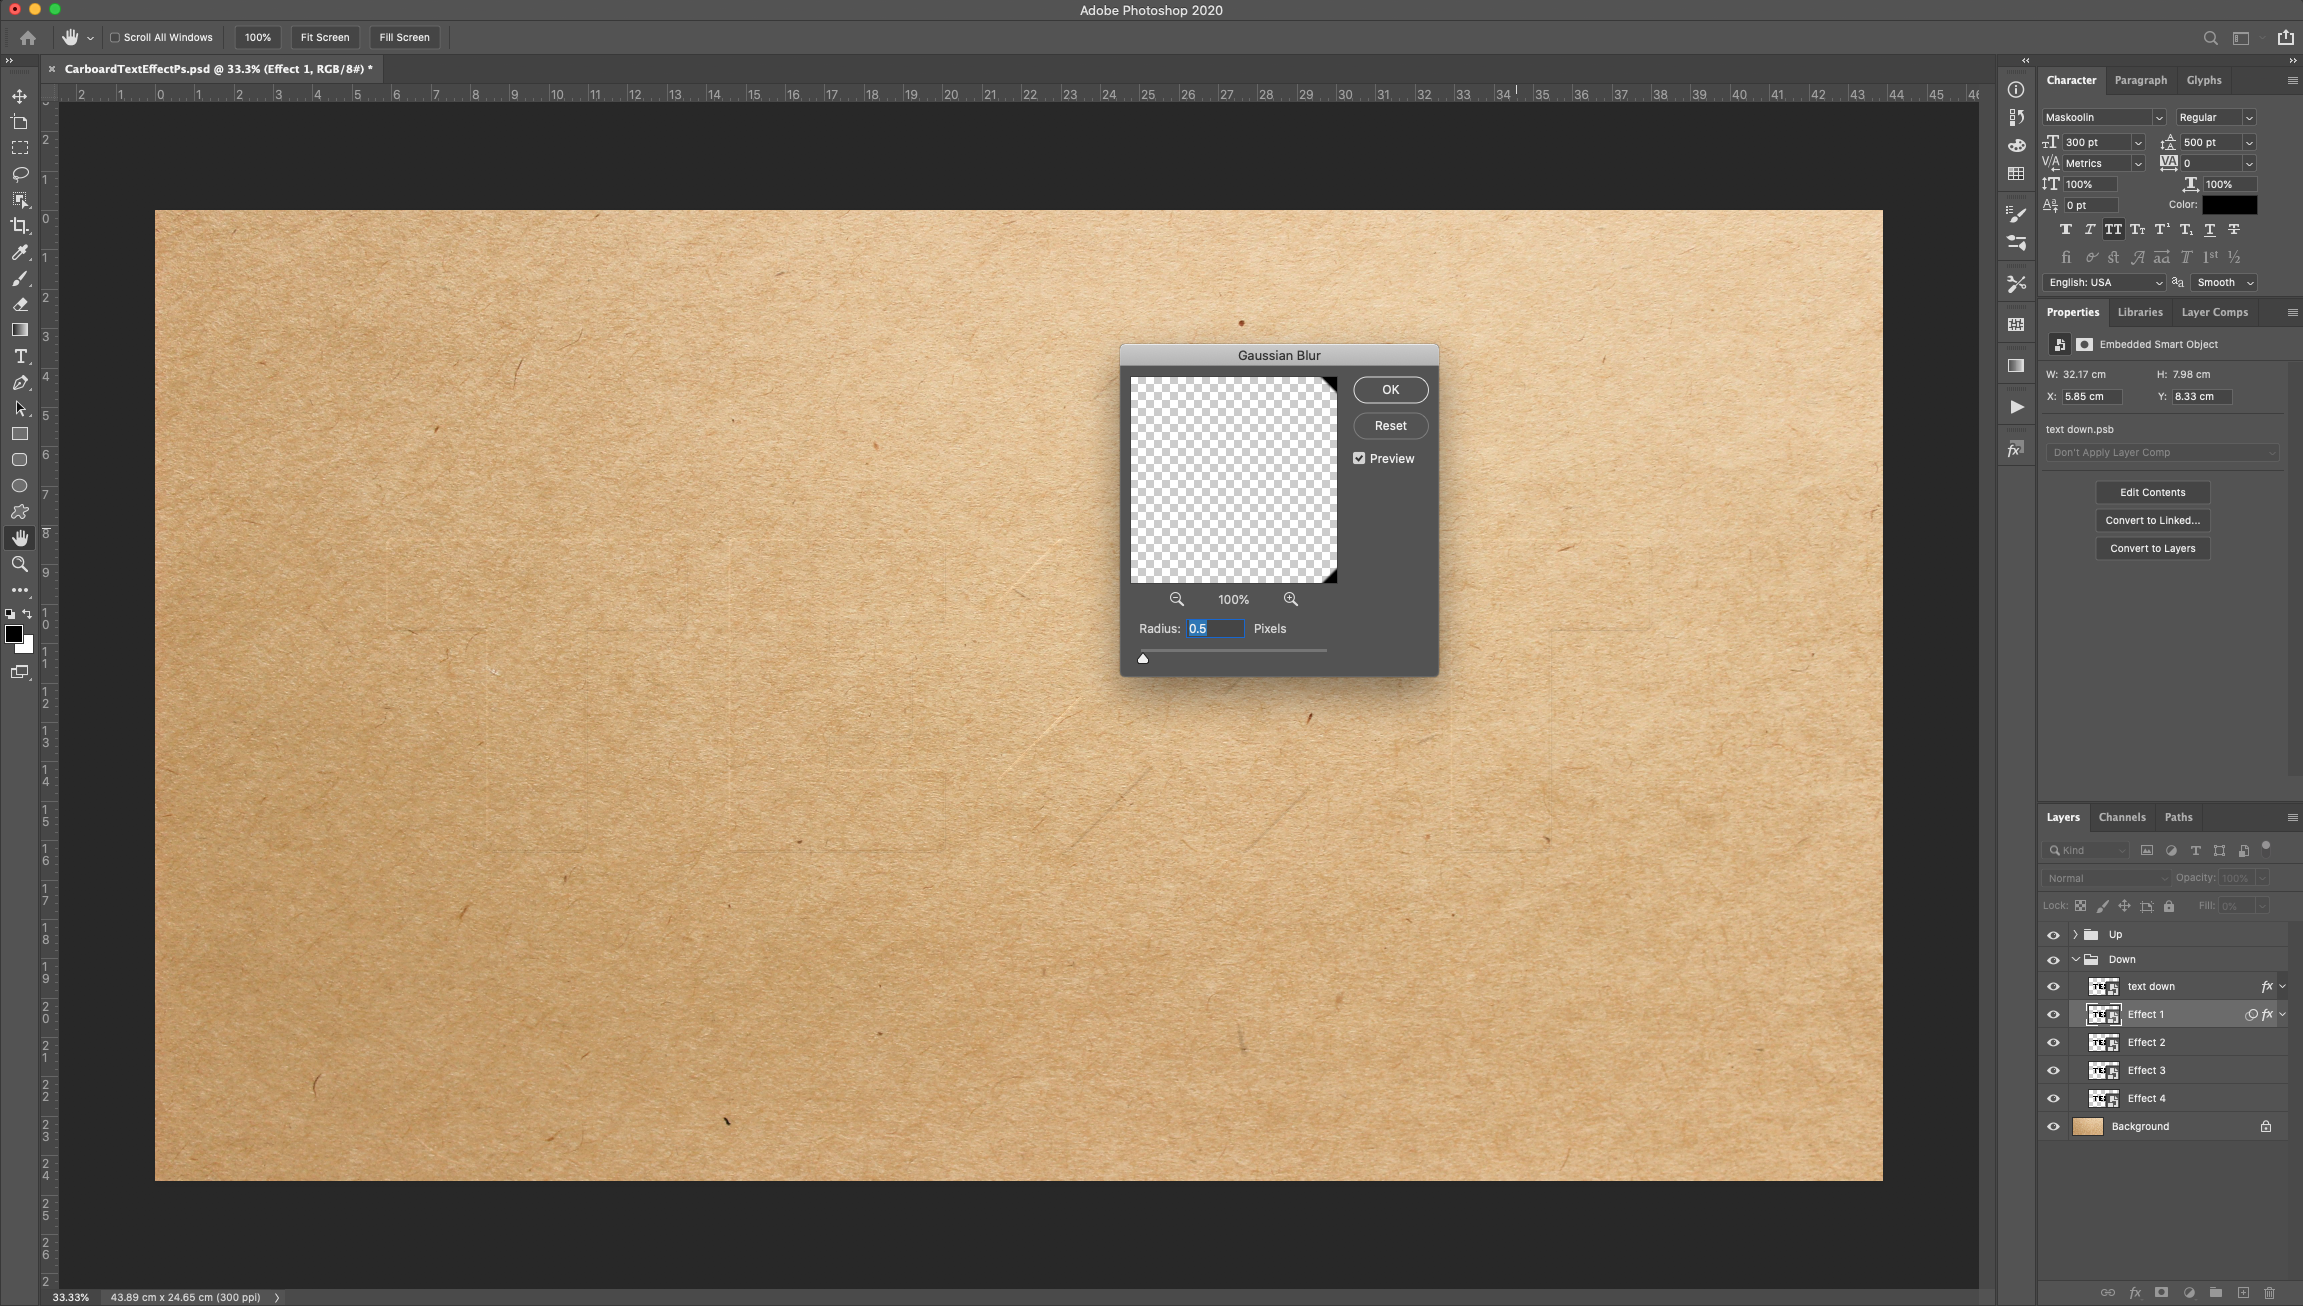
Go to Filter > Blur > Gaussian Blur and use a “Radius” of 5 Pixels.
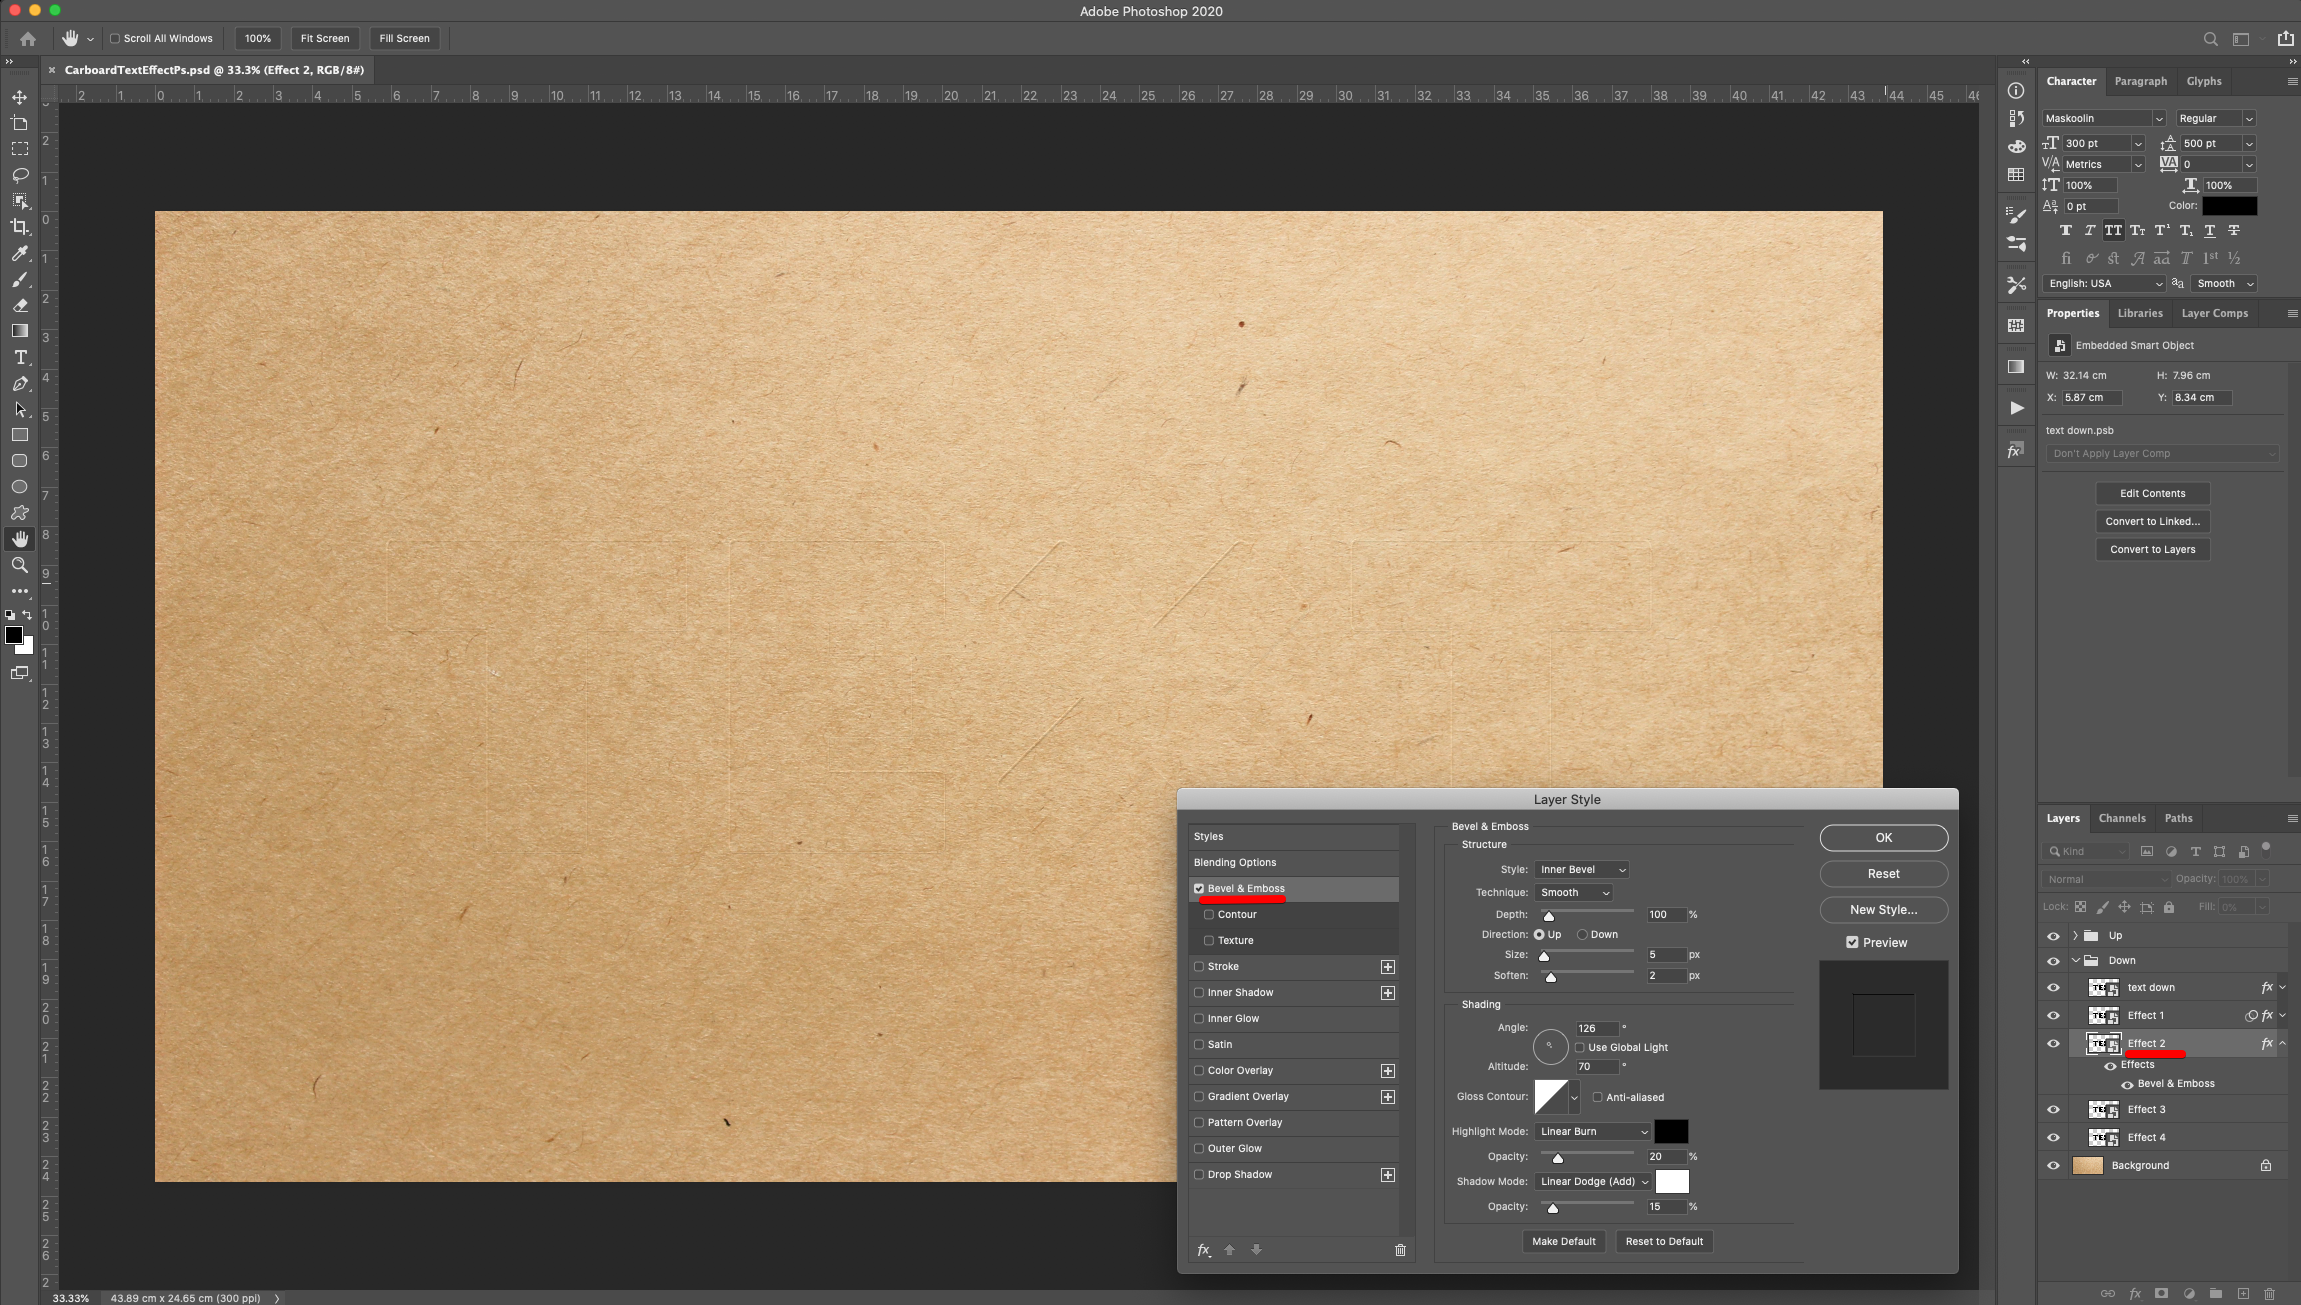
18 - Double-click on top of the “Effect 2” layer Thumbnail (in the “Down” group) and apply the following “Layer Styles”:
Bevel & Emboss:
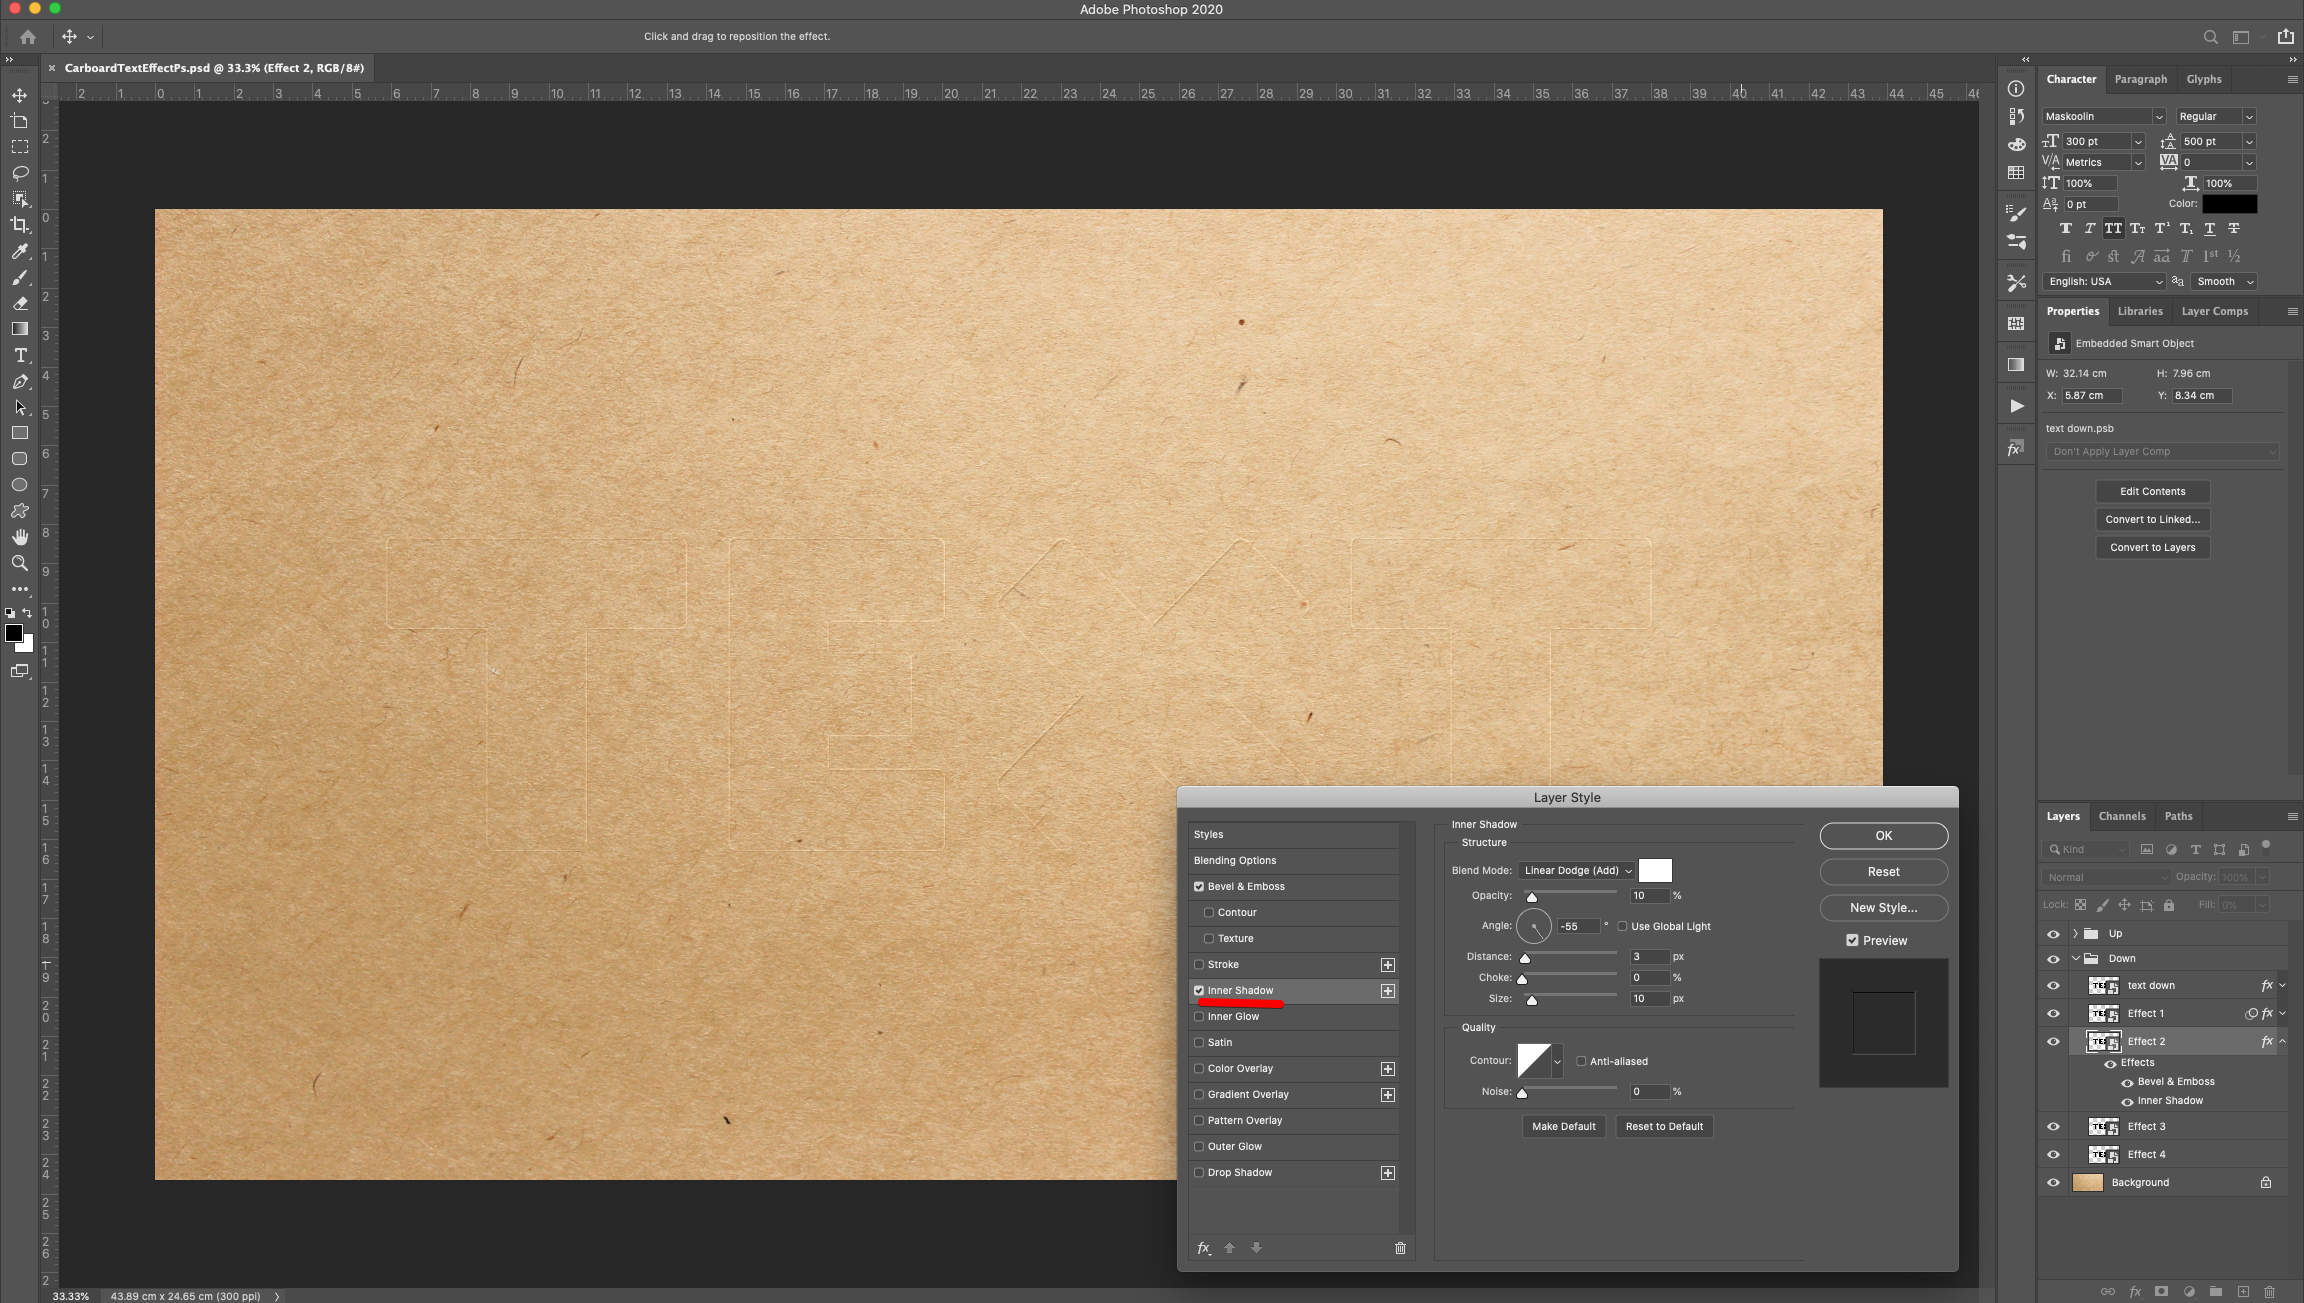
Inner Shadow:
Drop Shadow:
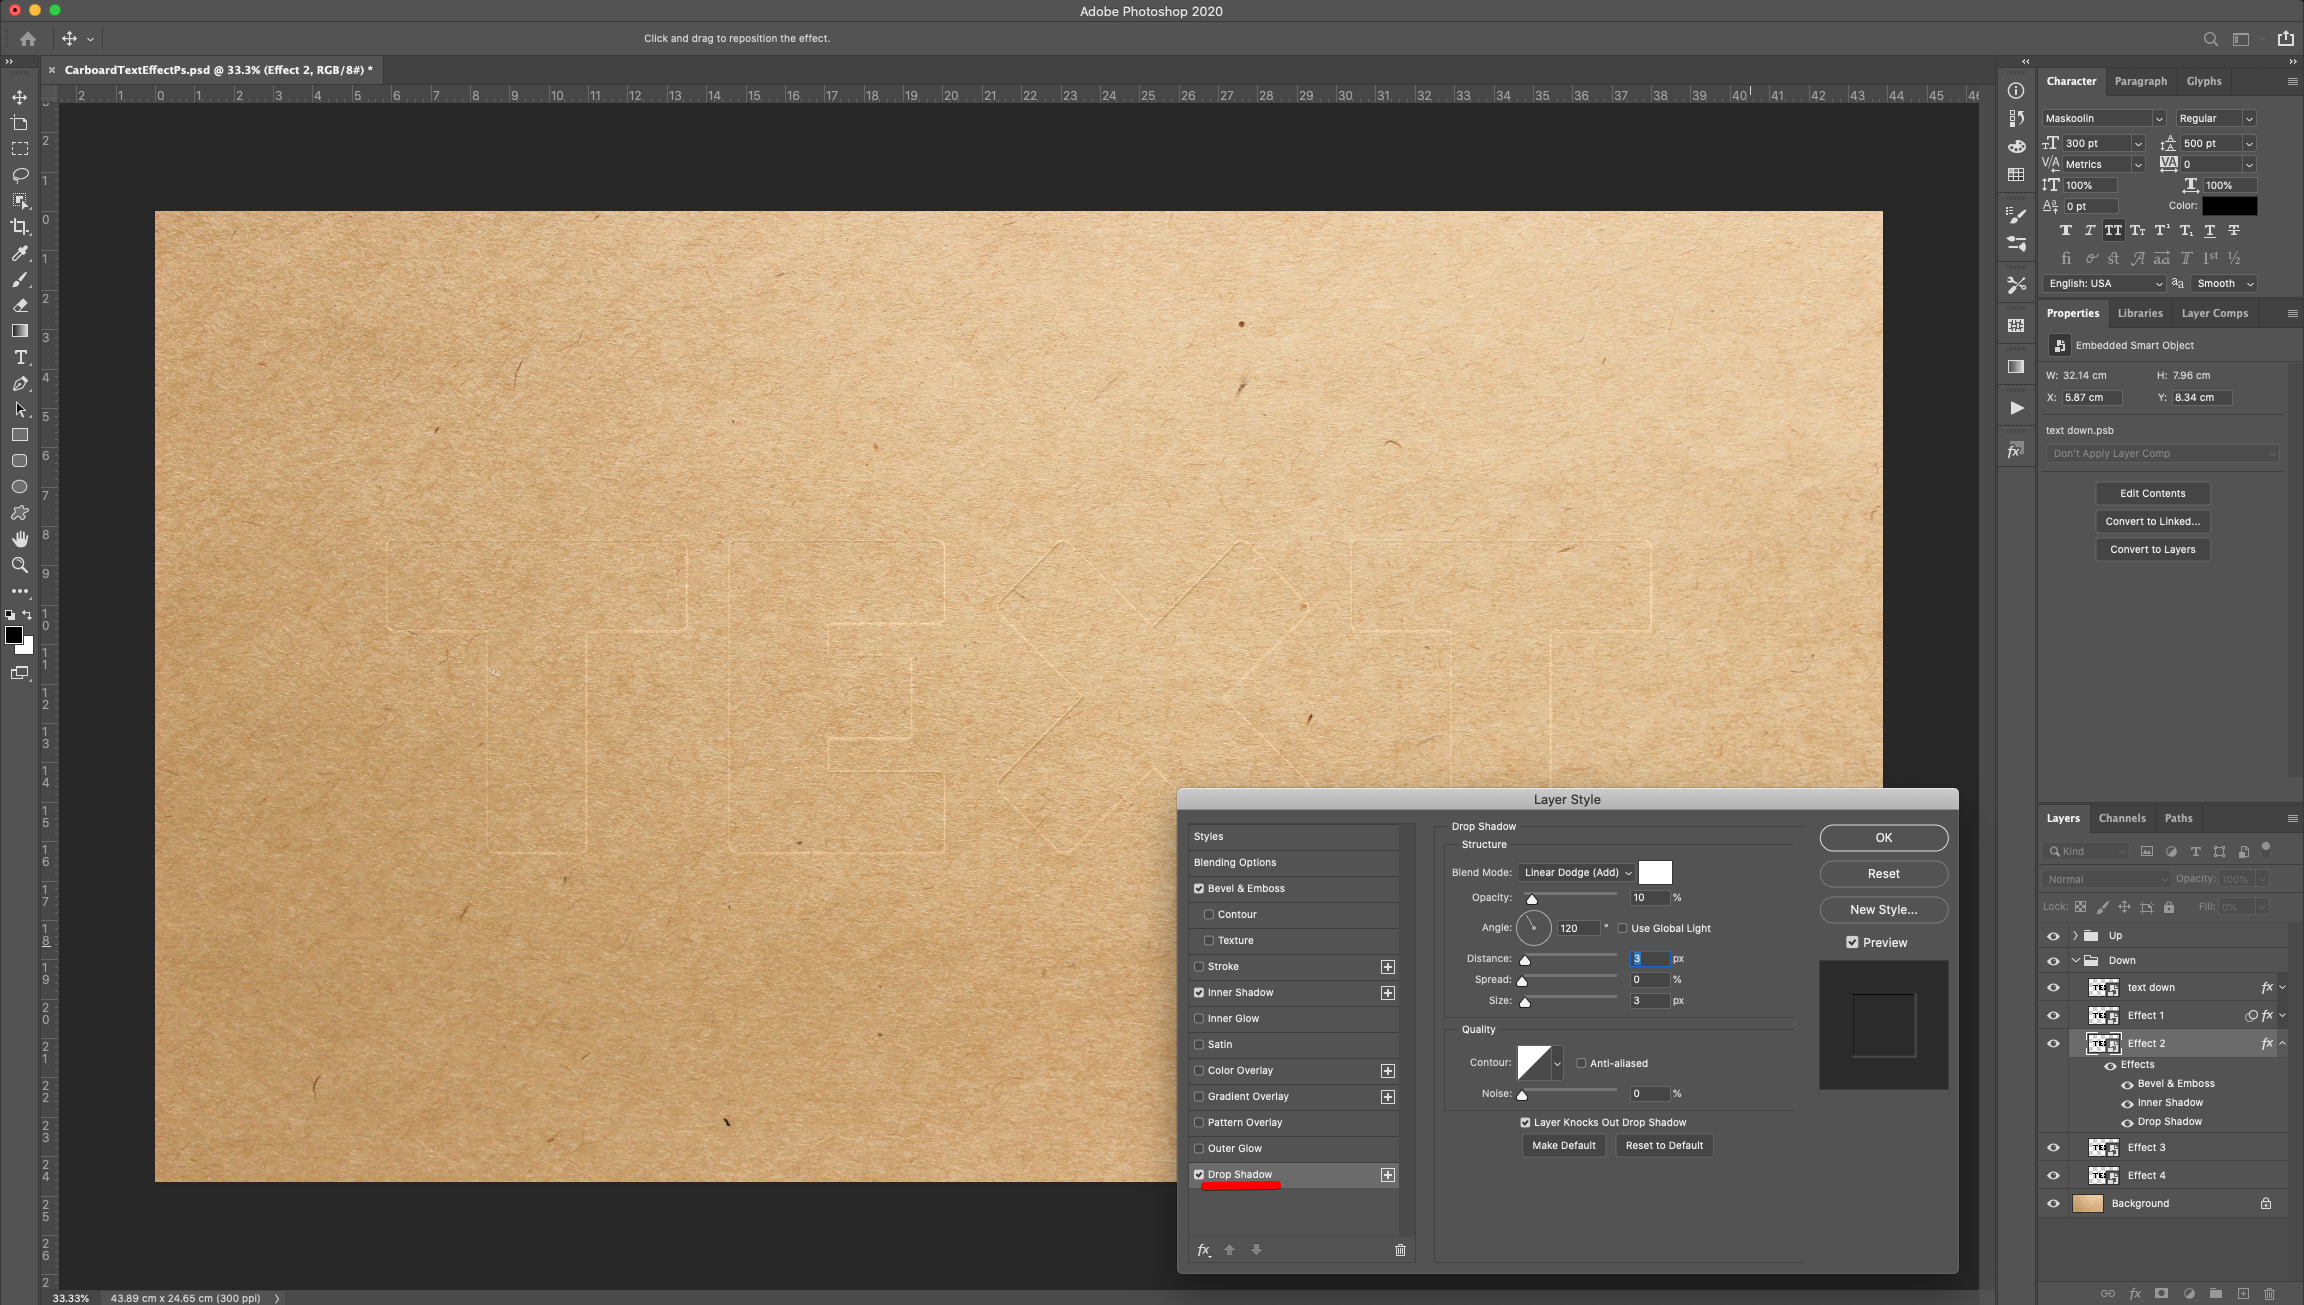
Go to Filter > Blur > Gaussian Blur and use a “Radius” of 0.5 Pixels.
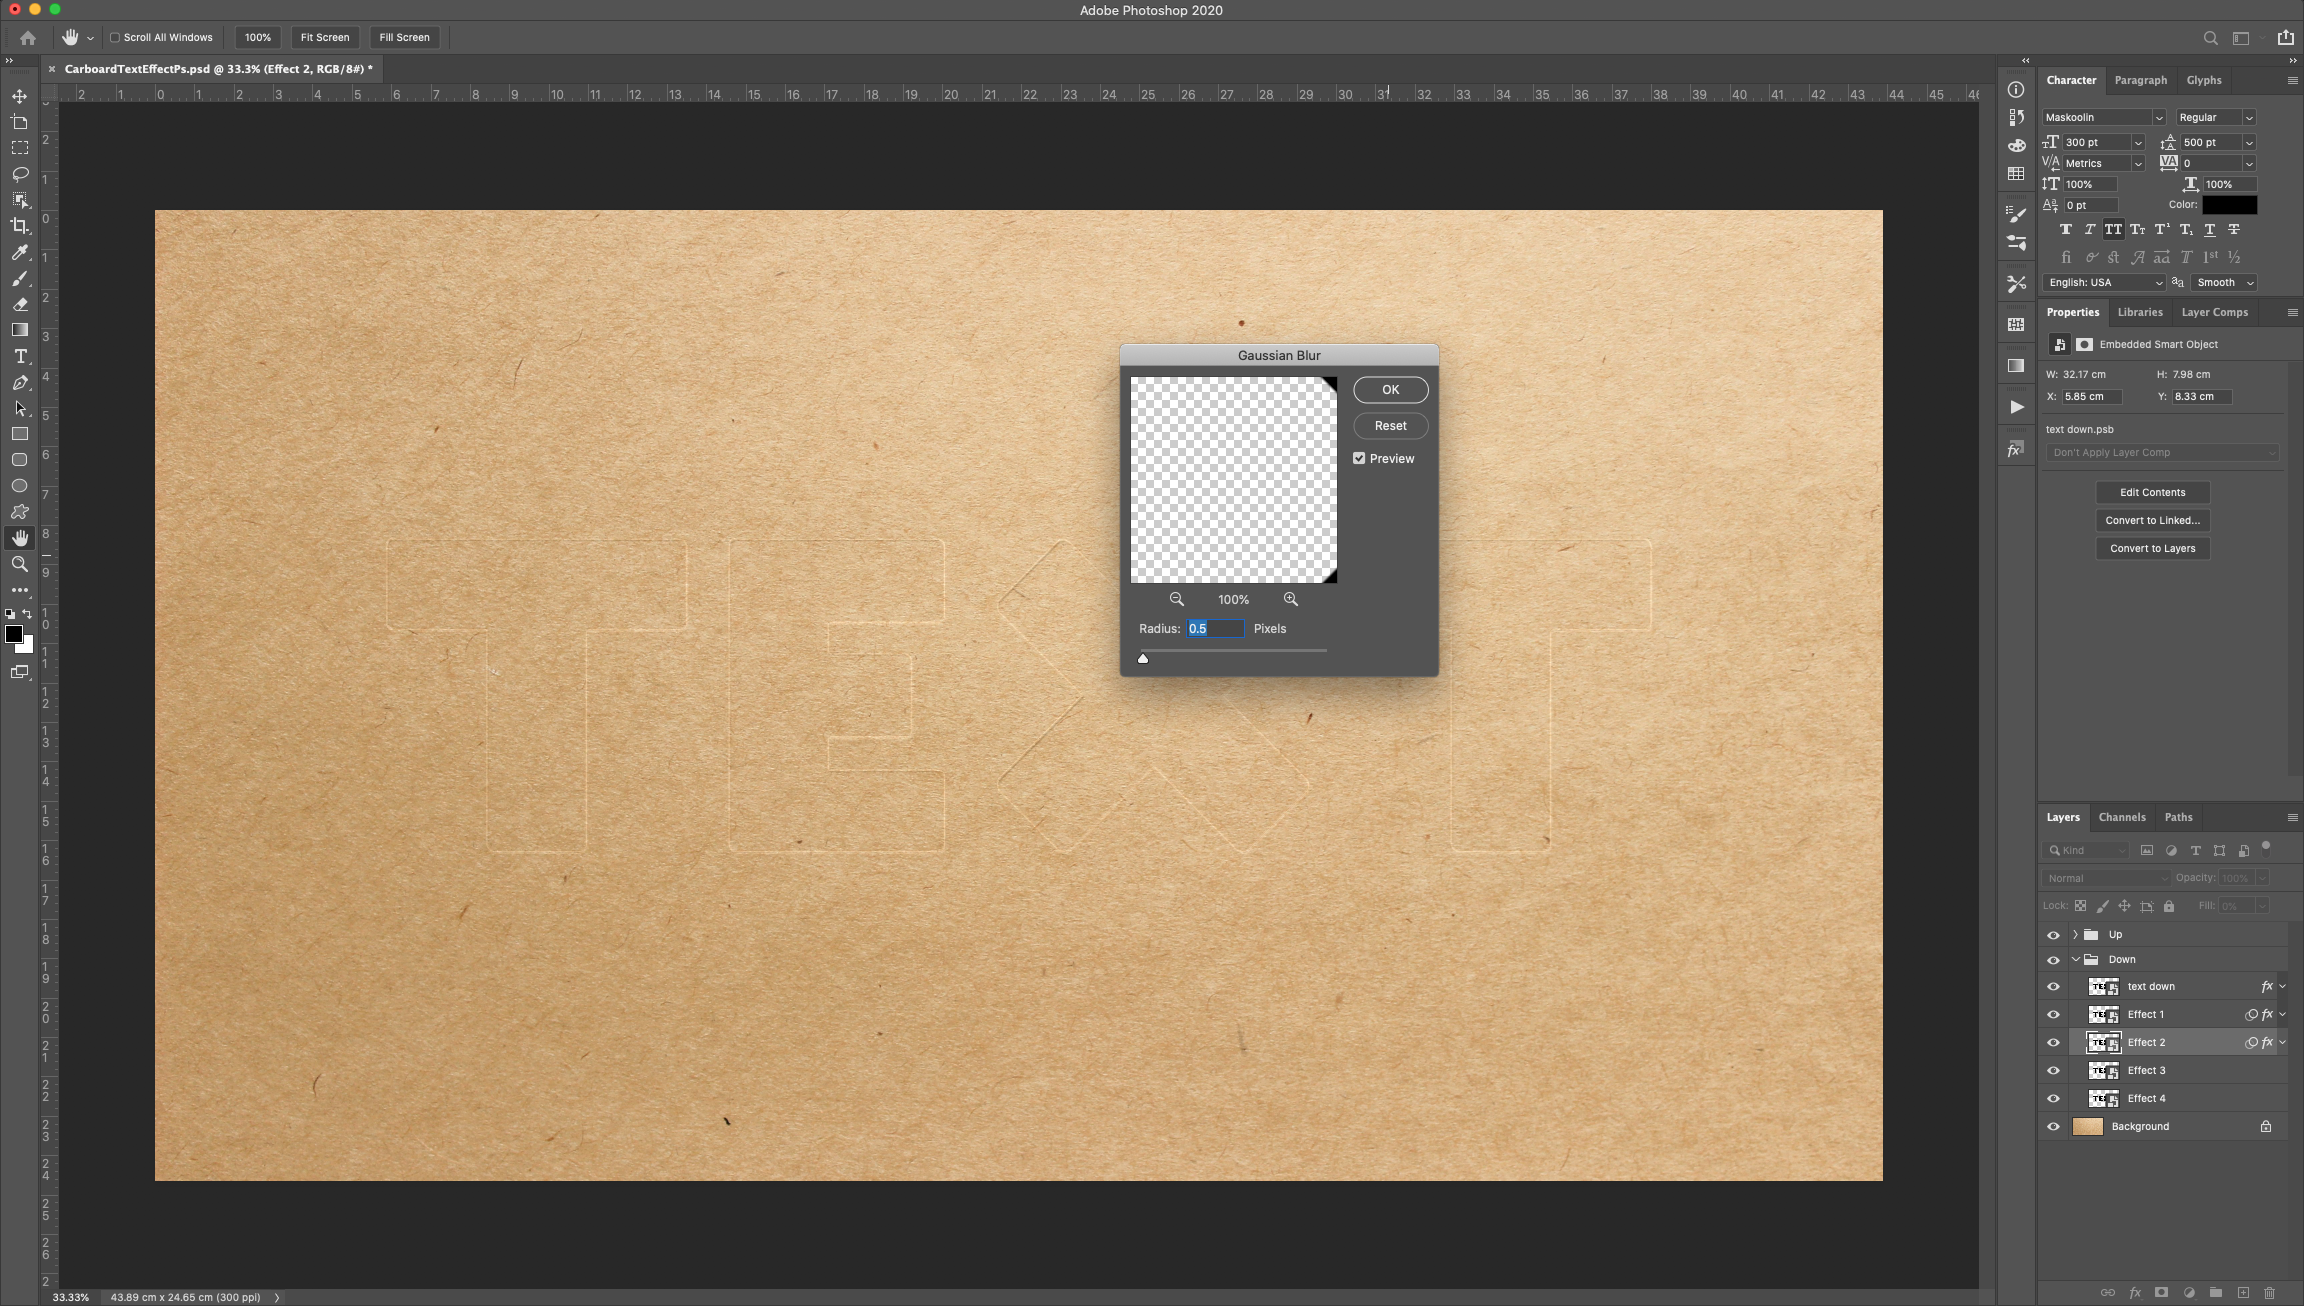
19 - Double-click on top of the “Effect 3” layer Thumbnail (in the “Down” group) and apply the following “Layer Styles”:
Bevel & Emboss:
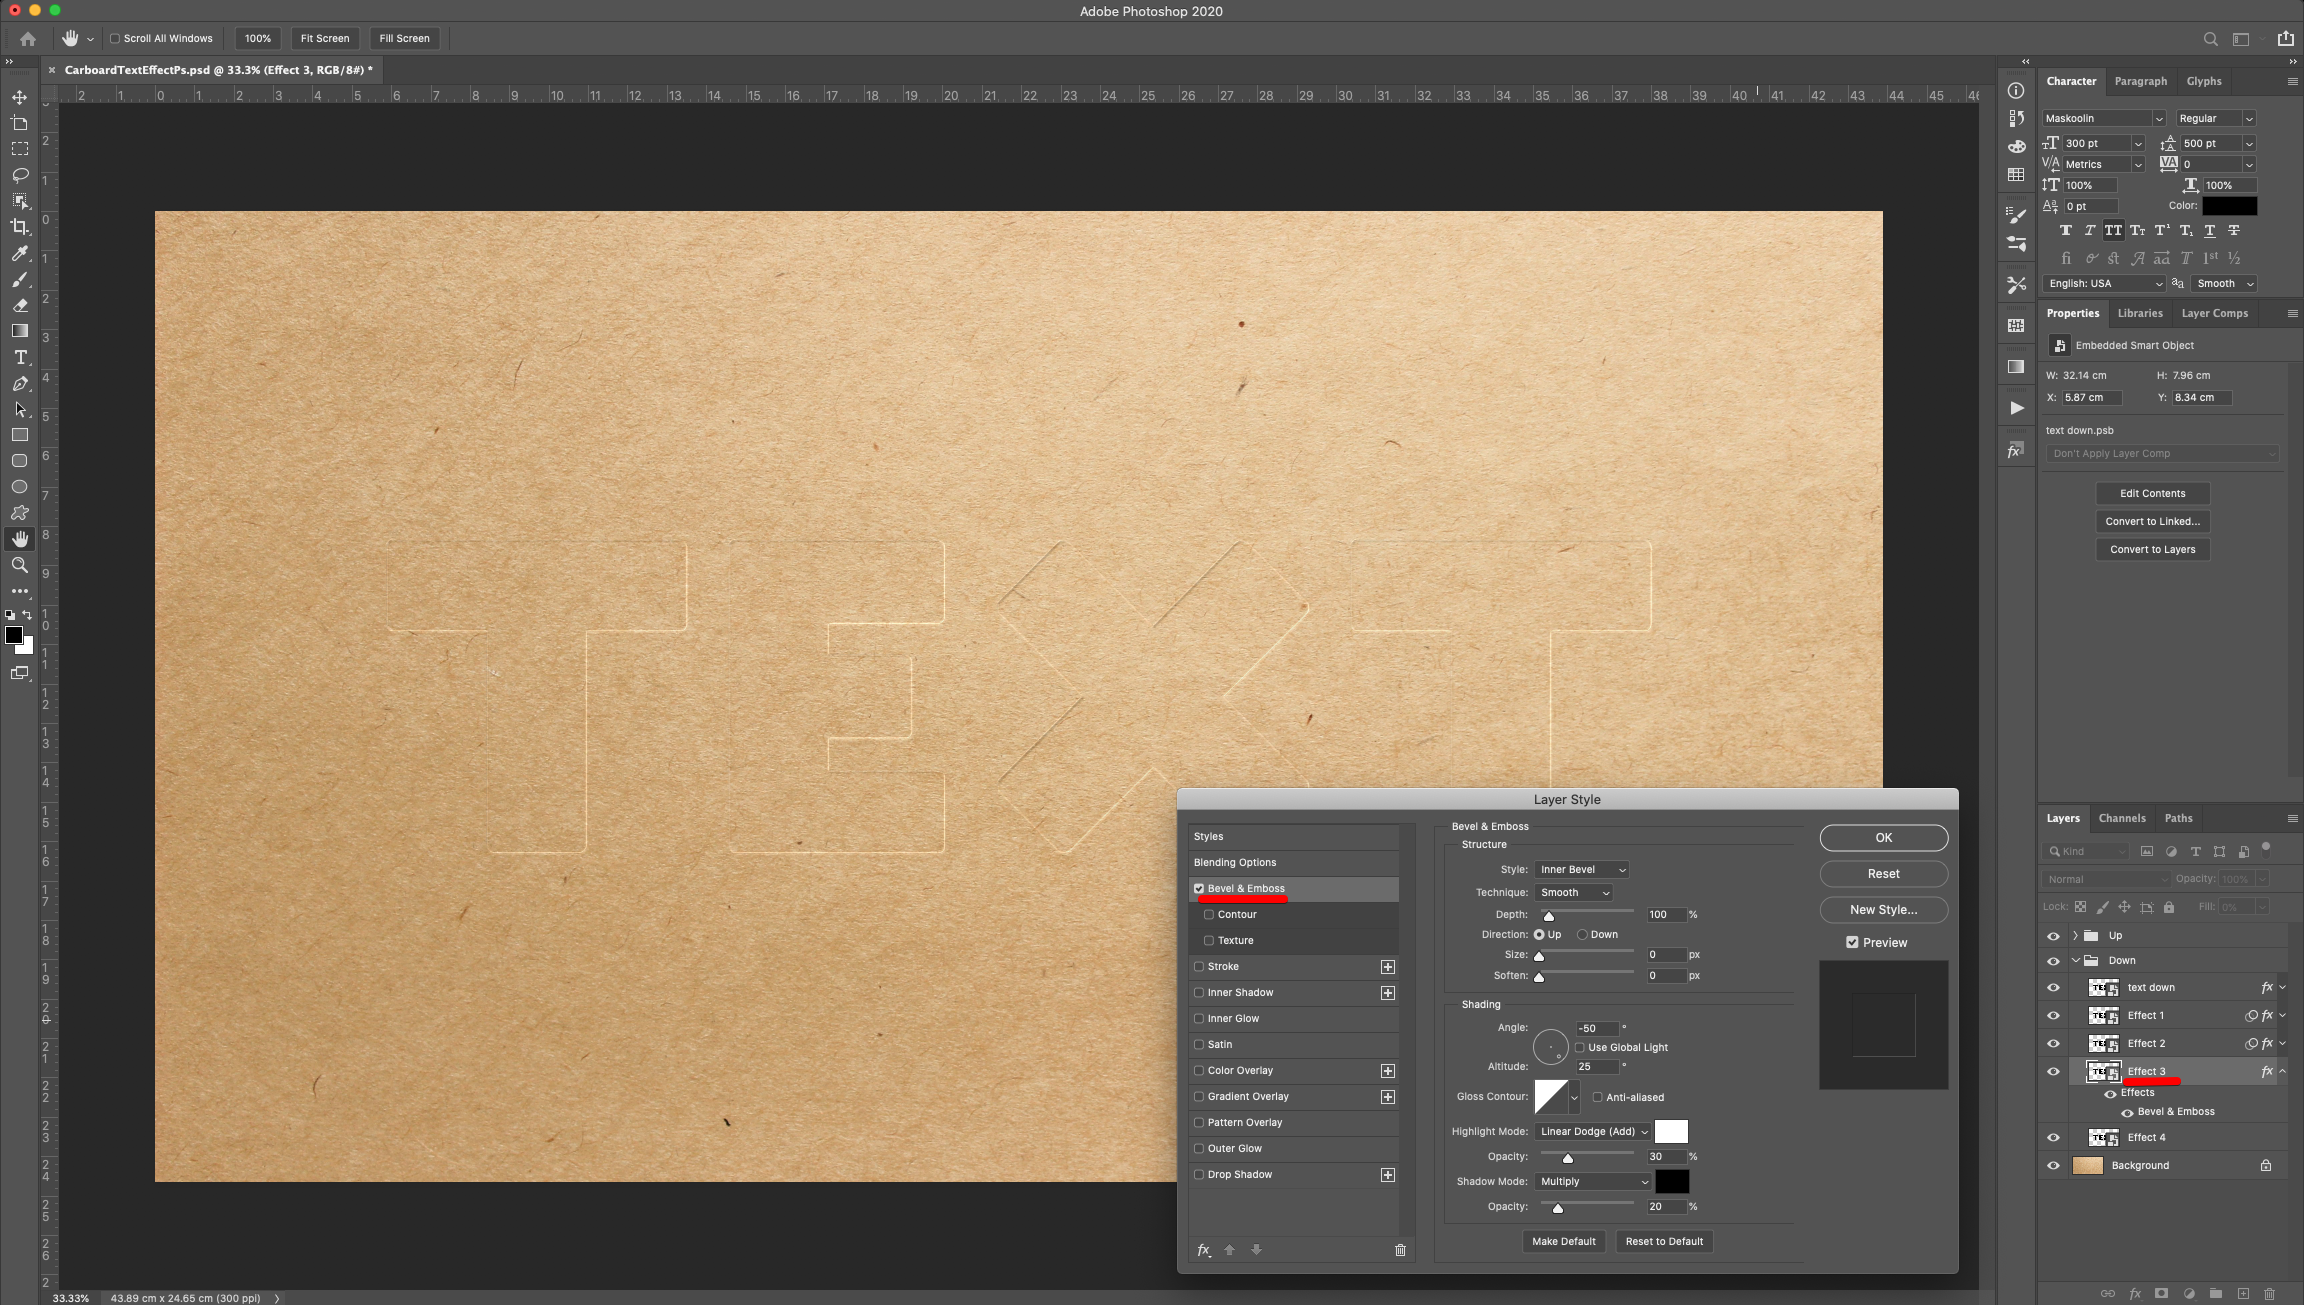
Texture: (Grey Granite)
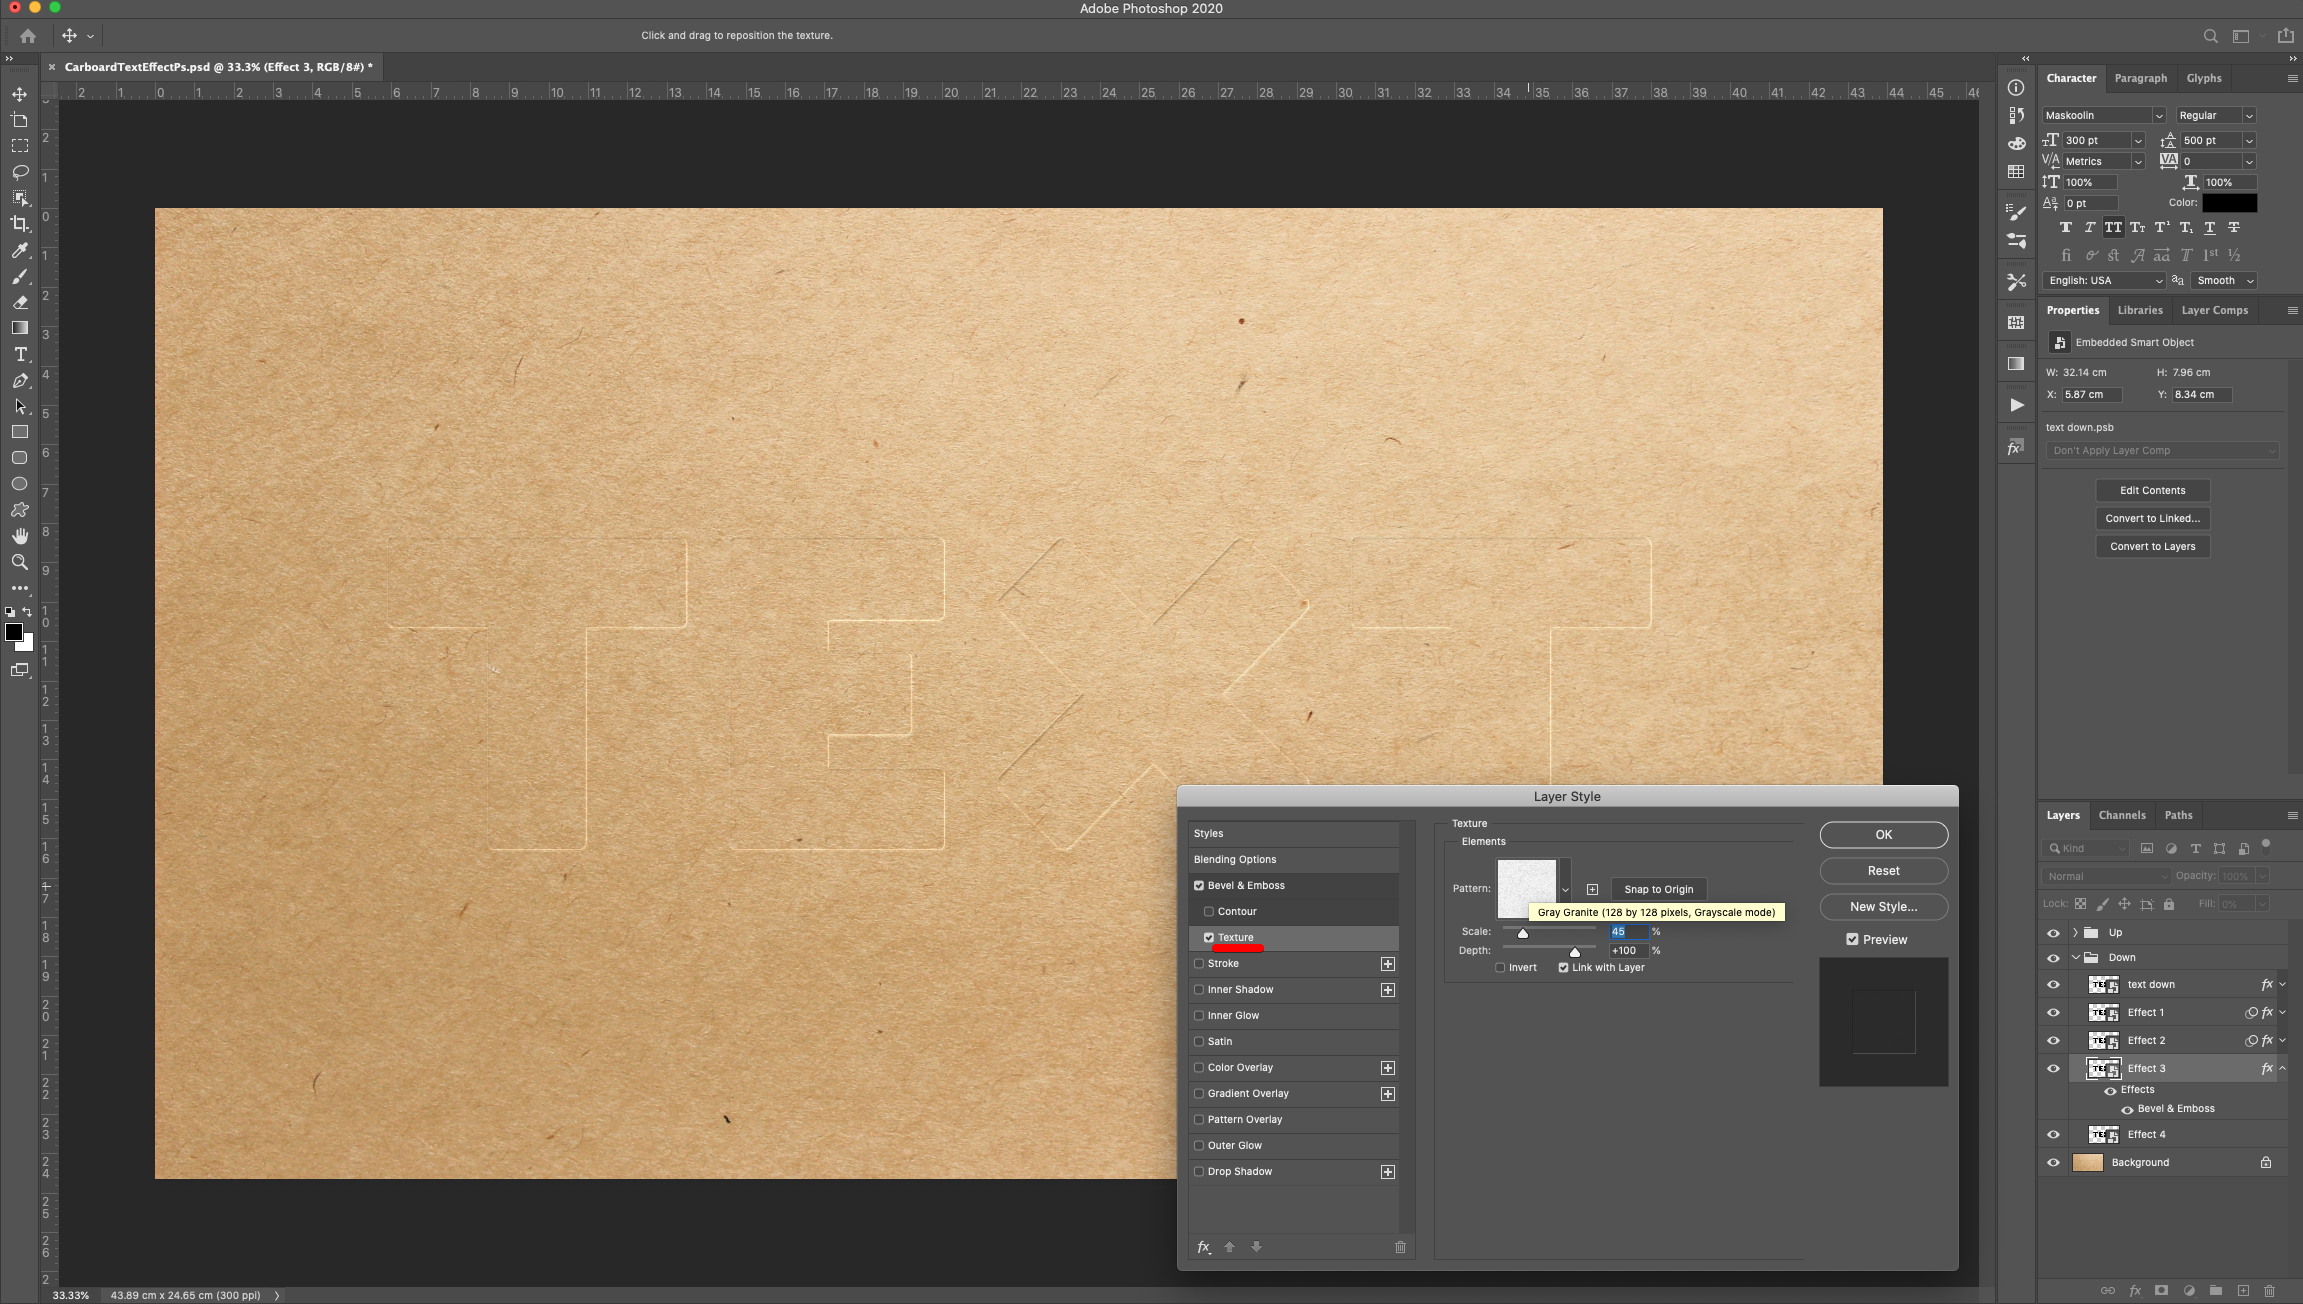
Inner Shadow:
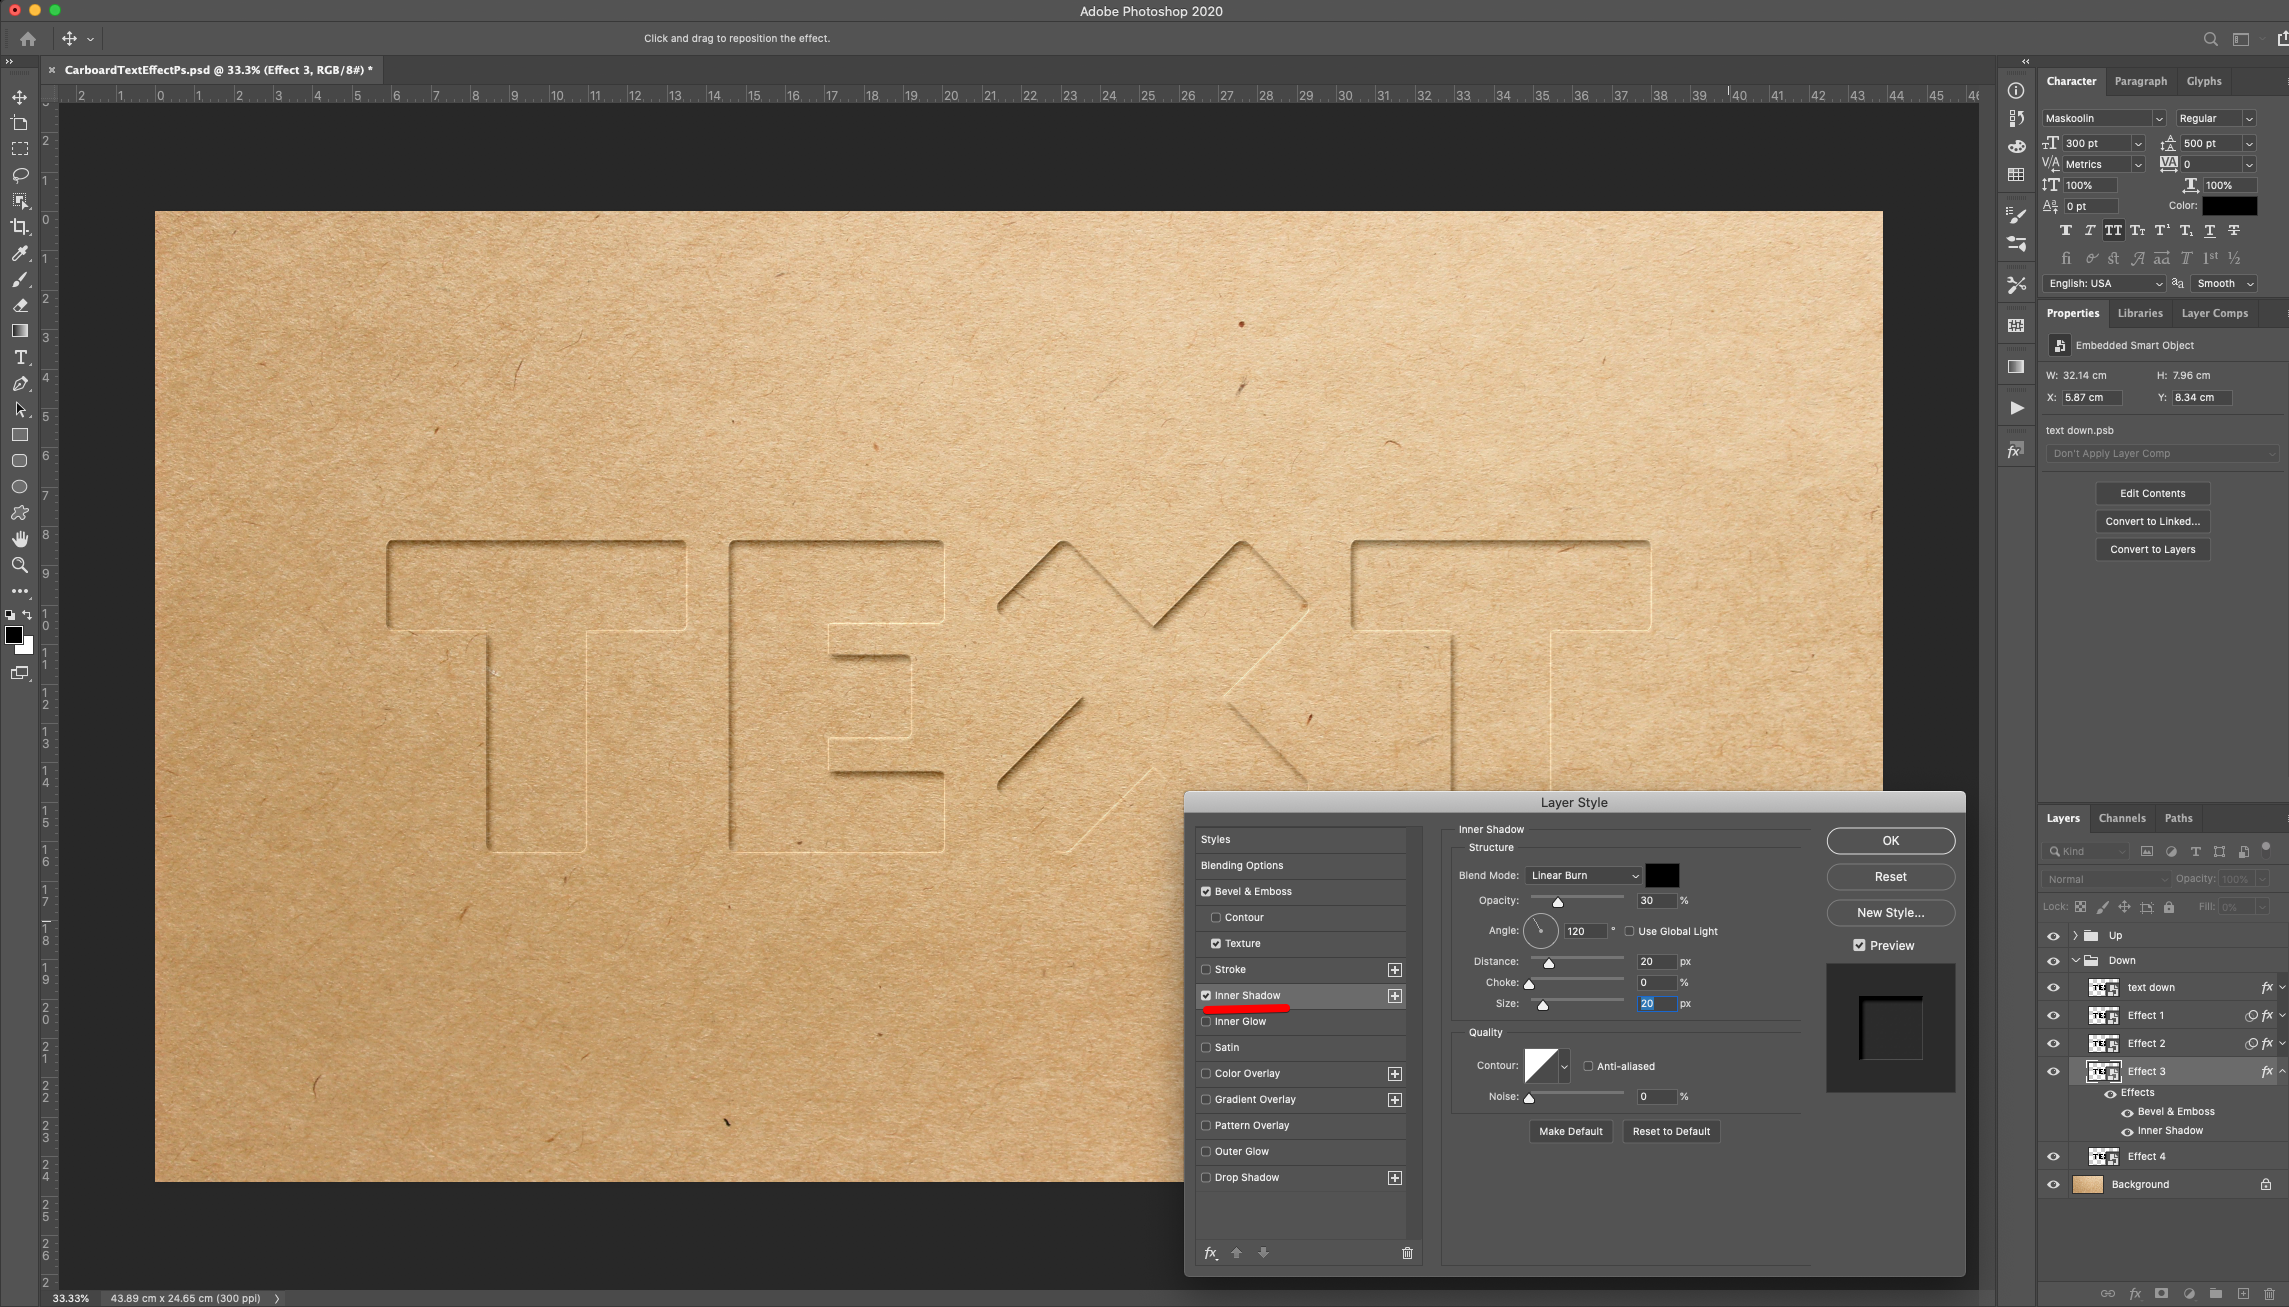
Color Overlay: (#000000)
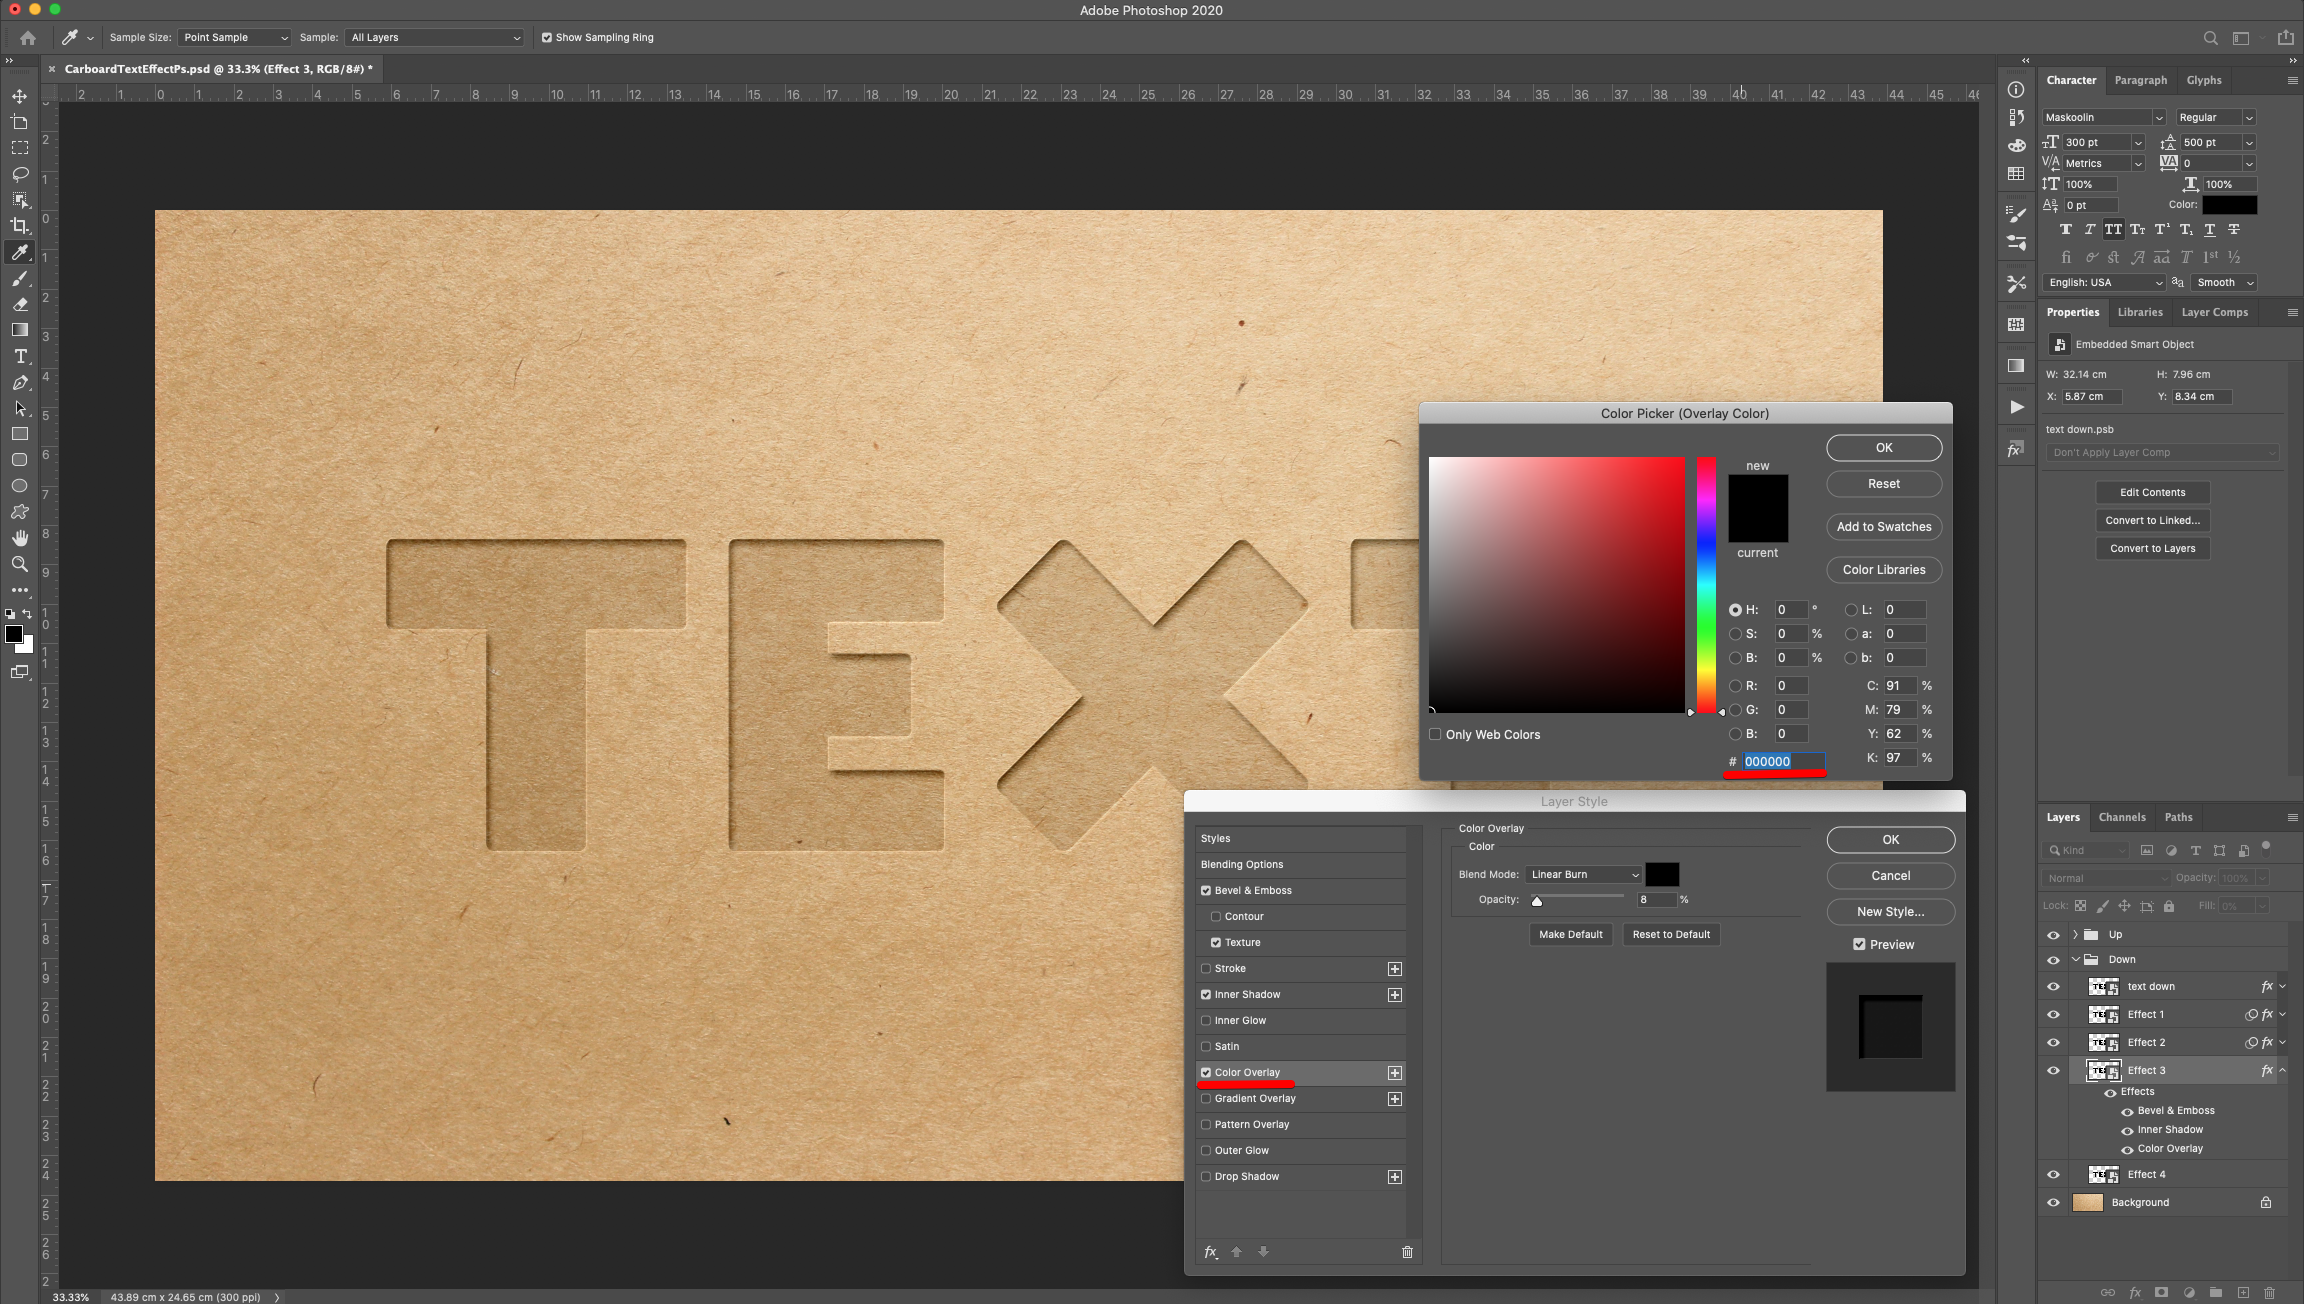
Gradient Overlay: (Foreground to Transparent)
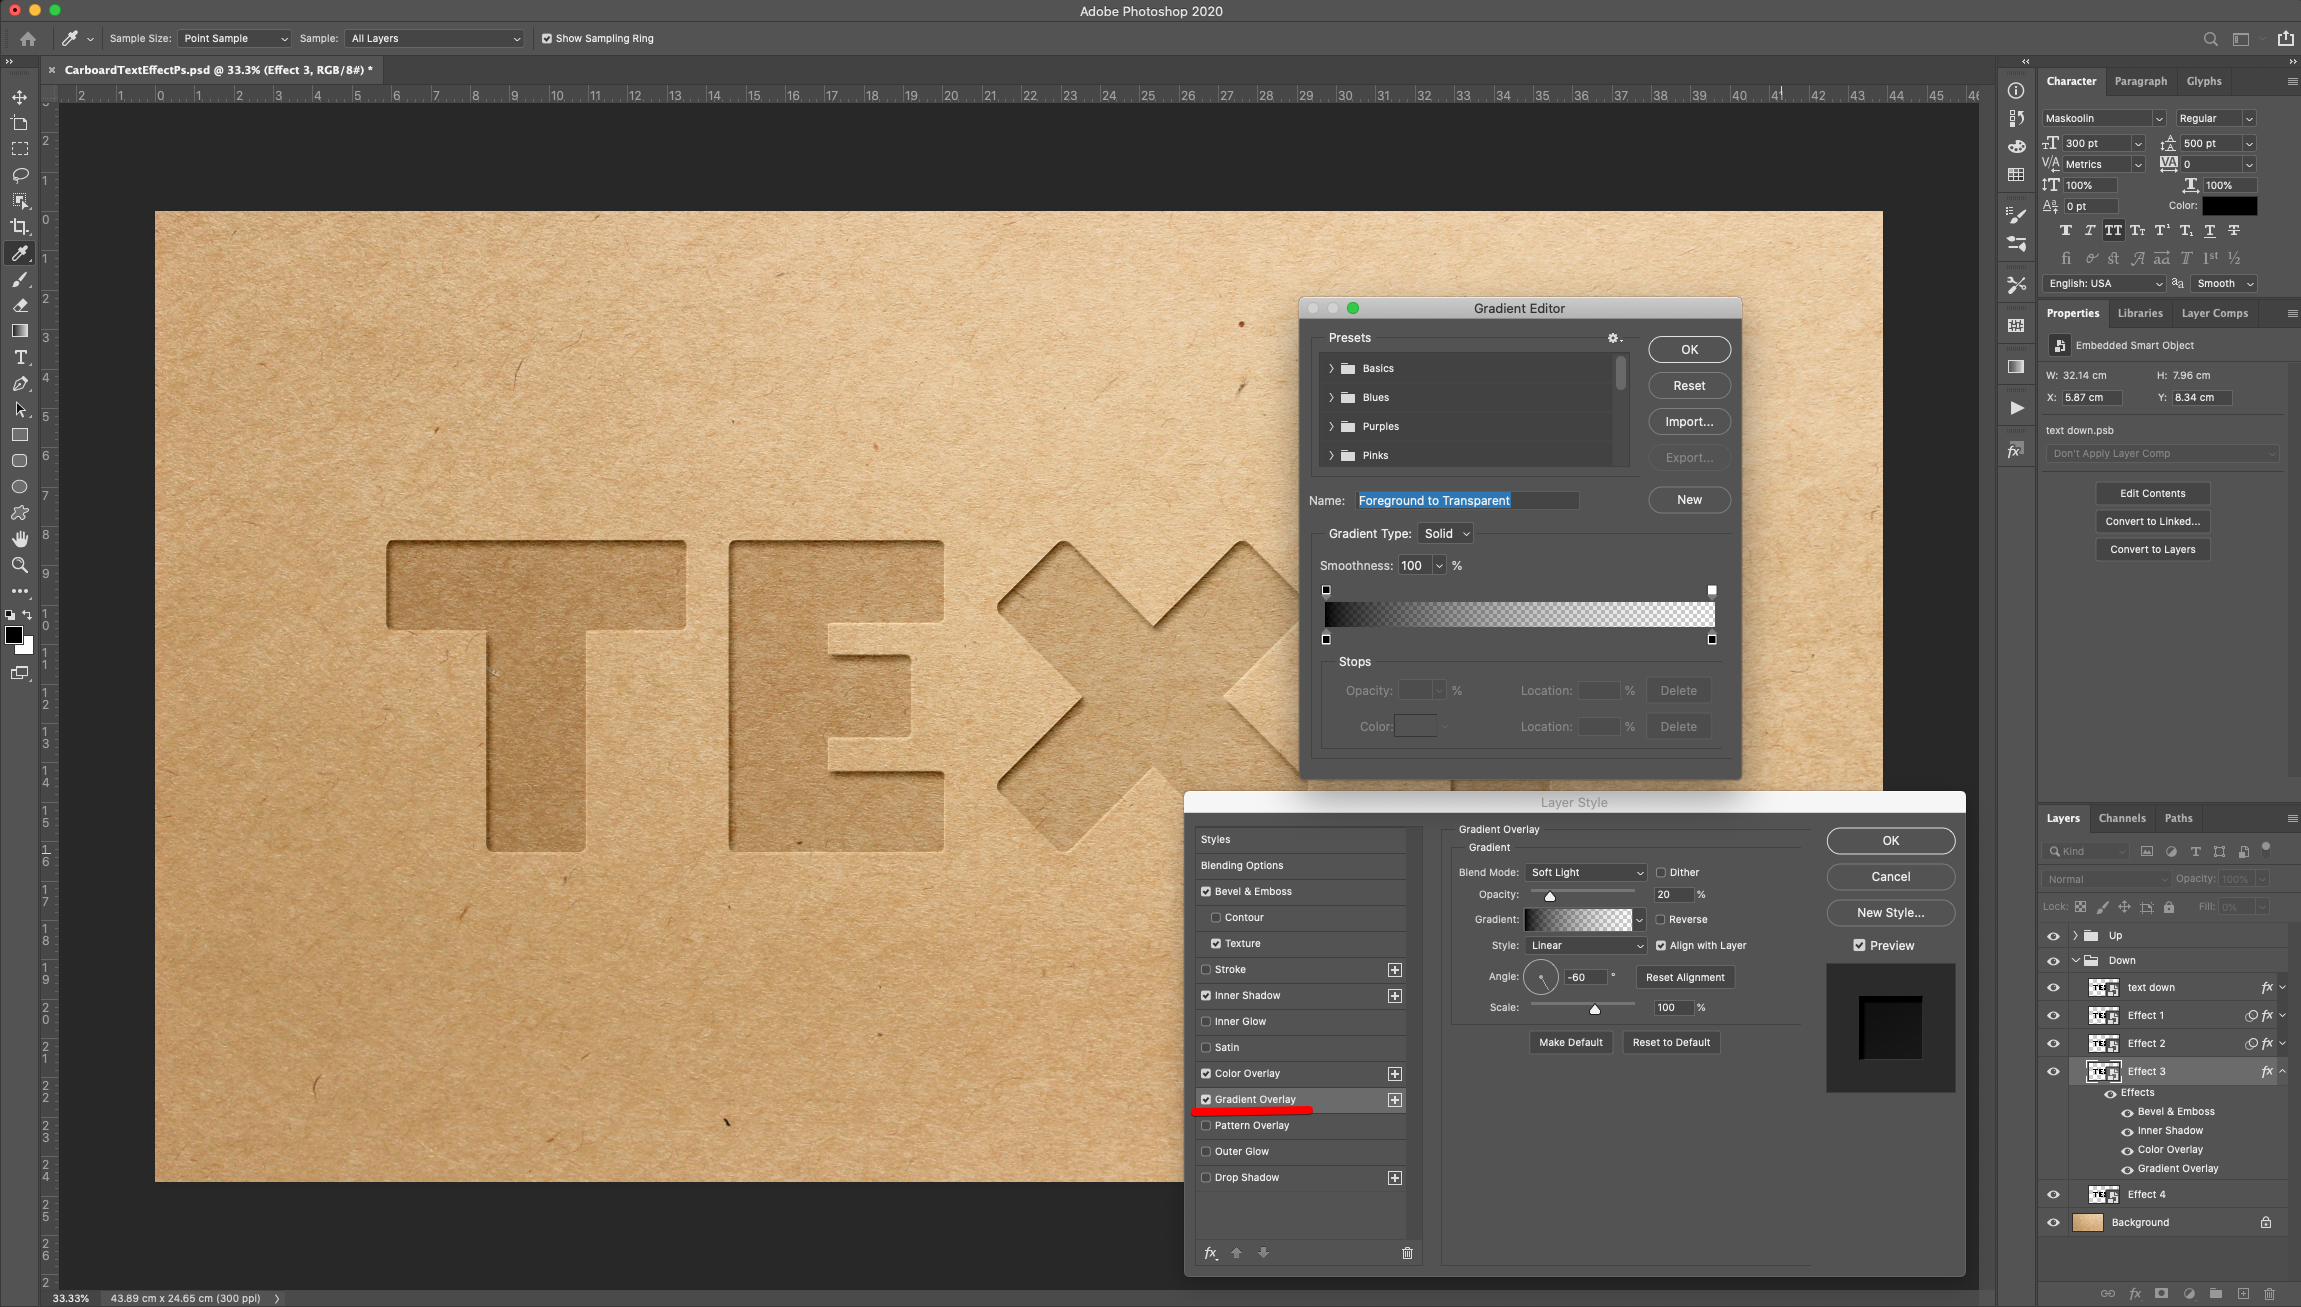
Drop Shadow:
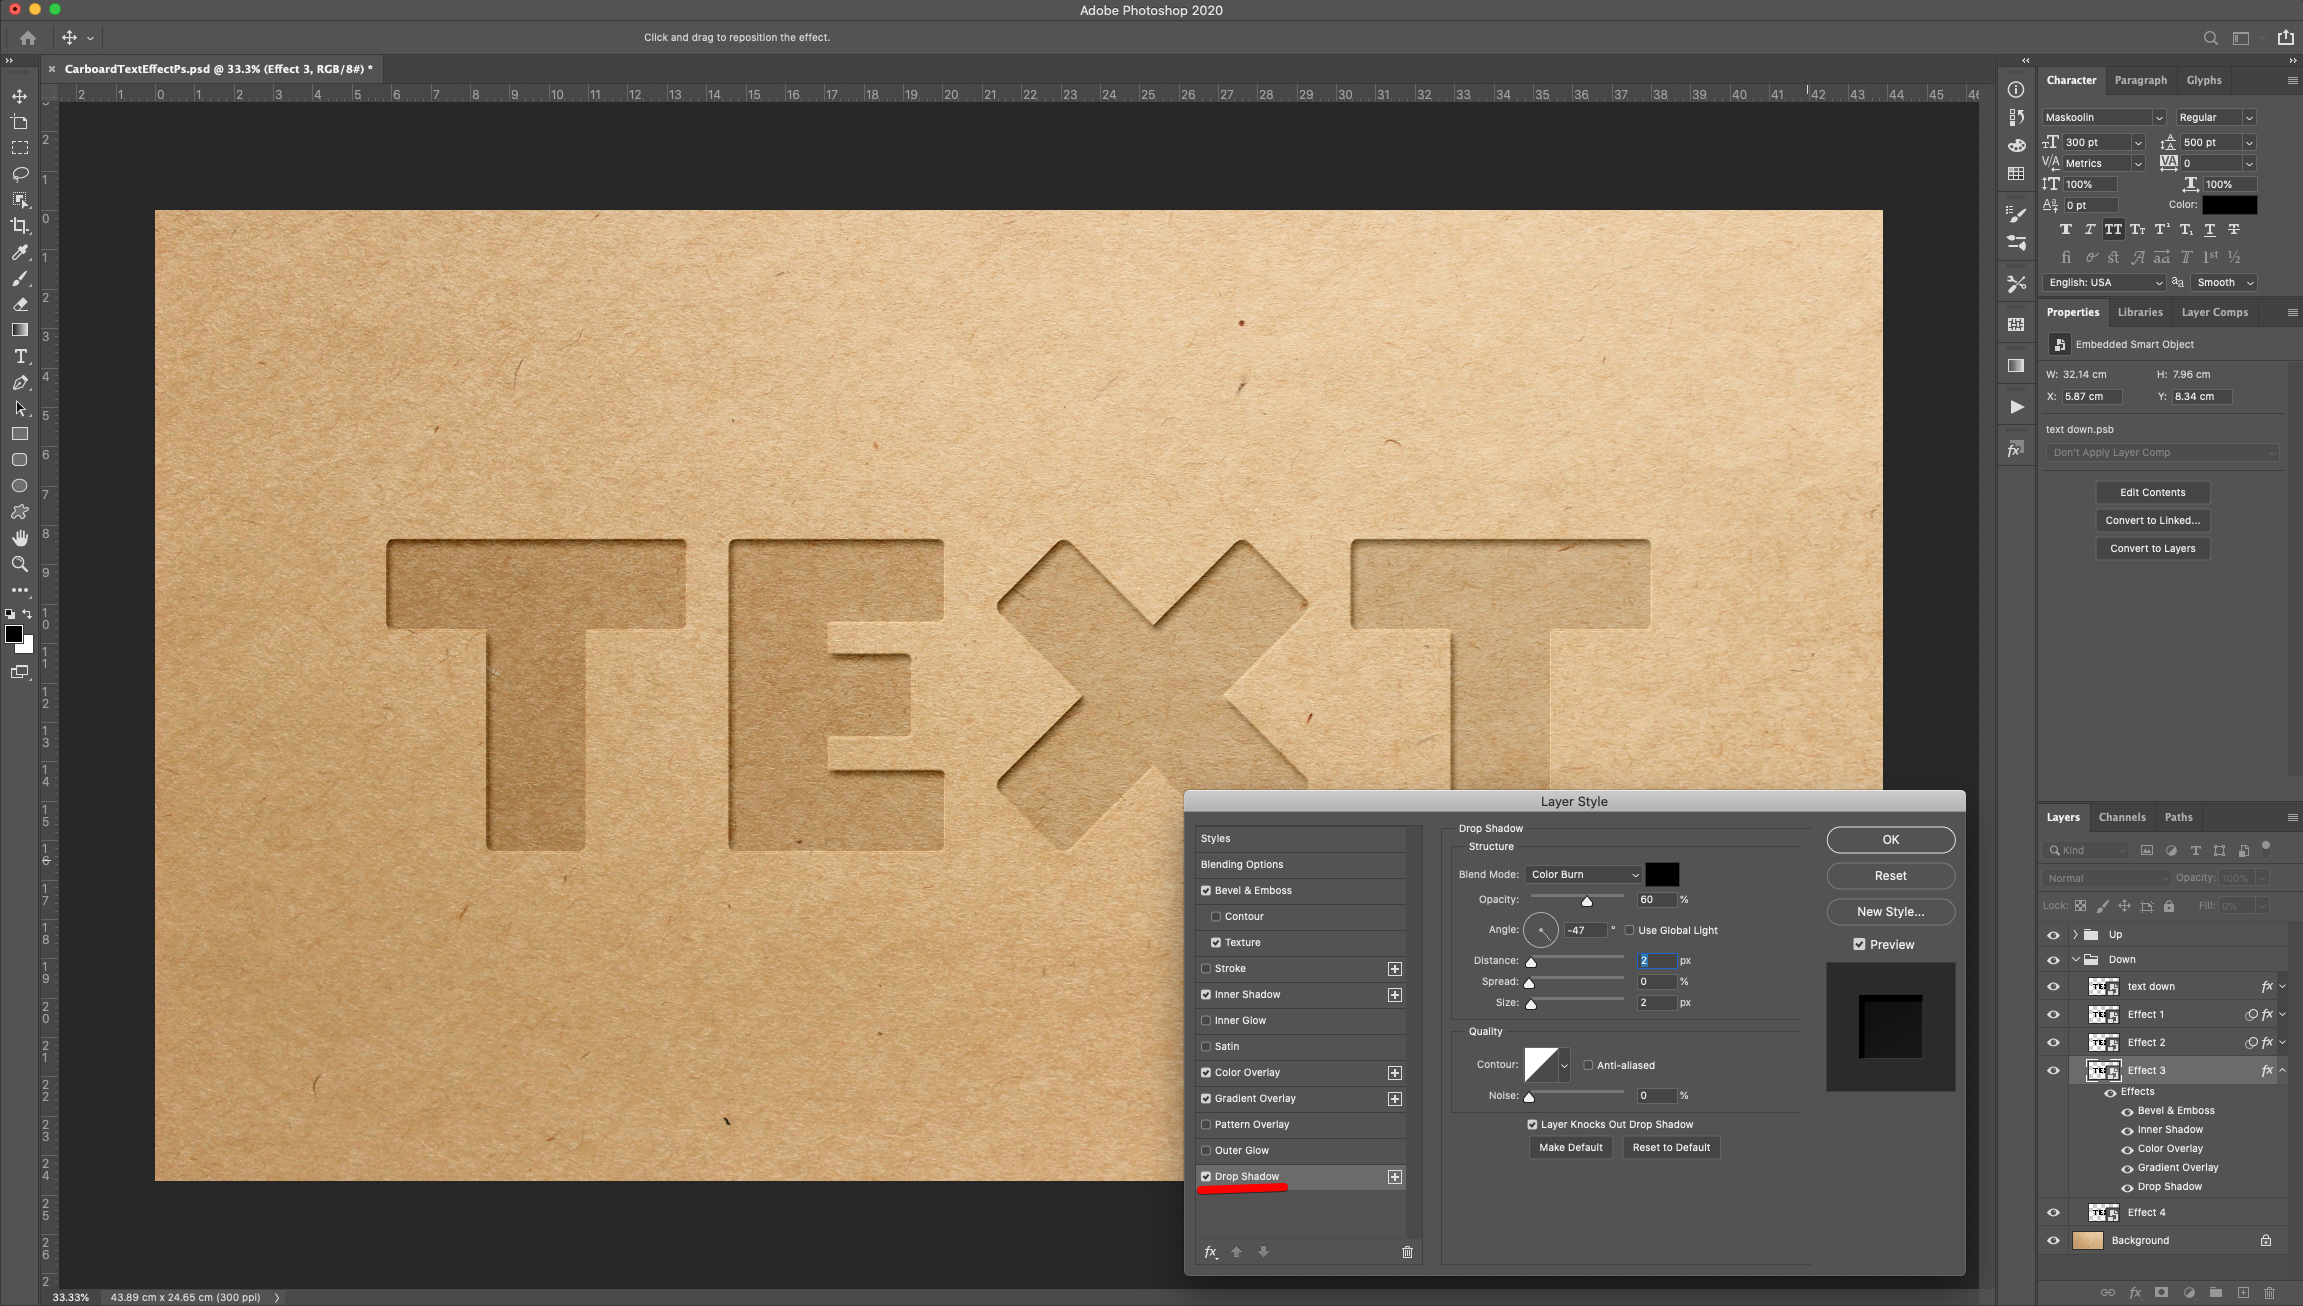
Go to Filter > Blur > Gaussian Blur and use a “Radius” of 0.5 Pixels.
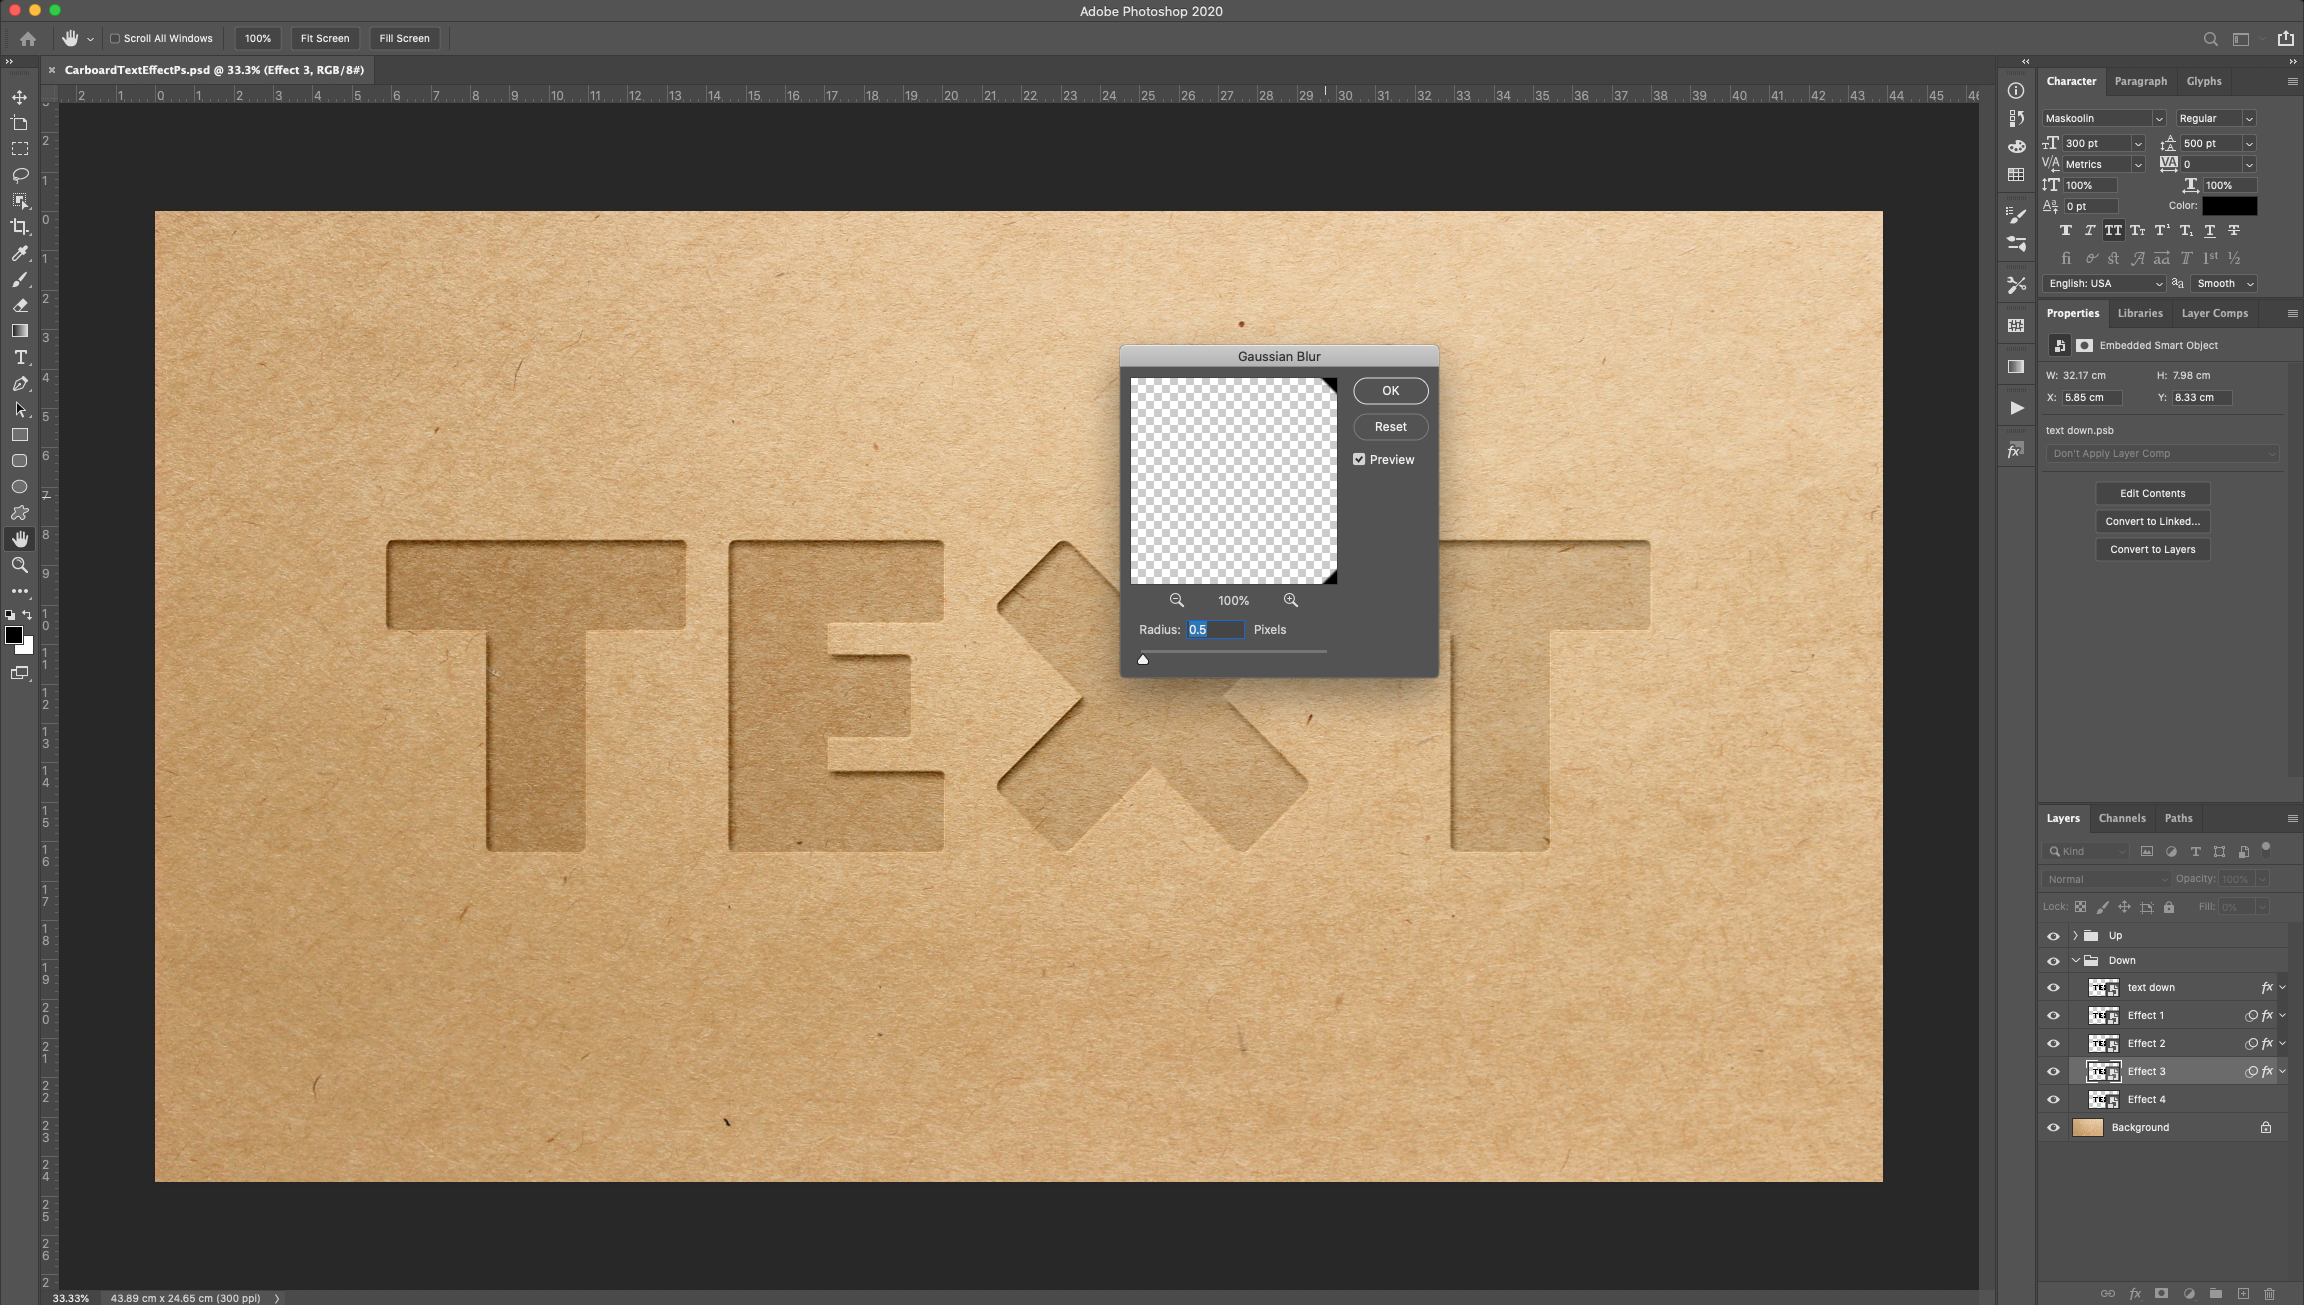
20 - Double-click on top of the “Effect 4” layer Thumbnail (in the “Down” group) and apply the following “Layer Styles”:
Bevel & Emboss:
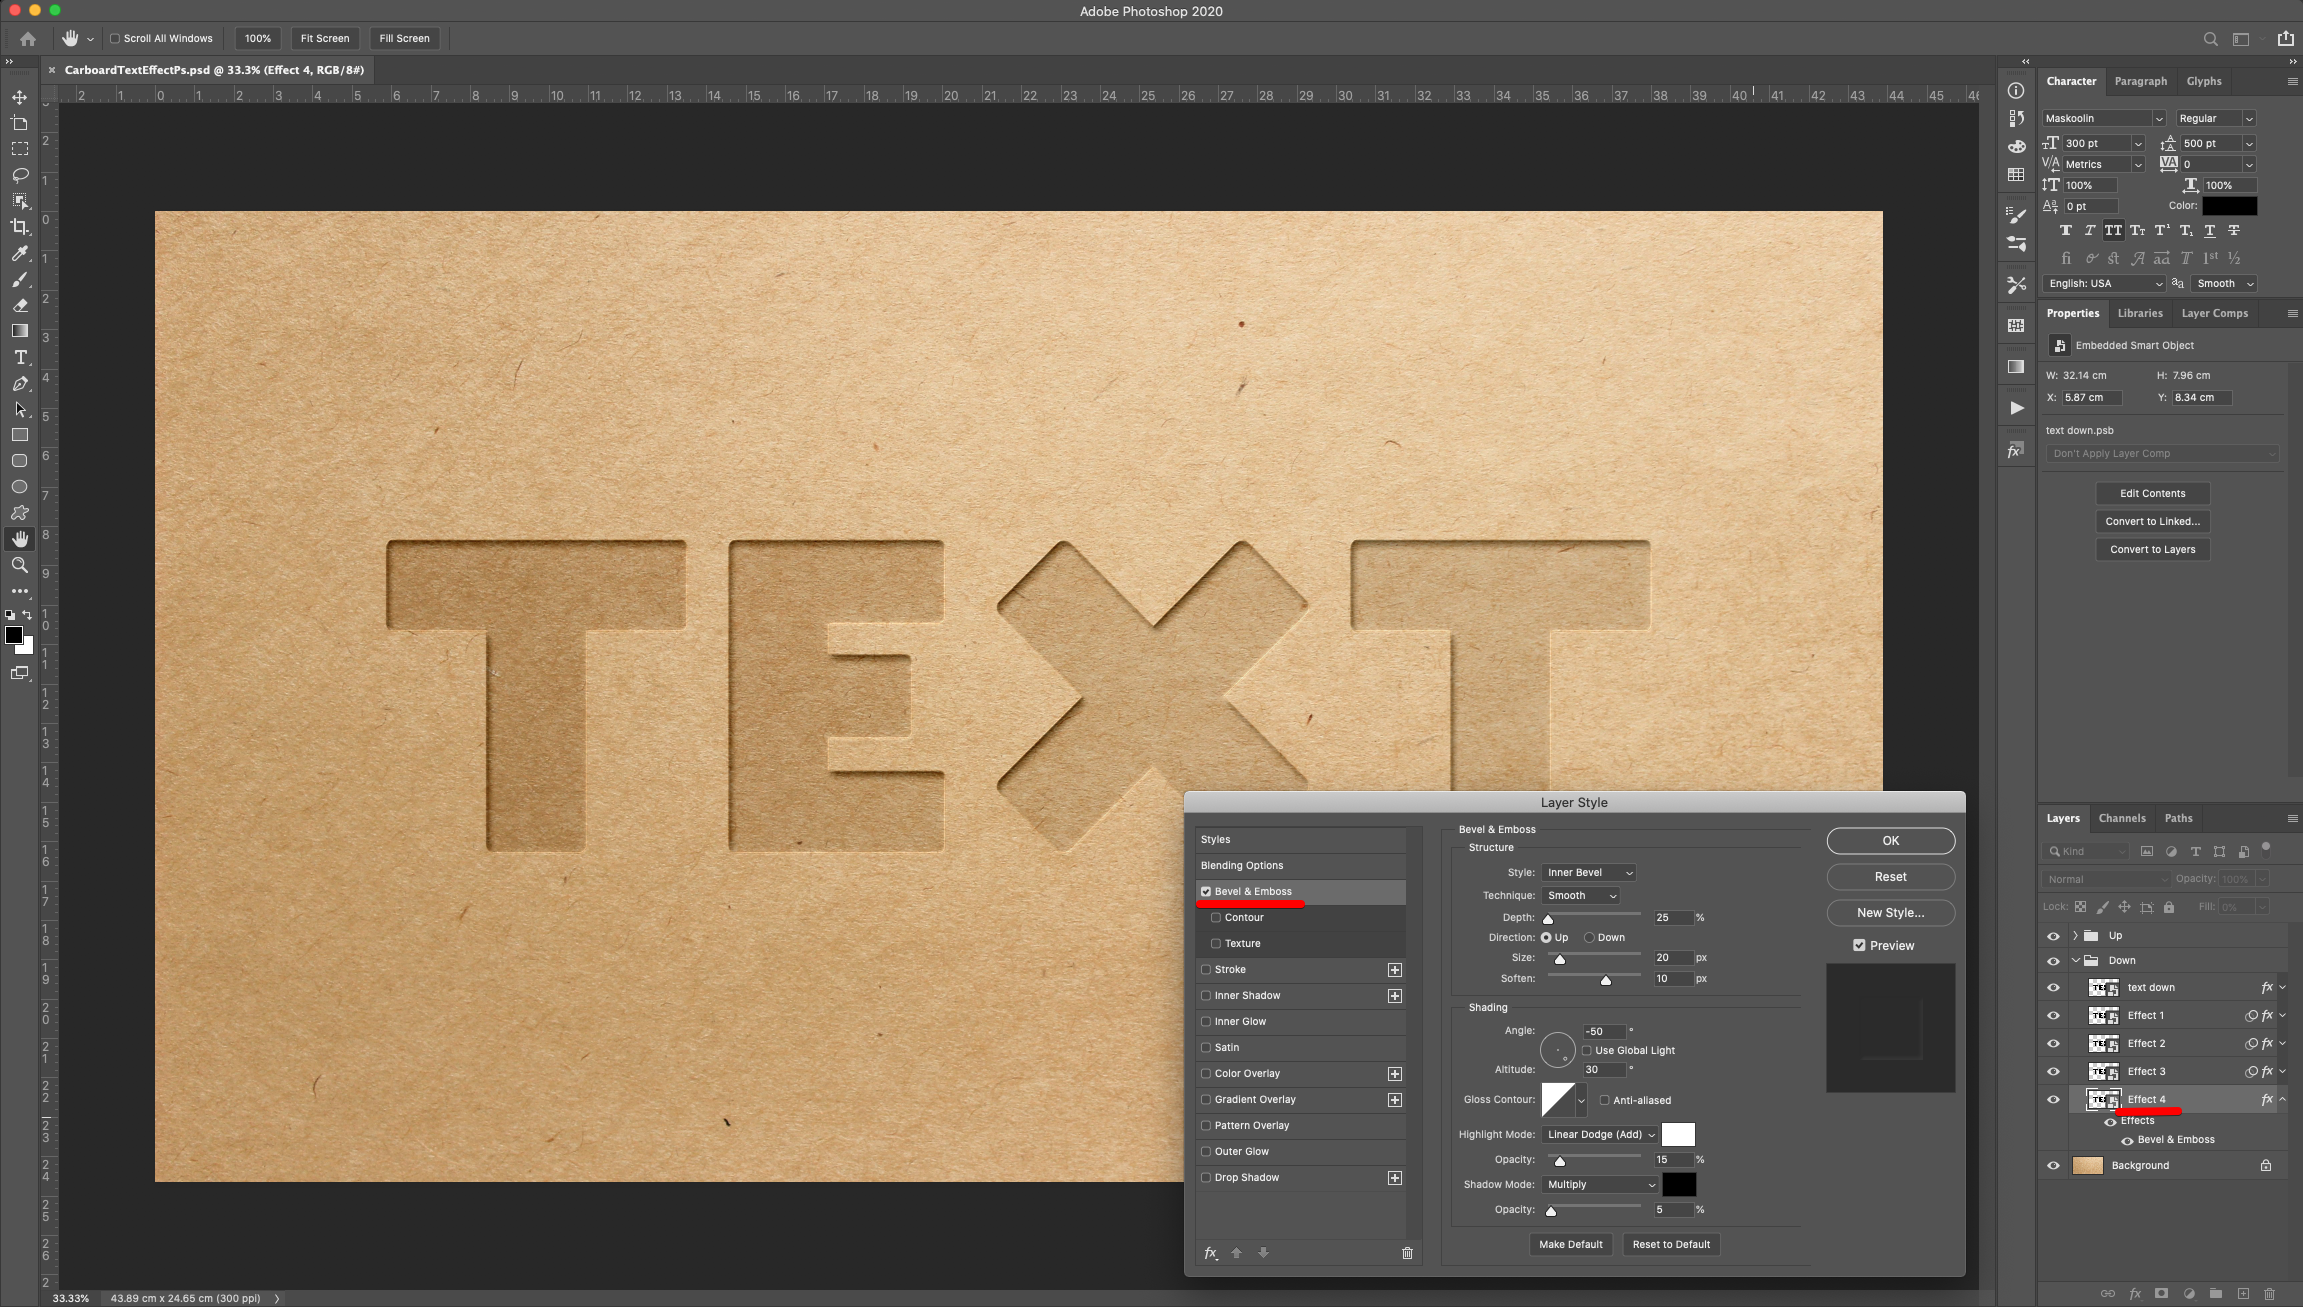
Inner Shadow:
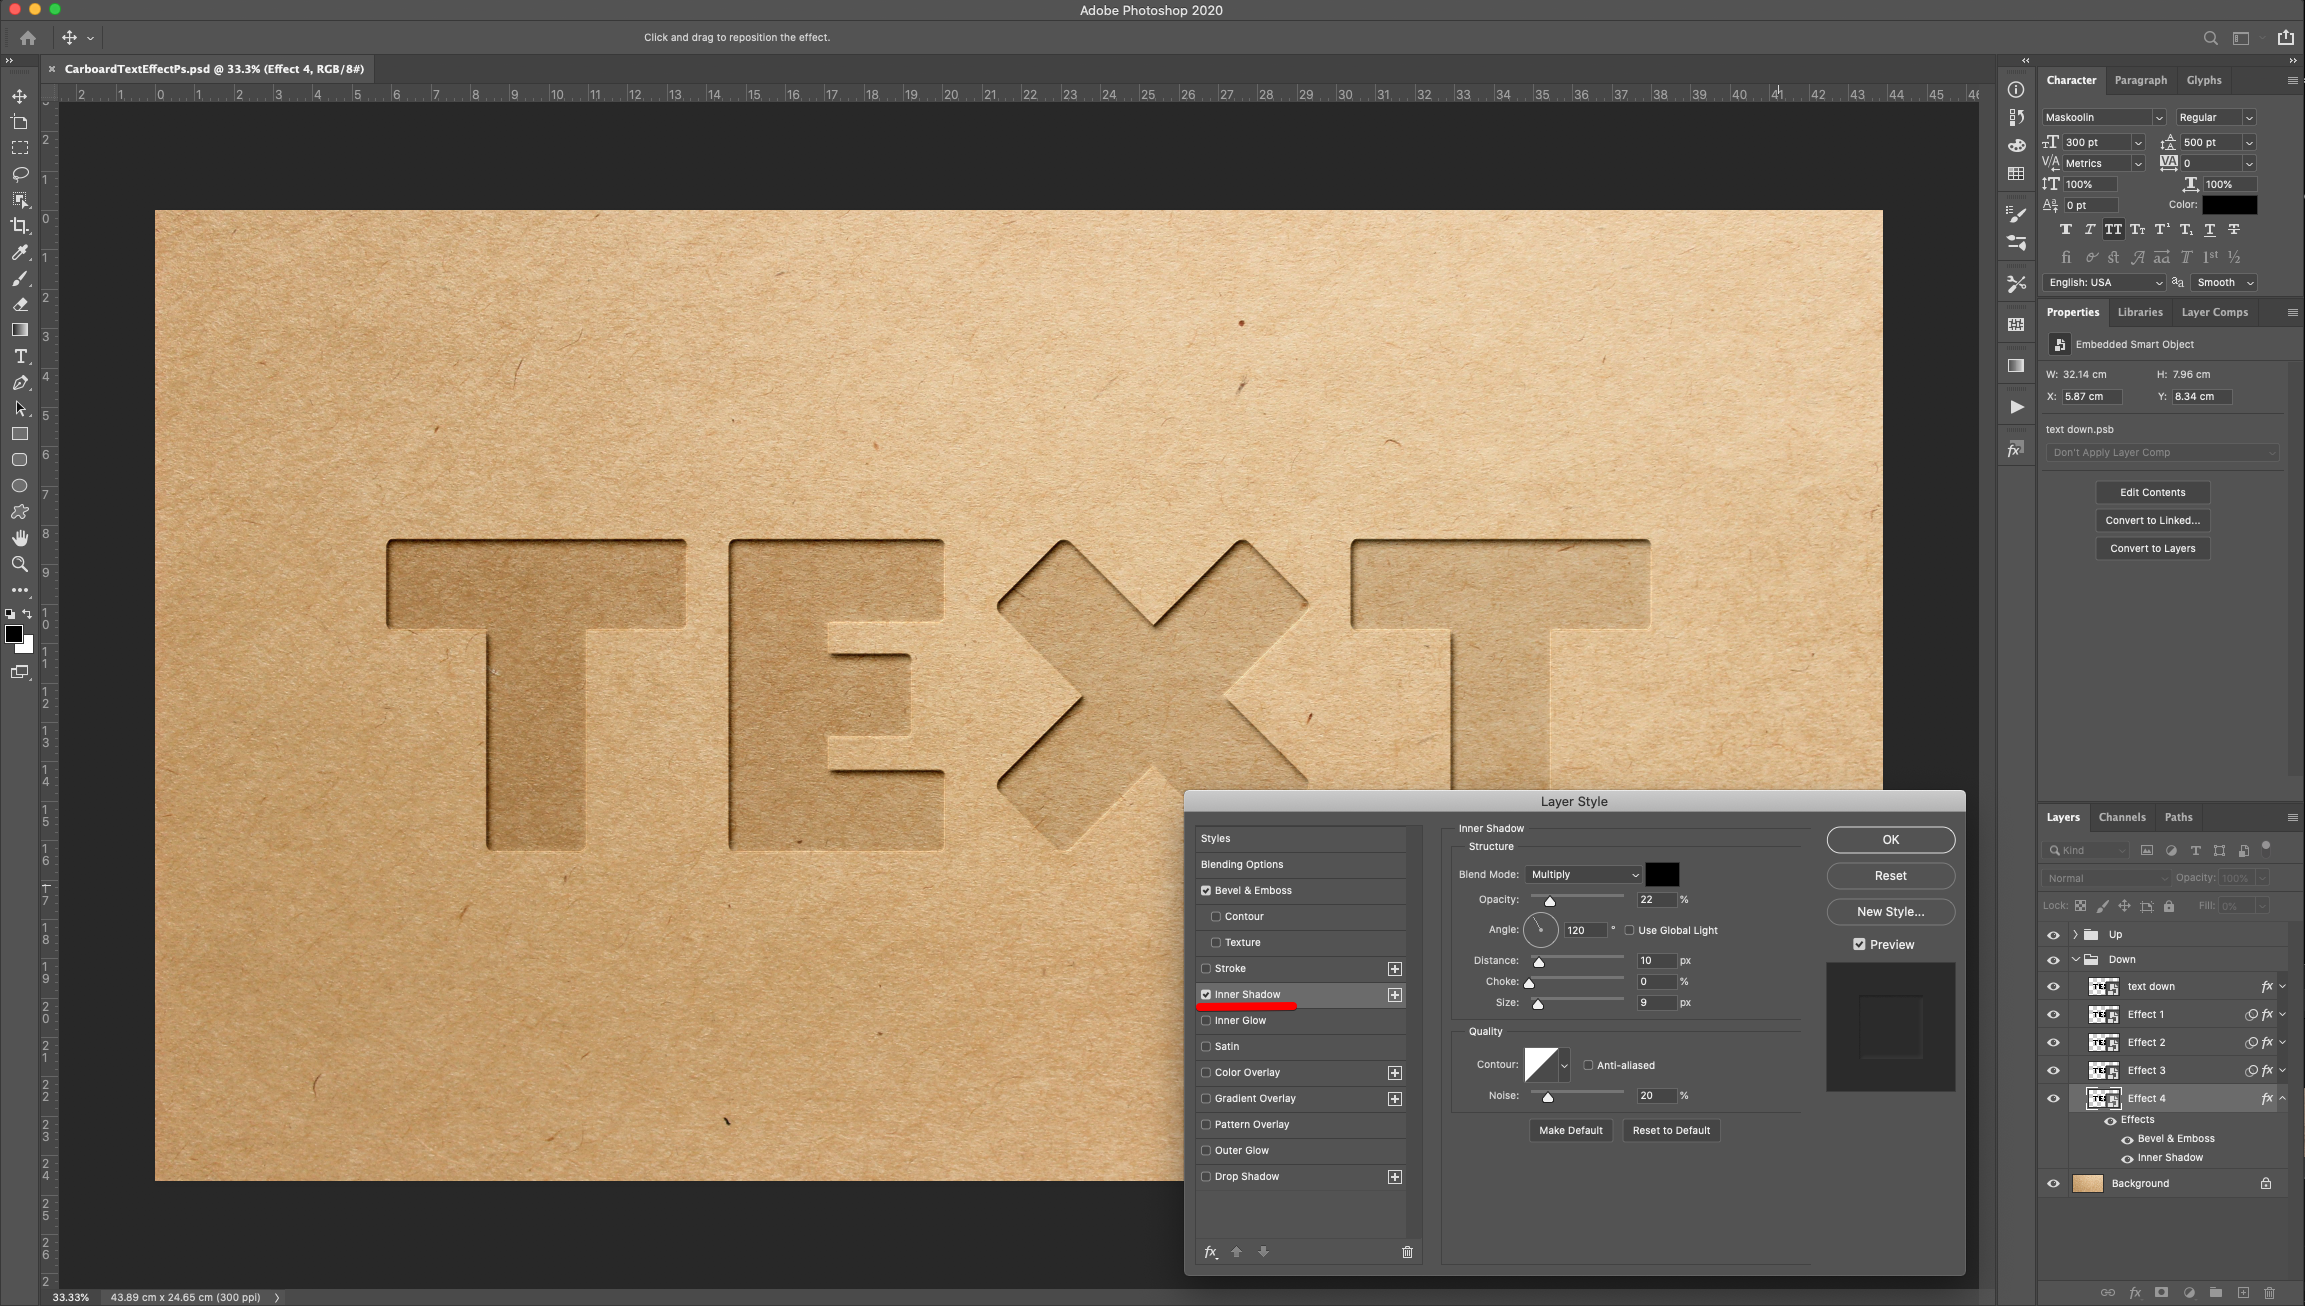
Drop Shadow:
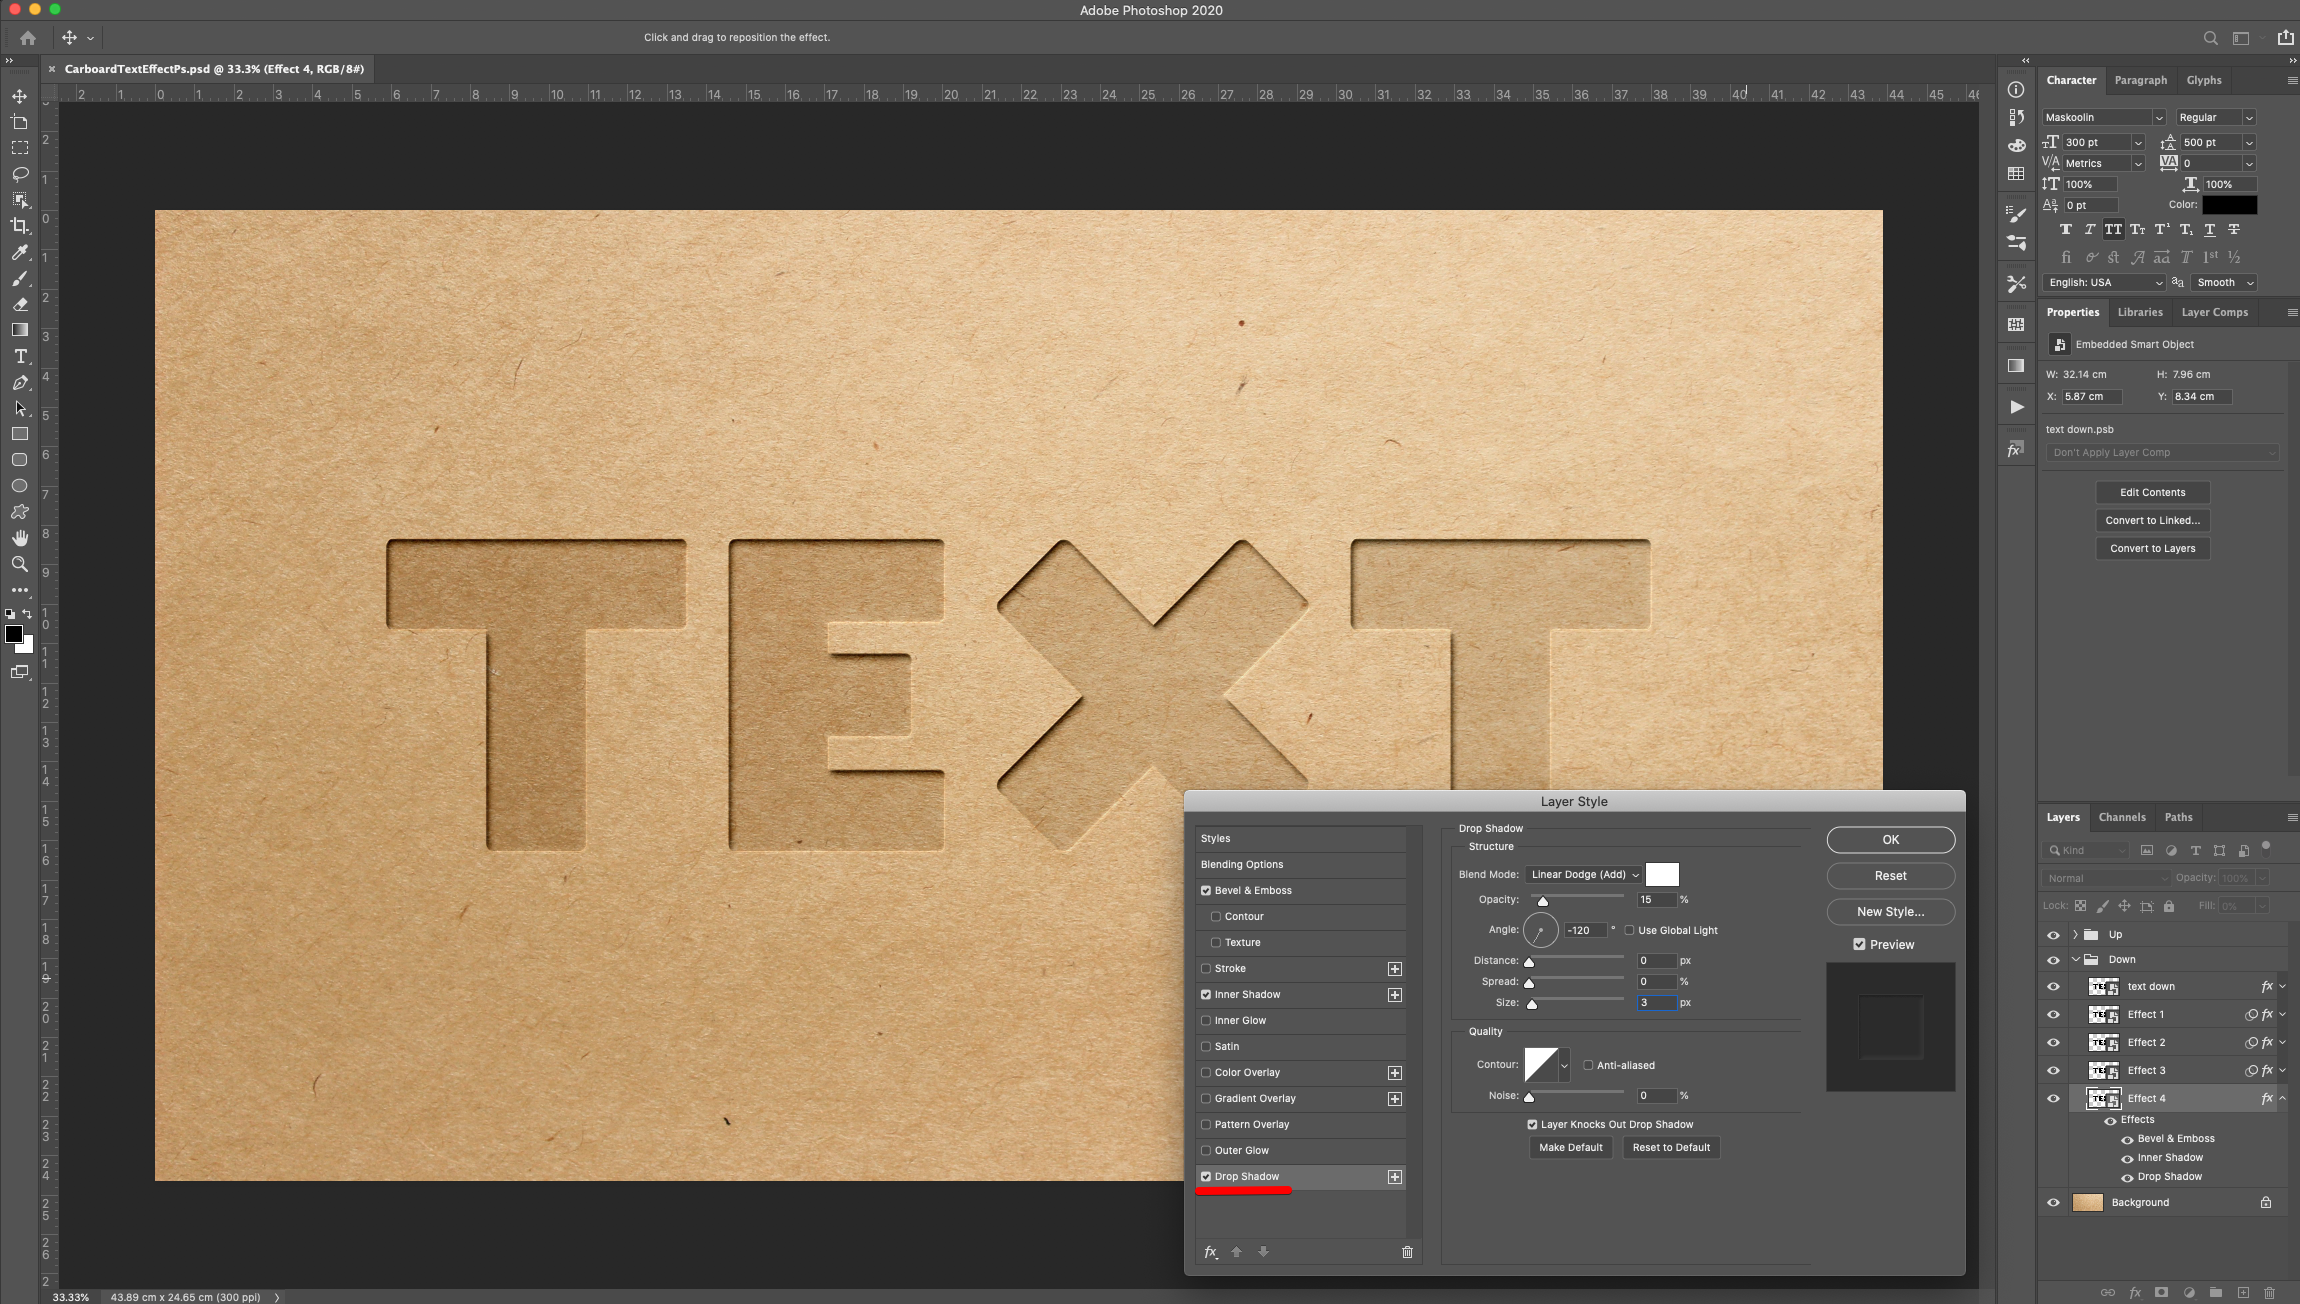
Go to Filter > Blur > Gaussian Blur and use a “Radius” of 0.5 Pixels.
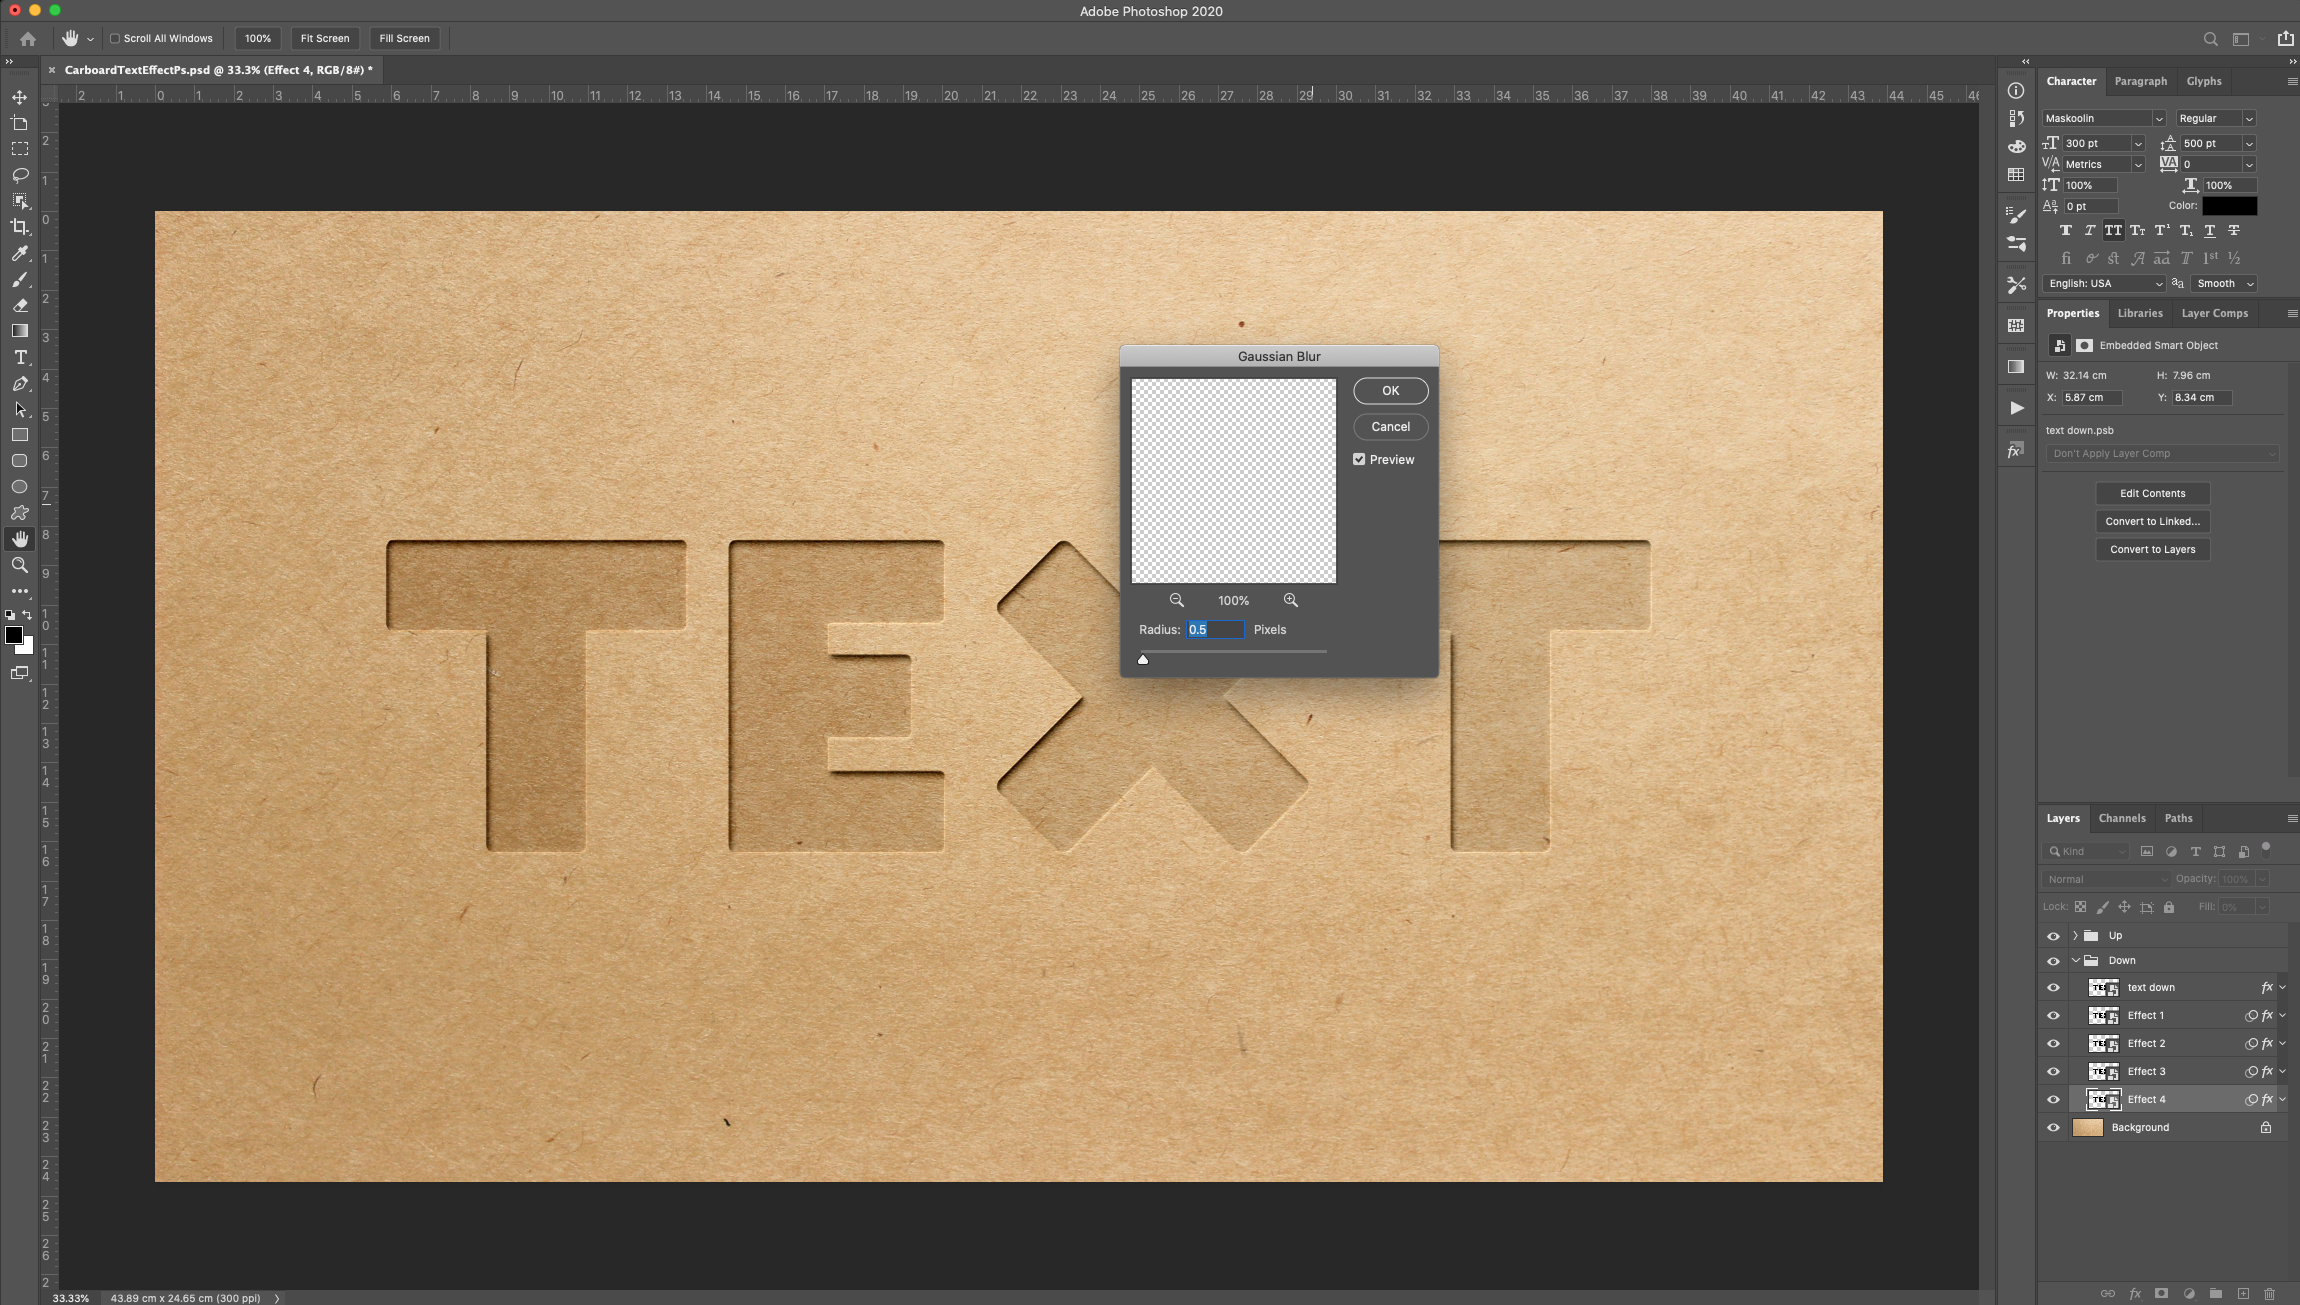
21 - Check out your work! You can use one or both effects together to achieve different results.
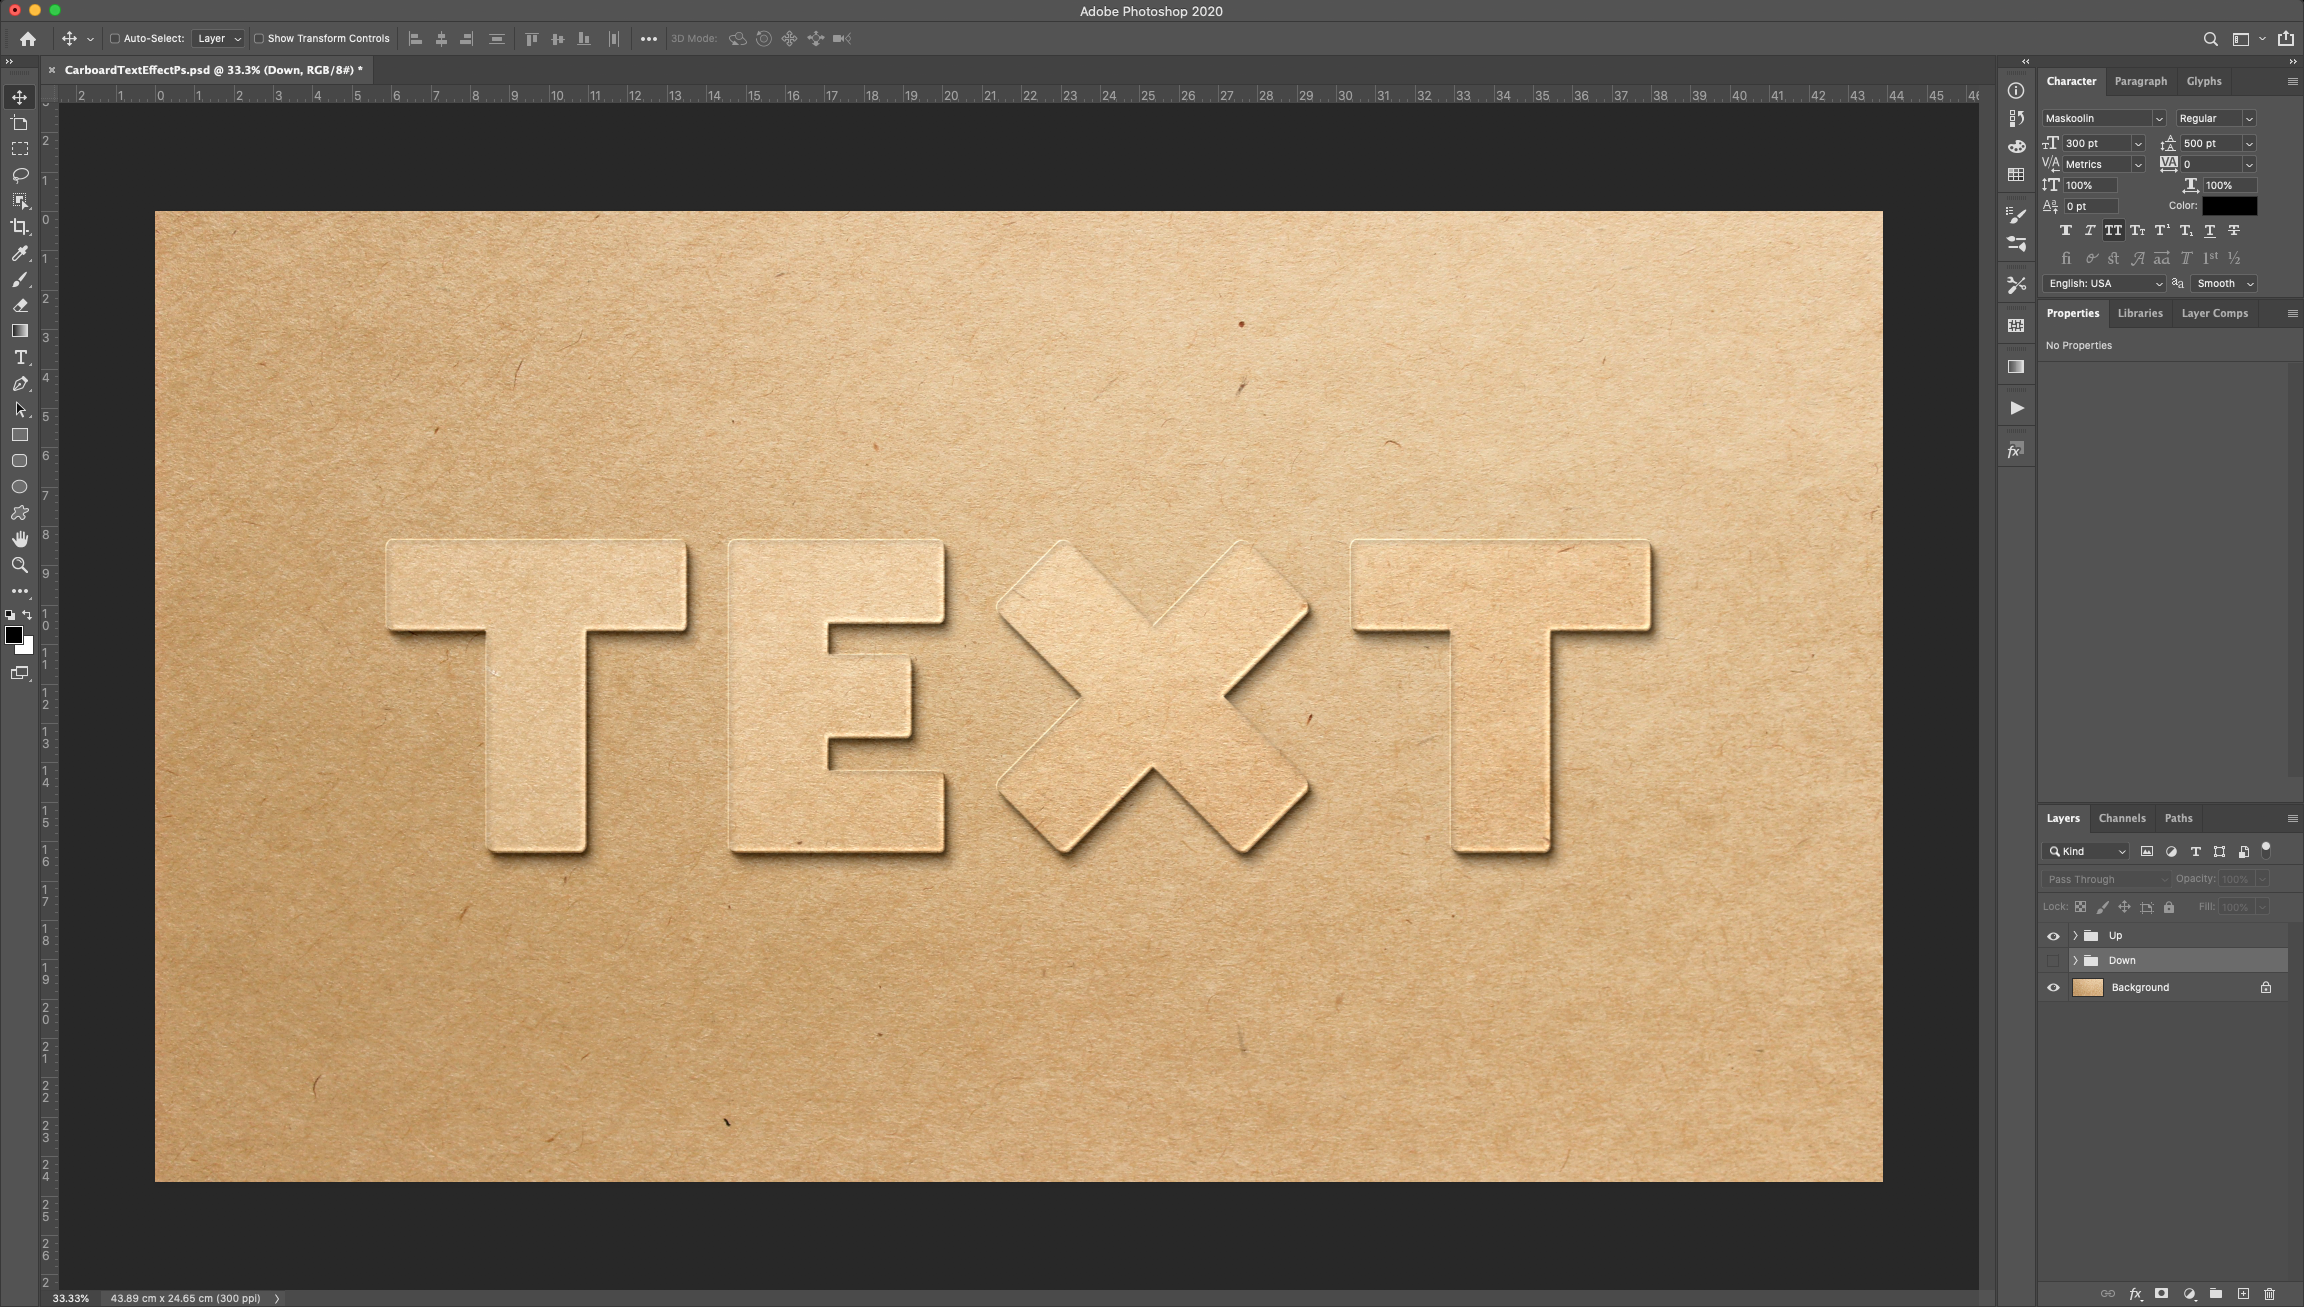
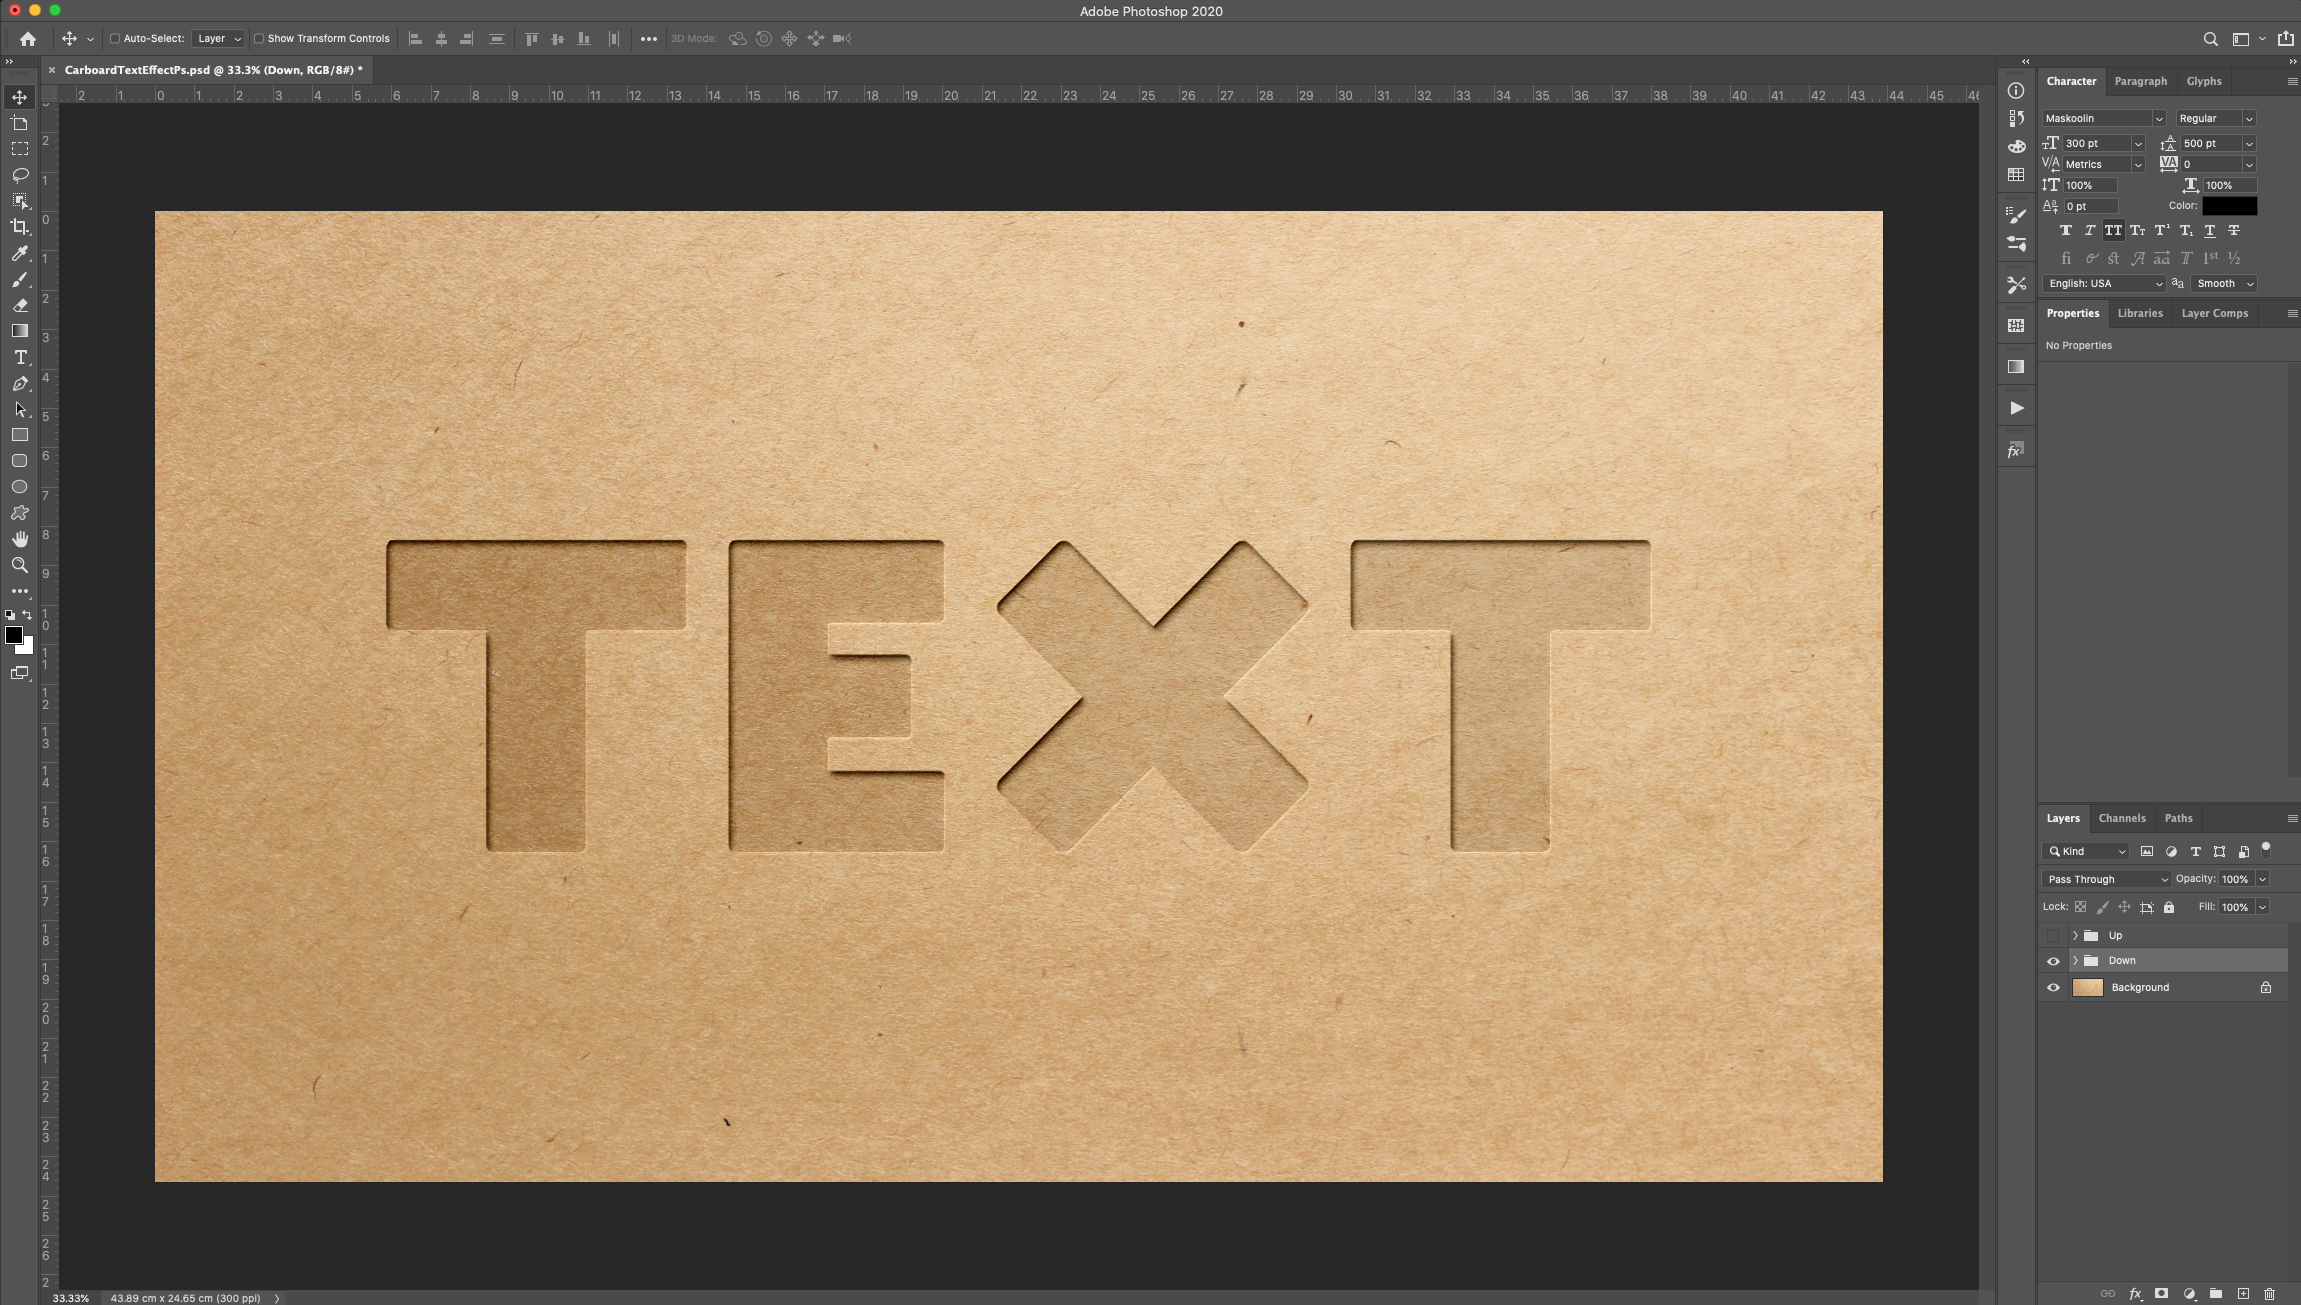
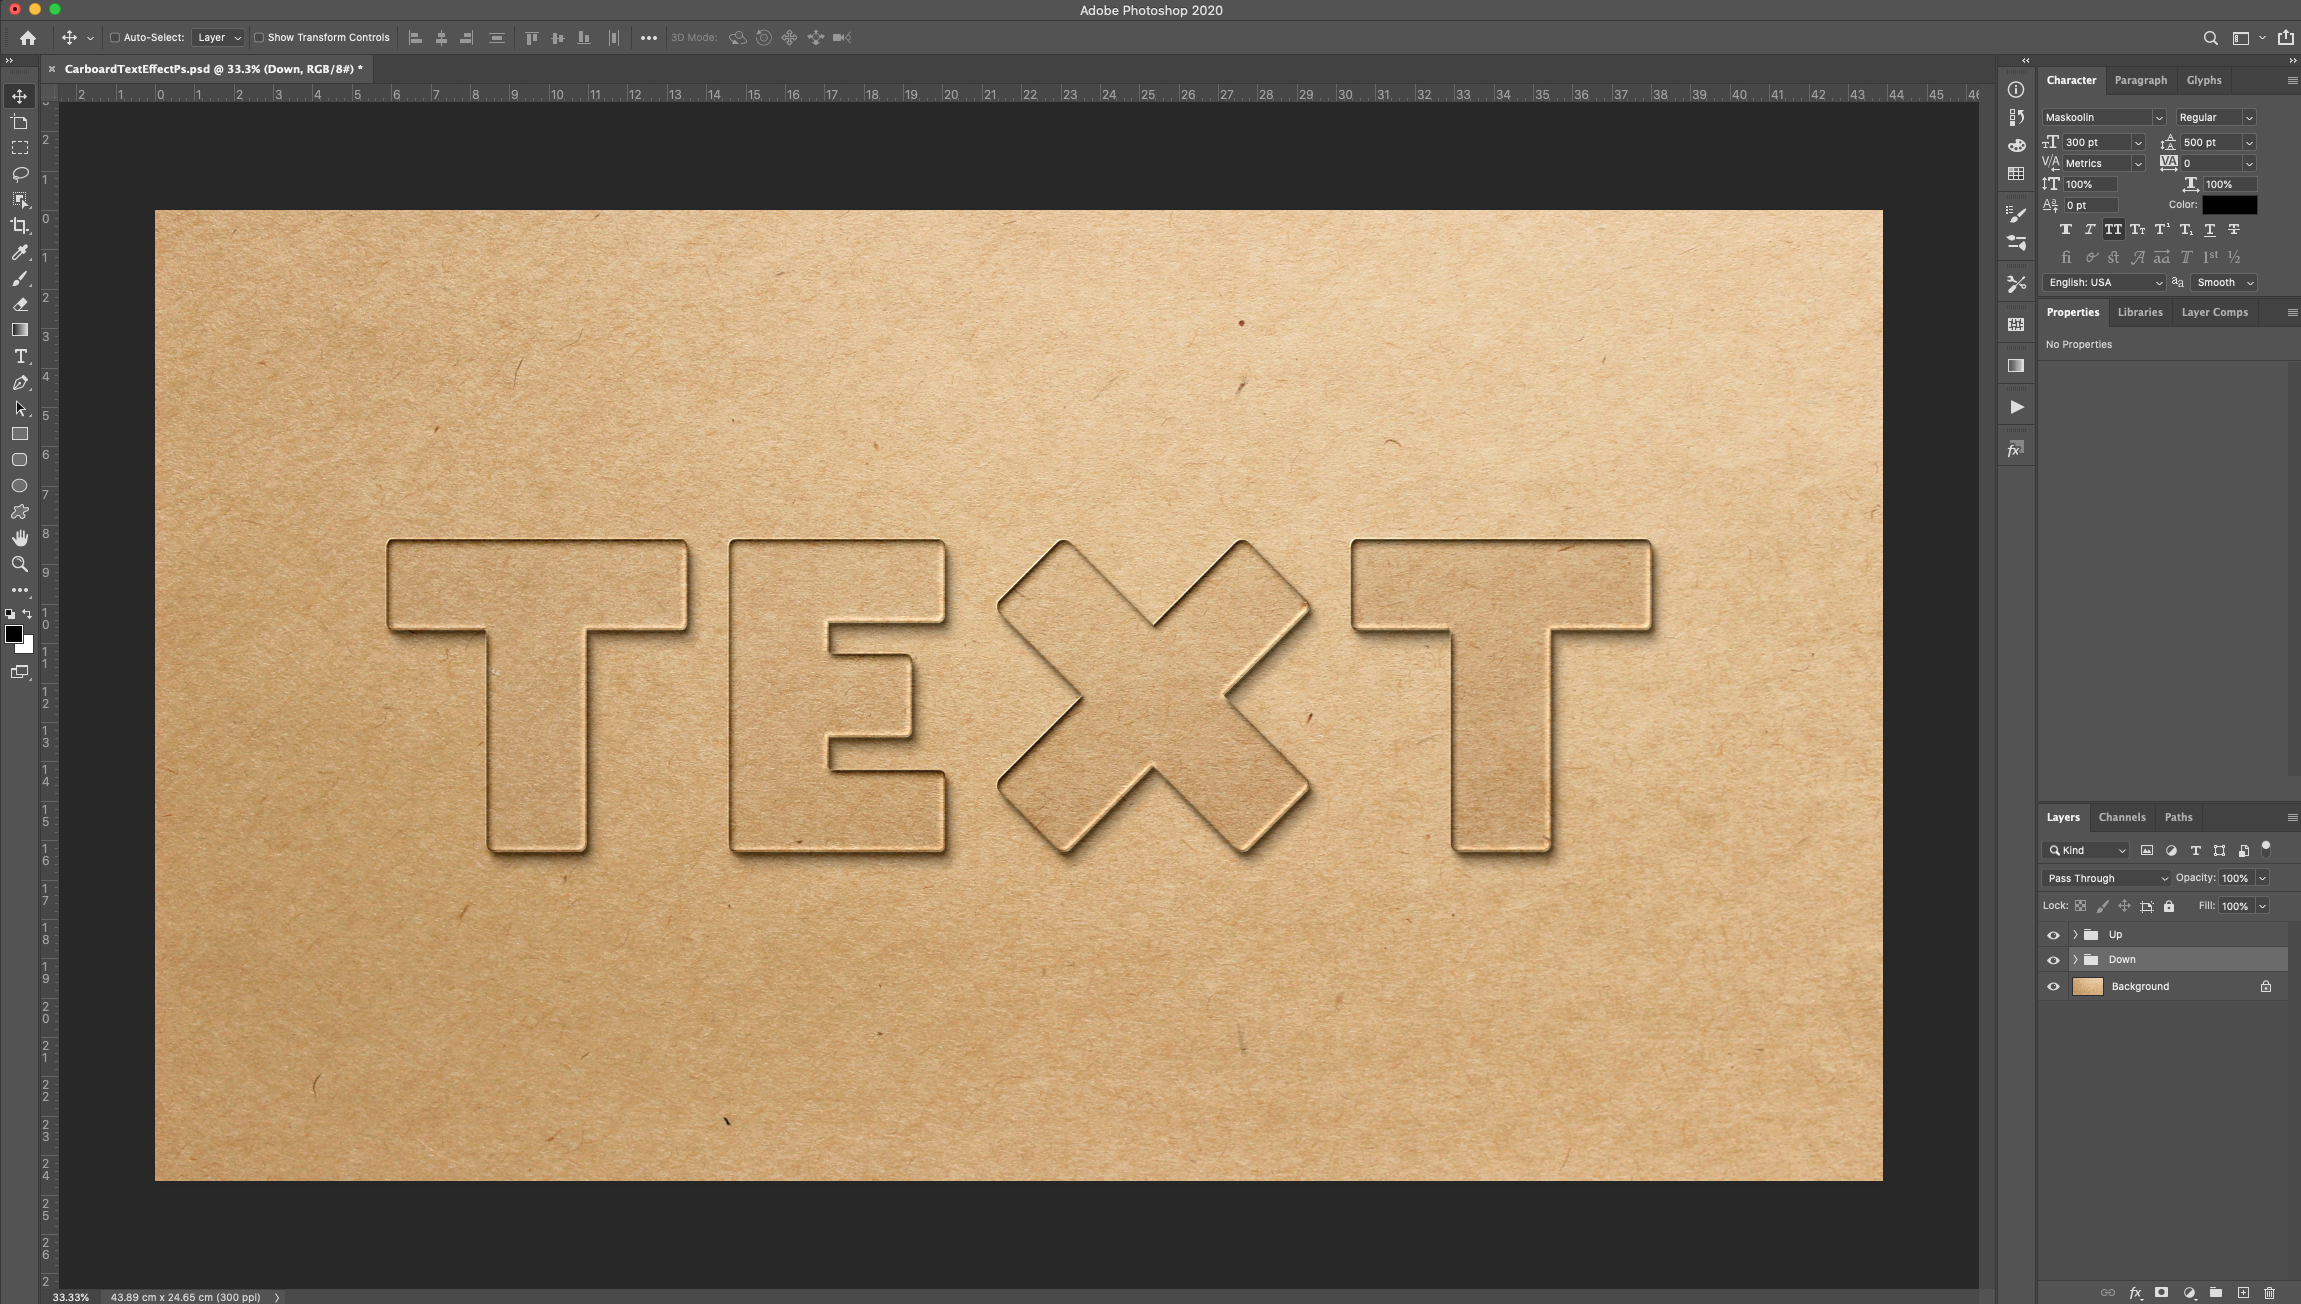
* To modify your text, just double-click on the “Text” Layer or “Text Down” (it will open it in another “Document”) change the text and “Save”. You should see the changes on your original file.
1 - In Photoshop, open the image you chose as “Background”.
2 - Select the “Type Tool” (T), choose your font and type your text. You can use any color as “Fill” color. The size will depend on the word you are typing.
3 - Center the text by selecting both Layers (“Shift” key) and clicking the “Align Vertical and Horizontal Centers” buttons on the Top Menu.
4 - Select the “Text” layer thumbnail and make a “Duplicate” (Command/Control + J). Name the Duplicate “Text Down” and place it under the original “Text”
5 - Right-click on top of the “Text” Layer thumbnail and “Convert to Smart Object”. This way, you can change your text without losing the effect.
6 - Change the “Fill” of both “Text” Layers to 0%.
7 - Select the “Text” layer thumbnail and make four (4) more “Duplicates” (Command/Control + J). Name the Duplicate “Effect 1 to 4” and place them under the original “Text” Layer. Repeat with the “Text Down” Layer.
8 - Select the “Text” and its duplicate “Effect” Layers thumbnails and “Group” them together by dragging them to the Small Folder icon on the bottom of the “Layers Panel”. Name the group “Up”. Repeat with the “Text Down” Layer and its duplicate “Effect” layers. Name this group “Down”.
9 - Double-click on top of the “Text” layer Thumbnail (in the “Up” group) and apply the following “Layer Styles”:
Bevel & Emboss:
10 - Double-click on top of the “Effect 1” layer Thumbnail (in the “Up” group) and apply the following “Layer Styles”:
Drop Shadow: (#ffffff)
11 - Go to Filter > Blur > Gaussian Blur and use a “Radius” of 0.5 Pixels.
12 - Double-click on top of the “Effect 2” layer Thumbnail (in the “Up” group) and apply the following “Layer Styles”:
Drop Shadow: (#000000)
Go to Filter > Blur > Gaussian Blur and use a “Radius” of 0.5 Pixels.
13 - Double-click on top of the “Effect 3” layer Thumbnail (in the “Up” group) and apply the following “Layer Styles”:
Bevel & Emboss:
Texture: (Grey Granite)
Color Overlay: (#ffffff)
Gradient Overlay: (Foreground to Background)
Drop Shadow:
14 - Go to Filter > Blur > Gaussian Blur and use a “Radius” of 0.5 Pixels.
15 - Double-click on top of the “Effect 4” layer Thumbnail (in the “Up” group) and apply the following “Layer Styles”:
Bevel & Emboss:
Inner Shadow:
Drop Shadow:
Go to Filter > Blur > Gaussian Blur and use a “Radius” of 0.5 Pixels.
16 - “Hide” the “Up” group by clicking on the “Small Eye” icon on the left side of its thumbnail and open the “Down” group. Double-click on top of the “Text Down” layer Thumbnail (in the “Down” group) and apply the following “Layer Styles”:
Bevel & Emboss:
17 - Double-click on top of the “Effect 1” layer Thumbnail (in the “Down” group) and apply the following “Layer Styles”:
Bevel & Emboss:
Go to Filter > Blur > Gaussian Blur and use a “Radius” of 5 Pixels.
18 - Double-click on top of the “Effect 2” layer Thumbnail (in the “Down” group) and apply the following “Layer Styles”:
Bevel & Emboss:
Inner Shadow:
Drop Shadow:
Go to Filter > Blur > Gaussian Blur and use a “Radius” of 0.5 Pixels.
19 - Double-click on top of the “Effect 3” layer Thumbnail (in the “Down” group) and apply the following “Layer Styles”:
Bevel & Emboss:
Texture: (Grey Granite)
Inner Shadow:
Color Overlay: (#000000)
Gradient Overlay: (Foreground to Transparent)
Drop Shadow:
Go to Filter > Blur > Gaussian Blur and use a “Radius” of 0.5 Pixels.
20 - Double-click on top of the “Effect 4” layer Thumbnail (in the “Down” group) and apply the following “Layer Styles”:
Bevel & Emboss:
Inner Shadow:
Drop Shadow:
Go to Filter > Blur > Gaussian Blur and use a “Radius” of 0.5 Pixels.
21 - Check out your work! You can use one or both effects together to achieve different results.
* To modify your text, just double-click on the “Text” Layer or “Text Down” (it will open it in another “Document”) change the text and “Save”. You should see the changes on your original file.
by @lornacane
Related Tutorials
Photoshop Tutorials
Easy See through Cut Out Text in Photoshop
Create a see-through cut out text design in Photoshop with these easy to follow steps.
Photoshop Tutorials
Ketchup Text in Photoshop
For this Tutorial, we will use Variane Script Free Font from Boy Moch...
Photoshop Tutorials
Paper Cutout Text Effect Photoshop
Photoshop Tutorials
How to Use Text Effects in Photoshop
With Photoshop Text Effects, you can create text with impact in just a few steps.
Photoshop Tutorials
How to Fill a Shape with Text in Photoshop
Learn how to fill a shape with text in Photoshop in seven quick steps.
Photoshop Tutorials
How to Make a Graffiti Text Effect in Photoshop
Learn how to create a realistic grafitti text effect in Photoshop.