

By Design Bundles
SCAL Tutorials7 min
Weeding lines in SCAL4 software
*Note- SCAL4 used.
1- Open SCAL4 software.
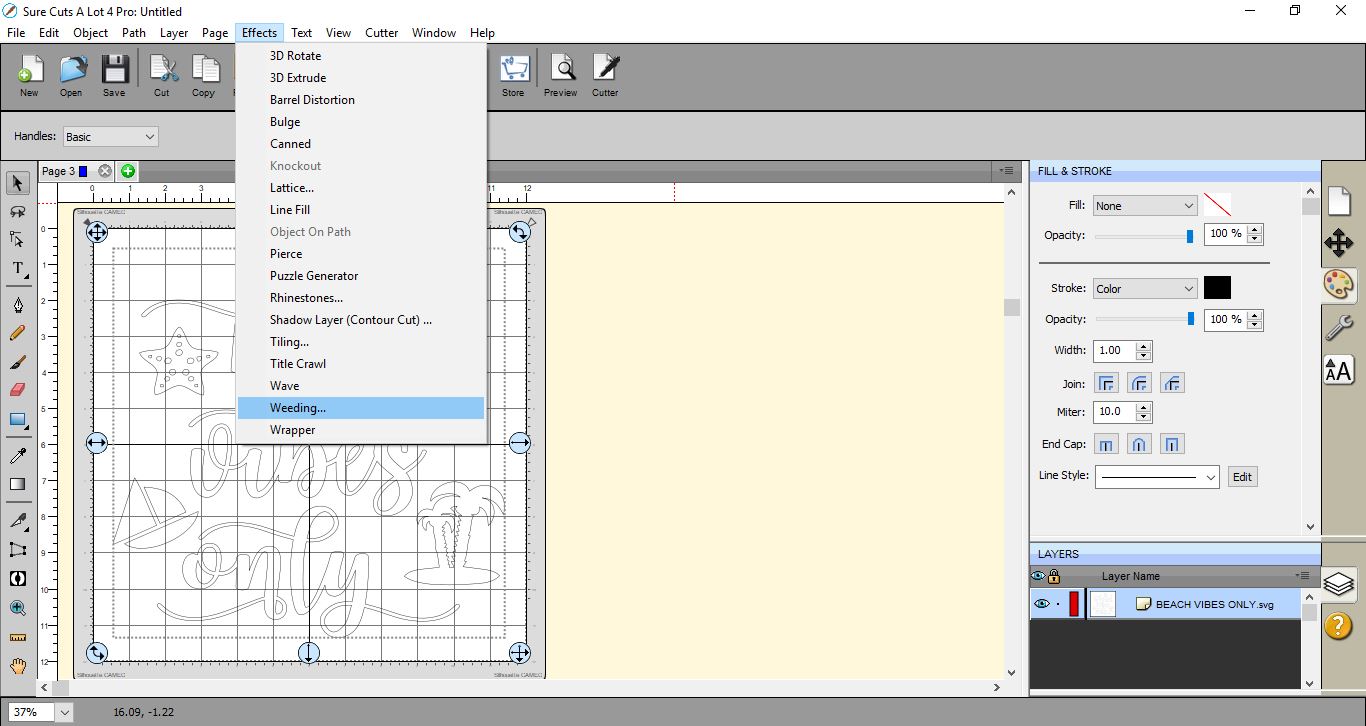
3- When you are ready to add weeding lines, select your design and go to effects, then weeding.
4- A new window will appear.
5- The first option you have is the border offset. you can adjust the amount of space you will have from the rectangle around your design when placing weed lines.
6- You have 8 choices on the way to add weed lines. To apply the weed lines you simply need to click within the border area and a line will appear.
7- The first choice is you can add lines from the border to the outside edge of the shape. This will not give you weed lines in the middle of your design only to the outer edge.
8- The next option does the opposite of regular weeding lines. It will add lines within the filled area of the shape.
9- The third option will add lines around the shape and in any holes within the shape. This is the traditional type of weeding lines that people tend to use.
10- This option adds a line within the specified area, so where ever you click a weed line will appear between 2 points.
11- Now we come to the vertical option. with this selection you can add lines from the border to the outside edge of the shape. This will not give you weed lines in the middle of your design only to the outer edge.
12- The next option does the opposite of regular weeding lines. It will add lines within the filled area of the shape vertically.
13- The next vertical option will add lines around the shape and in any holes within the shape. This is the traditional type of weeding lines that people tend to use.
14- Finally this vertical option adds a line within the specified area, so where ever you click a weed line will appear between 2 points.
When you have finished selecting your weeding choice, click OK.

16- If you go to preview you can see clearly the weed lines and where they are in line with your design.
1- Open SCAL4 software.
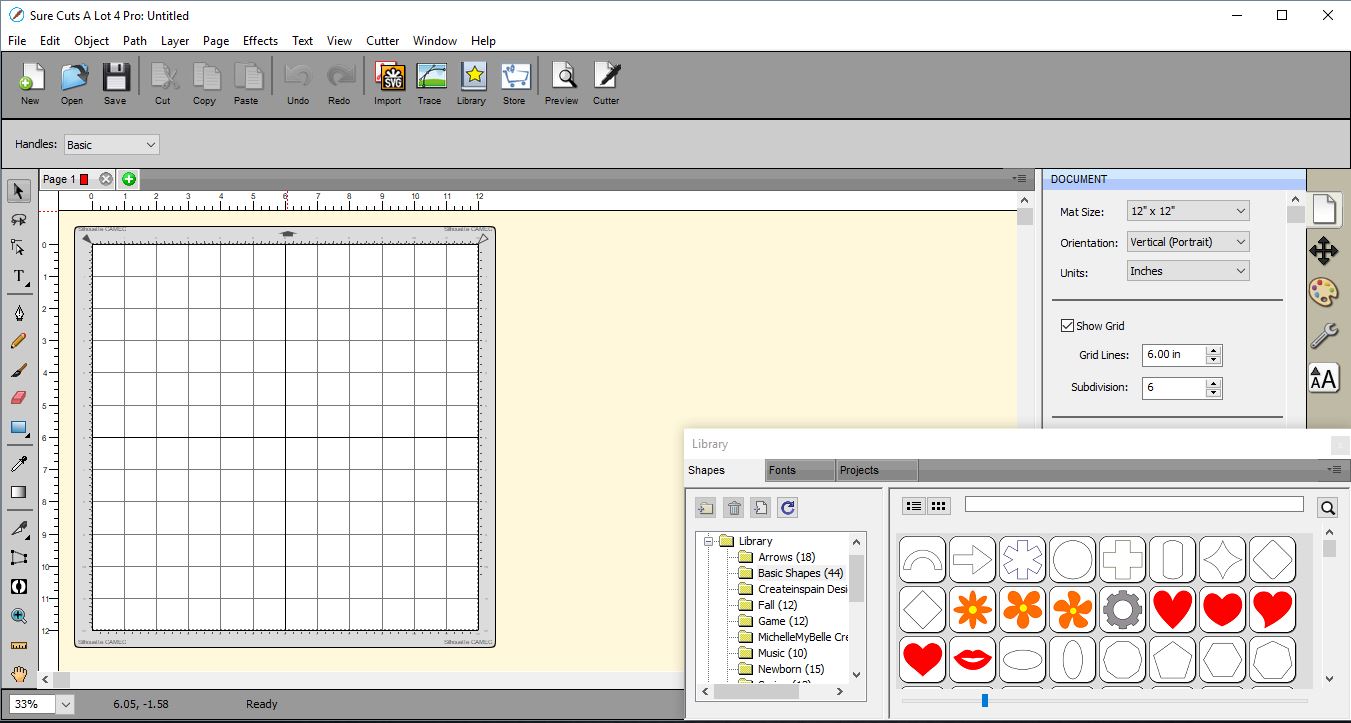
2- Insert your design you are cutting. I am using this Free SVG Bundle.
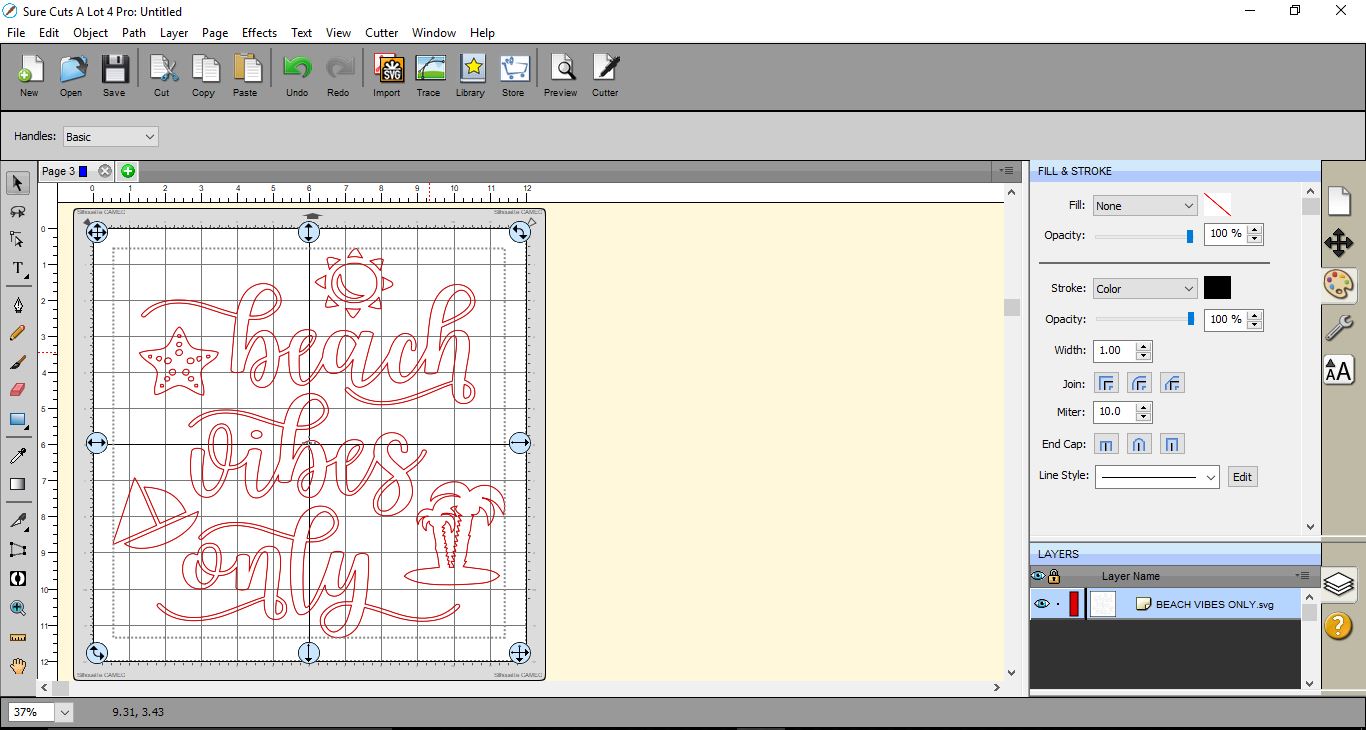
3- When you are ready to add weeding lines, select your design and go to effects, then weeding.
4- A new window will appear.
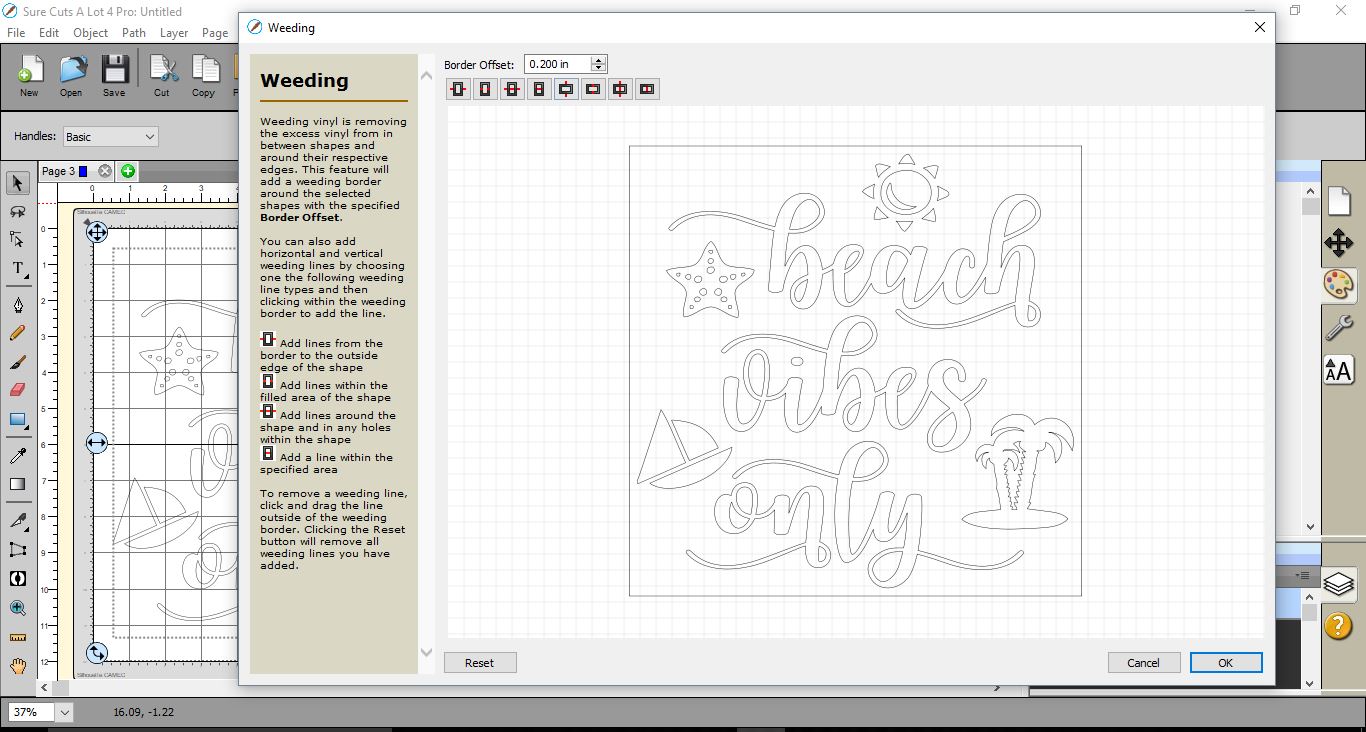
5- The first option you have is the border offset. you can adjust the amount of space you will have from the rectangle around your design when placing weed lines.
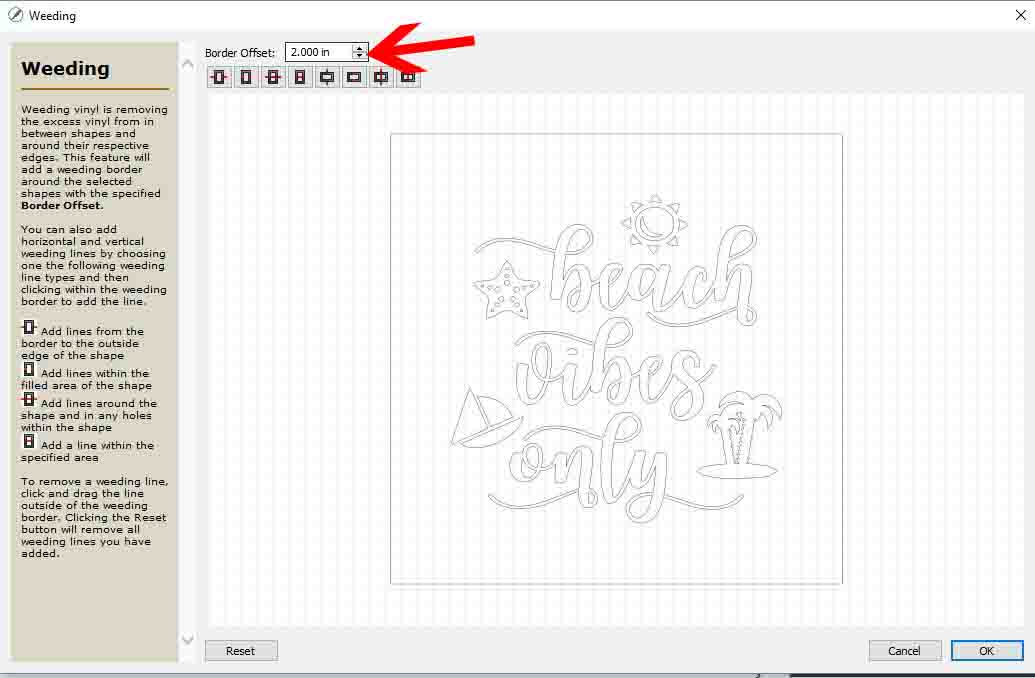
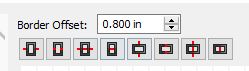
6- You have 8 choices on the way to add weed lines. To apply the weed lines you simply need to click within the border area and a line will appear.
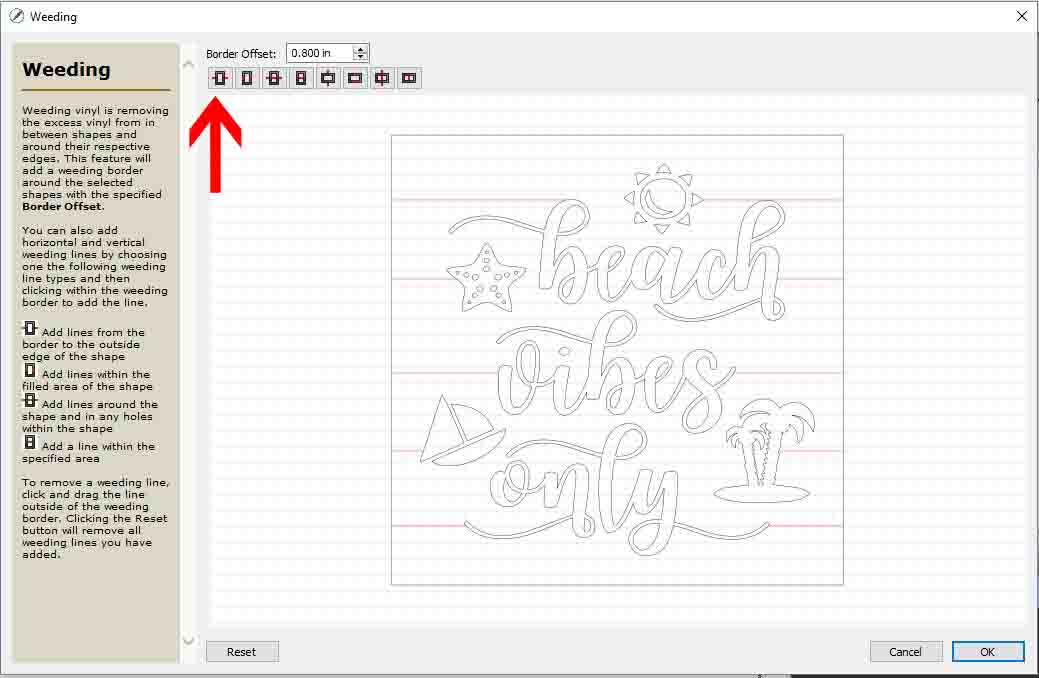
7- The first choice is you can add lines from the border to the outside edge of the shape. This will not give you weed lines in the middle of your design only to the outer edge.
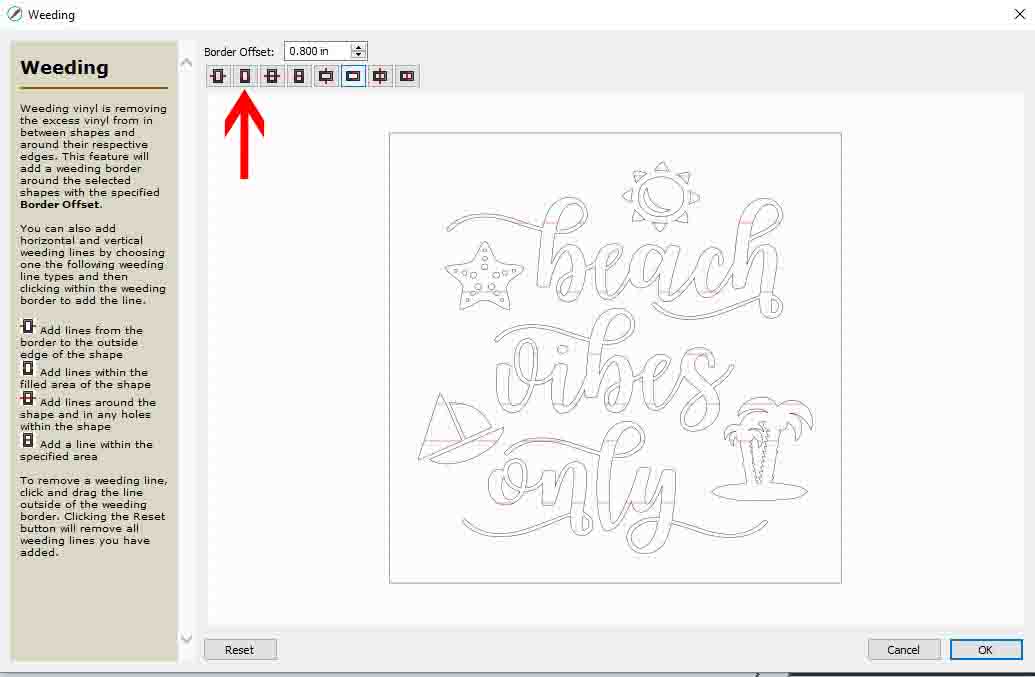
8- The next option does the opposite of regular weeding lines. It will add lines within the filled area of the shape.
9- The third option will add lines around the shape and in any holes within the shape. This is the traditional type of weeding lines that people tend to use.
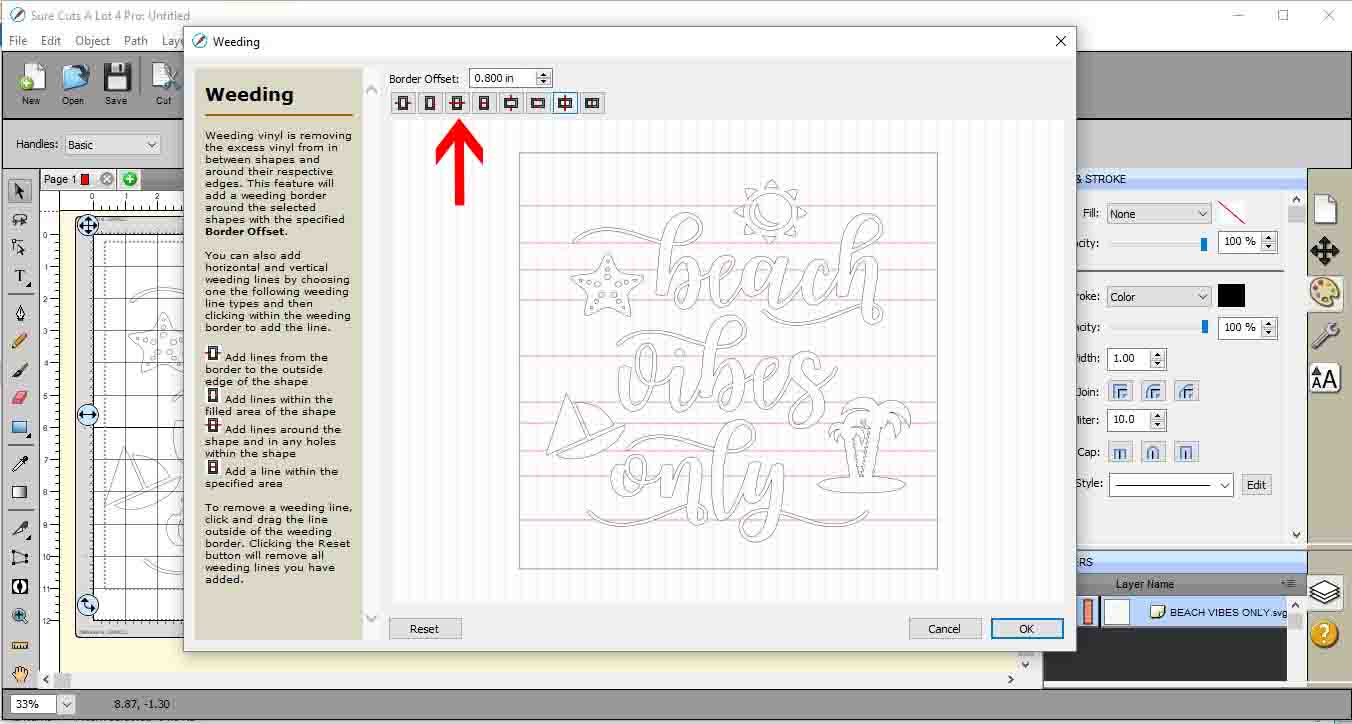
10- This option adds a line within the specified area, so where ever you click a weed line will appear between 2 points.
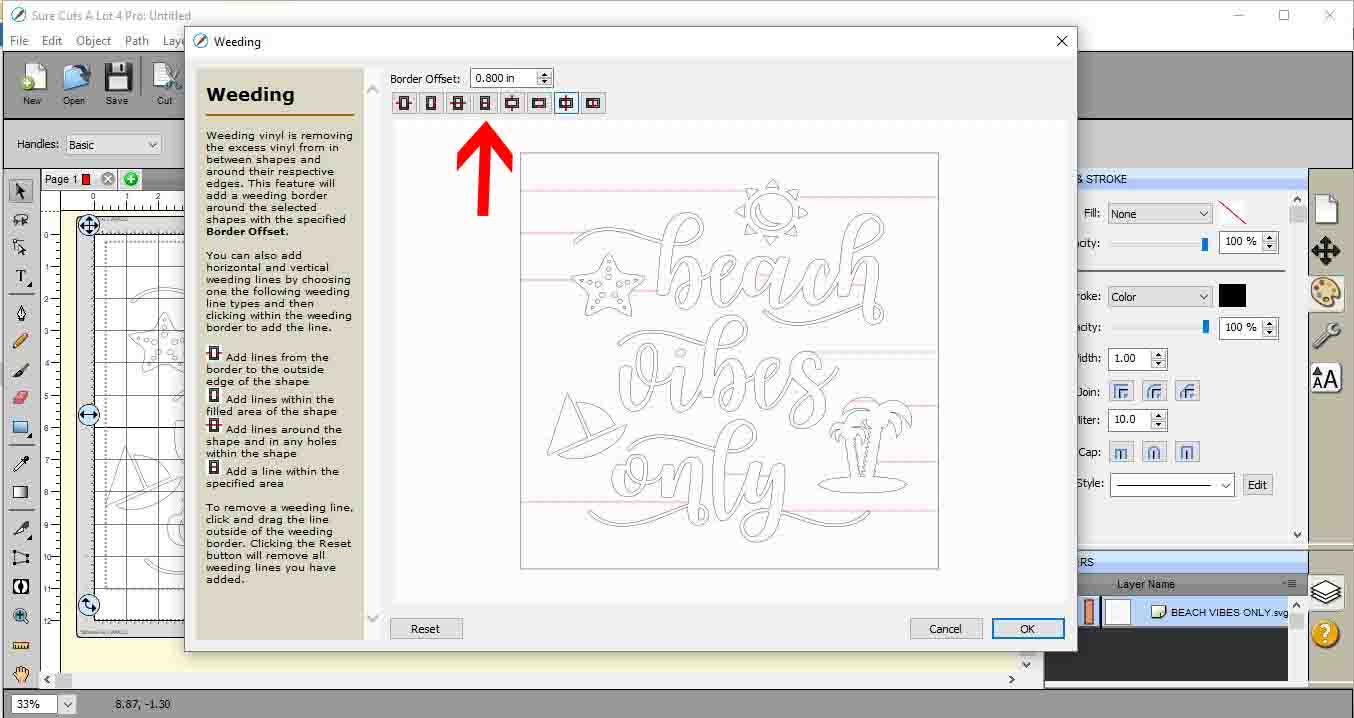
11- Now we come to the vertical option. with this selection you can add lines from the border to the outside edge of the shape. This will not give you weed lines in the middle of your design only to the outer edge.
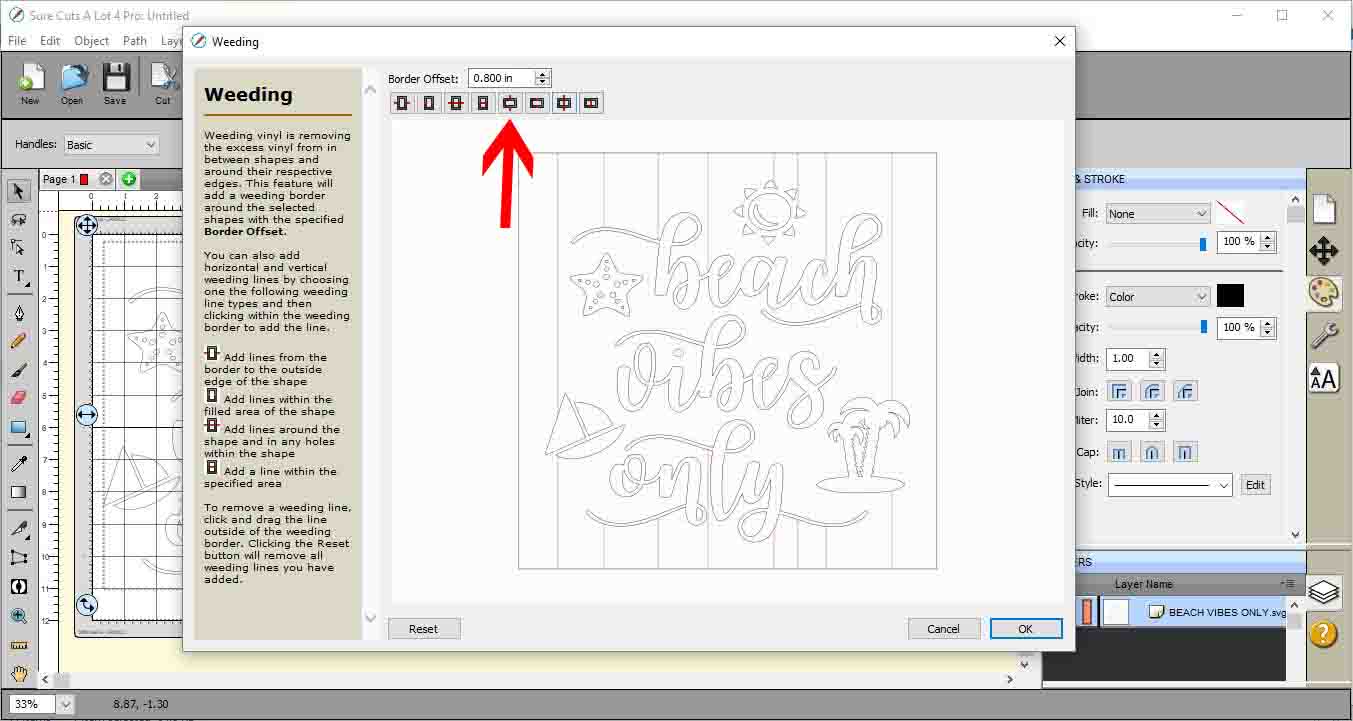
12- The next option does the opposite of regular weeding lines. It will add lines within the filled area of the shape vertically.
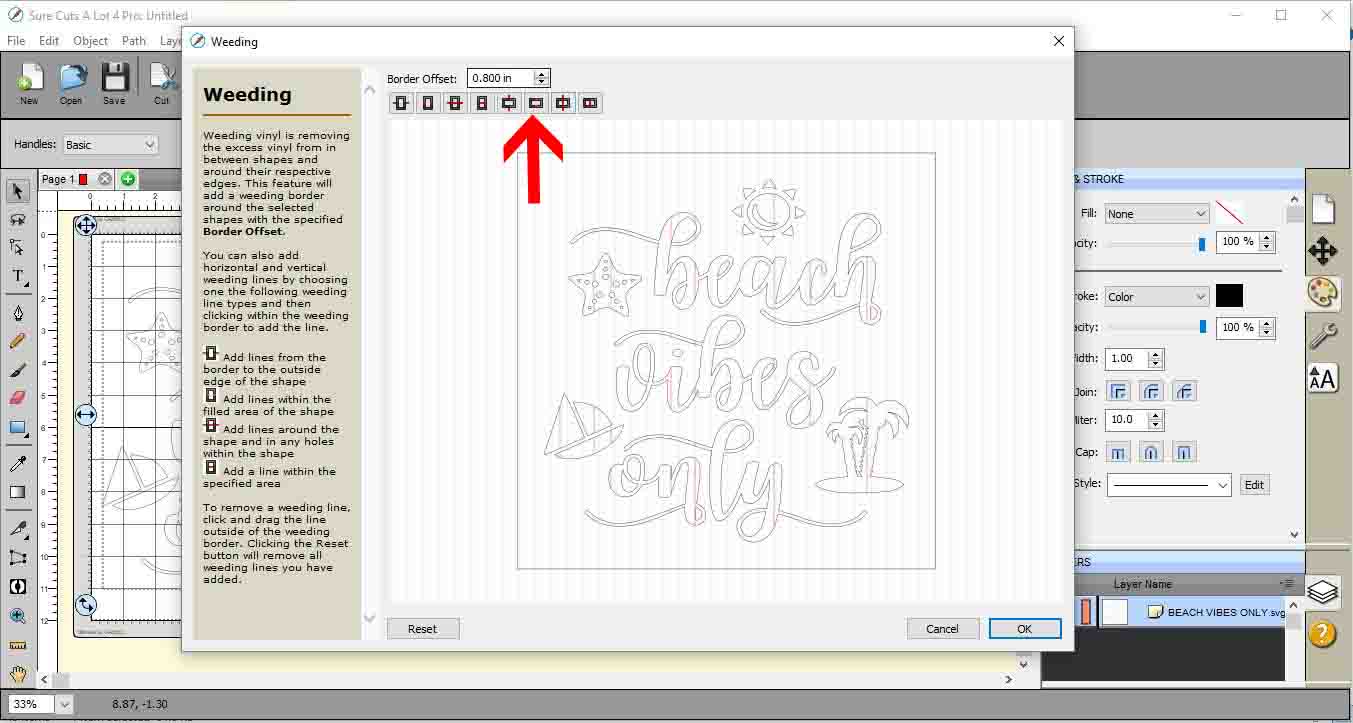
13- The next vertical option will add lines around the shape and in any holes within the shape. This is the traditional type of weeding lines that people tend to use.
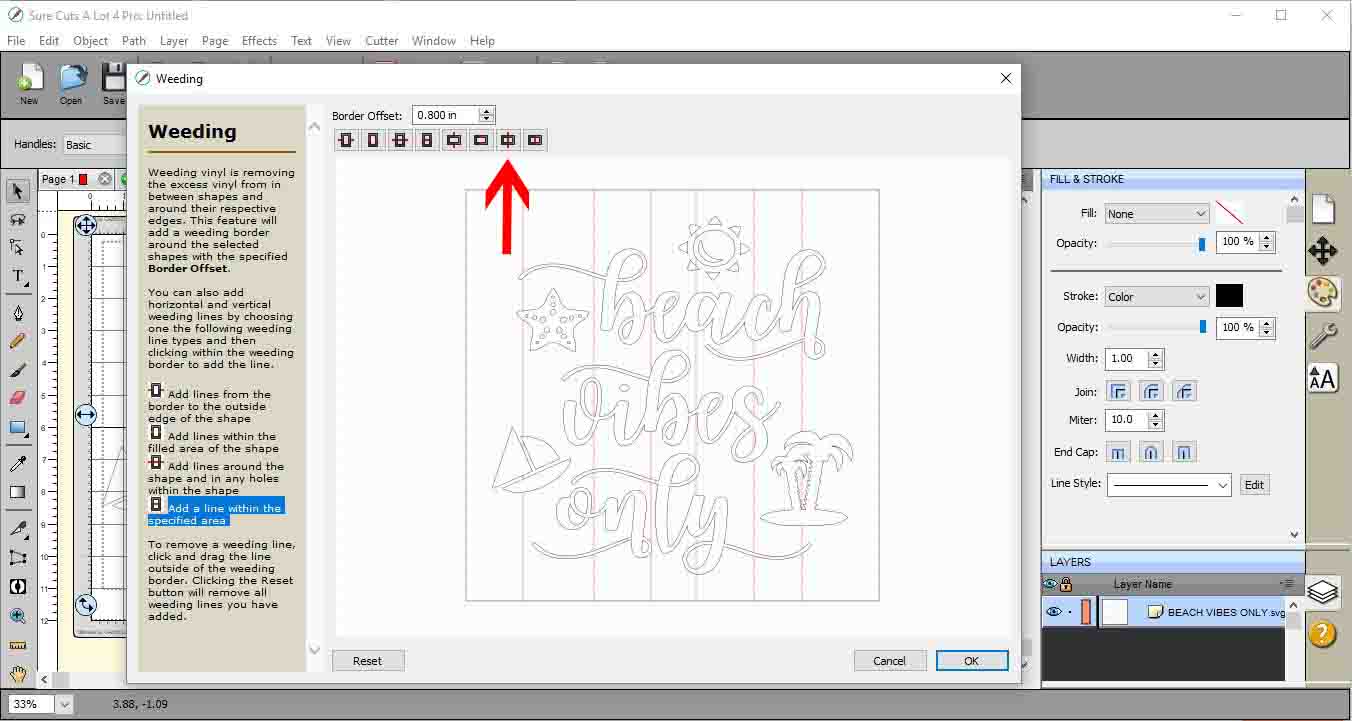
14- Finally this vertical option adds a line within the specified area, so where ever you click a weed line will appear between 2 points.
When you have finished selecting your weeding choice, click OK.
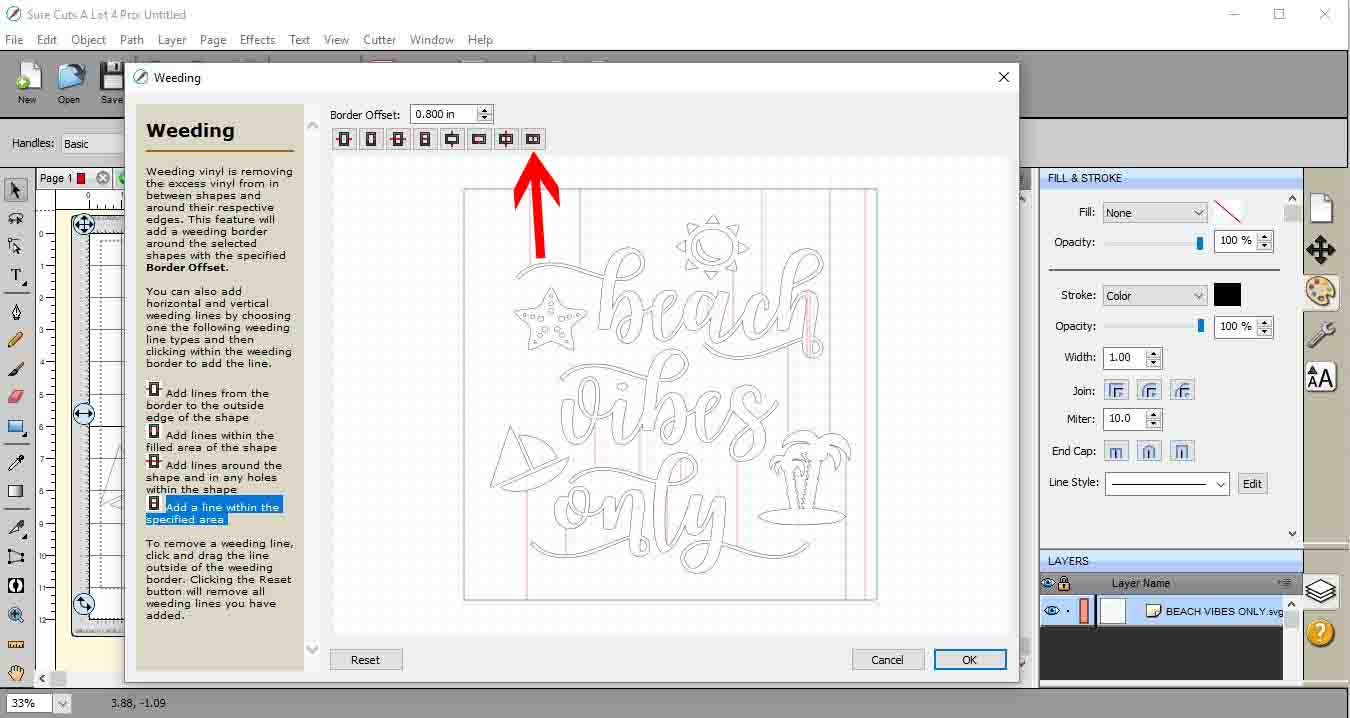
15- Once you click OK you will see the weed lines on your design when hovering over them with your cursor.
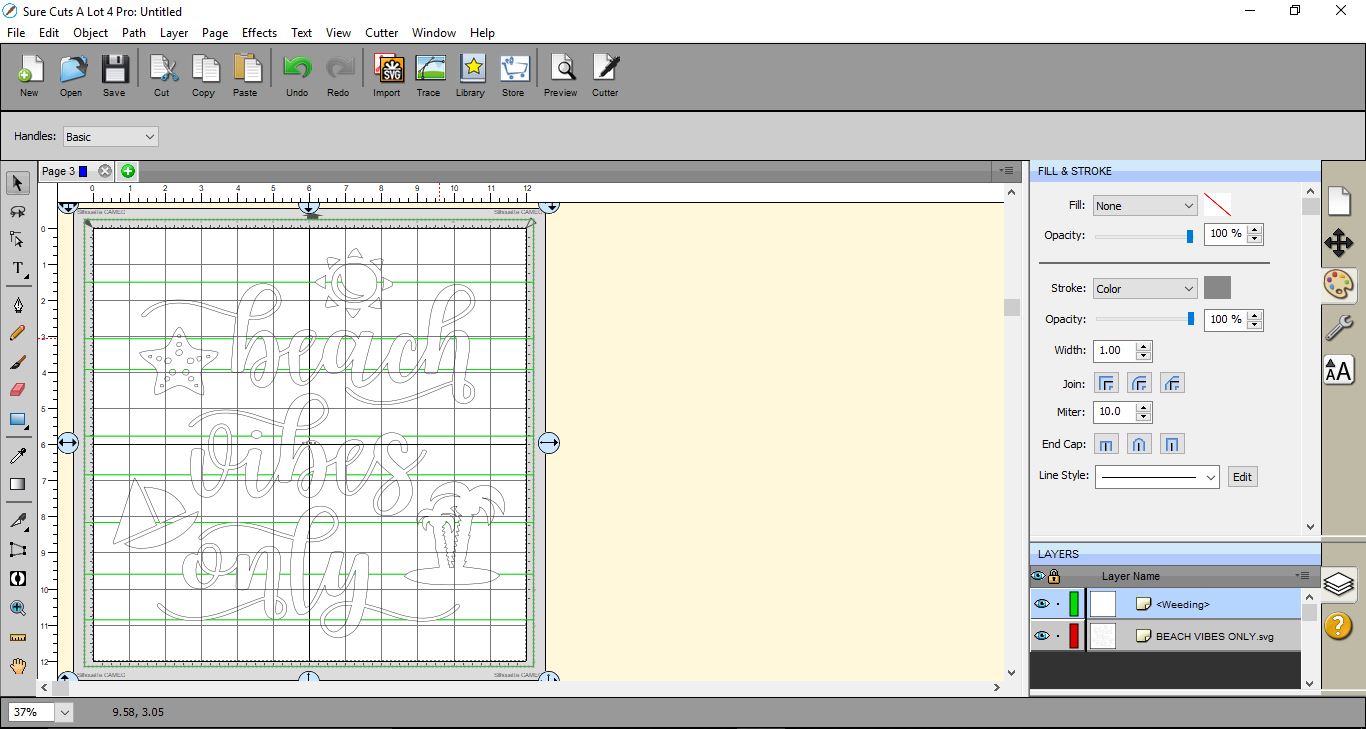
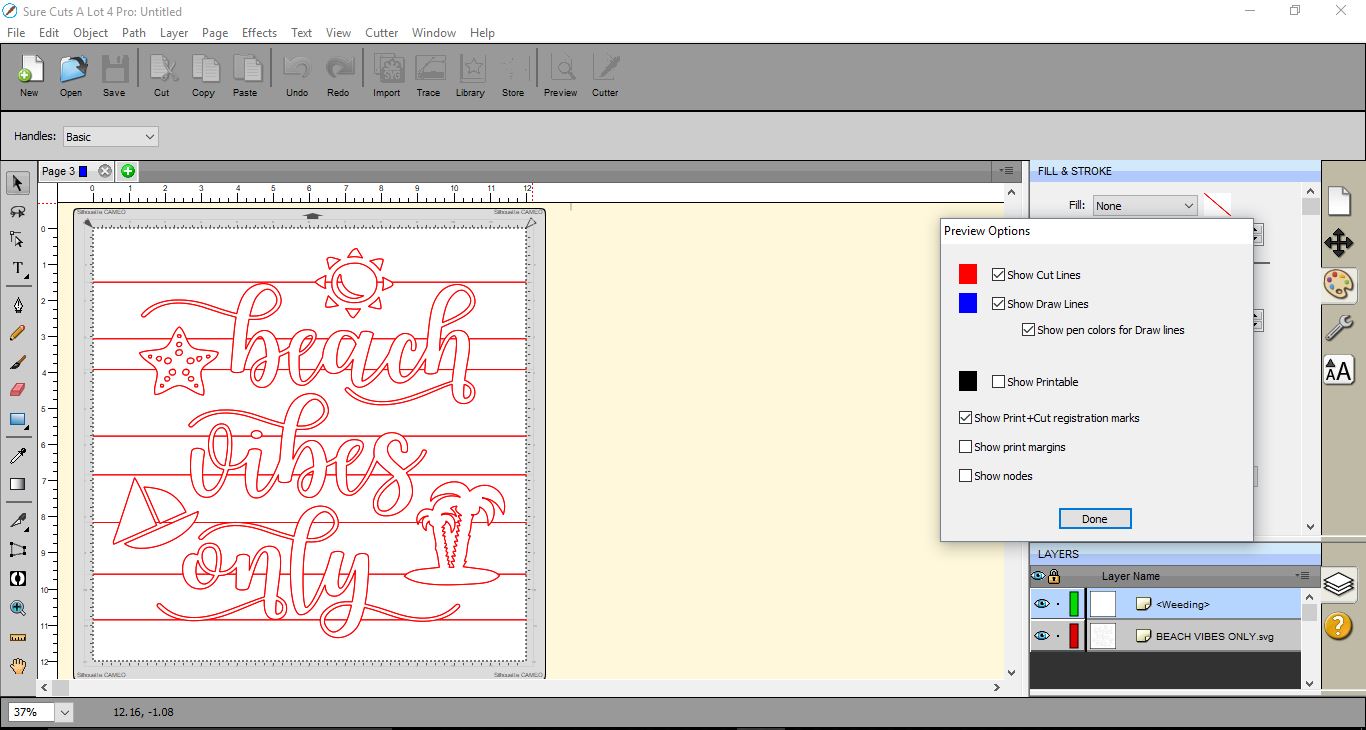
16- If you go to preview you can see clearly the weed lines and where they are in line with your design.
Related Tutorials
Silhouette Tutorials
Creating Weeding Lines In Silhouette Studio
In this Silhouette Studio tutorial, learn how to add weeding lines. Great for intricate designs!
SCAL Tutorials
How to Widen Foil Lines in SCAL4
Silhouette Tutorials
Removing Unwanted Cut Lines in Silhouette Studio
Today, we'll show you three methods of removing unwanted cut lines in Silhouette Studio.
Cricut Tutorials
How to Turn off Grid Lines in Cricut Design Space
In this step by step tutorial we will show you how to easily turn off grid lines at any time.
Procreate Tutorials
How to Draw Smoother Lines in Procreate
Discover how to draw smooth lines in Procreate with this quick tip.
Cricut Tutorials
How to Change Cut Lines to Score Lines in Cricut Design Space
In this Design Space tutorial we show you how to change a cut line to a score line.