By Design Bundles
Scan N Cut Tutorials3 min
How to create a die cut photo frame with text in brother scan and cut canvas workspace
1- Open canvas workspace.
2- Click on the shape tool.
3- Create a square.
4- Reshape the square to the shape you would like your frame.
5- Click on the text icon. Type your text.
6- To change your font click on the font drop down box. I am using the Amastery font by BlackCatsMedia.
7- Resize the text and place on the edge of the rectangle. Ensure it overlaps slightly.
8- Select both the text and rectangle. Go to process overlap. Click subtract.
9- The text is now inside the rectangle. Click on the shape tool and create another square.
10- Select the square and resize.
11- Resize the square into a rectangle to go around your text. This will be the outside of the frame.
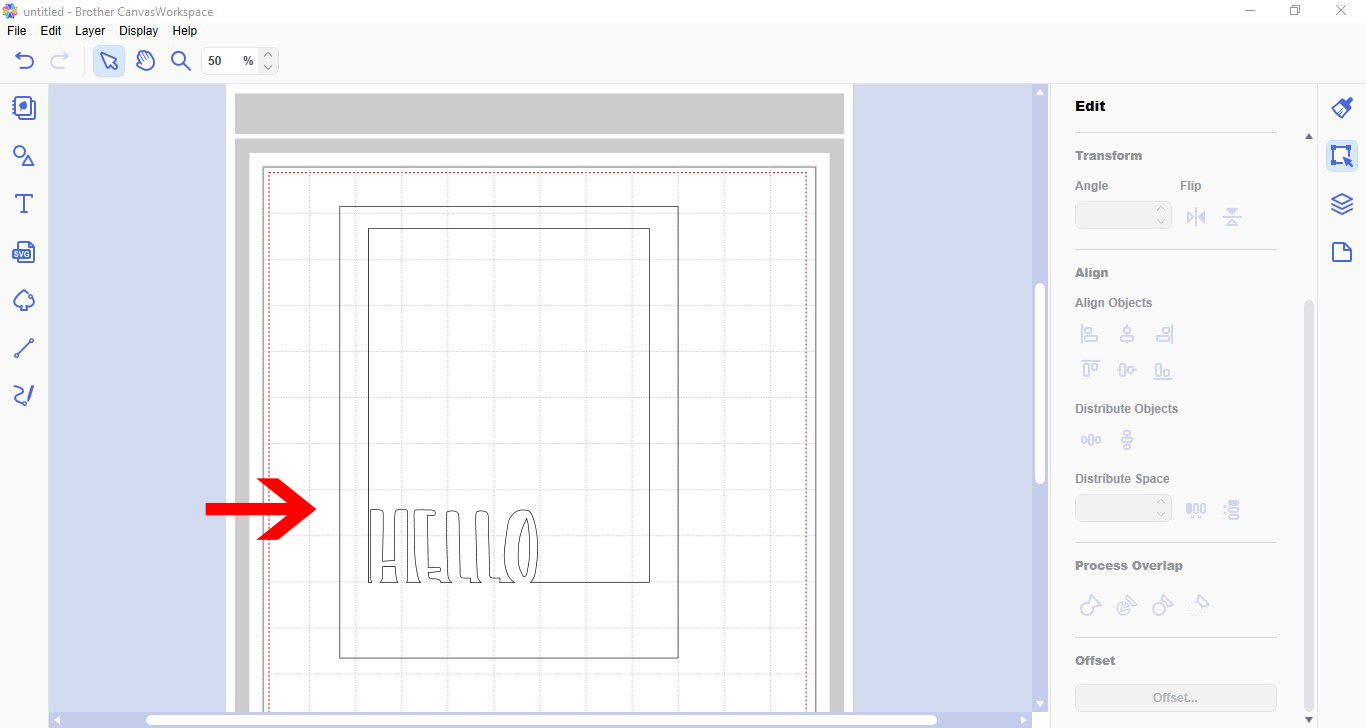
12-Select both the text and new rectangle. Use the align tool to center them.
13- With both still selected. Right click and group the two of them.
14- Your frame is now finished. You can cut this to use as a frame.

2- Click on the shape tool.
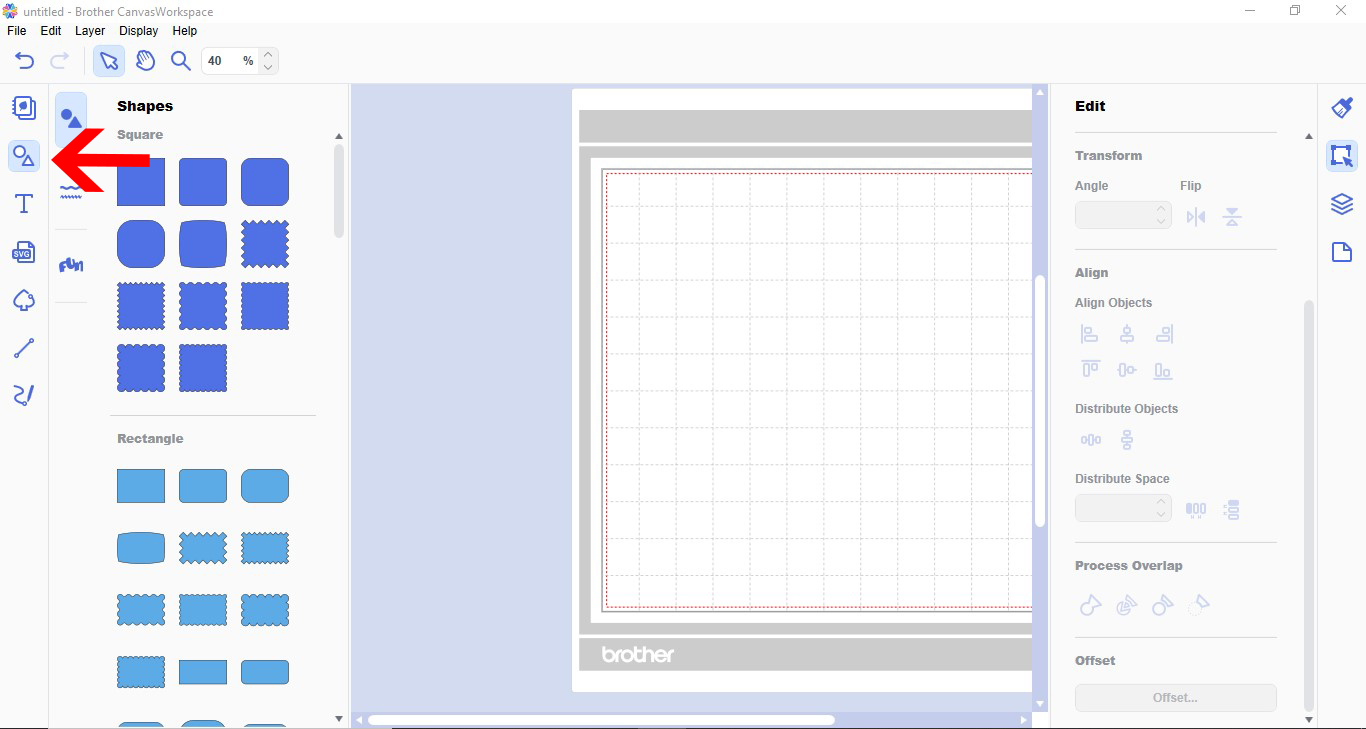
3- Create a square.
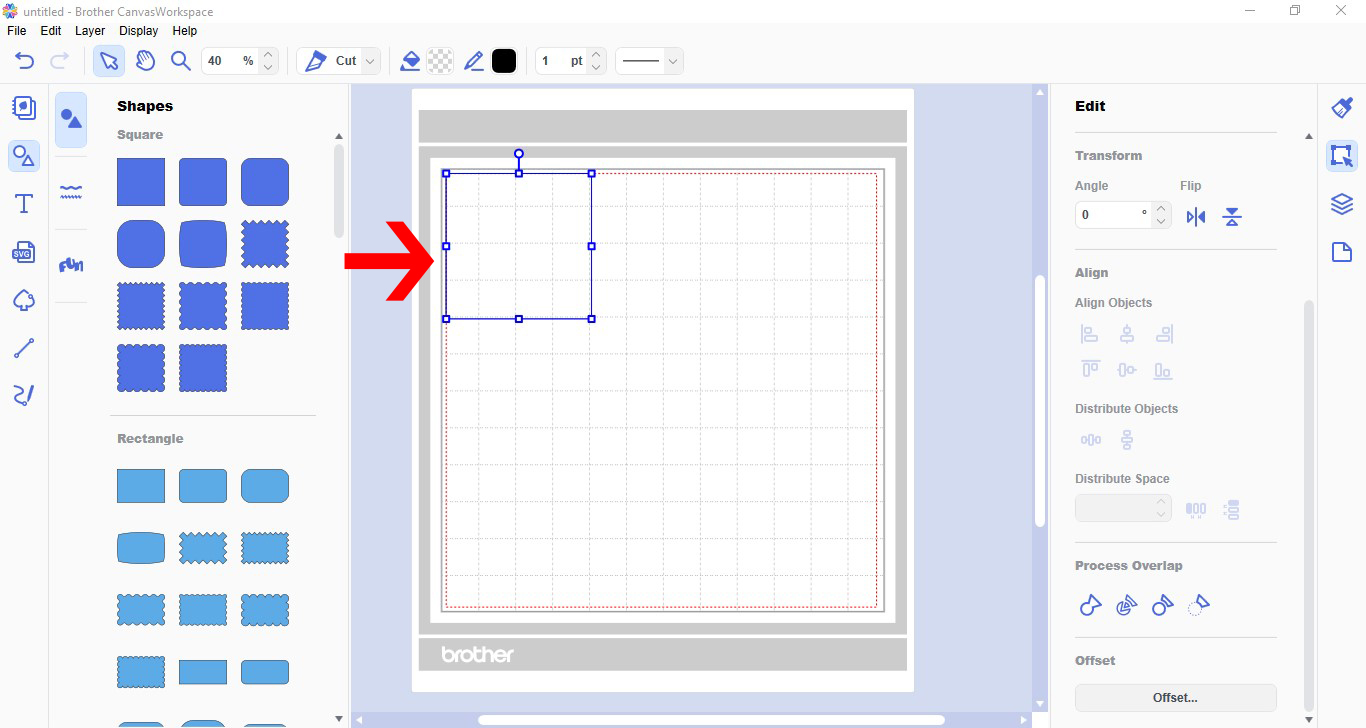
4- Reshape the square to the shape you would like your frame.

5- Click on the text icon. Type your text.
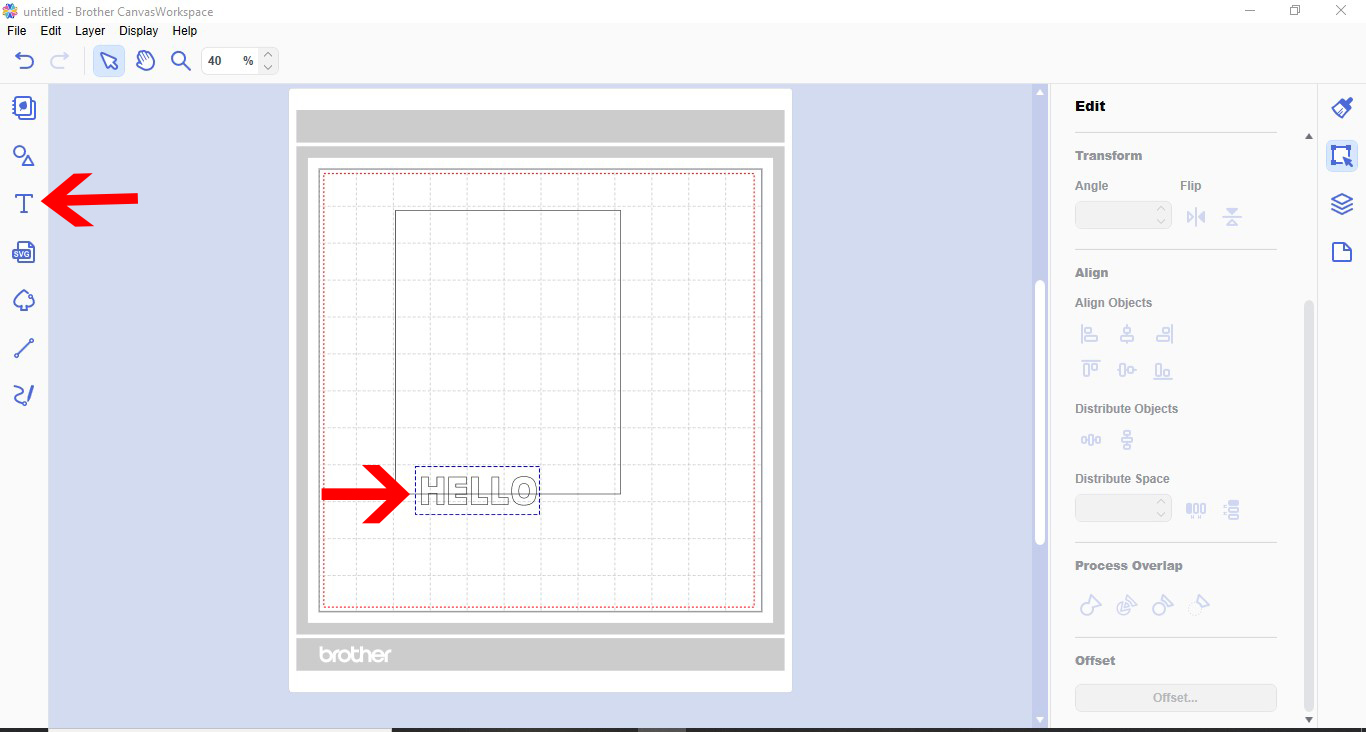
6- To change your font click on the font drop down box. I am using the Amastery font by BlackCatsMedia.
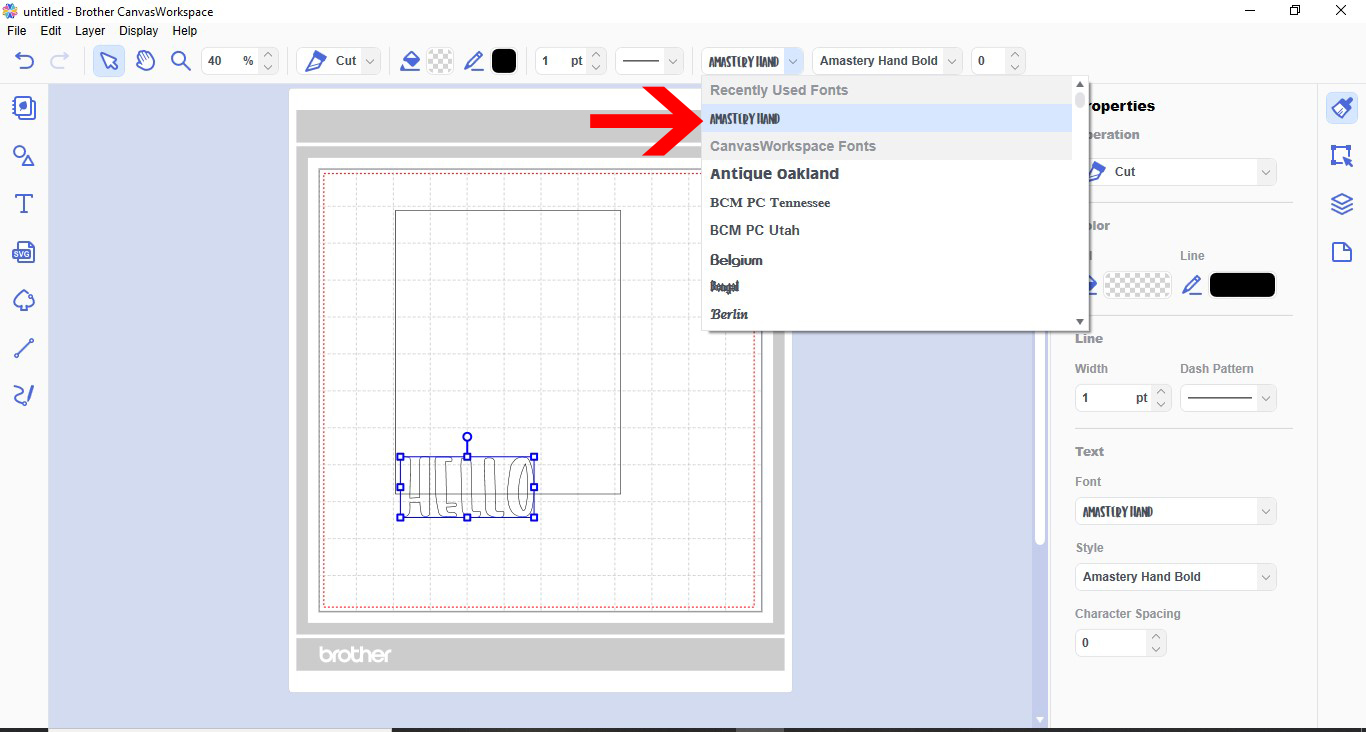
7- Resize the text and place on the edge of the rectangle. Ensure it overlaps slightly.
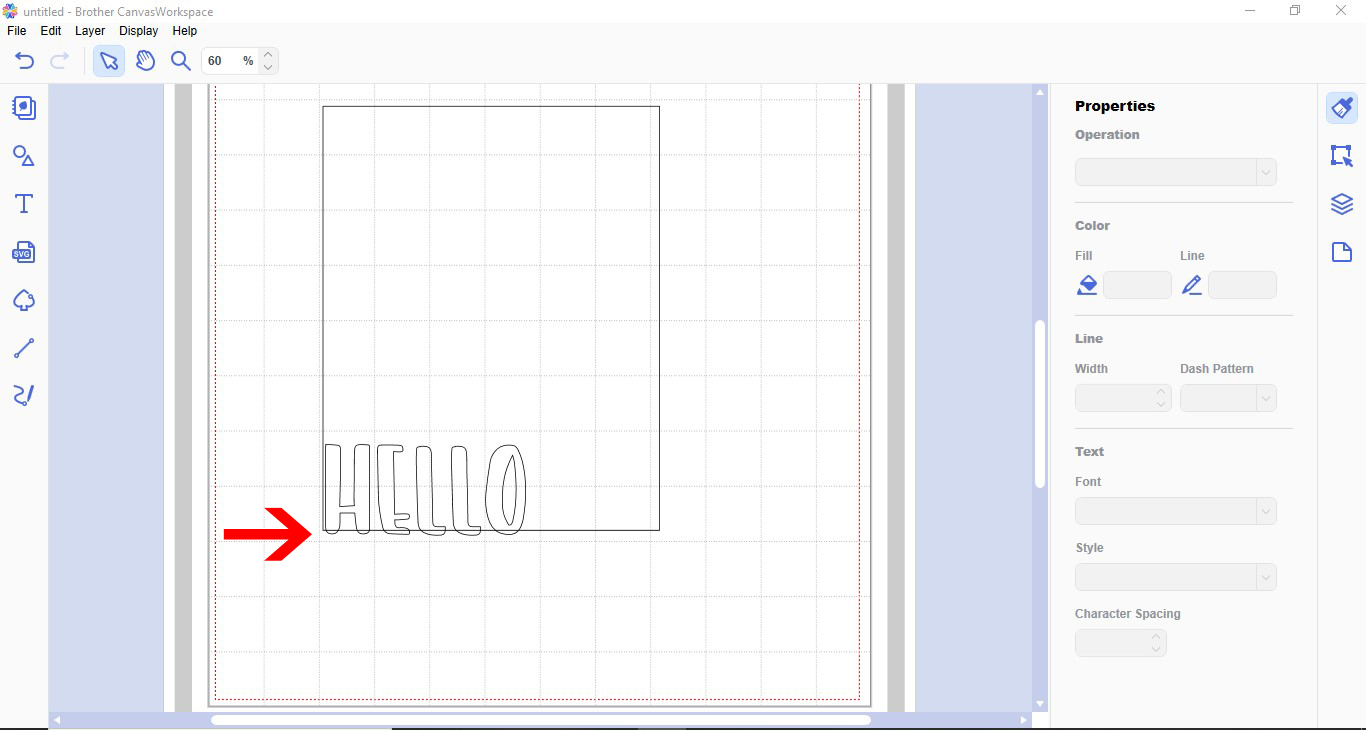
8- Select both the text and rectangle. Go to process overlap. Click subtract.

9- The text is now inside the rectangle. Click on the shape tool and create another square.

10- Select the square and resize.
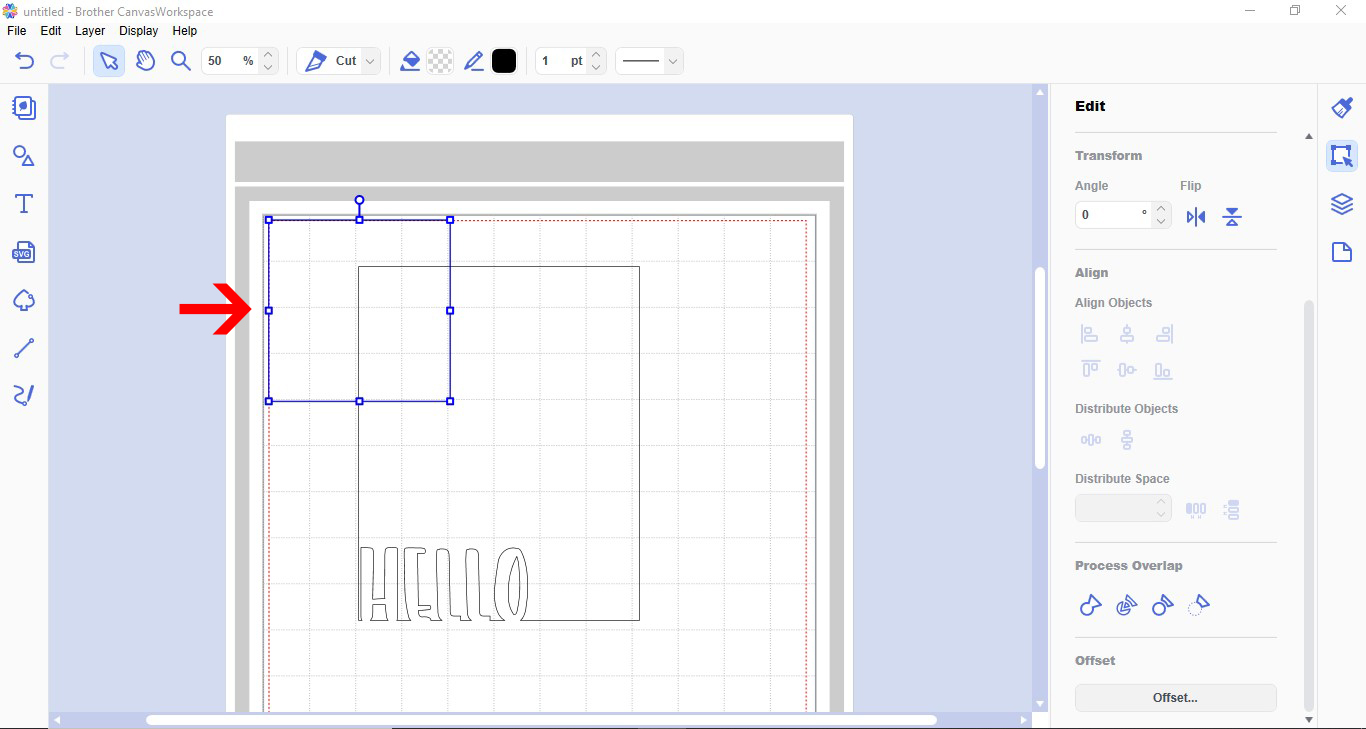
11- Resize the square into a rectangle to go around your text. This will be the outside of the frame.

12-Select both the text and new rectangle. Use the align tool to center them.

13- With both still selected. Right click and group the two of them.

14- Your frame is now finished. You can cut this to use as a frame.
Related Tutorials
Scan N Cut Tutorials
How to create curved text in brother scan and cut canvas workspace
Learn how to curve text in Brother Scan N Cut
Scan N Cut Tutorials
How to create a curved line in Brother scan and cut canvas workspace
Scan N Cut Tutorials
Two ways to weld text in Brother scan and cut canvas workspace
Scan N Cut Tutorials