By Design Bundles
How to create curved text in brother scan and cut canvas workspace
1- Open canvas workspace.

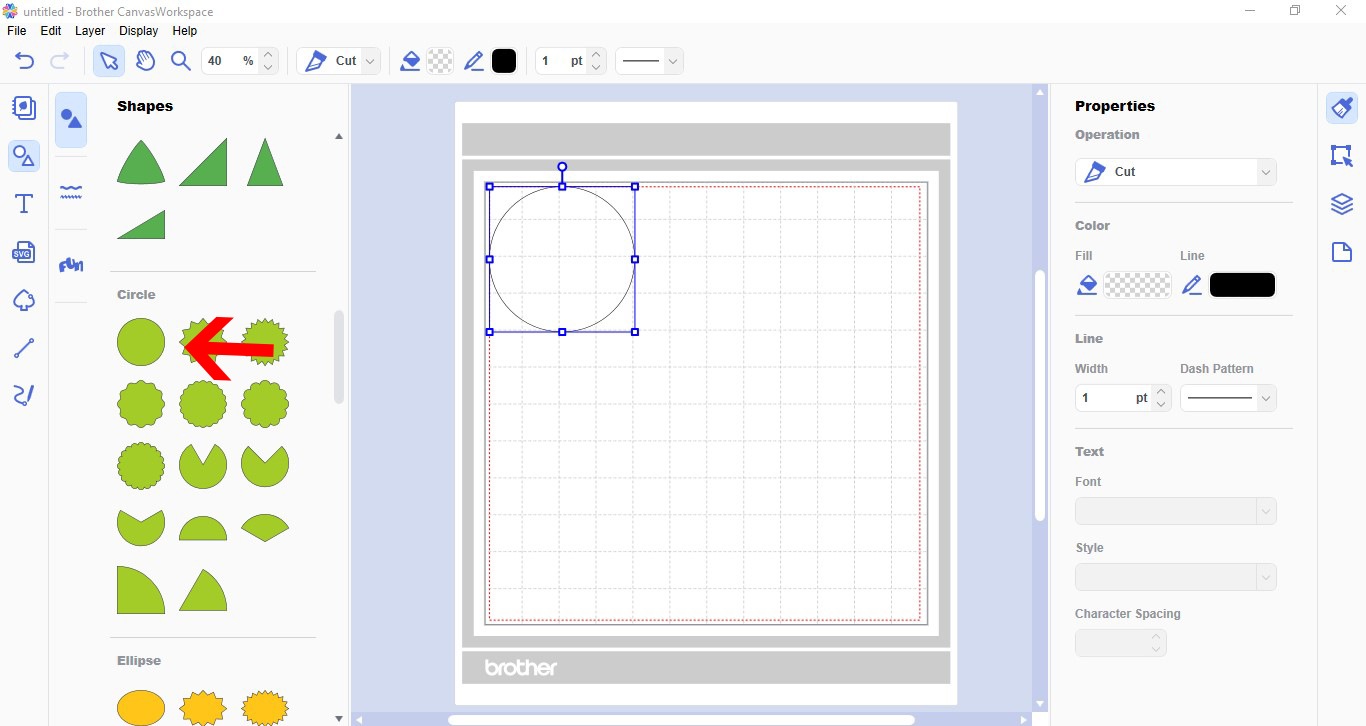
2- Click on the shape icon. Select a circle.
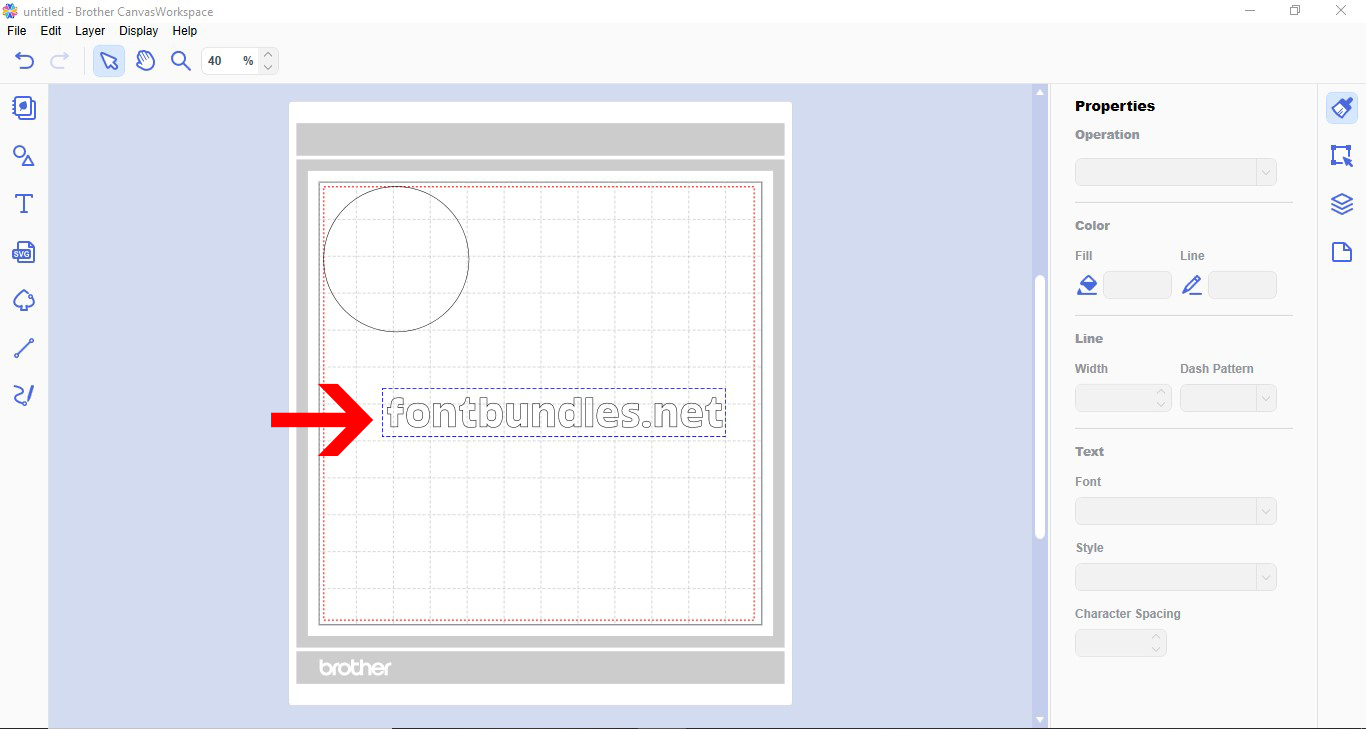
3- Click on the text icon.

4- Type your text.
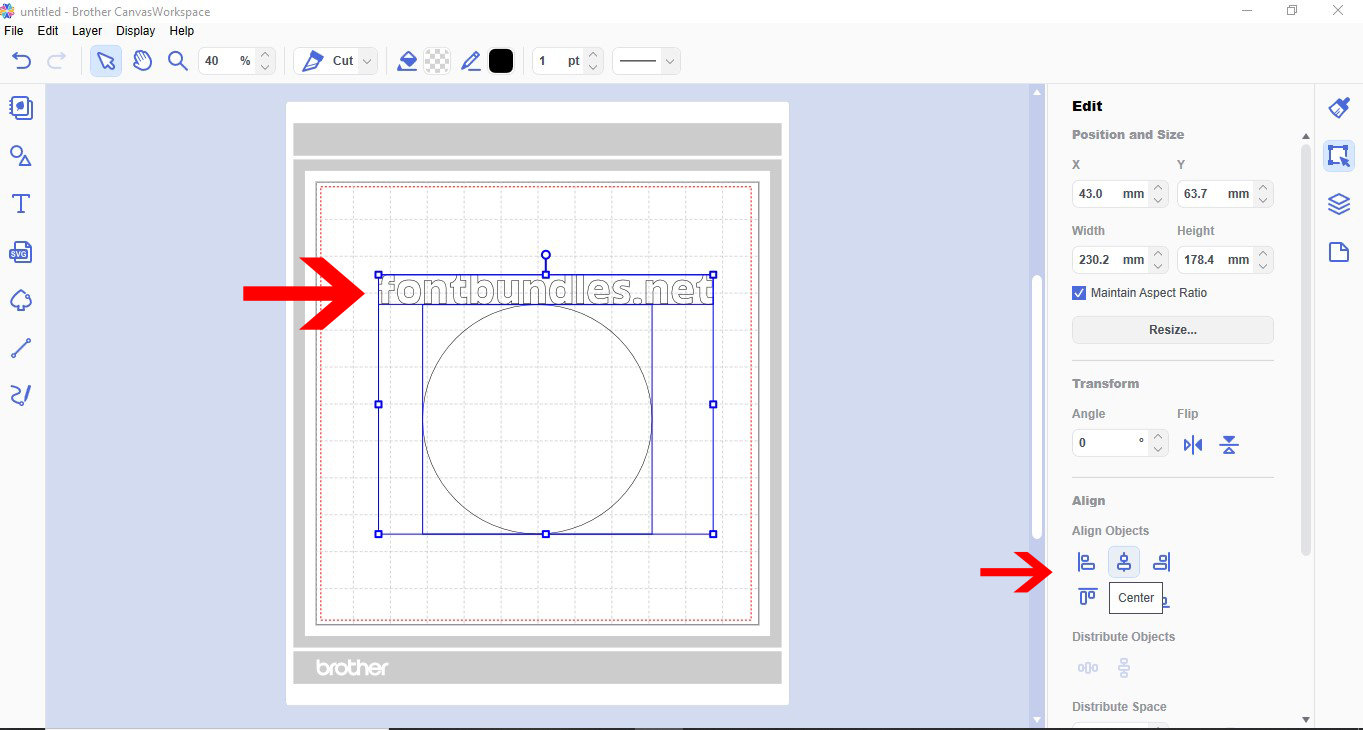
5- Resize the circle to the curve you want your text. Place the text over the circle at the top. Select both the text and circle. Using the align tool. Click the center option.
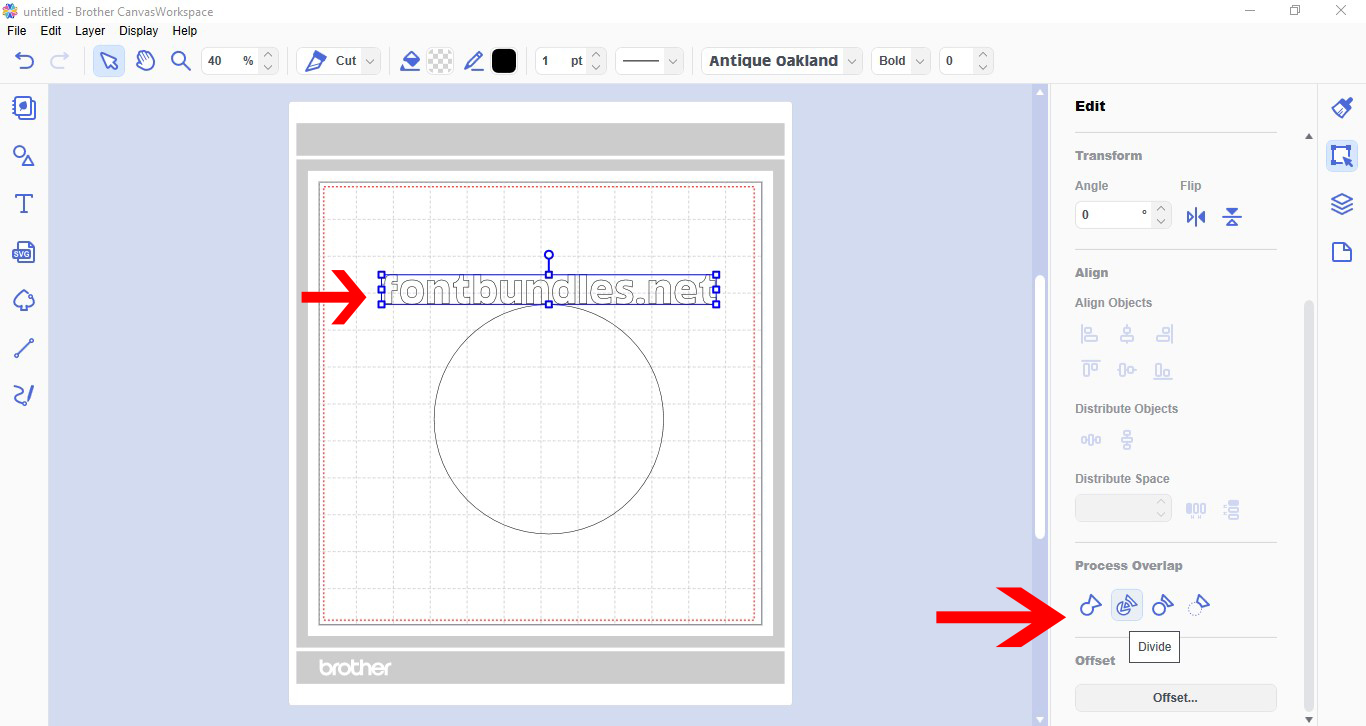
6-Select the text and using the process overlap function, click divide. This will separate your letters.
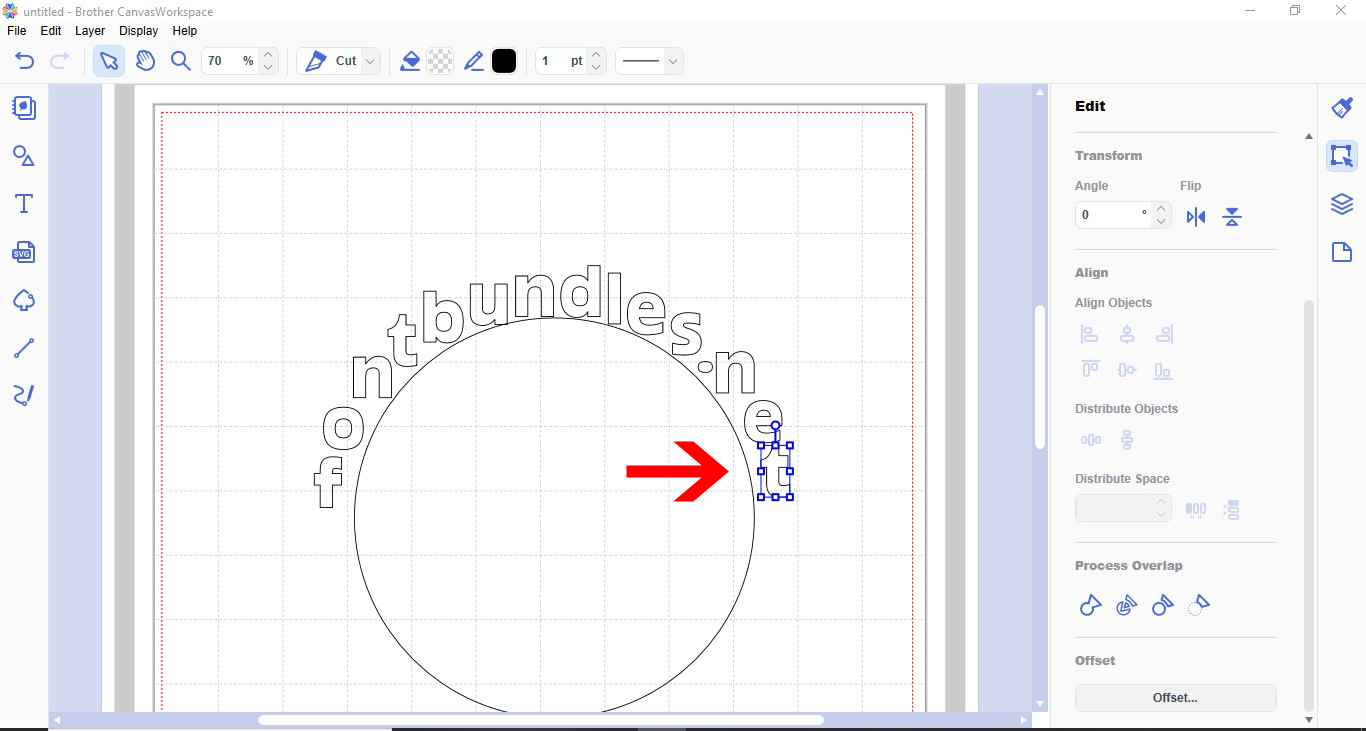
7- Drag each letter down around the circle.
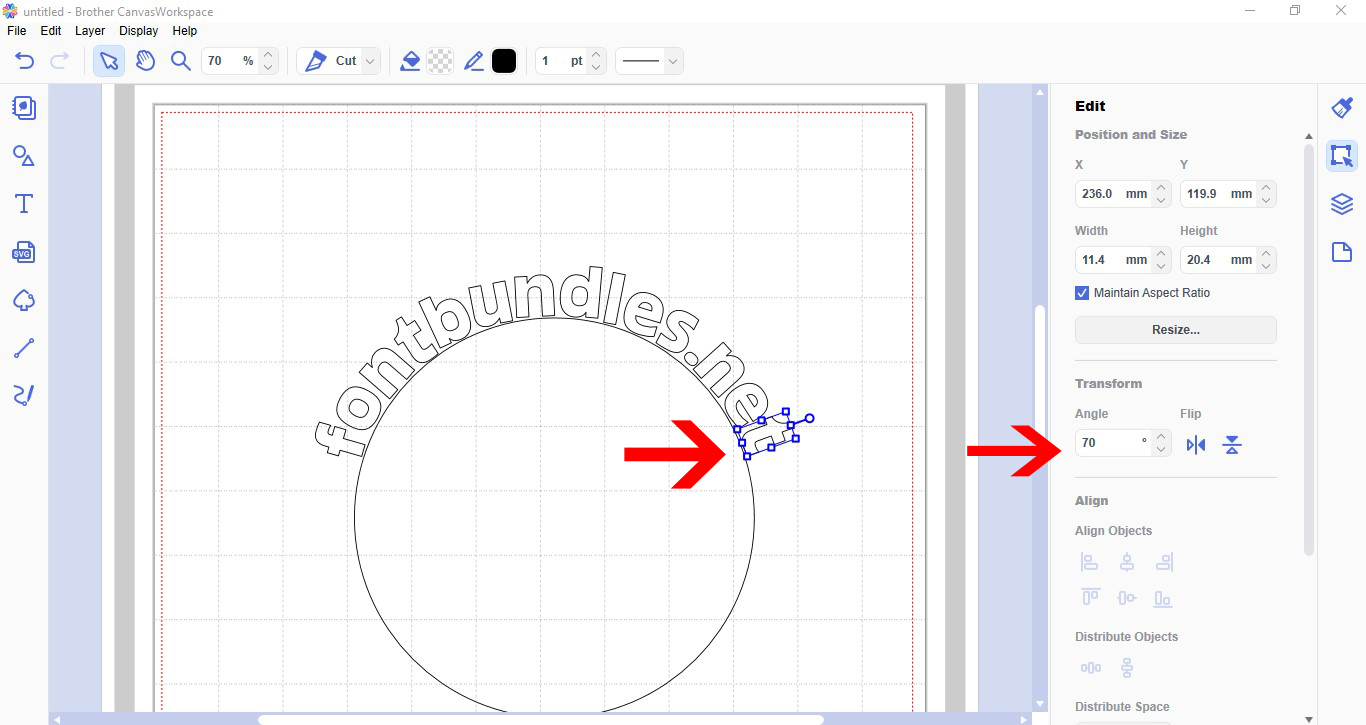
8- Select each letter one by one and adjust the angle so the letter is touching the circle.
9- Once you have moved the letters to where you want them, delete your circle.
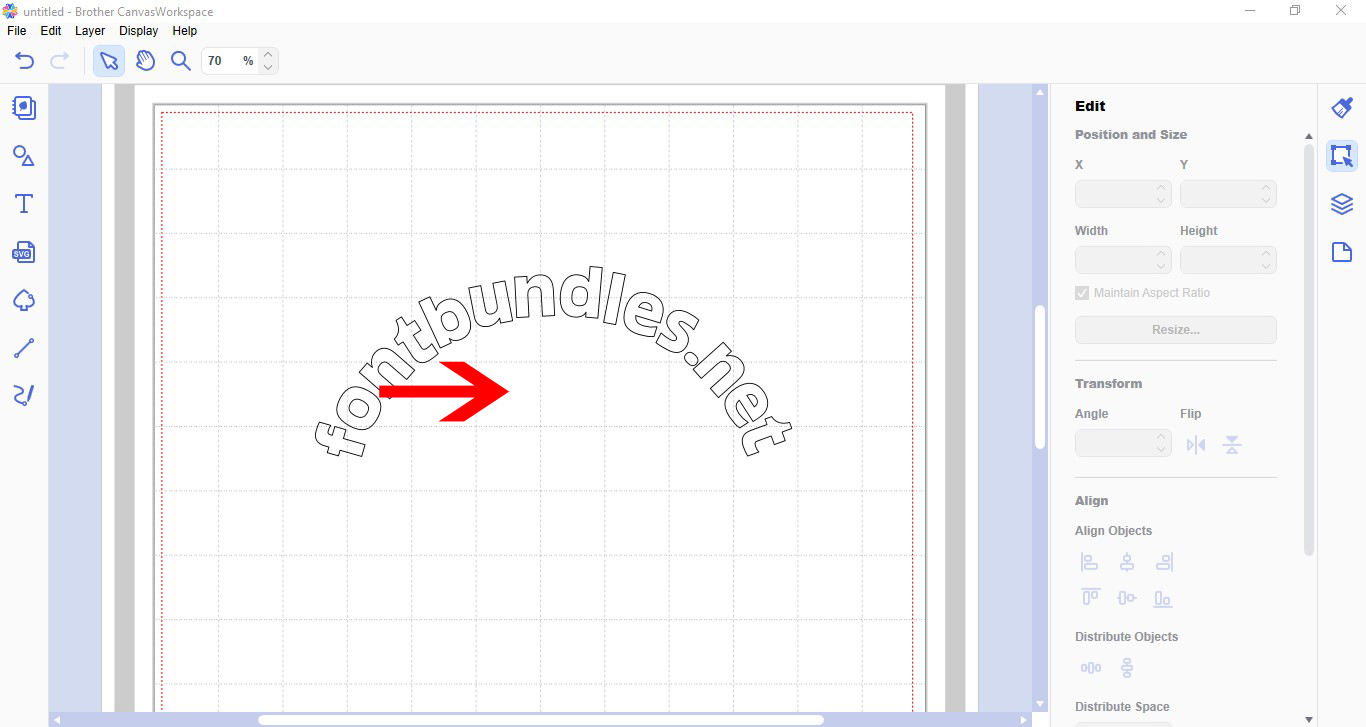
10- Select all the letters and right click. Group together.
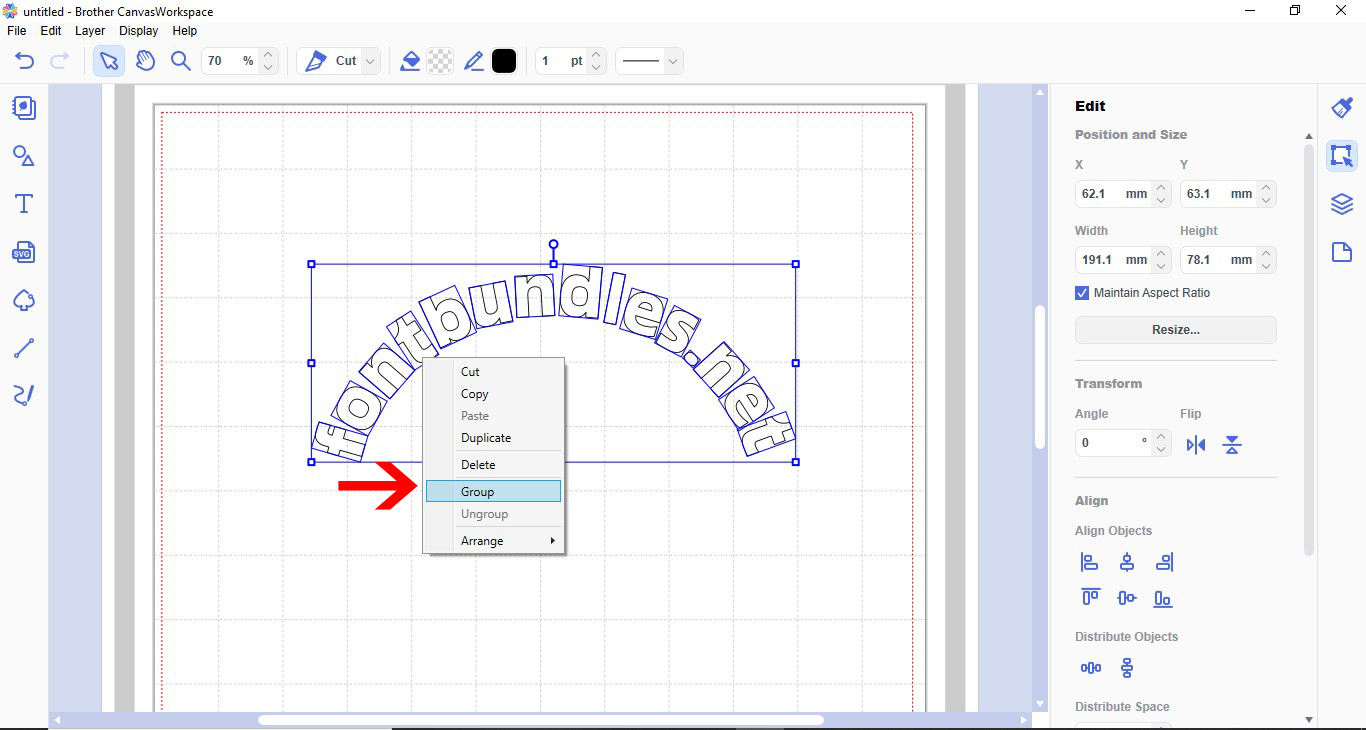
11- With the text now curved, you can make the text smaller or larger.

Now you know how to curve text in Brother Scan N Cut. We hope this tutorial has been helpful and that you have learned something new.