By Design Bundles
Silhouette Tutorials6 min
How to Create a Knockout Design in Silhouette Studio
The knockout technique is a pretty popular style for layering vinyl on t-shirts, particularly if you want to make a shirt for a school sports team.
It usually works best with at least two lines of text and with a relatively simple shape.
1- Open the image you want to use in your design.
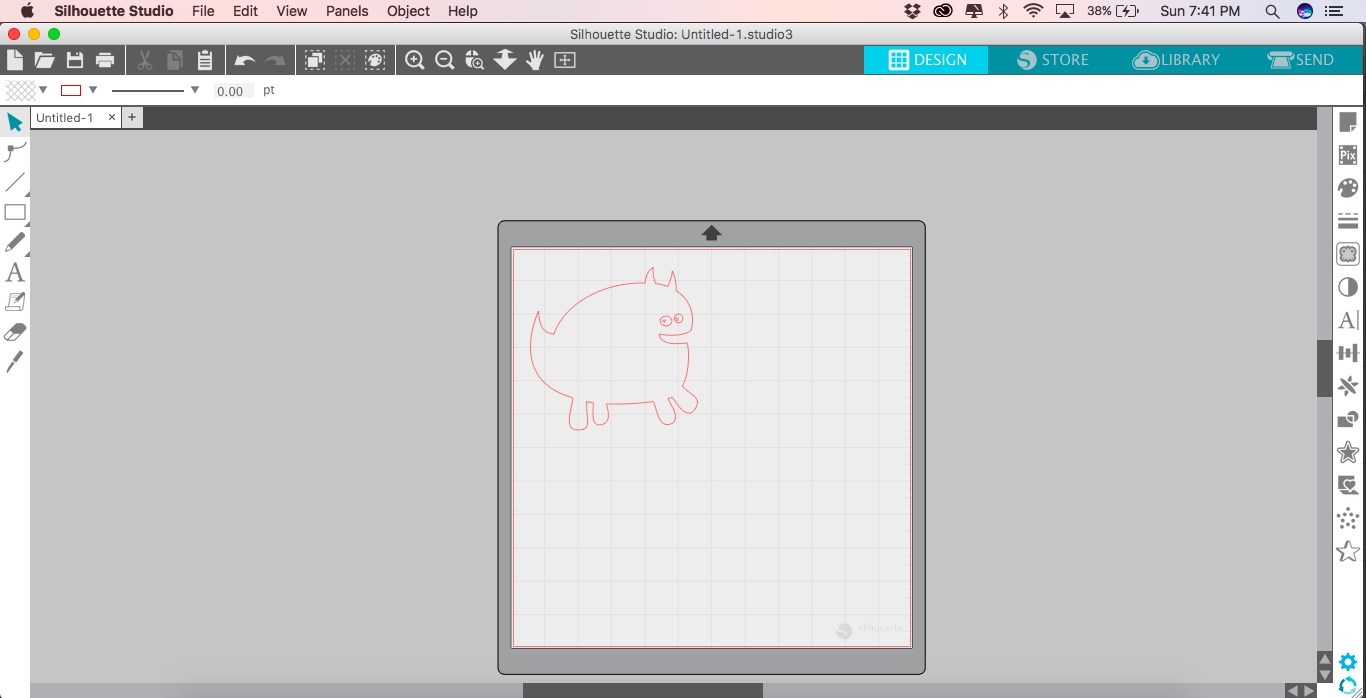
2- Open the Fill panel and select the color of vinyl you'll be using for your image.
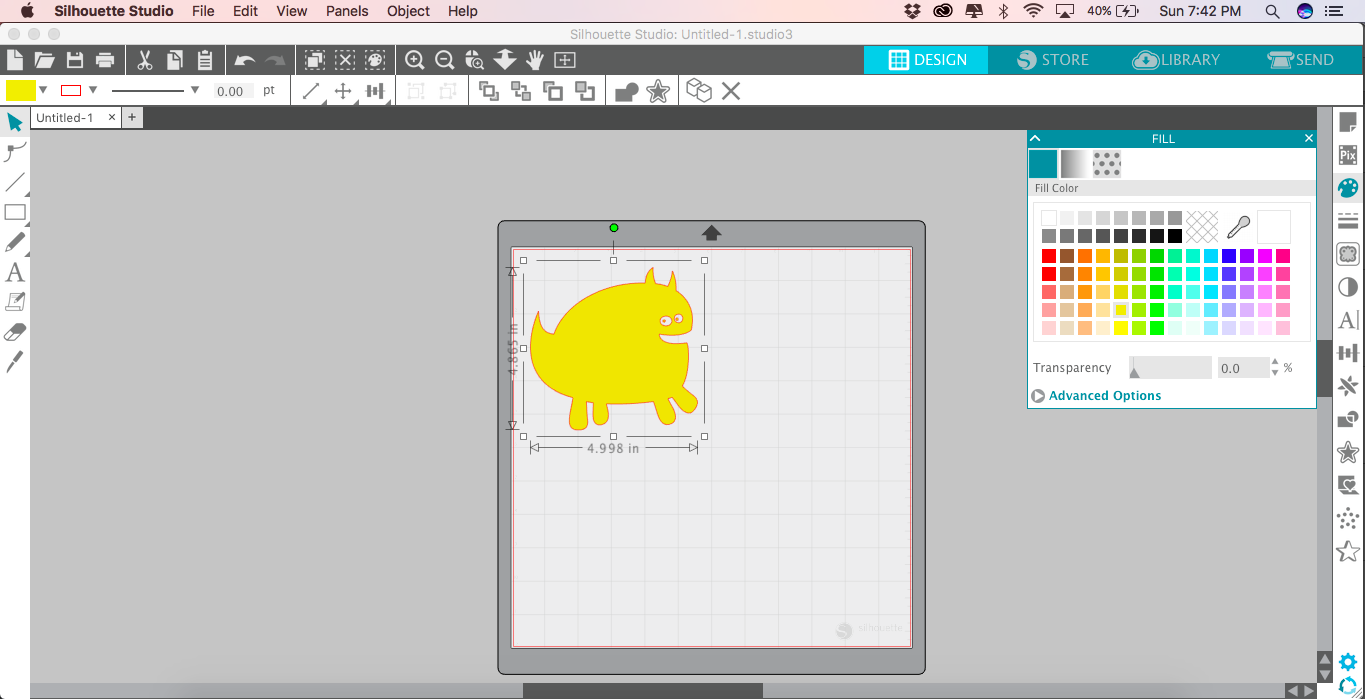
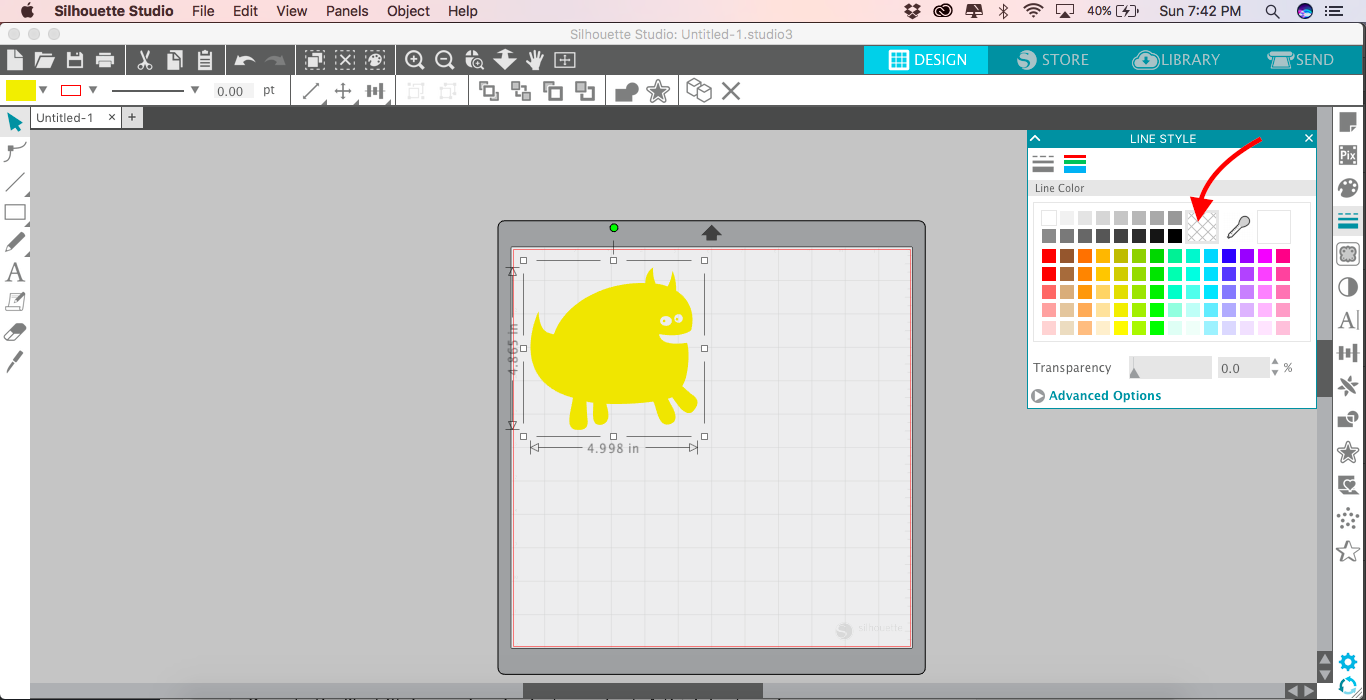
3- Open the Line Style panel and select the no line color option.
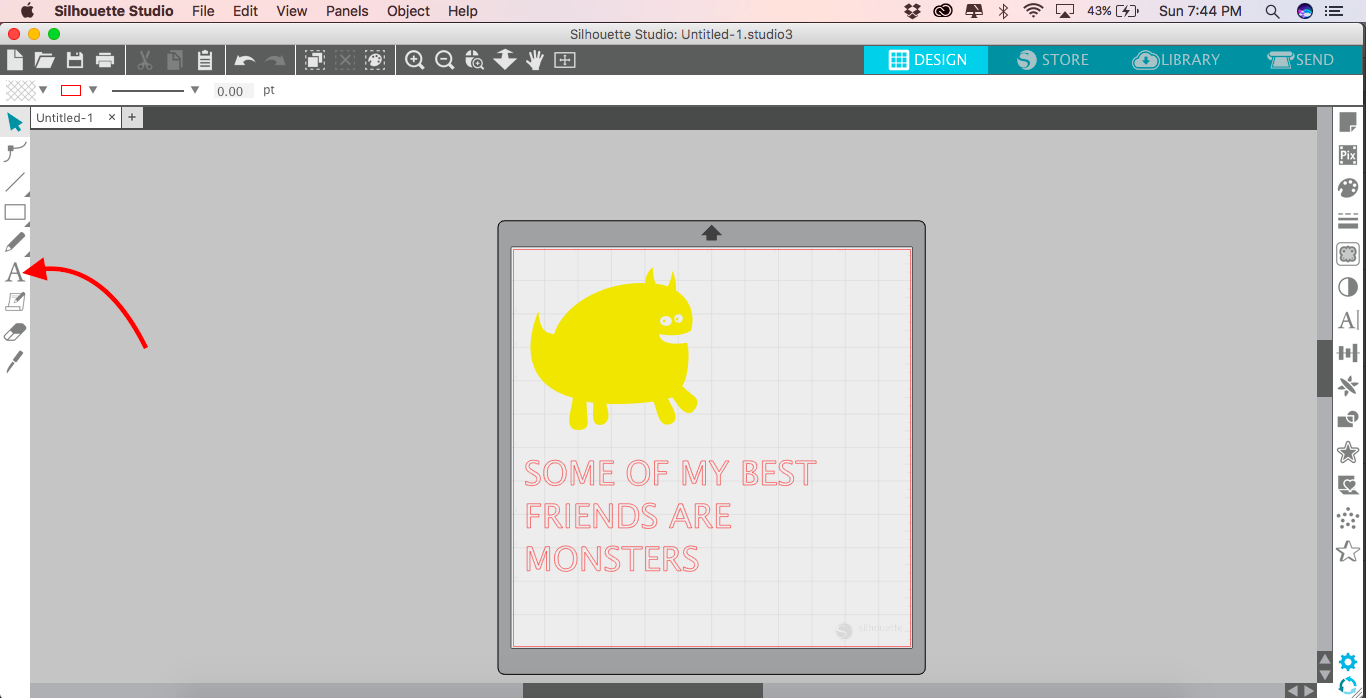
4- Open the Text tool and type the phrase you want to use in your design.
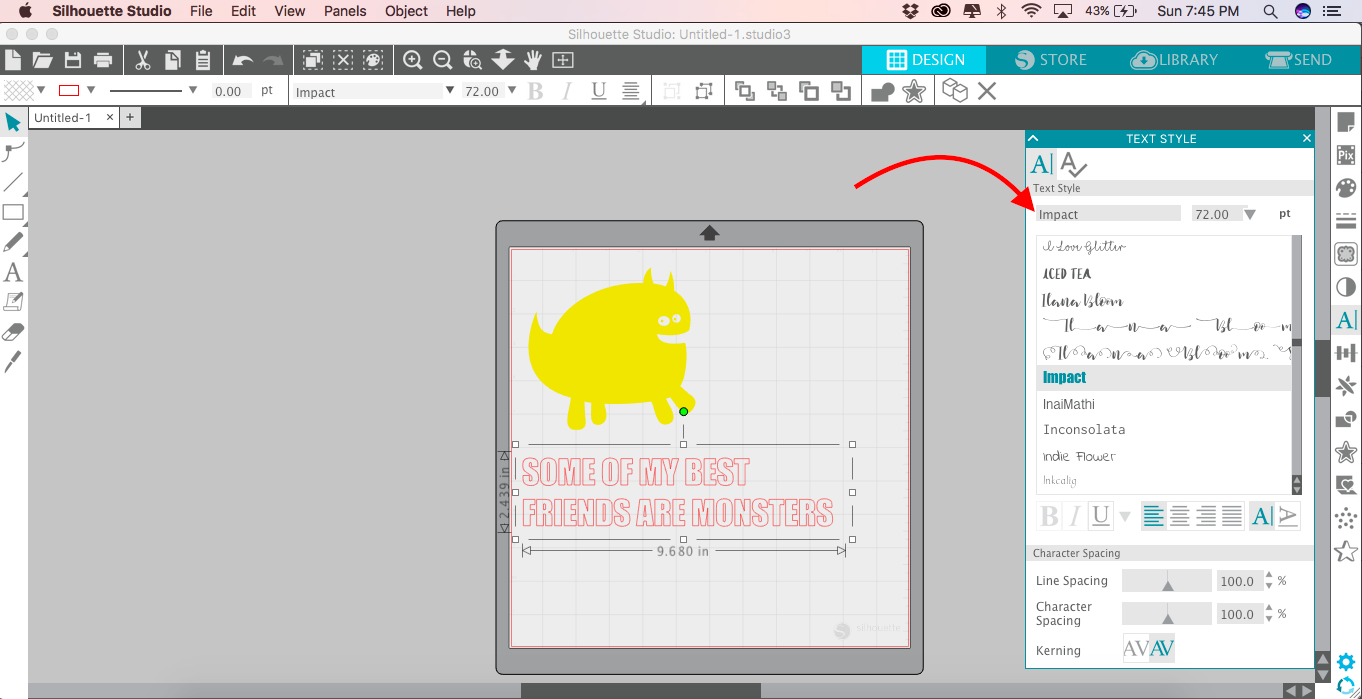
5- Open to the Text Style panel and select your font. A thick font works best. I opted for Impact.
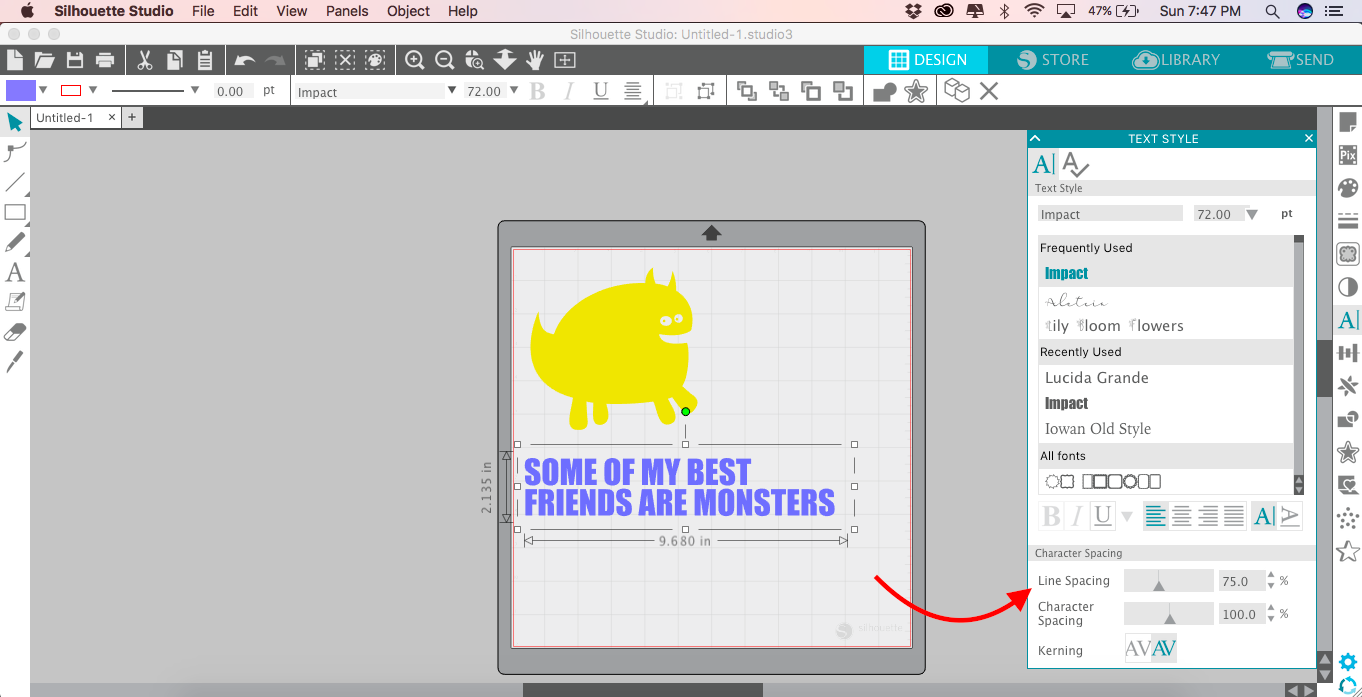
Open the Fill panel and select the color you want your text to be. Open the Line Style panel and select the no line color option.
Under Character Spacing, decrease the line spacing until the two lines are relatively close. (I opted for 75%)
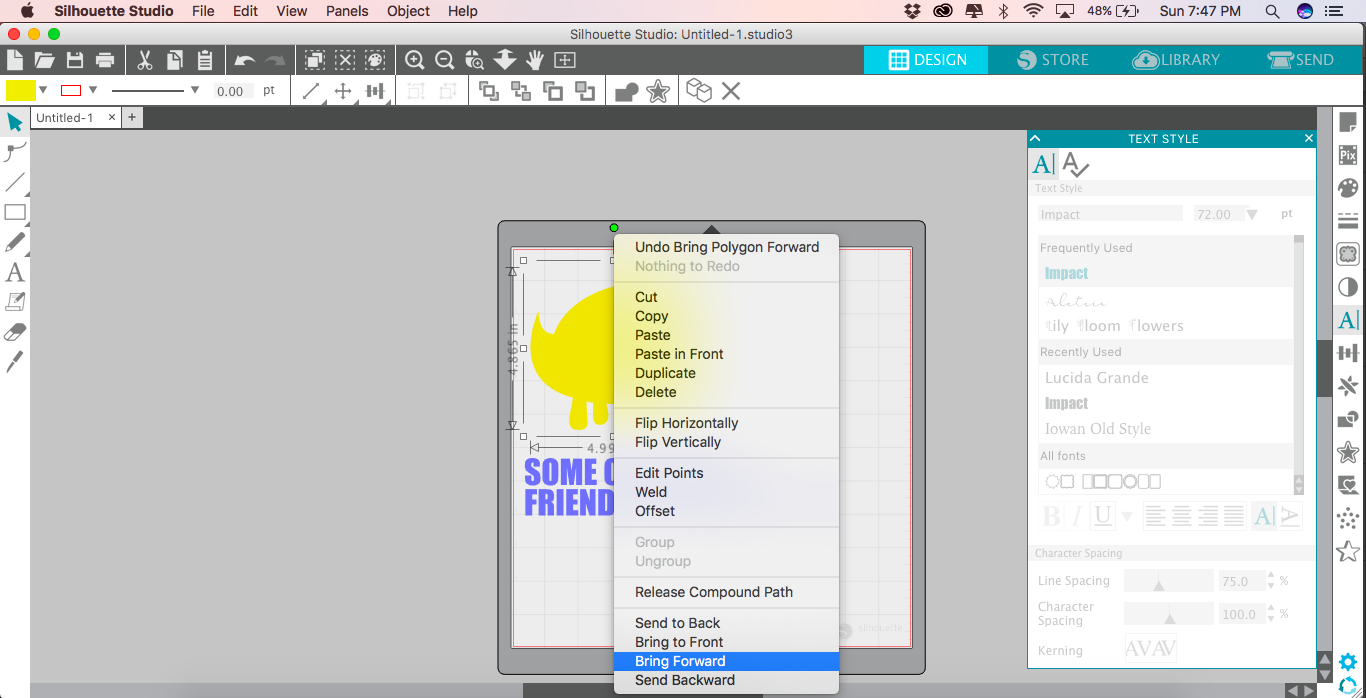
8- Line up the text and image as you want them to appear in your design. Make sure that the image is on top of the text by right-clicking the image and selecting Bring to forward.
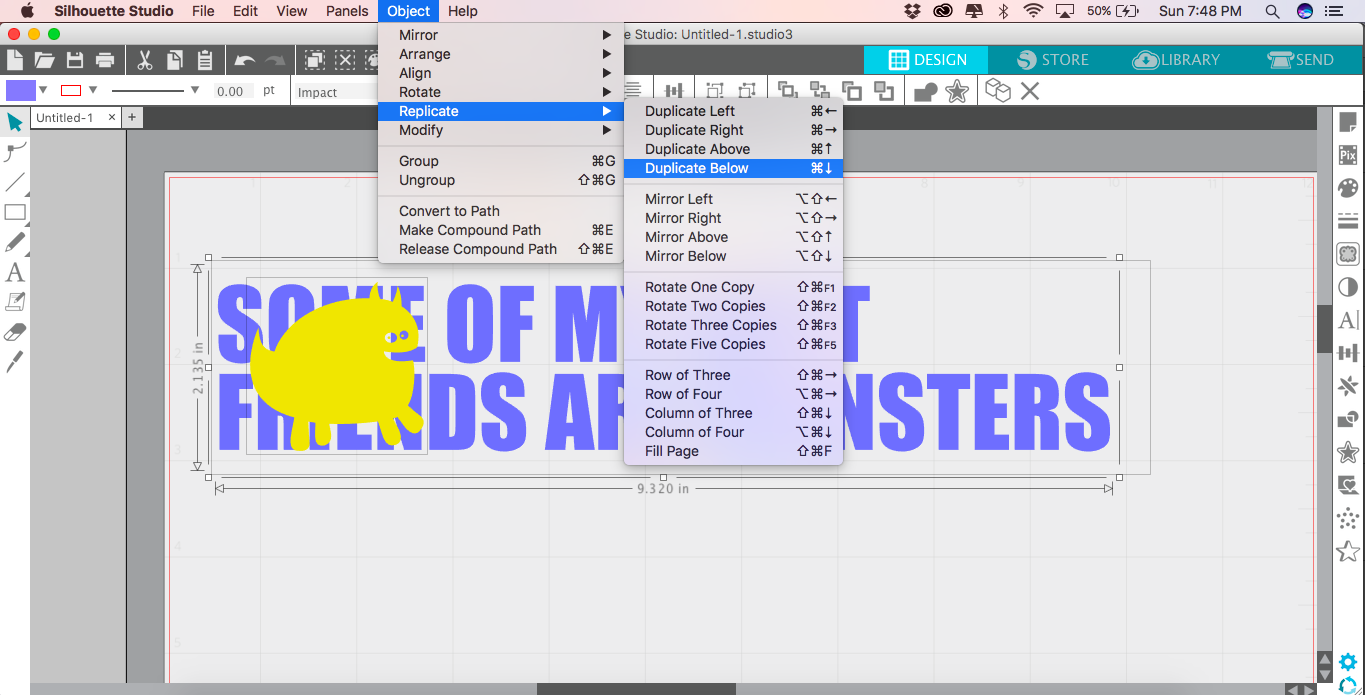
9- Select your text and image and make a copy by going to Object > Replicate > Duplicate below. You can also use the keyboard shortcut Command/Control-down arrow.
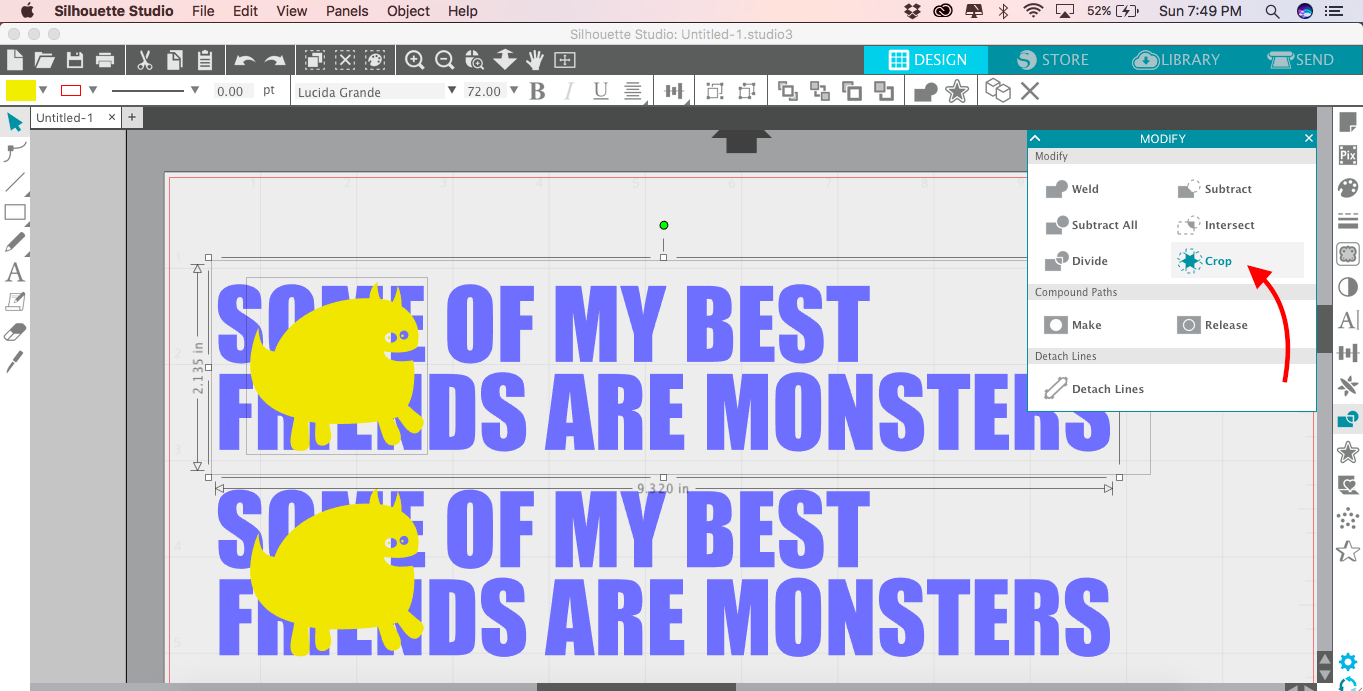
10- Click the first copy of your design and open the Modify panel. Click the Crop tool.
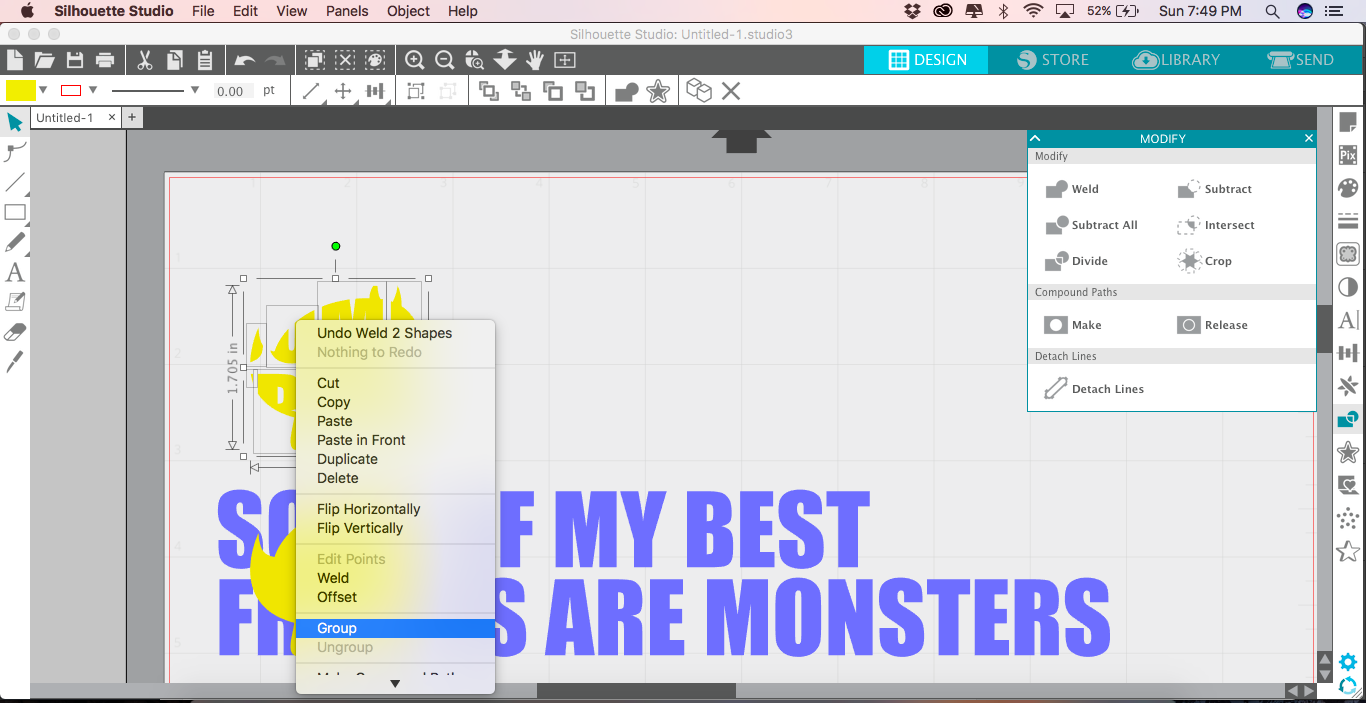
11 - Right-click the resulting cropped design and select Group from the context menu.
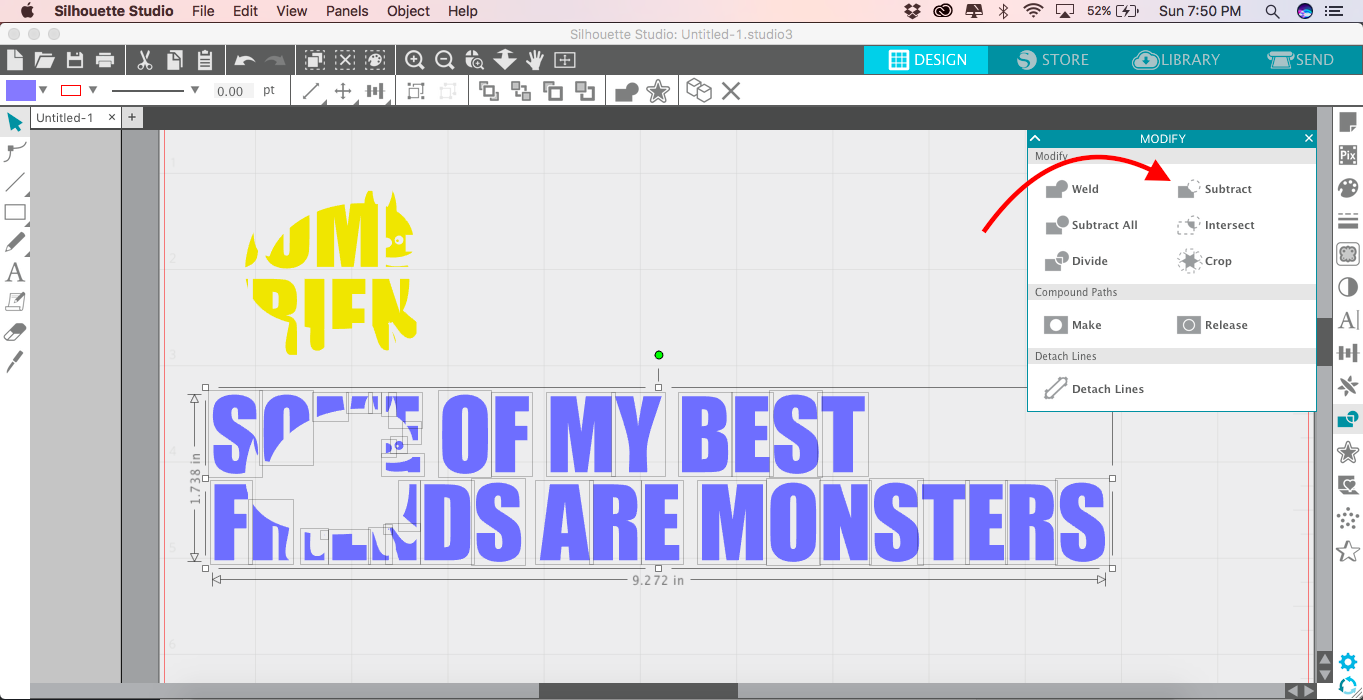
12- Click the second copy of your design and open the Modify panel. Click the Subtract tool.
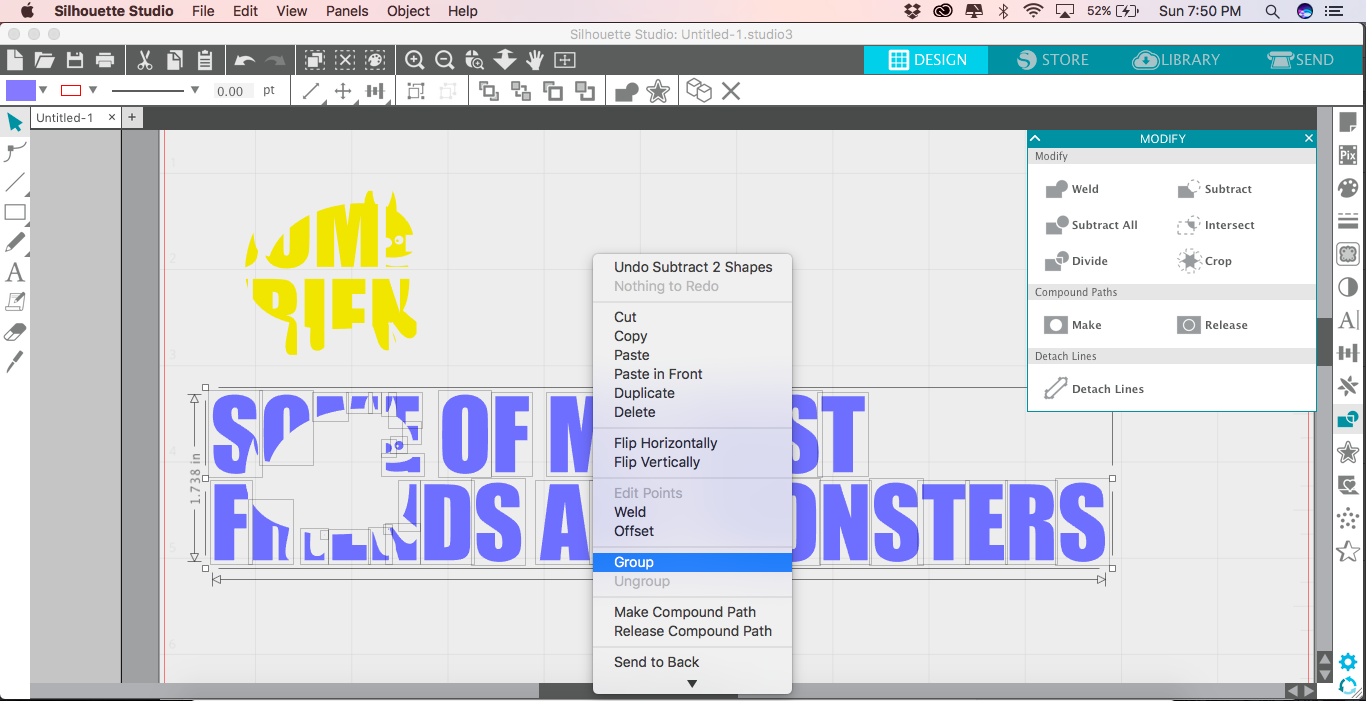
13- Right-click the resulting cropped design and select Group from the context menu.
14- Drag the cropped image into the subtracted space in your text. Zoom in to make sure it's lined up properly.
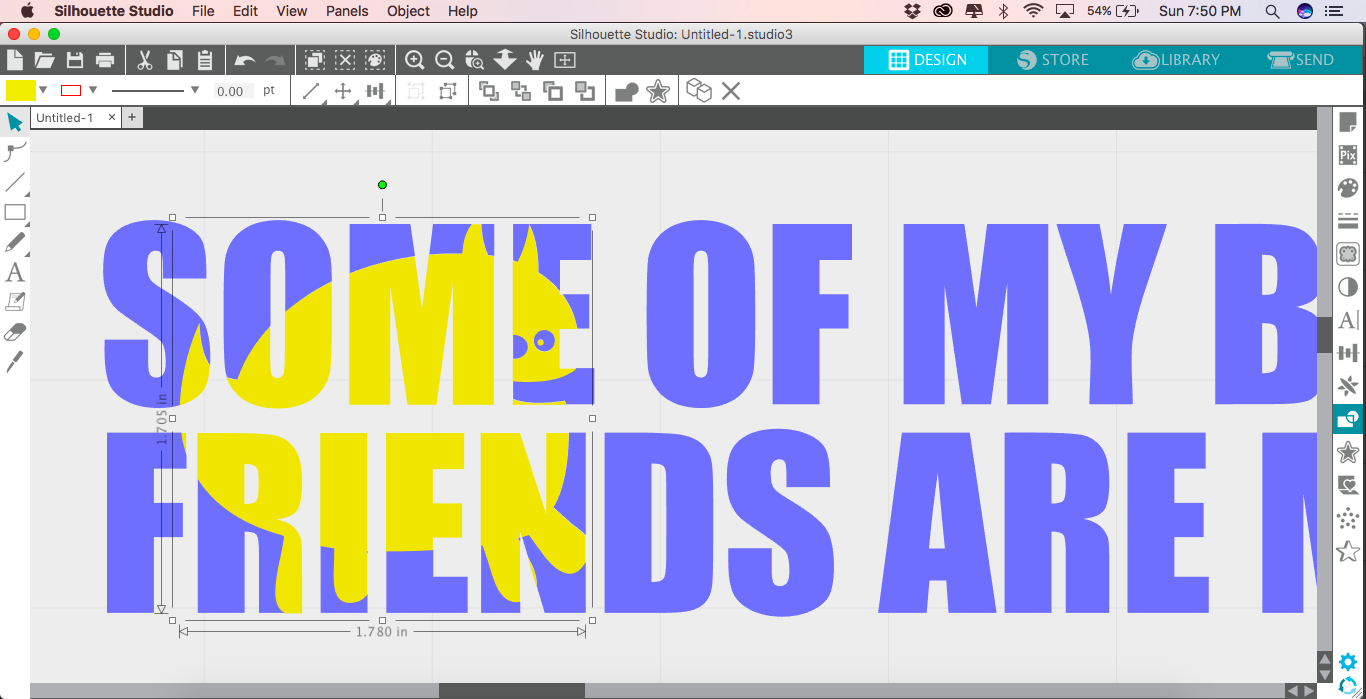
Now your design is ready to be cut.

Bonus Tip: When cutting a layered design, it also helps to add registration marks. Add a couple of squares in each corner of the design and include those marks in both vinyl colors. This will make it easier to line up your design accurately on your final project.
Related Tutorials
Silhouette Tutorials
How to Create a Distressed Design in Silhouette Studio
Silhouette Tutorials
How to Create Sublimation Designs in Silhouette Studio
Learn to create Sublimation Designs in Silhouette Studio in 6 easy steps!
Silhouette Tutorials
How to Create a Sheet of Stickers in Silhouette Studio
Discover how to create a sheet of stickers in Silhouette Studio step by step.
Silhouette Tutorials
How to Create a Split Monogram in Silhouette Studio
Silhouette Tutorials
How To Create Text to Path in Silhouette Studio
Discover how to use the Text to Path feature in Silhouette Studio with this easy to follow tutorial.
Cricut Tutorials
How to Thicken Text for Cricut Design Space using Silhouette Studio
In this tutorial learn how to use Silhouette Studio to create thicker text for Cricut Design Space.