
By Design Bundles
Silhouette Tutorials2 min
How to Create a Lithophane with Silhouette Alta
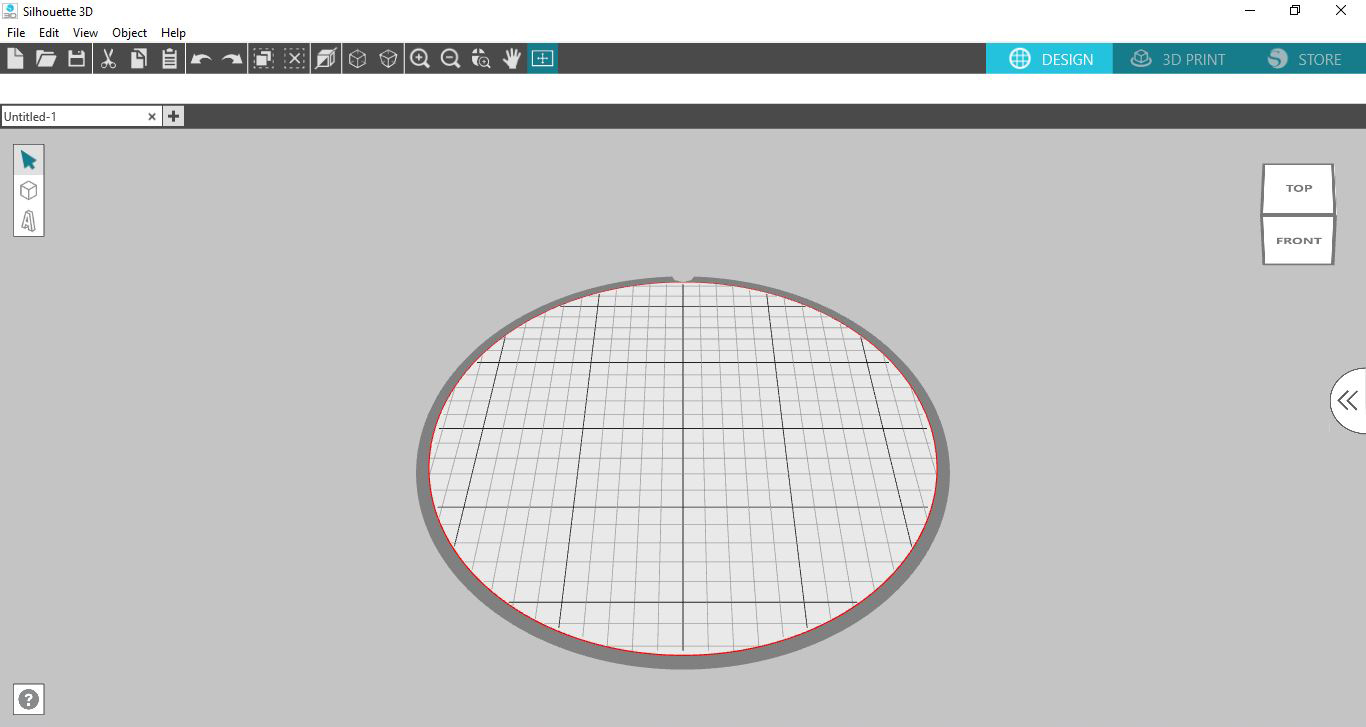
1- Open up Silhouette Alta software.
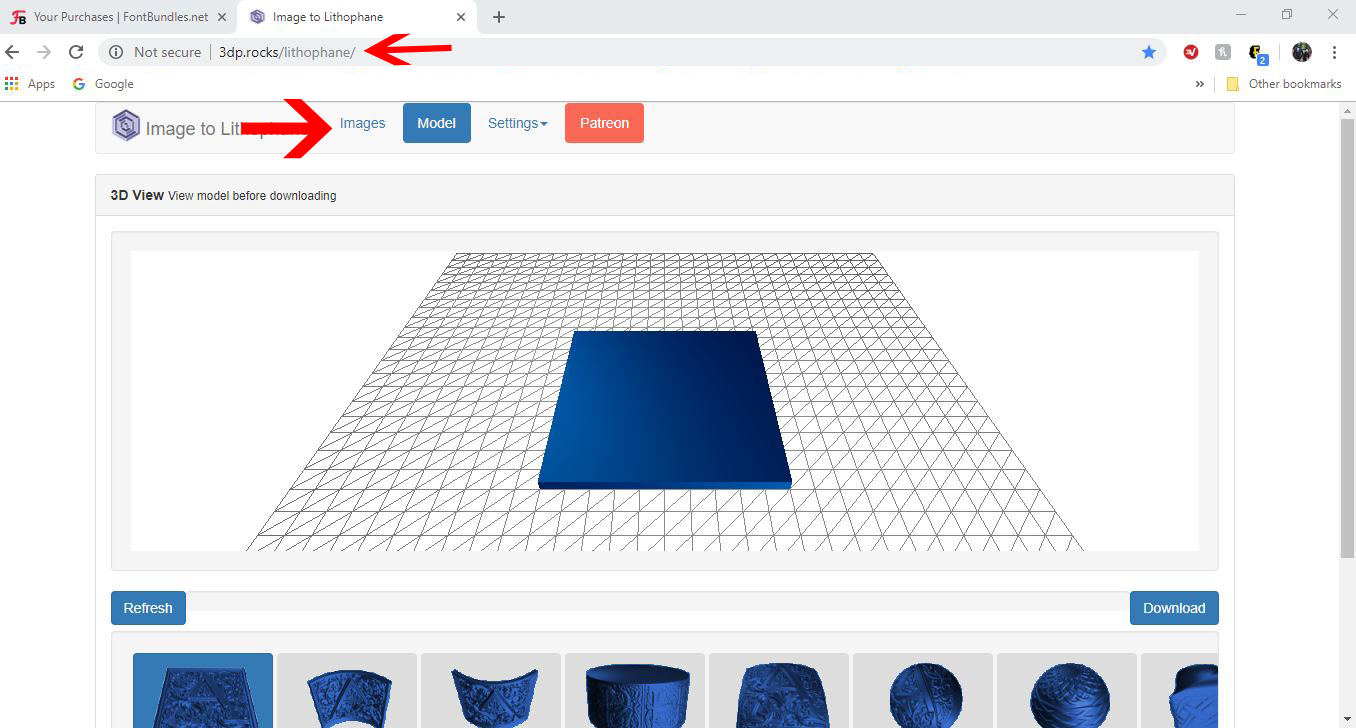
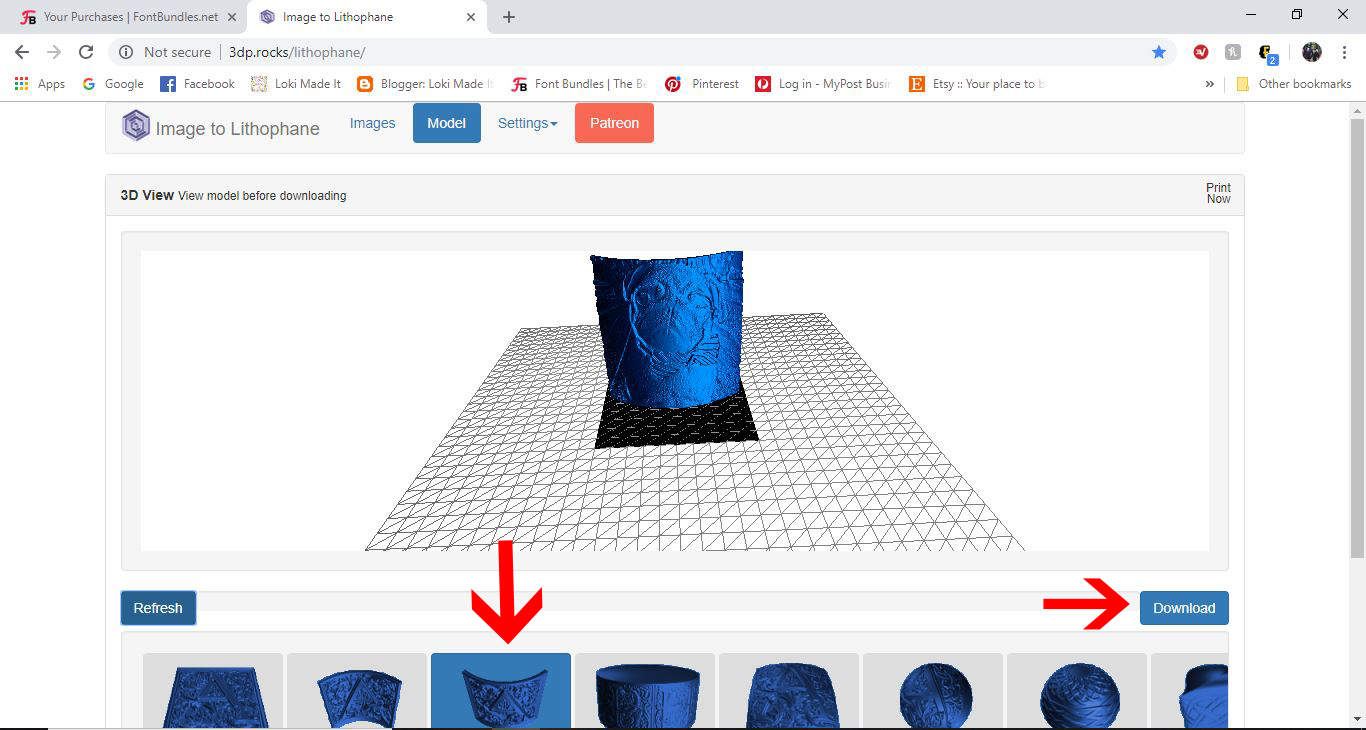
2- Go toa free image to lithophanesite. Click on images.
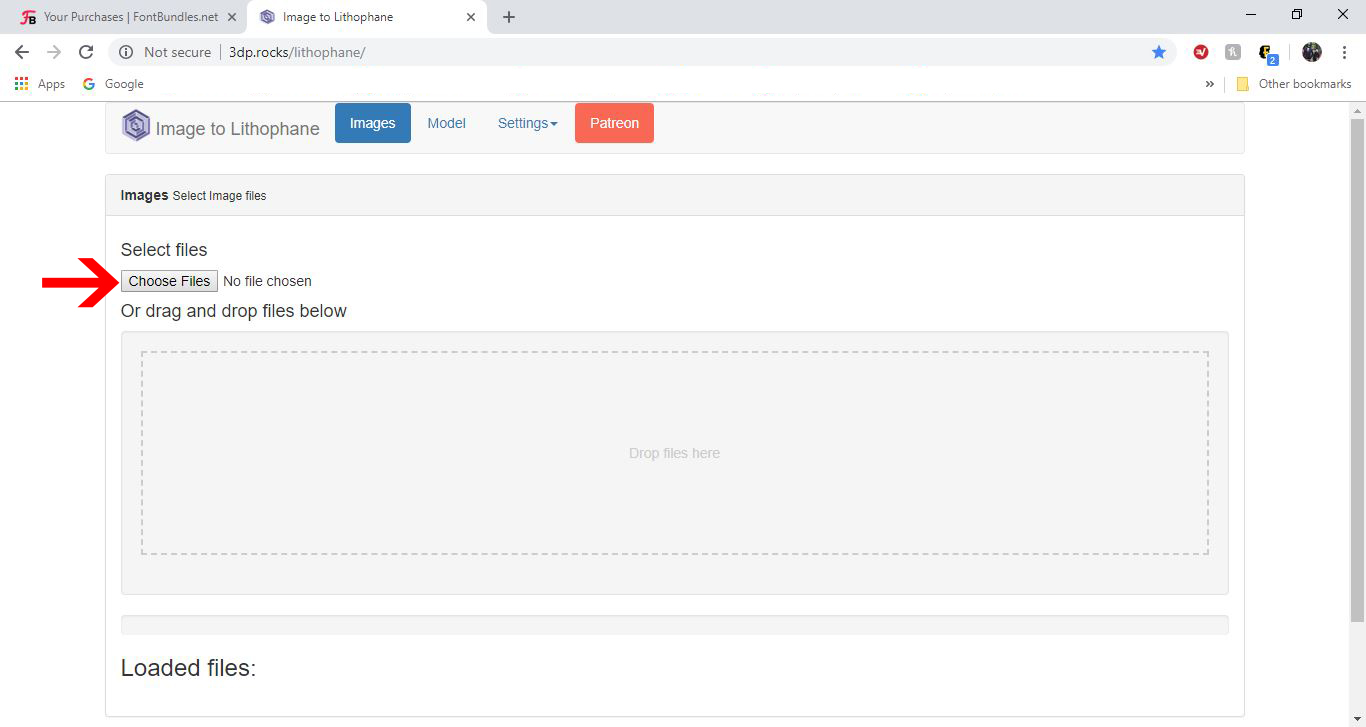
3- Click on choose file and upload your image. Try to get a good contrast image for best results.
4- Your image will load up as a lithophane.
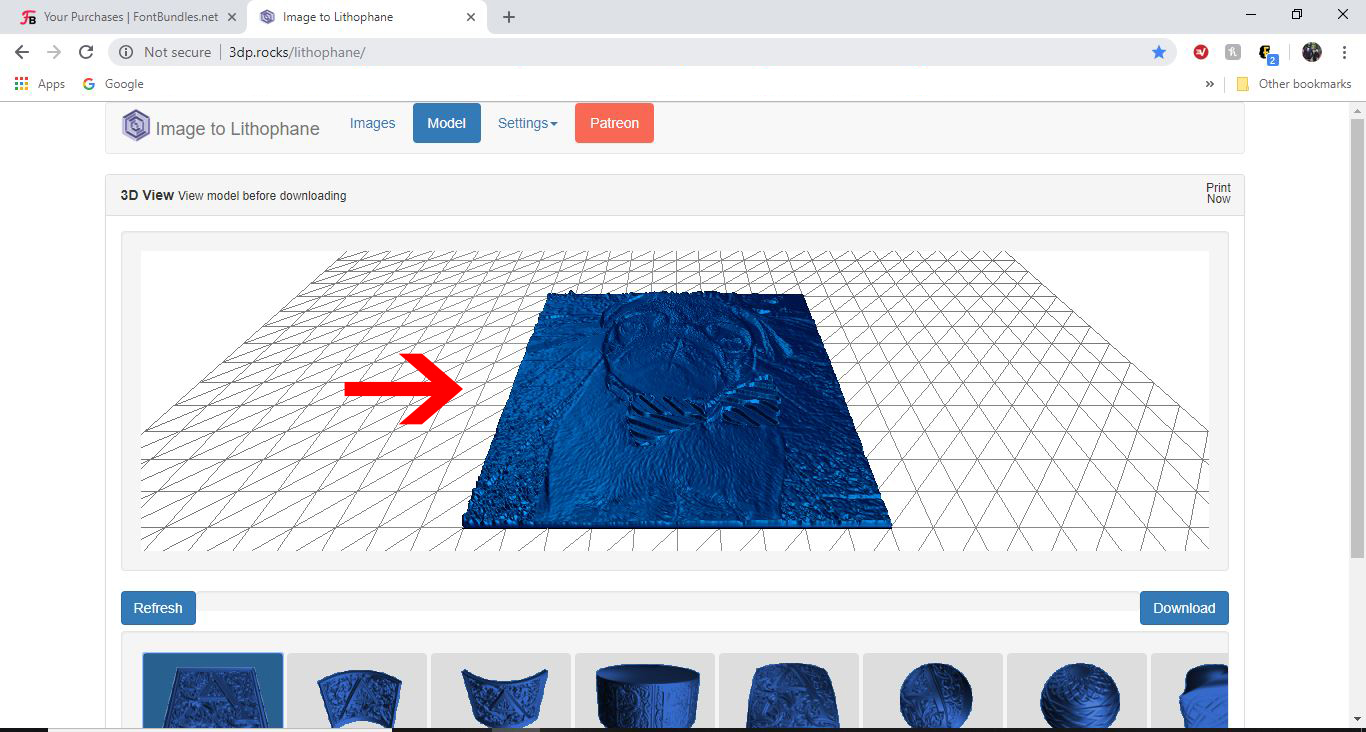
5- Depending on what you want to use your design for you can select different styles to create.
Once you are happy click on Download.
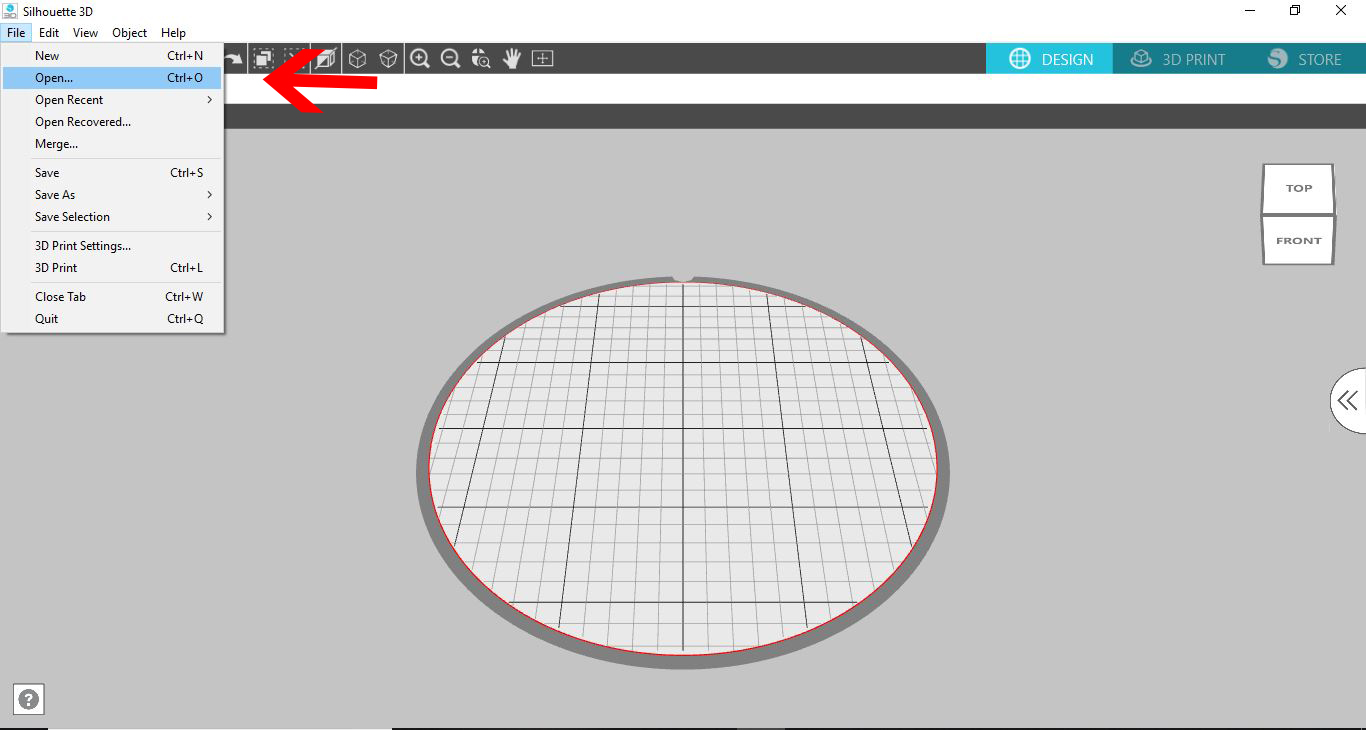
6- Go to File - Open.
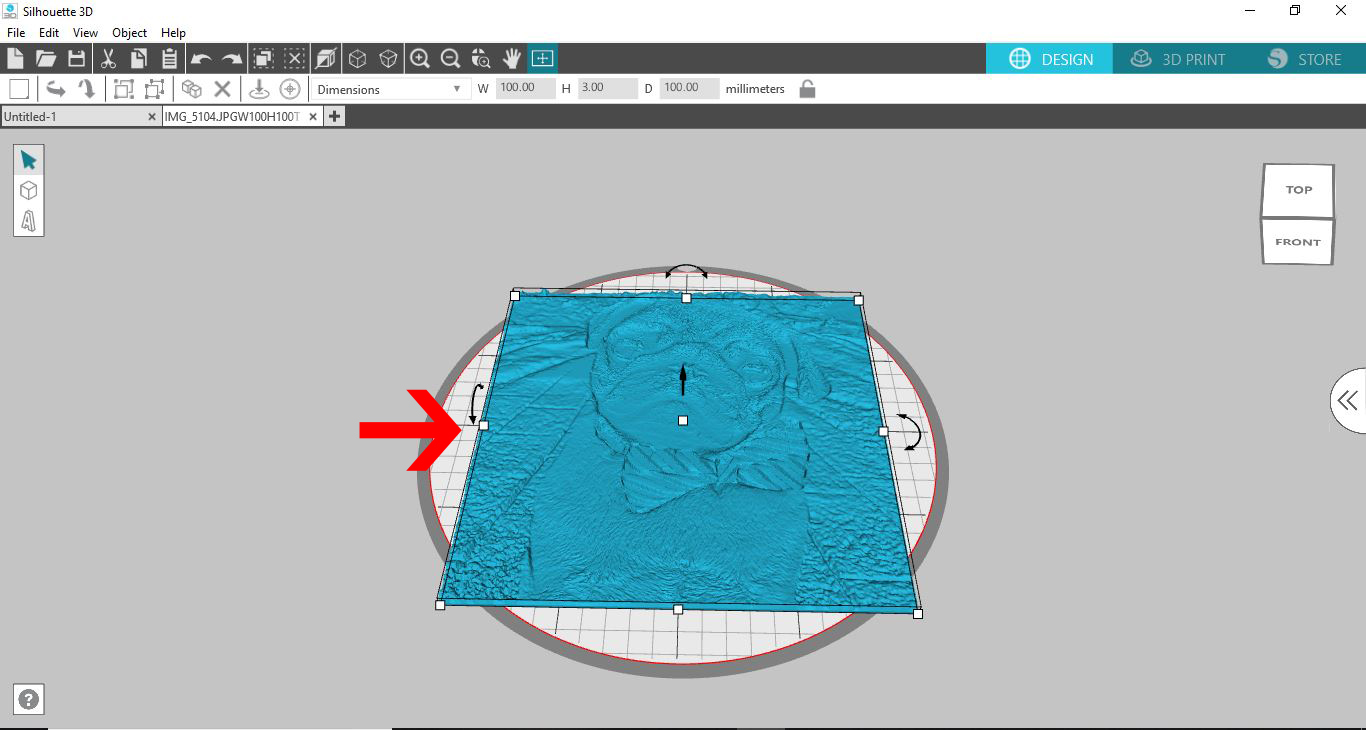
7- Your design will appear on your design area.
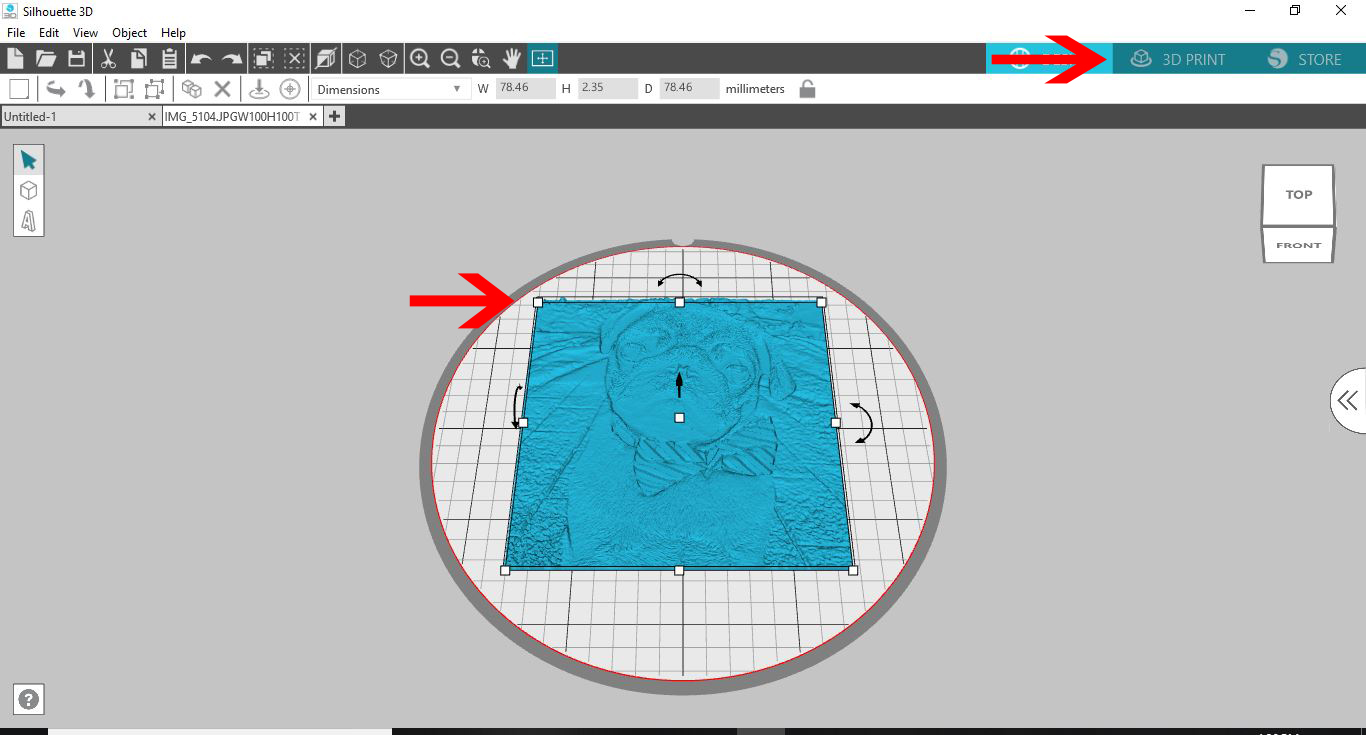
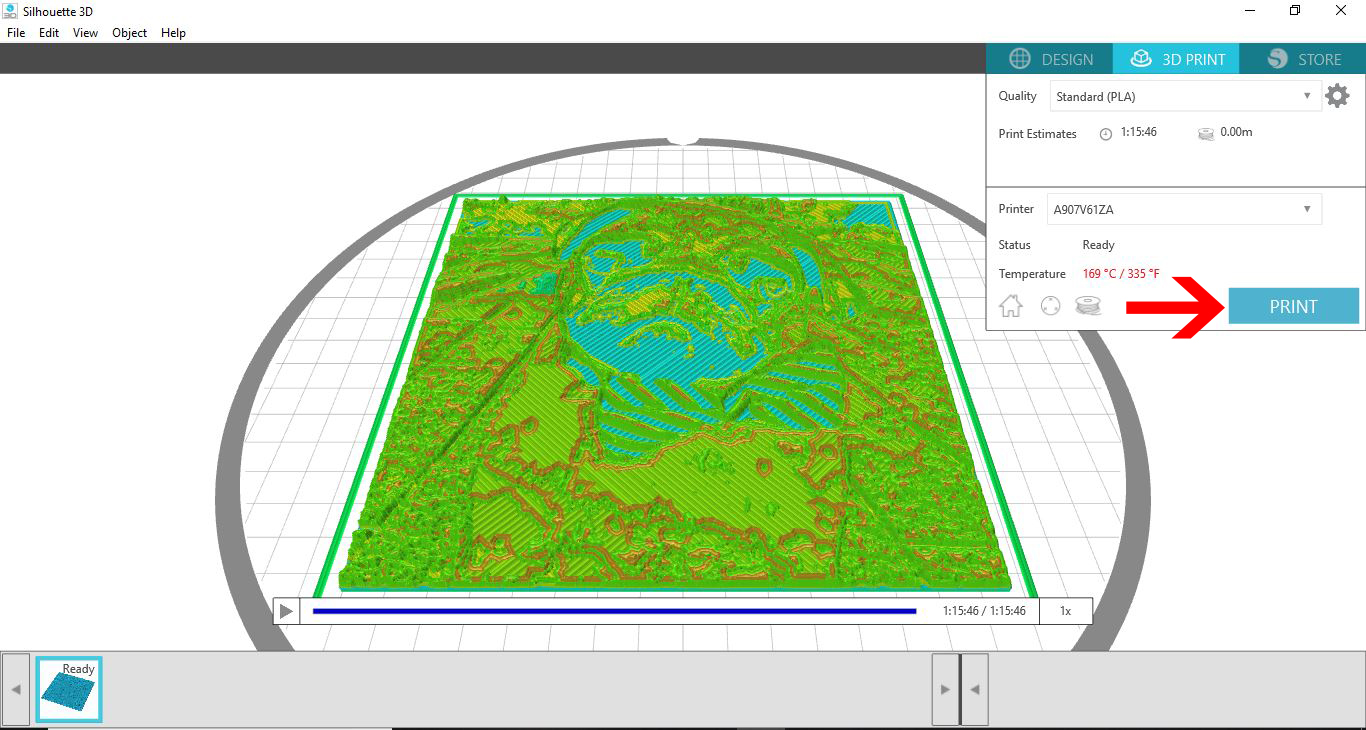
8- Resize to fit your plate. Do not adjust the thickness. this will need to stay as per the design. Click on 3D print.
9- Decide on your print quality (I recommend best for a lithophane) and then click on print.
Related Tutorials
Silhouette Tutorials
How to Create a Basic Cookie Cutter in Silhouette Alta 3D Printer
Silhouette Tutorials
How to Create a Basic Stencil in Silhouette Alta
Silhouette Tutorials
Using Silhouette Studio to Create Text for the Silhouette Alta 3D Printer Software
Silhouette Tutorials
How to Create a Basic Pencil Holder in Silhouette Alta
Silhouette Tutorials
How to Create a Basic Stencil Box in Silhouette Alta
Silhouette Tutorials