
By Design Bundles
Artistic and Frame text in Affinity designer
In Affinity Designer, the Artistic and Frame text tools can be found grouped together on the toolbar. The Artistic text tool is more for single or creative phrases that require impact. The Text Frame tool works best for longer phrases of text such as paragraphs. In this tutorial we will cover how to use the Artistic and Frame text tools in Affinity Designer.

We will be using a quirky script font for the Artistic Text and this modern display font for the Frame Text.
Let’s begin by opening Affinity Designer and creating a new document.
The Artistic Text Tool
When using the Artistic Text tool, the size of the font adjusts to the size of the bounding box. It doesn’t constrain the text as much as the Frame Text tool does. So you have more creative freedom with the Artistic Text tool.
Step 1 - Locate the Artistic Text Tool
Once you have created a new document in Affinity Designer, go to the left side toolbar. Depending on the last used text tool, you will either see a capital letter A, or a box with a letter T in it. To select the Artistic Text Tool, if not selected already, click on the little white arrow to open the menu. Then select the tool.
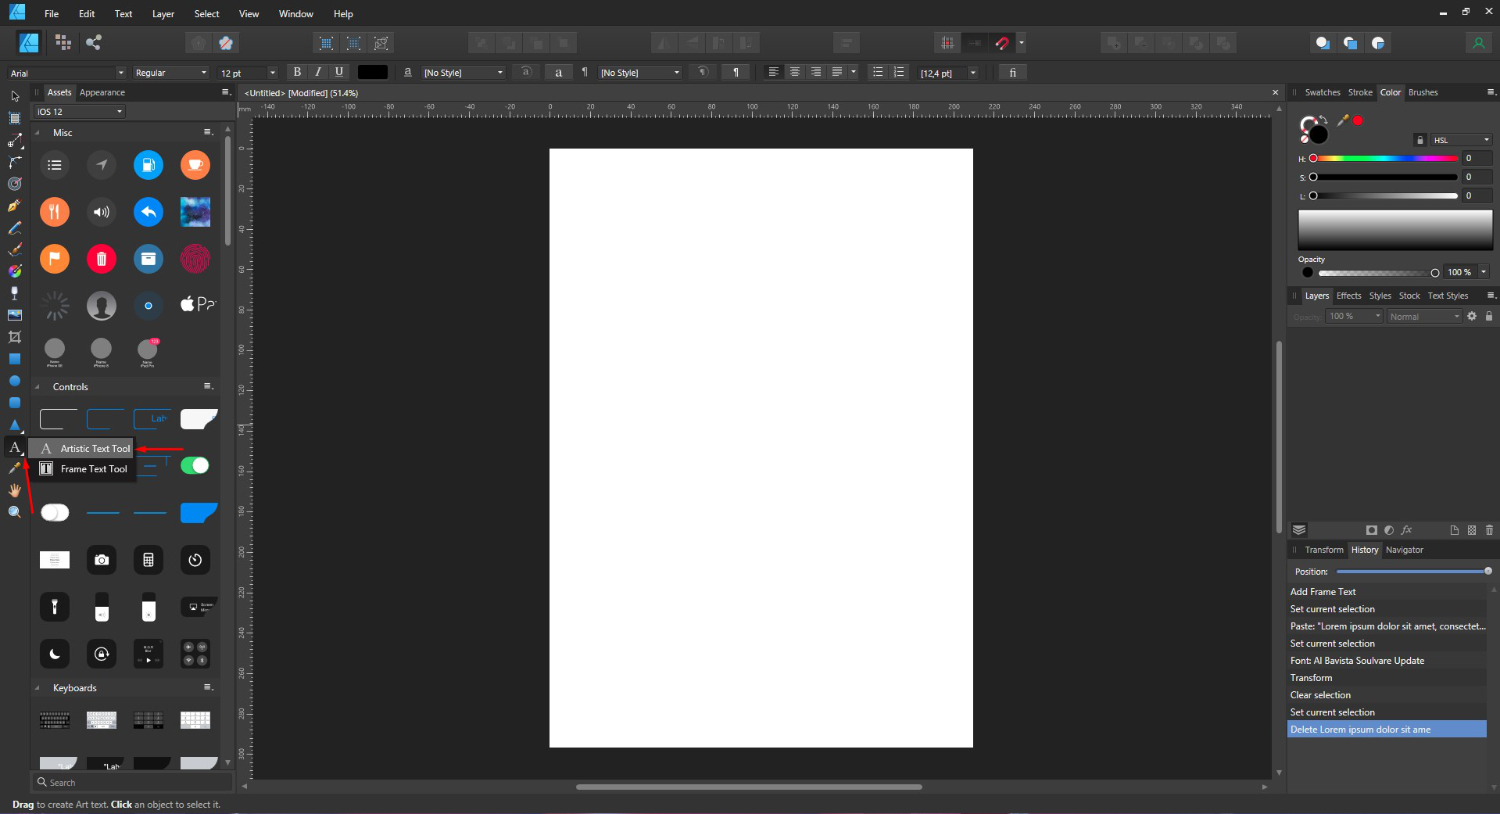
Step 2 - Add text then change the font
Now, click + drag out the size of the text. You will see a letter A appear, this will show you the size of your text. When you are happy, release your mouse.
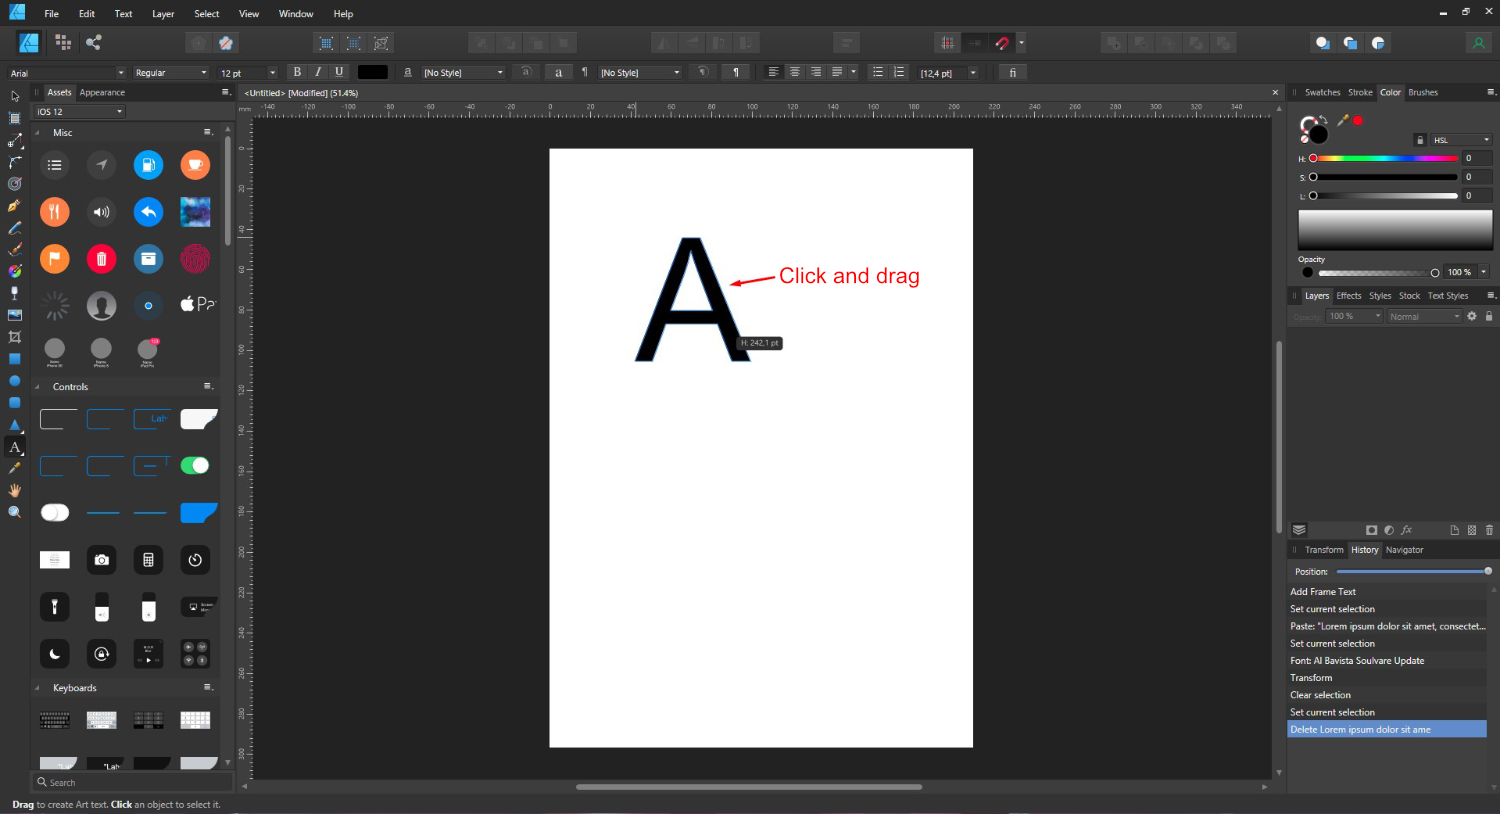
When you release your mouse button, a bounding box will take the place of the letter A. Now you can start typing. The fonts on your system can be found under the Font Family menu top left of the screen. You can also type in the font name to quickly access it.
We centered our text and applied the font. You may find that the size of your text changes according to the type of font used. To adjust the size, click and drag the sizing handles in or out.
When the text is in edit mode, you will see a long line. You can access the edit mode at any point when needed while this is still a text object. The edit mode will allow you to change the font and the text. If you click away from edit mode, just double click on the text to go back.

When adding text, Affinity automatically adds a text layer. In other cases you would normally have to add a New Pixel layer before you could begin your project.
Step 3 - Edit font style and color
Depending on your font, you may have Bold and Italics options available. In our case, we only have the Regular font. If your font does have Bold and Italics, you will see the Bold/Italics buttons show next to the font size. We are still able to Underline the font.

Next, change the color of your font. You can do this one of two ways. First, click on the little rectangle next to the Underline button at the top toolbar. Then adjust the color. If you find that nothing is happening, be sure that the S (Saturation) slider is at 100.
The second way is to click on the Fill option under the Color panel on the right side. Here you can also adjust the Stroke color, shown as a white circle with a line through it.

You can further edit the character spacing to change the look of your text.
The Frame Text Tool
Unlike the Artistic Text Tool, the Frame Text Tool uses a frame to constrain the text. As you change the size of the text, the flow of the text changes with it. We will better explain with our examples below.
Step 1 - Use the Frame Text Tool
As we did before, go to the left side toolbar and click on the little white arrow for the text tools. Select the Frame Text Tool then click + drag out a bounding box. The box can be resized once we have added our text.

For this example we are using a paragraph with the Bavista Soulvare font. We copied and pasted the text into the Text Frame box. Ariel is automatically selected as the font.

Step 2 - Adjust text size and font
You can change the font by selecting all of the text while in edit mode. Alternatively, you can click away to exit edit mode then click once to select the text object. Next, change the font using the Font Family top left. If at any time you want to edit the text, double click to enter edit mode.
Here we changed the font and size to 30pt. As you can see the text extends outside the bounding box and a little red eye appears on the right side. The eye indicates that the text is outside the designated area.

To fix this we can either decrease the size of the text or adjust the bounding box. We chose to change the size of the bounding box. Click + drag on the bottom middle resizing handle and drag down. This will only change the size of the bounding box and not the text.
If you want to resize the bounding box and text together, click + drag in or out on the second “floating” corner circle.

If you click + drag one of the sizing handles on the side, the flow of the text changes. We made a duplicate and placed it beneath the original. This was just to show you how the Text Frame Tool changes the flow of text when adjusted.

Step 3 - Change text stroke and fill
Change the text color Fill in the same way as you did with the Artistic Text Tool. Remember, if you don’t see the color change, move the Saturation slider all the way to the right. To change the Stroke color, click the outline circle that sits behind the Fill circle. This will bring it to the front and you can change the color from there.

You can also adjust the stroke width under the Stroke panel.
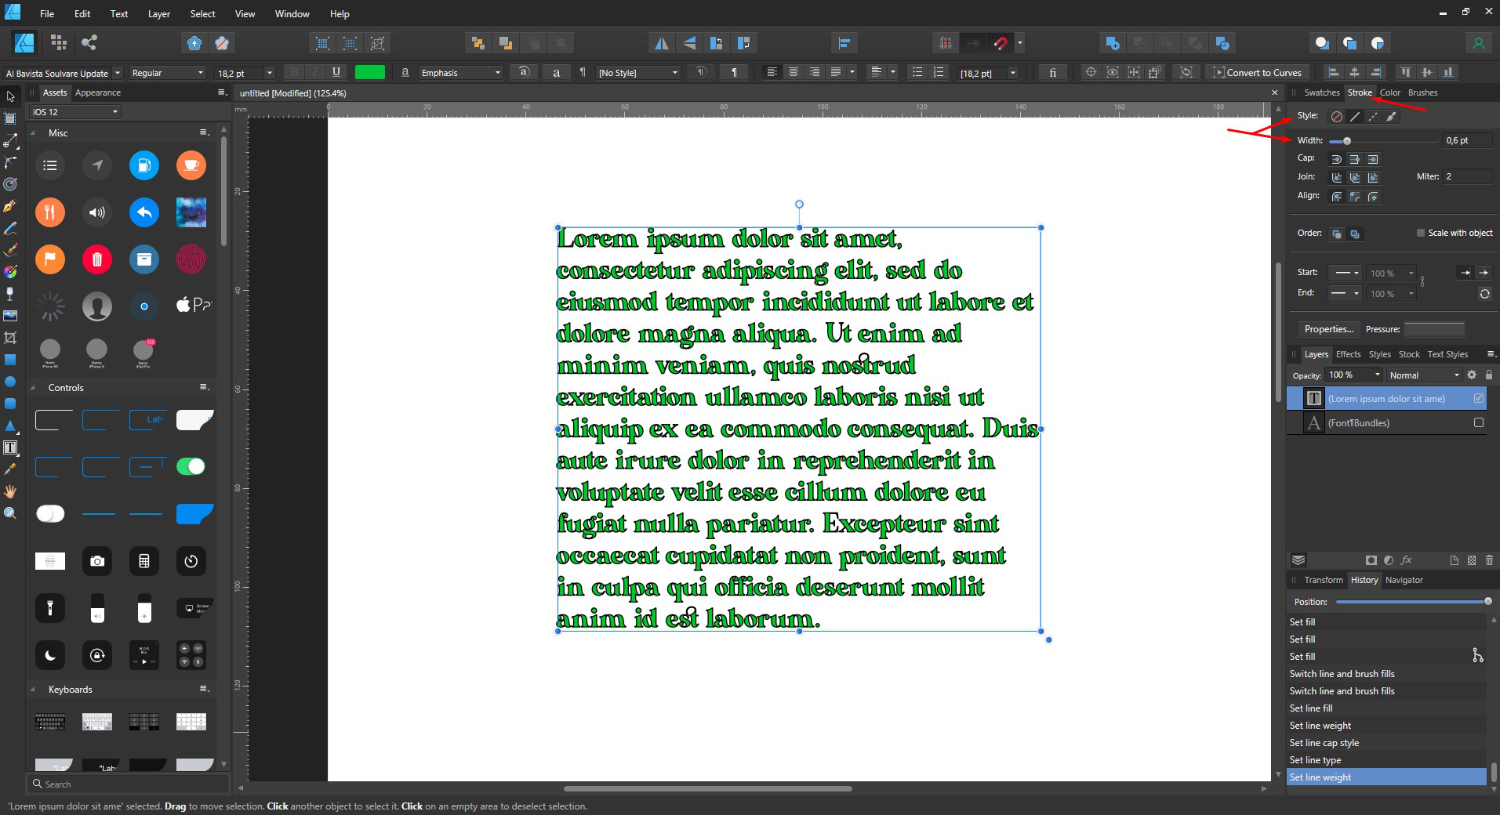
If you want to further edit your text, you could add a Text Style. We have a more detailed tutorial on using Text Styles in Affinity Designer to get you started.
When you are done with your text objects, you can add them to your projects. We added our text to a calligraphy mockup.

We hope you enjoyed this tutorial and found the information useful. Be sure to browse our other tutorials for fun and inspiring ways to create your projects.