
By Nadine Spires
How to Blur the Background in Affinity Photo
You would blur the background in Affinity Photo when bringing attention to the main focus. Adding a blur also removes distractions such as buildings and people. A blur can be subtle or much stronger depending on the photo and the required result. While a blurred background is usually done in camera, you can achieve a similar result with a few steps in Affinity Photo. In this tutorial we will show you how to blur a background using the selection tool.
To create a blurred background, we will be using a photo of a woman shopping. You are welcome to look through our commercial use photos for another photo if needed.
Step 1 - Create a Background Selection
Once Affinity Photo has been opened and a photo imported, we need to make a selection. First, create a duplicate layer of the photo by right clicking the layer > Duplicate. It's generally good practice to work on a copy and keep the original layer intact. This is just in case you want to go back and start over.
For our photo, we want to blur the background a little more. On the left side panel click on the Selection Brush tool. At the top toolbar, make sure that Add is selected and that Snap to Edges has been ticked. As you create the selection, it will snap to contrasting edges, making the selection much easier.
Adjust the size of your brush using the bracket keys [ and ].

Carry on to add the selection so that the background is completely selected. If you want to remove the selection from an area, click on the Subtract option. Then click + drag over an area to Subtract.

Don't worry too much about making an accurate selection as we will be refining it further in the next step.
Step 2 - Refine the Background Selection
Affinity Photo has a great tool to help create a more refined selection. Once you have created your selection, click the Refine option at the top toolbar.

The Refine panel will open and the woman will be highlighted in red. Zoom in on the photo, then click + drag the brush over areas you want refined. In this case, some of her hair was not initially selected, so we painted over those areas. Affinity Photo is fairly intuitive when picking up fine details in selections, but you can resize your brush if needed. We left the settings as is with the Adjustment Brush selected as Matte
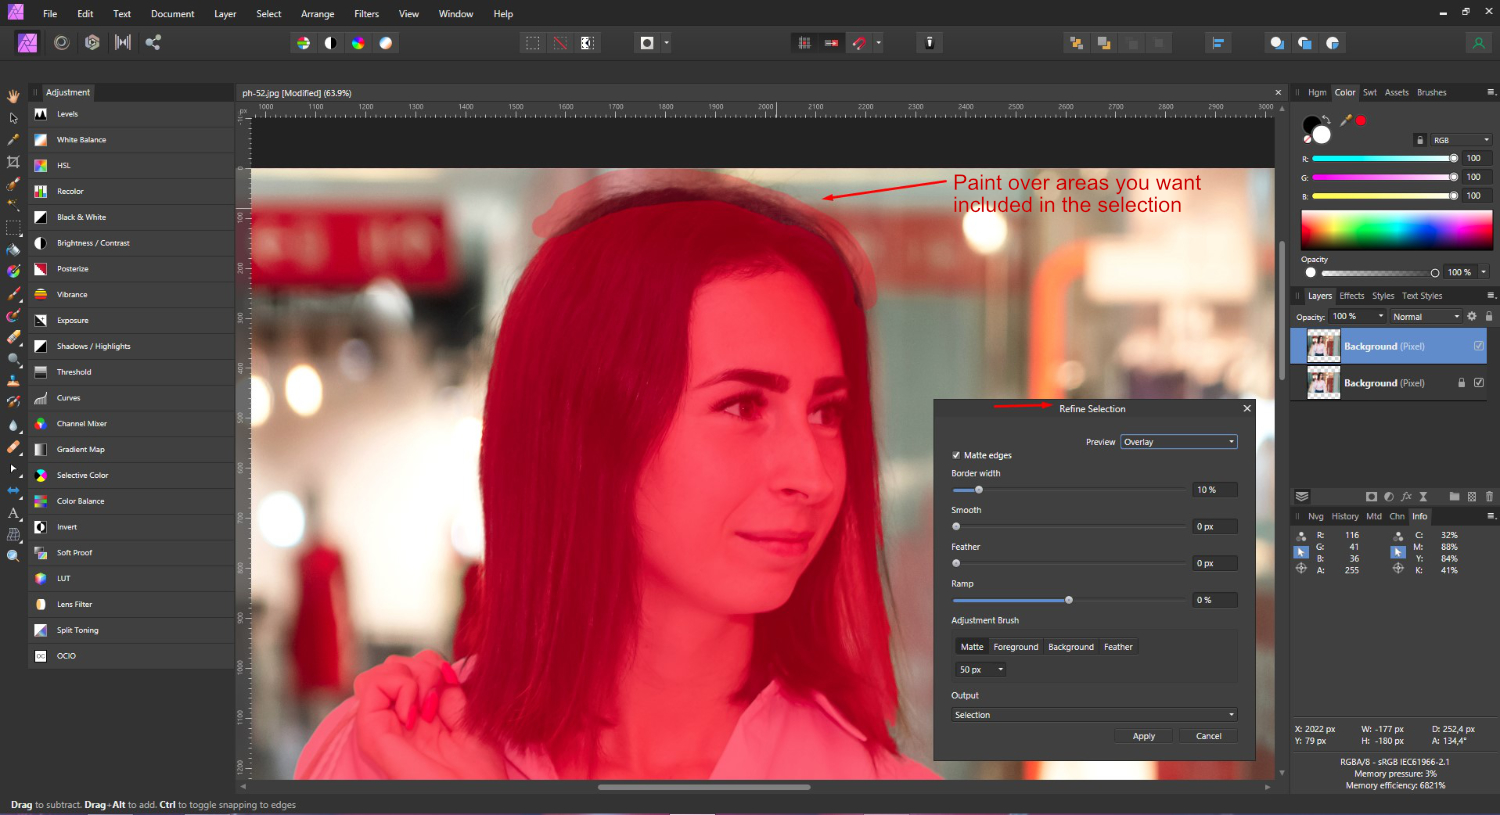
Carry on to paint over areas you want selected. If you would like to remove part of the selection, change the Adjustment Brush from Matte to Foreground. We changed to Foreground to remove the selection from her waist area as shown in the image below.

Now, don't worry about how strange the selection looks. Click back on Matte and very carefully paint back over the area you want kept in the selection. You can use the image below as reference.

Here is the result of removing and adding back to the selection.

Under the Output option, click on the drop down menu and choose Selection. This will add the selection to the layer. Now click Apply.

Step 3 - Add Gaussian Blur to the Background
Now that we have our selection, let us add the Gaussian Blur to the background in Affinity Photo. With the top Background layer still selected go to Layer > New Live Filter Layer > Blur > Gaussian Blur.
We are using a live filter layer instead of the standard Gaussian Blur filter so that we can edit it when needed. A live filter layer is non-destructive, giving you more flexibility when editing.

The Gaussian Blur panel will appear and attach a Mask layer to the Background layer. You may or may not see the mask show up in the thumbnail. Affinity Photo can be a little finicky here, but the mask selection is there.
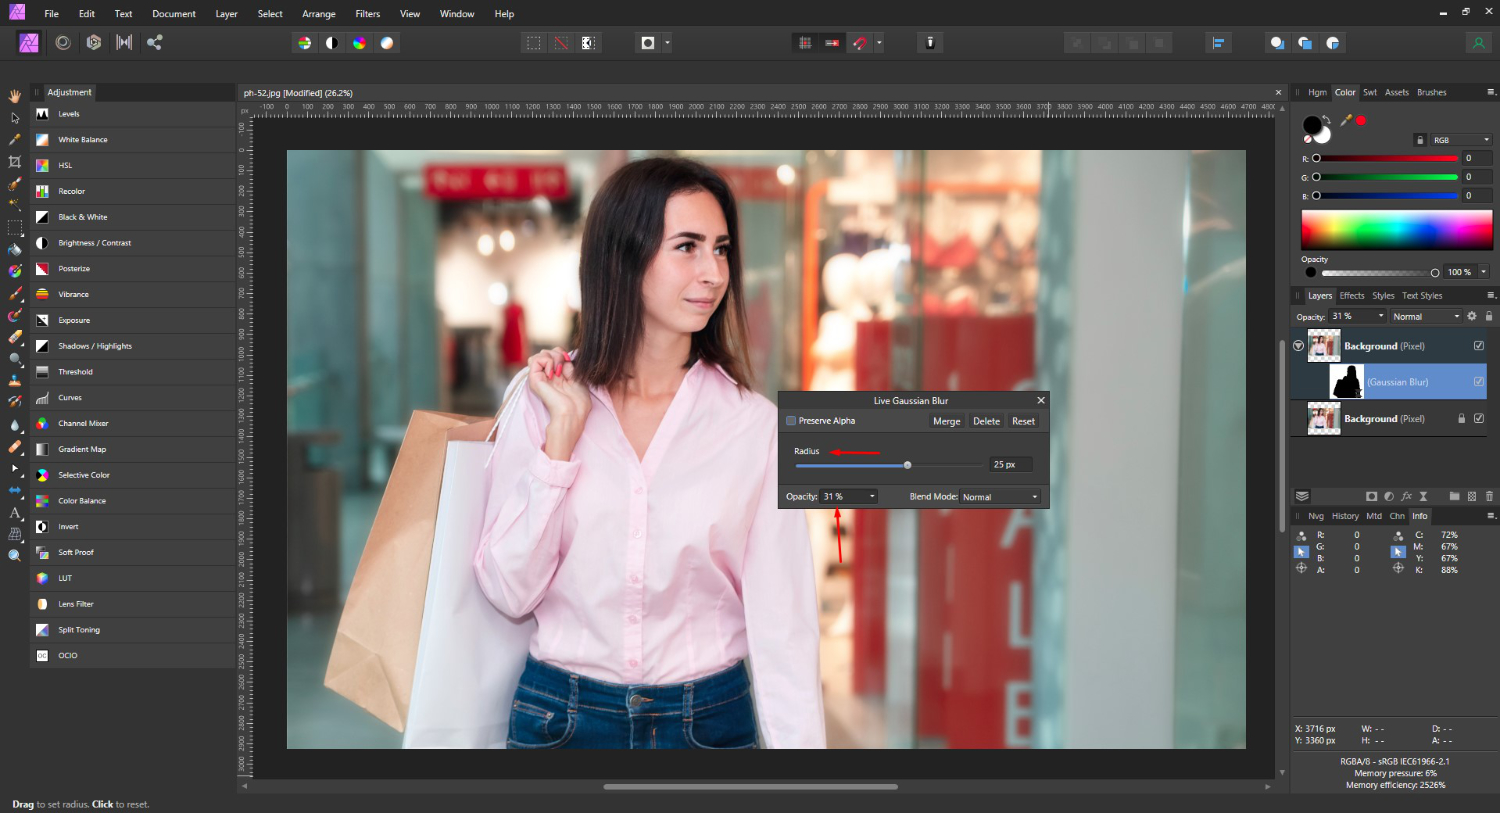
Adjust the blur as needed, we added 15px blur to our background. If you find that blurring causes the edges to fade, then make sure that Preserve Alpha is ticked.

You can play around with the Blend Mode to get some really strange results as well as the Opacity. Click on the X top right of the Live Gaussian Blur panel to exit. To deselect go to Select > Deselect.
If you want to edit the Gaussian Blur, double click on the mask to open the options. The blur in our photo caused a halo that was distracting. To counter this, we double clicked on the mask to open the options, then reduced the Opacity. This also allowed us to increase the Blur a bit more.
In the image below are comparisons of the original, a subtle blur and a stronger blur.
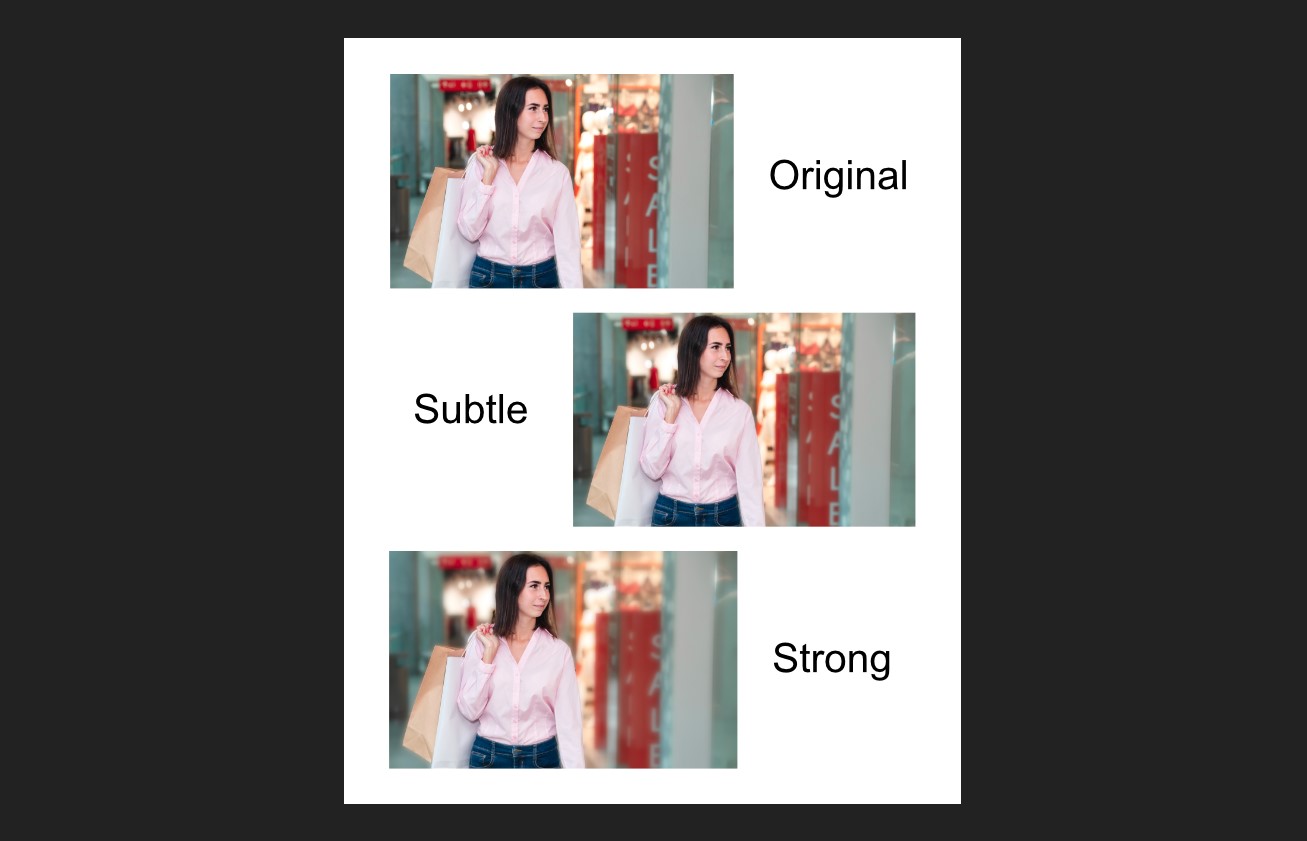
When you add blur to a background in Affinity Photo, it will differ for each photo. Some photos work best with a slight blur while others look great with an intense blur effect. So experiment with the settings to best find what suits your project.