By Design Bundles
Photoshop Tutorials8 min
How to Blur Background in Photoshop
For this tutorial, we will use a sunflower field photo to highlight by blurring the background.
In Photoshop, open the image you chose to work with.
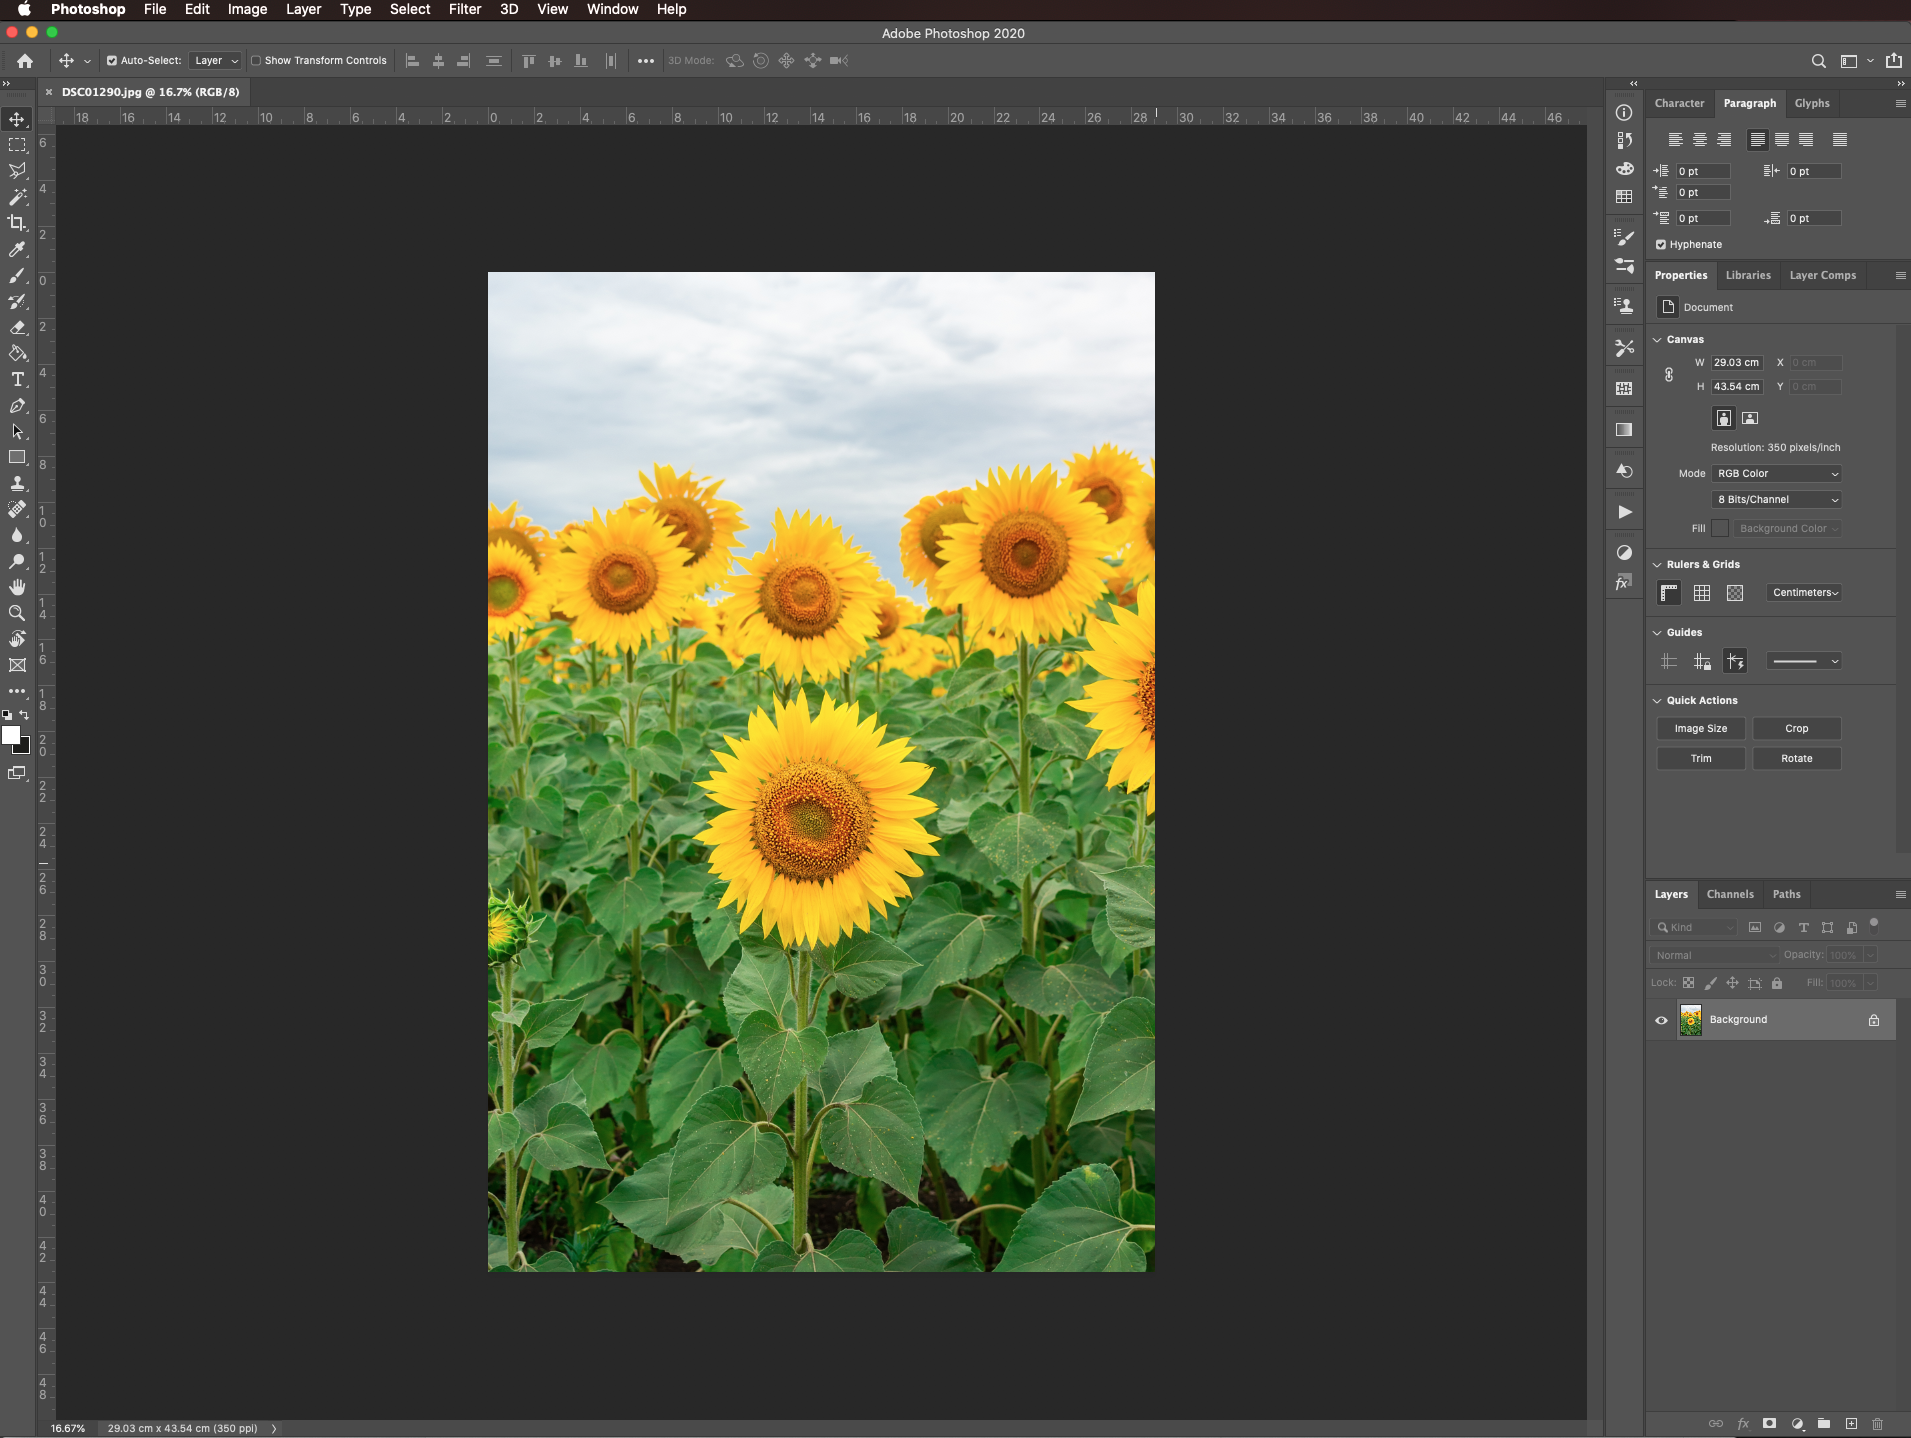
Go to Select > Select and Mask (option/alt + command/control + R).
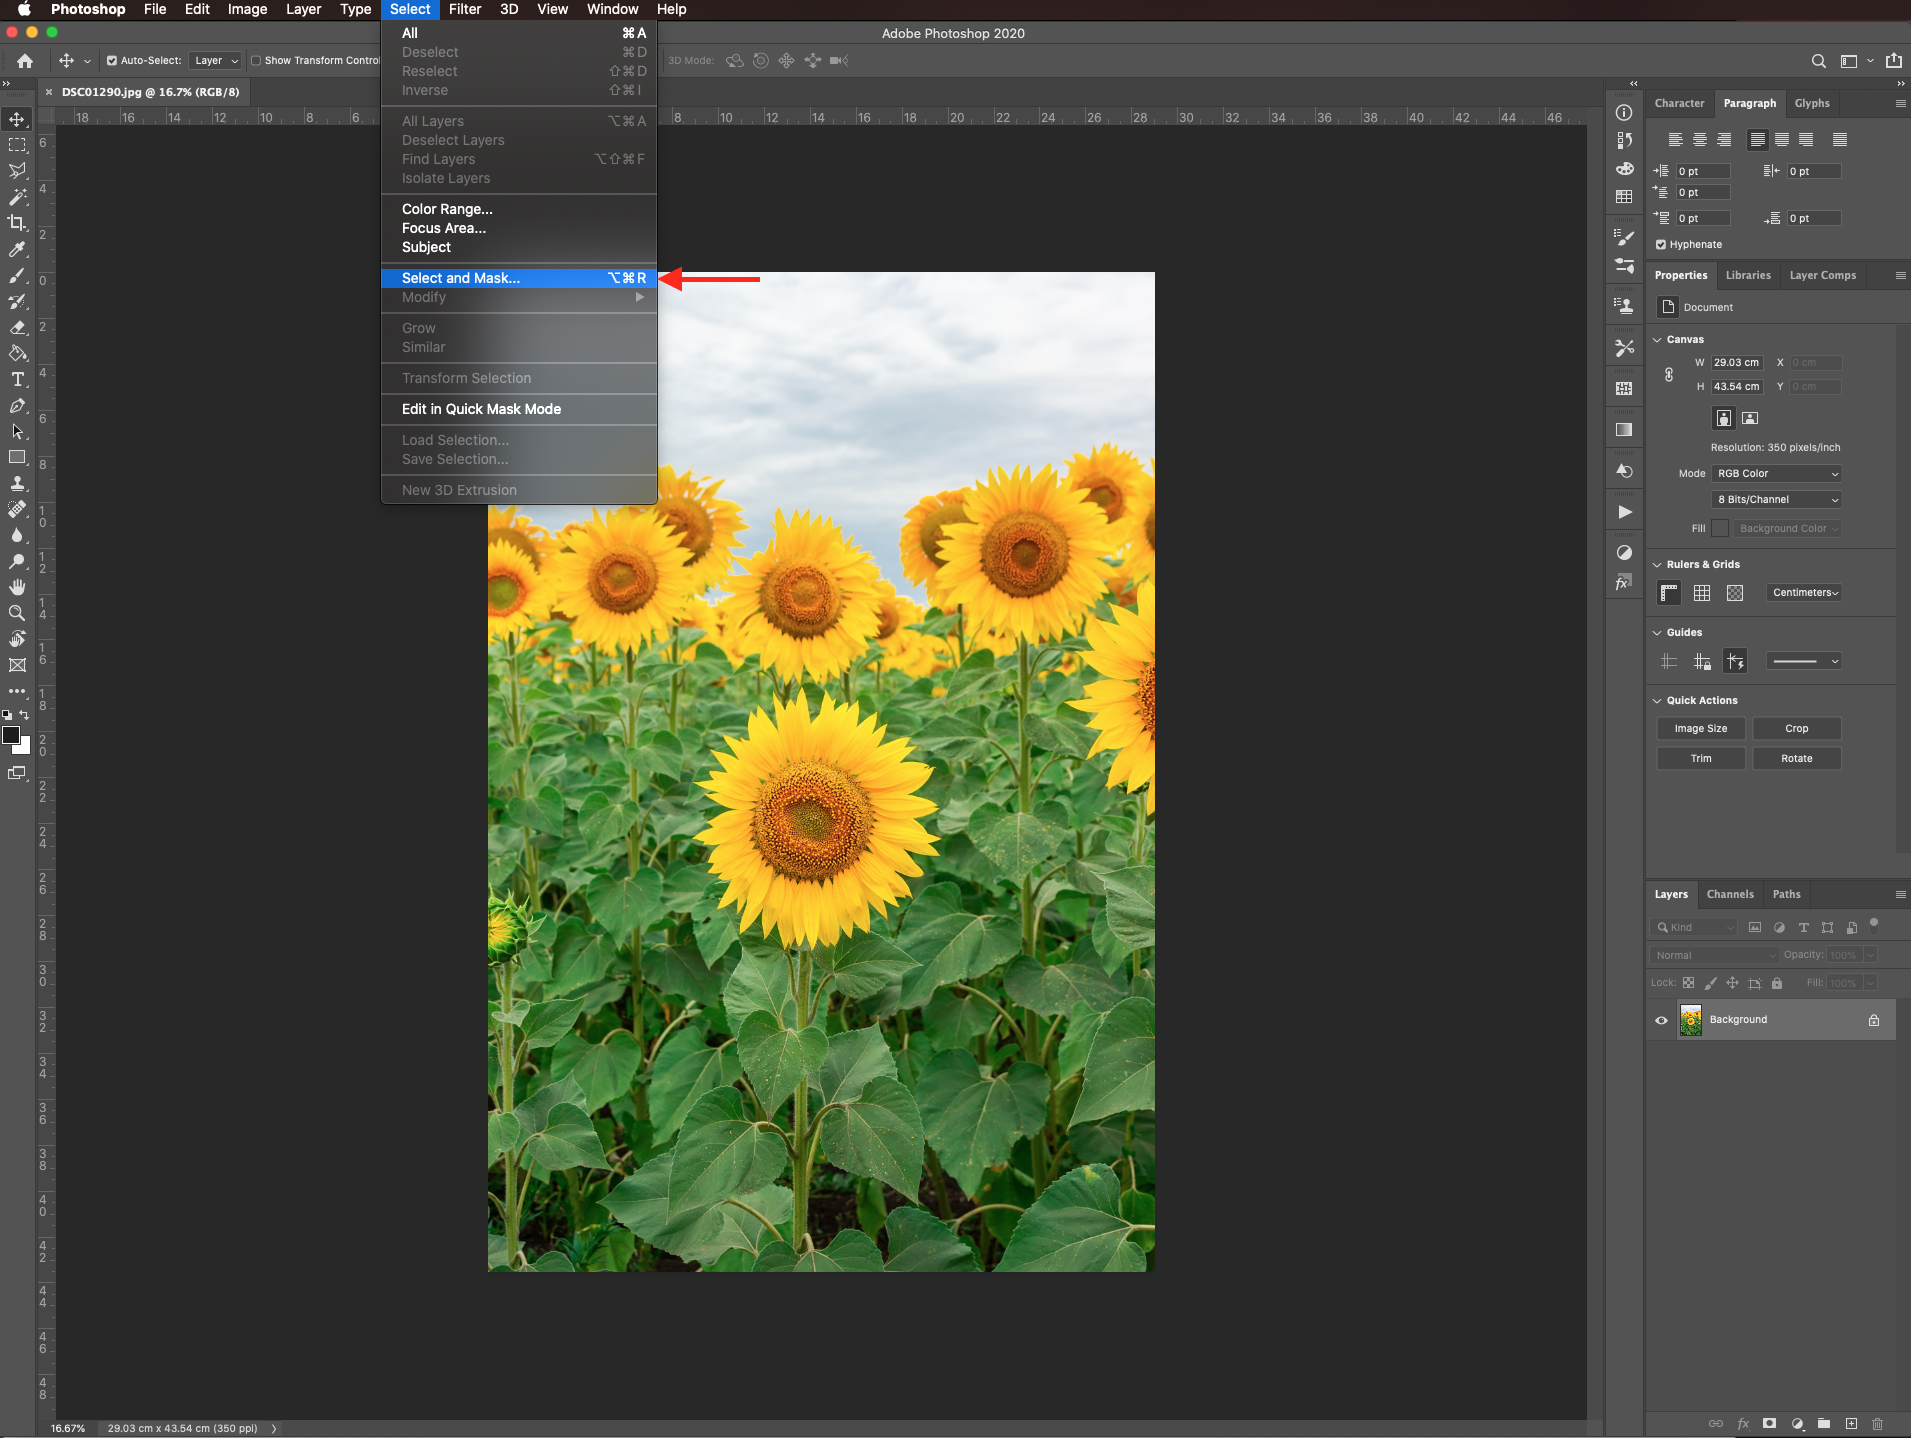
To see how to create and refine the selection with the mask check our tutorial on how to smooth the mask edges.
Check the decontaminate colors box and select output to new layer with layer mask before clicking OK.
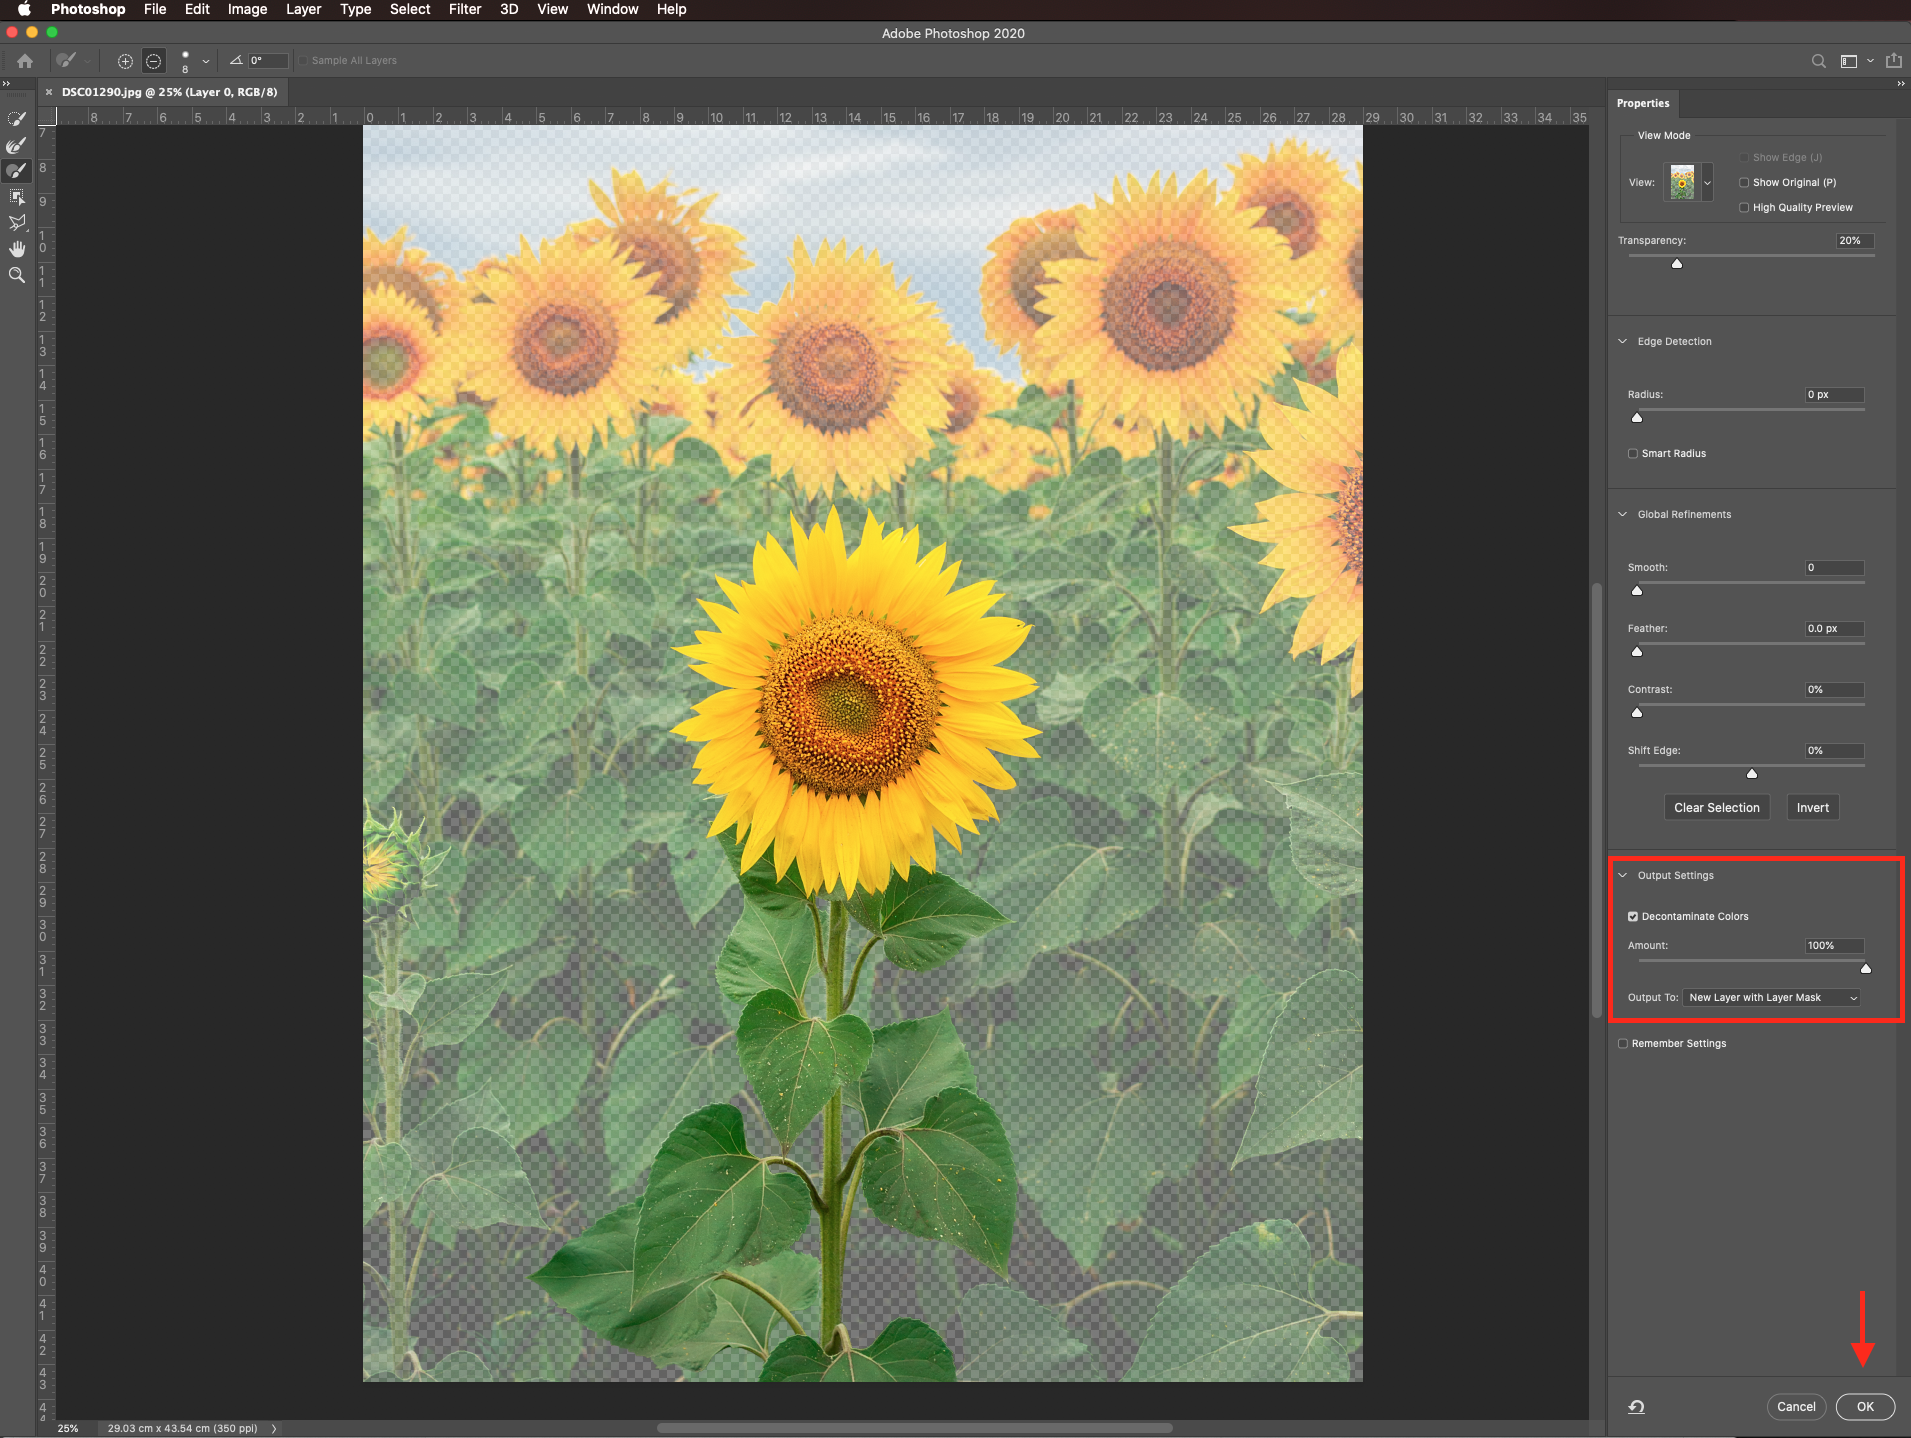
The resulting image should look similar to this.
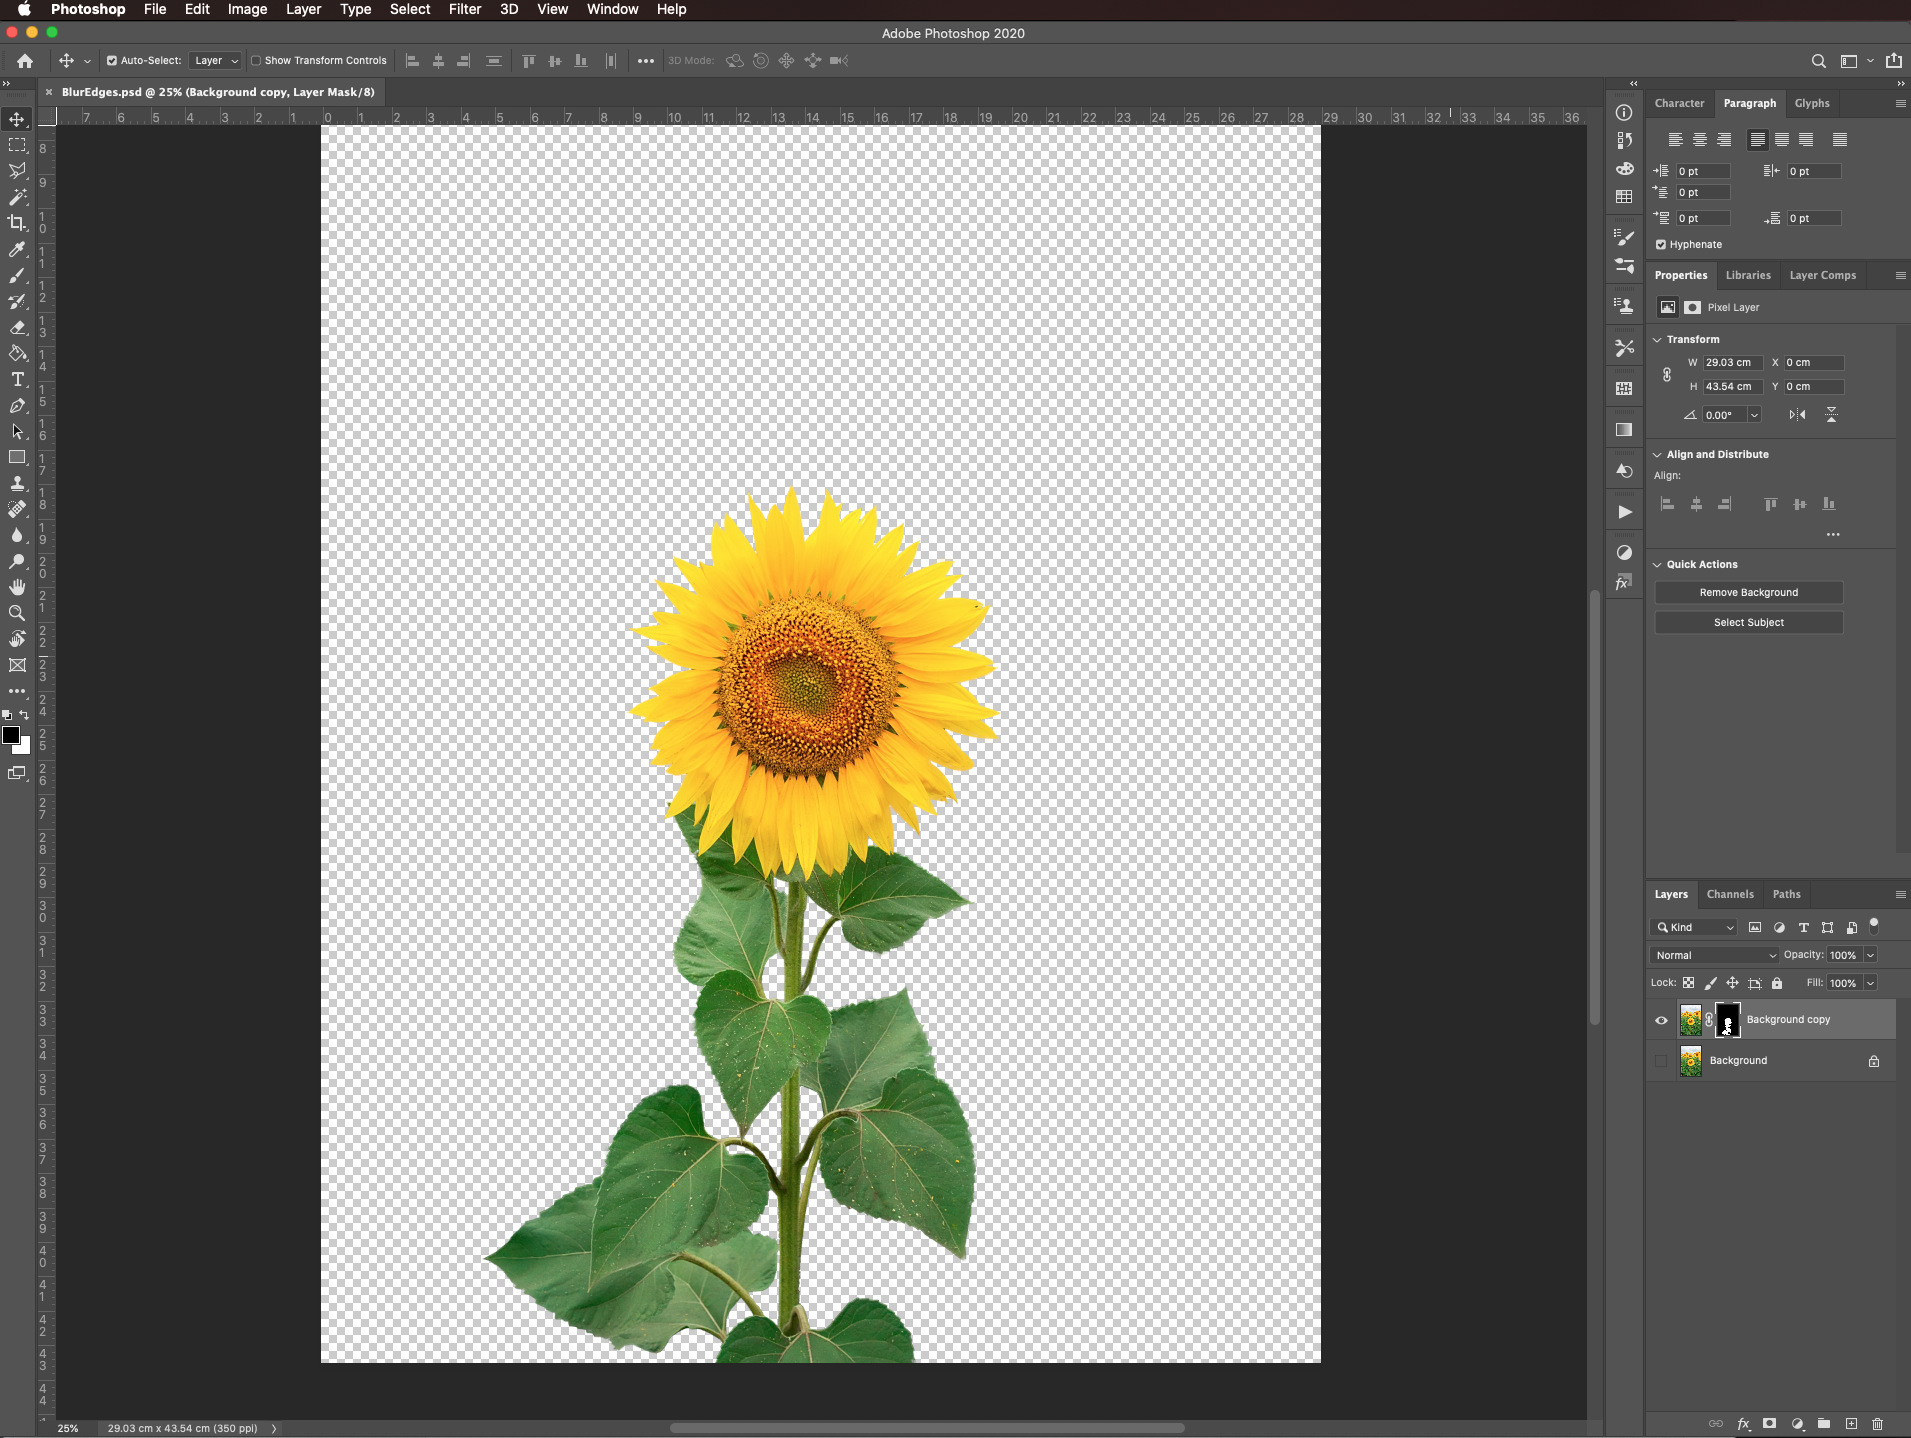
To see the mask, click on top of its thumbnail while holding the option/alt key.
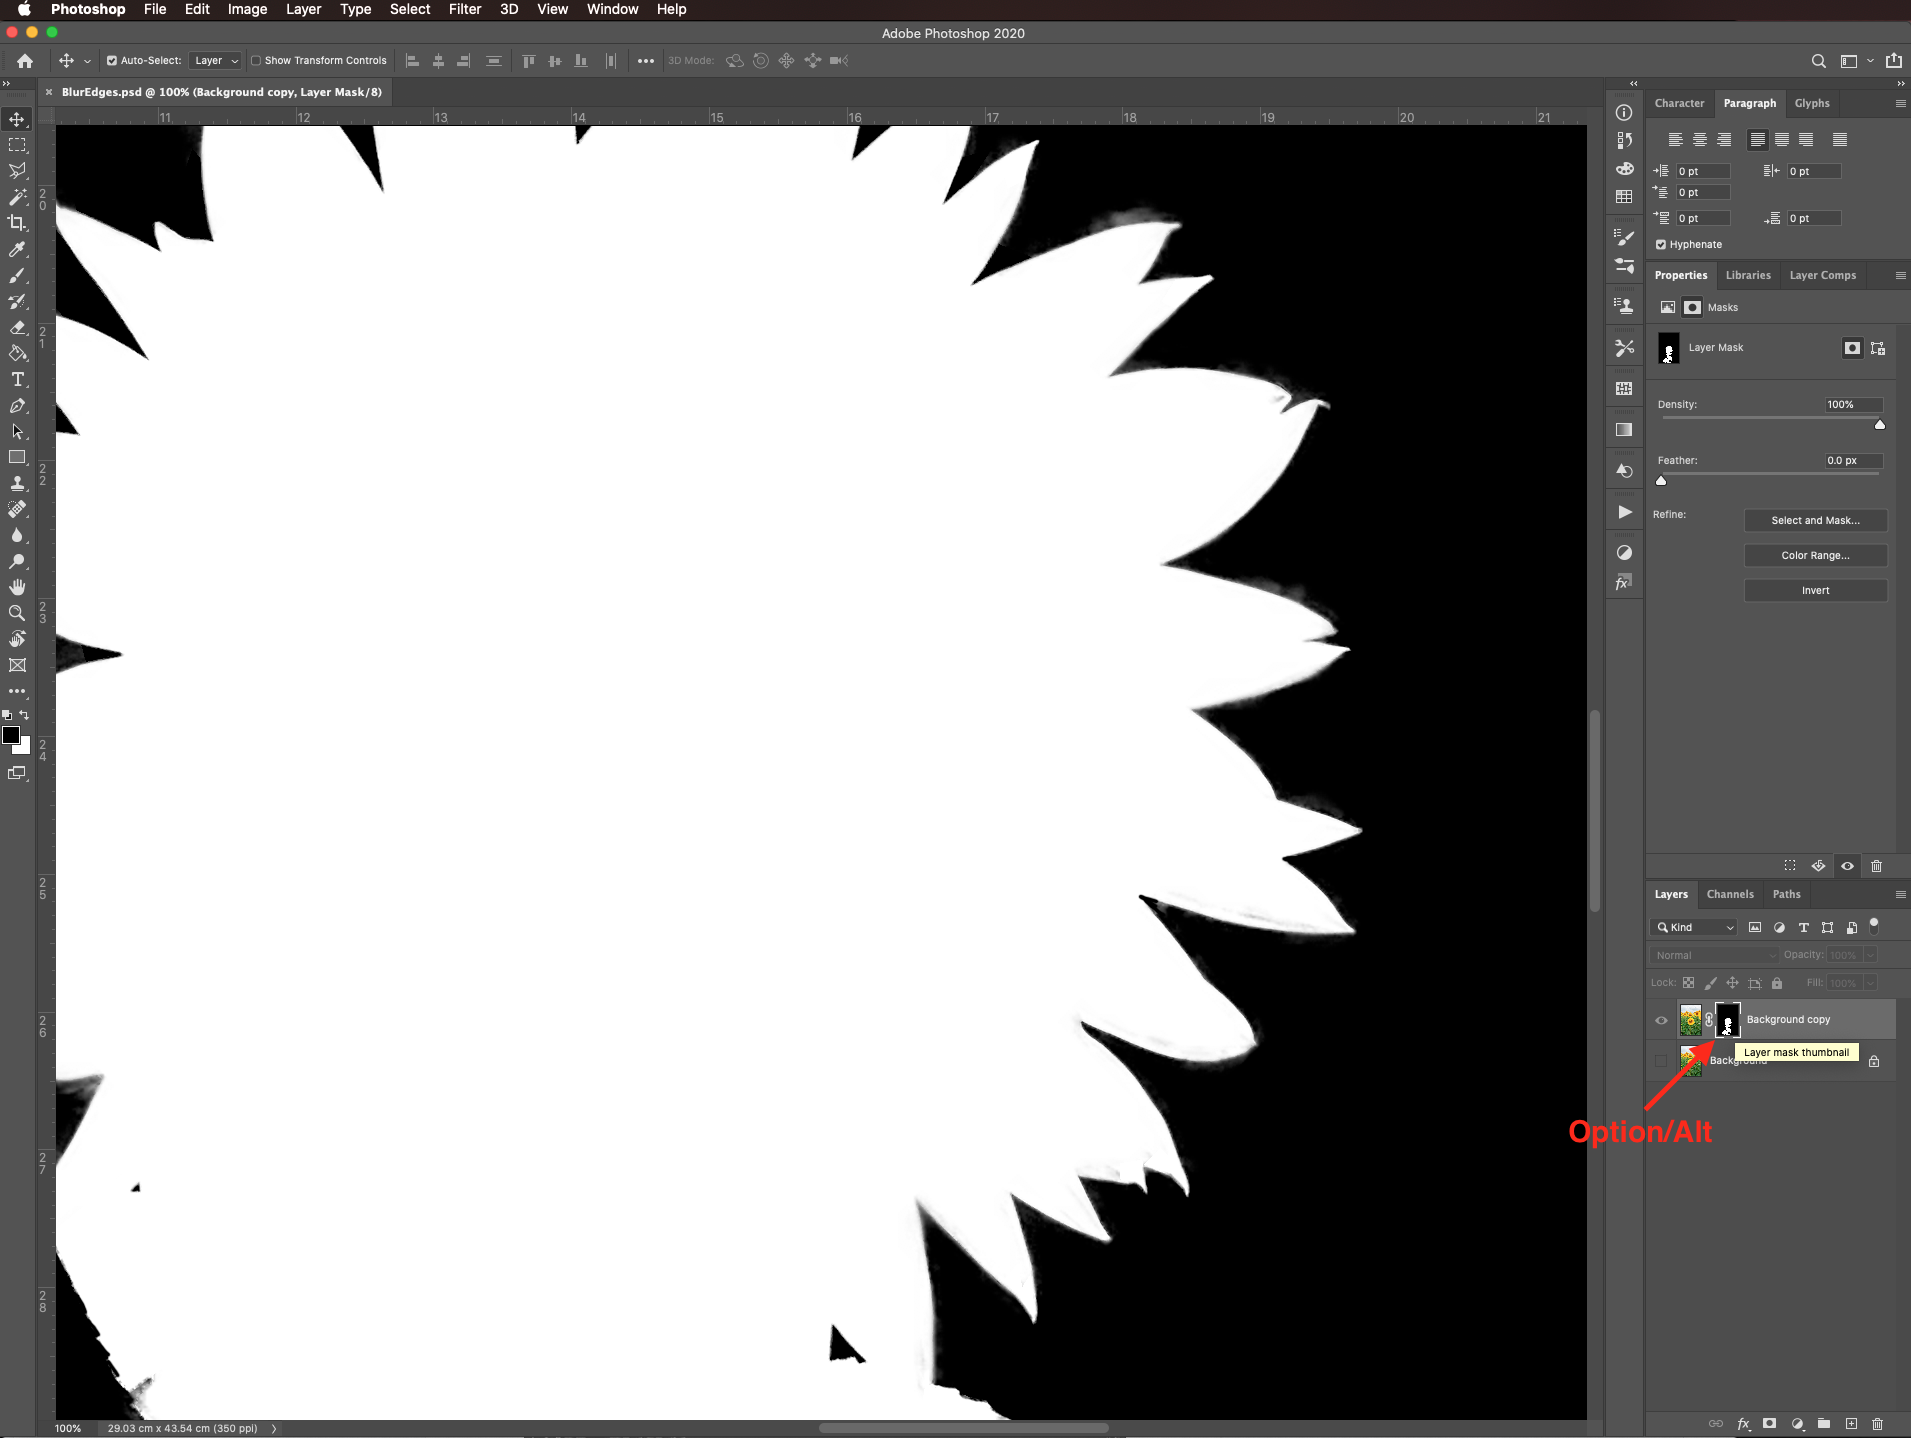
Choose a medium brush, make sure that white is the foreground color.
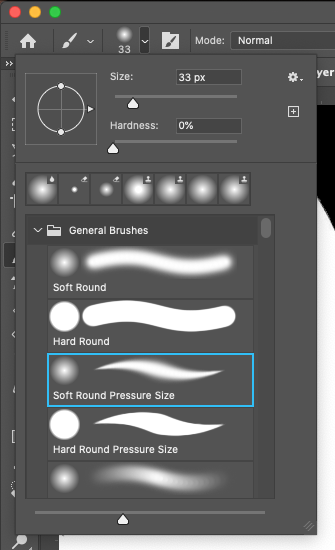
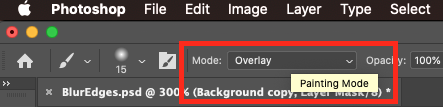
Change the brush blending mode to overlay and clean up the edges if needed.
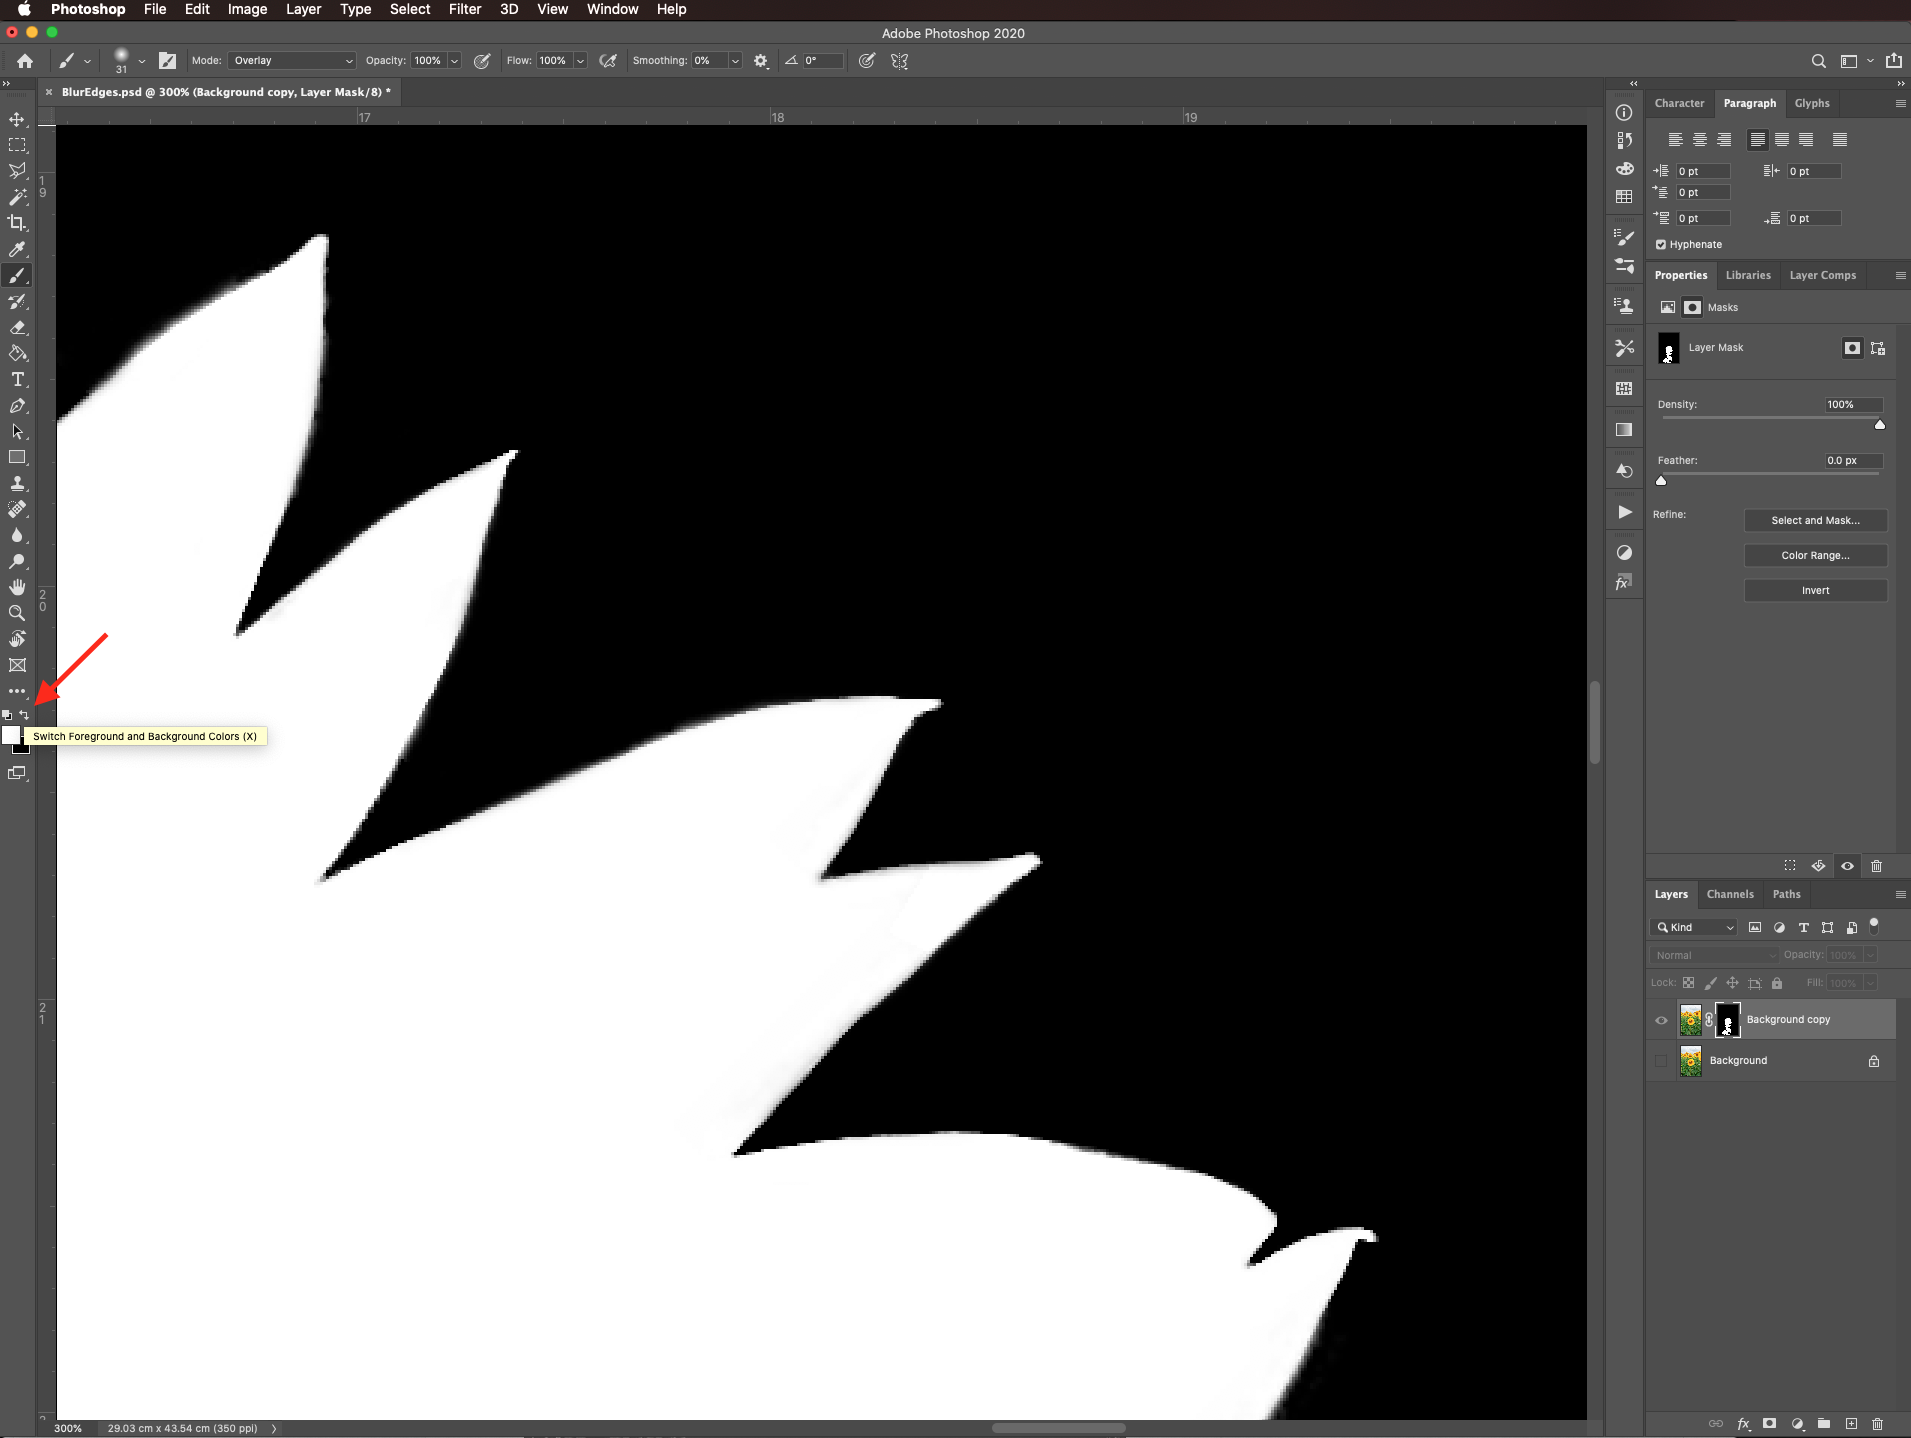
Change the foreground color to black and fix the outside edges too.
Now you can exit the mask view and check out your image.
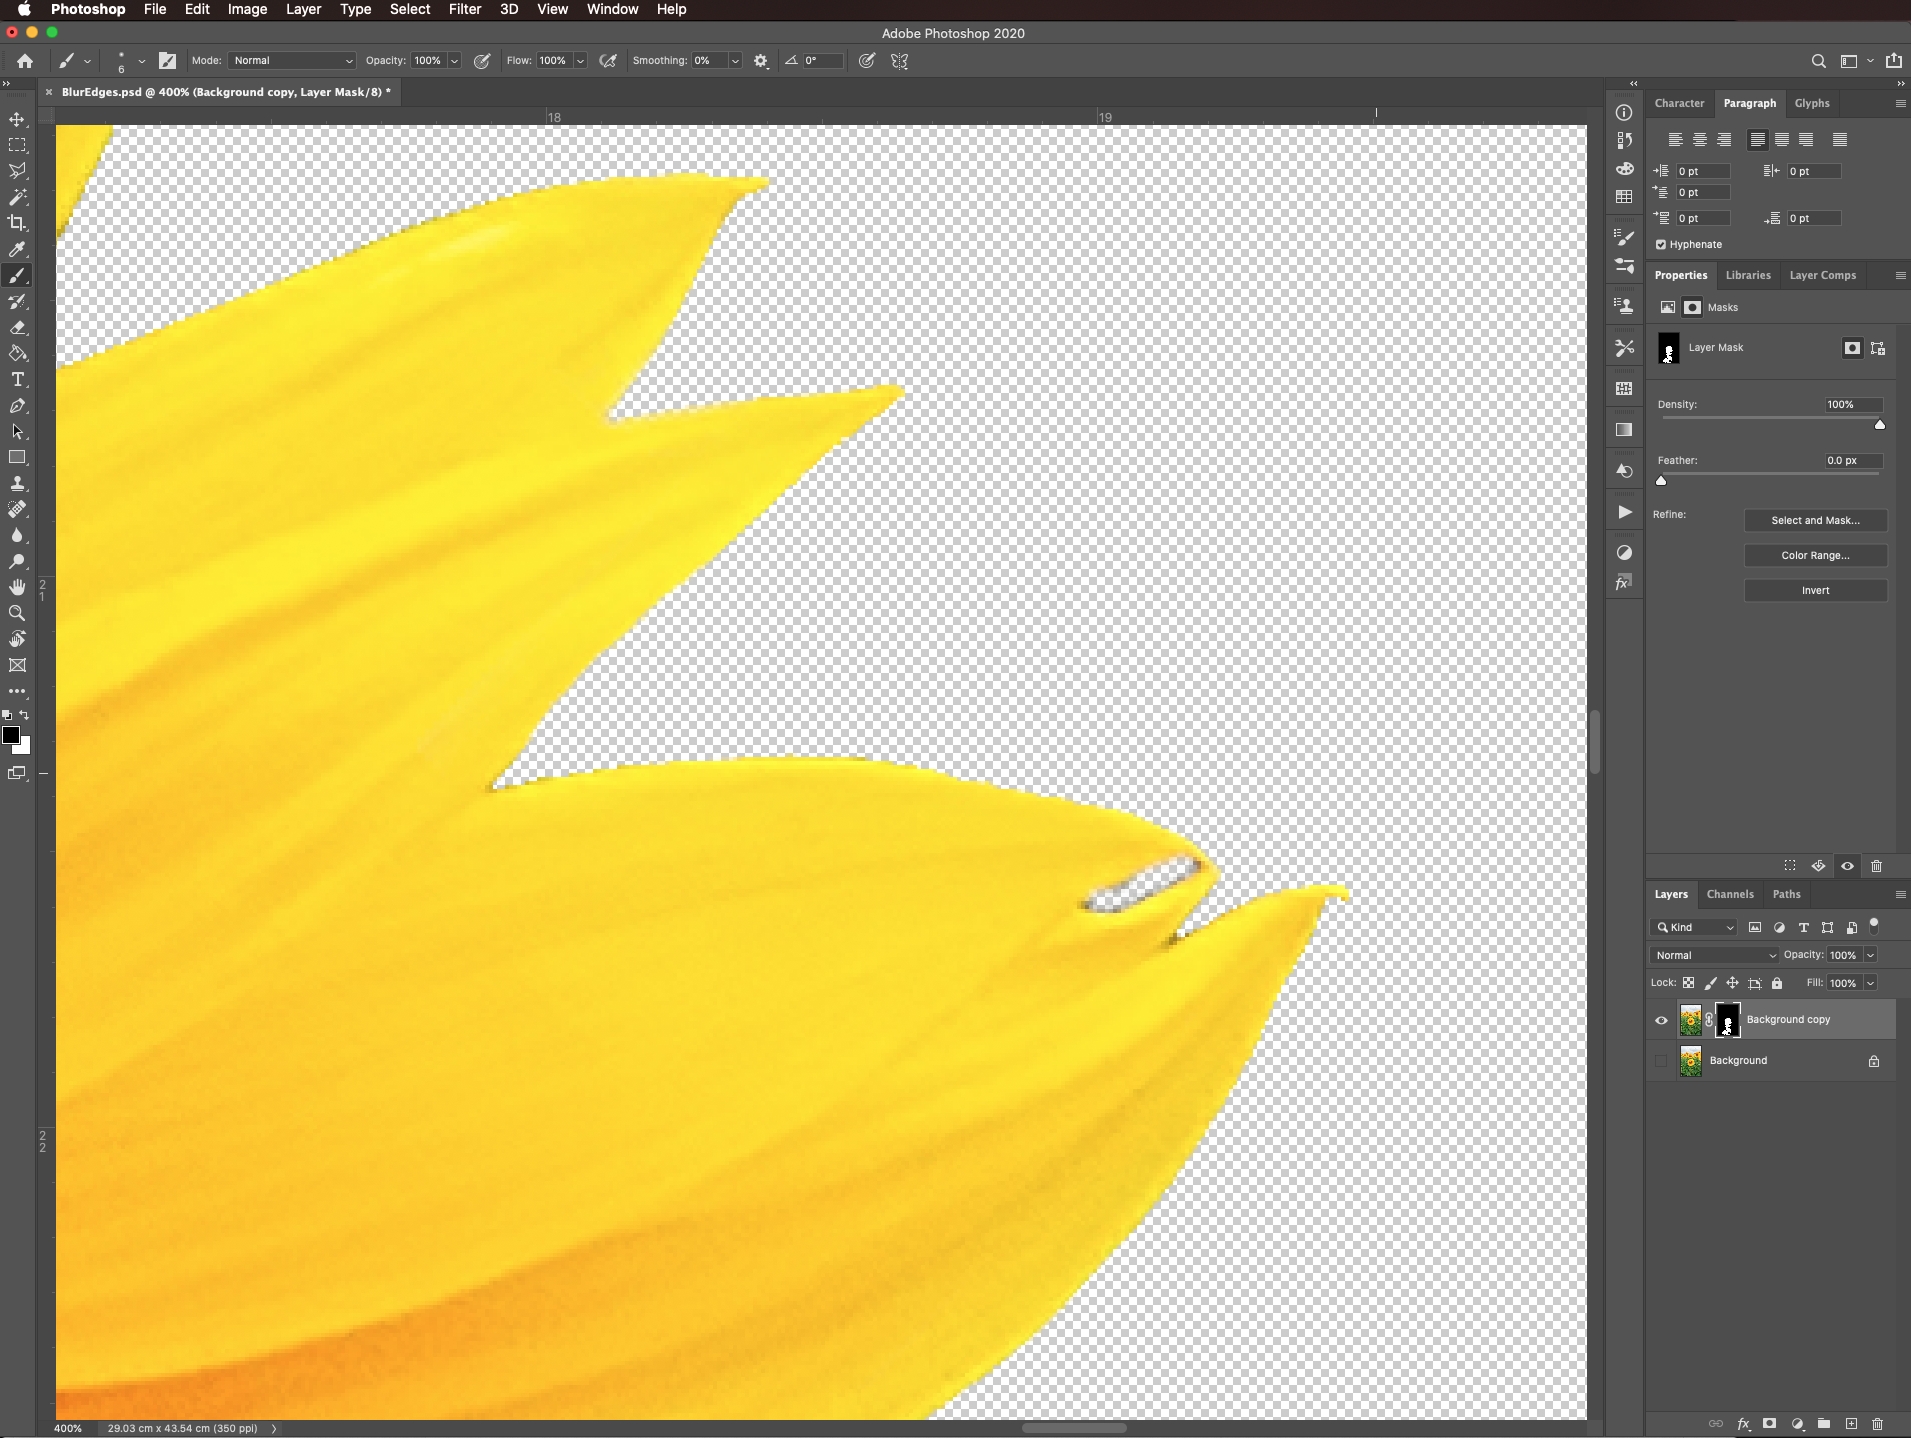
Duplicate the background layer (command/control + J).
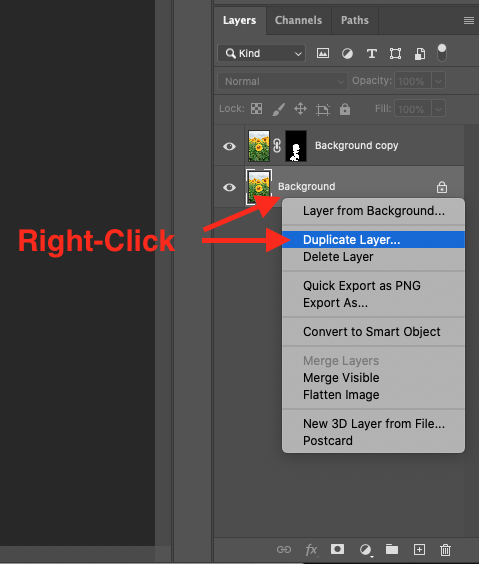
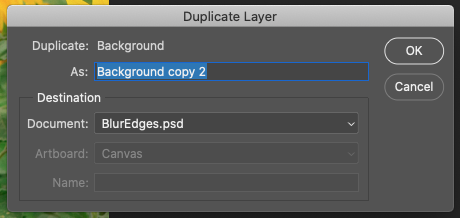
Or right-click on top of its thumbnail, choose duplicate layer and click OK on the pop-up window.
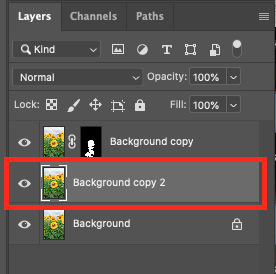
The duplicate should be in between the background and the masked layer.
Select the Lasso tool (L) and create a selection around the subject leaving a 3 mm space around its edges.
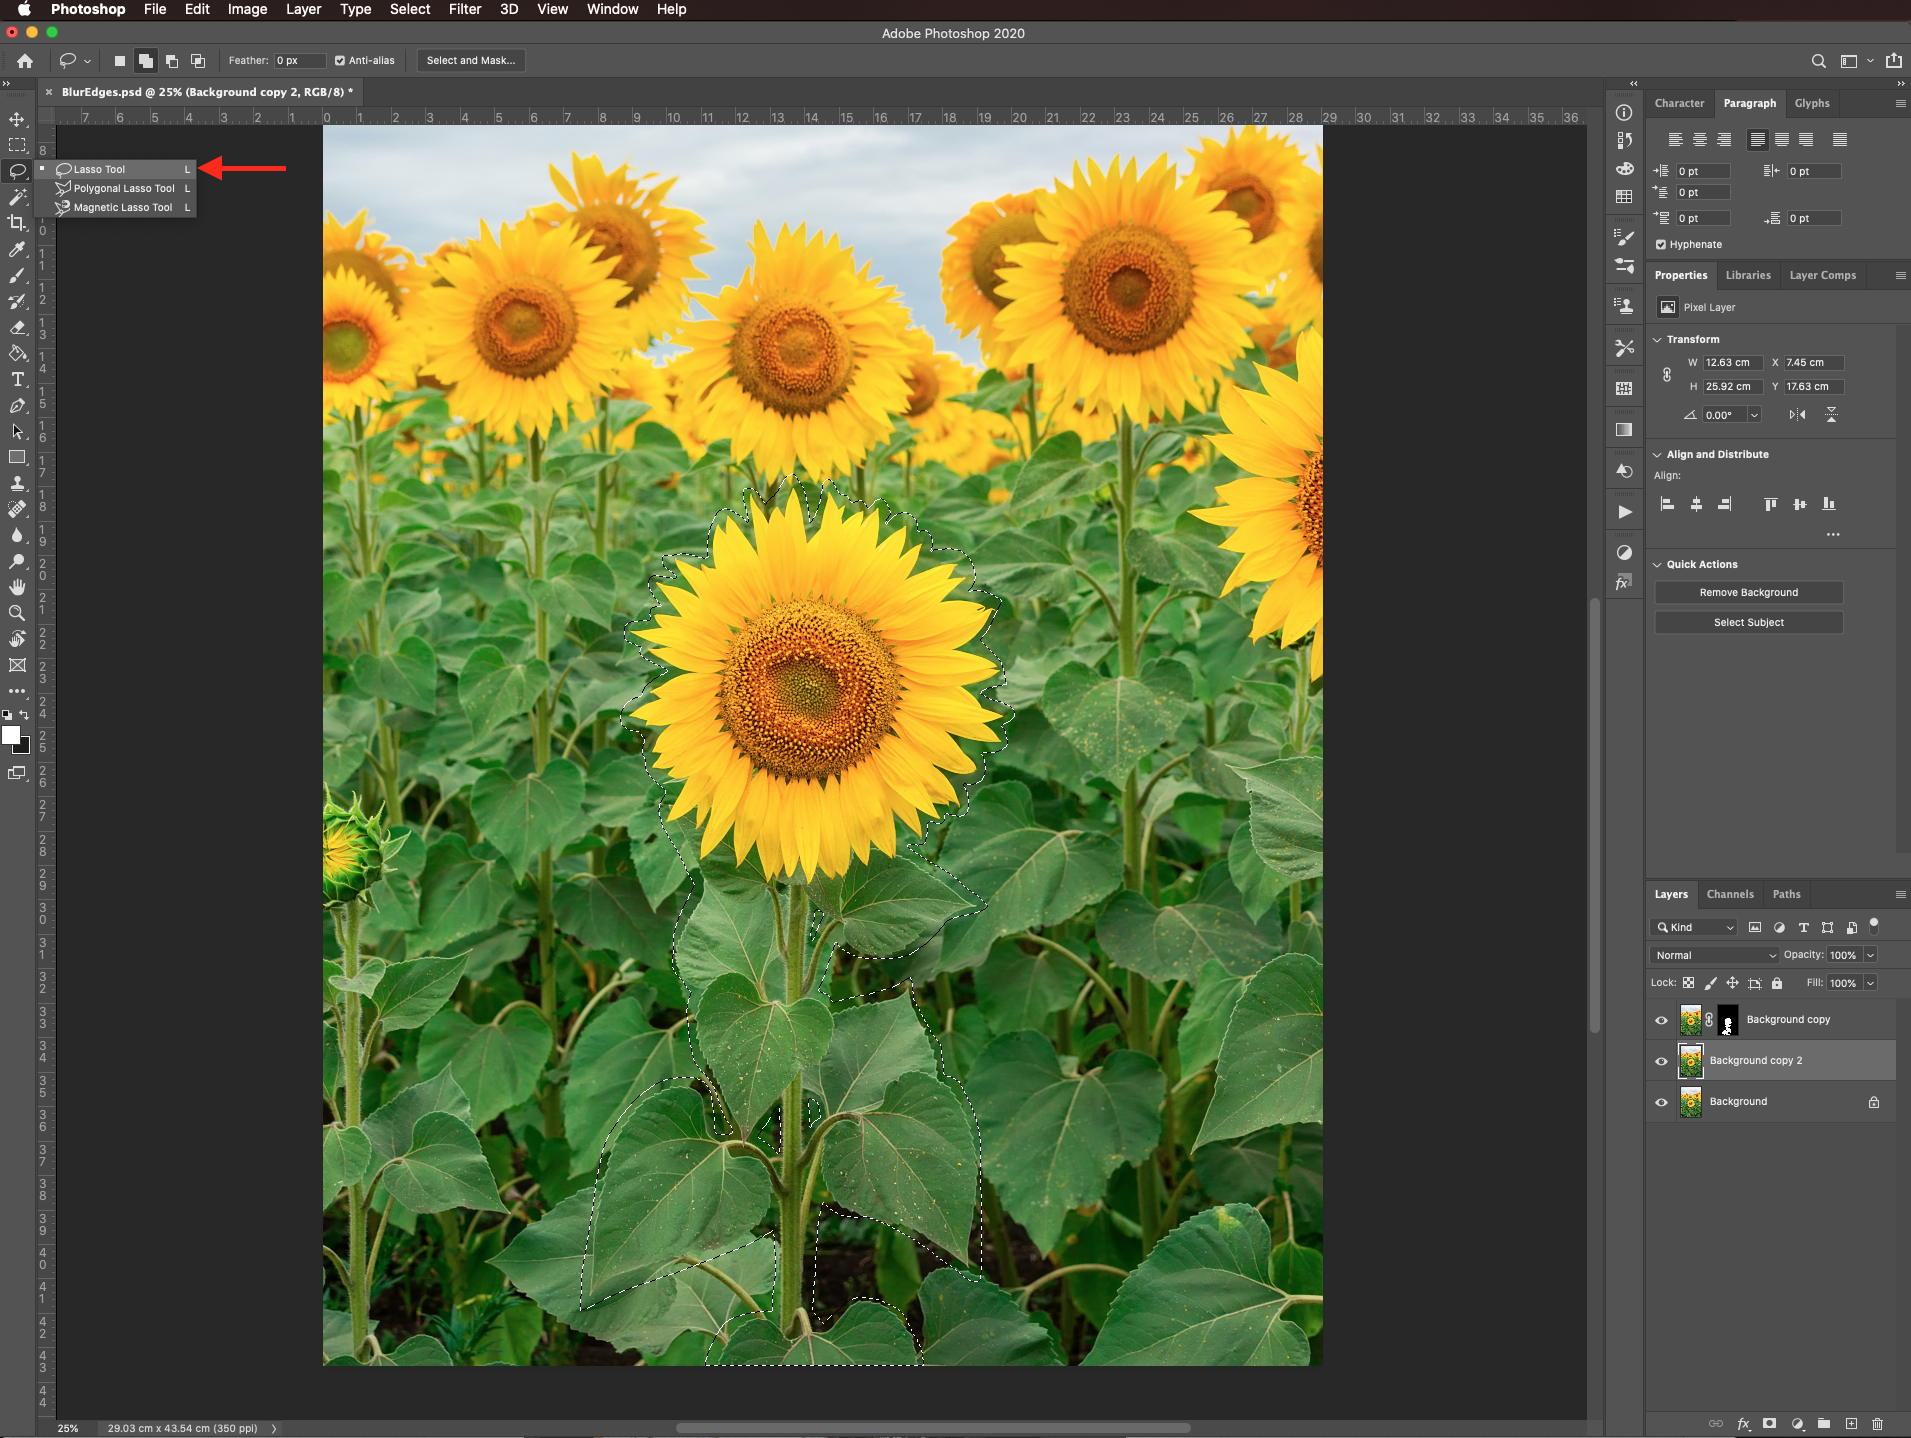
Go to Edit > Fill (shift + F5) and choose content-aware in the contents tab.
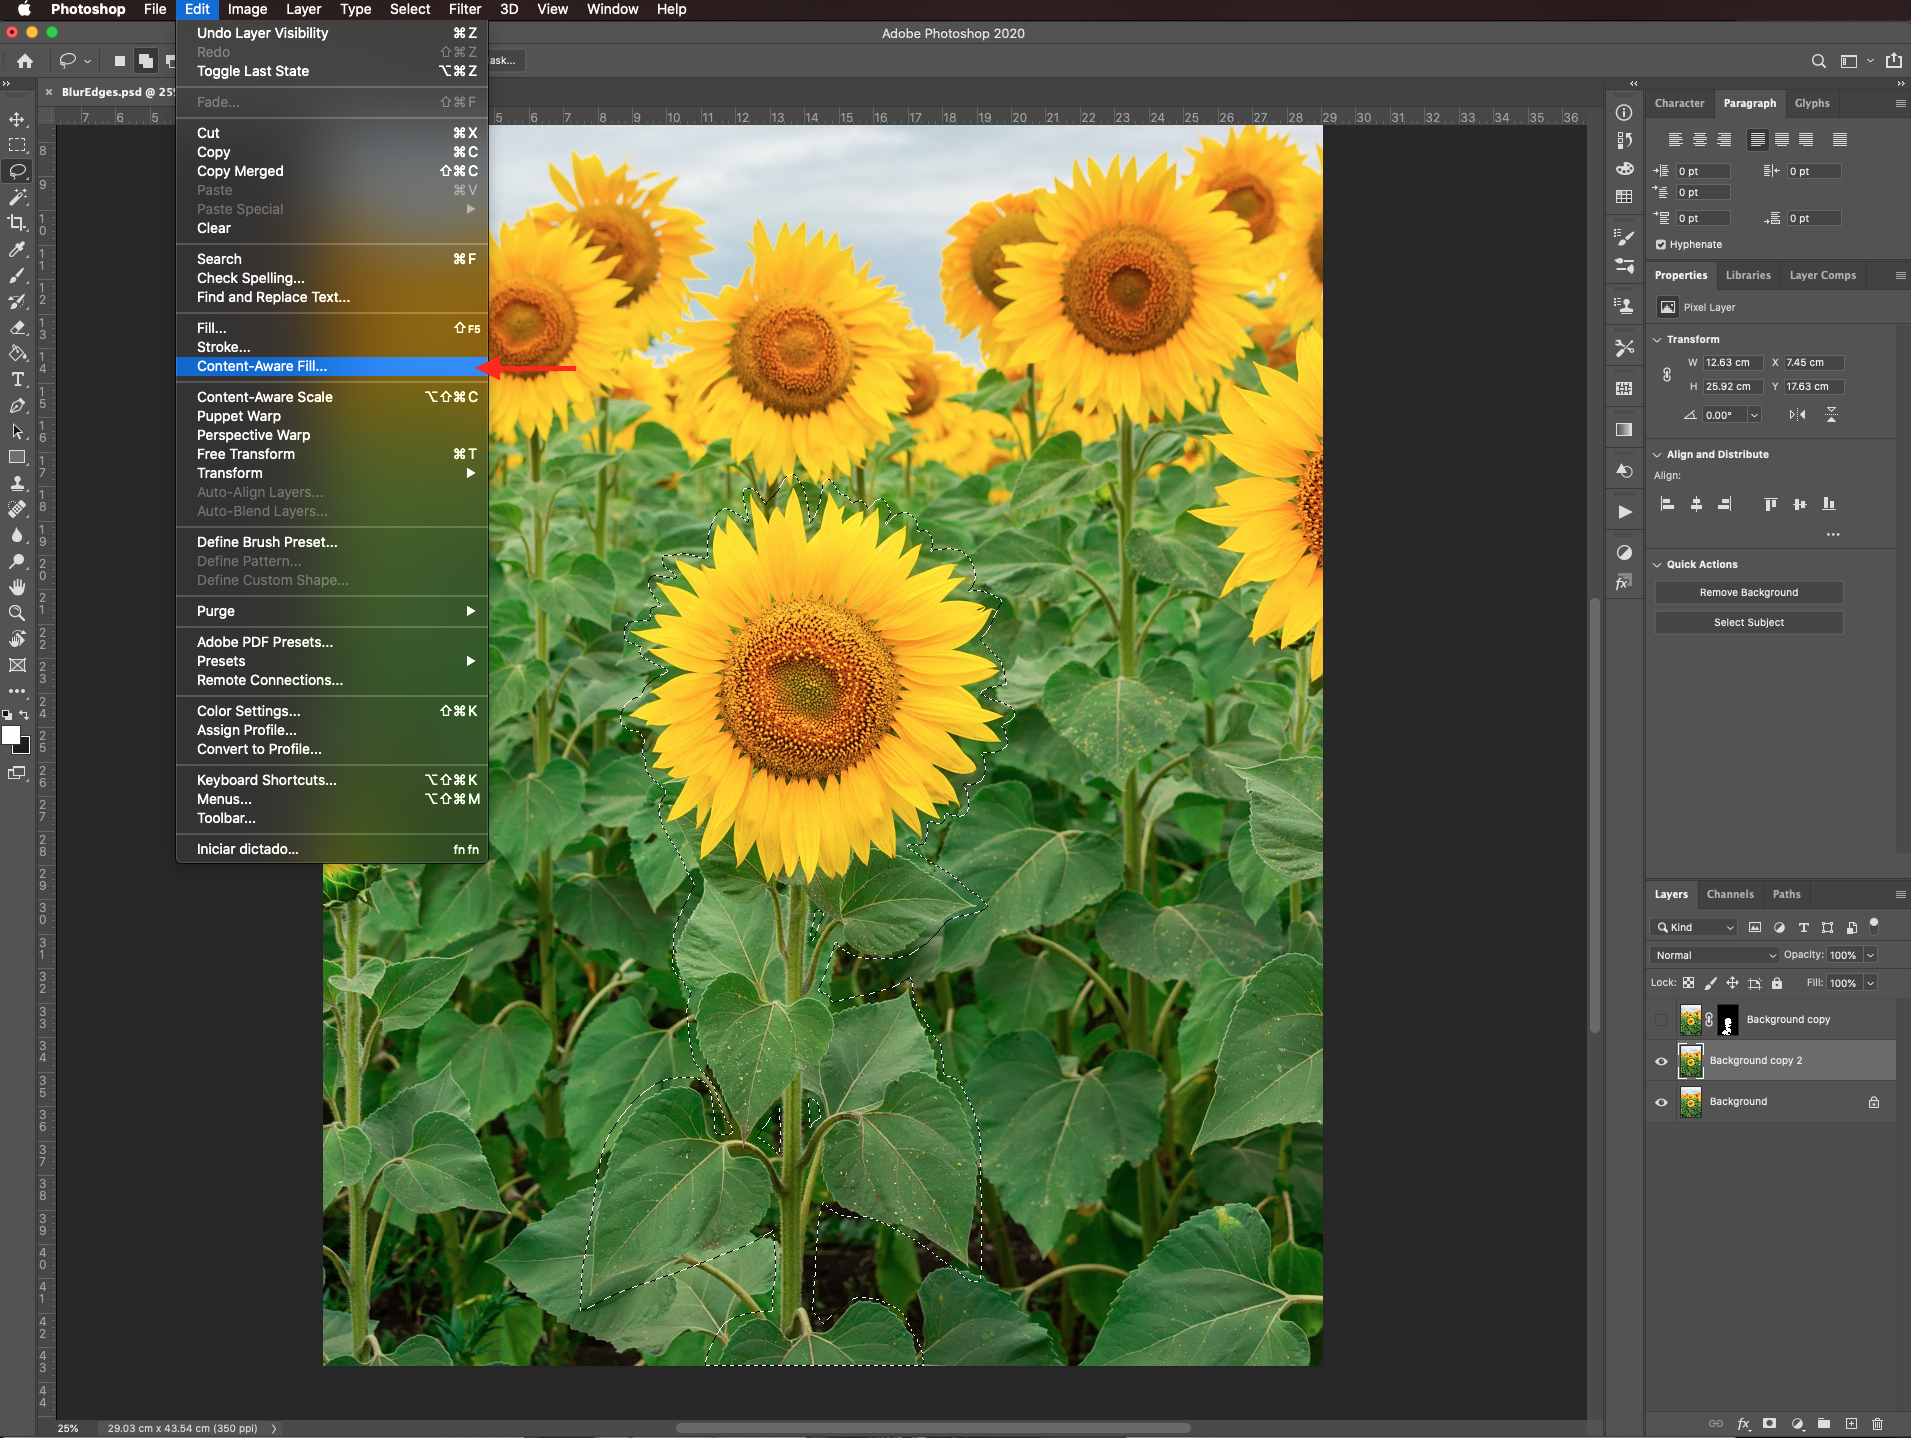
Check if the auto settings work for you and make sure that output to current layer is selected before clicking OK.
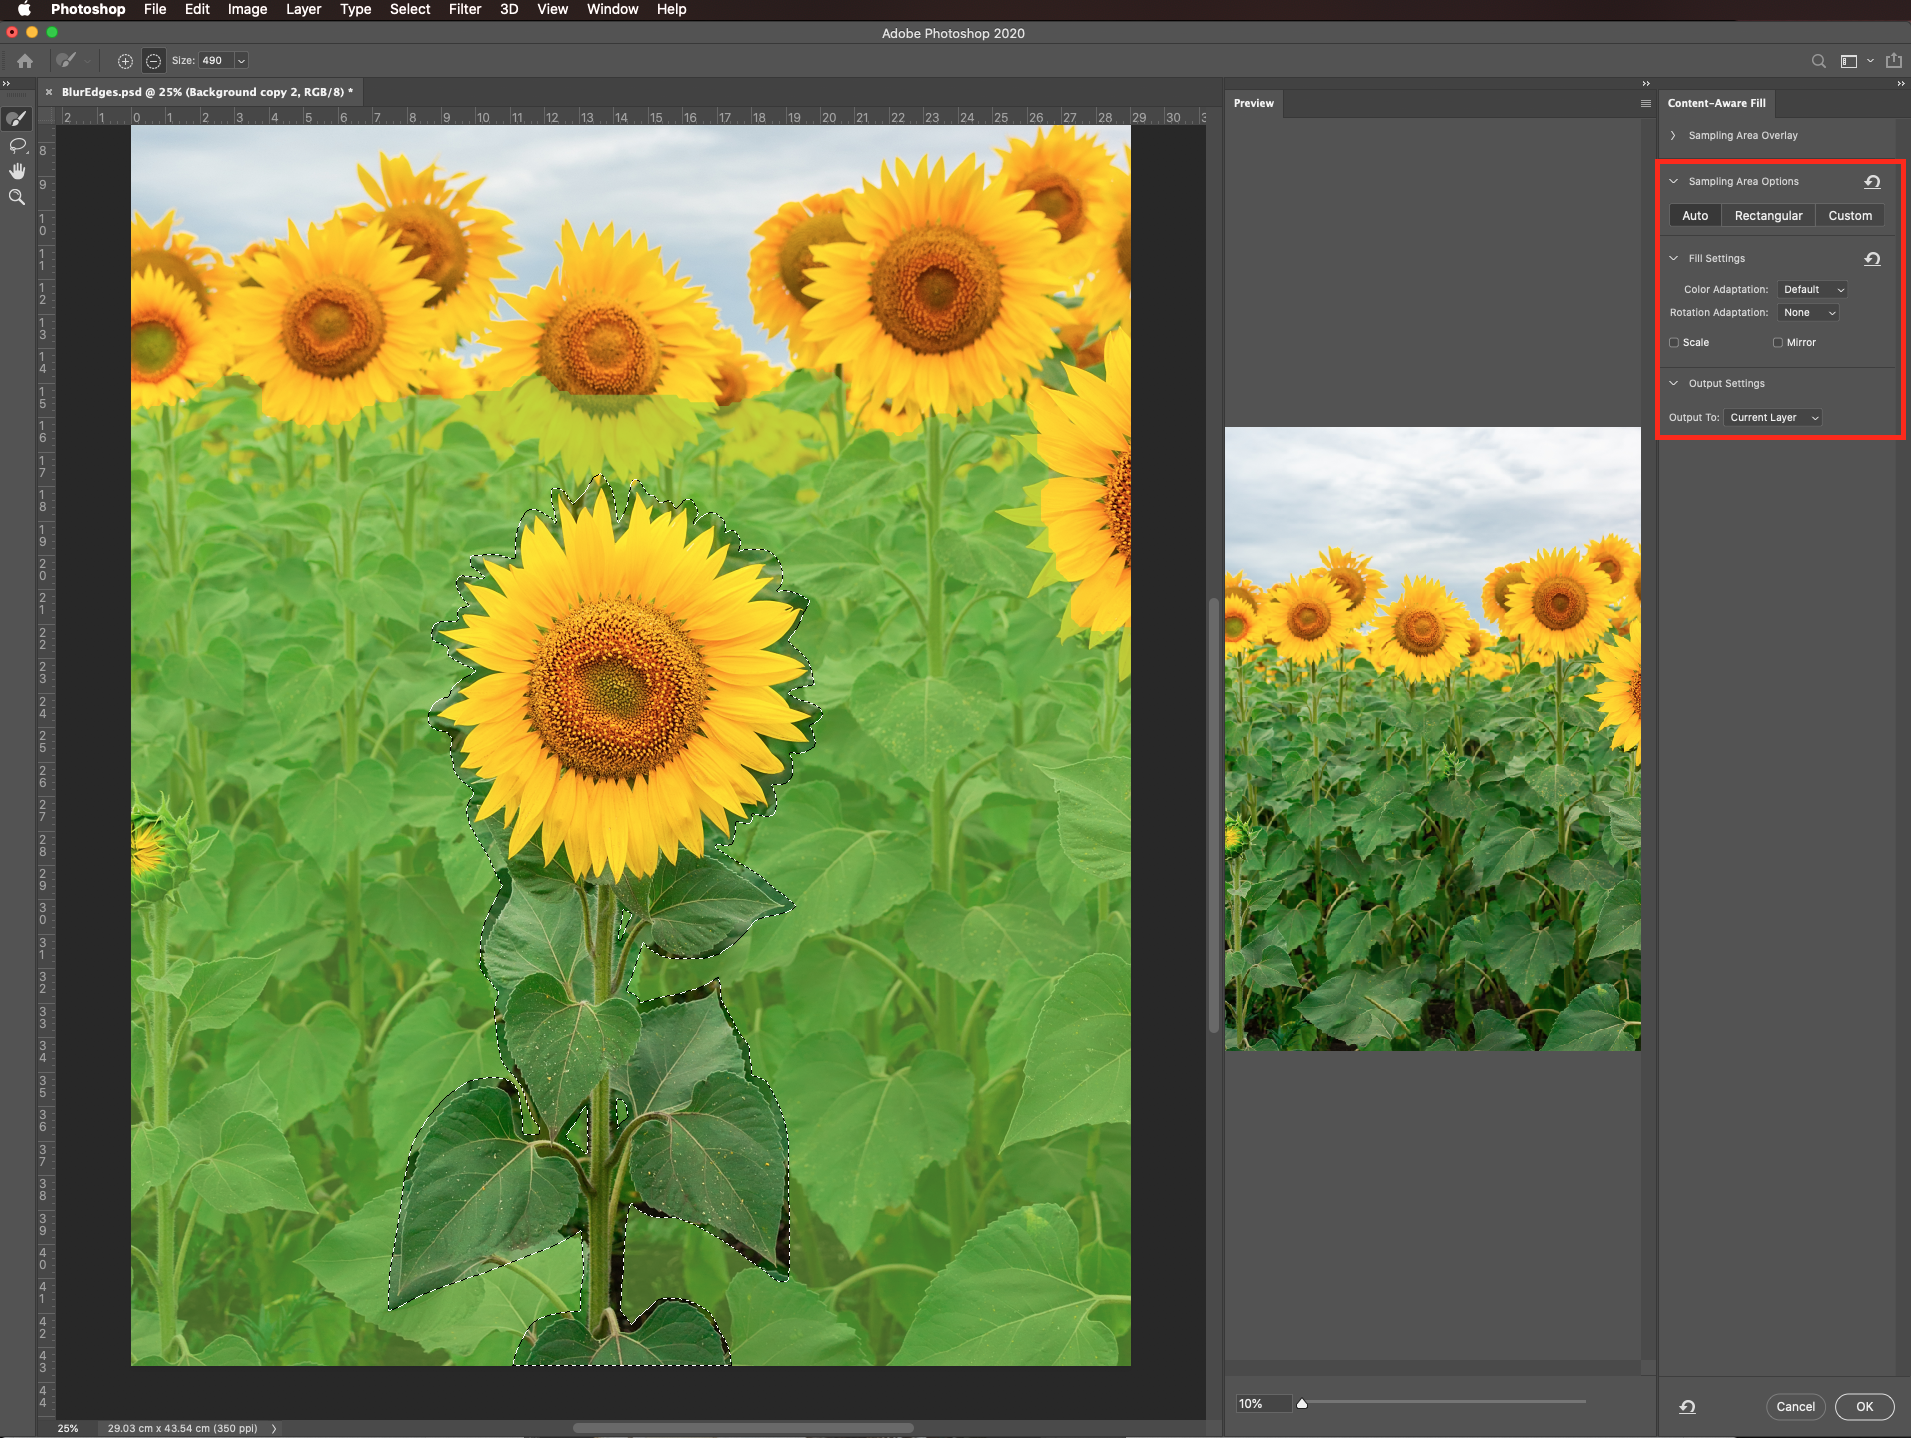
You can check out the result by hiding the masked layer on top but take into account that it doesn’t need to be perfect.
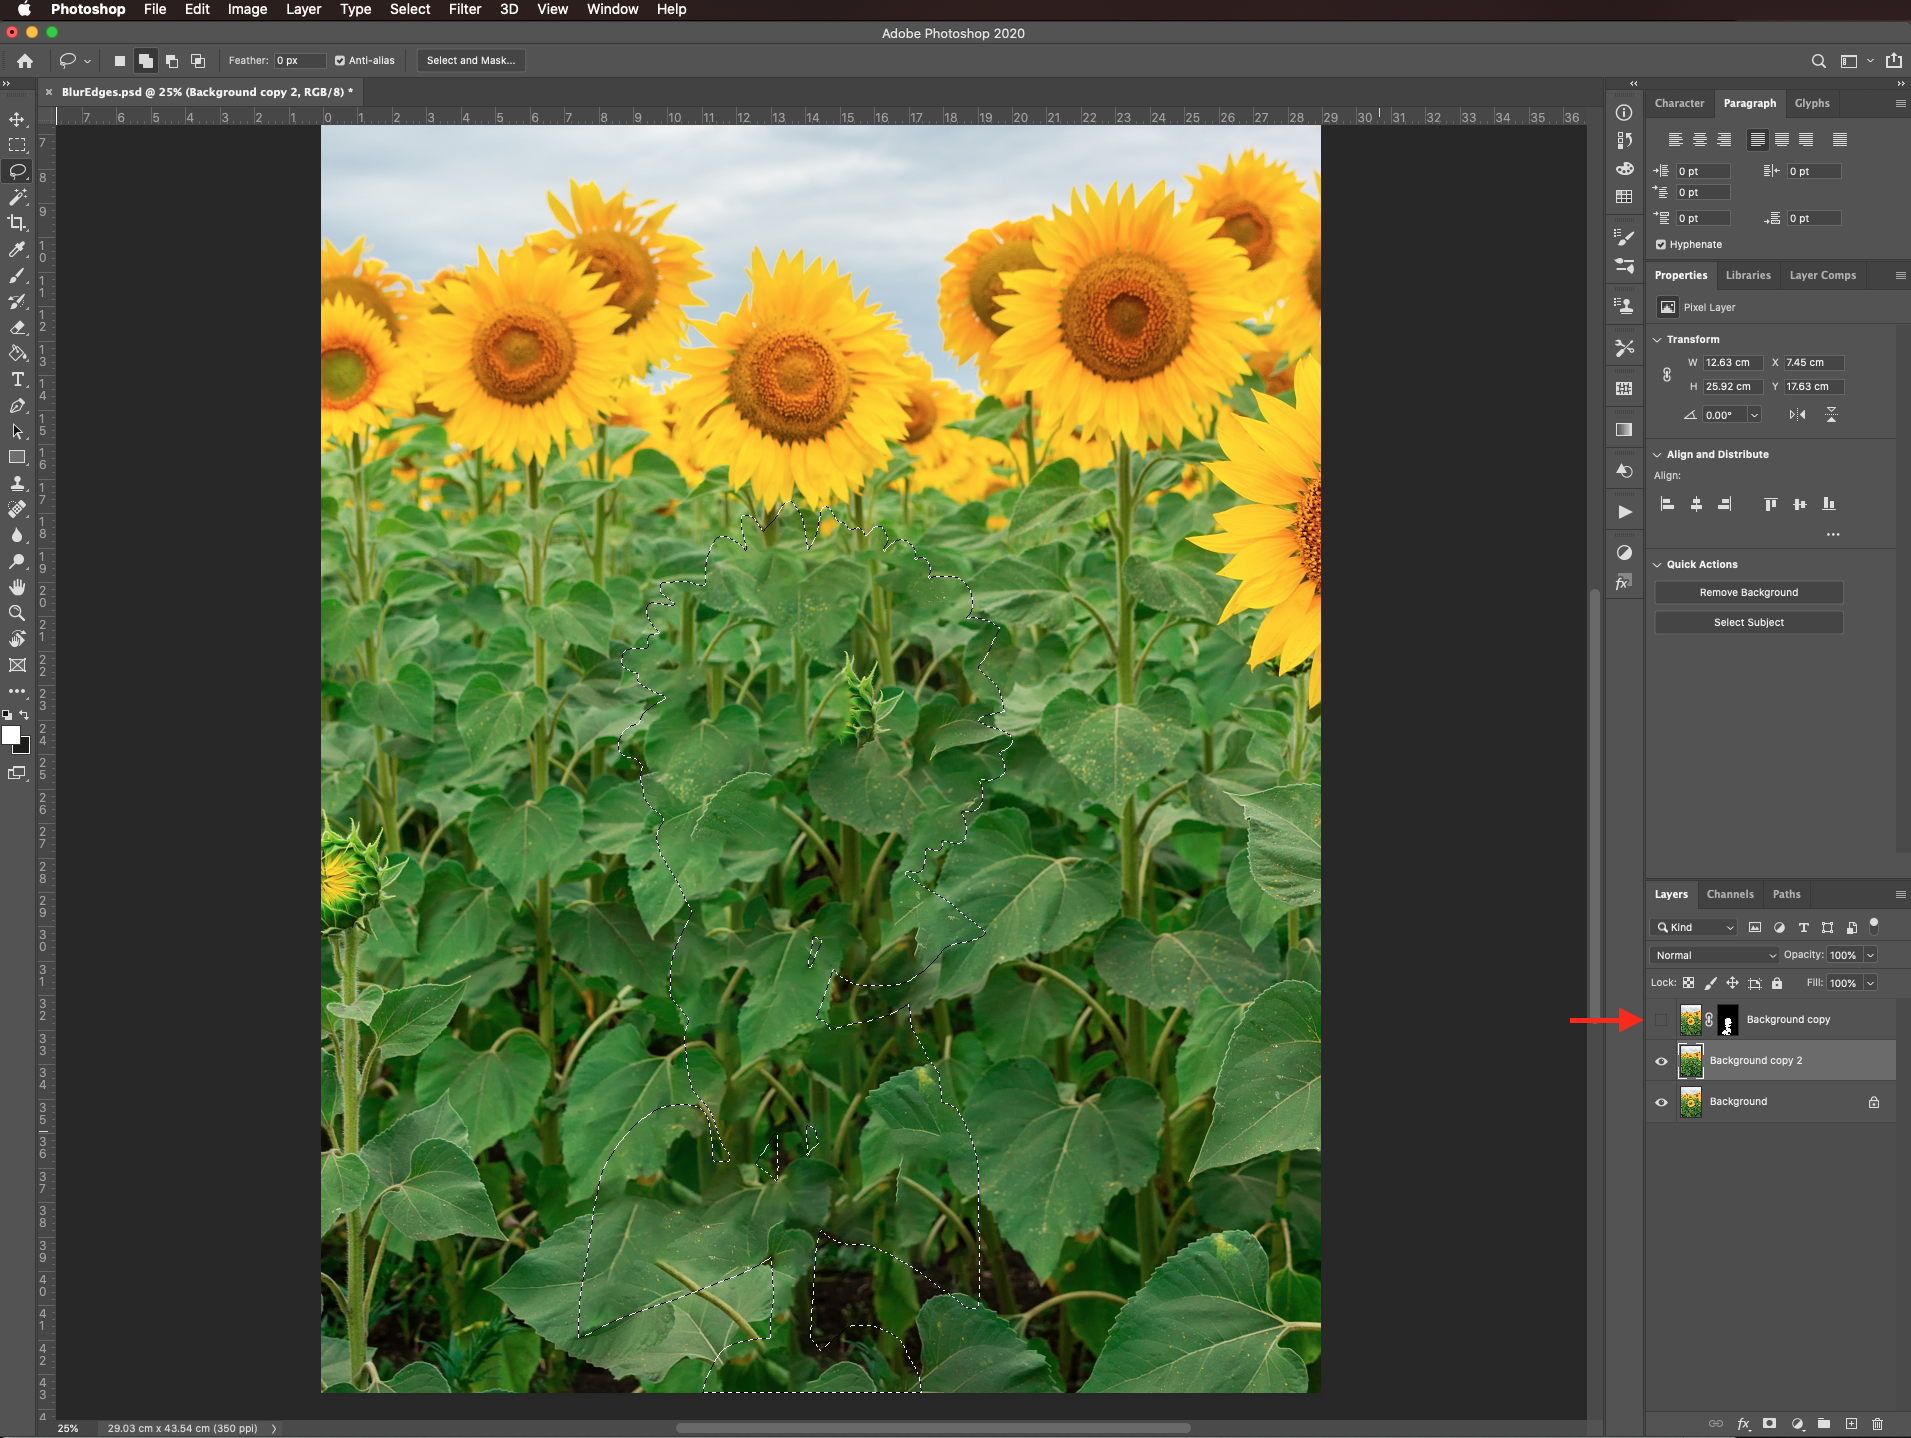
Deselect (command/control + D) and go to Filter > Blur > Gaussian Blur.
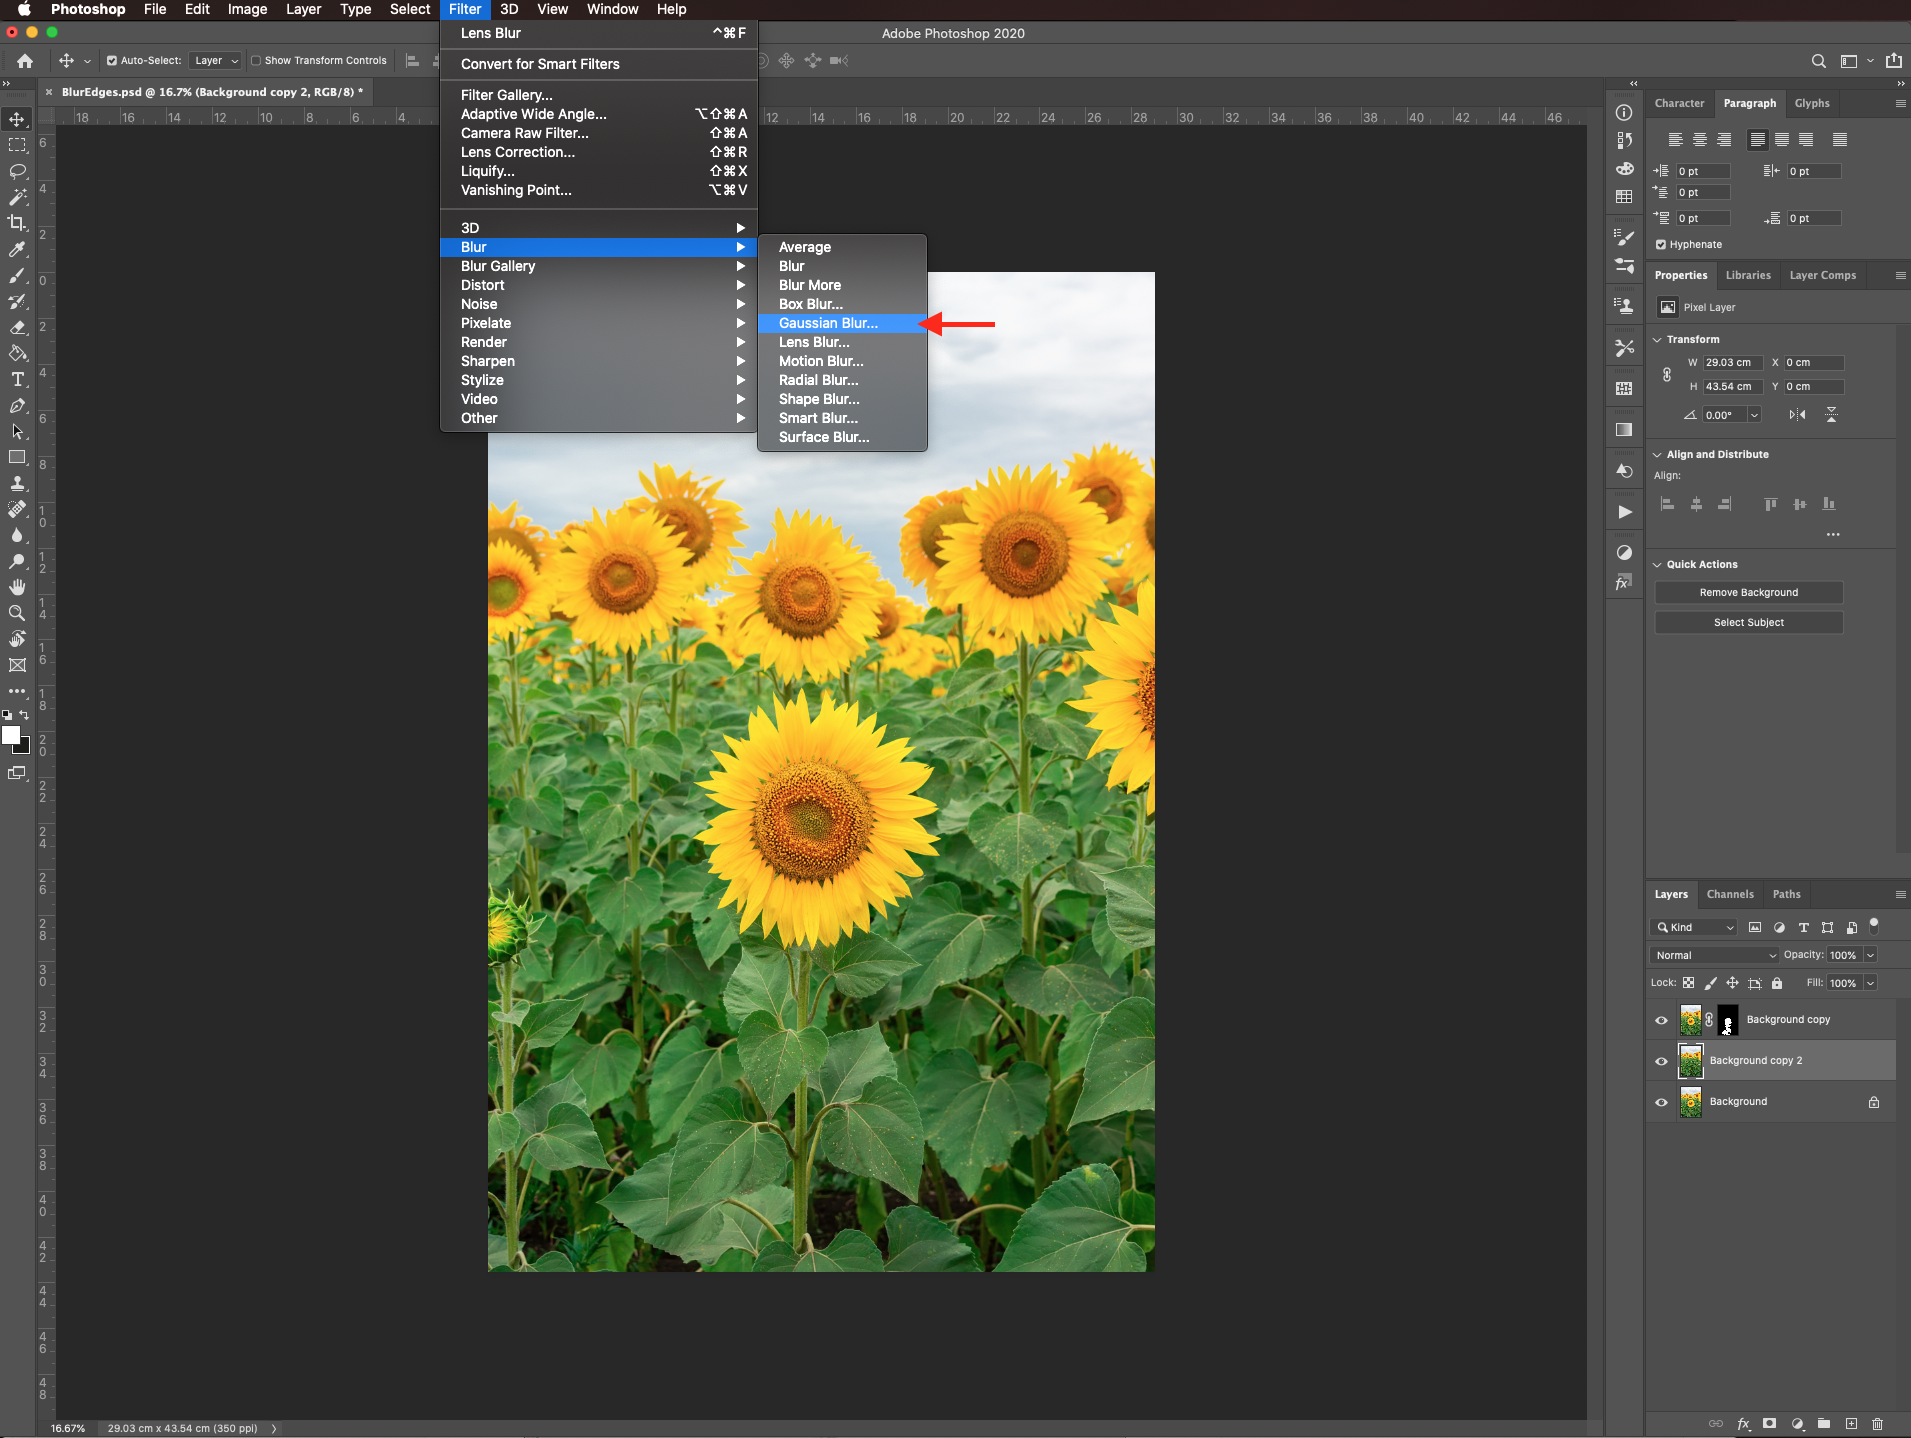
Use a radius of 15% (or whatever amount that suits your needs).
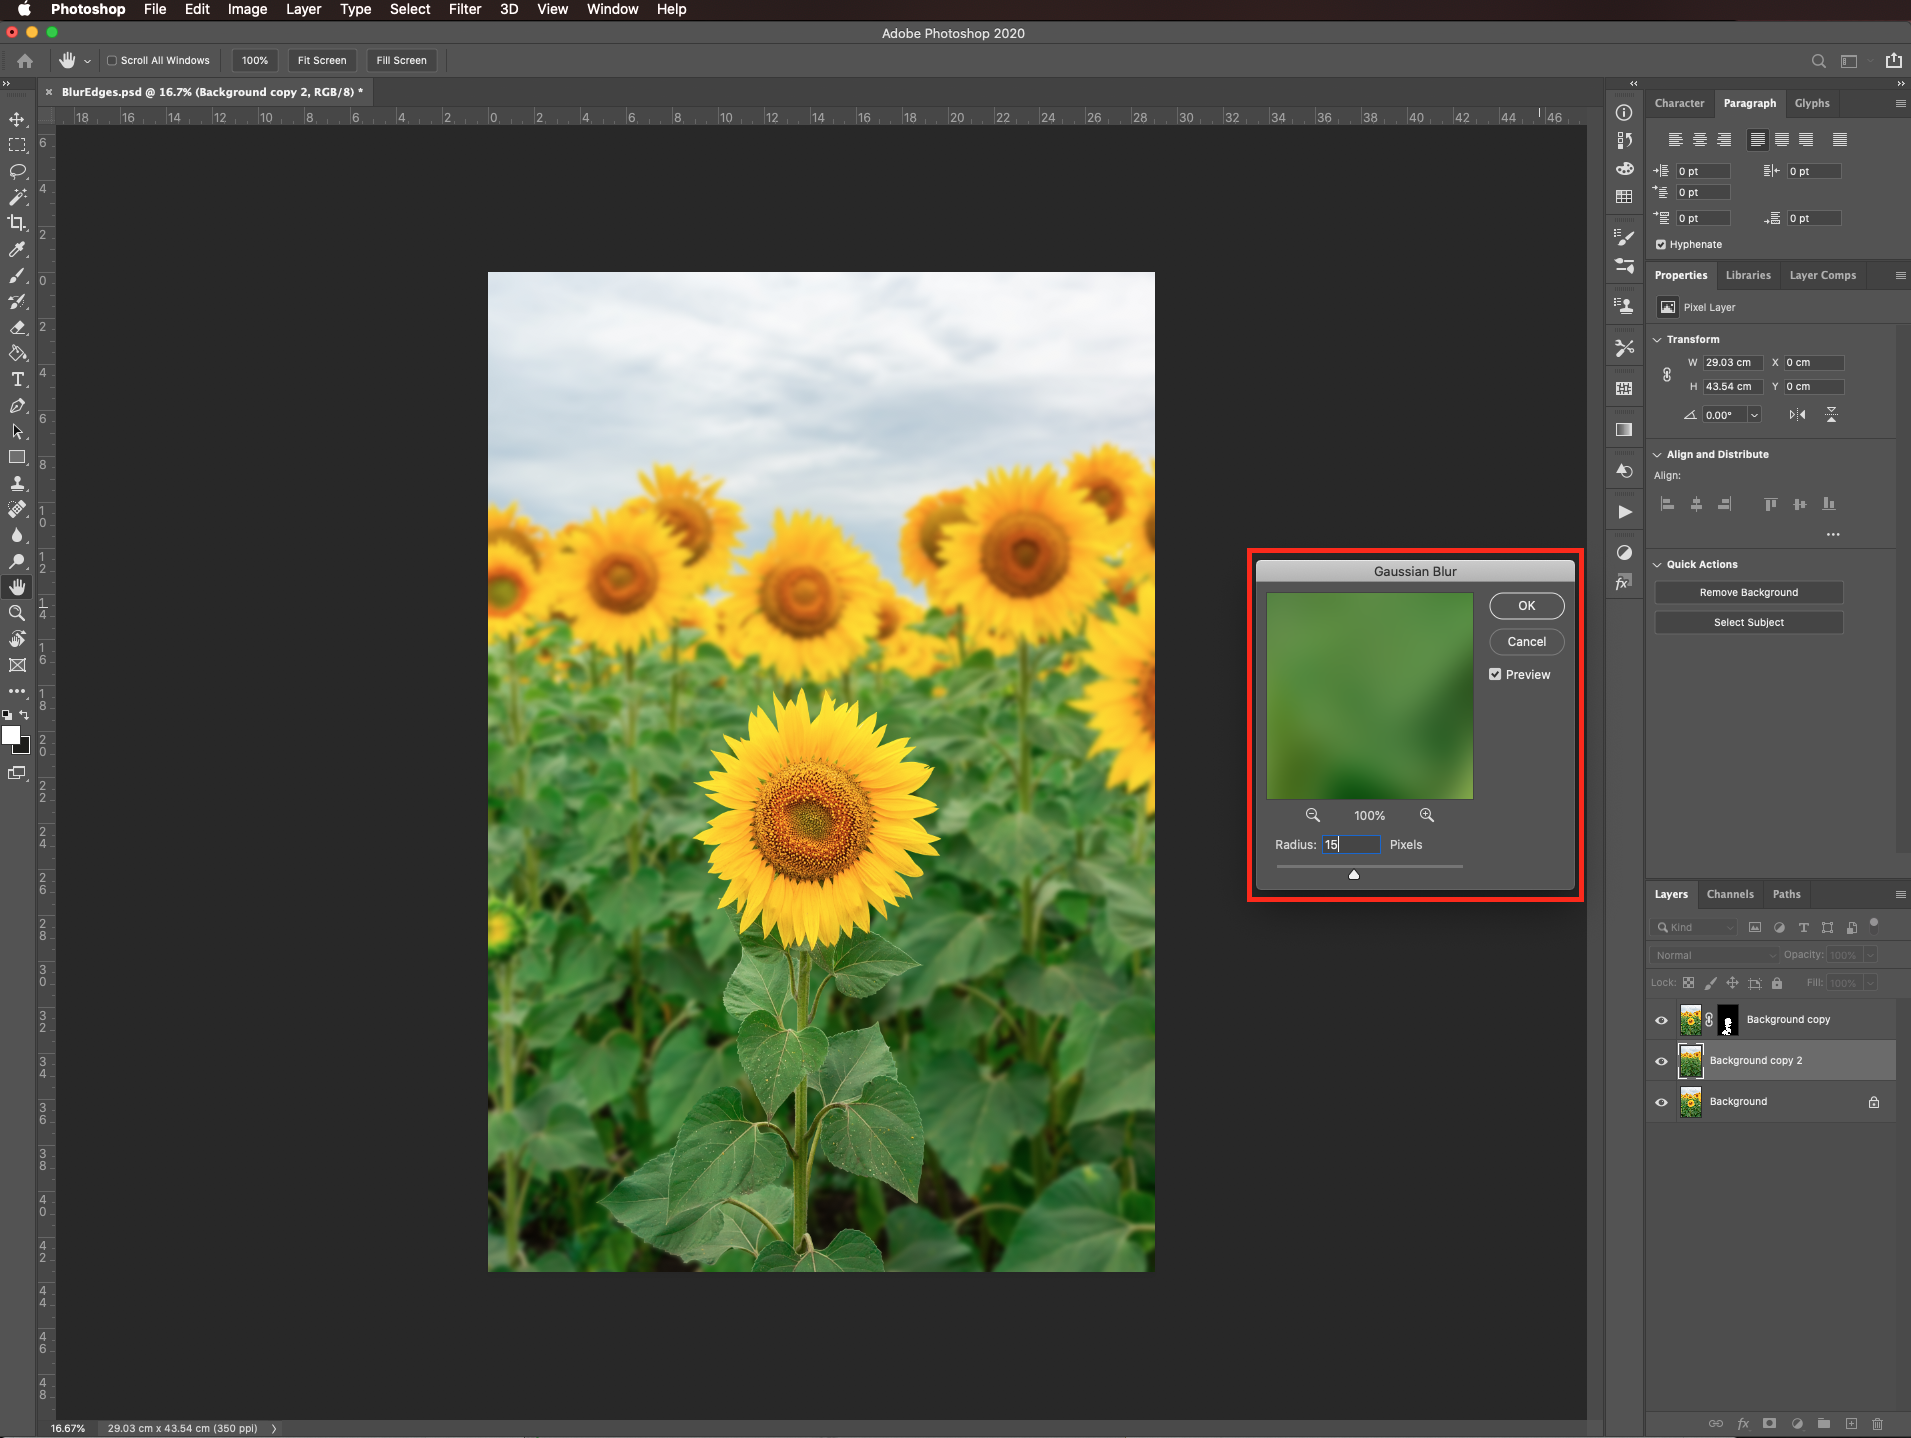
If you want to bring out and highlight the subject more a bit more, you can add a color lookup adjustment layer to it. With the top layer selected go to the Adjustments panel and create a new color lookup adjustment layer using Crisp_Warm.look as 3DLUT File. Make sure you clip it to the masked layer. You can use any other preset or skip this step altogether.
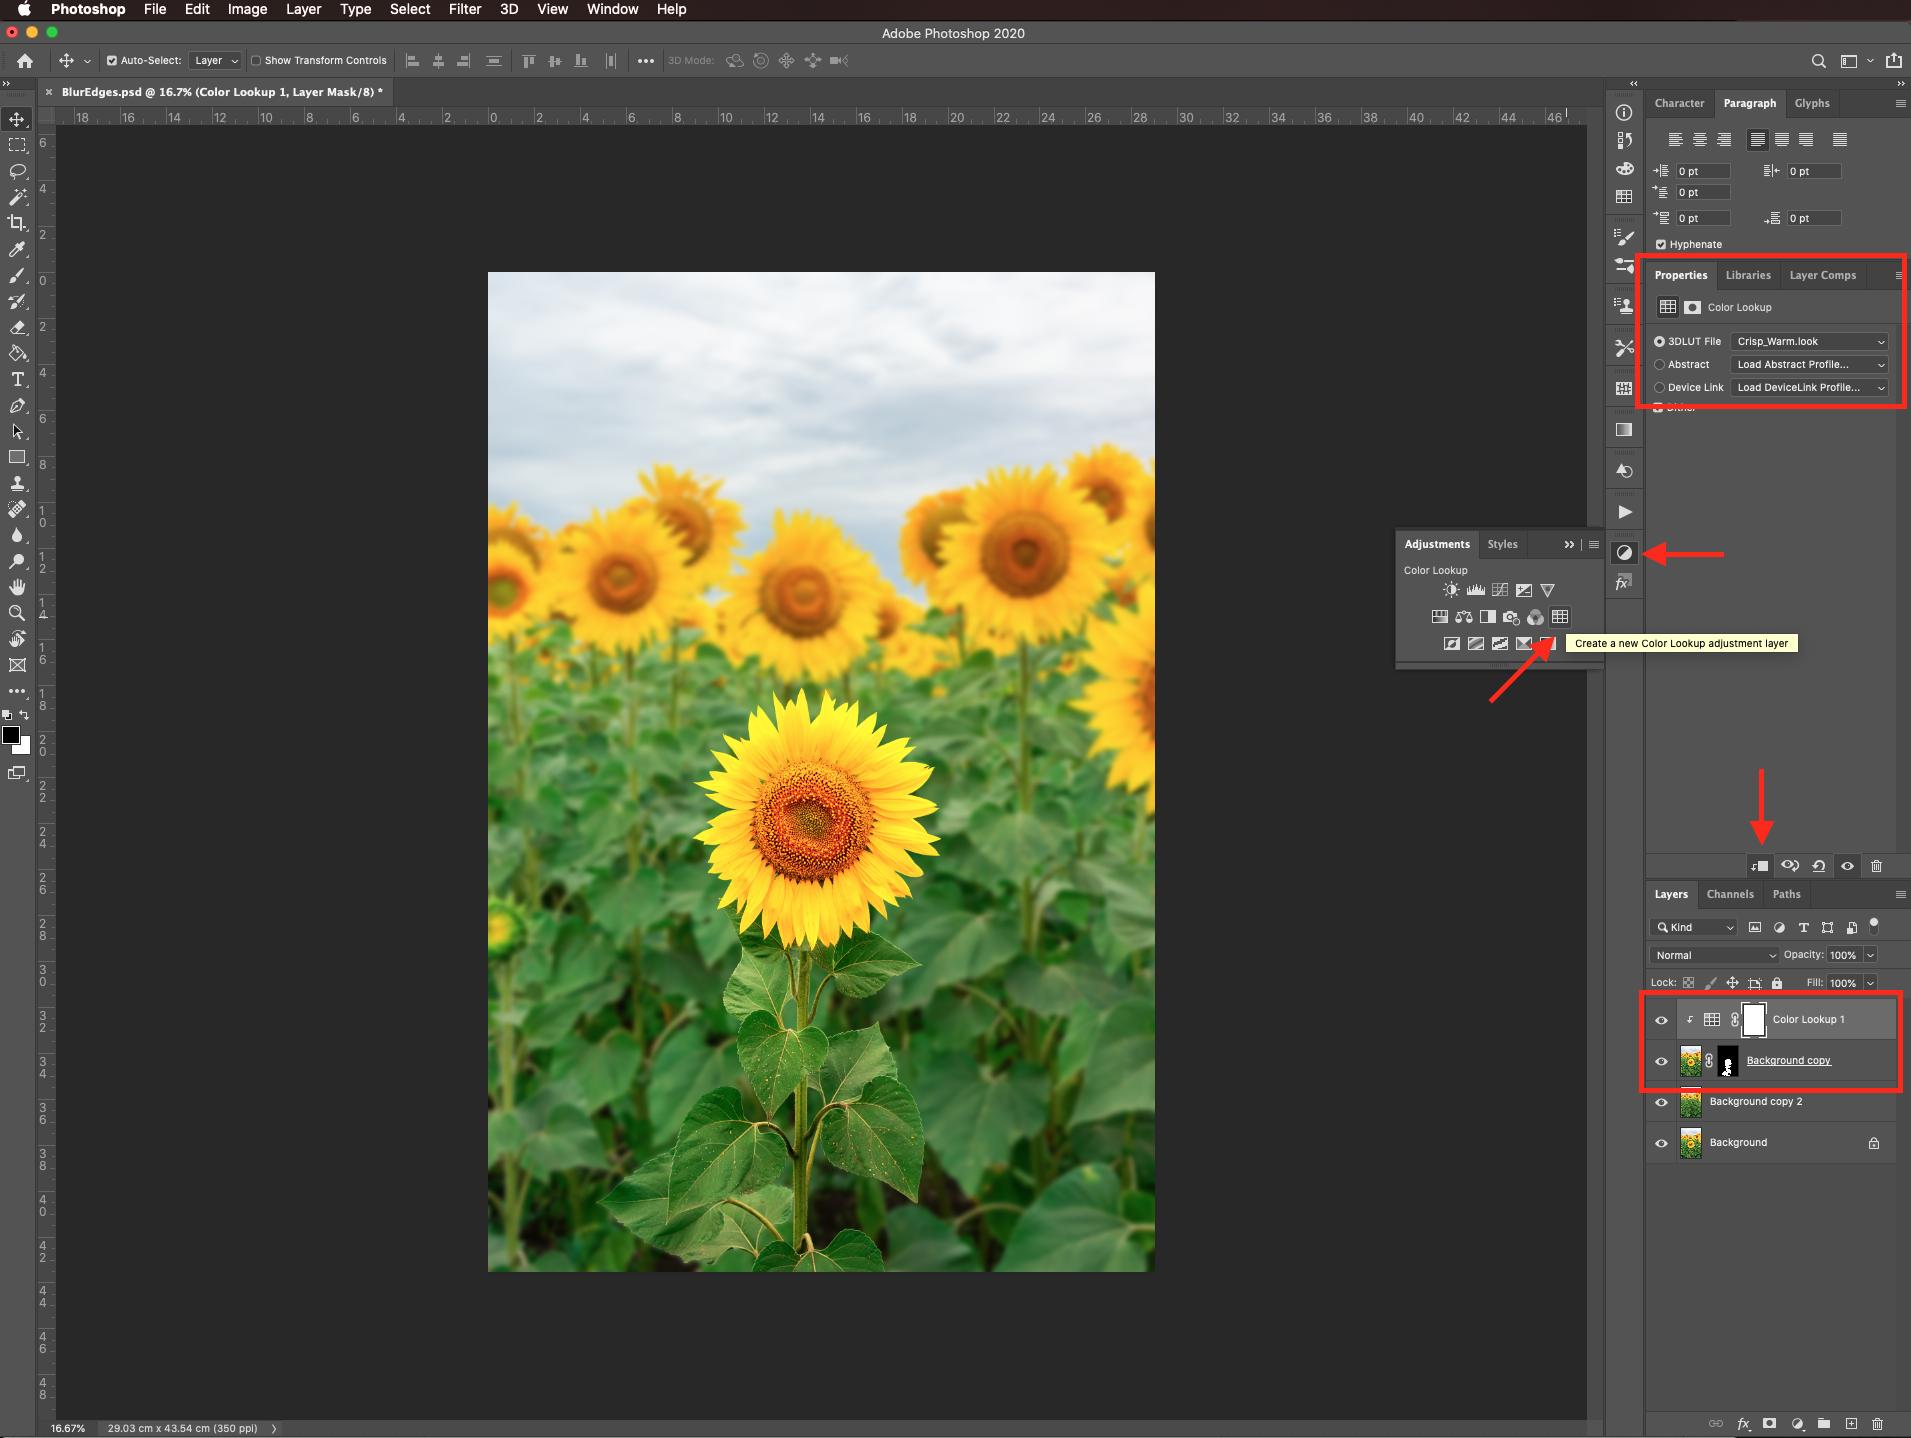
Check it out and don’t forget to save your work.
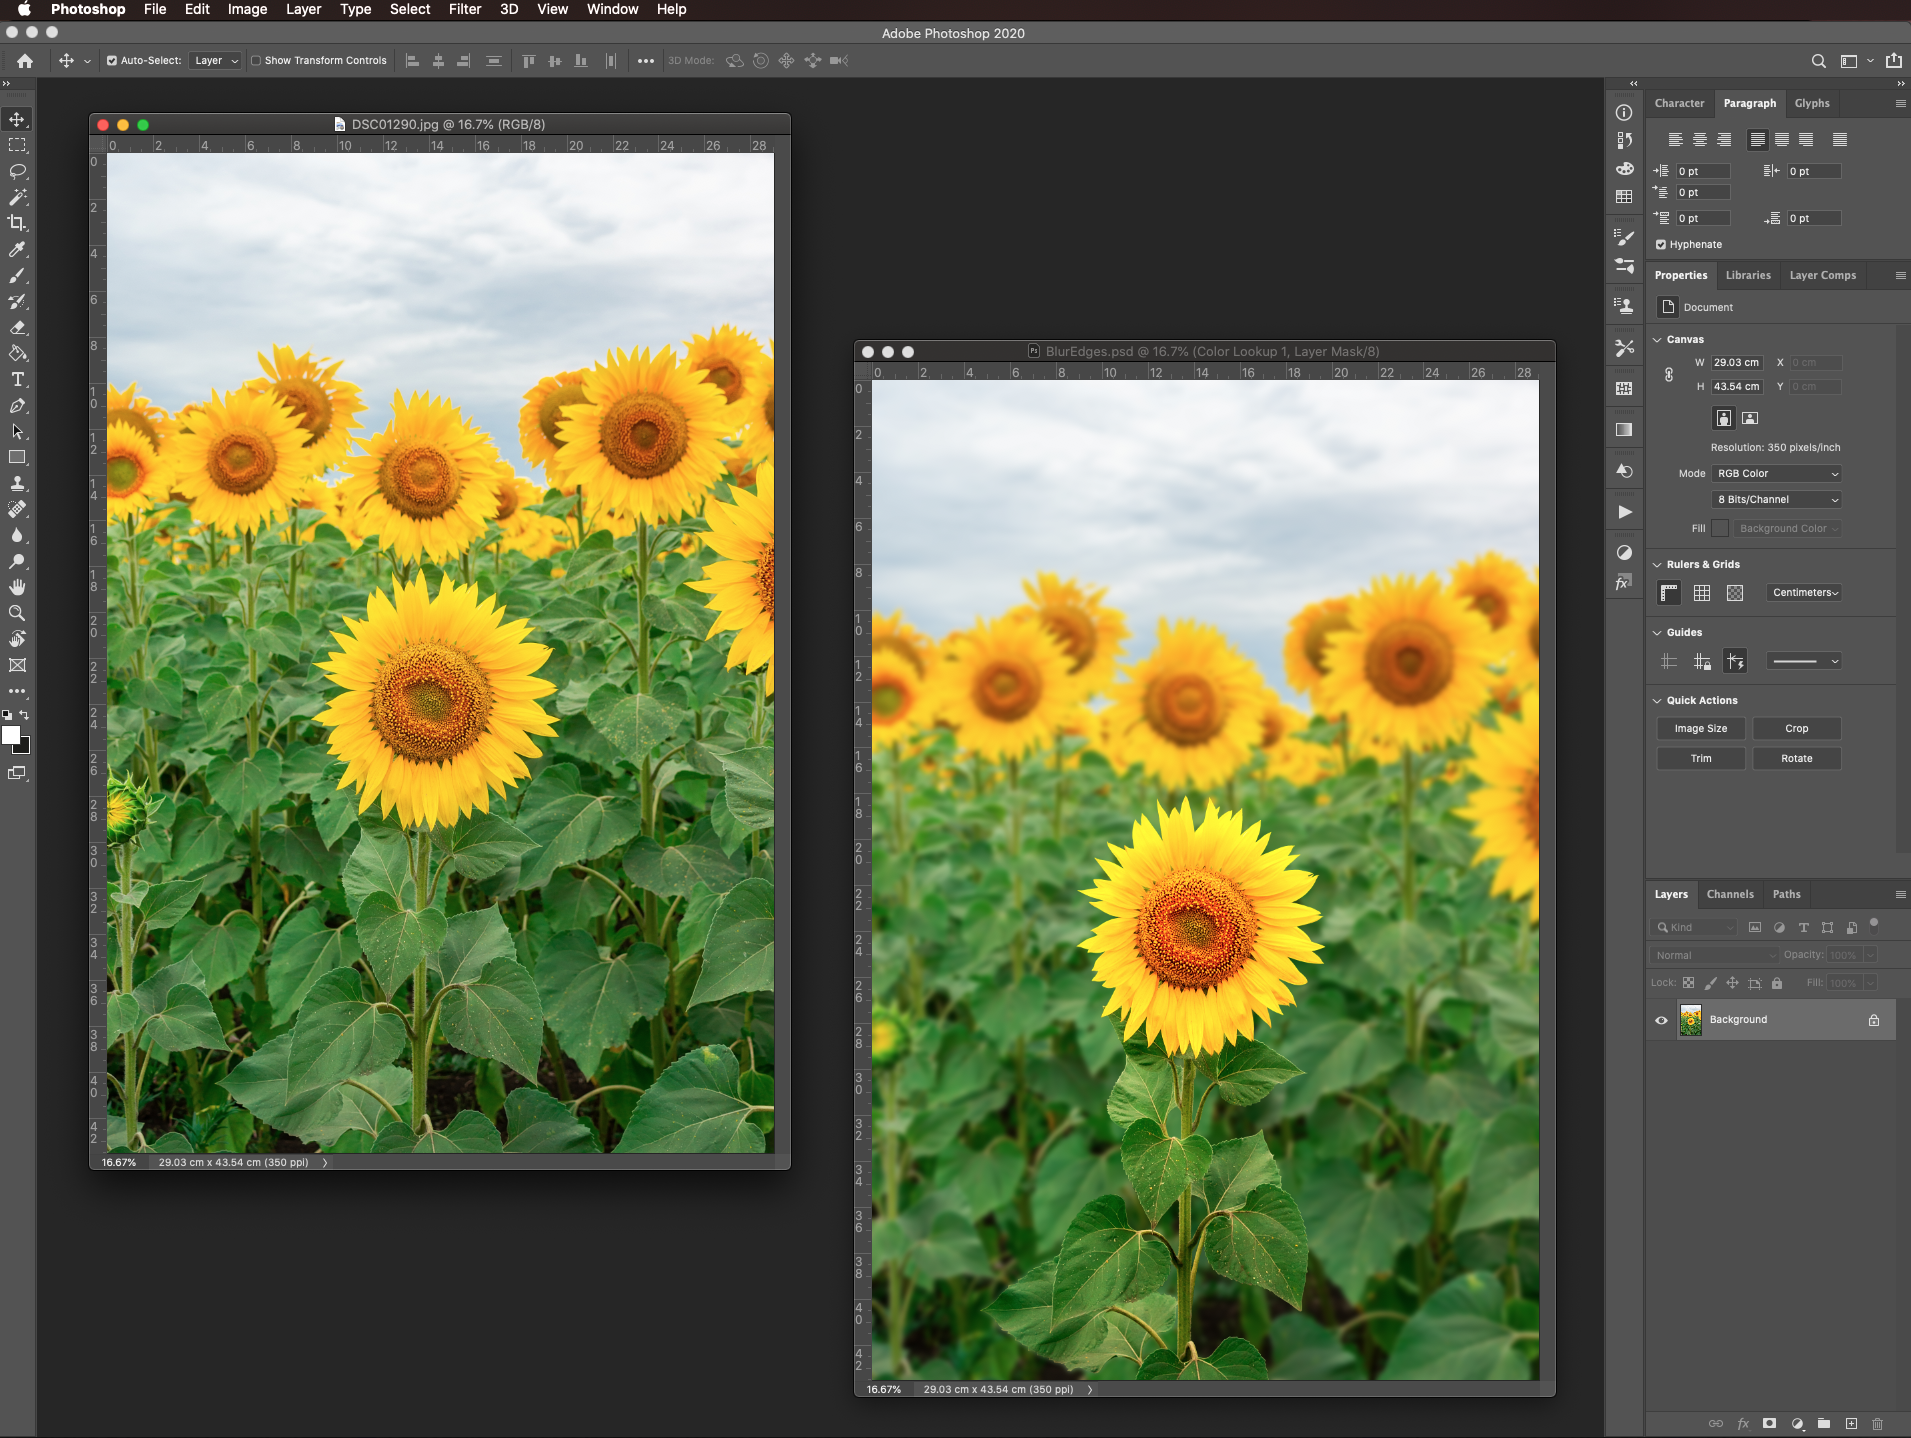
Now our background is blurred! What type of image will you be trying this technique with?
If you liked this tutorial make sure to check out some of our other Photoshop tutorials like how to use overlays and how to use textures.
Step 1: Open your image
In Photoshop, open the image you chose to work with.
Step 2: Create a mask
Go to Select > Select and Mask (option/alt + command/control + R).
To see how to create and refine the selection with the mask check our tutorial on how to smooth the mask edges.
Step 3: Save the mask
Check the decontaminate colors box and select output to new layer with layer mask before clicking OK.
The resulting image should look similar to this.
Step 4: Further clean edges using mask mode
To see the mask, click on top of its thumbnail while holding the option/alt key.
Choose a medium brush, make sure that white is the foreground color.
Change the brush blending mode to overlay and clean up the edges if needed.
Step 5: Fix outside edges
Change the foreground color to black and fix the outside edges too.
Now you can exit the mask view and check out your image.
Step 6: Duplicate the background layer
Duplicate the background layer (command/control + J).
Or right-click on top of its thumbnail, choose duplicate layer and click OK on the pop-up window.
The duplicate should be in between the background and the masked layer.
Step 7: Create a selection around the subject
Select the Lasso tool (L) and create a selection around the subject leaving a 3 mm space around its edges.
Step 8: Use content-aware fill on selection
Go to Edit > Fill (shift + F5) and choose content-aware in the contents tab.
Check if the auto settings work for you and make sure that output to current layer is selected before clicking OK.
You can check out the result by hiding the masked layer on top but take into account that it doesn’t need to be perfect.
Step 9: Apply a gaussian blur
Deselect (command/control + D) and go to Filter > Blur > Gaussian Blur.
Use a radius of 15% (or whatever amount that suits your needs).
If you want to bring out and highlight the subject more a bit more, you can add a color lookup adjustment layer to it. With the top layer selected go to the Adjustments panel and create a new color lookup adjustment layer using Crisp_Warm.look as 3DLUT File. Make sure you clip it to the masked layer. You can use any other preset or skip this step altogether.
Step 10: Save your artwork
Check it out and don’t forget to save your work.
Now our background is blurred! What type of image will you be trying this technique with?
If you liked this tutorial make sure to check out some of our other Photoshop tutorials like how to use overlays and how to use textures.
Related Tutorials
Affinity Tutorials
How to Blur the Background in Affinity Photo
Learn how to blur the background of your photos in Affinity Photo with this step by step tutorial.
Canva Tutorials
How to Blur the Background of Photo in Canva
Bokeh effect or out-of-focus blur in the background of your photos...
Photoshop Tutorials
How to Create a Faded Blur Effect in Photoshop
Create a faded blur effect in Photoshop using these technique and add mystery to your images.
Photoshop Tutorials
How to Make a Holographic Background in Photoshop
Learn how to create a shiny holographic effect in Photoshop with this step by step tutorial.
Photoshop Tutorials
How to remove the white background from images in Photoshop
DesignScape Tutorials
How to Blur Background of Photo in DesignScape
Learn how to blur the background of photos in DesignScape.