By Design Bundles
Cricut Tutorials8 min
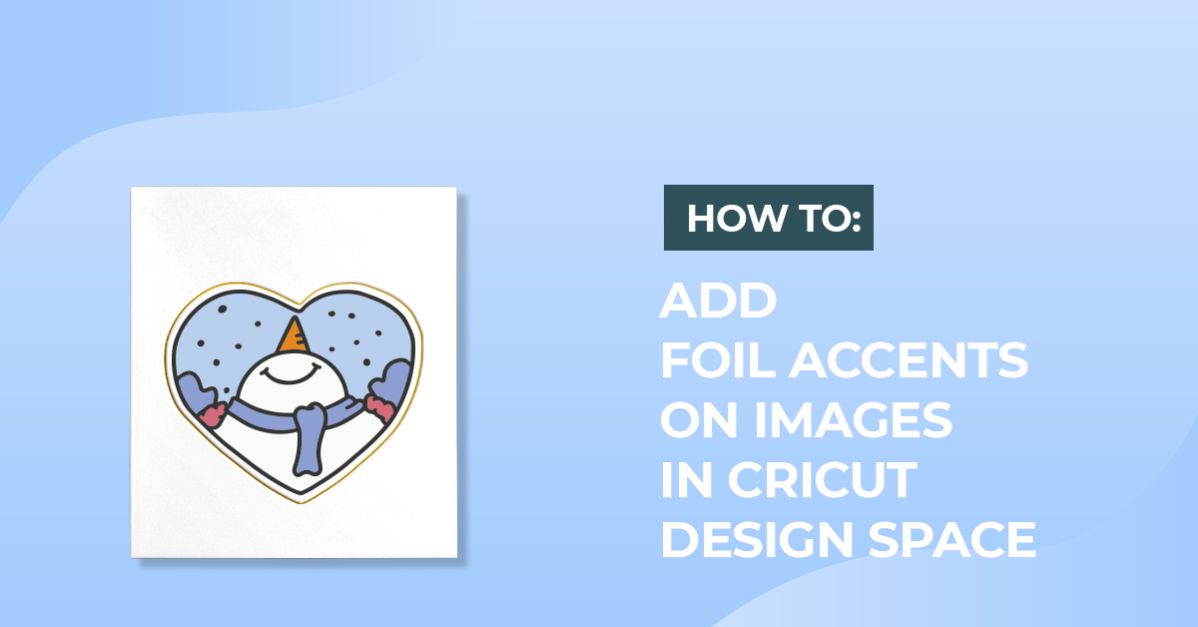
Foiling Accents on images in Cricut design space
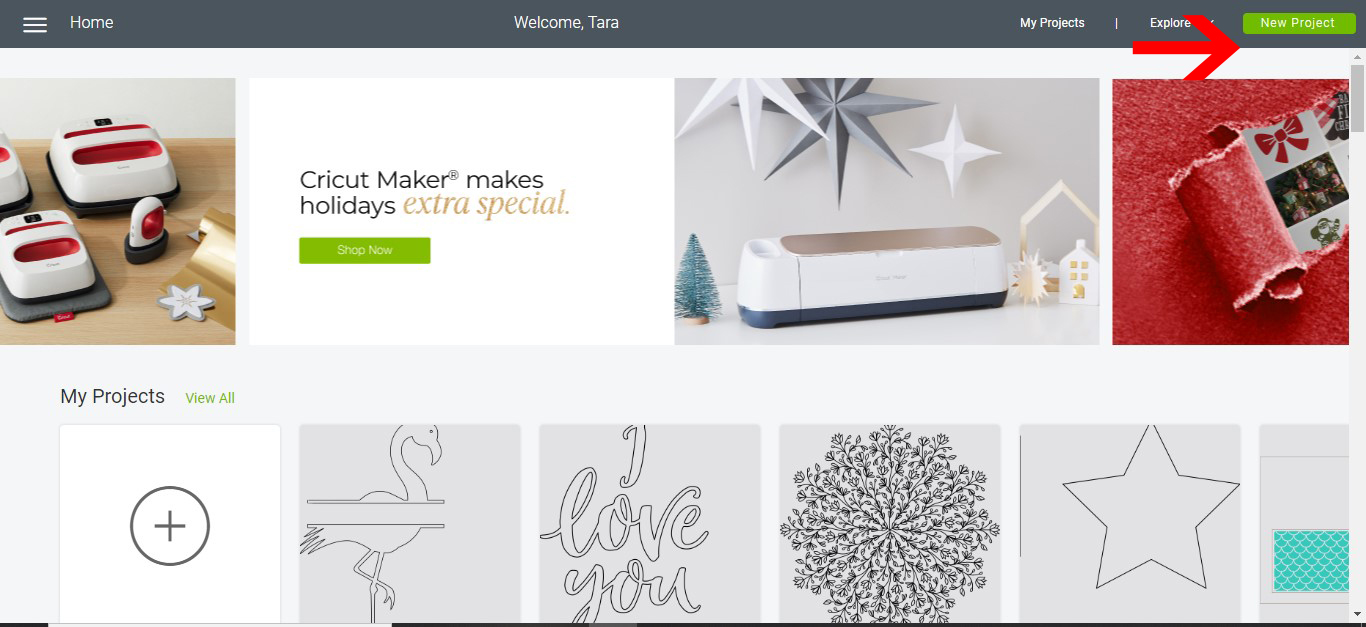
1- Open Cricut design space and click on new project.
3- Click on upload image.
4- Click on browse.
5- Select the design you would like to add foiled accents too. I am using Elves and gifts graphics from designbundles.net
6- Select the complex option in the image type option. Click continue.
7- Using the magic wand tool Start removing parts of your design. Where ever you remove the design a "cut line" will be created.
8- If you remove small parts of your design in the inside this will also create"cut lines" so in this image I have removed the belt and buttons so I get foil accents around those areas.
You can use the preview button to check your design. Once you are happy click continue.
9- You now have the option to either print and cut or just cut. At this point use the cut option. Name the file and save.
10- Now we need to create the print size of the design. Click upload.
11- upload the same image. click complex again.
12- Depending on the image you can use the magic want tool to remove parts again to create more accents. or if you hare happy with your previous accents just click continue.
13- This time you need to save as a print and cut. name the file and save.
14- Select both the print and cut file and also the plain cut file. and insert into your design space.
15- Both your designs will appear on your screen.
16- Select the cut file and change the line type to draw.
17- Realign the draw lines over your image. They should line up fine.
18- With both the draw lines and image selected, group them together and attach them so when you go to print and foil they will be in the same place on the cutting mat. Click make it.
19- Your print and cut will appear on your cut mat. Click continue.
20- Click on the print option.
21- Select your printer and print.
22- Place your image on your mat. Attach your foil over your design. Make sure that the foil and tape do not go over the registration marks that surround the image or the cricut will not be able register where it needs to add the draw lines.
23-Place your foil quill in clamp A. In clamp B where the cutting tool goes, remove the cutting tool as you will not need it and this also ensures that the machine will not complete the cut part of the print and cut.
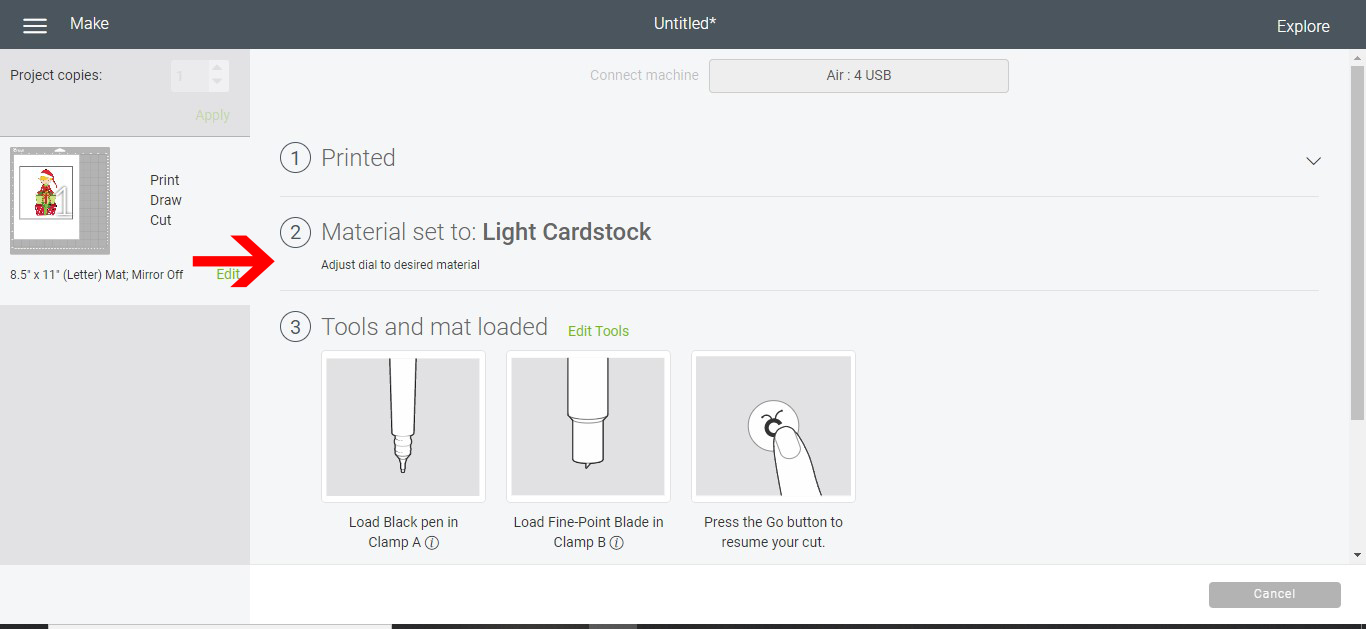
24- Select your material. and then click go.
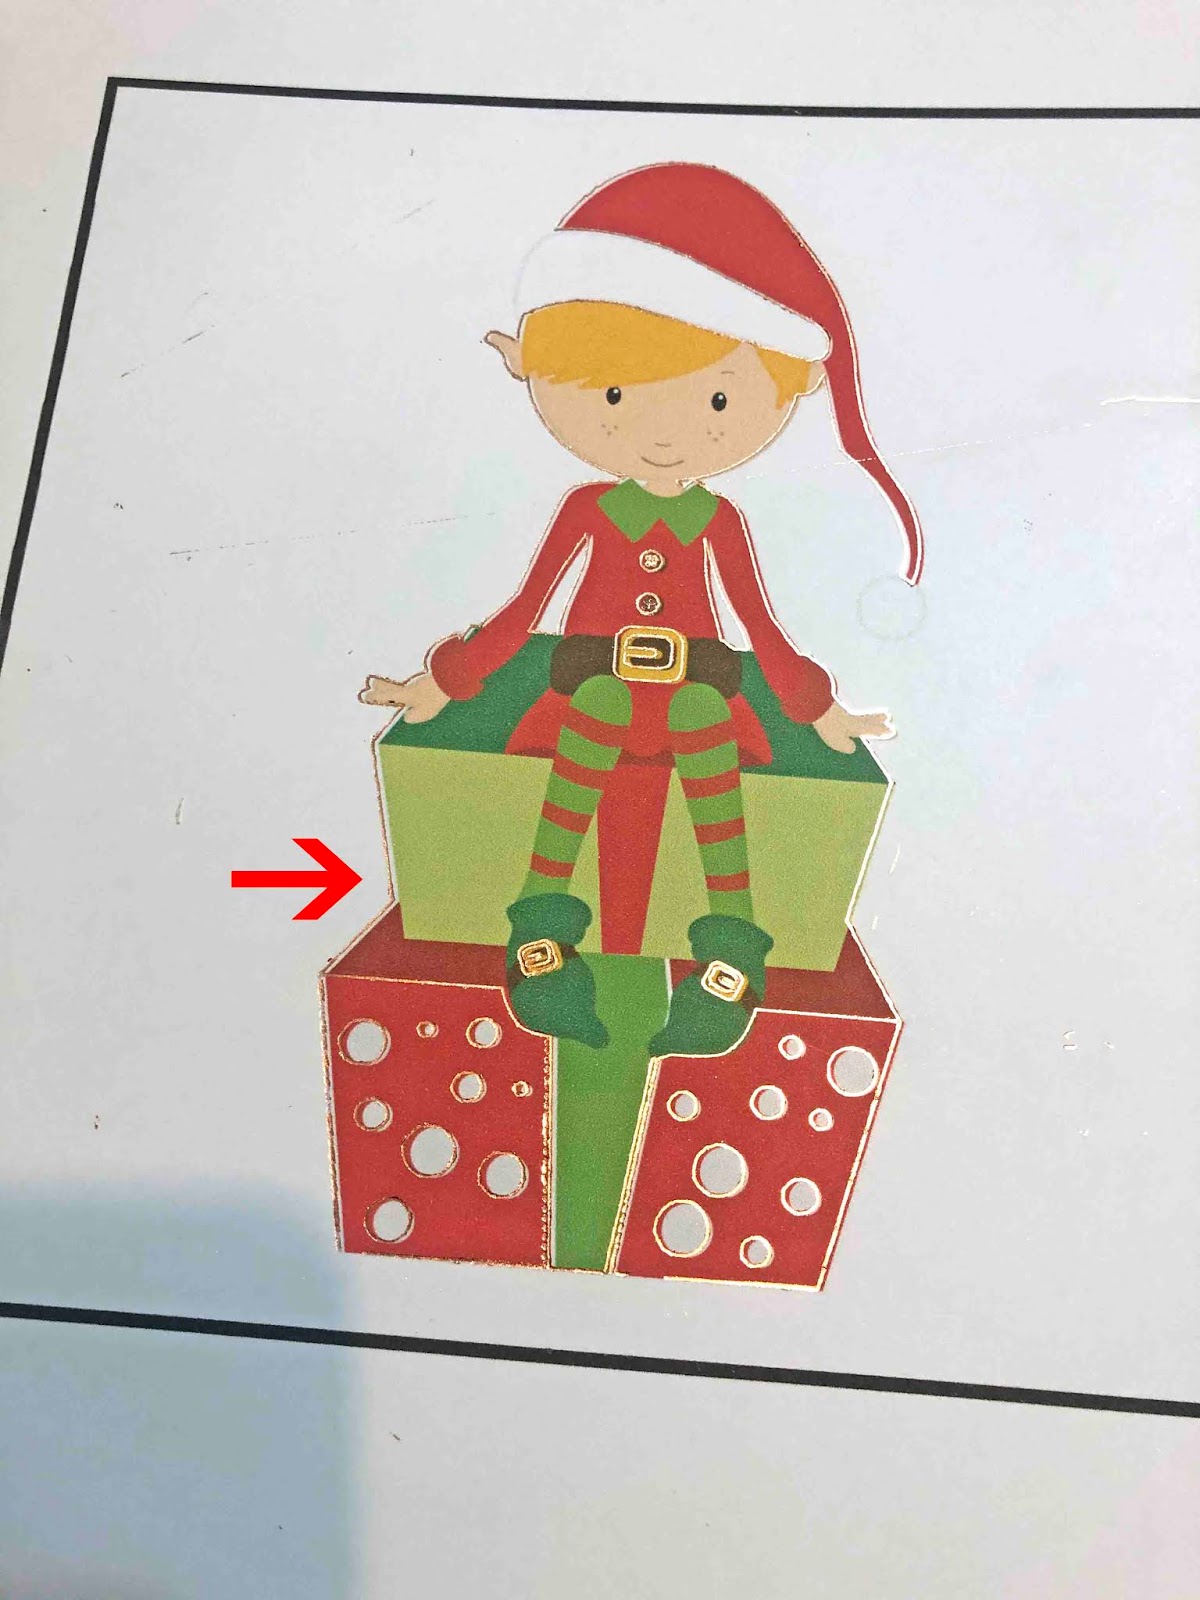
25- Your machine will foil over there the cut lines were places and the foil accents will now be seen. The cricut will now ask you to complete the cut part of the print and cut. you can actually click the finish button and this will cancel the cat part.
2- Click the upload icon.
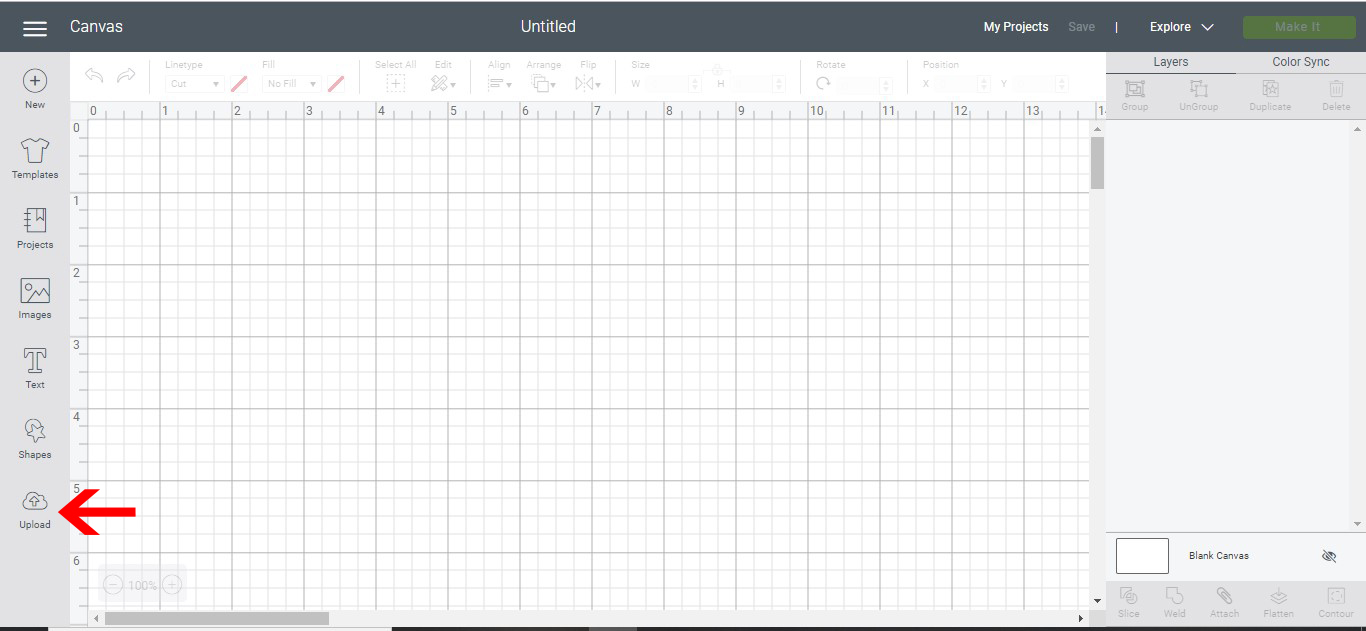
3- Click on upload image.
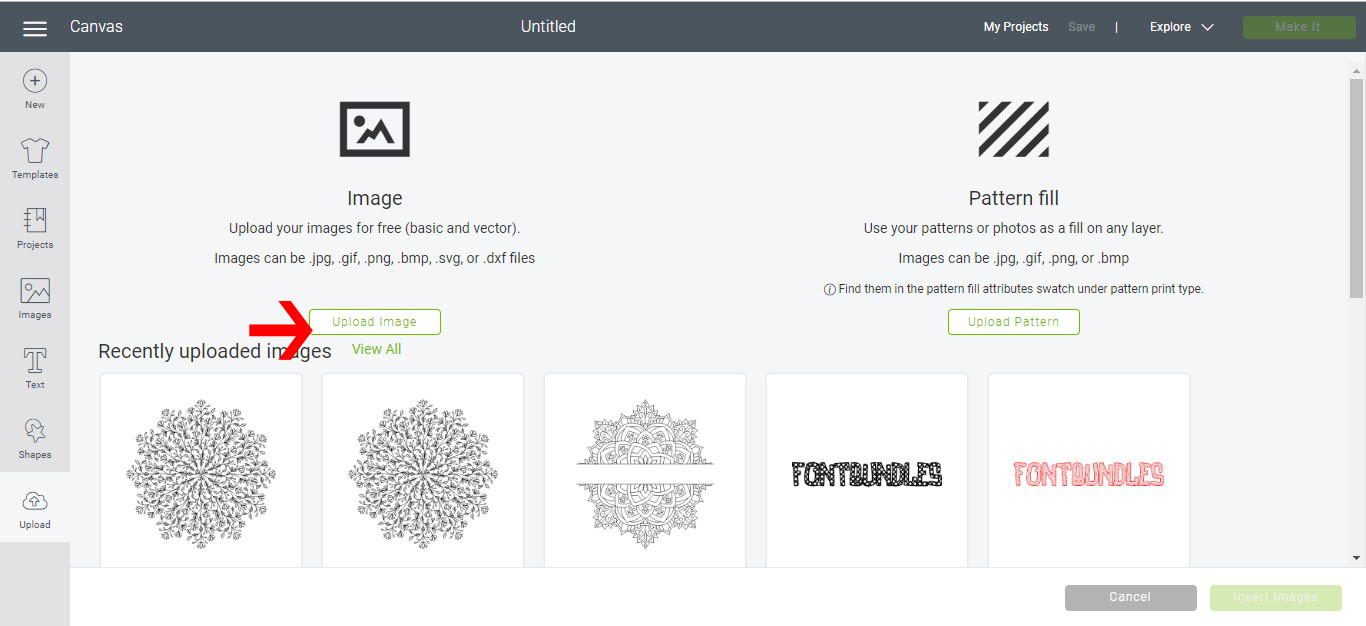
4- Click on browse.

5- Select the design you would like to add foiled accents too. I am using Elves and gifts graphics from designbundles.net
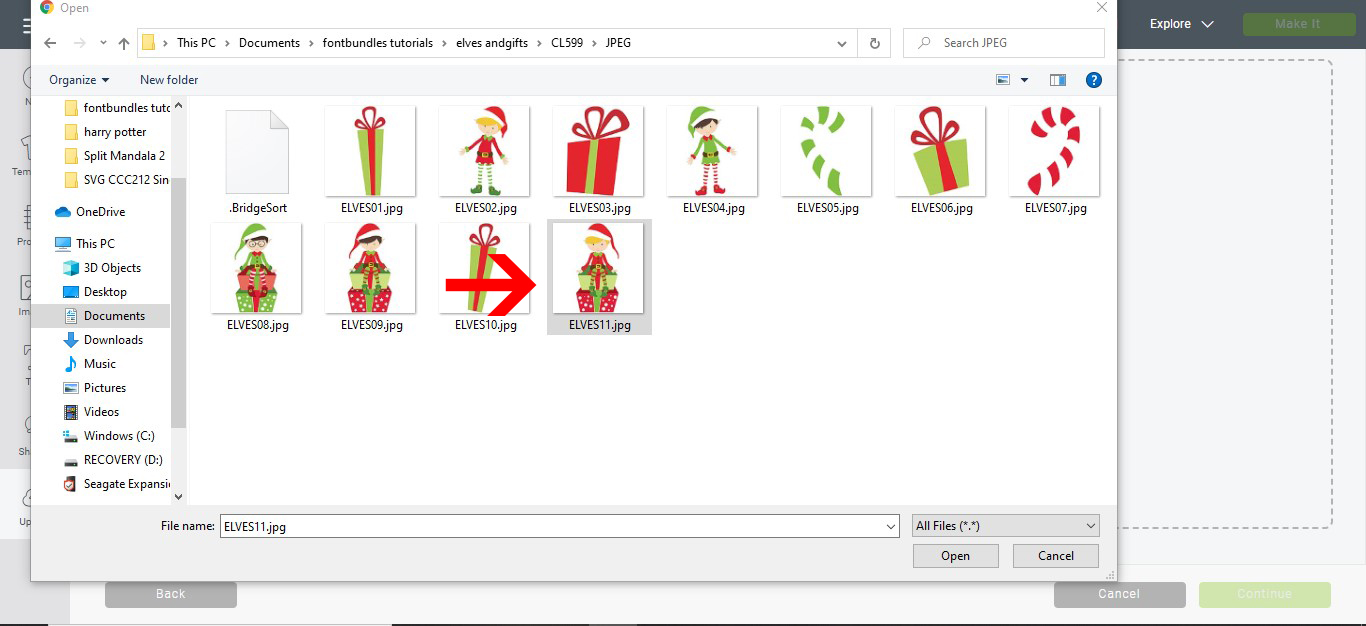
6- Select the complex option in the image type option. Click continue.

7- Using the magic wand tool Start removing parts of your design. Where ever you remove the design a "cut line" will be created.
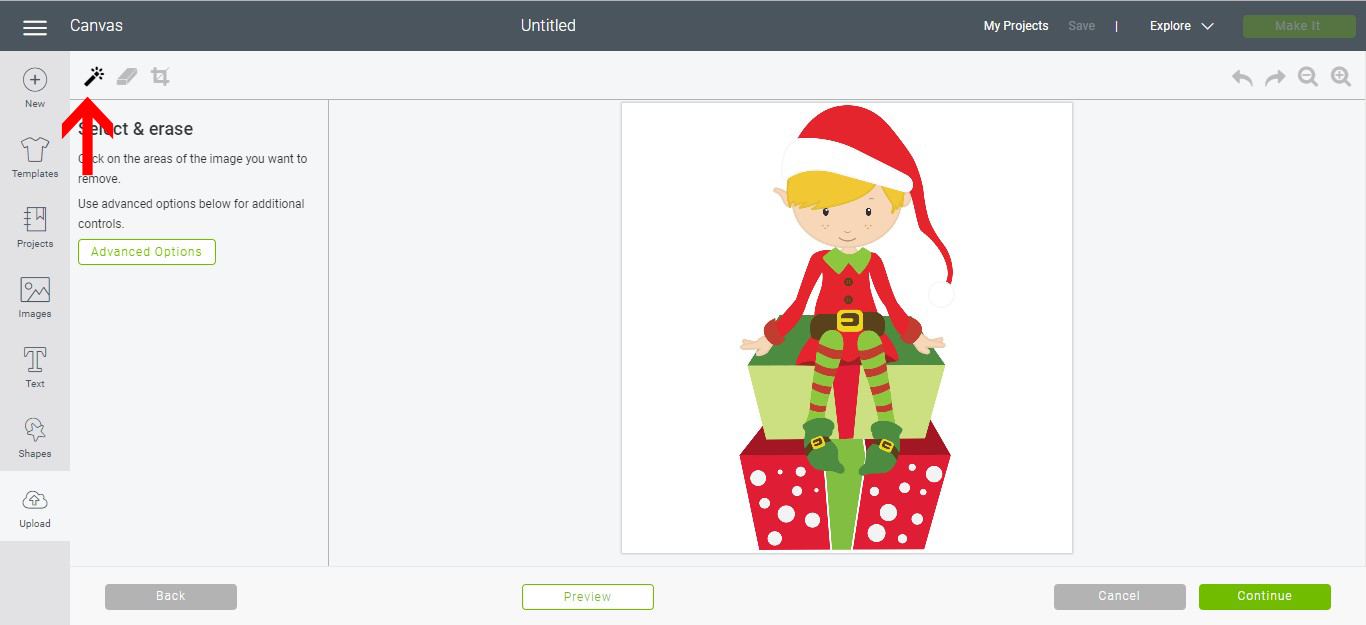
8- If you remove small parts of your design in the inside this will also create"cut lines" so in this image I have removed the belt and buttons so I get foil accents around those areas.
You can use the preview button to check your design. Once you are happy click continue.

9- You now have the option to either print and cut or just cut. At this point use the cut option. Name the file and save.
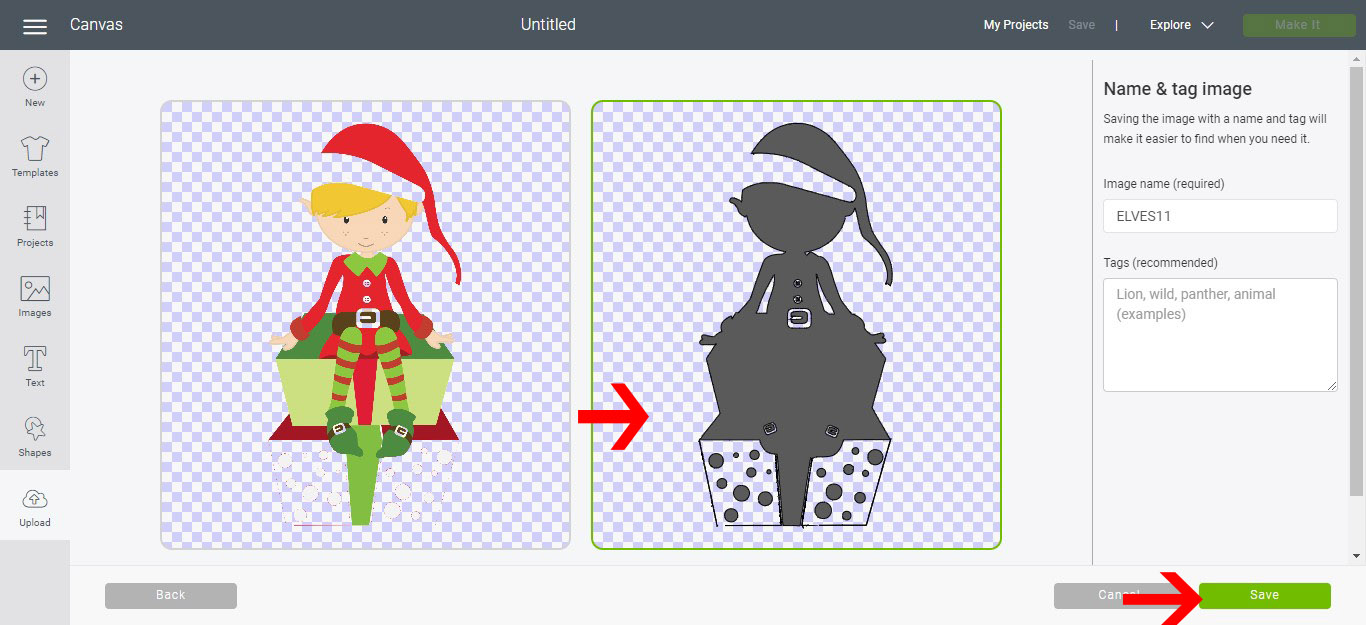
10- Now we need to create the print size of the design. Click upload.

11- upload the same image. click complex again.

12- Depending on the image you can use the magic want tool to remove parts again to create more accents. or if you hare happy with your previous accents just click continue.

13- This time you need to save as a print and cut. name the file and save.
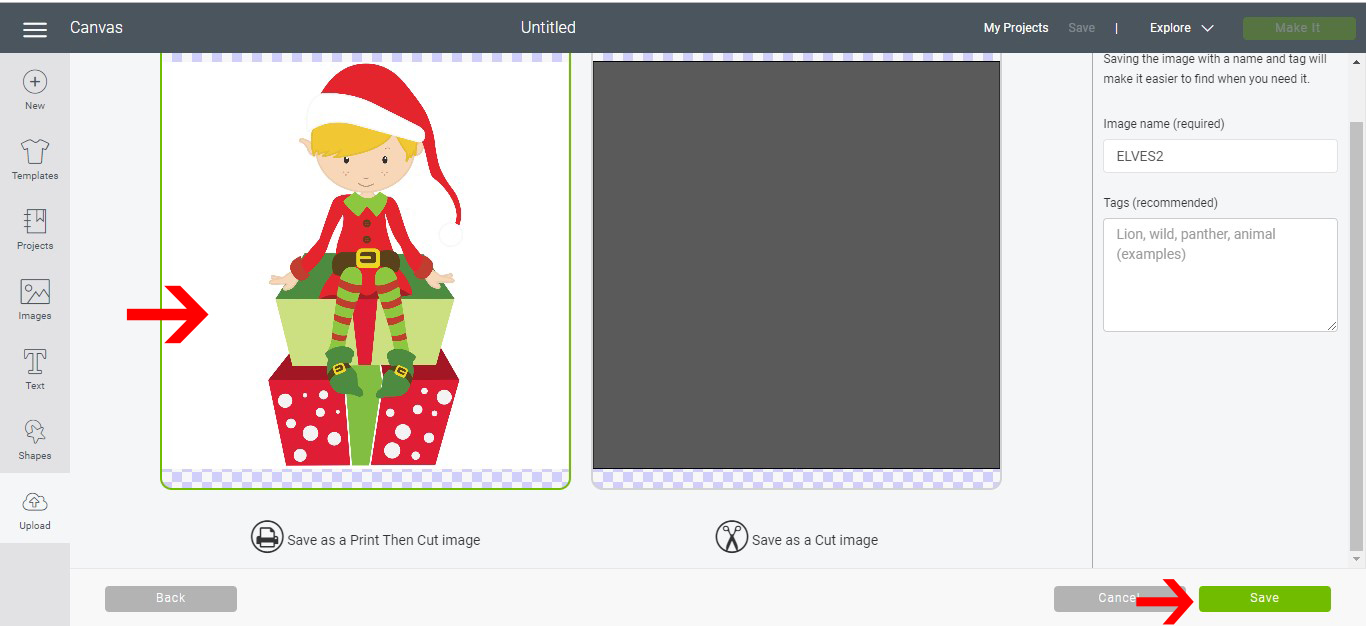
14- Select both the print and cut file and also the plain cut file. and insert into your design space.
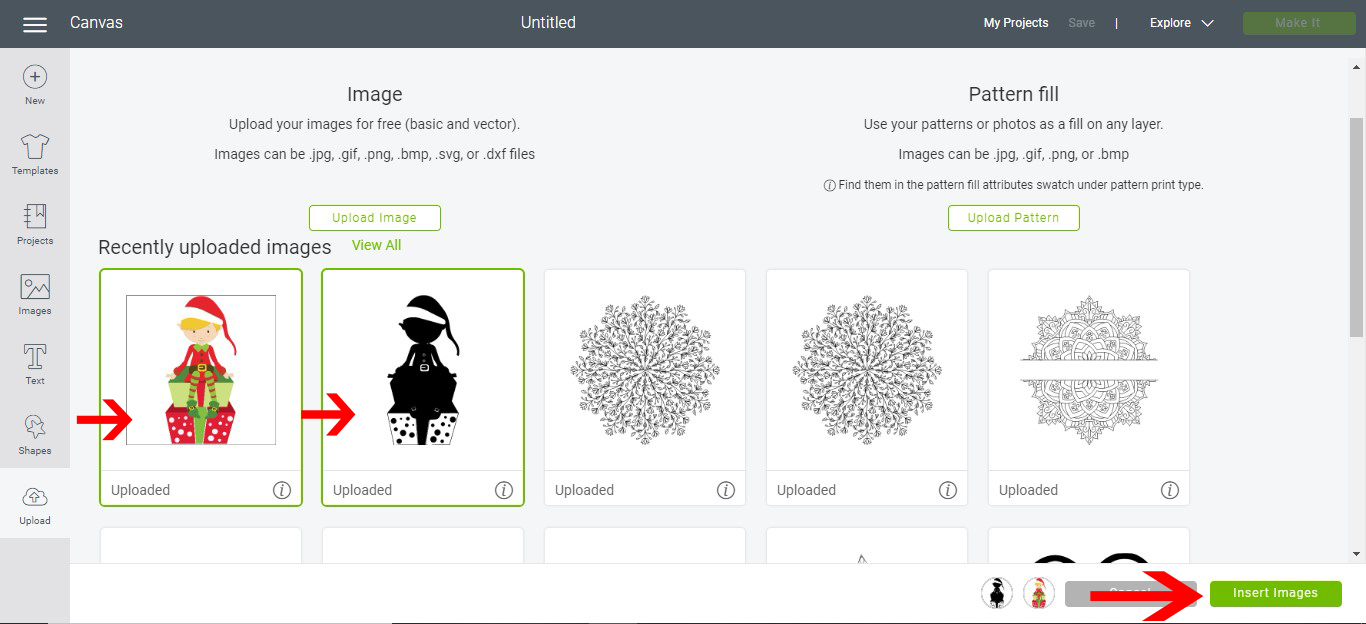
15- Both your designs will appear on your screen.
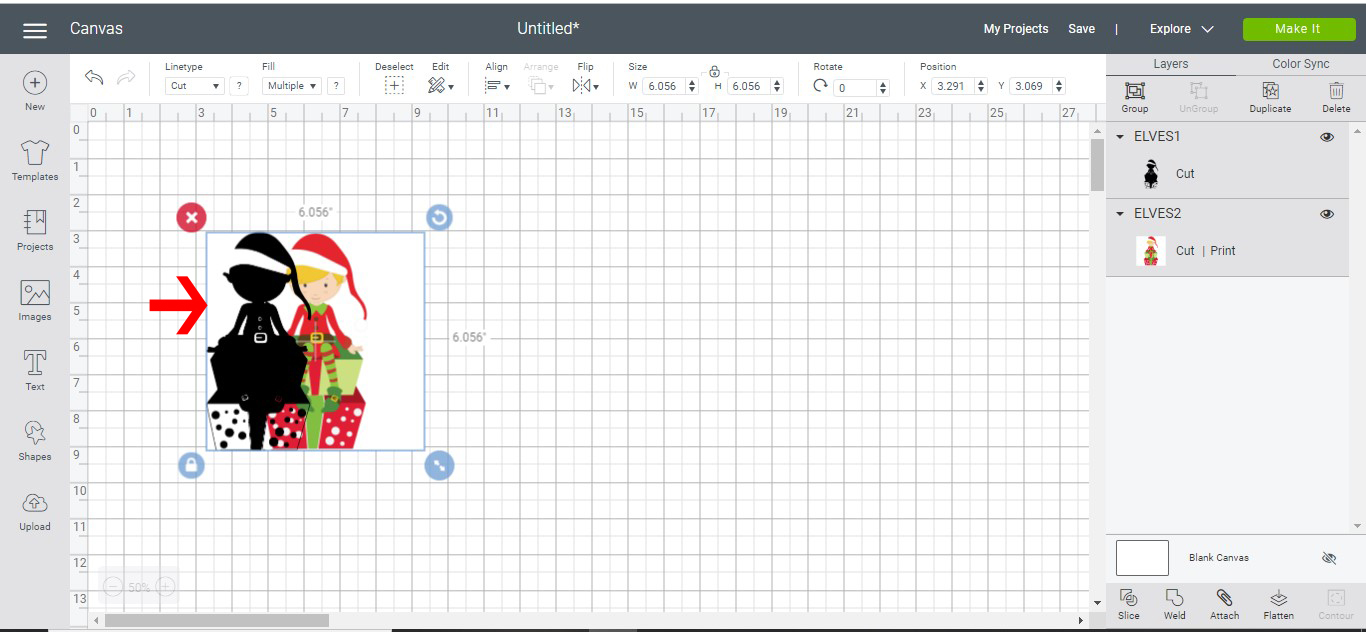
16- Select the cut file and change the line type to draw.

17- Realign the draw lines over your image. They should line up fine.
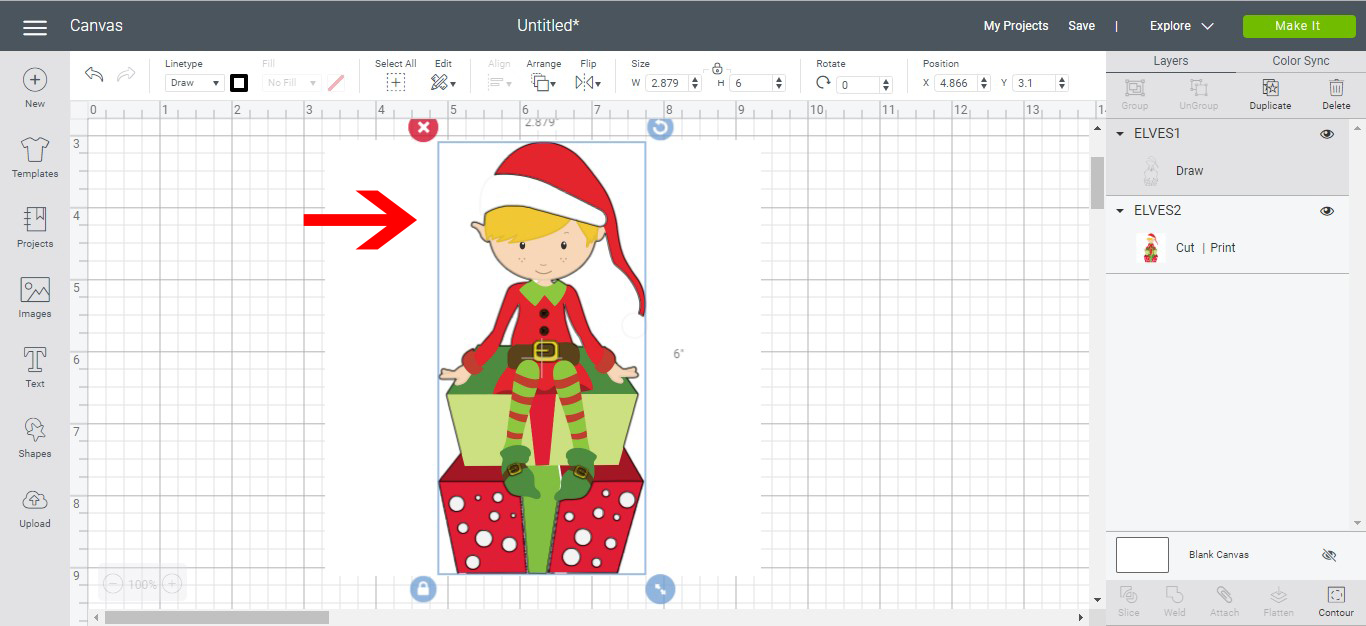
18- With both the draw lines and image selected, group them together and attach them so when you go to print and foil they will be in the same place on the cutting mat. Click make it.
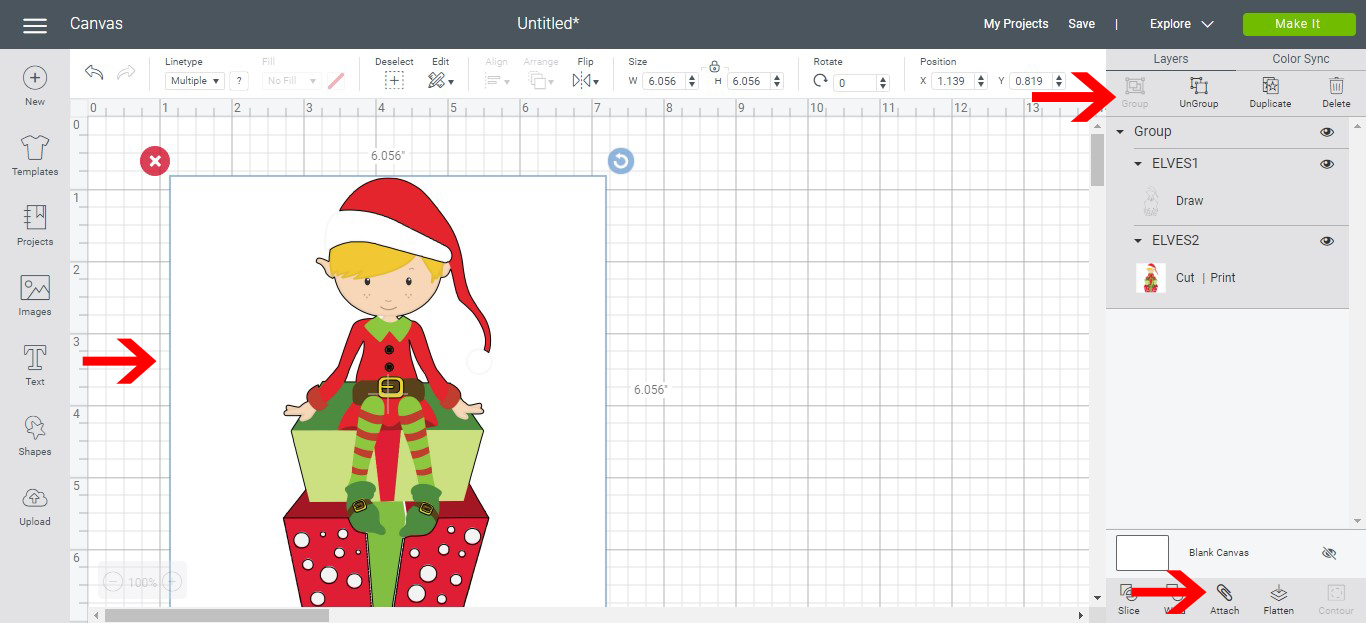
19- Your print and cut will appear on your cut mat. Click continue.
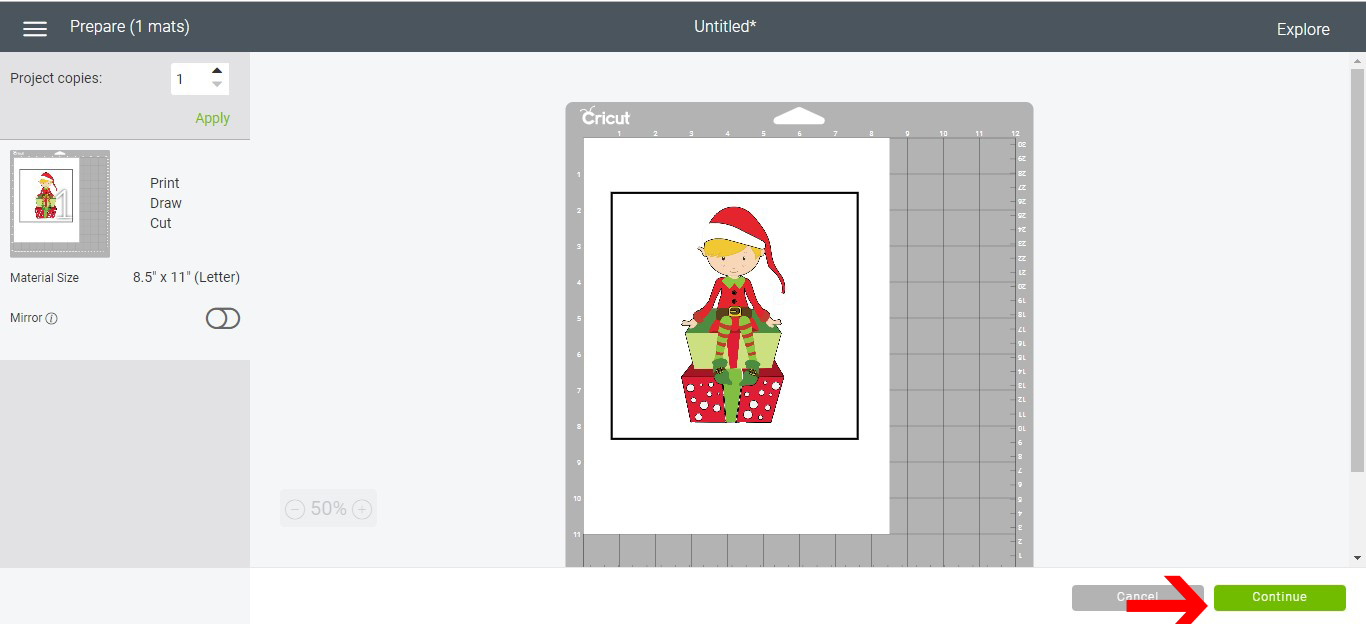
20- Click on the print option.
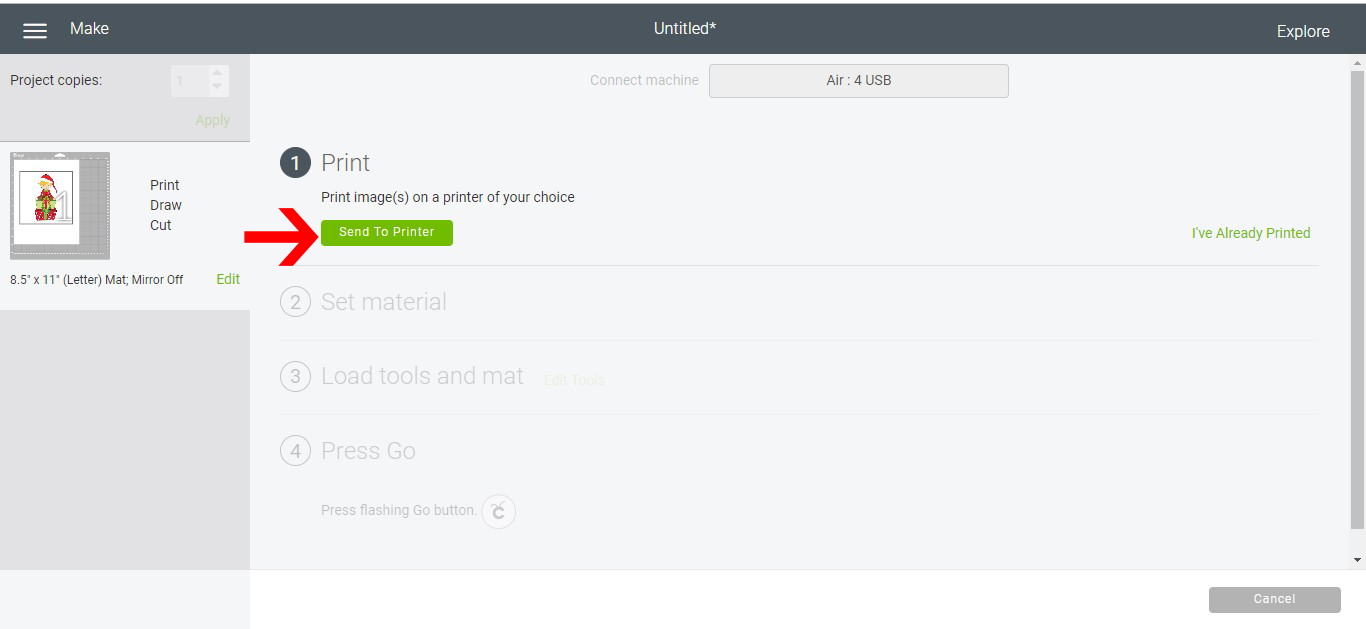
21- Select your printer and print.
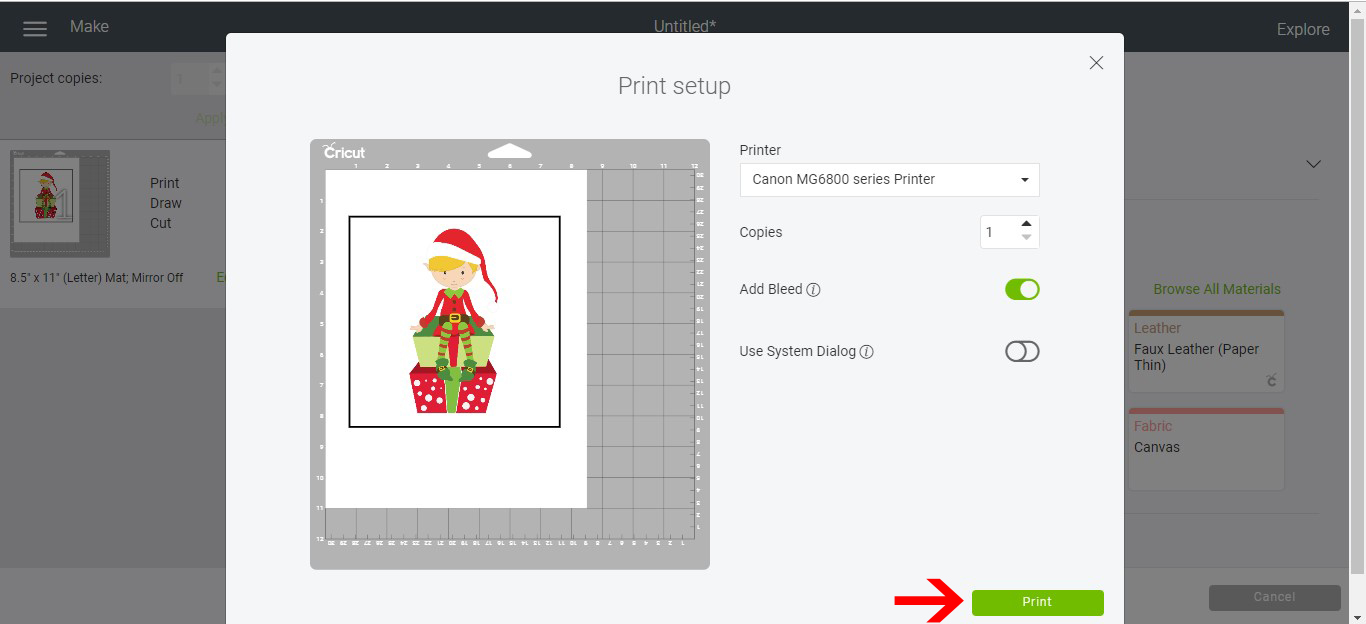
22- Place your image on your mat. Attach your foil over your design. Make sure that the foil and tape do not go over the registration marks that surround the image or the cricut will not be able register where it needs to add the draw lines.
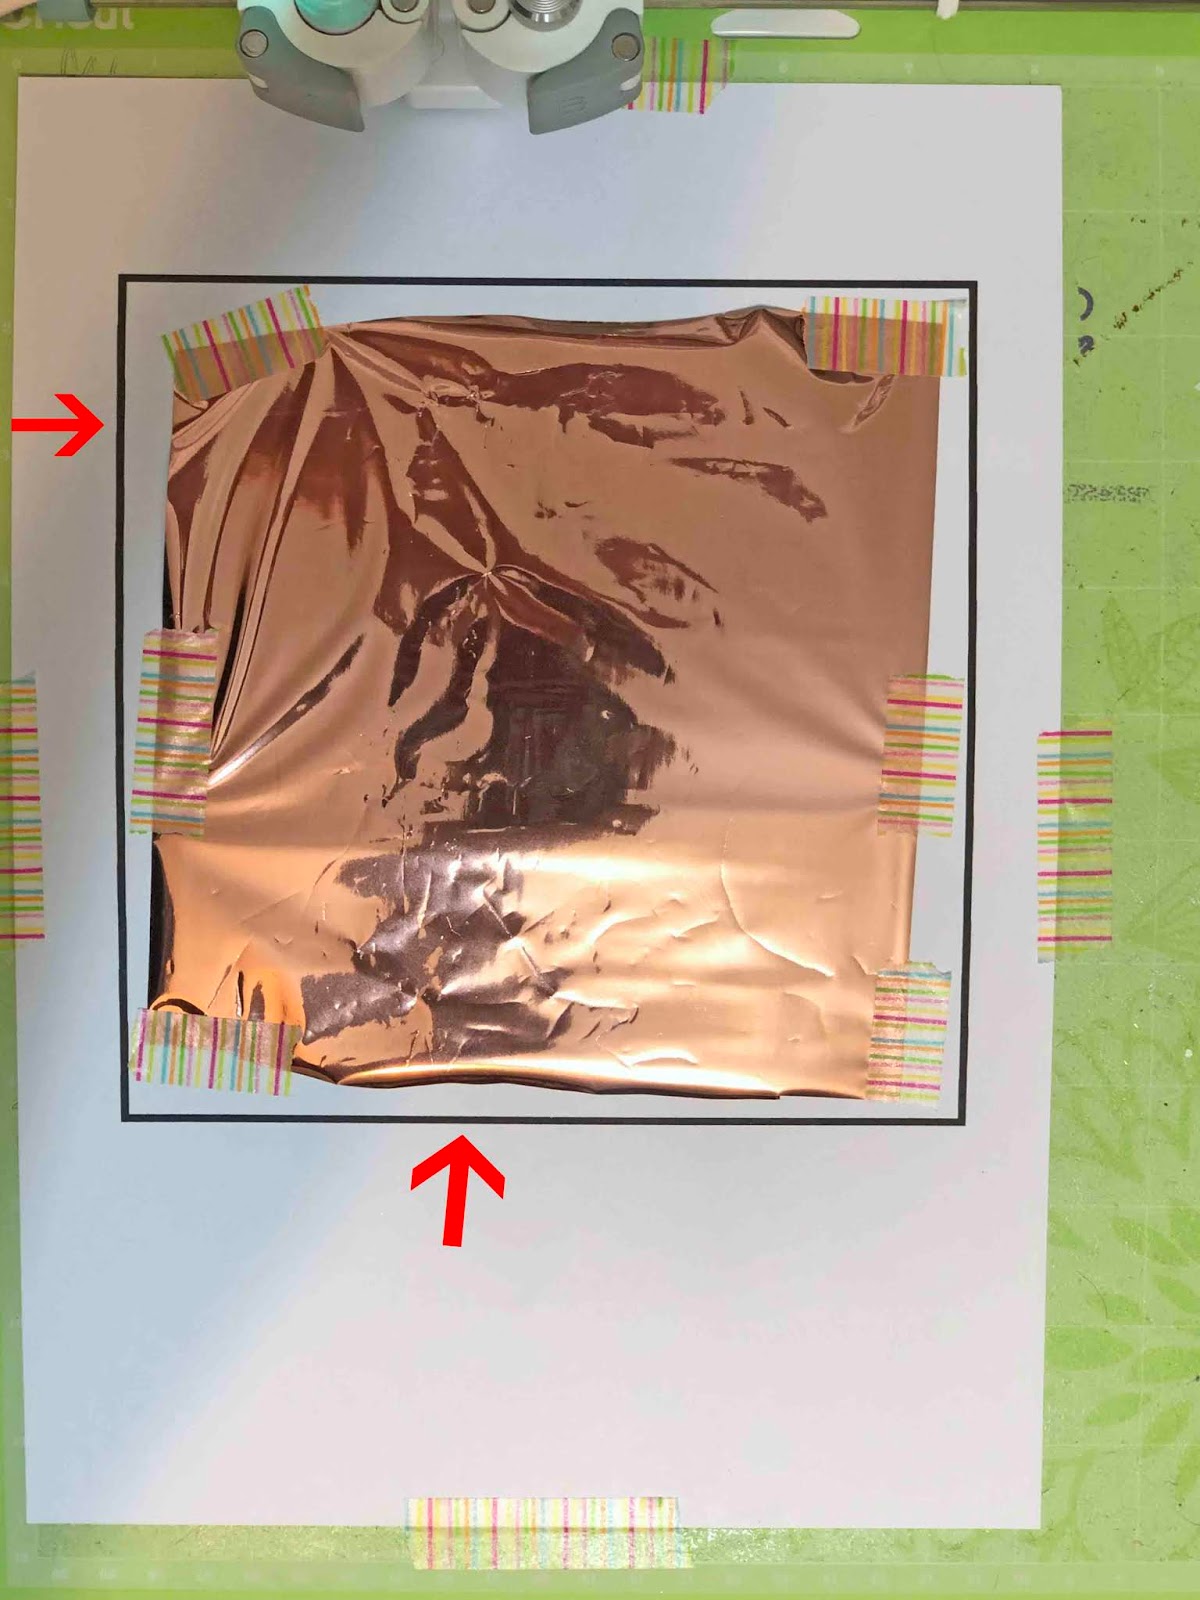
23-Place your foil quill in clamp A. In clamp B where the cutting tool goes, remove the cutting tool as you will not need it and this also ensures that the machine will not complete the cut part of the print and cut.

24- Select your material. and then click go.
25- Your machine will foil over there the cut lines were places and the foil accents will now be seen. The cricut will now ask you to complete the cut part of the print and cut. you can actually click the finish button and this will cancel the cat part.
Related Tutorials
Cricut Tutorials
Foiling on Vinyl with Cricut Design Space
Cricut Tutorials
Foiling on leather with cricut design space
Cricut Tutorials
Altering Images Using the Contour Tool in Cricut Design Space Mobile App
Discover how to alter images using the Contour Tool in Cricut Design Space.
Cricut Tutorials
How To Use The Slice Tool In Cricut Design Space To Split Images
Learn how easily to Split Images in Cricut Design Space using the Slice Tool.
Cricut Tutorials
Editing Images in Cricut Design Space
Crop, Erase or completely change a design with multiple tools for editing made easy.
Cricut Tutorials
Separating Images From a Multiple Image in Cricut Design Space 3
Discover how easy it is to separate images from a single design in Cricut Design Space.