By Design Bundles
Cricut Tutorials7 min
How to Place Images in Text in Cricut Design Space
Today we'll focus on how to place an image within a text. This can be used to create wonderful gifts, favors and more.
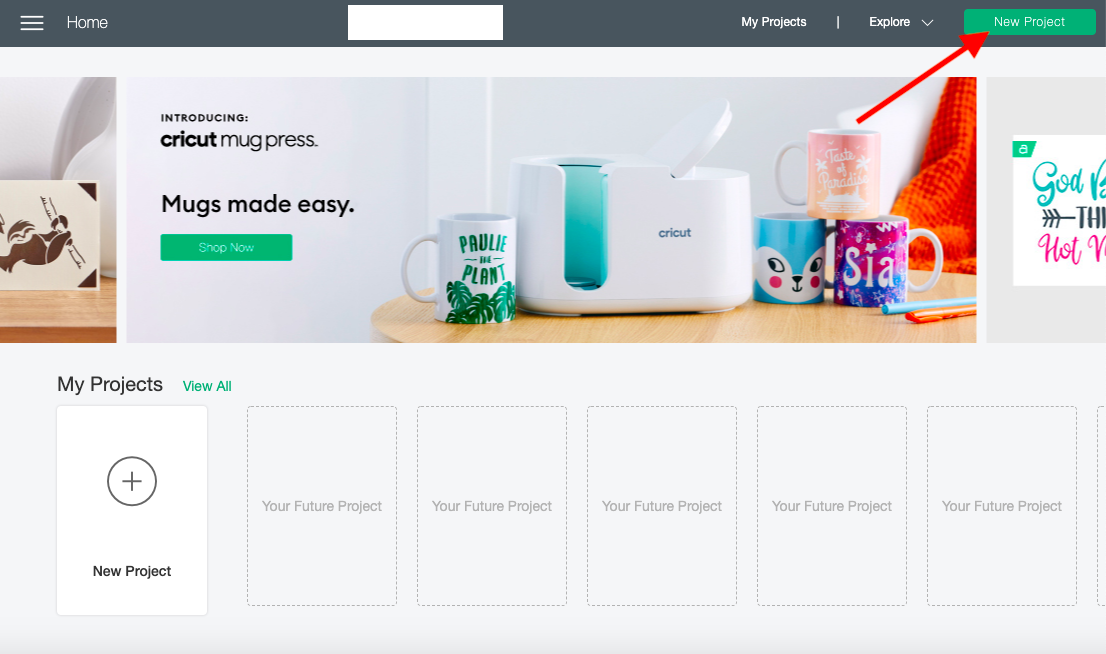
Once you are have logged in, create a new project in Cricut Design Space by simply clicking on the green button that is labeled New Project on the top right-hand corner.
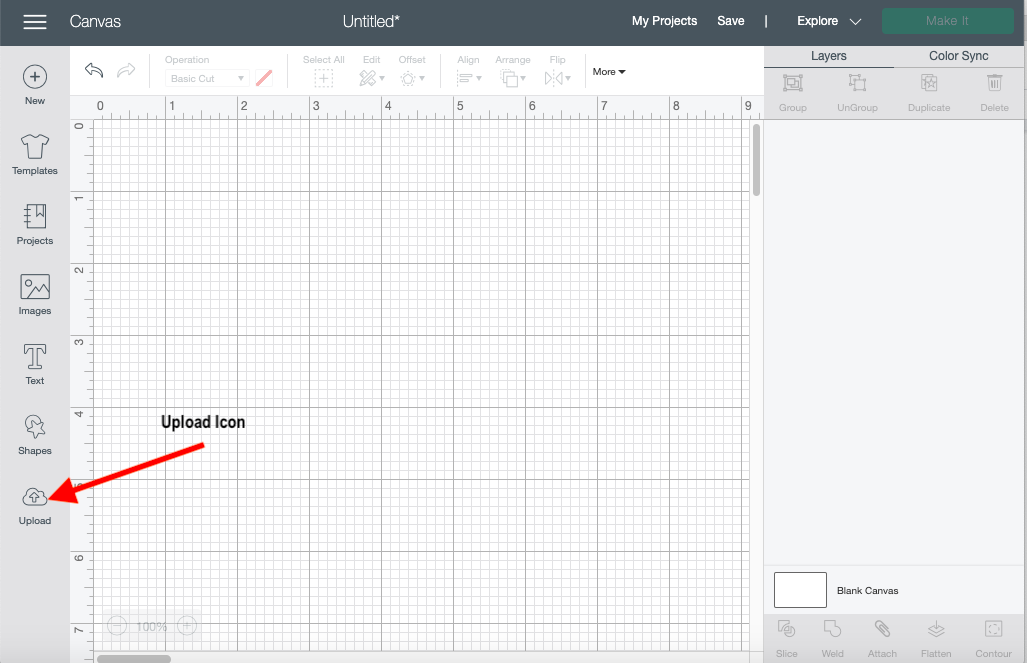
Now that you are on the canvas screen you can now start the upload process. Use the Upload button on the left side of your screen to get started. Today I will be uploading an image of beach rocks and a photo of boats in the water. I'll be uploading these images as a print and cut project. We have a great tutorial on Print and Cut images in Cricut Design Space if needed.
Today I'll be working with Cheeky Bite By Amber Nest Design to start the design process. I'll start by typing out a simple word using my text tool. If you need help with Cricut Design Space Text tool we have a great tutorial to show you how.
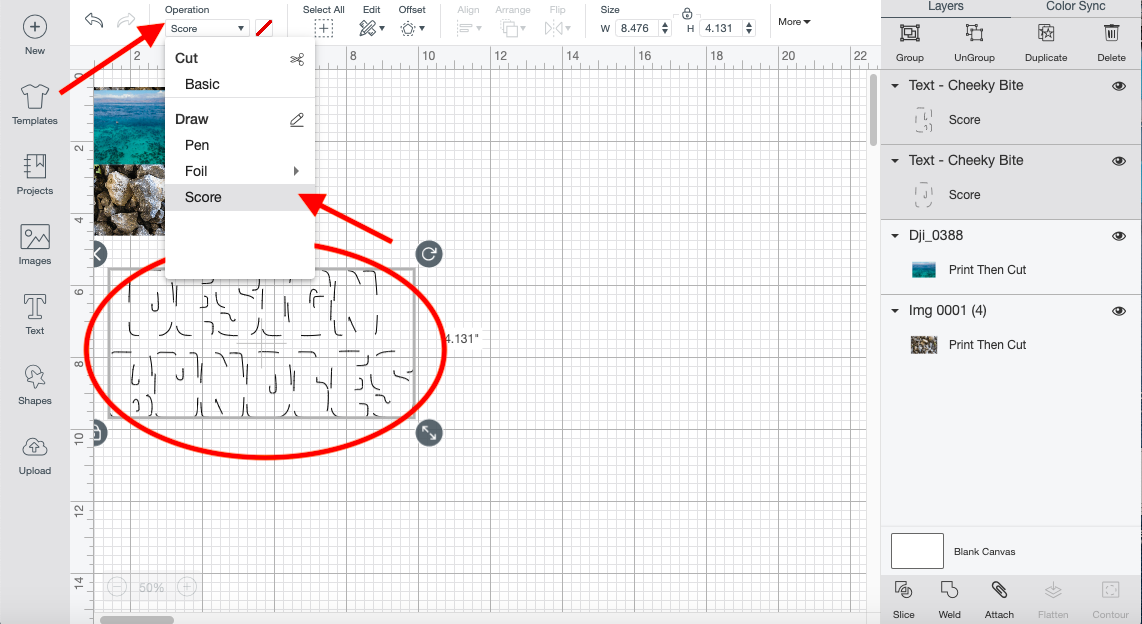
Once you have typed out your text go to your Operation Tab and click on the down arrow. A box will appear and you can now click Score. Your text will become transparent and you can now easily organize your images.
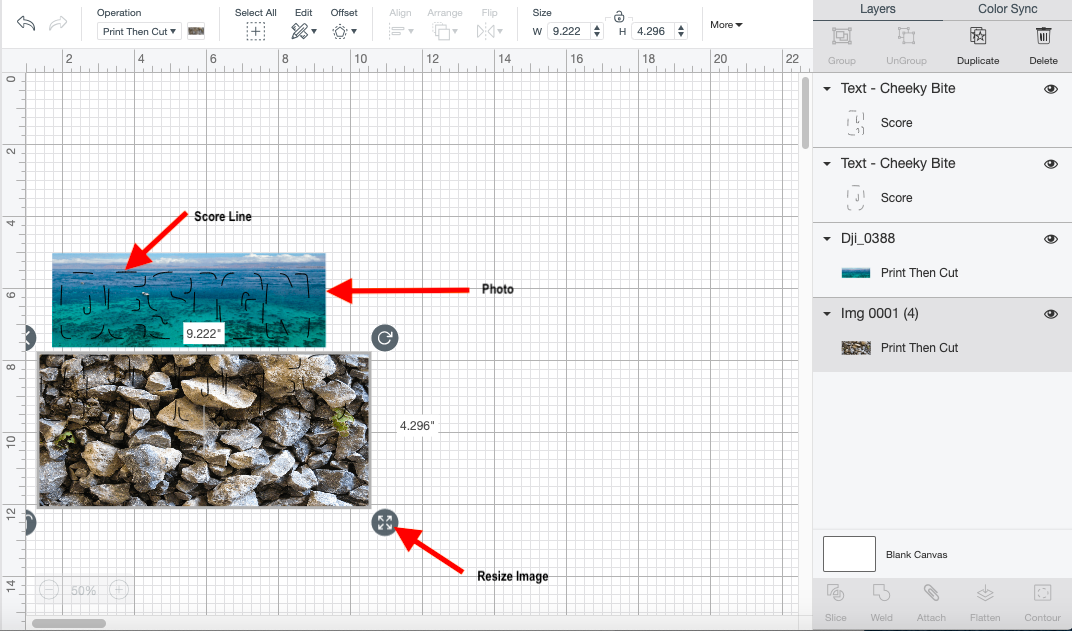
Resize and organize your images to fit within your score text. You can use as many photos as you like for this project but for today I'll just be using two. I'll resize and place my rock photo within my bottom text and my water photograph on my to text.
After organizing your images you can now slice each photograph. You can do this by selecting your score text along with the photo beneath it and clicking on the Slice button.
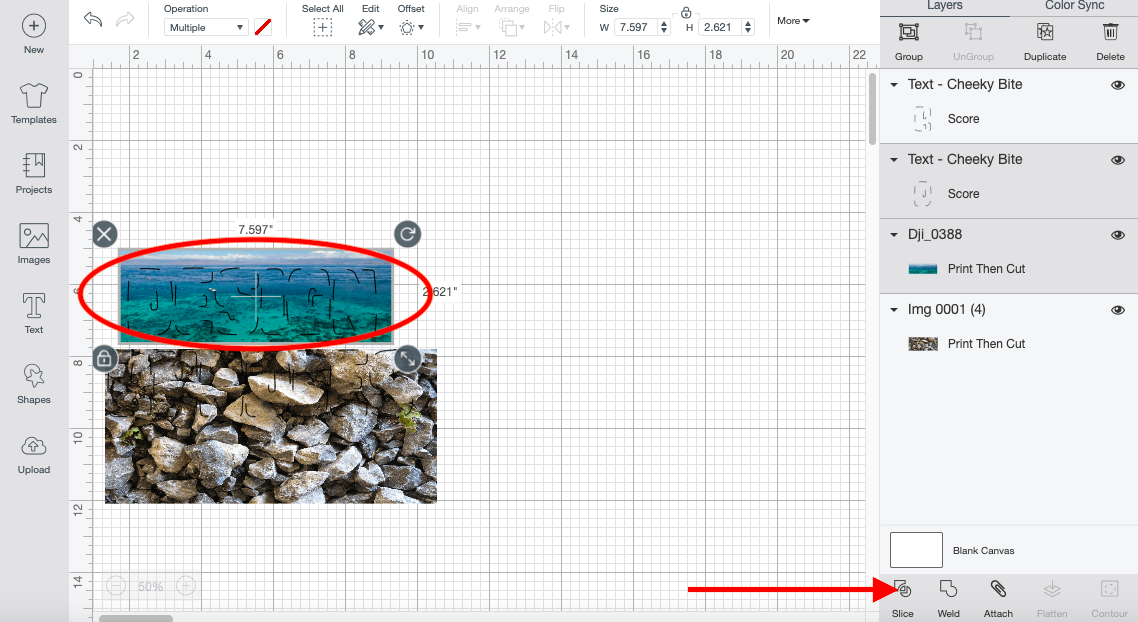
Continue to repeat this process until all your photographs are sliced. When you are finished you can delete all the unnecessary layers including your text score lines. This will leave you with a beautiful image inside your text.
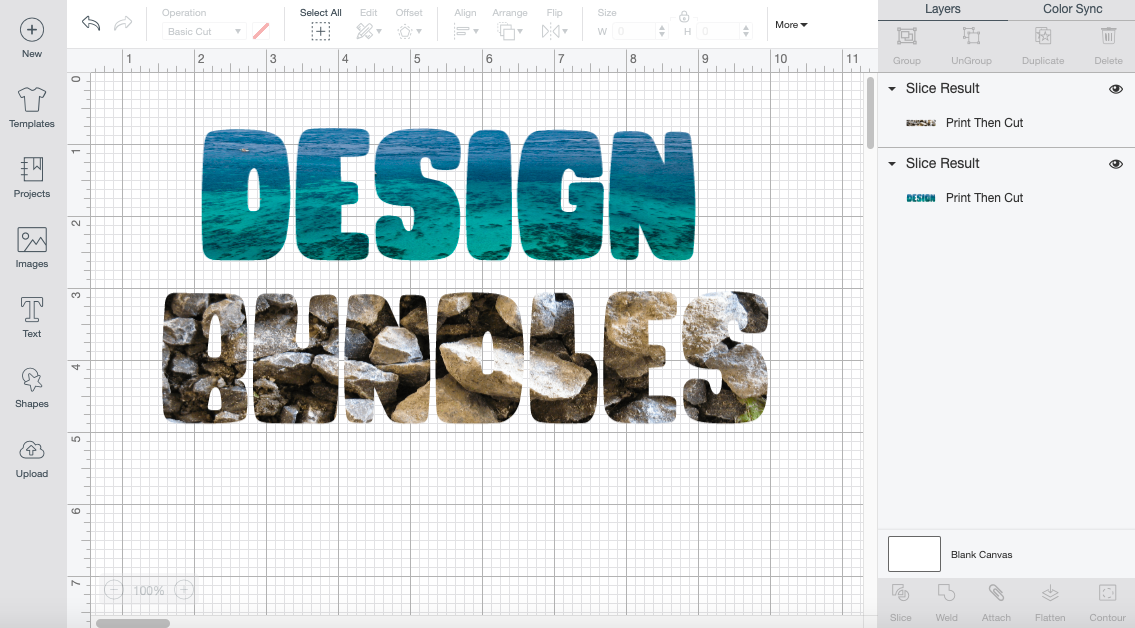
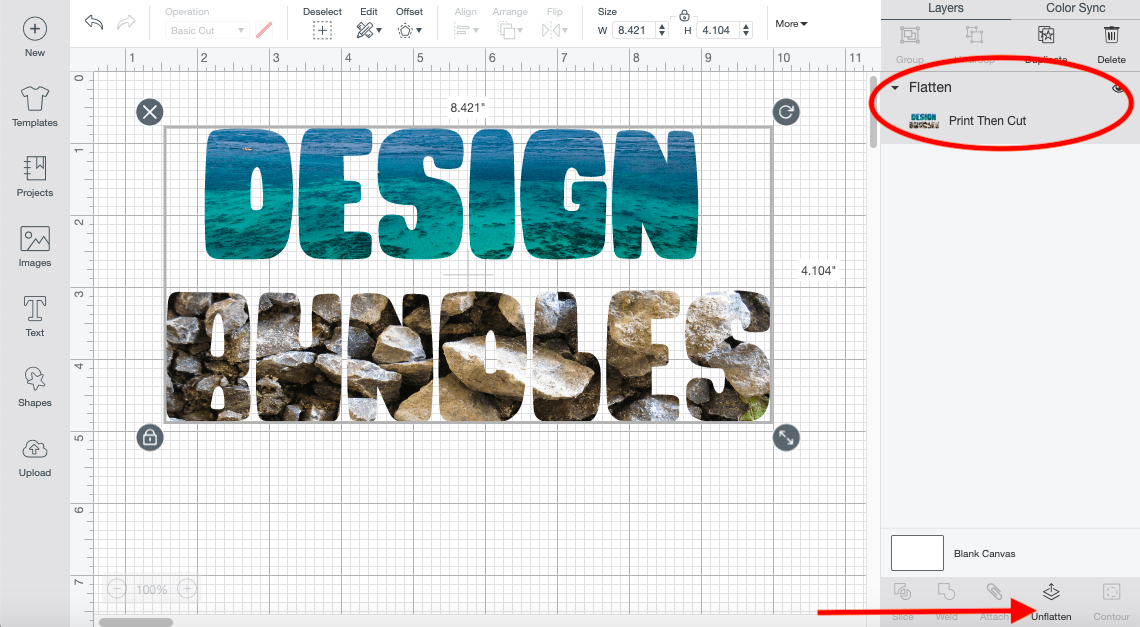
Select both of your images and click on the Flatten button. This will bring both layers together as one print and cut project.
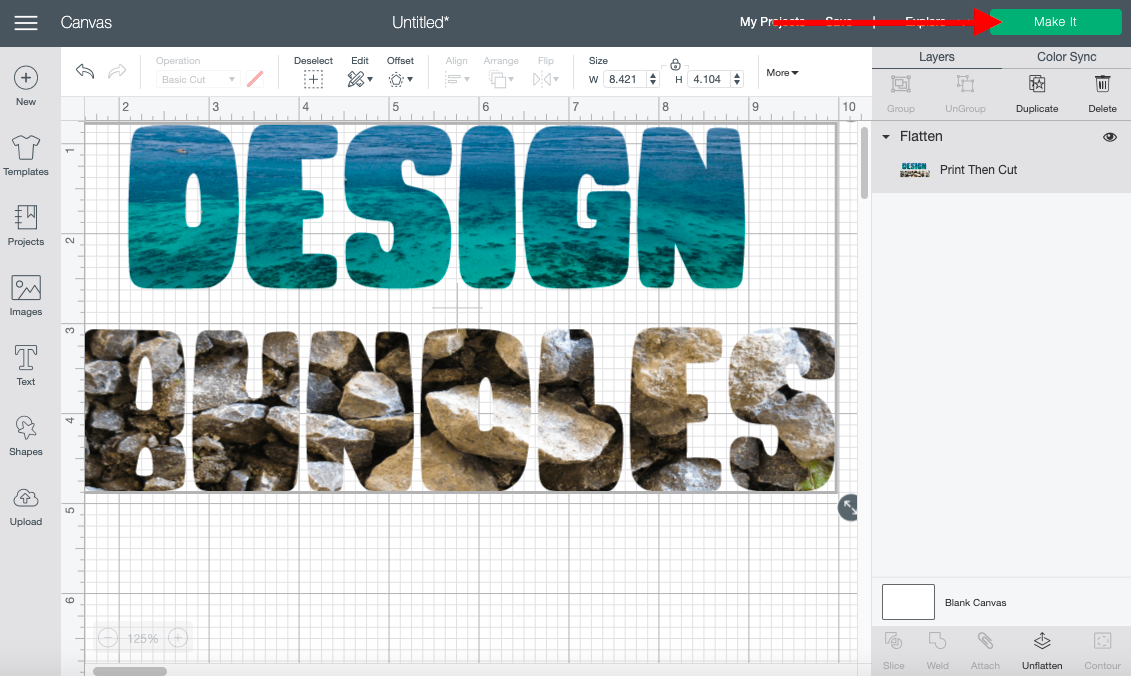
Click on the green Make It button on the top right-hand corner of your screen and follow your computer prompt to use the print and cut feature.
If you love this Cricut Design Space tutorial and want to create more items with it check out How to create an Offset to turn your photographs text into stickers.
Step 1. Create a New Project
Once you are have logged in, create a new project in Cricut Design Space by simply clicking on the green button that is labeled New Project on the top right-hand corner.
Step 2. Upload Images
Now that you are on the canvas screen you can now start the upload process. Use the Upload button on the left side of your screen to get started. Today I will be uploading an image of beach rocks and a photo of boats in the water. I'll be uploading these images as a print and cut project. We have a great tutorial on Print and Cut images in Cricut Design Space if needed.
Step 3. Type out Text
Today I'll be working with Cheeky Bite By Amber Nest Design to start the design process. I'll start by typing out a simple word using my text tool. If you need help with Cricut Design Space Text tool we have a great tutorial to show you how.
Once you have typed out your text go to your Operation Tab and click on the down arrow. A box will appear and you can now click Score. Your text will become transparent and you can now easily organize your images.
Step 4. Organize Your Images
Resize and organize your images to fit within your score text. You can use as many photos as you like for this project but for today I'll just be using two. I'll resize and place my rock photo within my bottom text and my water photograph on my to text.
Step 5. Slice Image
After organizing your images you can now slice each photograph. You can do this by selecting your score text along with the photo beneath it and clicking on the Slice button.
Continue to repeat this process until all your photographs are sliced. When you are finished you can delete all the unnecessary layers including your text score lines. This will leave you with a beautiful image inside your text.
Step 6. Flatten Your Image
Select both of your images and click on the Flatten button. This will bring both layers together as one print and cut project.
Click on the green Make It button on the top right-hand corner of your screen and follow your computer prompt to use the print and cut feature.
If you love this Cricut Design Space tutorial and want to create more items with it check out How to create an Offset to turn your photographs text into stickers.
Related Tutorials
Cricut Tutorials
Inserting Images in Text in Cricut Design Space
Learn how to add images to your text designs in Cricut, great for personalized gifts.
Cricut Tutorials
How To Use The Slice Tool In Cricut Design Space To Split Images
Learn how easily to Split Images in Cricut Design Space using the Slice Tool.
Cricut Tutorials
Editing Images in Cricut Design Space
Crop, Erase or completely change a design with multiple tools for editing made easy.
Cricut Tutorials
How to Curve Text in Cricut Design Space Mobile App
Today we’ll focus on how to curve Text in Cricut Design Space App....
Cricut Tutorials
How to Curve Text in Cricut Design Space
Discover how to quickly curve text in Cricut Design Space with this step by step tutorial
Cricut Tutorials