By Design Bundles
How to Center Your Designs to Cut in Cricut Design Space
You may think centering your design to cut in Cricut Design Space is impossible or hard to do, but it’s actually quite easy. You might need to cut out shapes or draw designs in the center of a card, and this little trick will help you do just that.
Before we start, make sure you know the dimensions of your material.
Step 1 - Open Cricut Design Space and Create a New Project
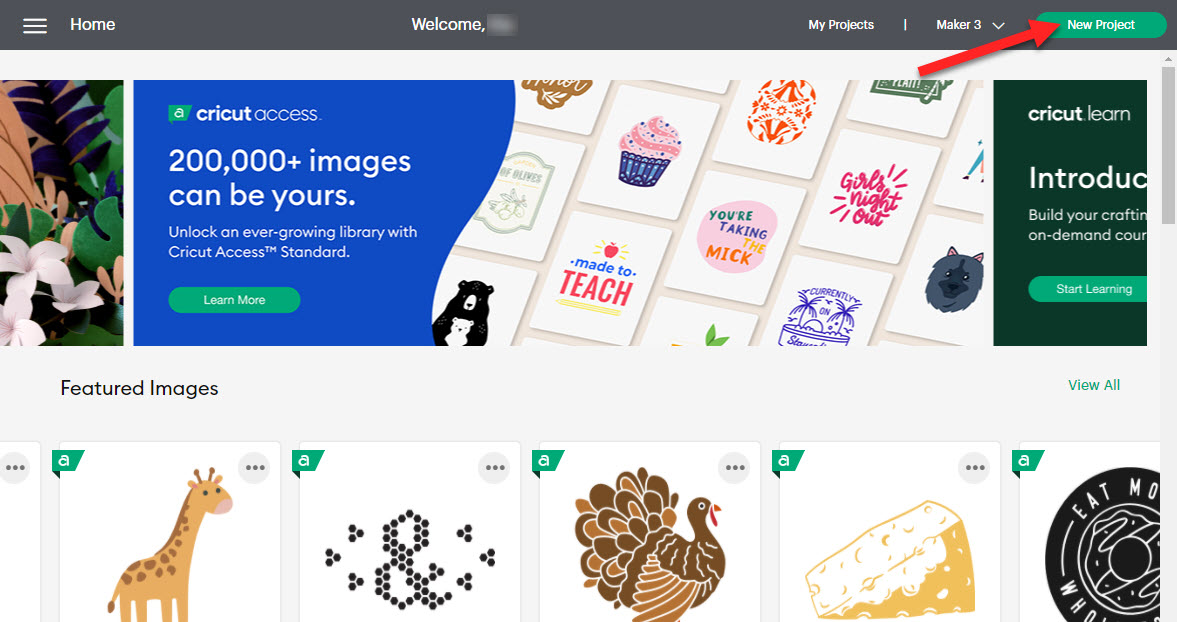
Log in to Cricut Design Space, and click on New Project.
Step 2 - Upload Your Image
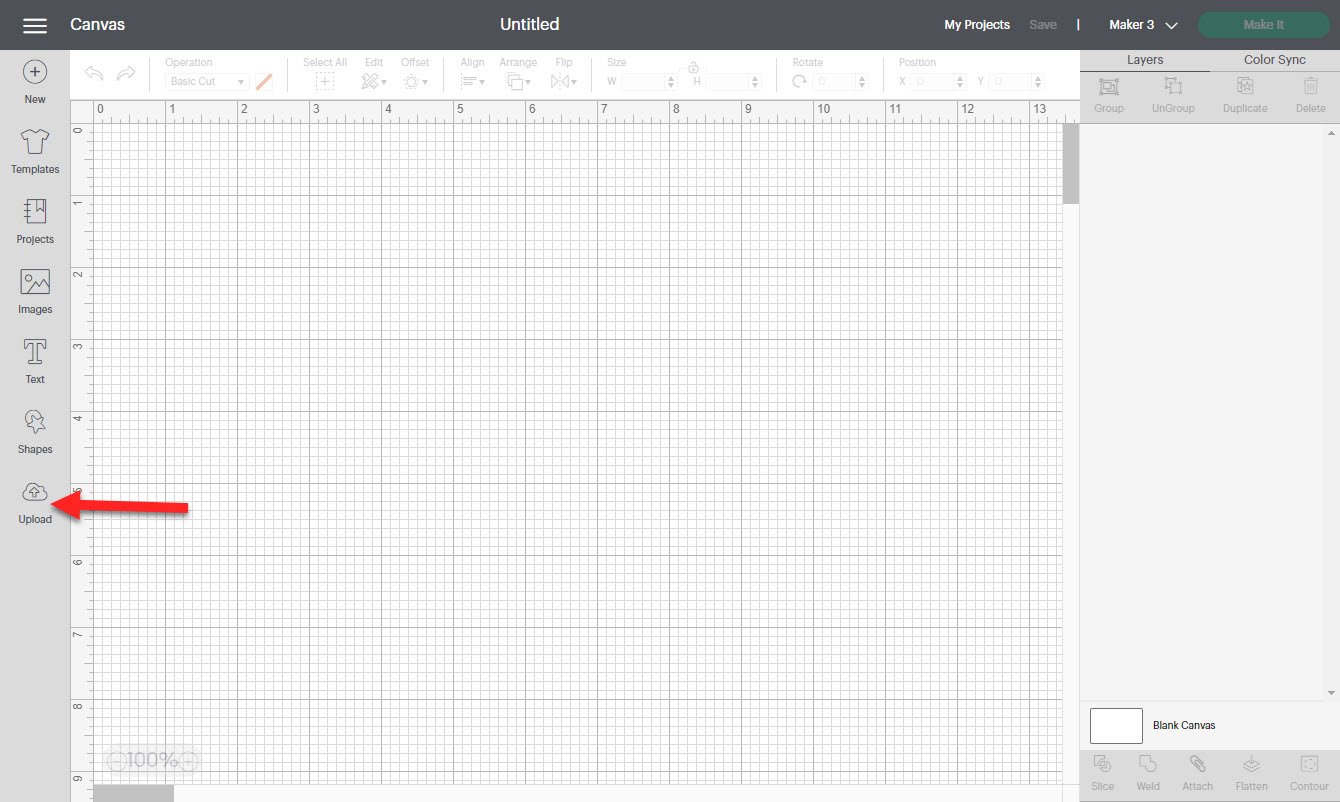
Click on Upload in the left toolbar
Next, click the Upload Image button

Click the Browse button

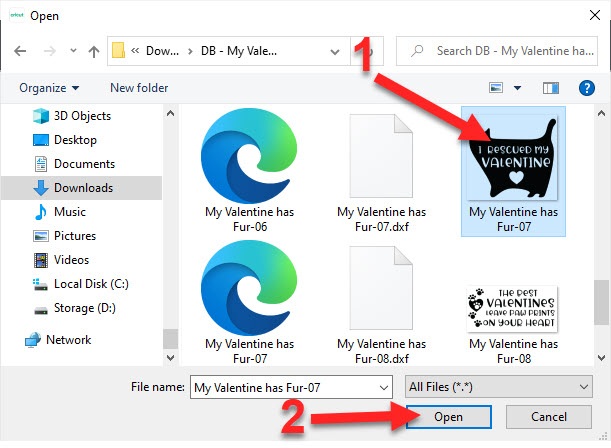
Locate Image on Computer and Click Open
Locate the image on your computer and click Open. We are using a cat silhouette SVG file in this tutorial.
Select Image Type and Click Continue
Select the image type depending on how complex the image design is, and then click Continue.

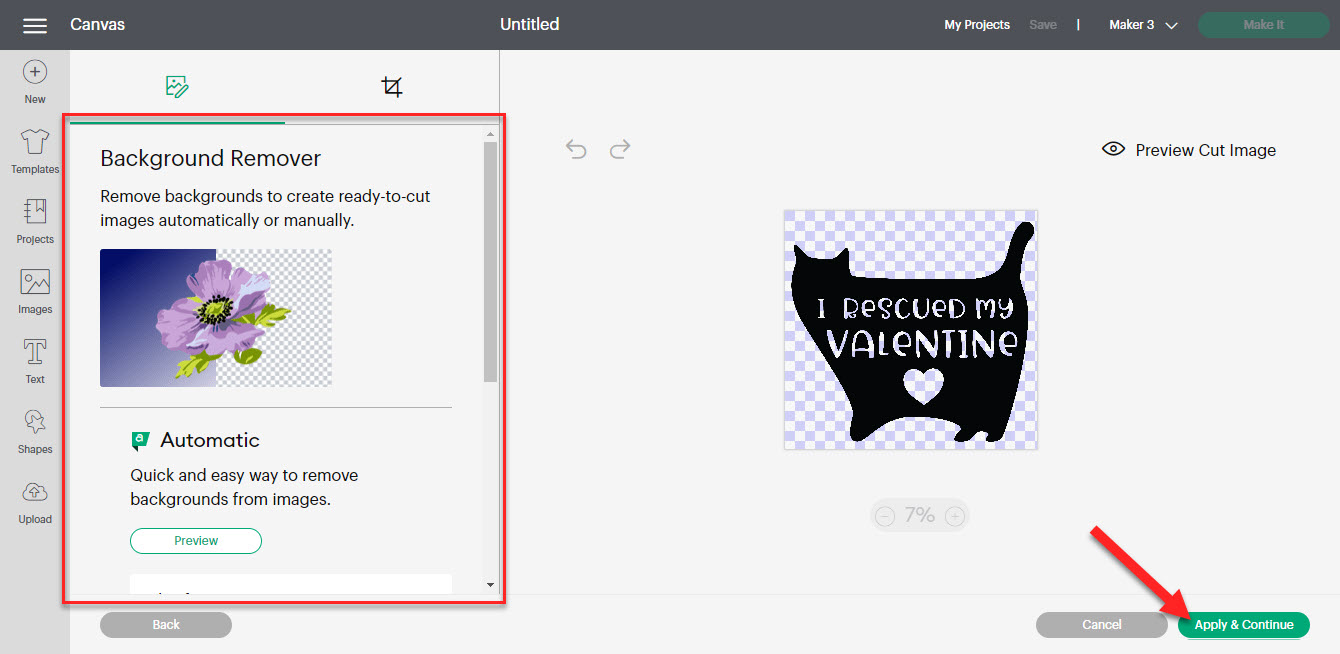
Edit Image and Click Apply & Continue
You can use the tools on the left side to automatically or manually remove the background if needed. Click Apply & Continue when you’re happy with what’s shown in the preview.
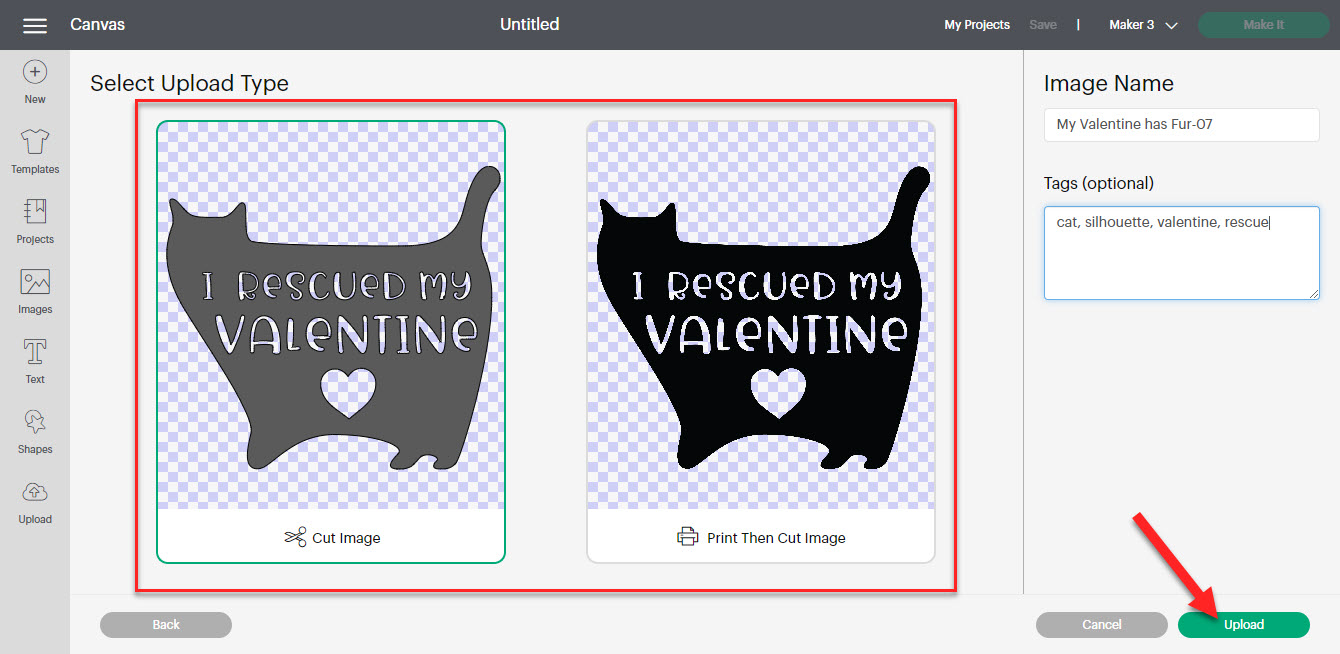
Select Upload Type and Click Upload
Select the upload type and click Upload. The upload type depends on whether you will only cut out the image or print and then cut.
Select Saved Image and Click Insert Images
Select the saved image and then click the Add to Canvas button.

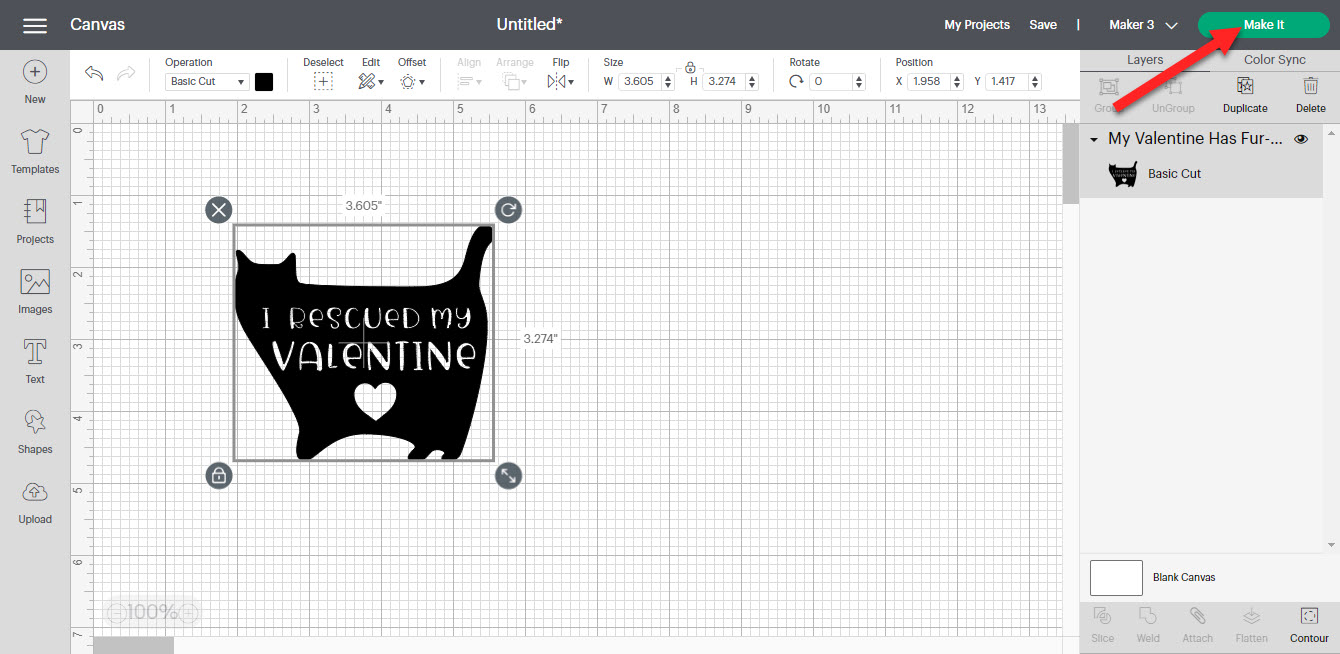
Step 3 - Click the Make It Button
Click the Make It button in the top right.
Pick how the material will be loaded and click Done.
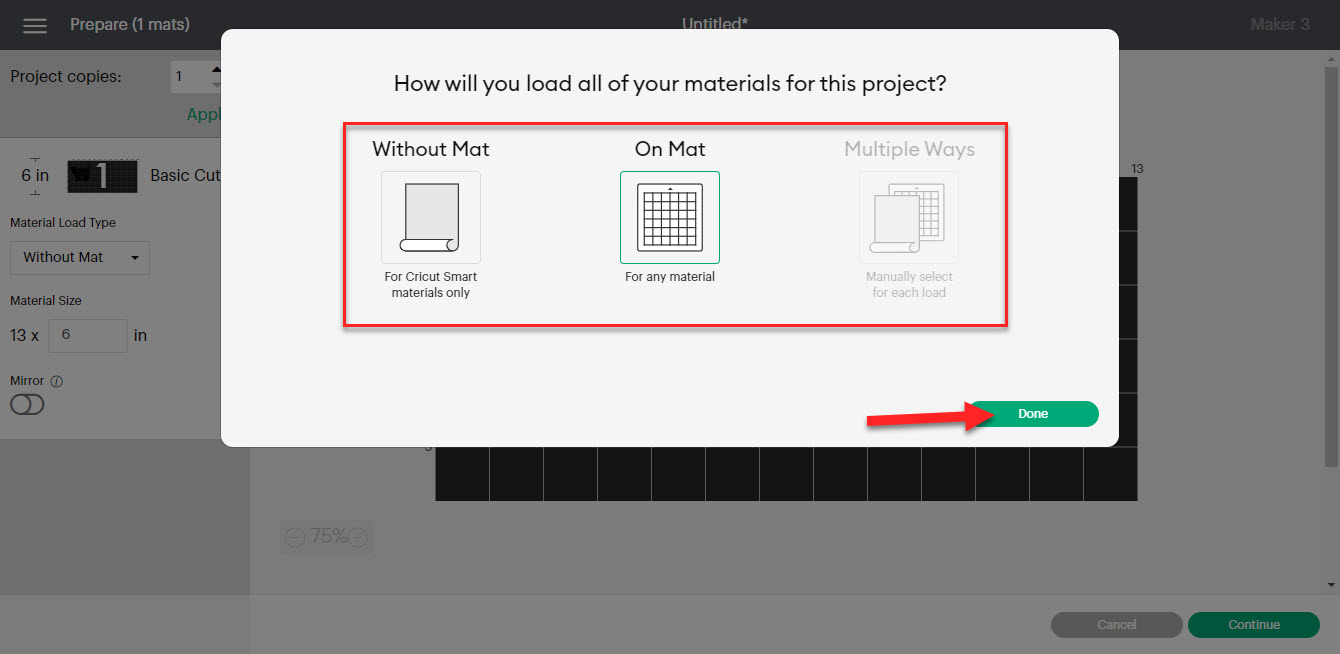
As you can see, the image will automatically be in the top left corner.

Step 4 - Create a Square Around the Image
You can trick the software into placing the image into the center of the design space and mat. This is good when wanting to create apertures in the middle of the material.
Click Shapes in the left toolbar and select Square.
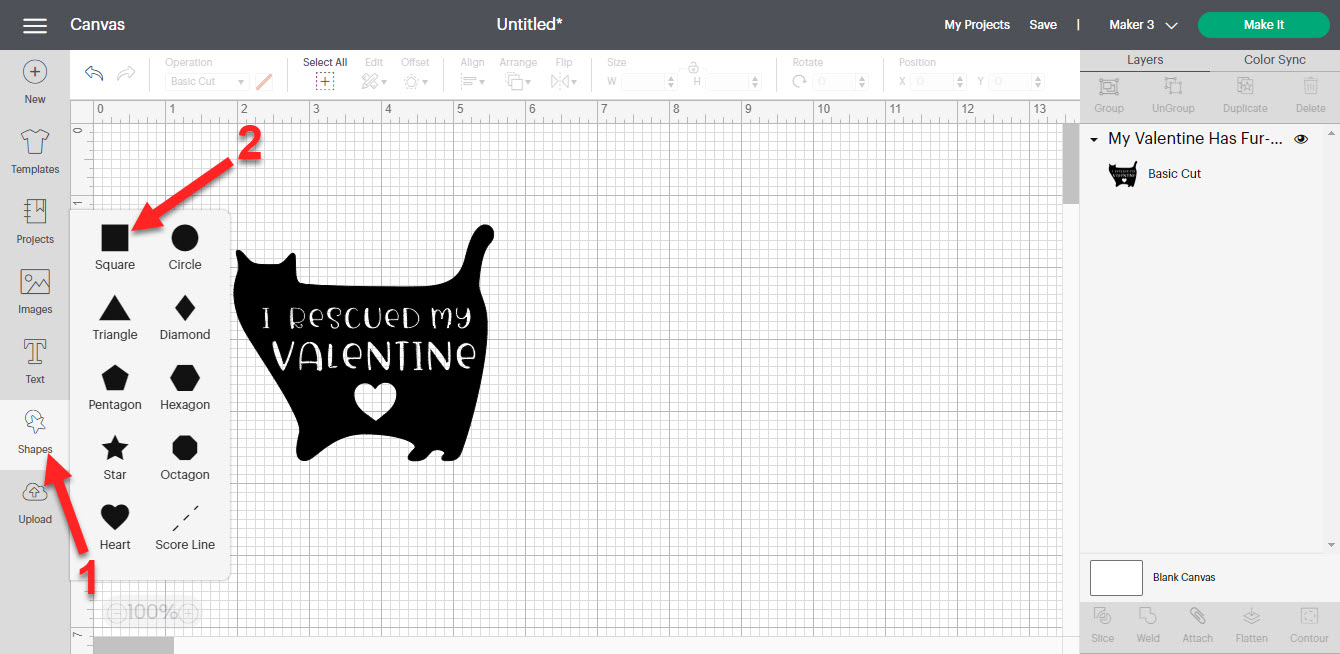
To get the width and height for the shape, subtract .5 inches from the width and height of your material. Our material is 12 x 12 inches, so we will create a square that is 11.5 x 11.5 inches.

Change the Square’s Operation Setting From Basic to Pen
Select the square and change the Operation setting from Basic (Cut) to Pen (Draw).
Note: in older versions of Cricut Design Space, this setting is called Linetype, and you would change it from Cut to Draw.
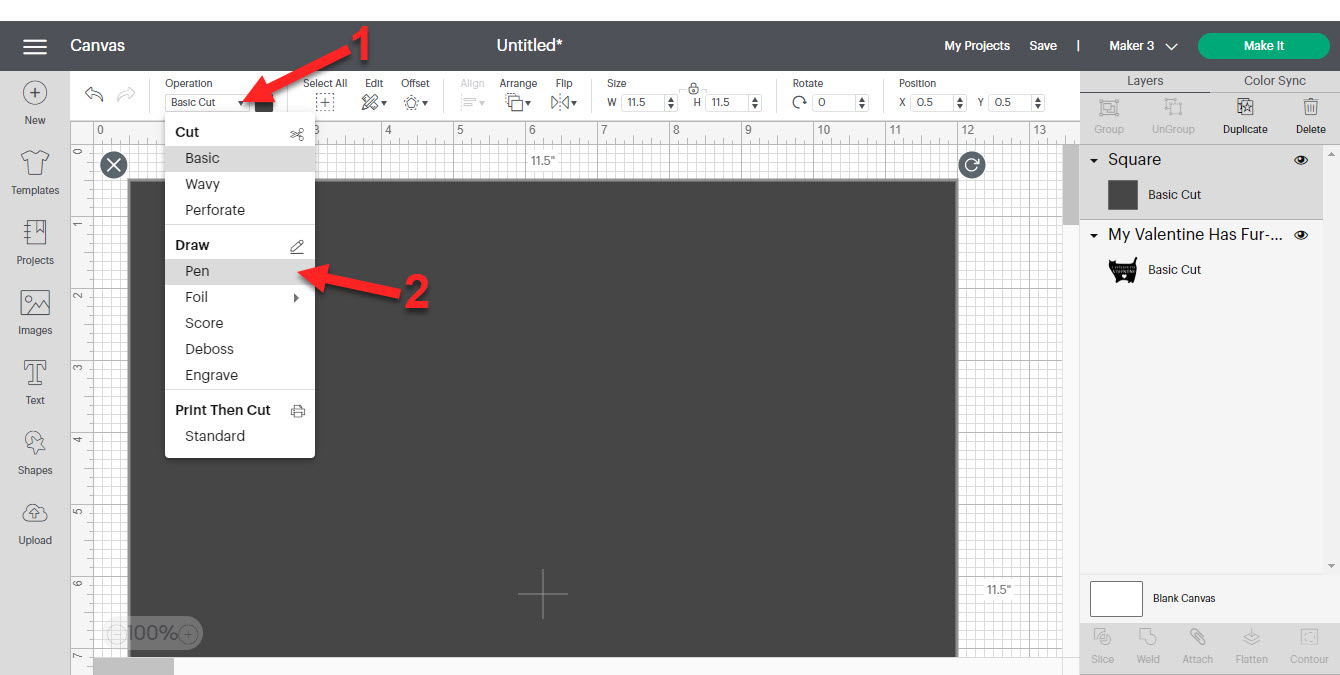
The square will now appear as an outline.
Step 5 - Center Align the Image and Square
Hold the Shift key and click the image and square in the Layers panel or on the canvas. Then click on Align > Center.

Decrease the Size of the Square
Click and drag the dual arrow button near the lower right corner of your square and decrease the size of the square. The square can be any size, but make sure you don’t move it.
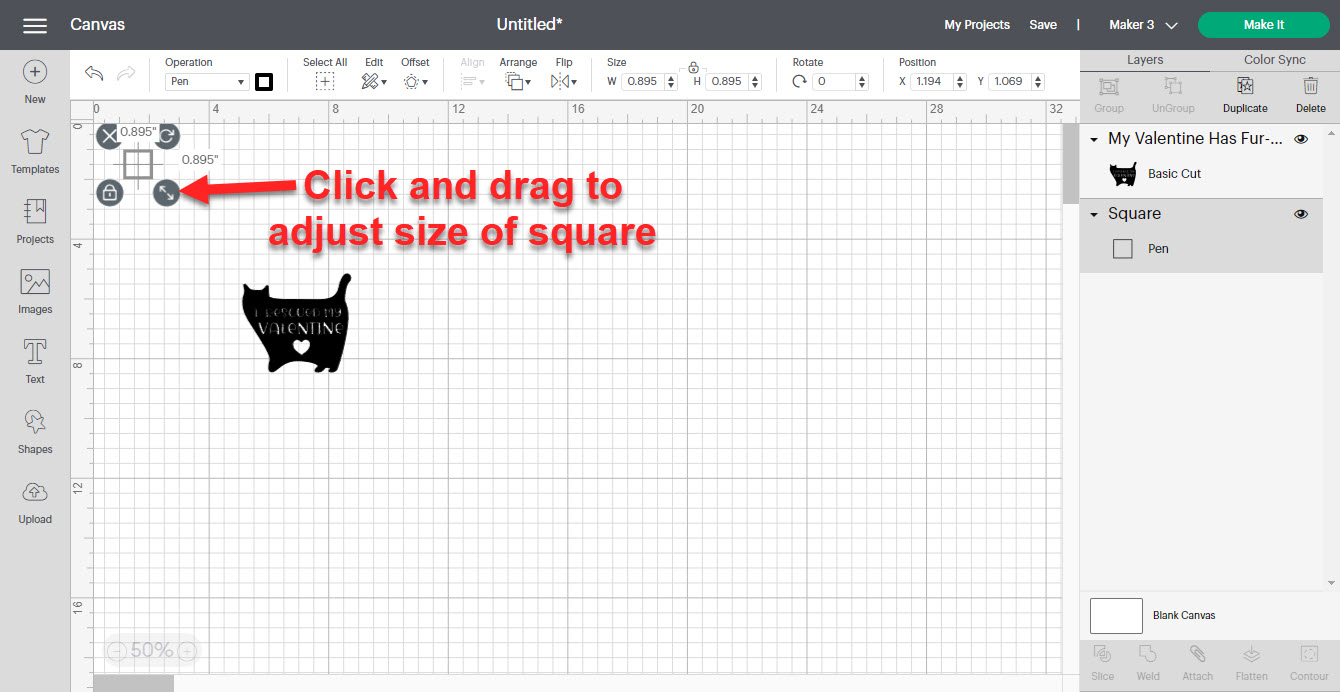
Step 6 - Attach Square and Image Then Click Make It Button
Again, select the square and the design in the Layers panel or on the canvas. Click Attach at the bottom of the Layers panel, and then click the Make It button.

As you can now see, the design is centered on the cutting mat.

Now that you know how to center your design on the cutting mat, you might want to try learning how to create a multi-layered image from a single-layered image or make a decorative border in Cricut Design Space for decorating a card.