By Design Bundles
How to Create a Stencil Bridge in Cricut Design Space
We have a great tutorial for you today! We will show you how to create a stencil bridge in Cricut Design Space so you can make reusable stencils. When creating reusable stencils, all of the parts need to be attached. If not, the stencil will fall apart.
You can use these funny Cricut SVG designs or even bold script fonts but try not to use something too detailed. We are going to be creating a stencil using a bold font.
Step 1 - Create the Text Object in Cricut Design Space
After logging into Cricut Design Space, on the homepage, click on the New Project button on the top right-hand corner.

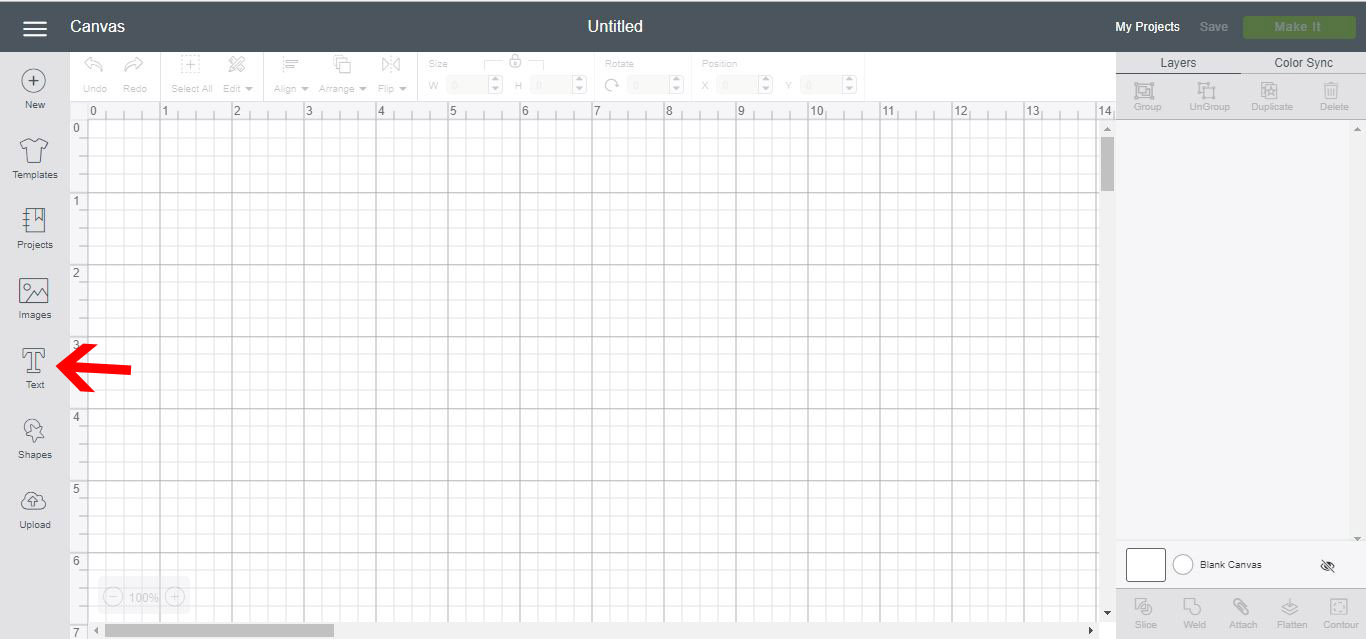
You will find the Text tool on the left side toolbar. Click on it to activate and use it.
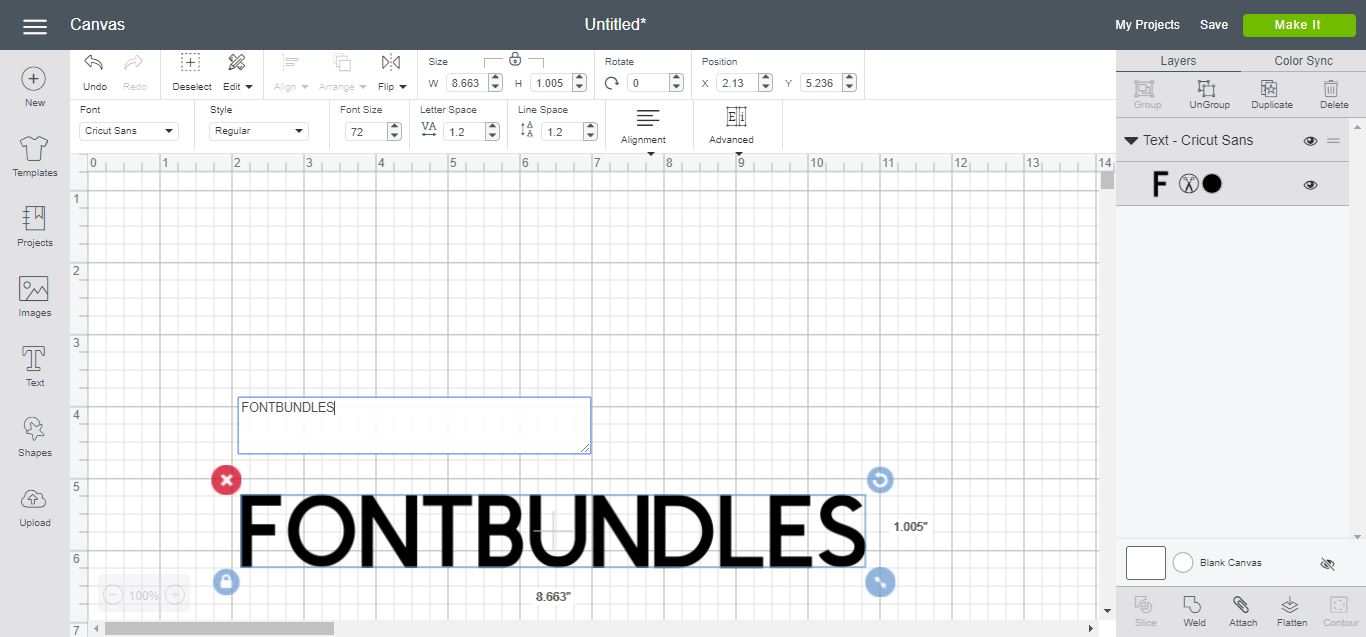
A text box will appear where you can type in your text.
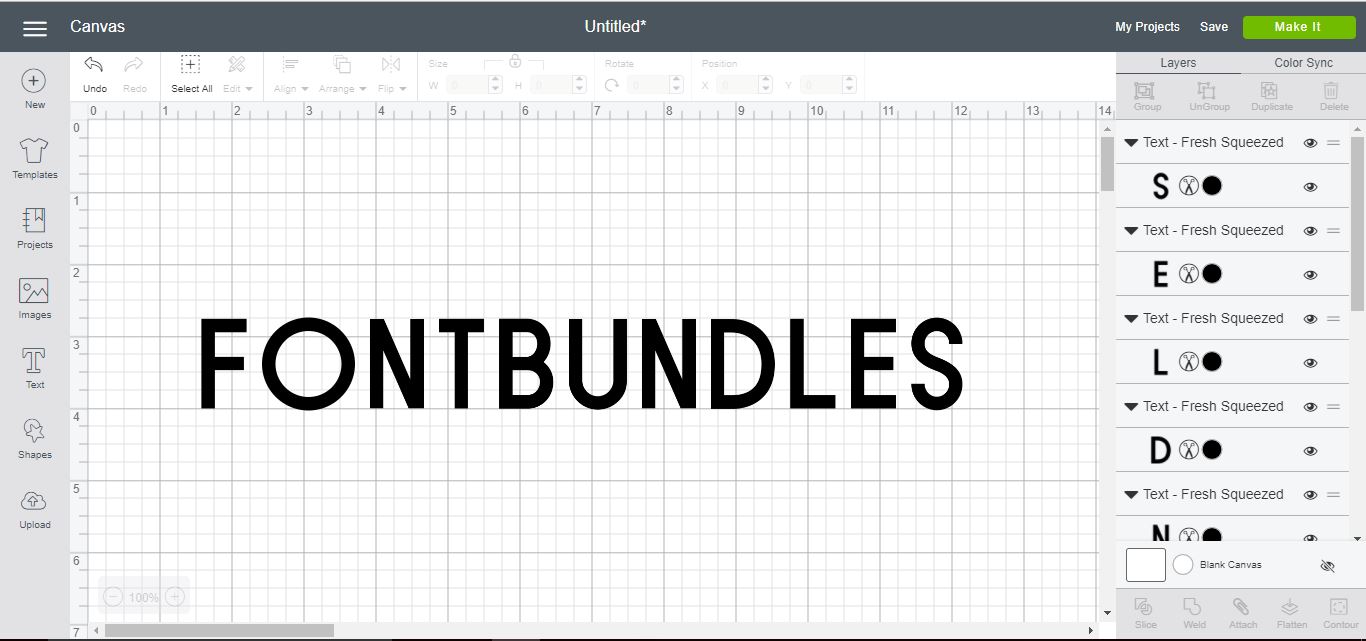
Edit your text object such as resizing or changing the font. Next, make sure your text is selected and go to the menu options on the right-hand side. Here you will need to click on the Ungroup option.

Your text will now be separated into individual letters or objects.
Step 2 - Create Stencil Bridges with the Shapes Tool
Go back to the toolbar on the left-hand side and click on the Shapes Tool. Choose the Square shape as this will be used to create the bridges between parts of the letters.

Adjust the size of the square using the sizing handles on the edges or the Size option at the top toolbar. You want to create a long oblong shape roughly the same width as the text.
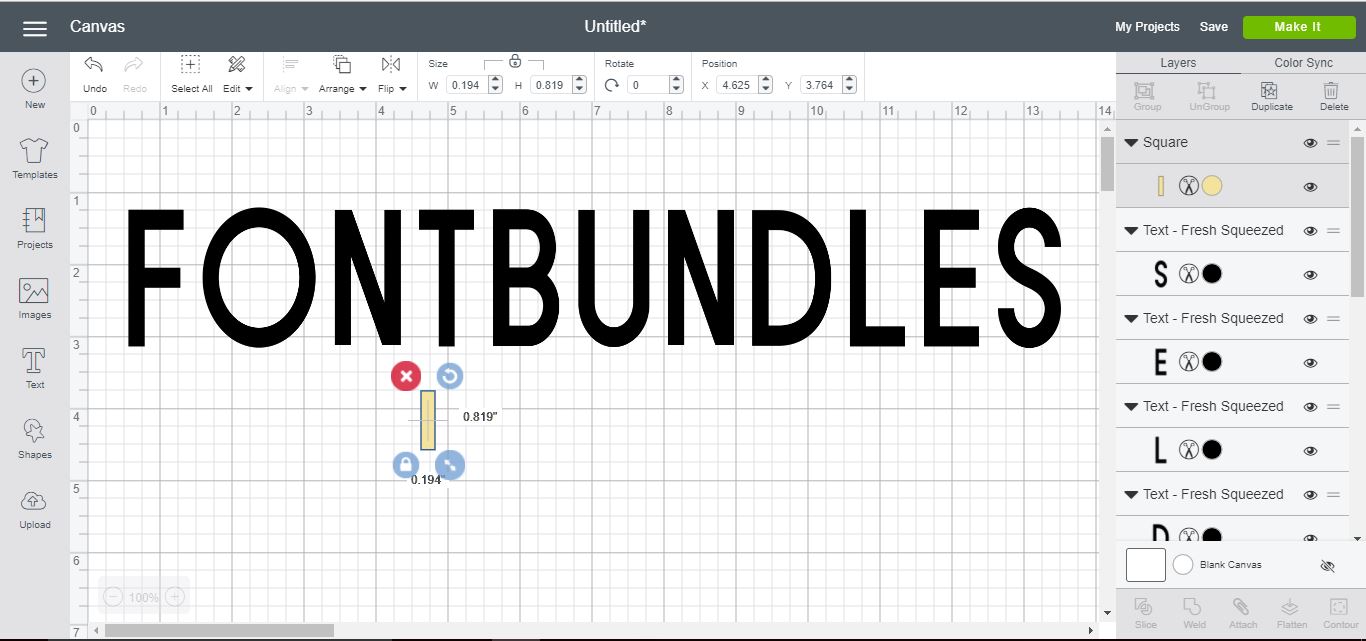
Take a look at your font and decide how many stencil bridges you will need. Select the bridge and duplicate it by right-clicking > Duplicate or click on the Duplicate option on the right side panel. For this bold font I need six stencil bridges.
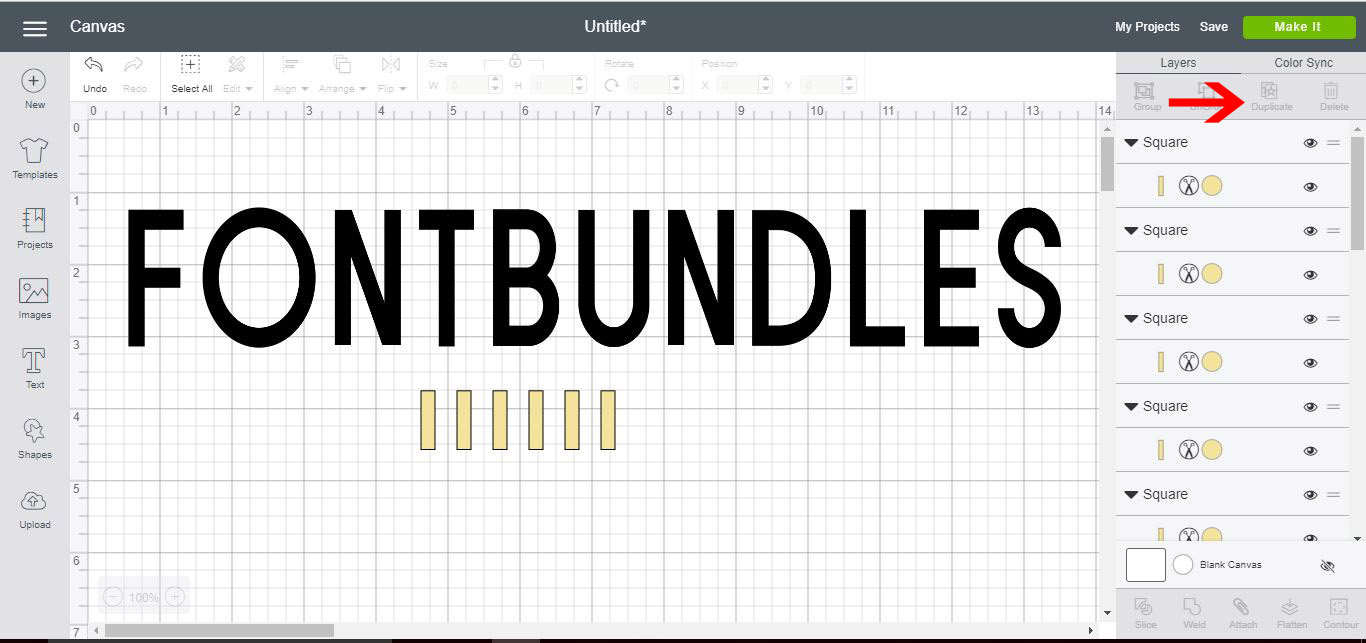
Step 3 - Weld and Slice the Stencil Bridges
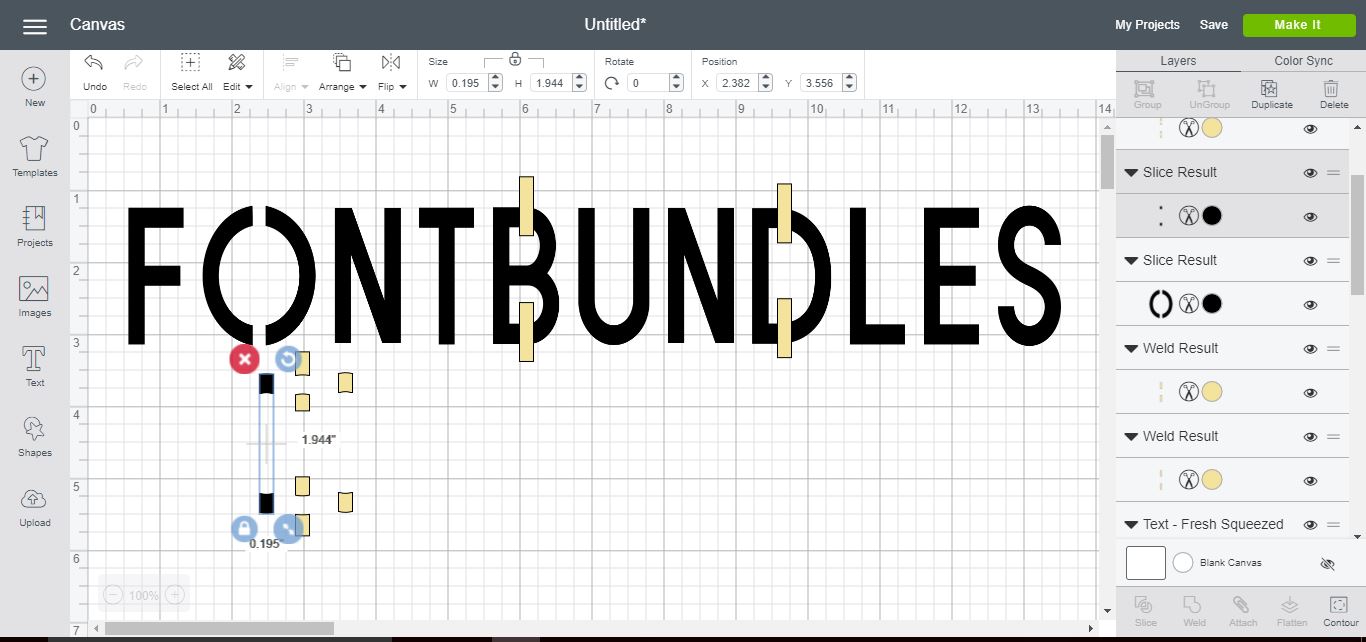
Place the bridges over the areas of the font that are not connected. For example, two bridges were placed over each of the letters "O", "B" and "D".
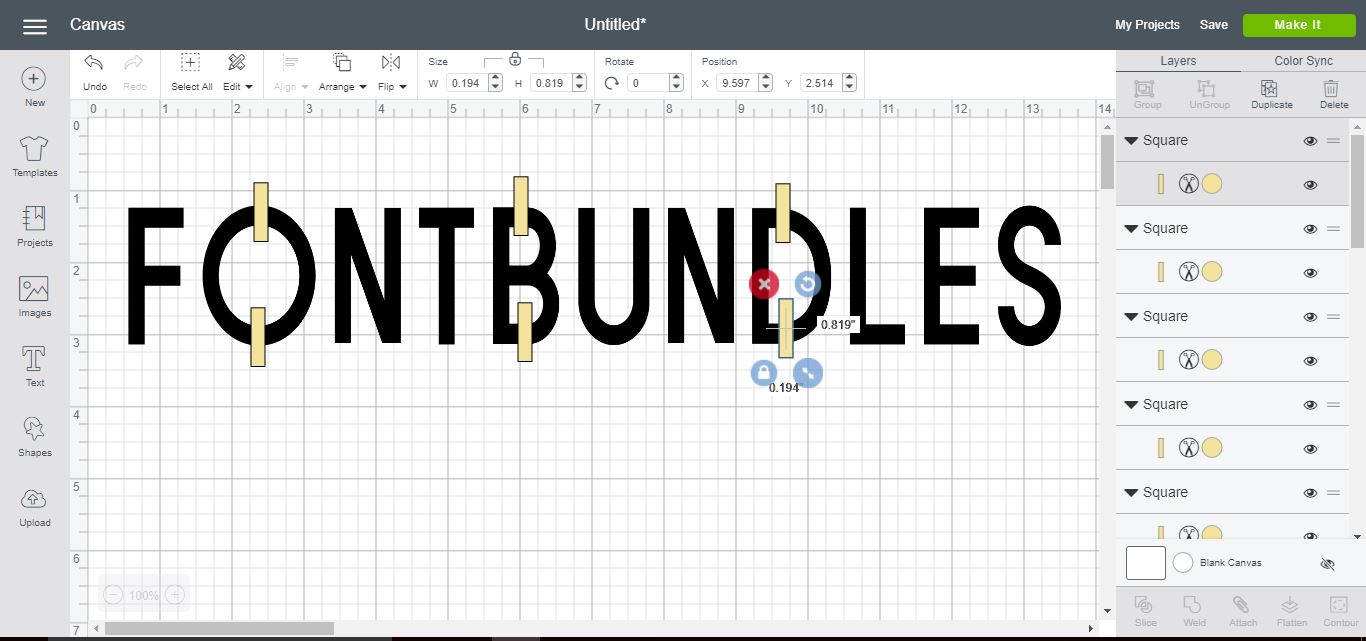
Select one of the letters and both of their stencil bridges. At the top toolbar click on the Align option and align all three horizontally.
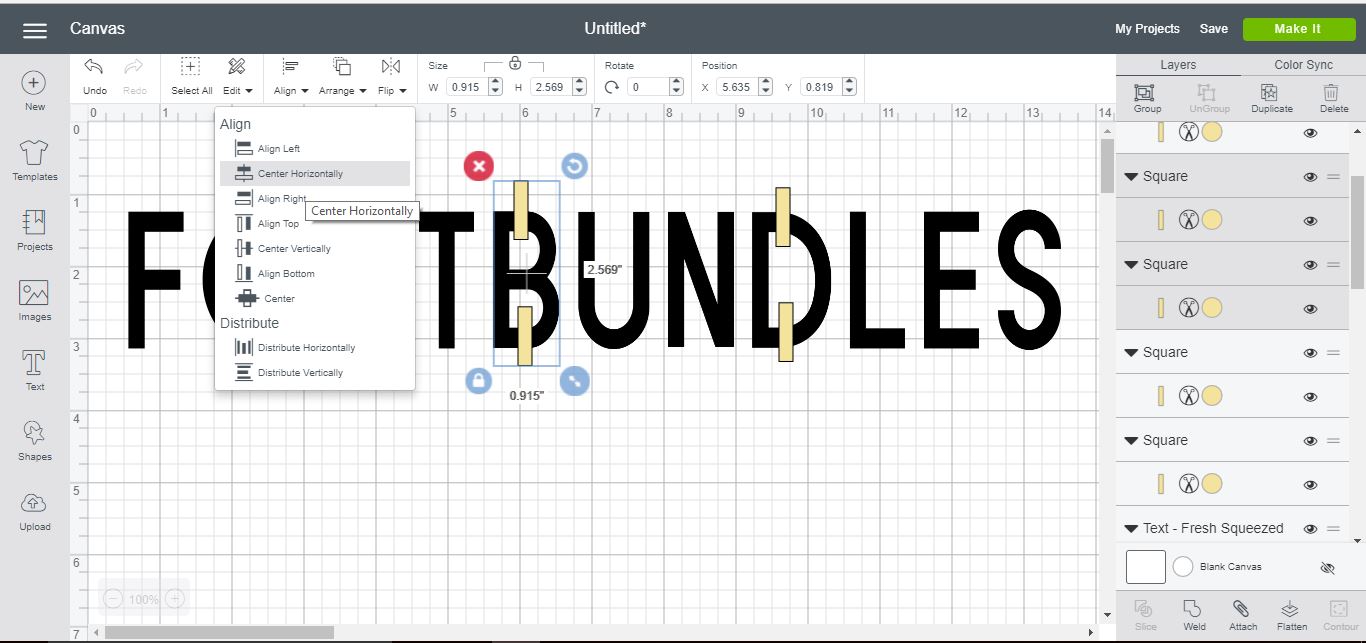
Repeat this step for the remaining two letters so that all of the bridges have been aligned with their letters.
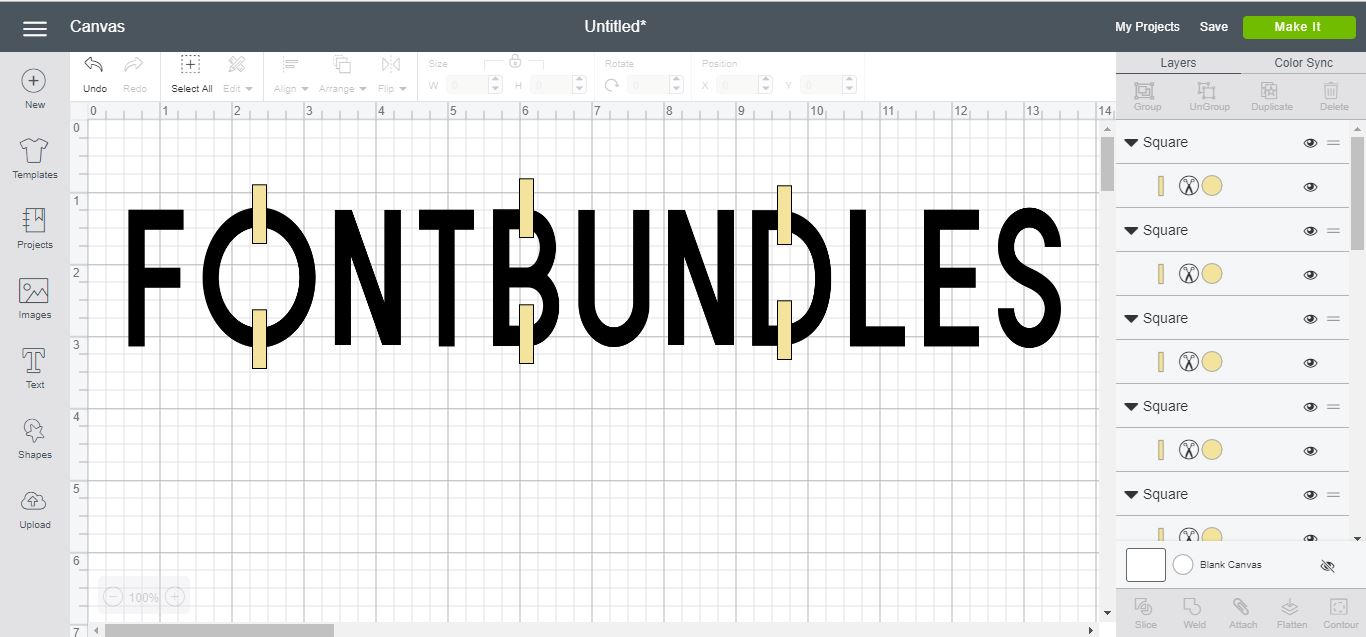
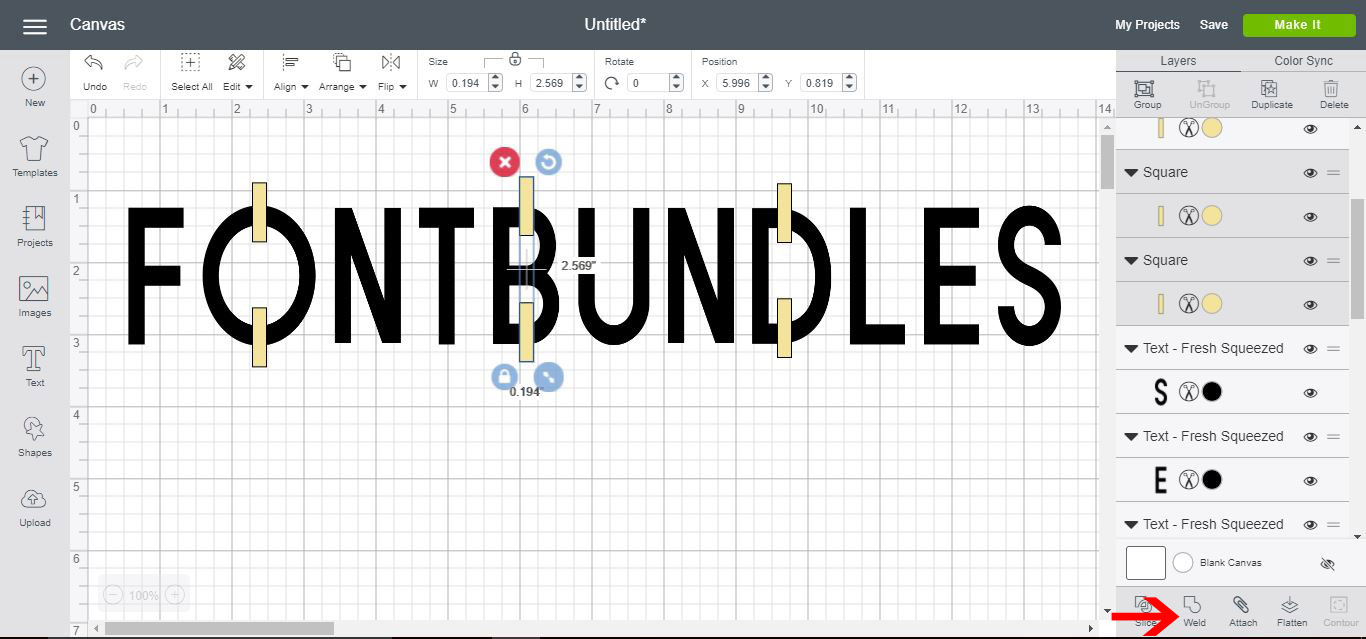
Select two bridges of one letter and click on the Weld option bottom right corner to make them one object. Repeat this for the other stencil bridges.
Now, select a letter with its stencil bridges and use the Slice Tool at the bottom right.
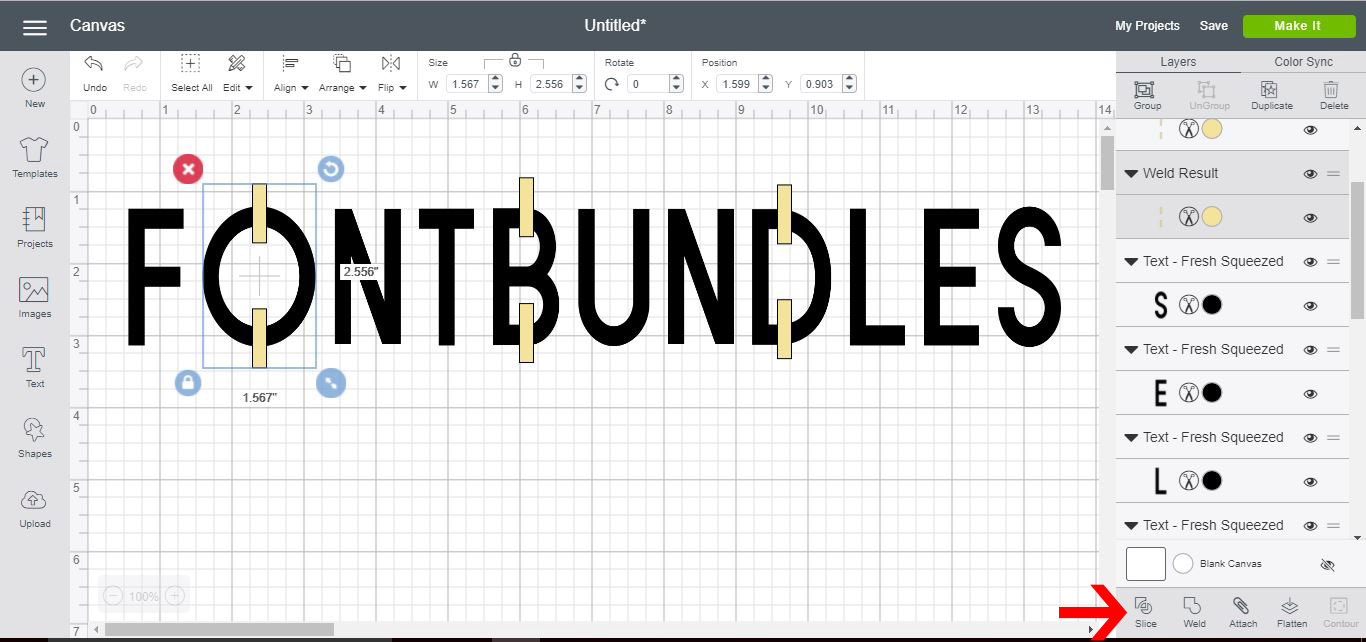
You may not see anything until you remove the slice sections. Repeat this action for the remaining two letters.
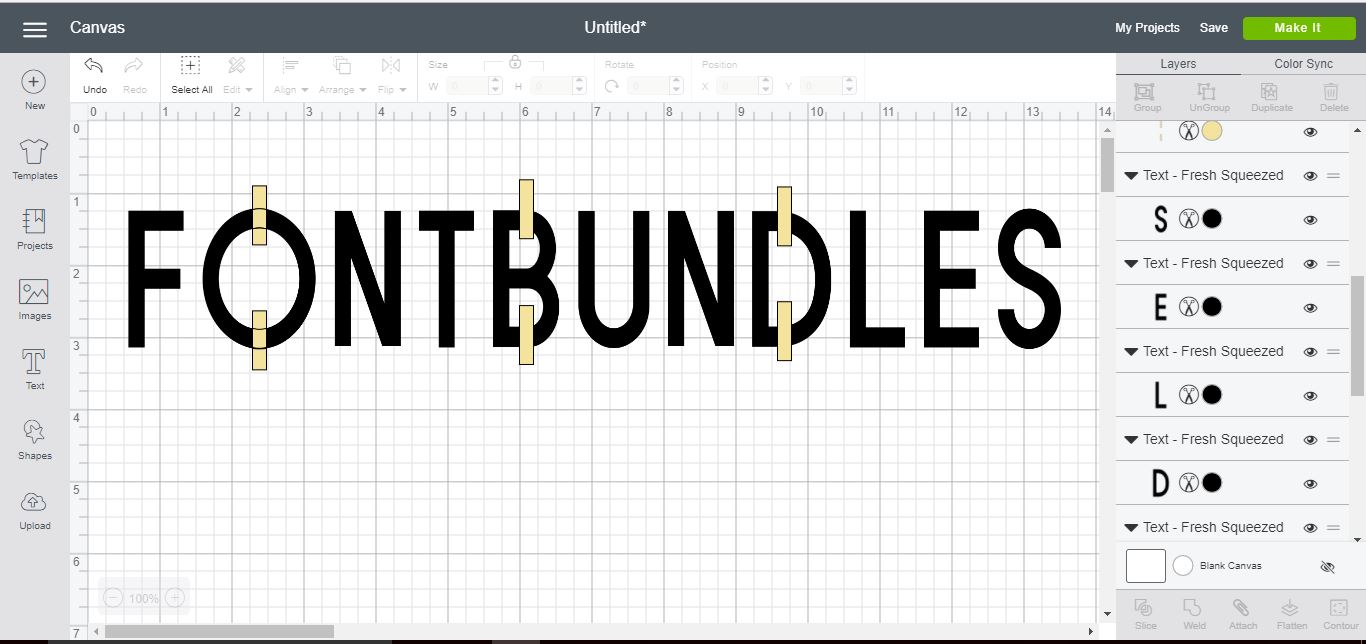
Finally, remove the excess sections that were sliced so that you are left with gaps in each letter.
Do the same for the rest of the letters in your text to create the final stencil design.
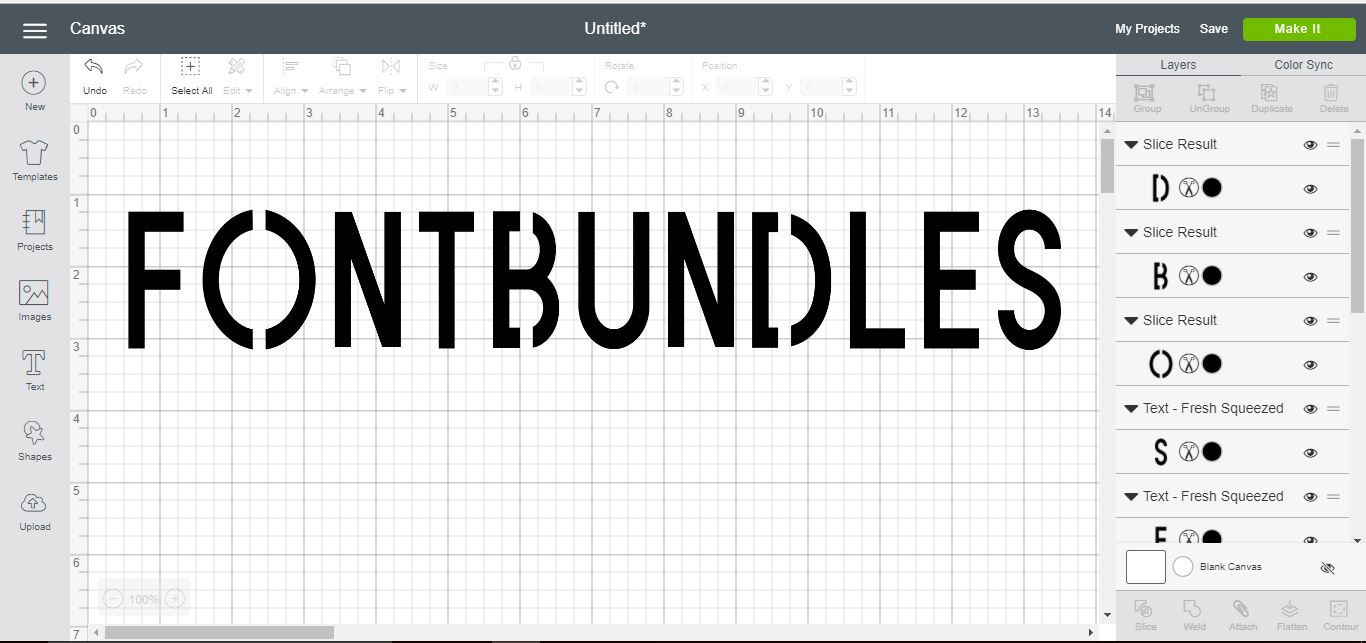
Now your stencil is ready for use in all of your projects. We hope that this tutorial has shown you how to easily create a stencil bridge for your favorite font or SVG design.