By Design Bundles
Cricut Tutorials3 min
Using a single line foil design in Cricut Design Space
1- Open Cricut Design Space. Click on new project.
2- Click on the upload icon.
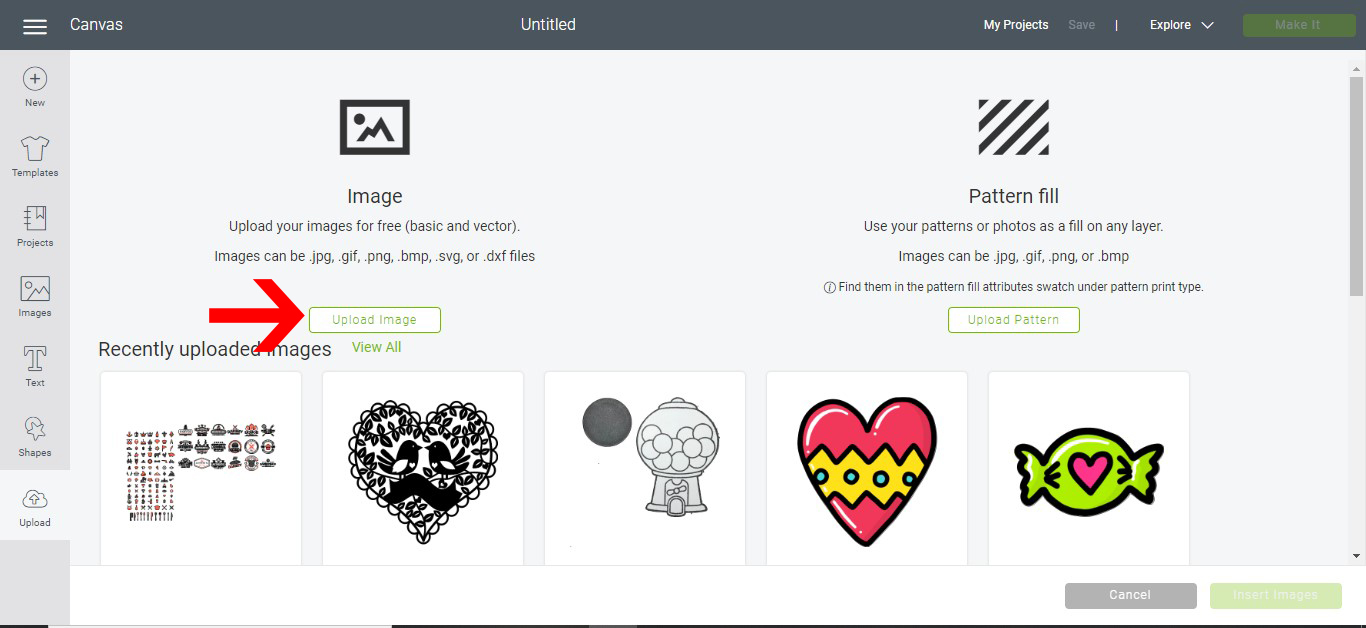
3- Click on upload.
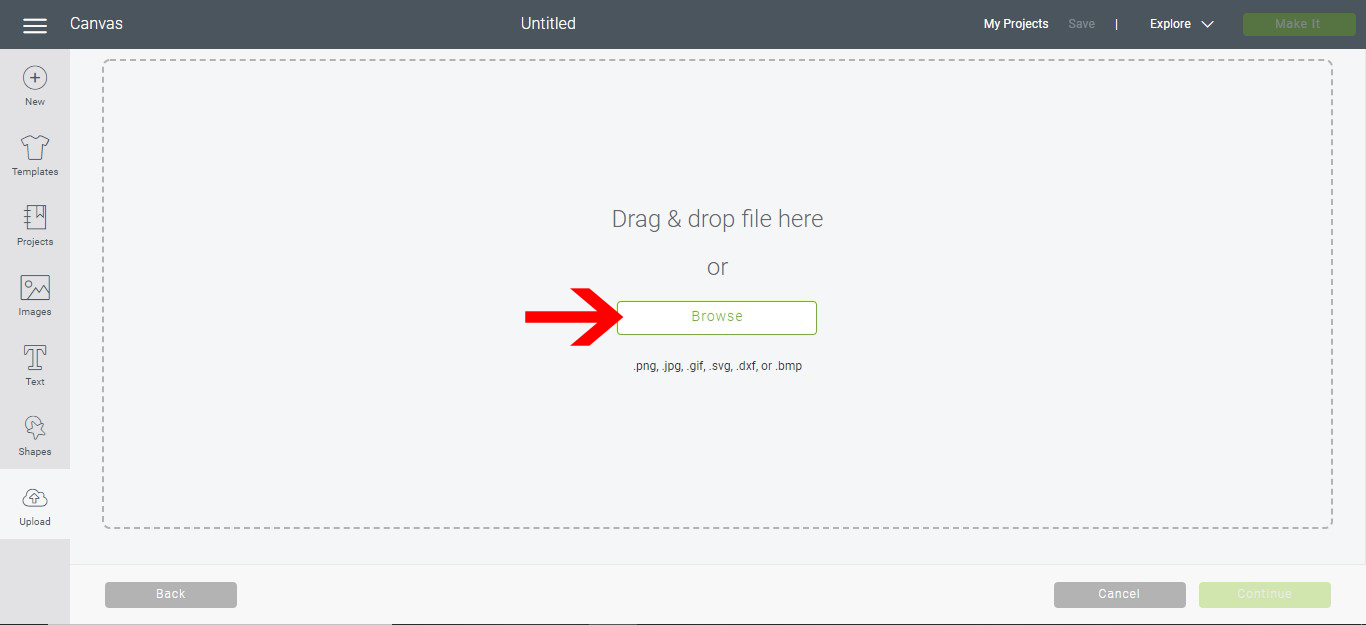
4- Click on browse.
5- Select your file. I am using Single Line Mandala by CleanCutCreative.
6- Your file will automatically be uploaded ready to insert. You can change the name of the file at this point.
7- Your design is saved. Select the design and insert.
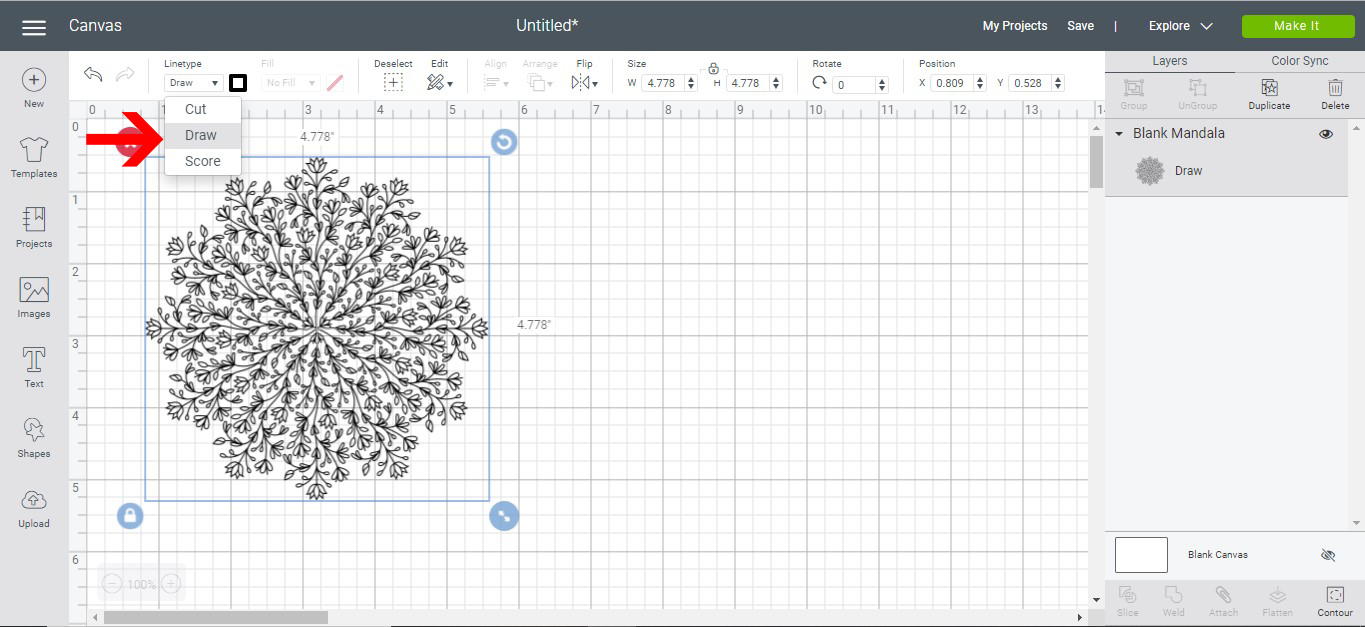
8- Select your design. Click on the line type drop down box .
9- Select draw. Click on make it.
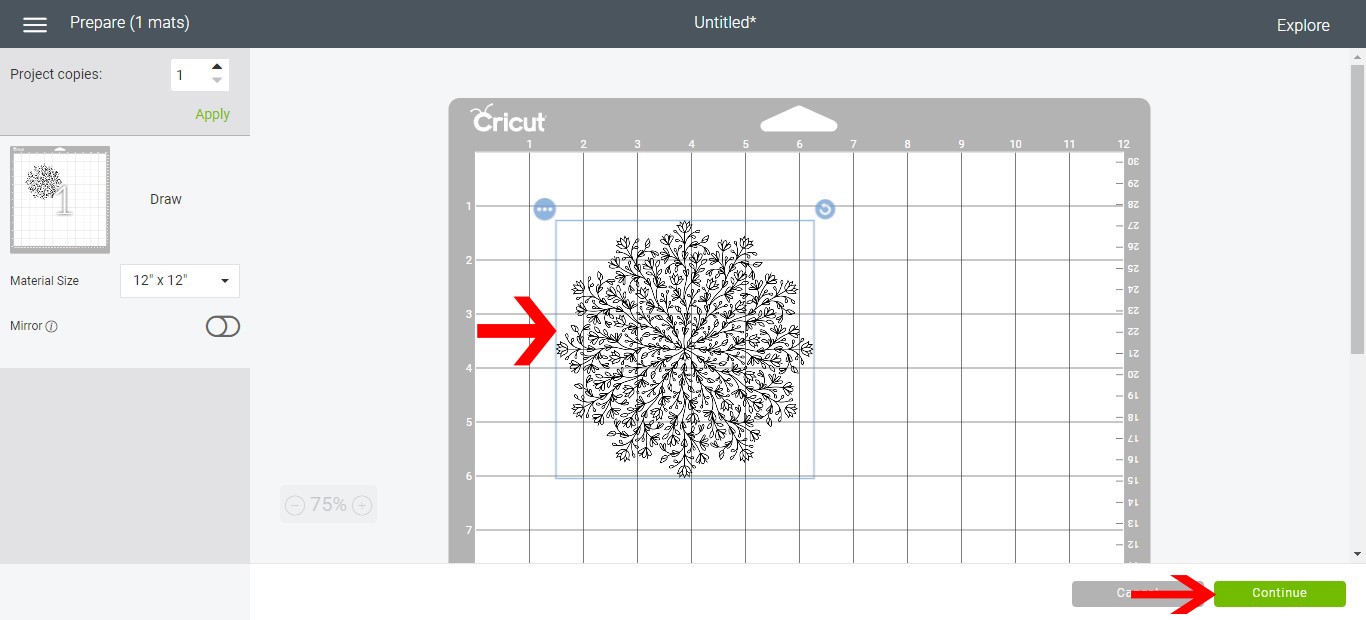
10- Adjust where you want the design. Click continue.
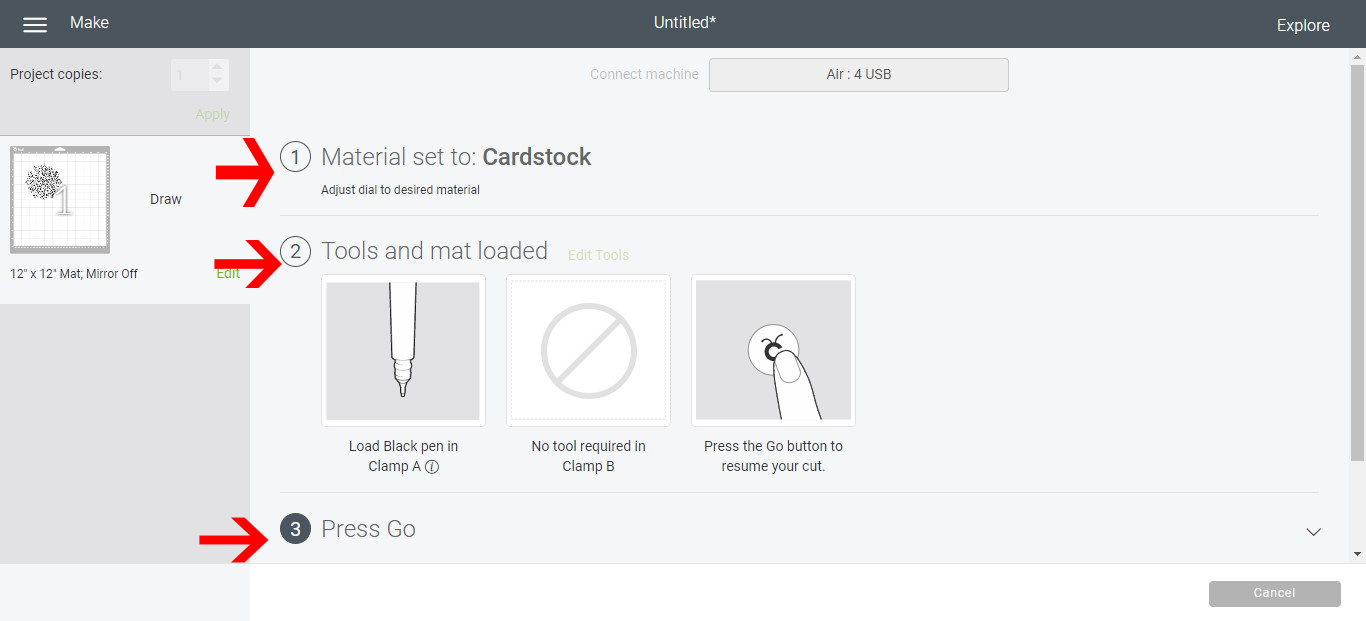
11- You can select the material type, insert the foil quill in the A clamp and once ready select go.
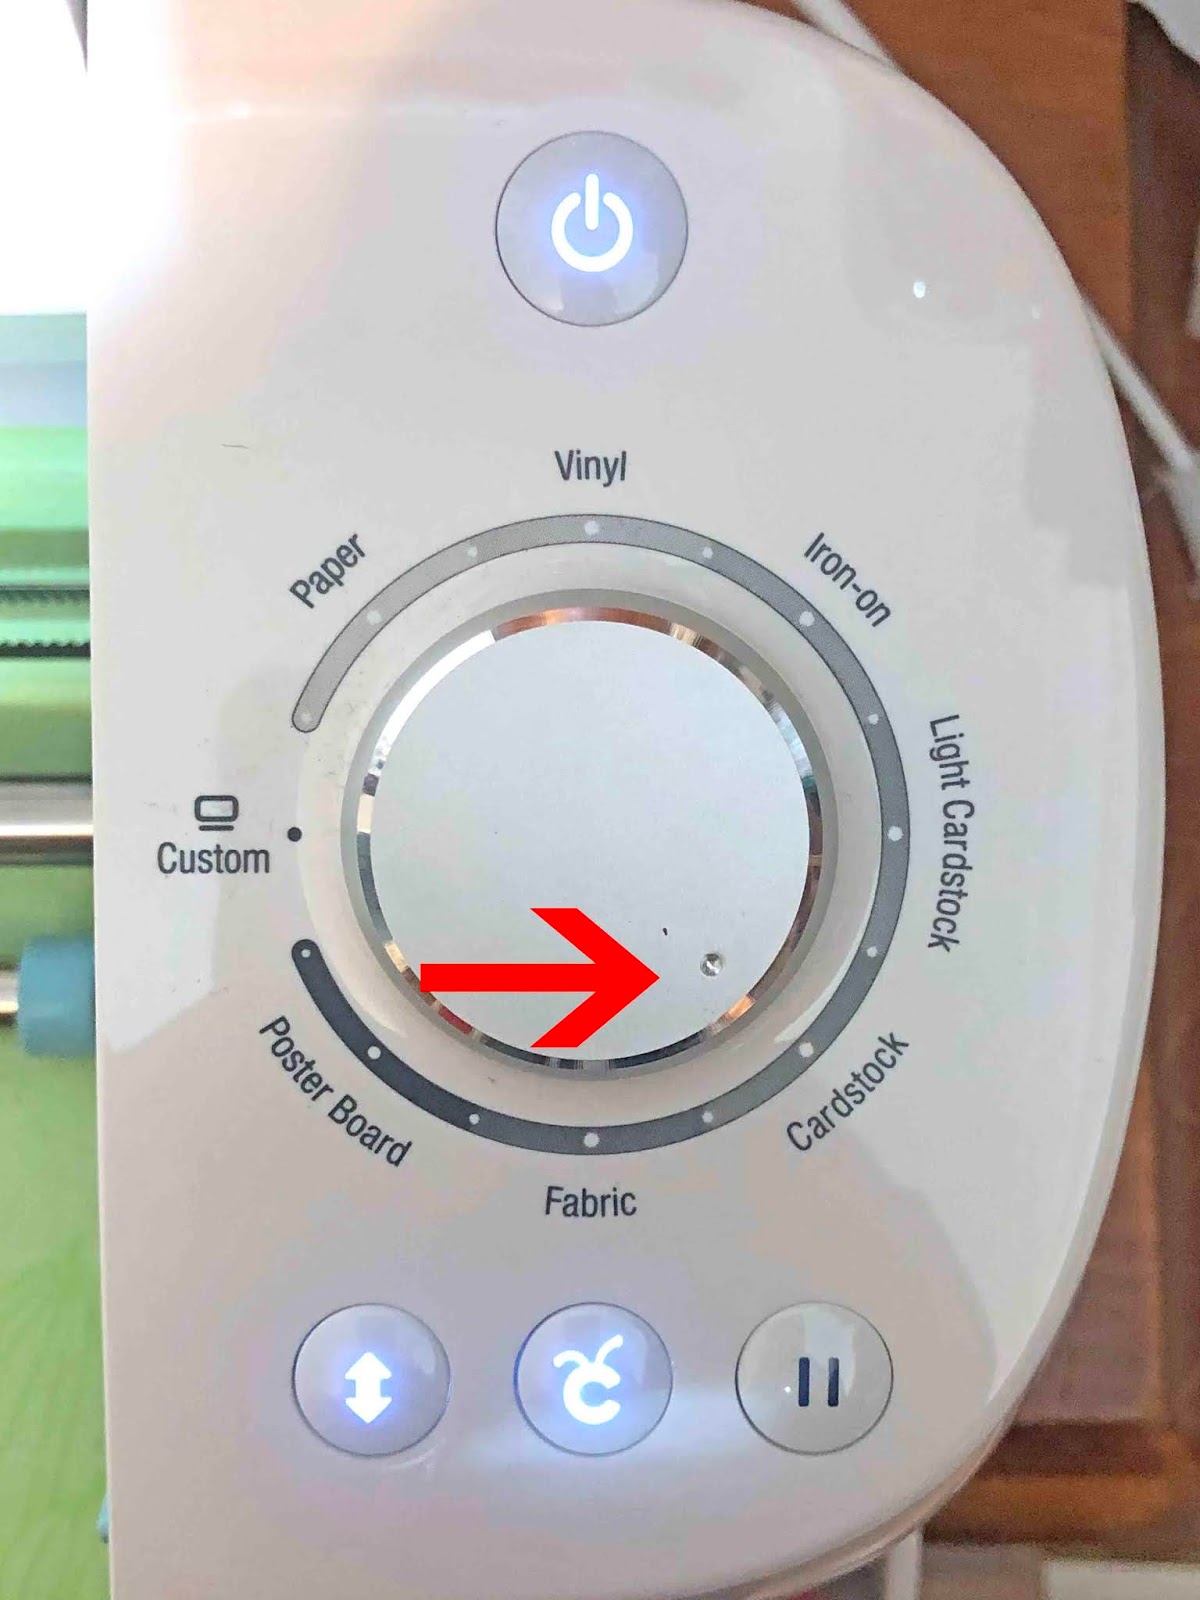
12- The dial on the machine can be adjusted to your media.
13- Your machine will start to foil. Make sure you have the foil held down well when doing intricate designs.
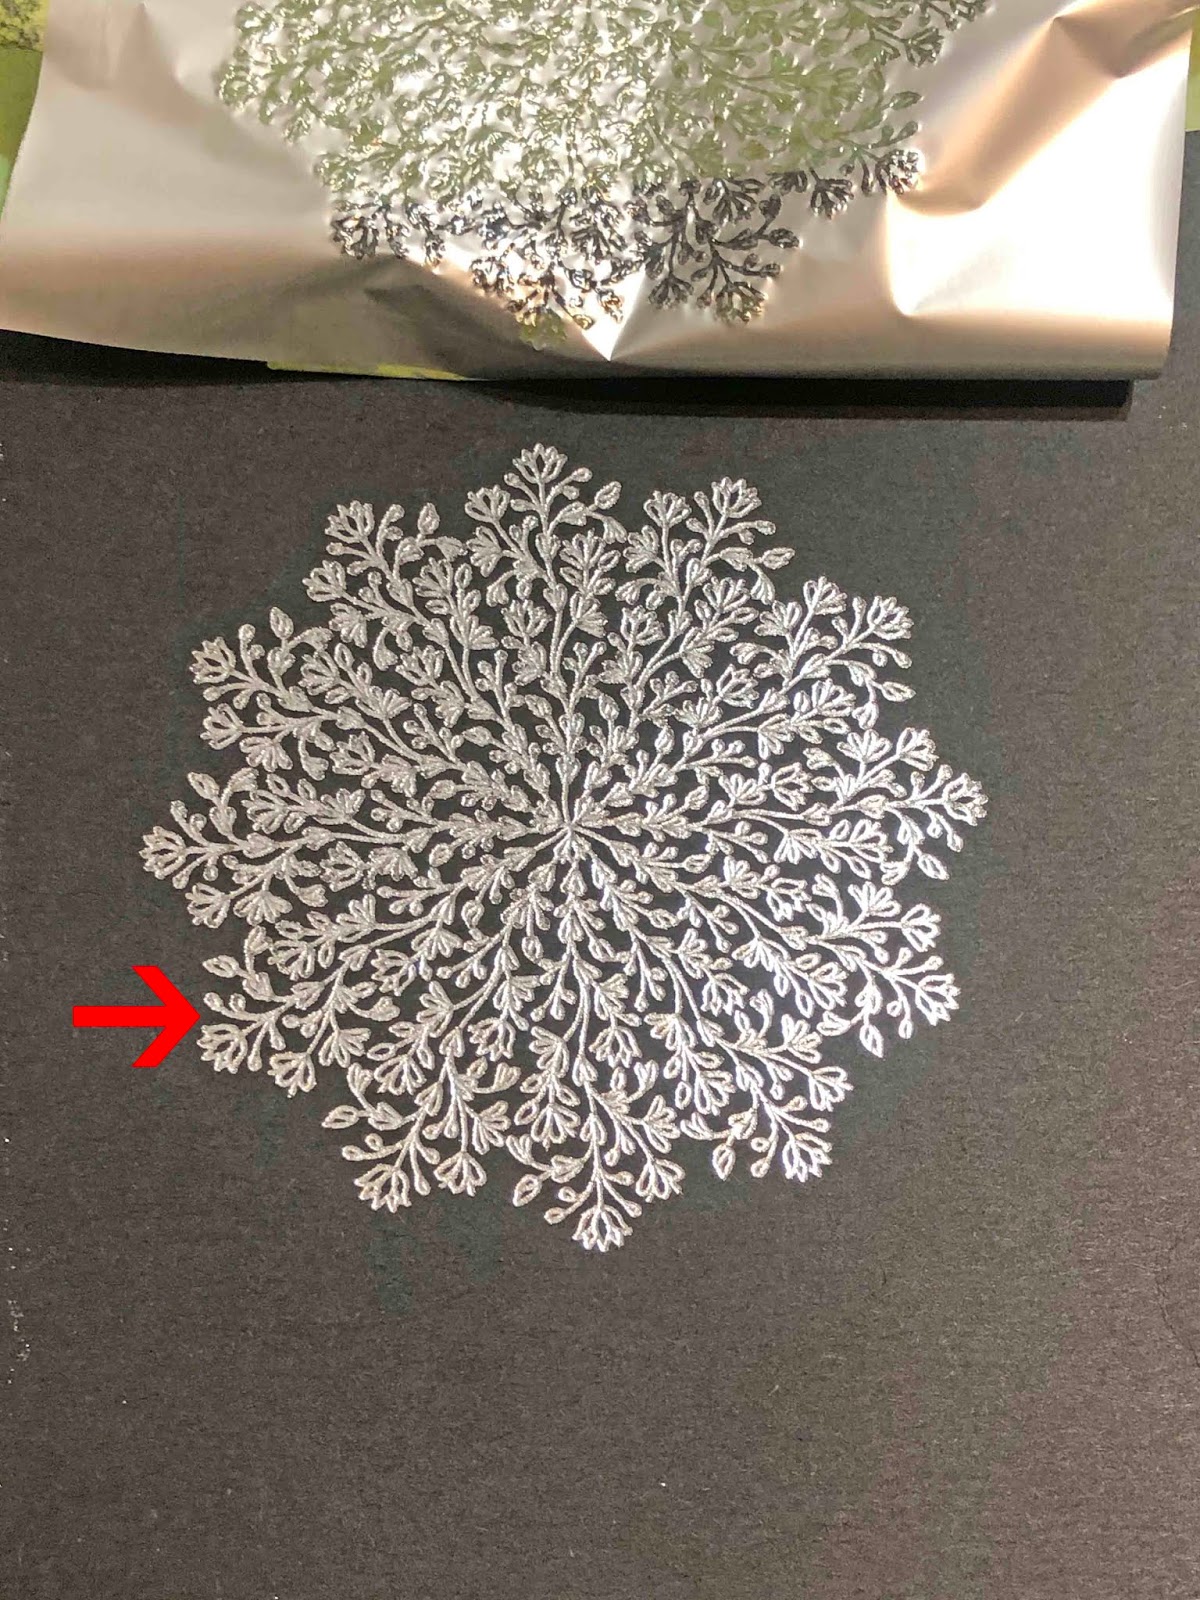
14- Your design is foiled.

2- Click on the upload icon.
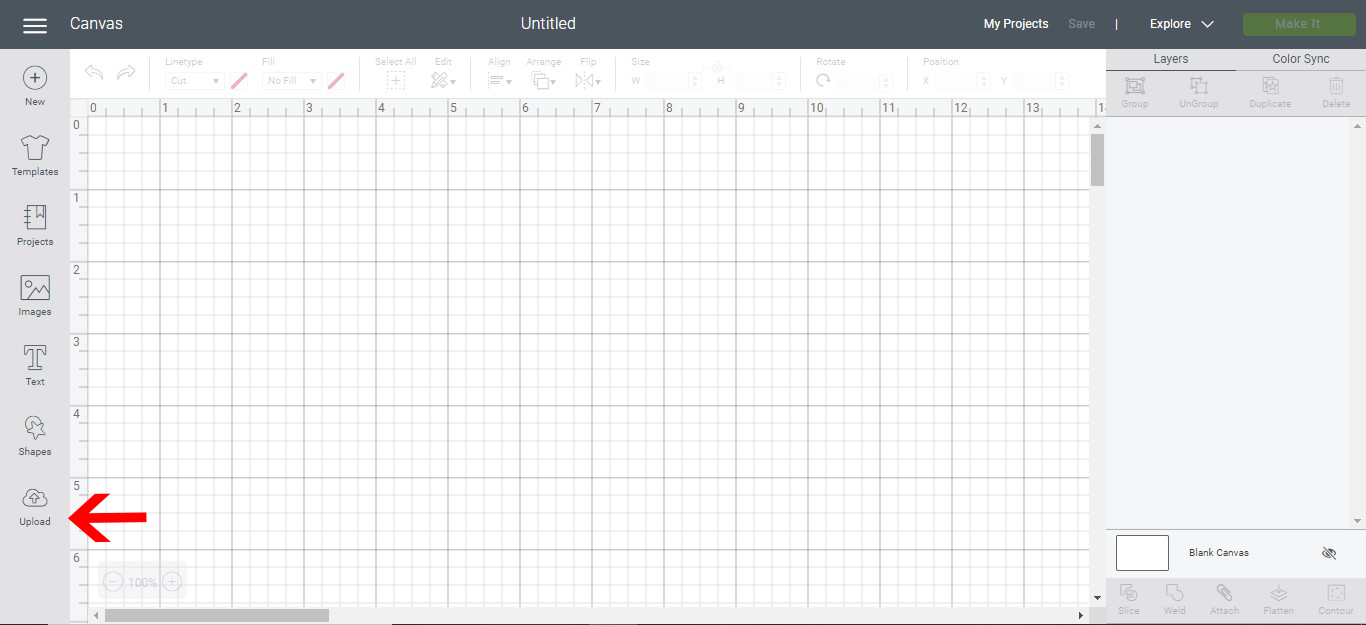
3- Click on upload.
4- Click on browse.
5- Select your file. I am using Single Line Mandala by CleanCutCreative.
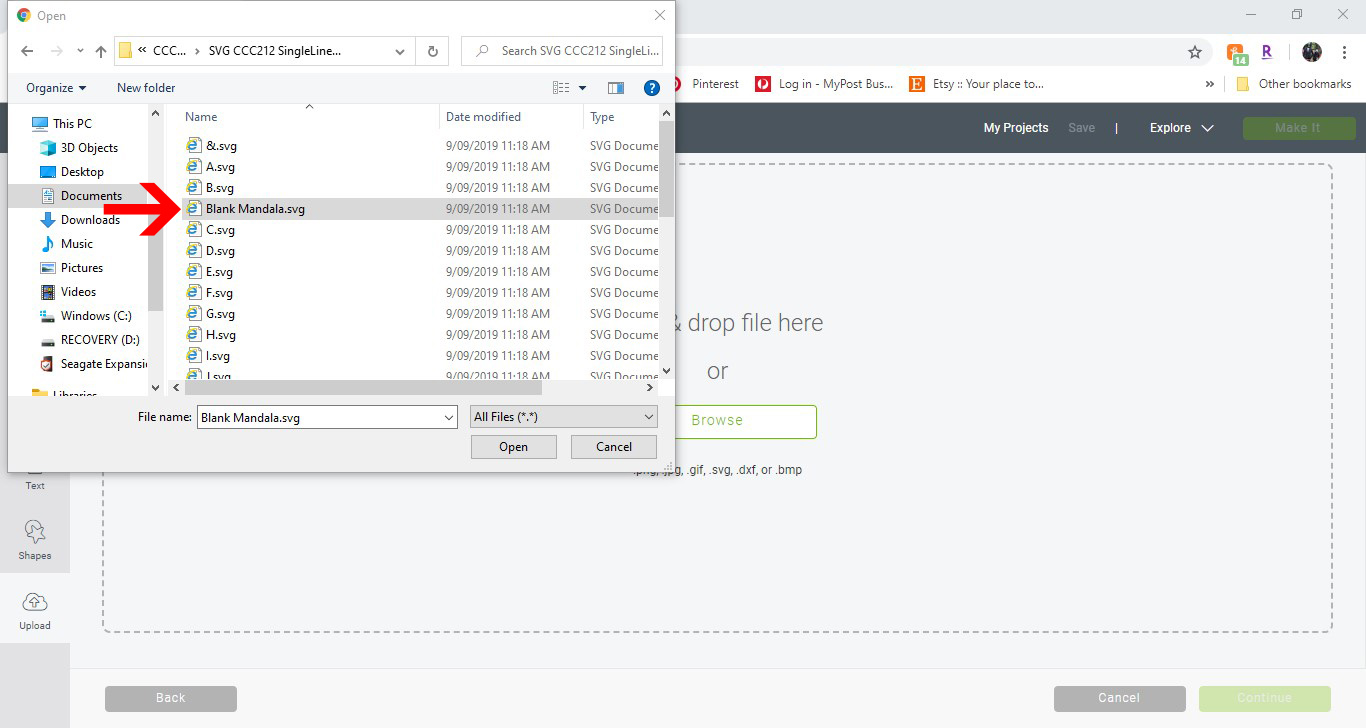
6- Your file will automatically be uploaded ready to insert. You can change the name of the file at this point.
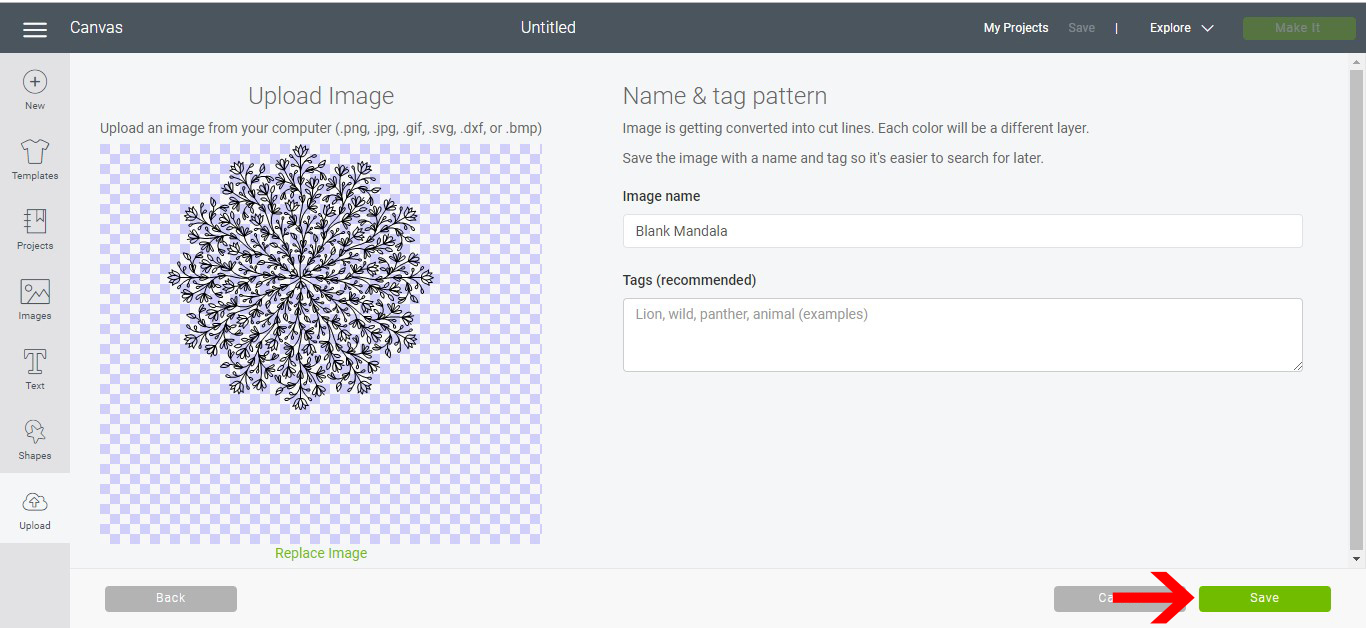
7- Your design is saved. Select the design and insert.
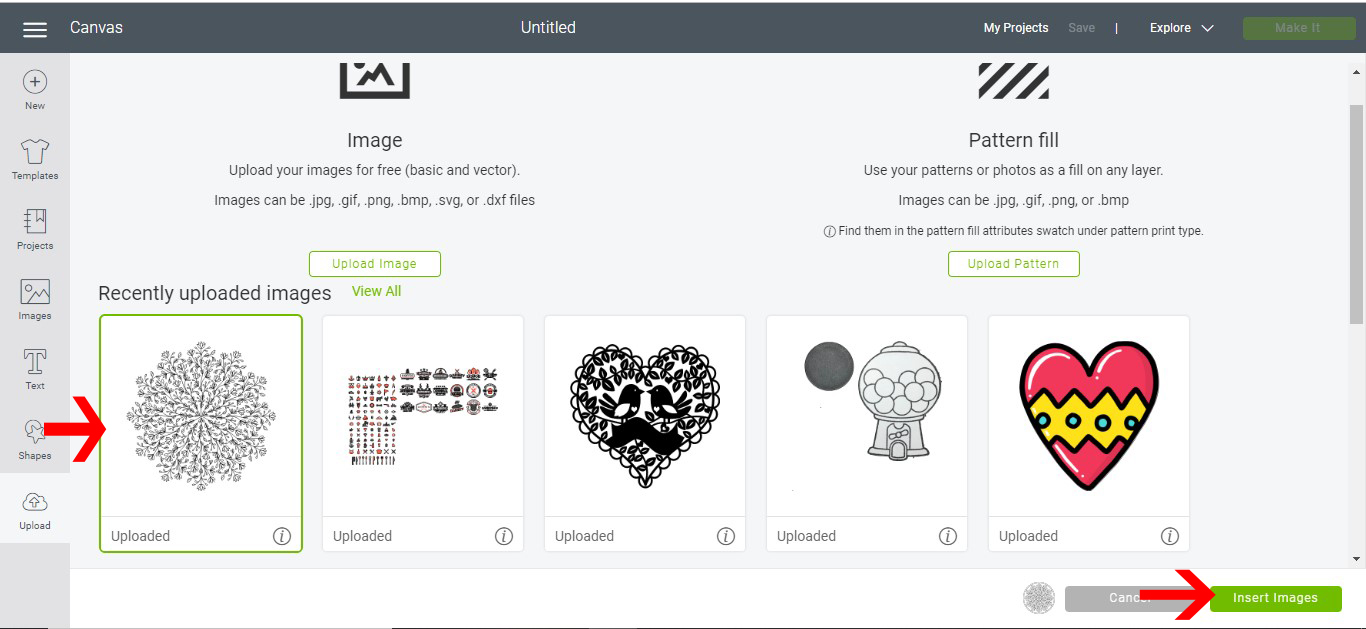
8- Select your design. Click on the line type drop down box .
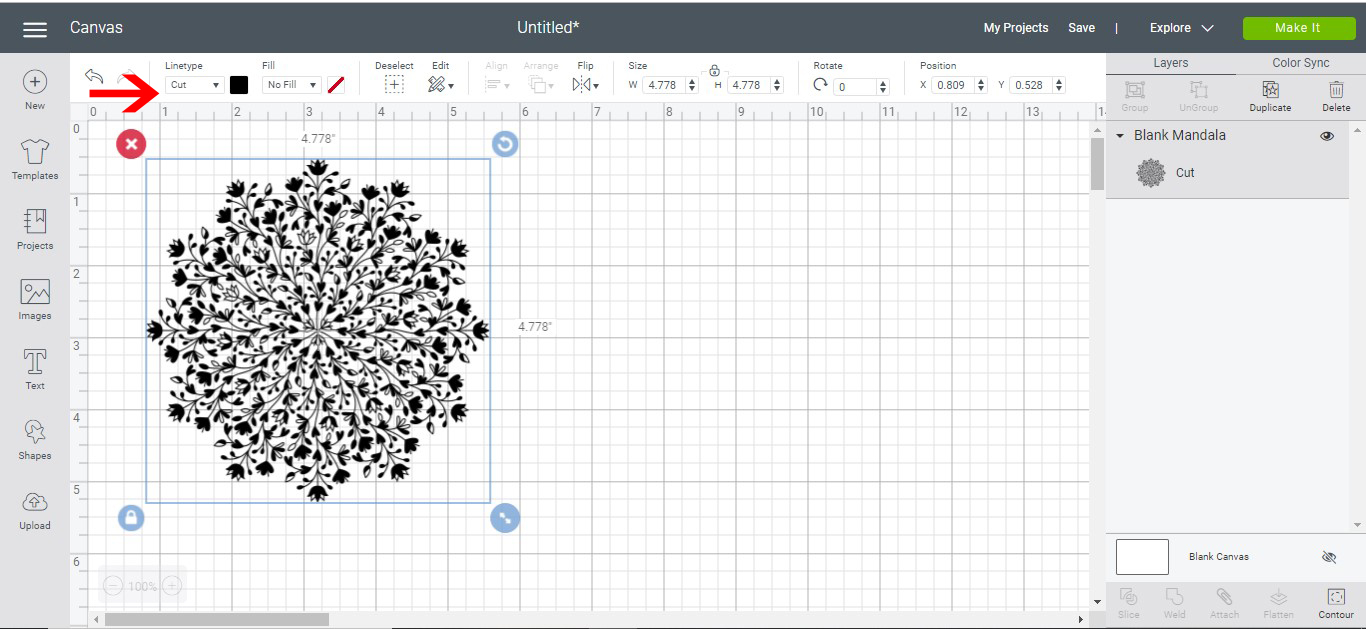
9- Select draw. Click on make it.
10- Adjust where you want the design. Click continue.
11- You can select the material type, insert the foil quill in the A clamp and once ready select go.
12- The dial on the machine can be adjusted to your media.
13- Your machine will start to foil. Make sure you have the foil held down well when doing intricate designs.
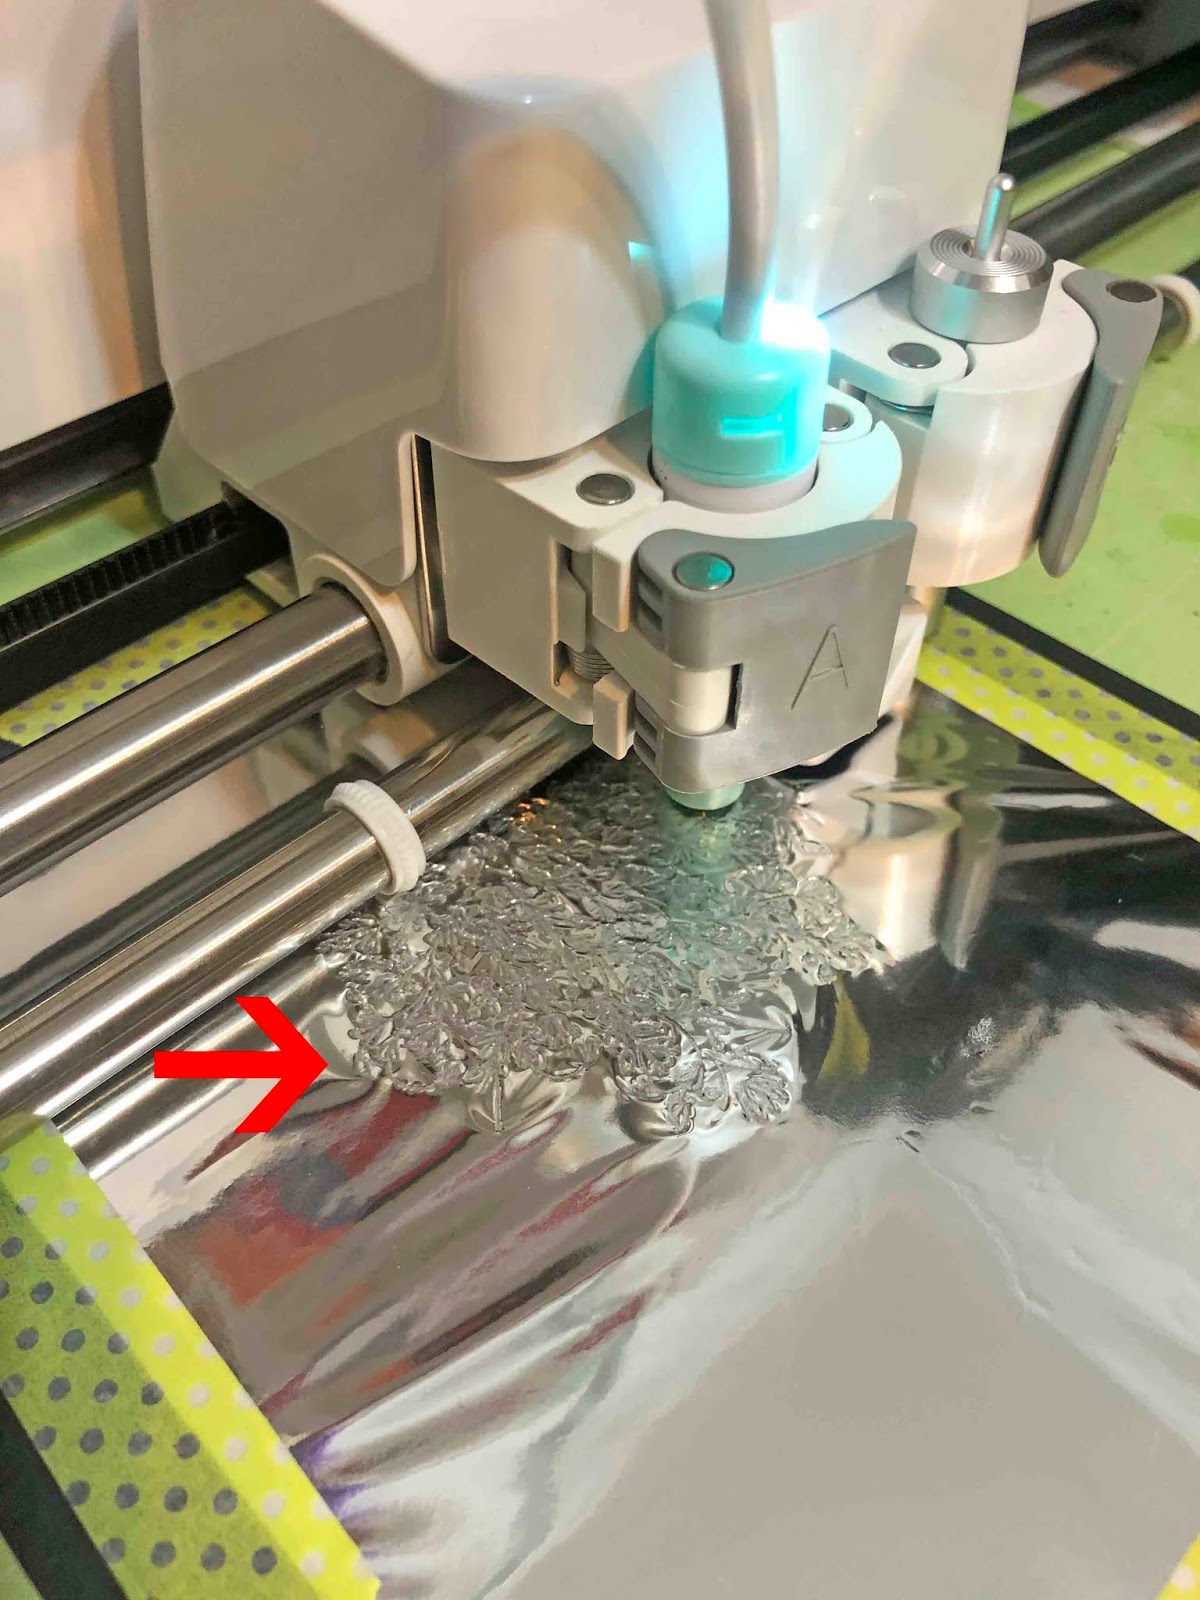
14- Your design is foiled.
Related Tutorials
Cricut Tutorials
How to draw your first line in cricut design space using the foil quill
Learn to draw your first line in Cricut Design Space with this beginner step by step tutorial.
Cricut Tutorials
Creating decorative borders in Cricut Design Space using the foil quill
Learn how to to make unique borders for cards or other craft projects!
Cricut Tutorials
Foiling acetate using the foil quill in cricut design space
Cricut Tutorials
Foiling a SVG file in cricut design space using the foil quill
Cricut Tutorials