By Nadine Spires
How to Use Overlays in DesignScape
Today, we will show you how to use overlays in DesignScape. Overlays are used to add texture, lighting, grunge and much more. In DesignScape, a browser based program, you can easily change the look and feel of your images. Available to Gold Plus Members, DesignScape is an awesome option to Photoshop and Illustrator.

If you are not a Gold Plus Member, the great news is that you can sign up for our 30-day free trial of the Gold Plus Membership and use DesignScape. On the landing page, click on the DesignScape button to begin.

For our tutorial, we are going to create a vintage grunge look. We will make use of a city street photo and a grunge overlay.
Step 1 - Make Adjustments to the Photo
Let’s begin by opening our photo and applying some edits. For an old fashioned photo look, we can add a Photo Filter Adjustment Layer. Go to Layer > New Adjustment Layer > Photo Filter and a new window will open on the right.

A warm, orange filter is automatically applied but we want to change this. Click on the color box to open the Color Picker. Now choose a more muted color. You are welcome to use the same HEX #837056 that we did. Then click OK.

You can further edit as needed but we chose to use just one adjustment layer. To close out of the side panel, click on the Properties Panel icon on the right.

Step 2 - Adjust the Grunge Overlay
Once we add the overlay to our photo, we are going to change the Blending Mode.
Resize the Grunge Overlay
First, drag + drop your grunge overlay onto the photo. It will be added as a Smart Object, which means you can edit it non-destructively.

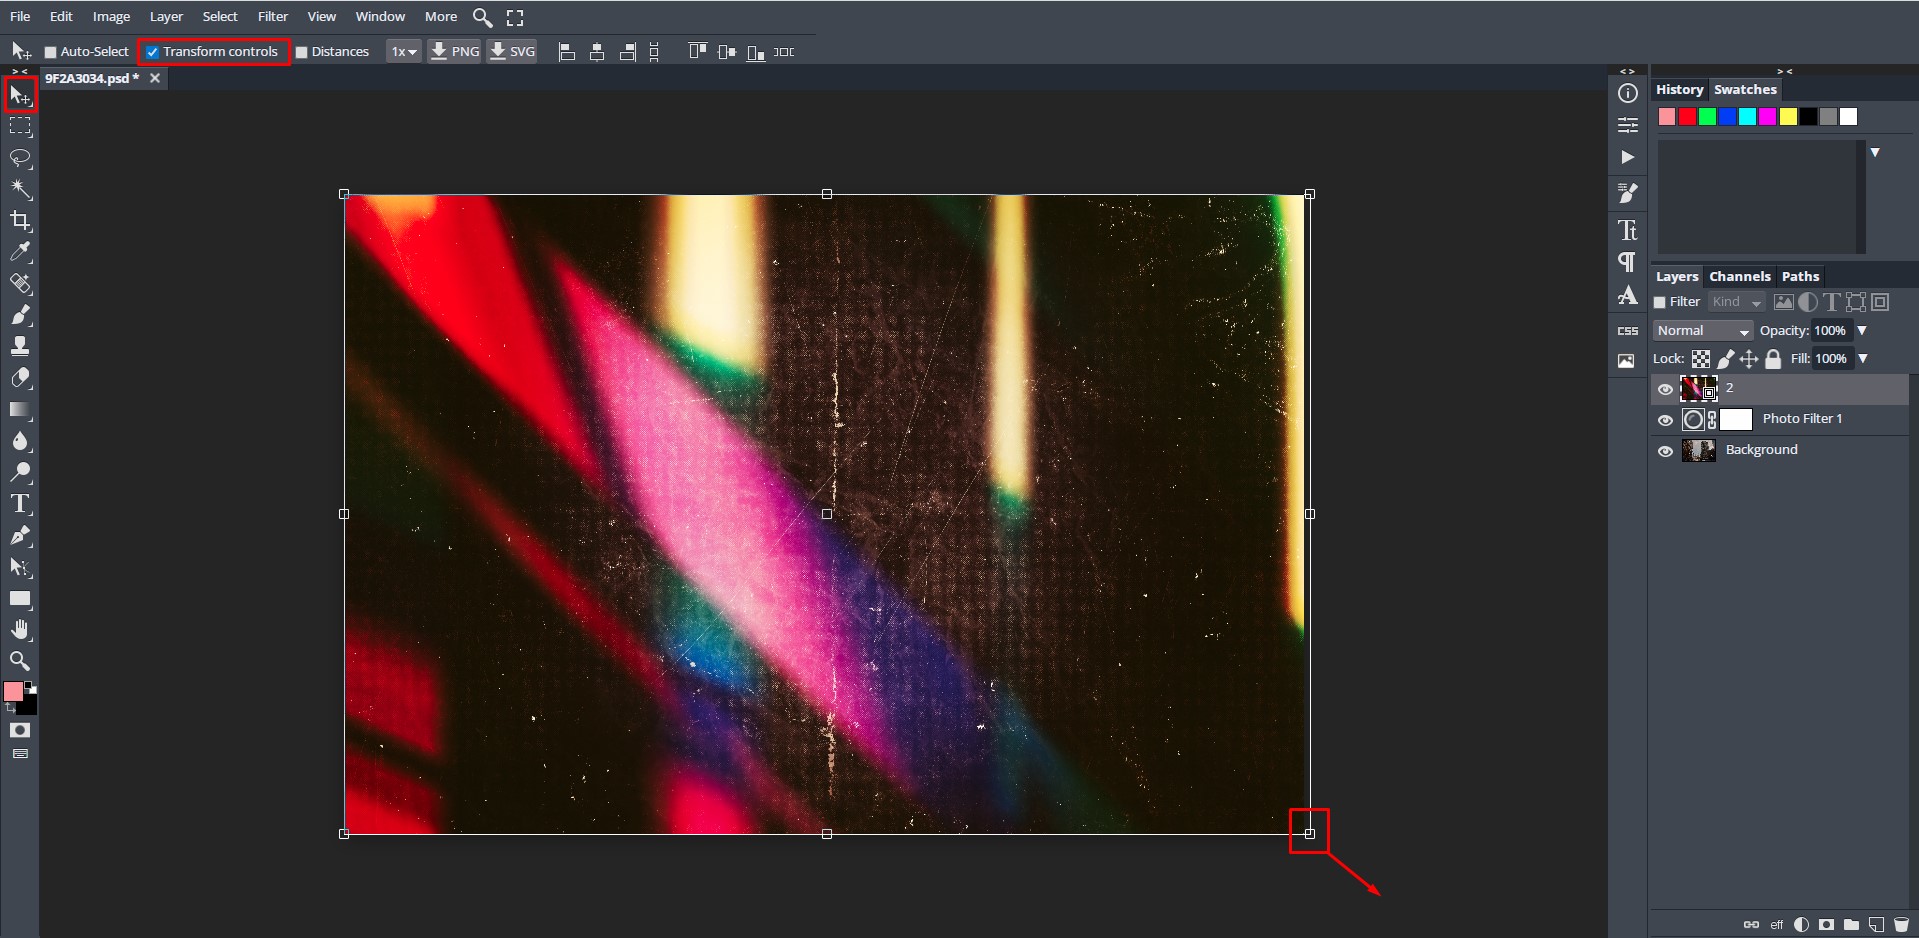
Depending on the overlay that you use, you may need to resize it to fit the image. On the left side toolbar at the top, click on the Move Tool. On the top toolbar, you will have a selection of settings. Make sure that the box for Transform controls is ticked so the sizing handles appear.
You can learn more about resizing with our transform and scale tutorial in DesignScape.
Now click + drag out a corner node to resize the overlay.
Change Blending Mode of the Overlay
The blending mode needs to be changed for the effect to work. Just above the Layers Panel you will find the Blending Mode options. Click on the drop down menu, then select from the different modes available. We changed our blending mode to Screen, which also lightened the city photo.

Edit in Smart Object Mode
You can independently edit the grunge overlay in Smart Object mode. We are not going to make any adjustments to the overlay. However, we wanted to show you the options in case you chose to.
Double click on the overlay thumbnail in the Layers Panel. This will open a new window where you can edit the overlay as needed.
Once you are done, to apply the changes you need to go to File > Save (Smart Object). Then click back on the city photo to see the changes applied.

Adjust Opacity of the Overlay Layer
If the overlay appears too strong, you can adjust the Opacity. Next to the Blending Mode option, in the Opacity box, click on the drop down arrow to adjust. You can also input a value. We used a value of 66%.

Experiment by adding more overlays and changing the Blending Modes. When you are done editing, the final step is to save your image. So we went to File > Export as > JPG.
Here is our final image result using an overlay in DesignScape.

We hope you enjoyed this tutorial on how to use overlays in DesignScape. With overlays, you can add character to photos, create vintage looks, even add rays of light to enhance your photos. You can also load and use Photoshop actions to have even more creative flexibility in DesignScape.