By Christine Hattingh
How to Draw Waves
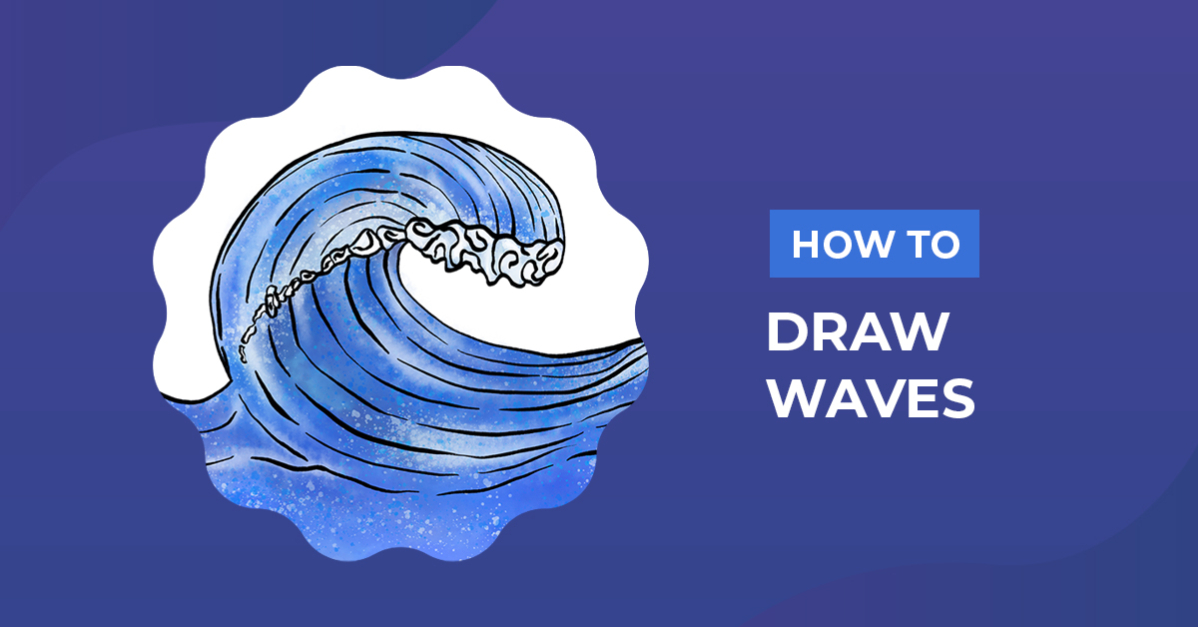
With this beginner-friendly tutorial, you will learn how to draw waves and capture the motion and power of the ocean. Follow along as we guide you through each step, from sketching the basic shape to adding color. Use your wave illustration in a variety of projects. Turn it into a stunning piece of wall art, use it as a design element for beach-themed stationery, or even create custom stickers for surfers with your unique design.

Create a beach clipart collection that matches your creative drawing style. Check out these step-by-step drawing guides to learn how to draw a boat or draw a starfish.
Before you splash into this tutorial, get all of your supplies ready. To illustrate your ocean clipart, you can use any traditional medium, such as colored pencils and paint, or use a digital drawing app like Procreate.
Step 1 - Create your Wave Sketch
To get started, grab a sketching medium such as a pencil. If you do not have one on hand, use a light-colored medium that you can cover up when applying color.
Create the Shape
First, draw a large circle shape that you will use as your wave guideline. You can make this as large or small as you want to.

Next, shape the curve of the wave by sketching a half circle inside your guideline. This will be the peak and lip of the wave. See our red sketch in the example below.
Then, draw a smaller curved line from the center, curving down and toward the right for the center tube of a wave.

Add Details
Along the top half, add a rough curving line to add shape to the lip of your wave drawing.

Next, add curved lines that follow the curved of your sketch to add a sense of motion to the waves.

Step 2 - Darken your Wave Outline
With your rough sketch done, swap your sketching medium for a permanent one. You can use any dark medium, such as black paint, an inking brush, or a marker. In this second step, you will trace your sketch lines to begin defining your wave line art.
As you create your wave outline, pay close attention to which sketch lines you want to make permanent. As you can see with our example image below, part of our right sketches we did not define.
Feel free to add ripples in the water around the wave or extend your lines to the edge of the paper to create an ocean scene. When you are done, erase the remaining rough sketches on your drawing.

Step 3 - Apply Color to your Illustration
Let's add some color to your illustration in the third and final step. To color the water, use an ocean color palette that has different shades of blues. Apply your blue shades to your drawing, adding lighter sections in some areas.
We colored our wave clipart with these watercolor Procreate brushes. It has splatter-effect brushes, which are perfect for adding foam and spray around the lip of the wave and on the water.

What a splashing wave illustration you made! Great job on following along and learning with our beginner drawing exercise. Why not create different wave formations by changing your guide and shaping sketches?
Use your drawing as beach clipart, design stickers, or create custom sublimated t-shirts, tumblers, and beach totes!