By Design Bundles
How to Uninstall Fonts on a Windows PC and Mac
With so many amazing fonts available on Font Bundles it's easy to get swept away and go on a downloading spree! I mean, have you taken a look at all the free fonts?!
Sometimes though, you may need to save space and uninstall fonts. In this tutorial we will show you how to uninstall fonts on both Windows PC and Mac!
Uninstalling Fonts on a Windows PC
Step 1: Click the Start button and then Settings

Step 2: Click Personalization and then select Fonts on the left

Step 3: Click on a specific font you want to uninstall

Step 4: Click the Uninstall button

Step 5: Click Uninstall in the popup dialog

If you need to delete multiple fonts at one time, hold down the CTRL key when you select the fonts. Once all the fonts are selected, follow the above steps to uninstall them all.
How to Uninstall Fonts on Mac
Step 1: Open Font Book
In the Finder window, select Applications > Font Book.
Step 2: Locate the Font You Want to Remove
In the Font Book application, you will see all fonts installed in your Mac. Select and right-click the font that you want to uninstall. Now, select Remove (font name) option.

A confirmation message will appear. Click the Remove button and the selected font will be uninstalled from Mac.
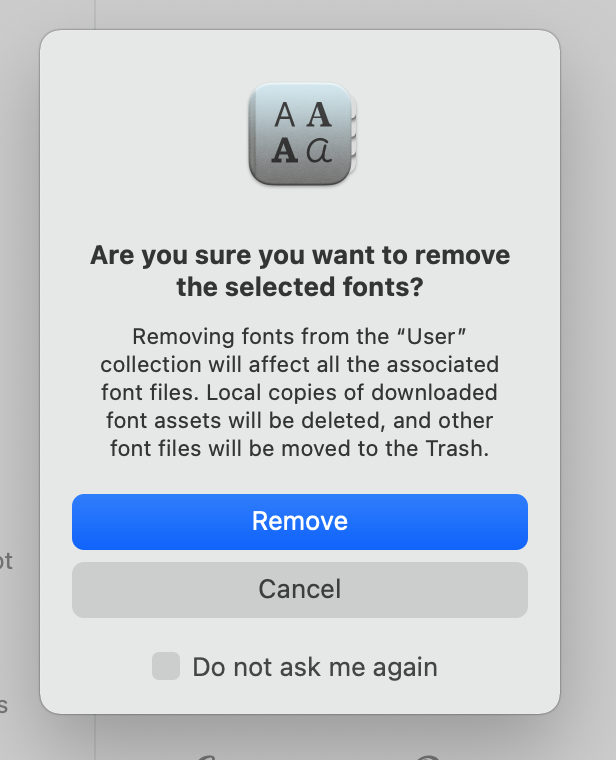
Repeat the above steps for every font you want to uninstall. If you want to uninstall multiple fonts, hold down Command while clicking on the font name to uninstall multiple fonts at once.
Note: If you think you will need a font later on, then you can choose to Disable the font instead. By doing this, the font will then be unavailable for use, but will still remain on your computer to be enabled for use in the future.

You'll know a font has been disabled if it says "Off" next to the name.

And when you need to use the font again, you can right click on the name and select Enable.

And there you have it! You have now learned how to uninstall fonts on Mac and PC!