By Design Bundles
Illustrator Tutorials10 min
How to Make a Linocut Flower in Illustrator
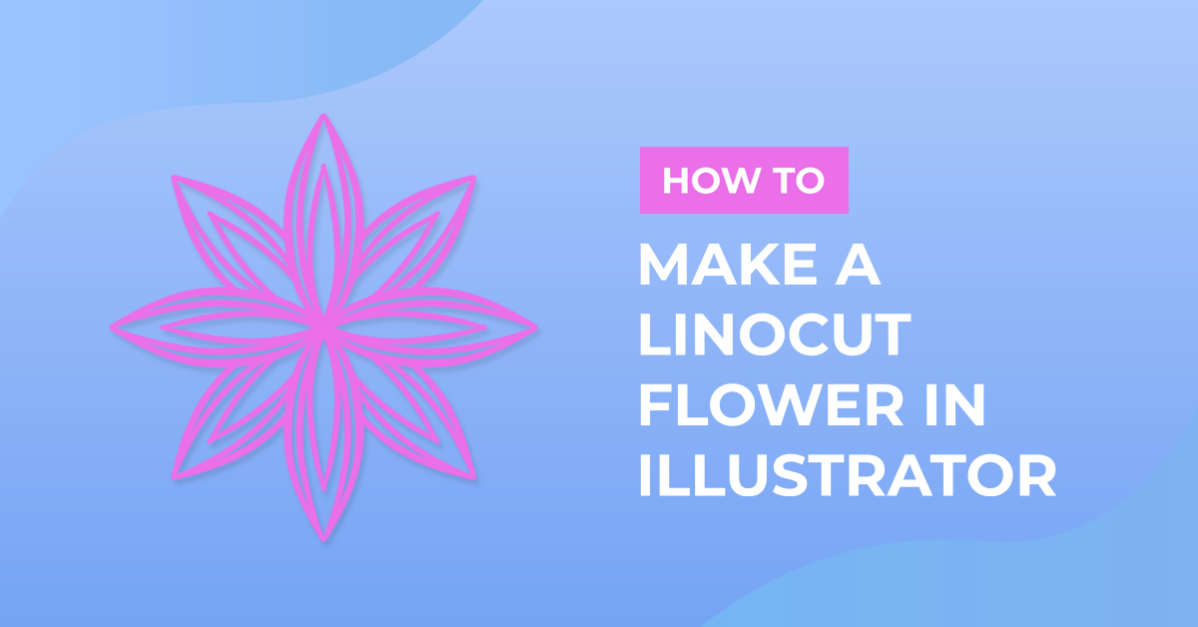
Linocut is a printmaking technique used for a relief surface. We will show you how to make a Linocut Flower in Illustrator. It is super quick and easy to create this effect using only a few tools. Once you have the knowledge, you will be able to design so many beautiful and intricate illustrations.
We can begin by opening Illustrator and setting up our document.
First, we will use the pen tool to start drawing our flower. Make sure to check out our complete guide on the pen tool if needed. Once your document is ready, select the Pen tool from the left toolbar.
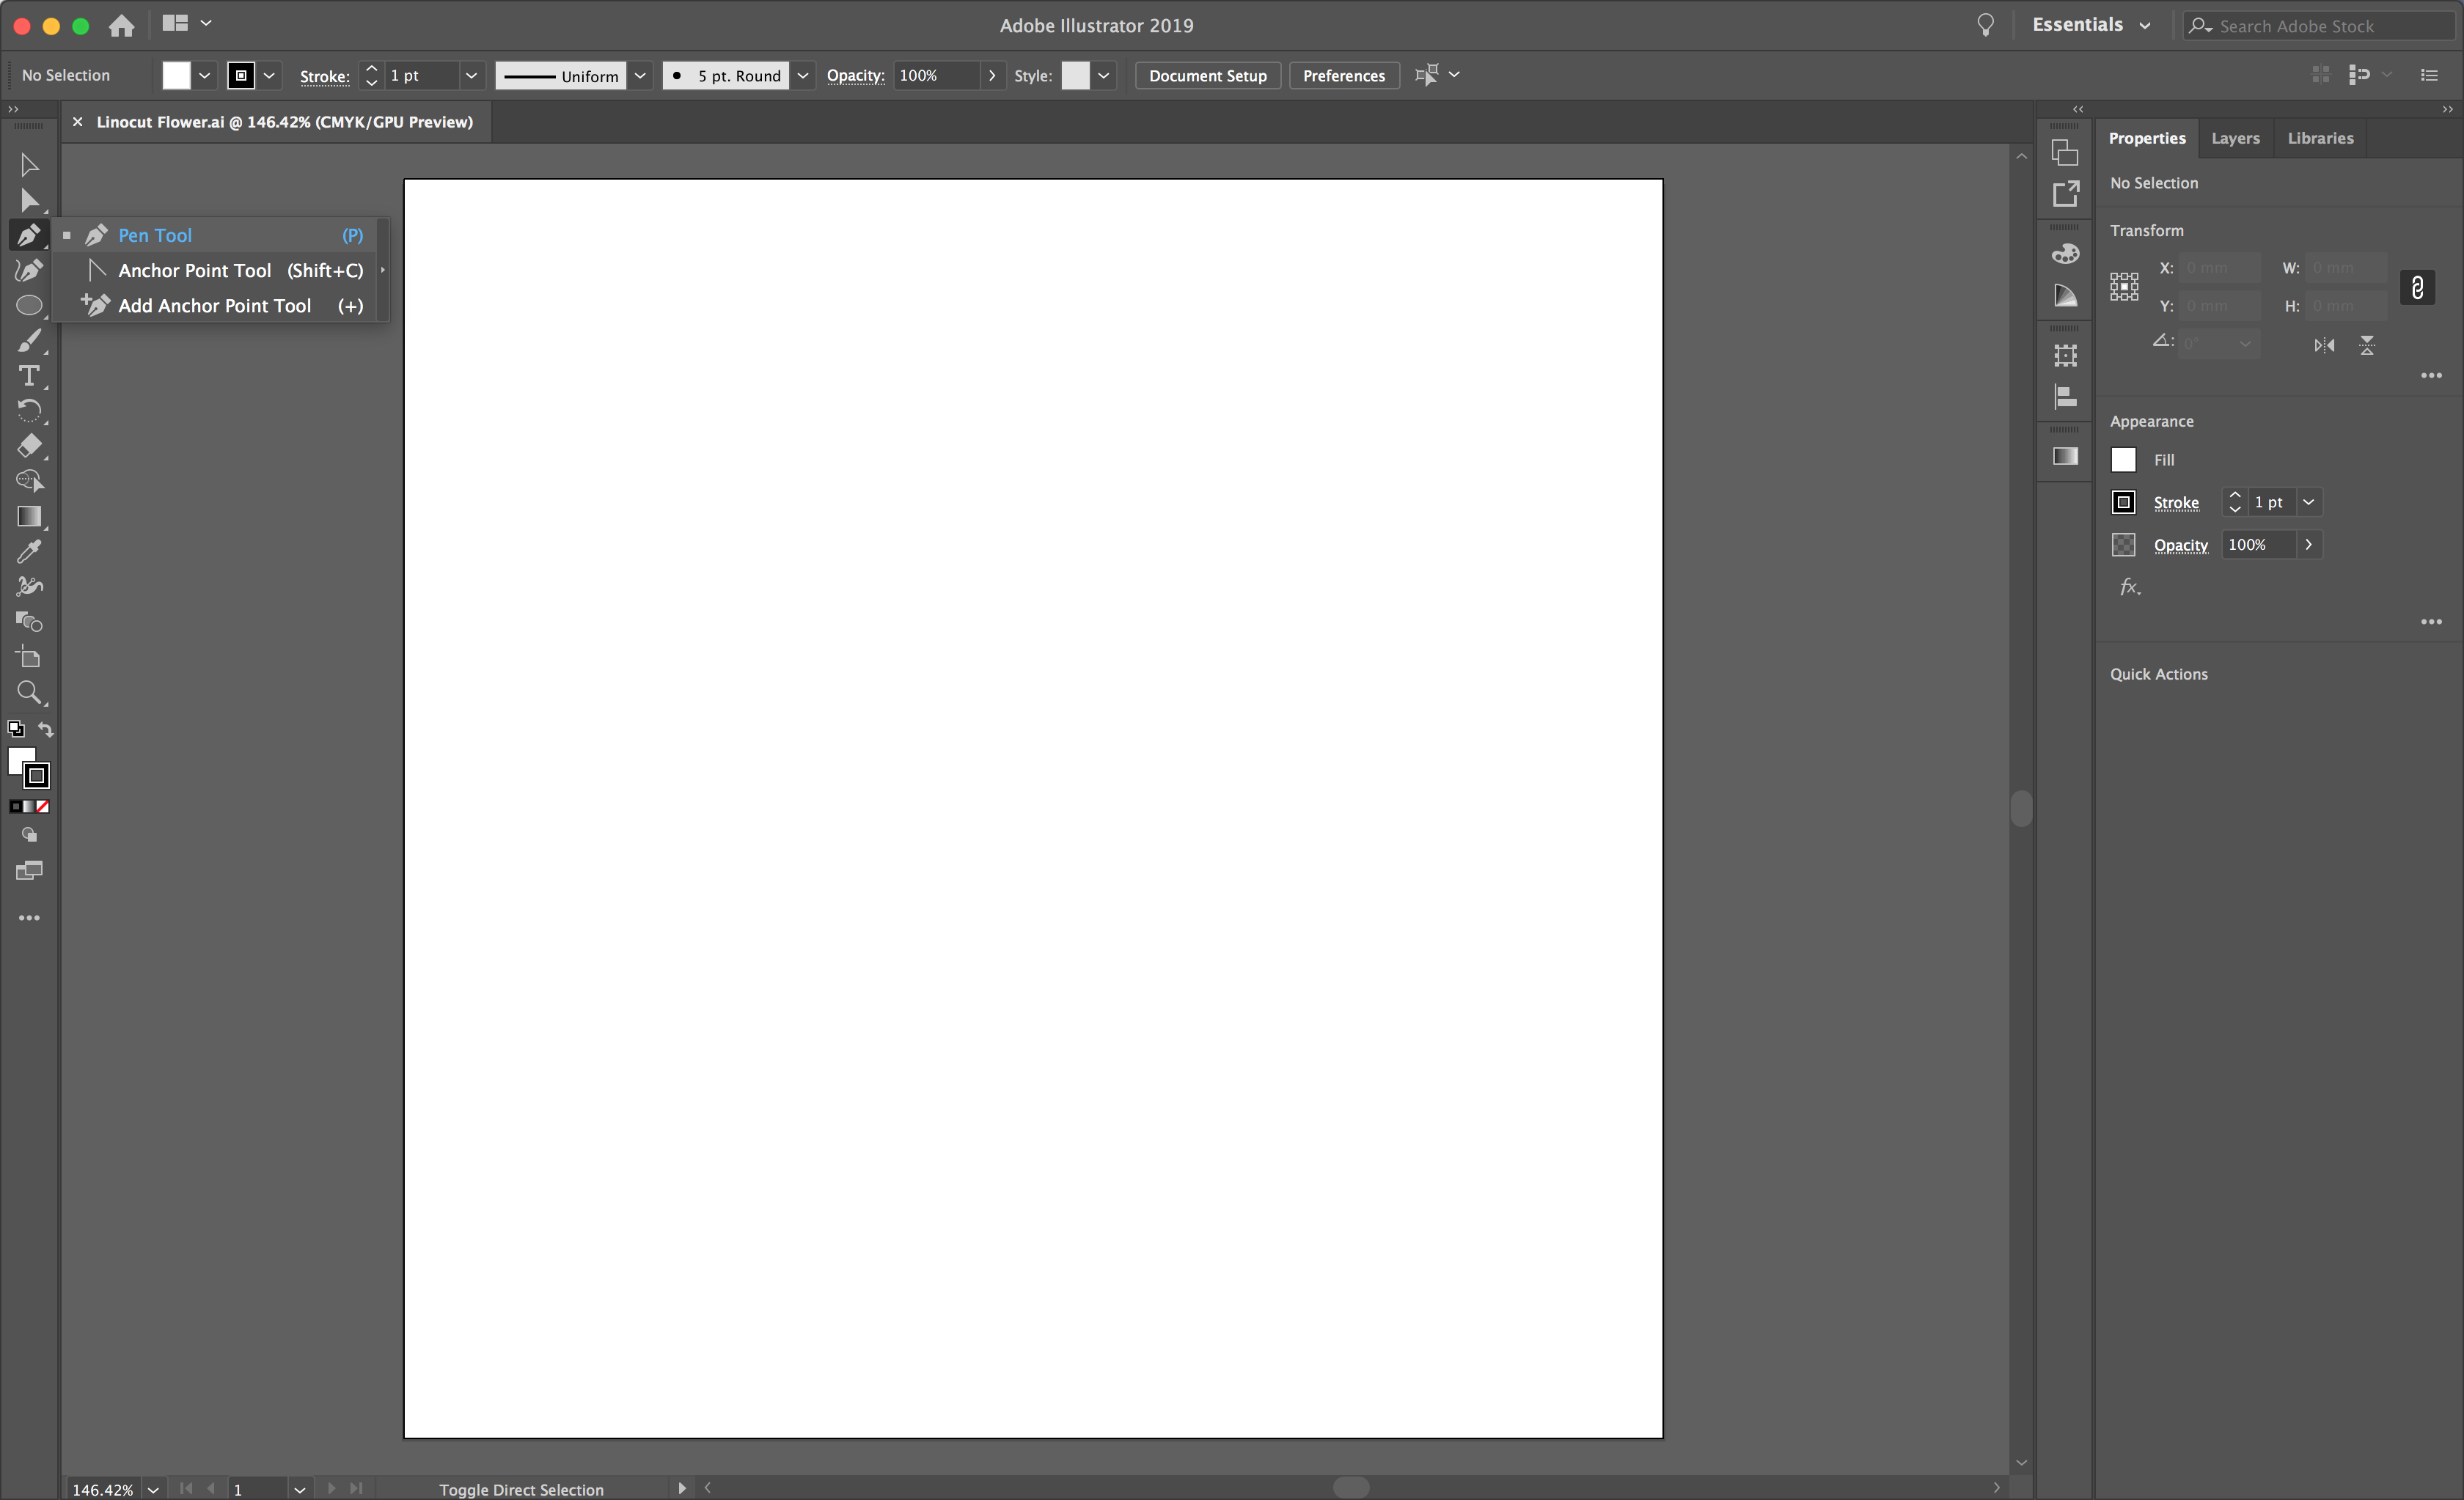
Click to create your first point. Then for your second point, click and drag to form the rounded side.
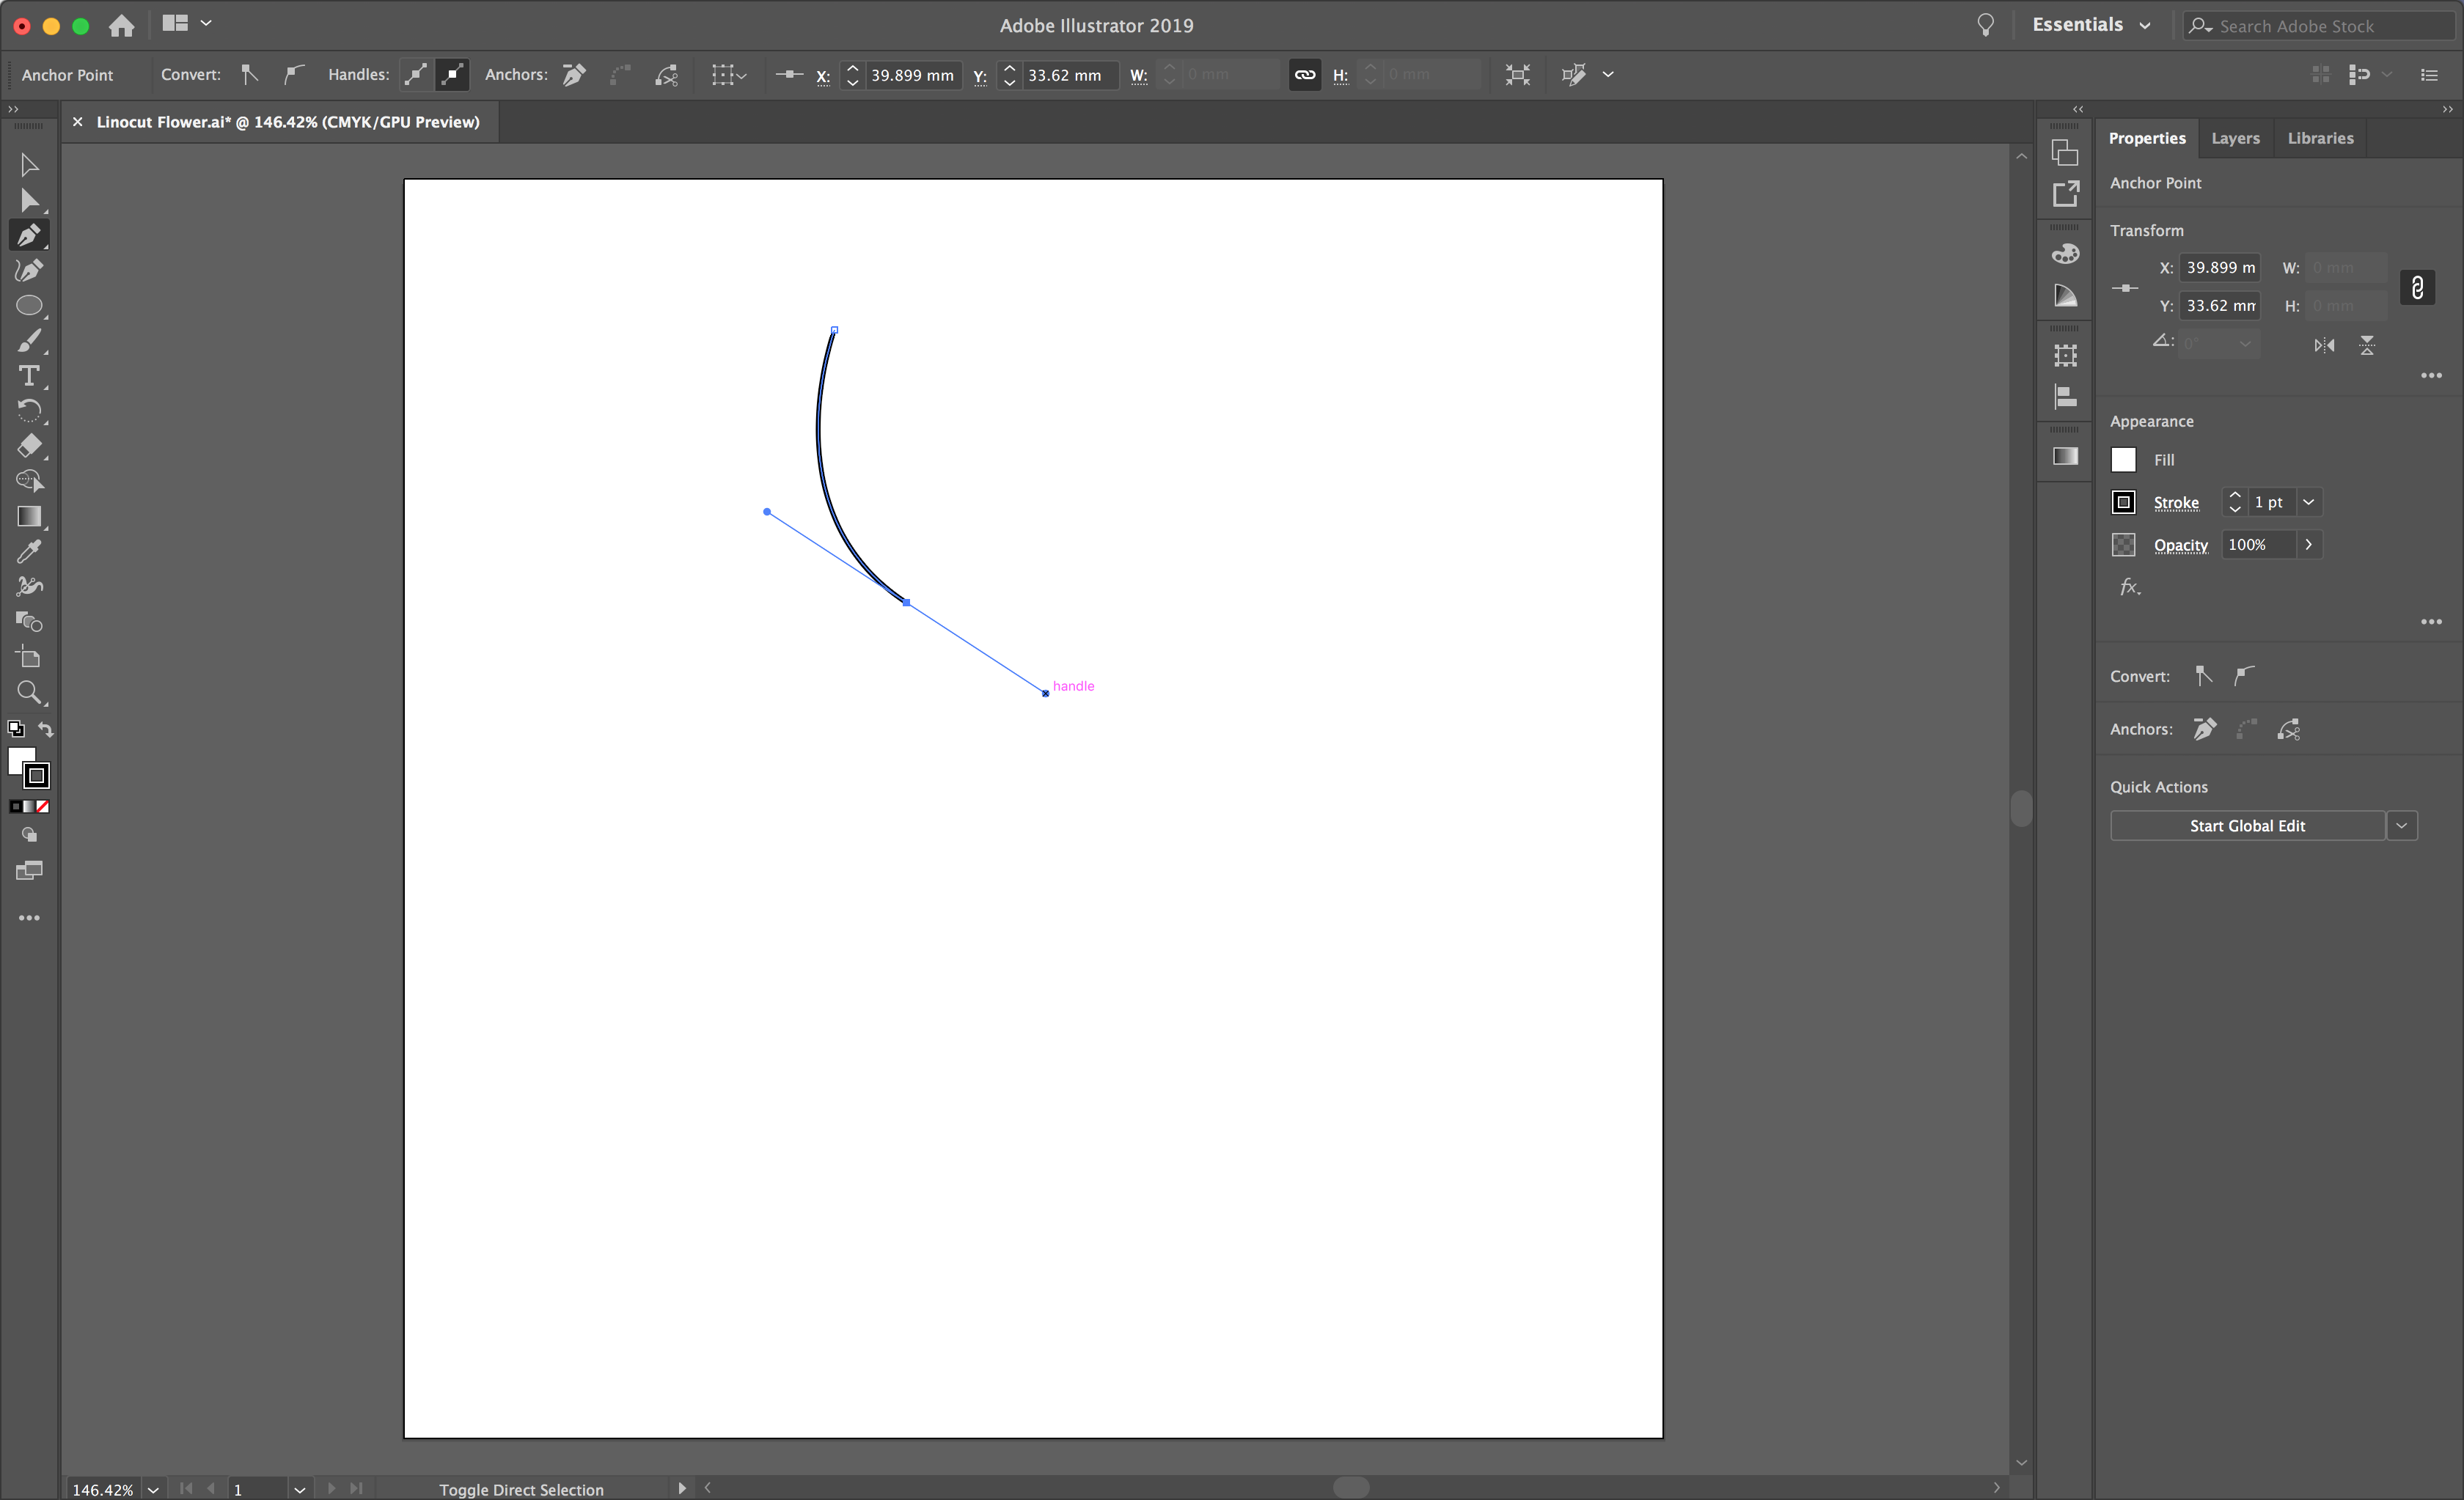
Draw your second line to complete the petal shape, ensuring the 2 sides aren't a complete shape. Refer to the screenshot below for a visual. For the second side of the shape, I have used two points to create the curved tip of the petal.
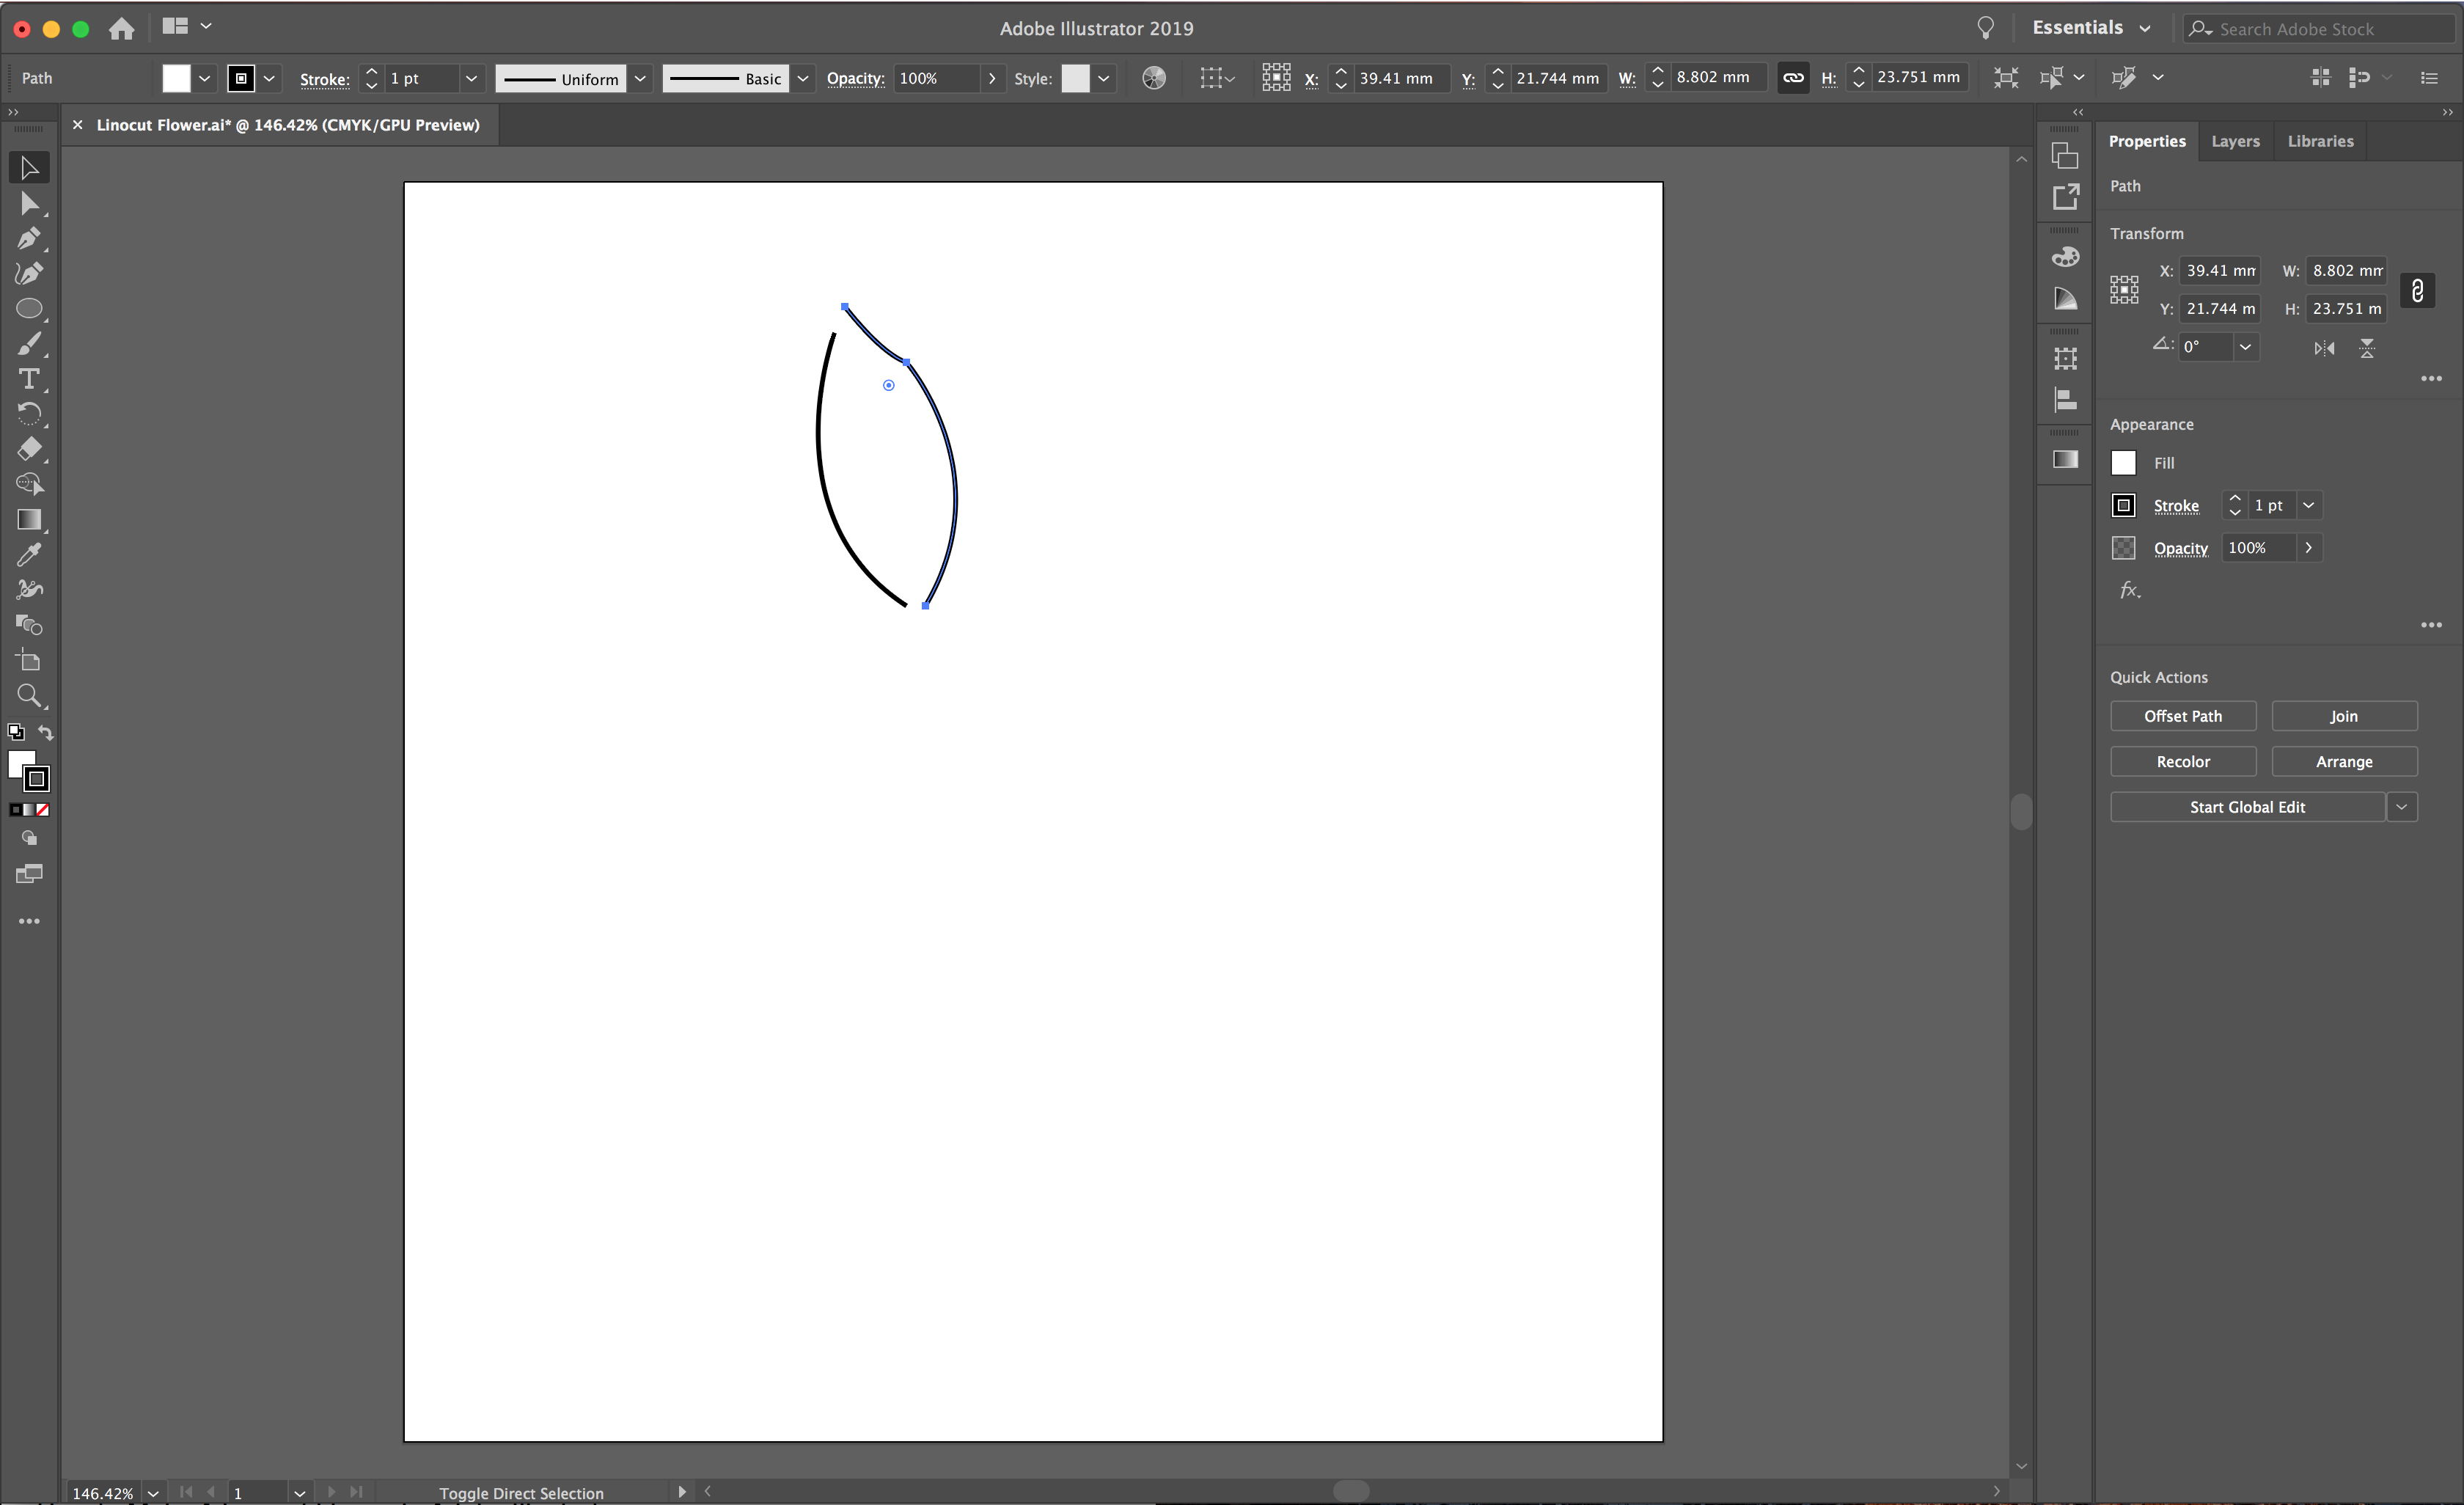
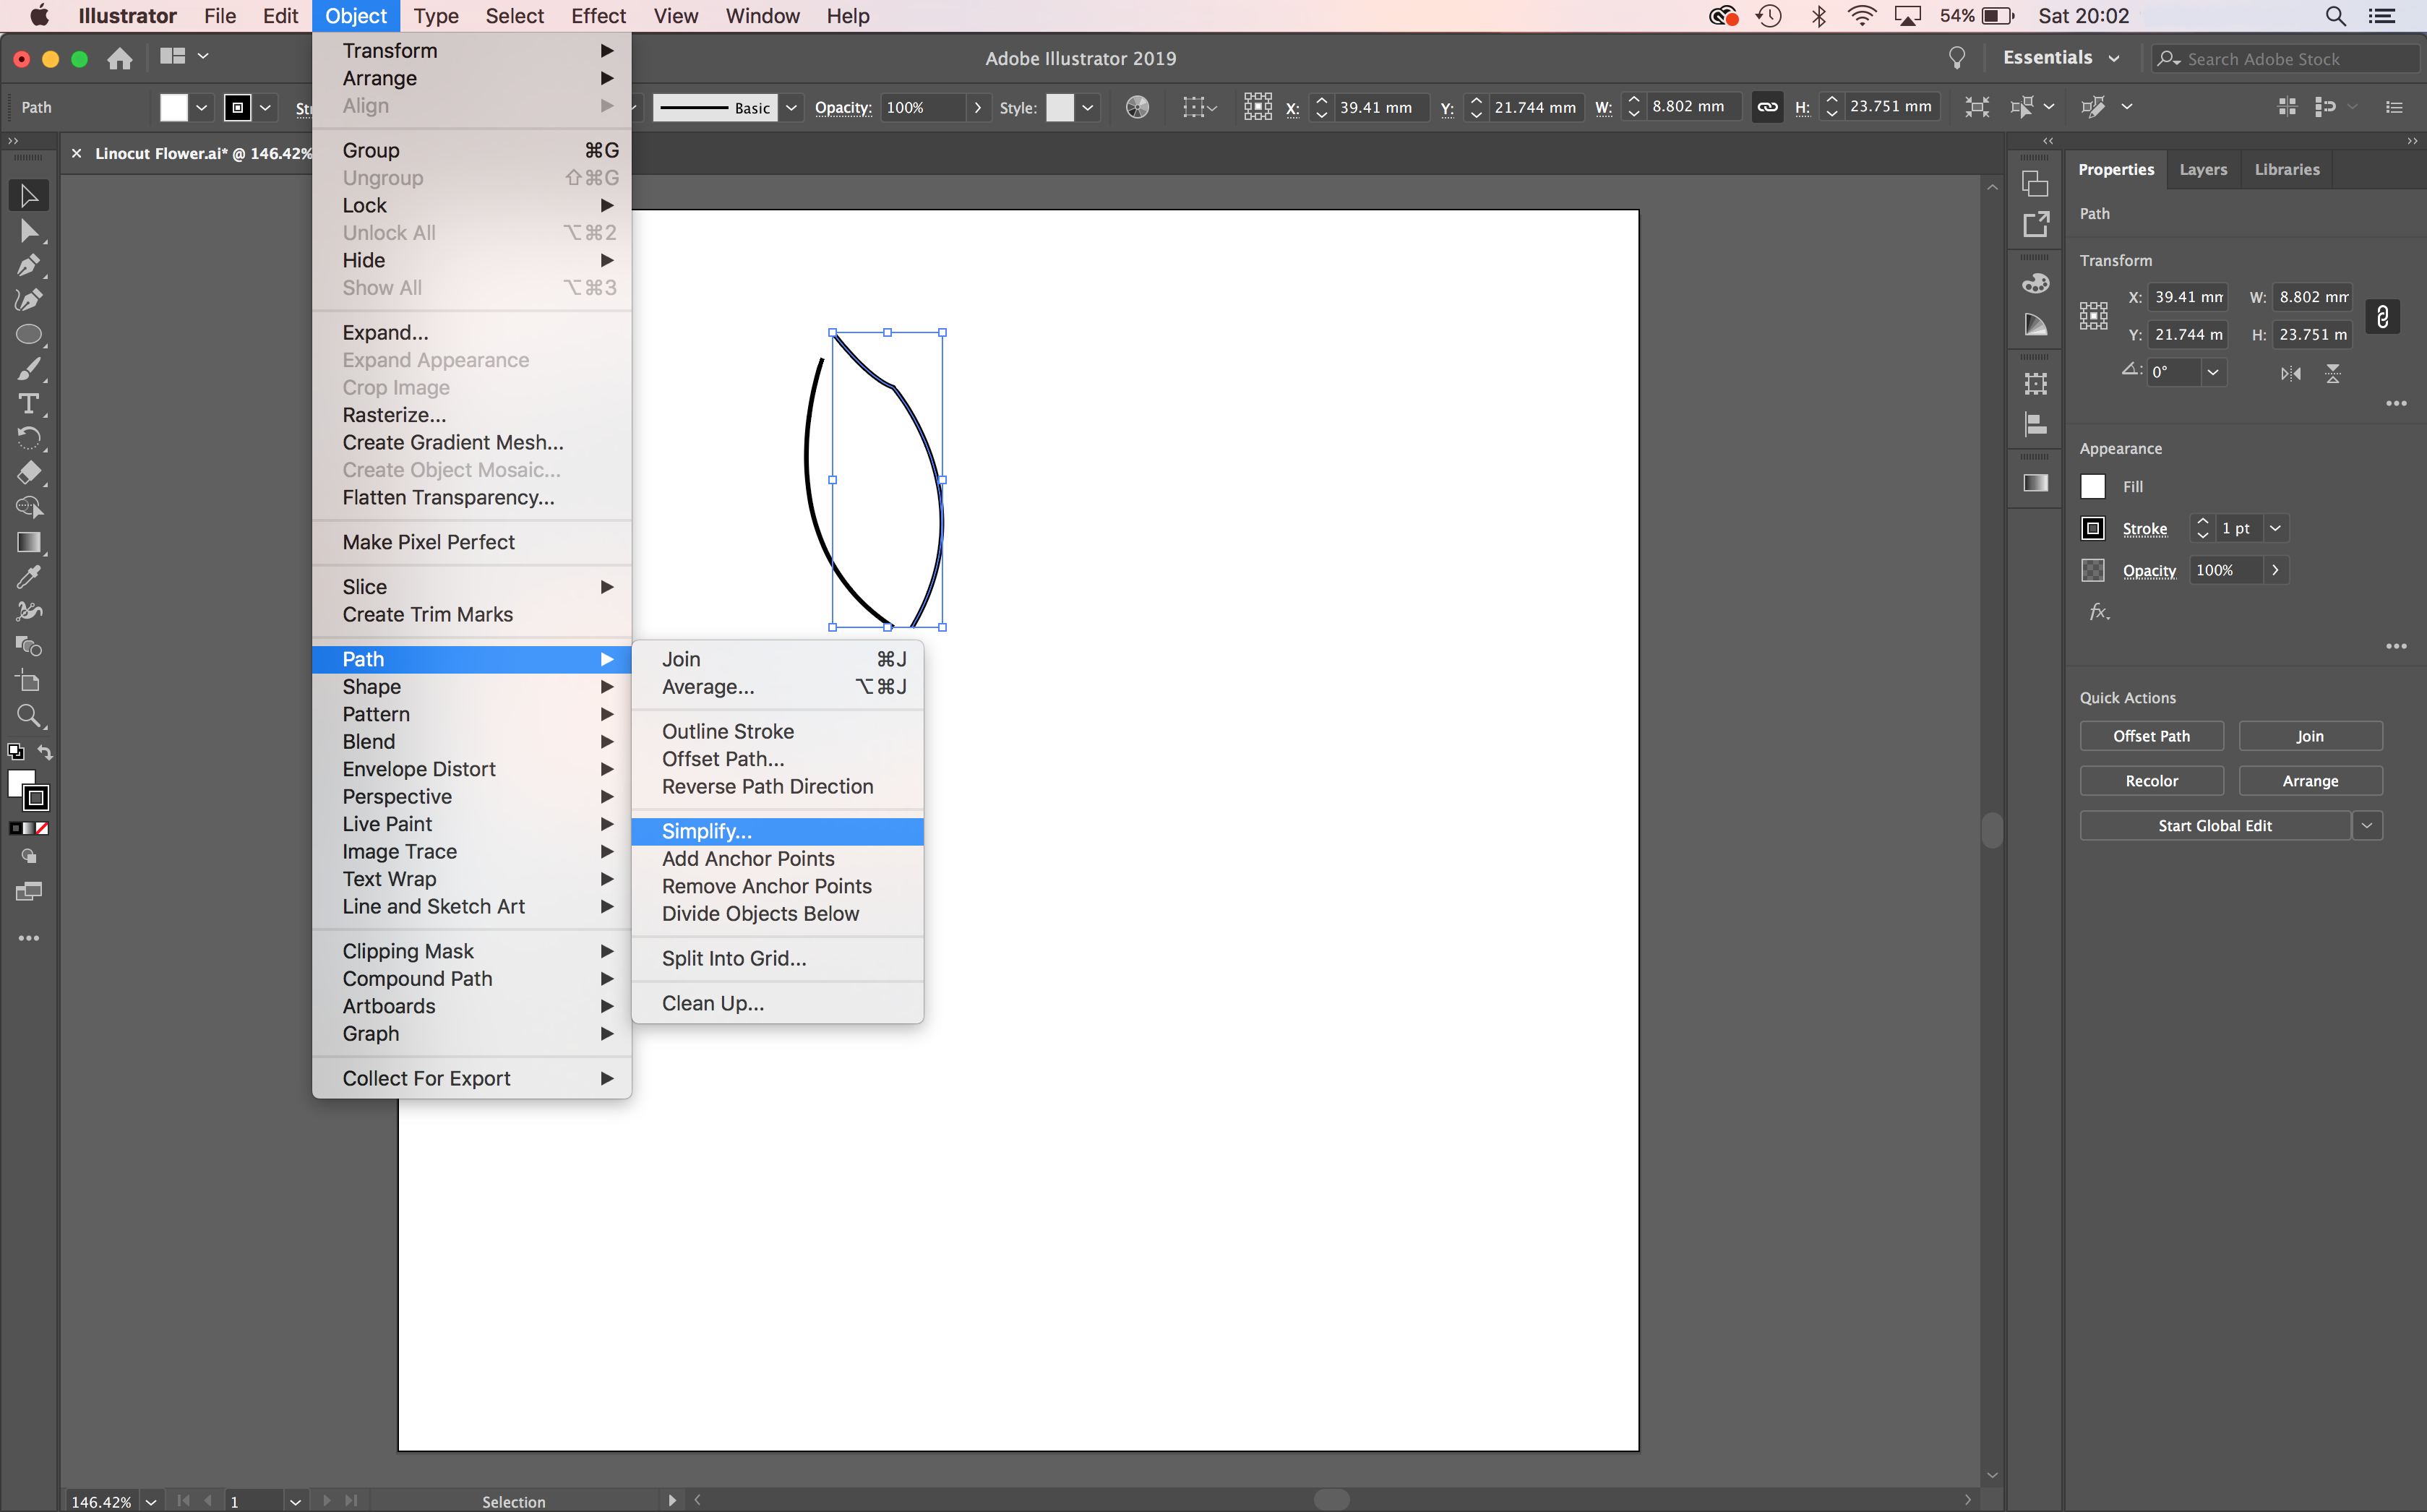
Once you have done this, to create a smooth line, select Object > Path > Simplify.
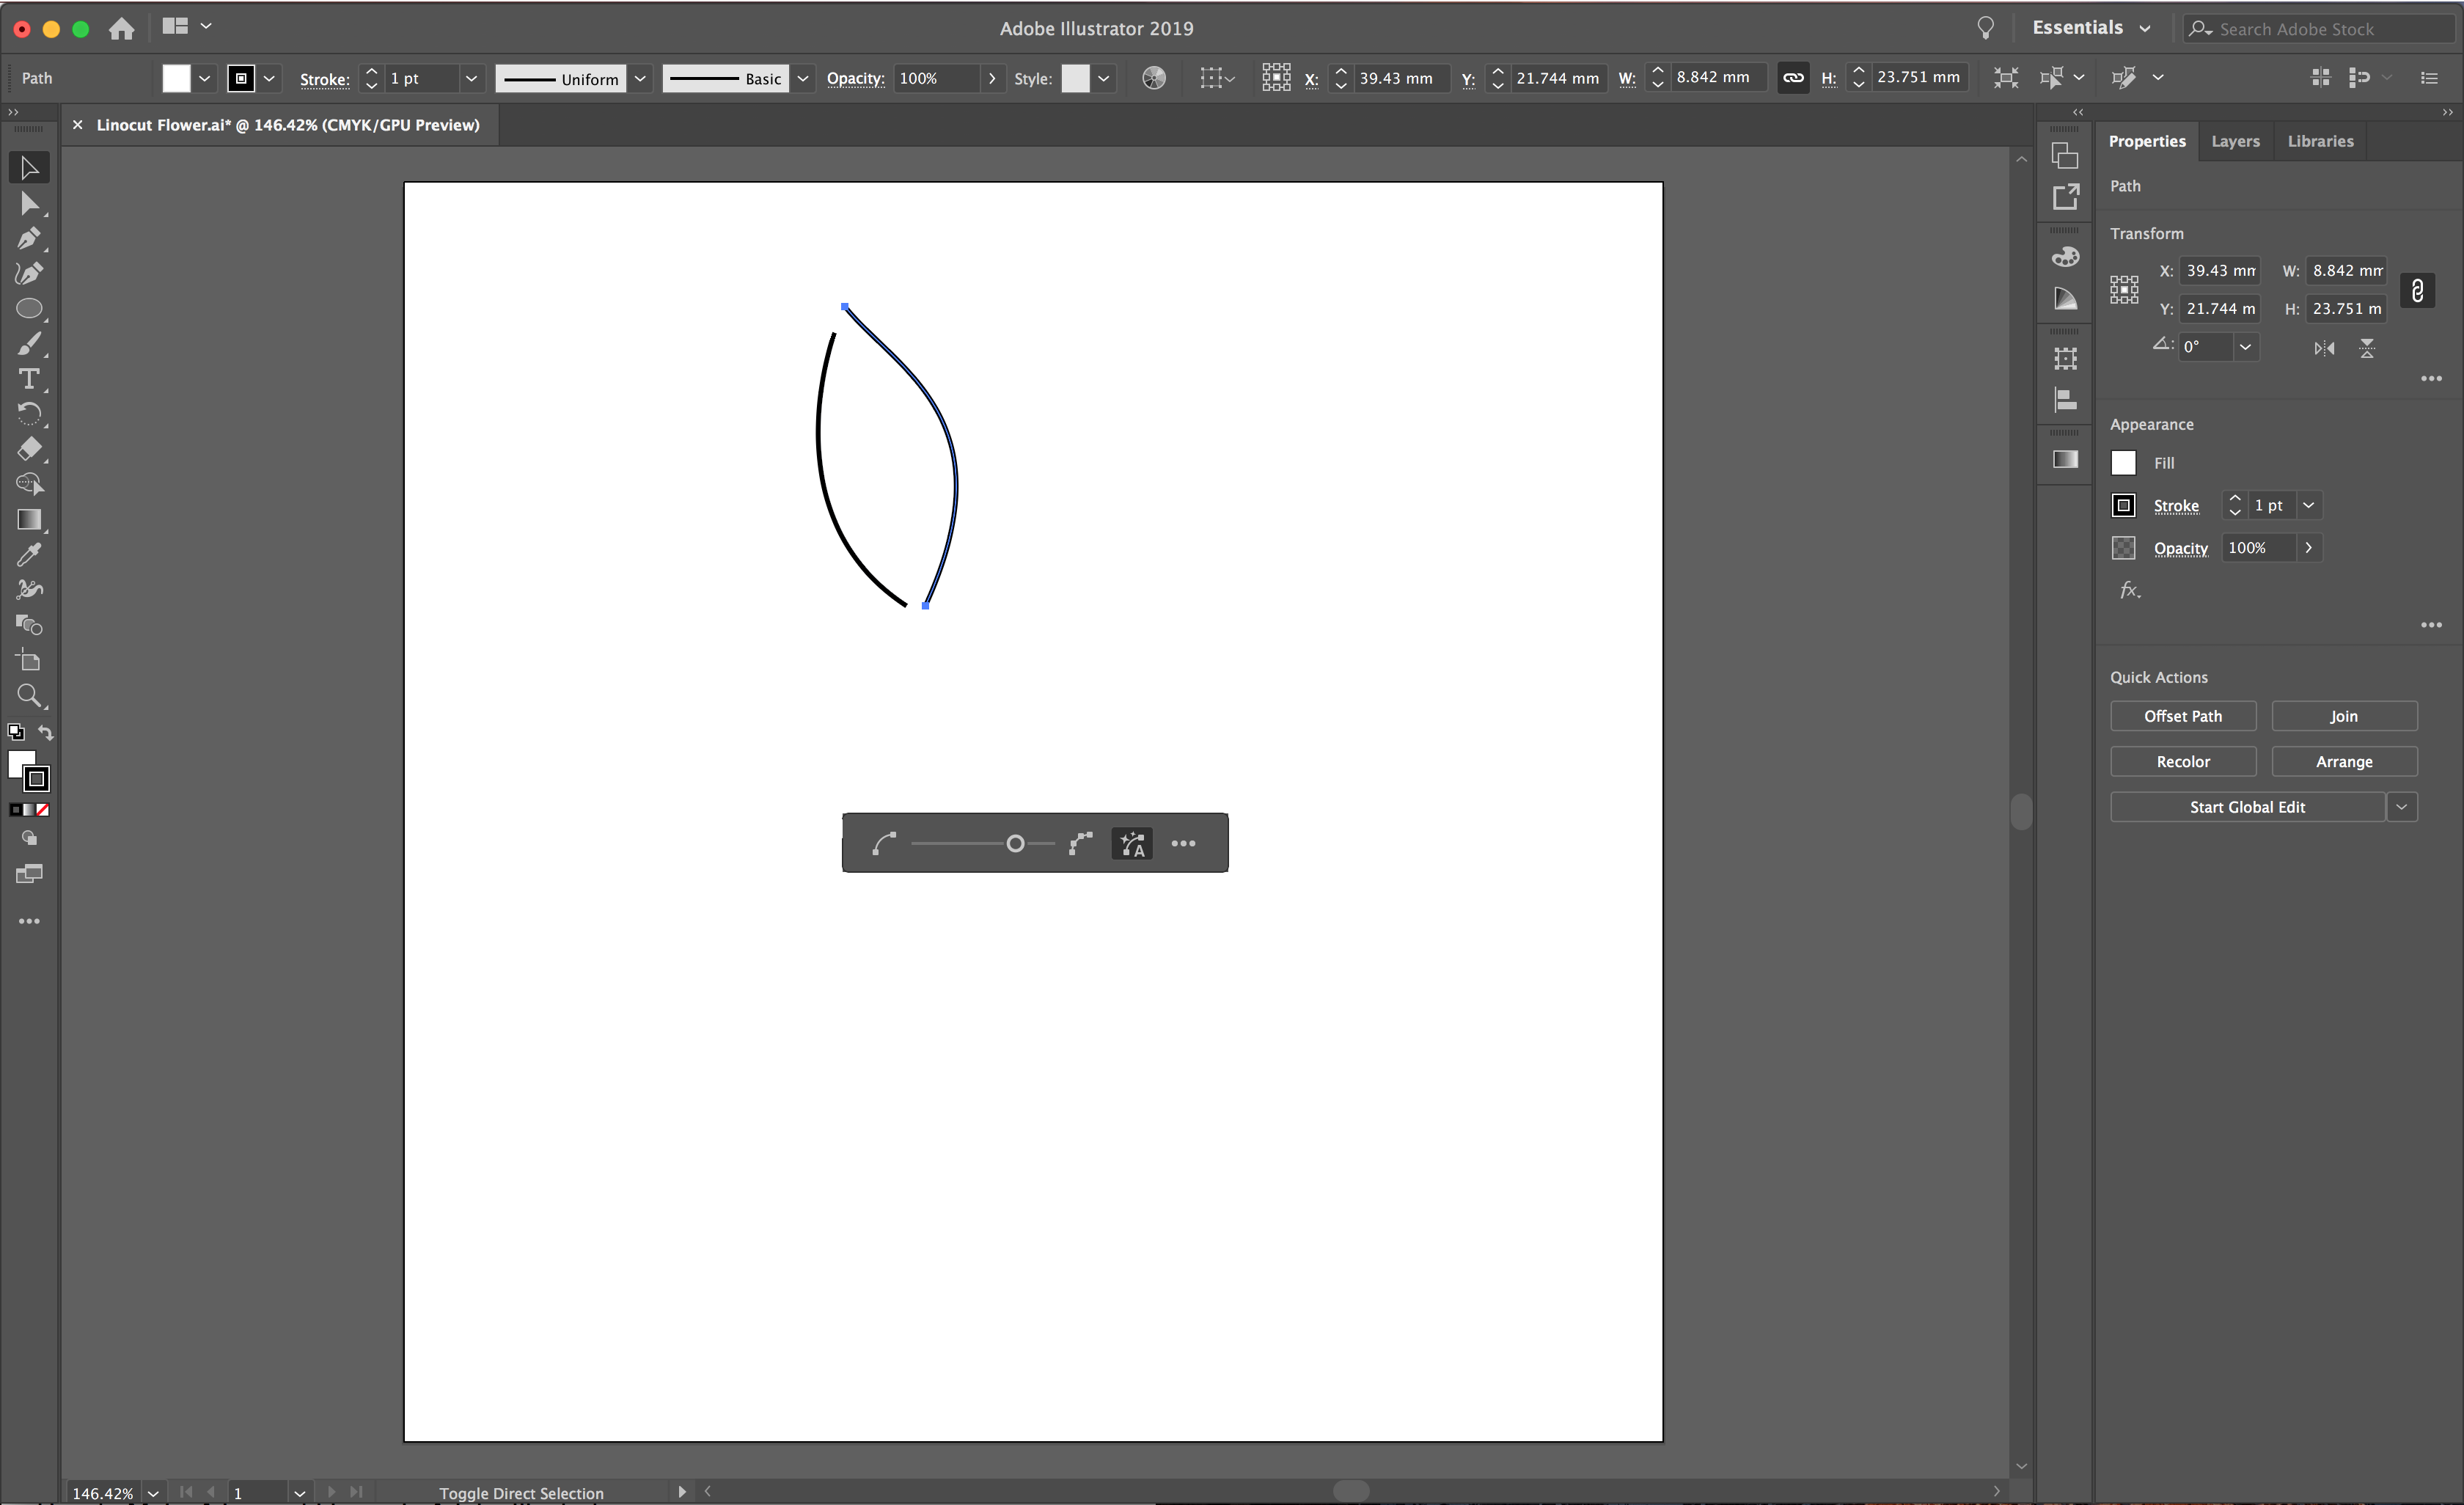
The slider will identify how many points you have within your line. Move the slider until you are happy with your shape.
Then, to achieve the Lino effect lines, open your Stroke panel by selecting Window > Stroke.
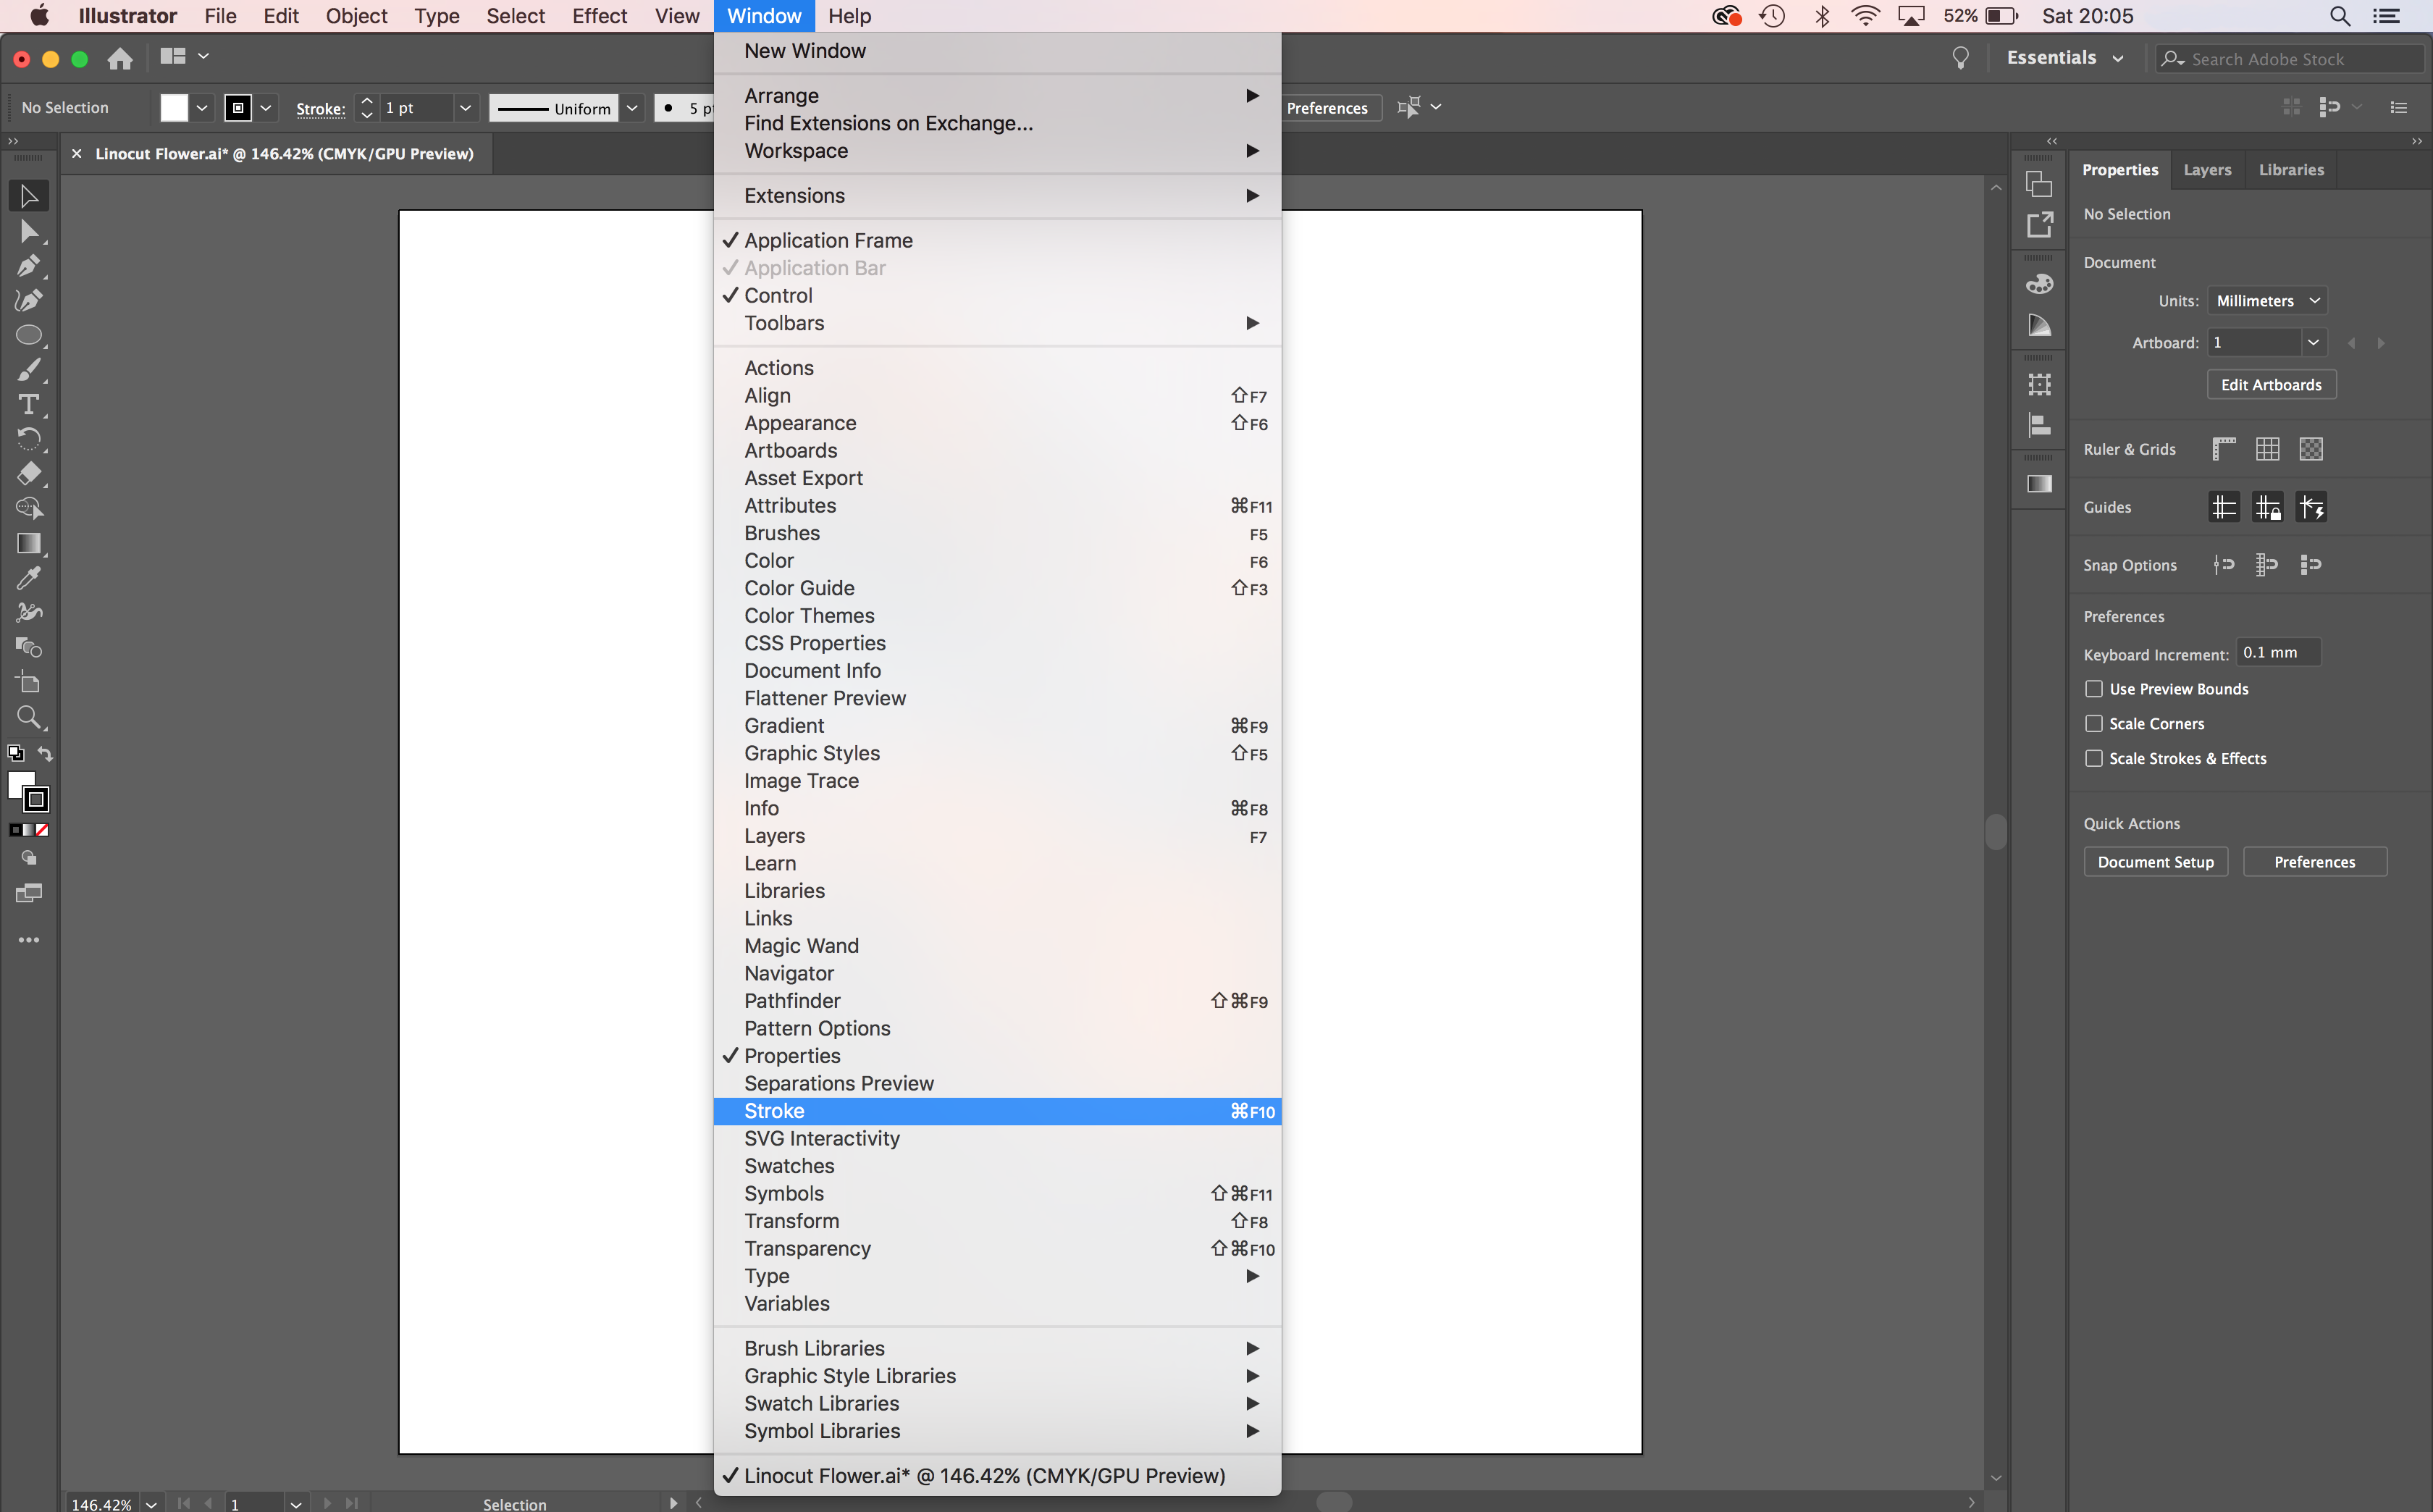
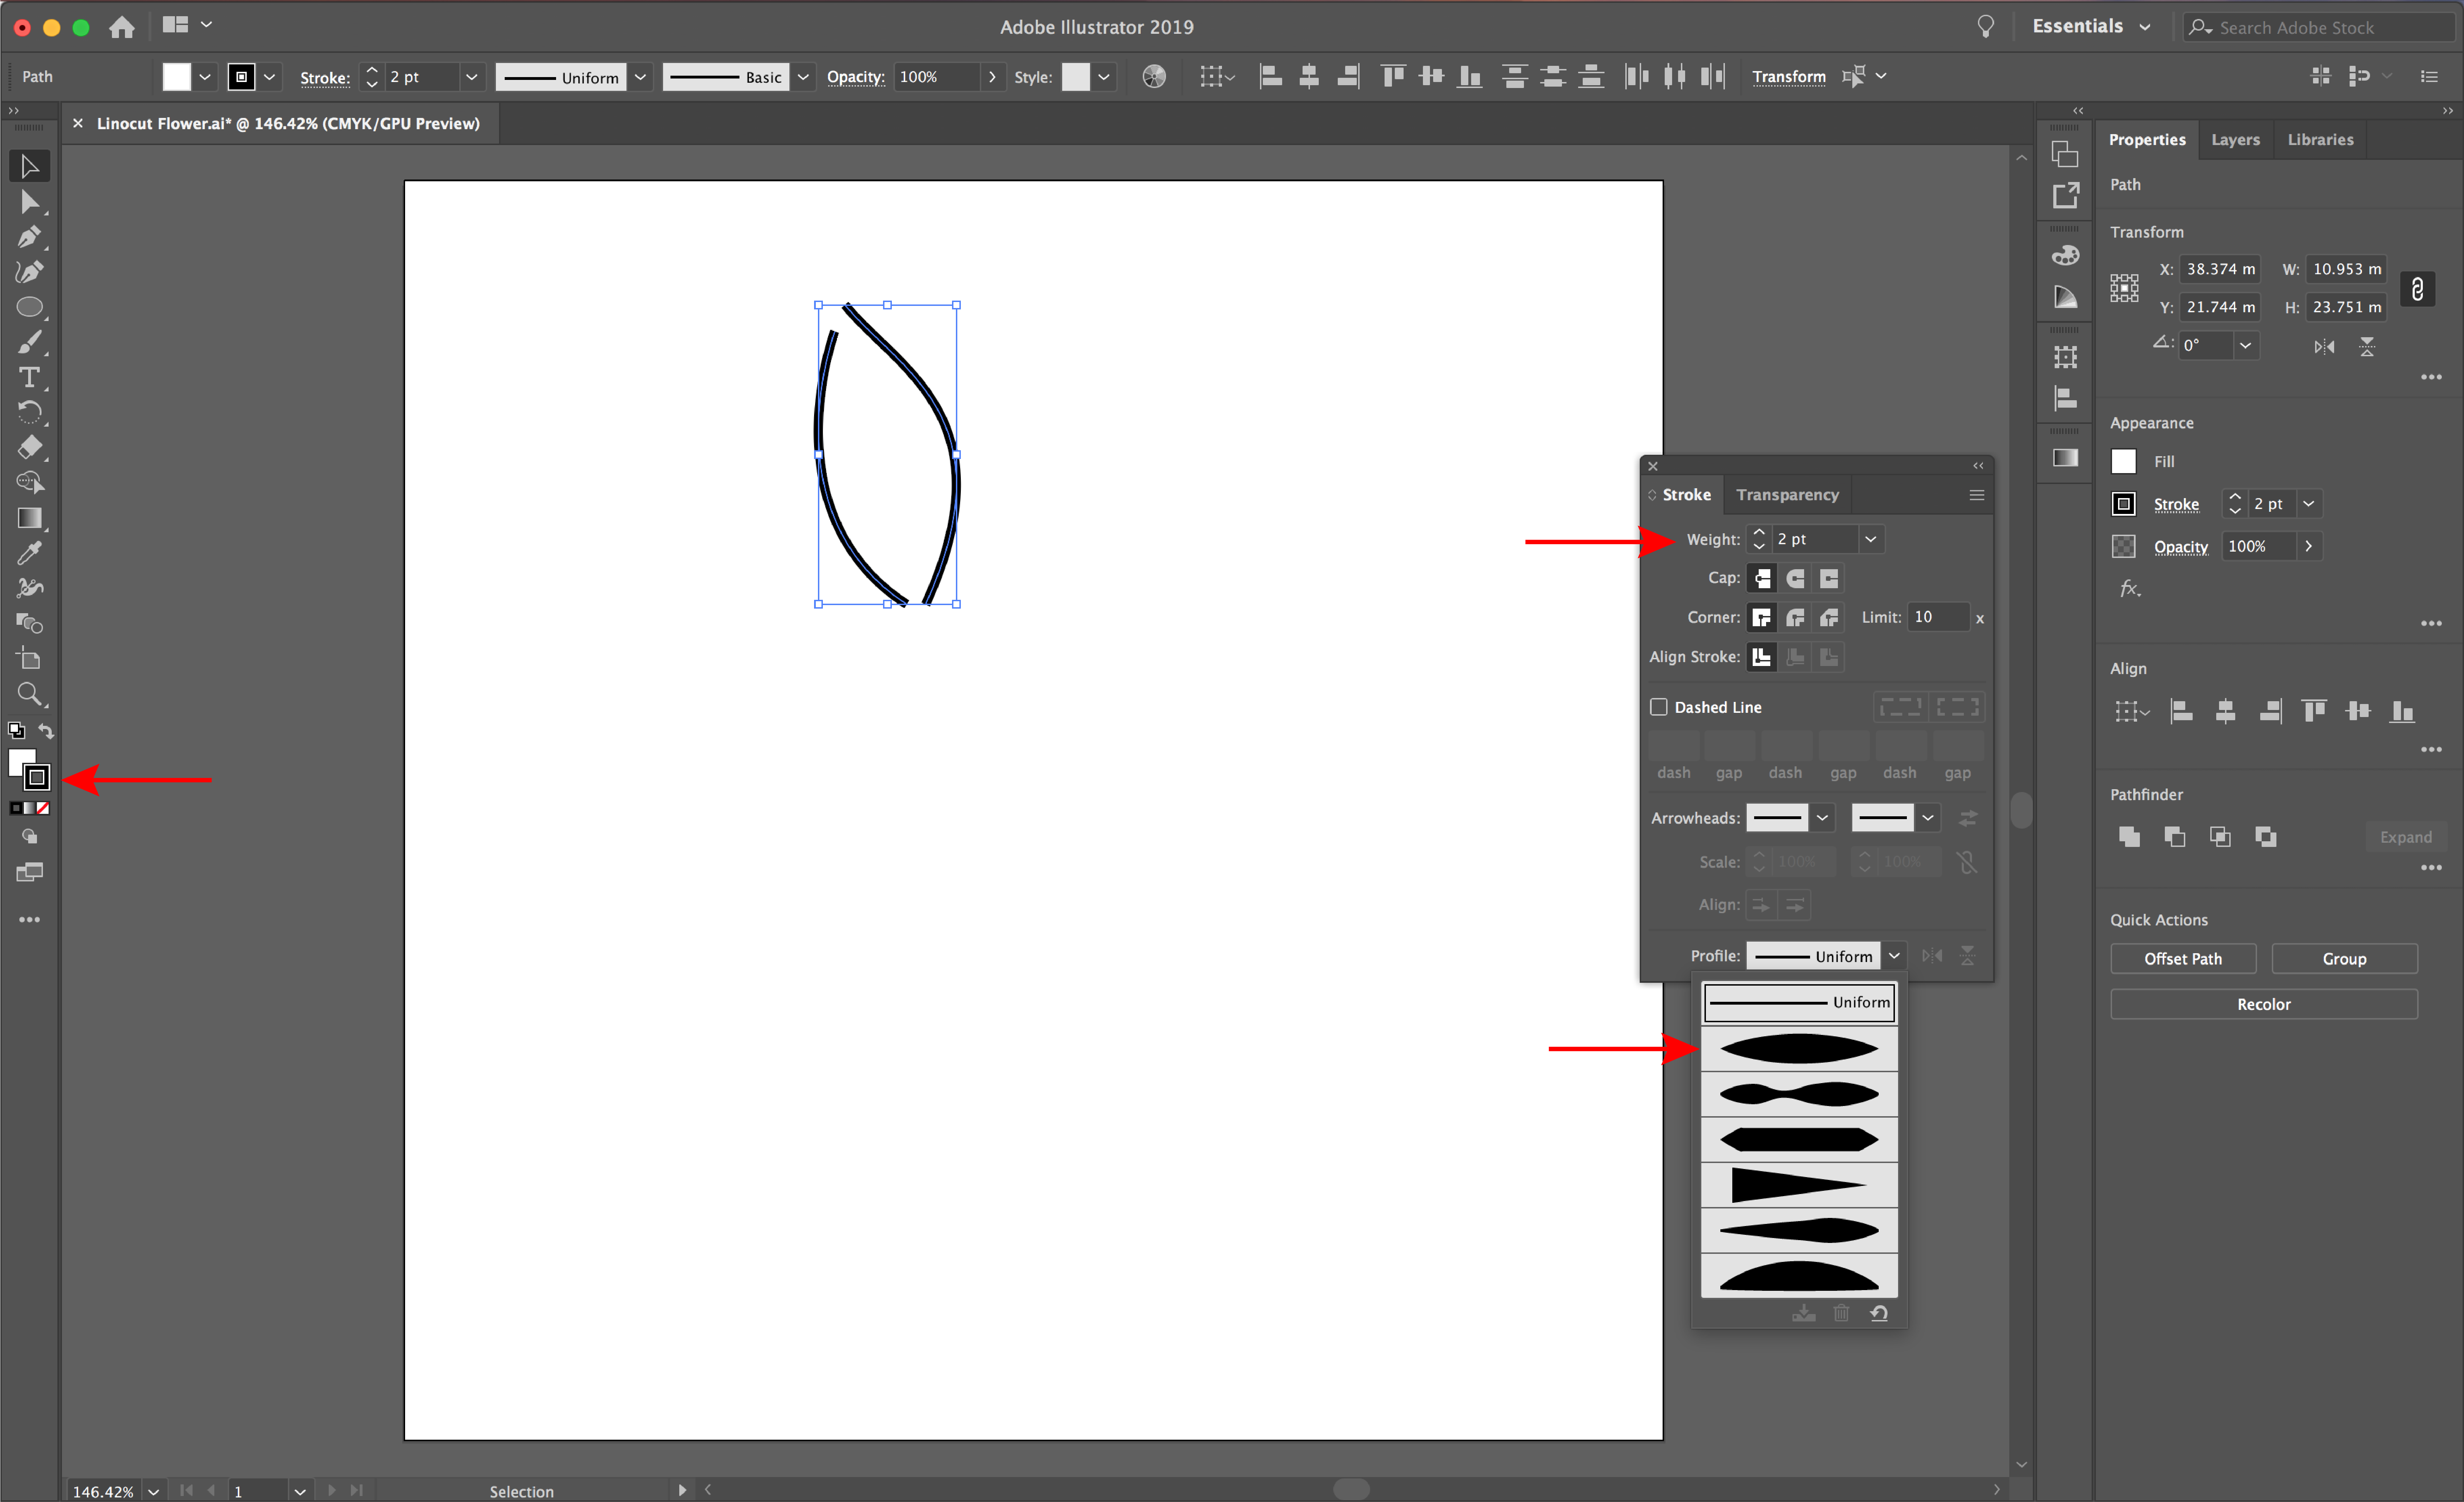
Select both your lines and change your line weight. Now select the second profile for your line style. Ensure that you have a black outline and there is no fill by checking the fill and stroke panel. Select and remove the fill by selecting the white box with a red line.
Next we will use the blend tool to create evenly spaced lines. The blend tool is great for making color palettes and for blending gradients in text. Select both your lines. Then select the blend tool from your left toolbar.
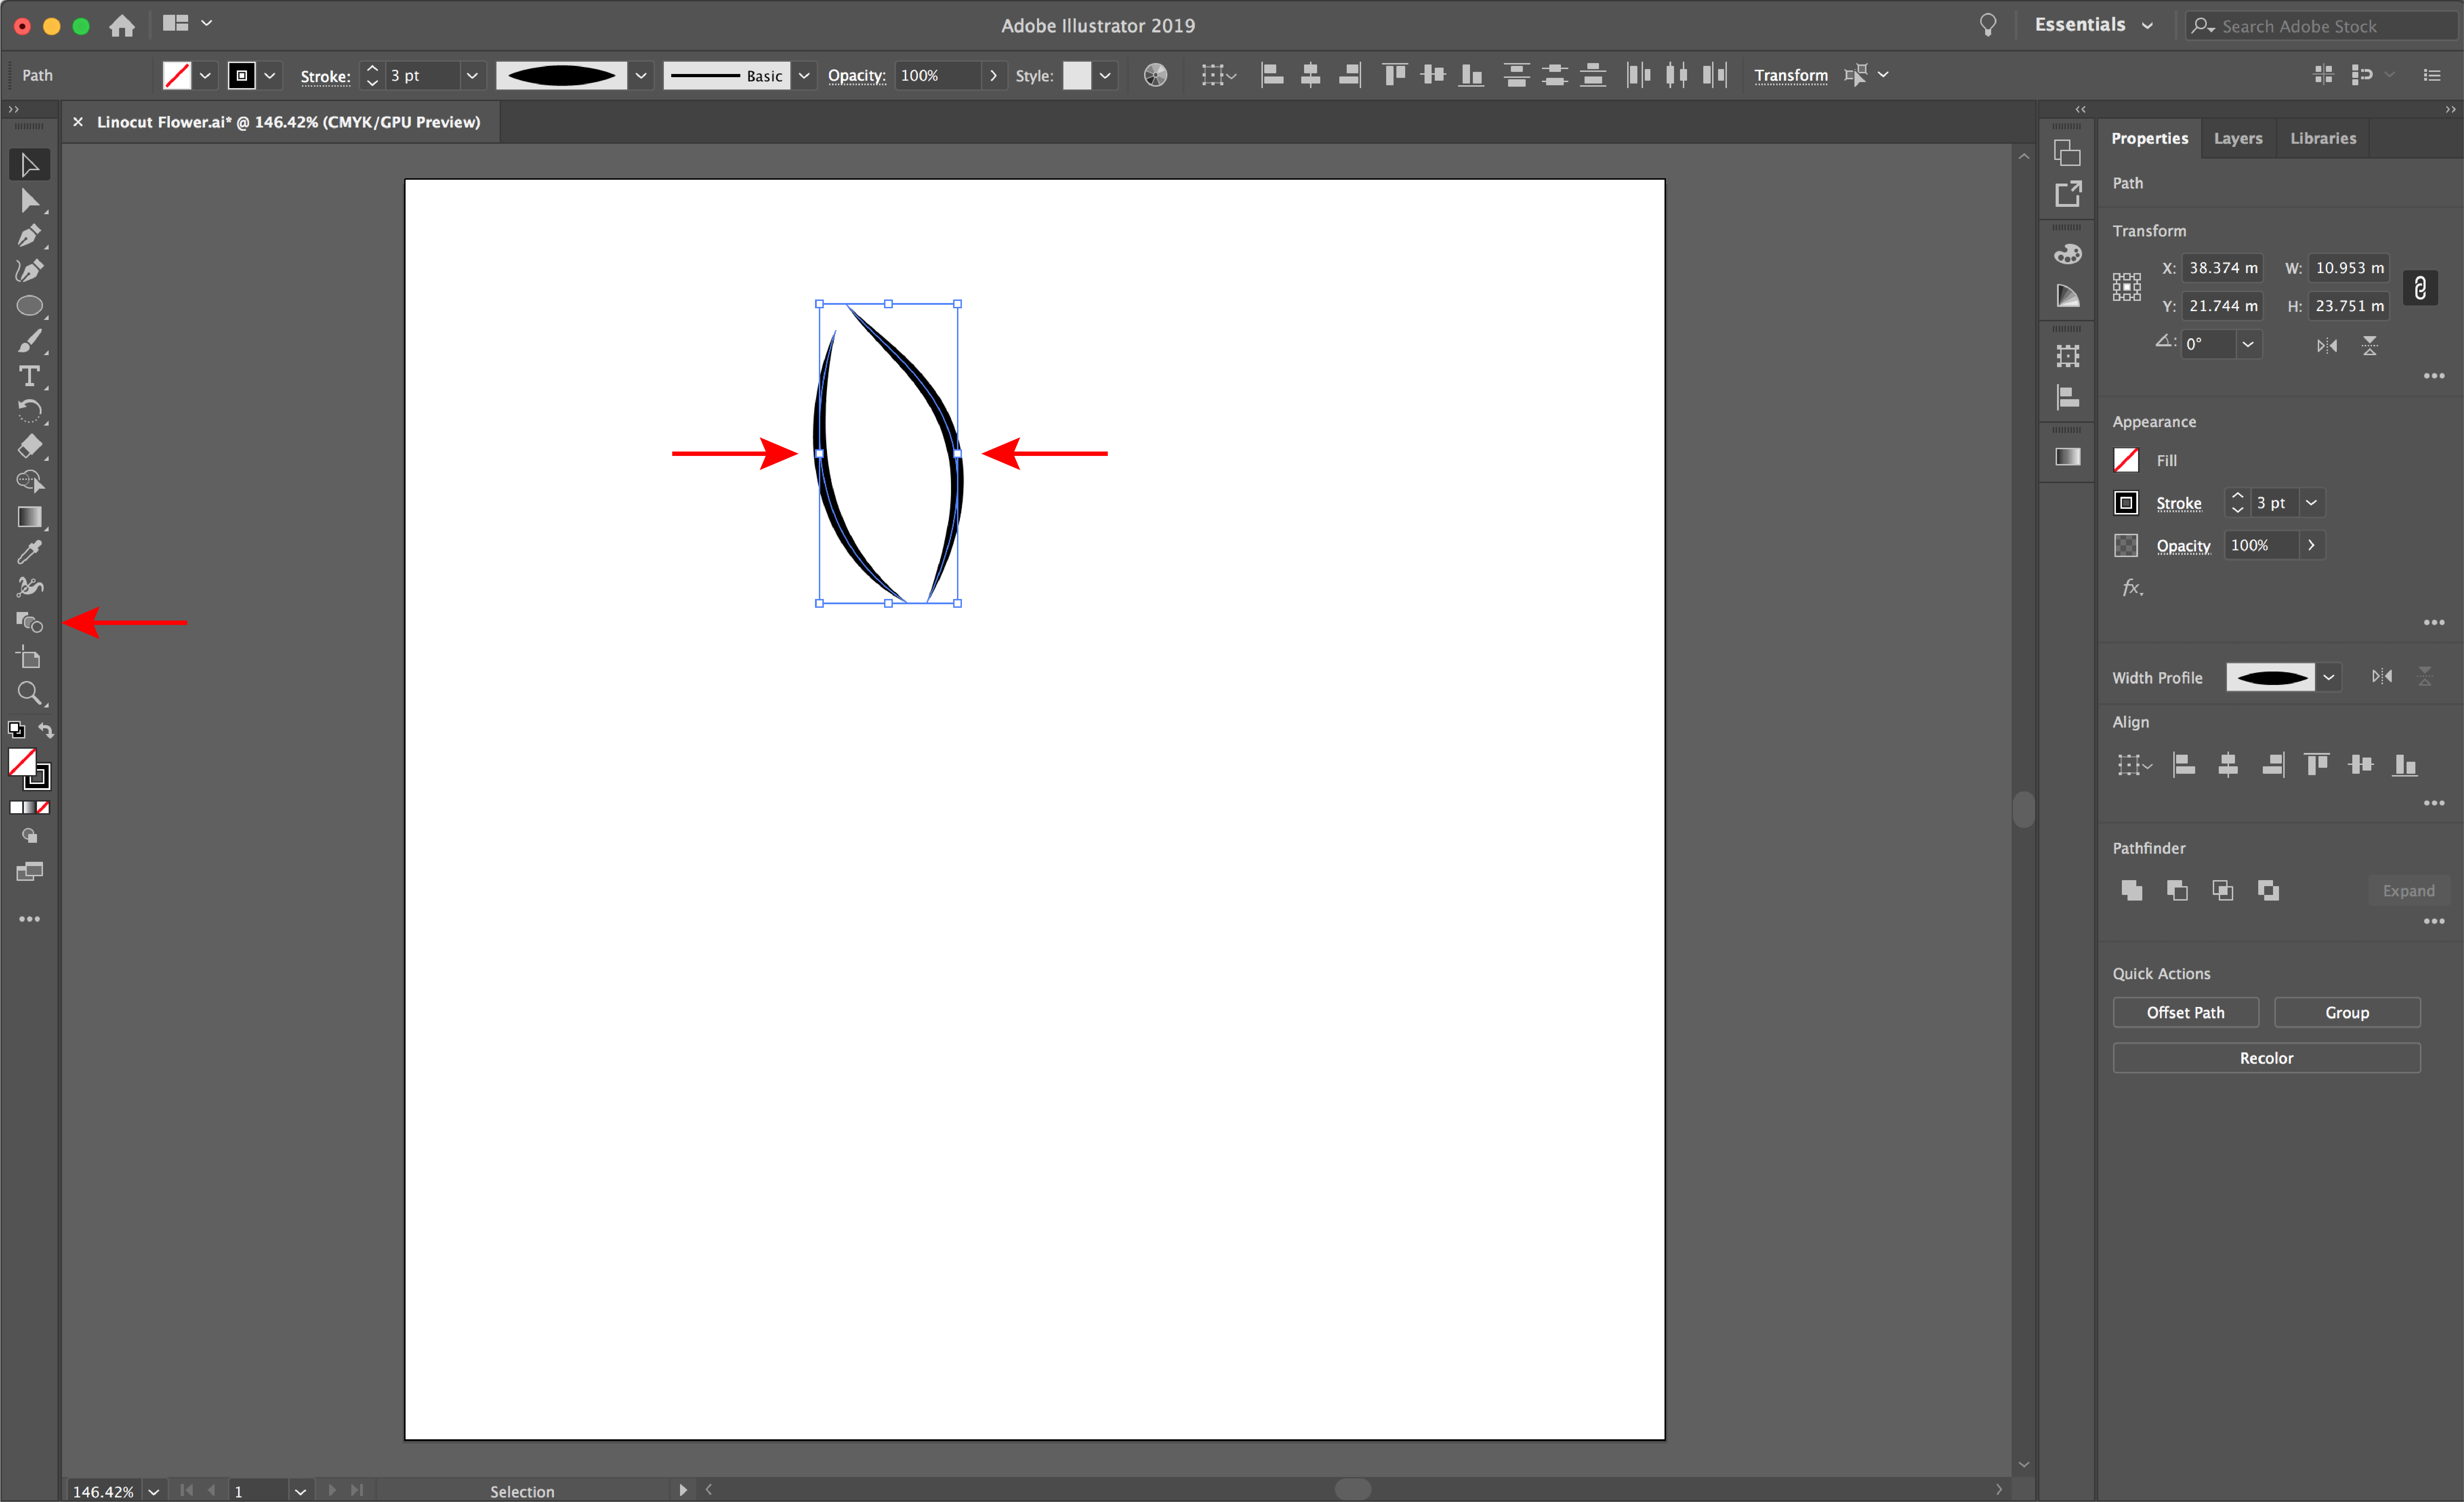
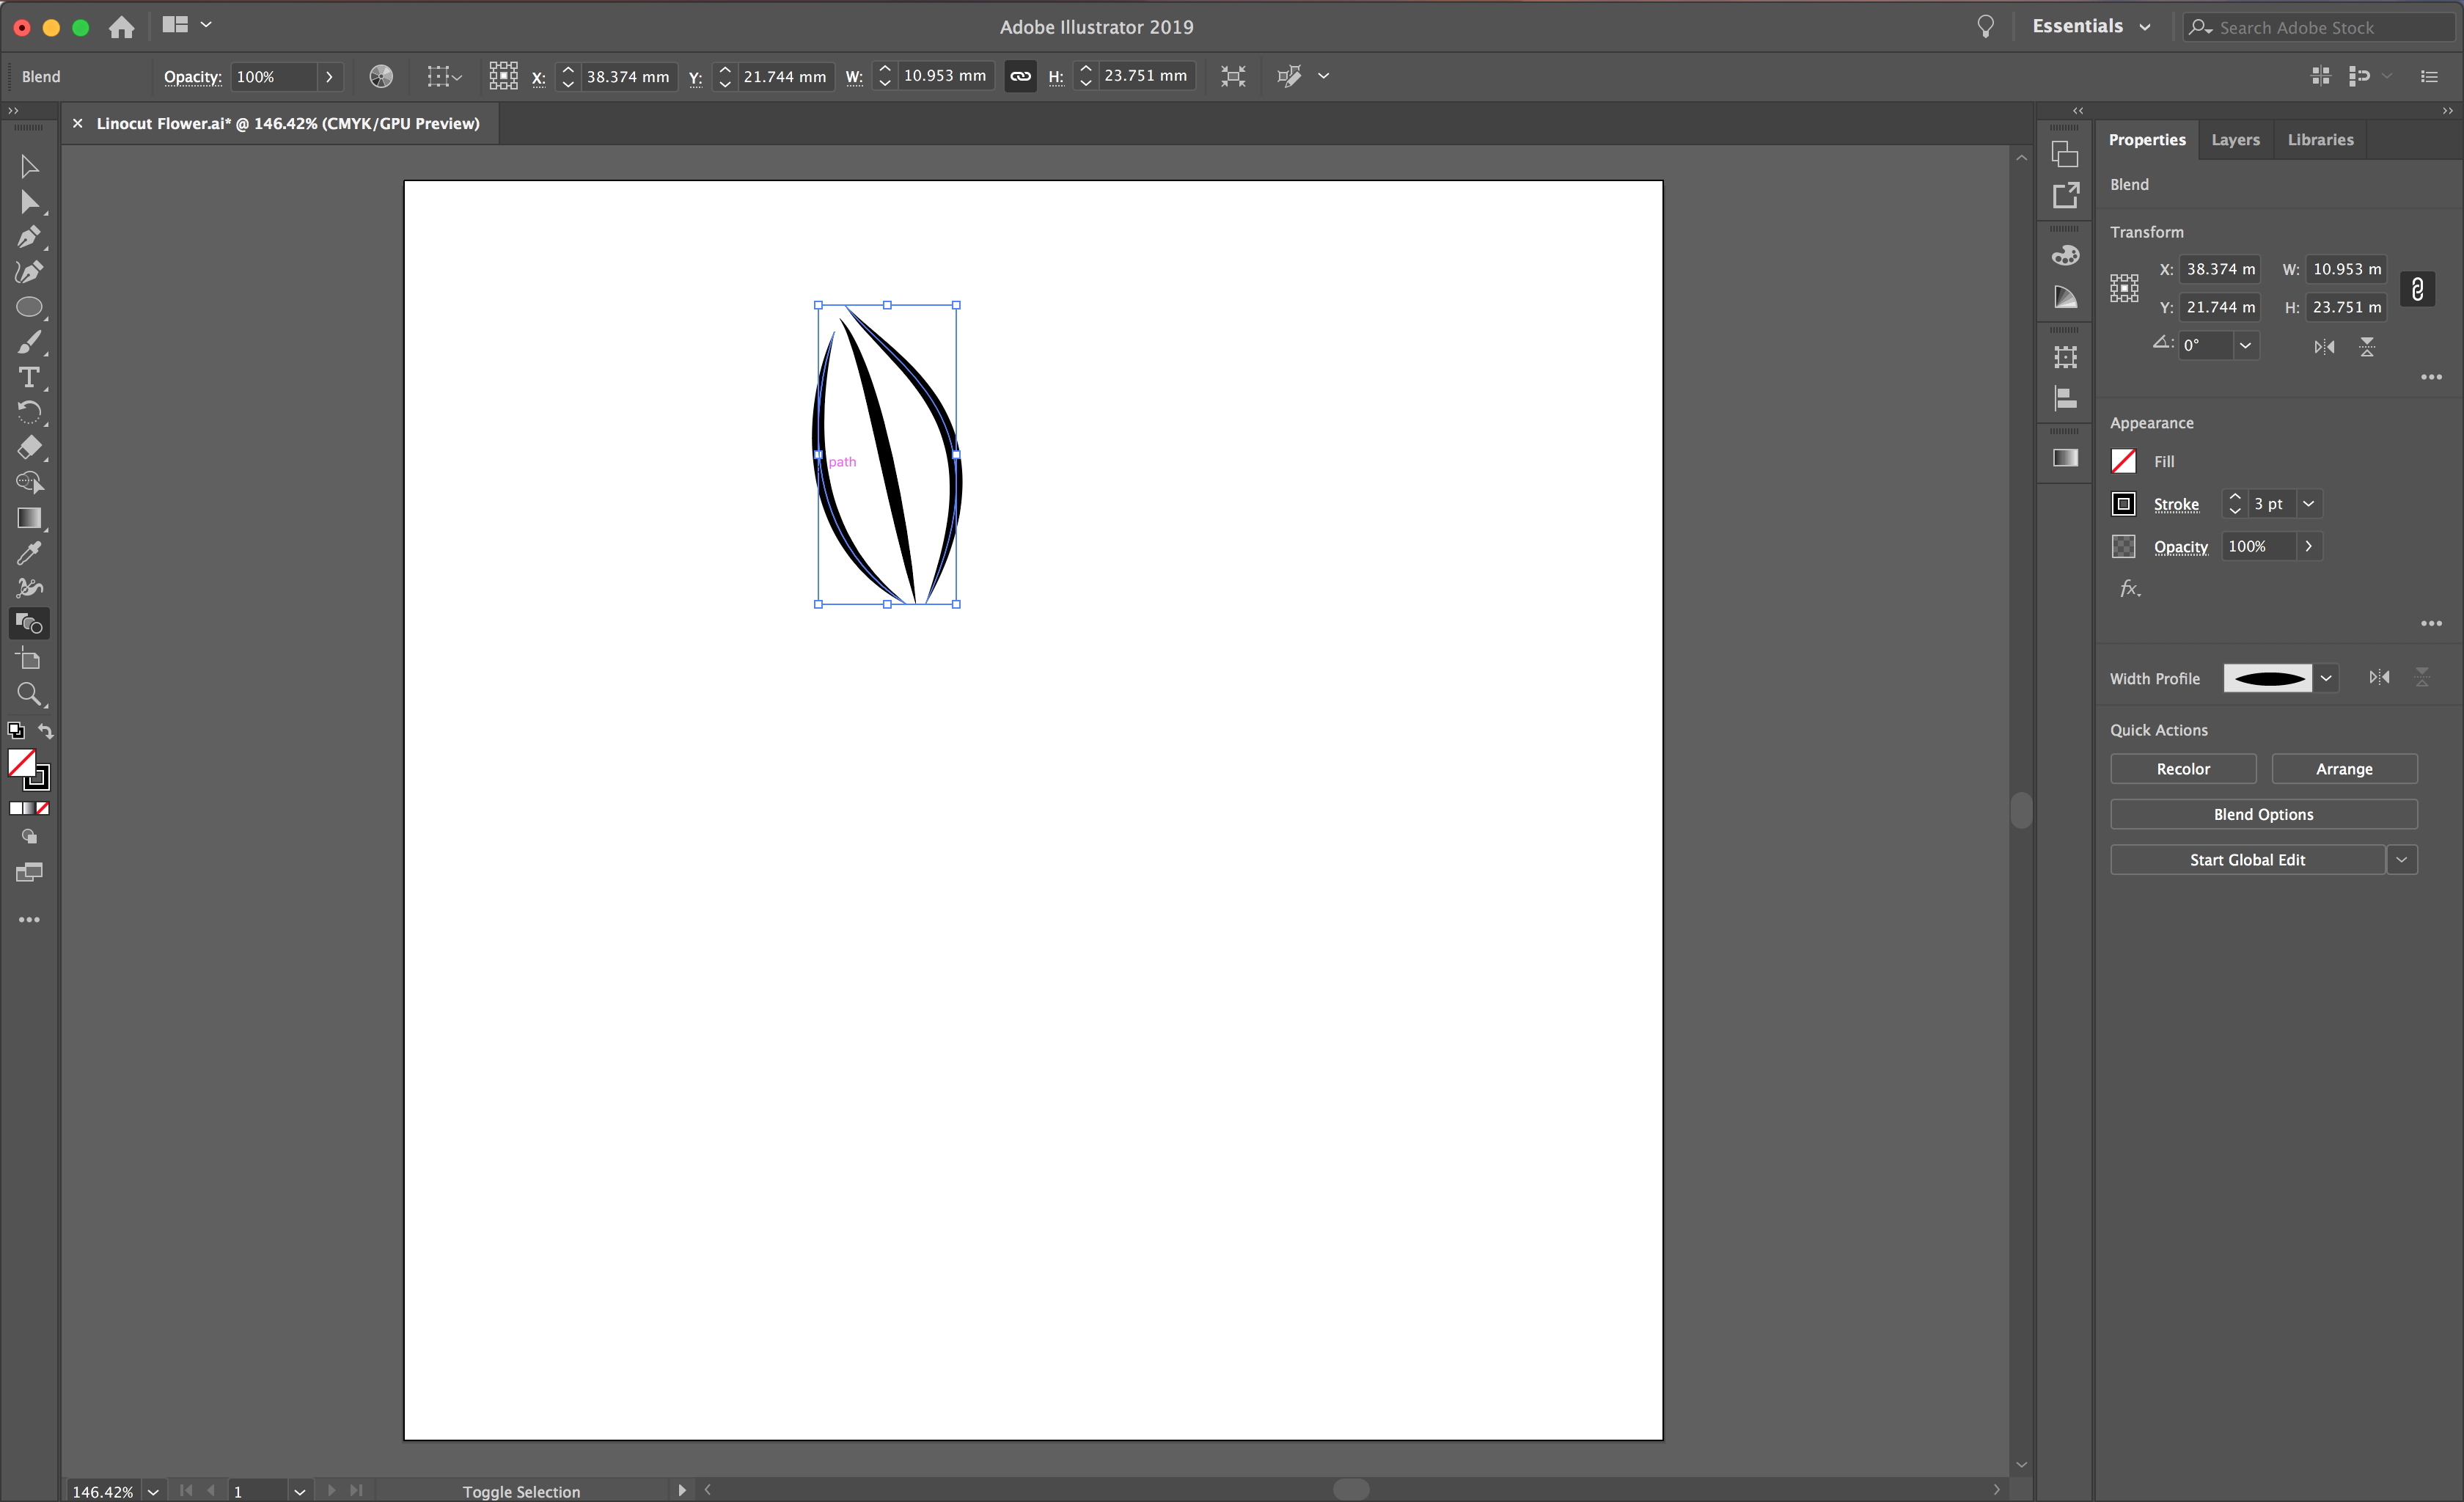
Click once on the left line and once on the right line. This will create one single line in the center.
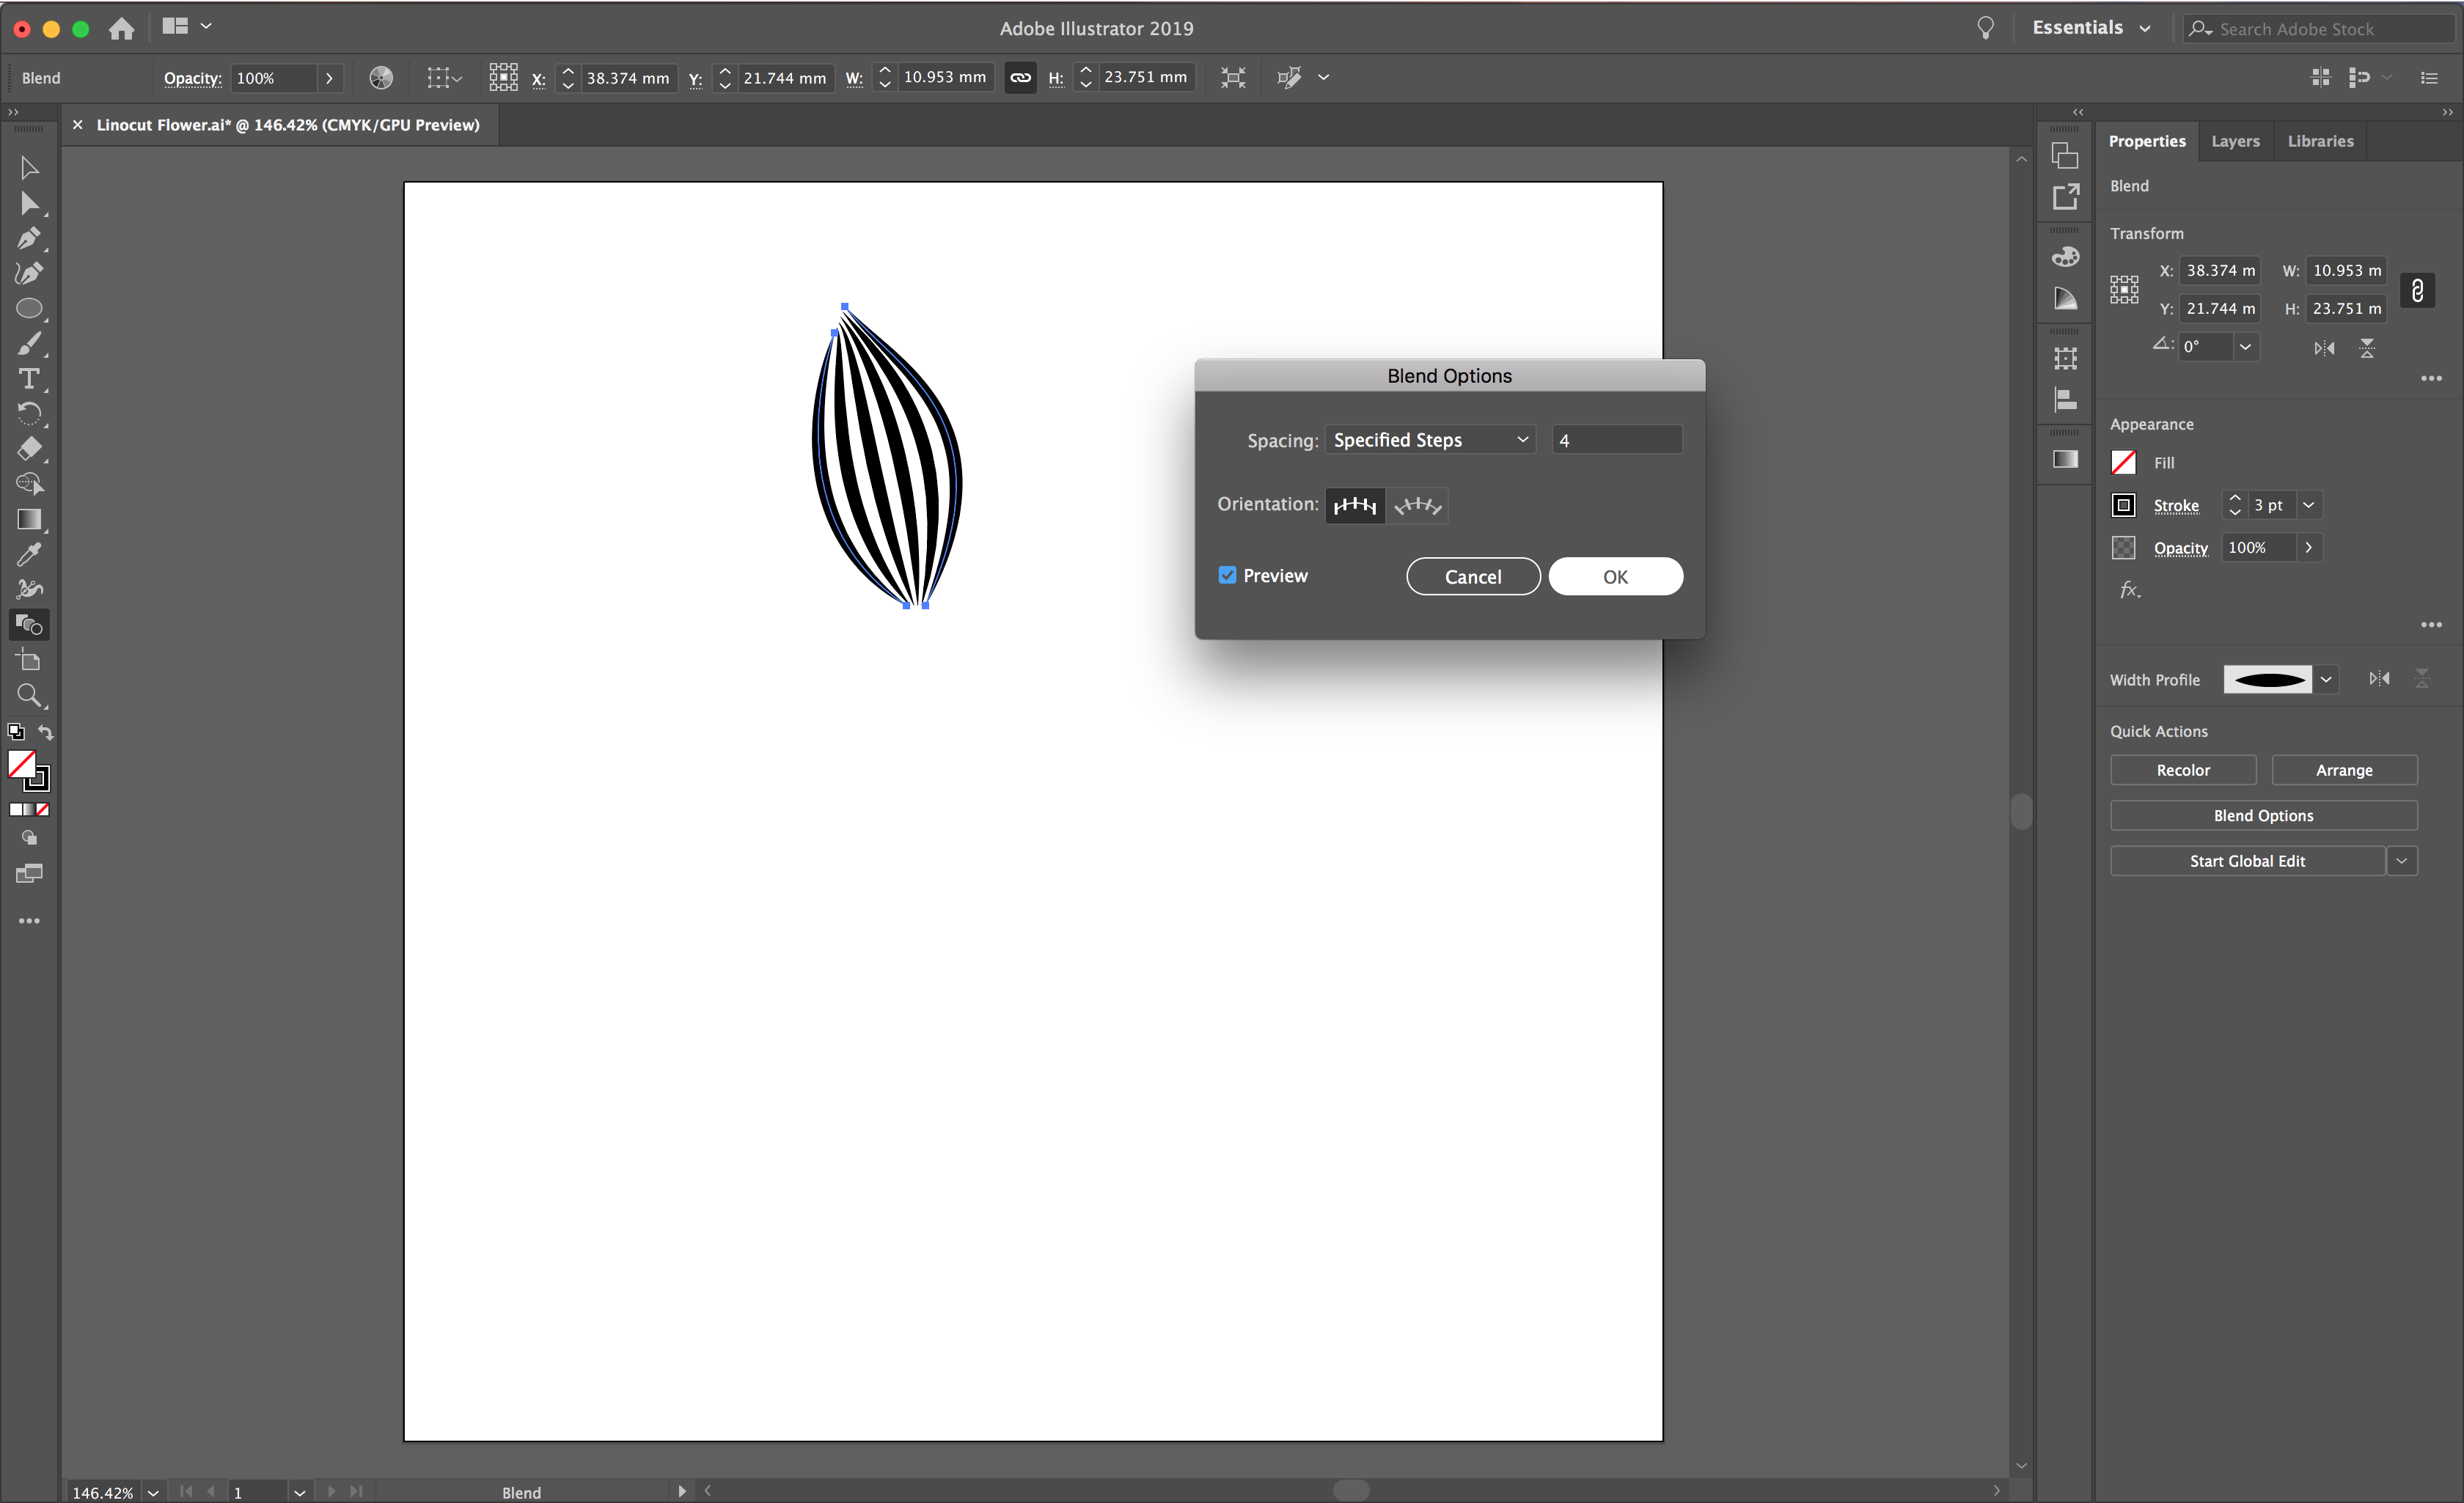
With your lines still selected, double click the blend tool button to adjust the blend settings. Select the preview button to see your design change with the settings. Change the spacing setting to ‘Specified Steps’. Then choose the amount of steps you want within your shape. I have chosen to use four steps.
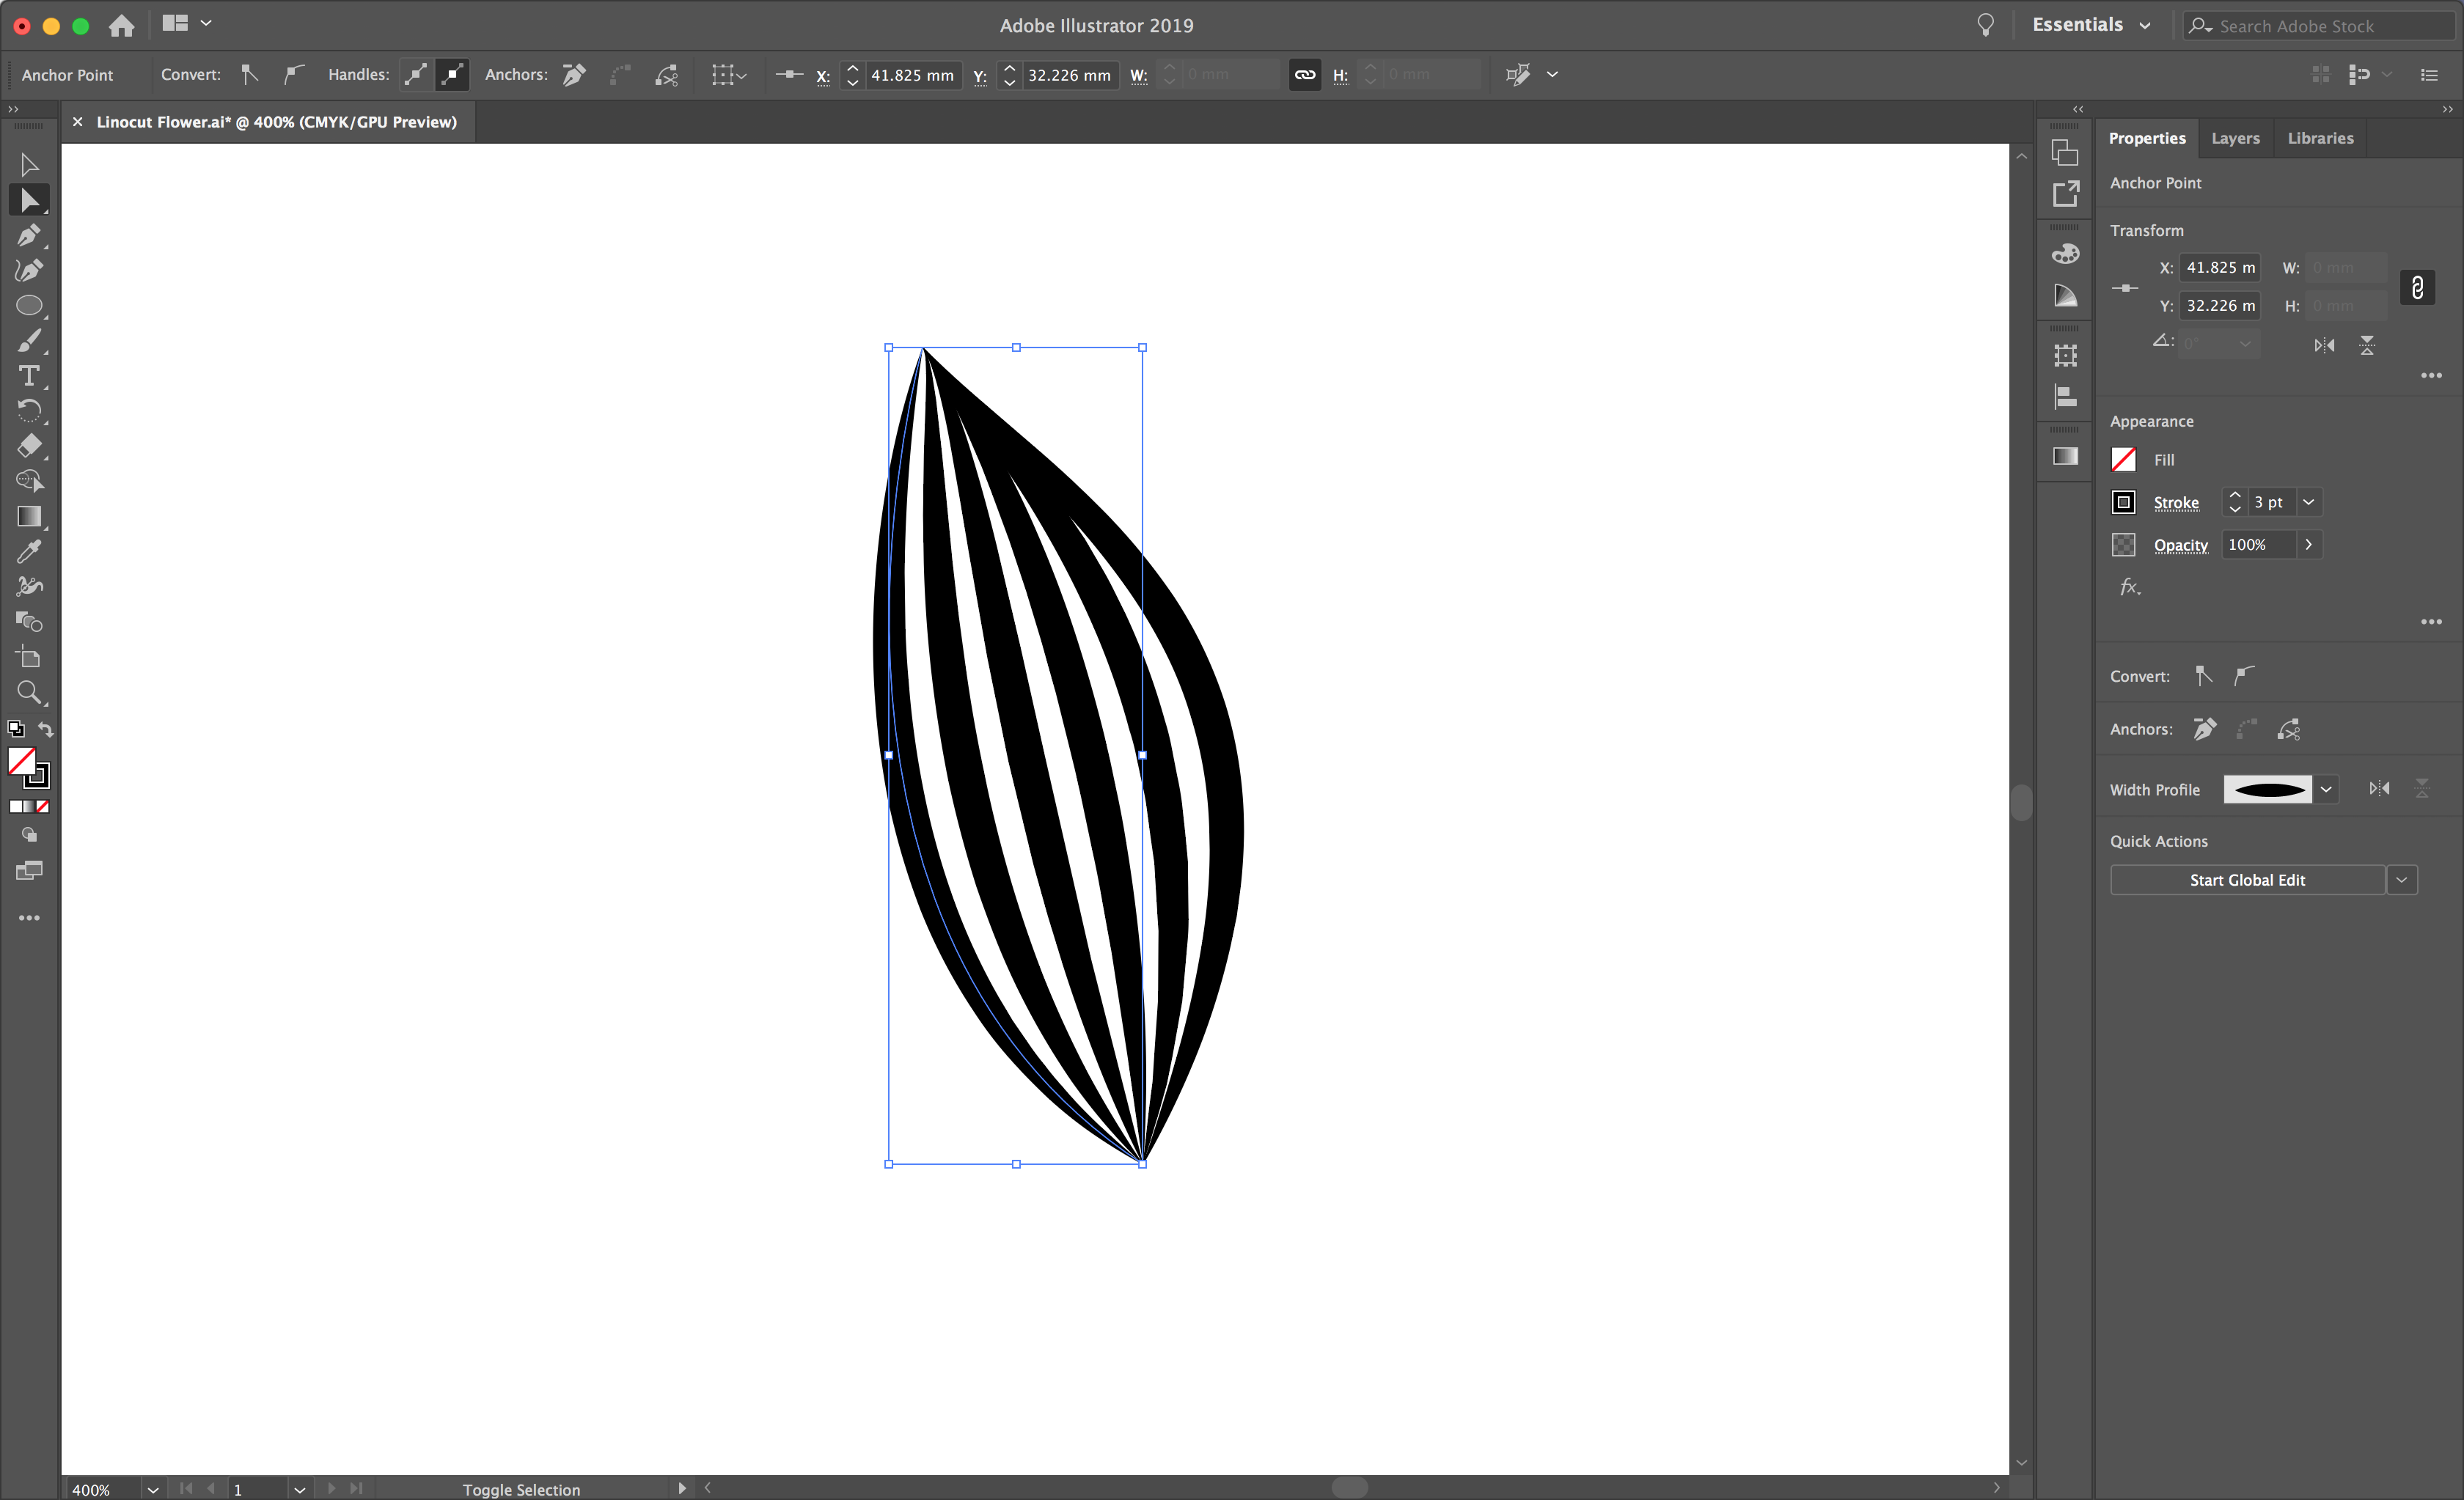
Zoom into your design and select the Direct Selection Tool, displayed as a white arrow. Select the individual points to move them together and close the petal shape.
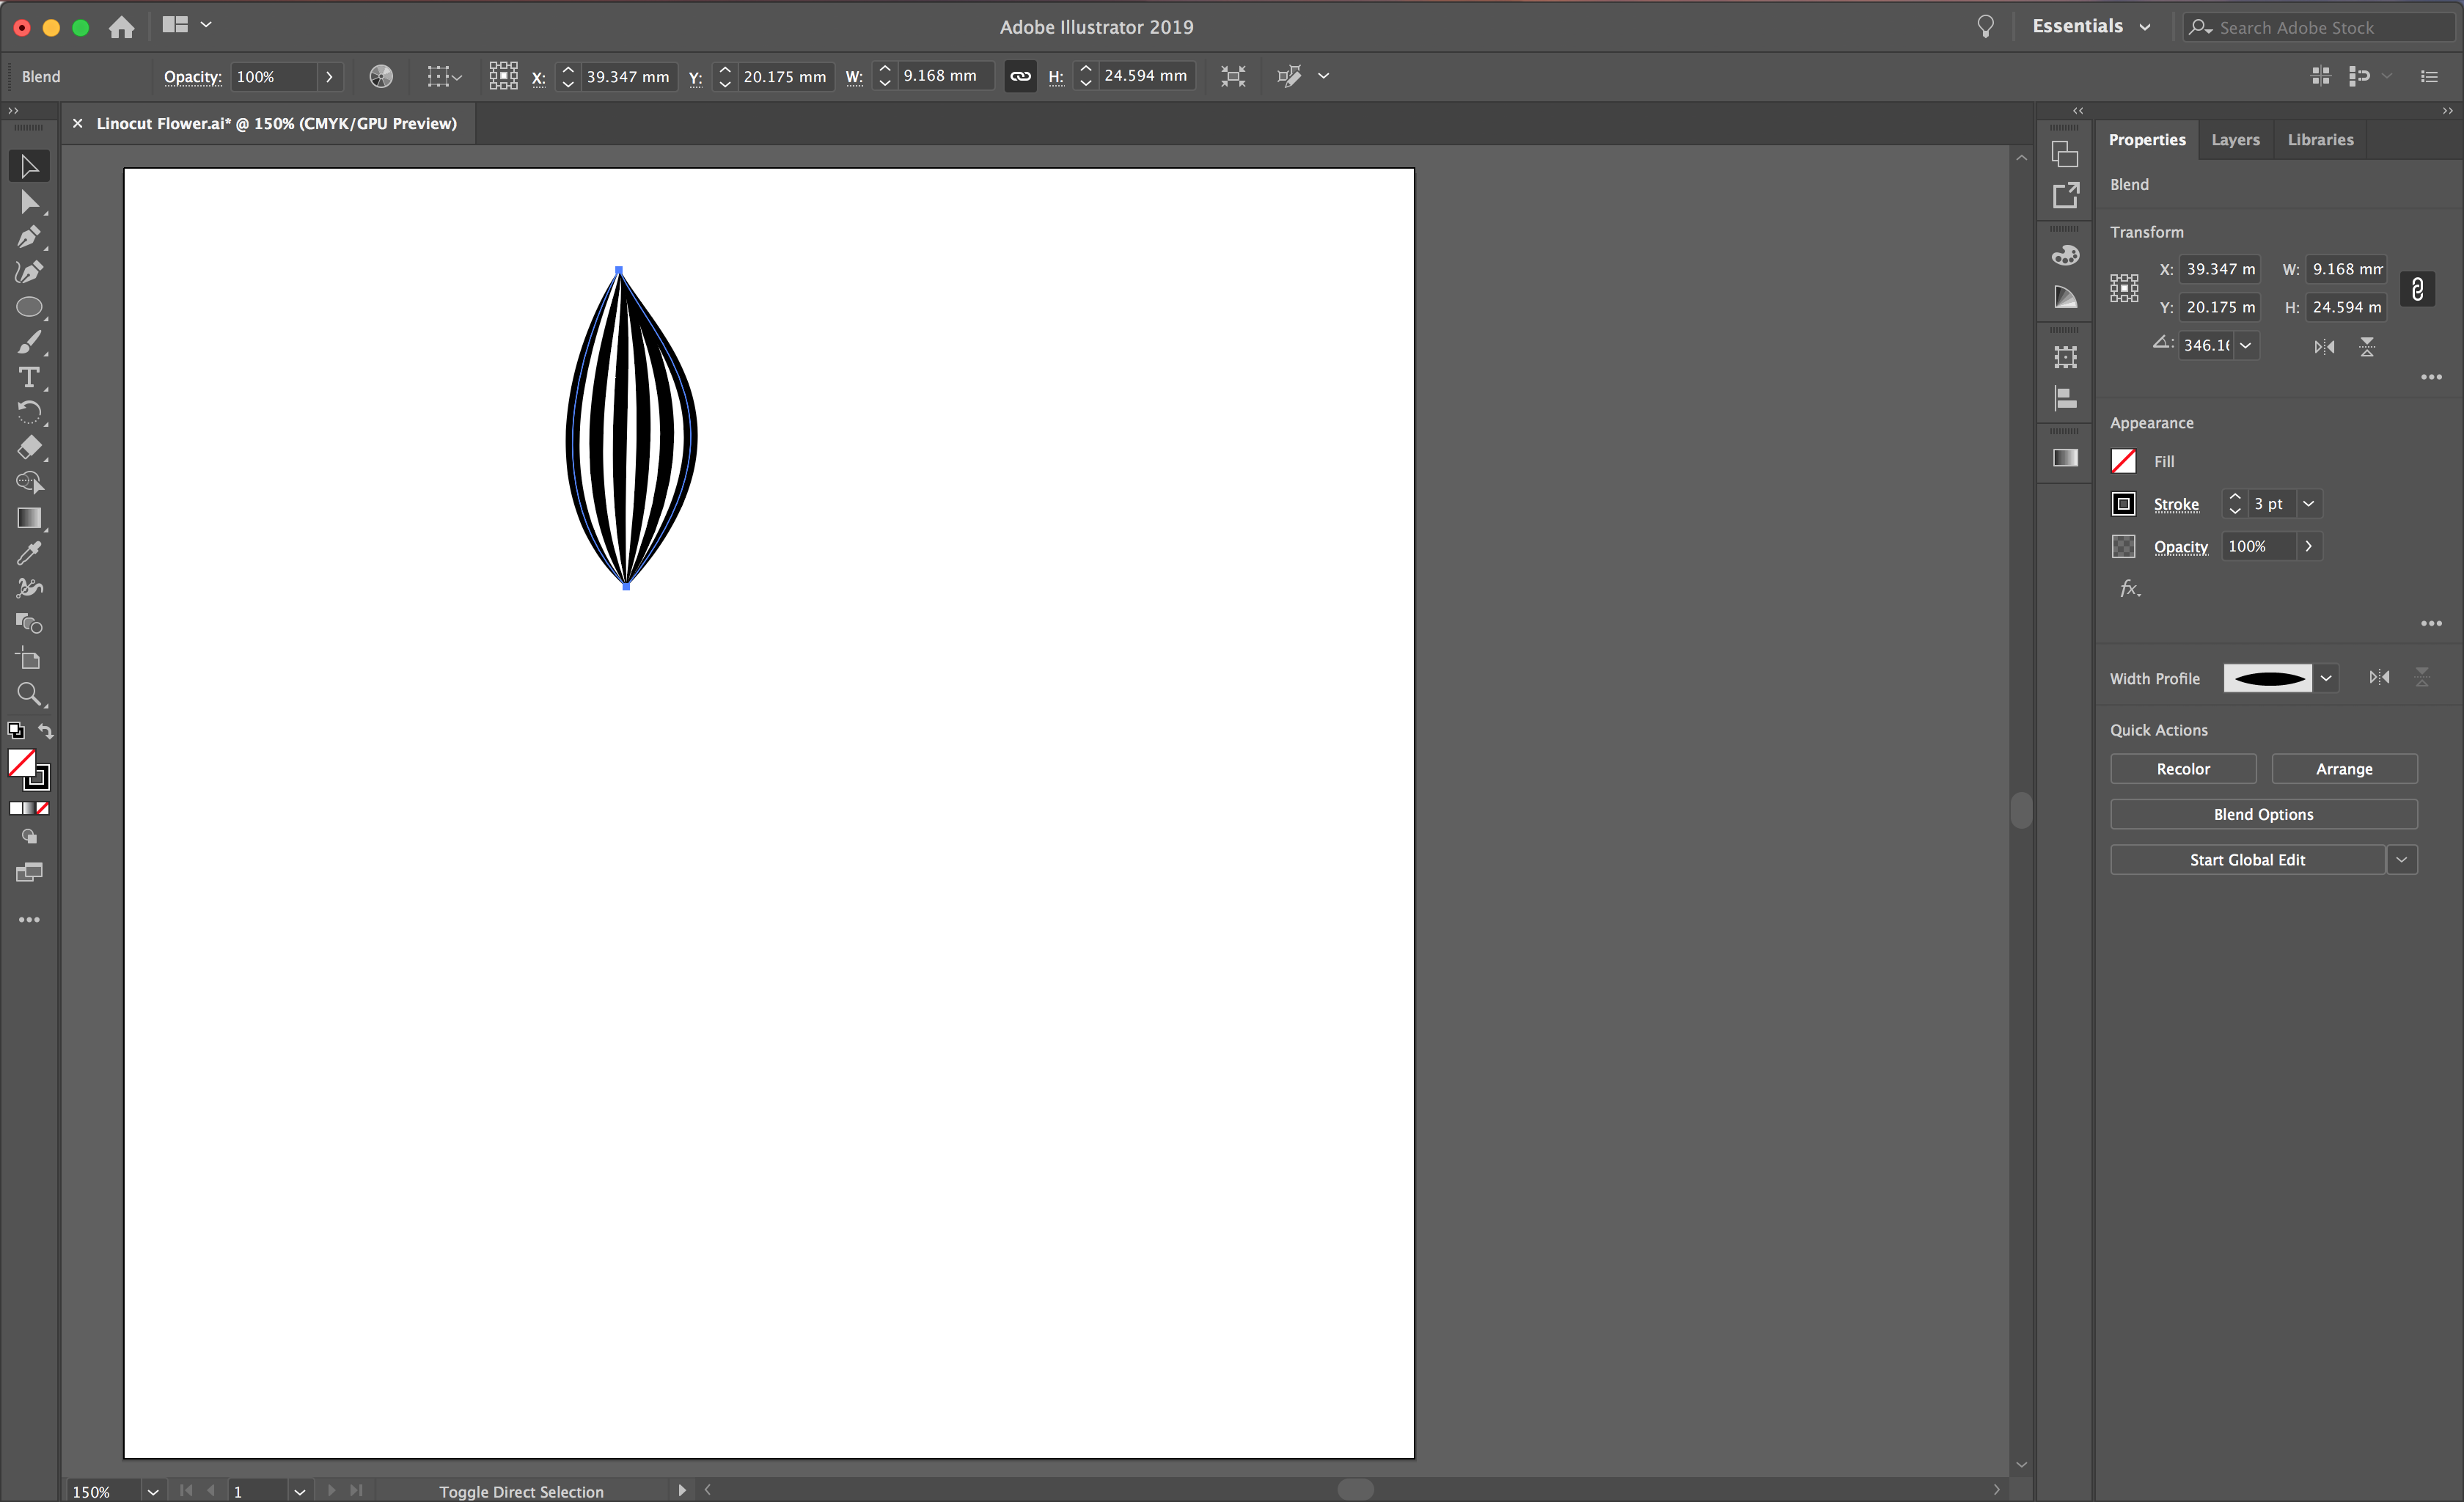
Select your entire petal with the Selection Tool, displayed as a black arrow top left. Rotate the petal until the top and bottom are almost in line. This doesn’t need to be exact.
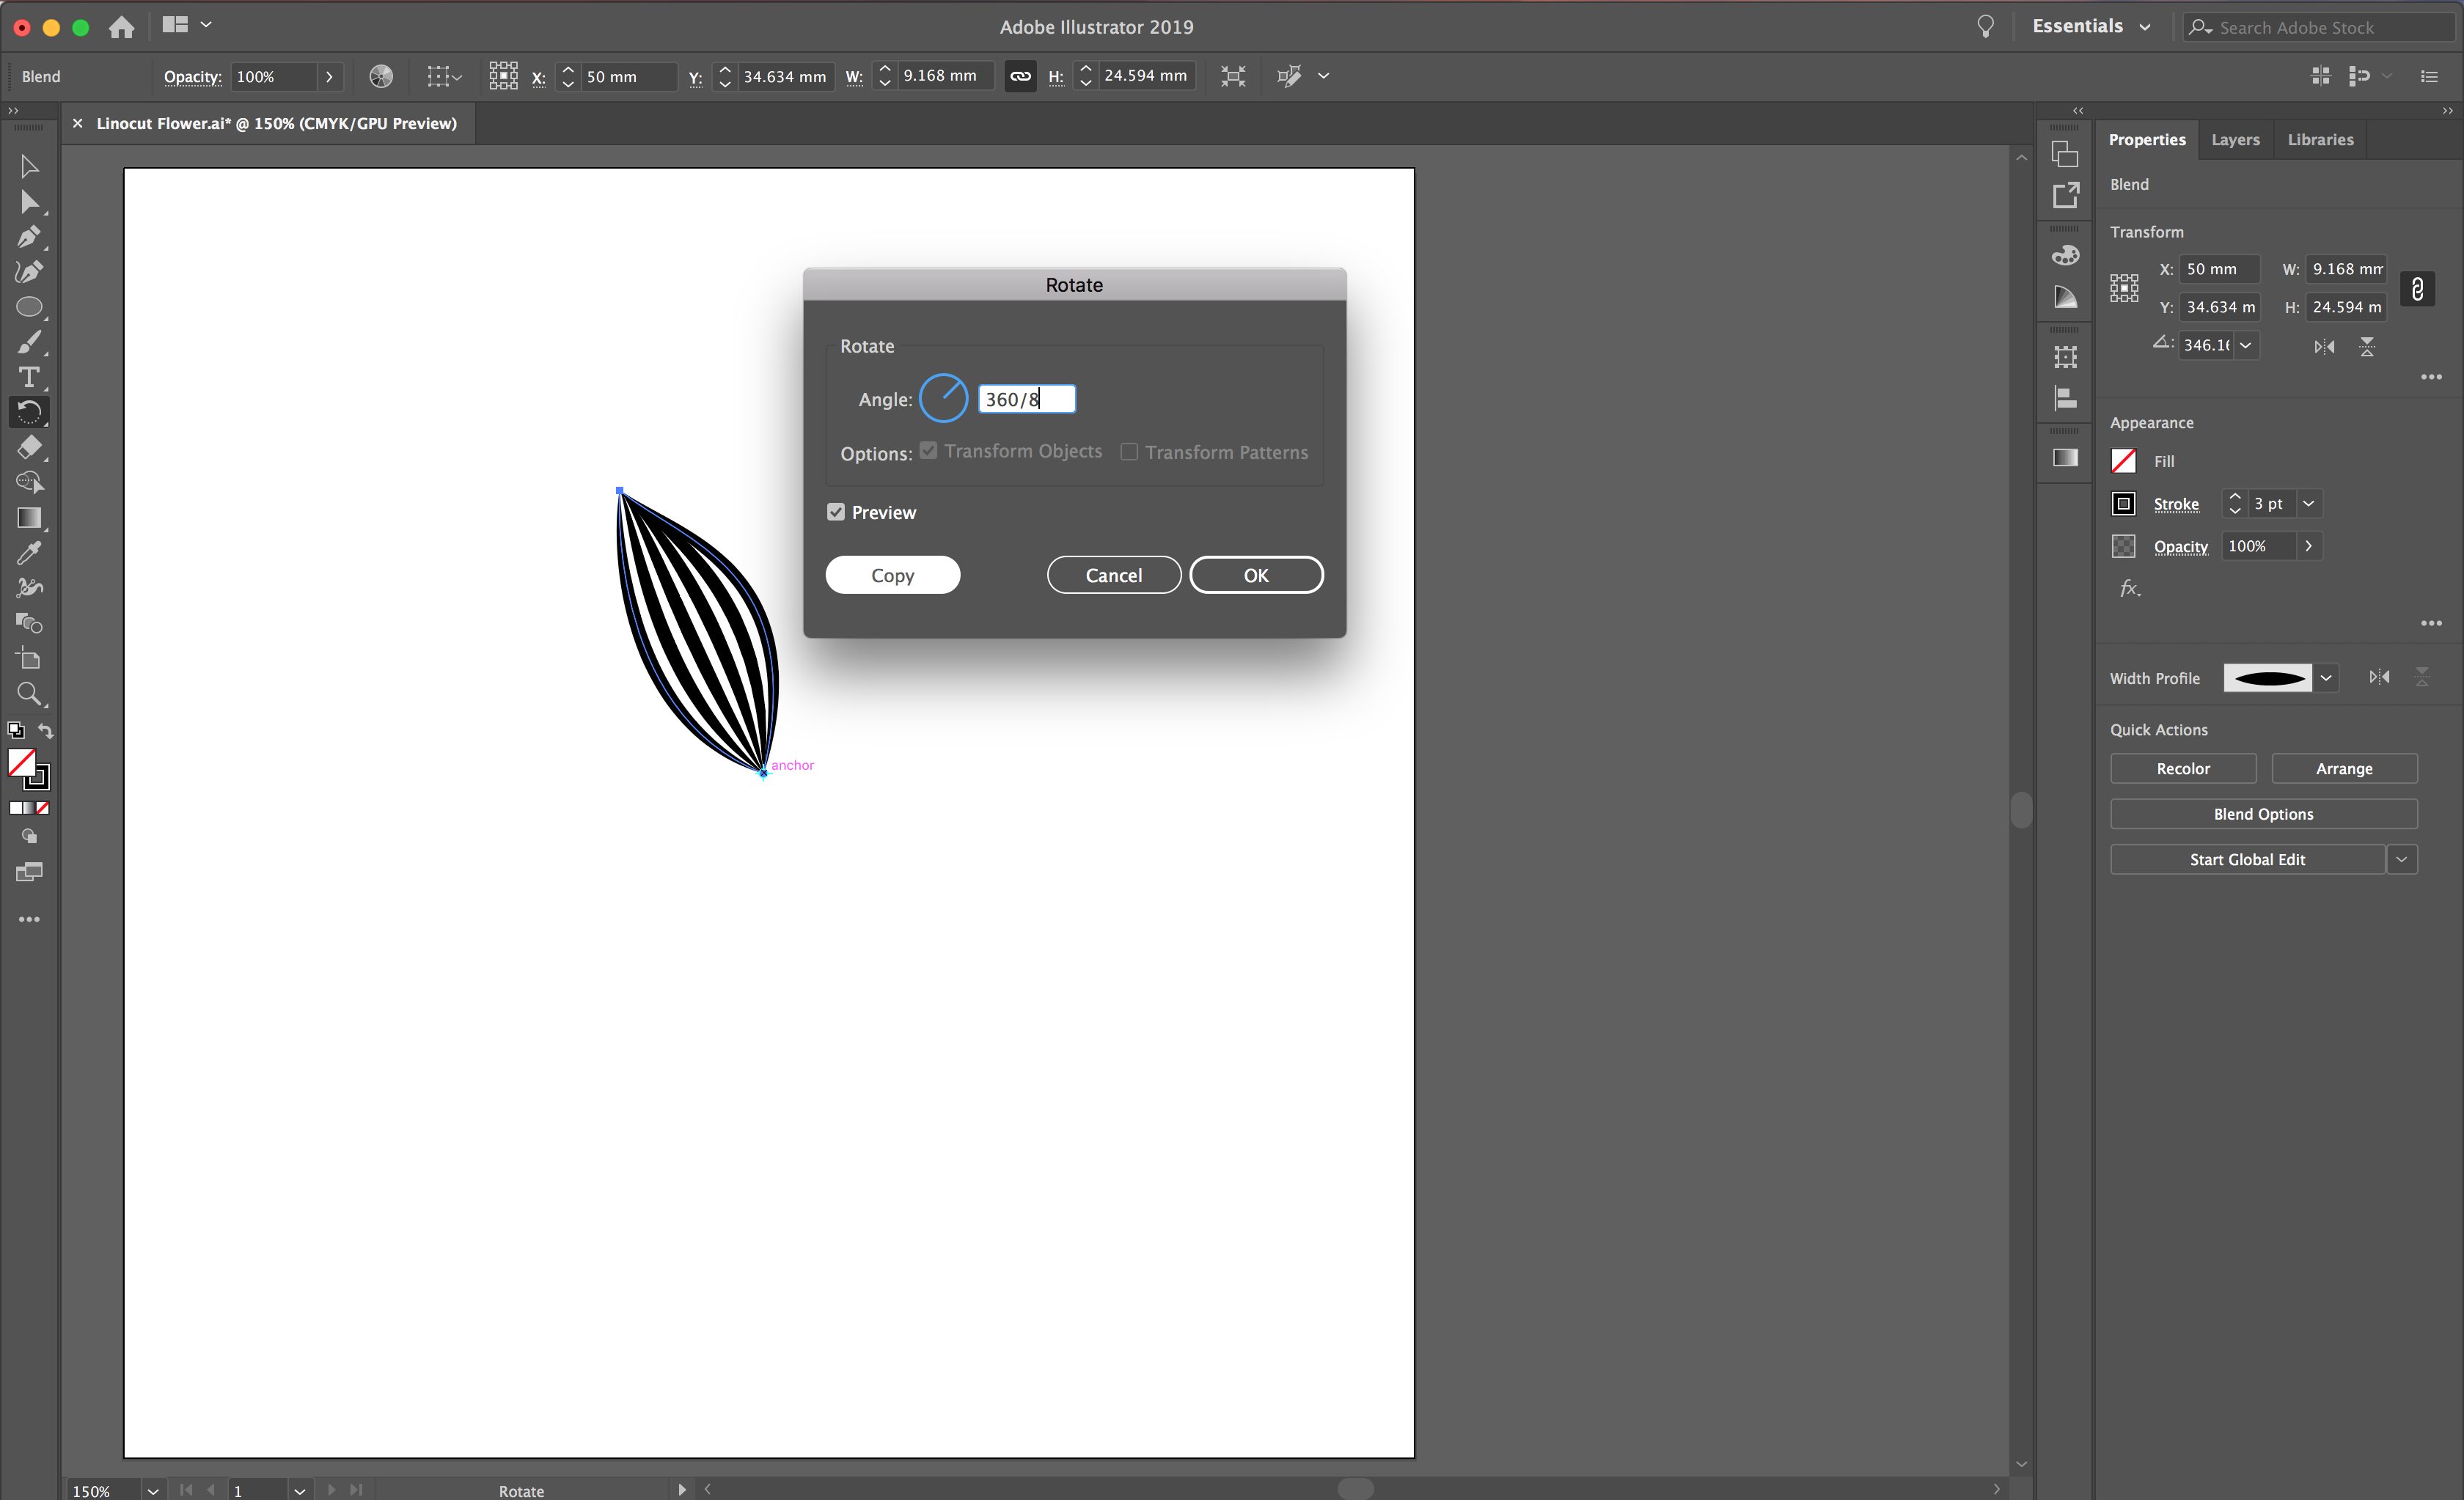
Select the Rotate Tool, hold Option on your keyboard and click the bottom of your petal. This will bring up the rotate settings. Here, you want to enter 360 divided by the amount of petals you want on your flower. As I want eight petals I have entered ‘360/8’. Next, select ‘copy’.
You will see one petal appear. From here you will use duplicate to make the rest of the design.
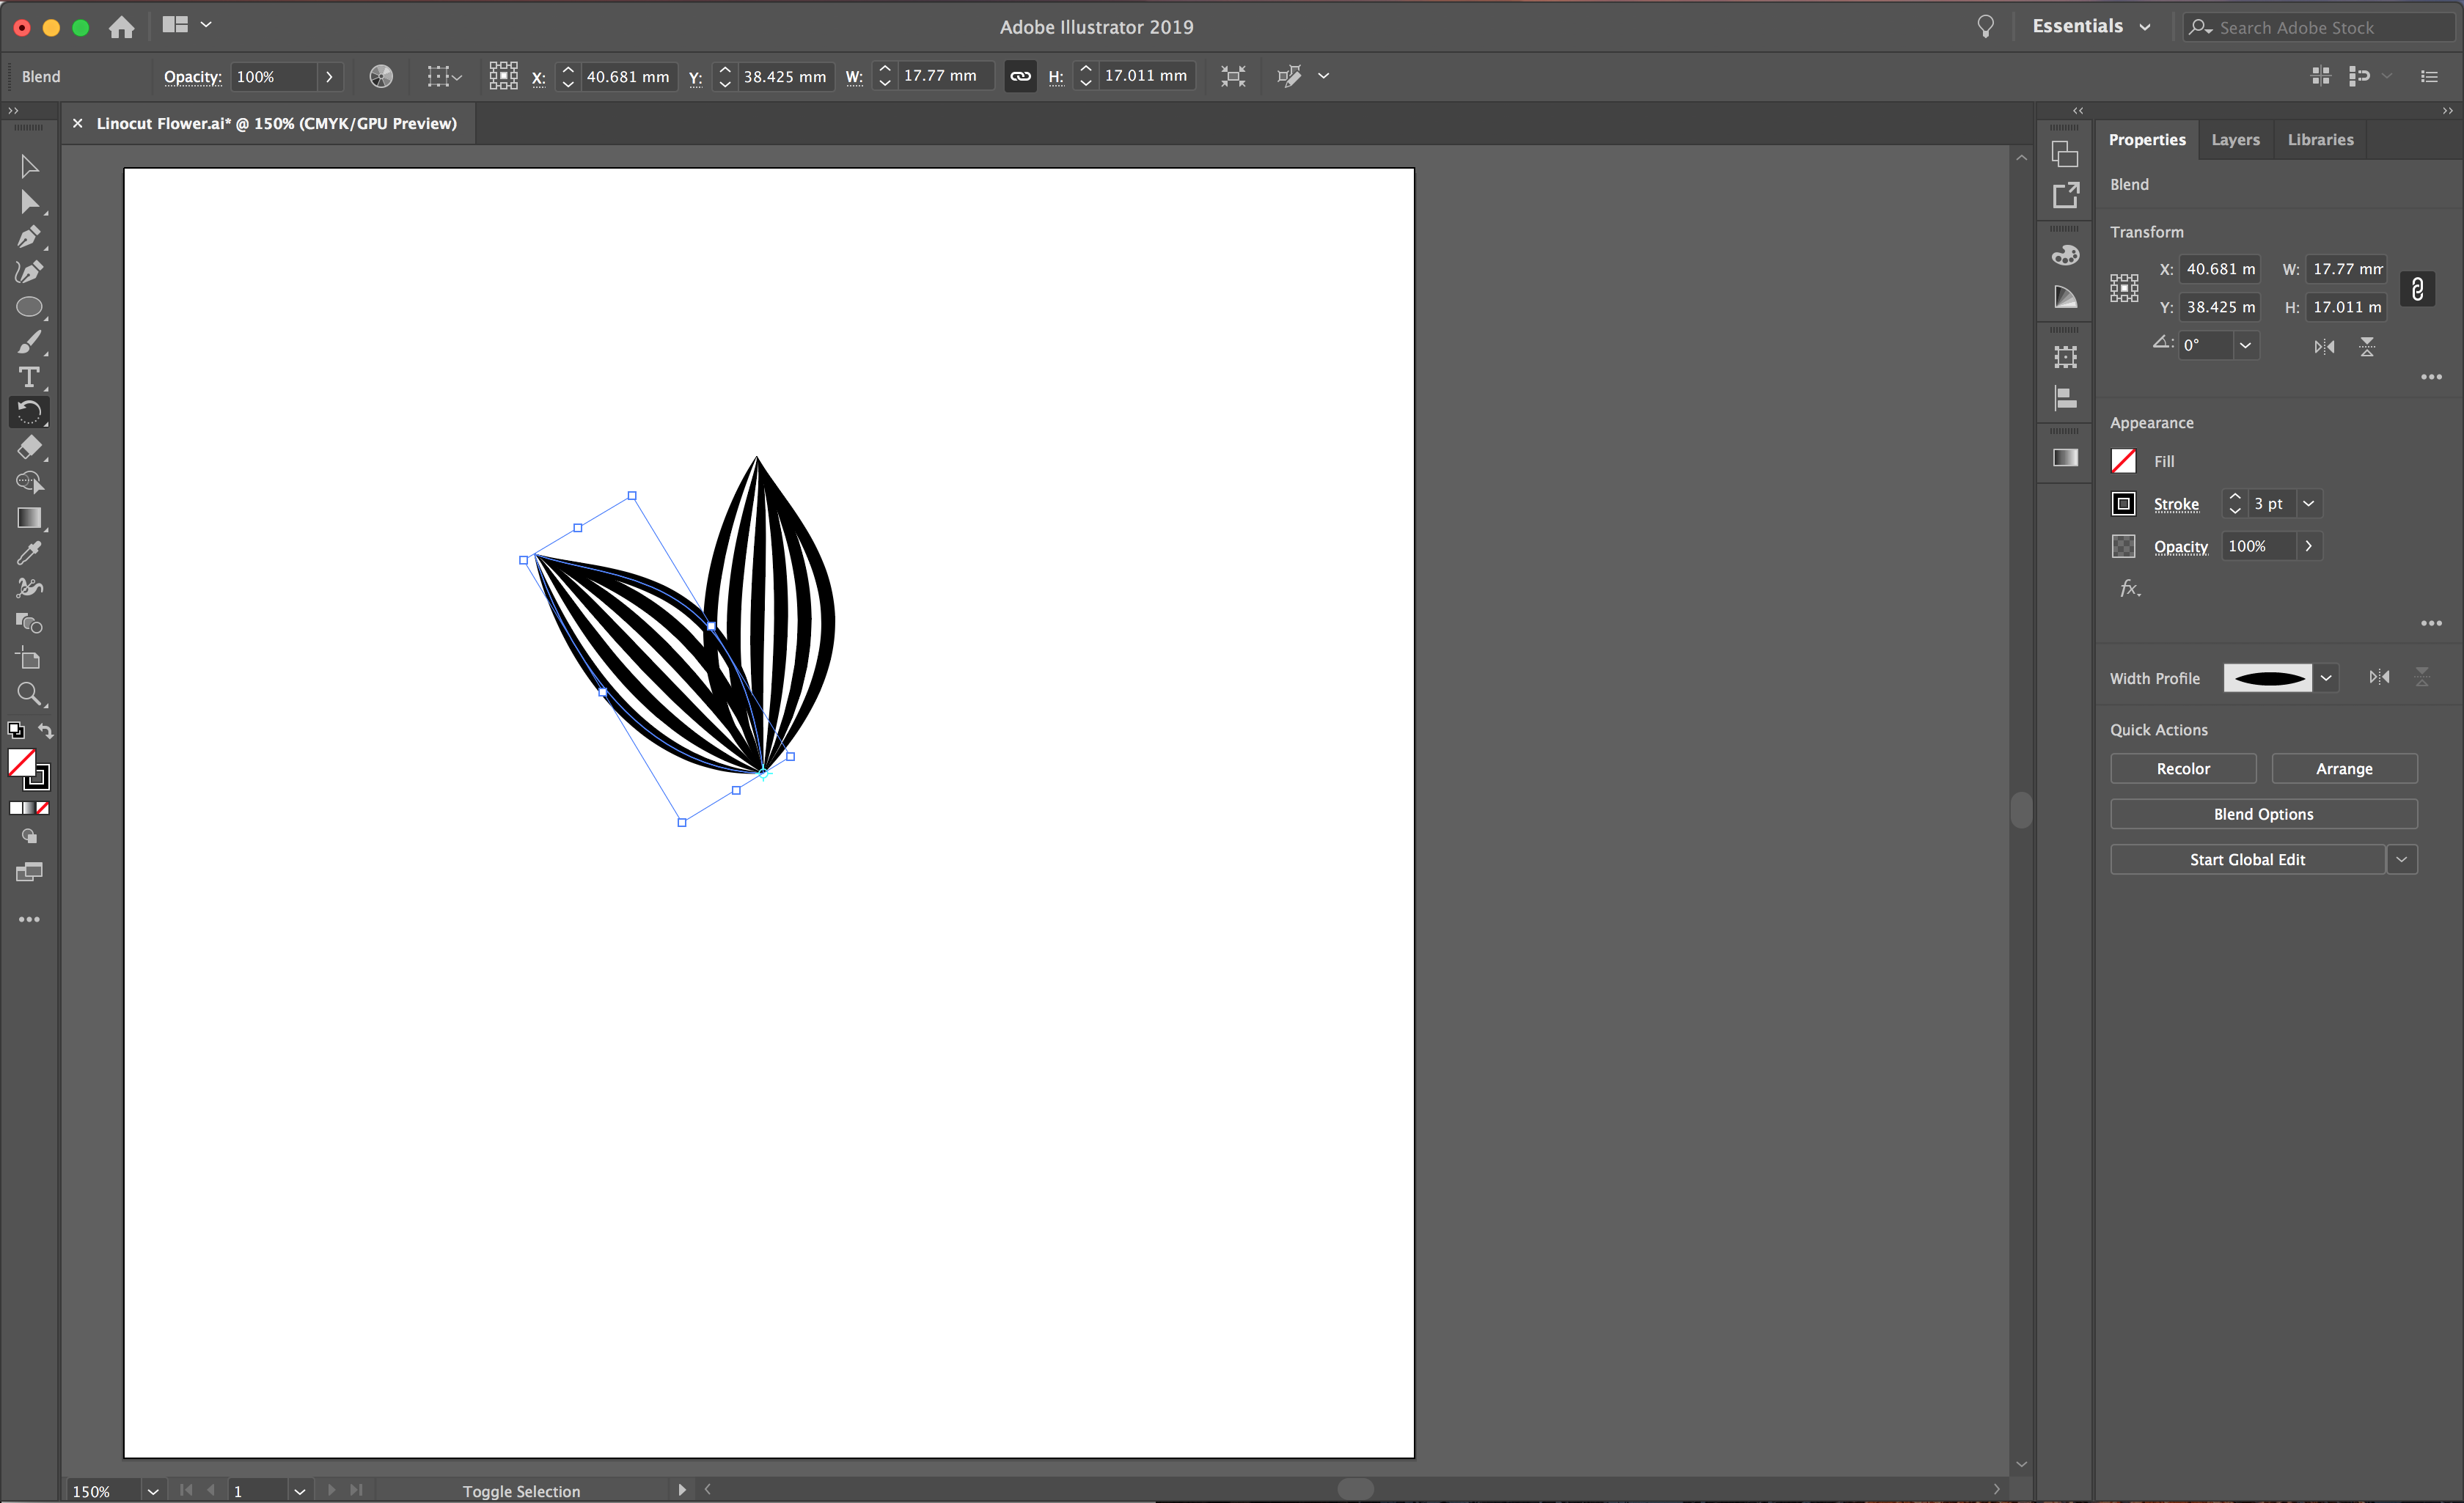
Select Option + D on your keyboard and duplicate your petal. Carry on doing this until you have completed the flower.
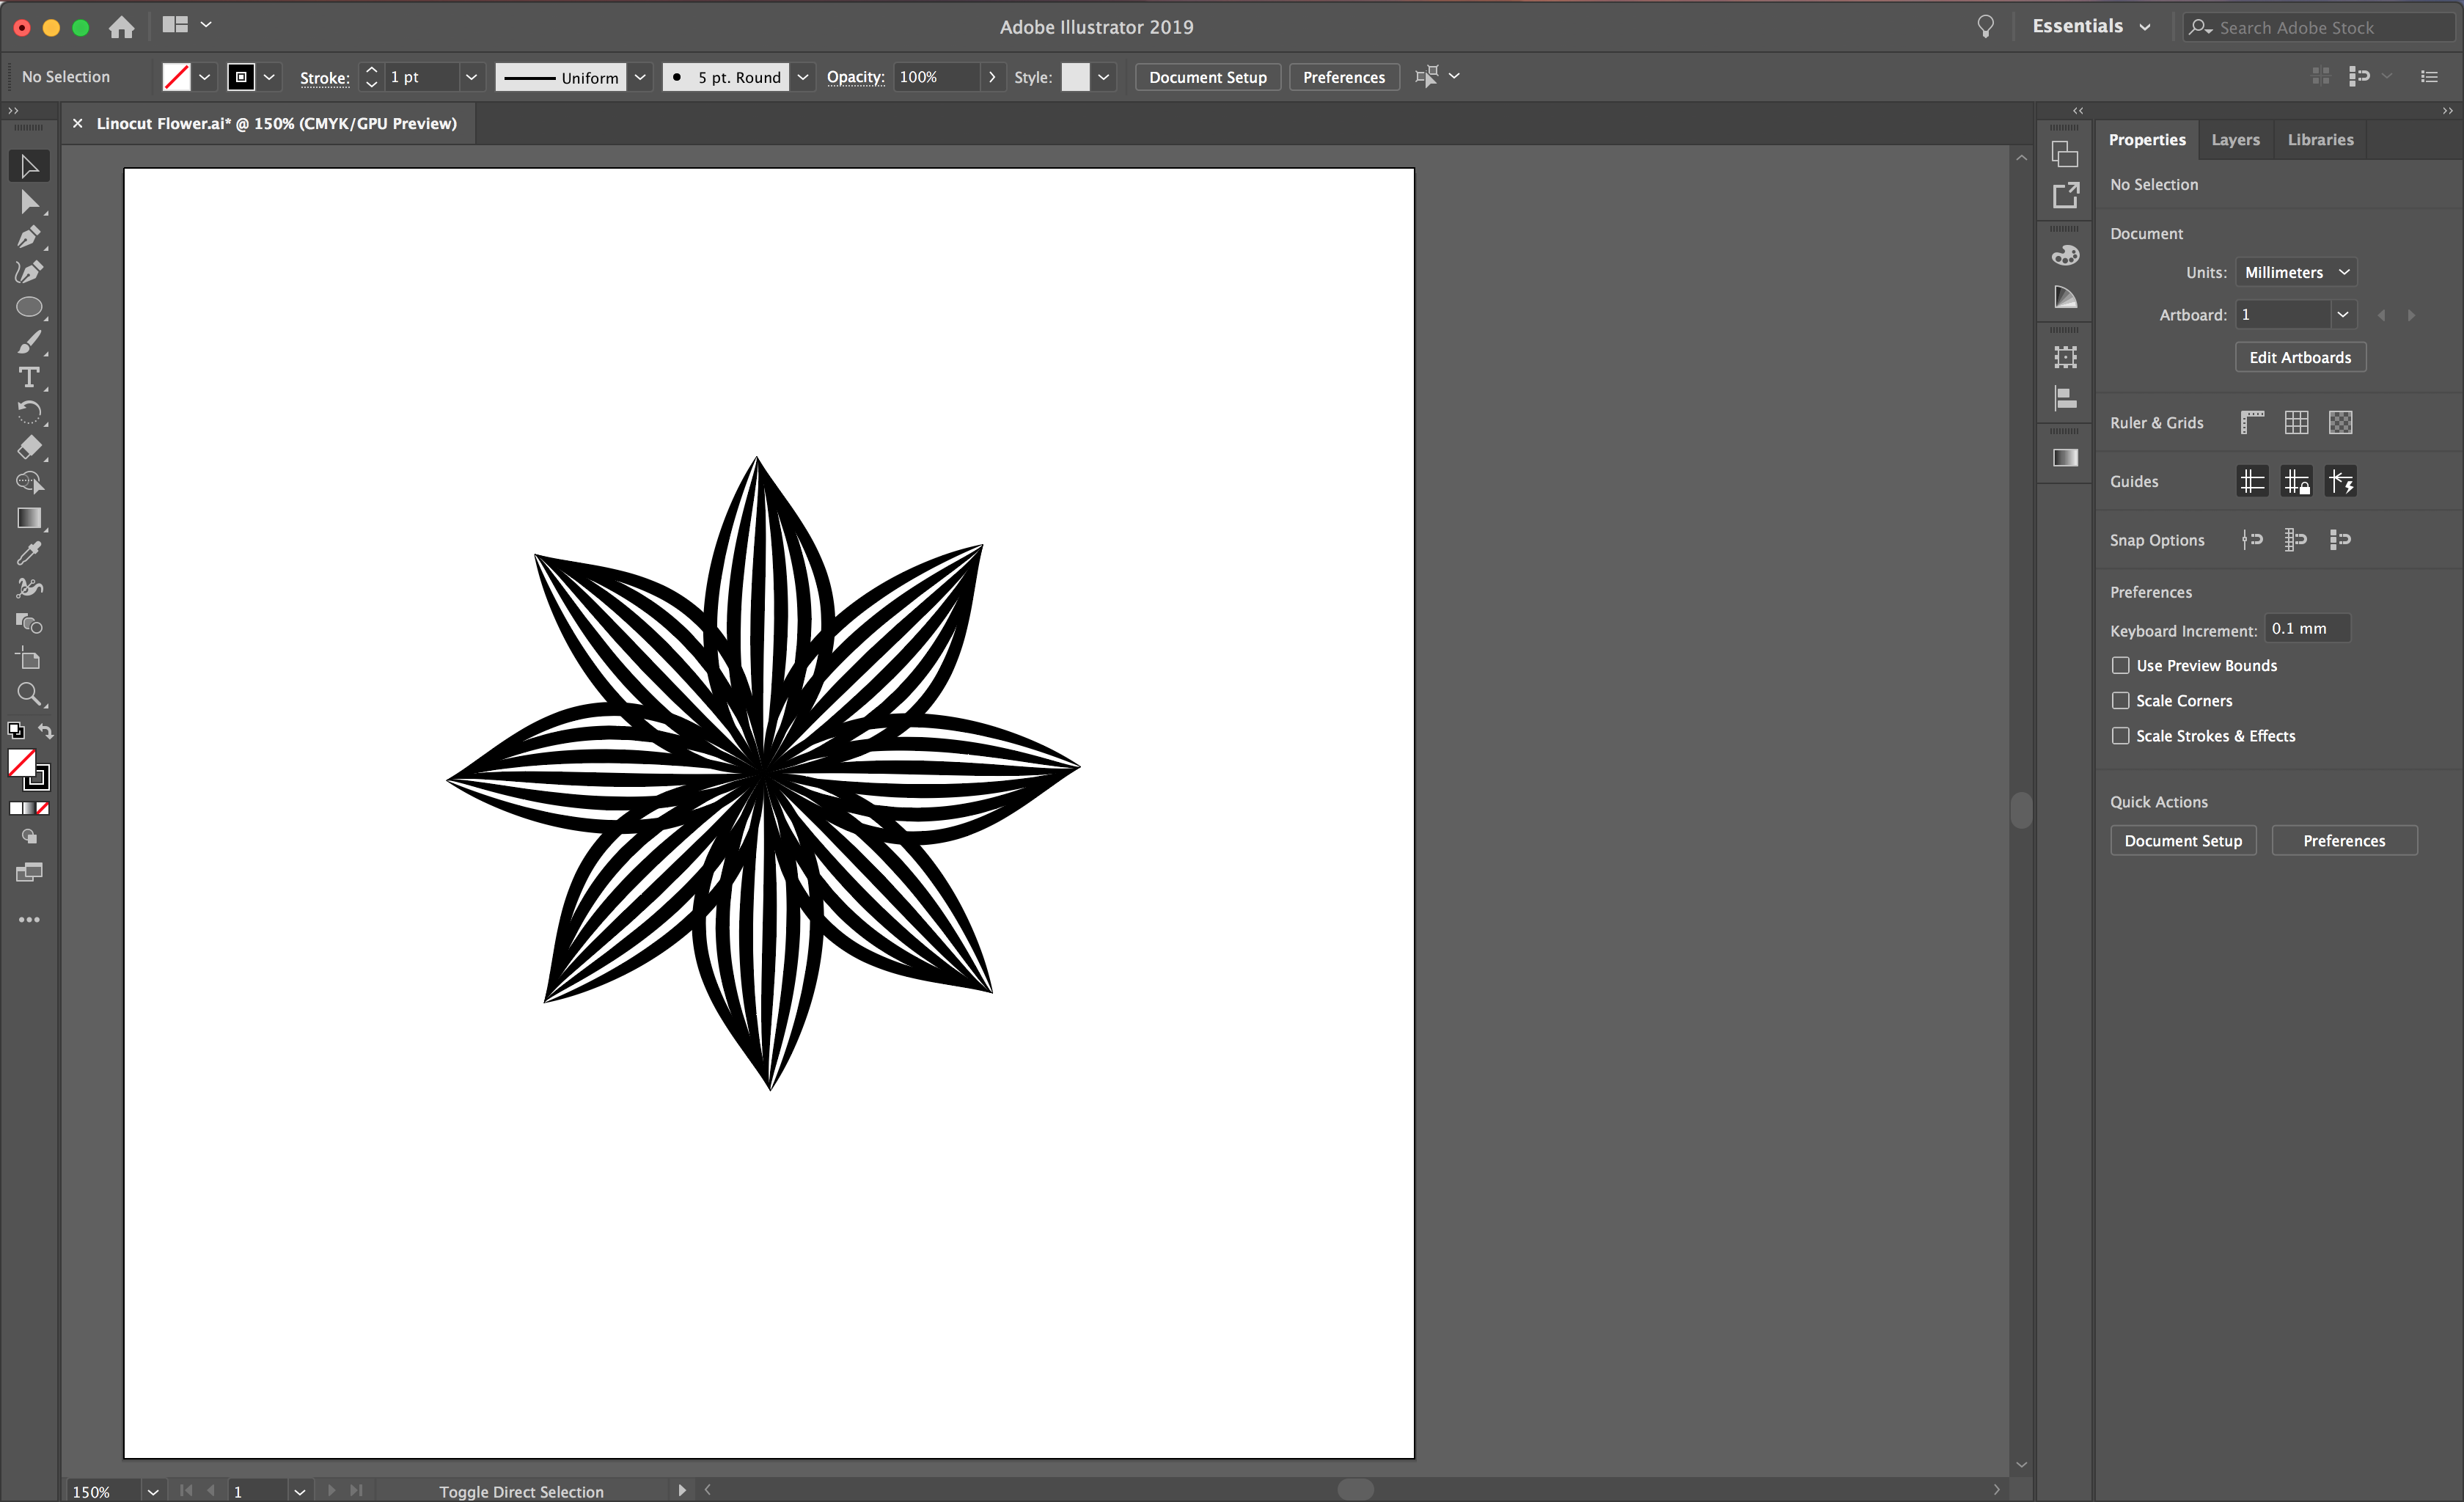
Your linocut flower design is now complete. We hope you enjoyed this tutorial. If you did, may also want to check out how to batch export files, creating a floral logo and making a paper cut effect.
We can begin by opening Illustrator and setting up our document.
Step 1 - Draw a petal shape with the Pen tool
First, we will use the pen tool to start drawing our flower. Make sure to check out our complete guide on the pen tool if needed. Once your document is ready, select the Pen tool from the left toolbar.
Click to create your first point. Then for your second point, click and drag to form the rounded side.
Draw your second line to complete the petal shape, ensuring the 2 sides aren't a complete shape. Refer to the screenshot below for a visual. For the second side of the shape, I have used two points to create the curved tip of the petal.
Once you have done this, to create a smooth line, select Object > Path > Simplify.
The slider will identify how many points you have within your line. Move the slider until you are happy with your shape.
Then, to achieve the Lino effect lines, open your Stroke panel by selecting Window > Stroke.
Select both your lines and change your line weight. Now select the second profile for your line style. Ensure that you have a black outline and there is no fill by checking the fill and stroke panel. Select and remove the fill by selecting the white box with a red line.
Step 2 - Use the blend tool to fill petal shape with lines
Next we will use the blend tool to create evenly spaced lines. The blend tool is great for making color palettes and for blending gradients in text. Select both your lines. Then select the blend tool from your left toolbar.
Click once on the left line and once on the right line. This will create one single line in the center.
With your lines still selected, double click the blend tool button to adjust the blend settings. Select the preview button to see your design change with the settings. Change the spacing setting to ‘Specified Steps’. Then choose the amount of steps you want within your shape. I have chosen to use four steps.
Zoom into your design and select the Direct Selection Tool, displayed as a white arrow. Select the individual points to move them together and close the petal shape.
Step 3 - Duplicate the petals to complete your flower
Select your entire petal with the Selection Tool, displayed as a black arrow top left. Rotate the petal until the top and bottom are almost in line. This doesn’t need to be exact.
Select the Rotate Tool, hold Option on your keyboard and click the bottom of your petal. This will bring up the rotate settings. Here, you want to enter 360 divided by the amount of petals you want on your flower. As I want eight petals I have entered ‘360/8’. Next, select ‘copy’.
You will see one petal appear. From here you will use duplicate to make the rest of the design.
Select Option + D on your keyboard and duplicate your petal. Carry on doing this until you have completed the flower.
Your linocut flower design is now complete. We hope you enjoyed this tutorial. If you did, may also want to check out how to batch export files, creating a floral logo and making a paper cut effect.
Related Tutorials
Illustrator Tutorials
How to Make 2D Flowers Using Polar Grid in Illustrator
In this tutorial, you will learn how to create 2D flowers using the Polar Grid in Adobe Illustrator.
Illustrator Tutorials
How to Make a Wavy Line in Illustrator
In this tutorial learn a super quick and easy way to draw a wavy line in Adobe Illustrator.
Illustrator Tutorials
How to Make a Seamless Instagram Carousel in Illustrator
Create stunning Instagram Carousels using Adobe Illustrator.
Illustrator Tutorials
How to Make Sparkles in Illustrator
In this tutorial you'll learn how to make trendy sparkles in Adobe Illustrator.
Illustrator Tutorials
How to Make a Knockout Design in Illustrator
Using Adobe Illustrator, you can create a Knockout Text Effect.
Illustrator Tutorials
How to Make a Ribbon Banner in Illustrator
Discover how to make a ribbon banner in Adobe Illustrator with this step by step tutorial.