By Design Bundles
How to use Glyphs in Adobe Illustrator
Using glyphs in Illustrator can help make your text designs look more fun and interesting. Glyphs are all the different characters in a font. A glyph can be a letter, a punctuation mark, a dingbat, a shape, etc. Today, we will go through two different ways of accessing and using glyphs in Illustrator, and you won’t want to stop using them once you learn how!
First, make sure your font has been downloaded and installed on your PC. We downloaded and installed a bouncy script font called Hello Winter. Keep in mind that not all fonts have alternate glyphs for every character.
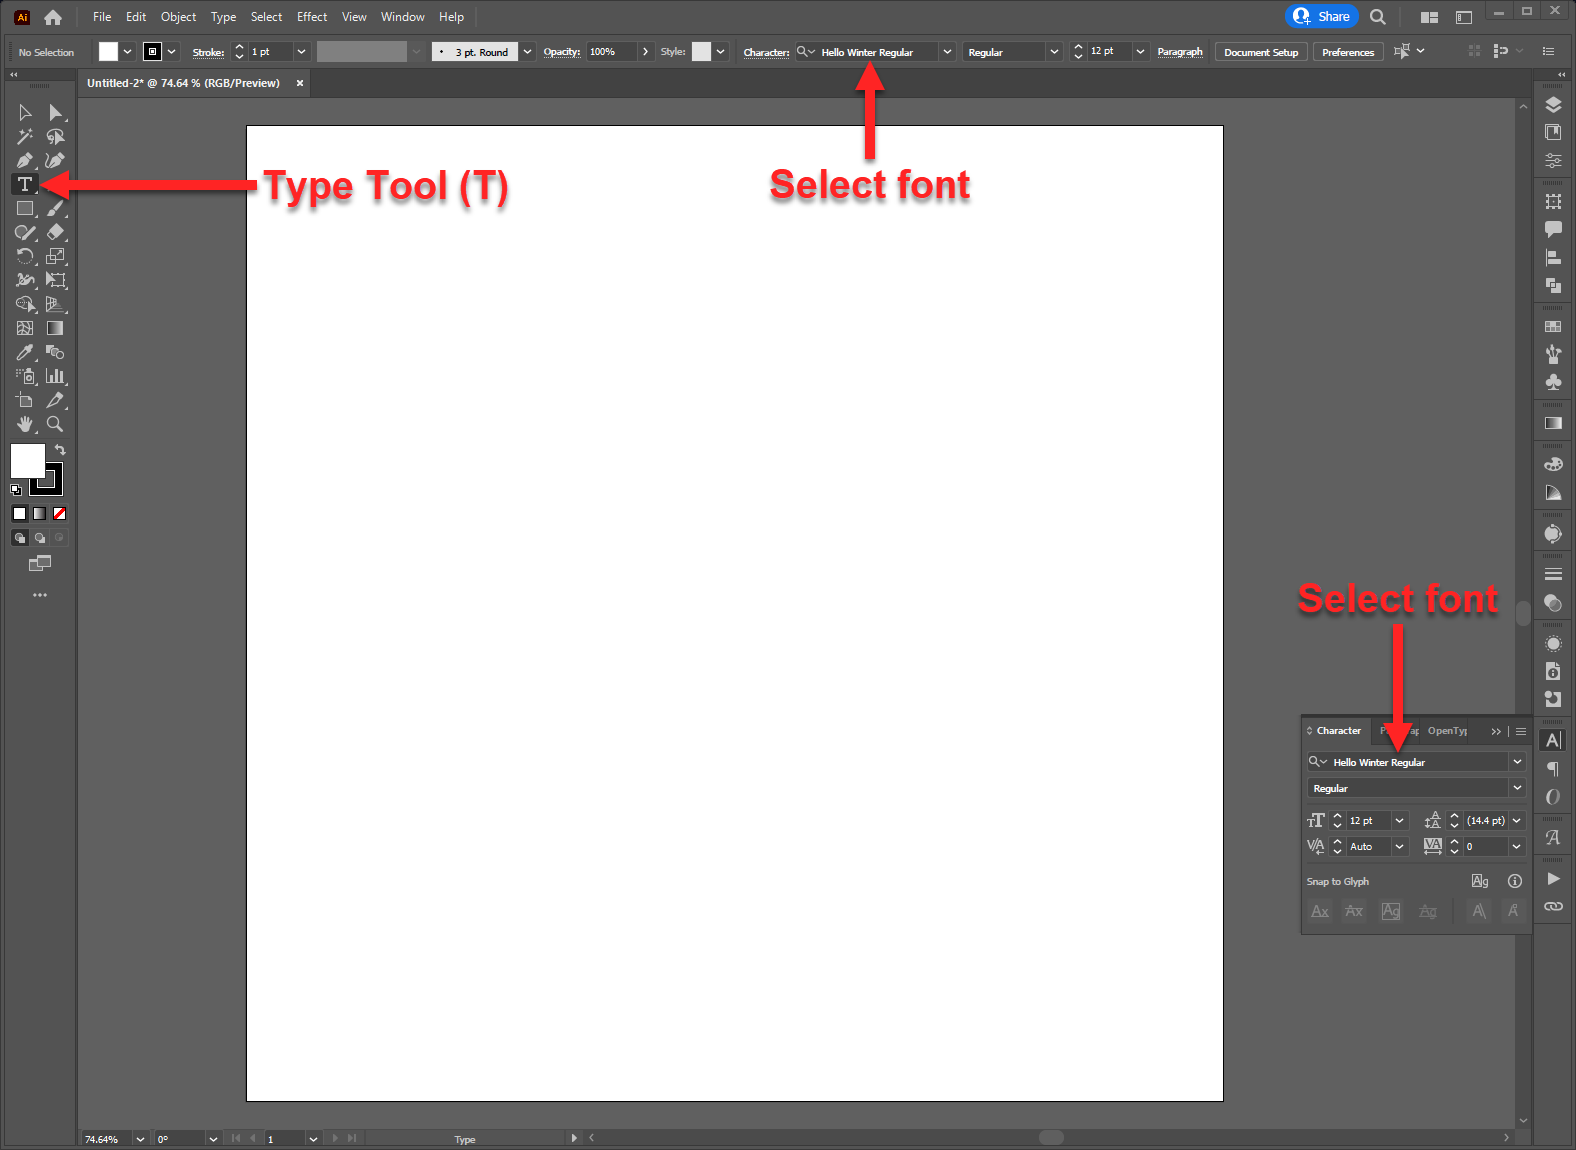
Step 1 - Select Type Tool
Select the Type Tool (T) and choose your font from the Set Font Family dropdown in the Control panel or the Character panel.
Step 2 - Add or Replace Glyphs
There are a couple of ways to use glyphs. You can add new glyphs to your text or replace parts of the existing text.
Add Glyphs Using the Glyphs Panel
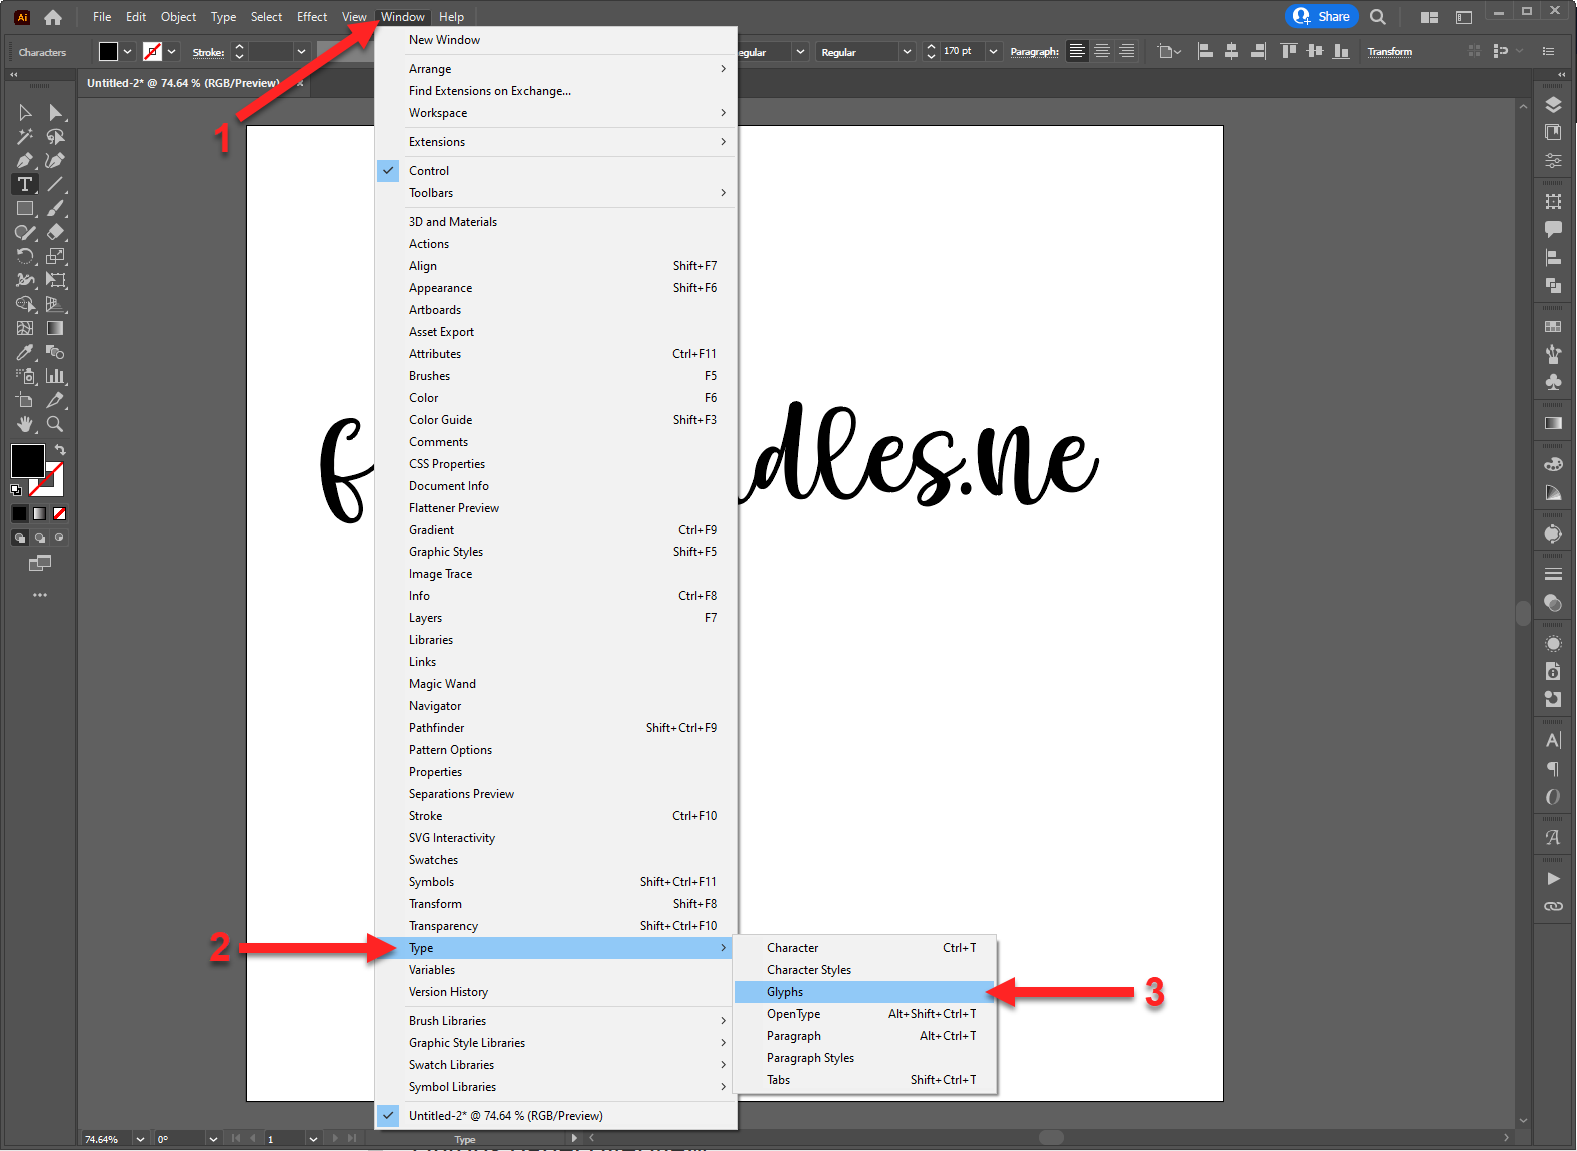
Click on the canvas to enter text editing mode. You can enter some text if you’d like. Open the Glyphs panel by going to Window > Type > Glyphs.
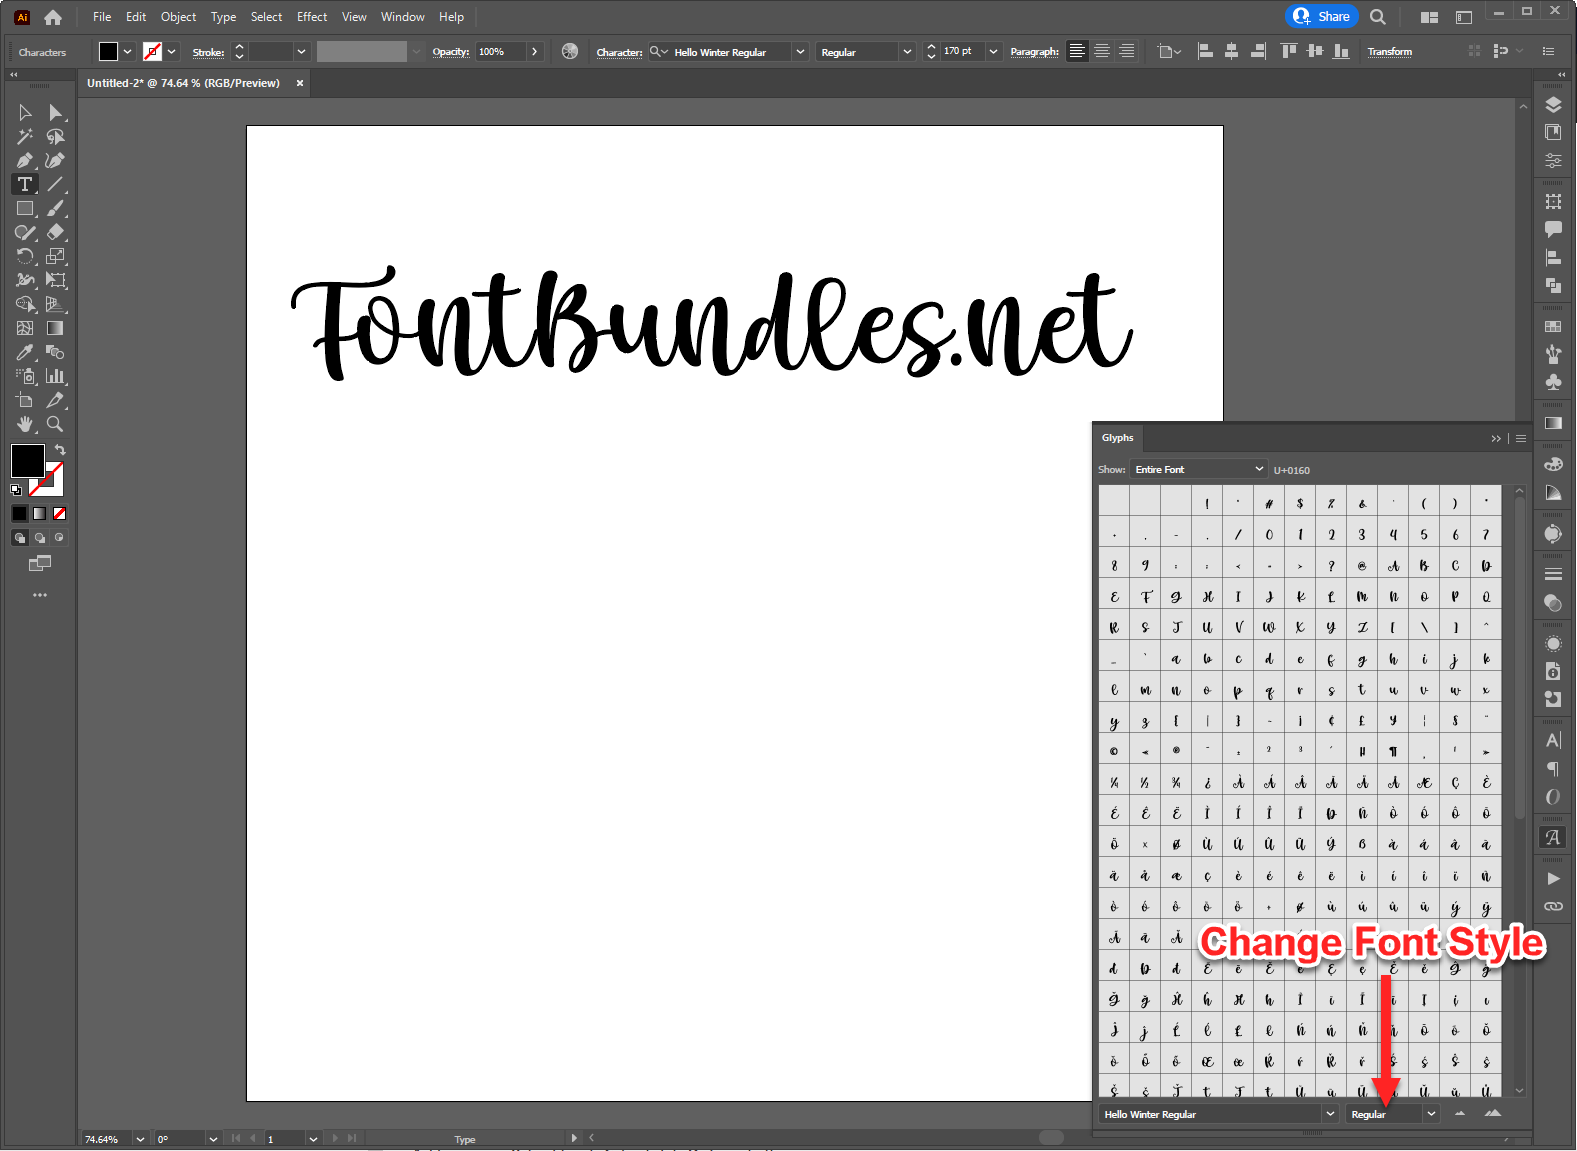
Make sure Entire Font is selected from the Show dropdown in the Glyphs panel to see all the glyphs for the currently selected font.

Double-click on a glyph to add it to your text. The glyph will be added wherever your text cursor is currently located.

Replace Existing Text With an Alternate Glyph
There are two ways you can replace existing text with a glyph.
Use the Glyphs Panel to Replace the Selected Text
With the Type Tool (T), select the text you want to replace. Then double-click on a glyph in the Glyphs panel to replace the selected text. You can continue adding more glyphs as we did below.

Use the Mini Glyph Menu to Replace a Selected Character
Select a character with the Type Tool (T). If alternate glyphs are available for the selected character, you will see a mini menu pop up below that character.
This menu will show a max of five alternate glyphs. If there are more than five options, you will see an arrow button on the right side of the mini menu. Click the arrow button to open the Glyphs panel.

Opening the Glyphs panel in this manner will show you all the available options for the currently selected character.

Glyphs Panel Tips
Before we end the tutorial, we wanted to give you some pointers on using the Glyphs panel.
Show Options
In the Glyphs panel, you can select what category of glyphs you want to see using the Show dropdown menu. You can choose Entire Font, Alternates for Current Selection, and other categories.
Suppose you already have the Glyphs panel open and the “Entire Font” category selected. You still can highlight a character and change the Show dropdown menu from “Entire Font” to Alternates for Current Selection to see only the highlighted character’s glyphs. This is helpful when the entire list of glyphs is very long.

Change Font in Glyphs Panel
You can easily change the font in the Glyphs panel itself. Just select a different font at the bottom left of the Glyphs panel.
You can see that we switched from Hello Winter to Humble Hearts down below.

Change Font Style
Next to the font, you will see another dropdown menu. Here, you can select a different font style if available. Examples of font styles are Regular, Italic, Bold, etc.
Change Glyph Preview Size
On the bottom right of the Glyphs panel, you will see two buttons with mountain icons. Use the left button to zoom out of the glyphs preview and the right button to zoom in. The size of the glyphs preview will not affect the size of the actual text.

Now you can add some cool or fancy looking text to your designs by using glyphs in Illustrator! From here, you can use your text to make some watercolor lettering or die cut stickers in Illustrator.