By Design Bundles
Inkscape Tutorials12 min
How to Create a Stacked Font in Inkscape
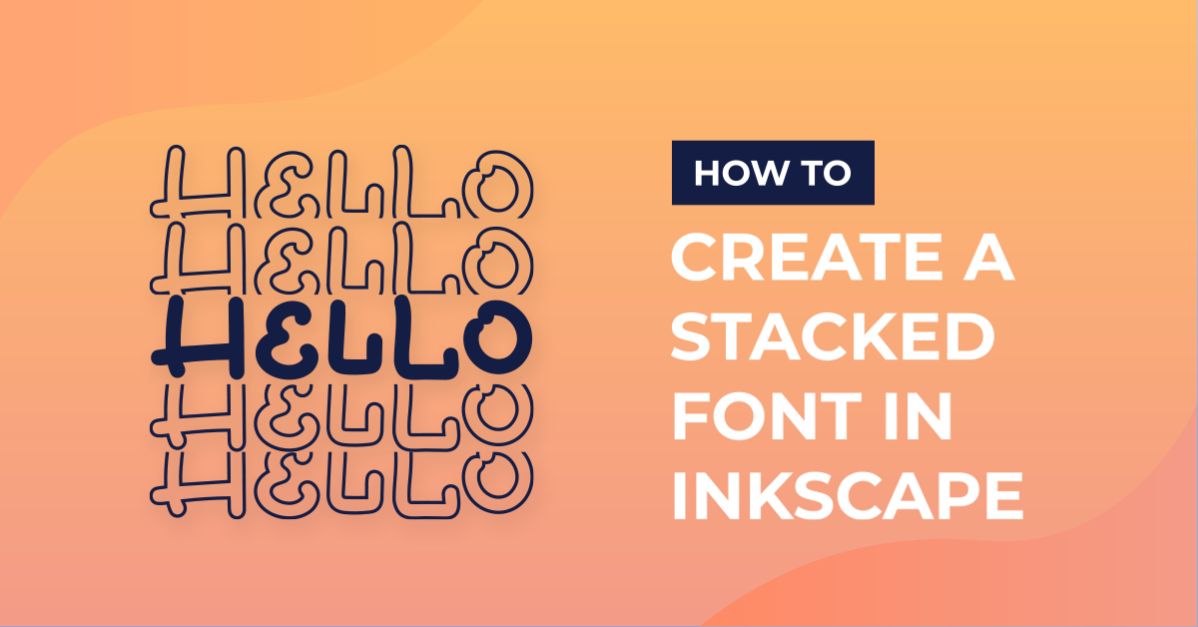
A Stacked Font is an easy way to make a fun design with just one or two words! Typically a stacked font has a solid text object in the center with outlined text duplicated above and below the solid text. You can purchase stacked fonts, but we will show you how to make a stacked font from any font you wish!
In this tutorial, I will use this cute handwriting font but you can use any of these fun fonts from Design Bundles.
Step 1 - Add text and change to a path
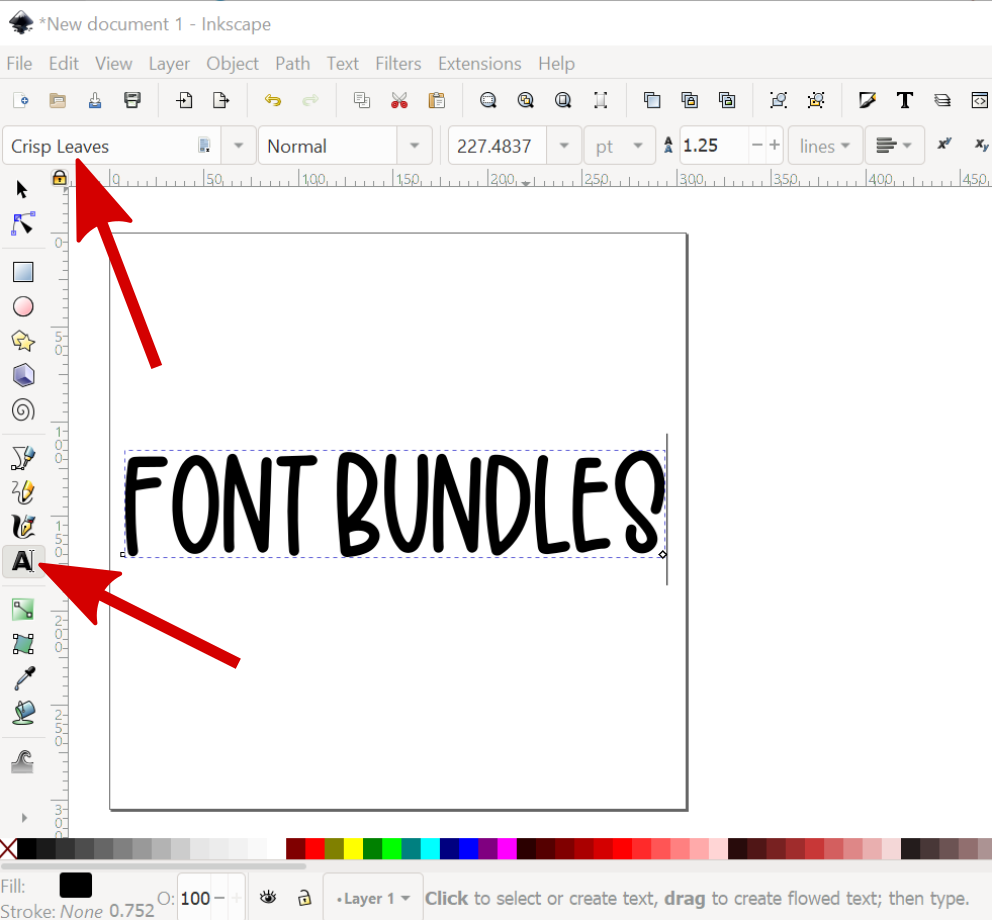
Start by clicking on the text tool in the left toolbar. Choose your font and type out any word or phrase you want. I typed out “Font Bundles” using the Crisp Leaves font.
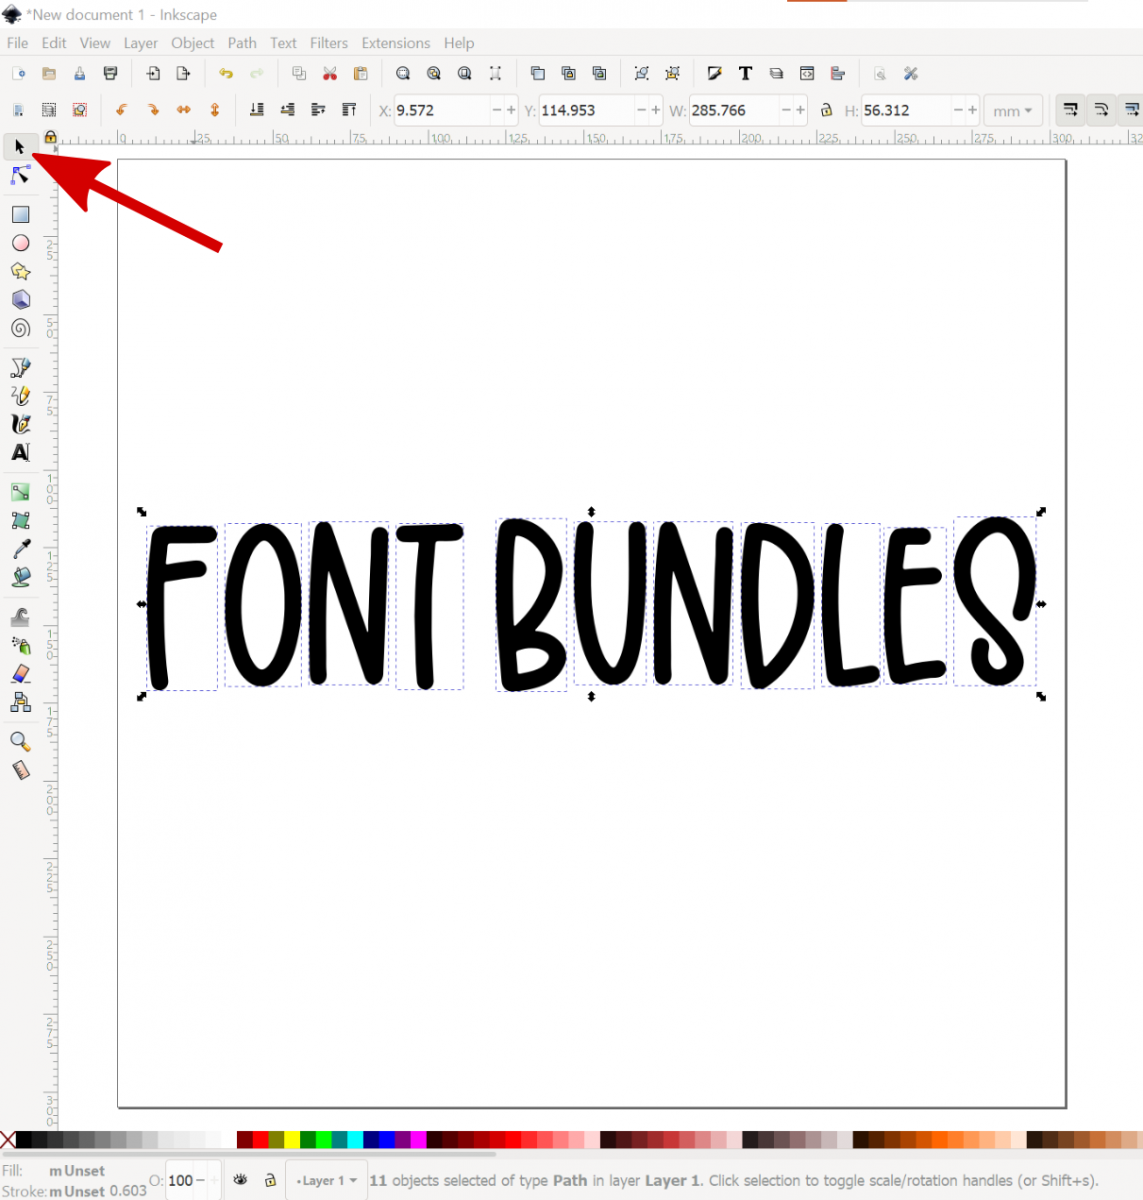
We want to convert the text to a path. Click on “Font Bundles” to select the text. Next, go to Path > Object to Path. Then go to Object > Ungroup. To ensure this step is done correctly, the bottom of Inkscape should show the number of “objects selected of type path” instead of “text”.
Hold down the Ctrl key and drag the corner to resize the letters, if desired.
Step 2 - Use Union to make all items one path
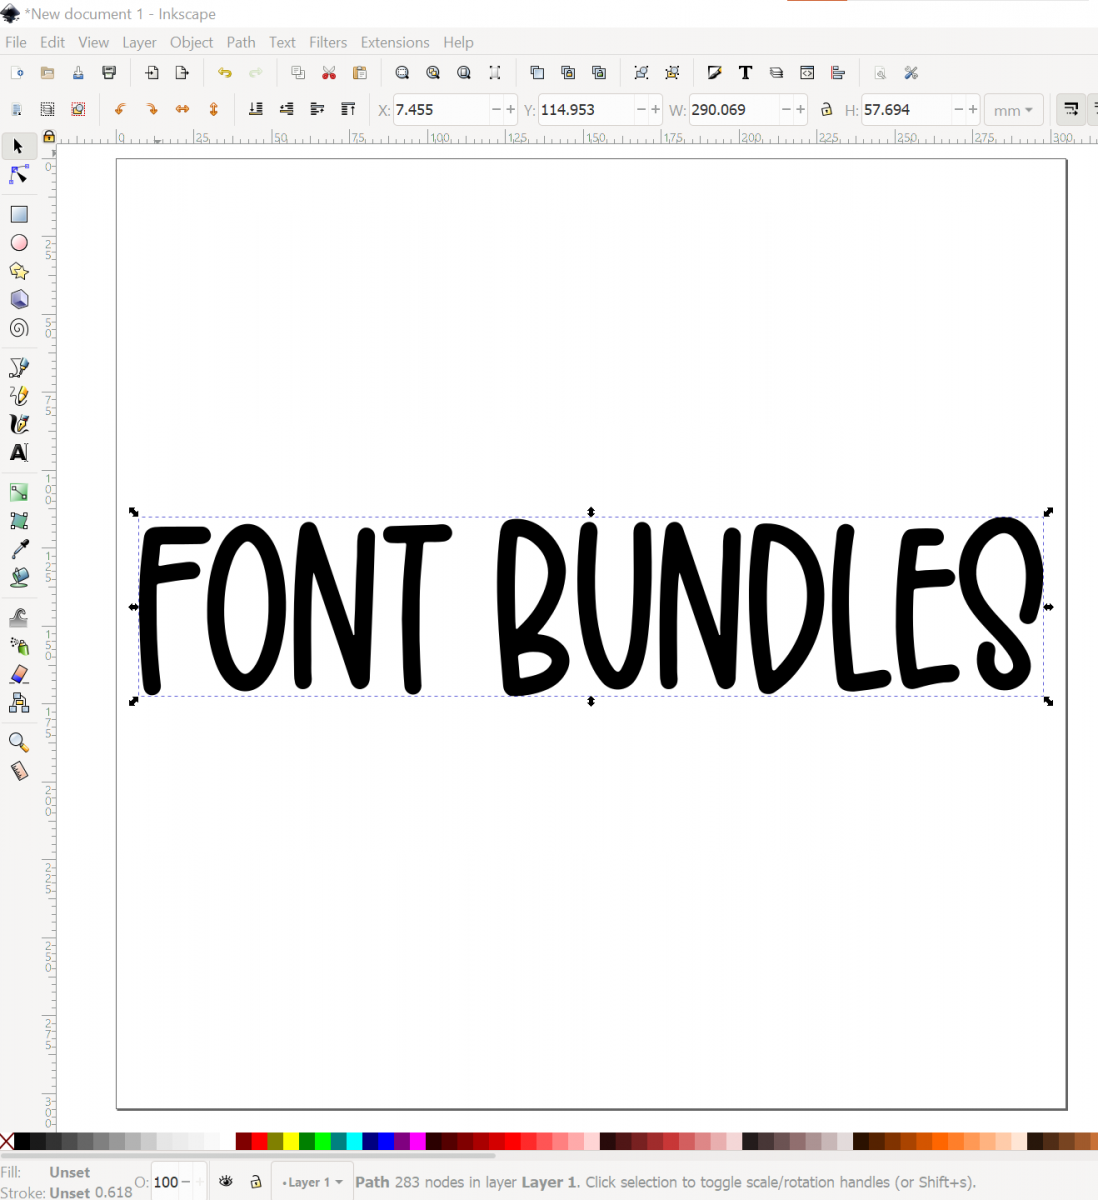
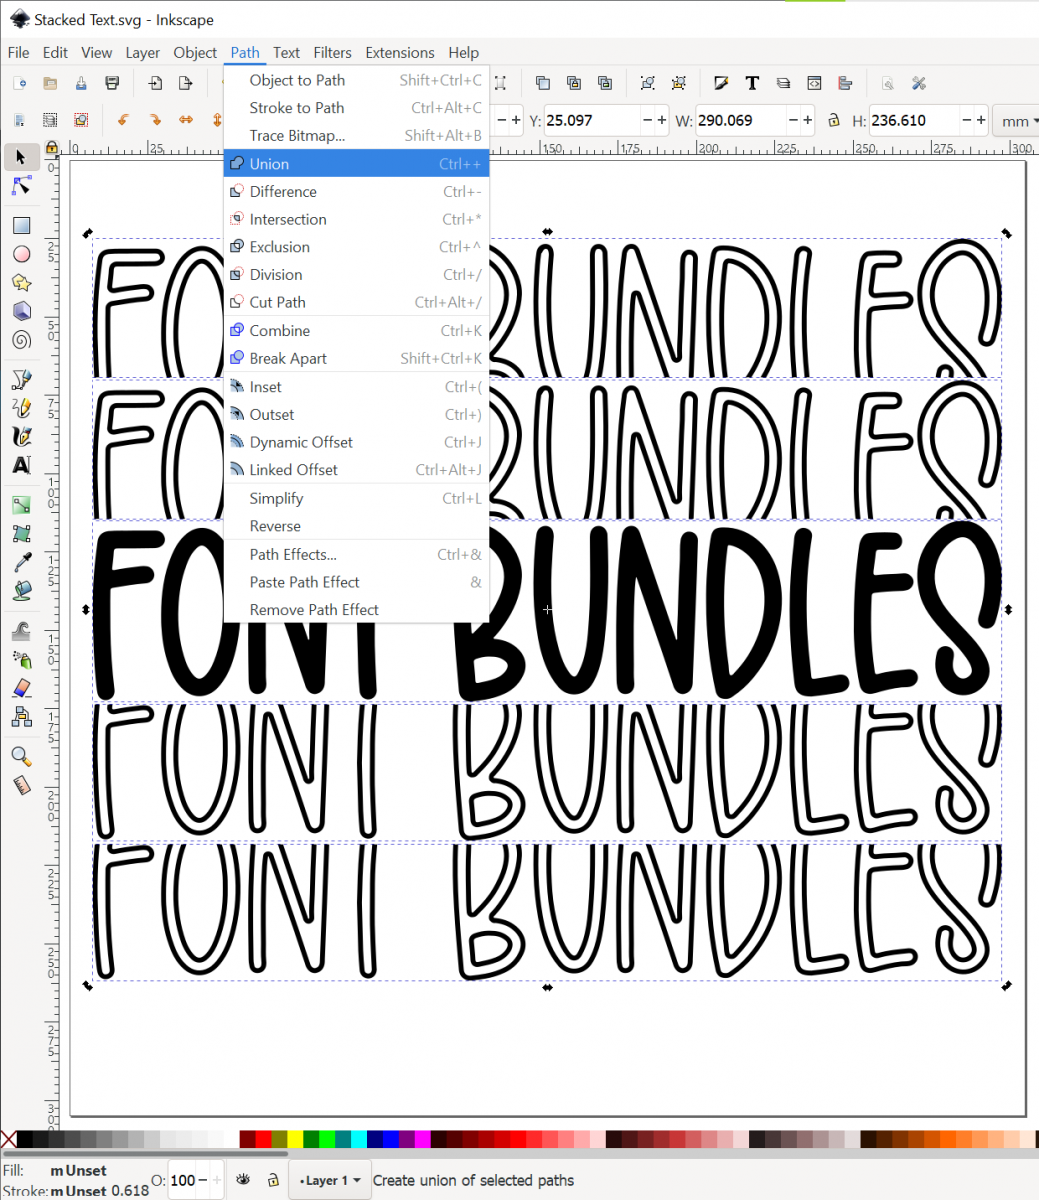
Select all items or letters and go to Path > Union to make them all one object. To ensure this step is done correctly, the bottom of Inkscape should show “Path” and then the number of nodes.
Step 3 - Duplicate then Offset the path
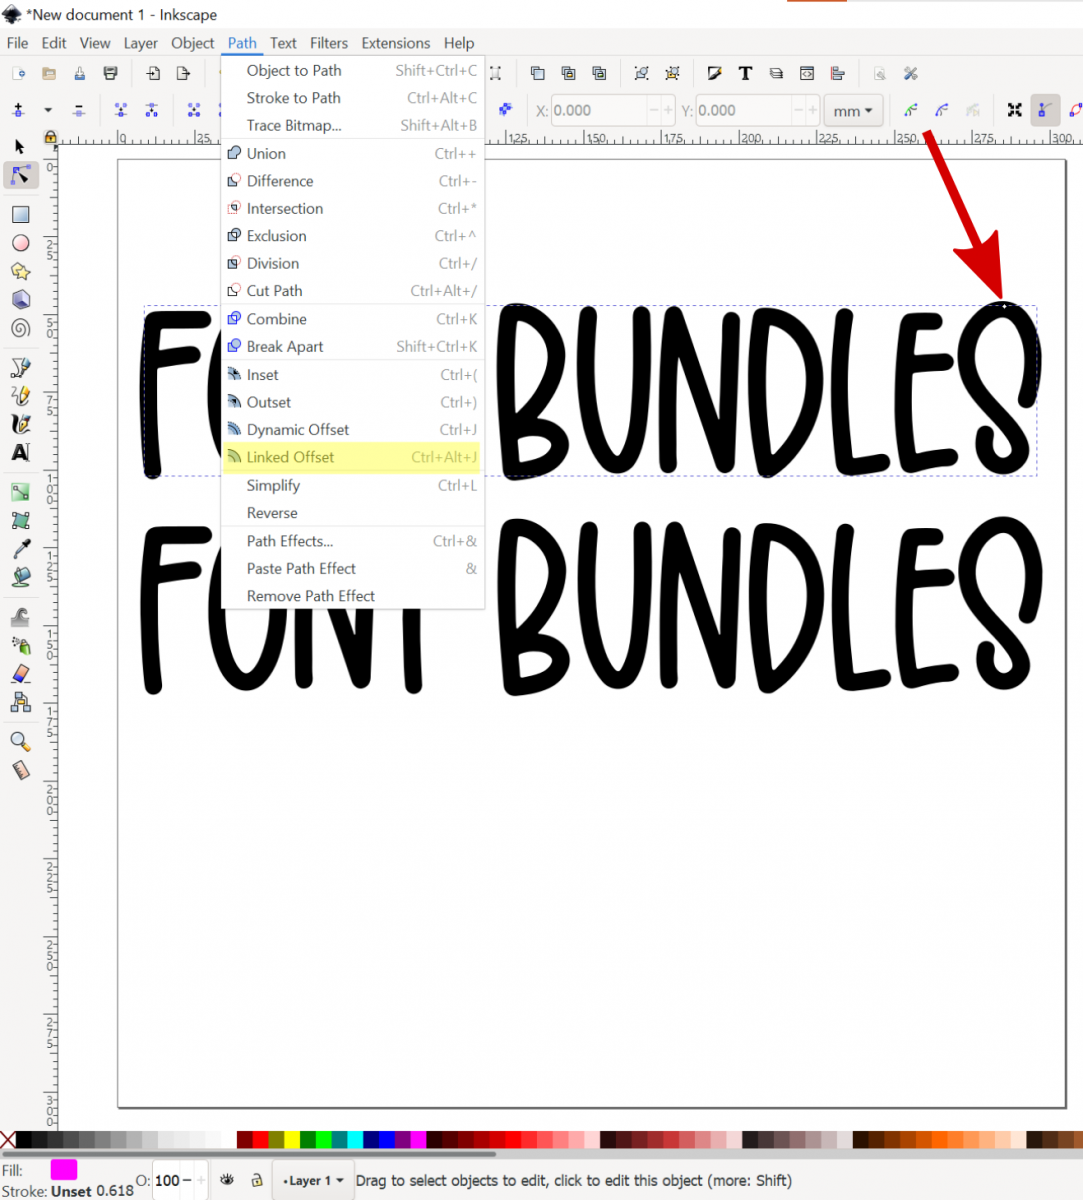
Duplicate "Font Bundles" by selecting the word and using the shortcut Ctrl + D.
Select one of the "Font Bundles" and go to Path > Linked Offset. A diamond node will appear at the highest point of the path. Click and drag the diamond node slightly inside the original text.
Step 4 - Create an Outline with the Difference tool
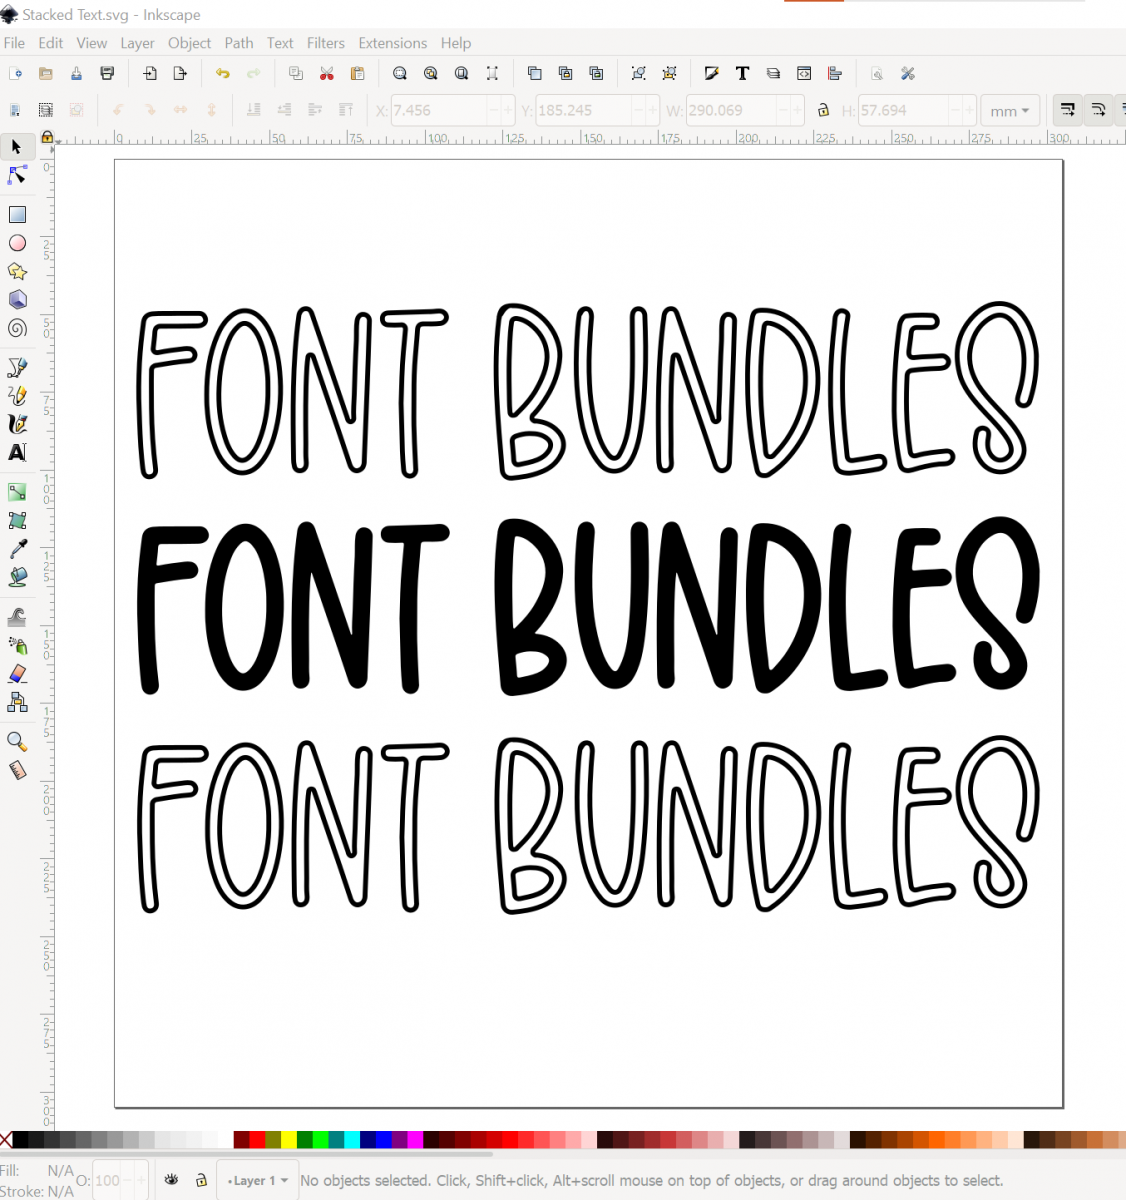
Select both the path and the offset path. Go to Path > Difference to create an outline that we will use for the stacked font.
Select the outlined wording and duplicate (Ctrl + D). Move one above the original (filled in) word and the other below.
Step 5 - Create partial text
Let's create the partial text with the top word first.
Create a rectangle
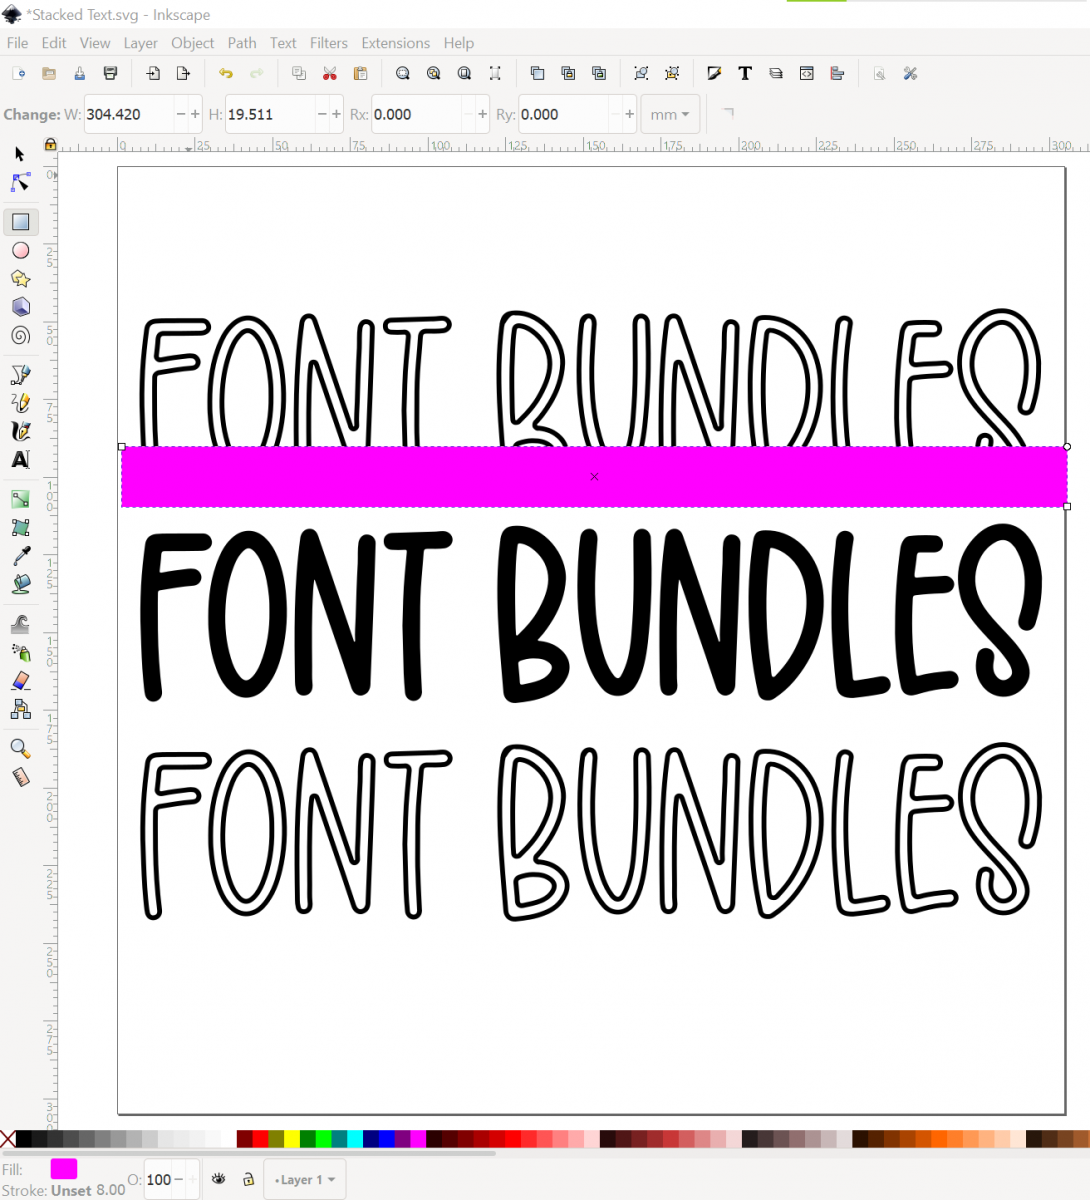
Select the Create Rectangles and Squares tool. Draw out a rectangle for the portion of the word that you want removed. Make sure that the rectangle is slightly wider than the wording.
Difference
Make sure the rectangle is above the wording and covering the lower portion we want removed. Select the wording and rectangle. Do this by holding down Shift and clicking on both to make sure they are selected. Then go to Path > Difference to create the upper partial wording.
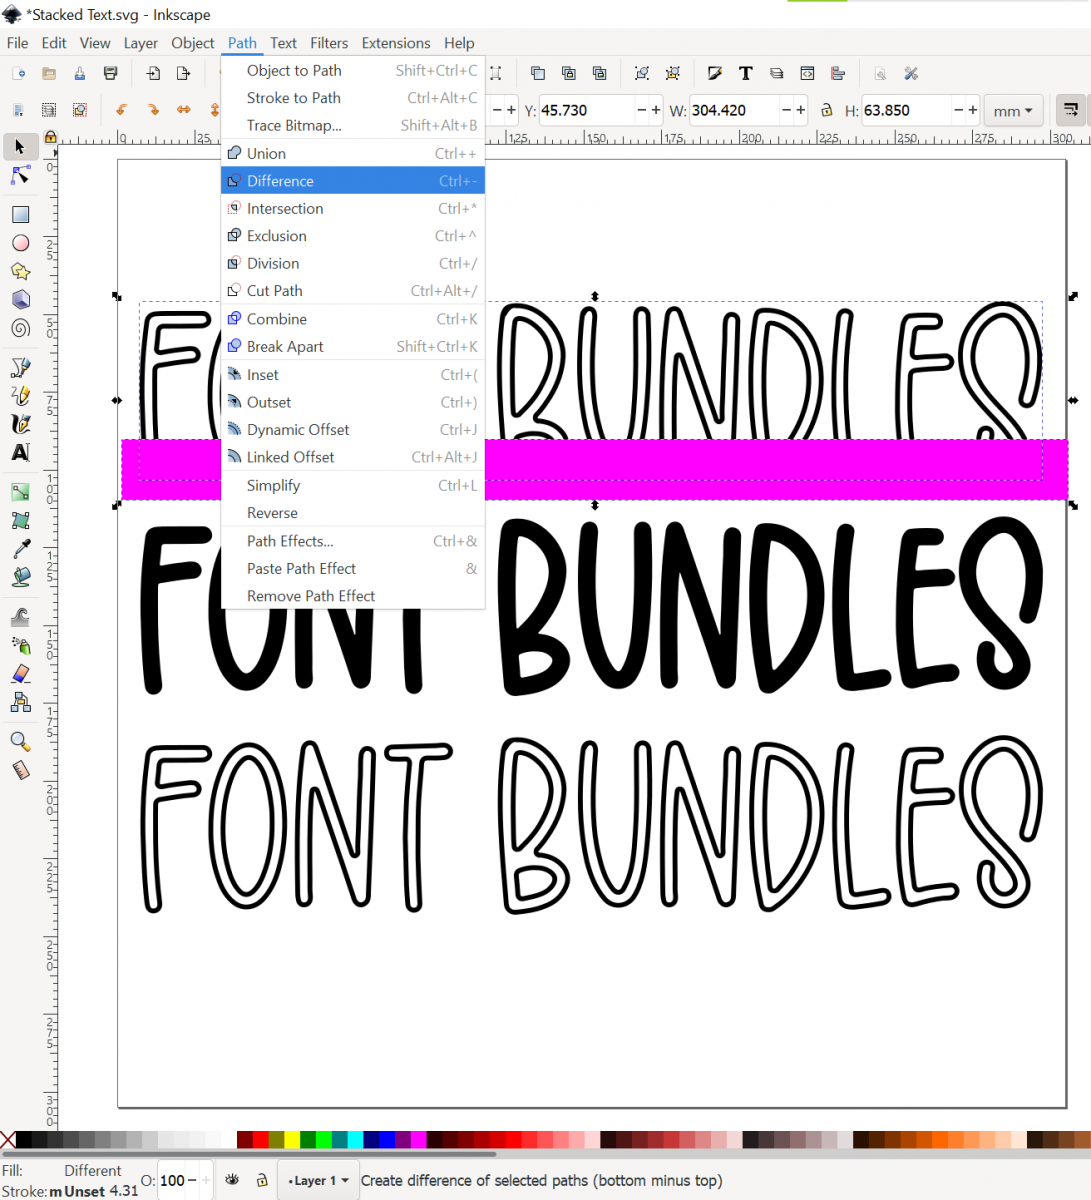
Repeat above steps with the bottom wording
Create another rectangle. Make sure it's on top of the wording and covering the upper portion we want removed. Select the rectangle and the wording beneath it. Then go to Path > Difference to create the partial wording.
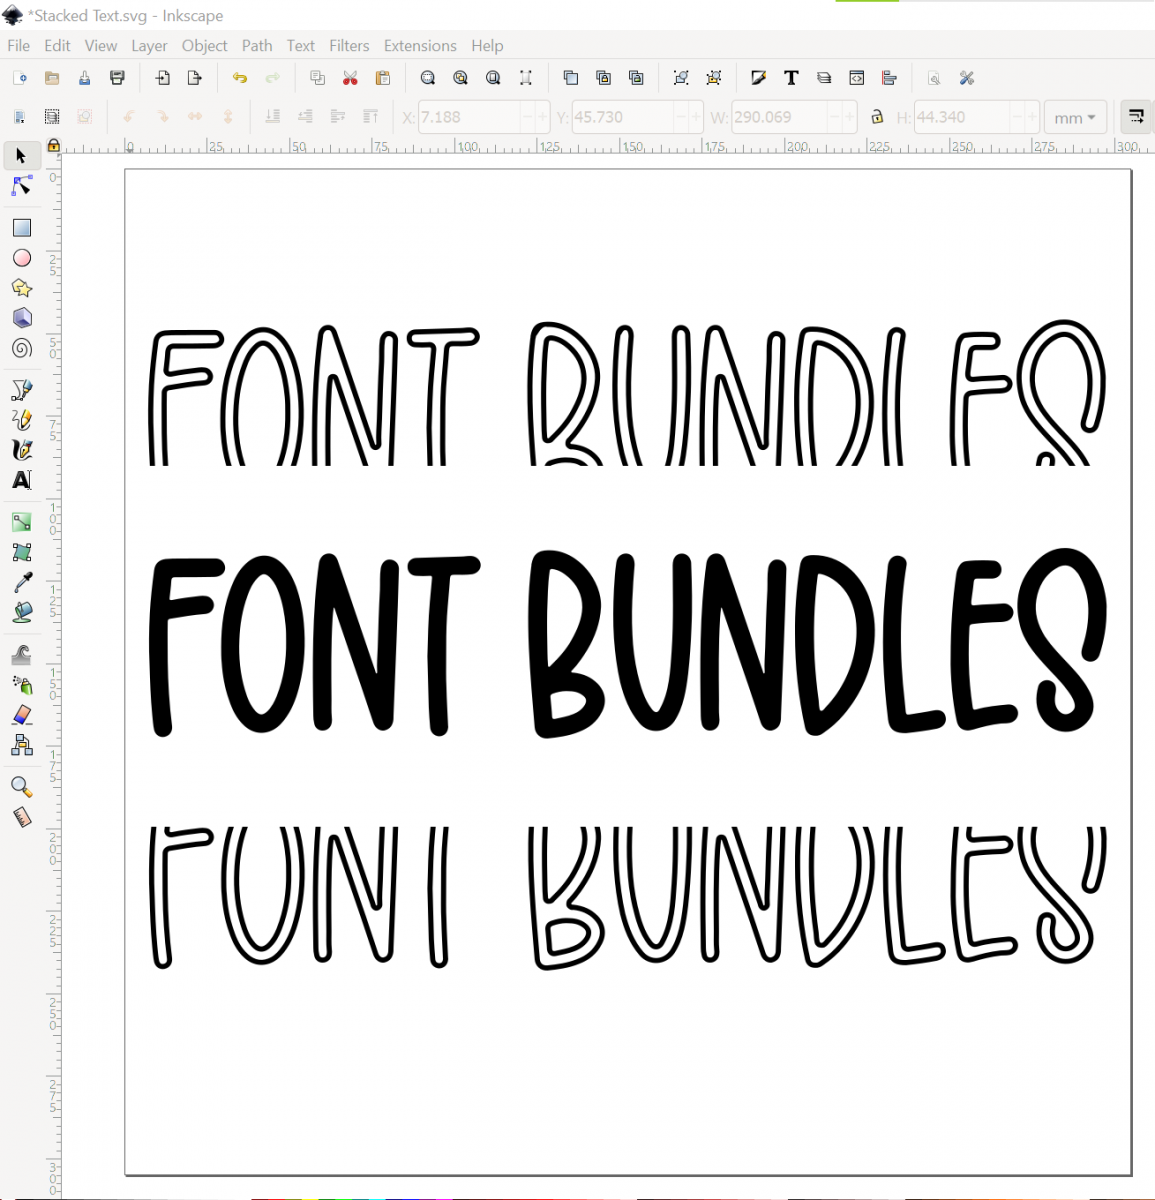
Step 6 - Duplicate top and bottom then align
Select the top wording and duplicate (Ctrl + D). Move the duplicated wording above the original. Select the bottom wording and duplicate (Ctrl + D). Move the duplicated wording below the original.
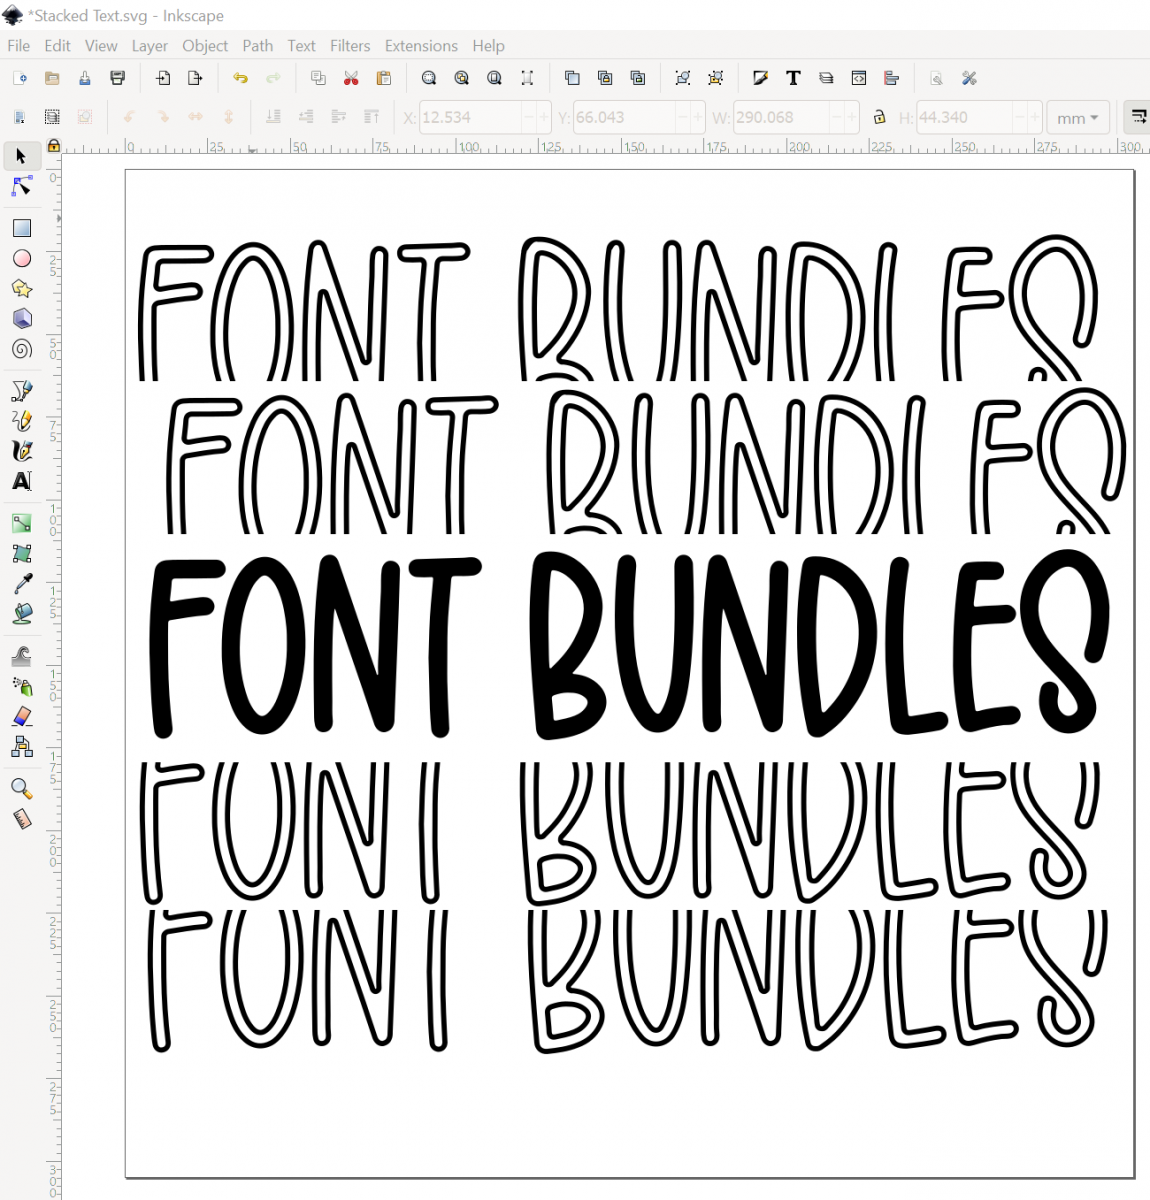
Next, we will use the Align Tool to straighten the wording vertically. Open the Align and Distribute tool by going to Object > Align and Distribute (or use the shortcut Shift + Ctrl + A). Select all 5 sets of wording, then select the align tool for "Center on Vertical Axis". This is so that all the objects (wording) line up vertically.
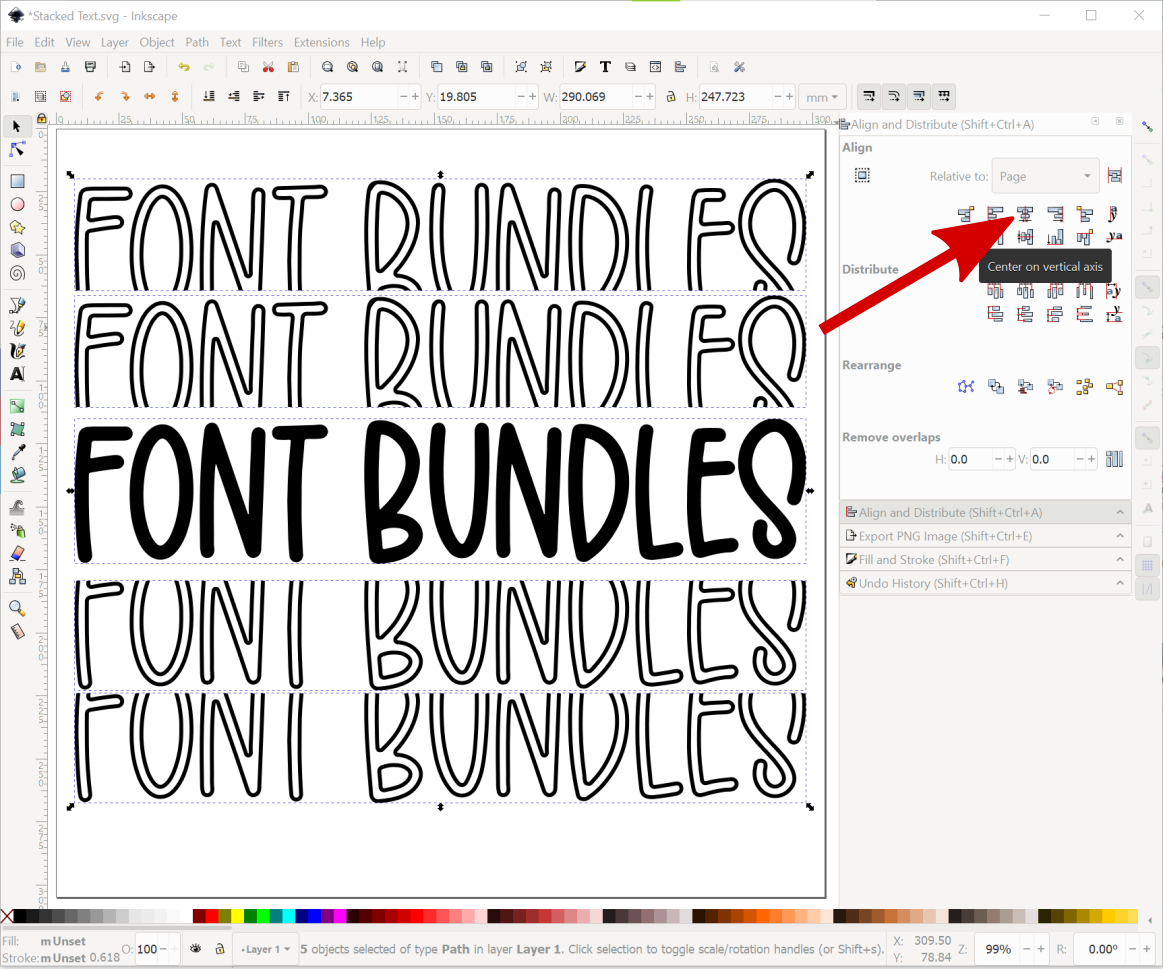
Step 7 - Adjust spacing and use Union
If you want to adjust the spacing between the stacked wording, you can do that at this time. I recommend manually adjusting with your arrow keys to how you want it spaced.
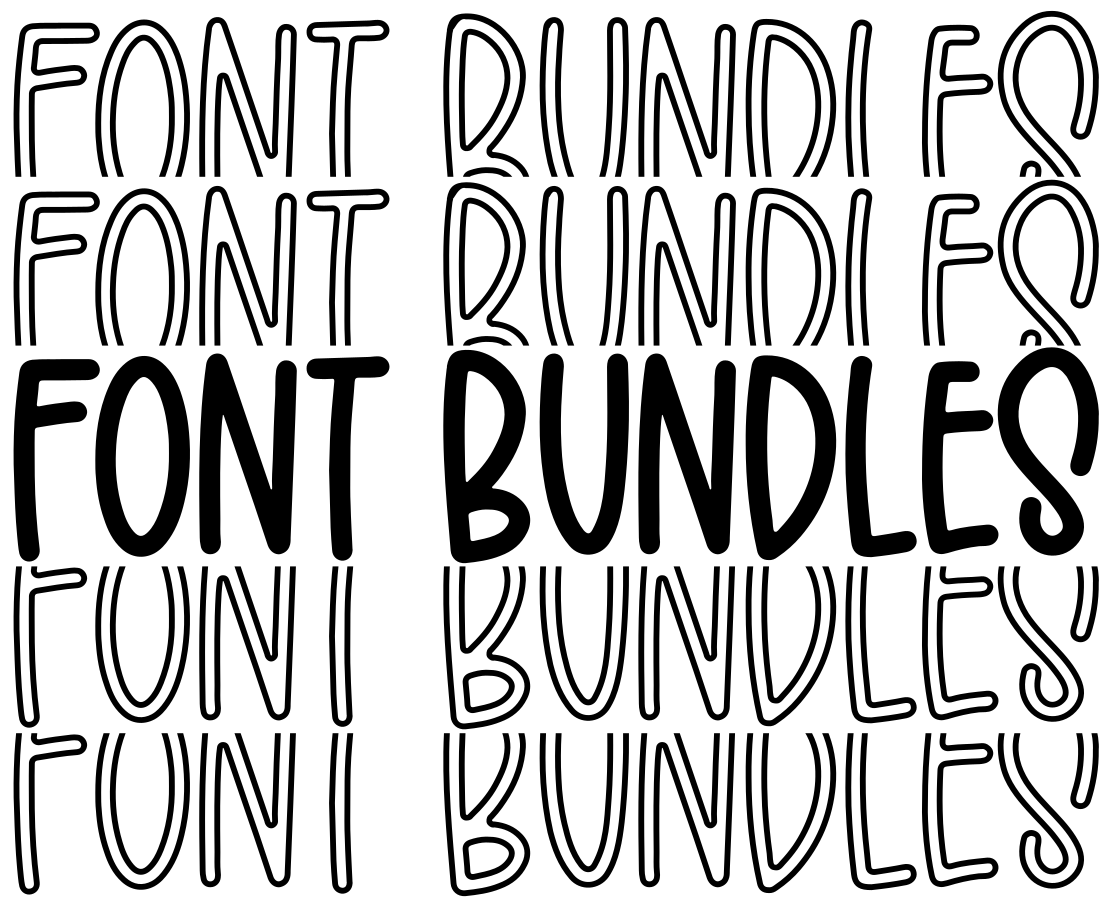
The Union option will be used again to make all items one path. Select all 5 sets of wording and go to Path > Union to make them all one object. This will ensure the stacked font stays lined up when you import it into your cutting machine software.
Next up, check out our other Inkscape tutorials on creating perspective text, adding patterns to text, and creating a long shadow.
Related Tutorials
Inkscape Tutorials
How to Create Decorative Borders in Inkscape
Discover how to create a decorative border with this step-by-step Inkscape tutorial.
Inkscape Tutorials
How to Create and Save Color Palettes in Inkscape
Discover how to create and save color palettes in Inkscape with this tutorial.
Font Tutorials
Accessing Font Glyphs in Inkscape
Font Tutorials
Fixing Font Clipping in Inkscape
In this Inkscape tutorial, we'll show you how you can quickly and easily fix font clipping!
Inkscape Tutorials
How to Create Perspective Text in Inkscape
Add dimension to your design with Perspective Text in Inkscape with this step by step tutorial.
Inkscape Tutorials
How to Create an Offset in Inkscape
If you need a font to be thicker, we'll show you how to create an offset in Inkscape.