By Design Bundles
Marquee Sign Text Effect in Photoshop
For this Tutorial, we are going to use the image of a “Light Bulb”, one that has a “Concrete” Texture, a “Bold” Font of your choice (we used “Blackoack Std”) and some “Spark” and/or “Flare” Brushes.
1 - In Photoshop, create a “New Document” and make sure Black is the color chosen for “Background”.

2 - Click on the small Black and White circular button at the bottom of the “Layers Panel” to create a “New Gradient Fill” layer. Use a “Radial Gradient” with a 90° Angle and a 120% “Scale”. Use the colors #393939 and #191919.


3 - Select the “Type Tool” (T), select your font (we used “Blackoack Std”), and type your text. Set the “Tracking” to 50 in the “Character Panel”. Fill your text with a deep dark red (we used #3f0914).


4 - Duplicate the text layer “Command/Control + J” and double-click on the duplicate to apply the following “Layer Styles”:

Bevel & Emboss: (Gloss Contour: Ring)

Contour: (Contour: Rolling Slope - Descending)

Stroke: (#2b060f)

Inner Shadow:

Drop Shadow:

Click on the “Plus” sign in the “Drop Shadow” tab to add another instance.
Drop Shadow:

5 - Double-click on the original text layer to apply the following “Layer Styles”:
Outer Glow: (#9f9455)

6 - Open the image of your “Light Bulbs”, select the “Elliptical Marquee Tool” and while holding the “Alt/Option” and “Shift” keys click in the center of the bulb and drag out to make a circle as big as your bulb.


7 - “Copy” and “Paste” it (Command/Control + C and Command/Control + V) into your original document. Name it “Bulb On”, do the same with a bulb that is not working and name it “Bulb Off”.

8 - Use “Free Transform” (Command/Control + T) to resize your bulbs to the proper size. Duplicate them (Command/Control + J) and place as many as you can, lined inside your letters. Don’t forget to add a few “Off” Bulbs. Do this with all your letters.


9 - Once you are done, select all your “Bulbs On” (use the “Shift” key) and click on the small “Folder” button at the bottom of the “Layers Panel” to create a “Group”, name it “Bulbs On” and do the same for the “Bulbs Off”. To make it easier to select some specific bulb check the “Auto-Select” box on the Top Menu and choose “Layer”.


10 - Double-click one of your “Bulbs On” and apply the following “Layer Styles”:
Inner Shadow: (#b8a23d)

Inner Glow: (#f7e26b)

Outer Glow: (#eec710, Contour: Rolling Slope - Descending)

Drop Shadow: (#eec710)

11 - Right-click on to top of its Thumbnail and choose “Copy Layer Style”, select the other layers, right-click on top of their Thumbnails and choose “Paste Layer Style”.


12 - Double-click one of your “Bulbs On” and change some values on the following tabs in the “Layer Styles”:
Outer Glow: (#eec710, Contour: Rolling Slope - Descending)

Drop Shadow: (#eec710)

“Copy” that “Layer Style”, select some of your bulbs and “Paste” to them.

13 - Go to the “Adjustments Panel” and create a “New Hue/Saturation Adjustment Layer” on top of everything using the following values:


14 - Open the file that has the “Concrete” texture and drag it into your file, place it on top of the “Background” and “Gradient Fill” Layers. Use “Free Transform” (Command/Control + T) to resize it if needed. Name it “Grunge”.


15 - Select the folder containing the “Bulbs On”, right-click on top of its Thumbnail and choose “Convert to Smart Object”. Do the same with the one containing the “Bulbs Off”.

16 - Select the “Brush Tool” (B), click on the small gear shaped Menu icon on the Top-right of the “Brushes Panel” and choose “Load Brushes” and navigate to where you saved the brushes you want to use. Select the .abr file and click “Open”.


17 - Create a “New Layer”, place it between the two “Bulb” layers, change the “Blending Mode” to “Soft Light” and name it “Flares”.

18 - Select one of the “Brushes” you just loaded, change the size to fit your work and use #d39202 as “Foreground” color. Paint some bursts of light on top of your letters. Change sizes and brushes until you are happy with the results.


19 - Go to the “Adjustments Panel” and create a “Gradient Map Adjustment Layer” on top of everything using the following colors: #d8a785 and # 927678 and check the “Reverse” box. Change the “Blending Mode” to “Soft Light” and the “Opacity” to 50%.


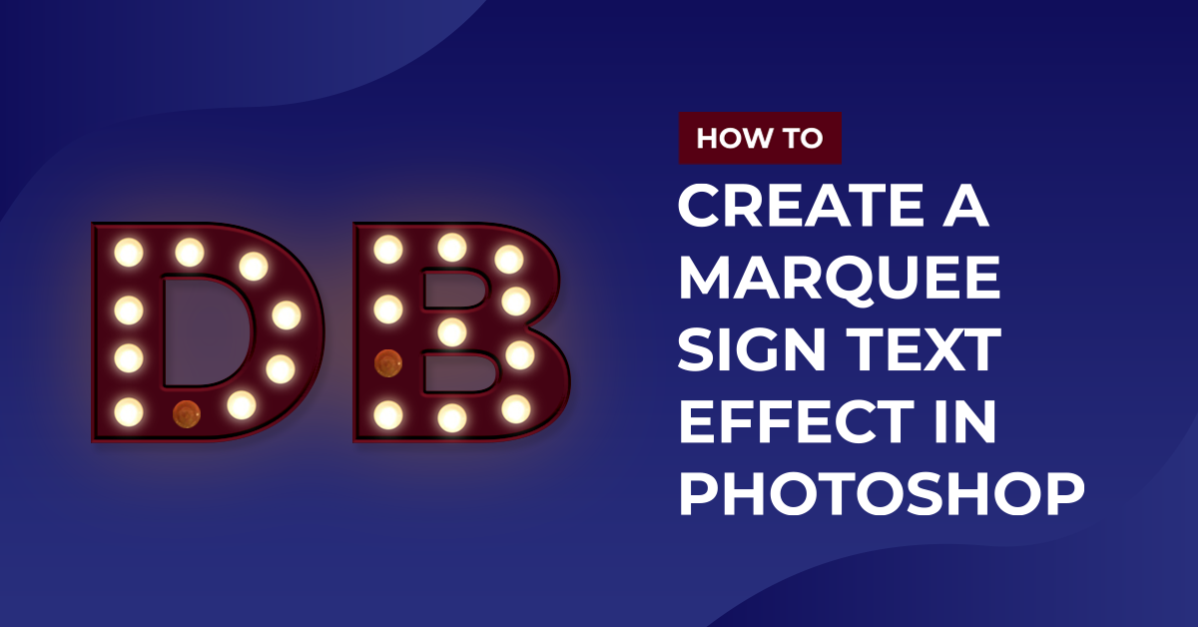
20 - Your text should look similar to this.

by @lornacane