By Design Bundles
Photoshop Tutorials7 min
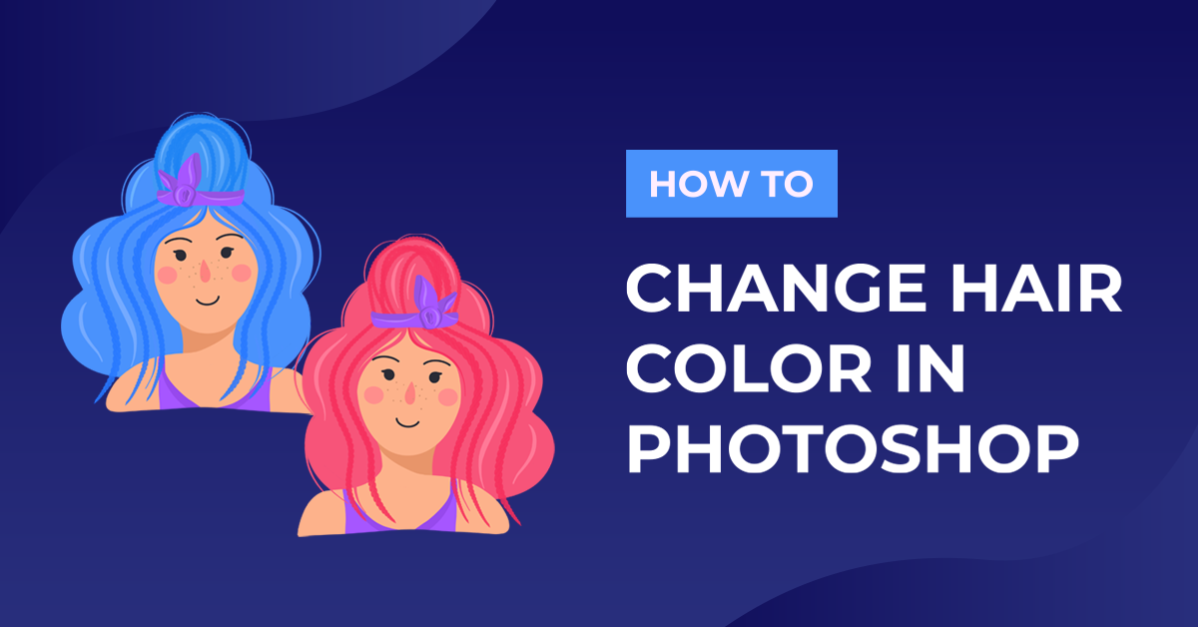
How to Change Hair Color in Photoshop
For this tutorial, I will be using a woman with dark hair stock photo. The effect will work better if the image you chose has a clear and/or even background.
Open the image you’ve chosen to work with. Then use the magnetic lasso tool (W) and start by clicking just outside the hair to create a selection around it.
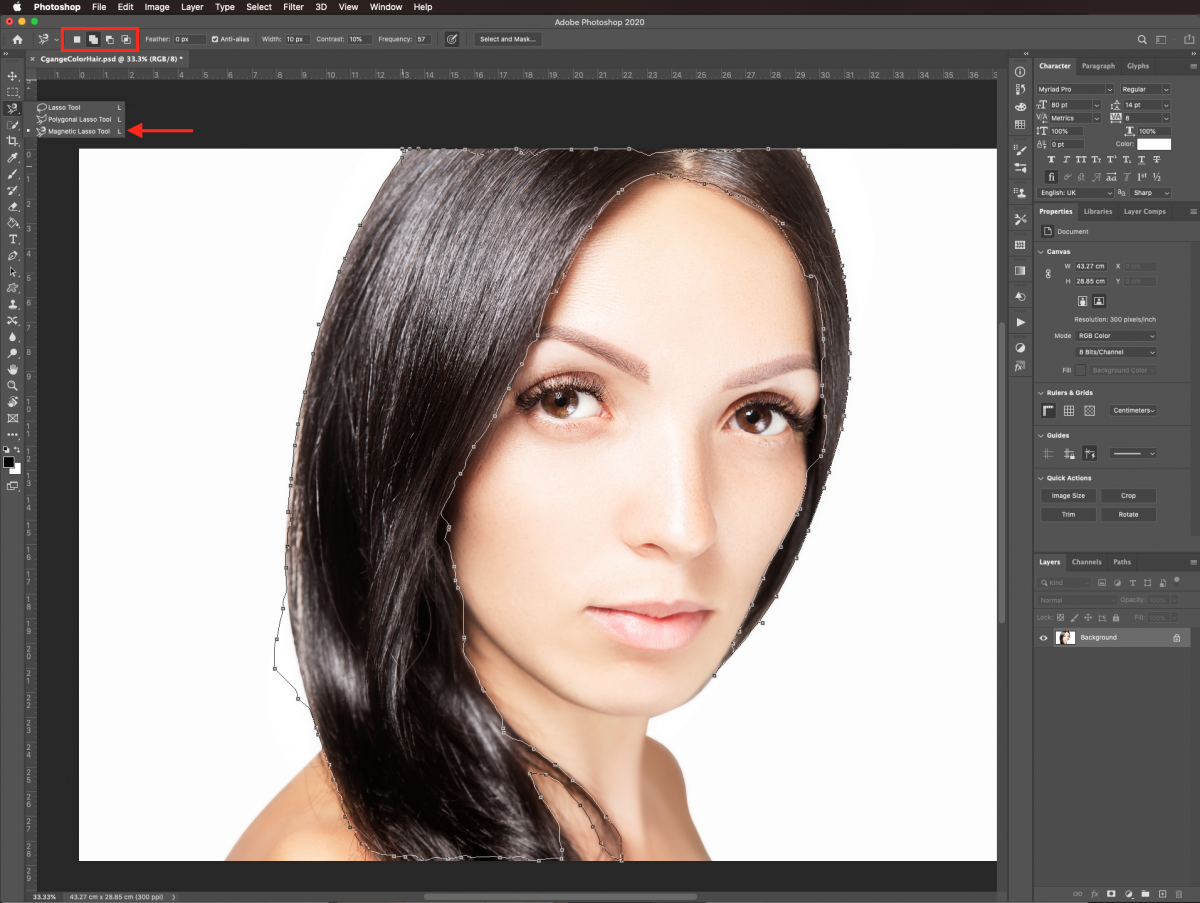
Change the size of the brush and use the add and/or subtract from selection options if needed. The selection does not need to be perfect.
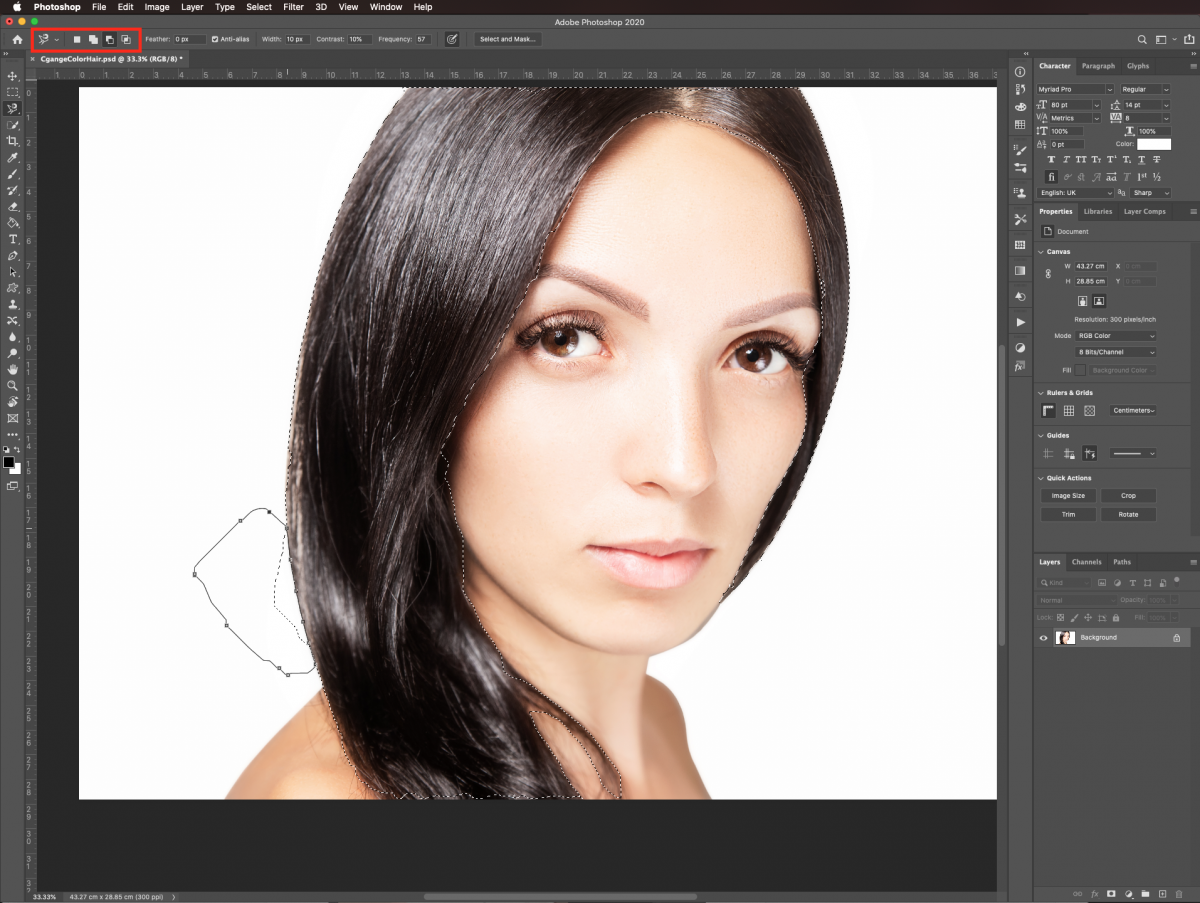
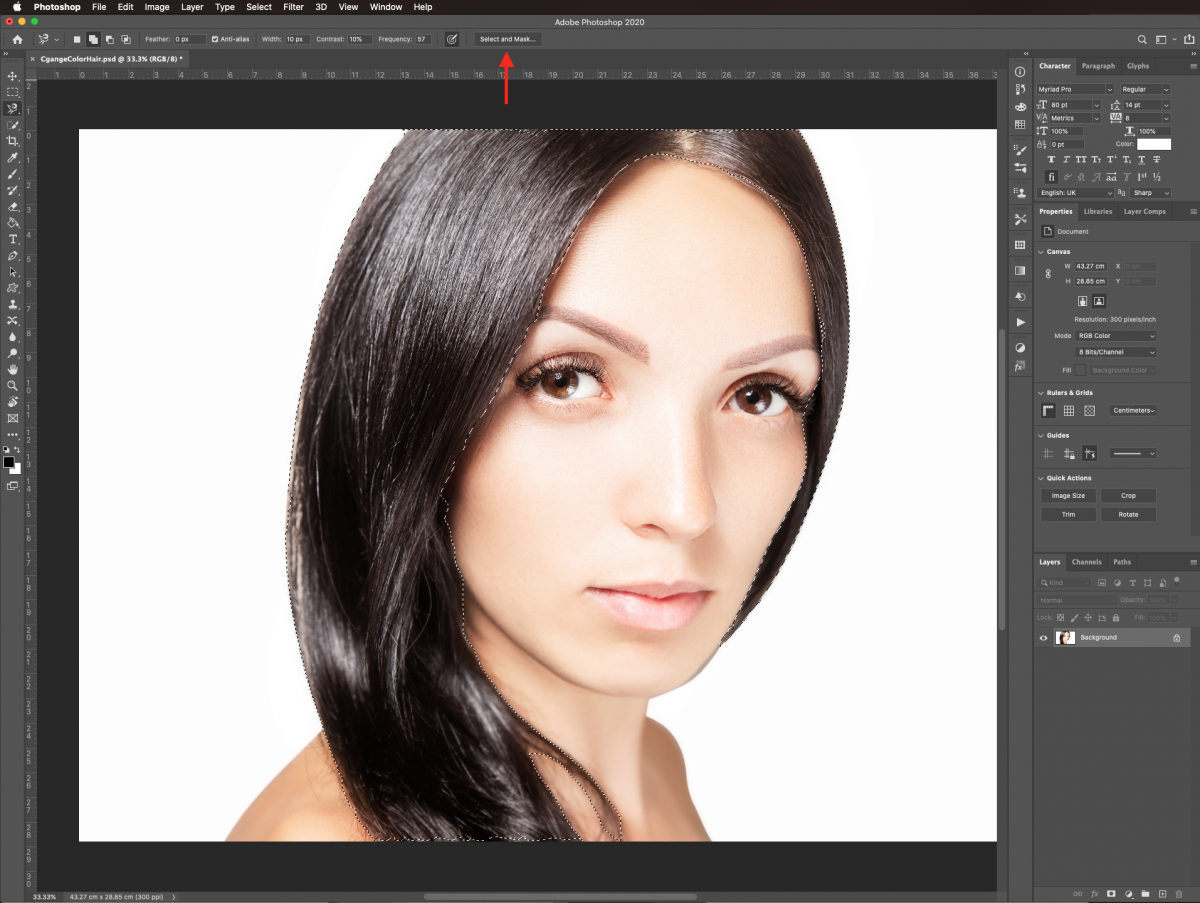
Click on the select and mask button on the top menu. For a more detailed explanation on how to create and refine the selection with the mask check our tutorial on how to smooth the mask edges.
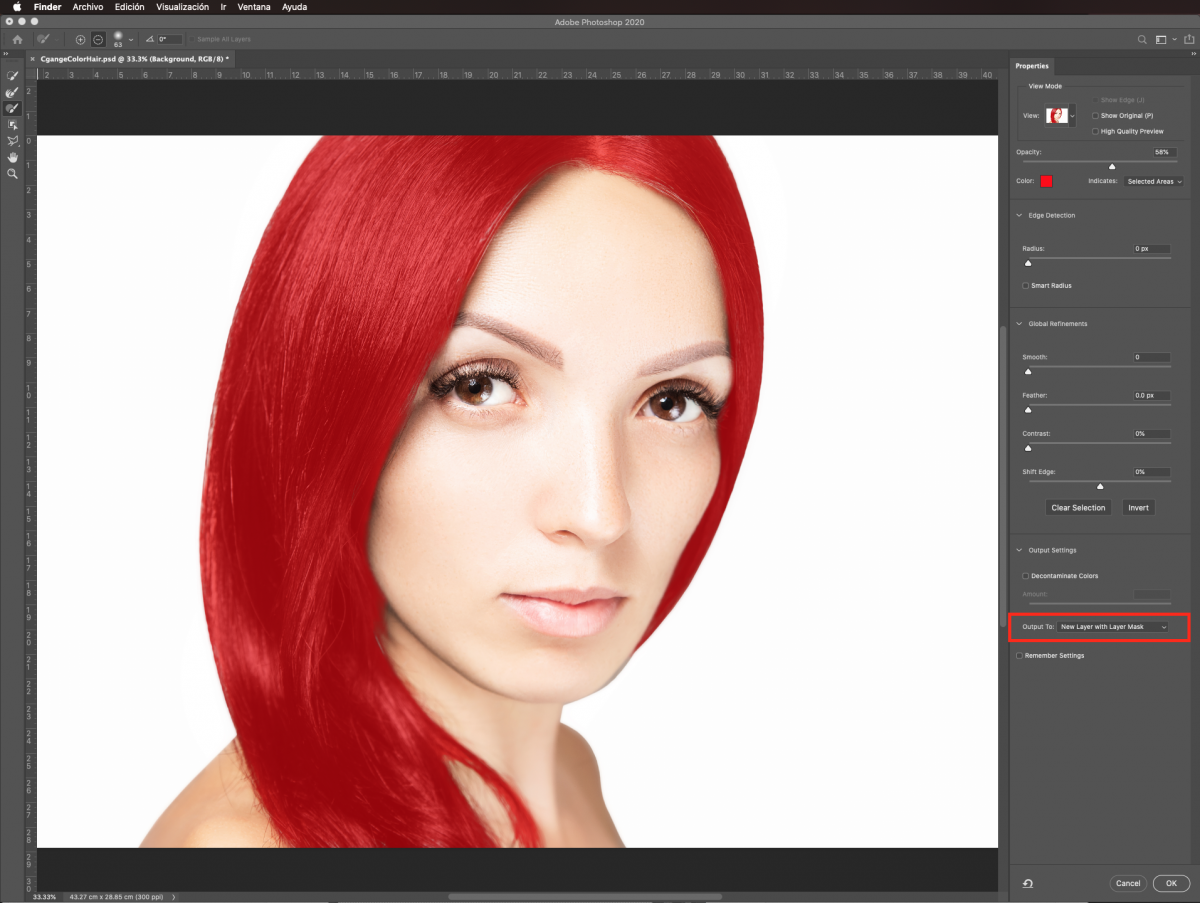
Once you are finished creating the mask, select output to new layer with mask once you are done and click ok.
Select the bottom layer and then create a new layer on top by clicking on the small button at the bottom of the layers panel.
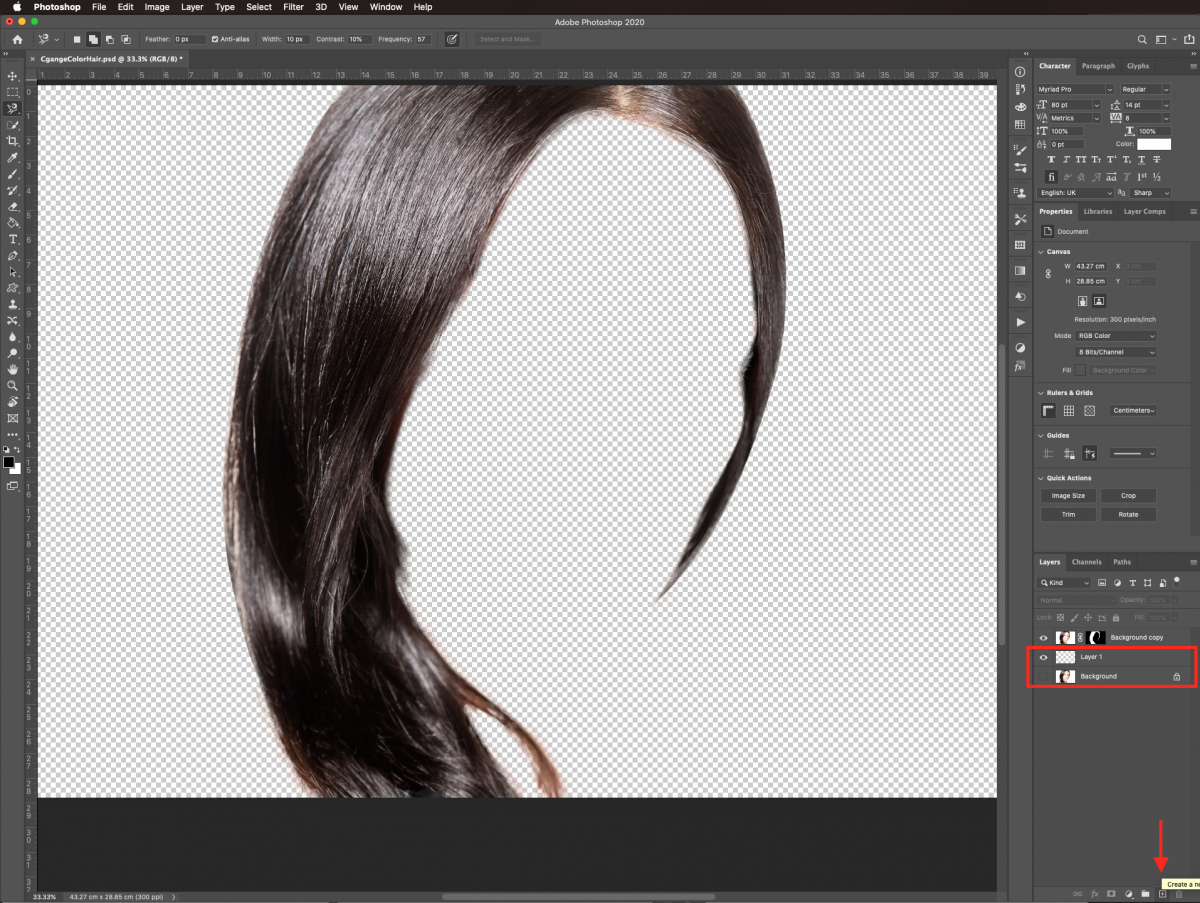
Fill it with black using the paint bucket tool (B) and make sure black is your foreground color before clicking on it.
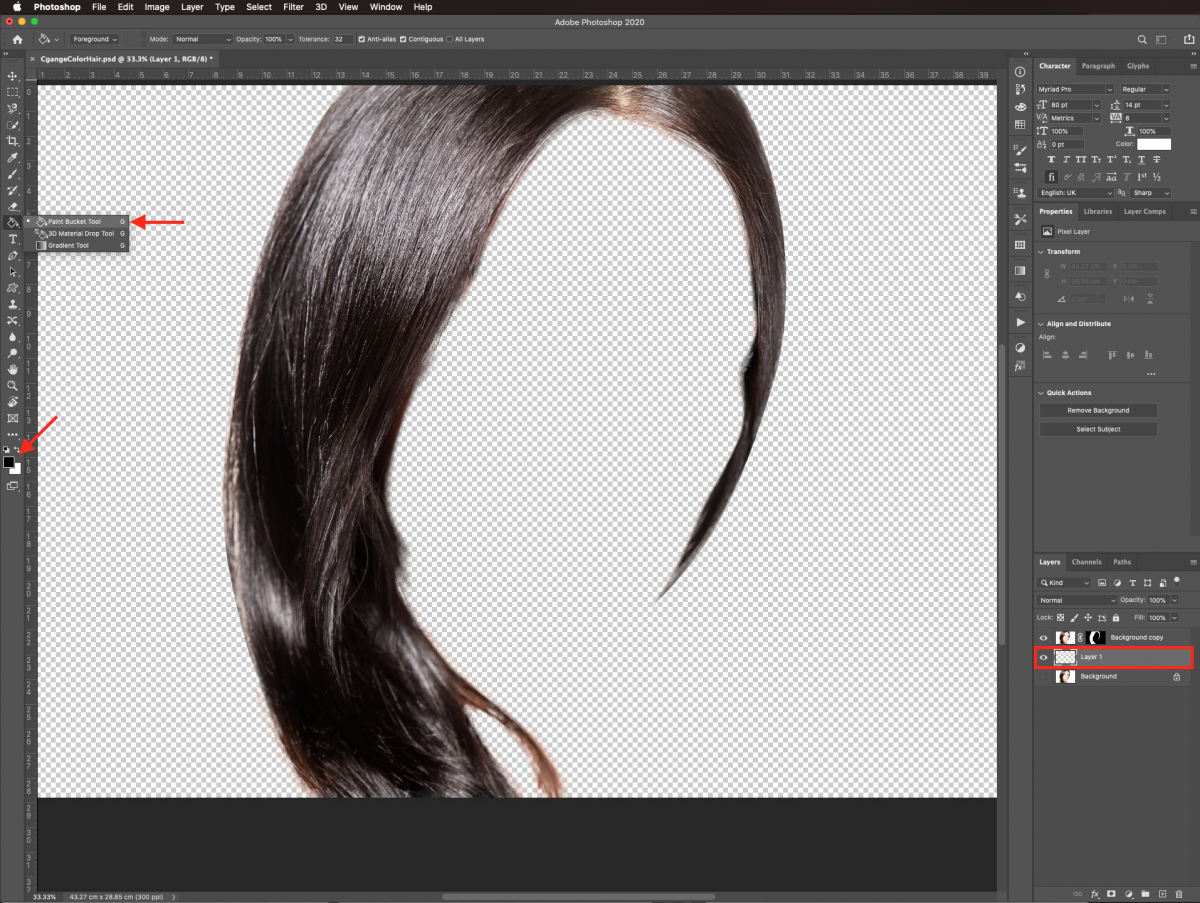
Make the background layer visible and lower the opacity of the black layer so you can see through a bit.
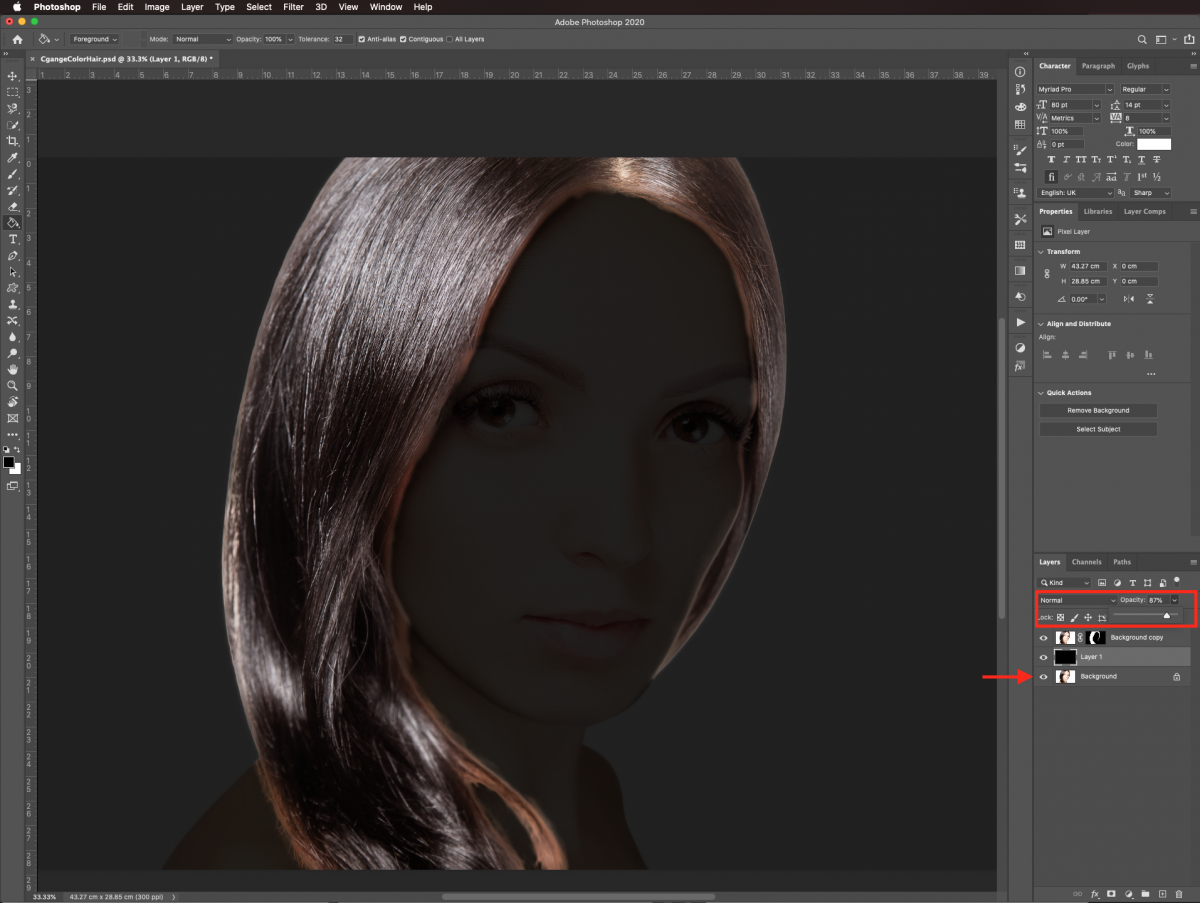
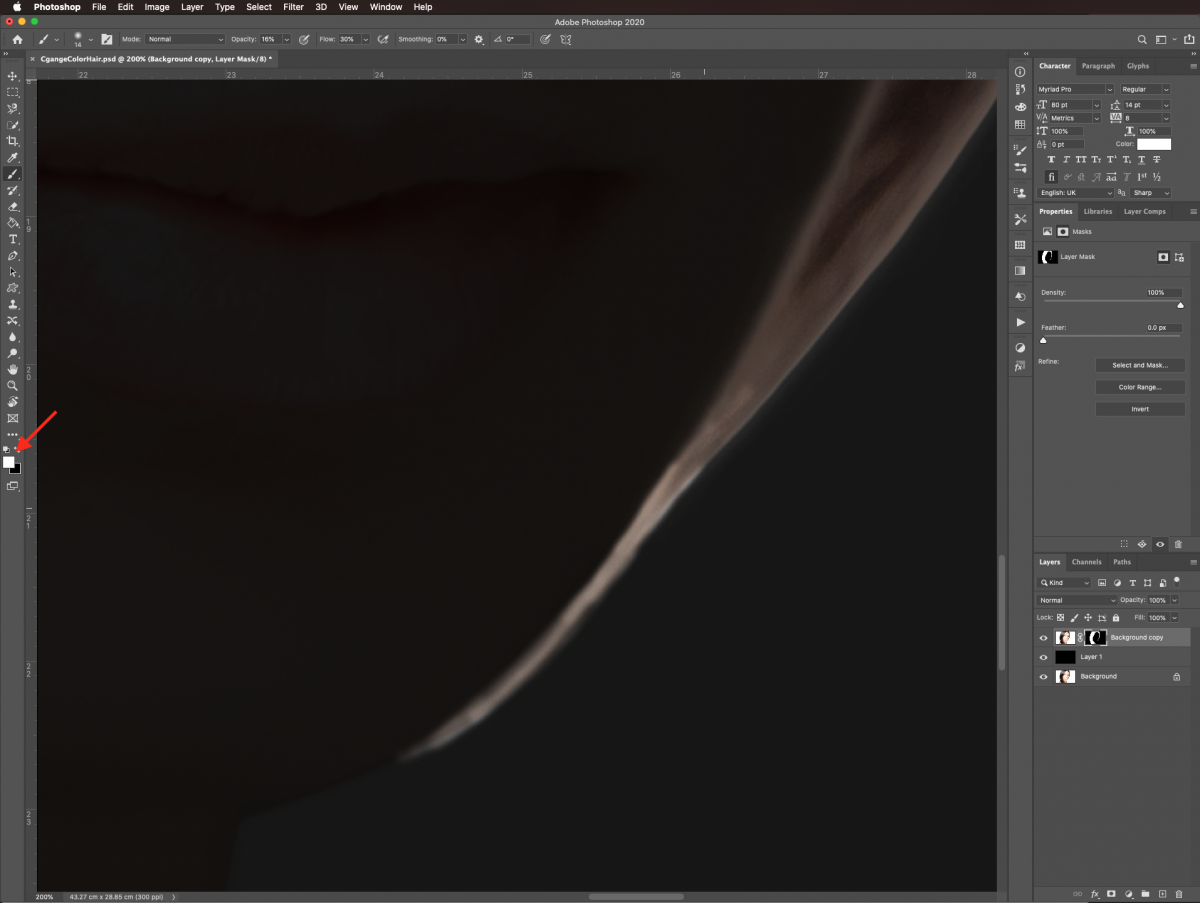
Make sure the mask thumbnail is selected and then, with the brush tool (B) and using a smooth brush with a very low flow (30%), smooth the edges of the hair.
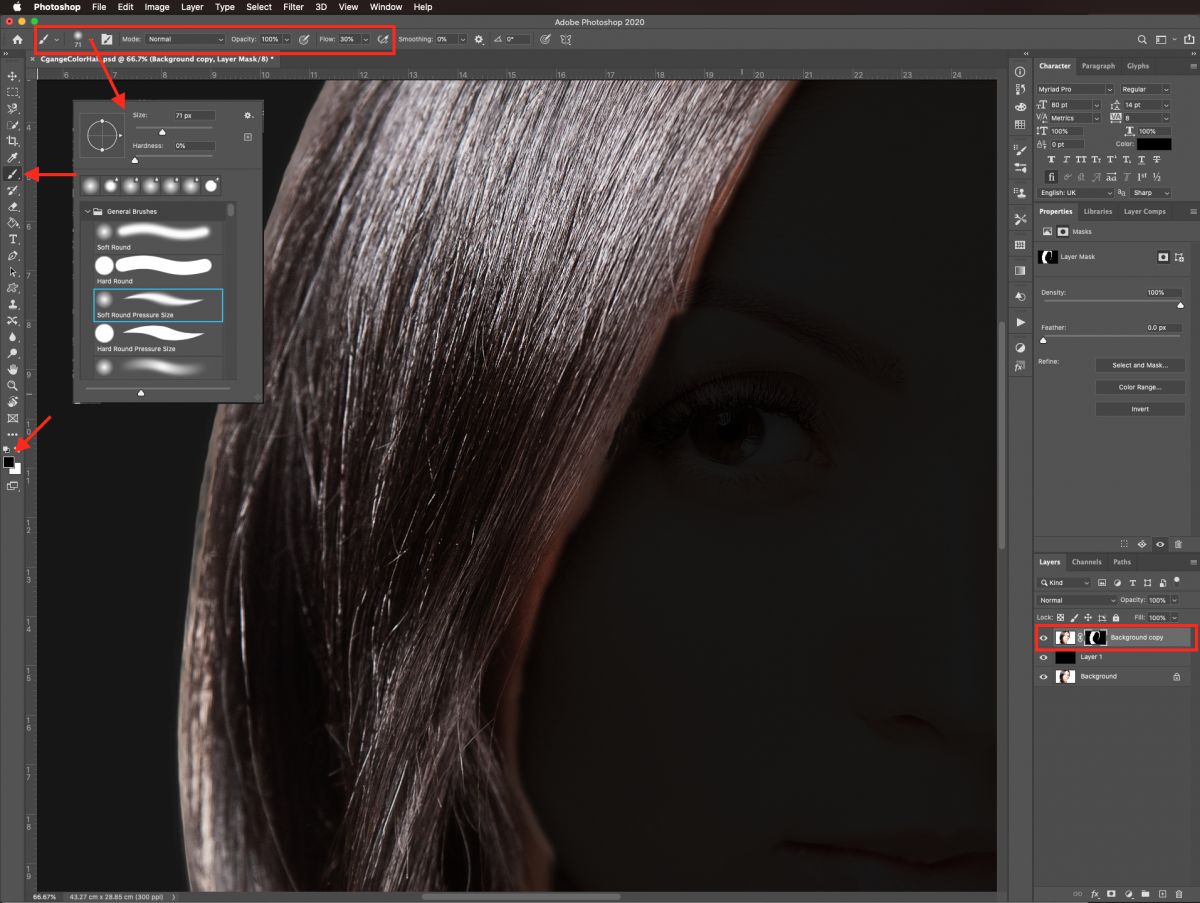
Use white to add to the selection and black to subtract from it.
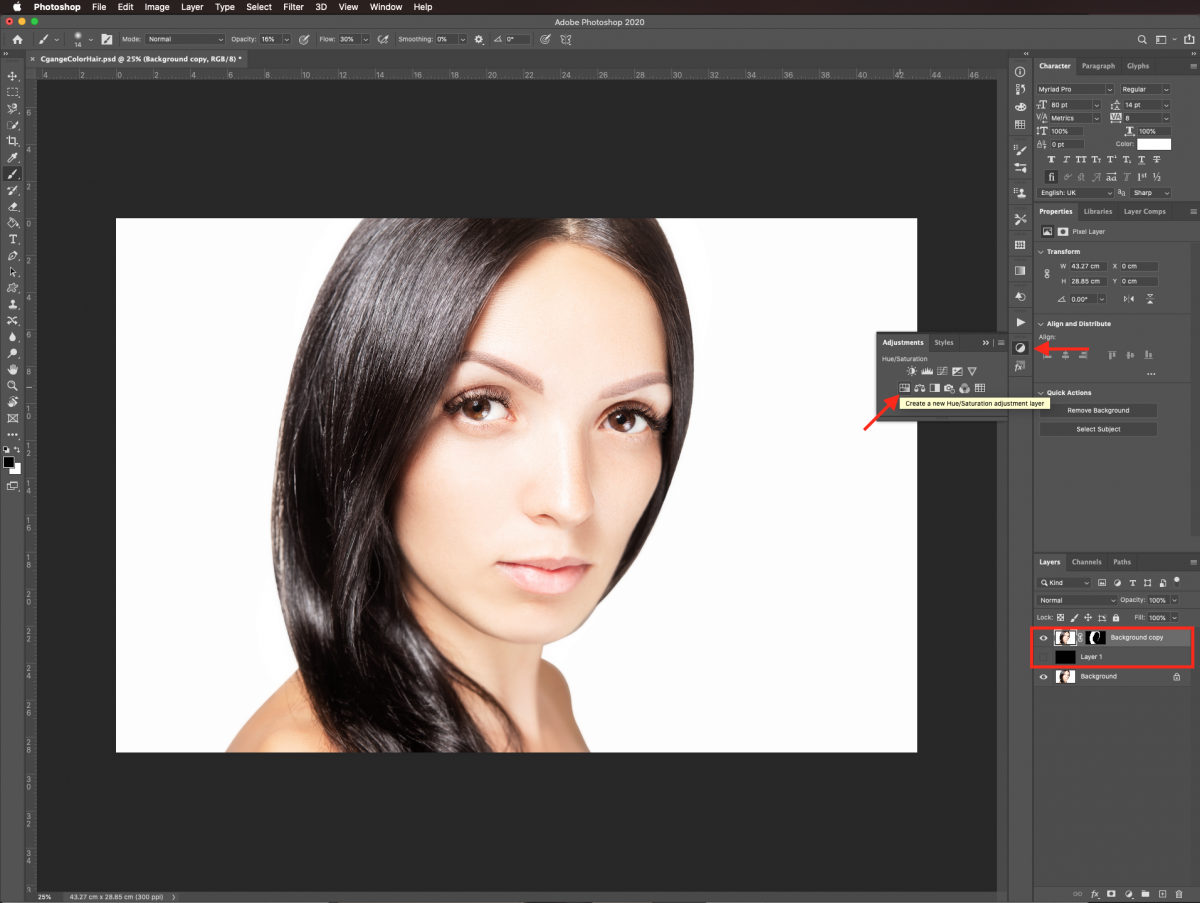
Turn off the black layer and create a new hue/saturation adjustment layer on top of everything.
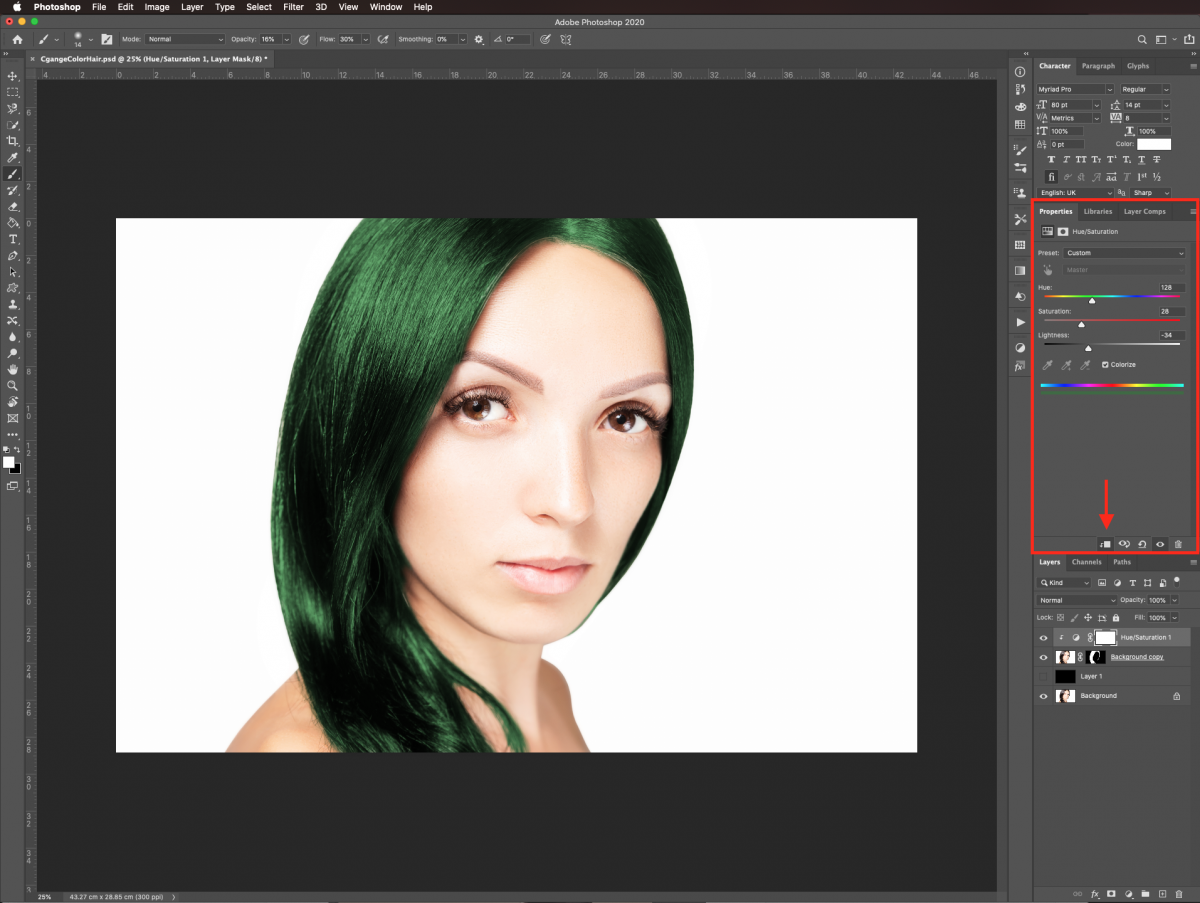
Clip it to the hair layer by clicking on the small button at the bottom of the adjustments panel, check the colorize box and move the hue, saturation, and lightness levers until you get the desired color.
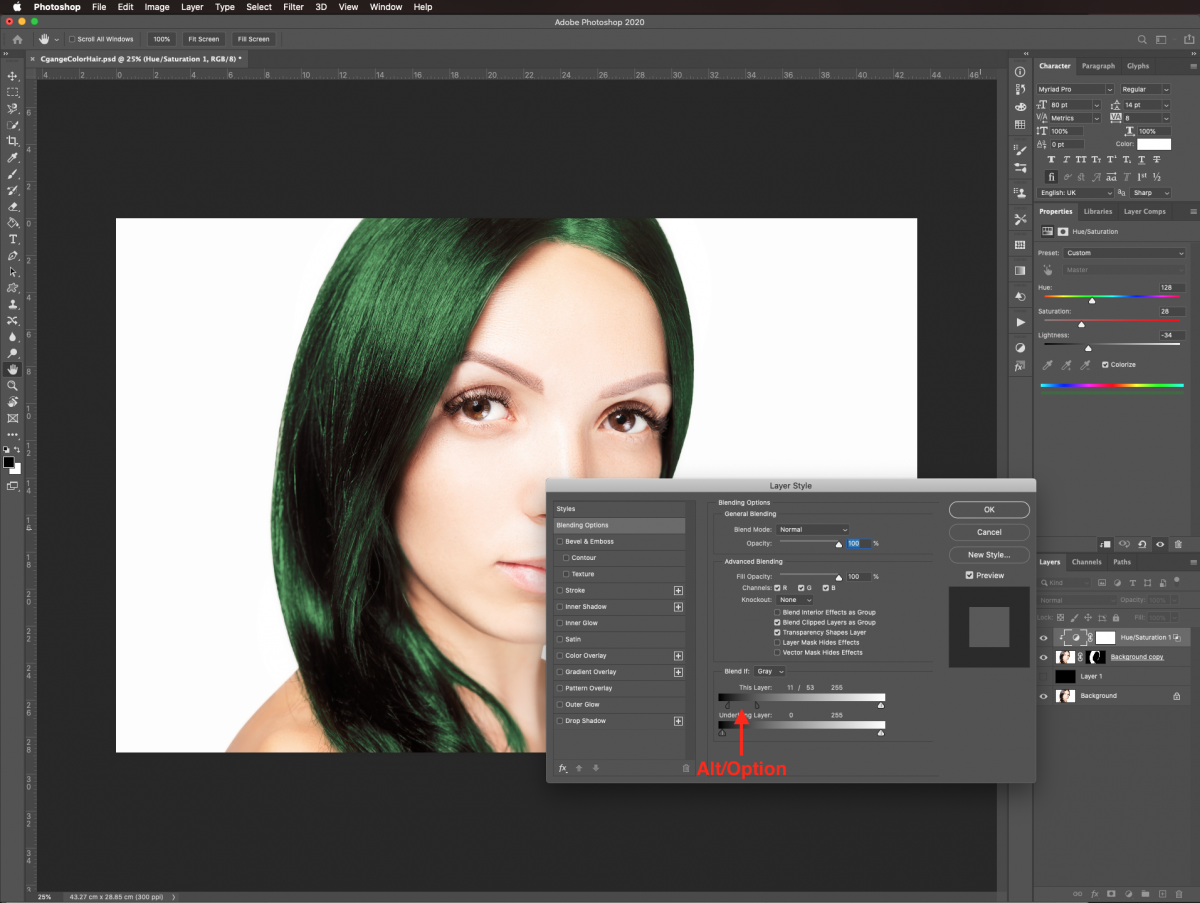
Double-click in the hue/saturation layer thumbnail to open the layer style window and, in the blending options tab head to the blend if gray section and move the black lever slightly to the right.
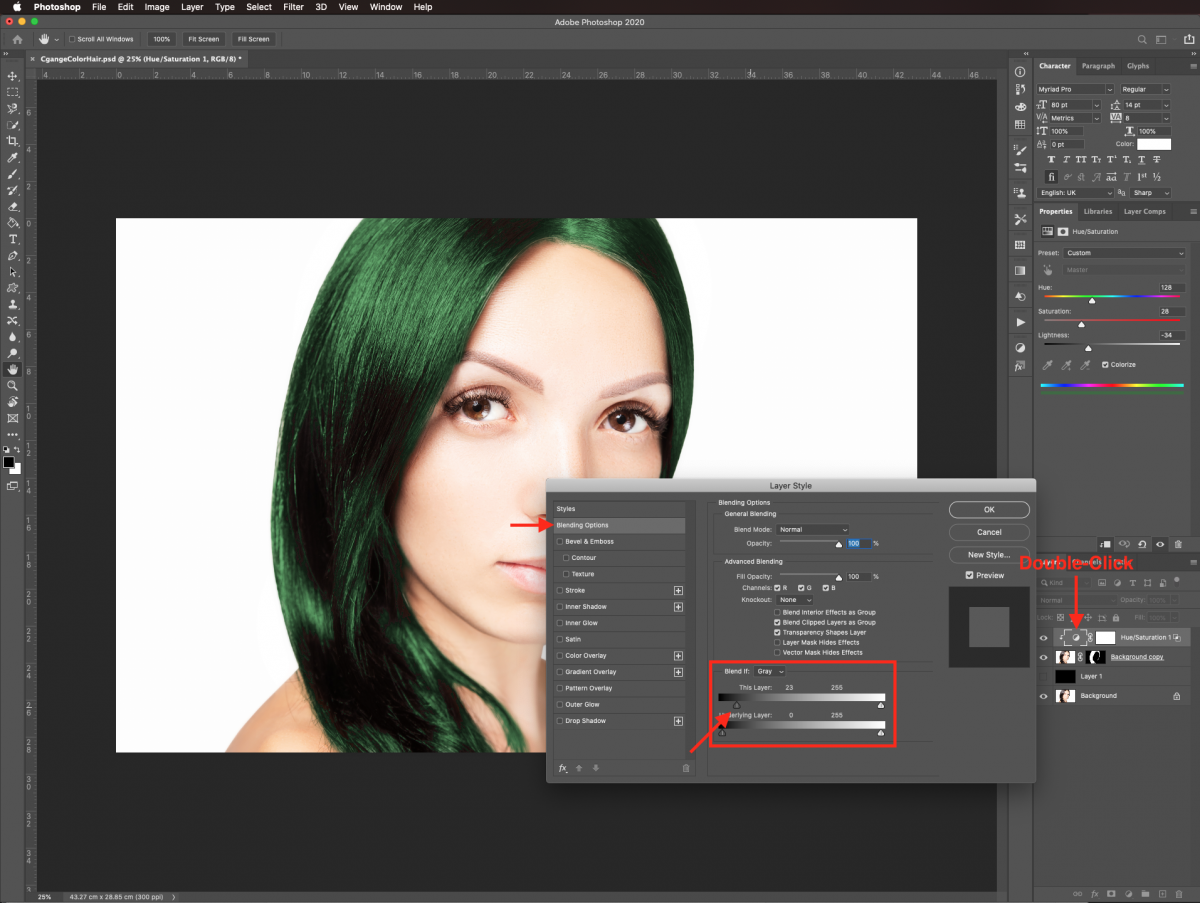
Option/alt-click on top of the lever to divide it and play around with it to achieve a smoother transition.
Check it out!
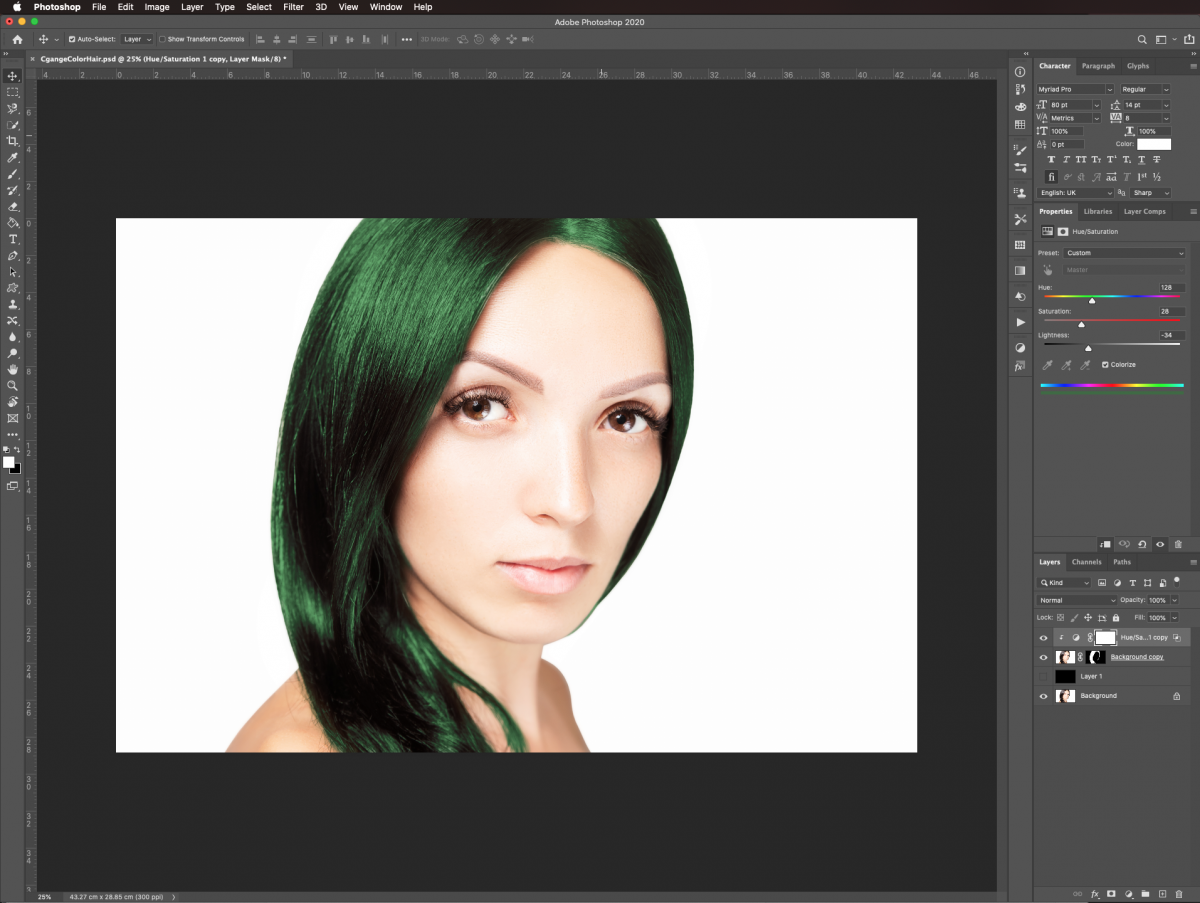
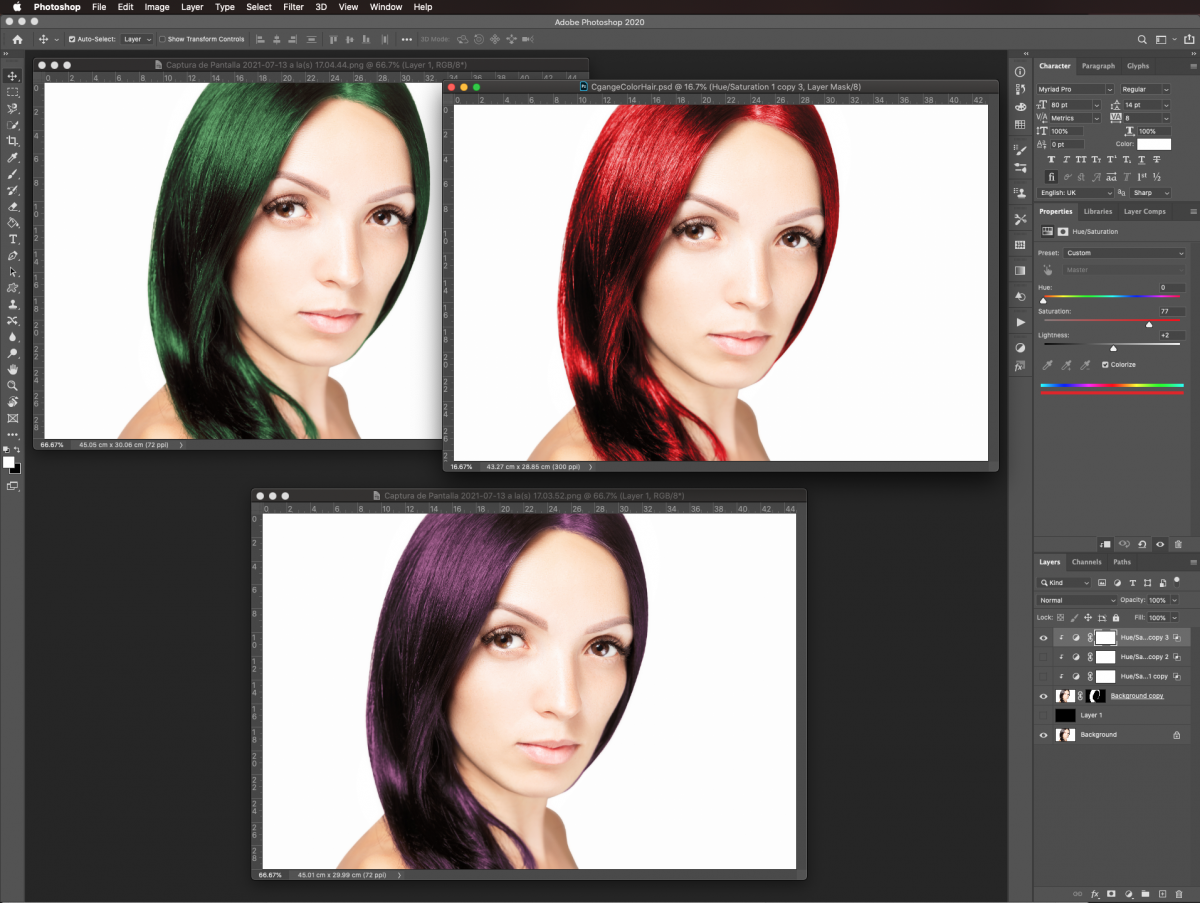
You can adjust the values of the hue/saturation layer to change the color. Or maybe create some duplicates with different colors.
If you liked this tutorial make sure to check out our guide on retouching skin in Photoshop.
Step 1: Select the hair
Open the image you’ve chosen to work with. Then use the magnetic lasso tool (W) and start by clicking just outside the hair to create a selection around it.
Change the size of the brush and use the add and/or subtract from selection options if needed. The selection does not need to be perfect.
Step 3: Mask your selection
Click on the select and mask button on the top menu. For a more detailed explanation on how to create and refine the selection with the mask check our tutorial on how to smooth the mask edges.
Once you are finished creating the mask, select output to new layer with mask once you are done and click ok.
Step 4: Create a contrast layer
Select the bottom layer and then create a new layer on top by clicking on the small button at the bottom of the layers panel.
Fill it with black using the paint bucket tool (B) and make sure black is your foreground color before clicking on it.
Step 5: Refine the hair edges
Make the background layer visible and lower the opacity of the black layer so you can see through a bit.
Make sure the mask thumbnail is selected and then, with the brush tool (B) and using a smooth brush with a very low flow (30%), smooth the edges of the hair.
Use white to add to the selection and black to subtract from it.
Step 6: Change the hair color
Turn off the black layer and create a new hue/saturation adjustment layer on top of everything.
Clip it to the hair layer by clicking on the small button at the bottom of the adjustments panel, check the colorize box and move the hue, saturation, and lightness levers until you get the desired color.
Step 7: Adjust the color using blending modes
Double-click in the hue/saturation layer thumbnail to open the layer style window and, in the blending options tab head to the blend if gray section and move the black lever slightly to the right.
Option/alt-click on top of the lever to divide it and play around with it to achieve a smoother transition.
Check it out!
You can adjust the values of the hue/saturation layer to change the color. Or maybe create some duplicates with different colors.
If you liked this tutorial make sure to check out our guide on retouching skin in Photoshop.
Related Tutorials
Photoshop Tutorials
How to Change Eye Color in Photoshop
Learn how to change eye color in Photoshop with this quick tutorial.
Photoshop Tutorials
How to Change Text Color in Photoshop
Photoshop Tutorials
How to Change Colors of Objects in Photoshop
Canva Tutorials
How to Change the Color of a Logo in Canva
In today's tutorial, we will show you how to change the color of a logo in Canva.
Photoshop Tutorials
How to Change Pattern of Clothes in Photoshop
Discover how to change or add patterns to clothing in Photoshop.
DesignScape Tutorials
How to Change Your Design Color in DesignScape
Discover how to quickly and easily change your design color in DesignScape.