By Design Bundles
Photoshop Tutorials7 min
Colored Light Text in Photoshop
For this tutorial, we will the Font “Morning Sunset” from Fontbundles.com (https://fontbundles.net/geekmissy/7493-morning-sunset) and some “Star Brushes” to add some flair.
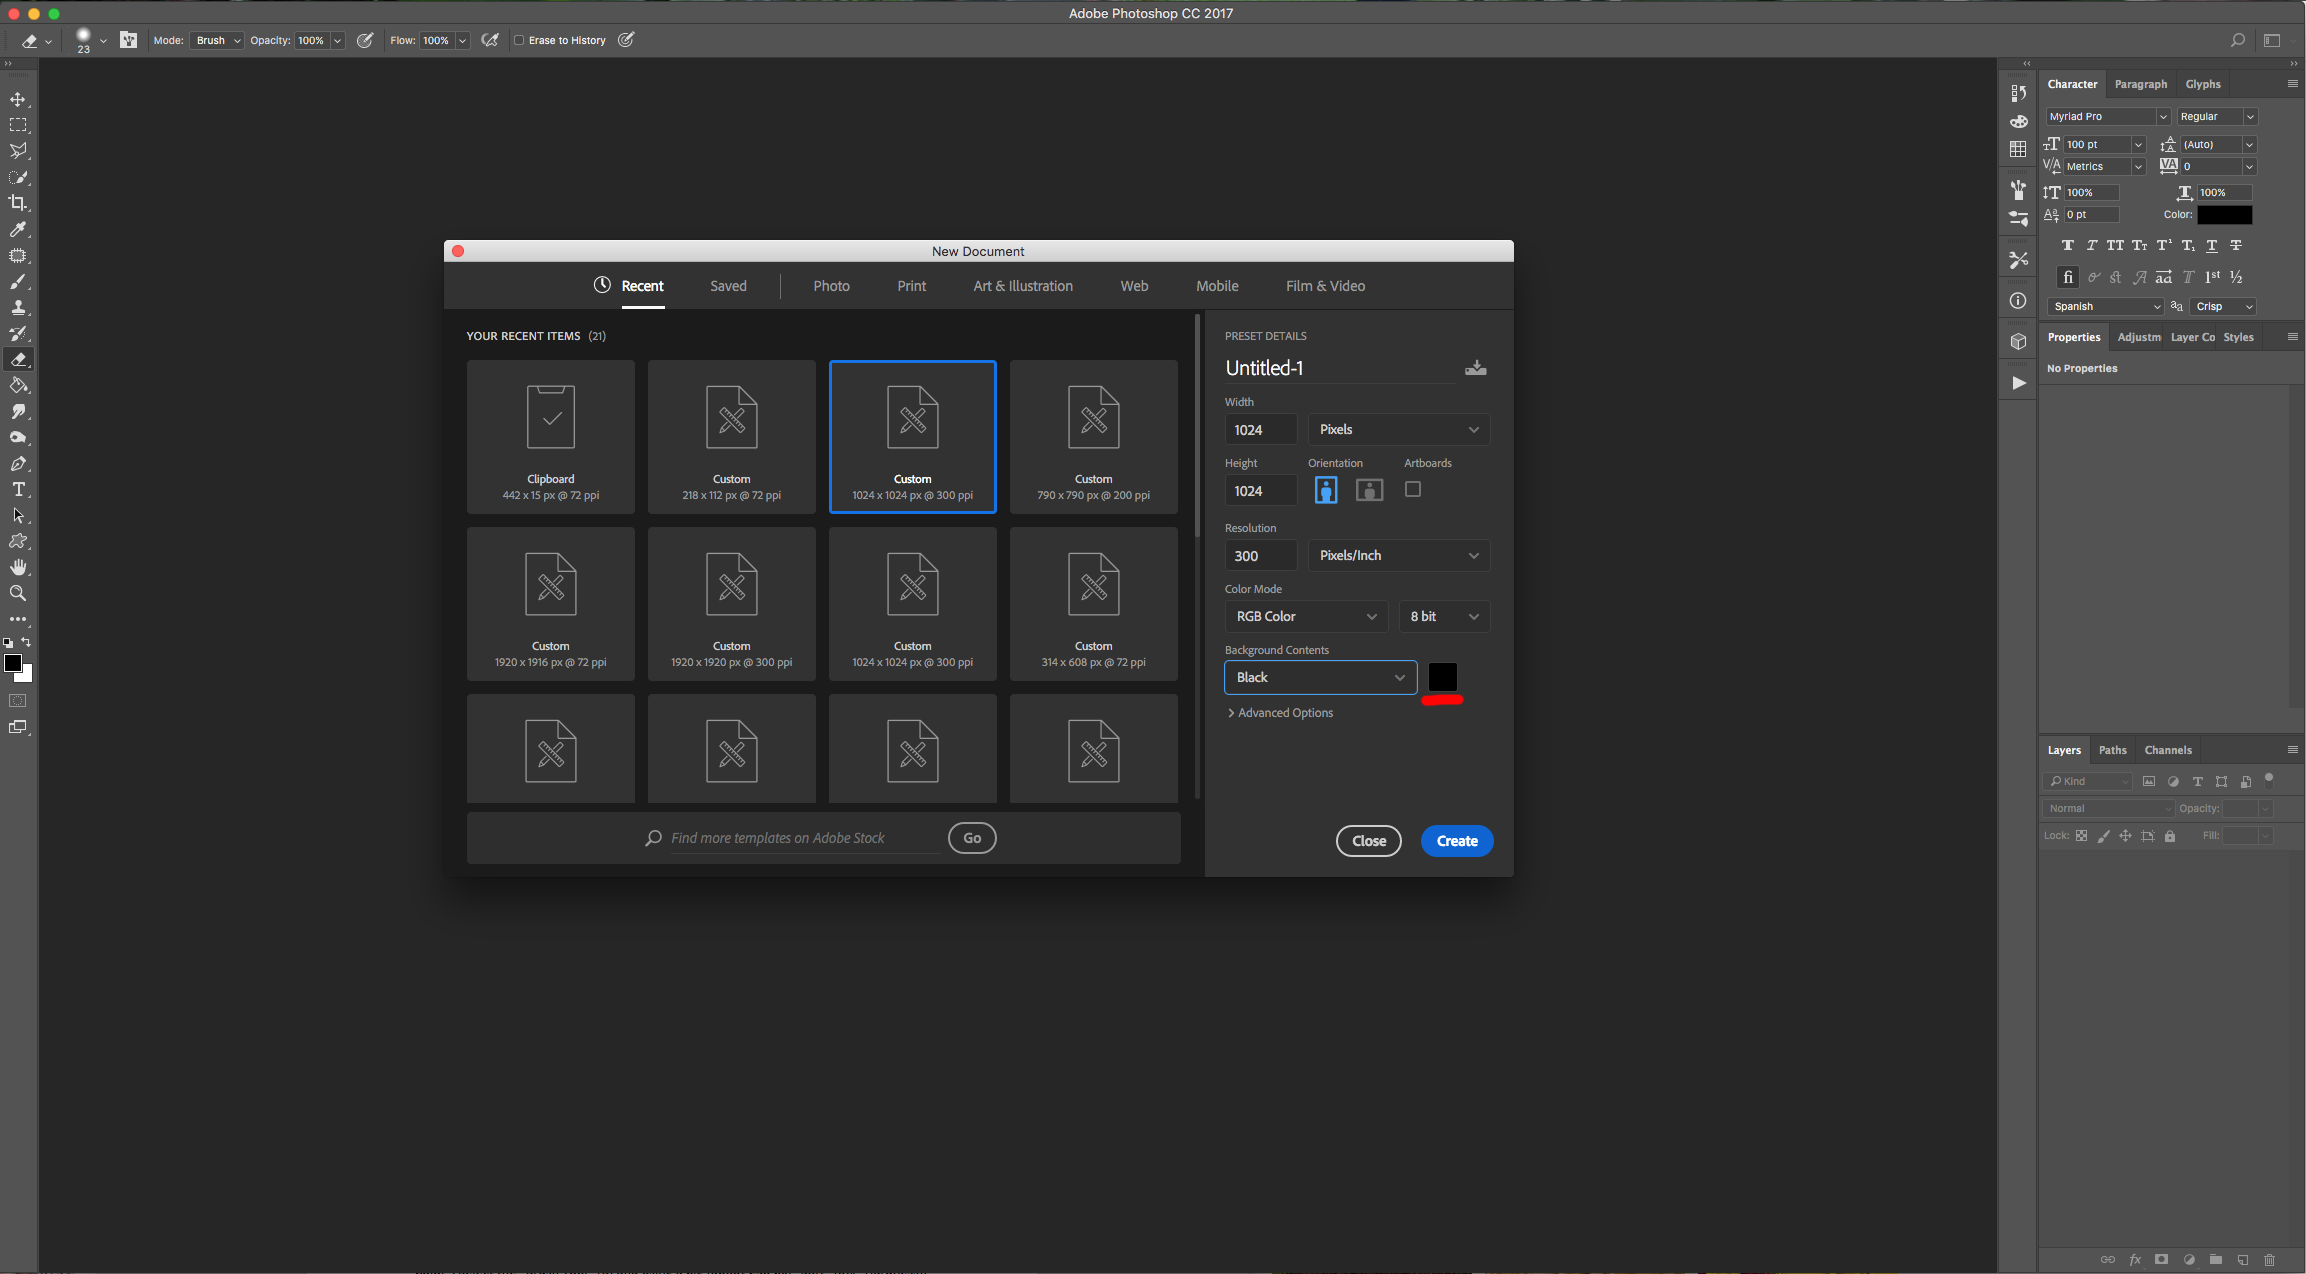
1 - In Photoshop, create a “New File” using Black as your “Background” color.
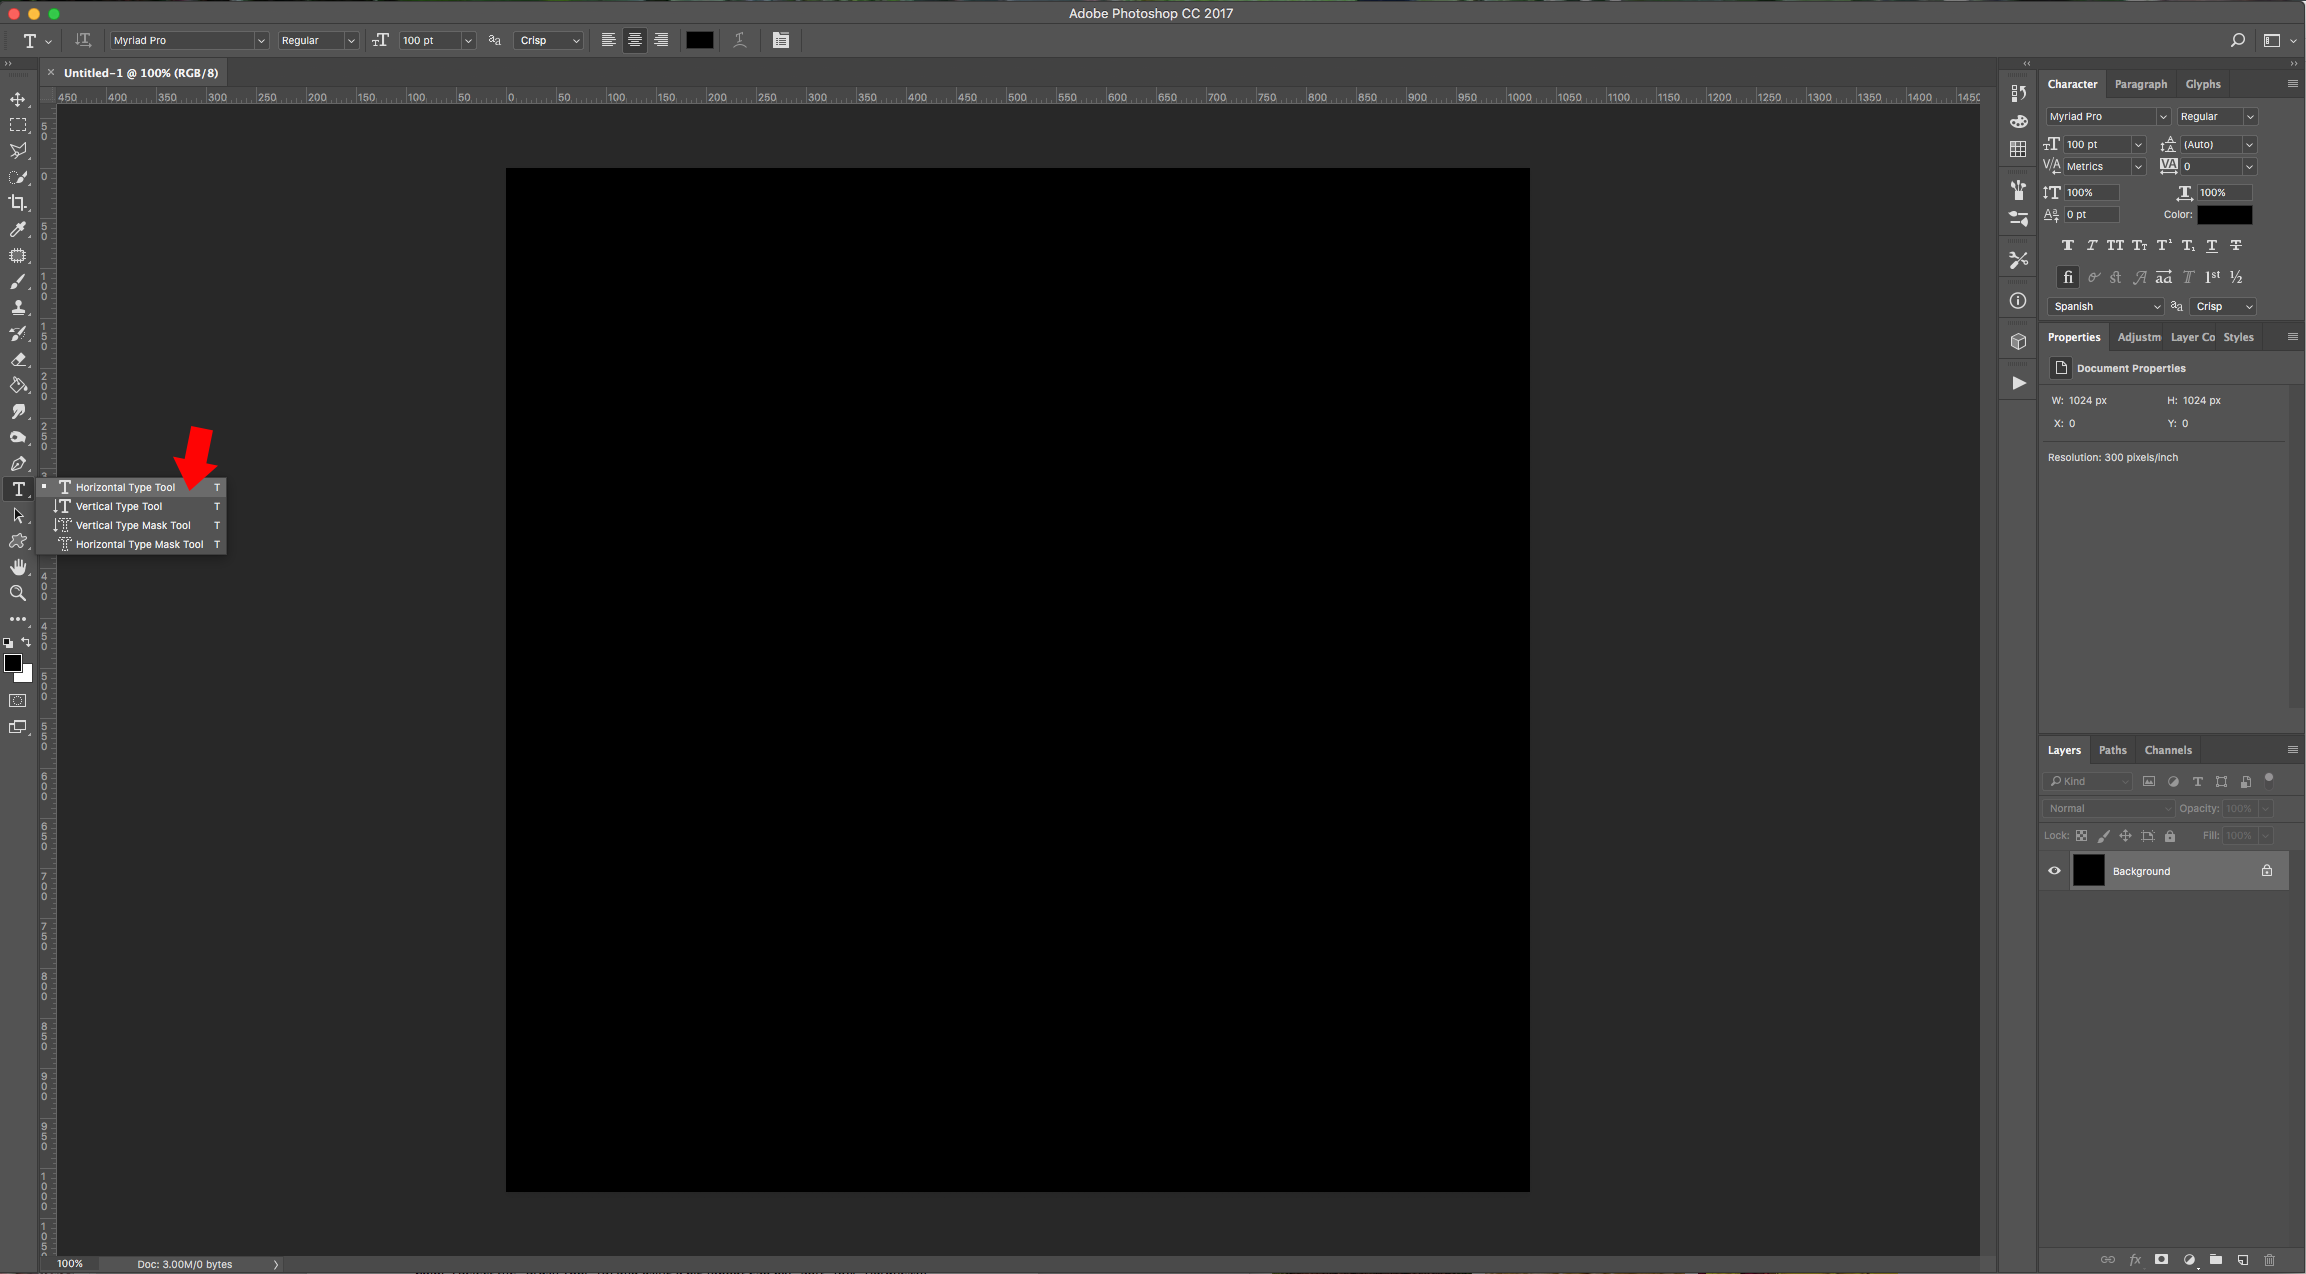
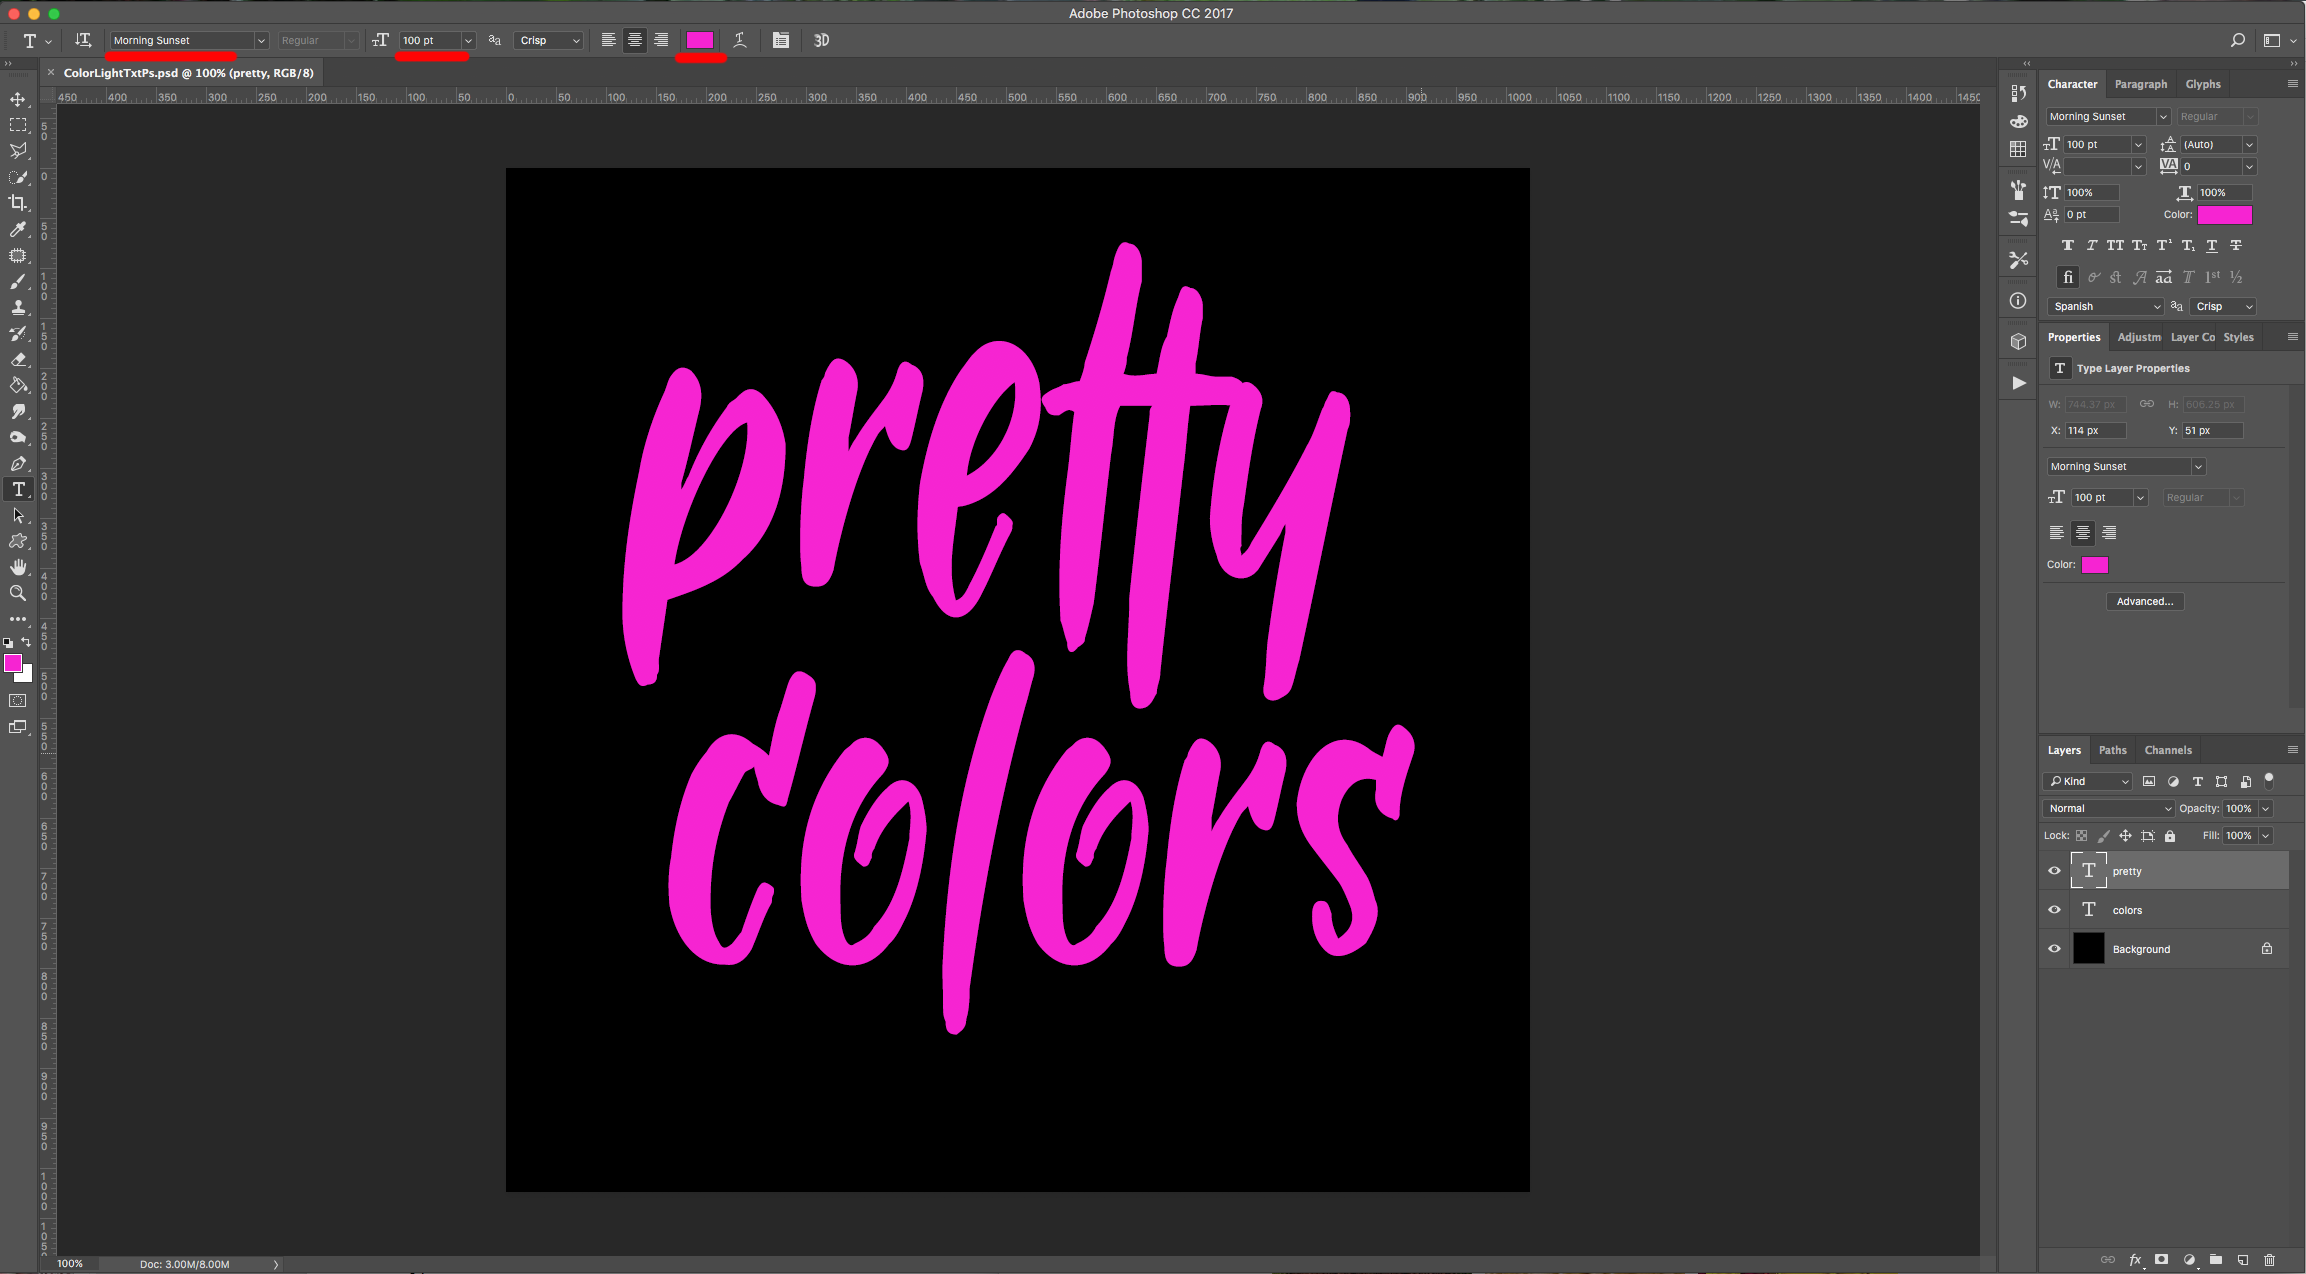
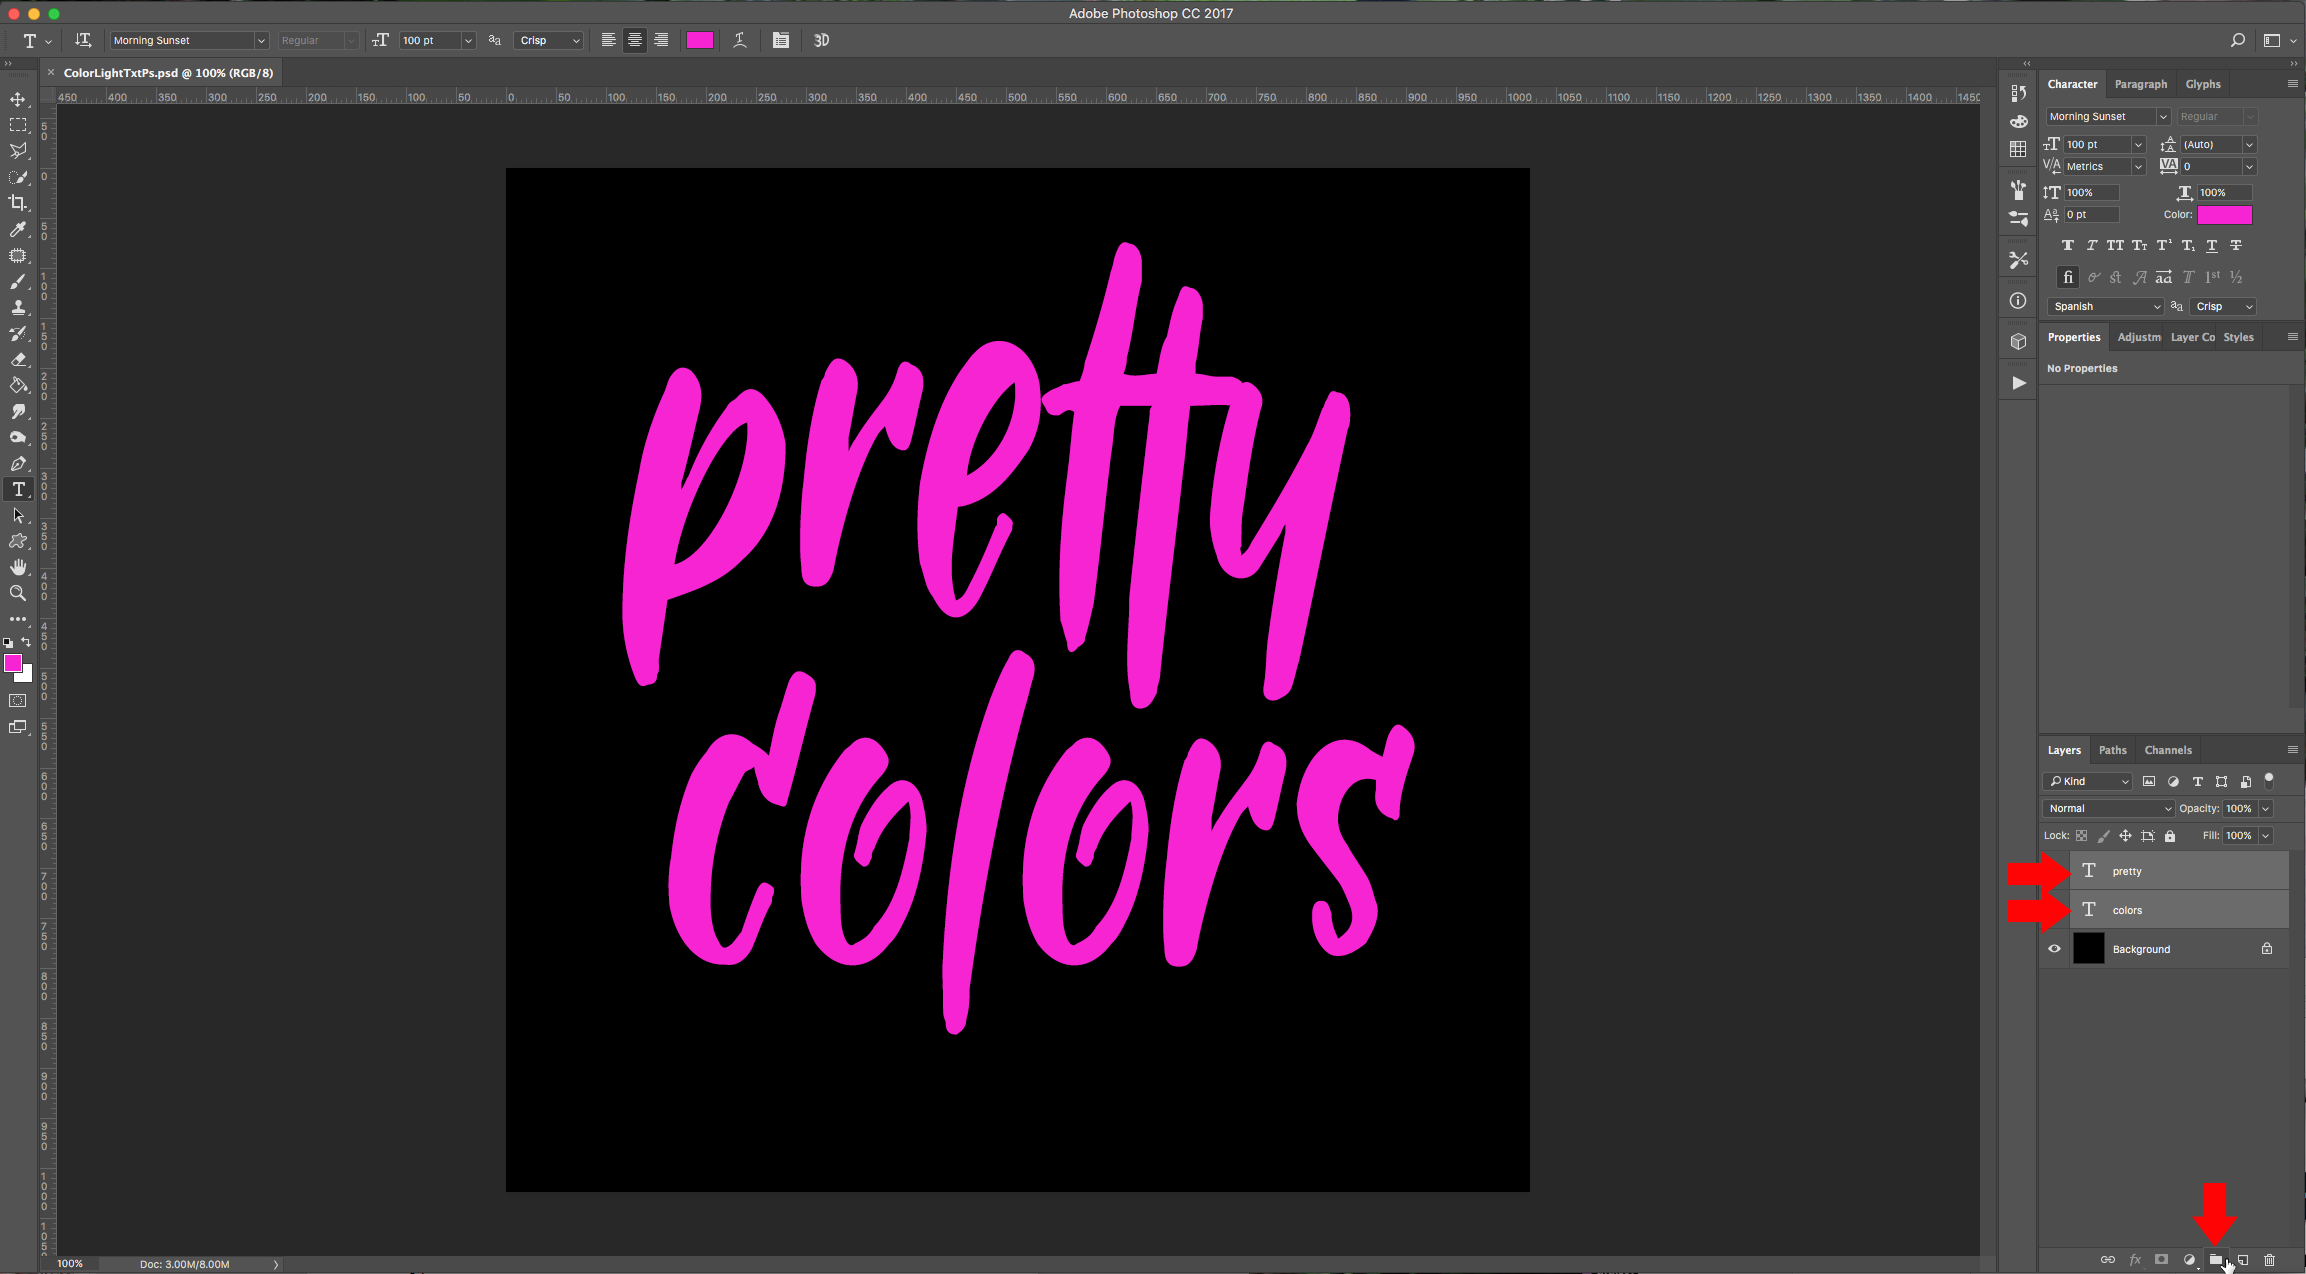
2 - Select the “Type Tool” (T), choose your font and type your text. Use a nice bright color as “Fill” (we used #f908d4). If you are using more than one line of text, place each line in a different “Layer” and create a “Group” by clicking on the small Folder icon at the bottom of the “Layers Panel”.
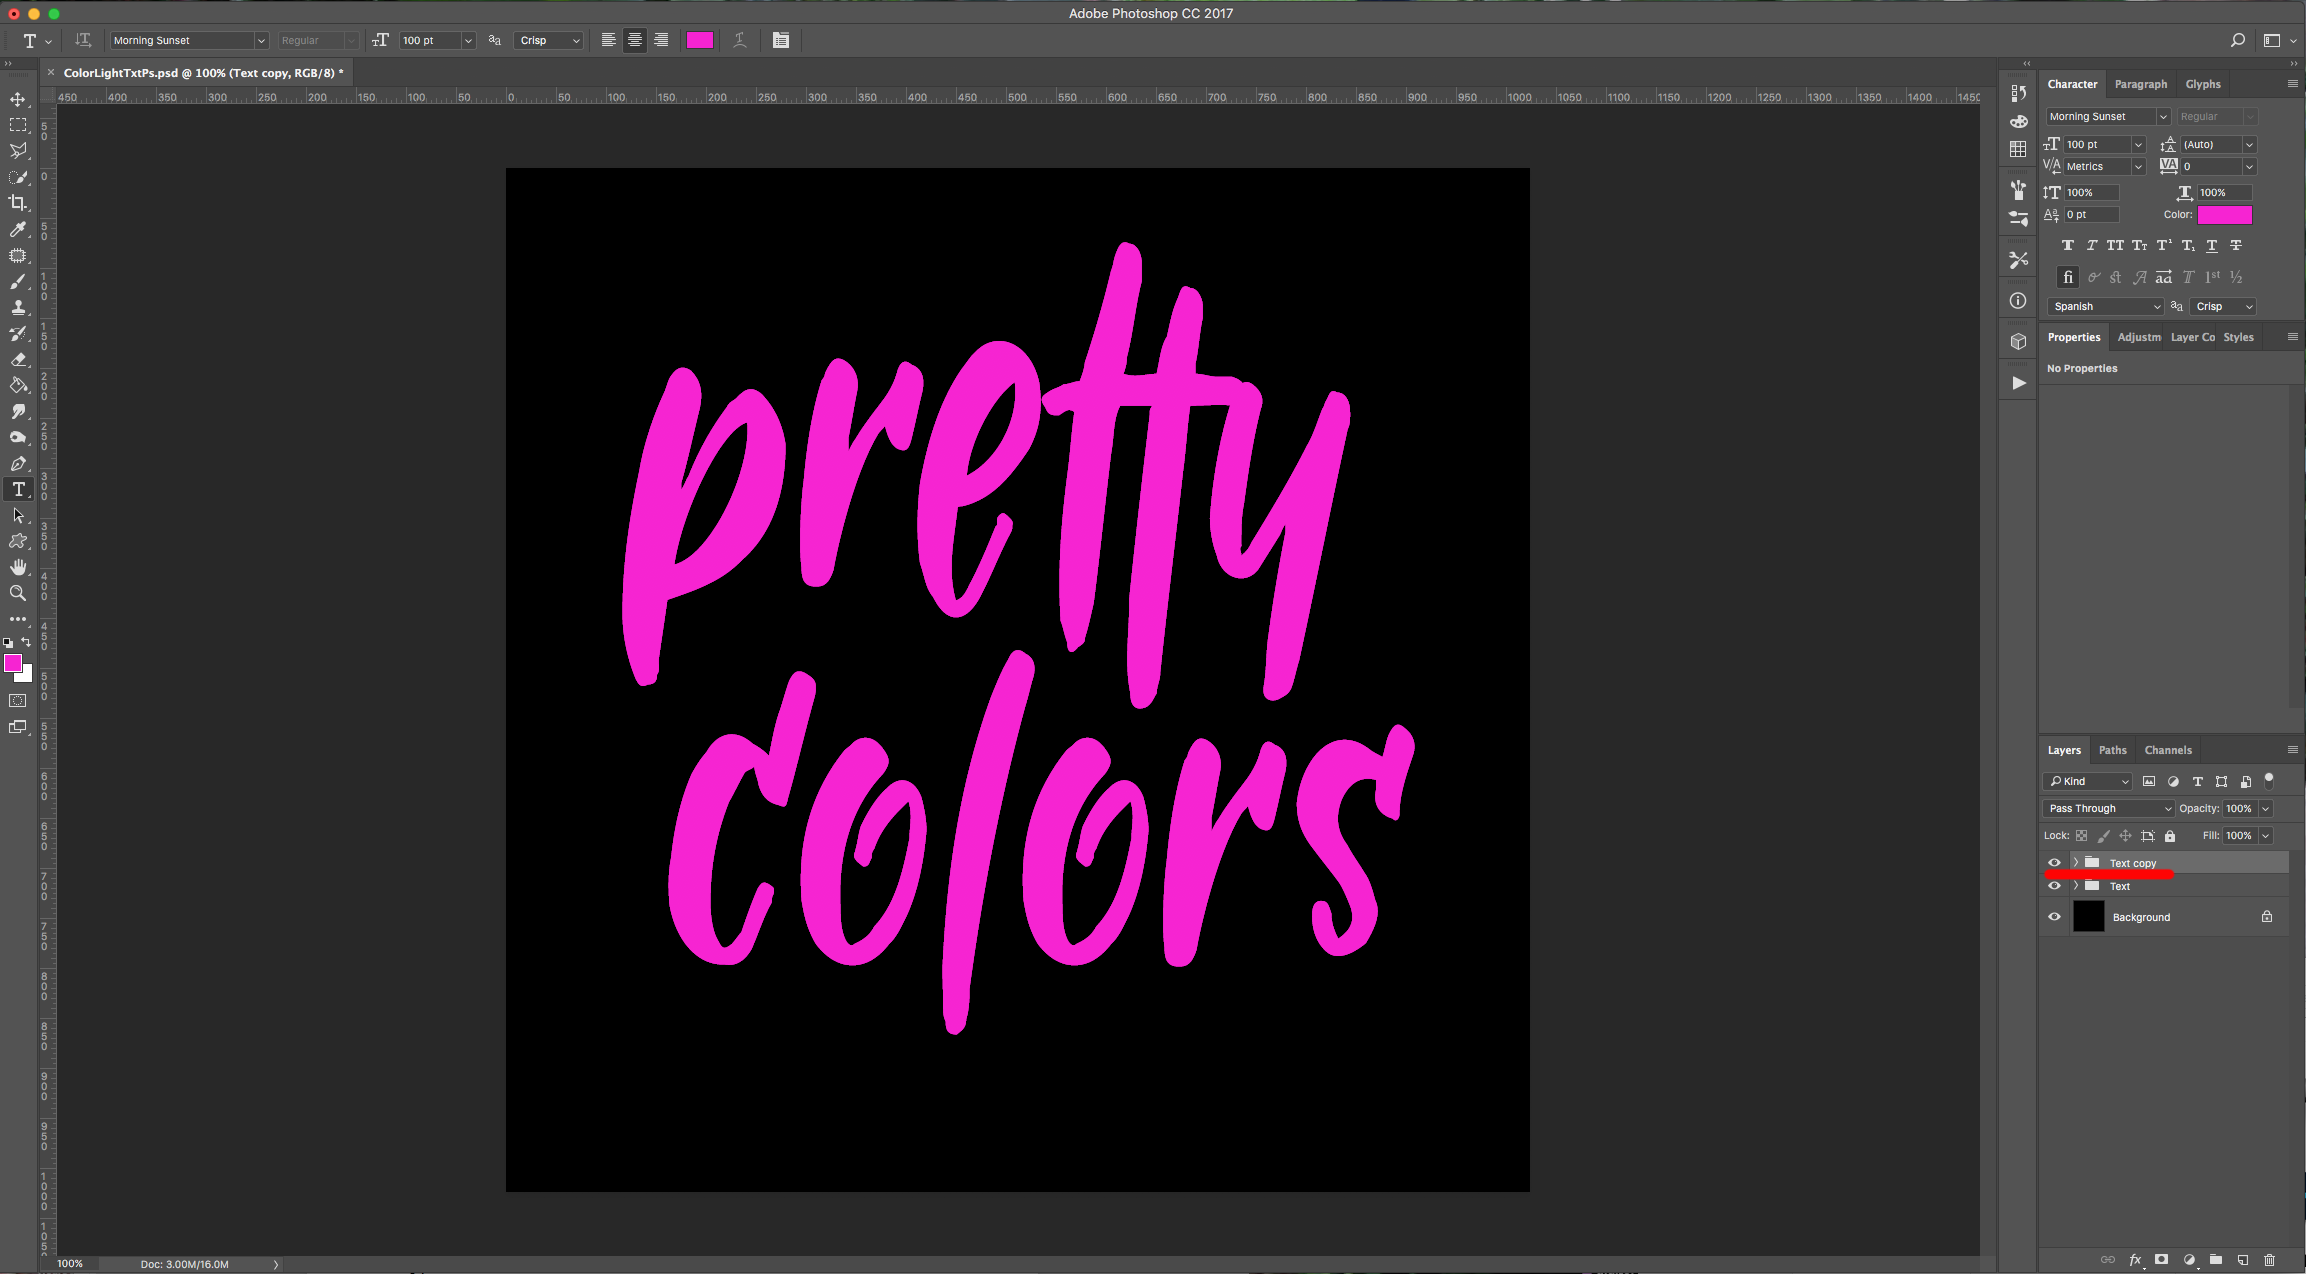
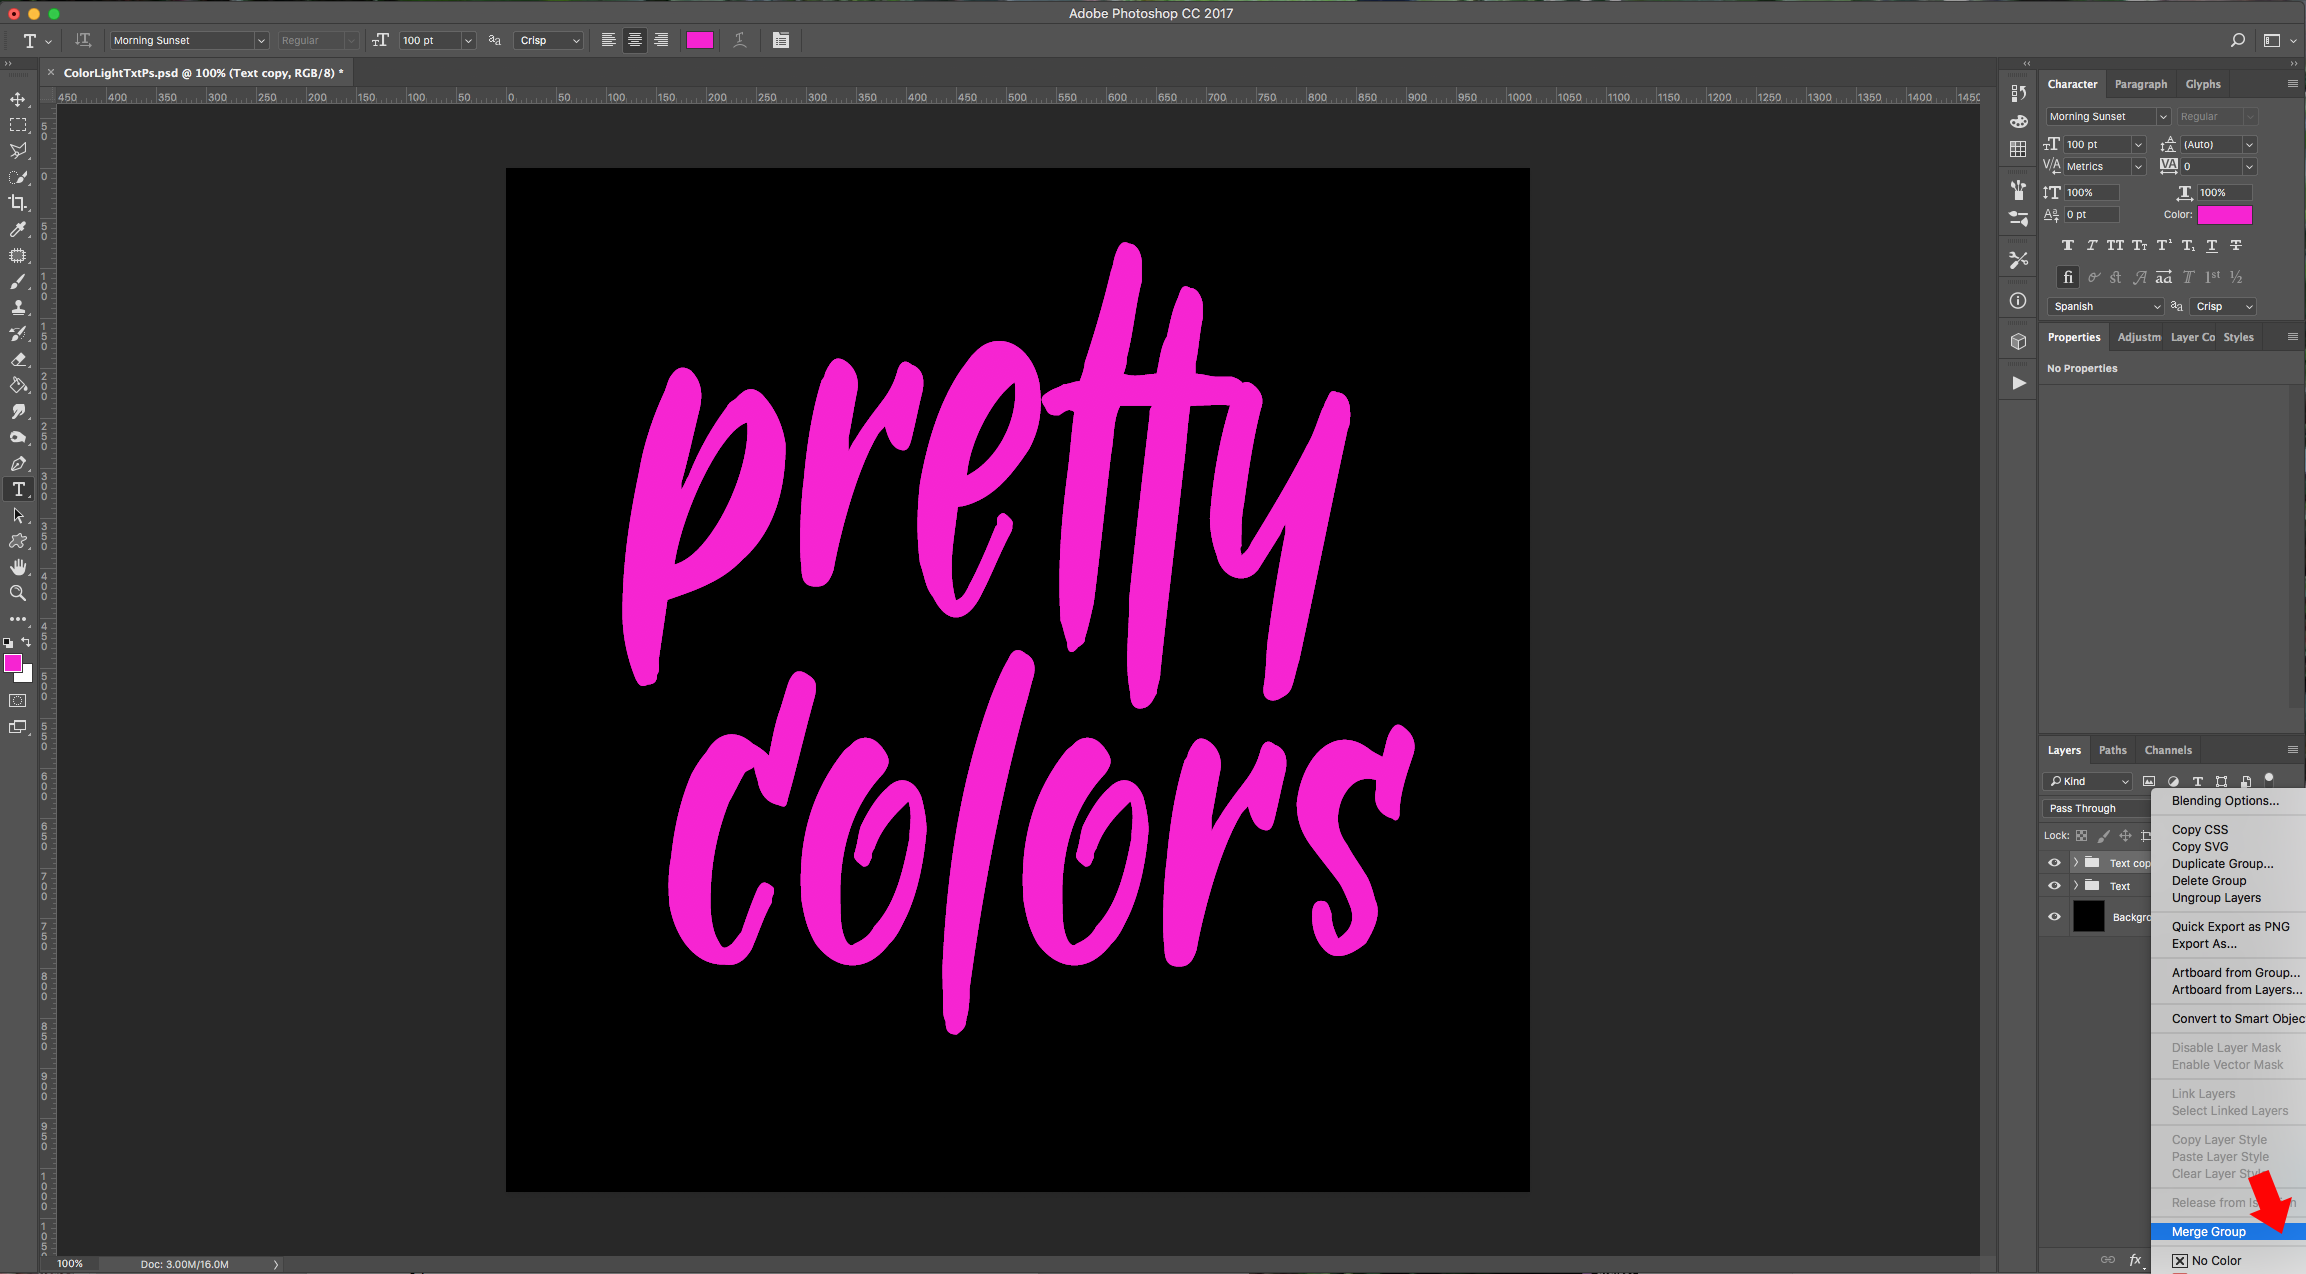
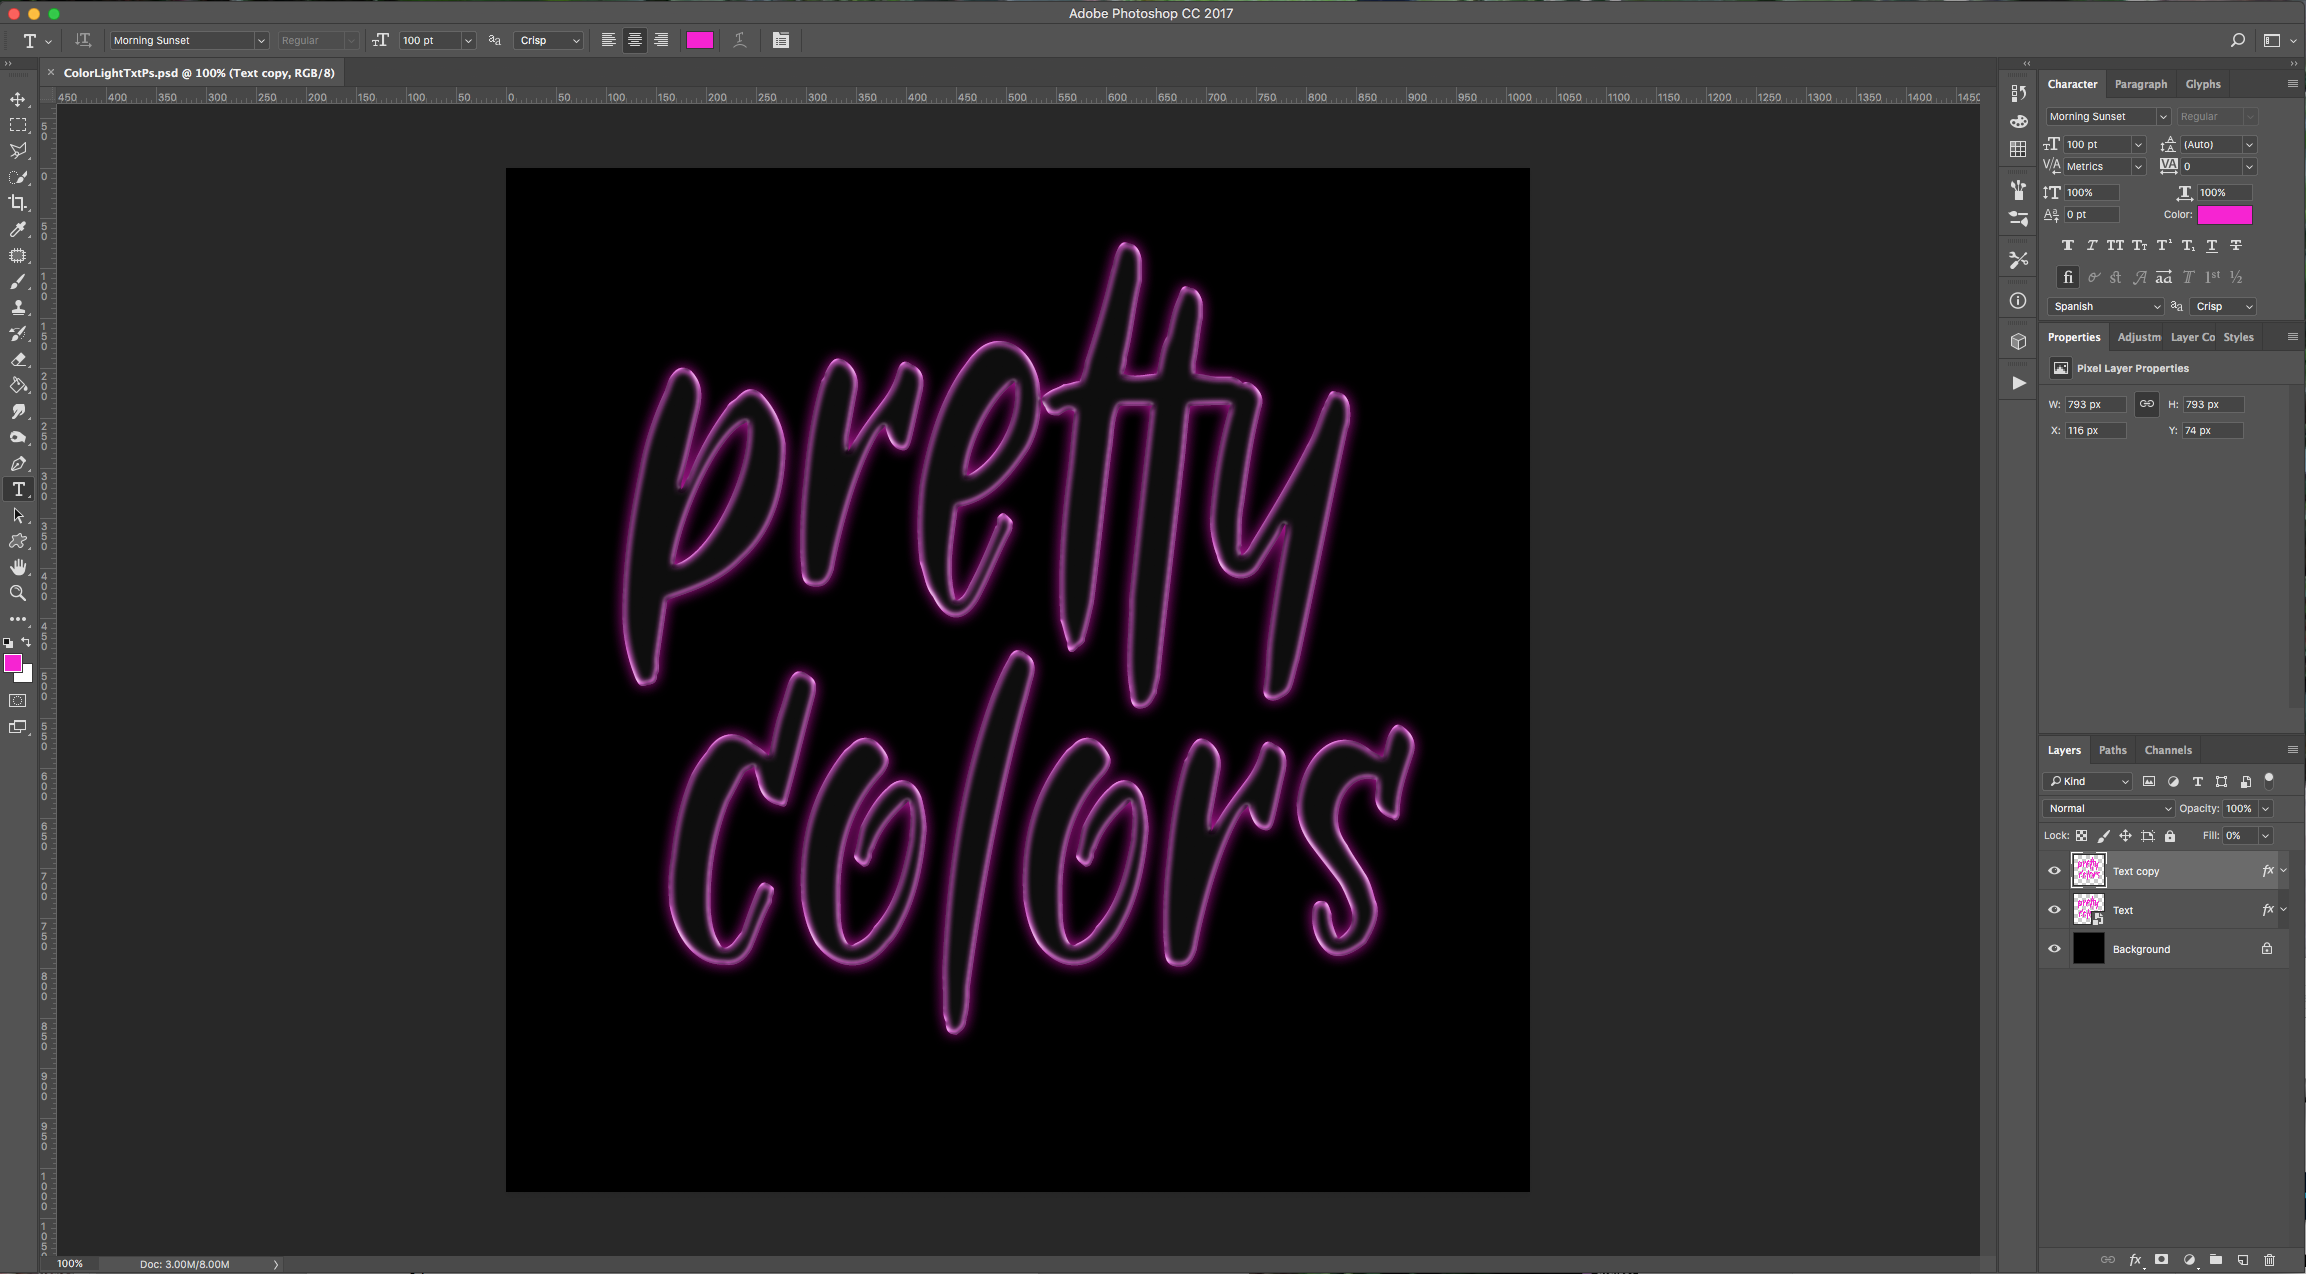
3 - Duplicate your “Text” Group (Command/Control + J), right-click on top of its Thumbnail and choose “Merge Group”.
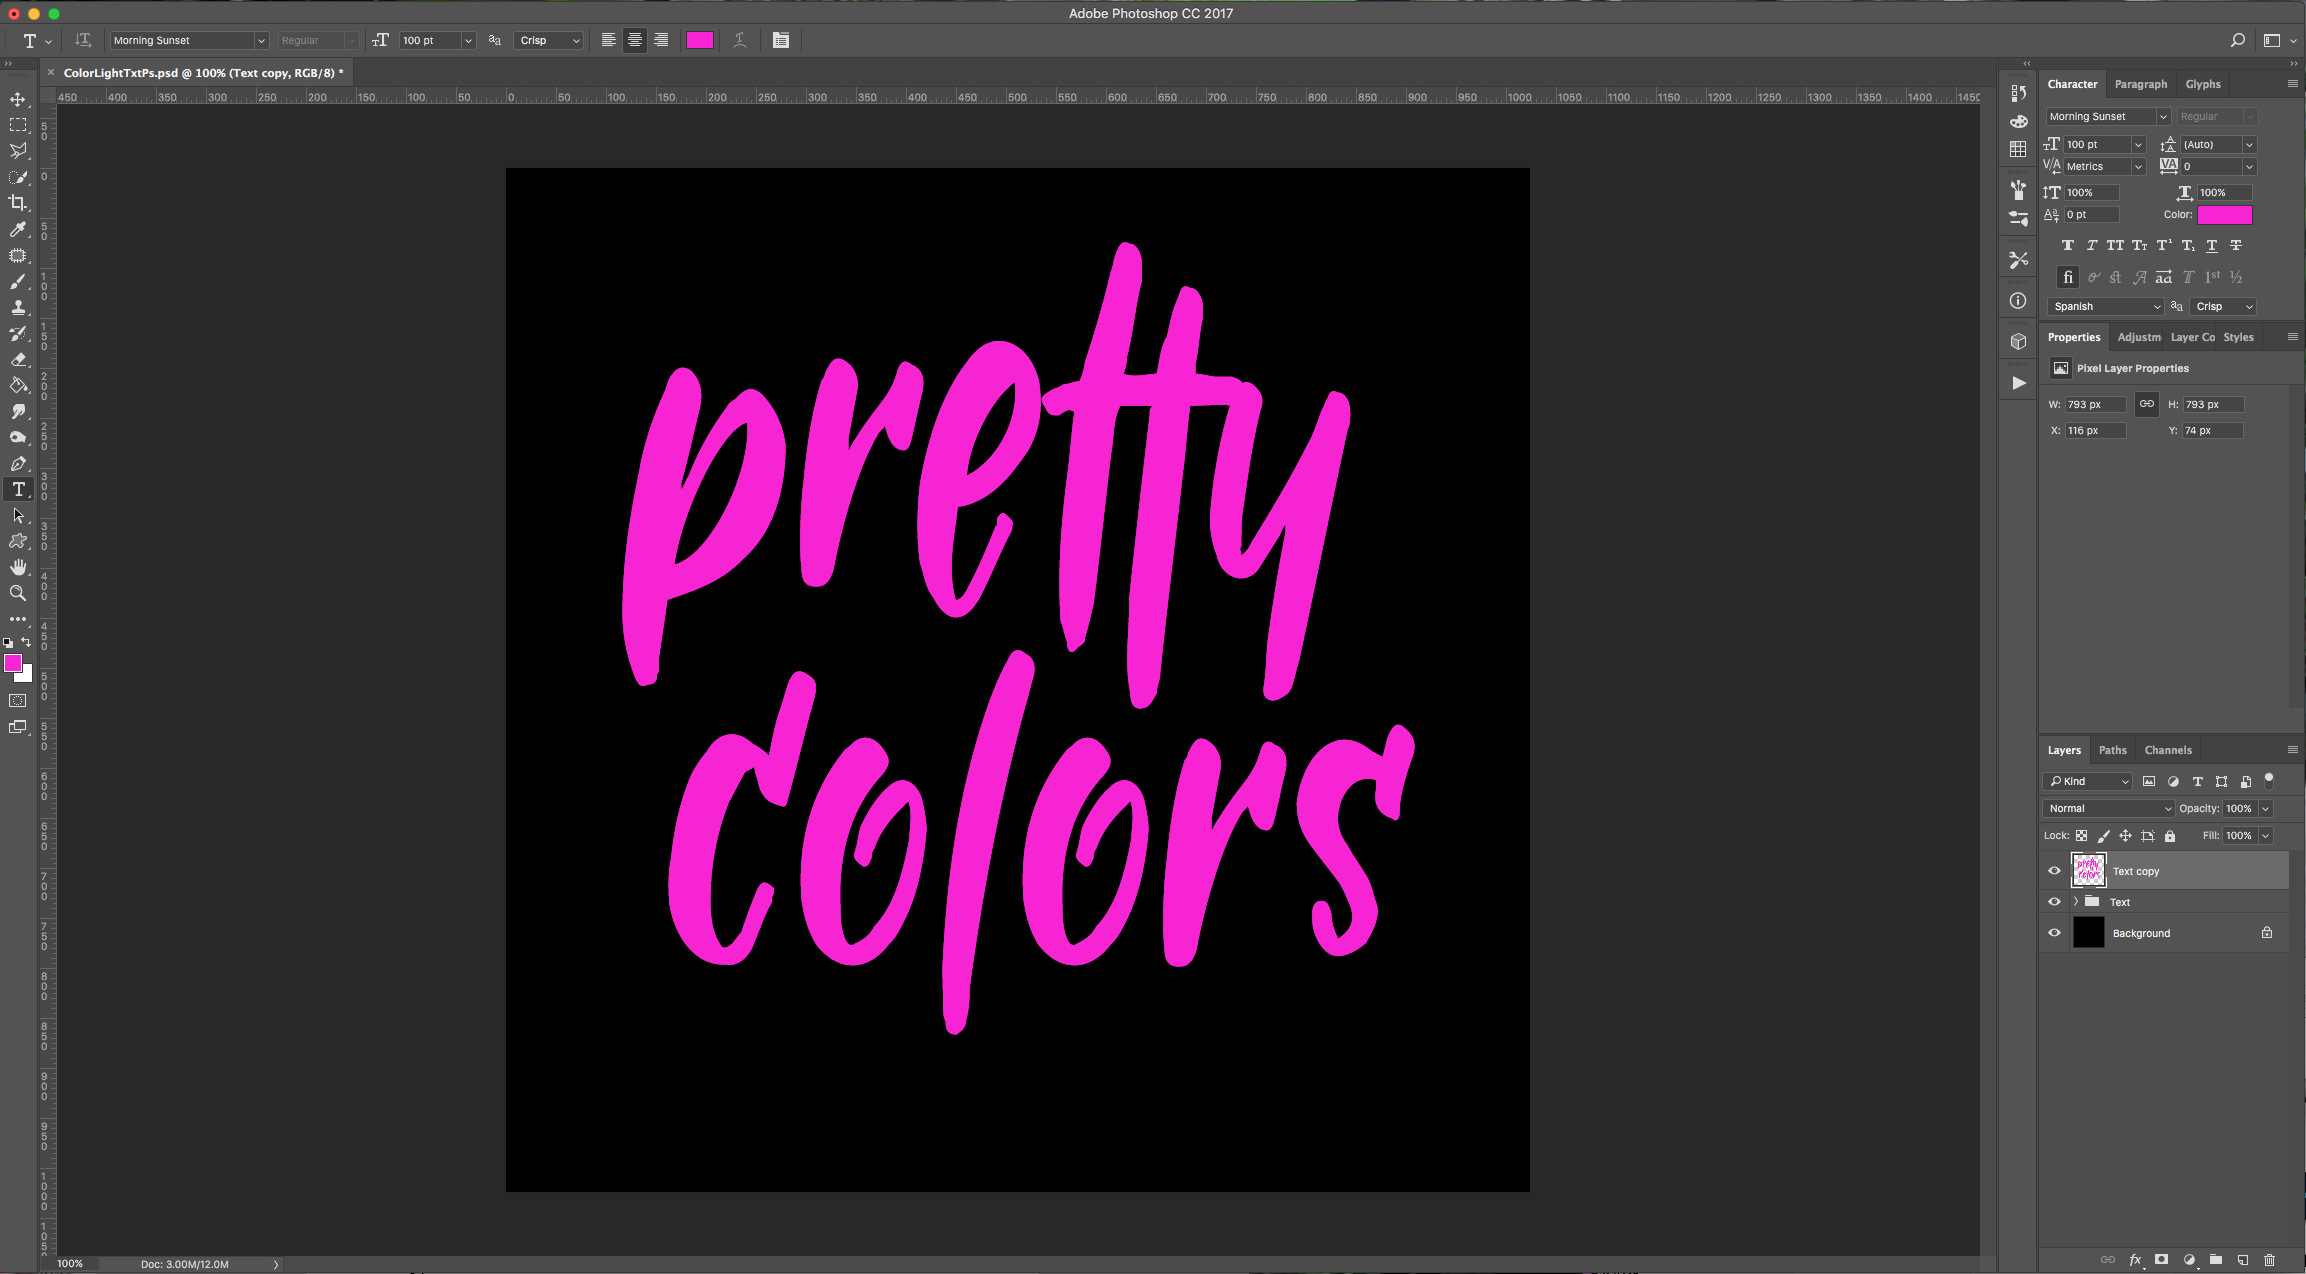
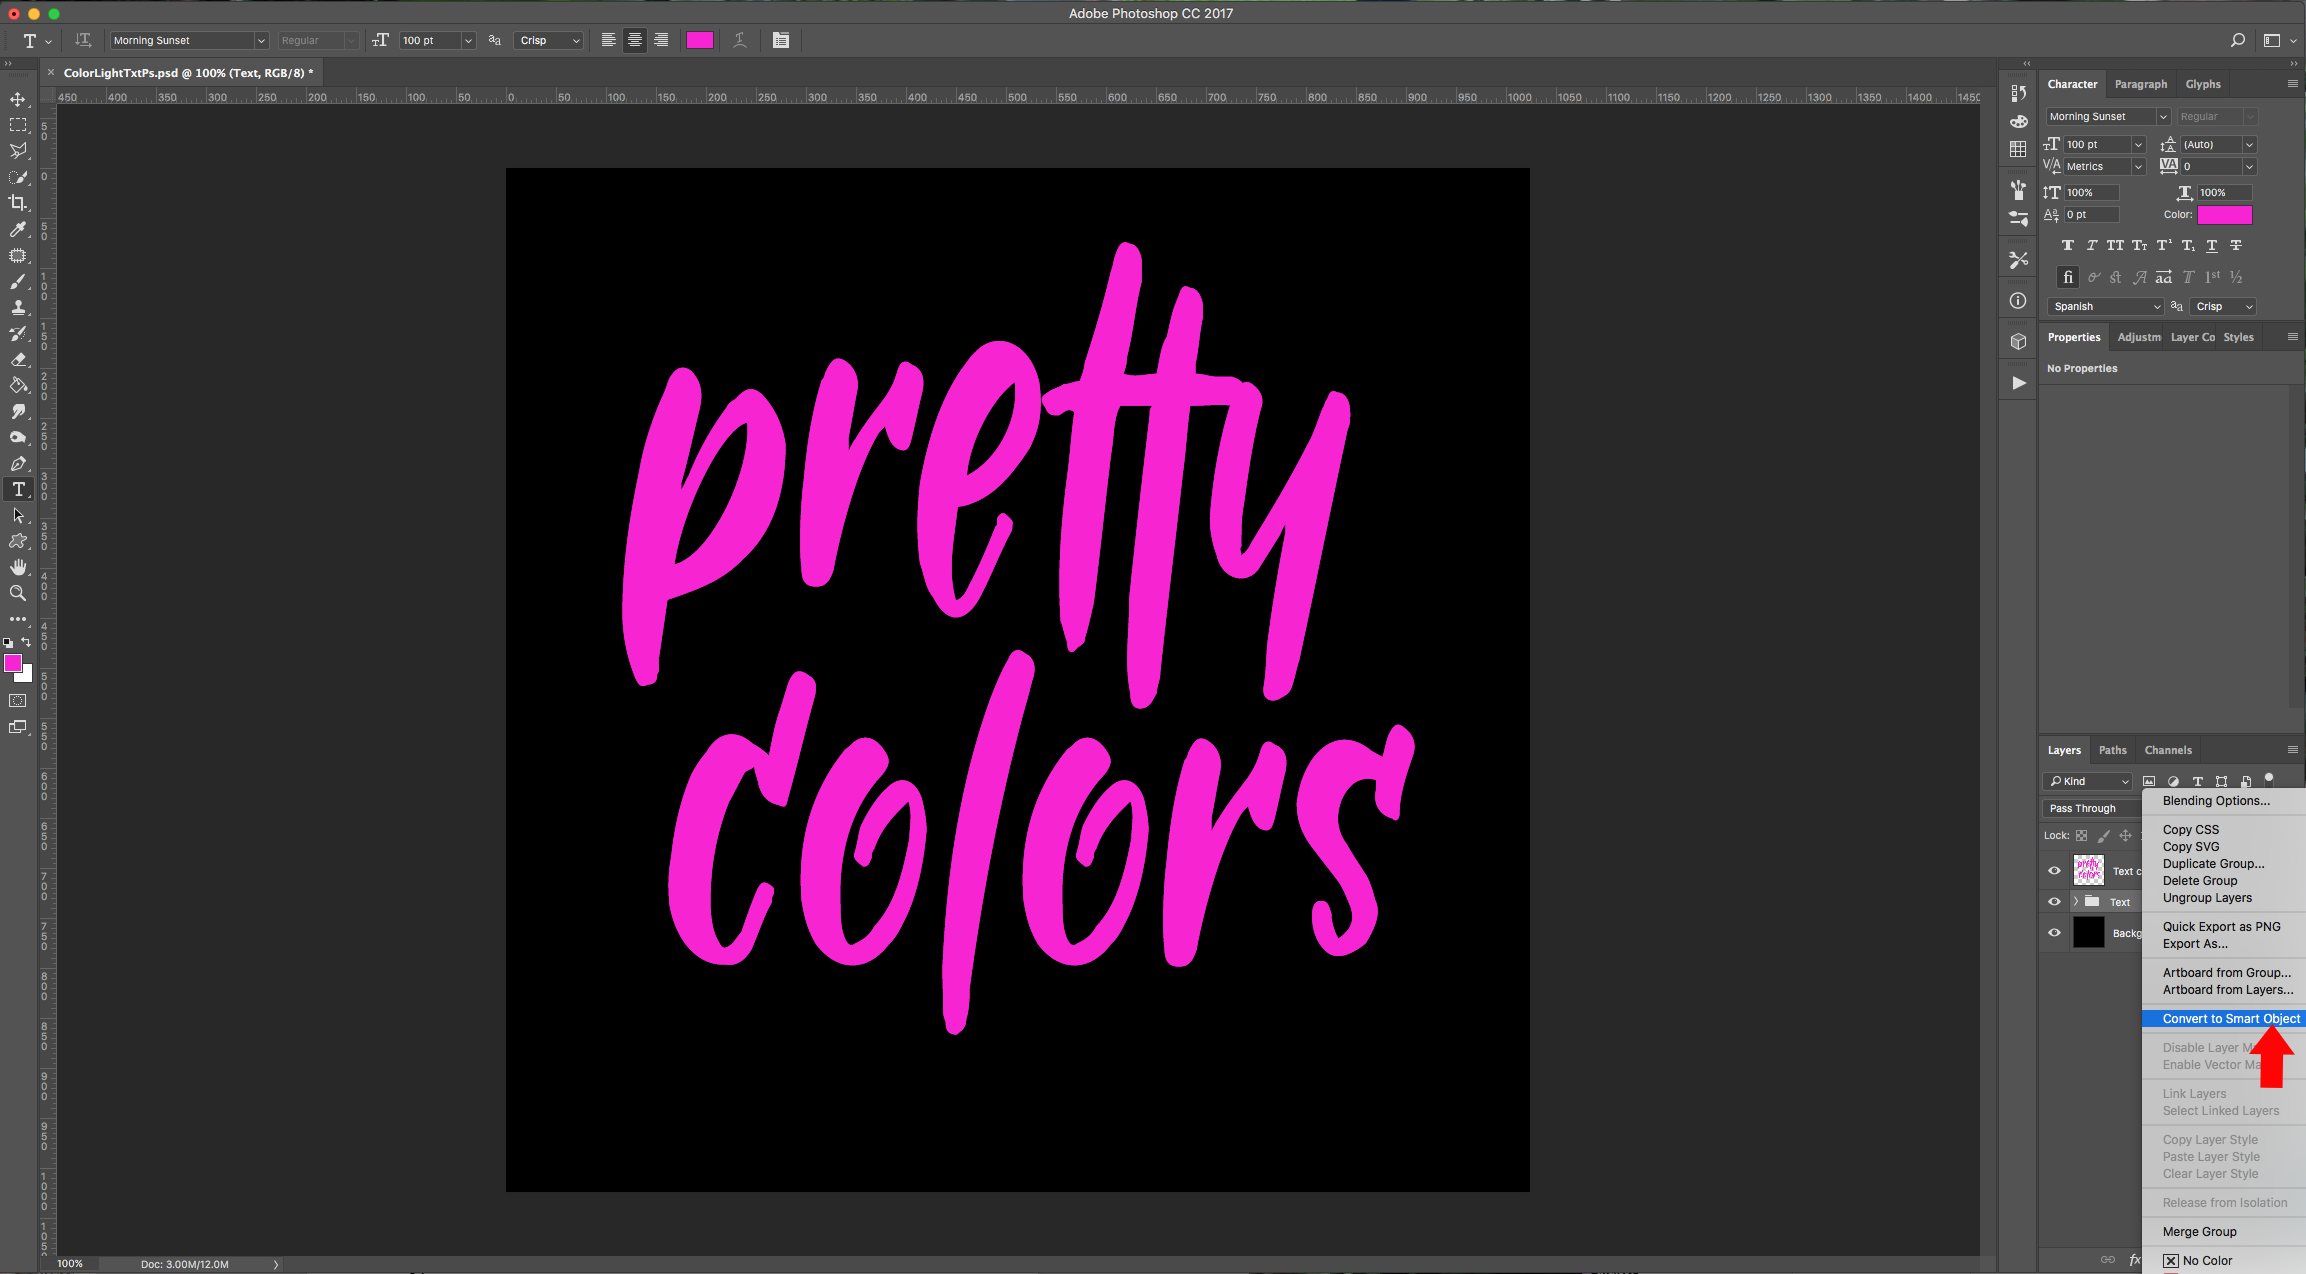
4 - Select your original “Text” Group, right-click on top of its Thumbnail and choose “Convert to Smart Object”.
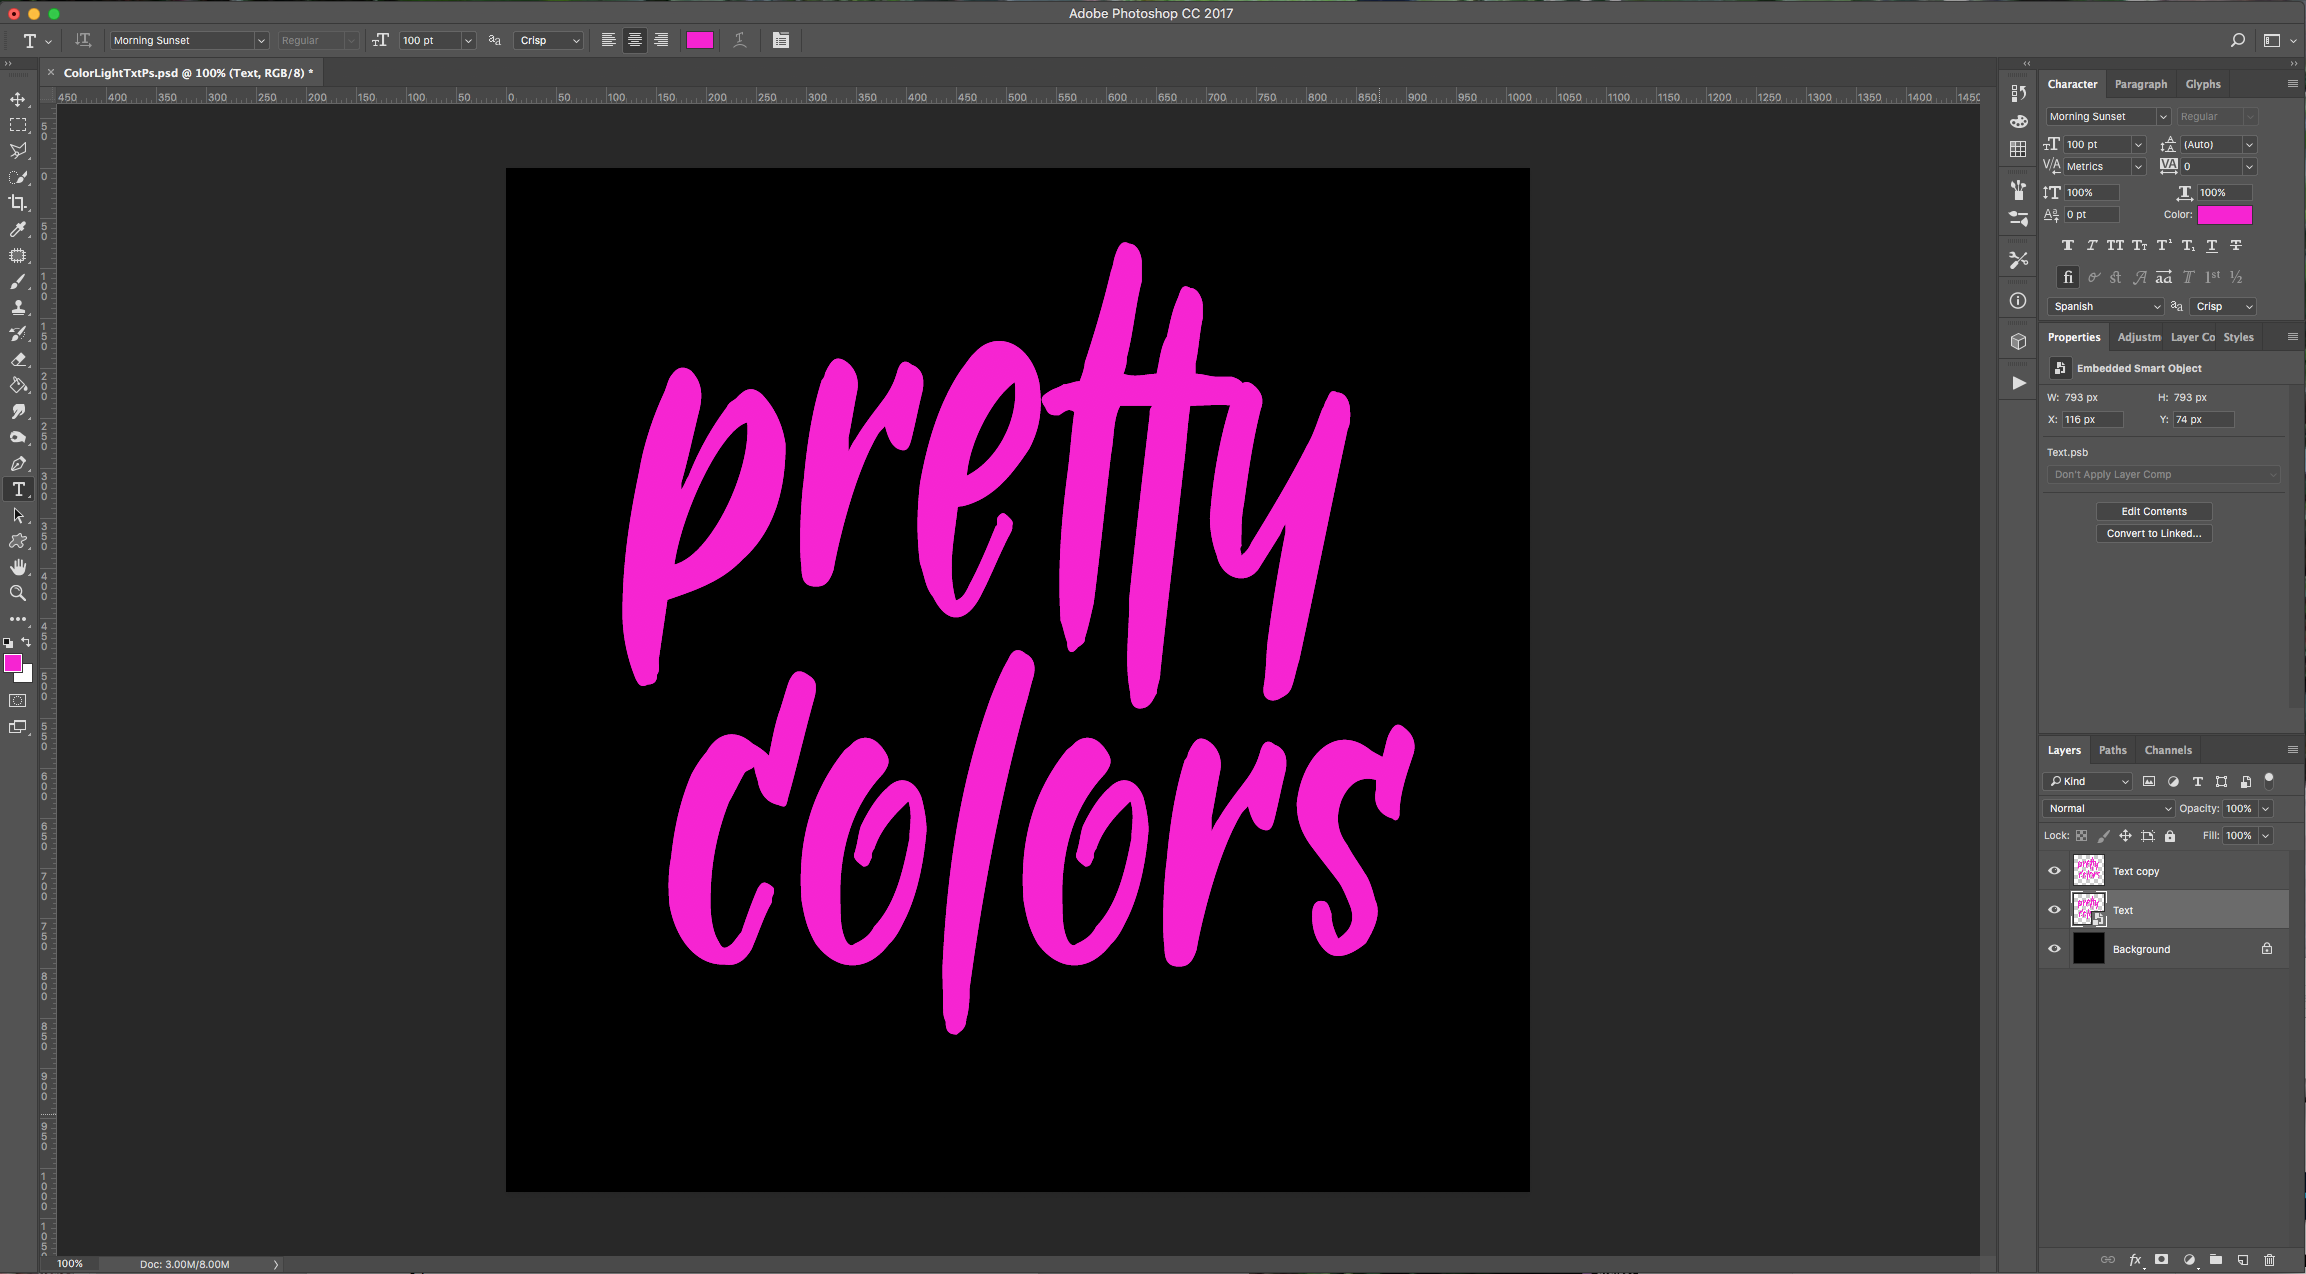
5 - Double-click on top of its Thumbnail and apply the following “Layer Styles”:
Blending Options:
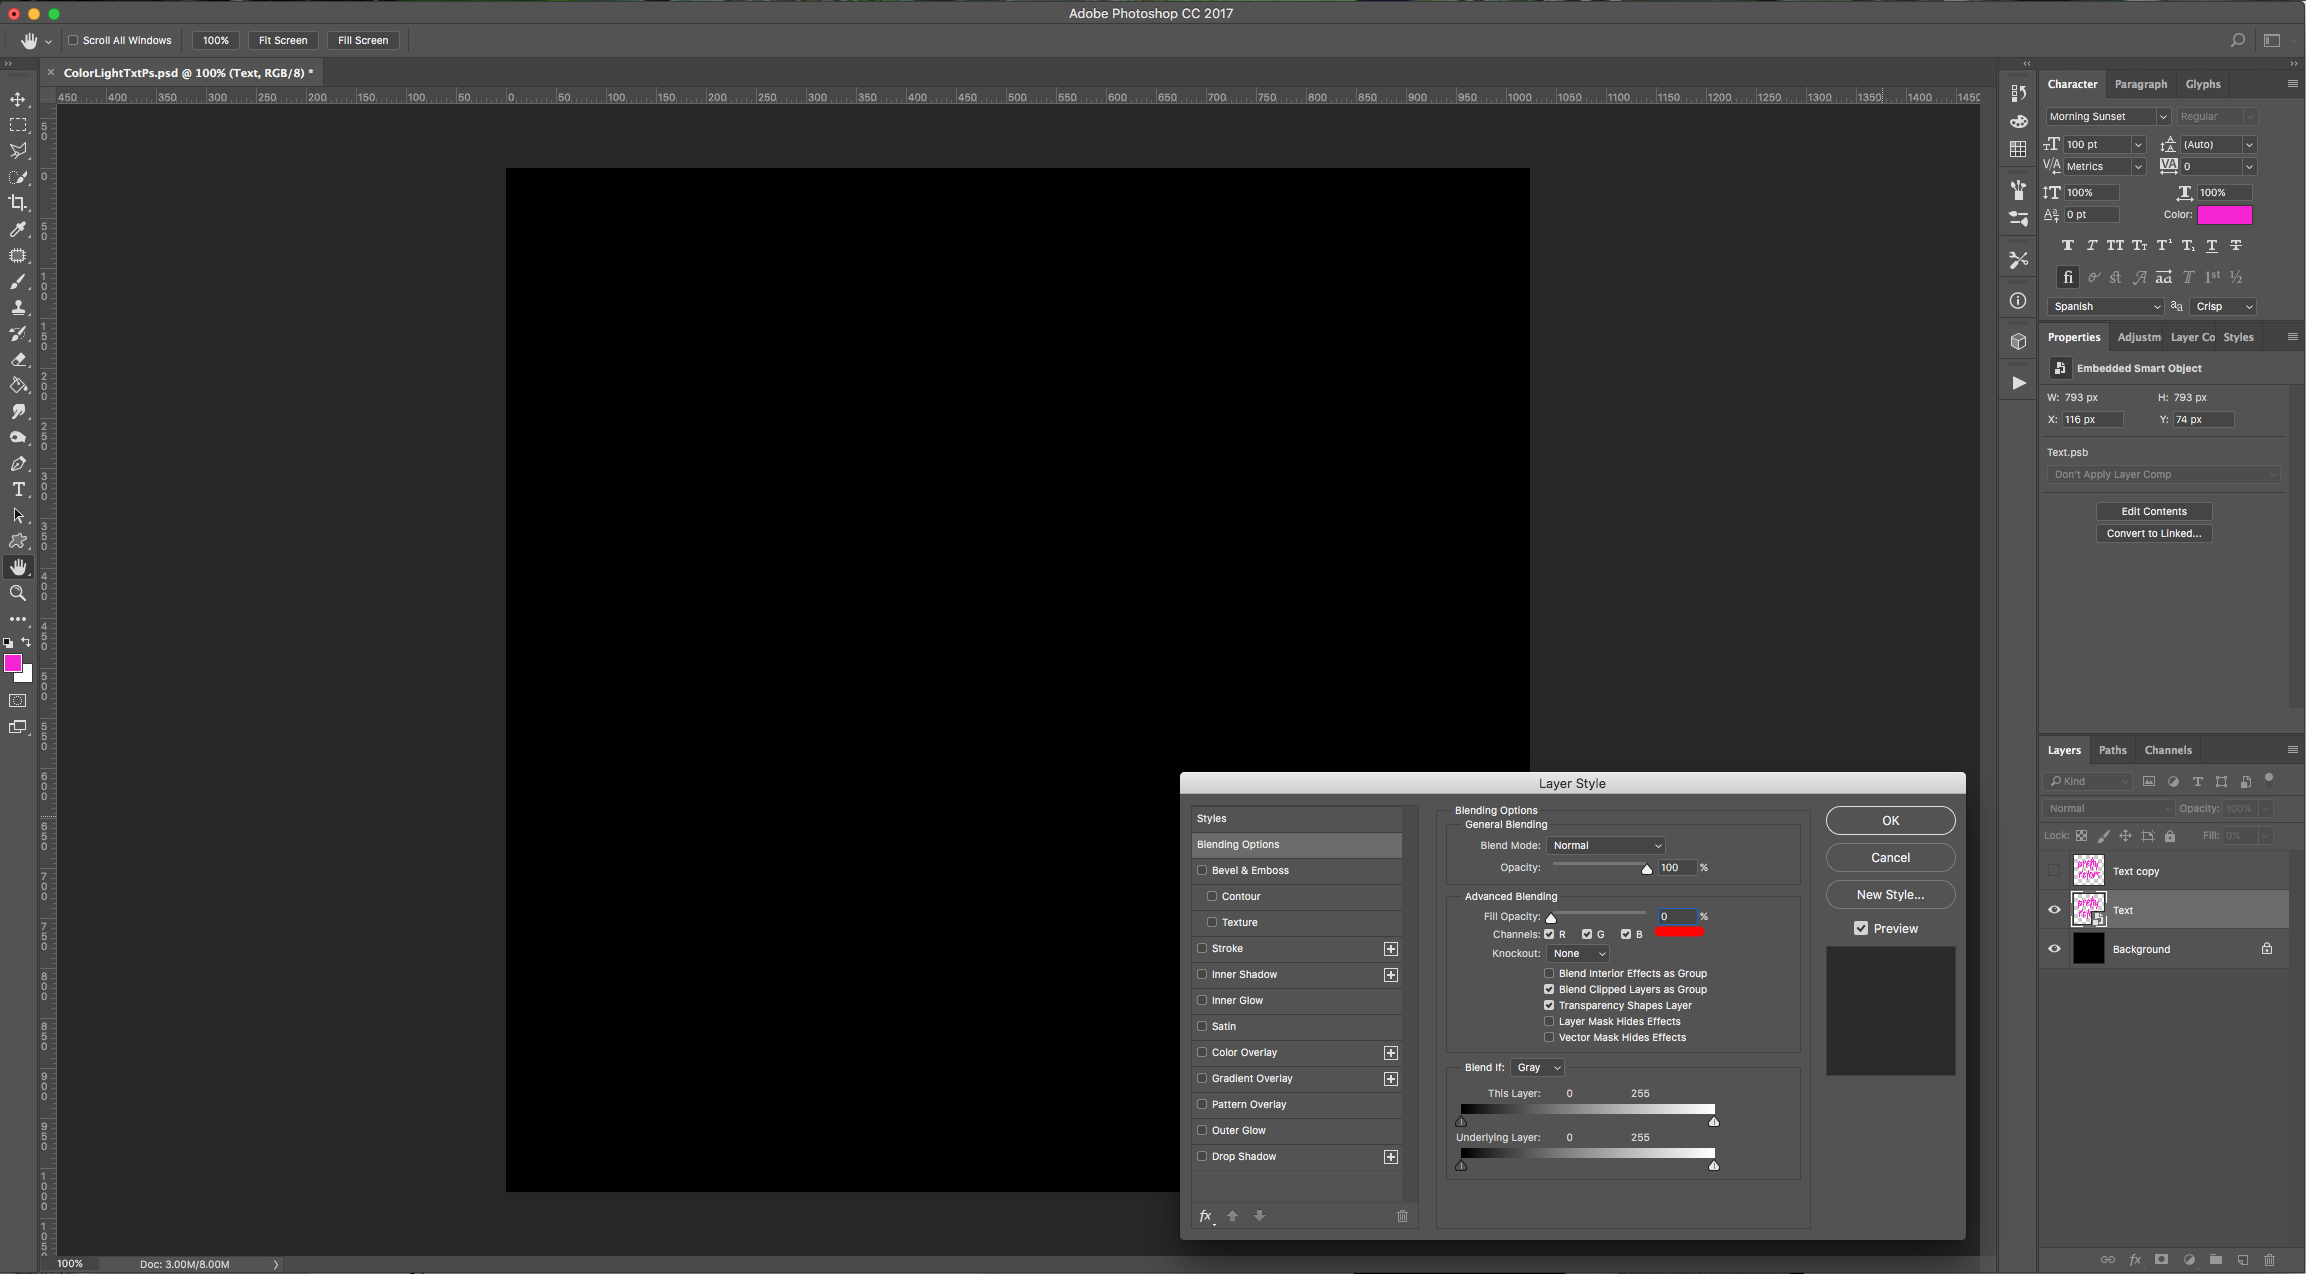
Inner Glow: (#f908d4)
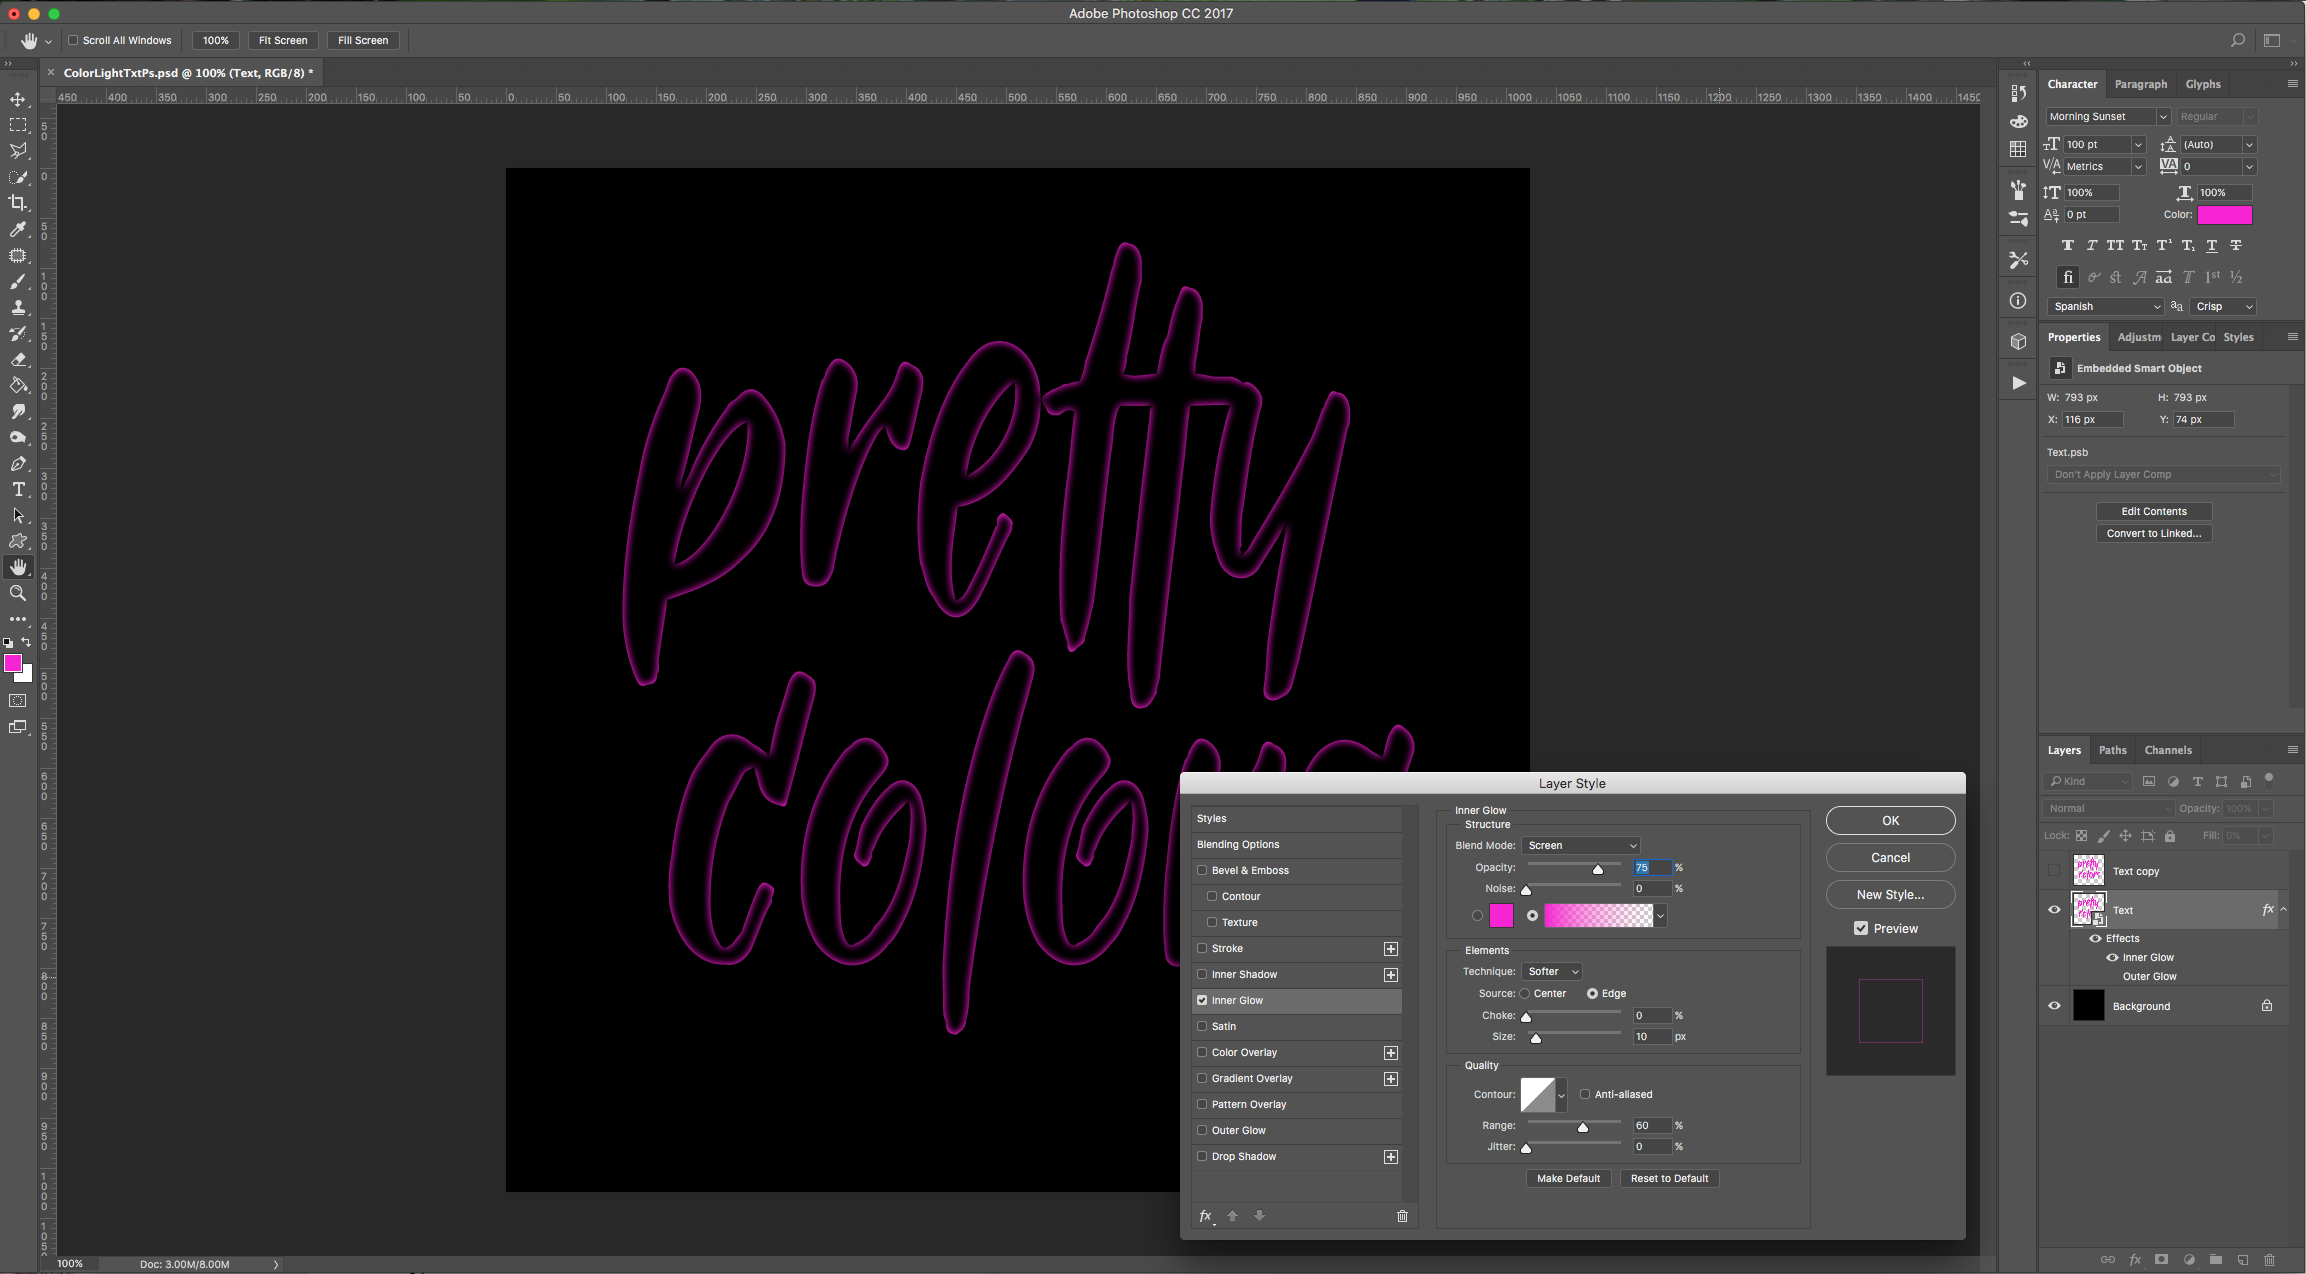
Outer Glow: (#f908d4)
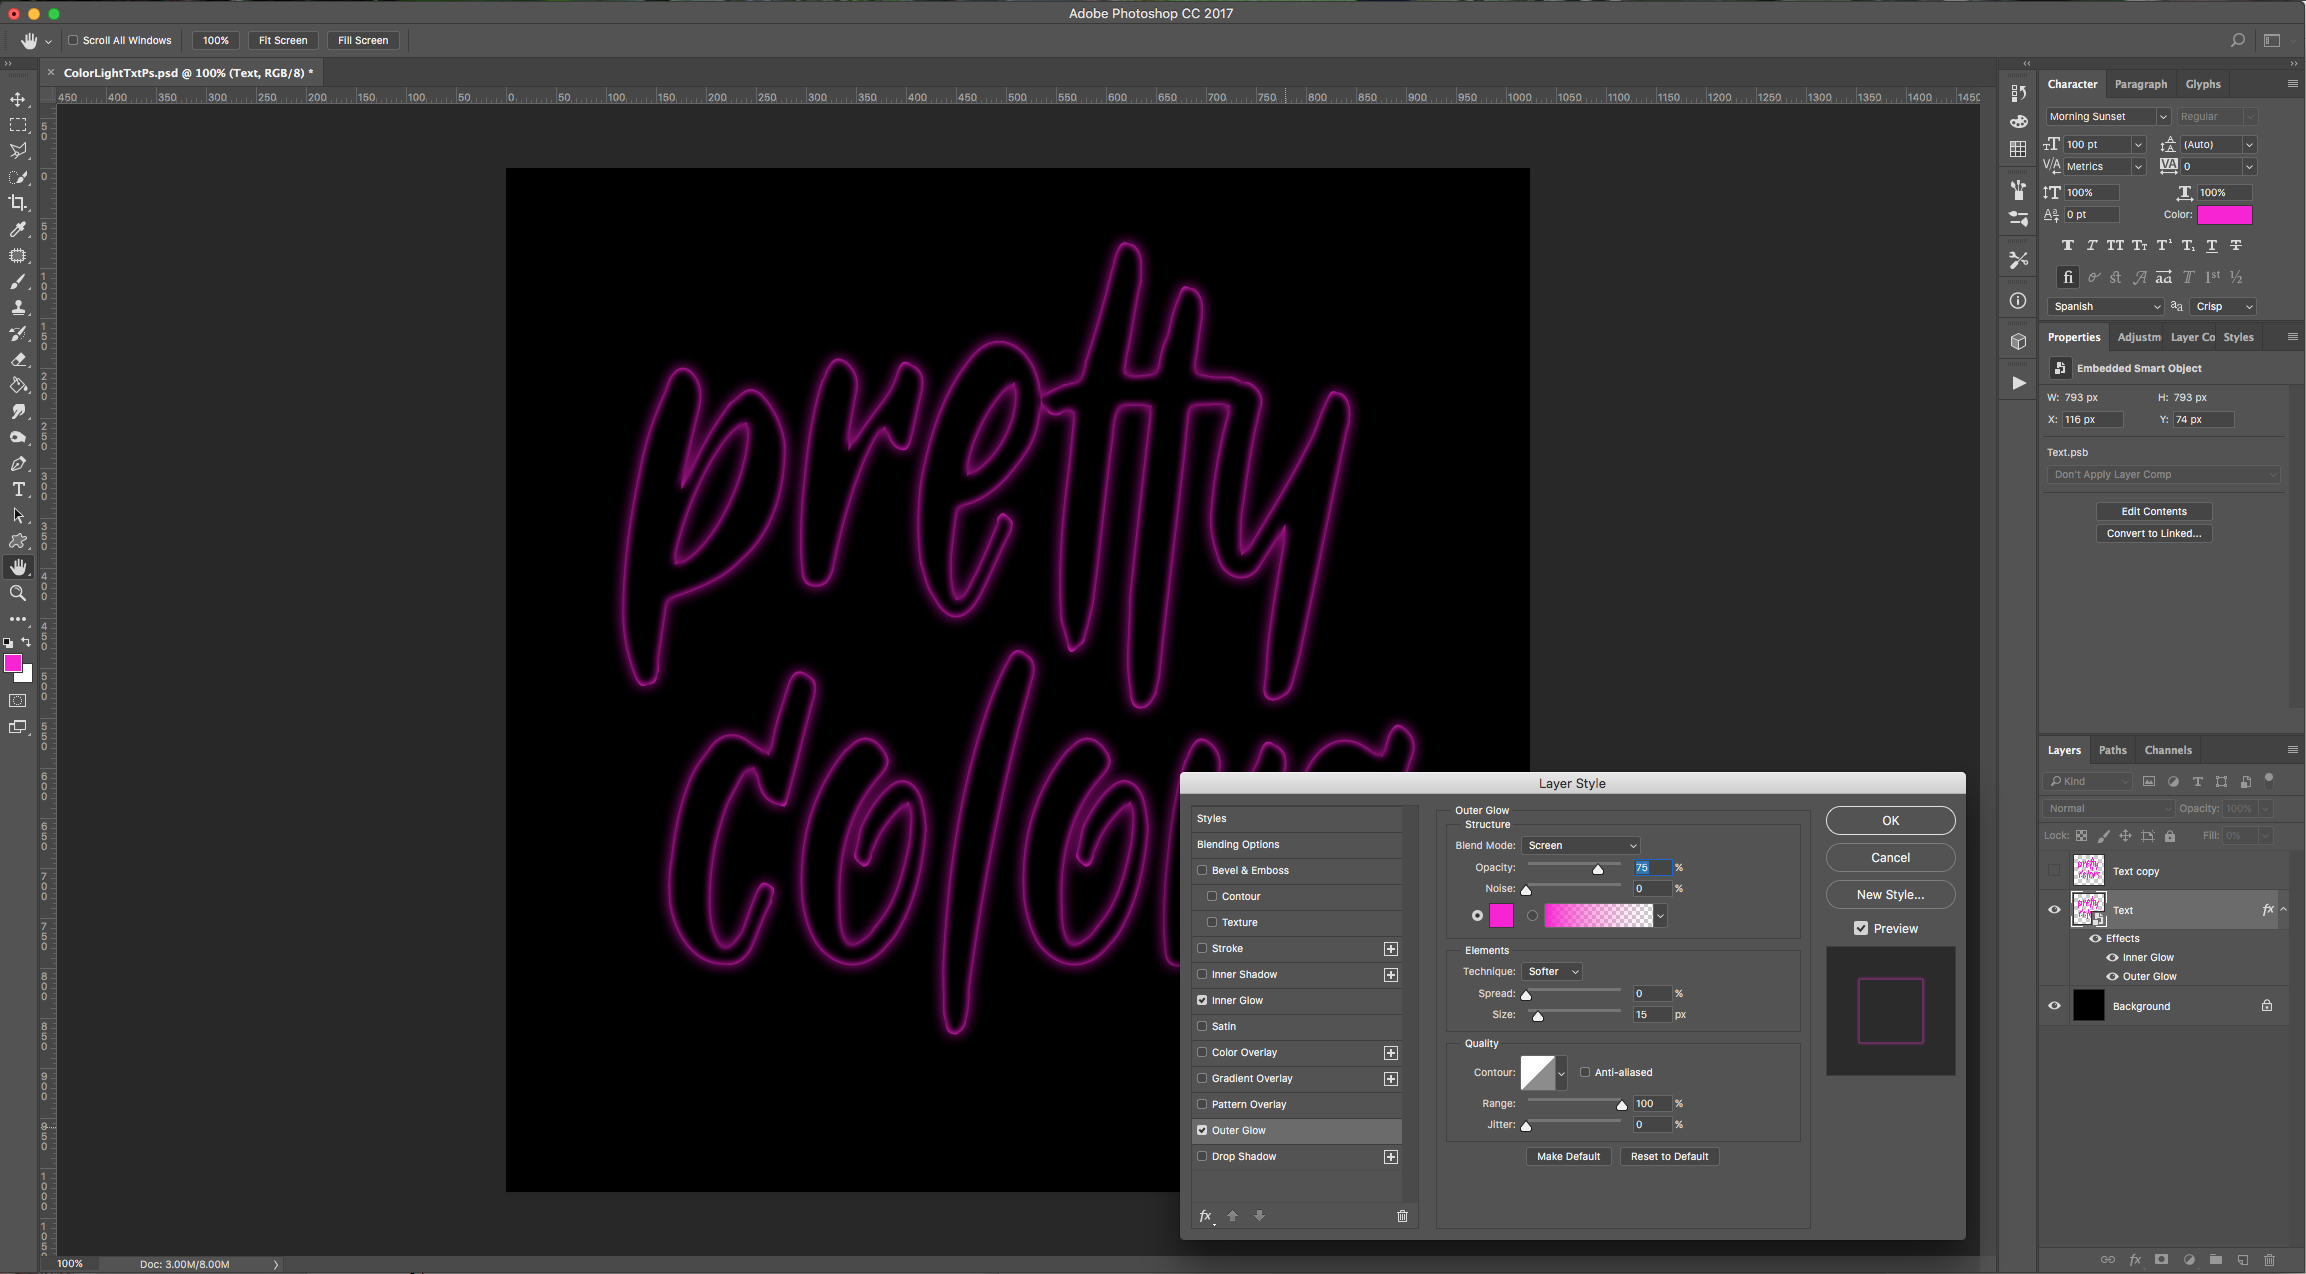
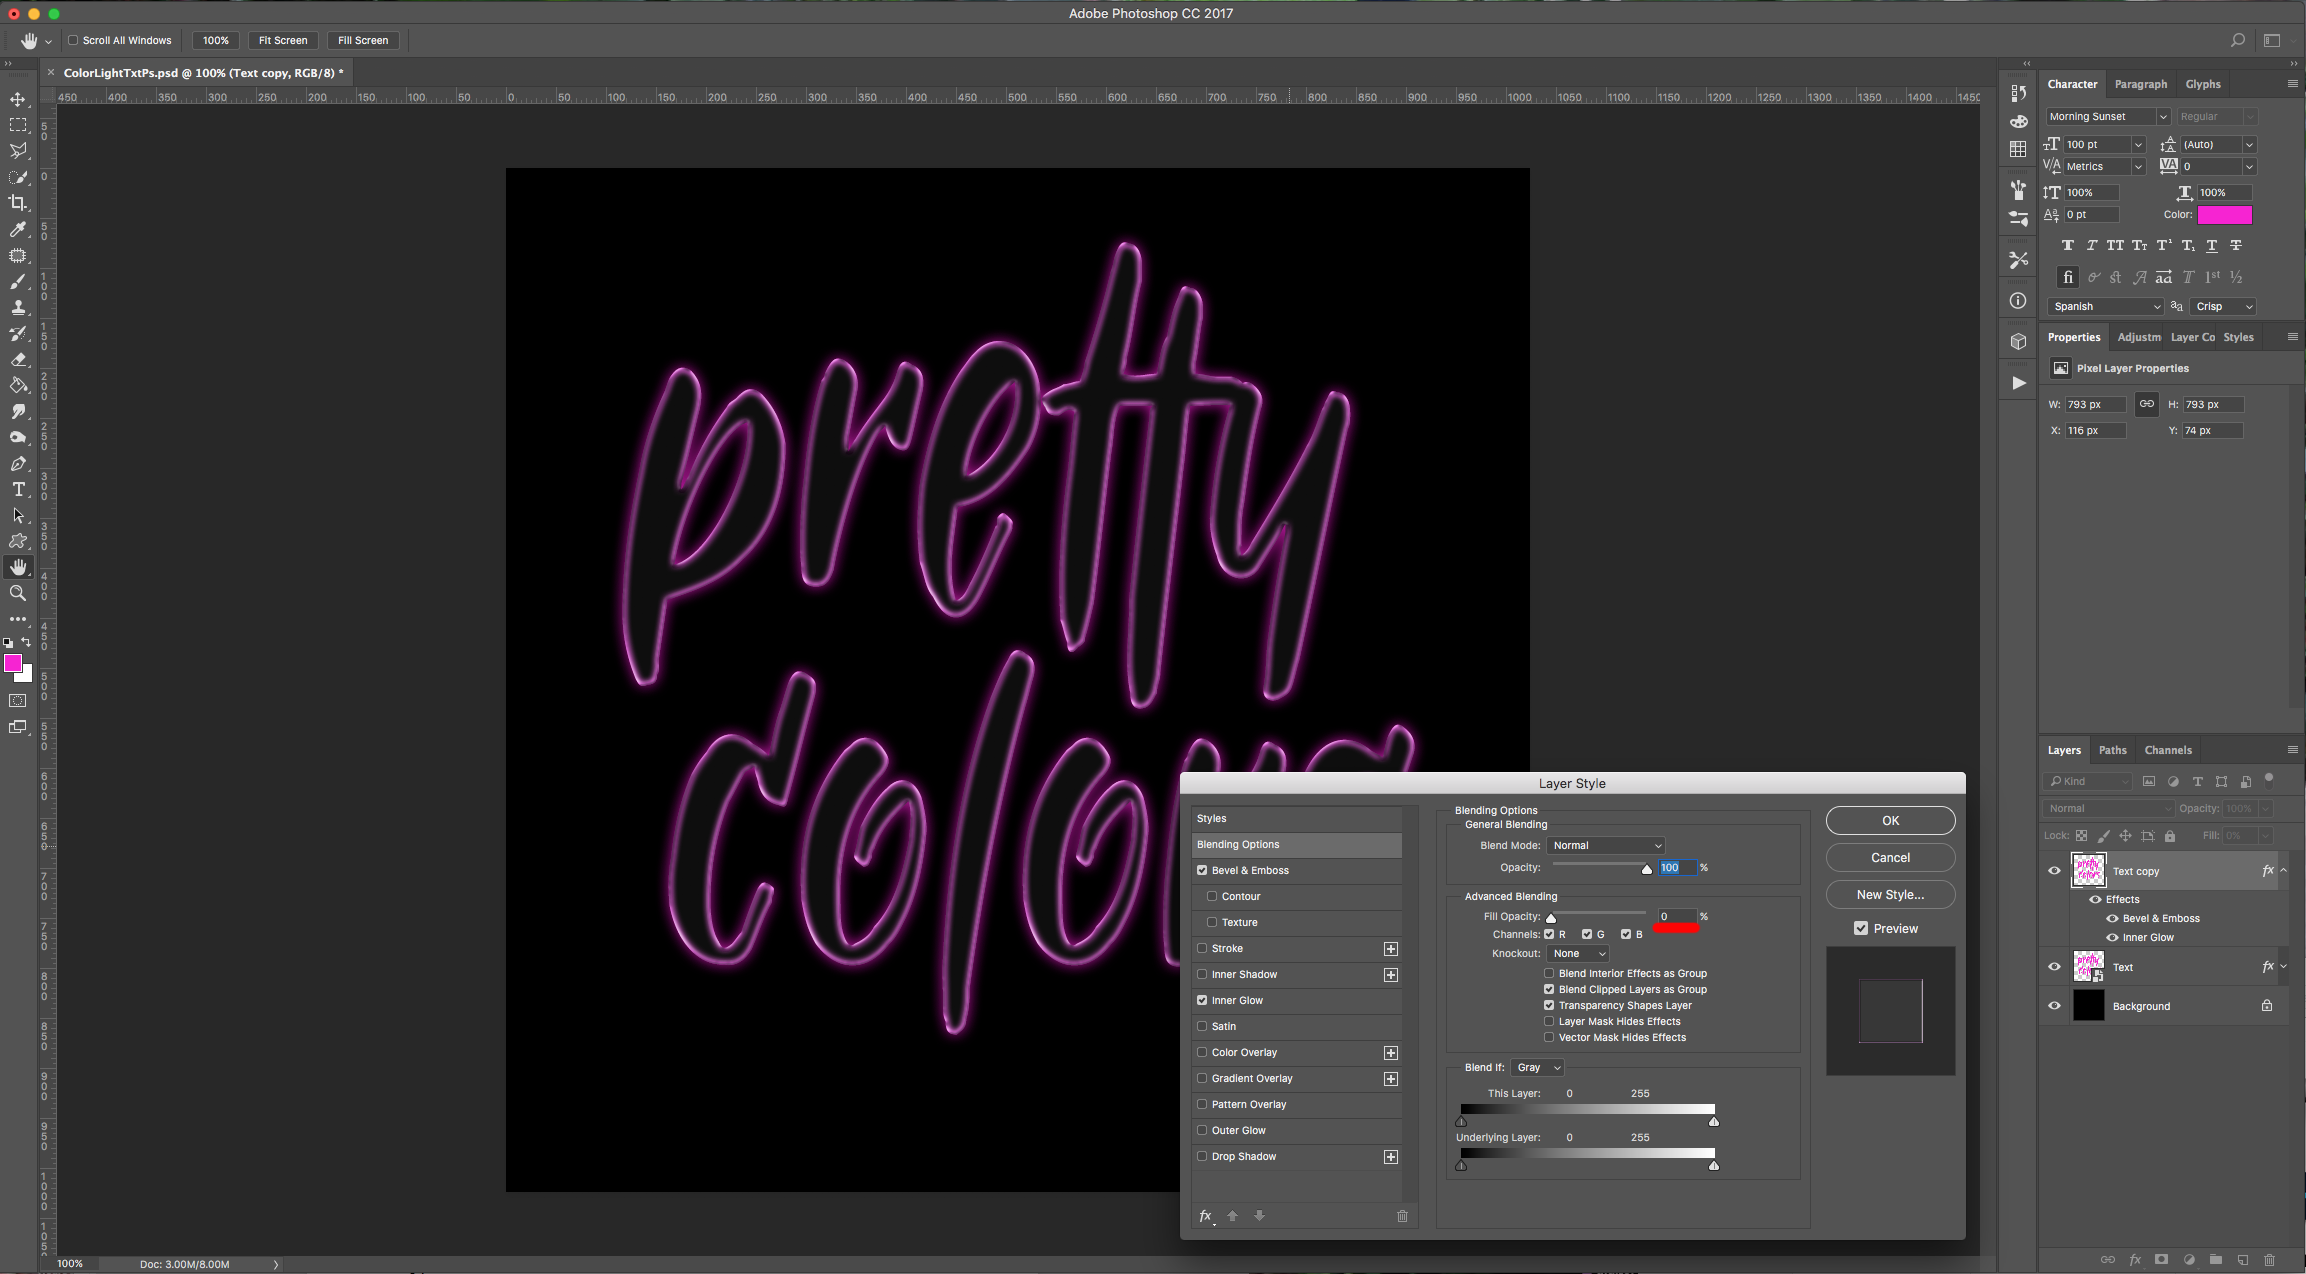
6 - Go to your “Text” Group duplicate, double-click on top of its Thumbnail and apply the following “Layer Styles”:
Blending Options:
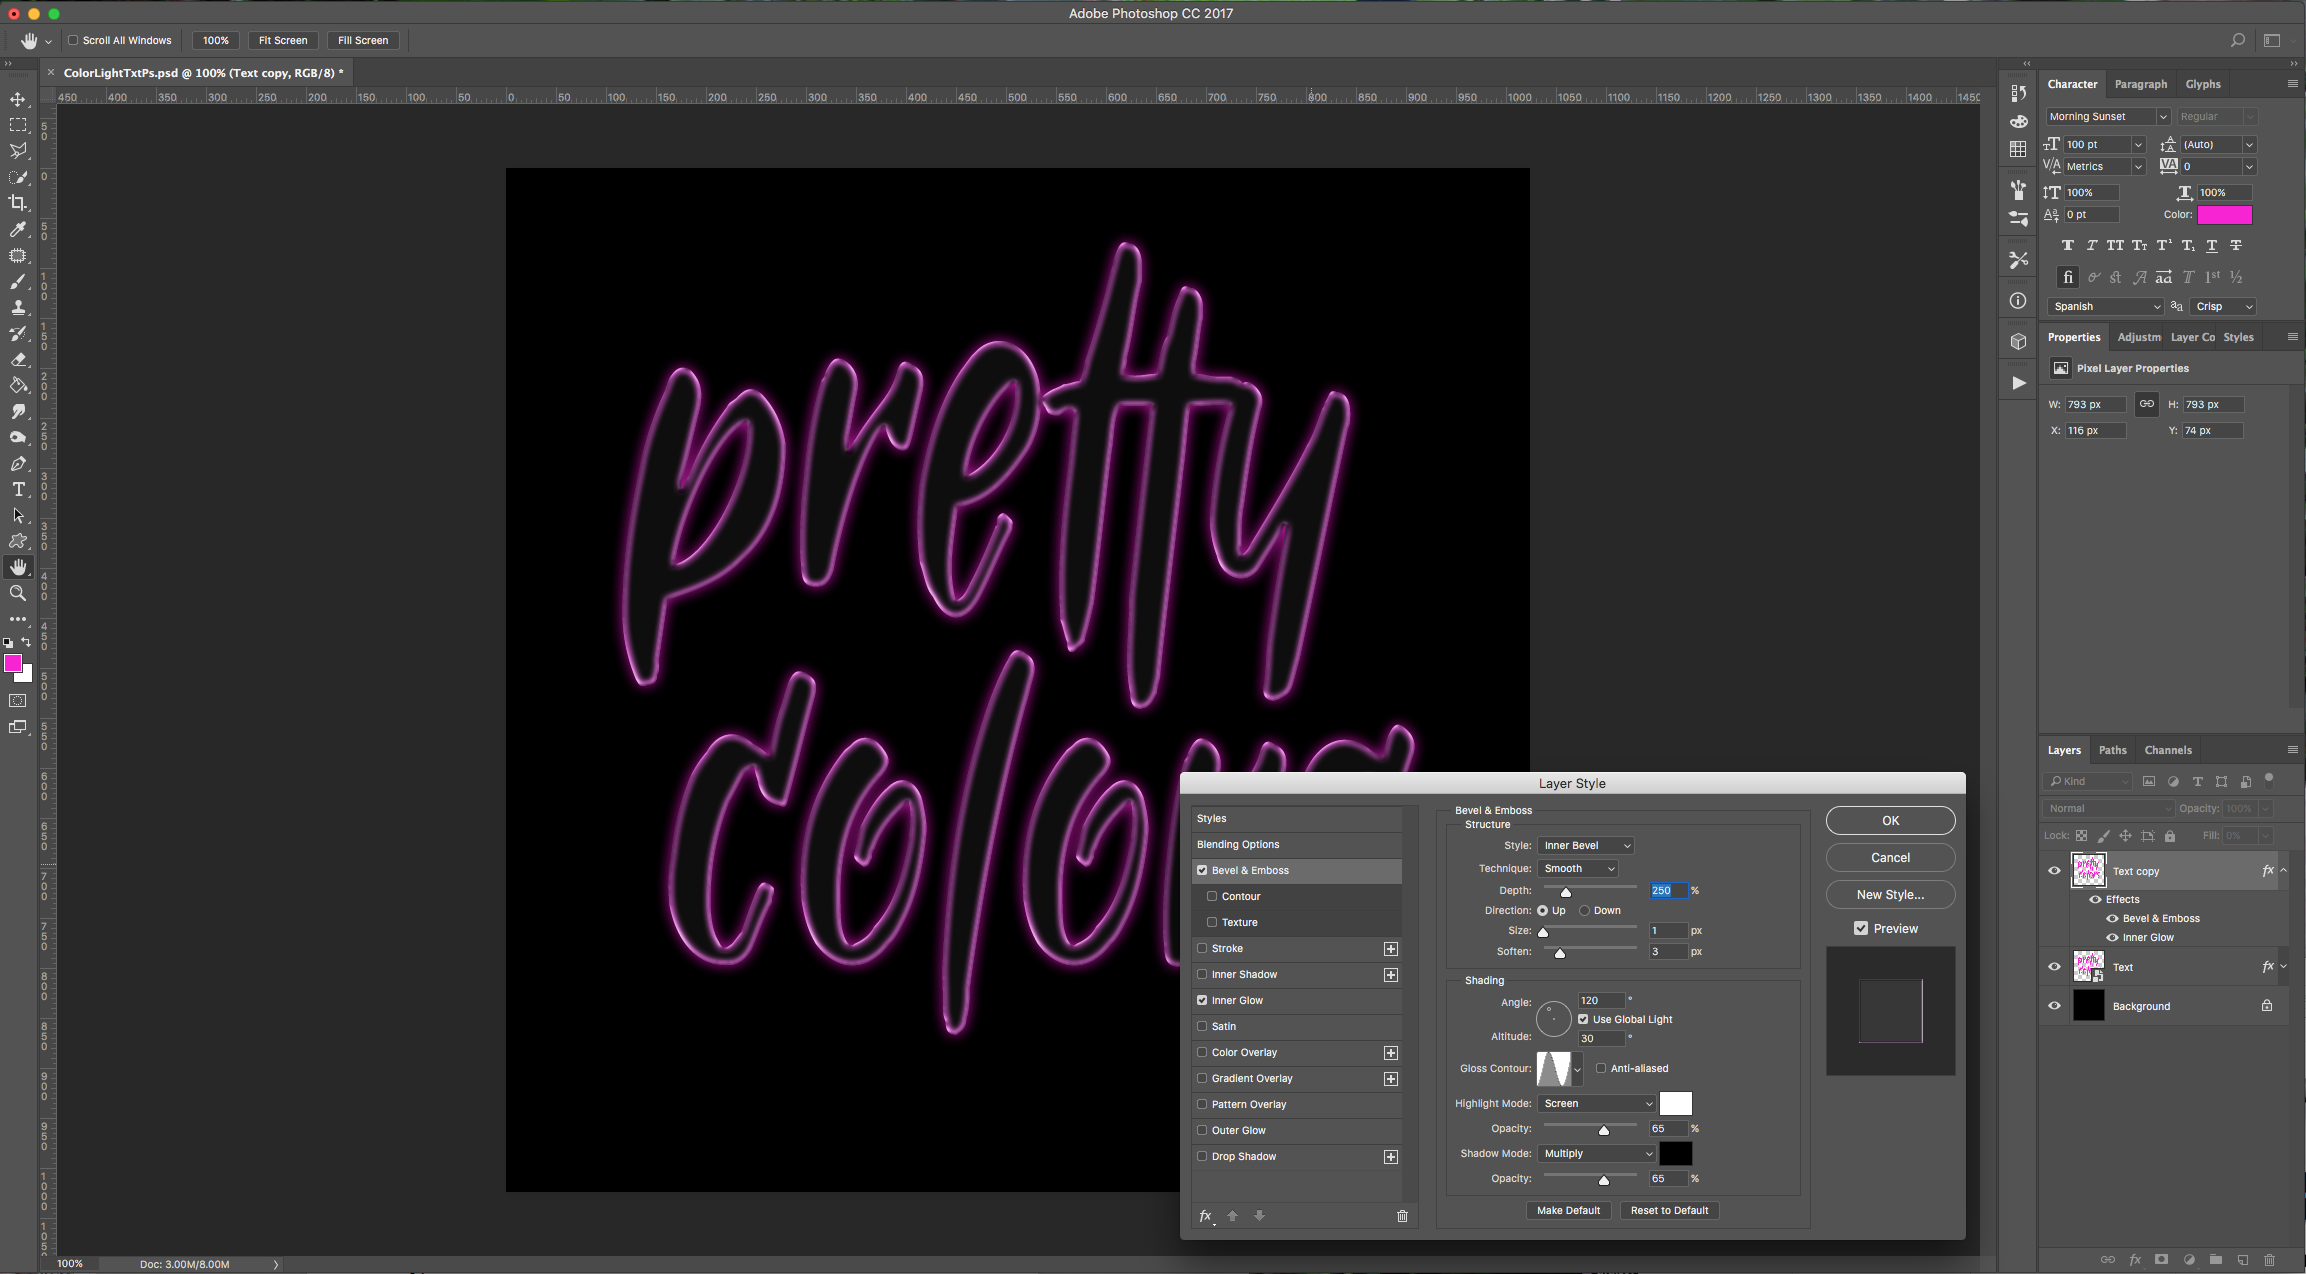
Bevel & Emboss: (Gloss Contour: Ring)
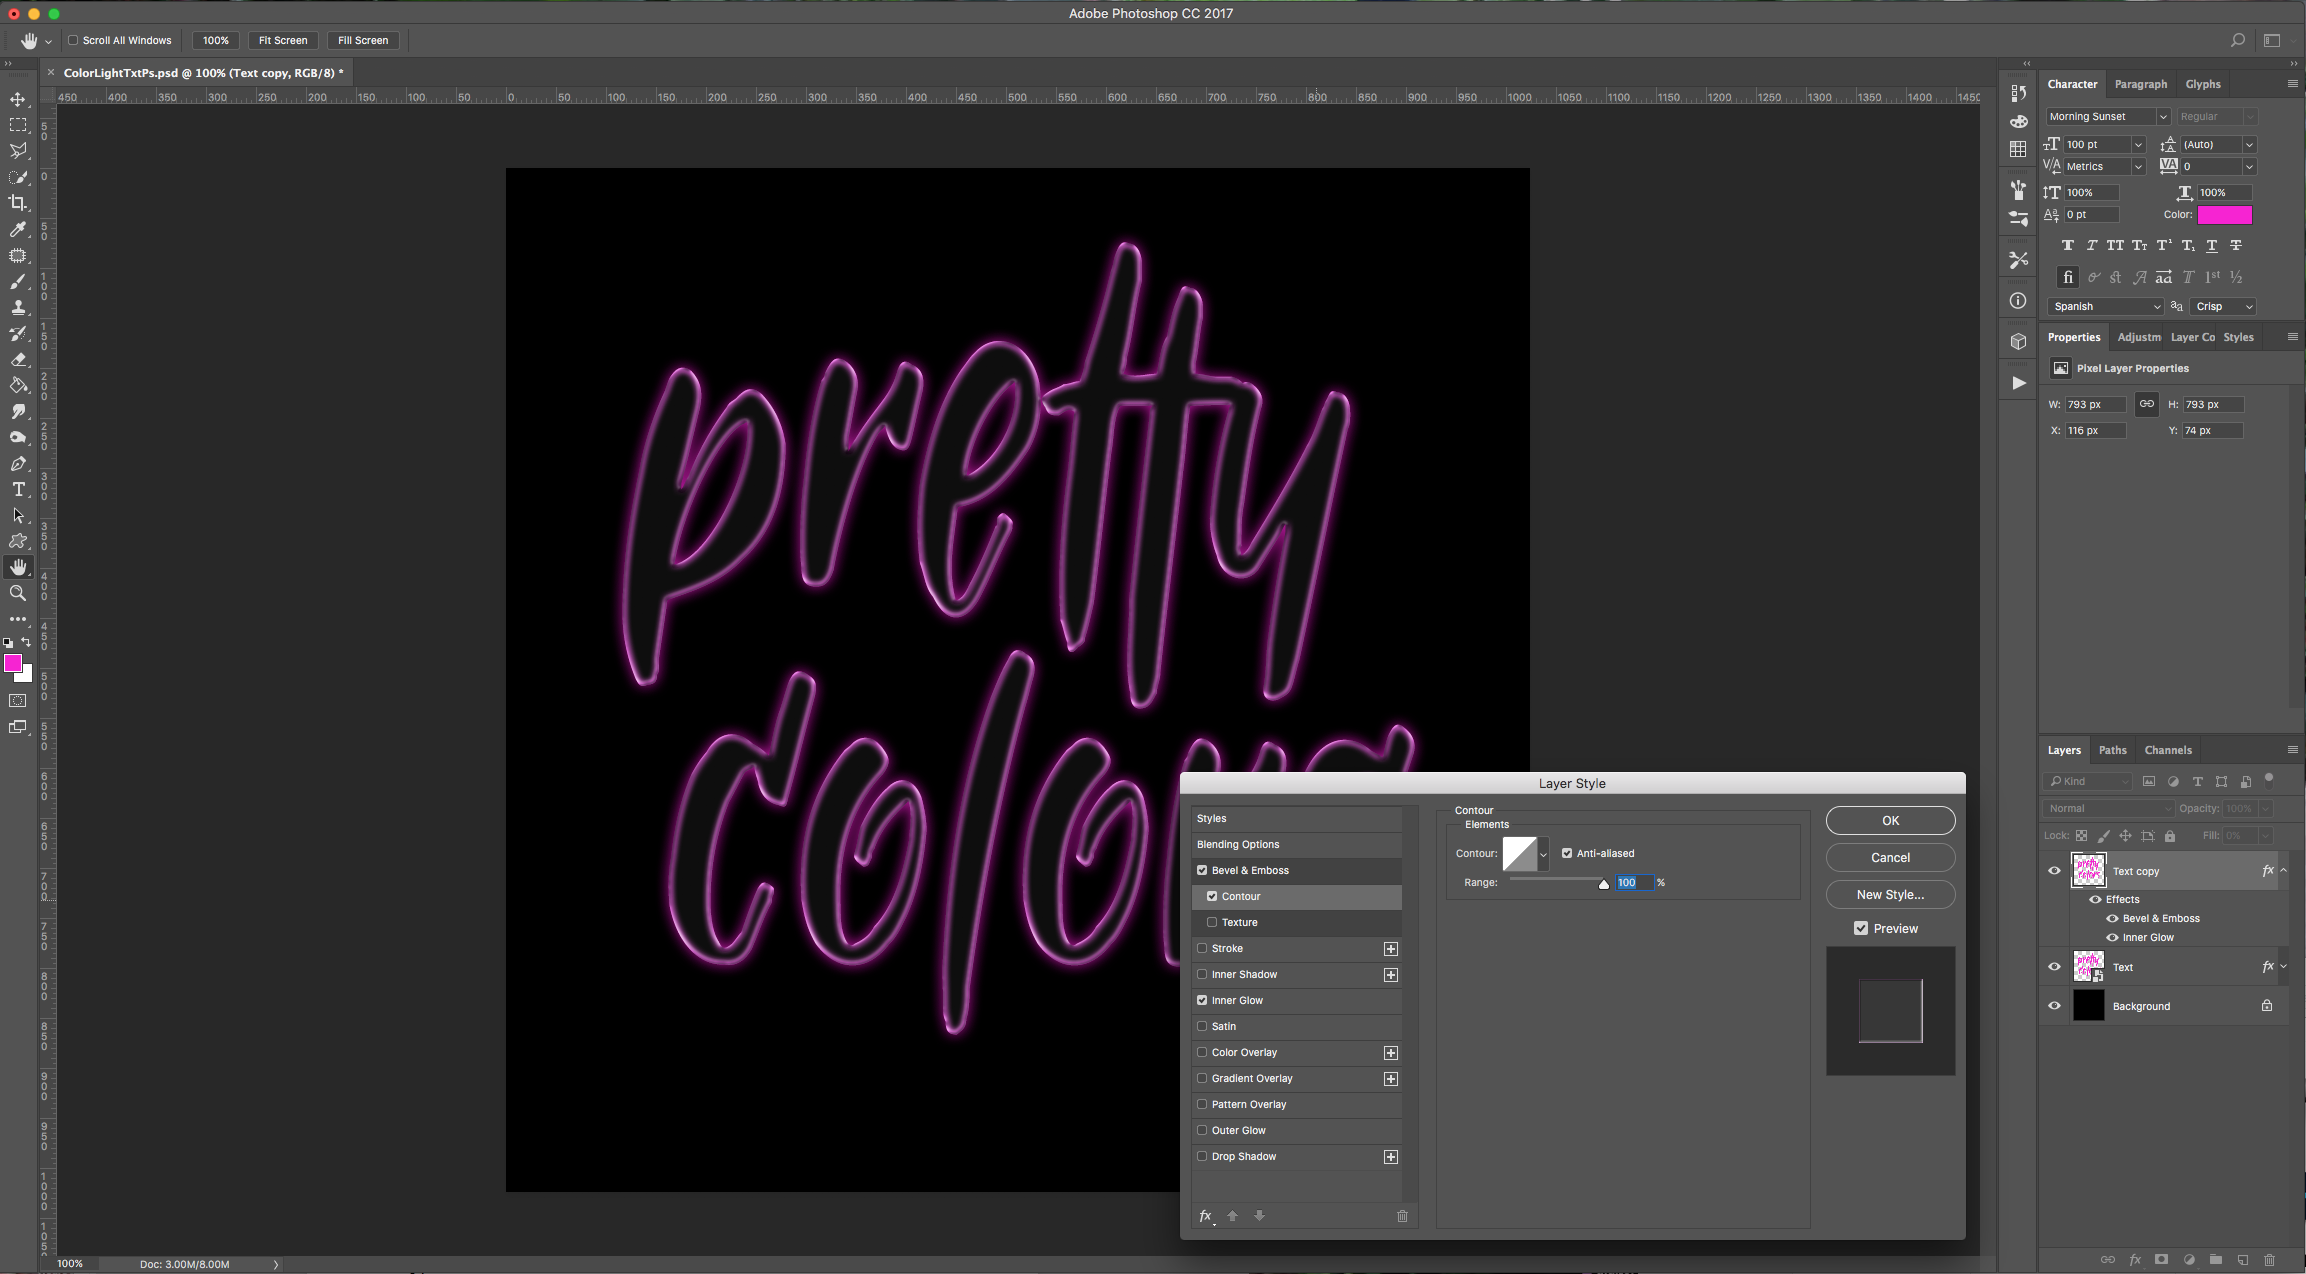
Contour:
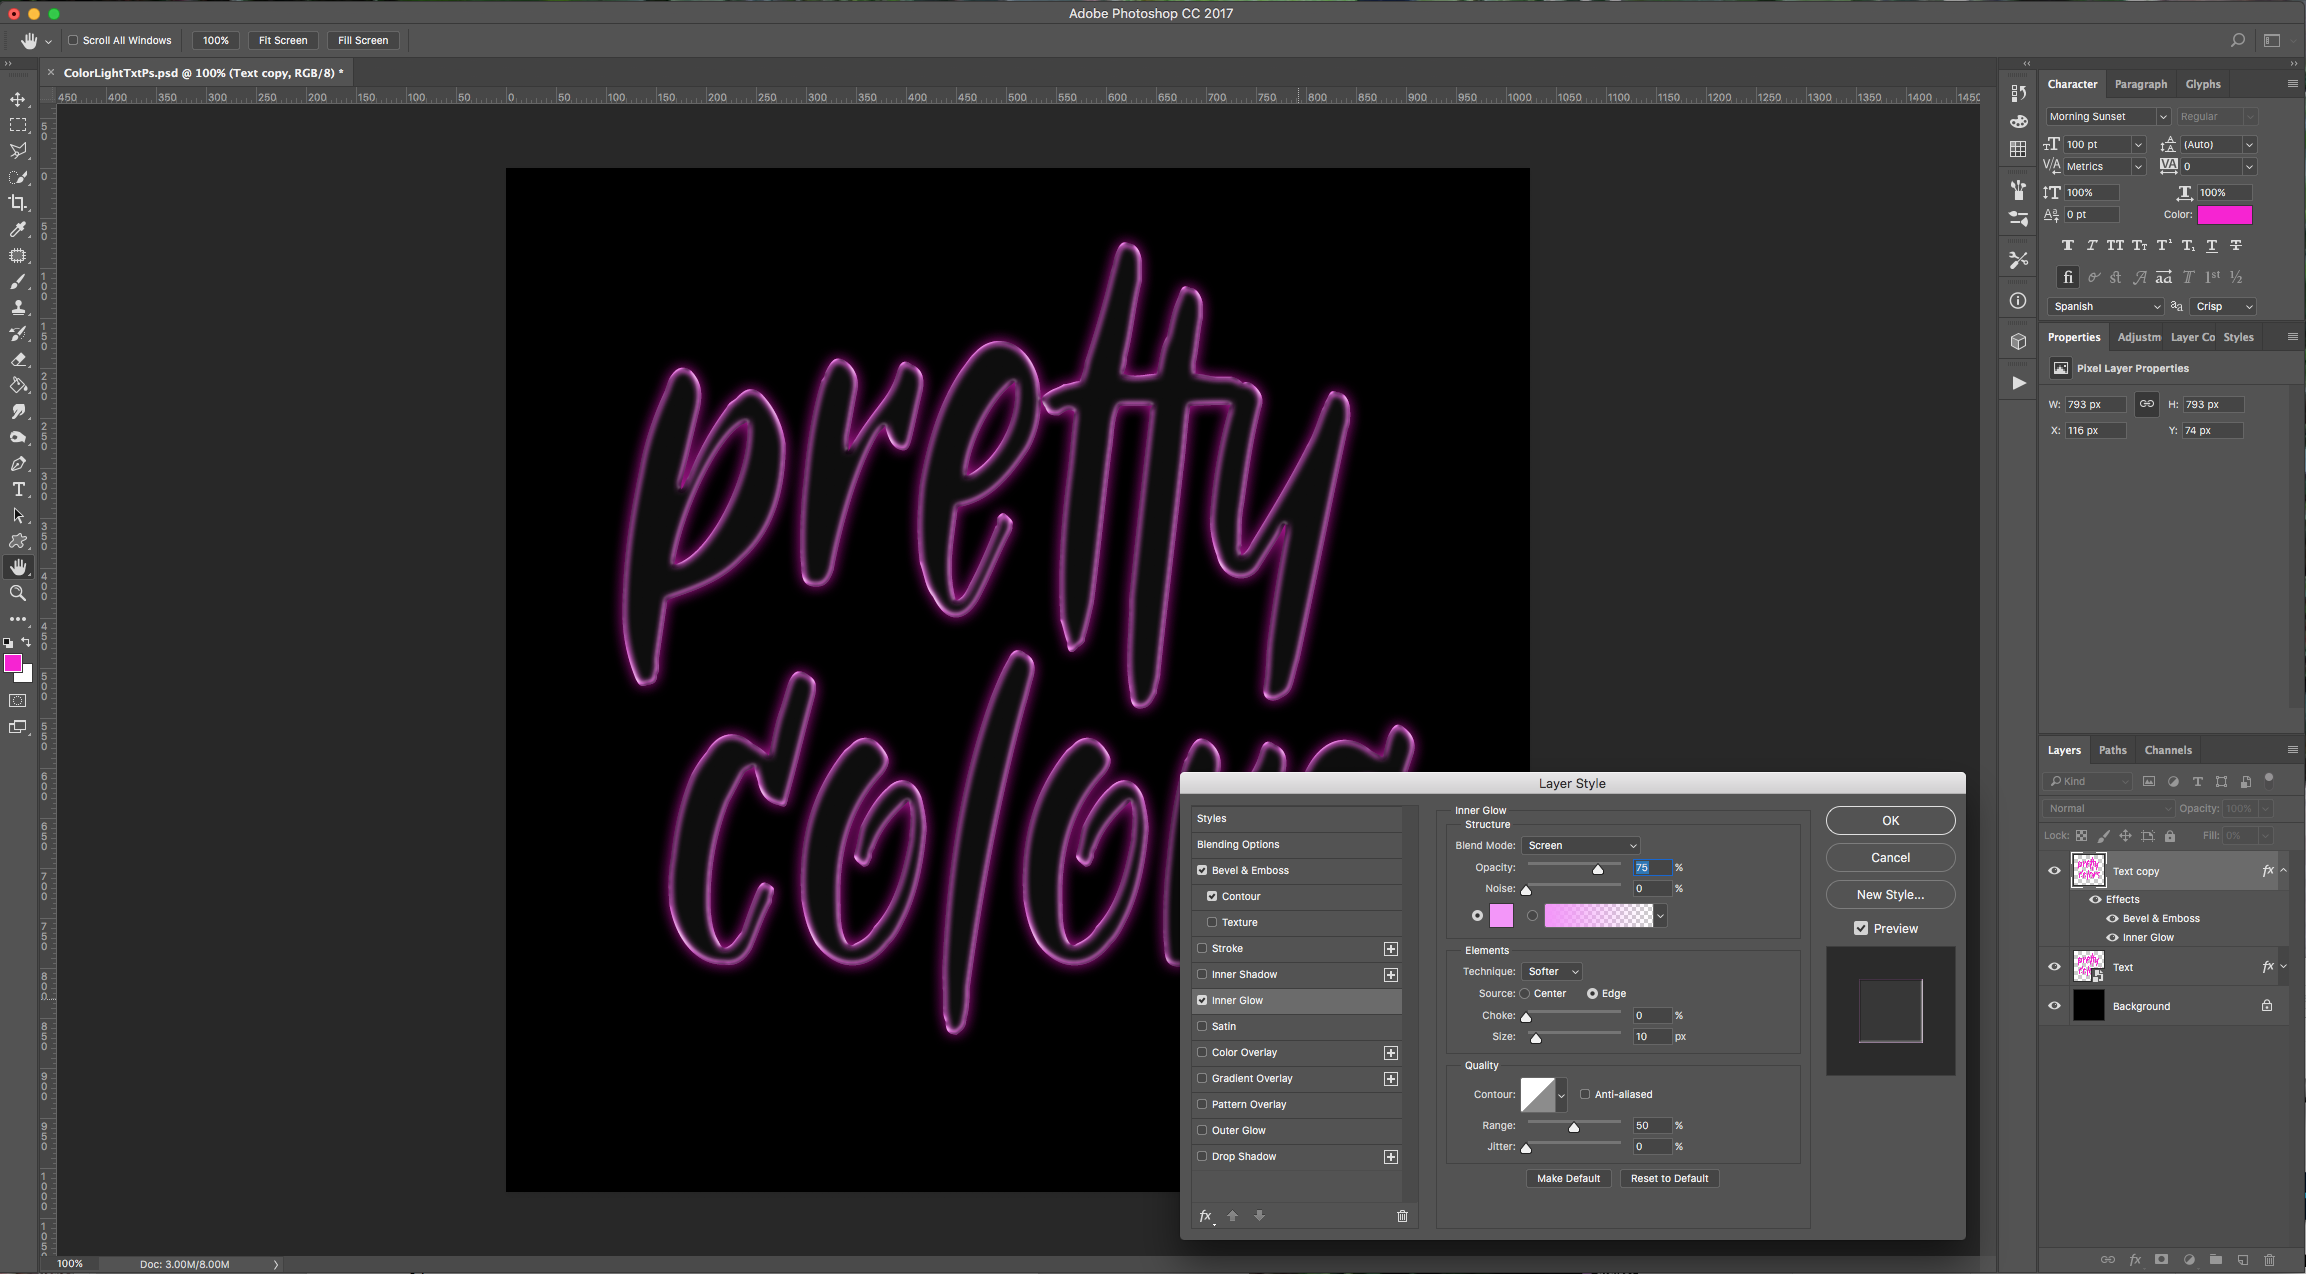
Inner Glow: (#f593fb)
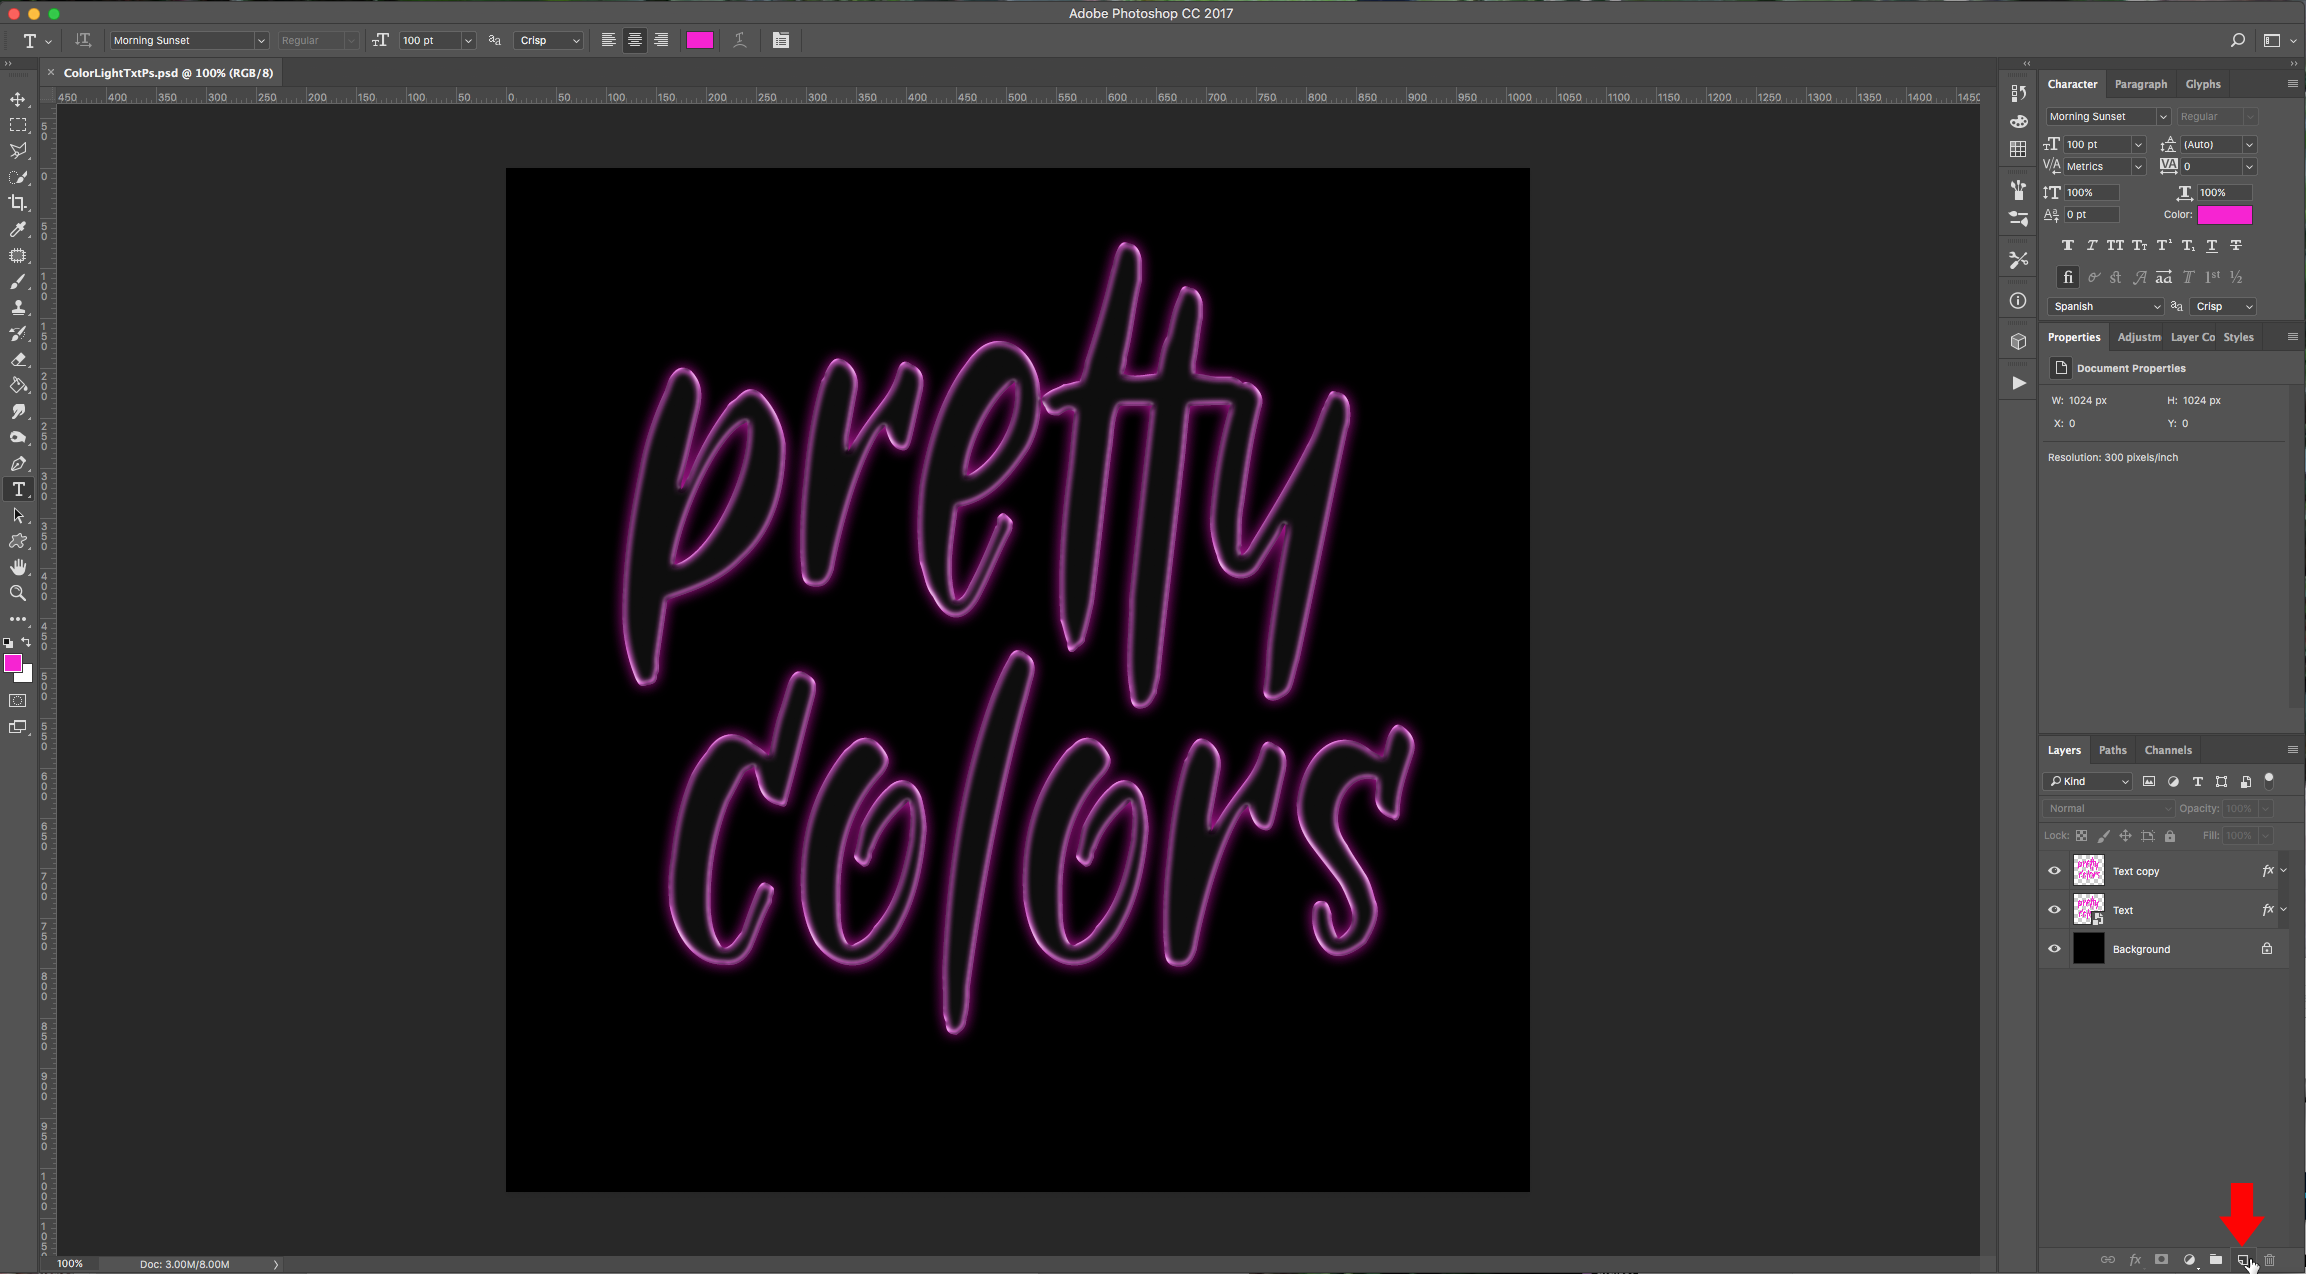
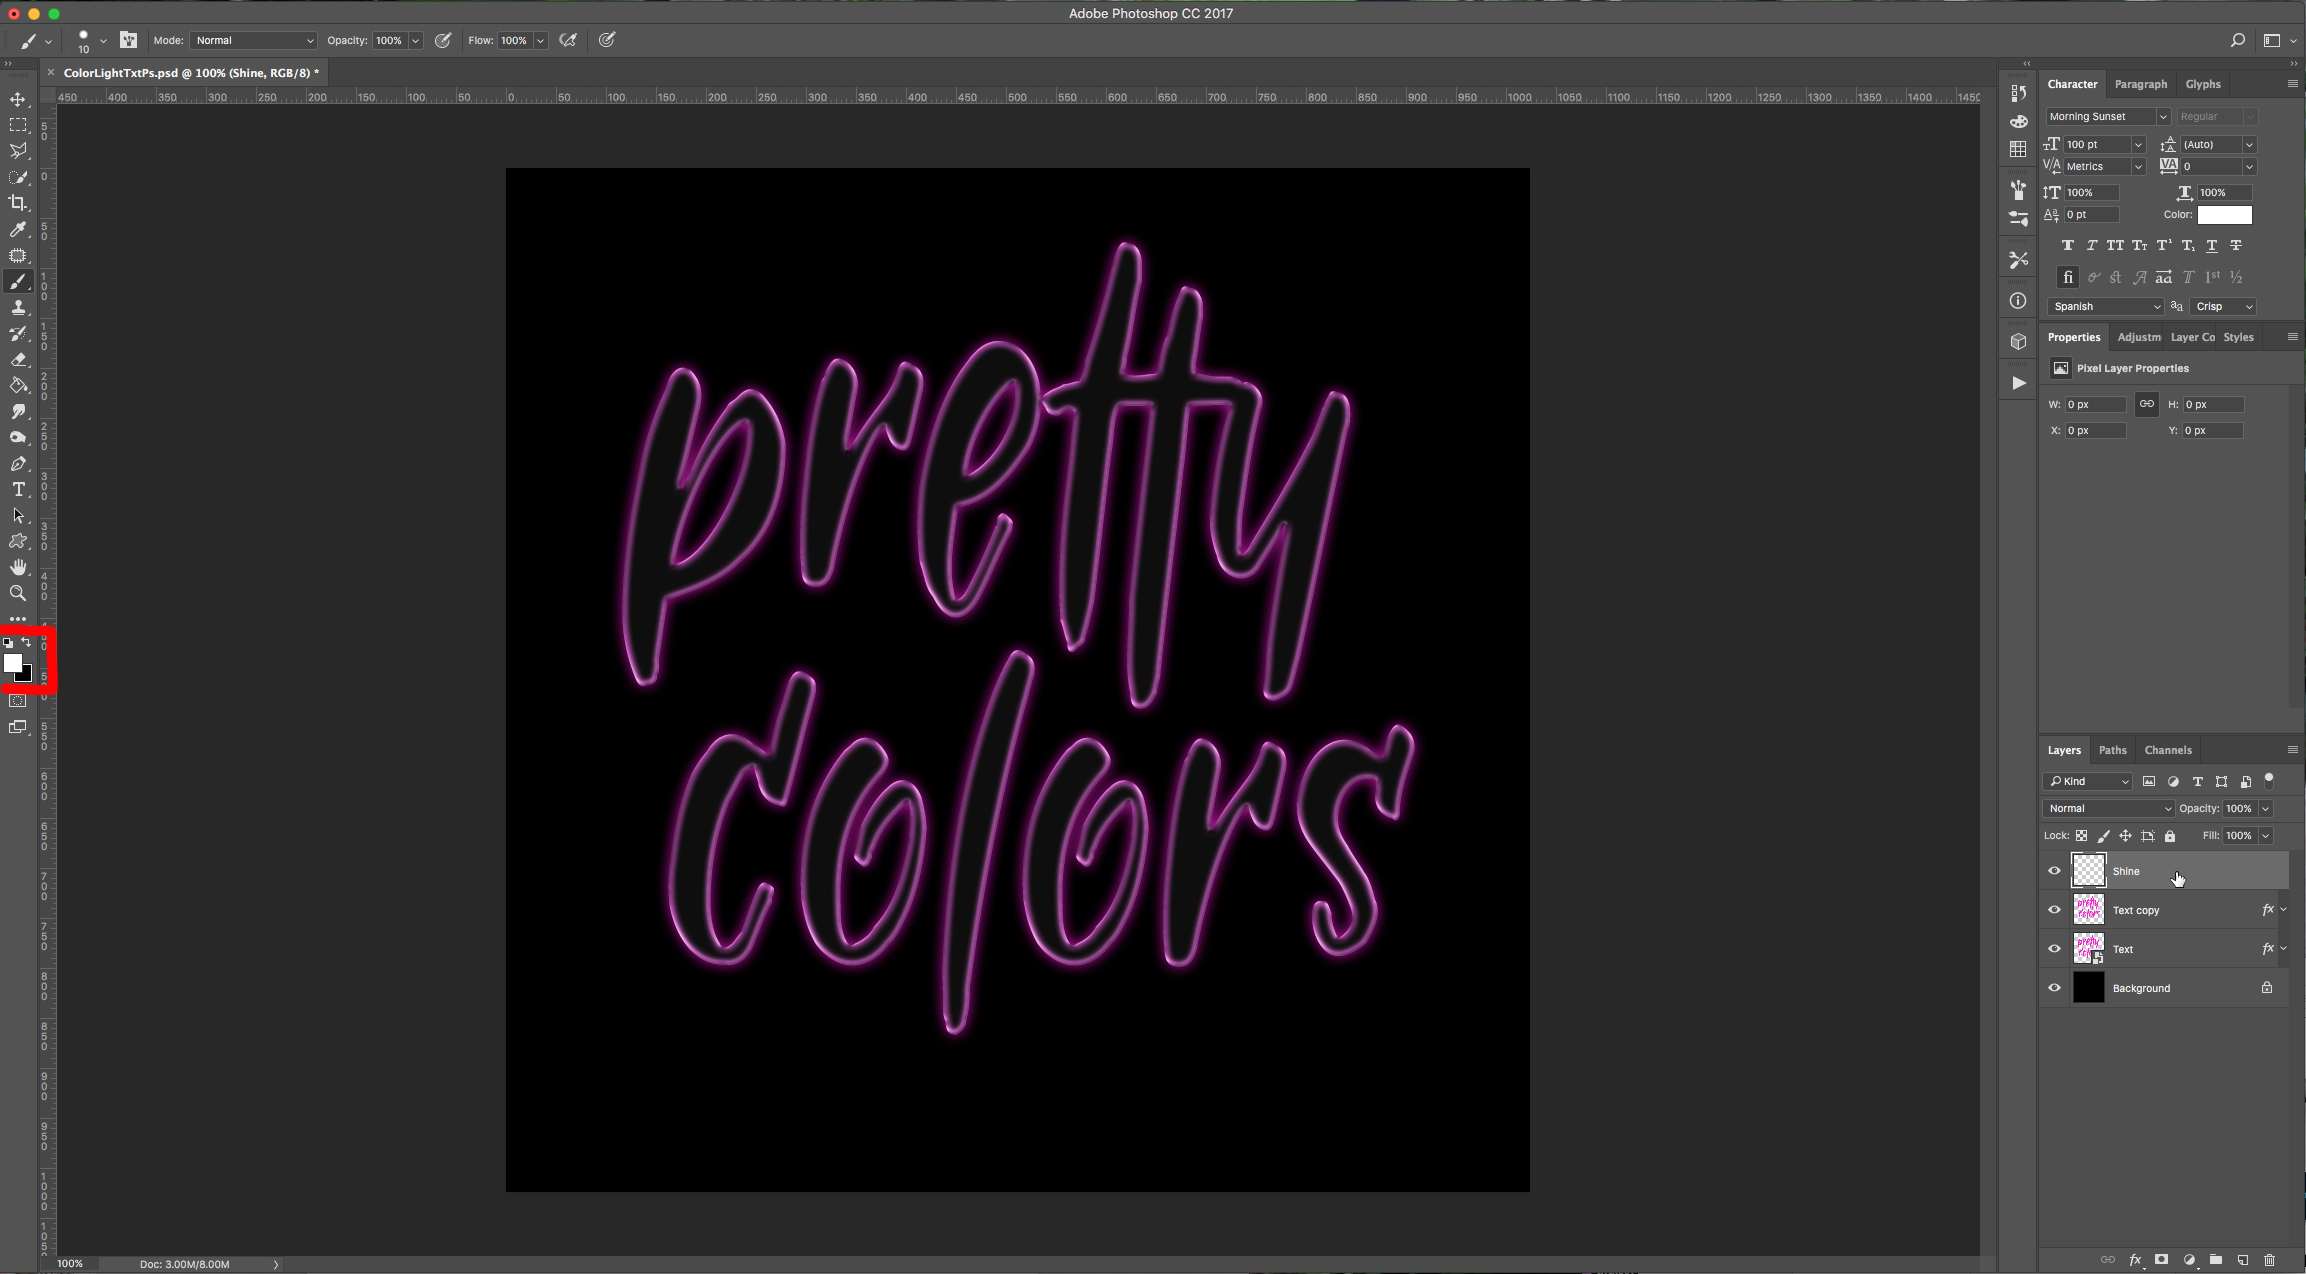
7 - Create a “New Layer” by clicking on the small button at the bottom of the “Layers Panel”, set the “Foreground” color to White, and name it “Shine”.
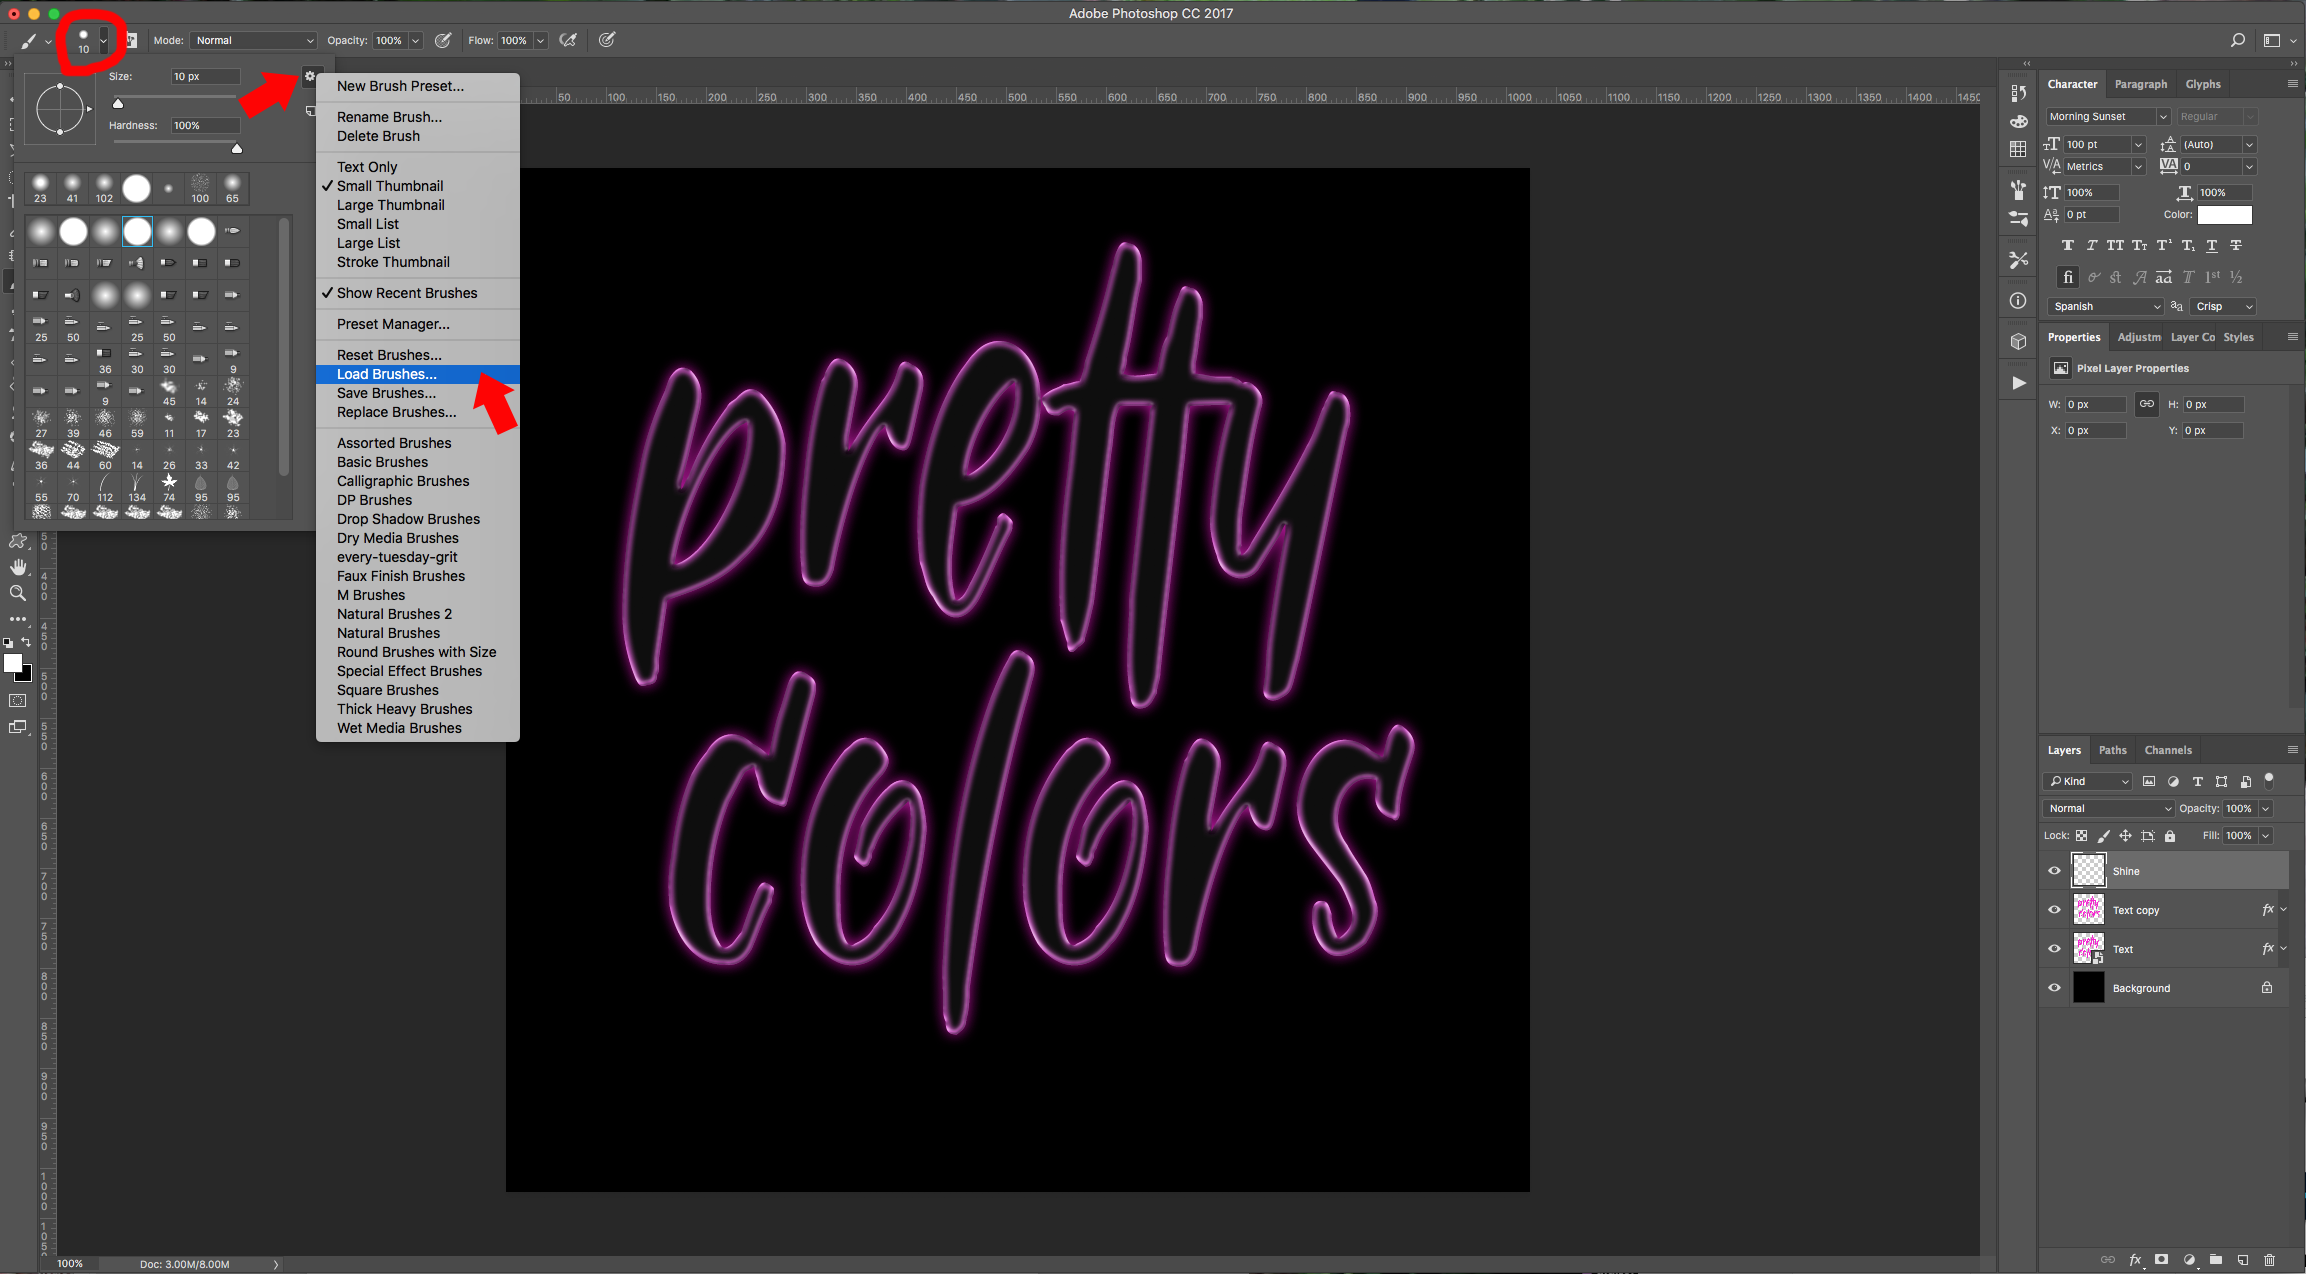
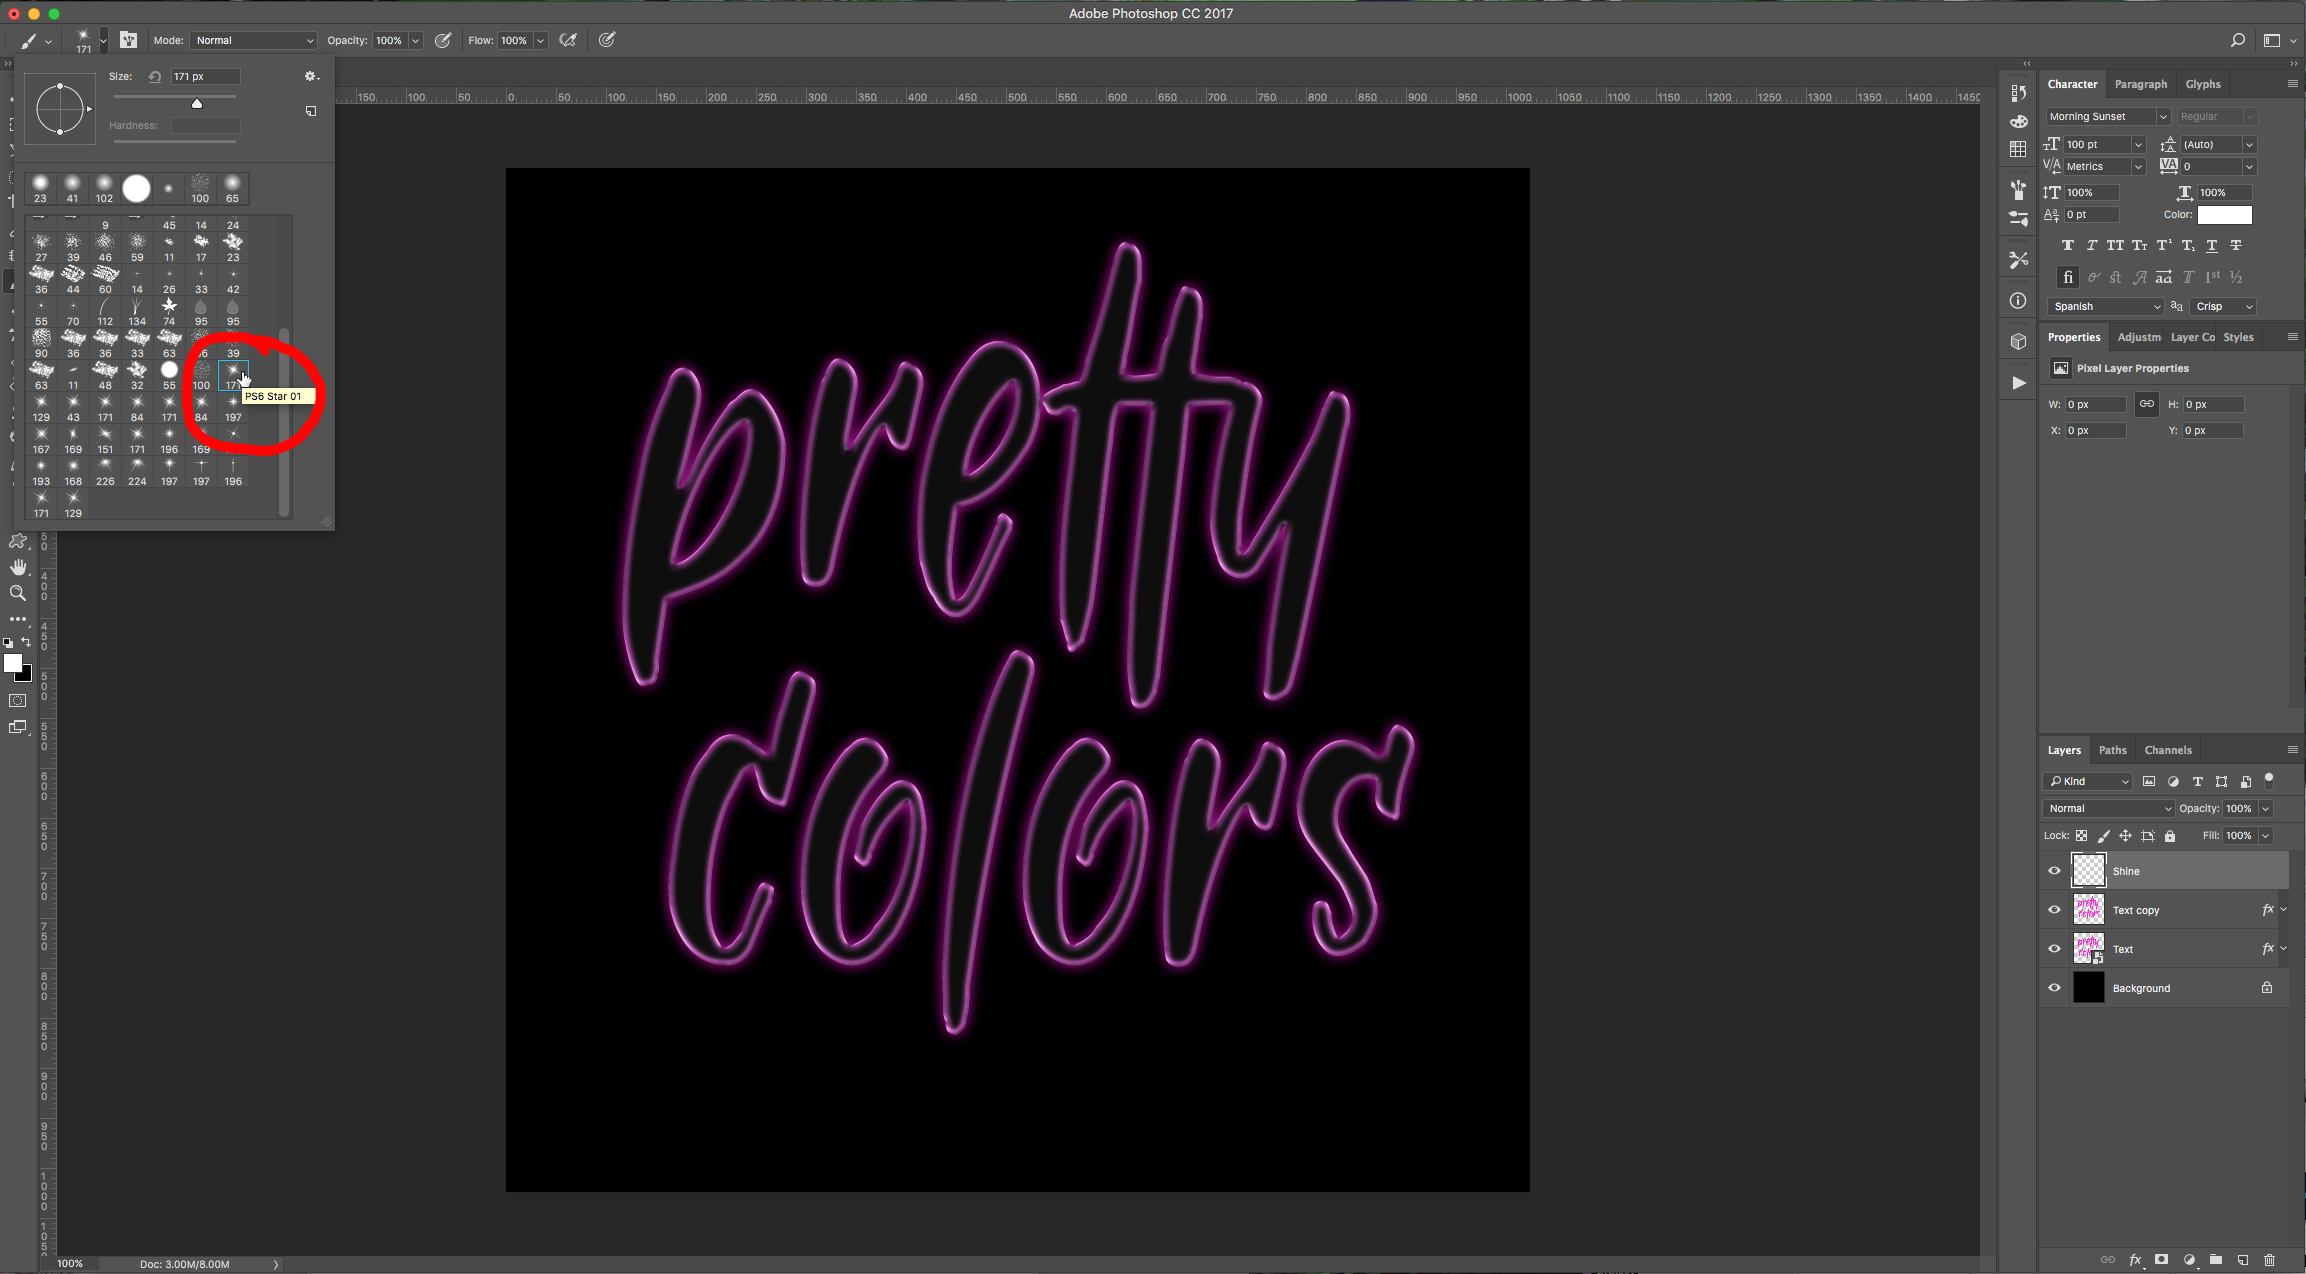
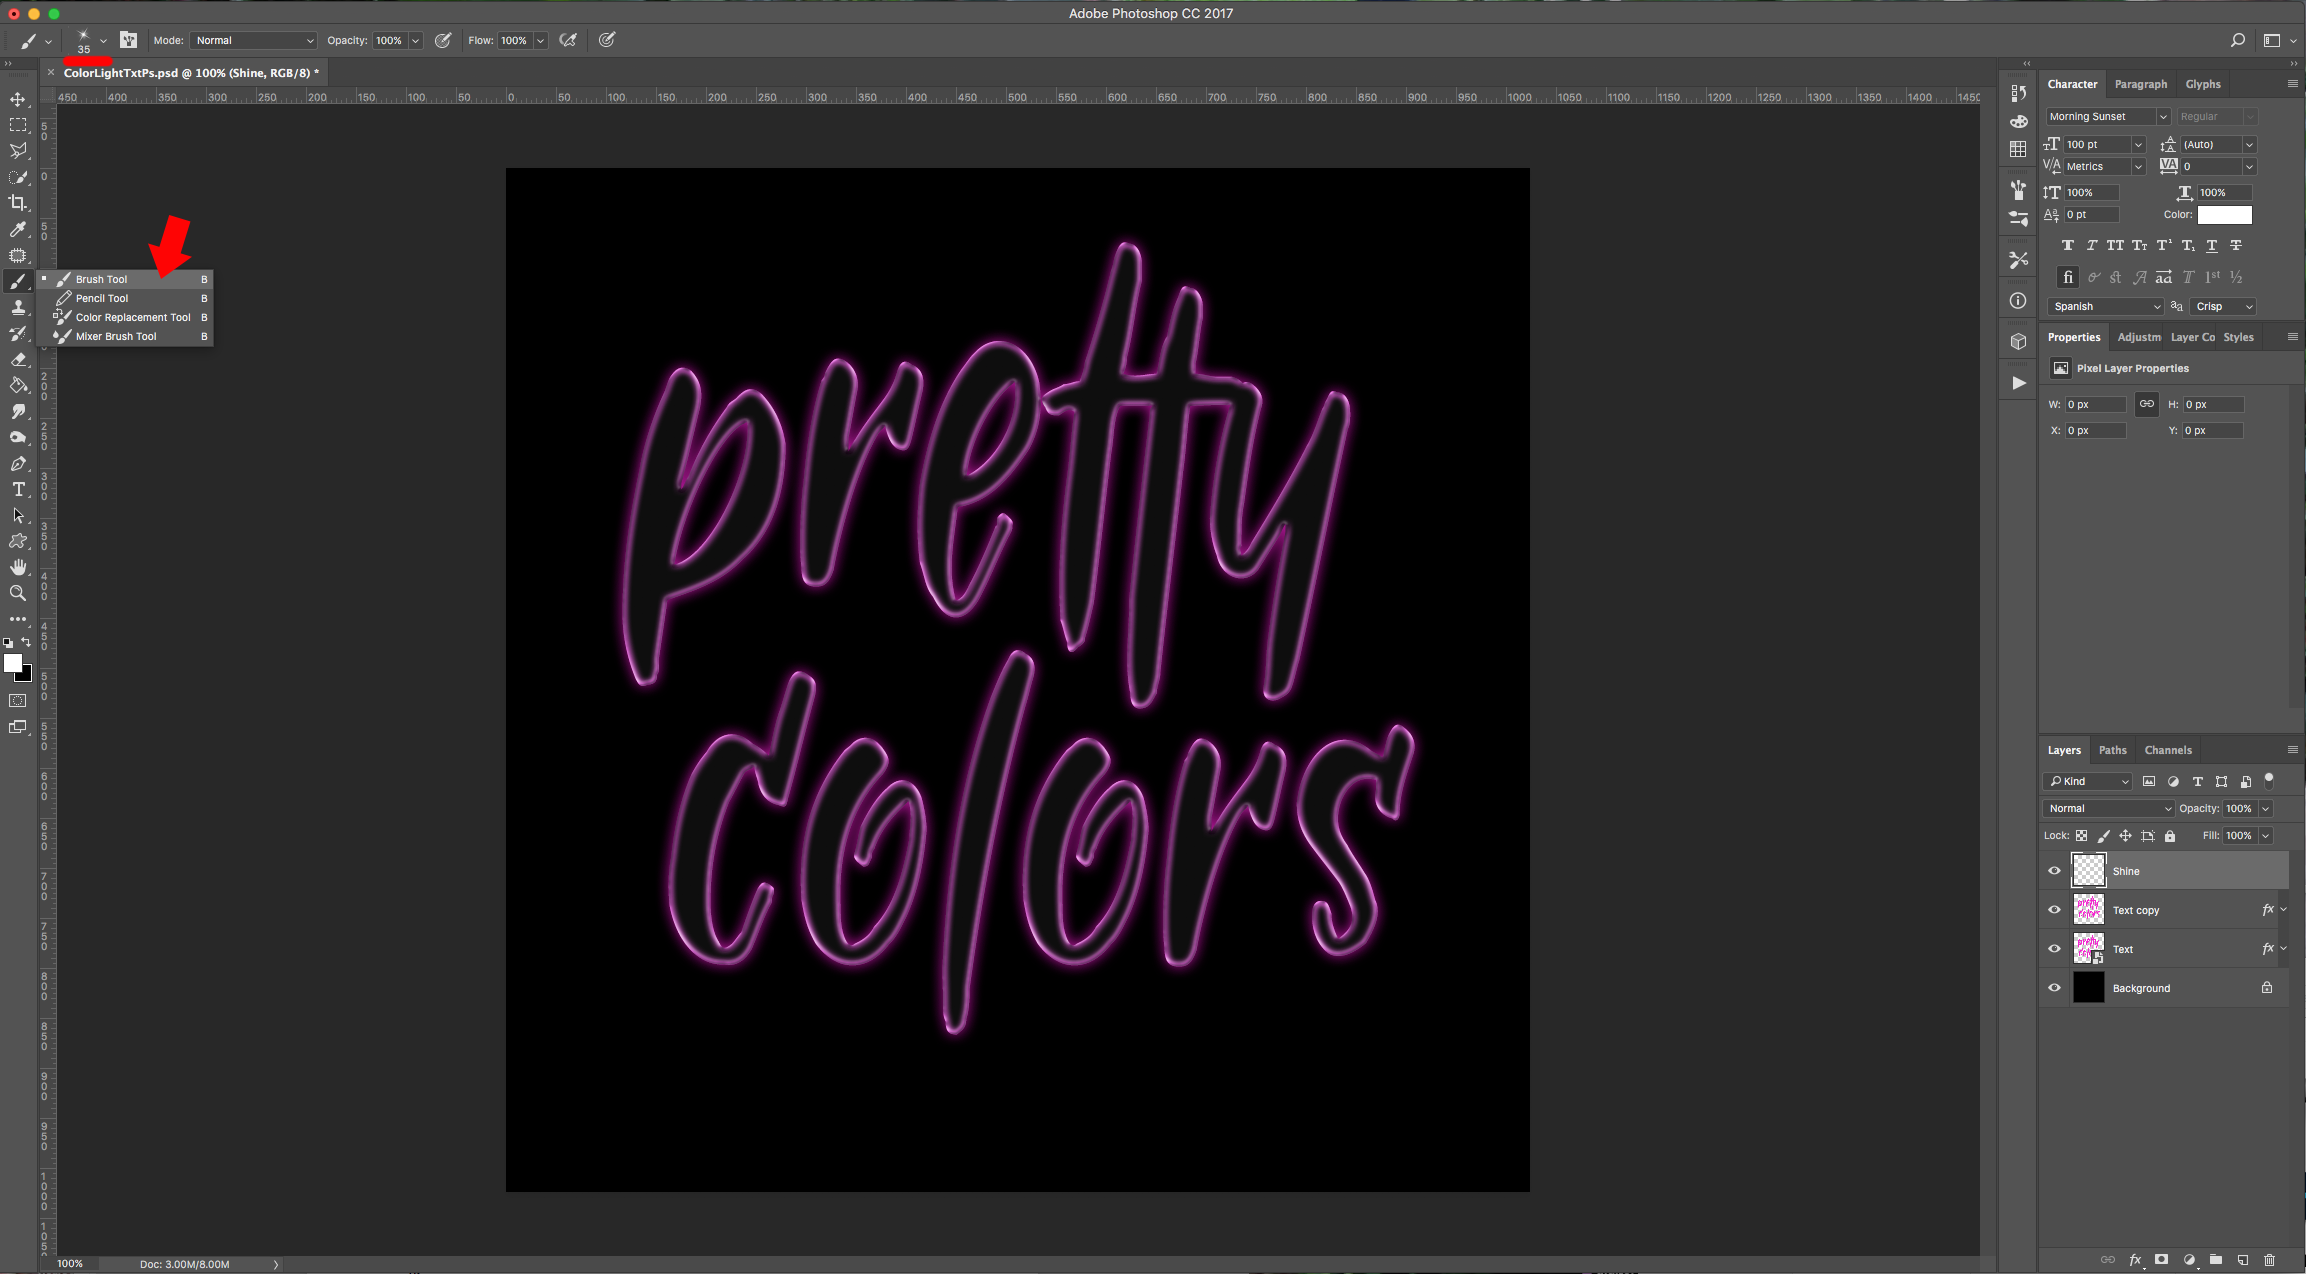
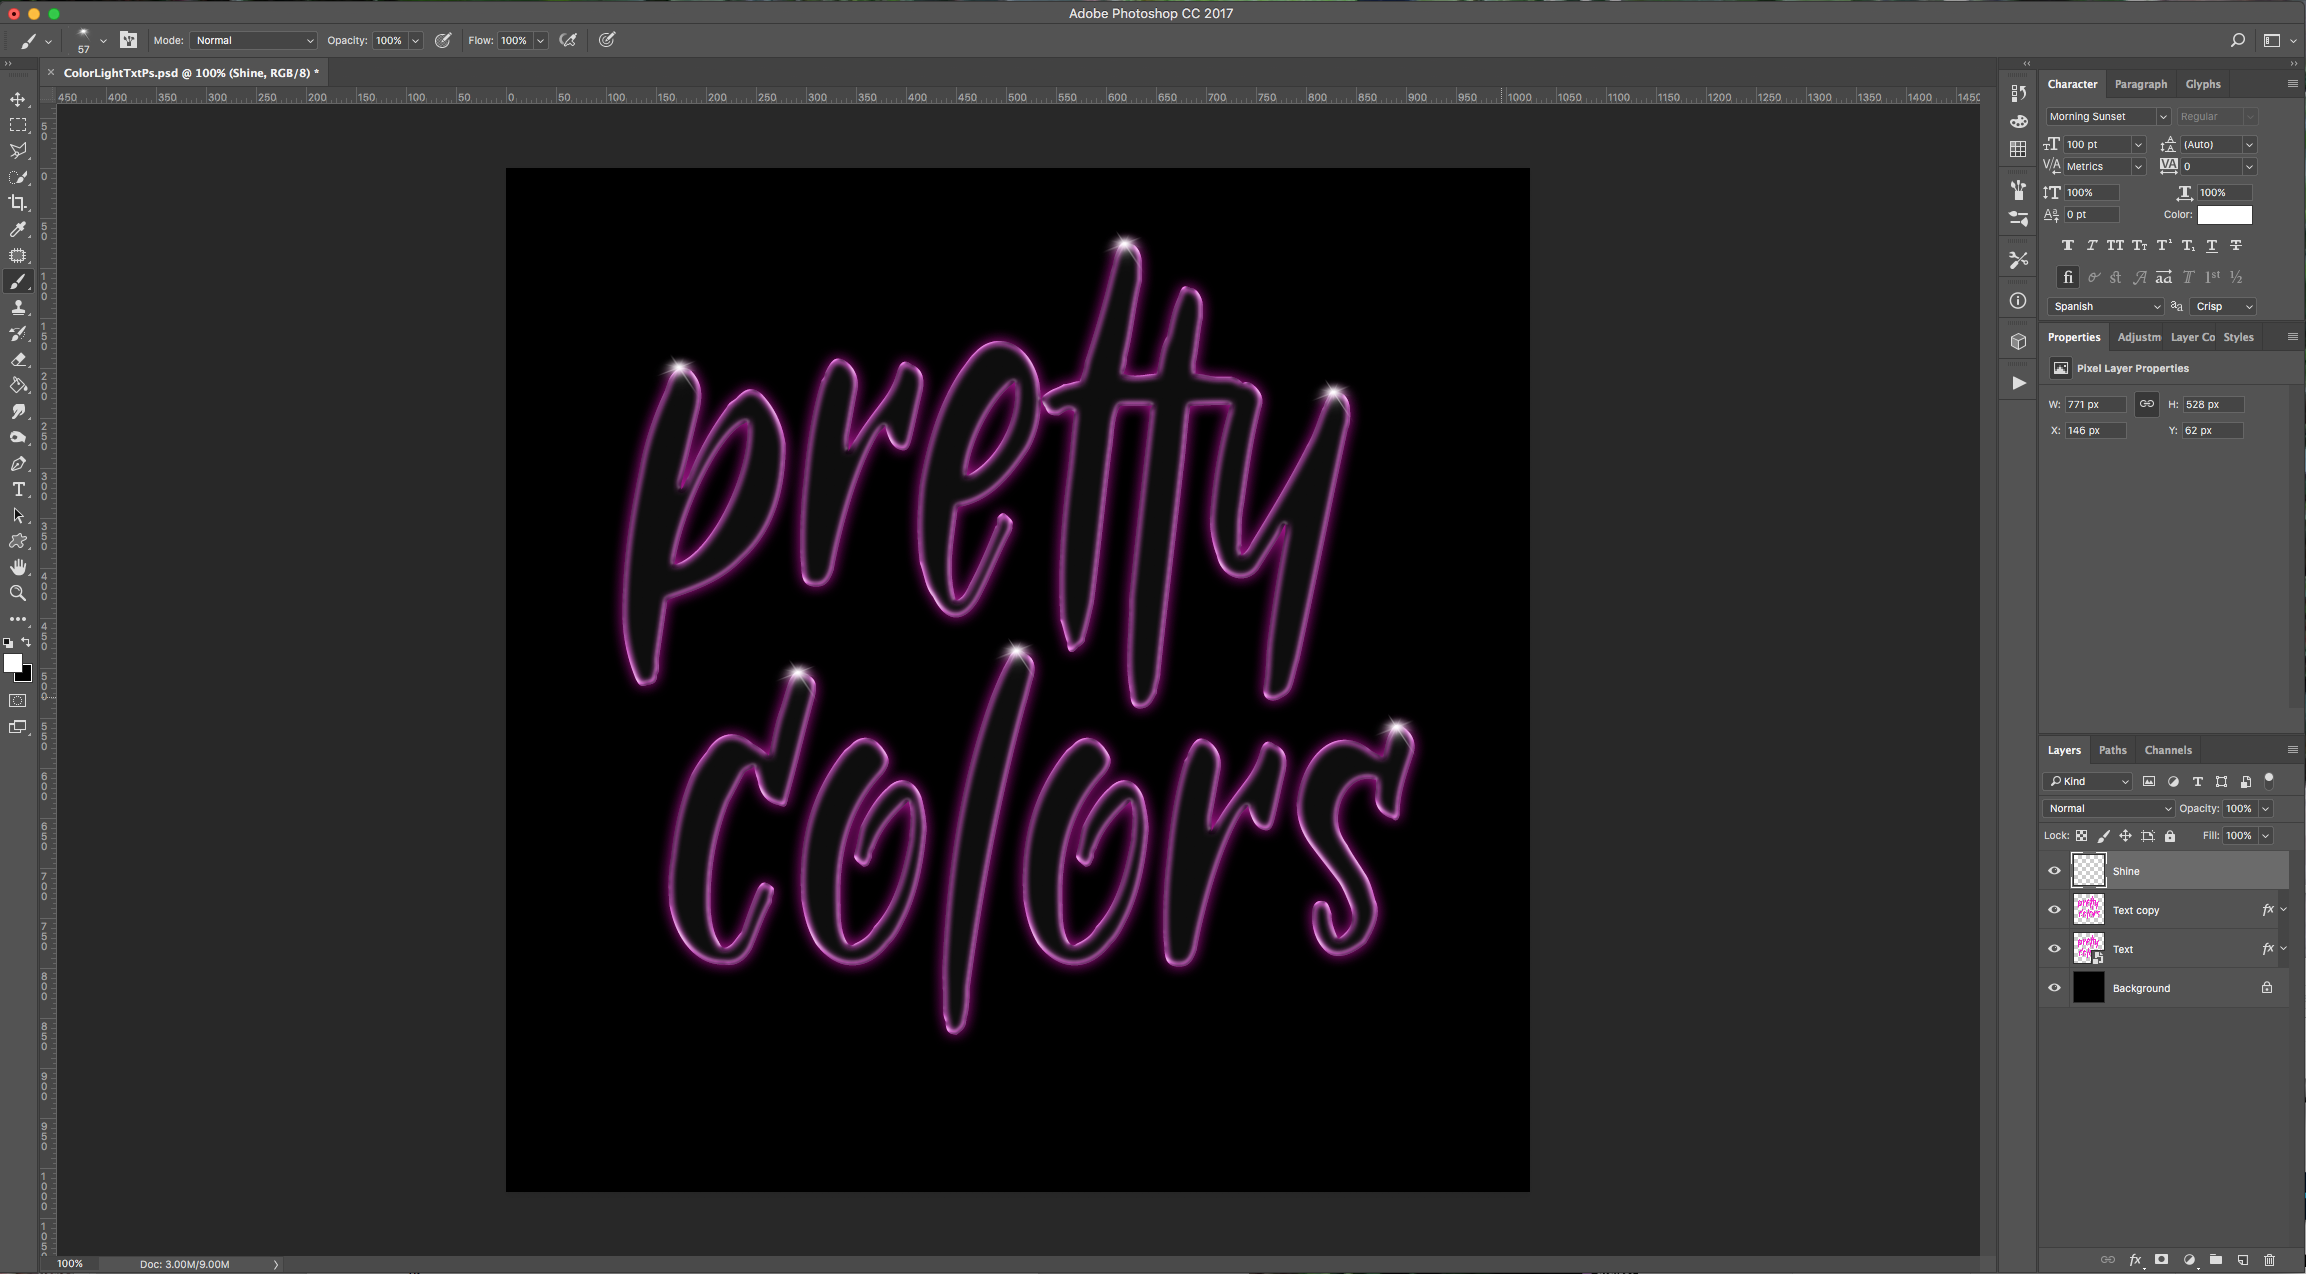
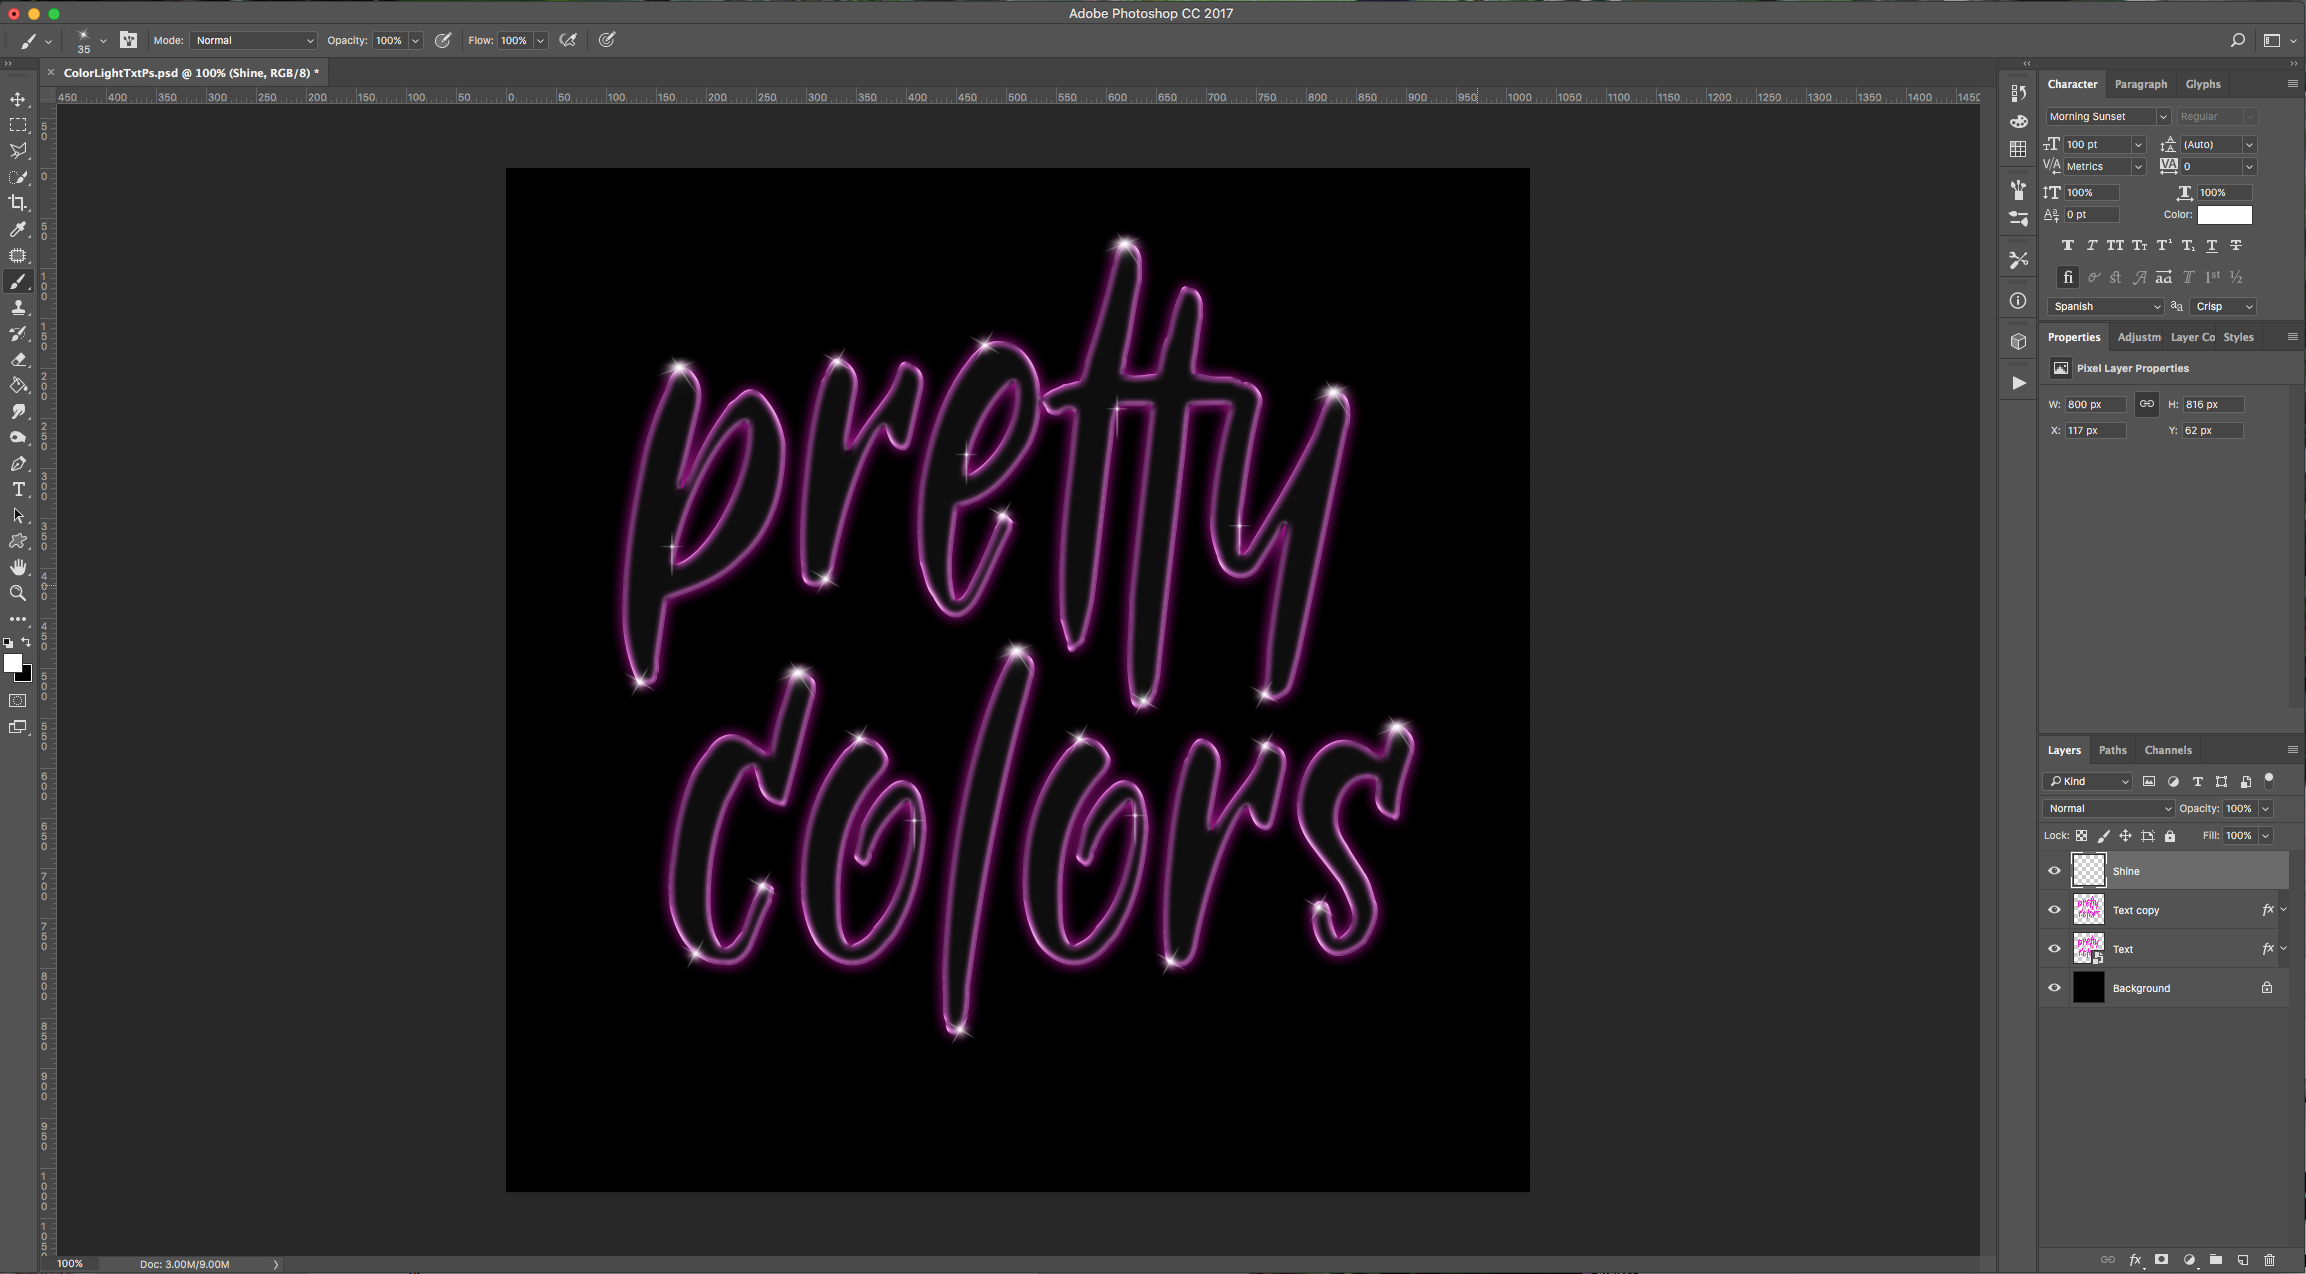
8 - To load your “Brushes”, click on the small “Gear” icon on the top-right of the “Brush Preset Picker Panel”, choose “Load Brushes” and navigate to where you saved your file (it should have “.abr” after the name). Choose one and change the “Brush Size” to about 30 or 40 px. Use the “Brush Tool” (B) to start adding some “Sparkles” over your text edges.
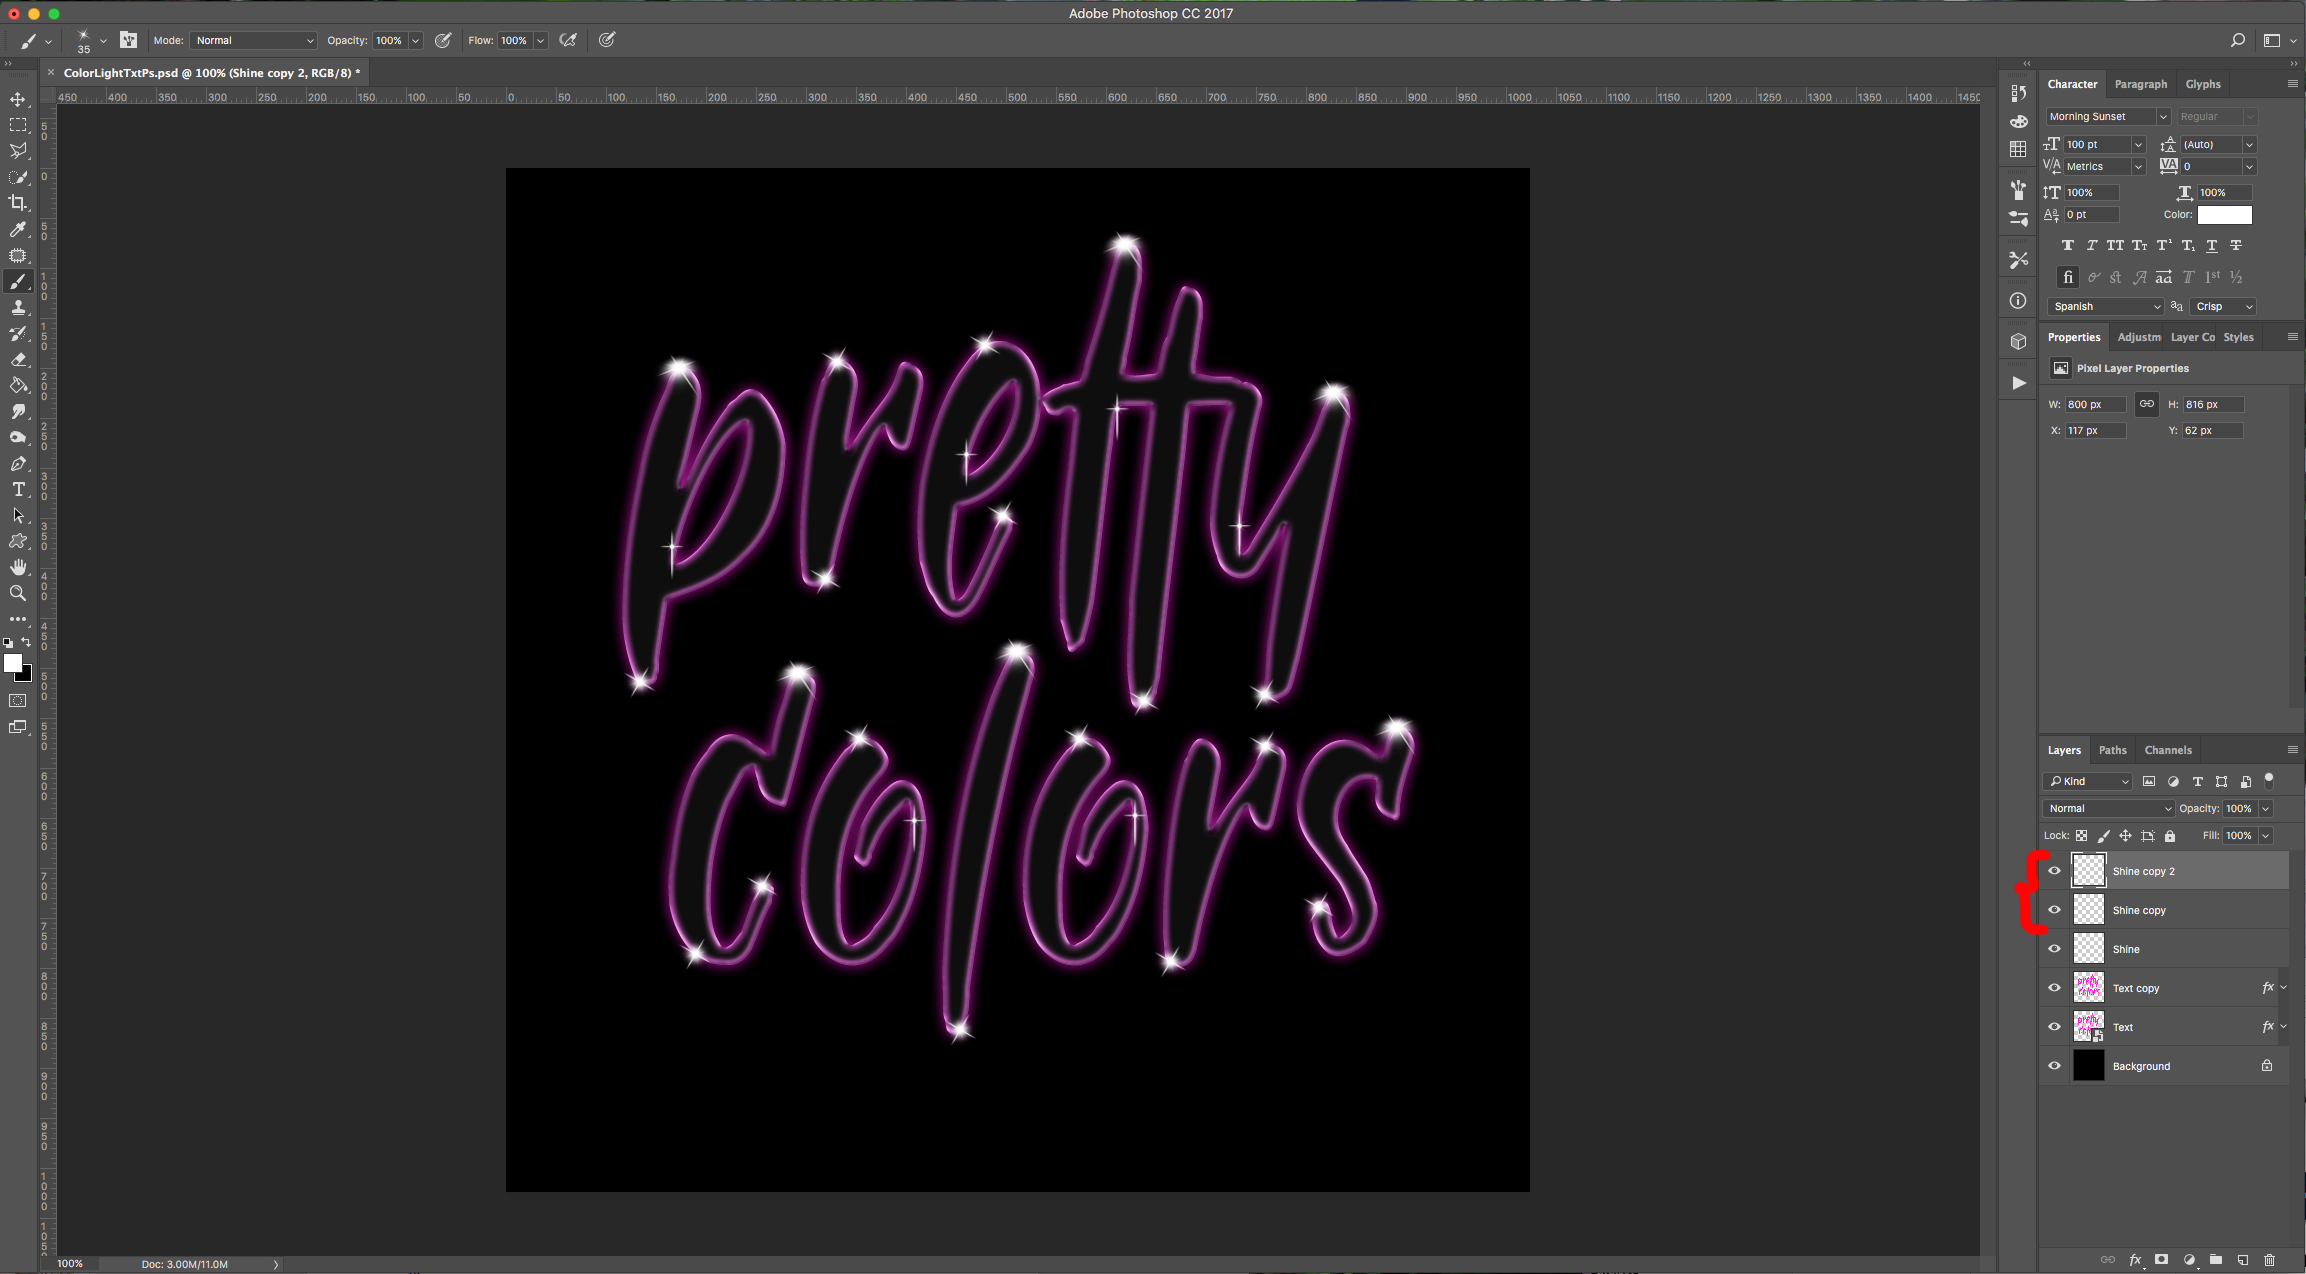
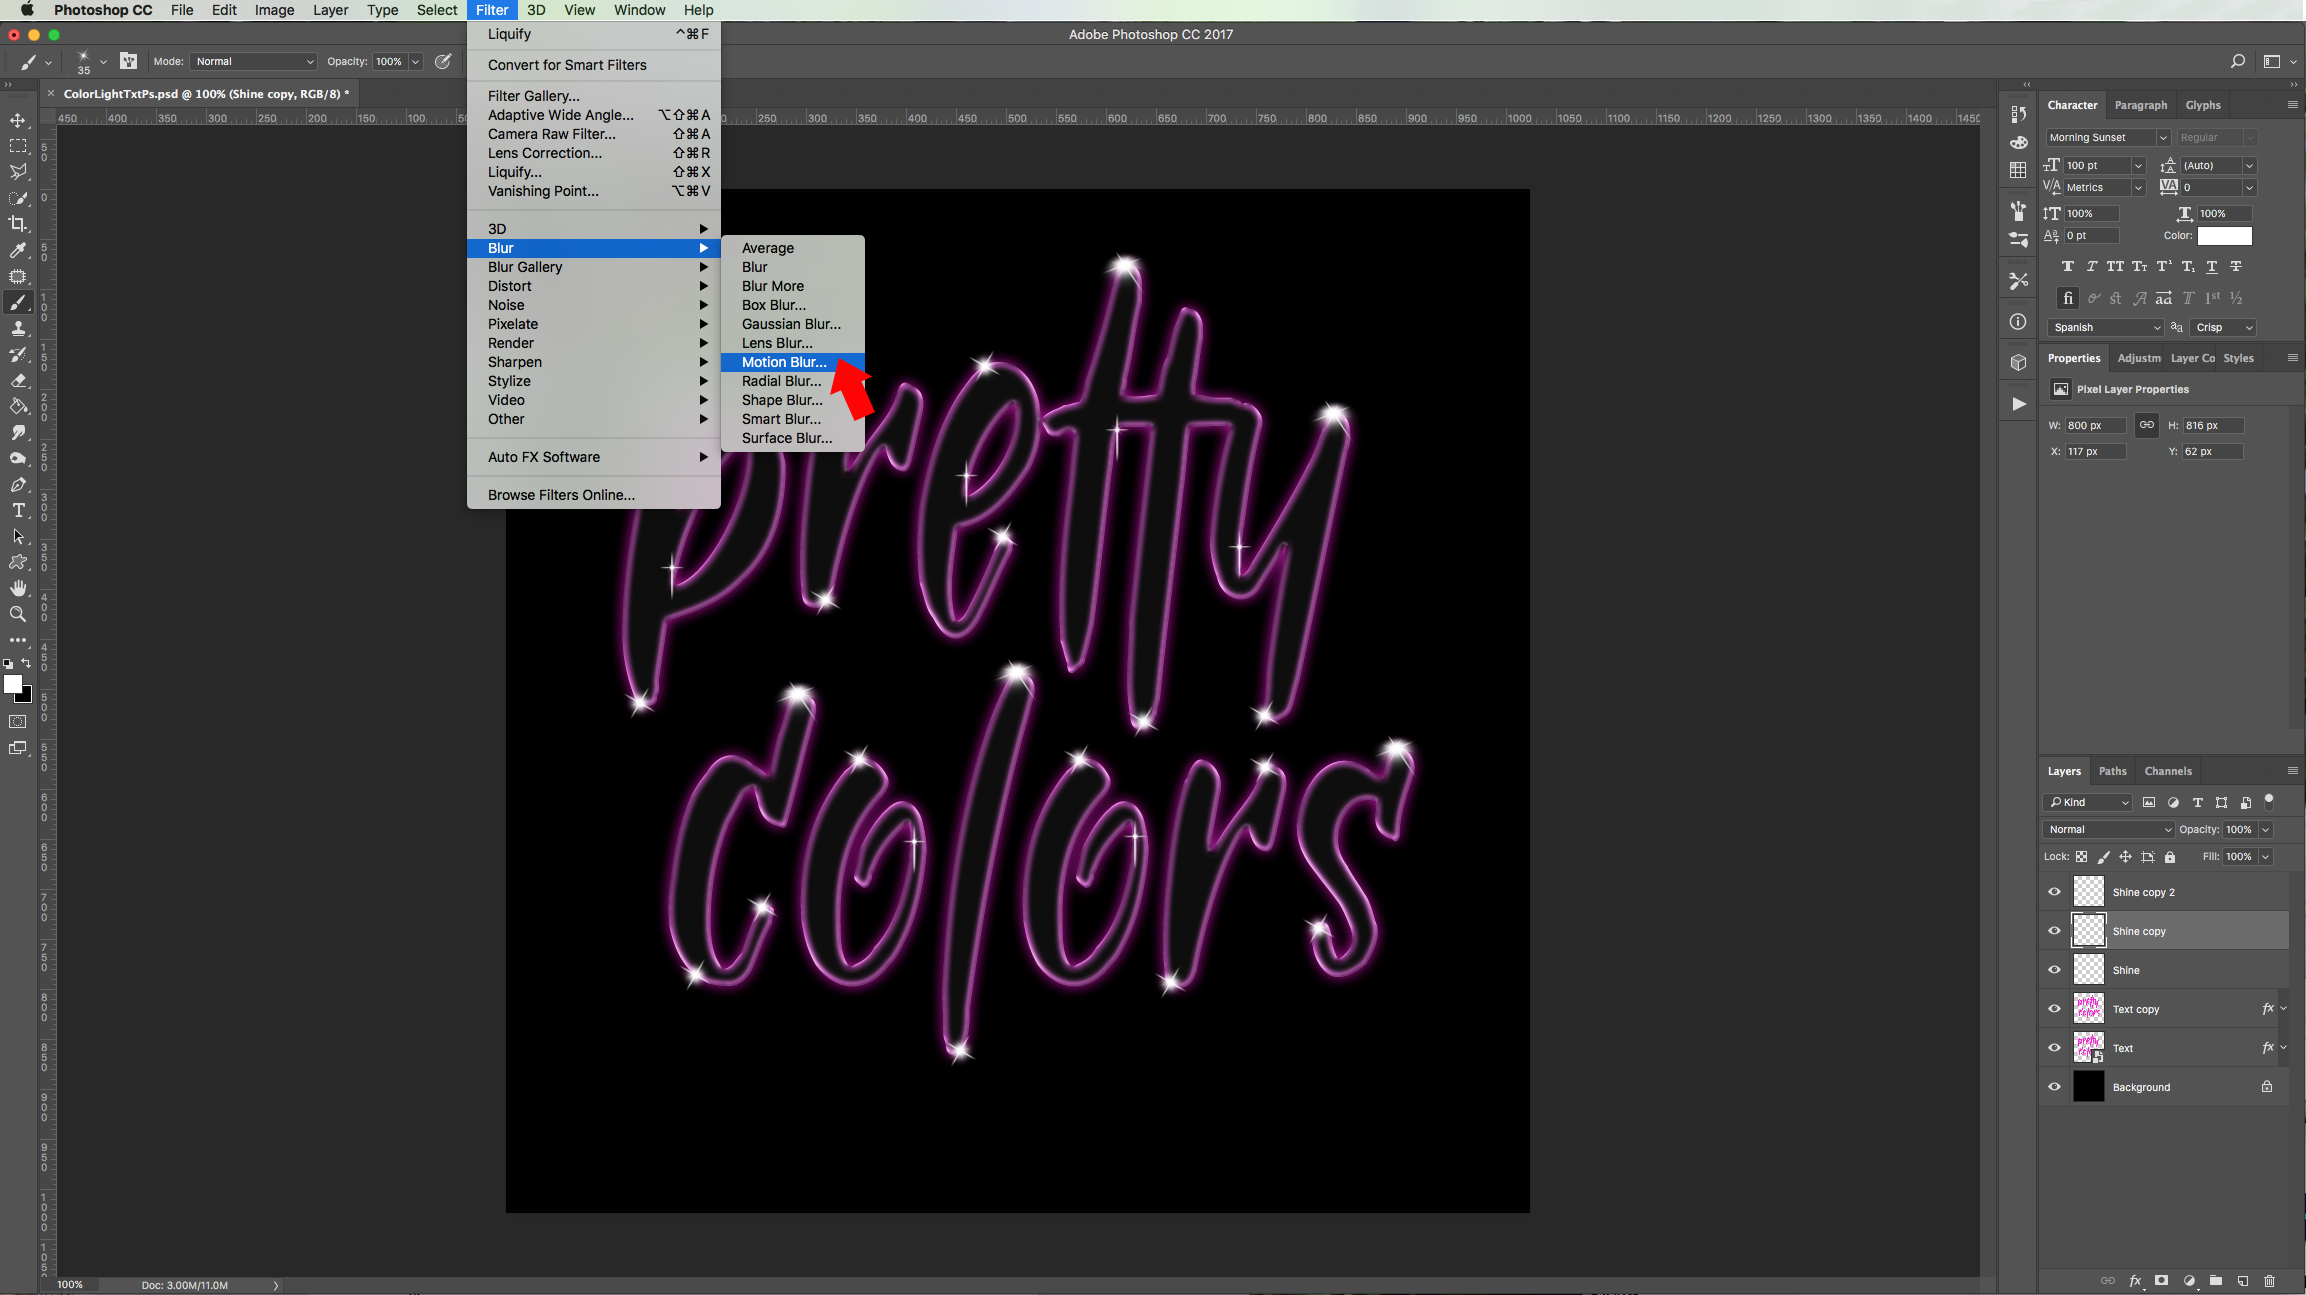
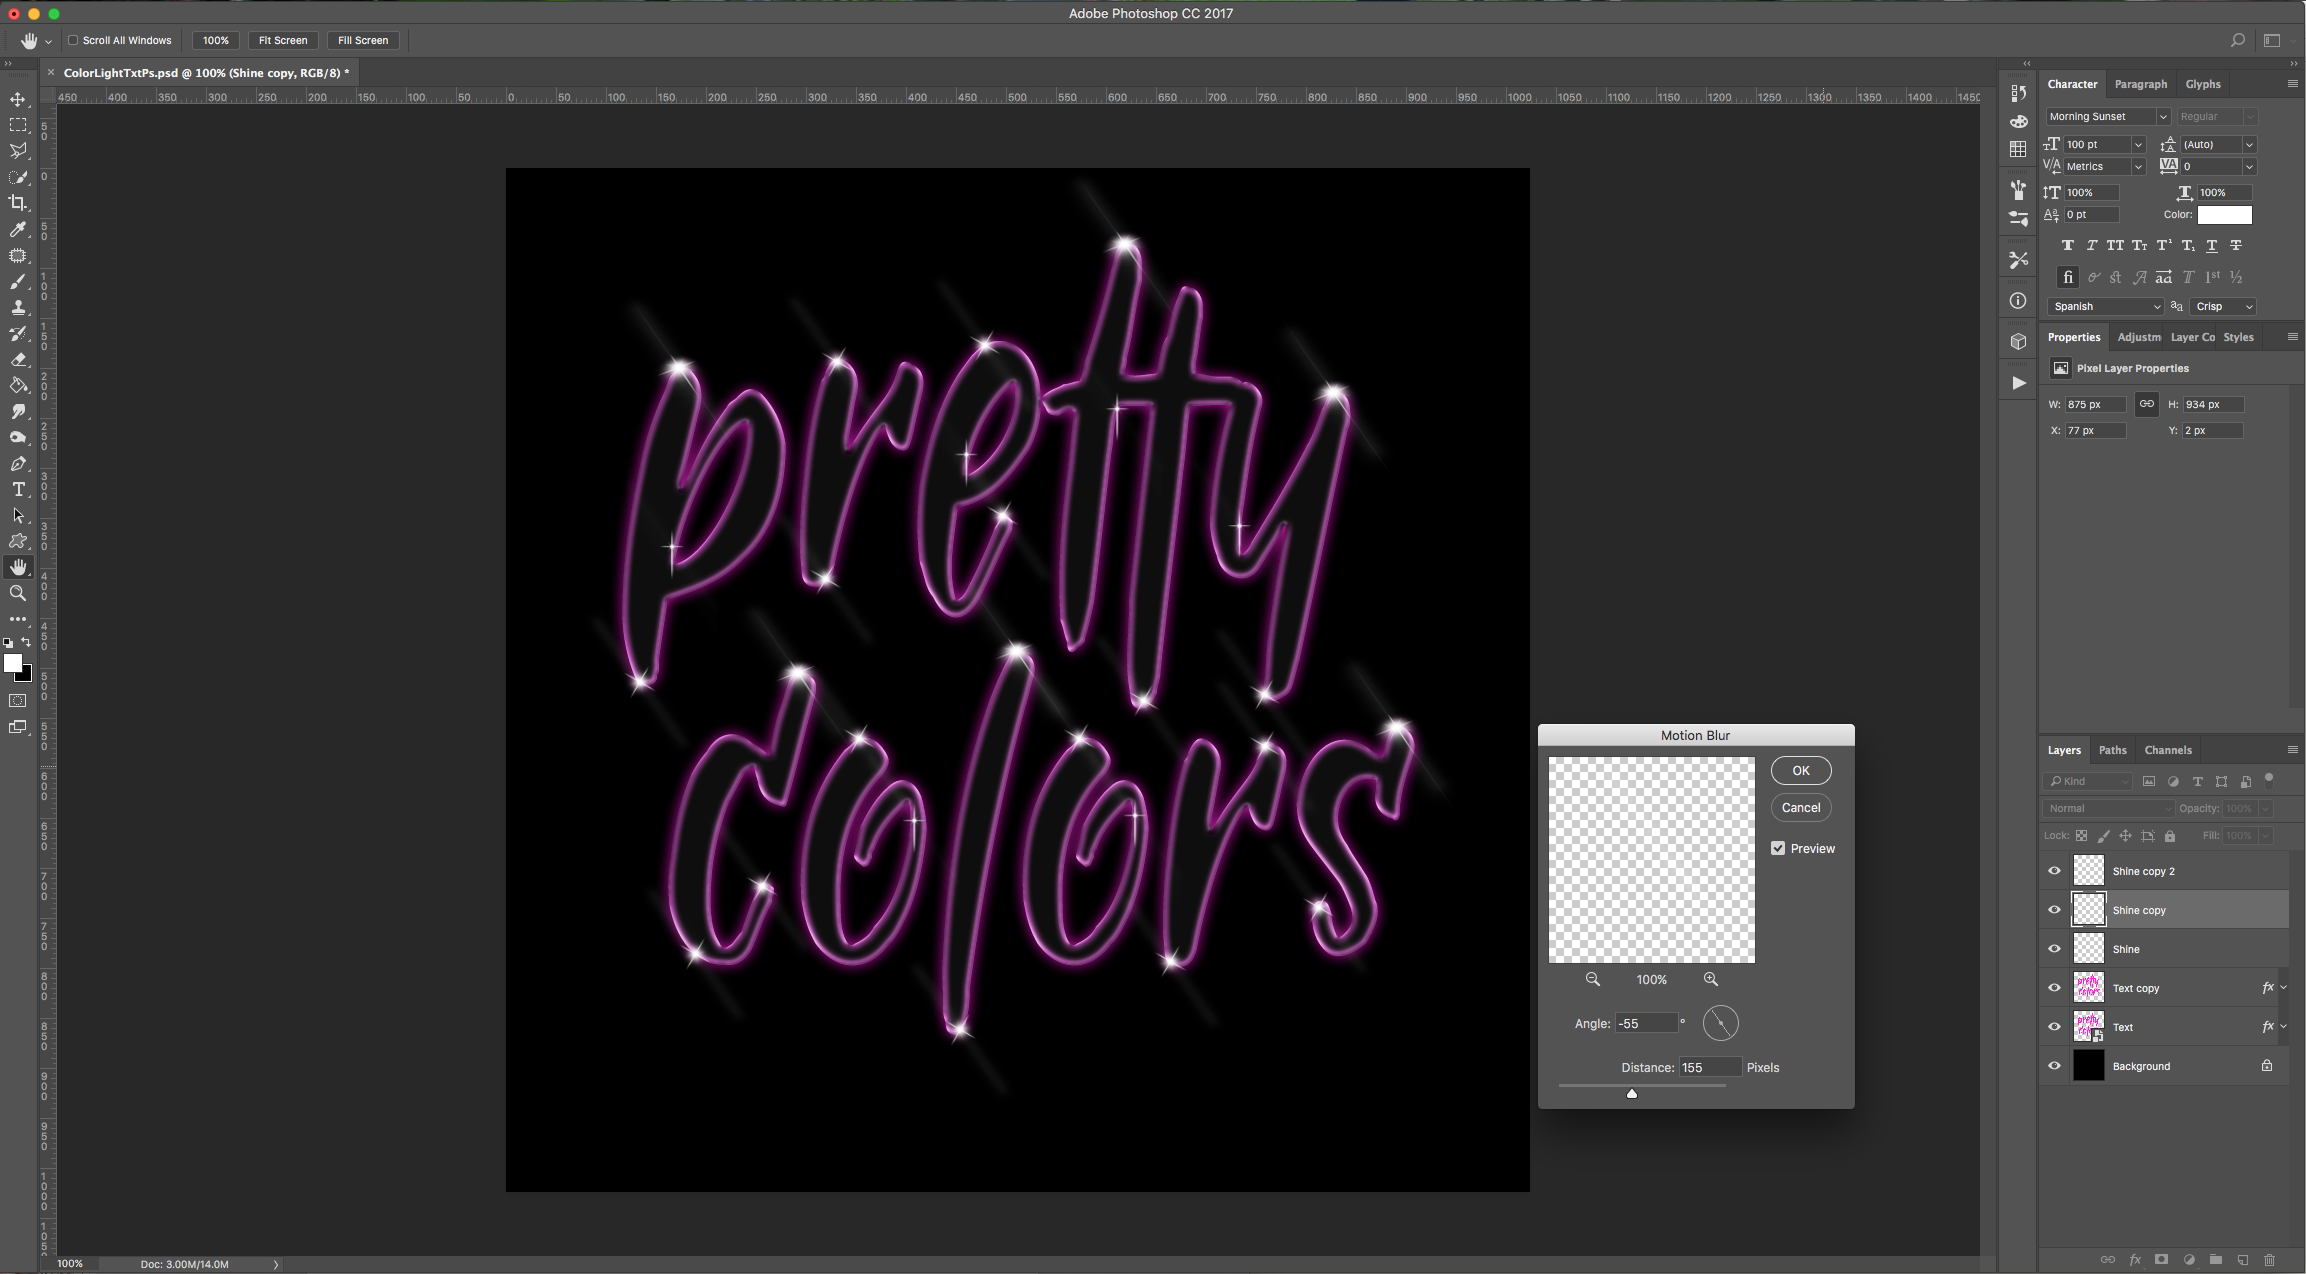
9 - Once you are done, duplicate your “Shine” Layer twice, select one of your duplicates, go to Filter > Blur > Motion Blur and use an “Angle” of -55° and a “Distance” of 155 Pixels.
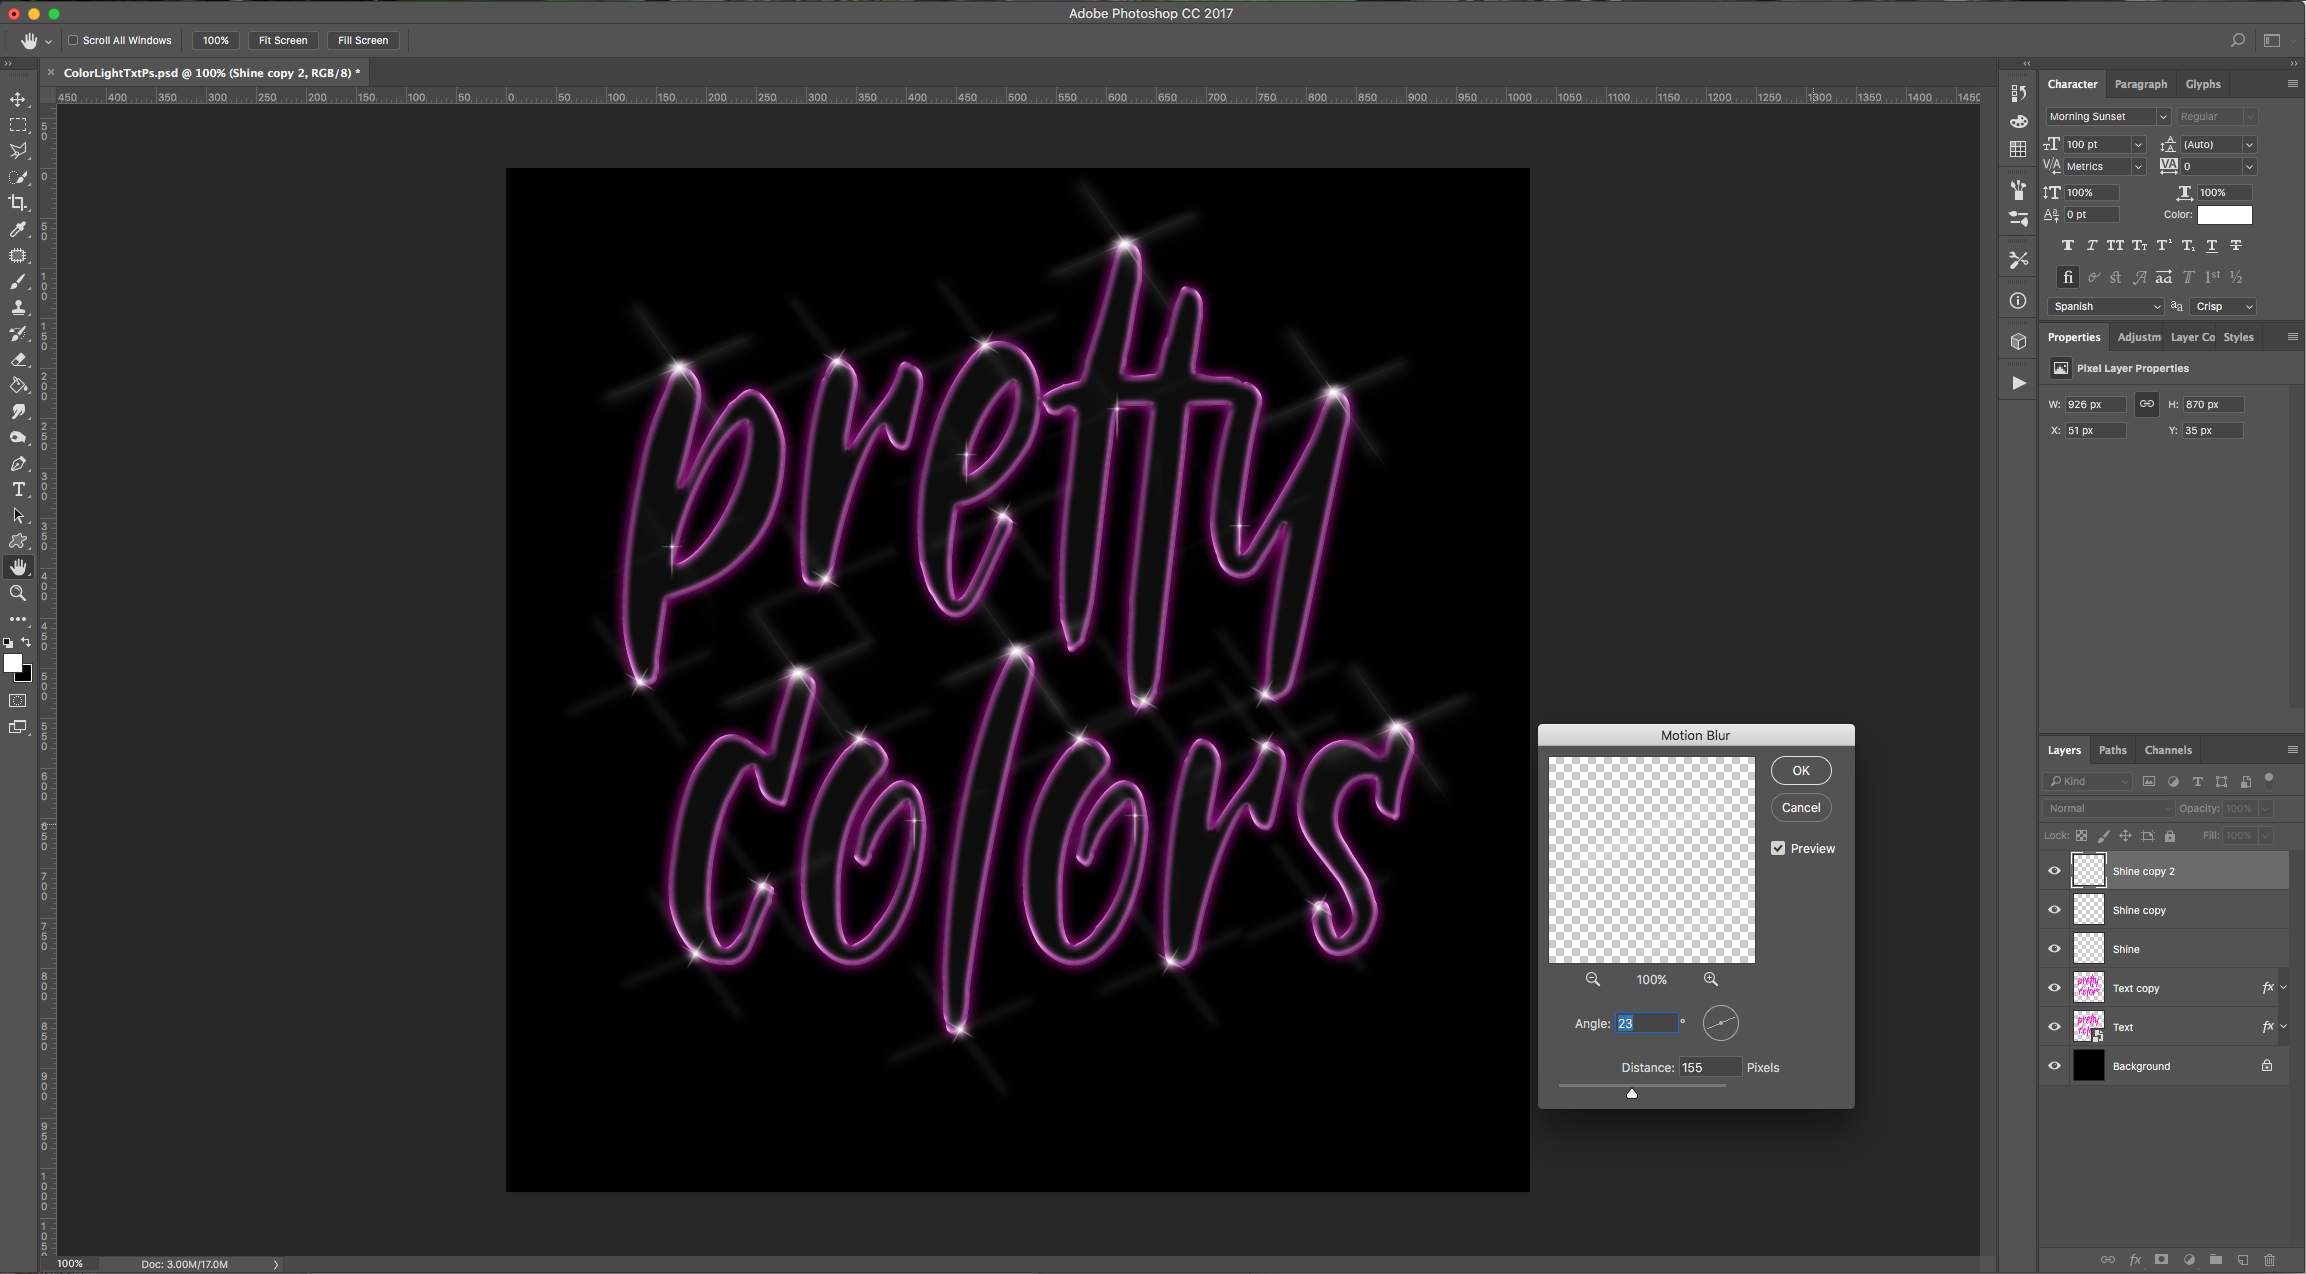
10 - Select your other duplicate and apply the same filter but this time use an “Angle” of 23°. You may need to use different angles depending on your brushes.
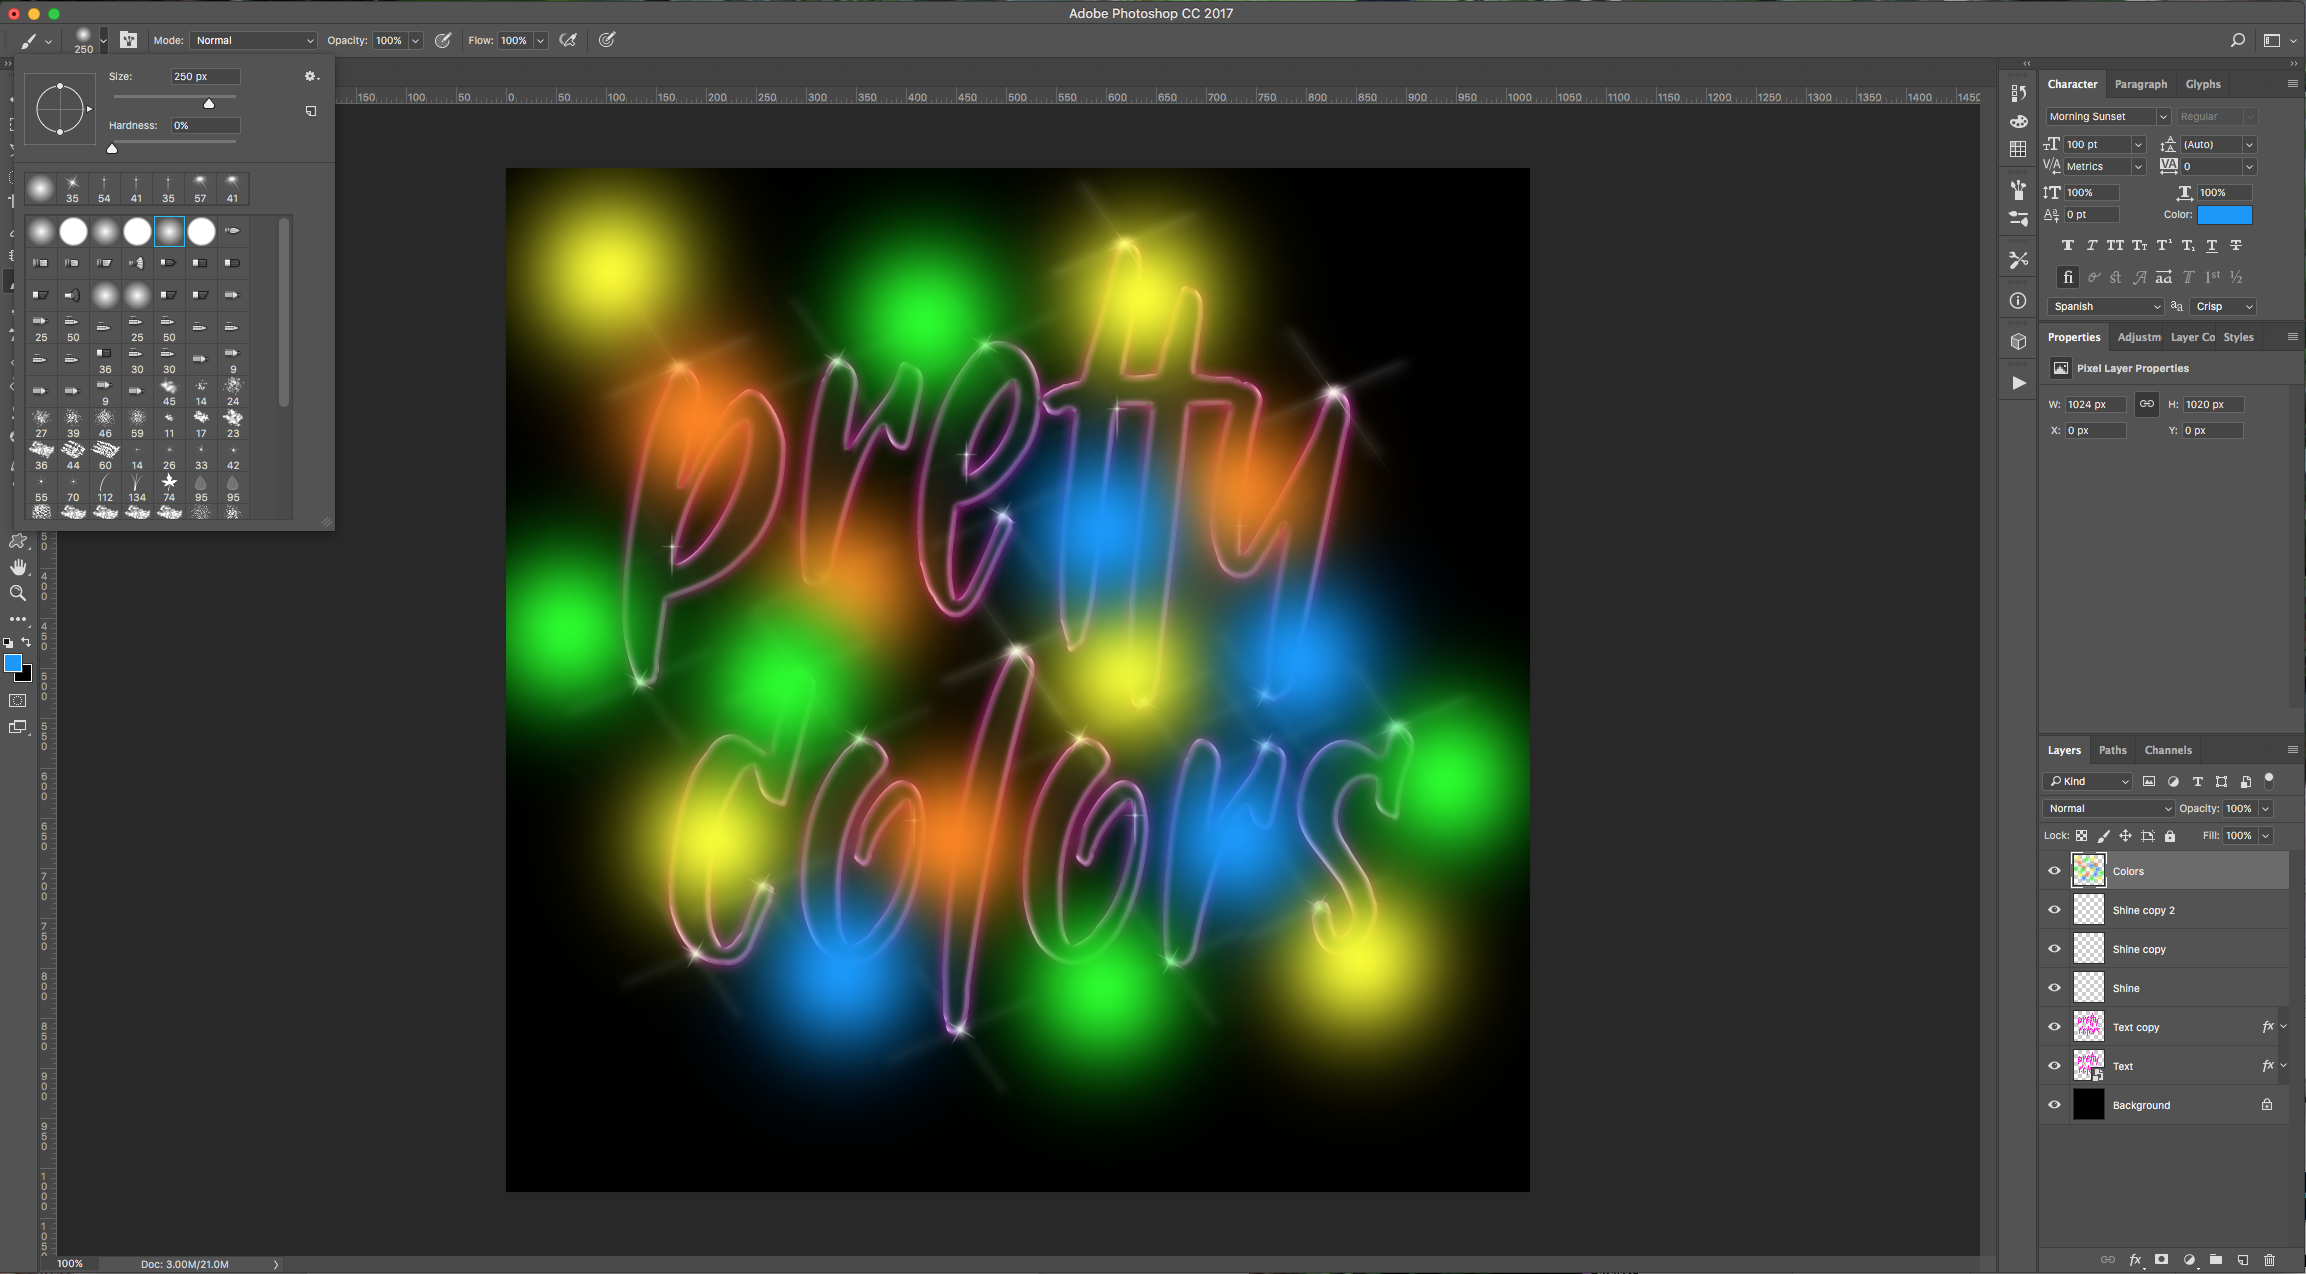
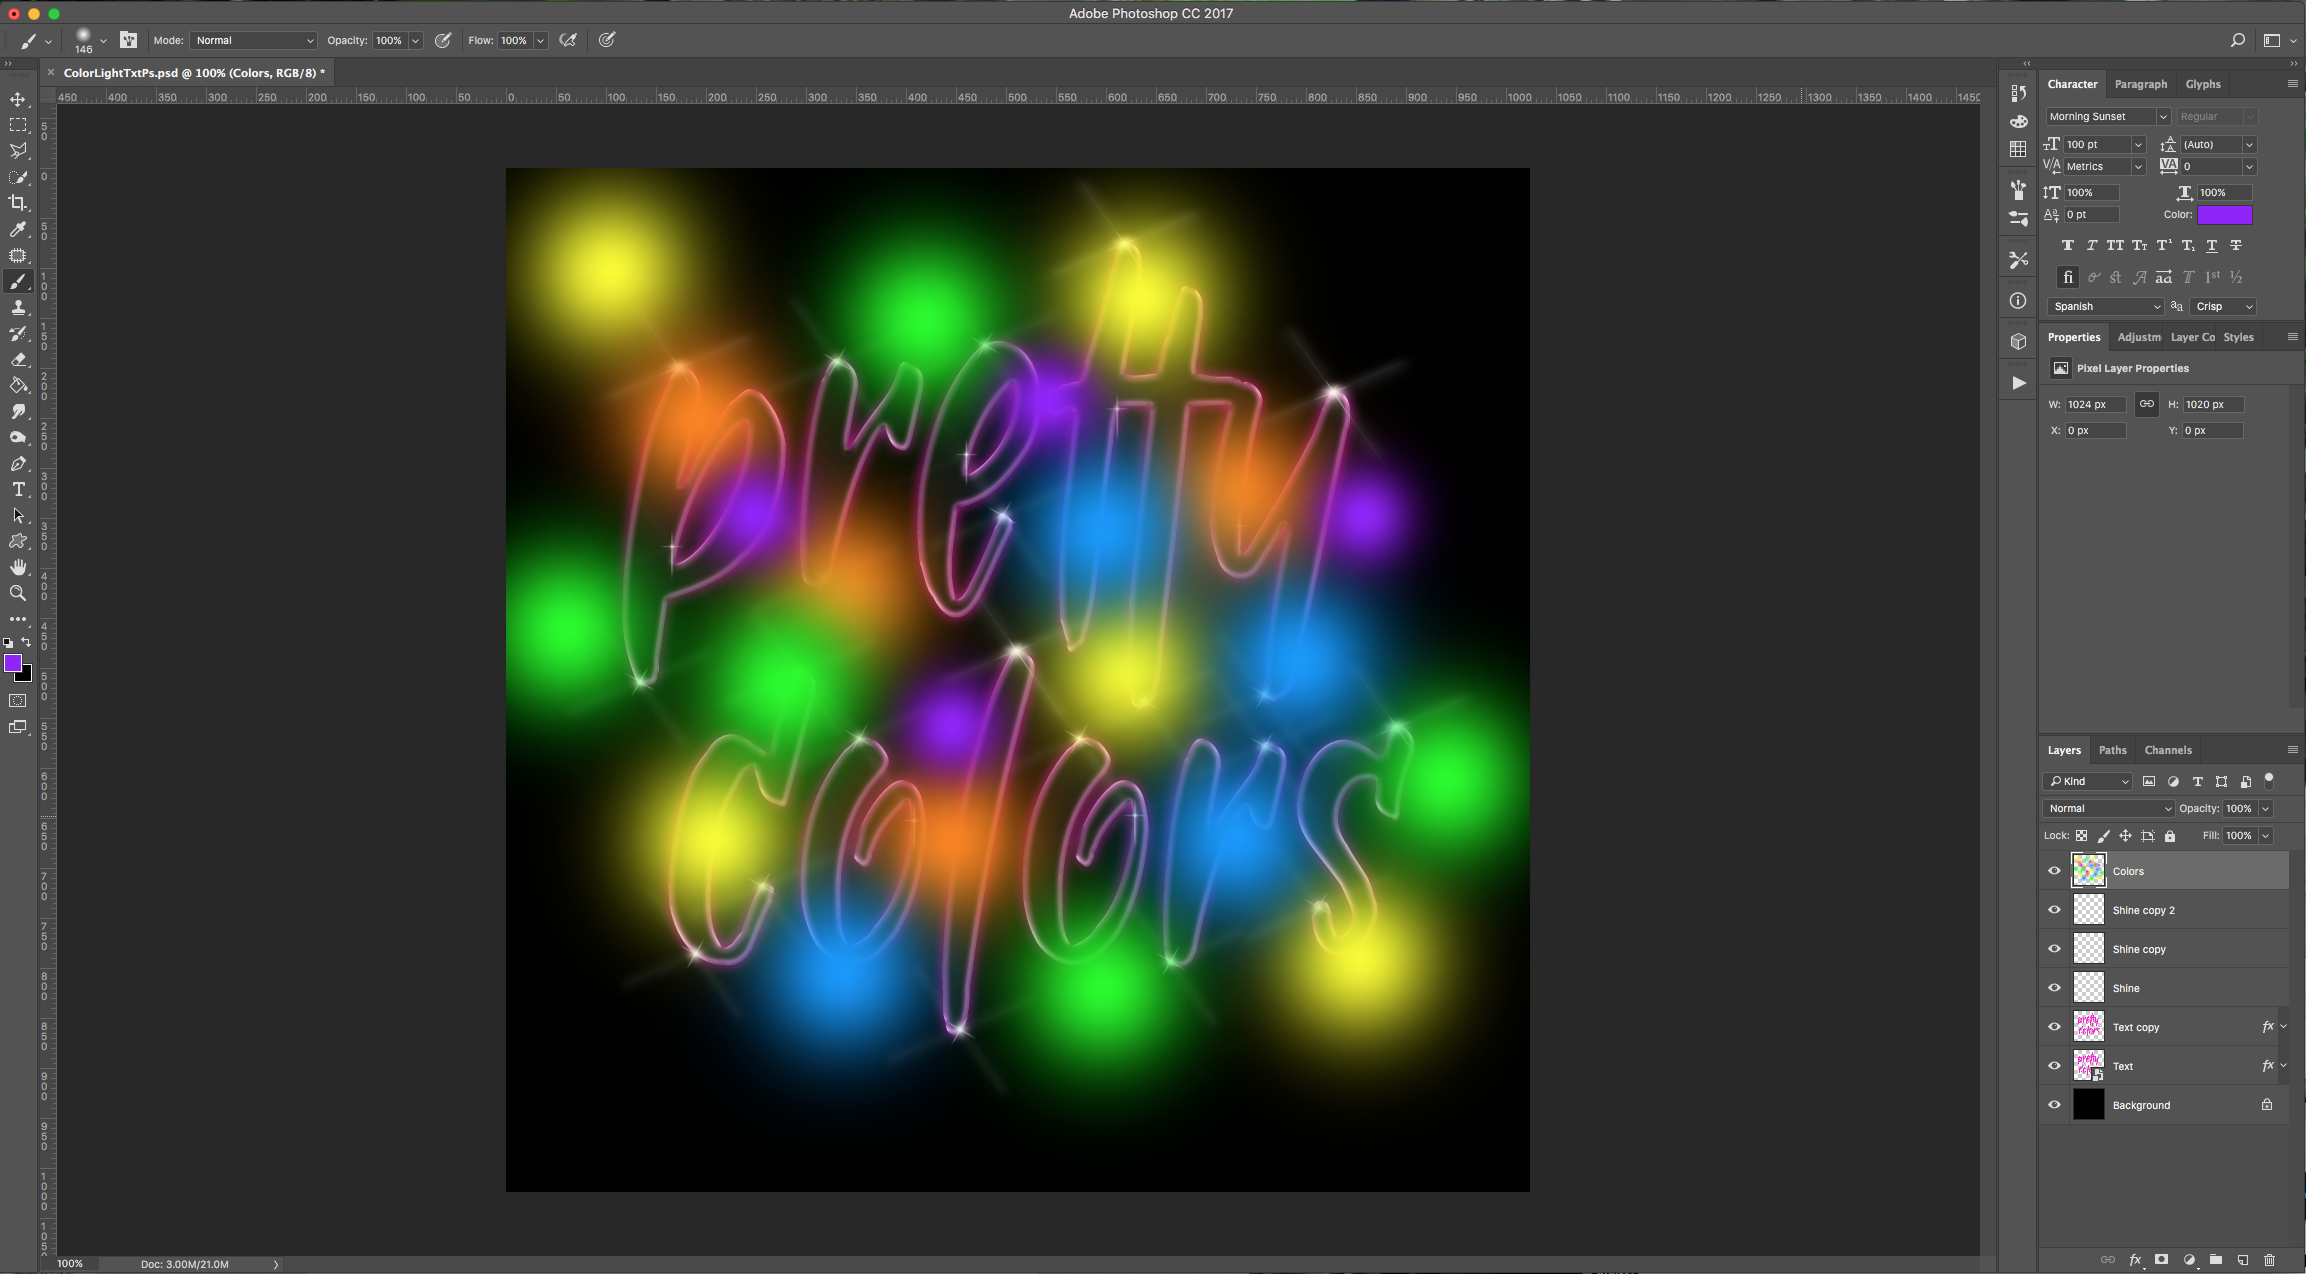
11 - Create a “New Layer” on top, name it “Colors”. Select the “Brush Tool” (B) and using a big round (about 250 px) “Soft” (0% “Hardness) brush, “Paint” some bright colors randomly on your layer.
12 - Change your Layer’s “Blending Mode” to “Color”.
1 - In Photoshop, create a “New File” using Black as your “Background” color.
2 - Select the “Type Tool” (T), choose your font and type your text. Use a nice bright color as “Fill” (we used #f908d4). If you are using more than one line of text, place each line in a different “Layer” and create a “Group” by clicking on the small Folder icon at the bottom of the “Layers Panel”.
3 - Duplicate your “Text” Group (Command/Control + J), right-click on top of its Thumbnail and choose “Merge Group”.
4 - Select your original “Text” Group, right-click on top of its Thumbnail and choose “Convert to Smart Object”.
5 - Double-click on top of its Thumbnail and apply the following “Layer Styles”:
Blending Options:
Inner Glow: (#f908d4)
Outer Glow: (#f908d4)
6 - Go to your “Text” Group duplicate, double-click on top of its Thumbnail and apply the following “Layer Styles”:
Blending Options:
Bevel & Emboss: (Gloss Contour: Ring)
Contour:
Inner Glow: (#f593fb)
7 - Create a “New Layer” by clicking on the small button at the bottom of the “Layers Panel”, set the “Foreground” color to White, and name it “Shine”.
8 - To load your “Brushes”, click on the small “Gear” icon on the top-right of the “Brush Preset Picker Panel”, choose “Load Brushes” and navigate to where you saved your file (it should have “.abr” after the name). Choose one and change the “Brush Size” to about 30 or 40 px. Use the “Brush Tool” (B) to start adding some “Sparkles” over your text edges.
9 - Once you are done, duplicate your “Shine” Layer twice, select one of your duplicates, go to Filter > Blur > Motion Blur and use an “Angle” of -55° and a “Distance” of 155 Pixels.
10 - Select your other duplicate and apply the same filter but this time use an “Angle” of 23°. You may need to use different angles depending on your brushes.
11 - Create a “New Layer” on top, name it “Colors”. Select the “Brush Tool” (B) and using a big round (about 250 px) “Soft” (0% “Hardness) brush, “Paint” some bright colors randomly on your layer.
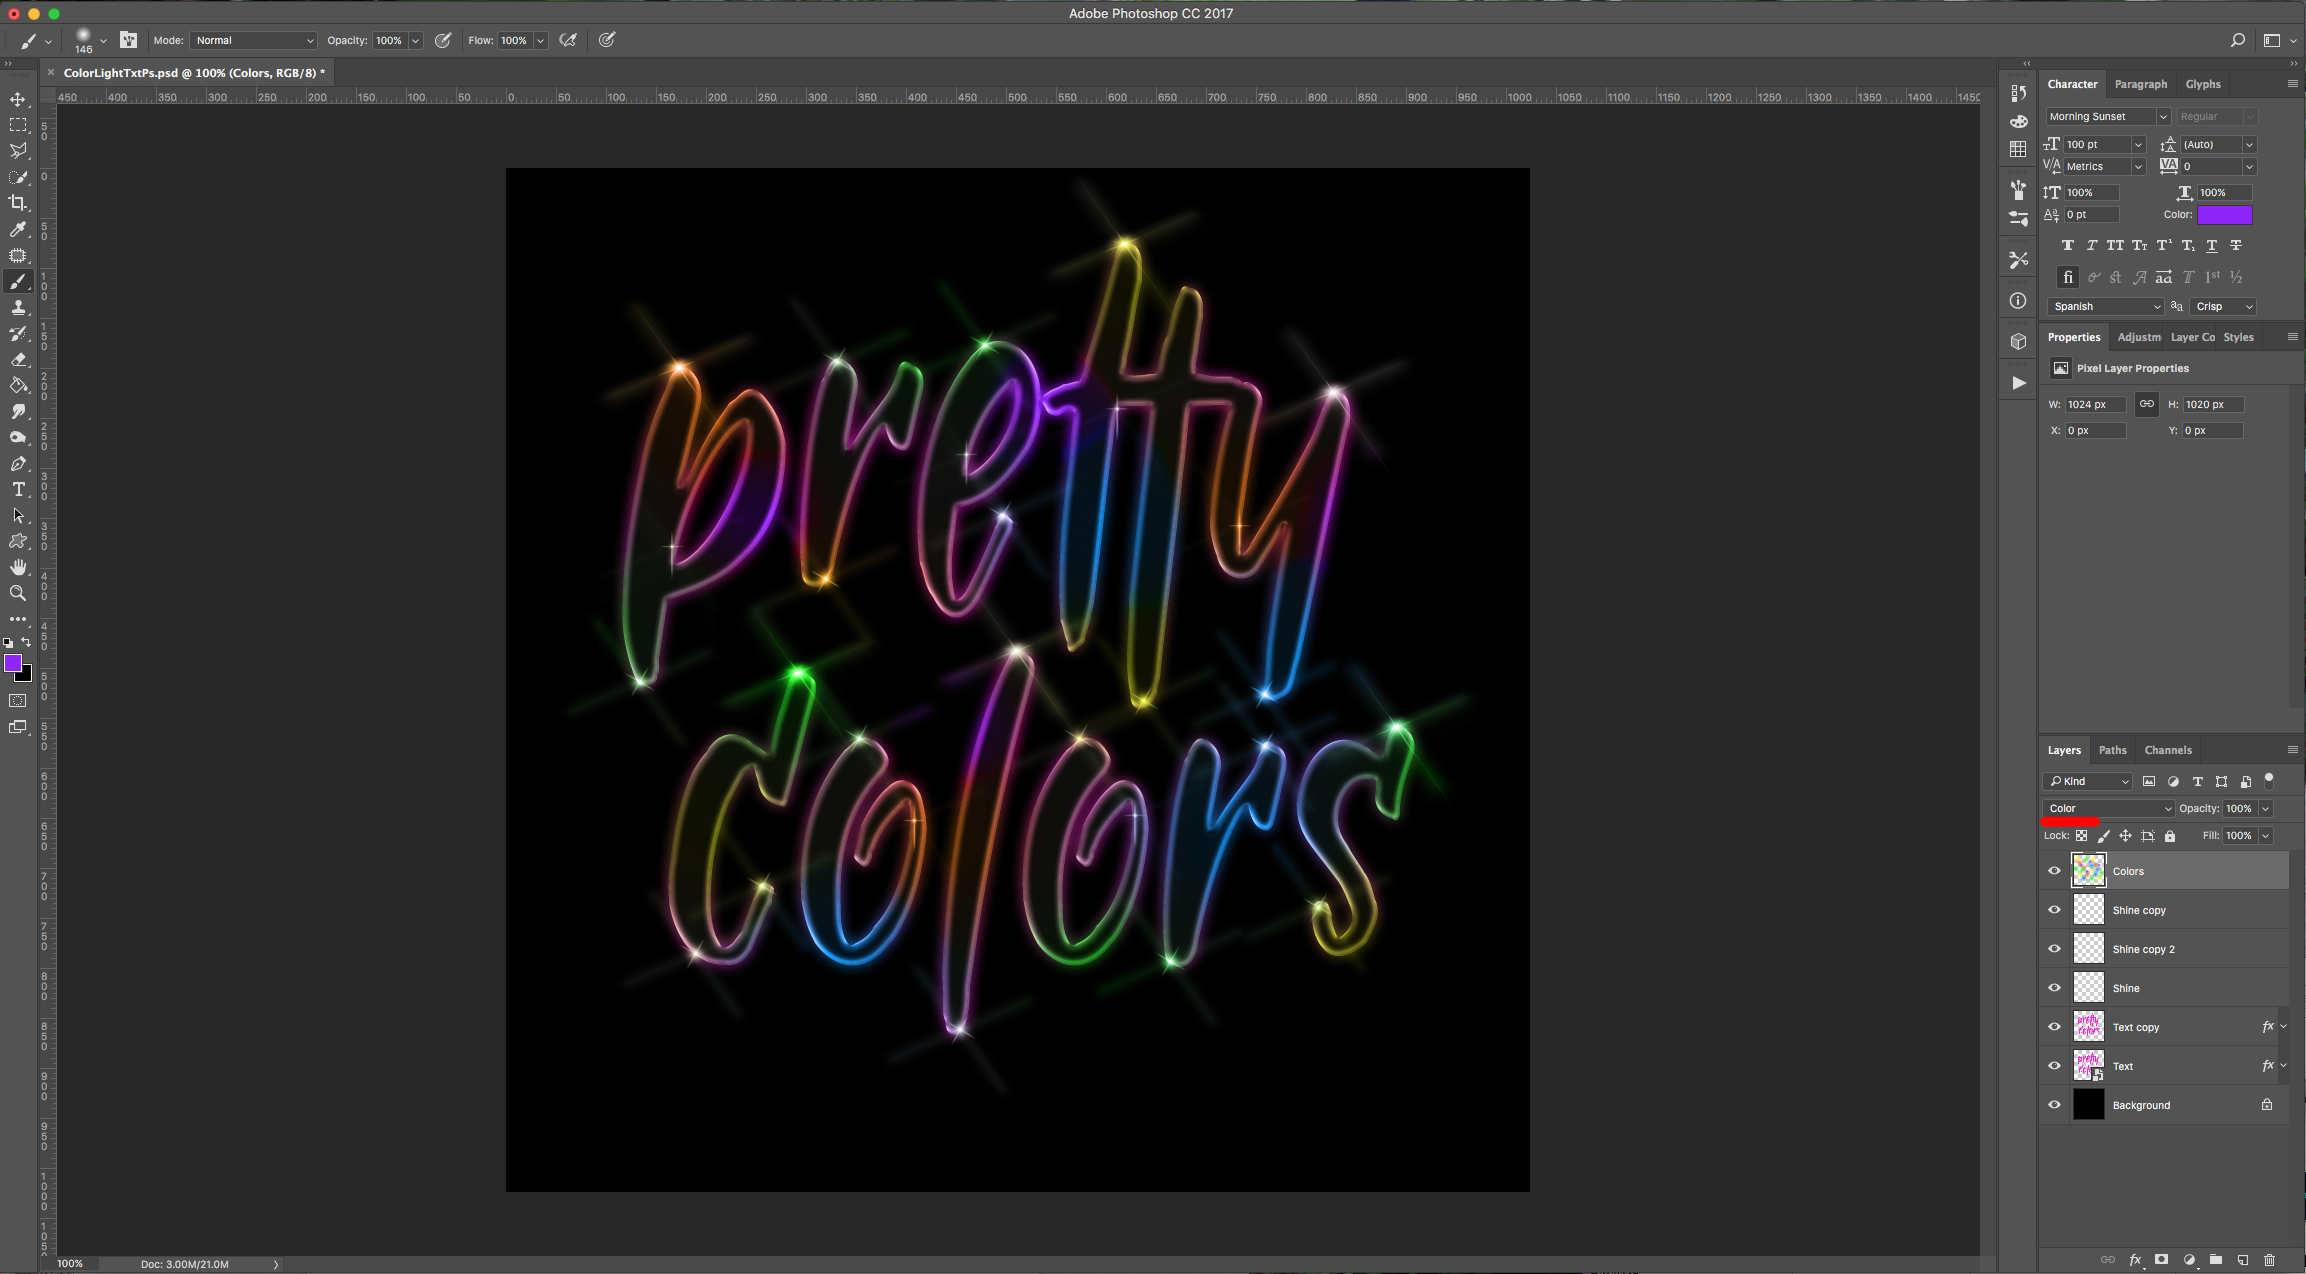
12 - Change your Layer’s “Blending Mode” to “Color”.
by @lornacane
Related Tutorials
Photoshop Tutorials
Light burst text effect in Photoshop
Photoshop Tutorials
Light Box Text in Photoshop
Photoshop Tutorials
How to Use Text Effects in Photoshop
With Photoshop Text Effects, you can create text with impact in just a few steps.
Photoshop Tutorials
Easy See through Cut Out Text in Photoshop
Create a see-through cut out text design in Photoshop with these easy to follow steps.
Photoshop Tutorials
How to Fill a Shape with Text in Photoshop
Learn how to fill a shape with text in Photoshop in seven quick steps.
Photoshop Tutorials
How to Make a Graffiti Text Effect in Photoshop
Learn how to create a realistic grafitti text effect in Photoshop.