By Design Bundles
Photoshop Tutorials10 min
How to Replace the Sky in Photoshop
For this tutorial, you will need an image with a sky you want to modify and another one with the sky you wish to use instead. We will use blue sky photo and blue sky with clouds.
In Photoshop, open the image you want to change the sky to.
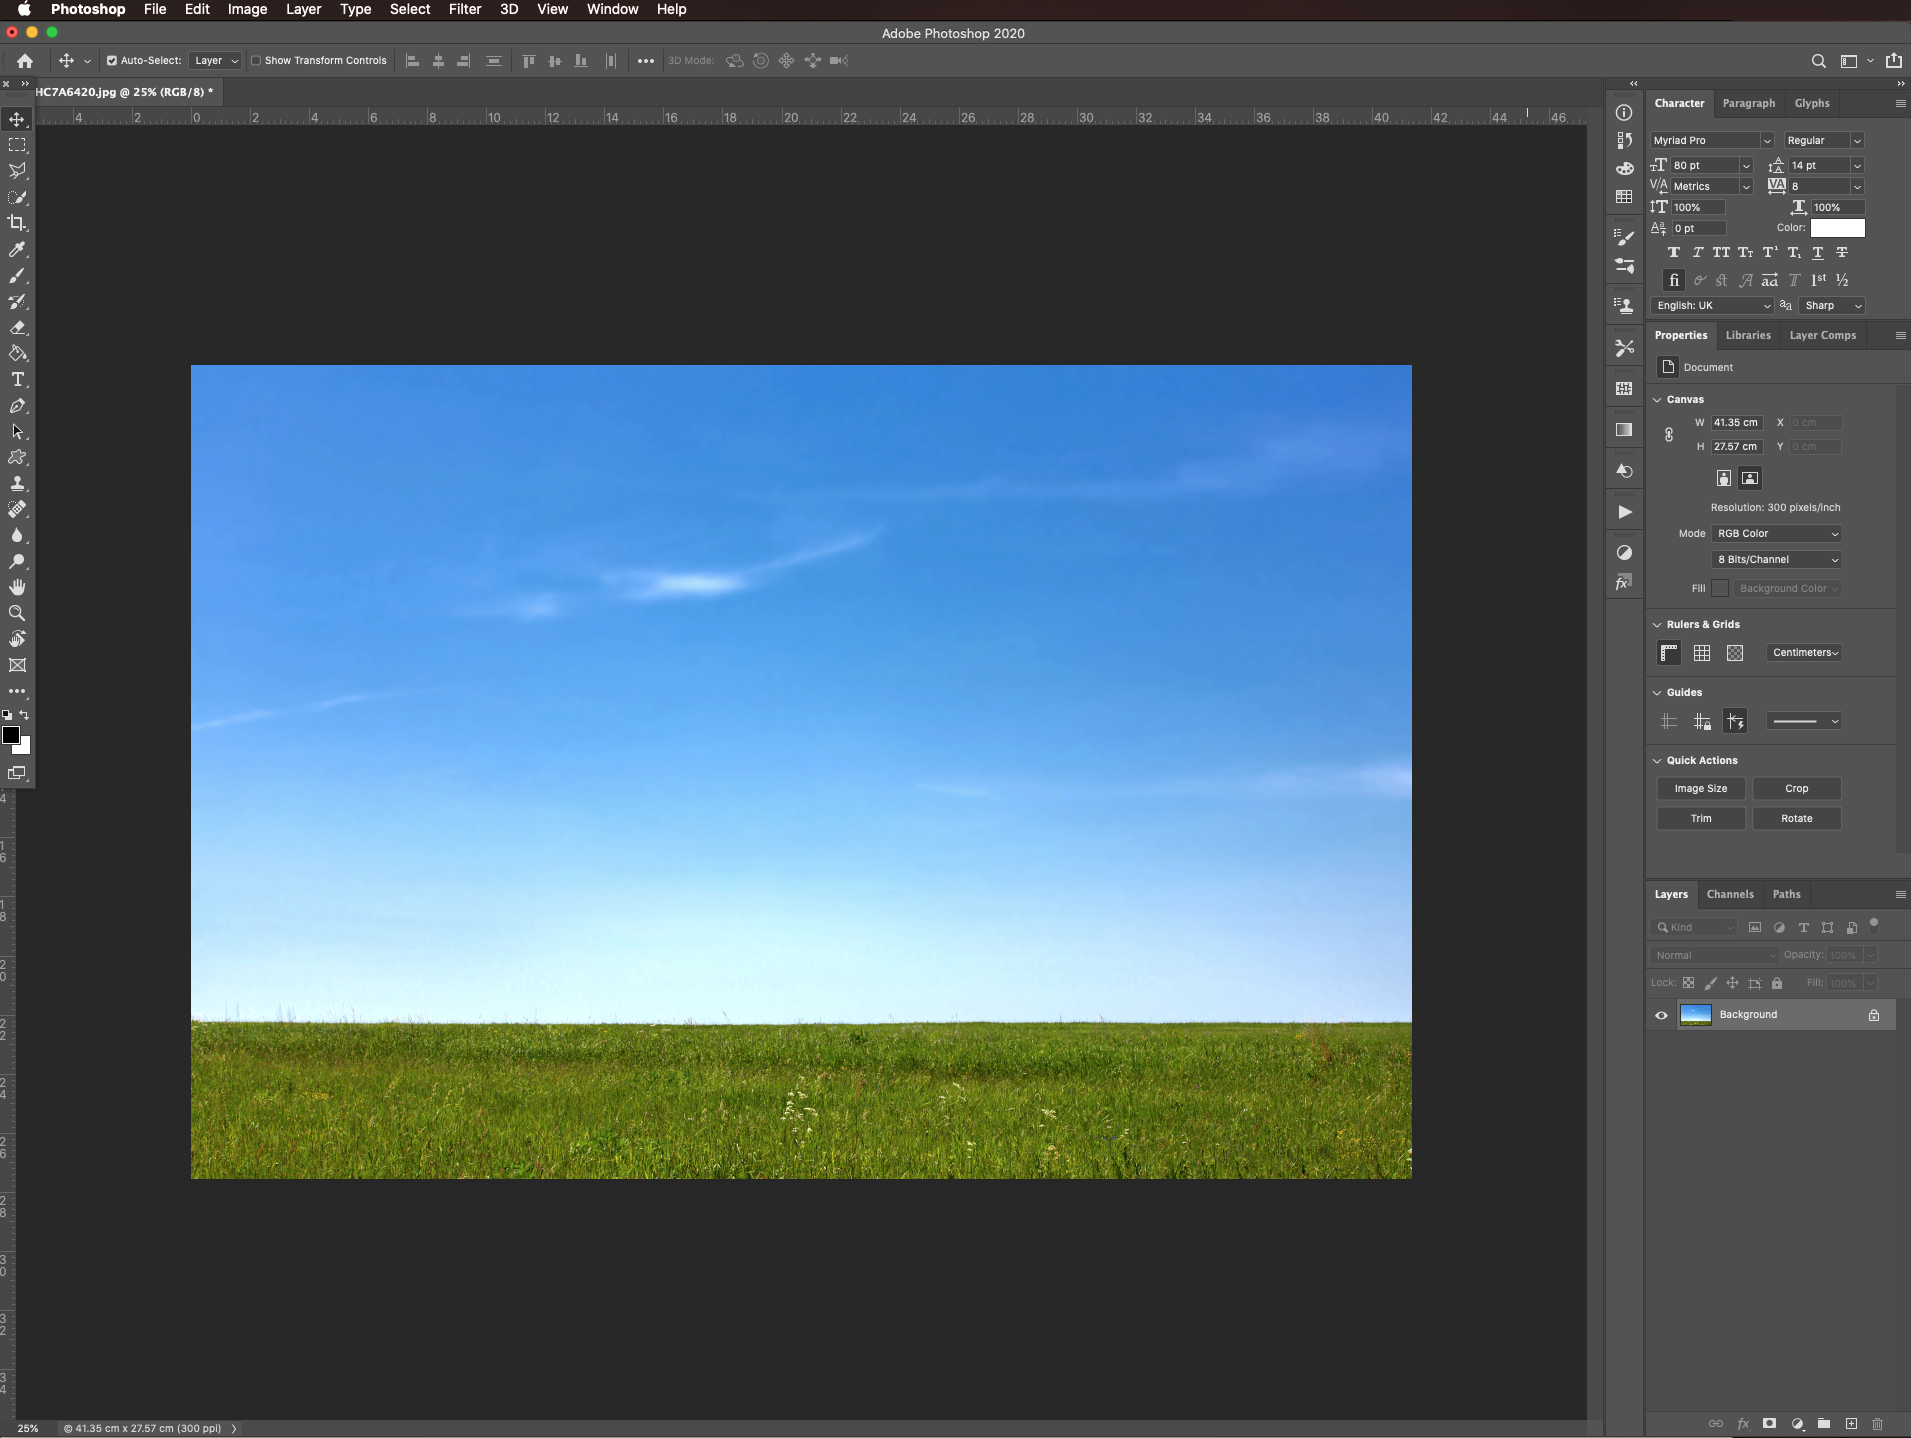
Then, duplicate it (command/control + J) and hide the background layer for now (click on the small eye icon on the left side of its thumbnail).
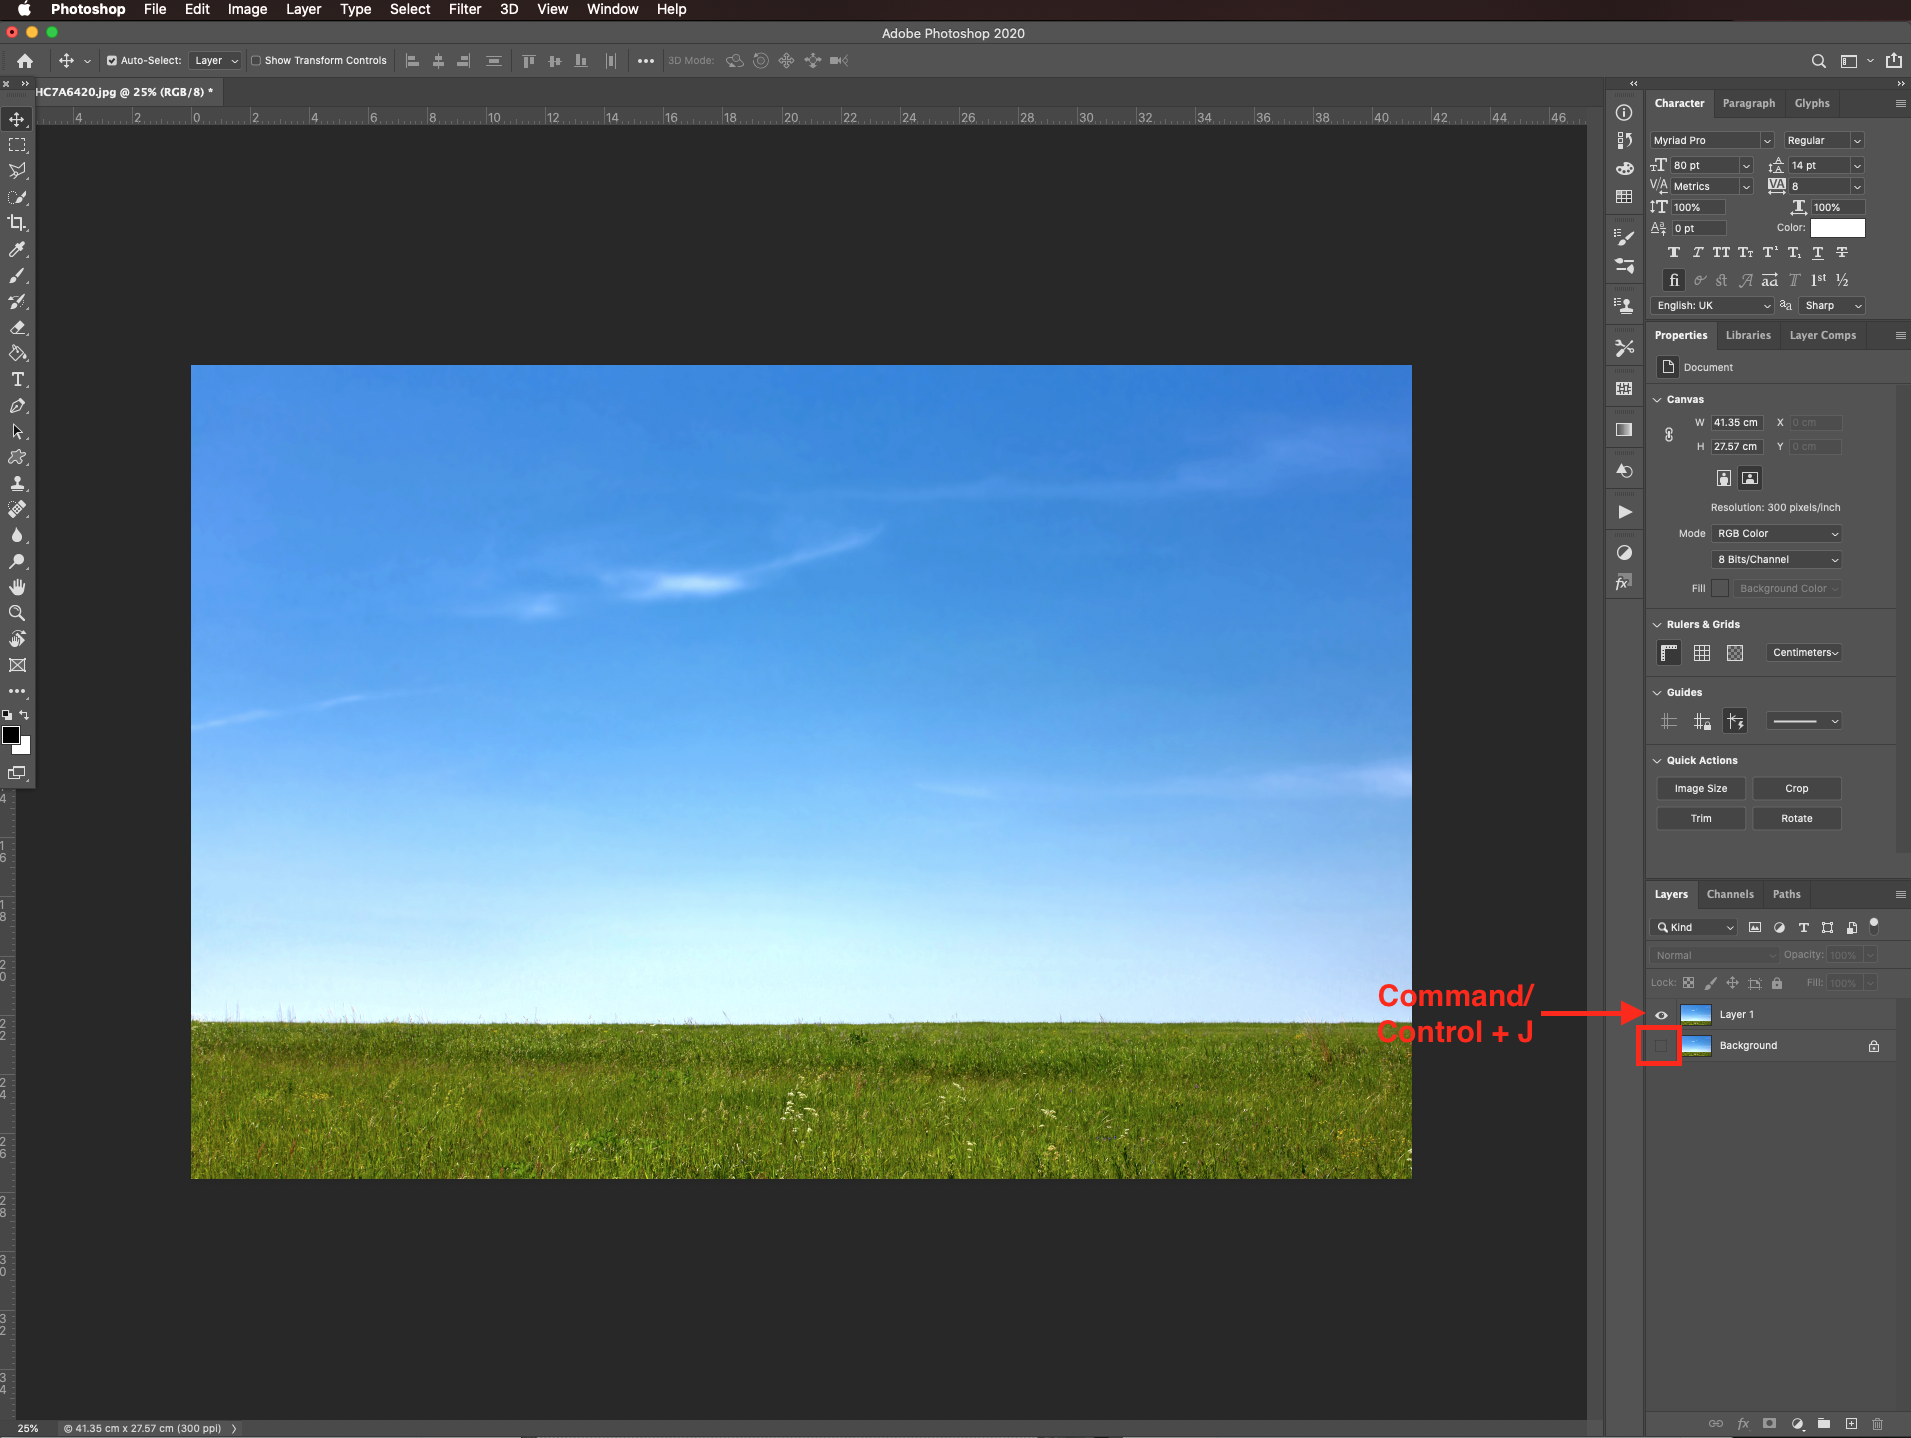
Double-click on top of your duplicate’s thumbnail to open the layer style panel and in the blending options tab select blue from the blend if field. Move the right-hand lever from this layer to the left until the sky starts to disappear. Depending on the amount of blue present in your sky this will be more or less accurate. To make a smoother transition hold the alt/option key to split the lever in half.
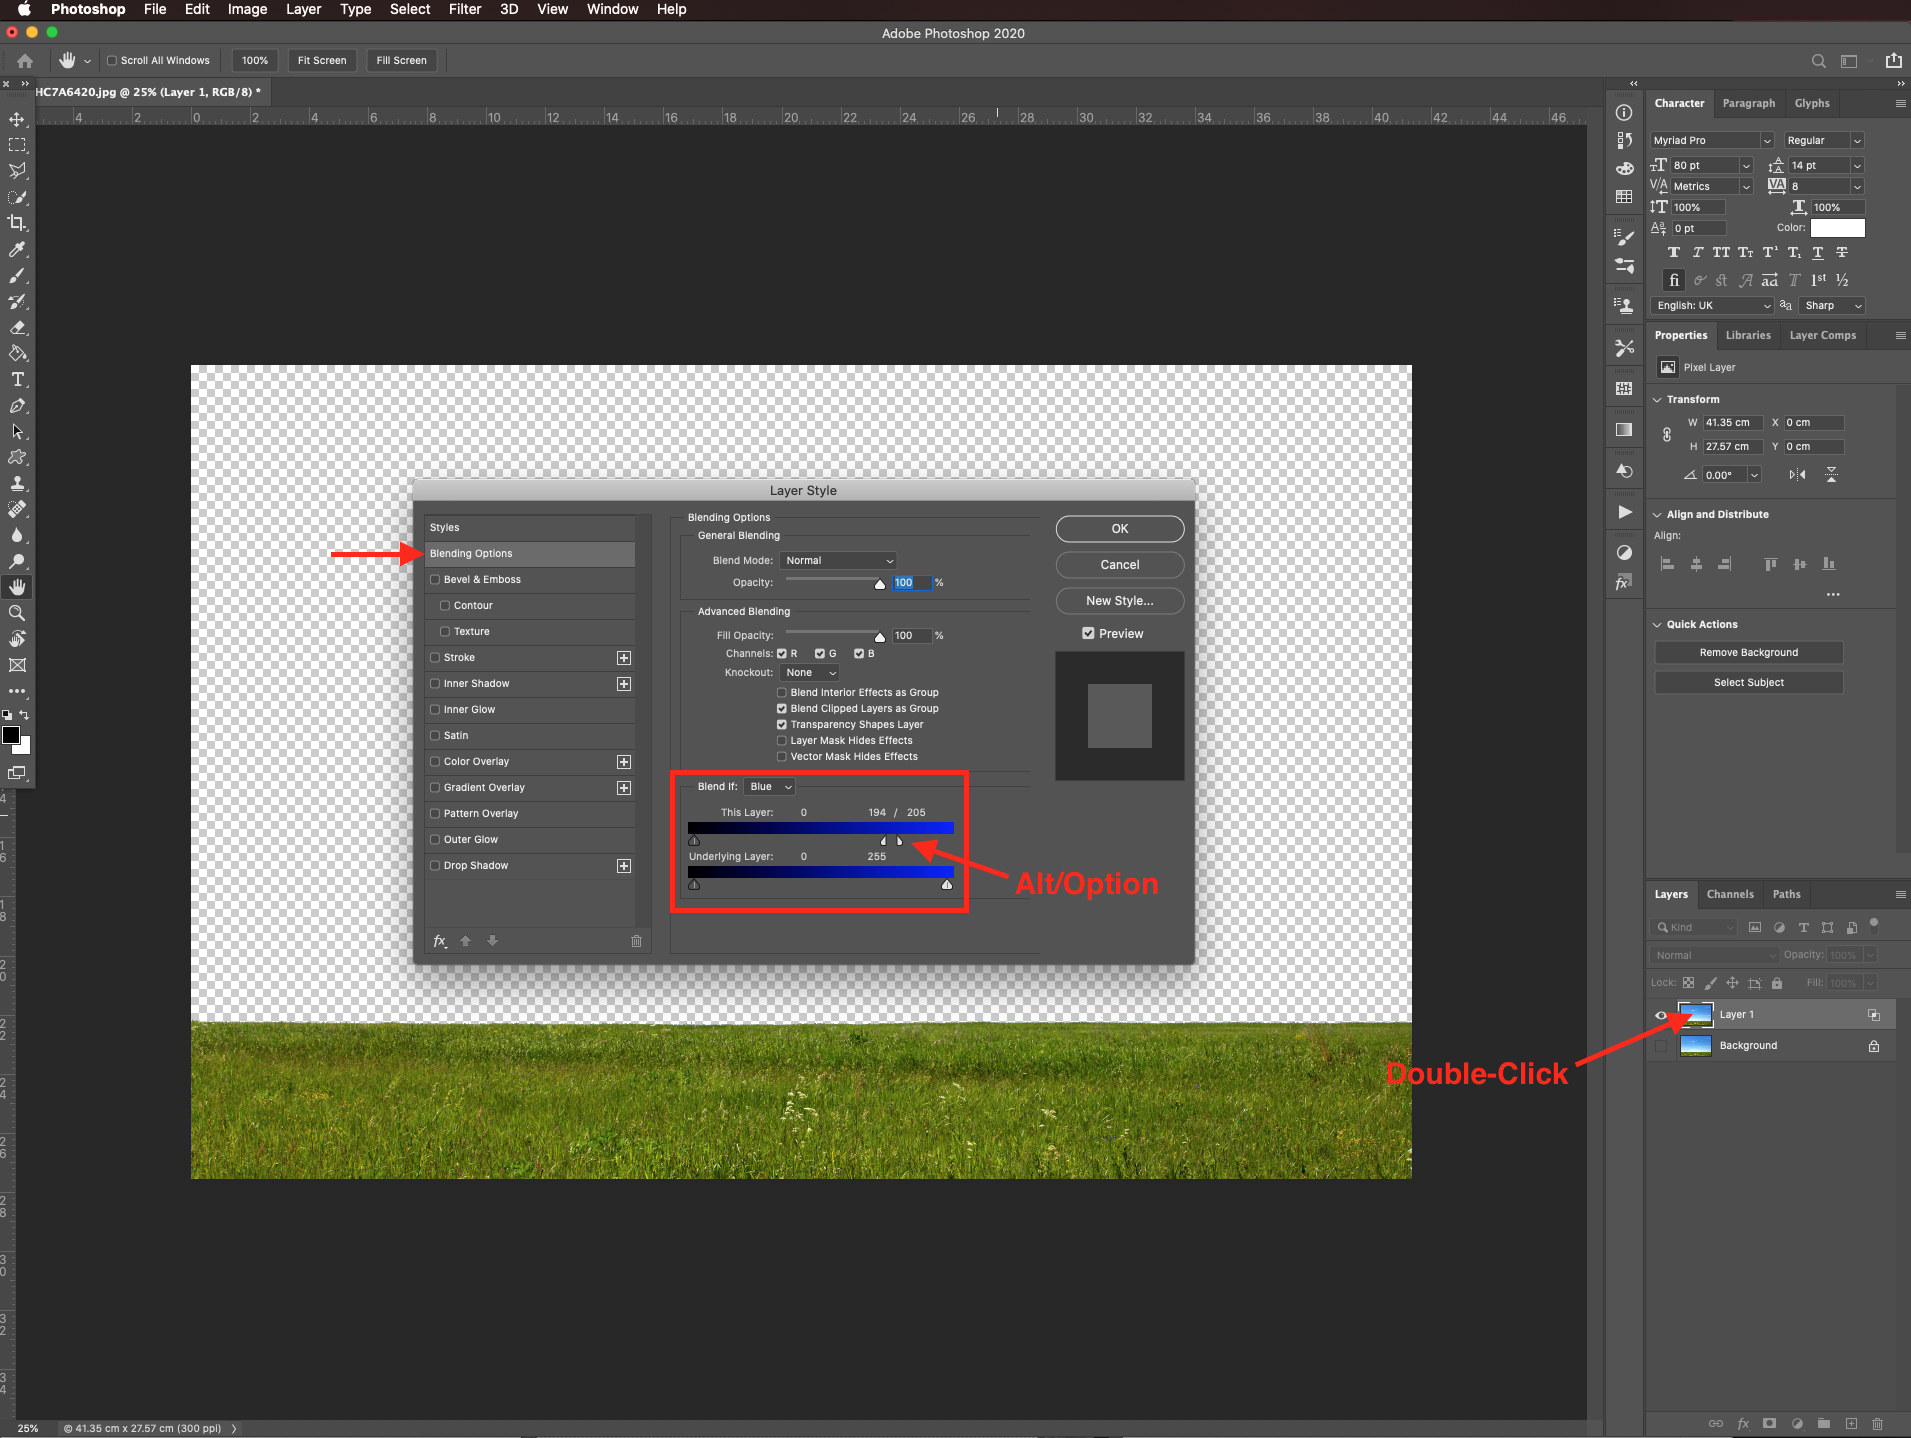
Depending on your image you won’t be able to get rid of the entire sky. To delete the rest, click on the add layer mask button at the bottom of the layers panel to create a mask. Select the brush tool (B), make sure you are using black as the foreground color, give it a large size, and delete as much sky as possible.
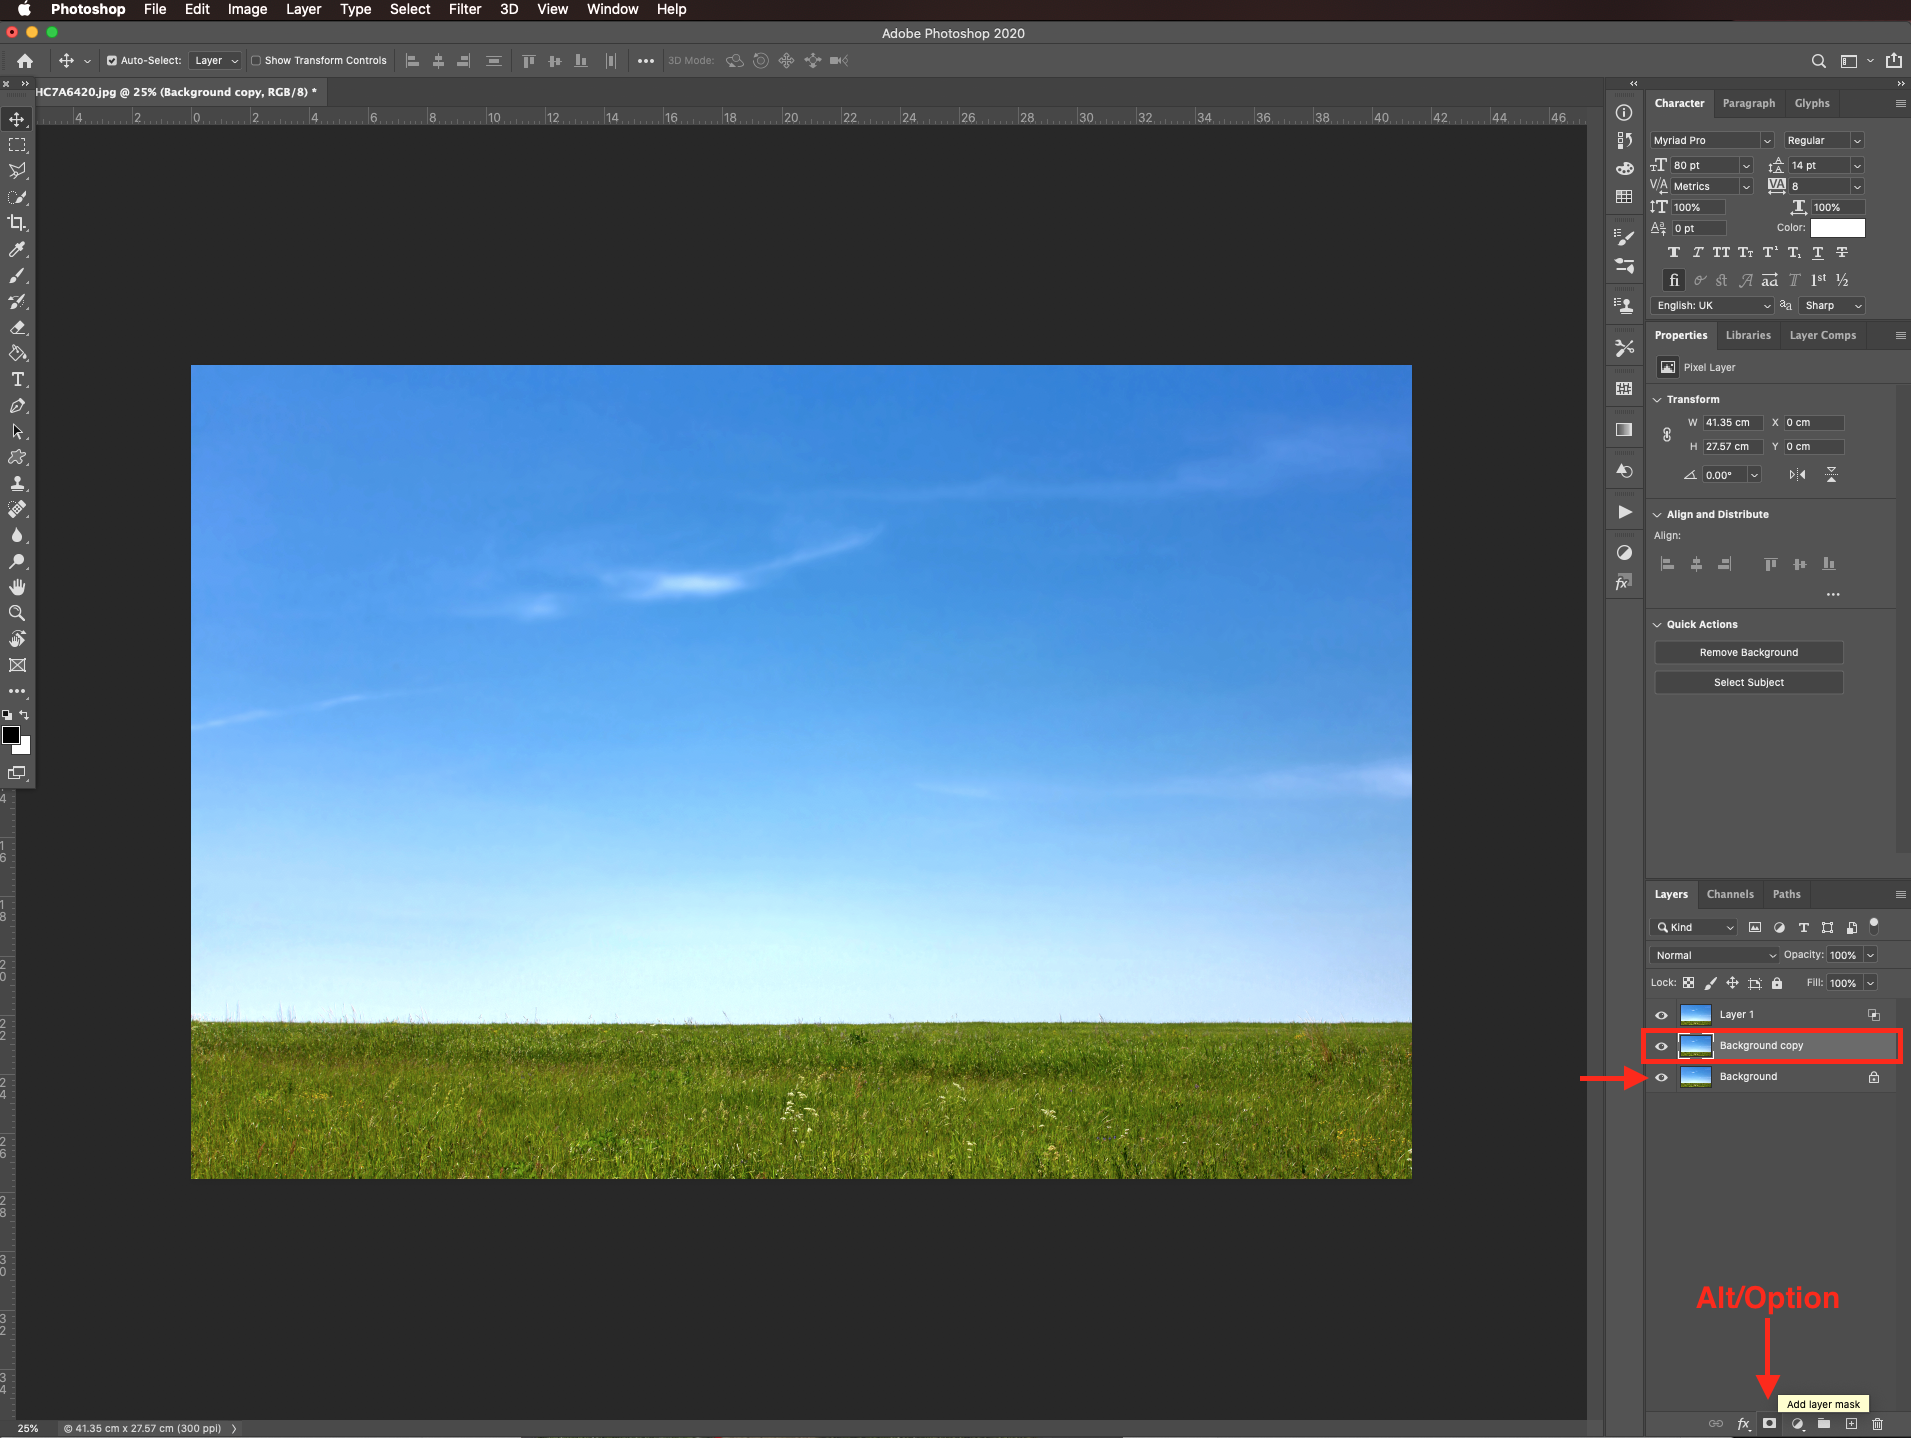
It is possible that some portions of the image that you wish to keep disappeared with the blues adjustment. To fix it, turn on your background layer, create another duplicate and add a layer mask to it but hold the alt/option key while creating it to hide everything.
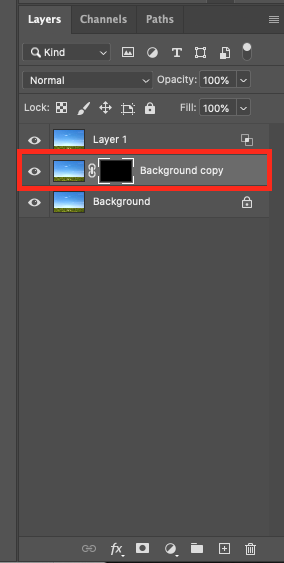
The mask thumbnail should be black.
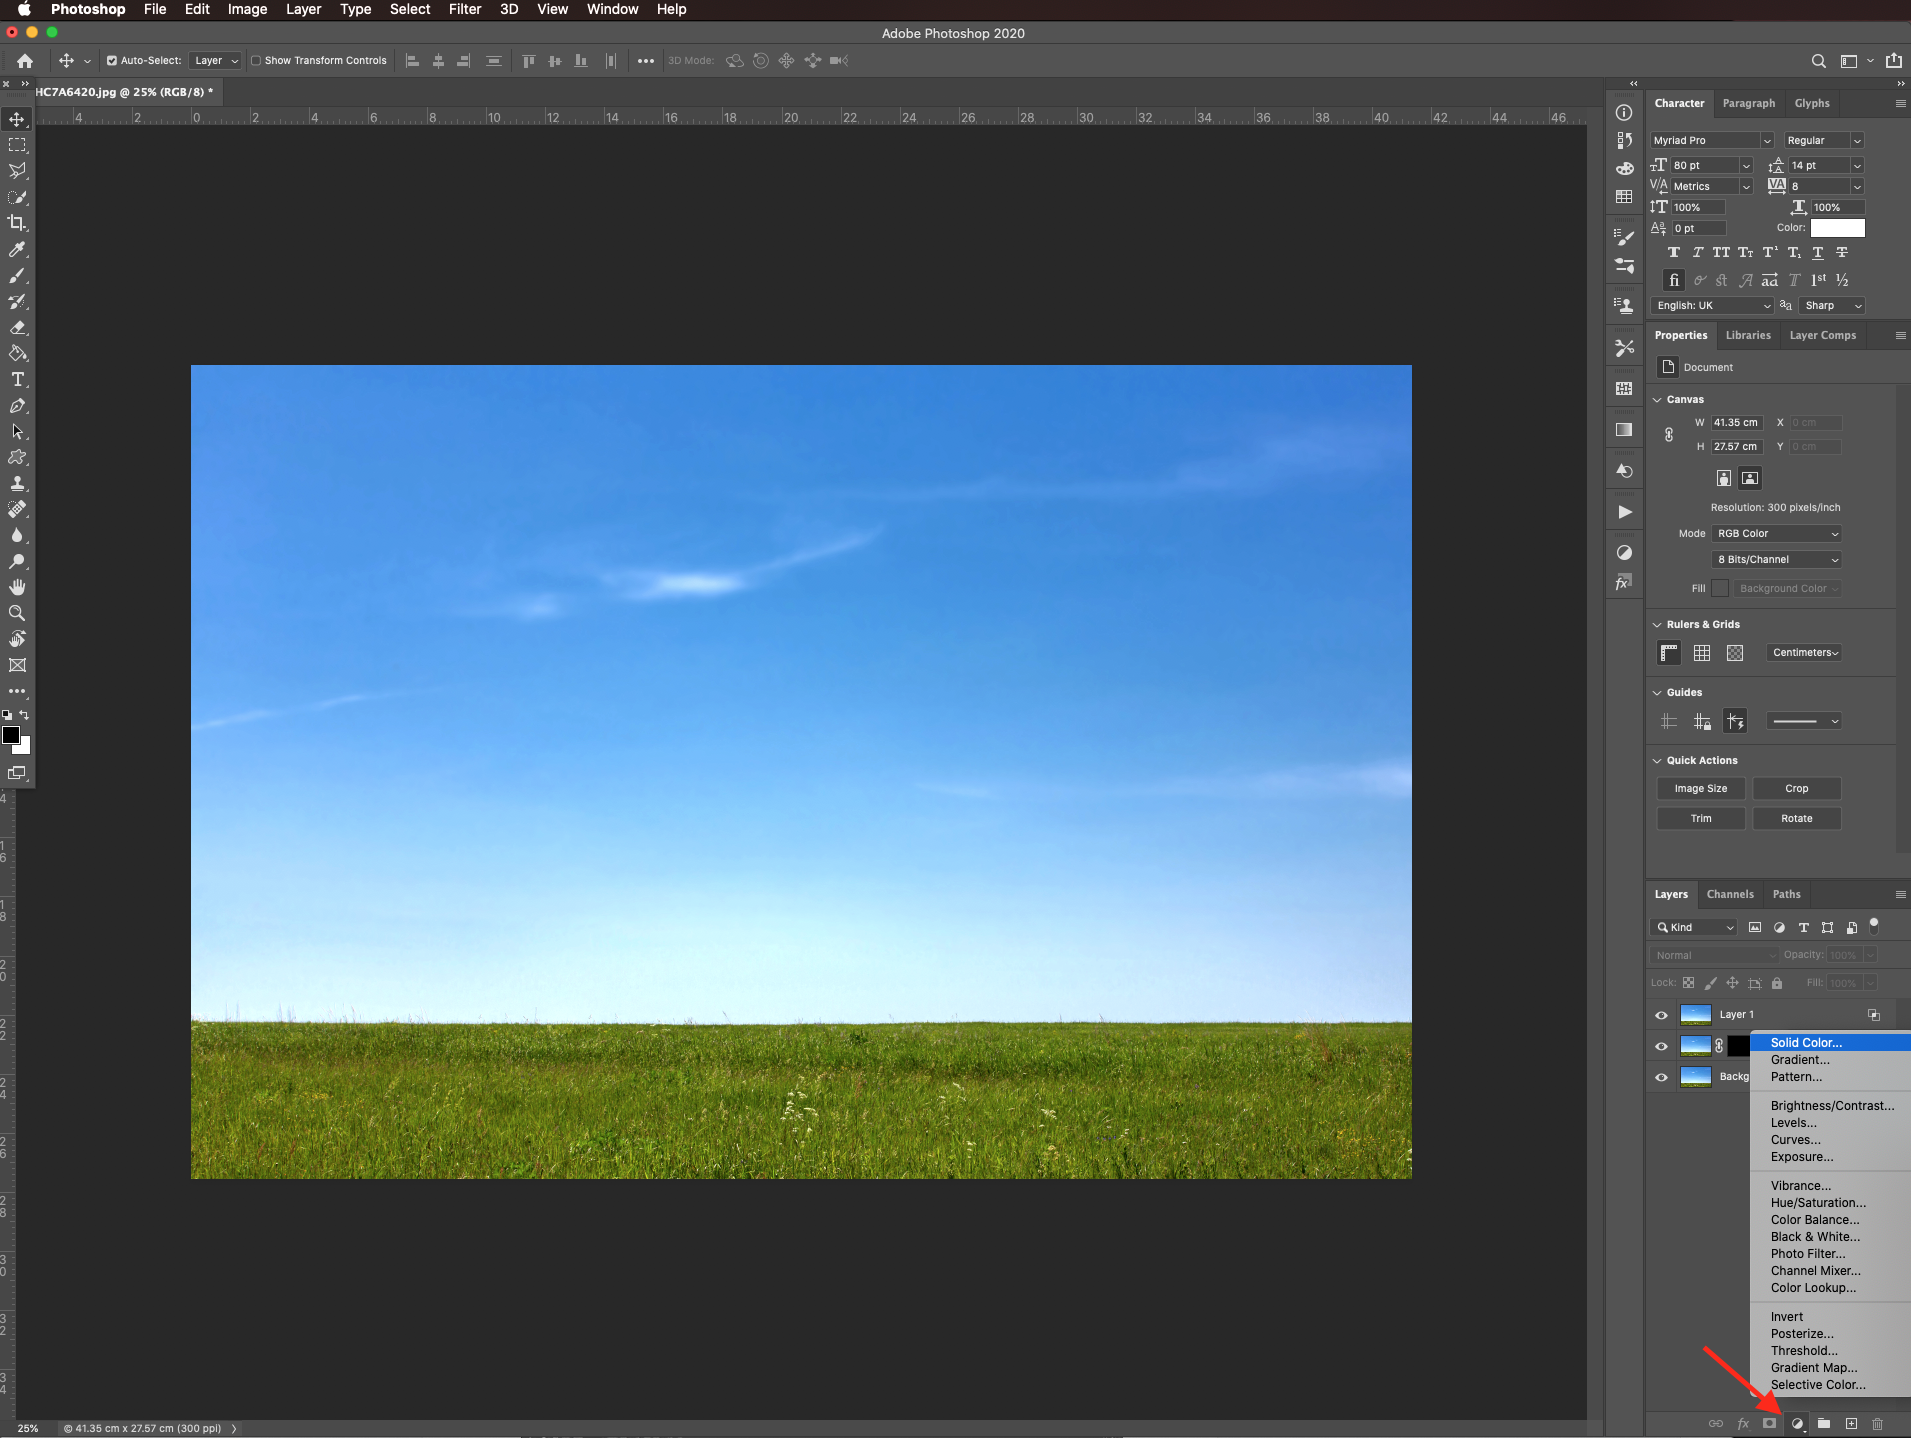
To have a better view of the spots that need fixing, create a solid color fill layer under the one you just masked. Do it by clicking on the small black & white button at the bottom of the layers panel and choosing a bright contrasting color as fill.
Zoom in to check the edges and details.
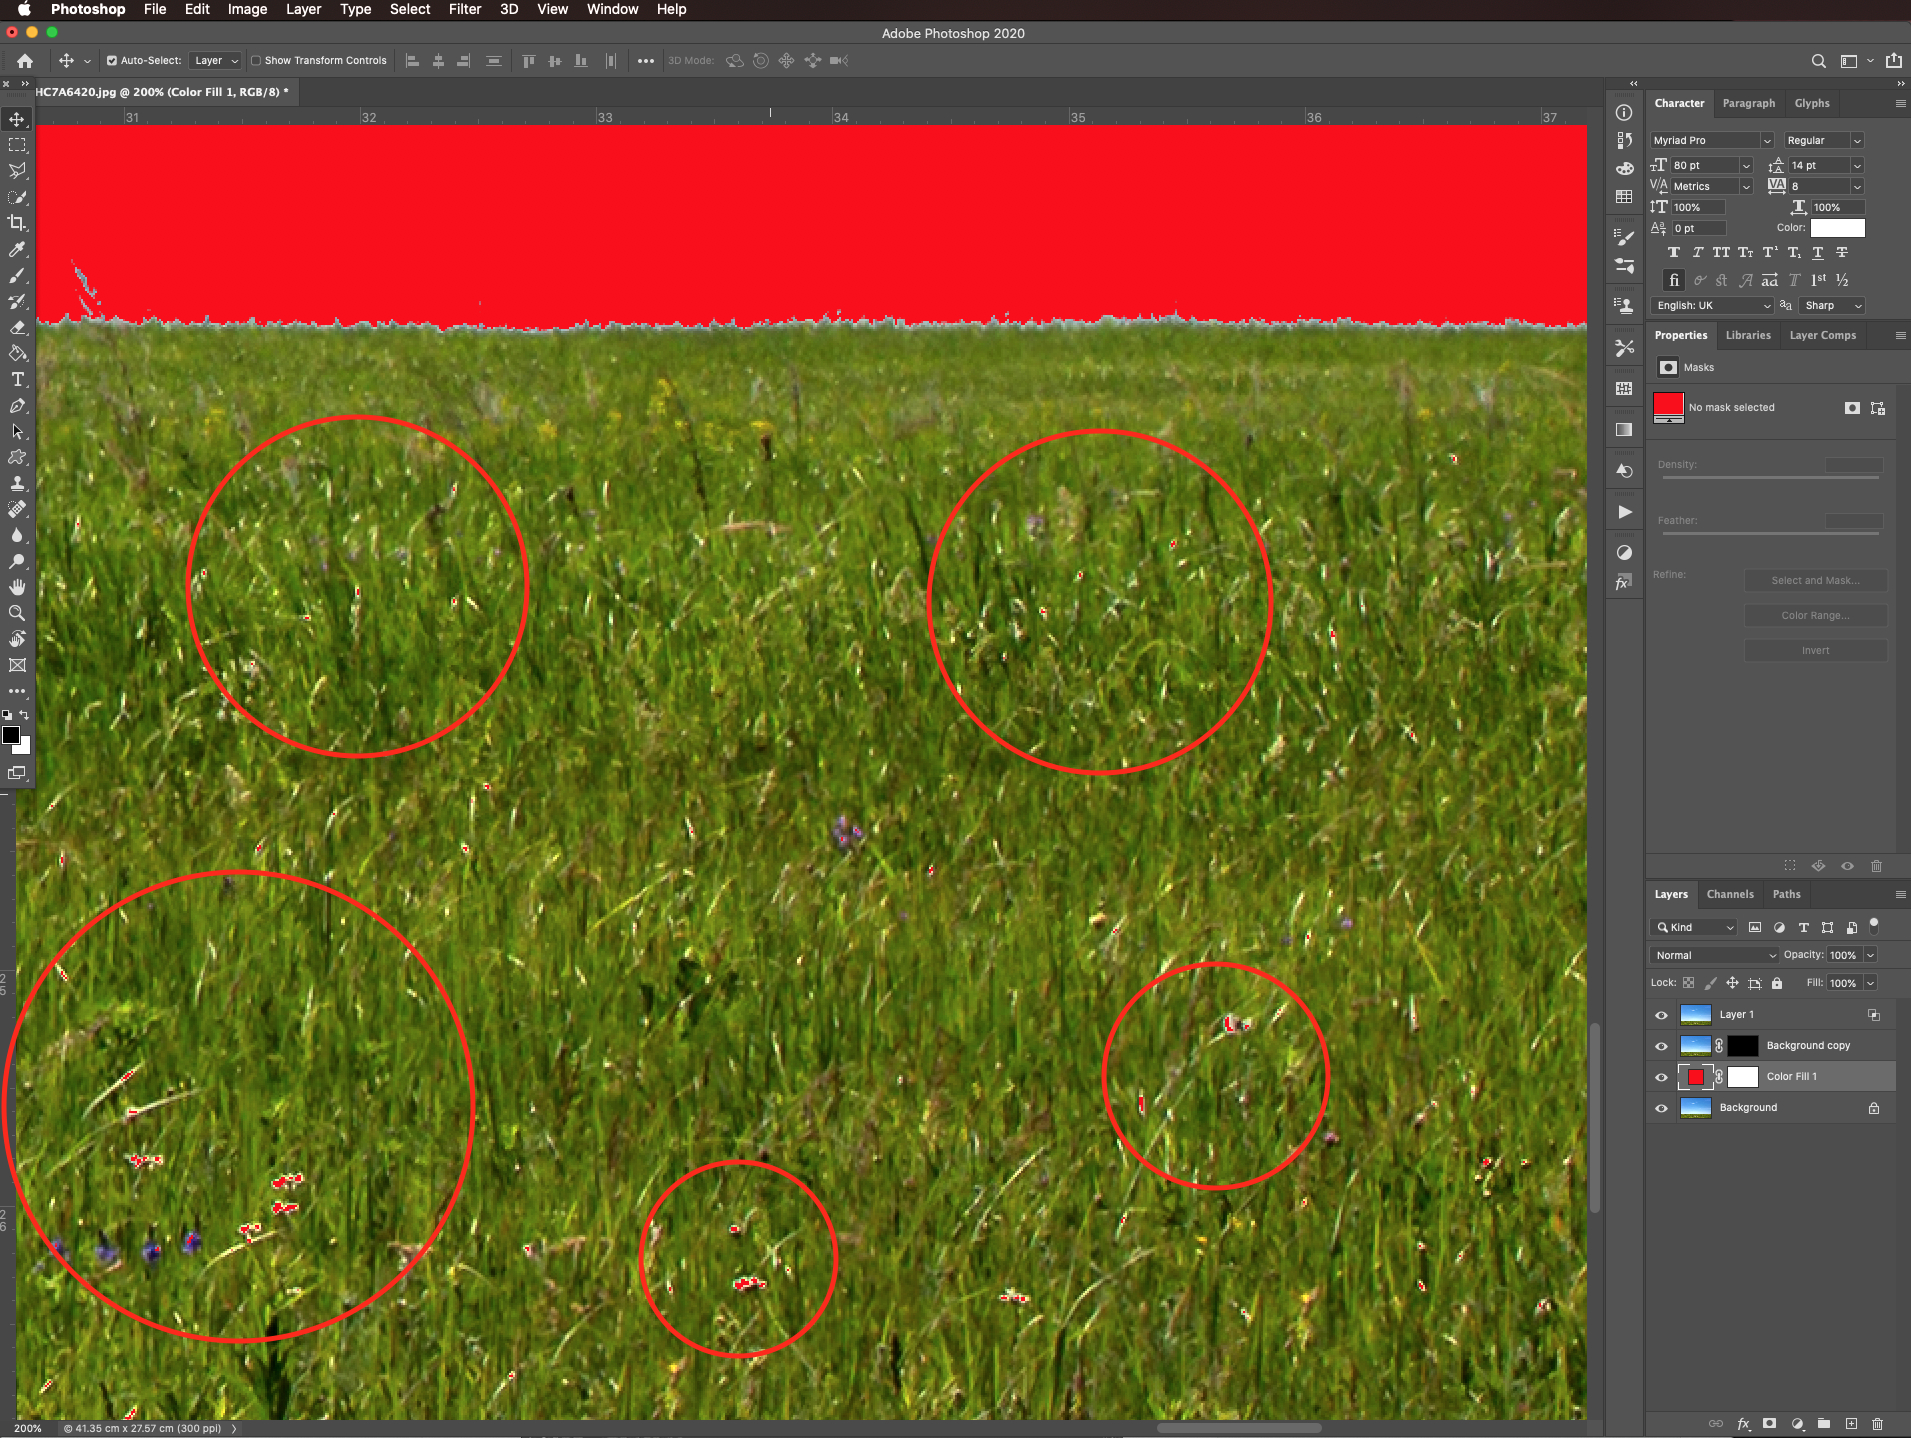
Select the mask thumbnail and use the brush tool (B) with black as the foreground color to bring out the parts that require it.
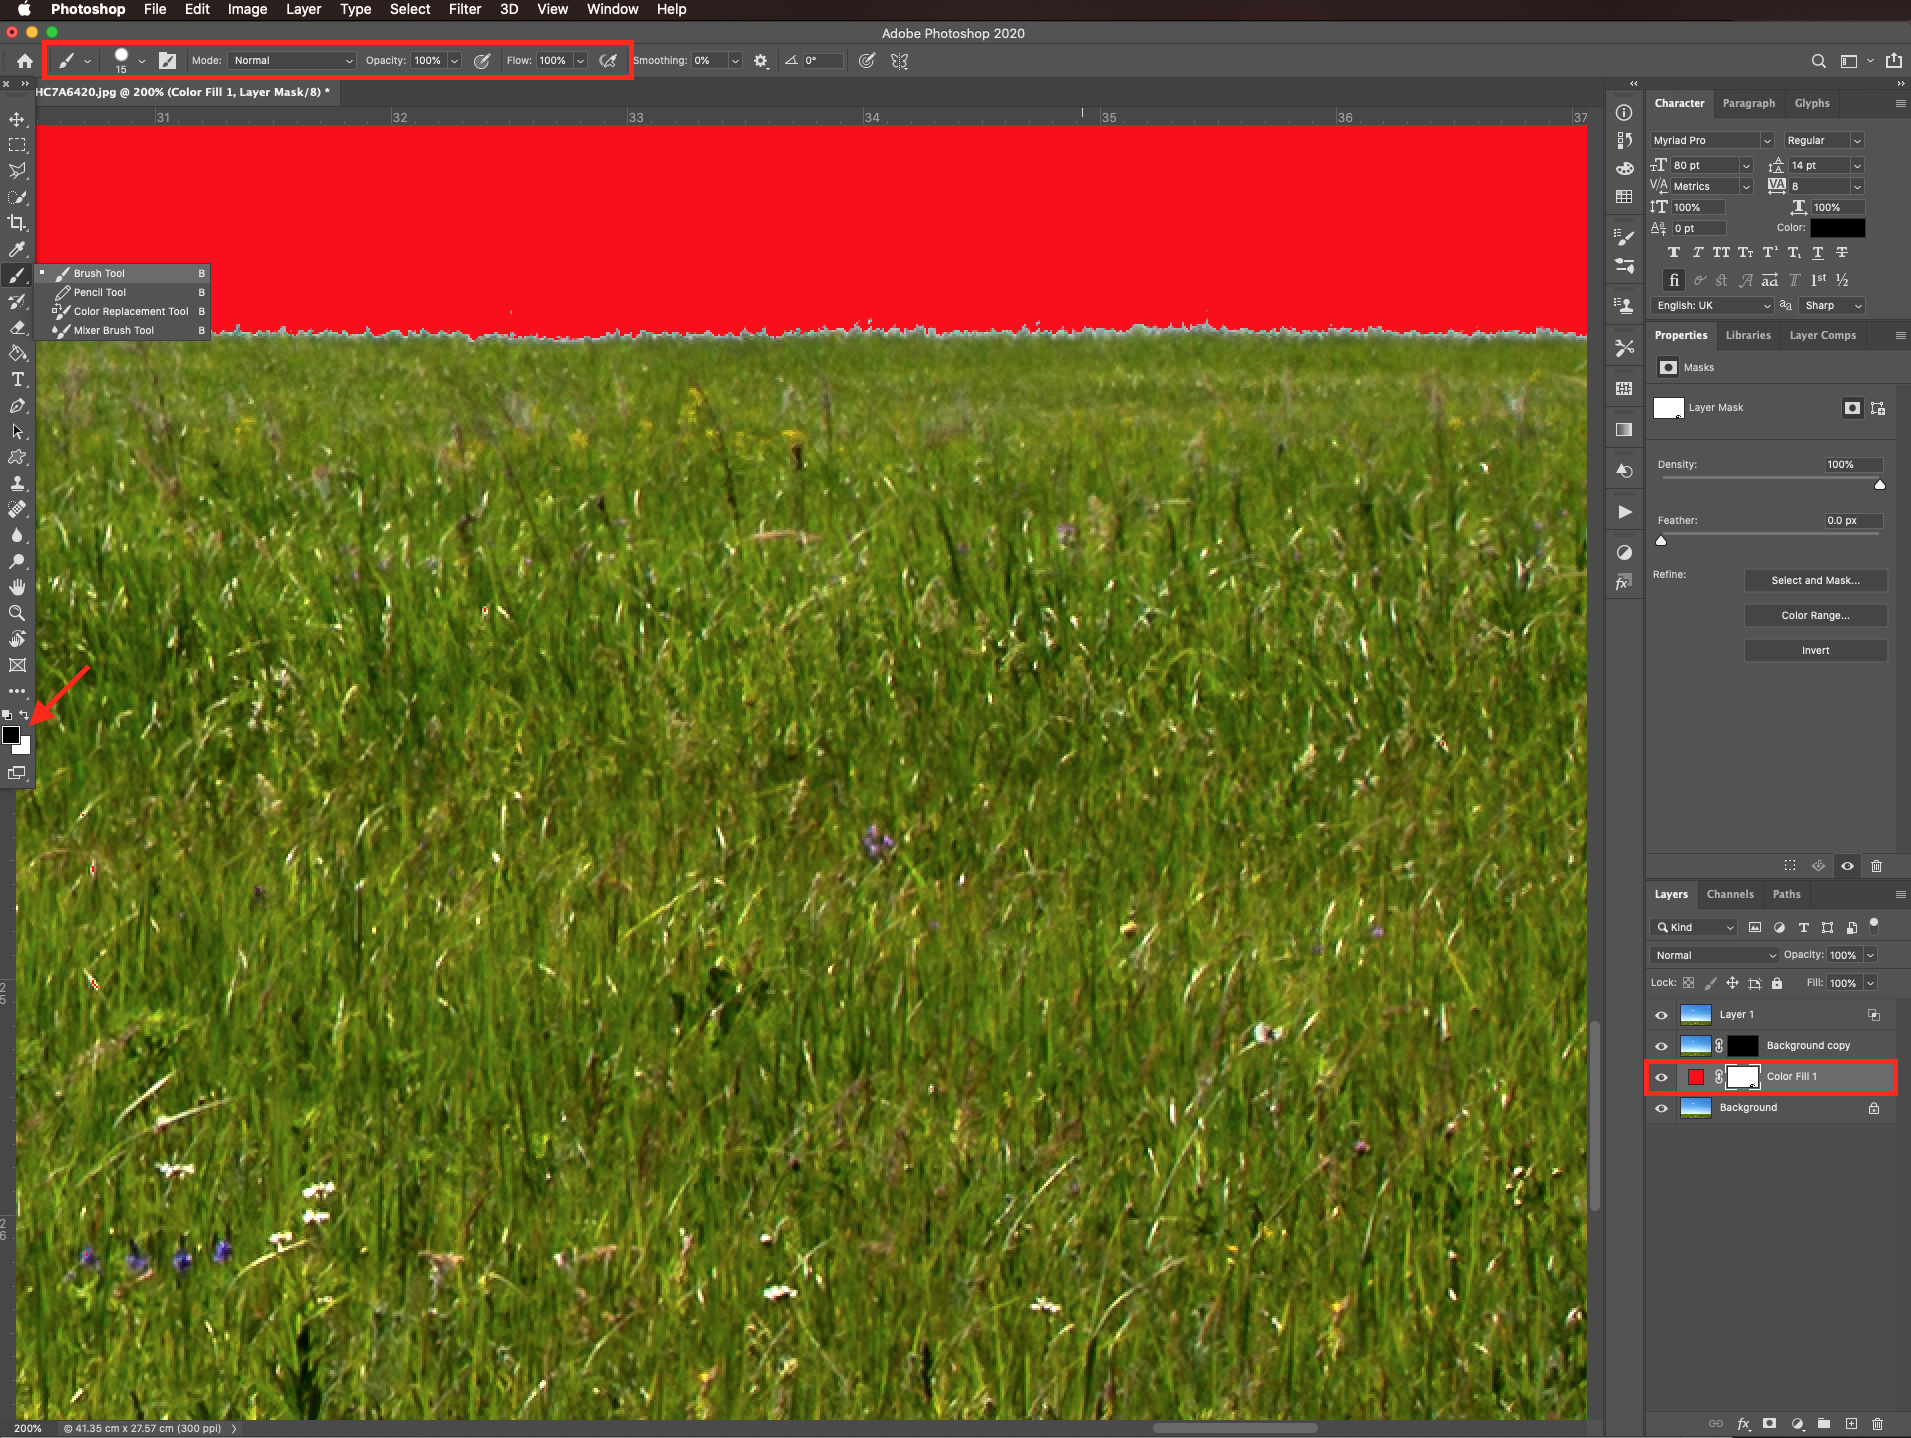
Once you are done, you can delete the color fill layer.
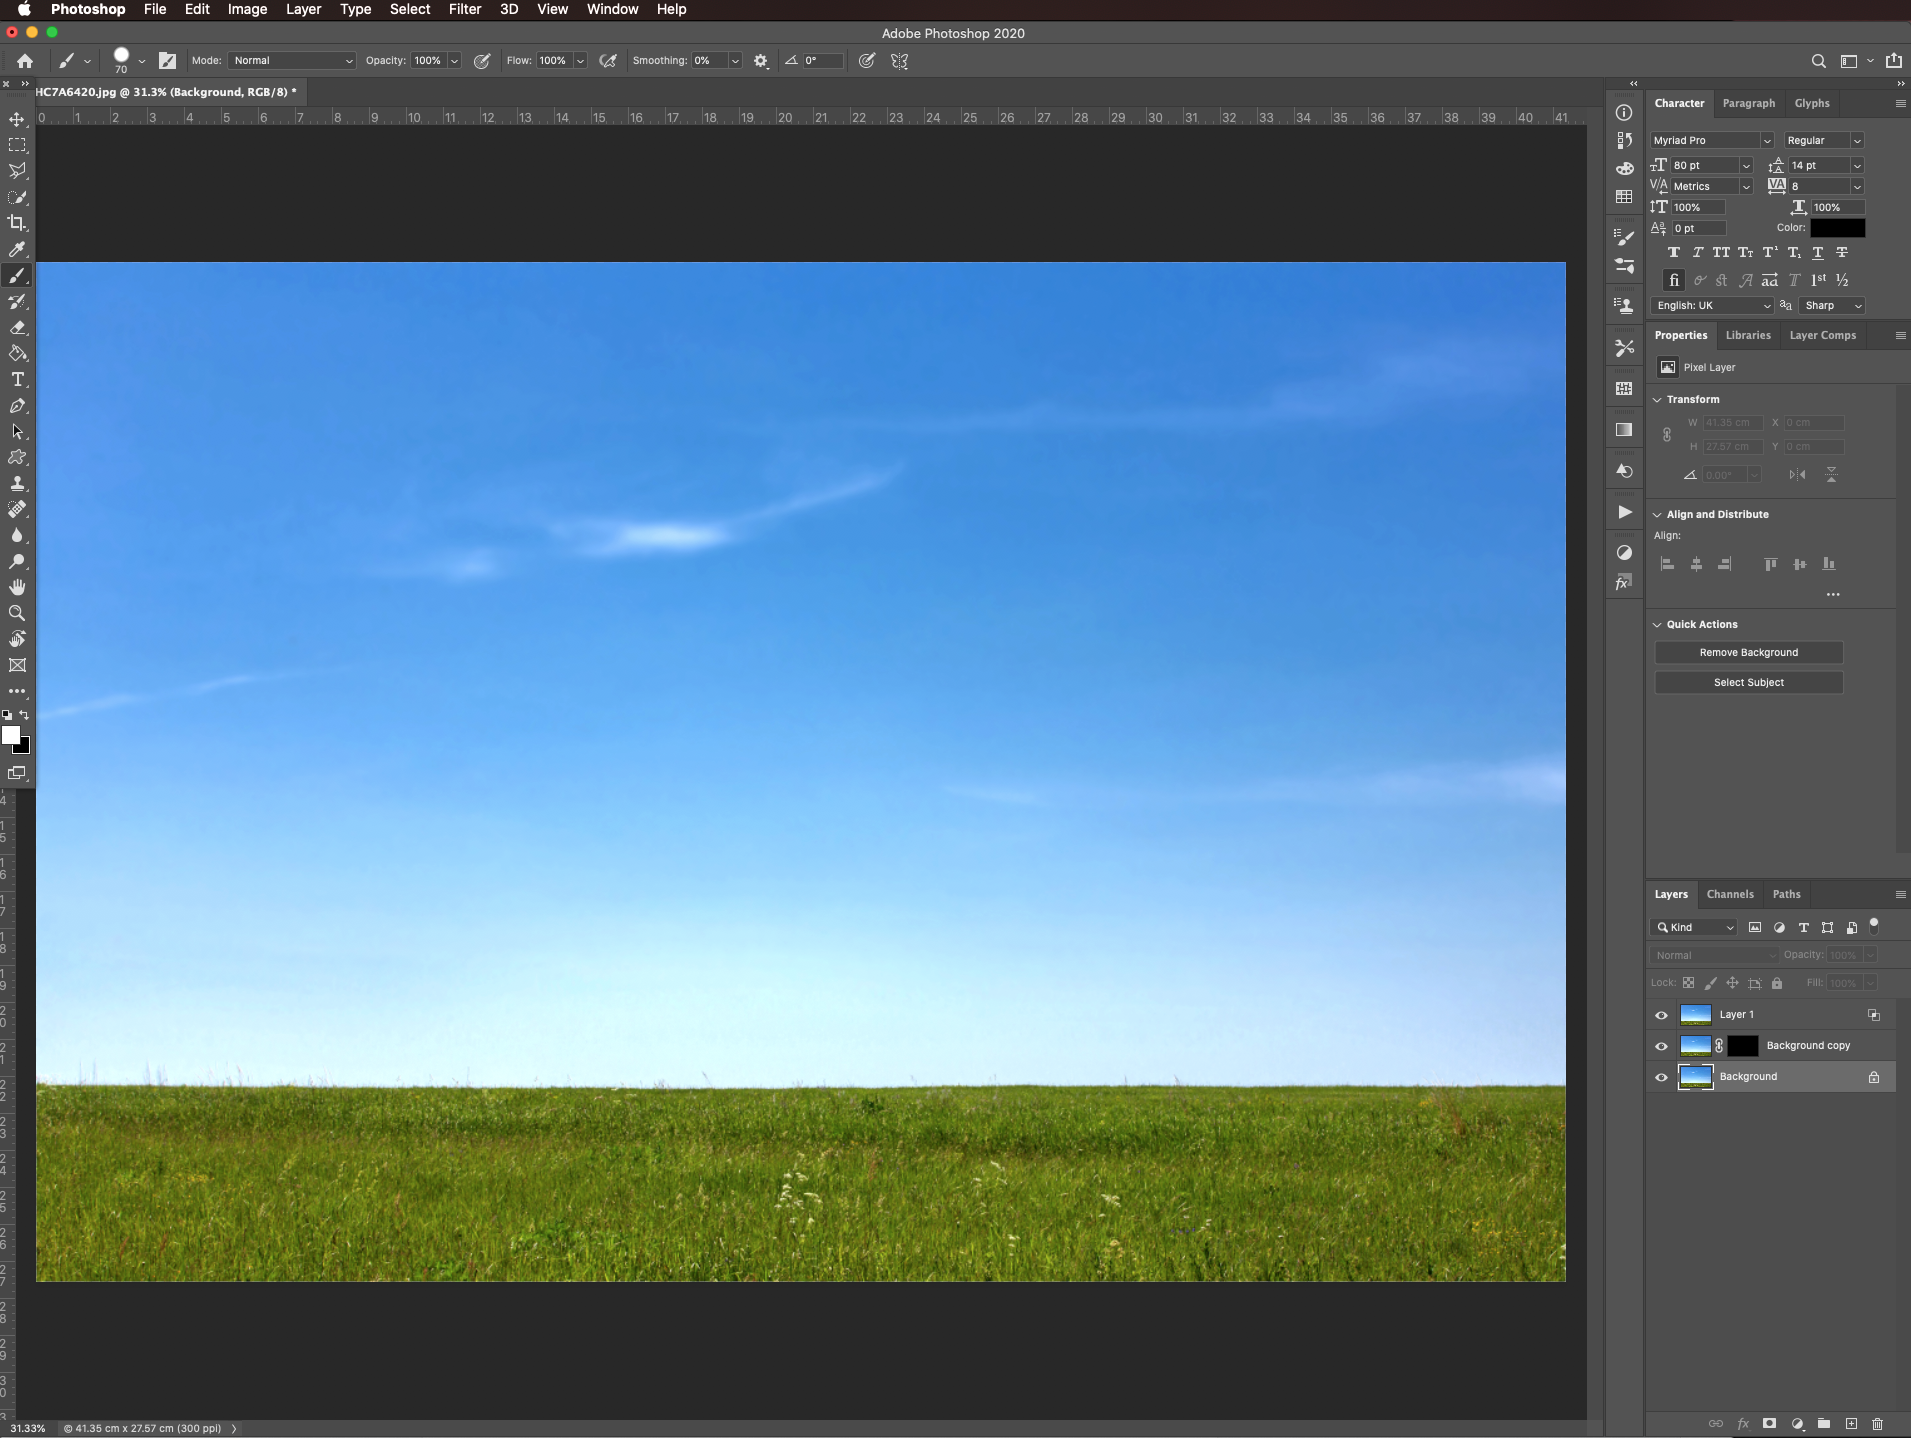
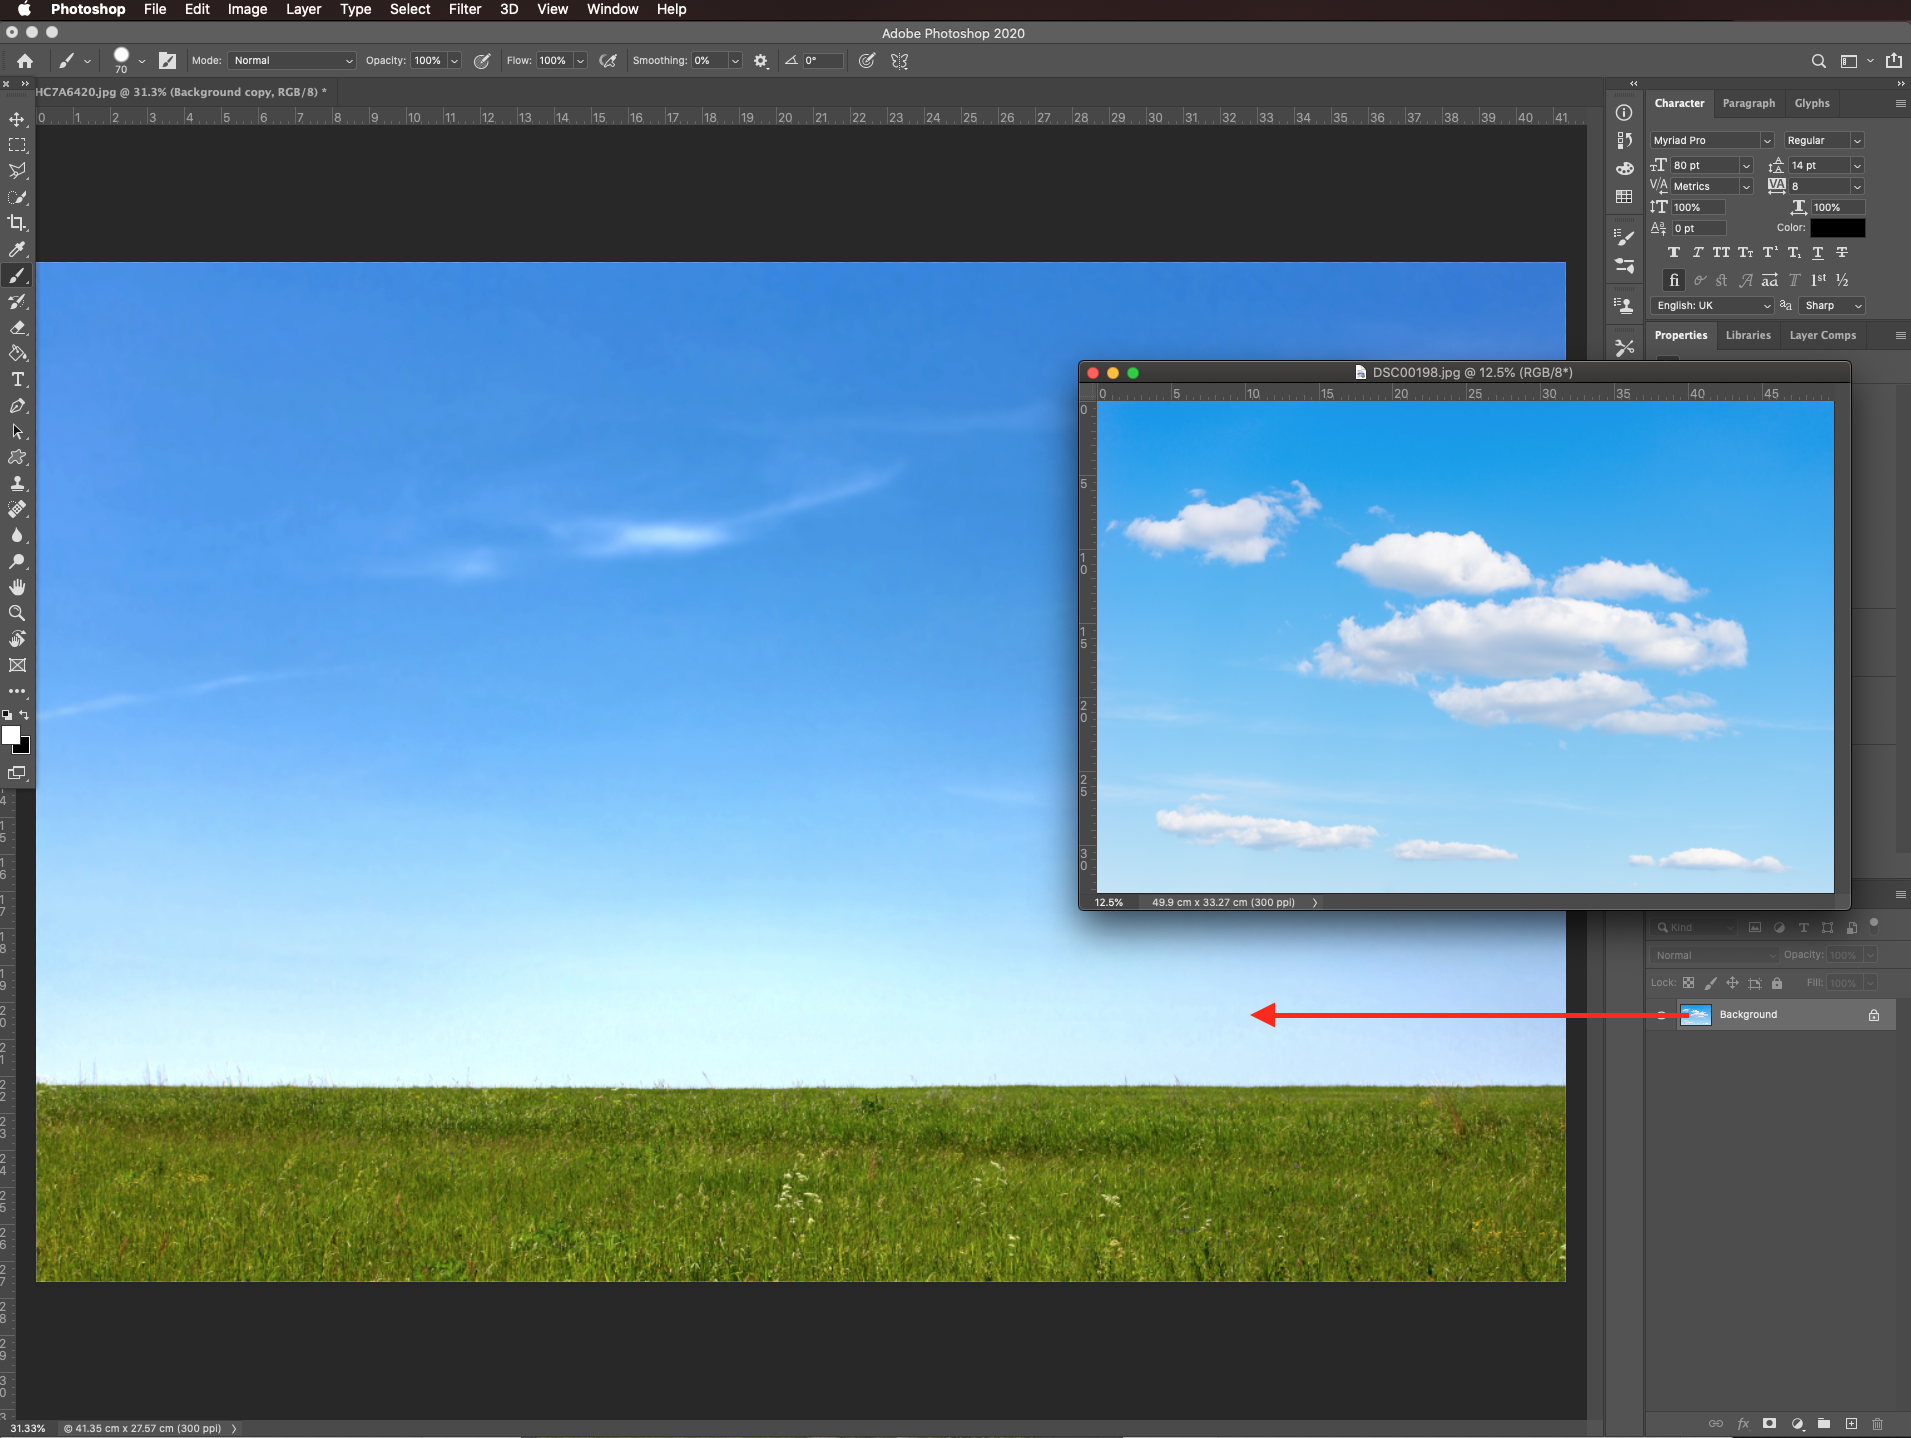
Open the image of the sky you want to add and drag it into your document and place it in between your two masked background duplicates.
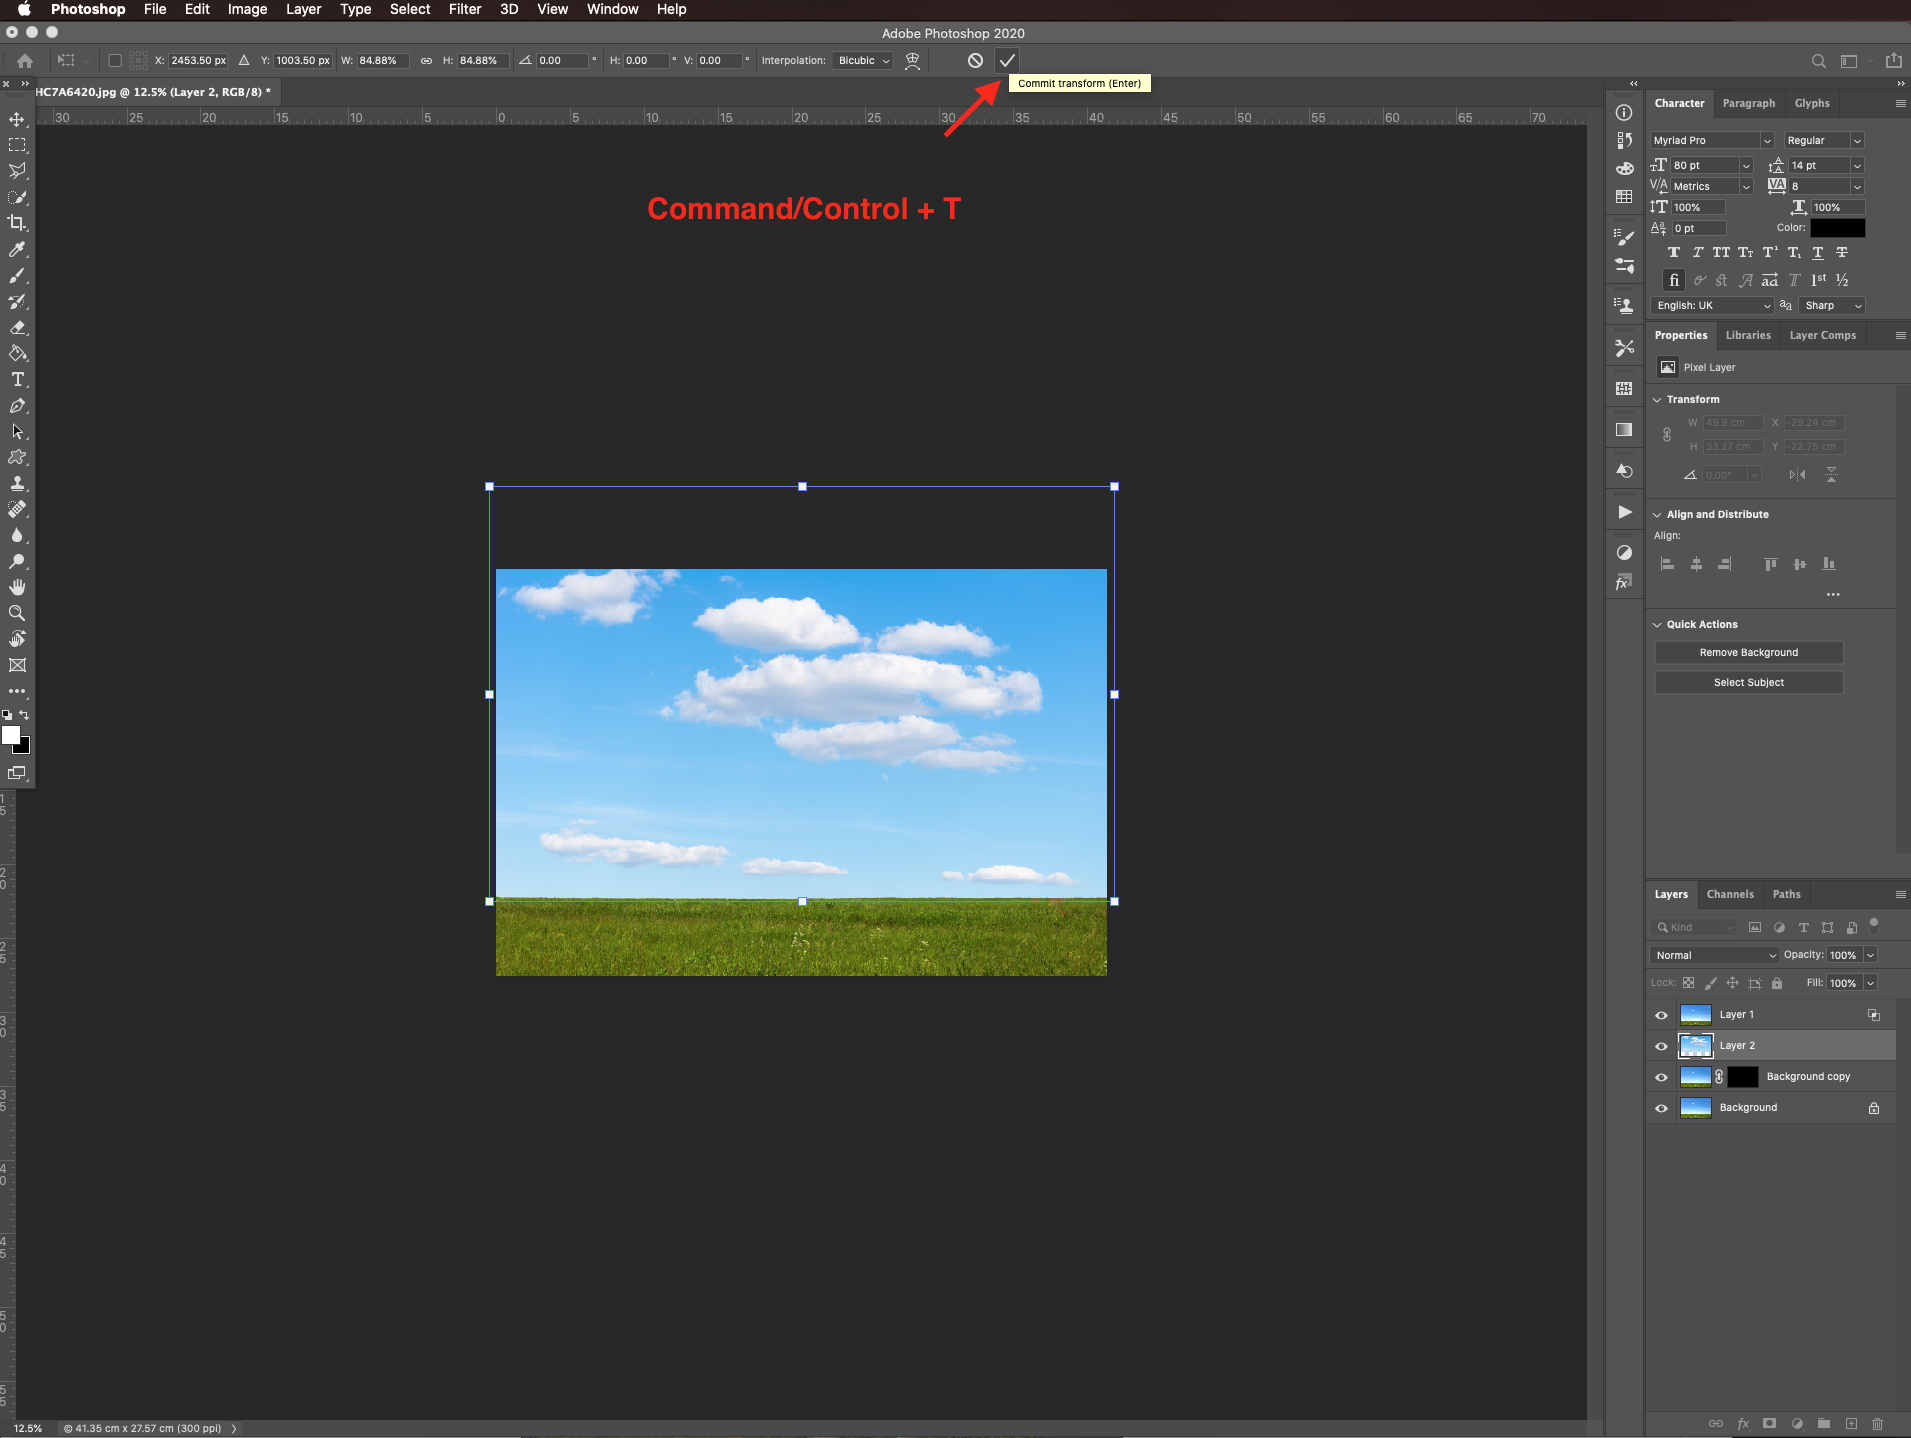
Resize it using free transform (command/control + T) and place it in the proper position.
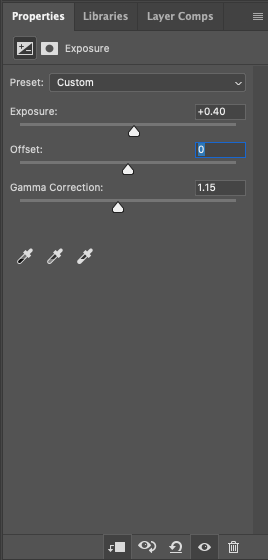
Create a new exposure adjustment layer on top of everything, clip it to layer 1 (click on the small button at the bottom of the properties panel).
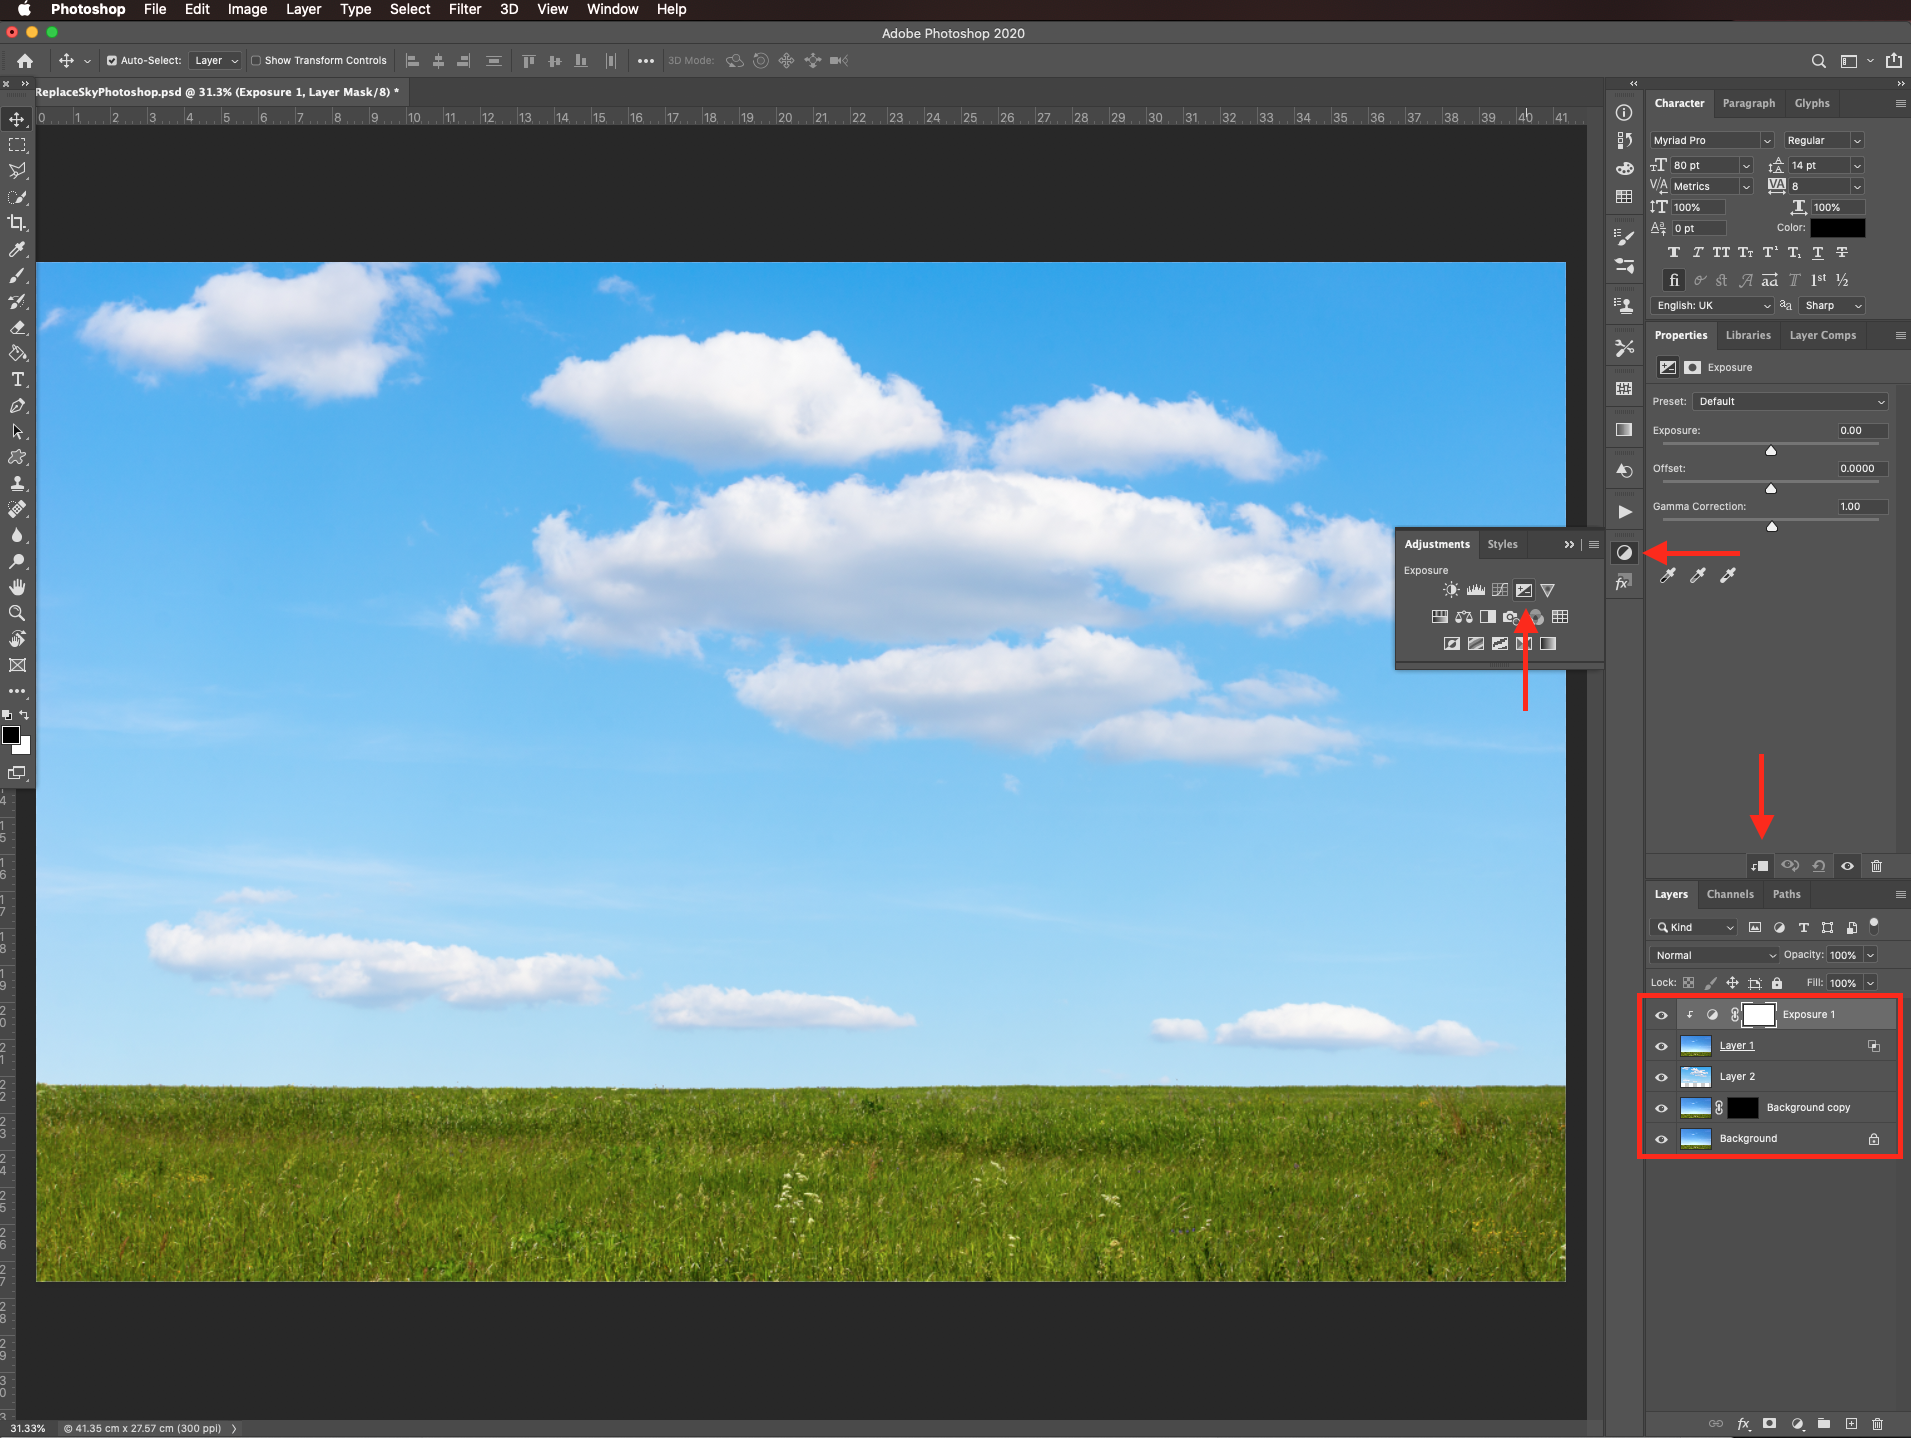
And adjust the settings to make your image more bright and similar to the new sky.
Create a new vibrance adjustment layer on top of everything and crank the vibrance to +100.
To make the edges between the horizon and sky a bit smoother, use the blur tool, make sure you are working on layer 1, and use a small brush with a 10% strength to do so.
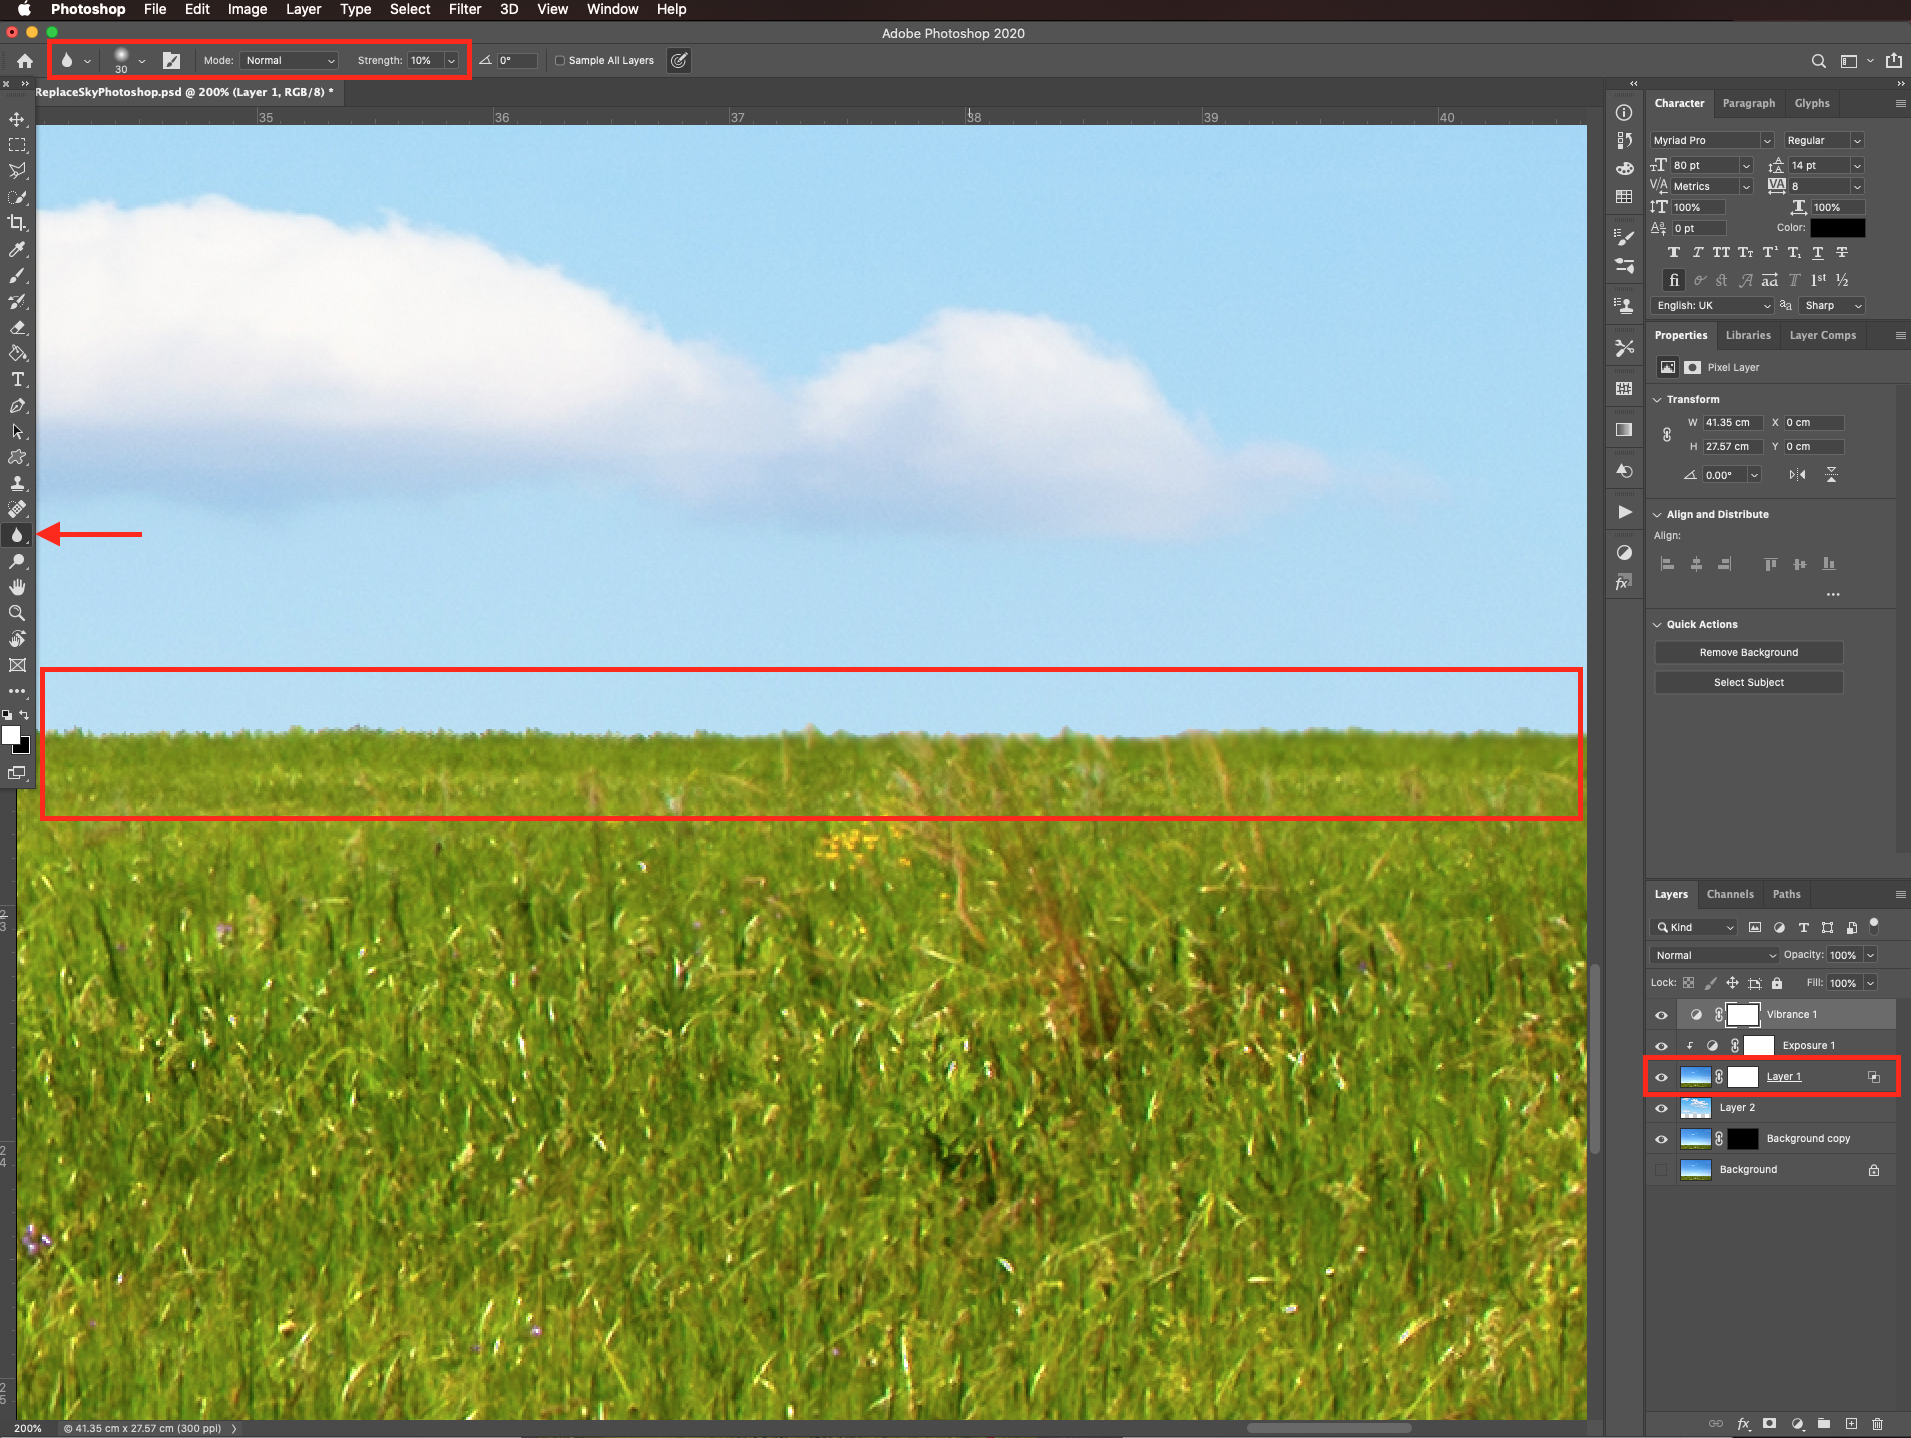
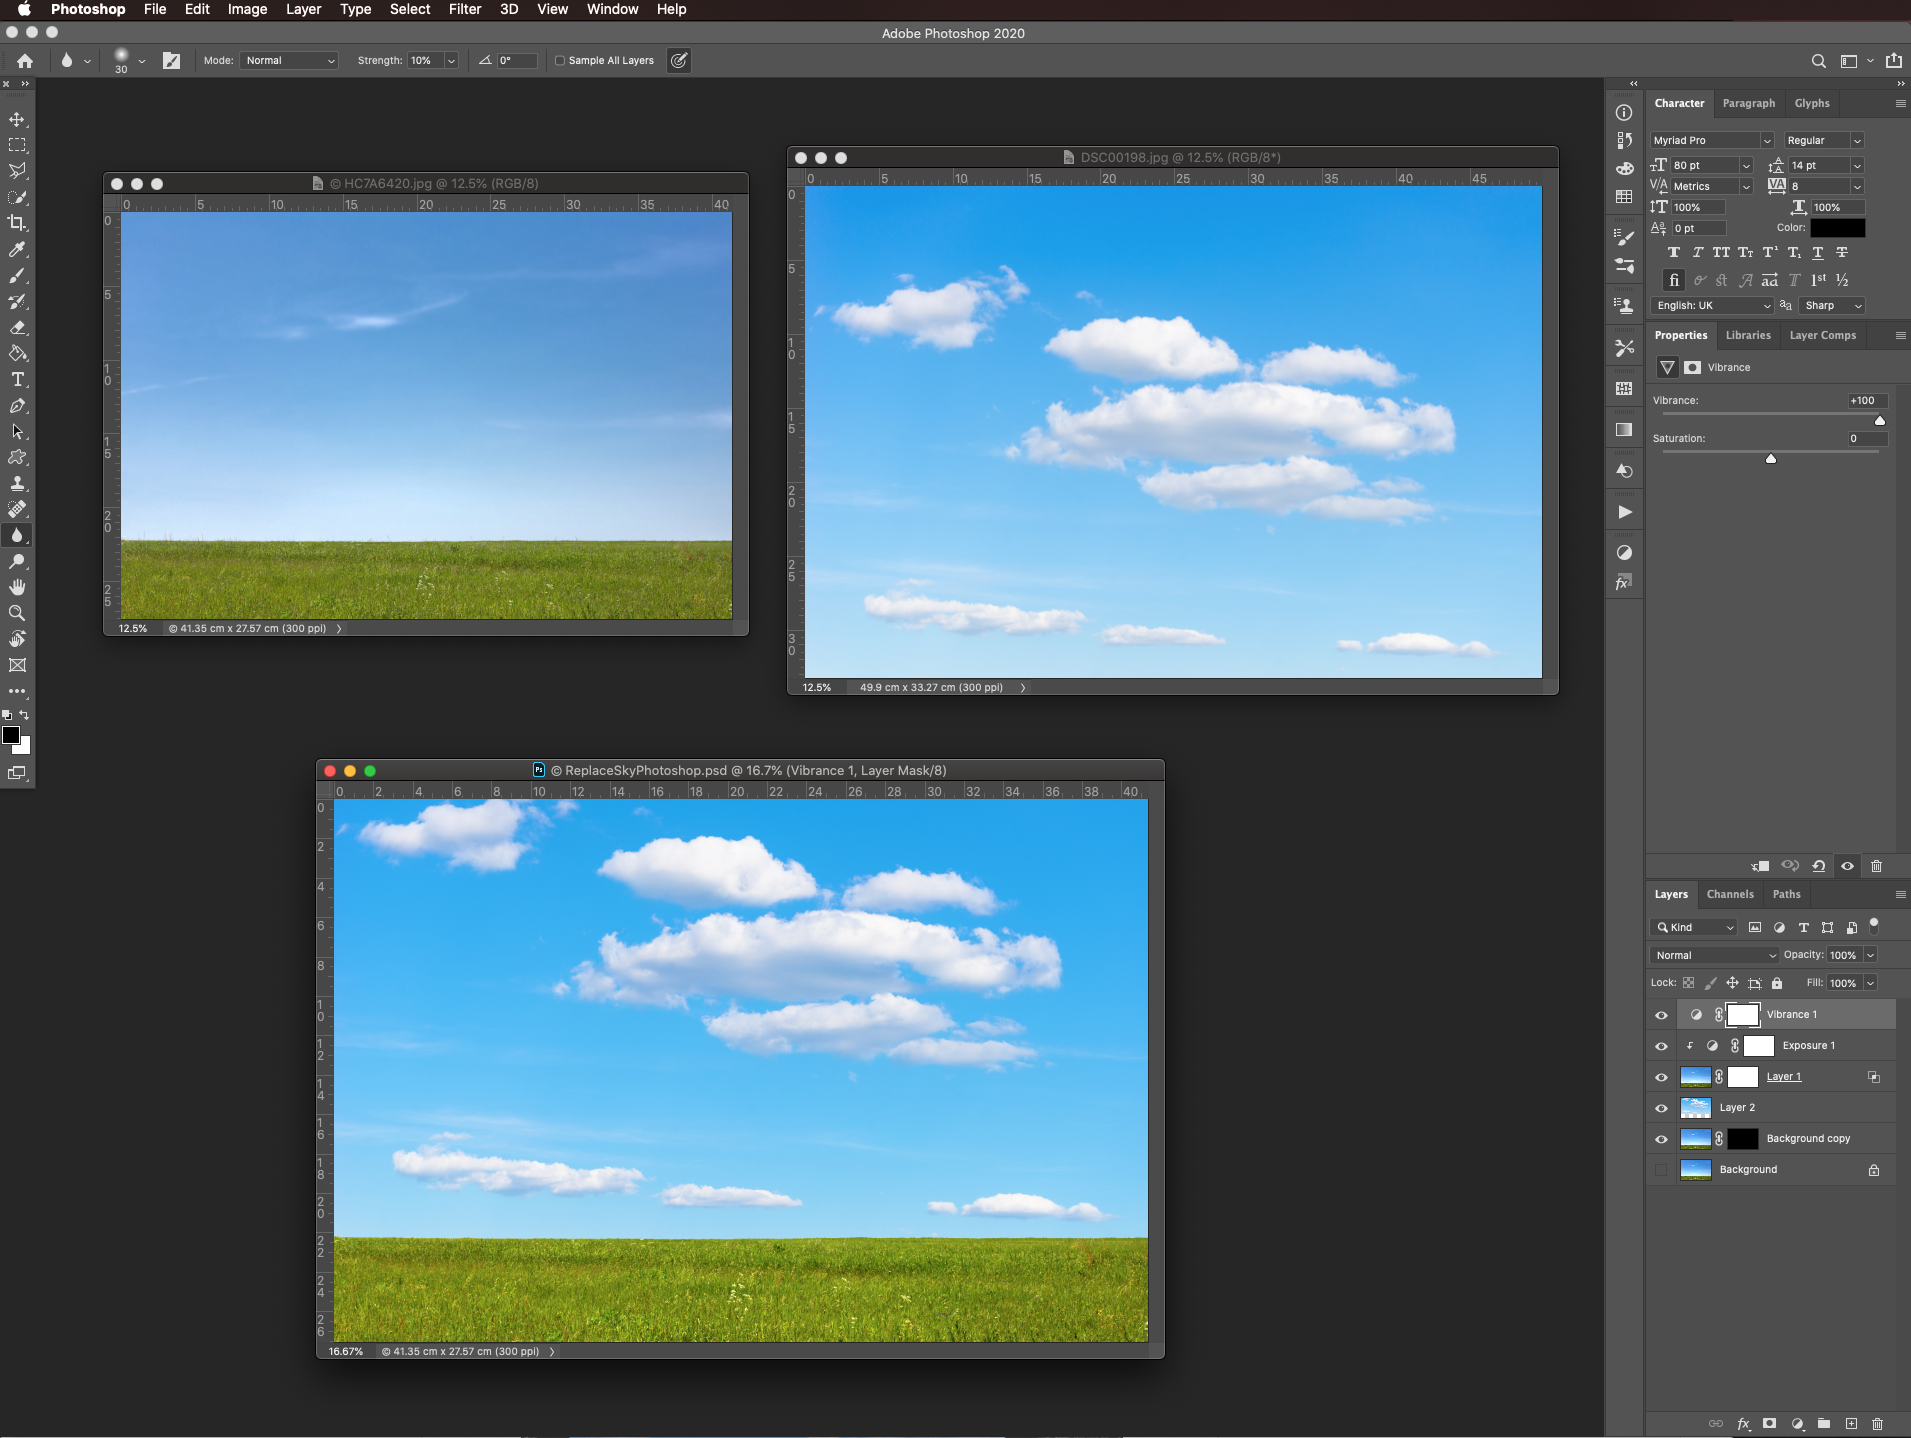
Your artwork should look similar to this.
If you liked this tutorial make sure to check out our other Photoshop tutorials like changing the color of objects and creating clipping masks in Photoshop.
Step 1: Open base image and duplicate it
In Photoshop, open the image you want to change the sky to.
Then, duplicate it (command/control + J) and hide the background layer for now (click on the small eye icon on the left side of its thumbnail).
Step 2: Select the sky
Double-click on top of your duplicate’s thumbnail to open the layer style panel and in the blending options tab select blue from the blend if field. Move the right-hand lever from this layer to the left until the sky starts to disappear. Depending on the amount of blue present in your sky this will be more or less accurate. To make a smoother transition hold the alt/option key to split the lever in half.
Depending on your image you won’t be able to get rid of the entire sky. To delete the rest, click on the add layer mask button at the bottom of the layers panel to create a mask. Select the brush tool (B), make sure you are using black as the foreground color, give it a large size, and delete as much sky as possible.
Step 3: Recover portions deleted by mistake
It is possible that some portions of the image that you wish to keep disappeared with the blues adjustment. To fix it, turn on your background layer, create another duplicate and add a layer mask to it but hold the alt/option key while creating it to hide everything.
The mask thumbnail should be black.
To have a better view of the spots that need fixing, create a solid color fill layer under the one you just masked. Do it by clicking on the small black & white button at the bottom of the layers panel and choosing a bright contrasting color as fill.
Zoom in to check the edges and details.
Select the mask thumbnail and use the brush tool (B) with black as the foreground color to bring out the parts that require it.
Once you are done, you can delete the color fill layer.
Step 4: Import the replacement sky image
Open the image of the sky you want to add and drag it into your document and place it in between your two masked background duplicates.
Resize it using free transform (command/control + T) and place it in the proper position.
Step 5: Adjust the exposure and vibrance of the original image
Create a new exposure adjustment layer on top of everything, clip it to layer 1 (click on the small button at the bottom of the properties panel).
And adjust the settings to make your image more bright and similar to the new sky.
Create a new vibrance adjustment layer on top of everything and crank the vibrance to +100.
Step 6: Fix the edges of the horizon
To make the edges between the horizon and sky a bit smoother, use the blur tool, make sure you are working on layer 1, and use a small brush with a 10% strength to do so.
Your artwork should look similar to this.
If you liked this tutorial make sure to check out our other Photoshop tutorials like changing the color of objects and creating clipping masks in Photoshop.
Related Tutorials
Affinity Tutorials
How to Replace the Sky in Affinity Photo
Learn how to quickly replace the sky in your image in Affinity Photo with this tutorial.
Photoshop Tutorials
How to Use Text Effects in Photoshop
With Photoshop Text Effects, you can create text with impact in just a few steps.
Photoshop Tutorials
How to Create Speech Bubbles in Photoshop
Learn how to create and edit fun speech bubbles in Photoshop using custom shapes.
Photoshop Tutorials
How to Make Sublimation Designs in Photoshop
Discover how to make sublimation designs in Photoshop that you can use to create beautiful gifts.
Photoshop Tutorials
How to Use EPS Files in Photoshop
In this tutorial, learn how to use EPS files in Photoshop as Smart Objects to maintain image quality
Photoshop Tutorials
Image Burned in Wood in Photoshop
In this tutorial, discover how to create a realistic wood burned effect in Adobe Photoshop.