
By Design Bundles
Photoshop Tutorials7 min
How to Smooth Mask Edges in Photoshop
For this tutorial, you will need an image or portrait to work with. It is a good idea that the subject of the background is as simple as possible to make it easier to outline. We will be using a rose stock photo, but make sure to check out the rest of the flower stock photos available on Design Bundles.
In Photoshop, open the image you chose.
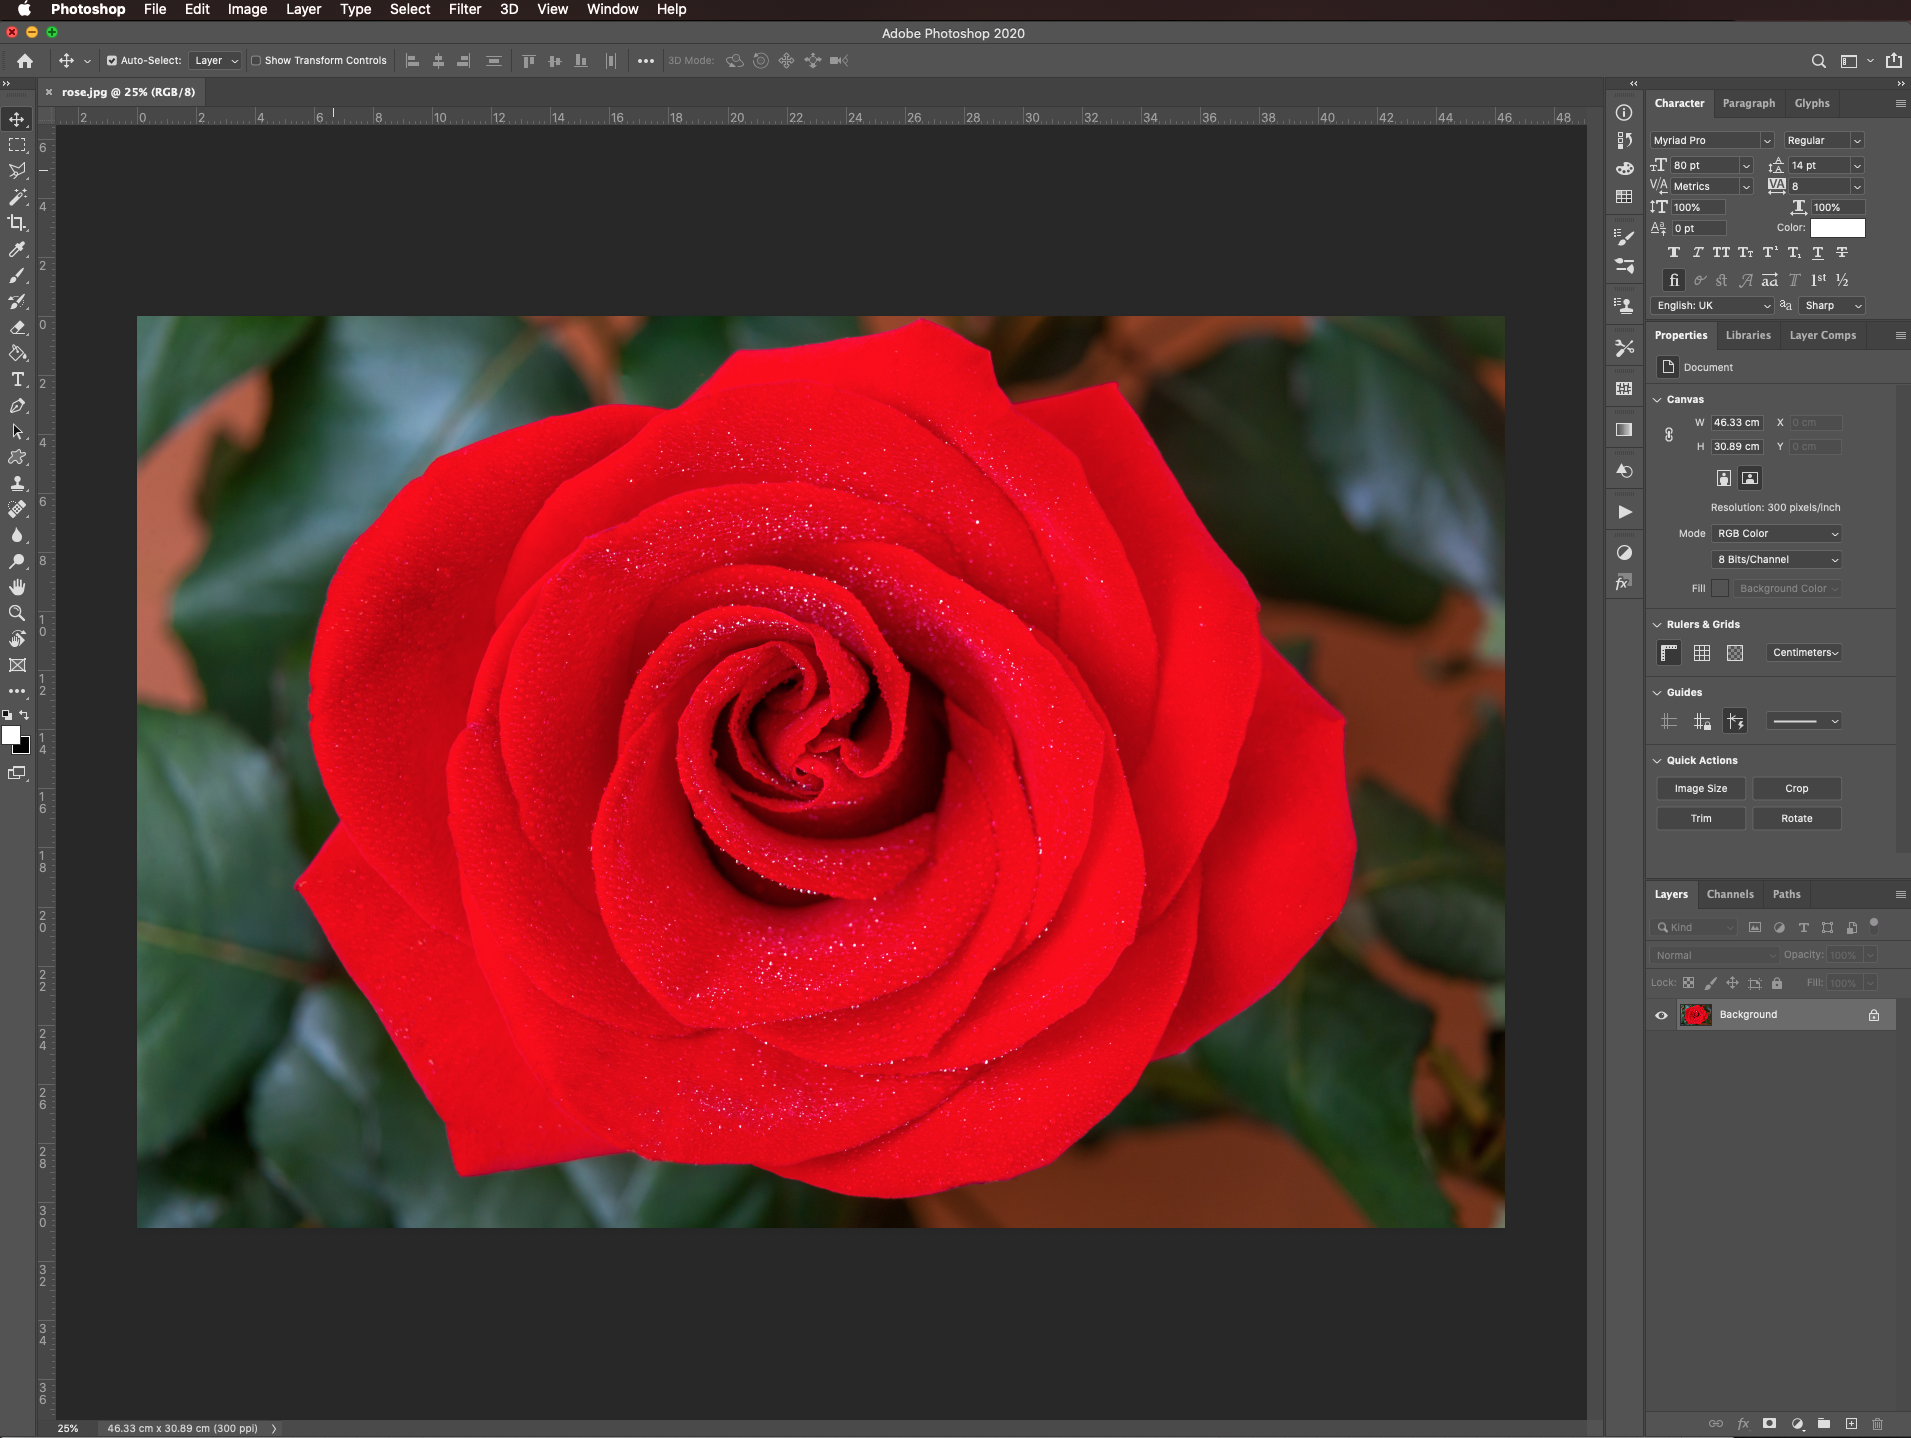
Use the quick selection tool (W).
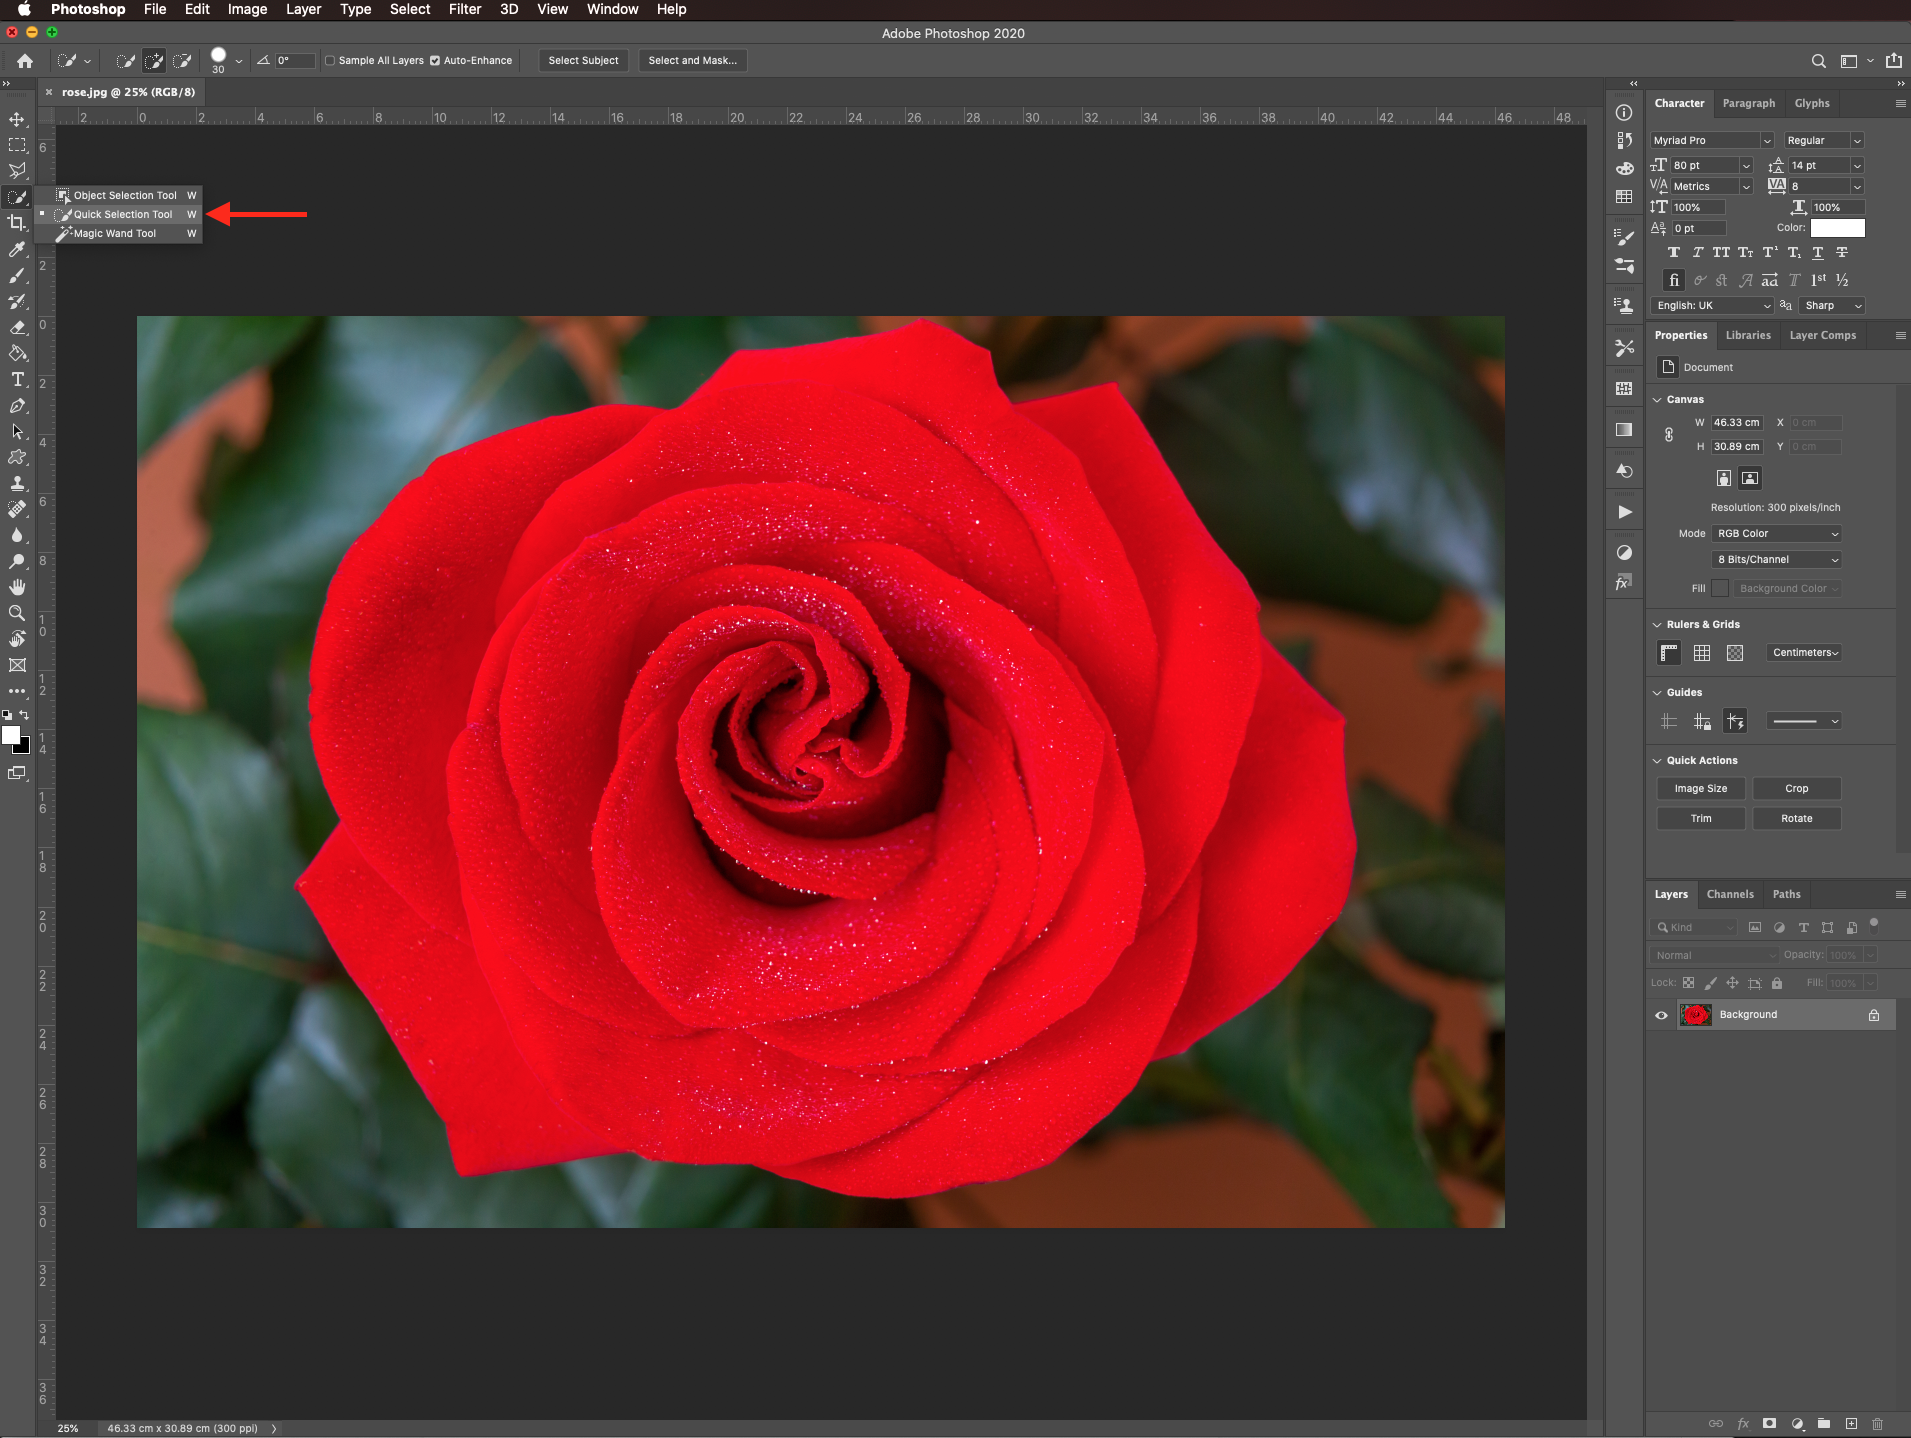
And start selecting what you want to keep.
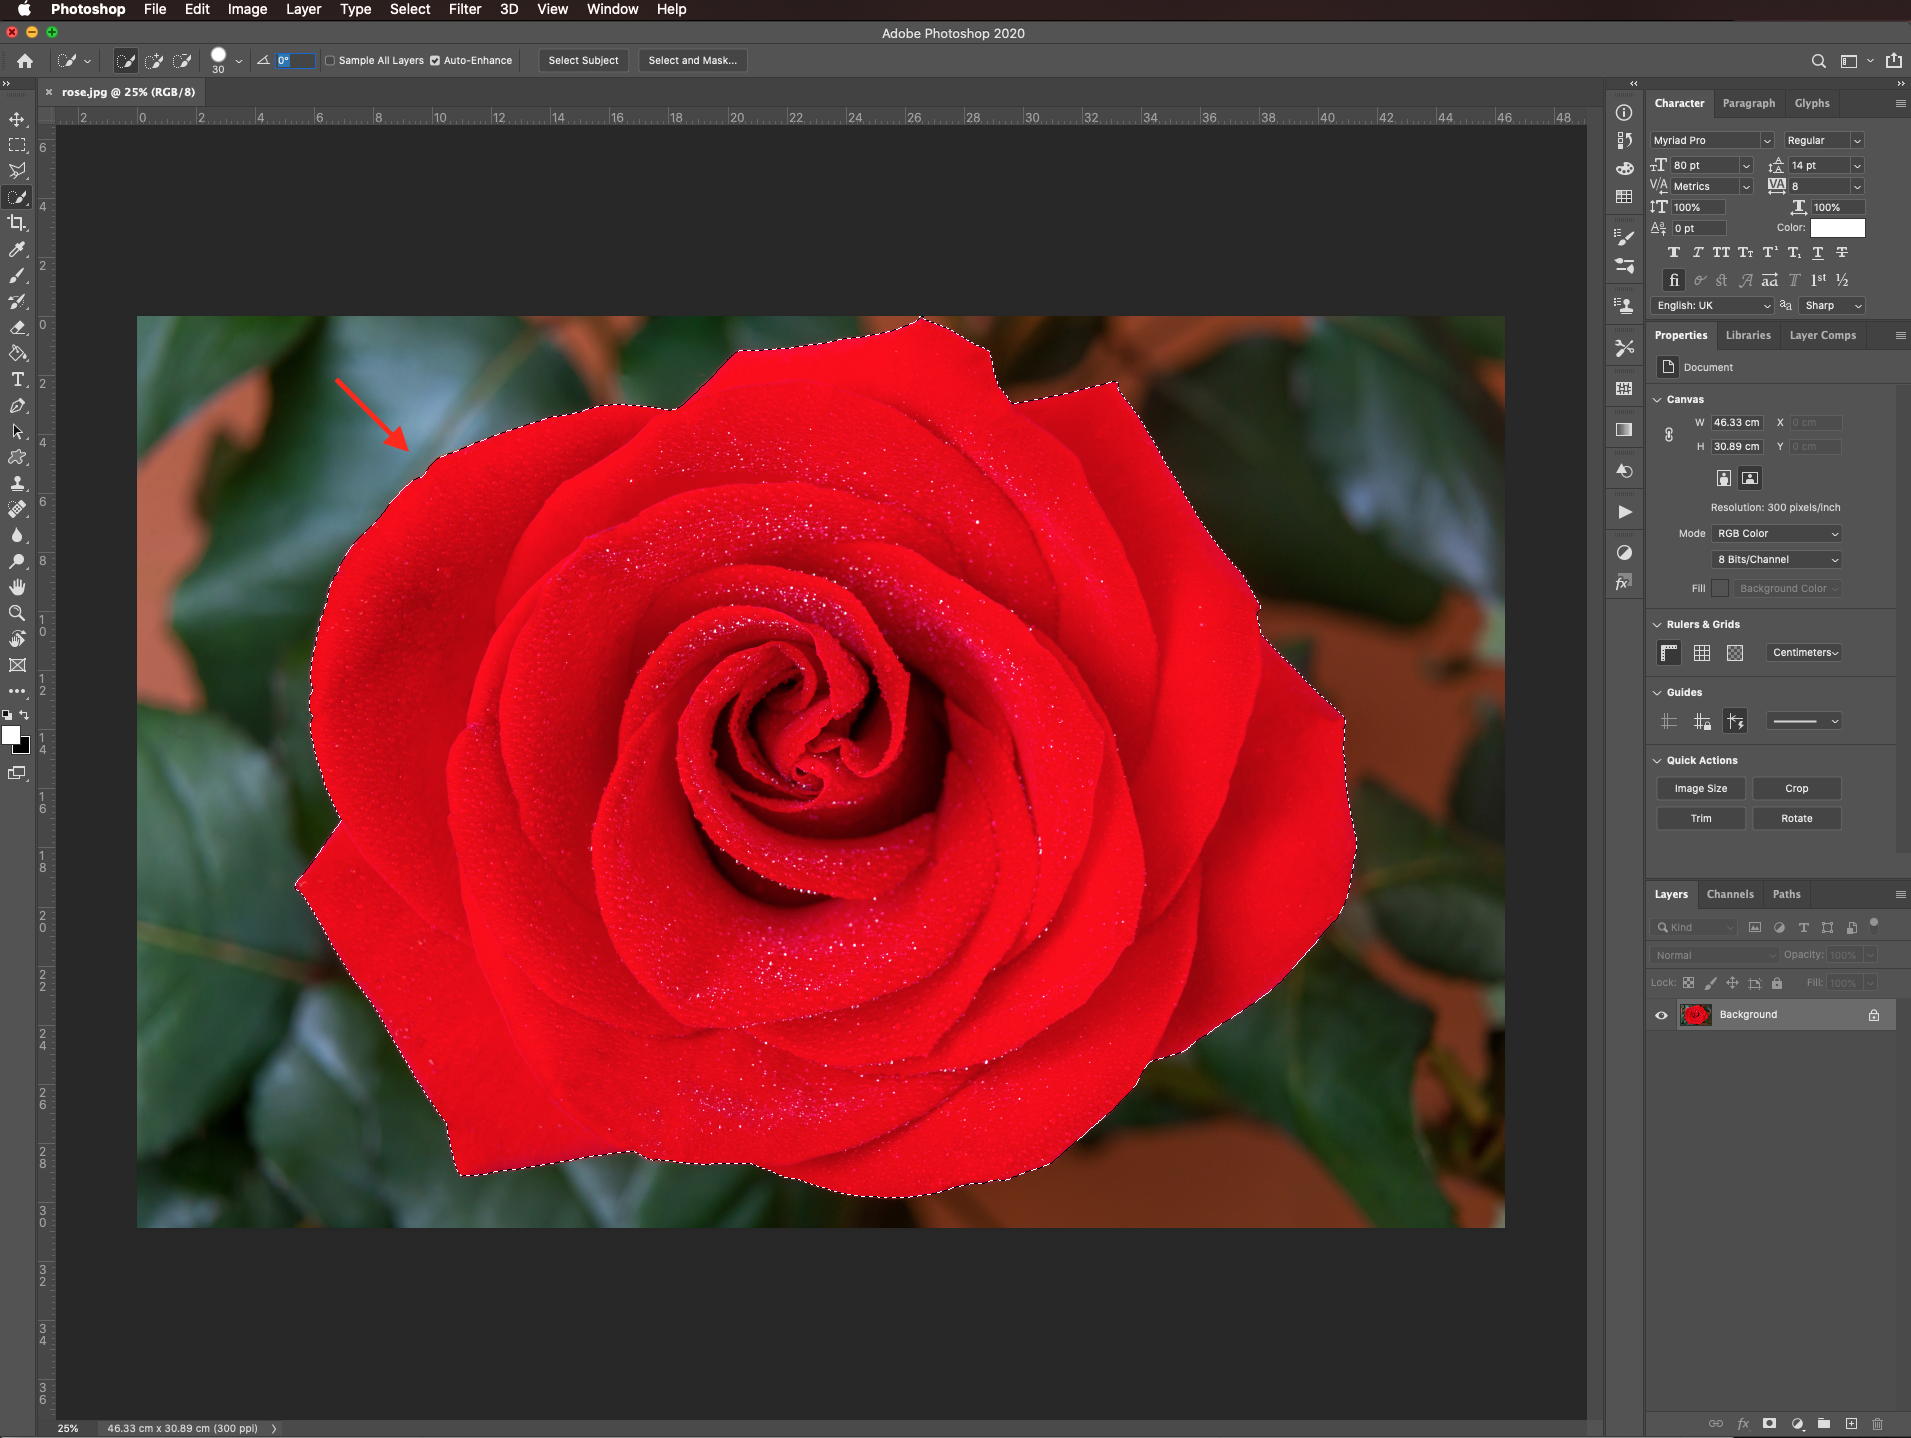
Use the add and/or subtract from selection buttons to refine your selection.

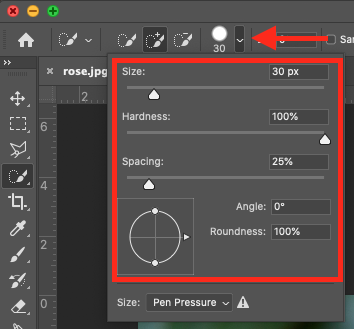
Make the brush size smaller (or bigger) to select the portions that require a more precise approach.
Once you are happy with your selection, click on the select and mask button on the top menu.

Choose the type of background that will give you a better view of the edges as view mode (we used onion skin (O)).
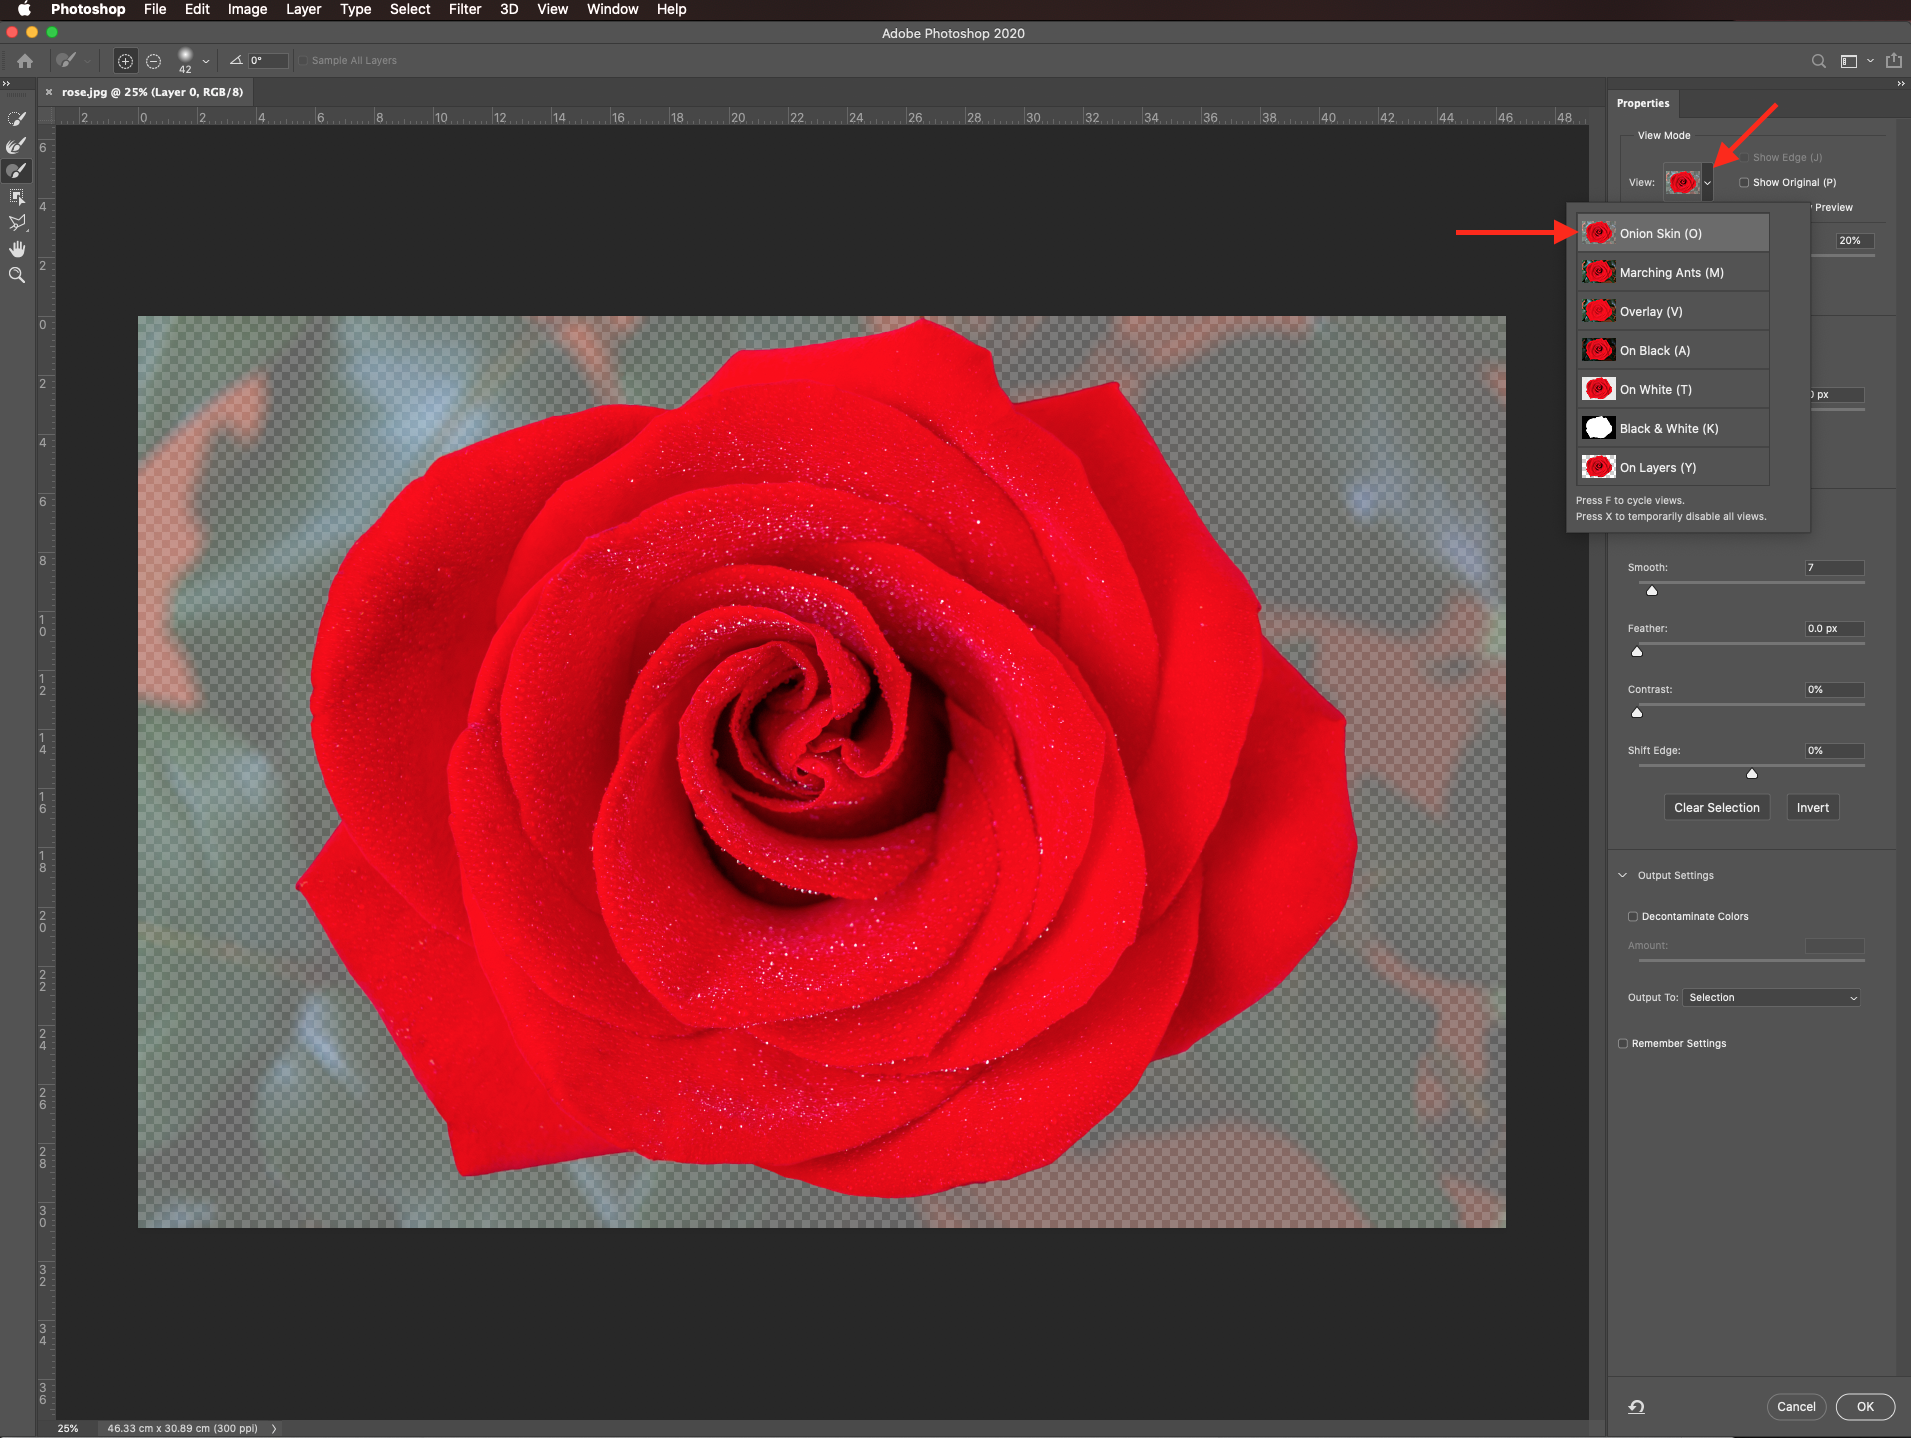
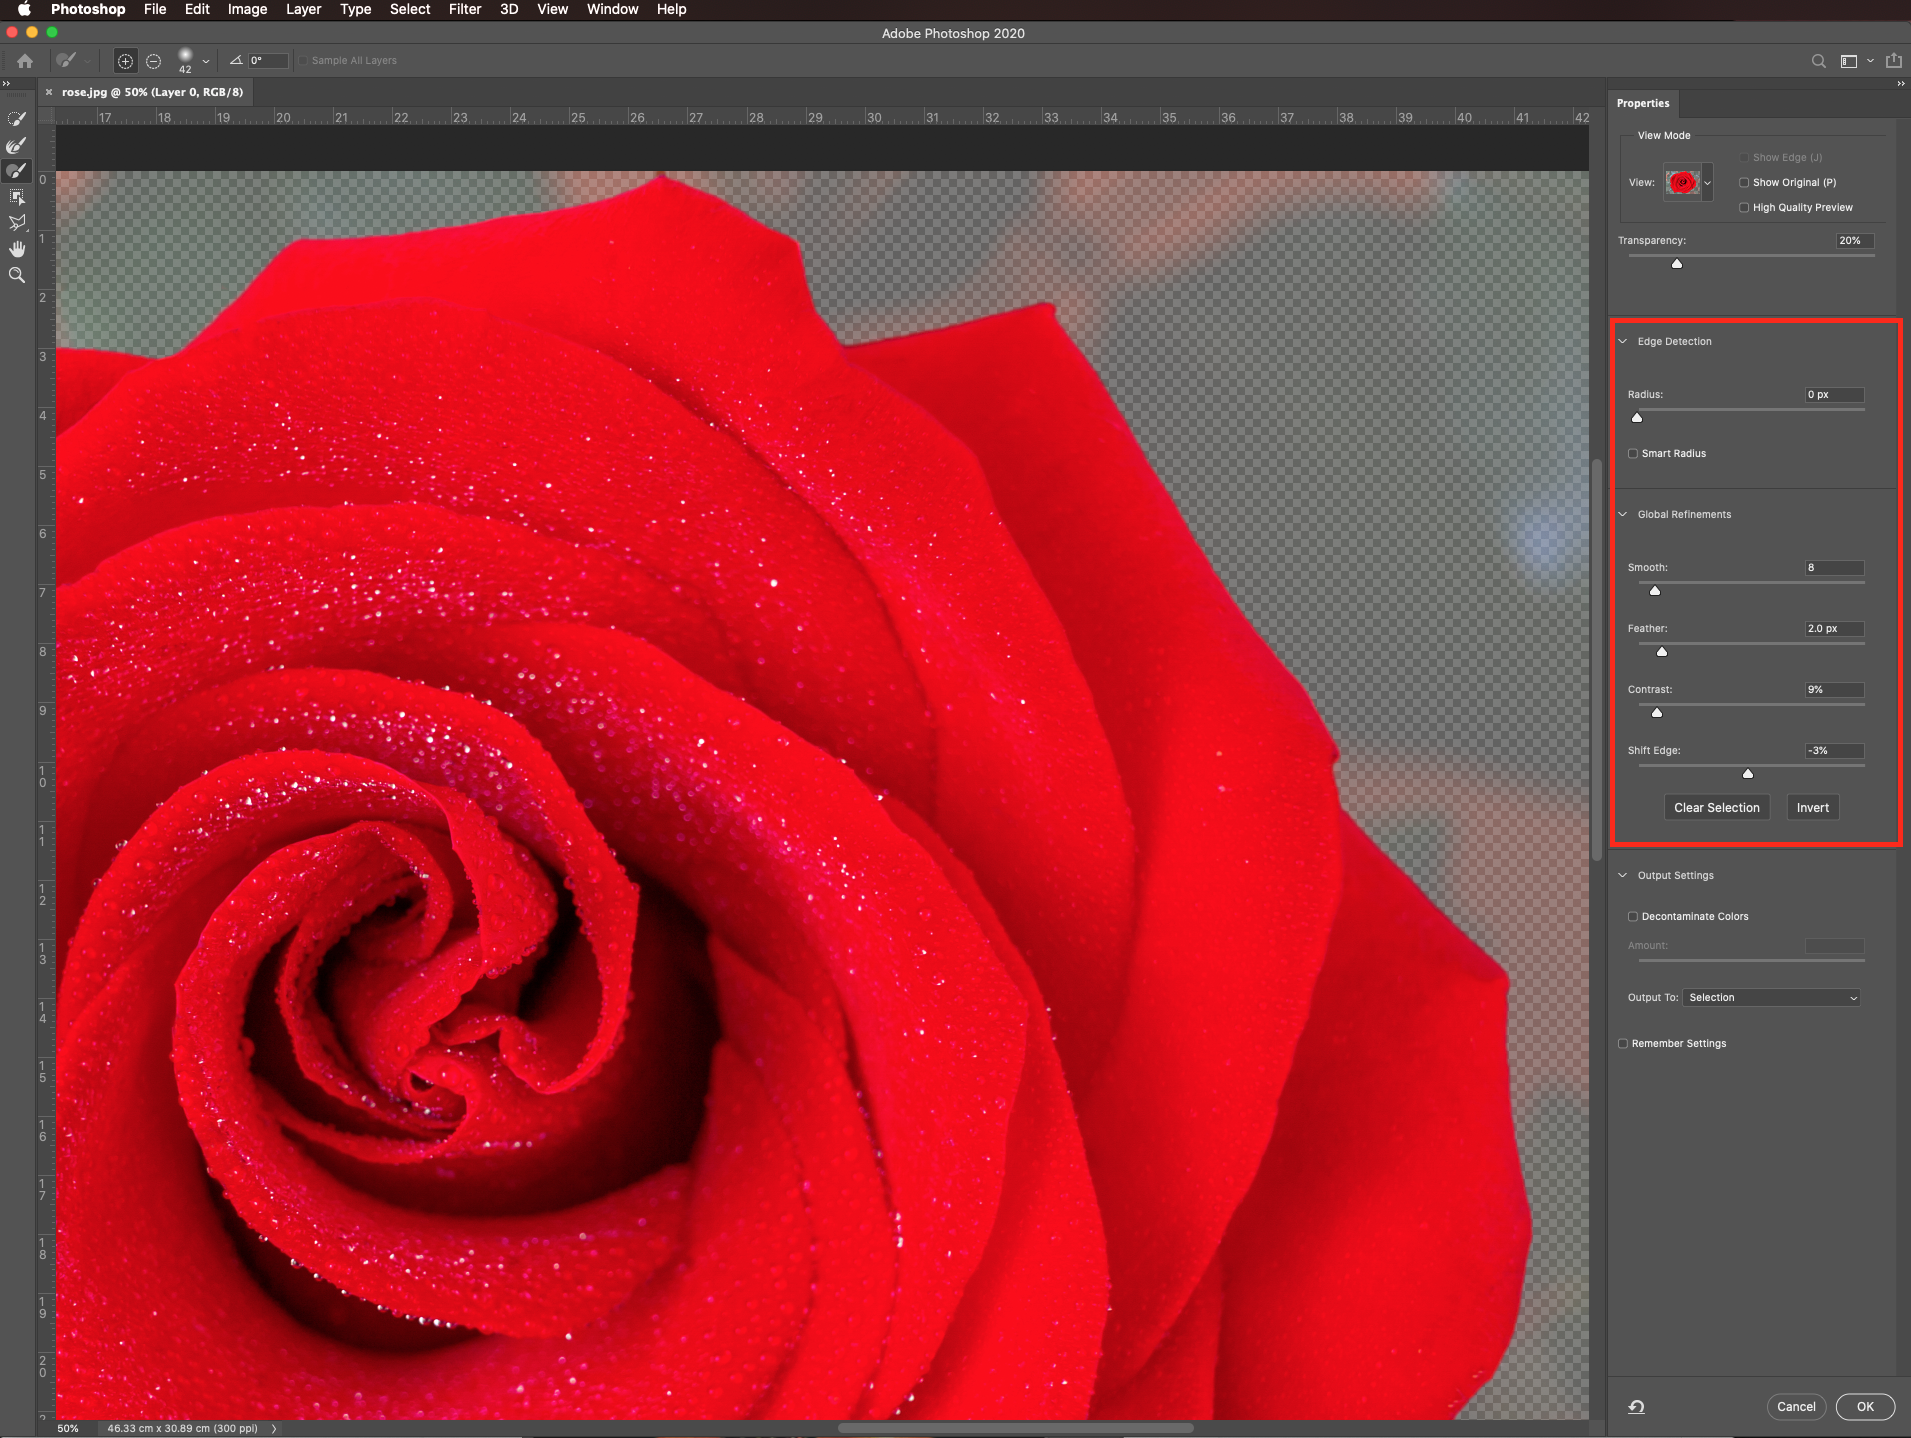
Then, start tweaking the smooth value until you are happy with the result. Next, do the same with the feather and contrast. It doesn’t matter if you see some background color, crank them up until everything is smooth. You can also adjust the shift edge value a bit to make it look better.
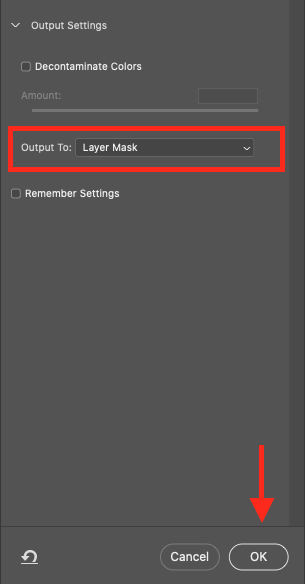
Finally, select output to layer mask and click Ok.
Here’s how our masked image looks.
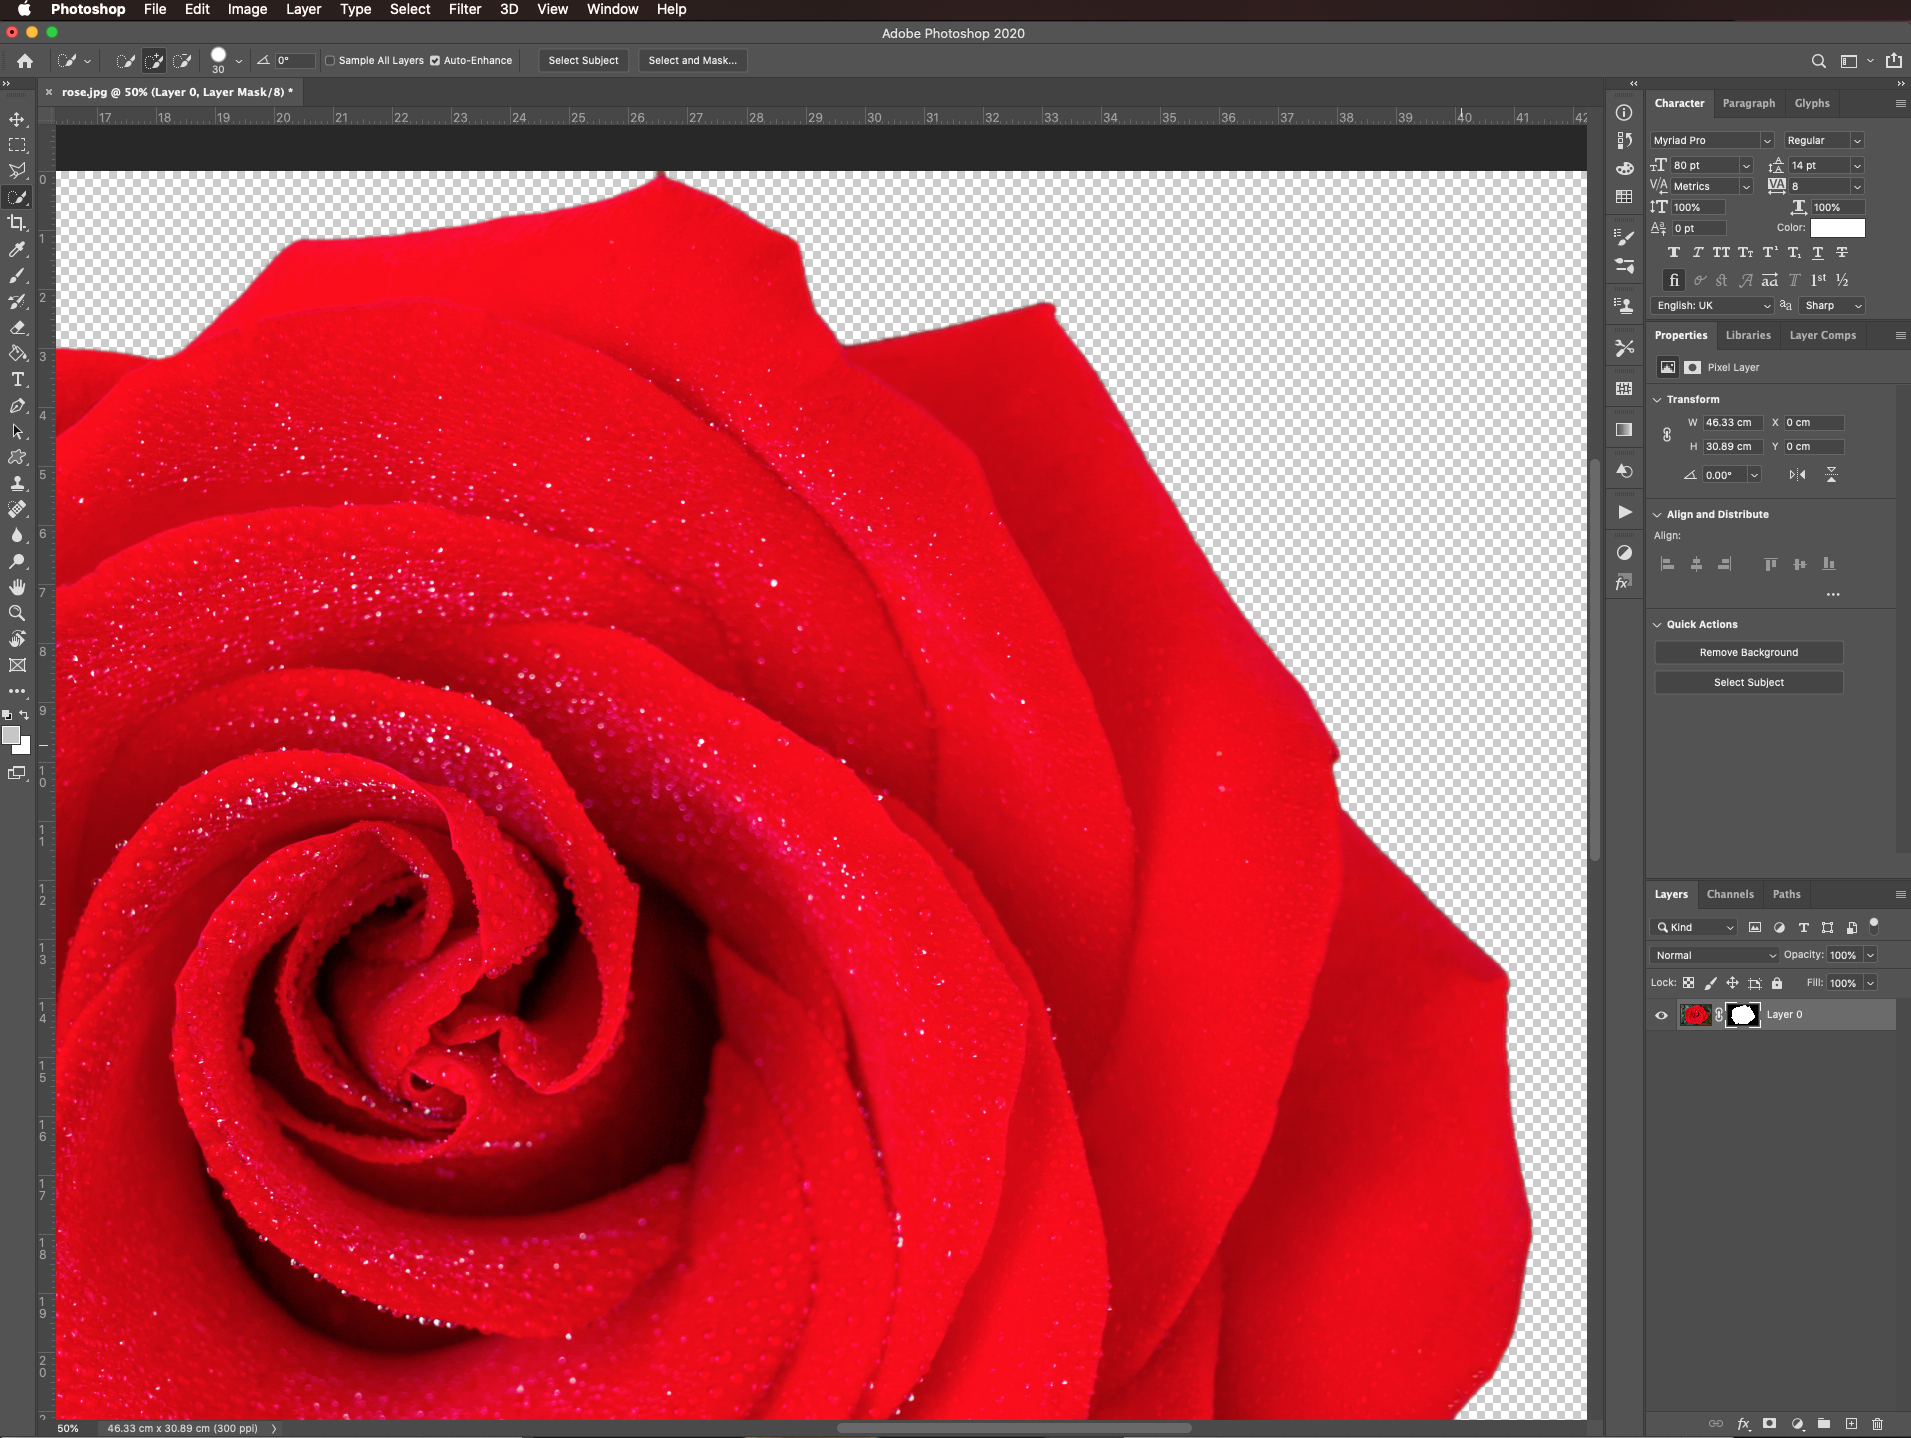
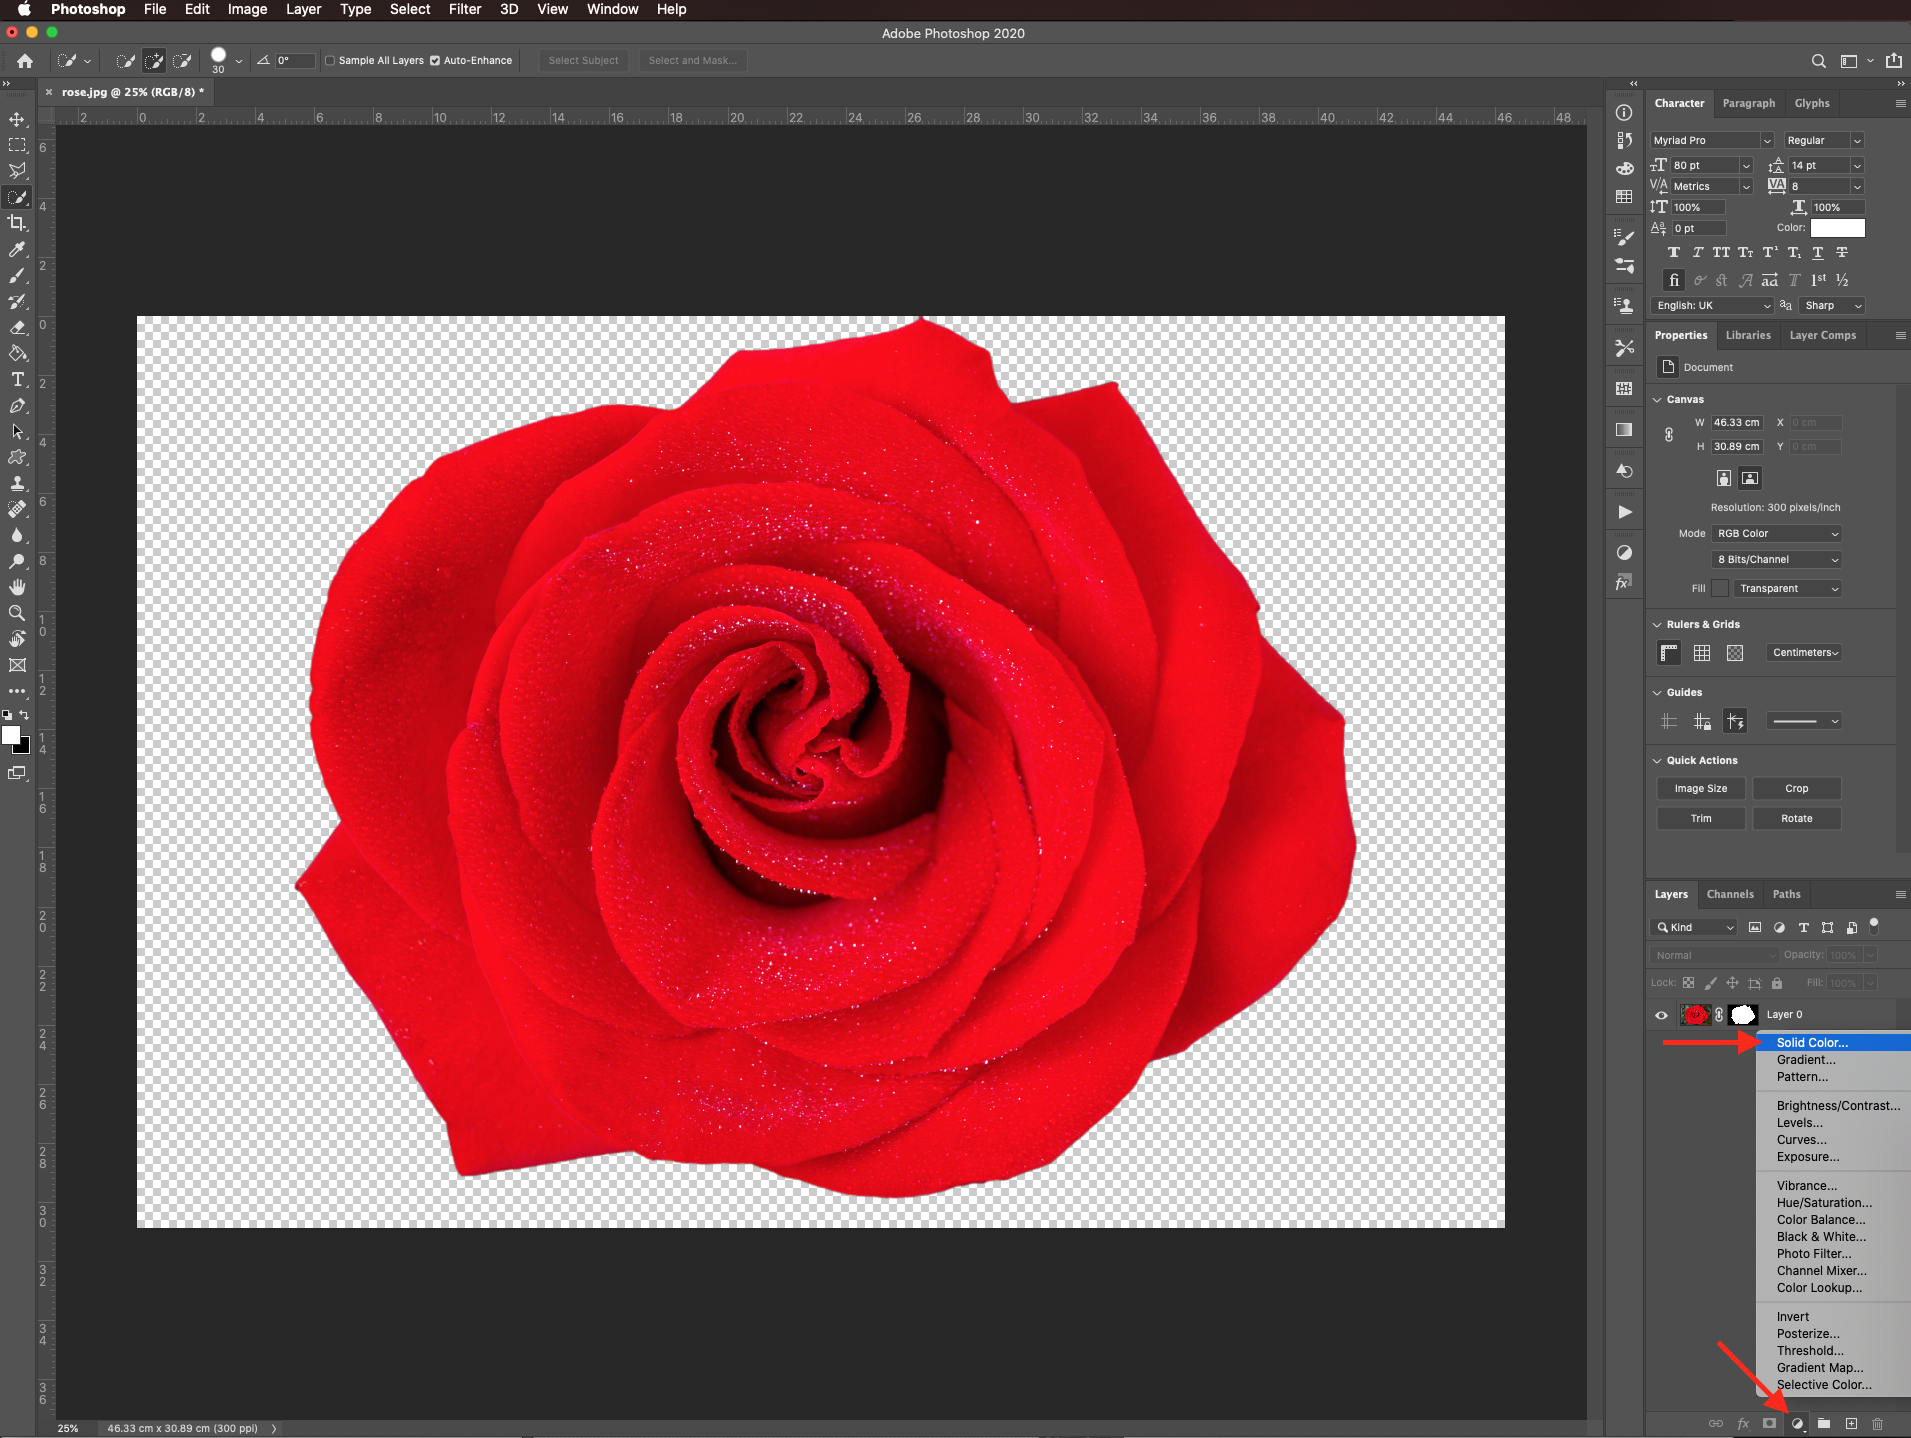
Zoom in and look for places where the background is still showing. Create a new solid color fill layer by clicking on the small black & white button at the bottom of the layers panel.
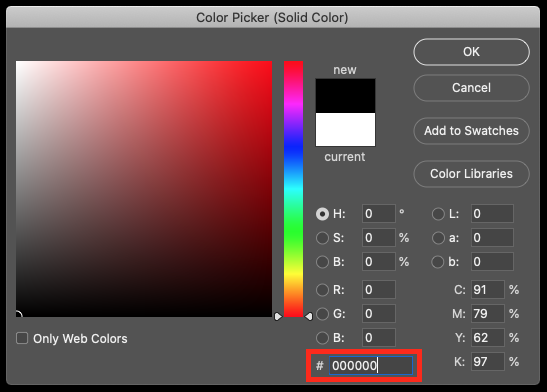
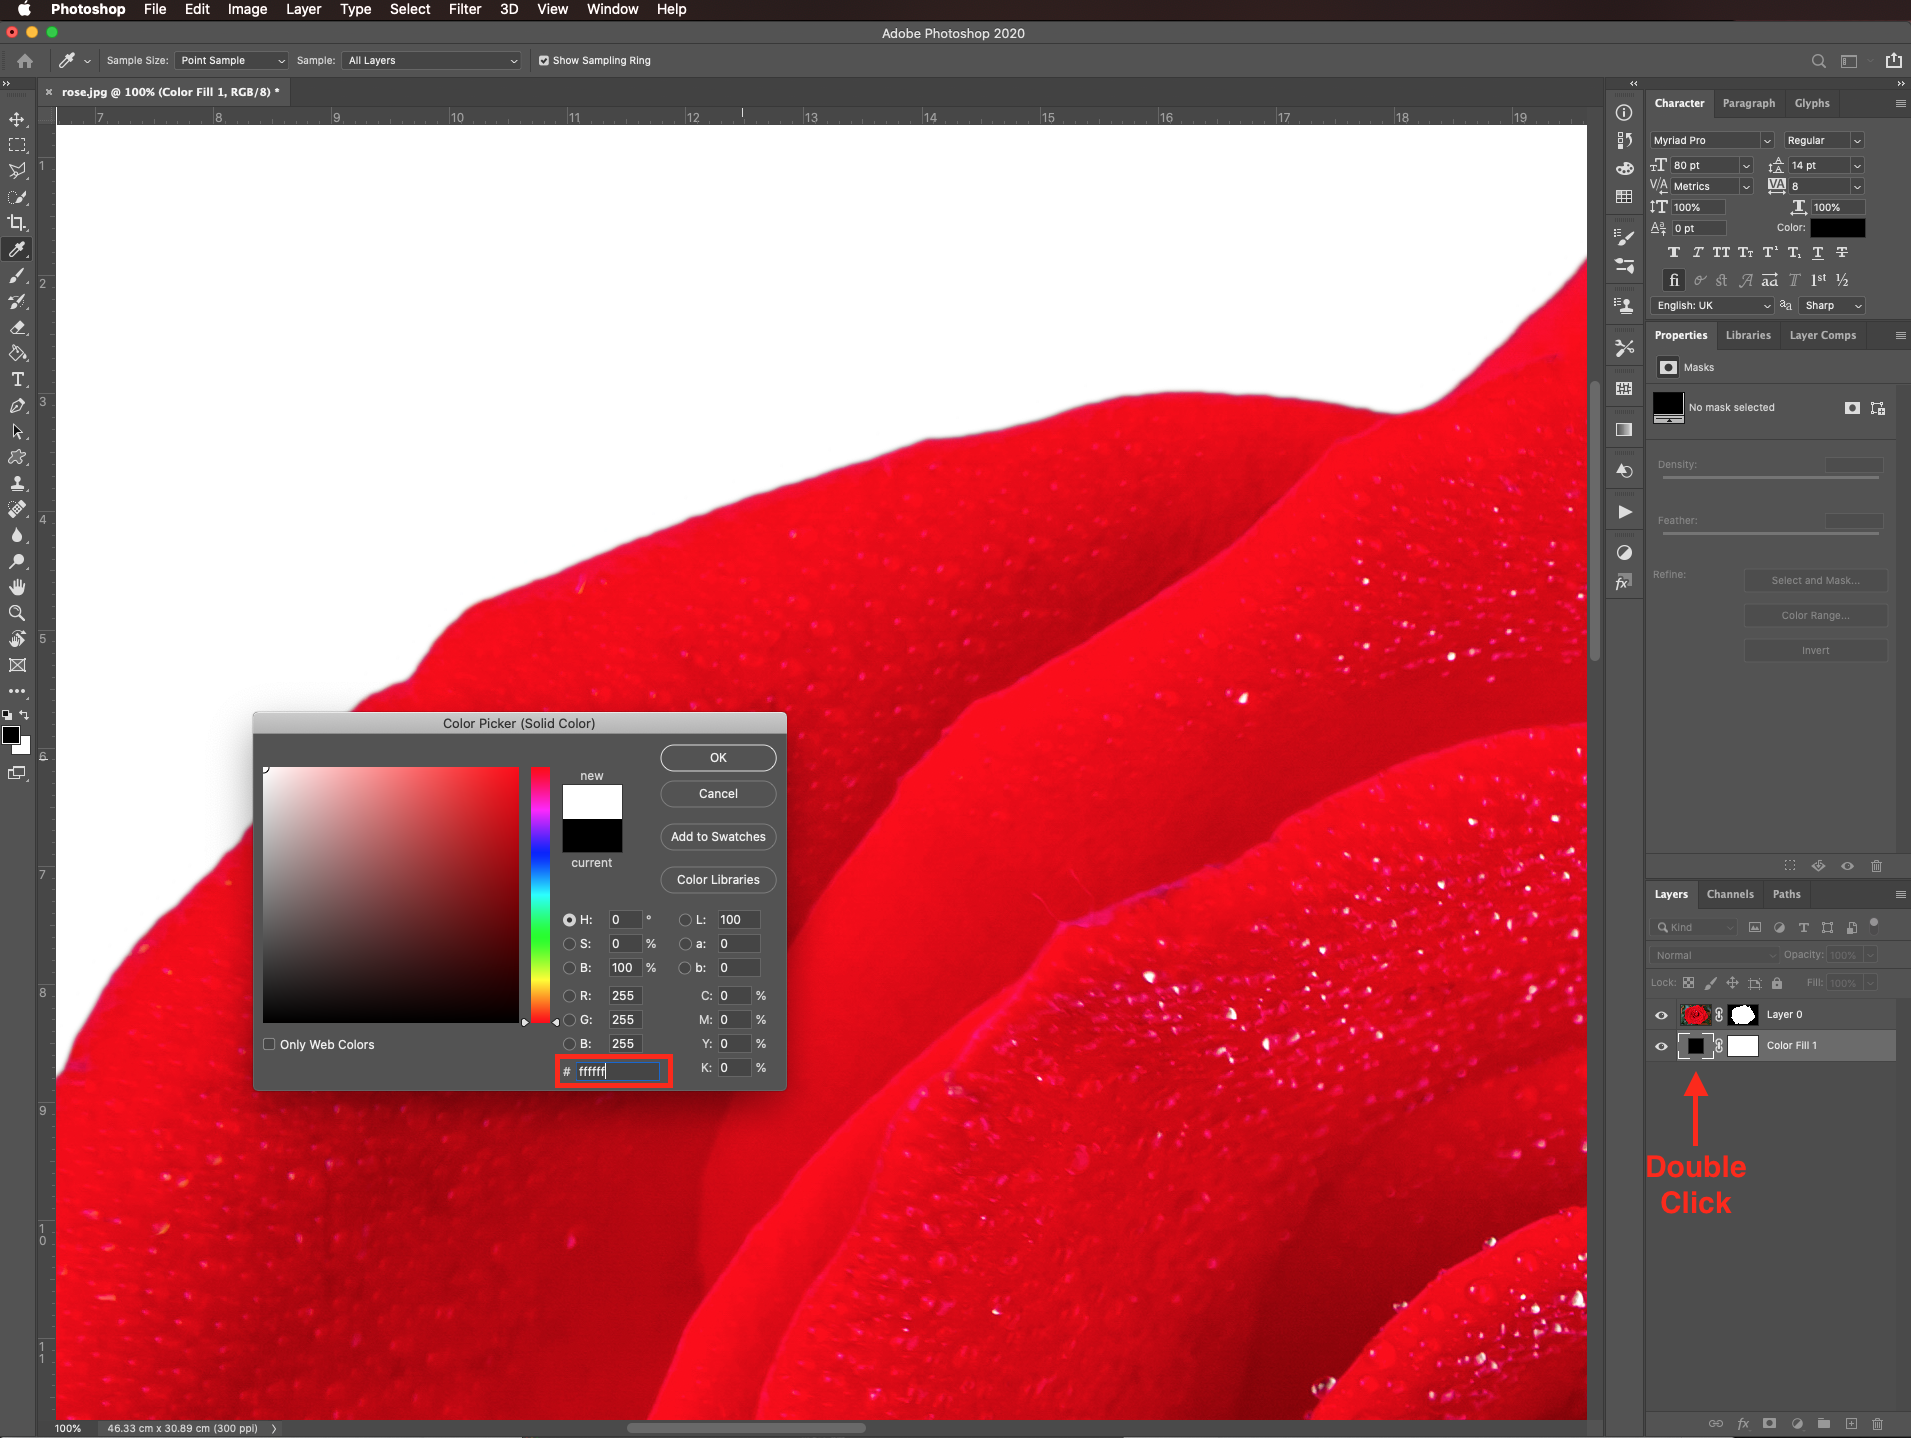
Choose black (#000000) as the fill color.
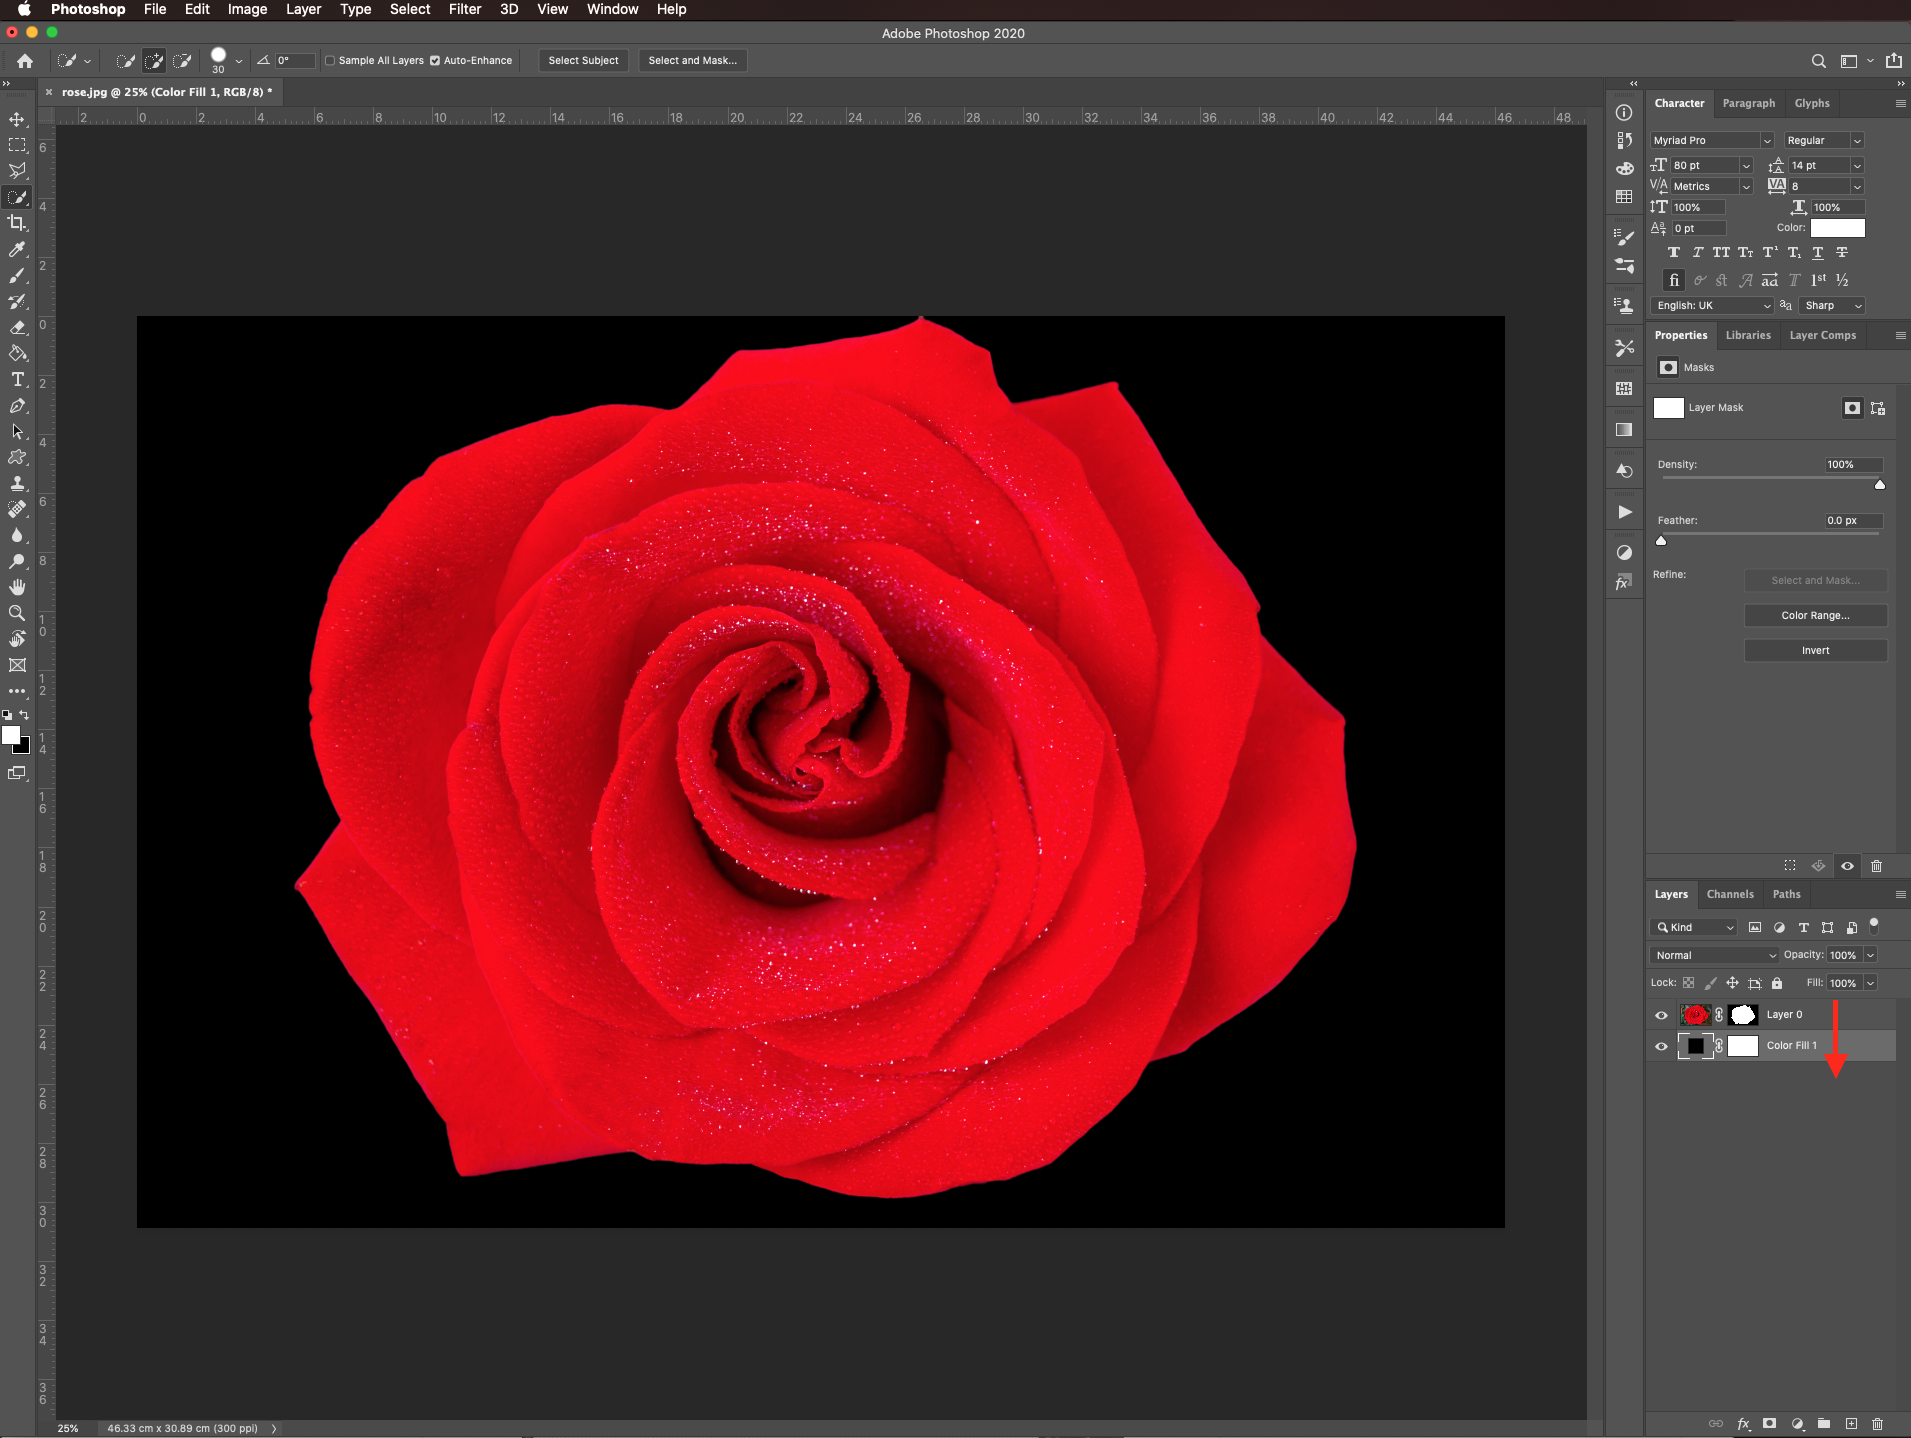
And move its thumbnail so it is placed under the masked image.
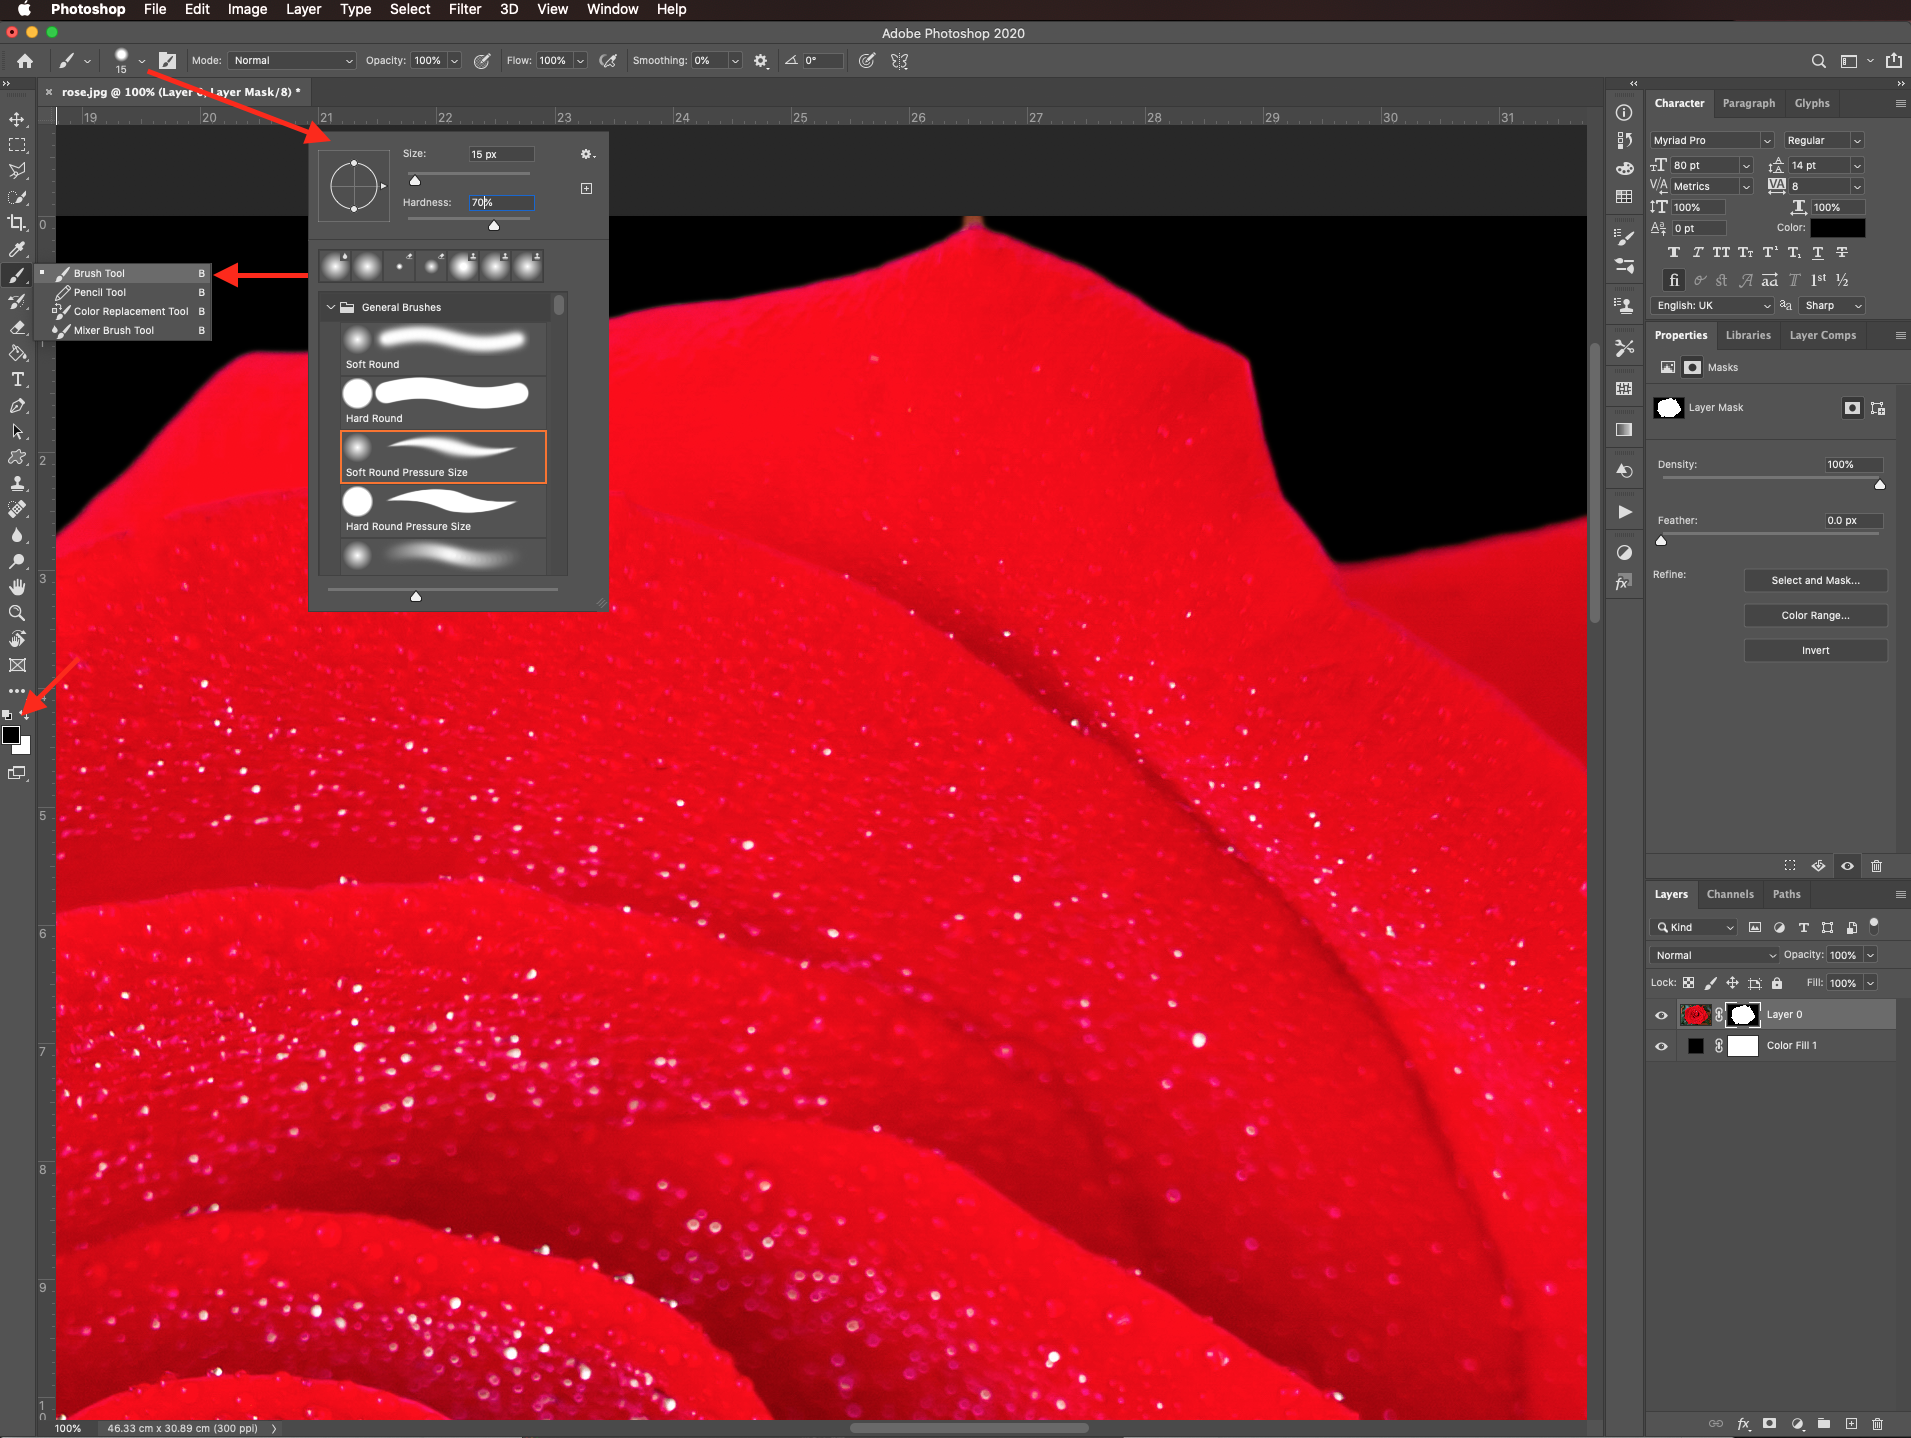
Select the brush tool (B), (make sure you are working on the selection layer mask) and use a small medium-hard brush (5 px, 70% hardness) with black as foreground color, to clean the spots where the background shows.
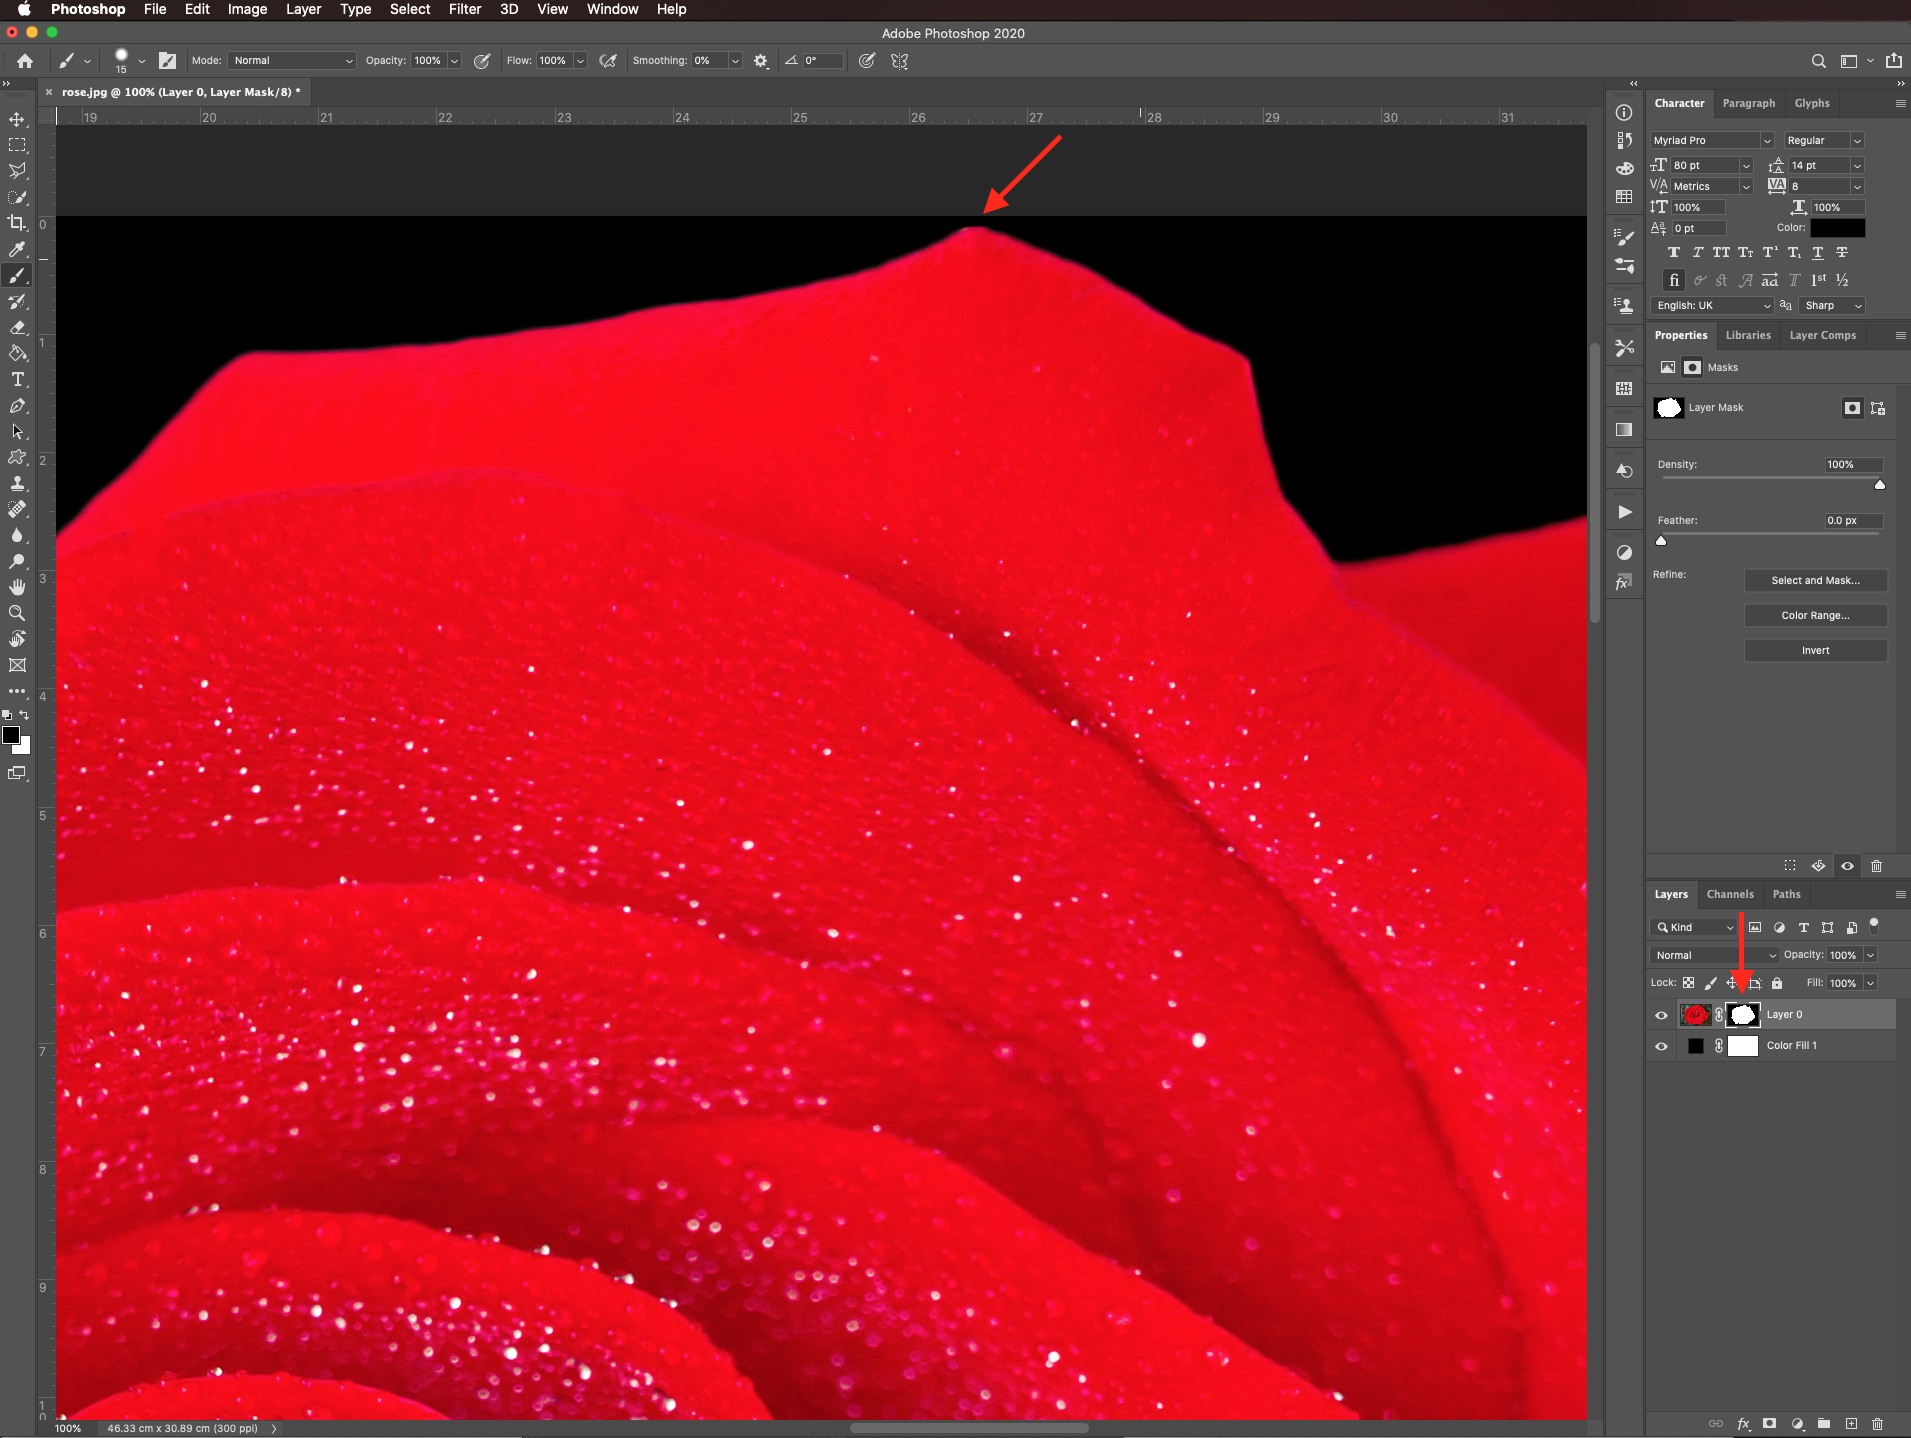
Change the foreground color to white to bring out portions of the image that are covered instead. Go back and ford with your brush until you are satisfied with the image.
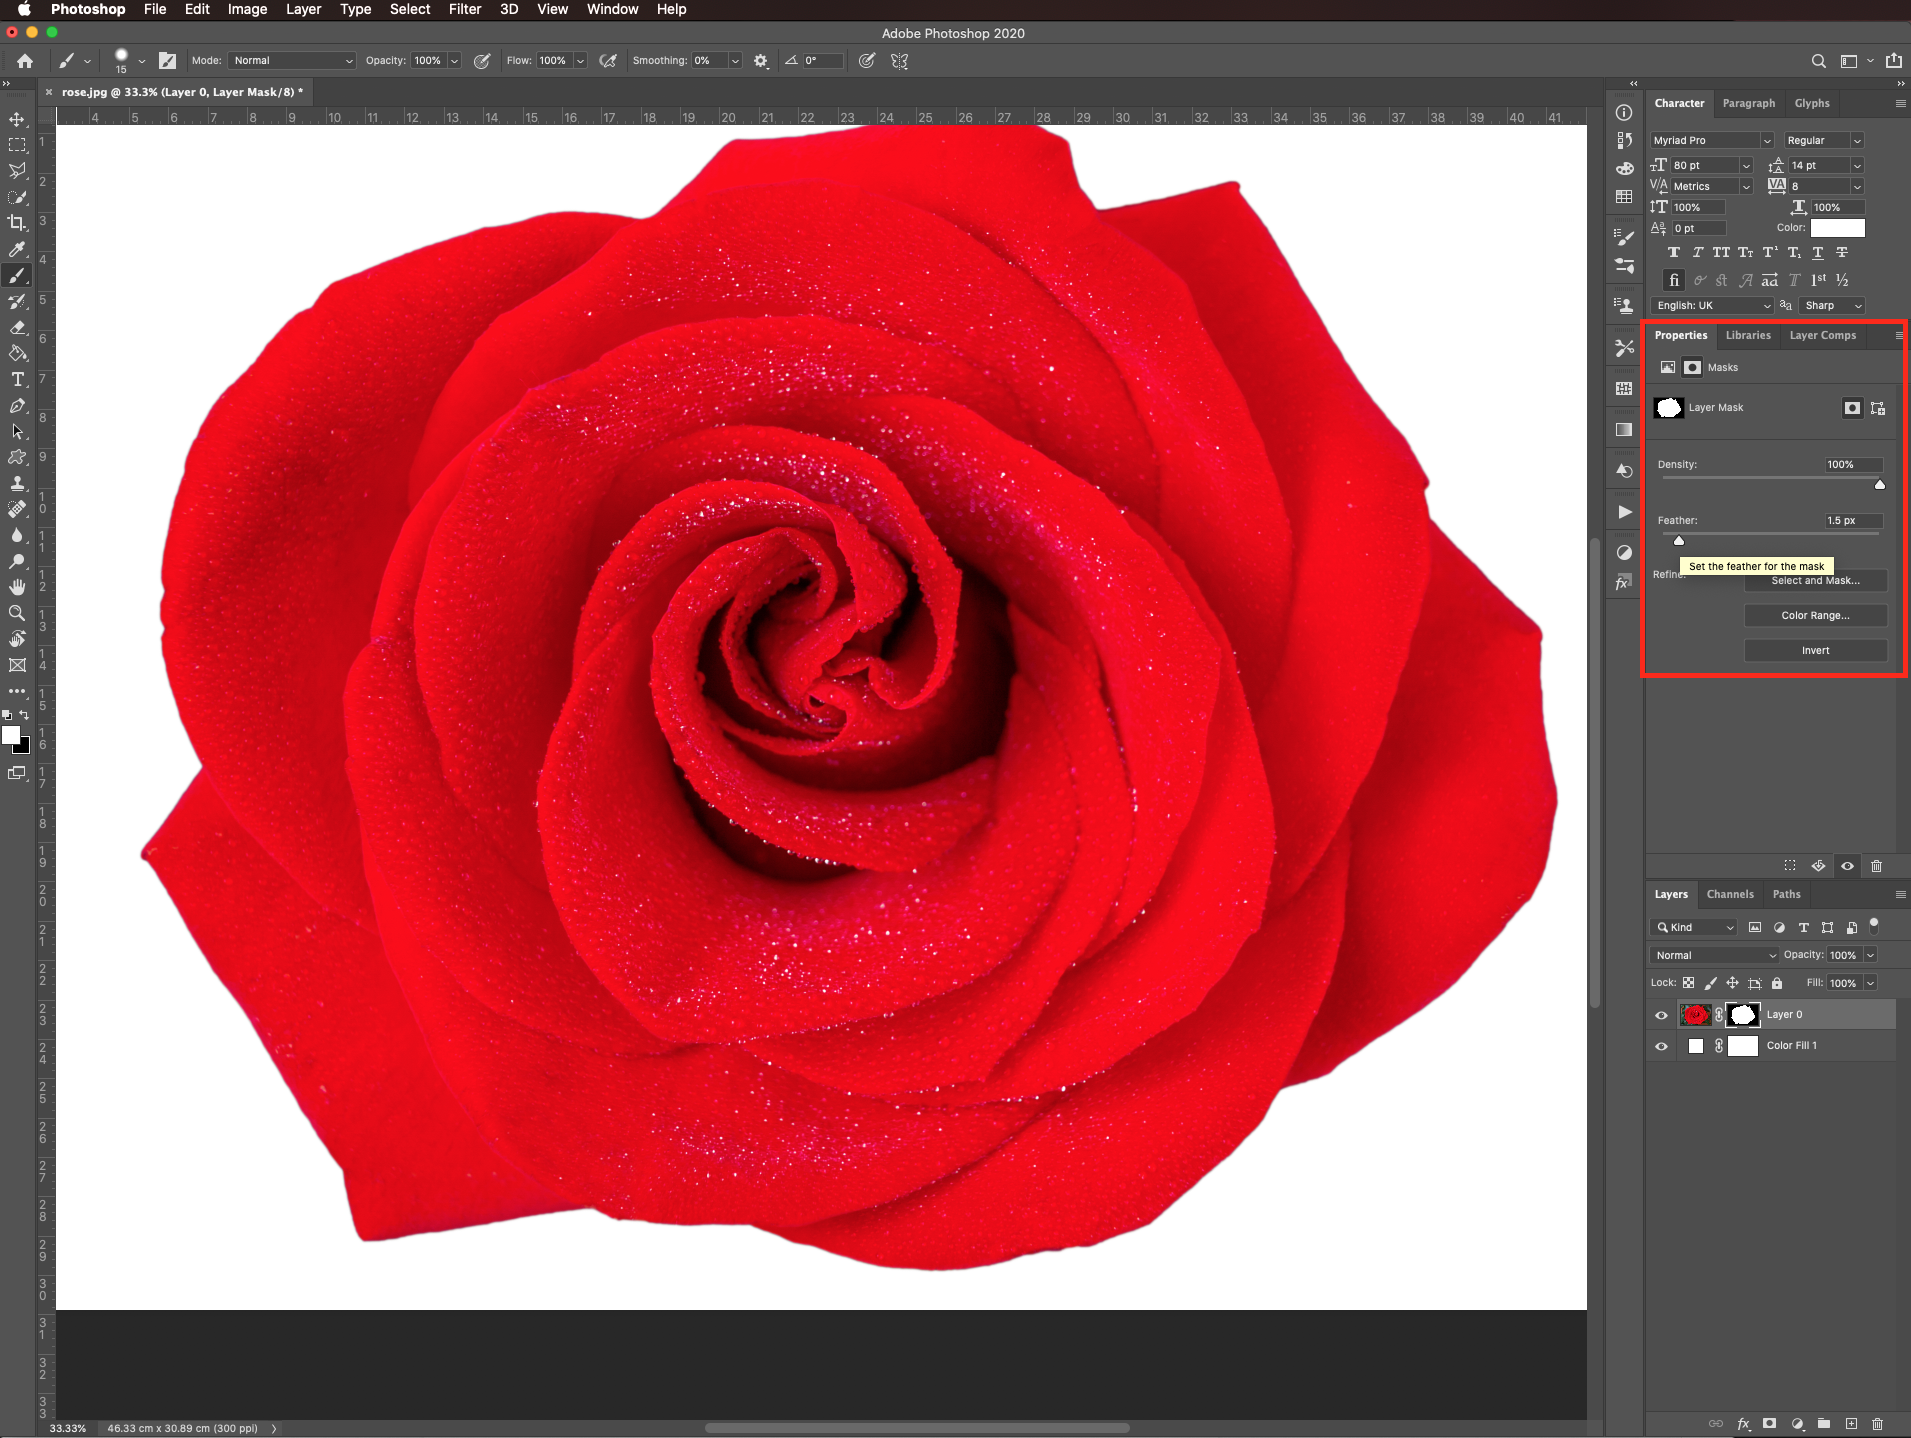
Then, increase the feather a bit in the properties panel.
You can change the background color by double-clicking on its thumbnail and changing it there.
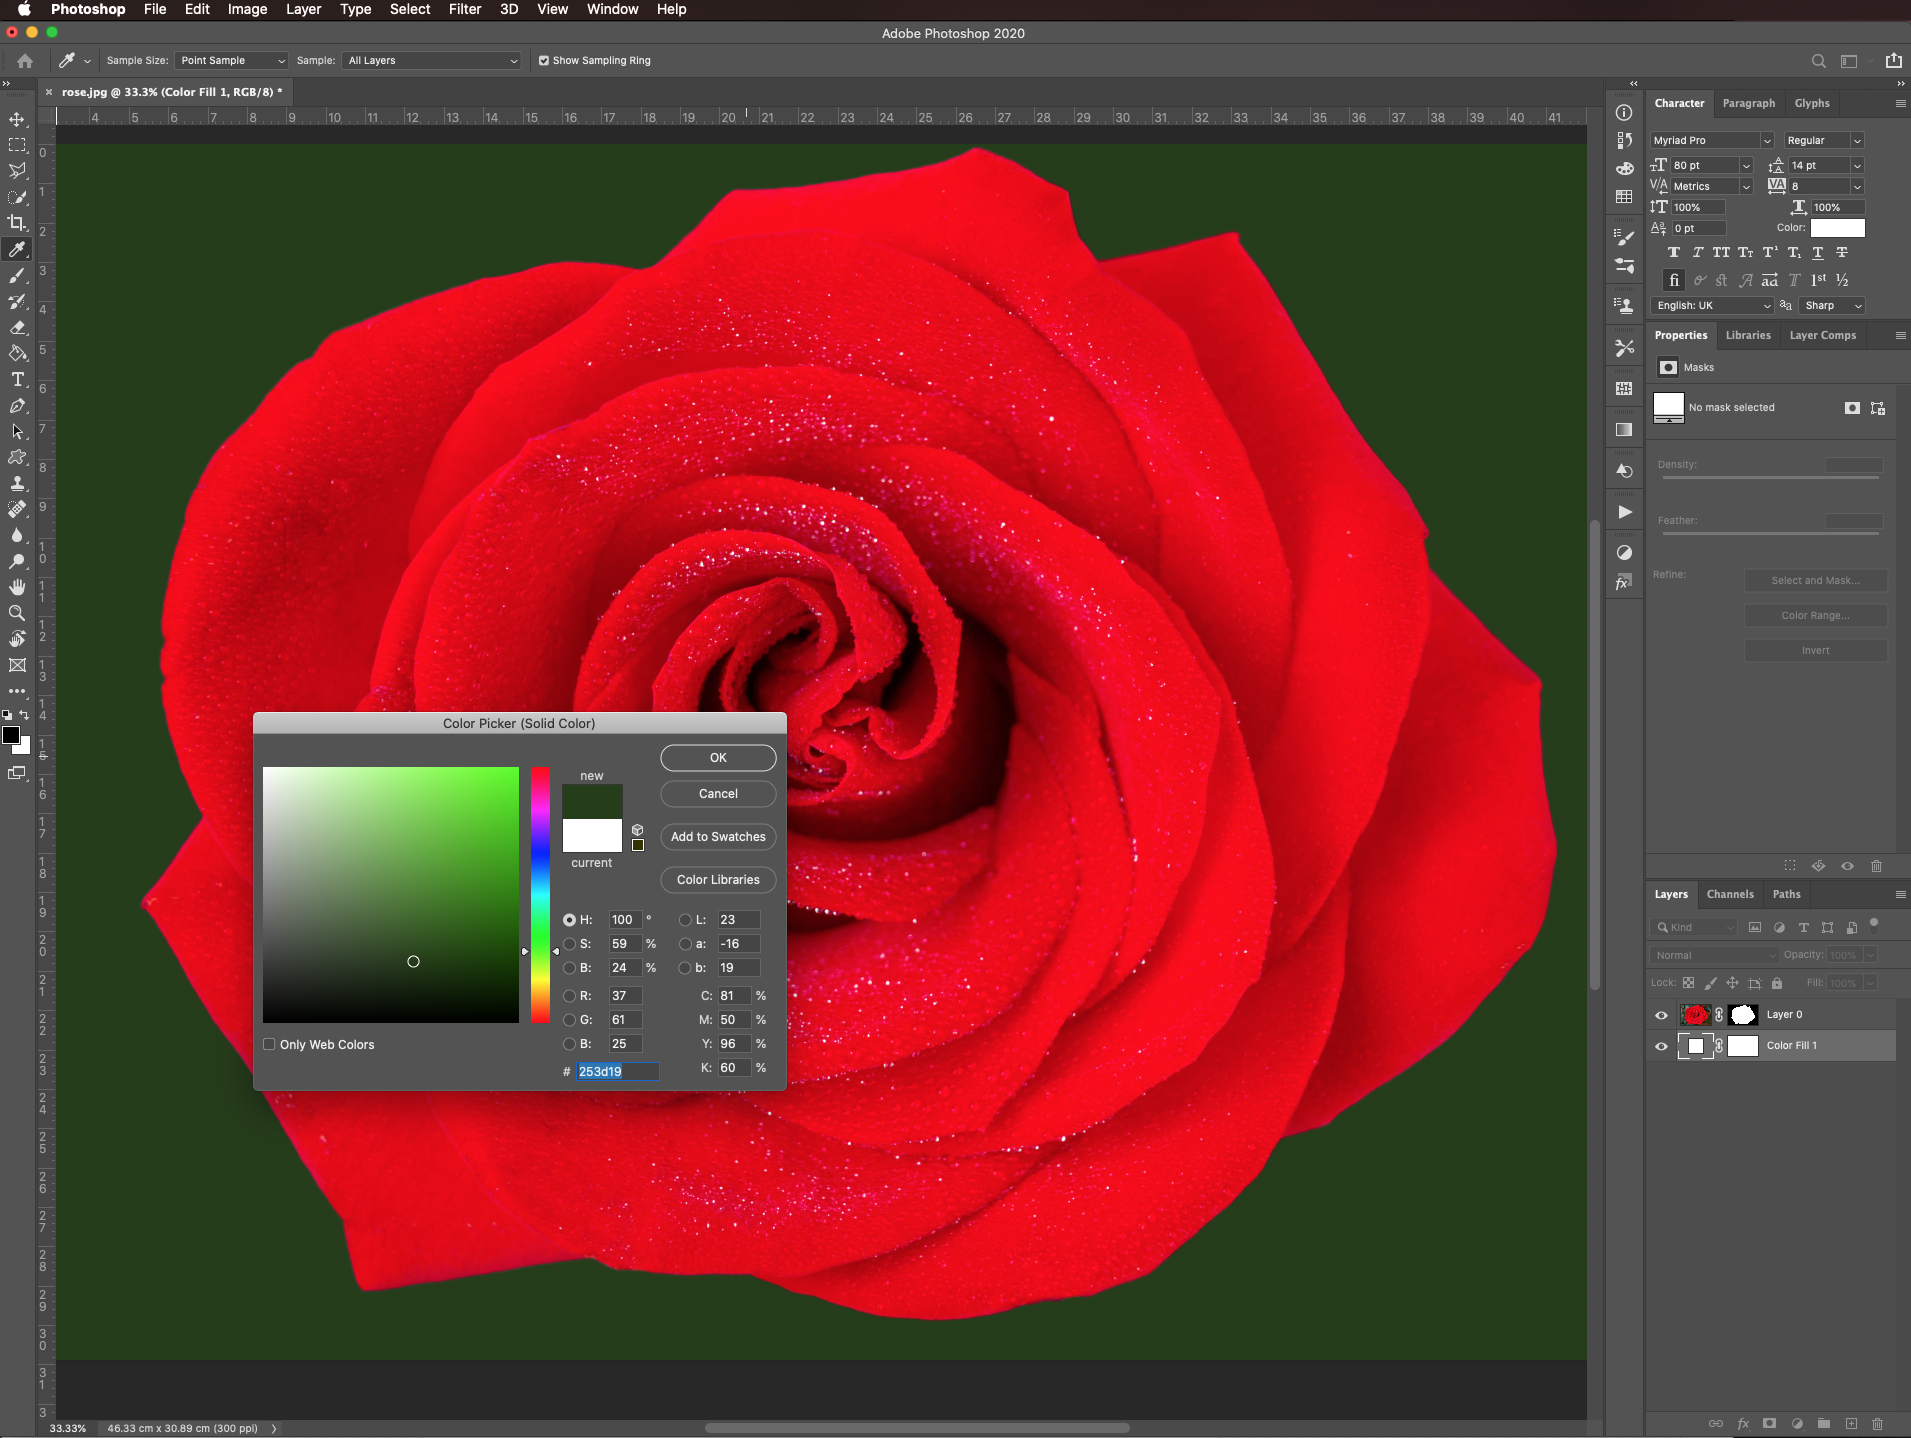
Here’s the final result.

If you liked this tutorial make sure to check out our other Photoshop tutorials like creating clipping masks, perspective cropping, and using the healing brush.
Step 1: Open your image
In Photoshop, open the image you chose.
Step 2: Make the selection
Use the quick selection tool (W).
And start selecting what you want to keep.
Step 3: Refine your selection
Use the add and/or subtract from selection buttons to refine your selection.
Make the brush size smaller (or bigger) to select the portions that require a more precise approach.
Step 4: Mask your selection
Once you are happy with your selection, click on the select and mask button on the top menu.
Step 5: Adjust the mask’s edge detection and global refinements settings
Choose the type of background that will give you a better view of the edges as view mode (we used onion skin (O)).
Then, start tweaking the smooth value until you are happy with the result. Next, do the same with the feather and contrast. It doesn’t matter if you see some background color, crank them up until everything is smooth. You can also adjust the shift edge value a bit to make it look better.
Finally, select output to layer mask and click Ok.
Here’s how our masked image looks.
Step 6: Clean up the masked image and add a background layer
Zoom in and look for places where the background is still showing. Create a new solid color fill layer by clicking on the small black & white button at the bottom of the layers panel.
Choose black (#000000) as the fill color.
And move its thumbnail so it is placed under the masked image.
Select the brush tool (B), (make sure you are working on the selection layer mask) and use a small medium-hard brush (5 px, 70% hardness) with black as foreground color, to clean the spots where the background shows.
Change the foreground color to white to bring out portions of the image that are covered instead. Go back and ford with your brush until you are satisfied with the image.
Then, increase the feather a bit in the properties panel.
You can change the background color by double-clicking on its thumbnail and changing it there.
Here’s the final result.
If you liked this tutorial make sure to check out our other Photoshop tutorials like creating clipping masks, perspective cropping, and using the healing brush.
Related Tutorials
Photoshop Tutorials
How to Create Distressed Edges in Photoshop
Learn how to create distressed edges from scratch in Photoshop using an eraser brush.
Photoshop Tutorials
Mask Transparent Object in Photoshop
Photoshop Tutorials
Layering Designs in Photoshop Using a Clipping Mask
Photoshop Tutorials
Carnival Mask in Photoshop
Photoshop Tutorials
Venice Style Carnival Mask in Photoshop
Photoshop Tutorials
How to Use Layer Masks in Photoshop
Learn about using layer masks in Photoshop to non destructively edit and conceal parts of an image.