By Kia Lor
How to Create Distressed Edges in Photoshop
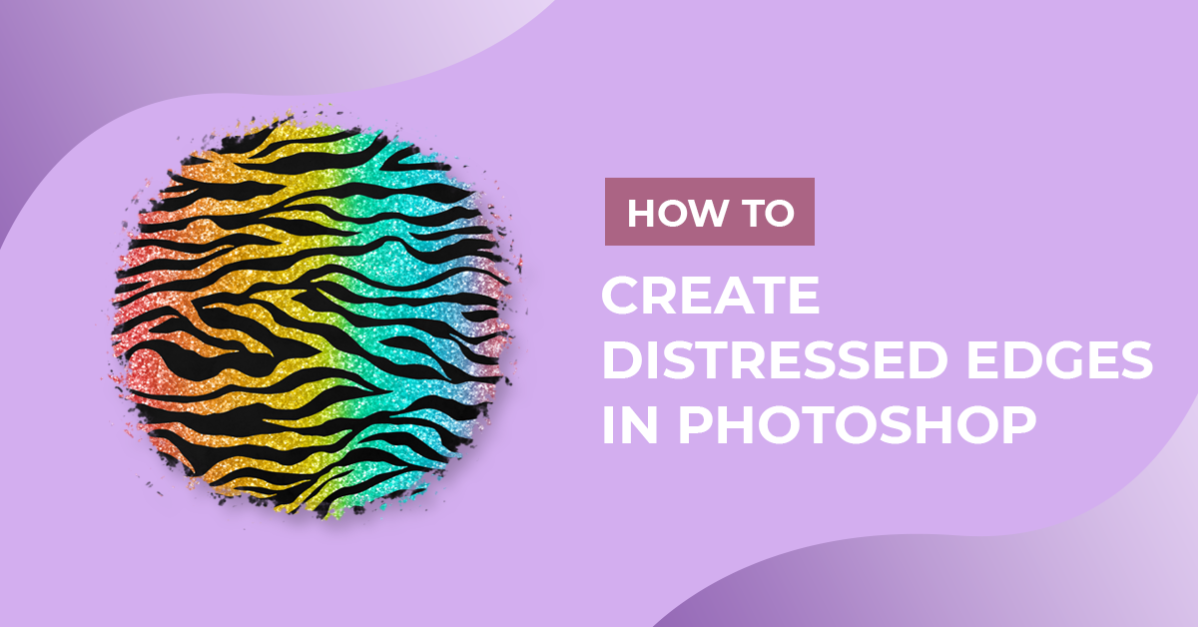
If you’ve been wondering how to create distressed edges in Photoshop, you’re in luck! This tutorial will show you how to do exactly that. We’ll be making the distressed edges from scratch using a brush.

We will be using built-in Photoshop brushes, but there are all kinds of Photoshop brushes on DesignBundles that you can use instead. The brush you choose to use doesn’t even really have to be a distressed or grunge brush.
Step 1 - Create Your New Document
Make your document a large size as the finished design will be used with other projects. We made ours 3600 x 3600 pixels with the Resolution option set to 300 pixels/inch and the Background Contents option set to White.
Note: if you just have an image that you want to add a distressed edge to, you can open that image instead and continue on with Step 2.

Step 2 - Add a New Layer
Go to Windows > Layers to open the Layers panel, and click the Create a new layer icon at the bottom.

Step 3 - Add a Stroke to the New Layer
Select the Rectangular Marquee Tool (M) and then the entire canvas by pressing Ctrl/Cmd + A. Next, right-click on the canvas and select Stroke.

In the Stroke panel, enter a Width. We entered 200 px, but yours will depend on the size of your document. You may have to do a little trial and error with it. Now pick a color. The color can be any color you want that’s not the same as the background. We chose the color black. Then select Inside for the Location and click OK.
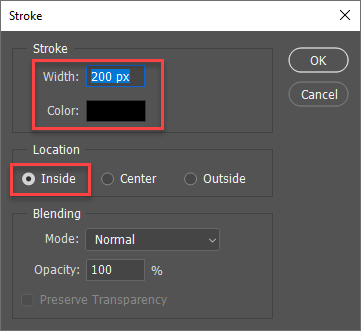
Then right-click on the canvas and choose Deselect (Ctrl/Cmd + D).

Step 4 - Select and Modify a Brush for the Eraser Tool
Select the Eraser Tool (E). Then open the Brushes panel (Window > Brushes), and search for one of the following brushes to use:
- Chalk Brush (27)
- Close Cross Hatch (45)
- Ink on Rough (35)
- Wet Spread (45)
- Rough Wash (55)
- Rough Round Bristle (104) - *Hardness setting not available
Note: if you use a brush that does not have the Hardness setting available, you may have to brush over the areas multiple times to erase/blend out the harsh straight border.

Click on the Brush preset picker icon in the Options bar at the top. Then increase the Size and Hardness of the brush. You can come back and change the settings if needed.

Step 5 - Erase the Black Stroke Border
Slowly erase the inside of the black stroke border all the way around. You’ll see the distressed edges start to form.

If you were adding distressed edges to an actual image, you could skip to Step 7.
Step 6 - Export the Distressed Edge Border
You can export the distressed edge border you've created to use on other projects.
Hide Background Layer
Before you export, you must click the eye icon for the Background layer to hide it.

Export Distressed Edge Border
Then click on File > Export > Export As.

The most important part of the Export As dialog is making sure the Format is set to PNG and that the Transparency checkbox below is marked. Make sure your other settings are correct and click Export. You’ll then pick a save location, enter the file name, and click Save.

To use the distressed edge border on another project in Photoshop, continue reading as we’ll show you how in the following step.
Step 7 - Make a Distressed Background
This step will show you how to make a distressed background with the distressed edge border we created above.
Note: you can also follow this step to add a distressed edge to an image using the distressed edge border we created or an imported transparent distressed edge PNG. Your image would be the background in that case.
Select Pixels
Hold down Control/Command and click on the distressed edge border's layer thumbnail to select that layer’s pixels.

Invert the Selection
Select the Rectangular Marquee Tool (M), right-click on the canvas, and choose Select Inverse.

Add a Layer Mask
Select the Background layer and click on the Add a layer mask icon at the bottom of the Layers panel. It’s the icon that has a rectangle with a circle in the middle. Once you add a layer mask to “Background” layer, its name will change to “Layer 0.”

Hide Distressed Edge Layer
Click the eye icon of the distressed edge border layer to hide it. The background itself now has a distressed edge.

Change Color of Distressed Background
If you want to change the color of the distressed background, double-click on the distressed background layer (Layer 0) to open the Layer Style dialog. In the Layer Style dialog, click on Color Overlay. Then click the color icon to pick whatever color you want the distressed background to be. We chose the color black. Click OK to apply the change and close the Layer Style dialog.

Export Distressed Background
Your distressed background is finished and can be exported the same way as we exported the distressed edge border above.

You can use the exported distressed background PNG with other projects by clipping the image to the distressed background with a clipping mask. We have a tutorial on using clipping masks in Photoshop if needed.
Now you know how to create distressed edges in Photoshop, and I bet it wasn’t as hard as you thought! You can use all different distressed/grunge brushes to really tailor the distressed edges to your liking.