By Lorna Cana
How to Find Which Layer a Stray Mark is on in Procreate
If you realize that you have a stray mark in your artwork, and you really don’t want to go layer by layer to find where it is, here’s a really nifty hack that will help you find it in no time so that you can get back to work.
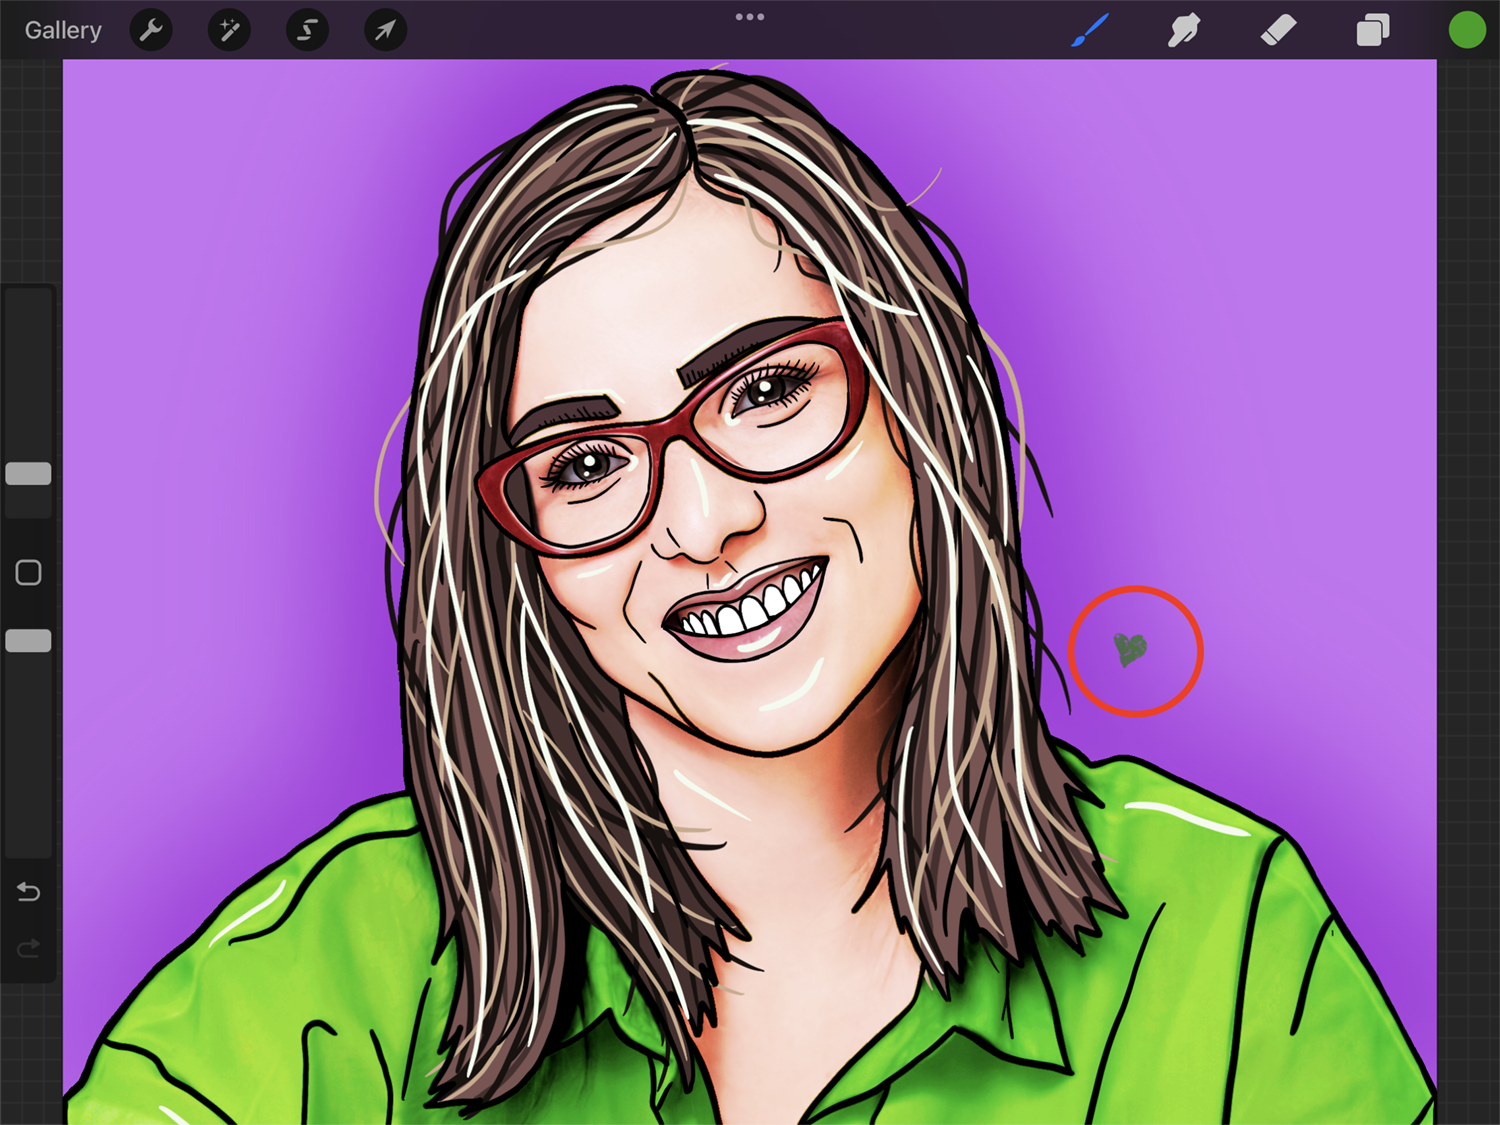
For this example, we used the artwork we created following our tutorial on drawing flat characters in Procreate. Feel free to check it out if you want to learn how to use that cool technique for your artwork.
Step 1 - Set the Layer Select Preferences
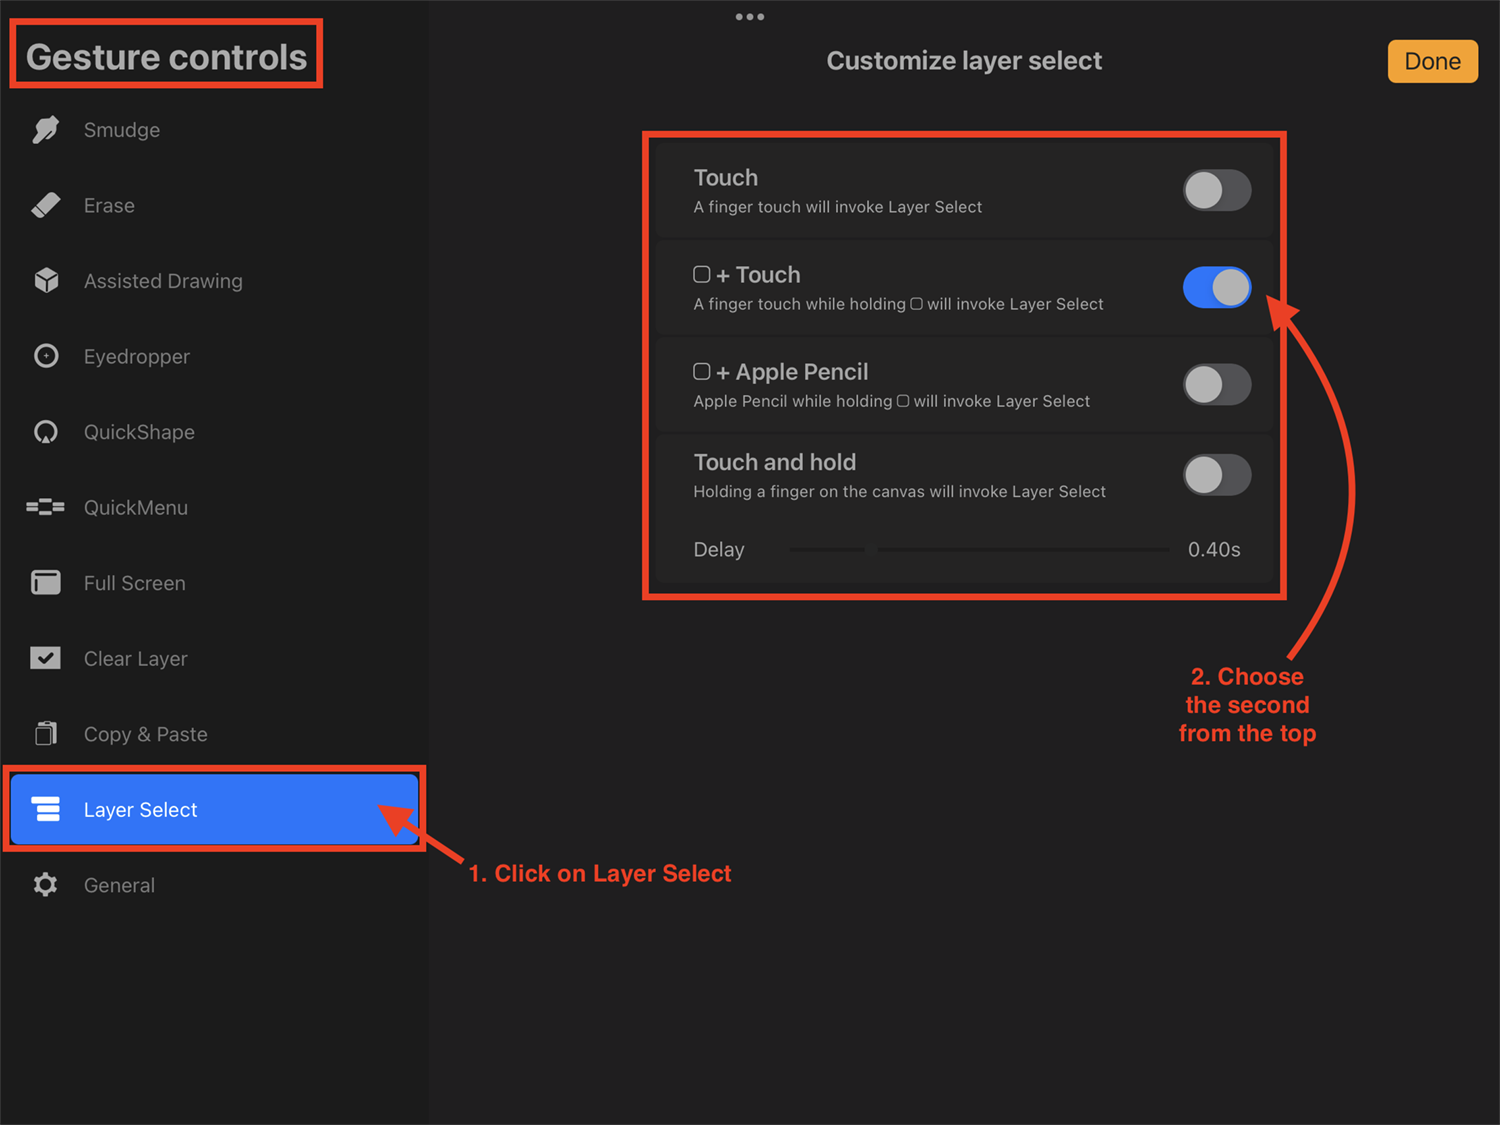
First, we need to adjust Procreate’s Layer Select Preferences so that we will be able to use this option properly.
Open theActions menu by clicking on the wrench icon in the top menu bar. Then click the Preferences icon and finally on Gesture controls to open the submenu.

Next, click on the Layer Select tab to open the Customize layer select options. Tap on the button next to the second option from the top (Modify button + Touch) to turn it on.
You can choose any other option that suits you better, but this is the one that will interfere less with other gestures that you may use in your workflow.
Step 2 - Select the Layer Containing the Stray Mark
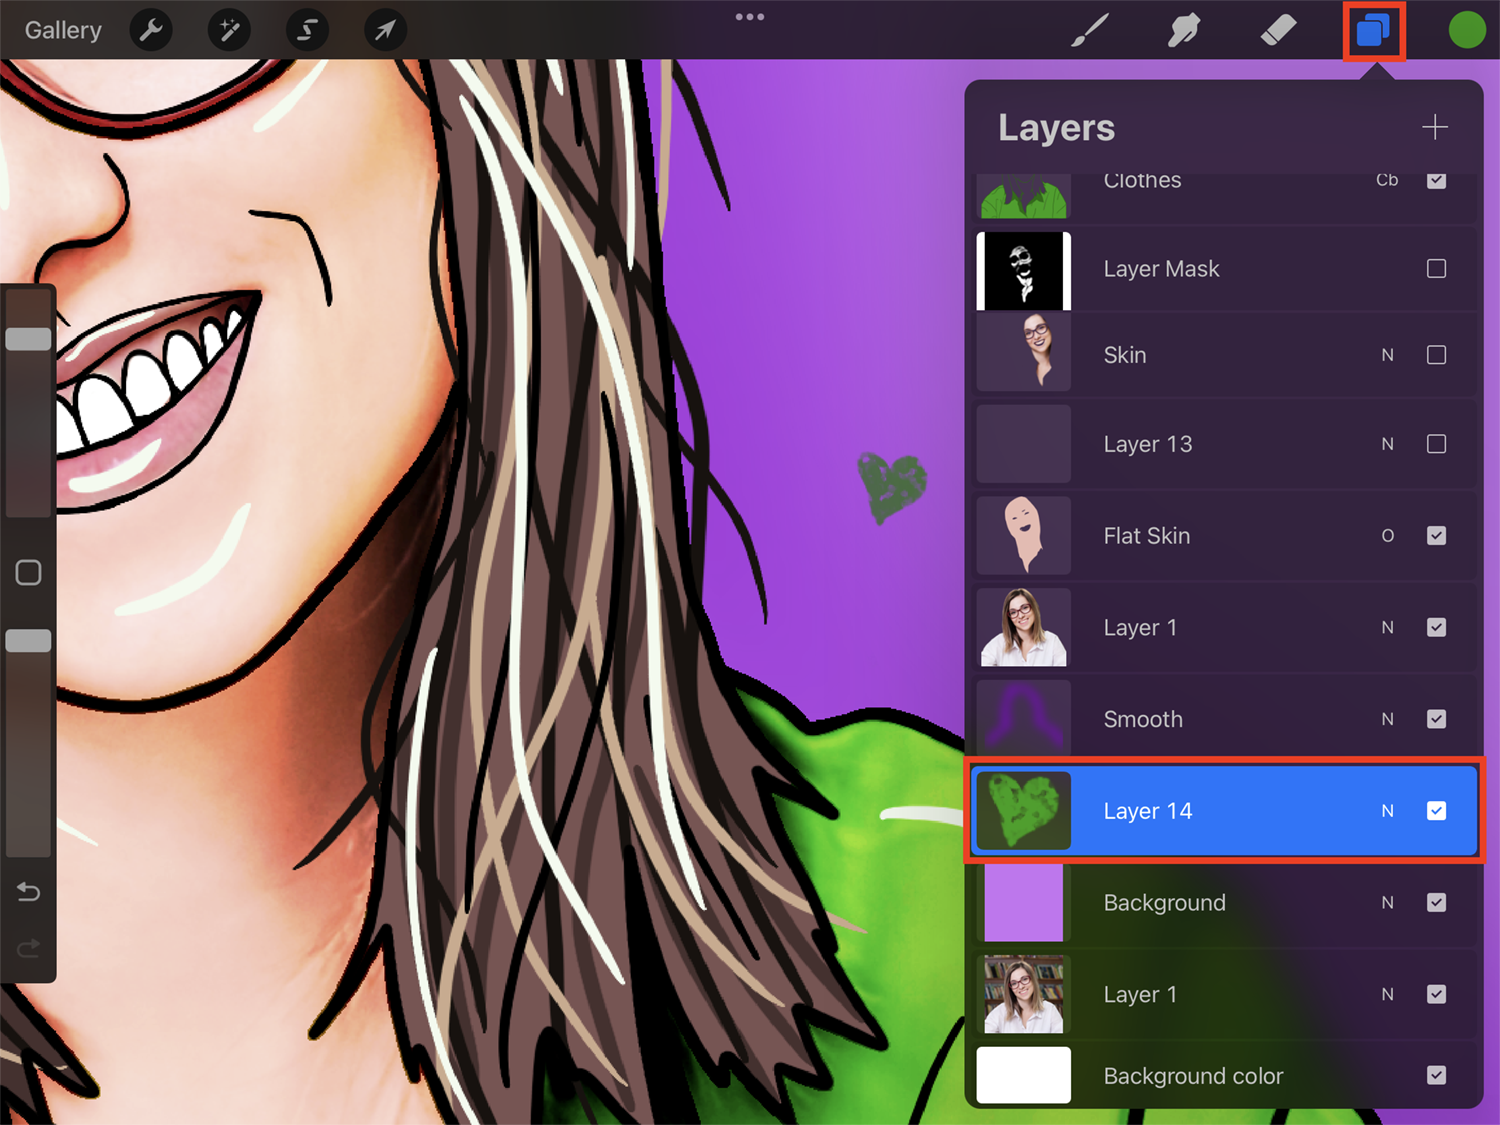
Now, zoom in on the stray mark so you have a better view. Then tap on top of the stray mark while holding the Modifybutton (small square icon) in the sidebar.
TheLayer Select popup will appear, showing you all the visible layers available in that location, including the one containing your stray mark.
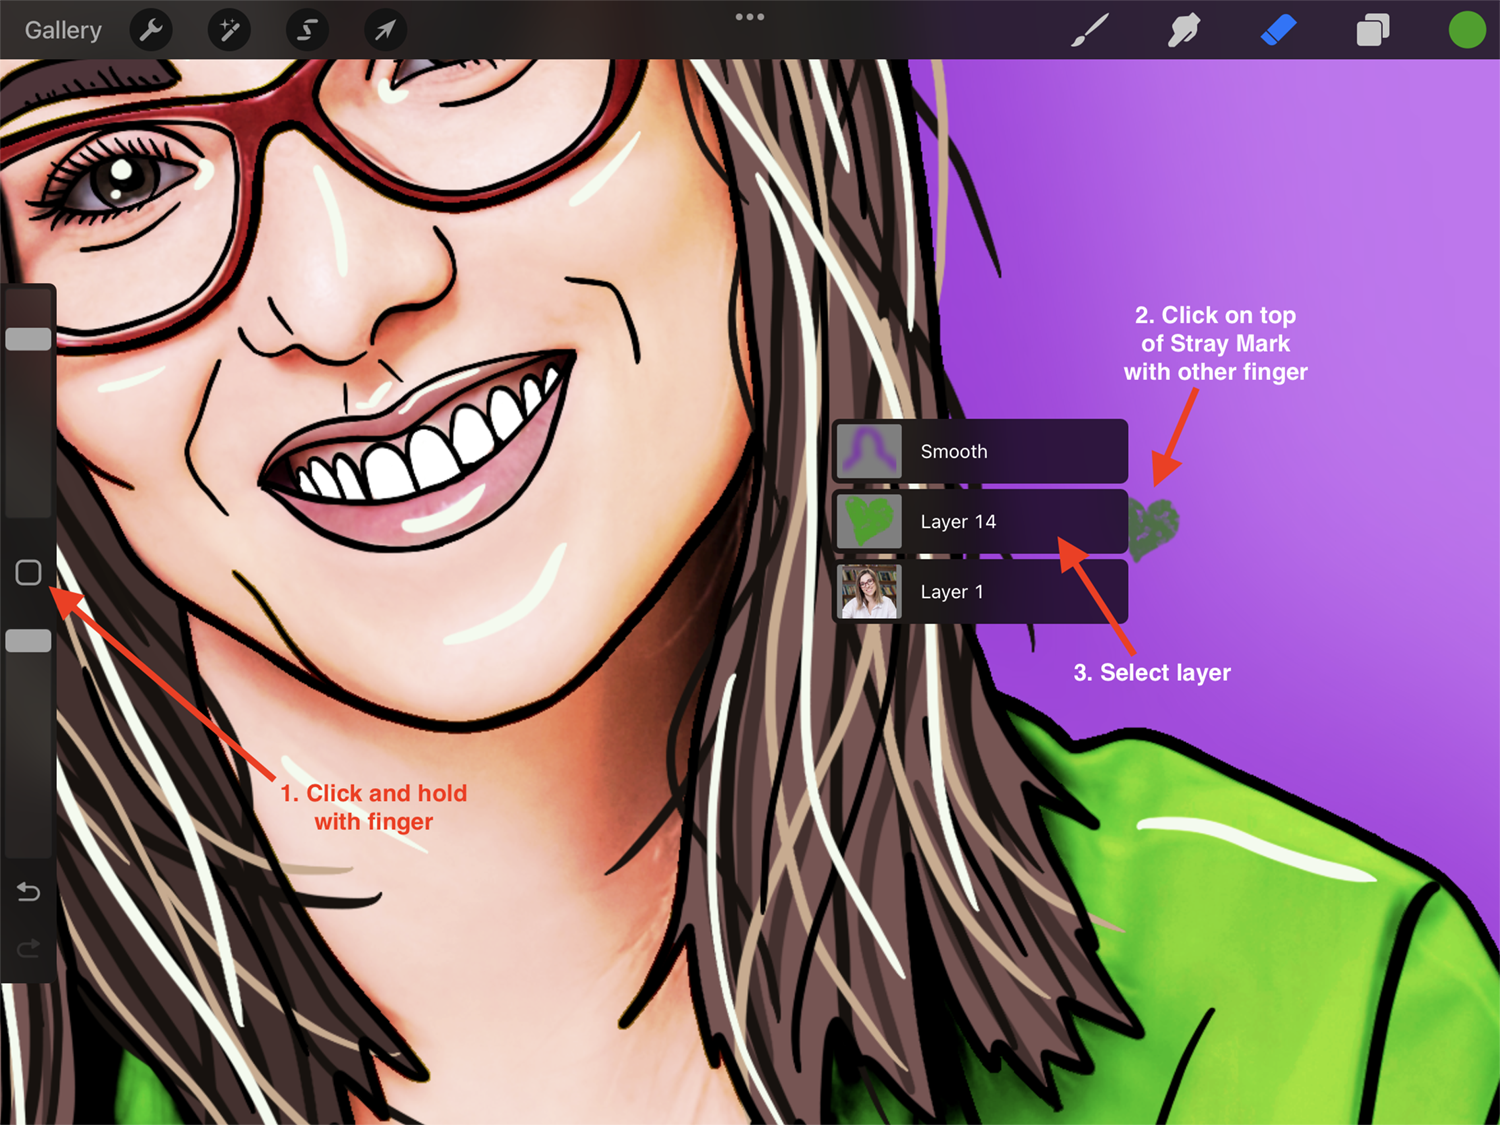
Then, just select the layer and get rid of the mark by erasing it or by deleting the entire layer.
You can also drag toward the layer you want and then release your finger while on top of it to instantly select that layer.
We hope you enjoyed this Procreate tutorial. If you did, be sure to check out how to copy layers to a new canvas, import and use brushes, and make a transparent background in Procreate.