By Design Bundles
SCAL Tutorials6 min
SCAL4 Basics- How to create an offset
*Note- SCAL4 Pro used.
1- Open Sure Cuts a Lot 4 software.
2- Create the image that you would like to put an offset around.
3- Select the design and right click on it. Select Appearance > Add shadow layer.
4- A new window will appear. This Shadow layer will create your offset. You can adjust the thickness of the offset by moving the slider.
5- When you move the slider it will make the off set thicker as seen below. You also have an invert option.
6- By selecting the invert you will create the offset on the inside.
7- You can also adjust the miter. This will change the corners of your design. Where sometimes an offset can cut them off on the corners, you can increase the miter and this will create the sharp corners.
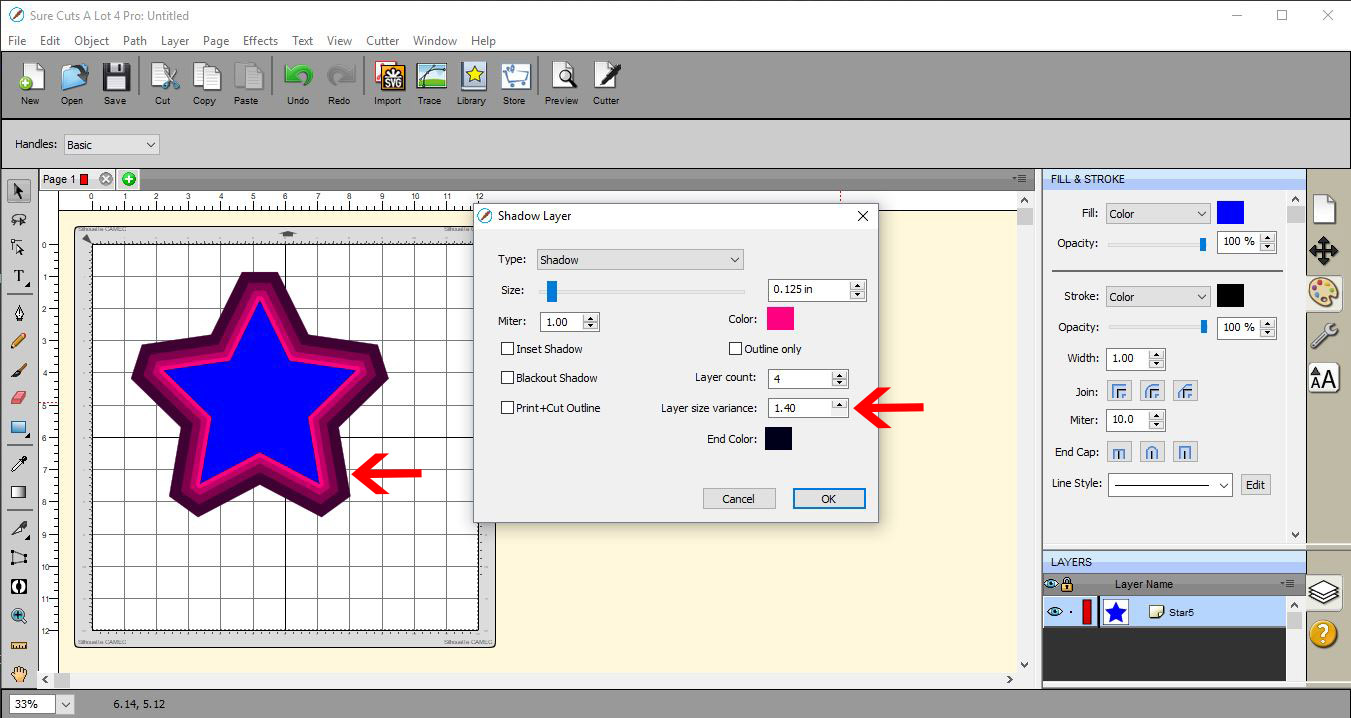
8- You can also increase the number of offsets you would like in the layer count. This is a great feature if you want to mat and layer several copies on a design.
9- you can also change the layer via variance. This will increase the width of each offset as you add them to the design.
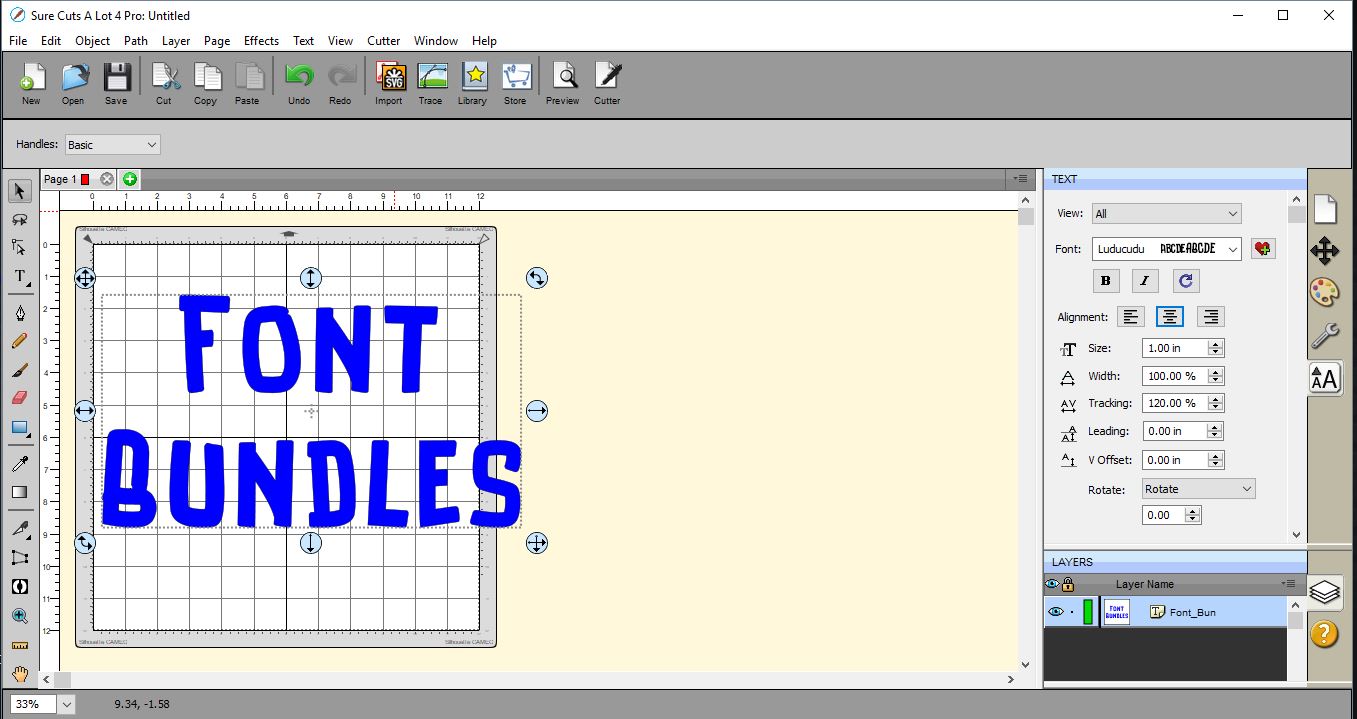
10- You can also create offsets(shadow layers) with text. Type your text.
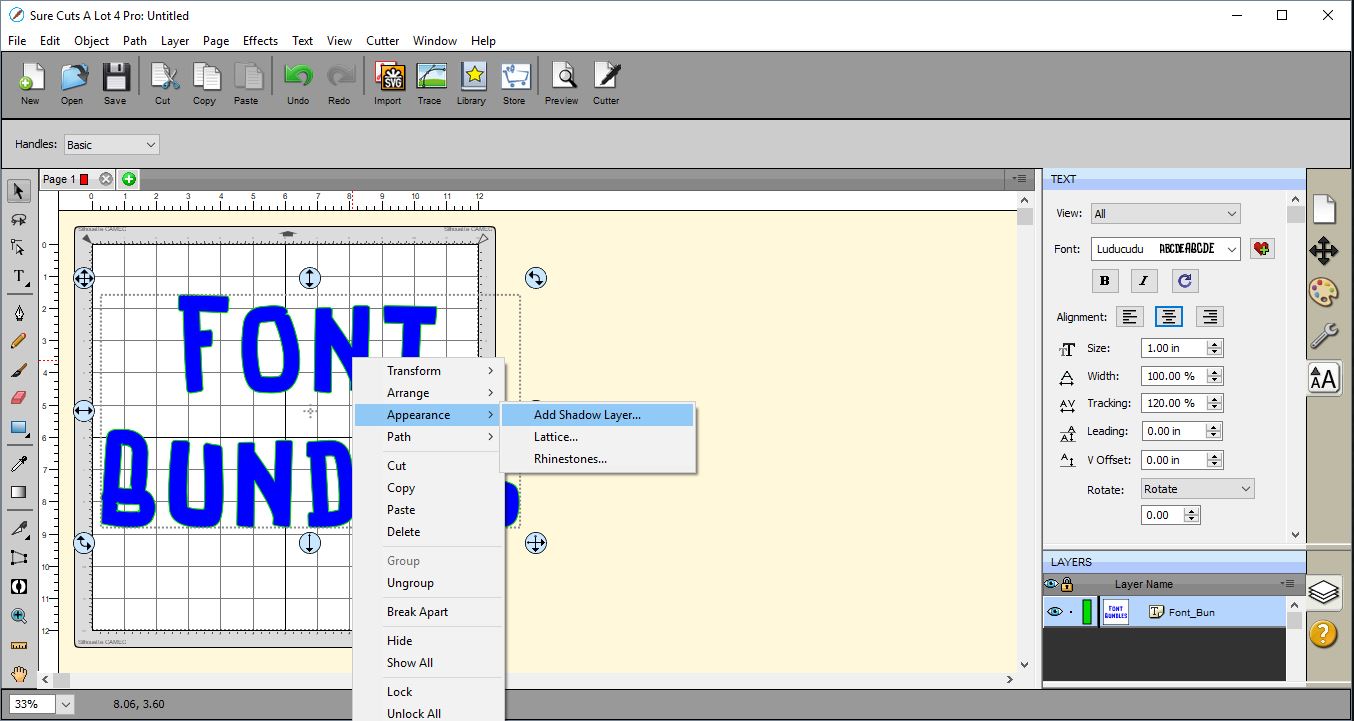
11- Right click on your text and select Appearance > add shadow layer.
12- The shadow layer window will appear. As the same as the shape above you will see a small offset around each letter.
13- You can increase and decrease the width of the offset with the slider in the shadow layer window.
All the other above options are the same for text. Once you are happy click OK.
14- You can see that the shadow layer /offset is 2 separate cut designs now. you cna cut them in different colors and then layer them.
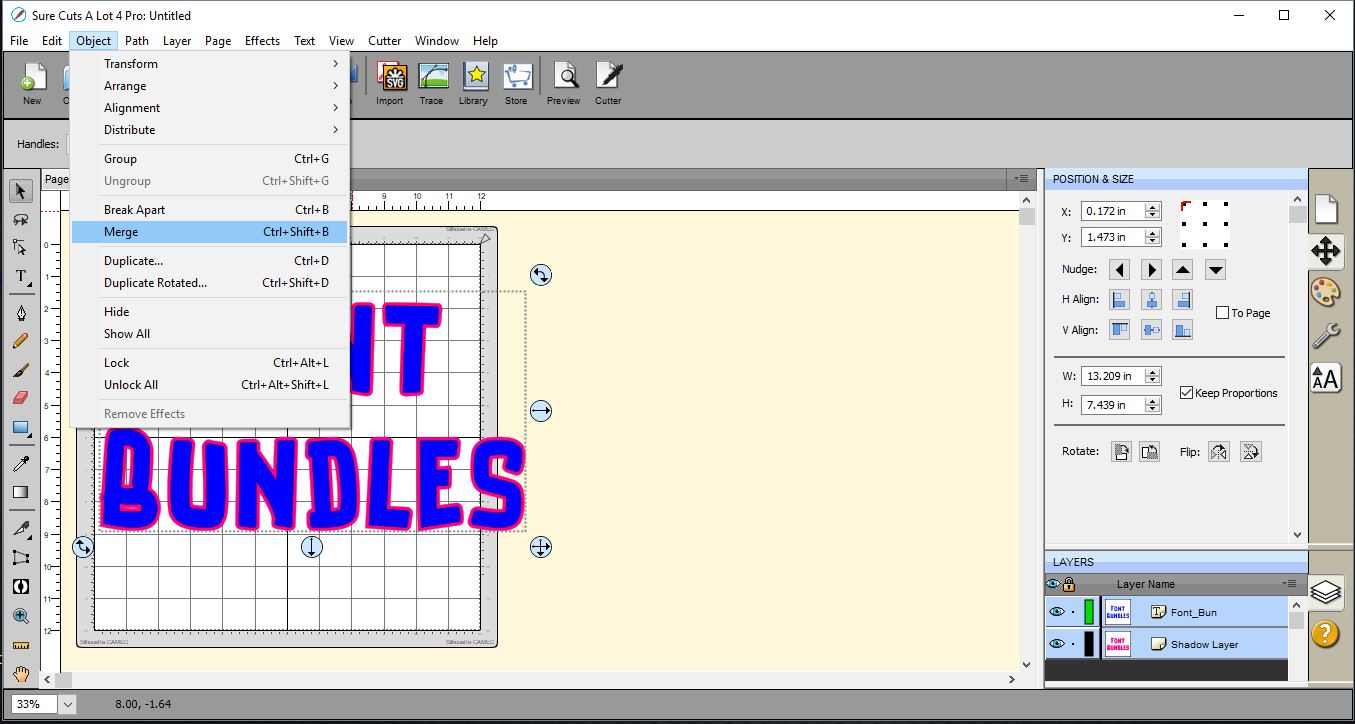
15- You can also create an outline effect with the shadow layer/offset. Select both the original text and the offset you created and go to object > merge.
16- The merge will remove the middle of your text leaving an outline. You can click on preview to see how it will cut.
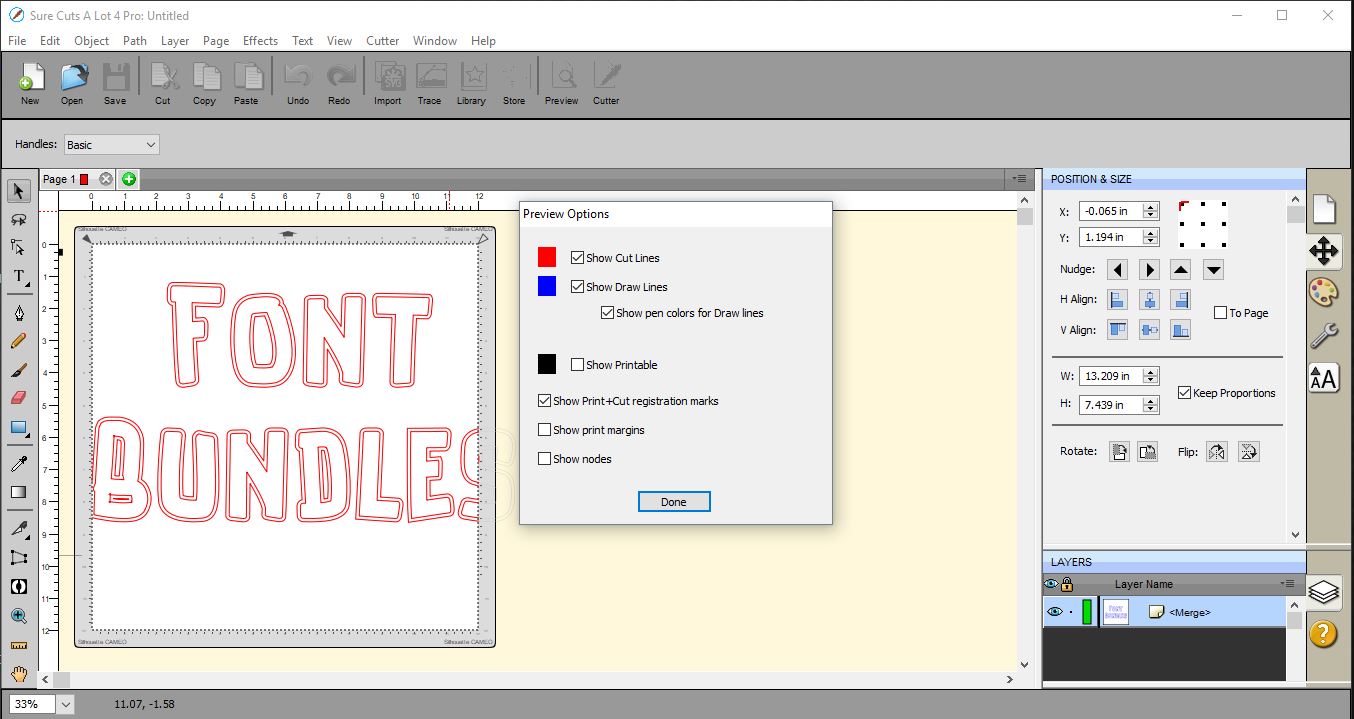
17- As you can see in the preview screen, you now have a outline effect to cut.
1- Open Sure Cuts a Lot 4 software.

2- Create the image that you would like to put an offset around.
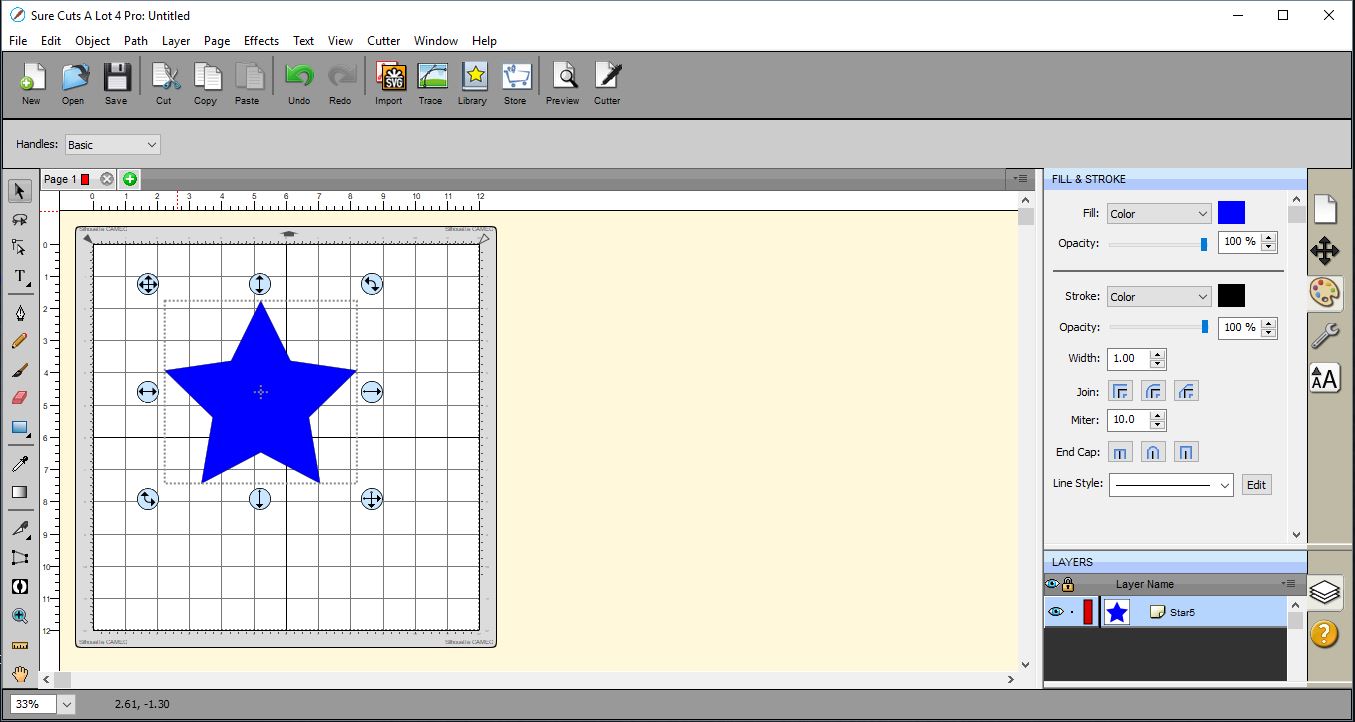
3- Select the design and right click on it. Select Appearance > Add shadow layer.
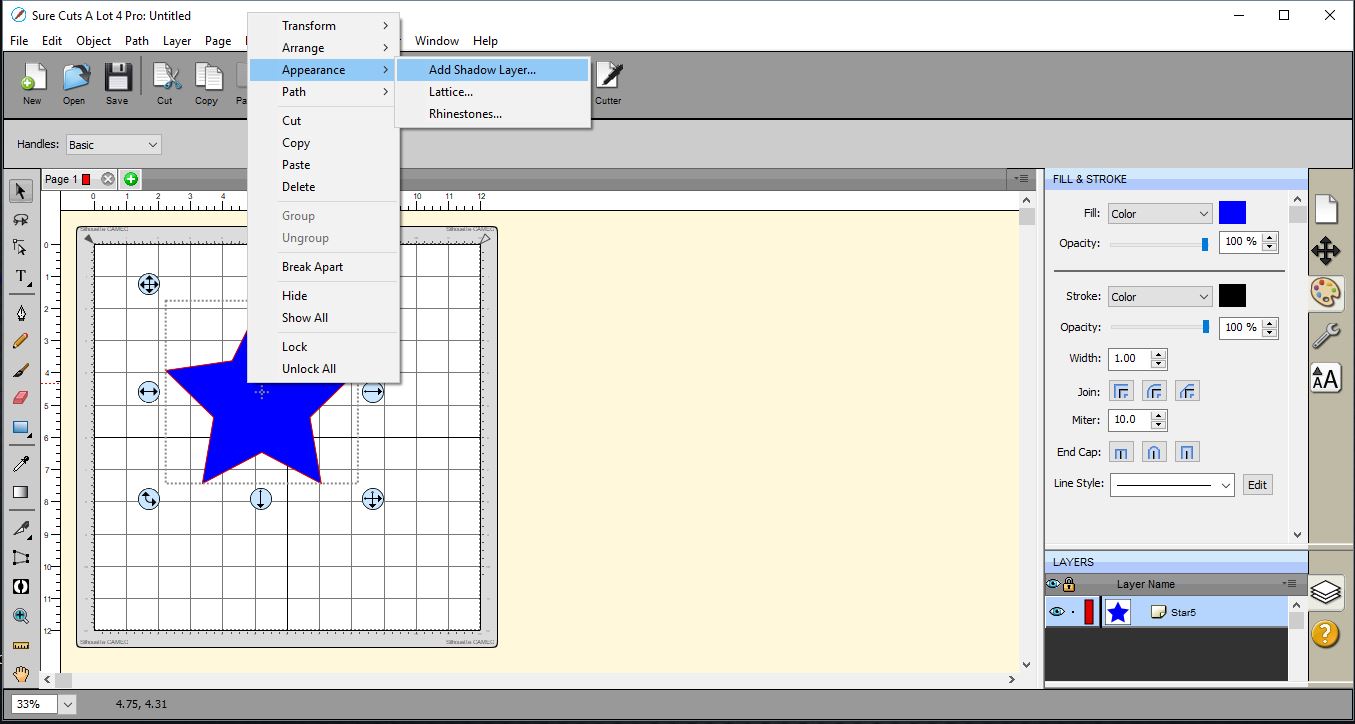
4- A new window will appear. This Shadow layer will create your offset. You can adjust the thickness of the offset by moving the slider.
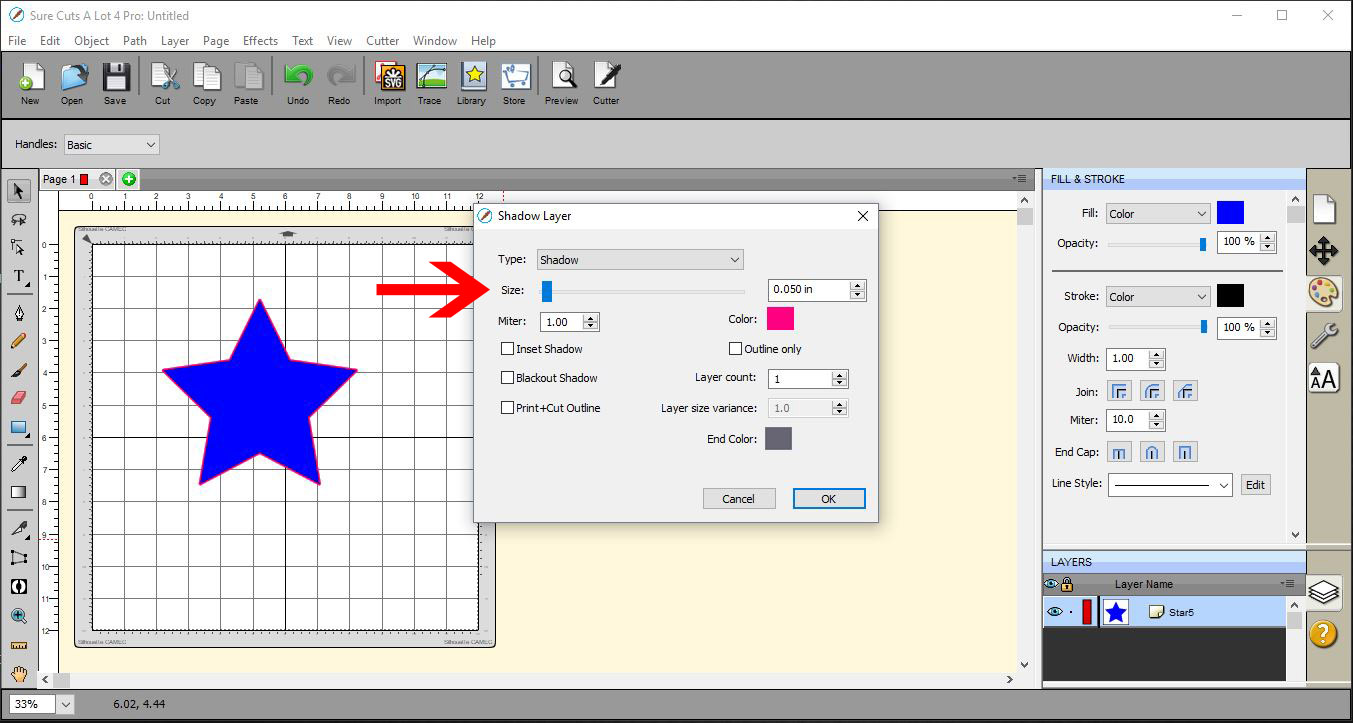
5- When you move the slider it will make the off set thicker as seen below. You also have an invert option.
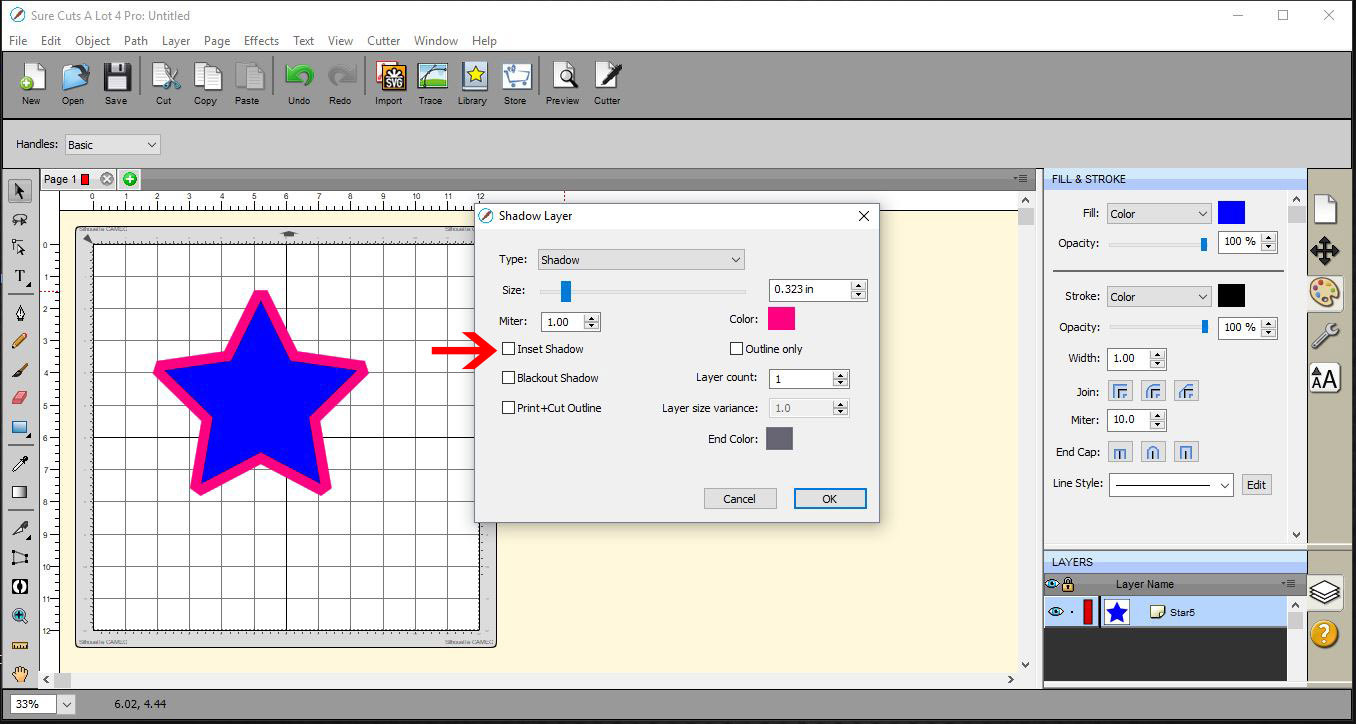
6- By selecting the invert you will create the offset on the inside.
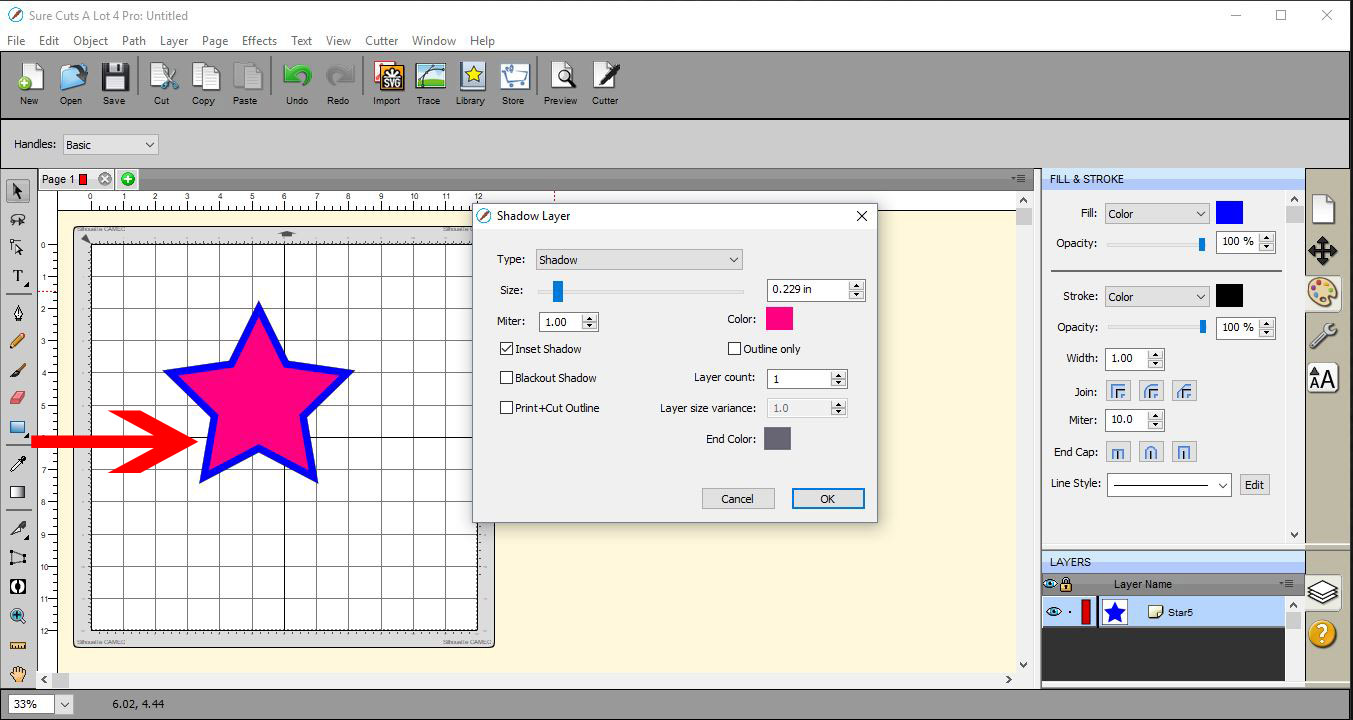
7- You can also adjust the miter. This will change the corners of your design. Where sometimes an offset can cut them off on the corners, you can increase the miter and this will create the sharp corners.
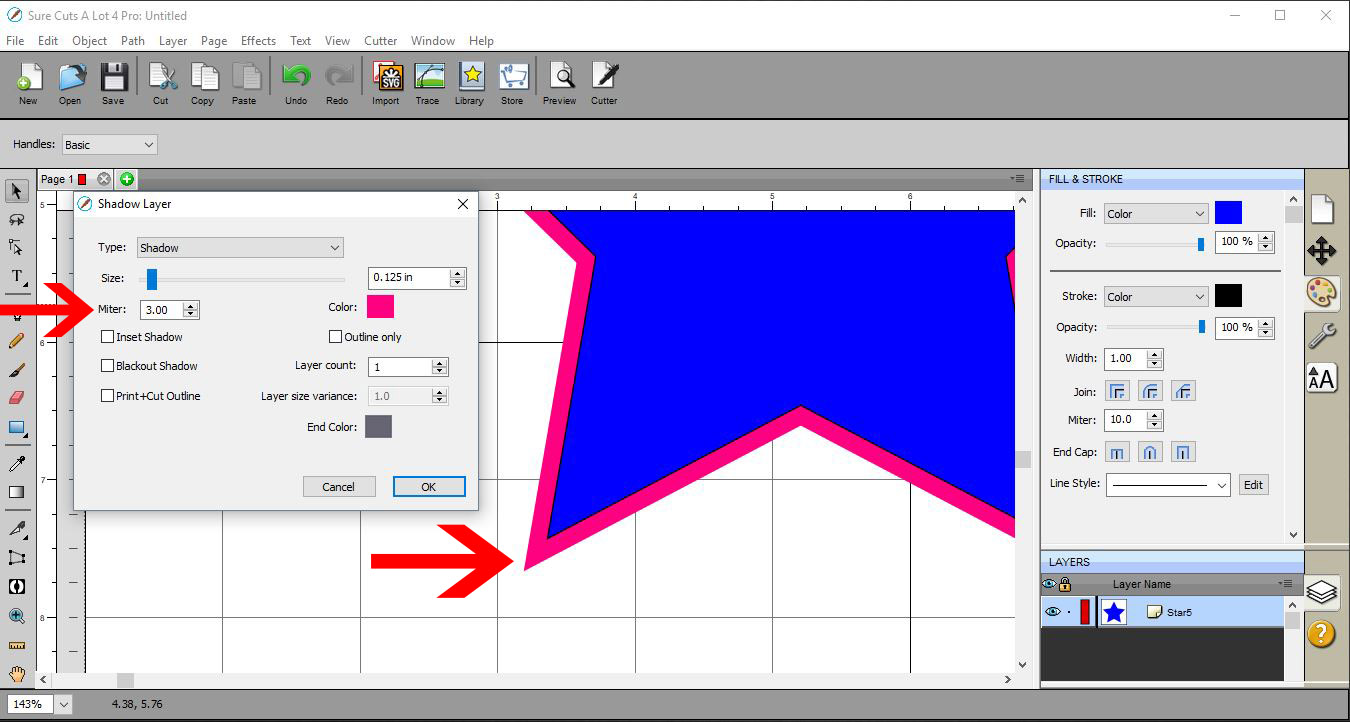
8- You can also increase the number of offsets you would like in the layer count. This is a great feature if you want to mat and layer several copies on a design.
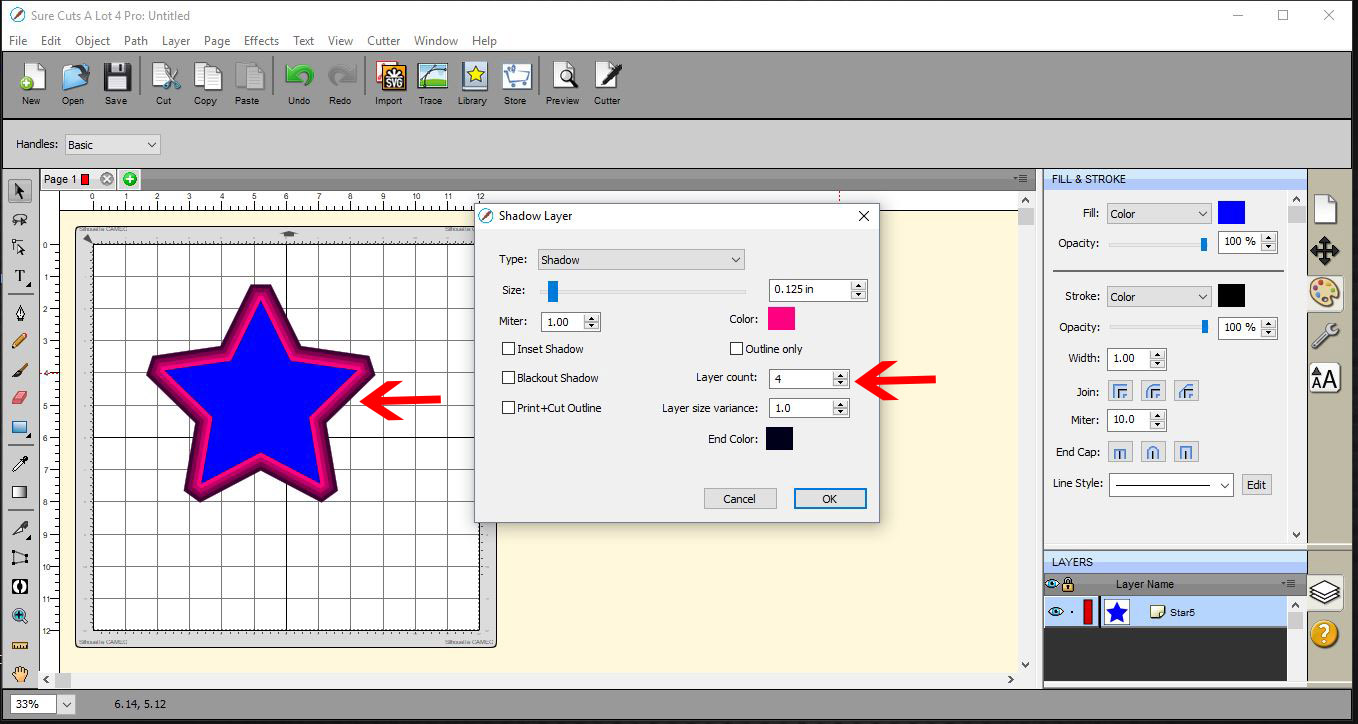
9- you can also change the layer via variance. This will increase the width of each offset as you add them to the design.
10- You can also create offsets(shadow layers) with text. Type your text.
11- Right click on your text and select Appearance > add shadow layer.
12- The shadow layer window will appear. As the same as the shape above you will see a small offset around each letter.
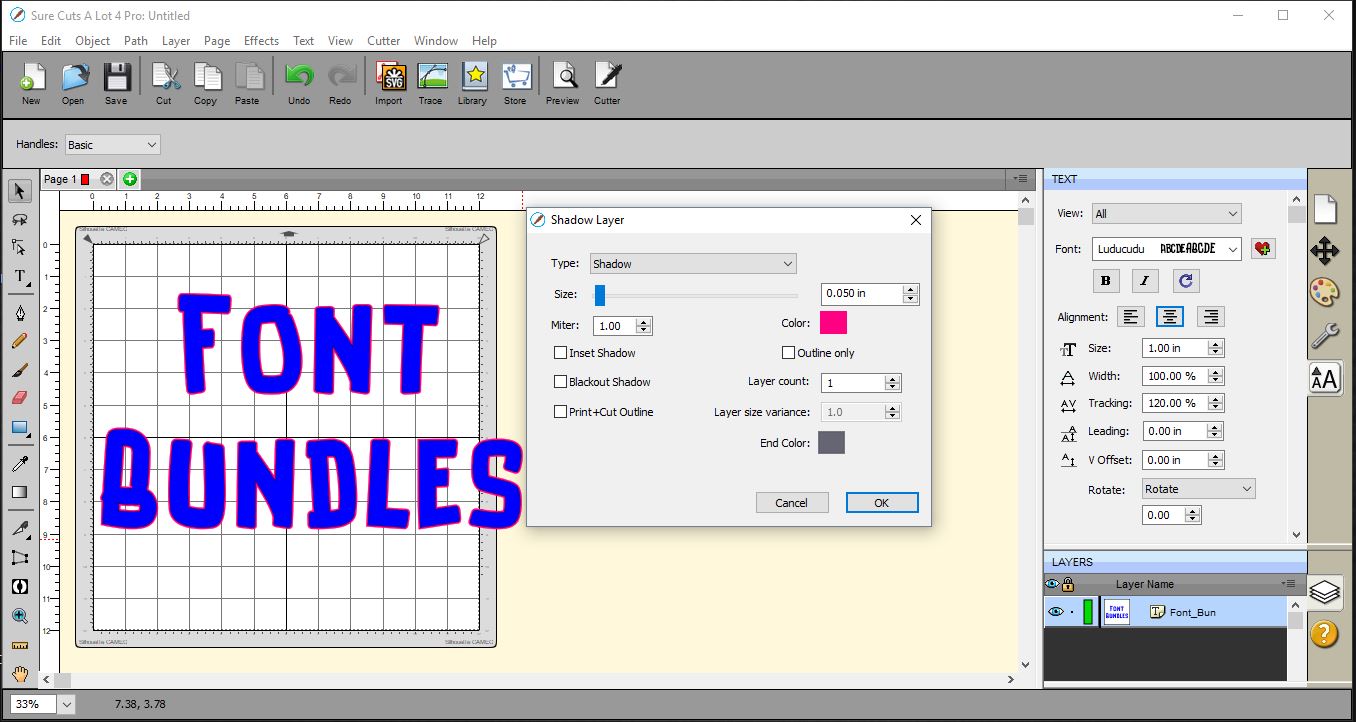
13- You can increase and decrease the width of the offset with the slider in the shadow layer window.
All the other above options are the same for text. Once you are happy click OK.

14- You can see that the shadow layer /offset is 2 separate cut designs now. you cna cut them in different colors and then layer them.
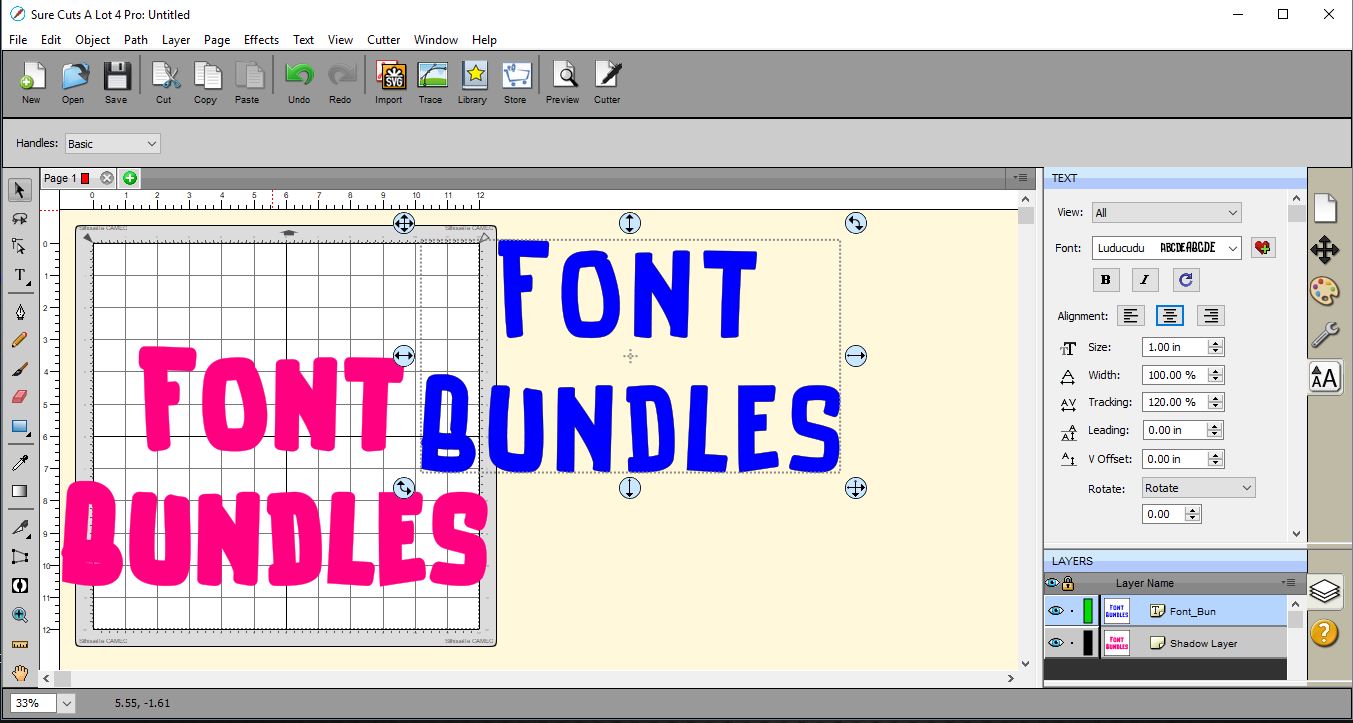
15- You can also create an outline effect with the shadow layer/offset. Select both the original text and the offset you created and go to object > merge.
16- The merge will remove the middle of your text leaving an outline. You can click on preview to see how it will cut.
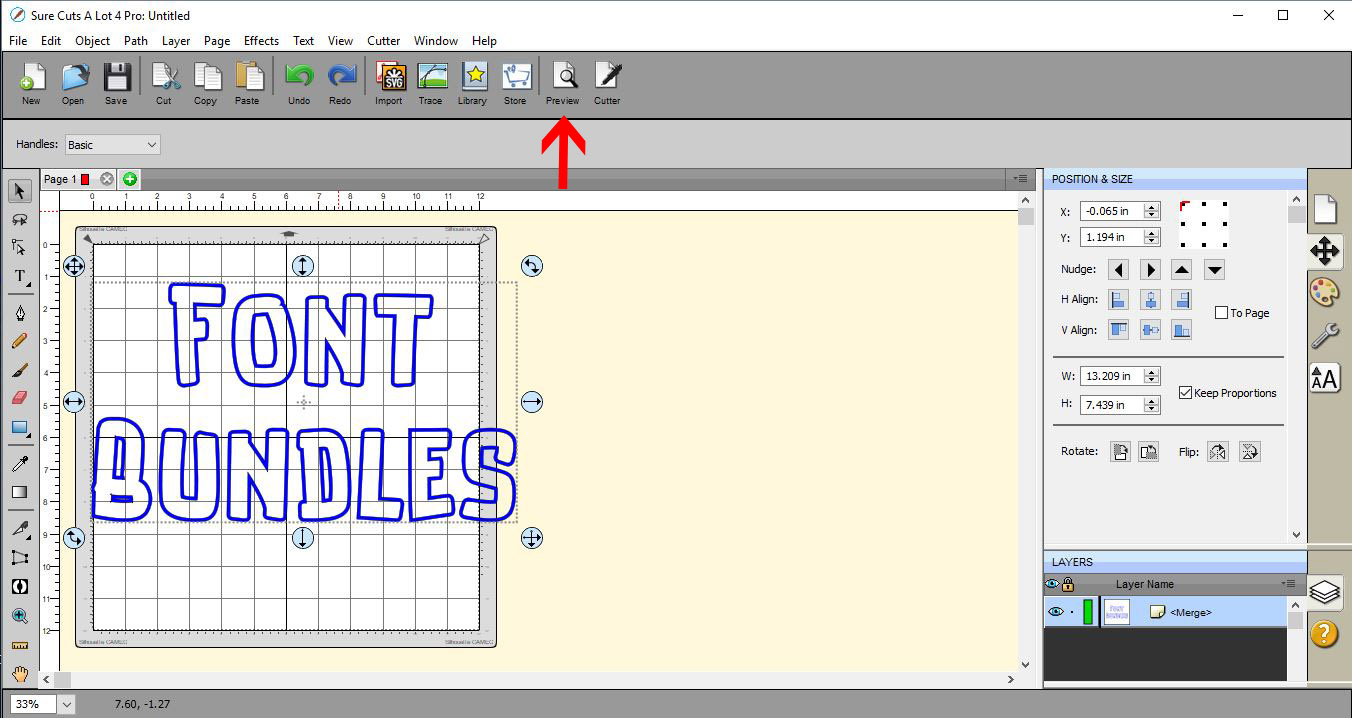
17- As you can see in the preview screen, you now have a outline effect to cut.
Related Tutorials
Inkscape Tutorials
How to Create an Offset in Inkscape
If you need a font to be thicker, we'll show you how to create an offset in Inkscape.
Scan N Cut Tutorials
How to Create an Offset Using the Foil Quill in Brother Scan and Cut Canvas Workspace
DesignScape Tutorials
How to Create an Offset Stroke in DesignScape
In 5 quick steps you'll learn different ways to use and create an Offset Stroke in DesignScape.
SCAL Tutorials
How to Create Decorative Borders to Foil in SCAL4
SCAL Tutorials