By Design Bundles
Cut by Layers in Silhouette Studio
The Cut by Layers feature in Silhouette Studio is available in Designer Edition and higher. It allows you to cut each layer separately and keep everything organised. You are able towork faster and find the exact layer you want to cut. In this tutorial we will show you how to cut by layers in Silhouette Studio V4.1.
Step 1 - Access the layers panel
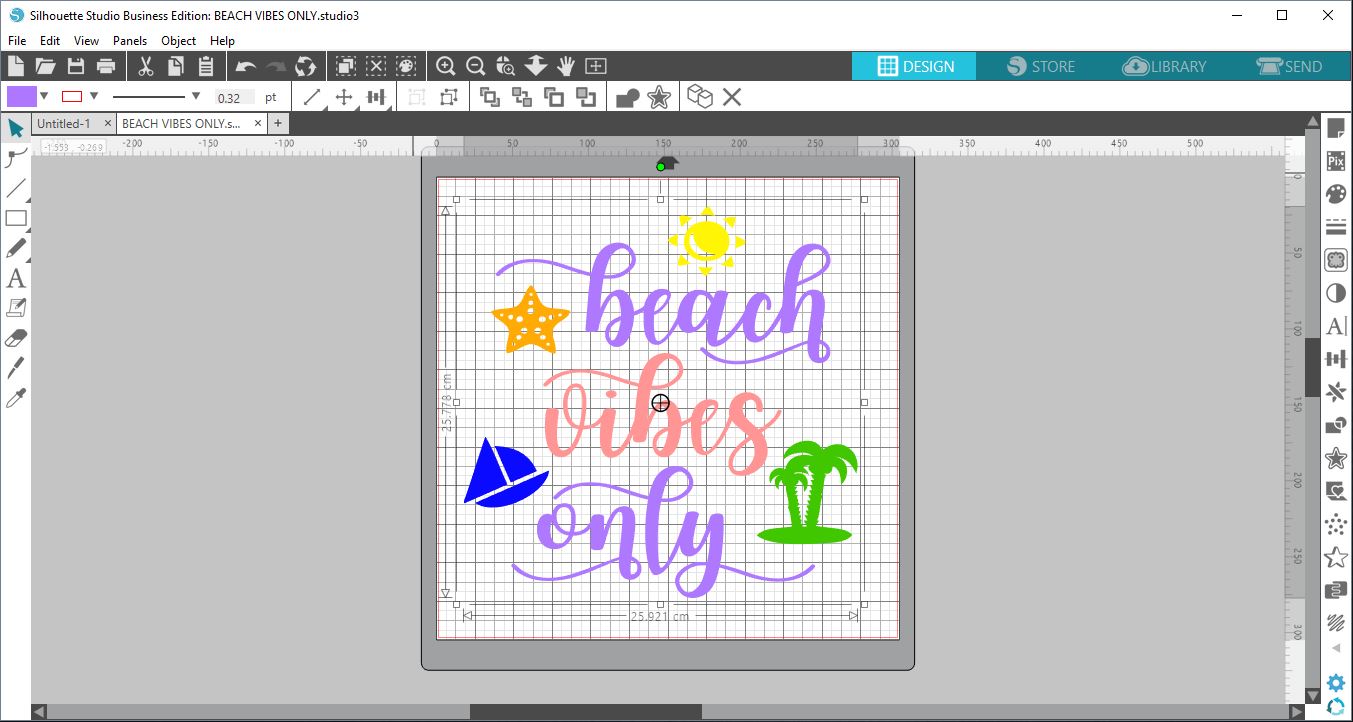
We will begin by openingSilhouette Studio. Next, import your design by going to File > Open. Once your design has been loaded onto the mat, the next step is tolocate the Layers panel.
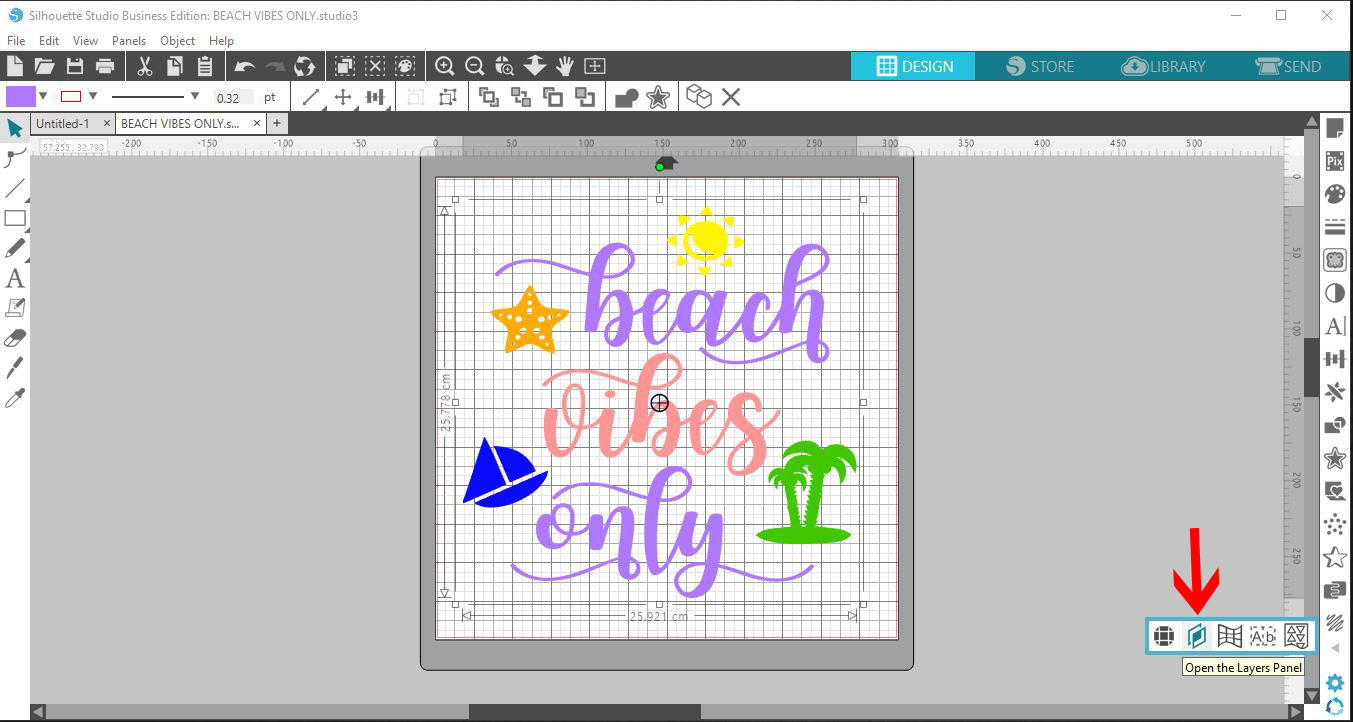
The Layers panel is located on the right hand side of the screen. Click on the Layers panel icon to open the options.
Step 2 - Layer Panel Options
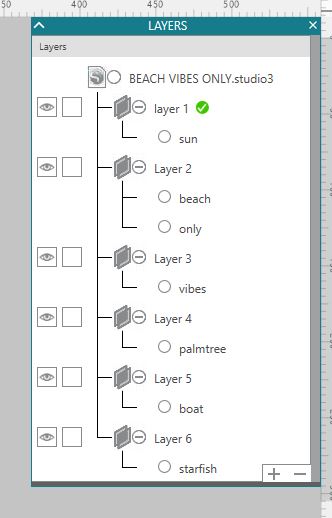
The Layer panel has quite a few options for arranging how your layers are presented. You can expand your layer to see different objects within the layer by clicking on the layer.
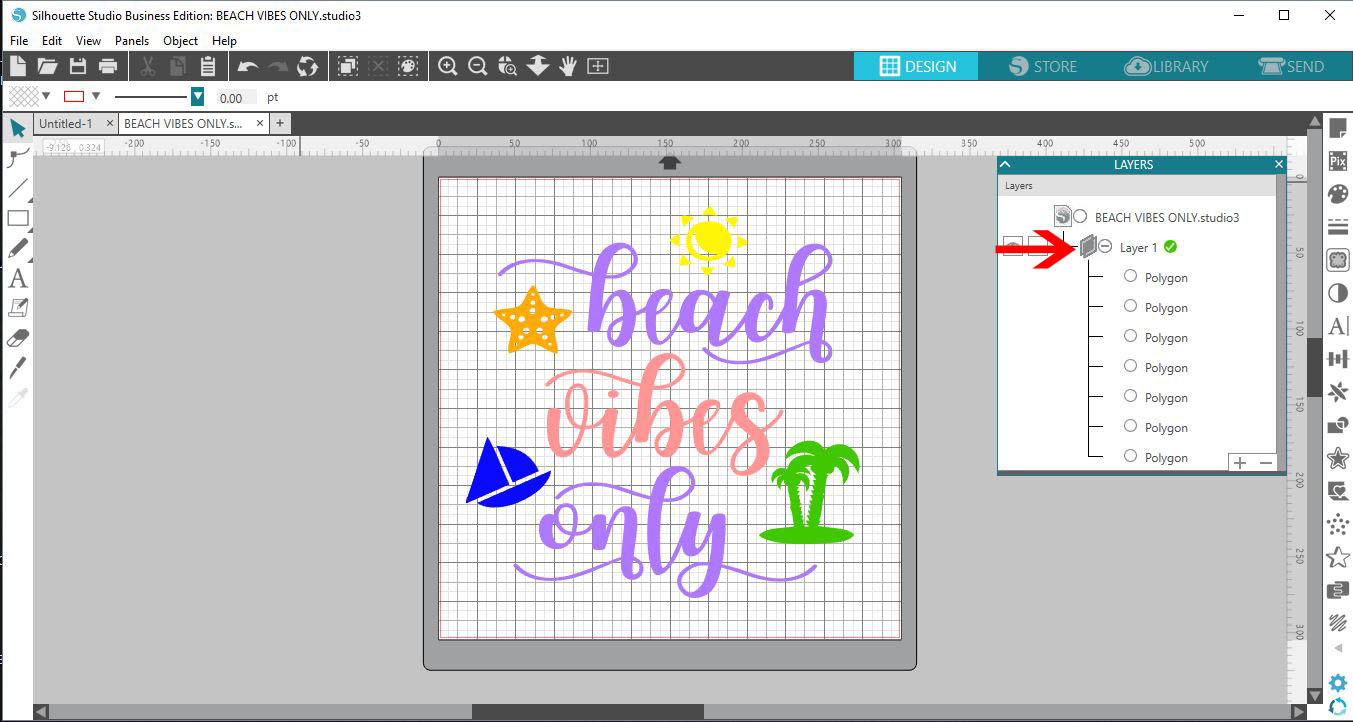
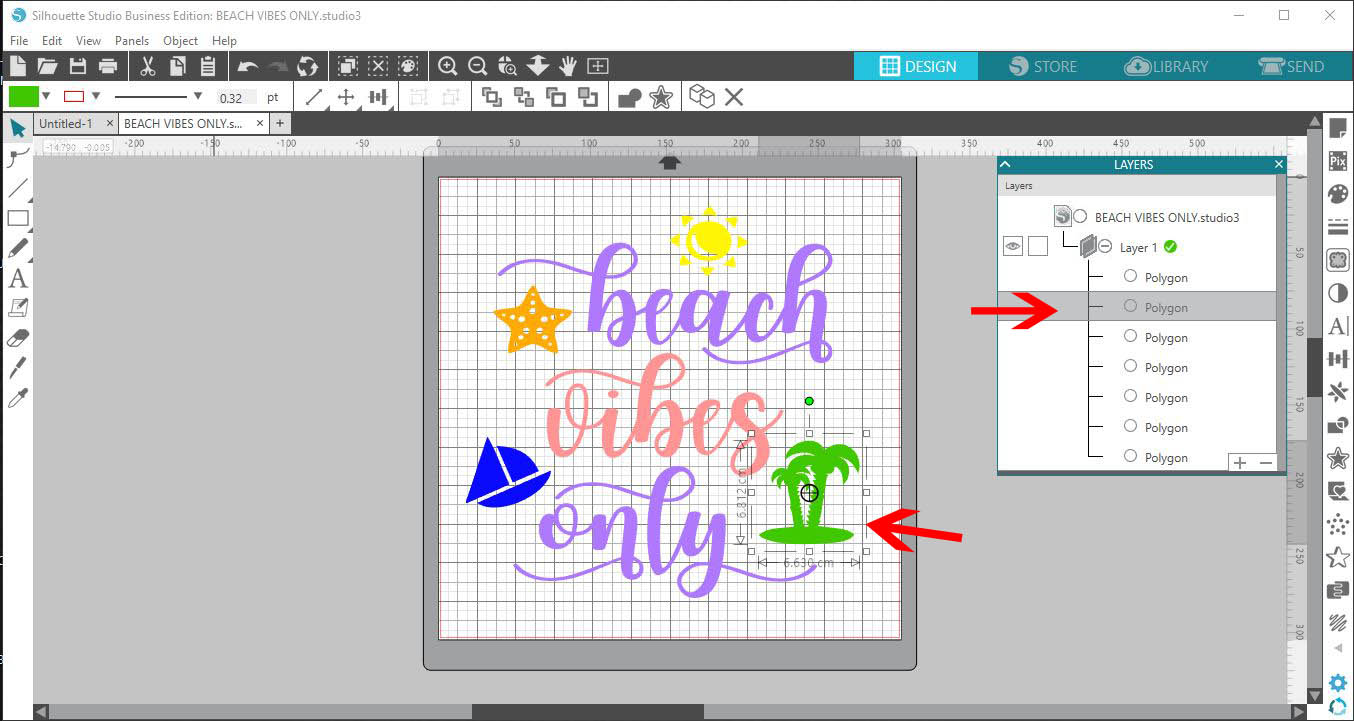
Each object in the design is connected to a layer. You can select a specific object in the layer and it will automatically select on your design.
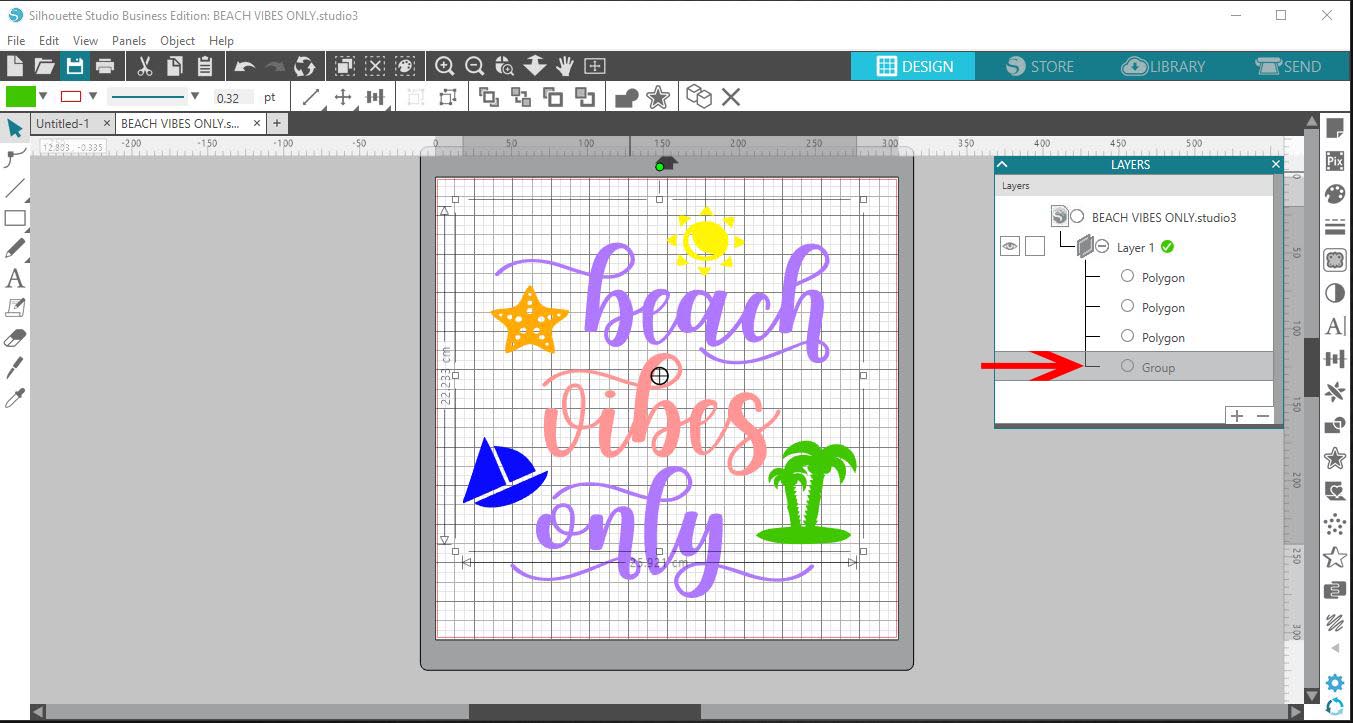
If the objects have been grouped, the layer will be shown as a Group.
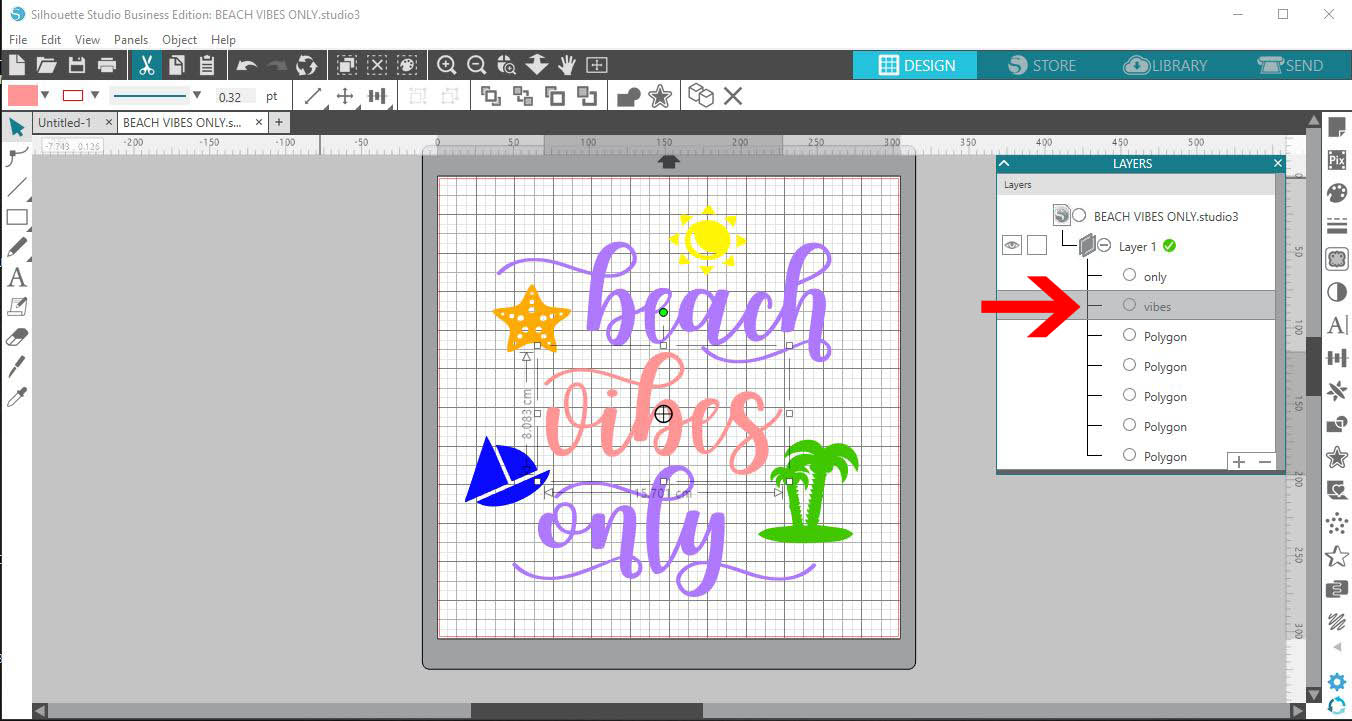
You can also rename each object within the layer. Do this by clicking on the layer name and typing in a new name.
Step 3 - Add, Delete and Rearrange layers
Layers can be added and deleted. To add a layer right click on the top layer and select Add Layer. Alternatively you can click on the plus icon at the bottom of the layer panel. To delete a layer, click to select and click on the minus icon.
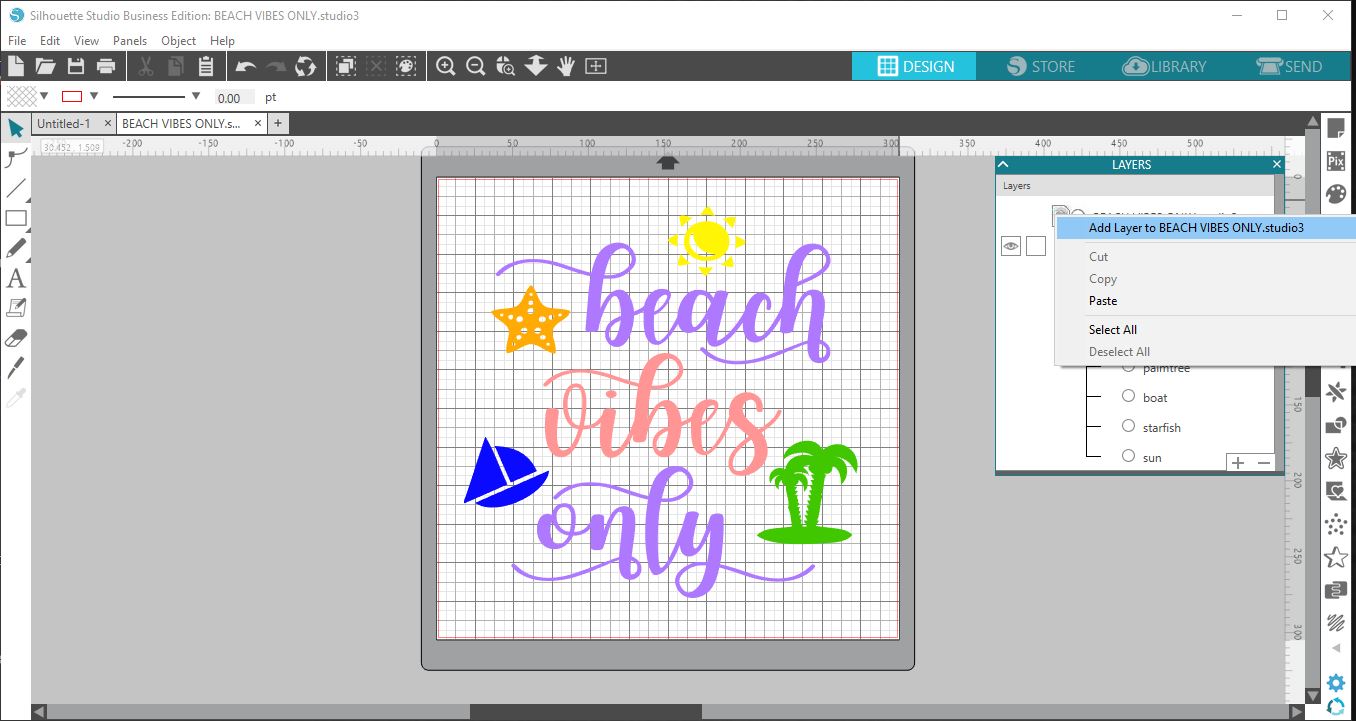
Objects can be sorted into different layers by dragging them to the selected layer. This is great for several objects that are beingcut with the same colored material. It means you can cut these objects all at the same time. You can also keep them in the same spot for layering your design.
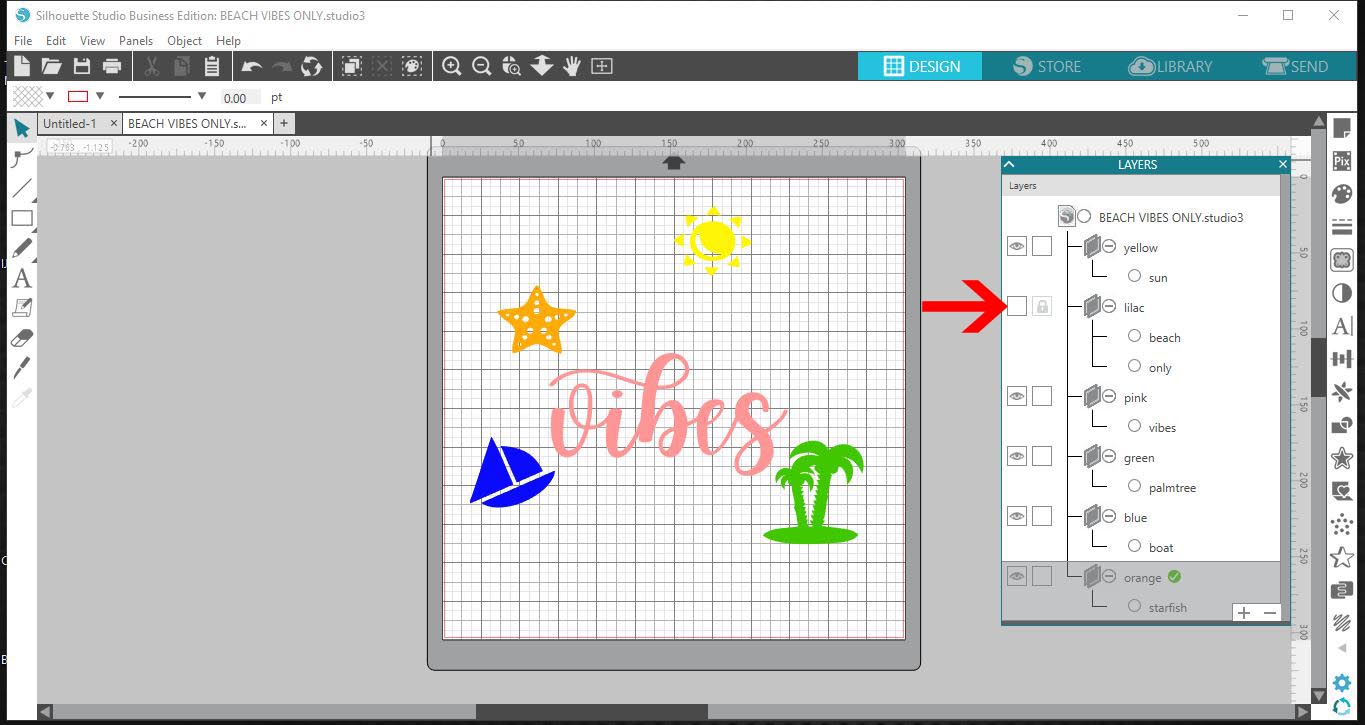
In each layer there are two boxes. One box has an Eye icon and the other is blank until you click it. Once clicked it becomes a little Lock icon.
When the Eye icon is visible then so is the layer with the object(s) on it. When you click the box, the Eye icon disappears and the layer with object(s) is hidden. It is good to note that the layer will still cut when sending your design to your silhouette.
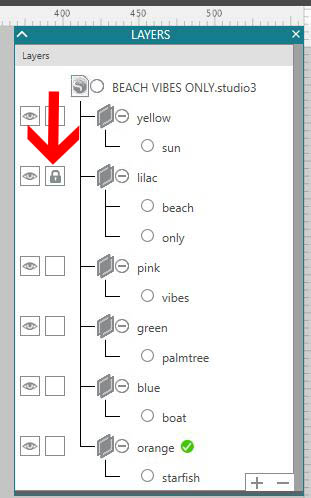
The lock icon when clicked and activated will lock that specific layer. So, when designing on your workspace you will not accidentally move that part of the design.
Step 4 - Send Panel and Cut by Layer
The Cut by Layers option can be found under the Send panel. Once your design is ready you can click on the Send icon. This will bring up the cut screen. Click on the Layers option to Cut by Layers.

You will see each layer listed in the cut section. By naming your layers with the Layers panel, it will be easy to identify. We named each layer after the color of vinyl that we will be cutting.This makes it easier to see what colors and amount of vinyl is needed.
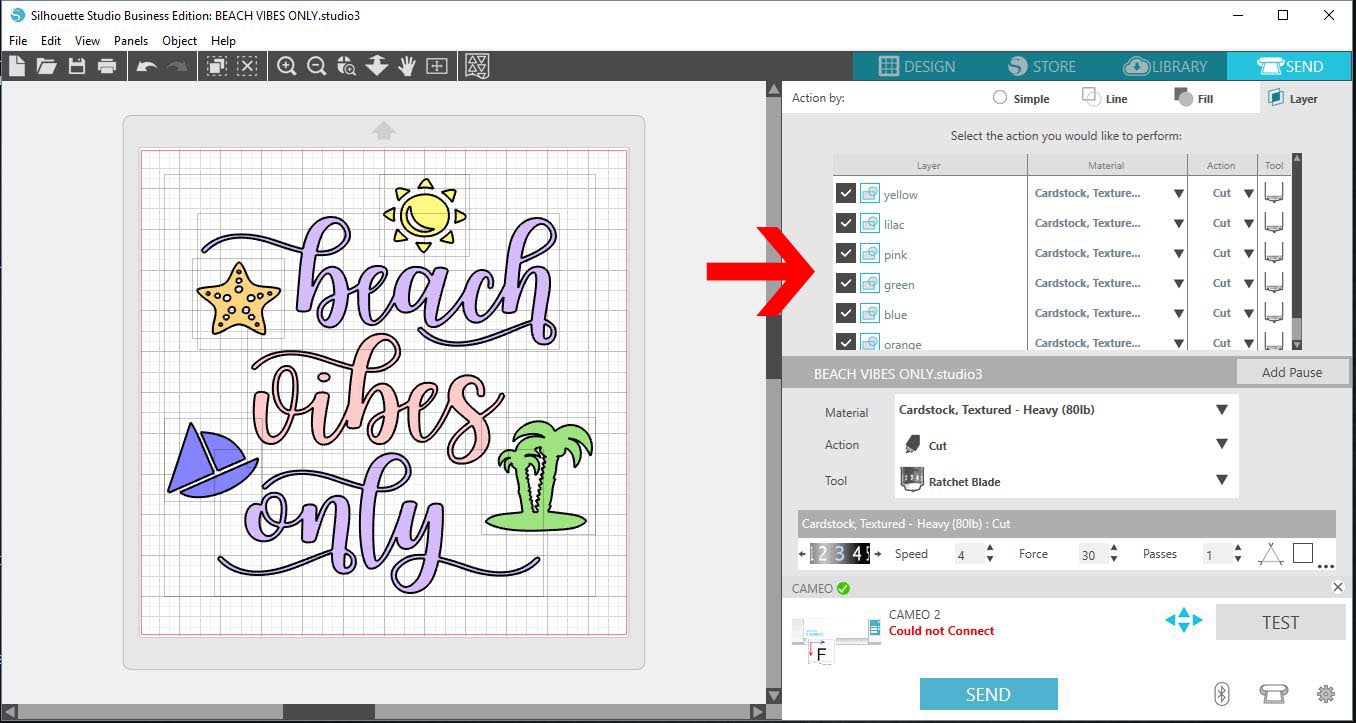
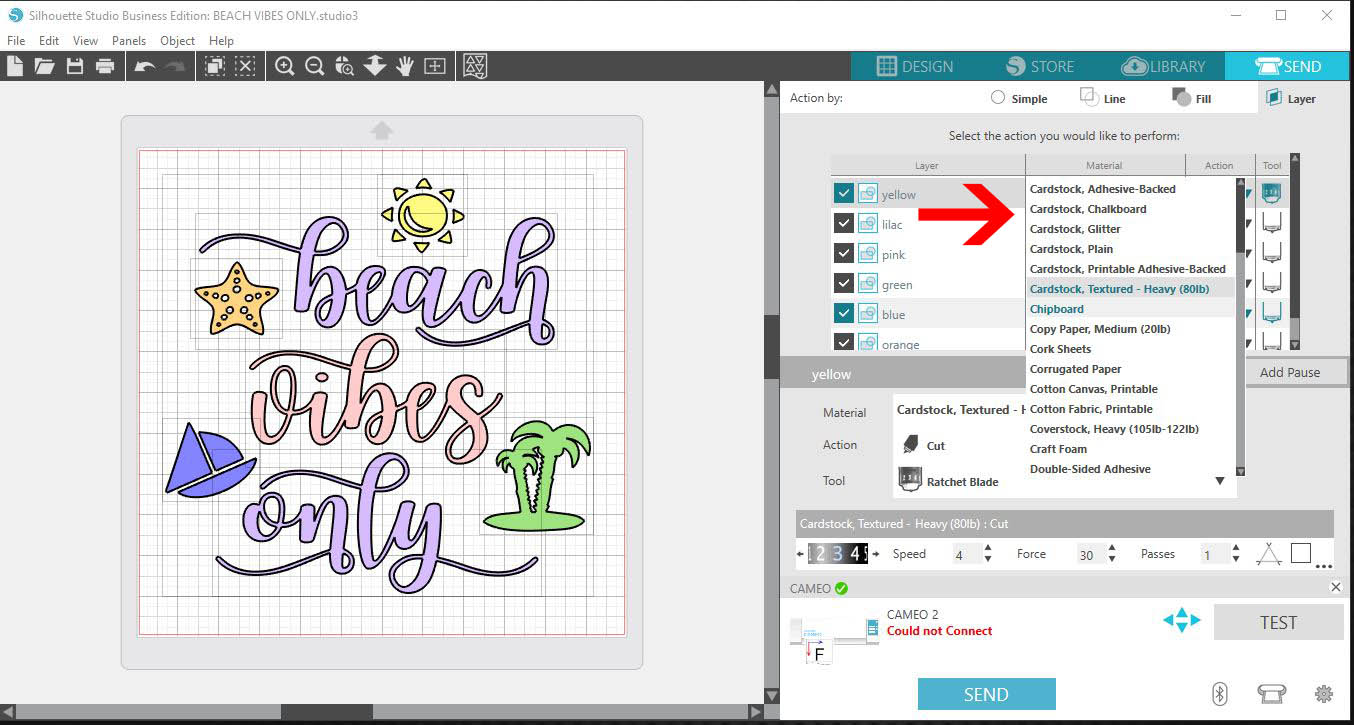
In each layer you can select what type of media you are using. It helps greatly when you are cutting with two different cut settings. An example would be for a project that uses two types of media.
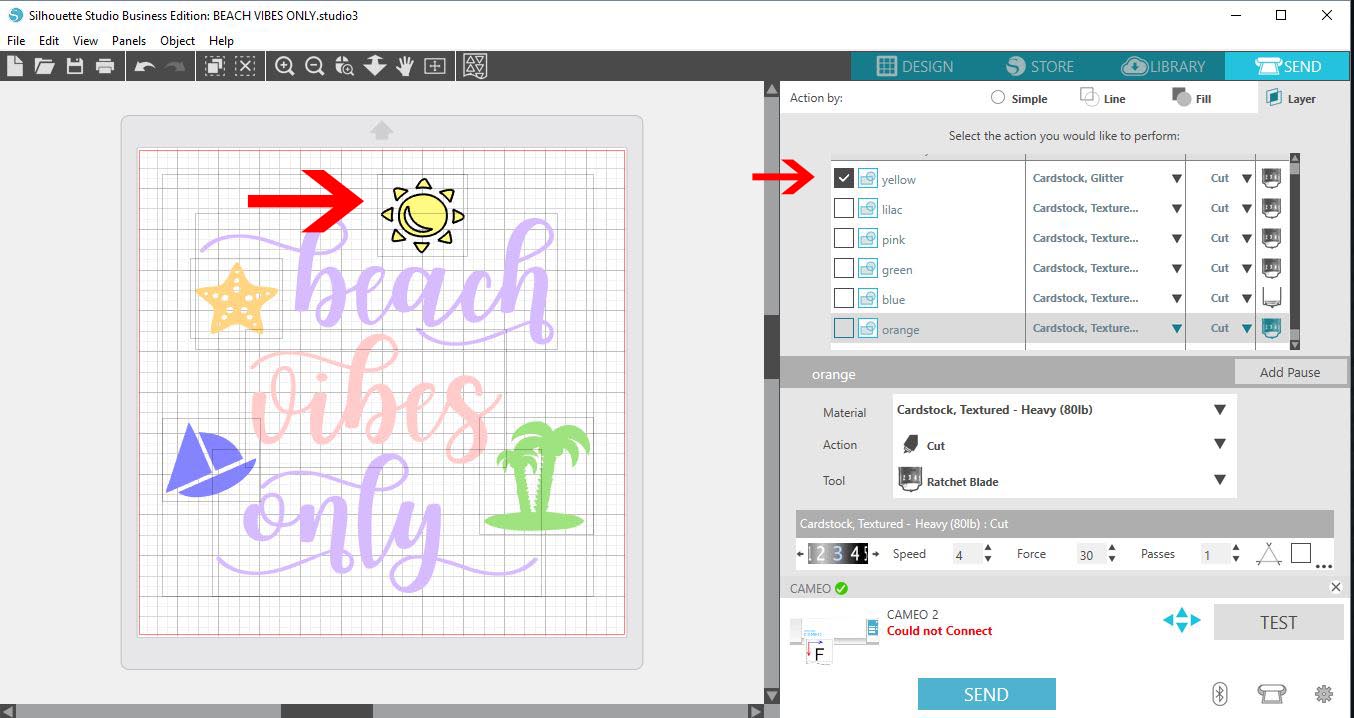
You can uncheck any layers you do not want to cut. You can even uncheck all of them and cut one at a time.
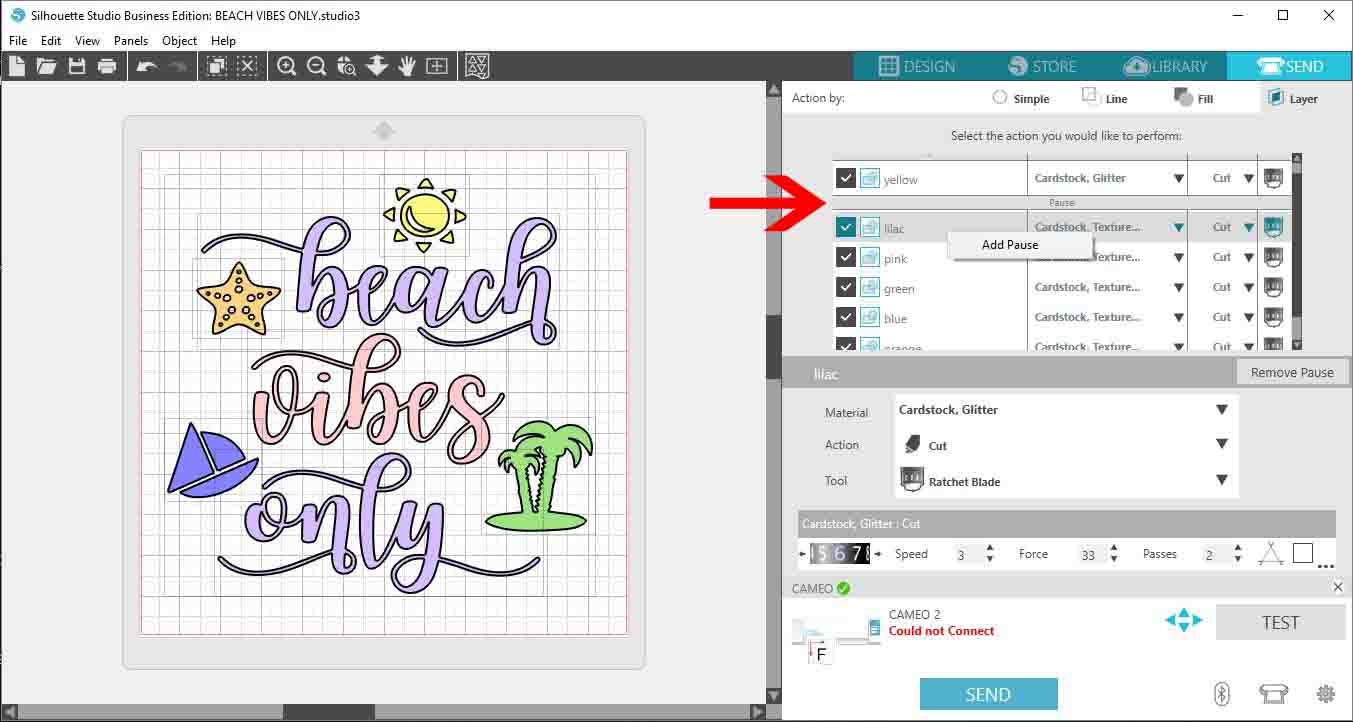
Alternatively, right click on a layer and insert a pause option. This will stop the machine after it cuts each layer, giving you enough time to make changes. Changes can be the type of media, the blade depth and more for each layer.
If you have enjoyed this tutorial, we have even more tutorials for you to check out such as using the print bleed function, removing unwanted cut linesand using the Autotrace feature in Silhouette Studio.