By Design Bundles
Silhouette Tutorials2 min
How to Create a Basic Stencil Box in Silhouette Alta
1- Open Silhouette Alta software. Click on the right tab to access the library.
2- Click on your library.
3- Select a silhouette or basic shape file. Double click on it.
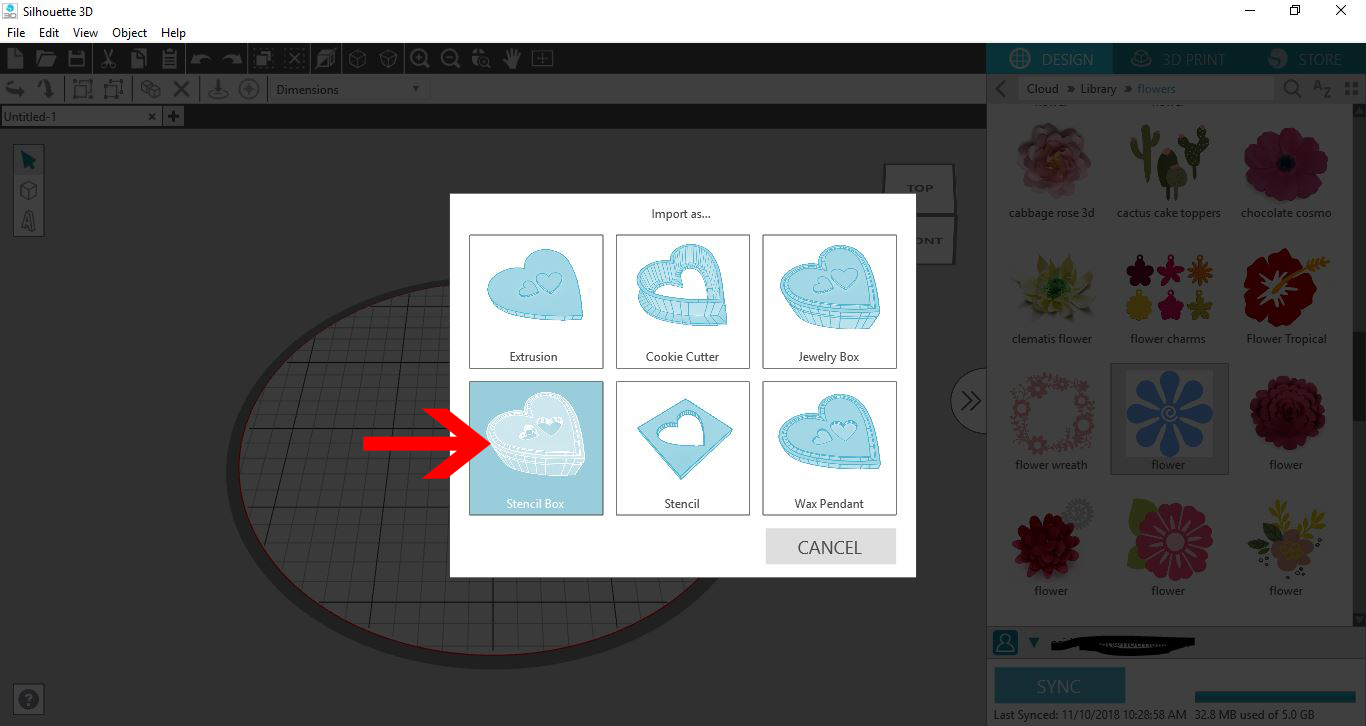
4- A new window will appear. Click on stencil box.
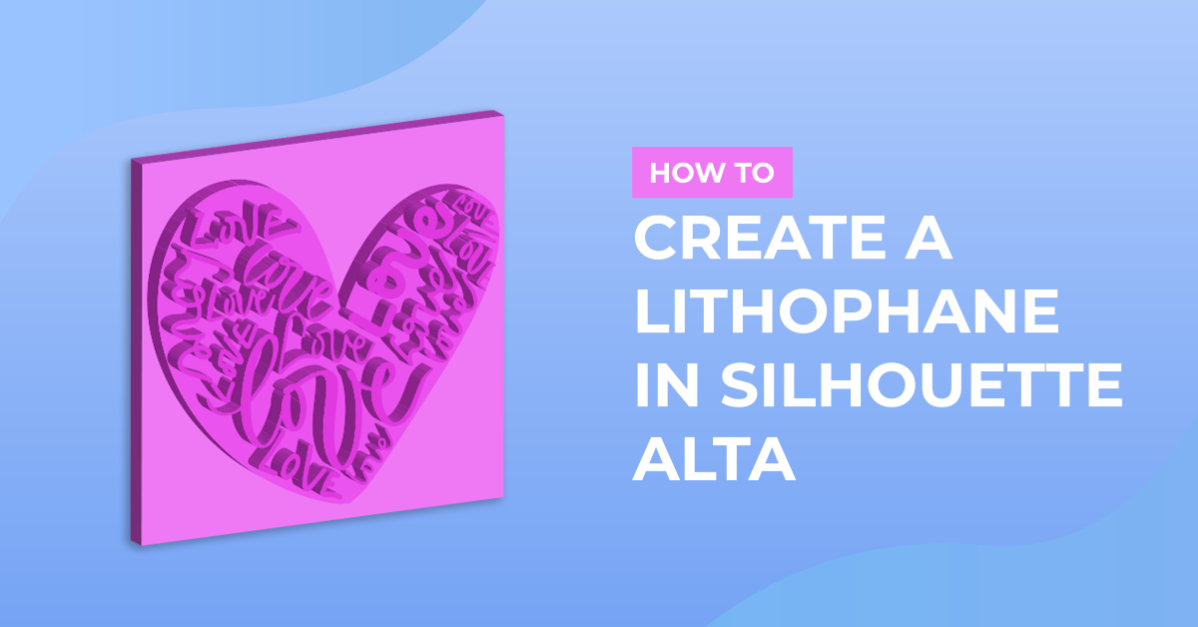
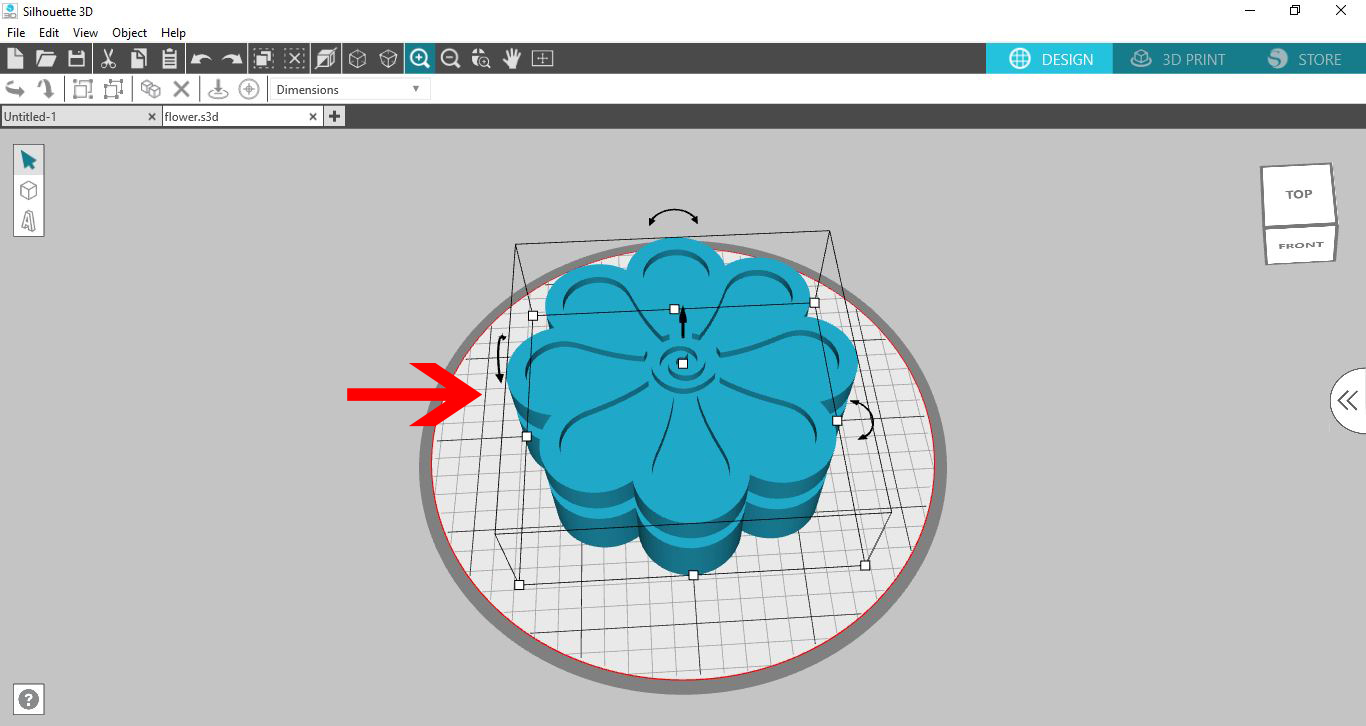
5- The software will automatically create a stencil box with a debossed effect on the lit of your design.
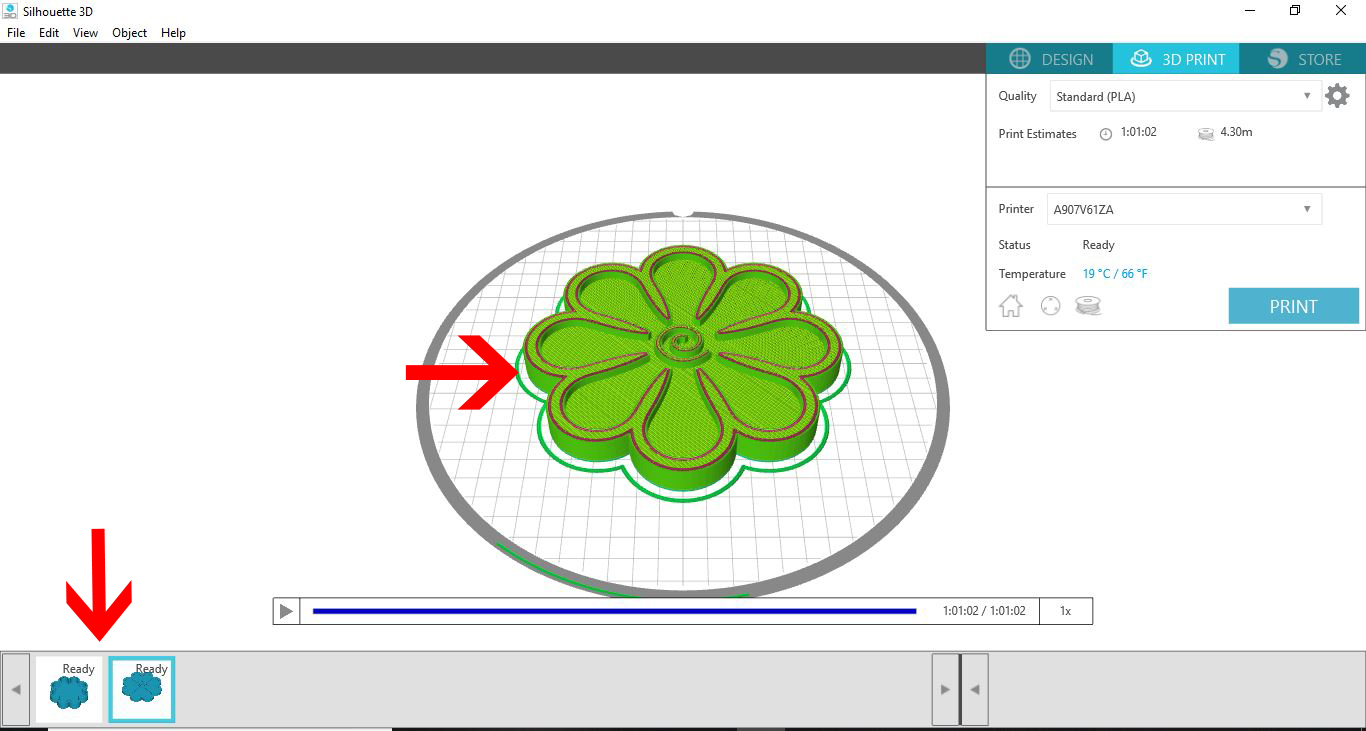
6- When you are happy with the size and shape. Click on the 3D print icon. The software will automatically slice your design ready to print. You will see only one part of your design on the screen.
7- To access and print the other part of your design click on the icon on the bottom left. this will have all parts of your designs ready to print.
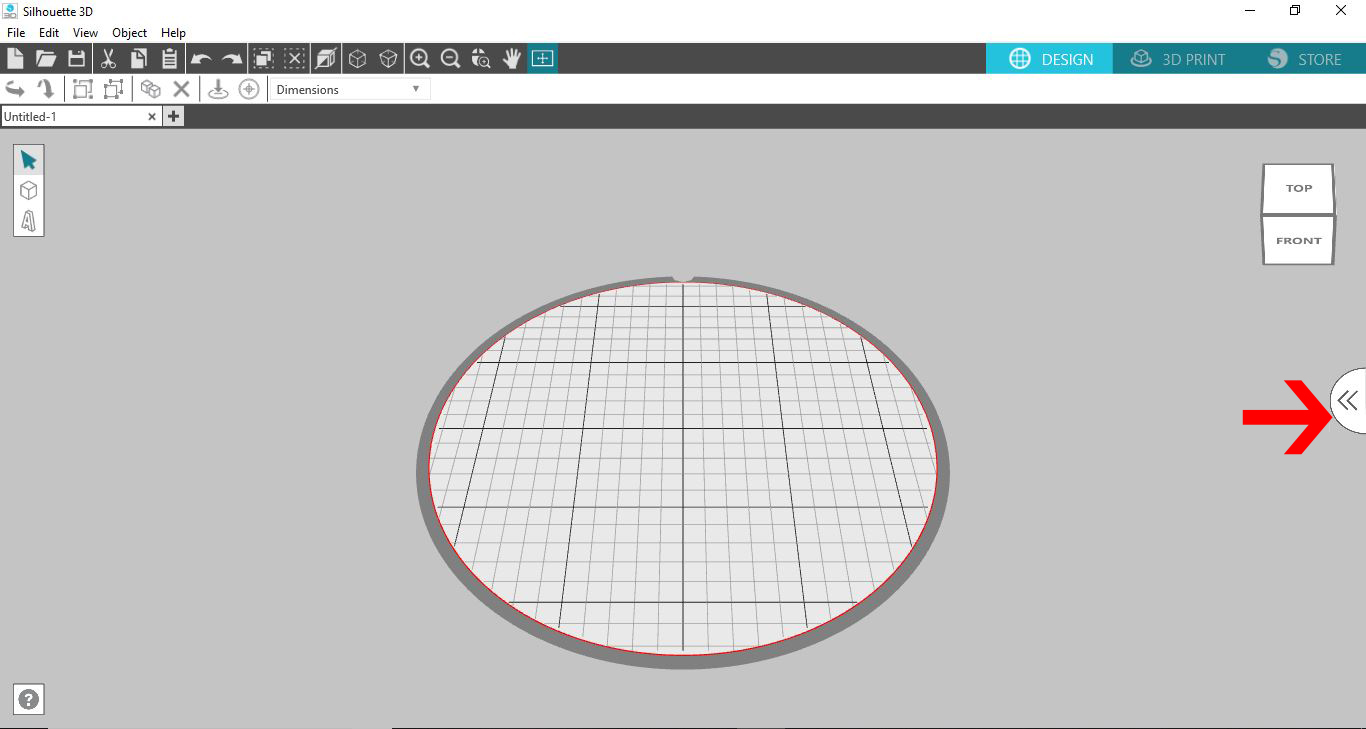
2- Click on your library.
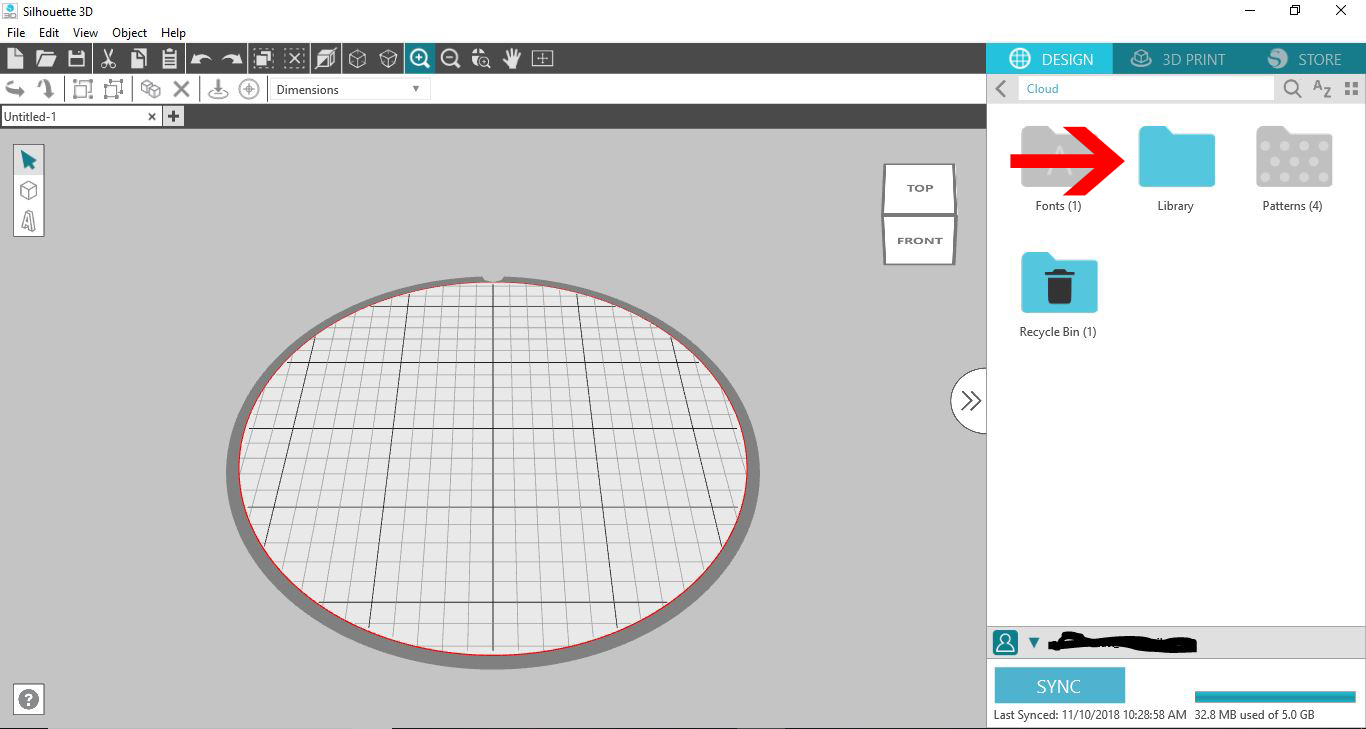
3- Select a silhouette or basic shape file. Double click on it.
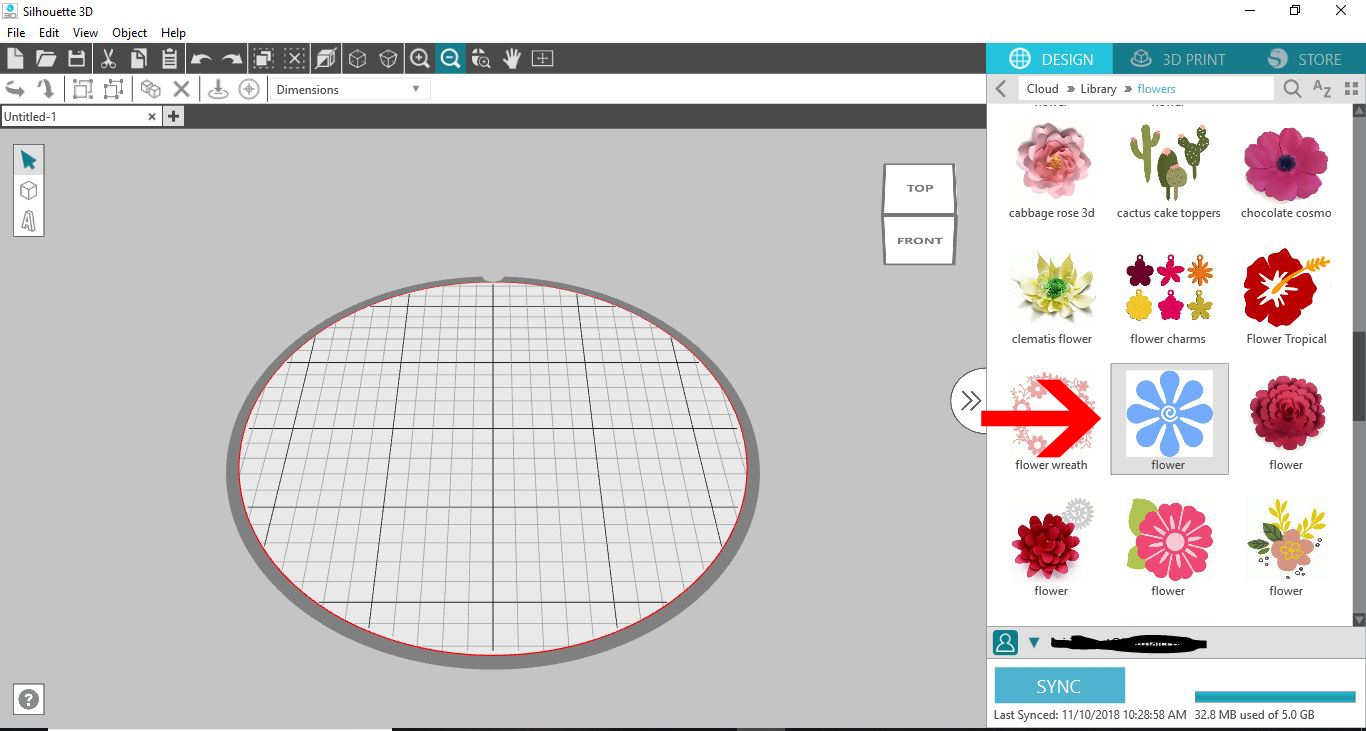
4- A new window will appear. Click on stencil box.
5- The software will automatically create a stencil box with a debossed effect on the lit of your design.
6- When you are happy with the size and shape. Click on the 3D print icon. The software will automatically slice your design ready to print. You will see only one part of your design on the screen.
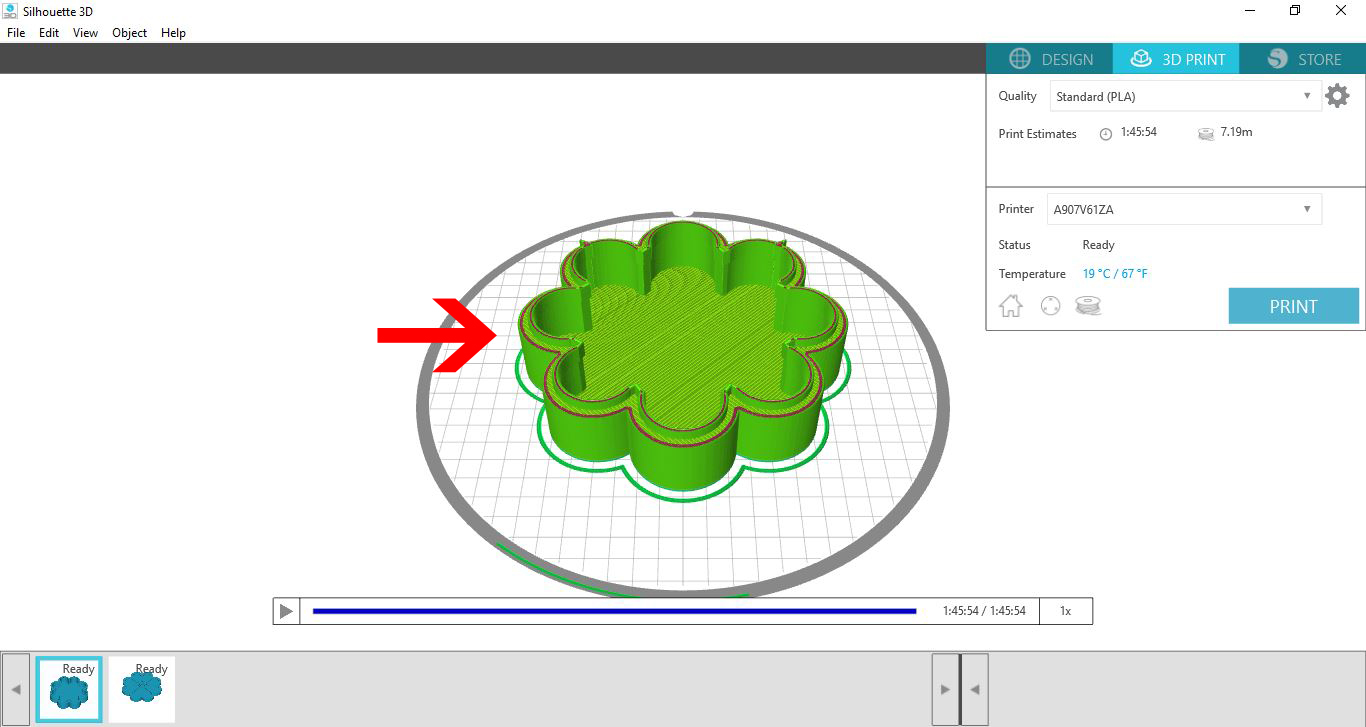
7- To access and print the other part of your design click on the icon on the bottom left. this will have all parts of your designs ready to print.
Related Tutorials
Silhouette Tutorials
How to Create a Basic Stencil in Silhouette Alta
Silhouette Tutorials
How to Create a Basic Cookie Cutter in Silhouette Alta 3D Printer
Silhouette Tutorials
How to Make a Basic Jewelry Box in Silhouette Alta
Silhouette Tutorials
How to Create a Basic Pencil Holder in Silhouette Alta
Silhouette Tutorials
Creating a Stencil Box Using SVG file in Silhouette Alta software
Silhouette Tutorials