By Design Bundles
Silhouette Tutorials4 min
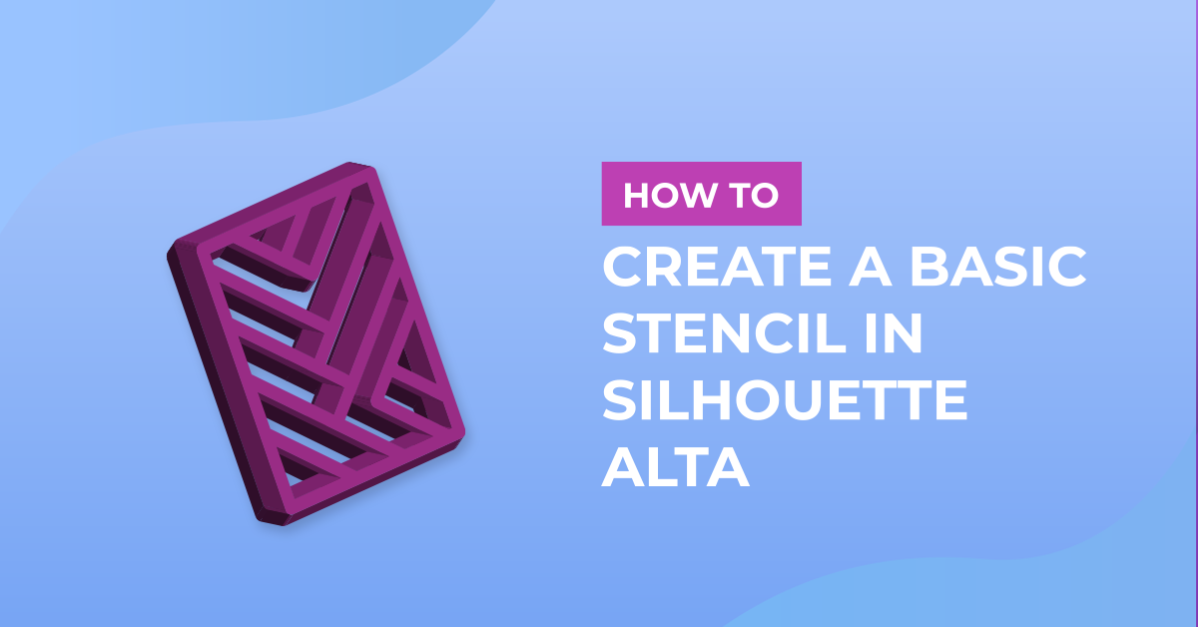
How to Create a Basic Stencil in Silhouette Alta
1- Open Silhouette Alta software. Click on the right side tab.
2- Click on the library folder.
3- Find a folder where you may have background files.
4- Double click on your image.
5- A new window will appear. Click on the stencil option.
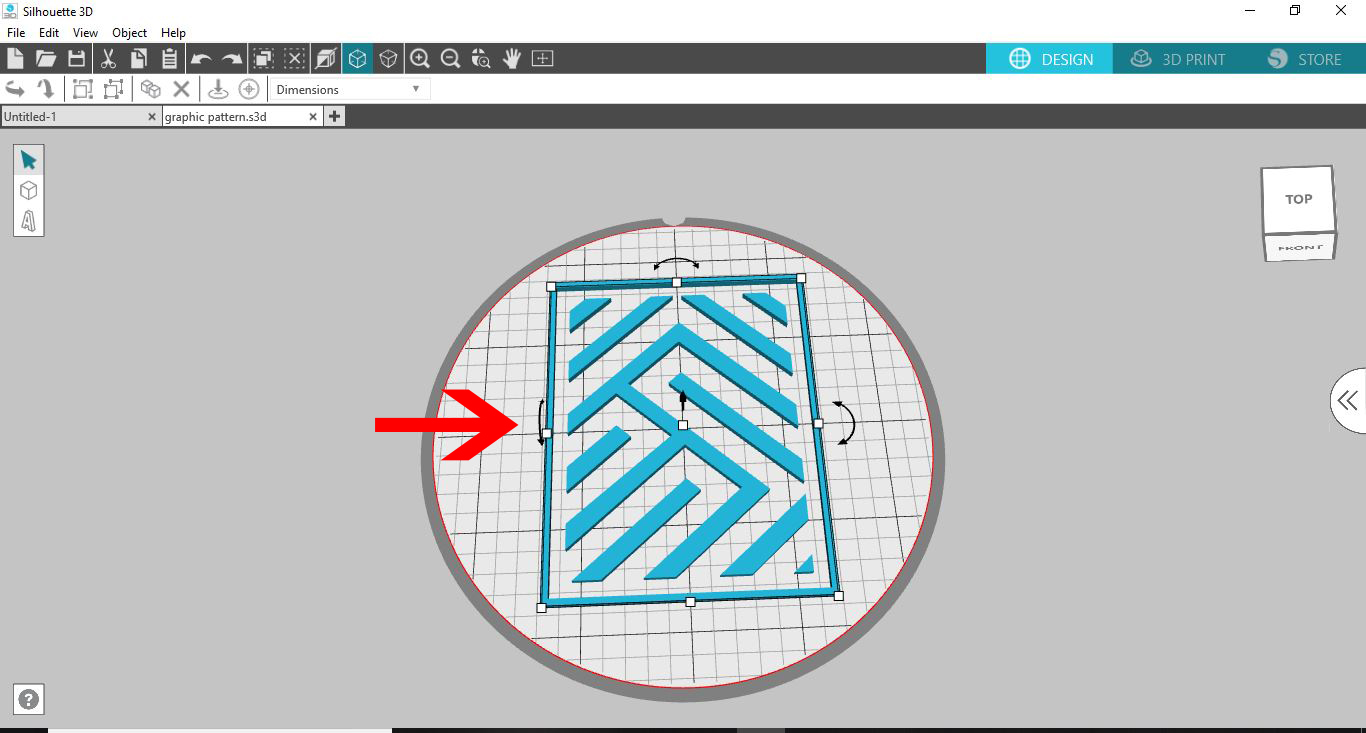
6- Your design will appear as a stencil. With this particular design there are gaps from the edge to the design which need to be joined to create a whole stencil.
7- Click on the shape option. Then click on the cube.
8- Flatten the cube to the same height as the stencil.
9- Resize the flattened cube to a long thin rectangle. Place on the edge of your stencil to join the middle of the design to the edge.
10- Right click on the rectangle and duplicate.
11- Move the duplicated rectangle to the right joining the middle to the edge.
12- Right click and duplicate again.
13- Rotate then shorten and place across the top of the stencil to join the edge with the middle stencil design.
14- Repeat again to the bottom of your design. then click on the select all icon.
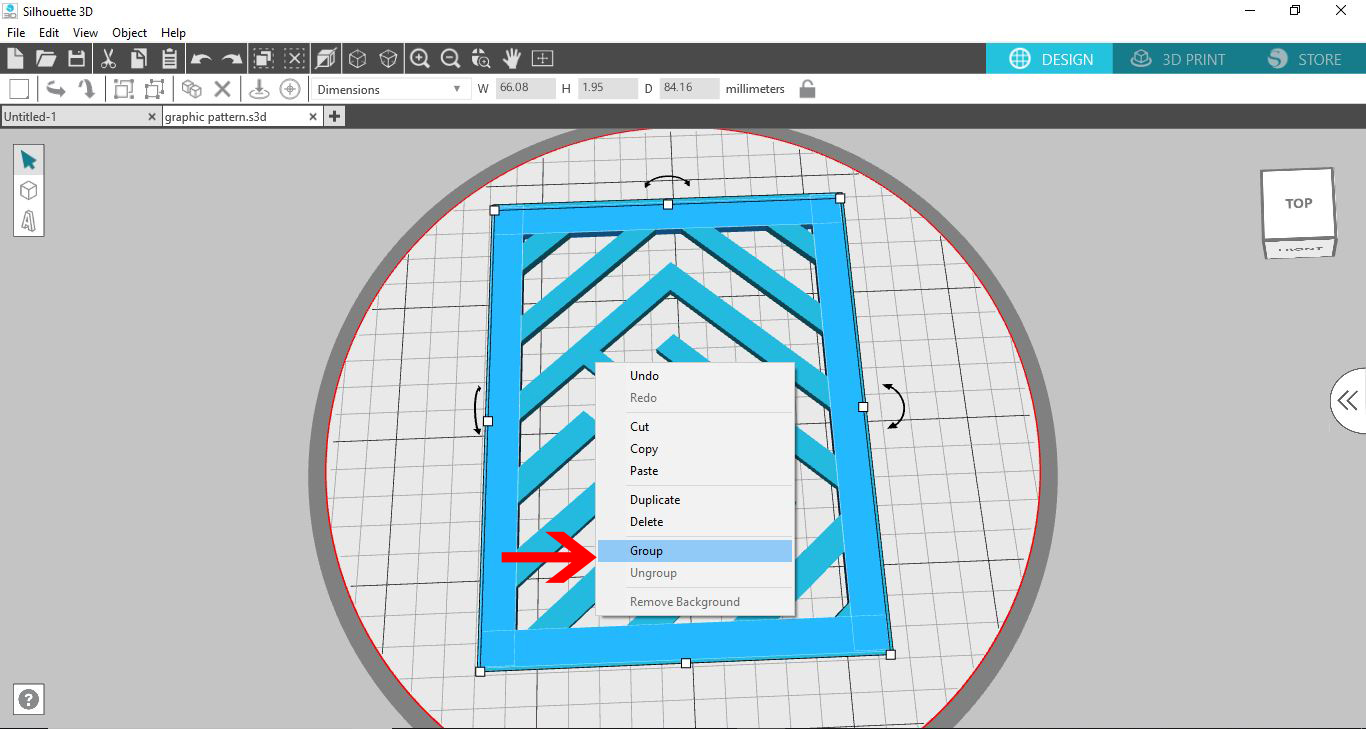
15- Right click and group. By grouping the pieces the printer will print as one design not several separate small ones.
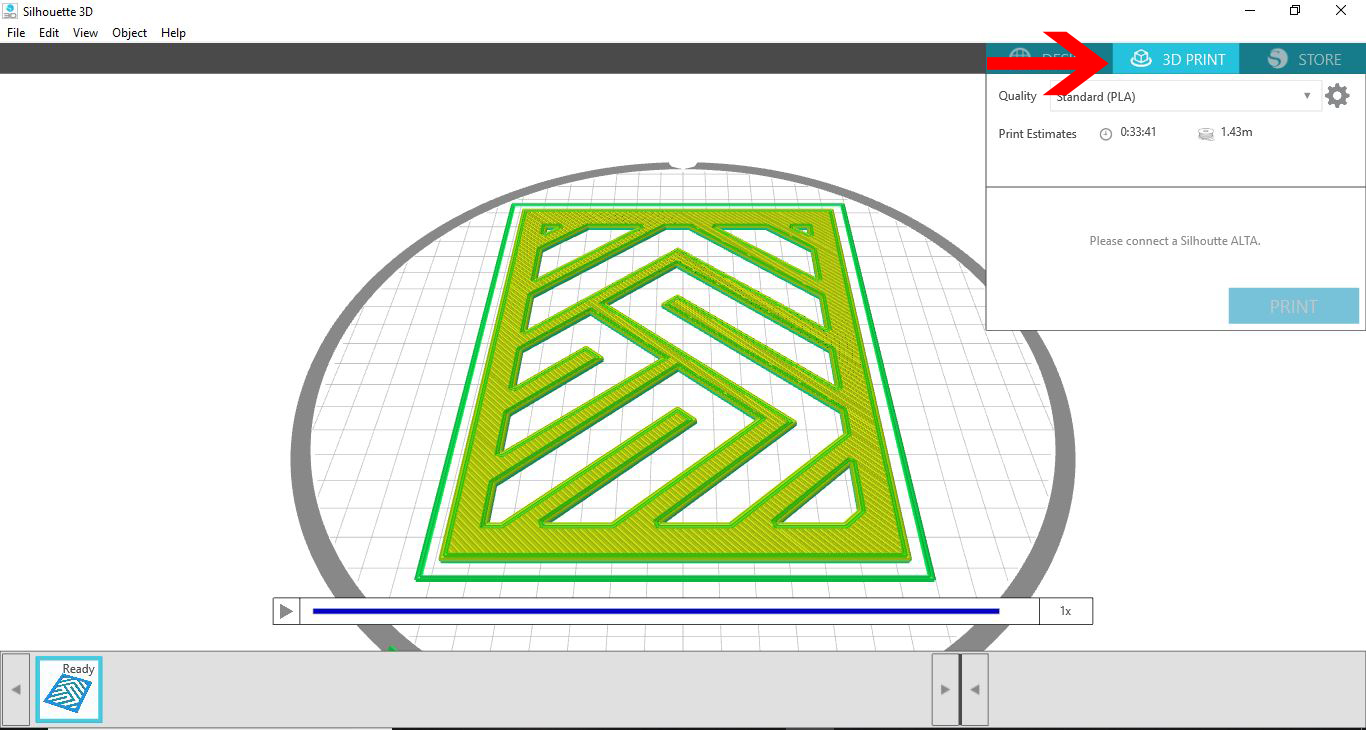
16- Click on 3D print and then select your print options and print.
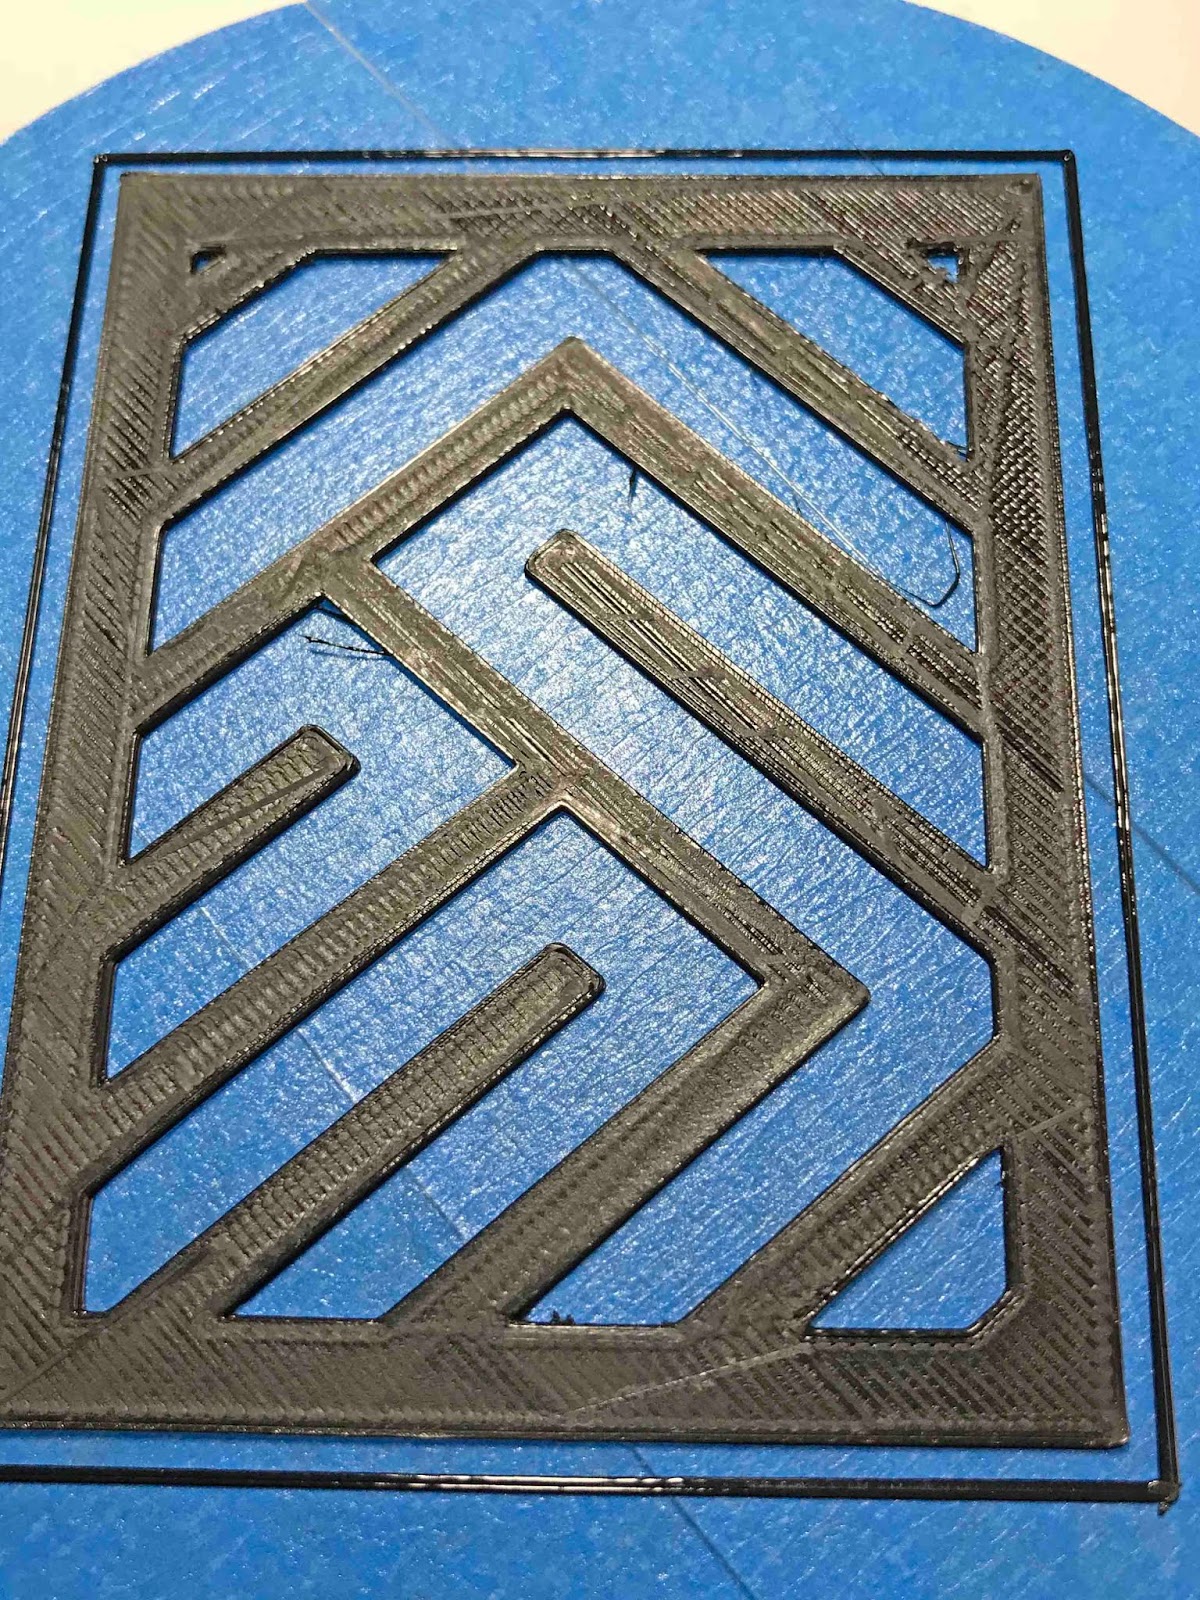
17- Your finished design can now be used as a stencil with paint or spray. You can also use these stencils through a manual die cutting machine to dry emboss patterns.
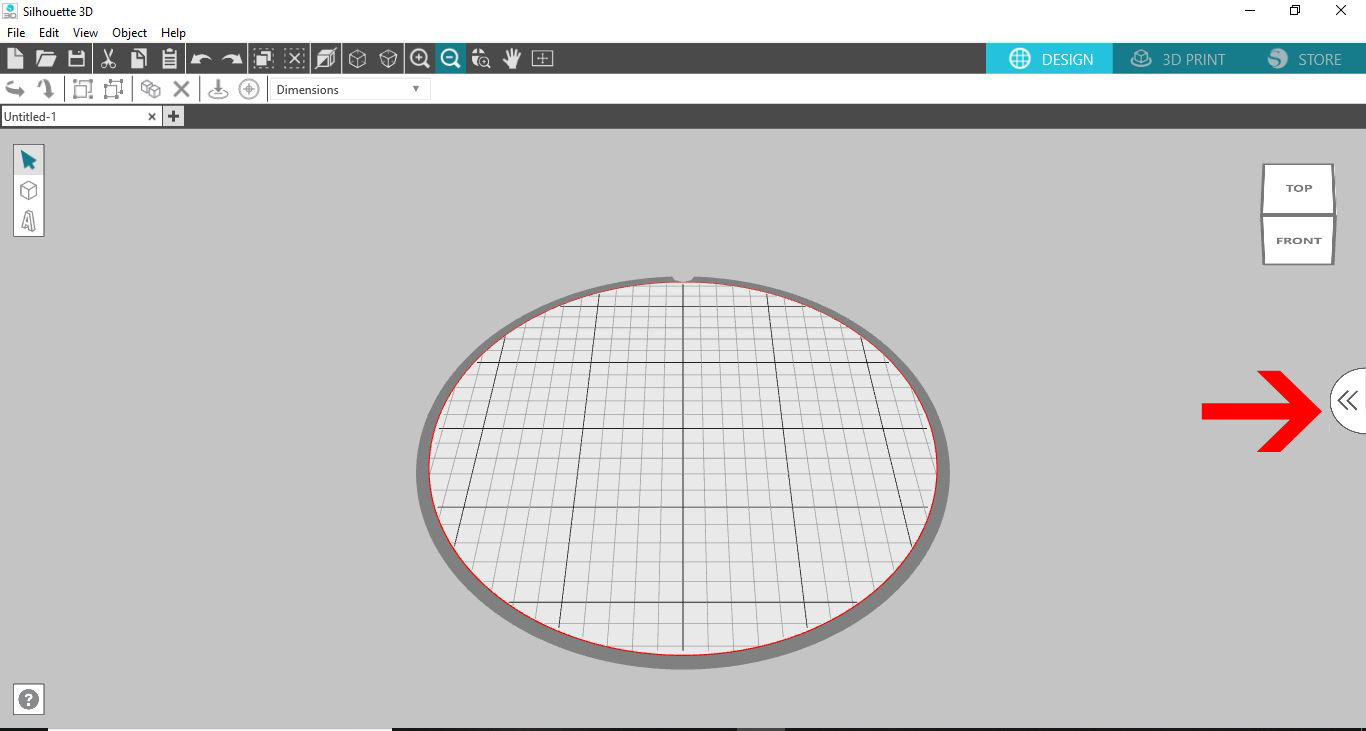
2- Click on the library folder.
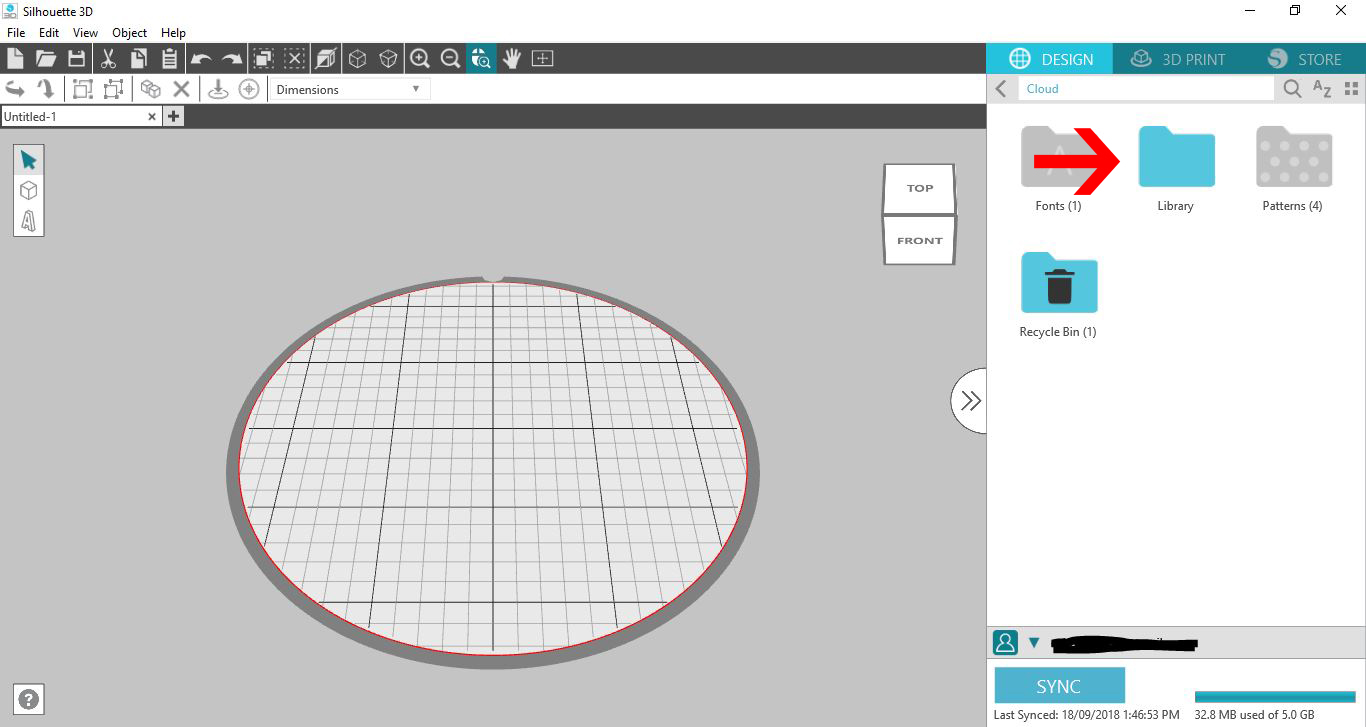
3- Find a folder where you may have background files.
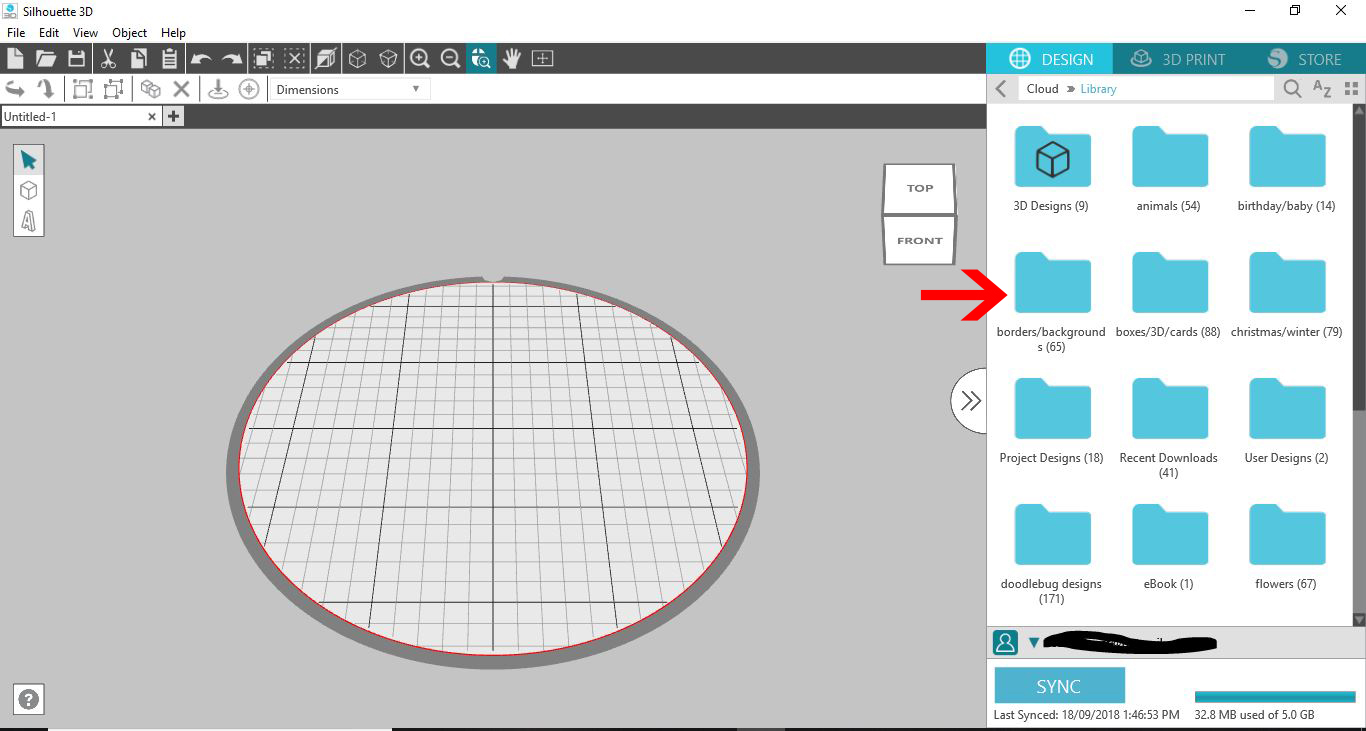
4- Double click on your image.
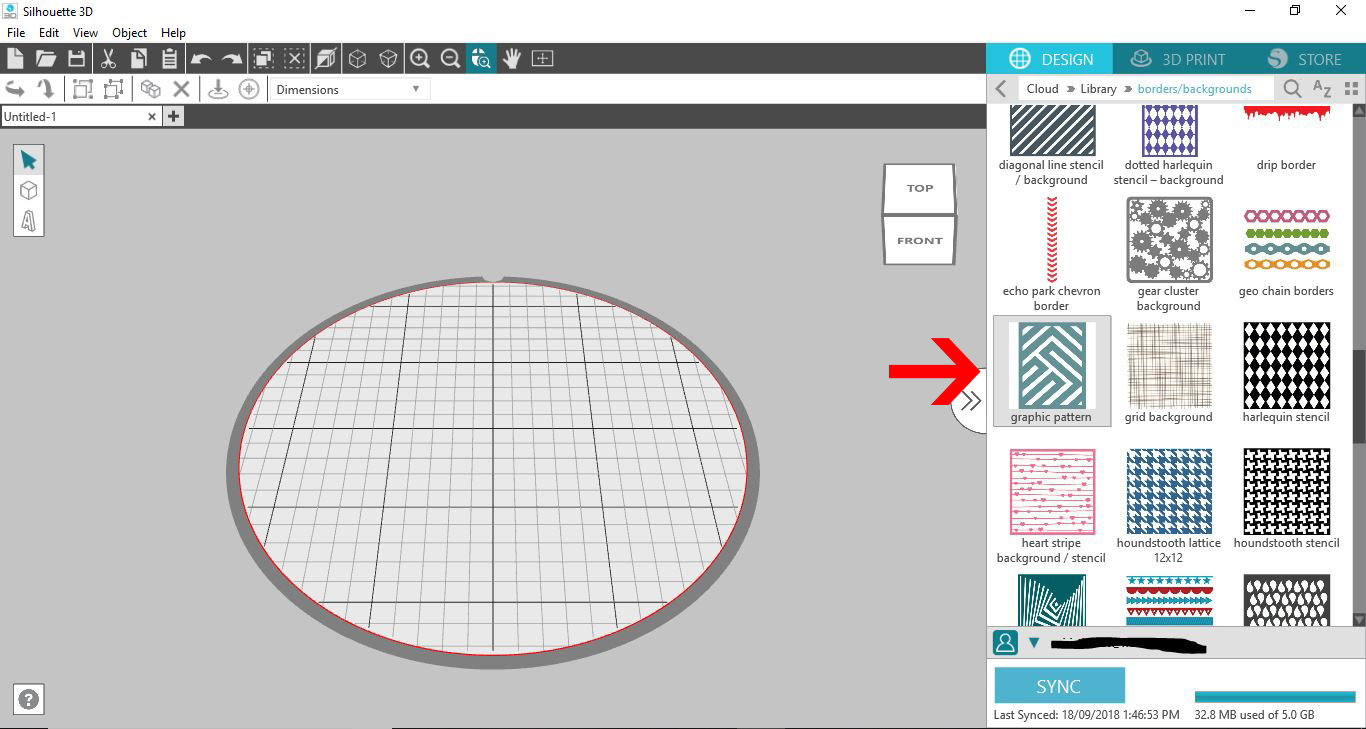
5- A new window will appear. Click on the stencil option.
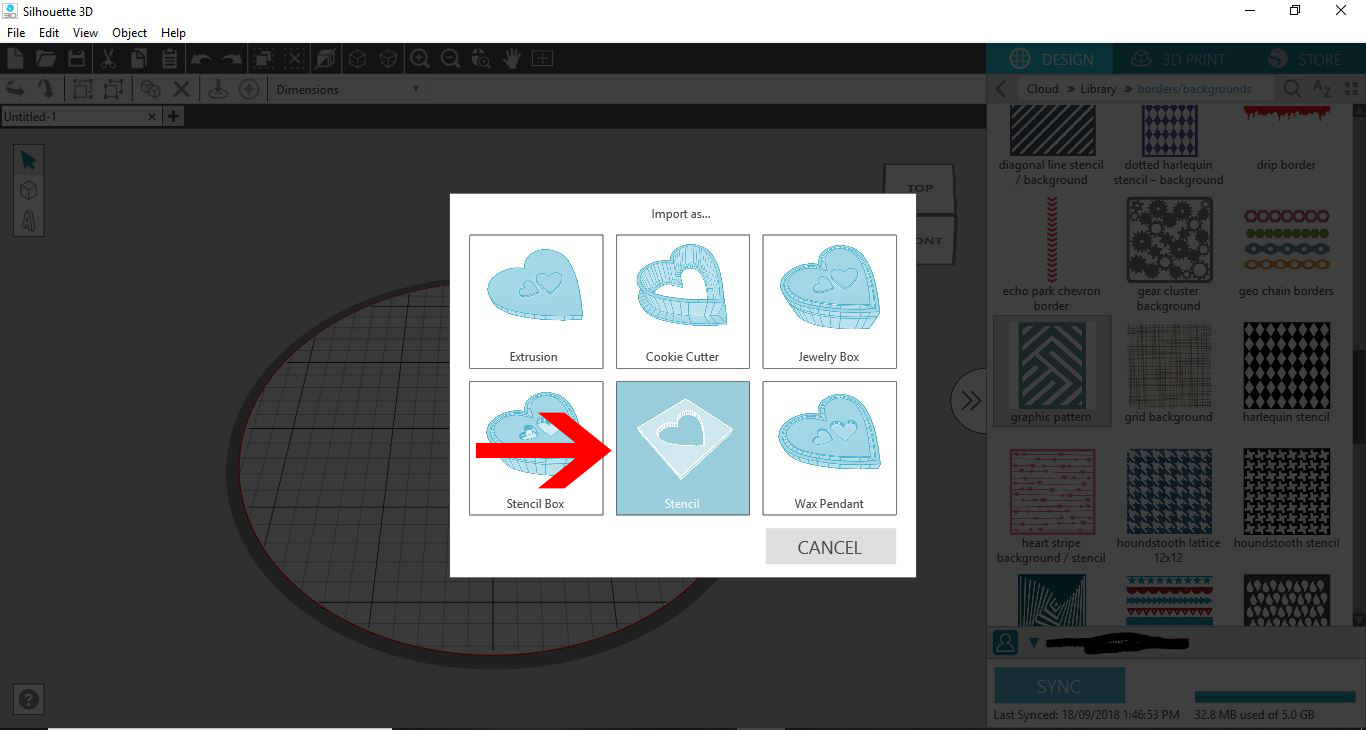
6- Your design will appear as a stencil. With this particular design there are gaps from the edge to the design which need to be joined to create a whole stencil.
7- Click on the shape option. Then click on the cube.
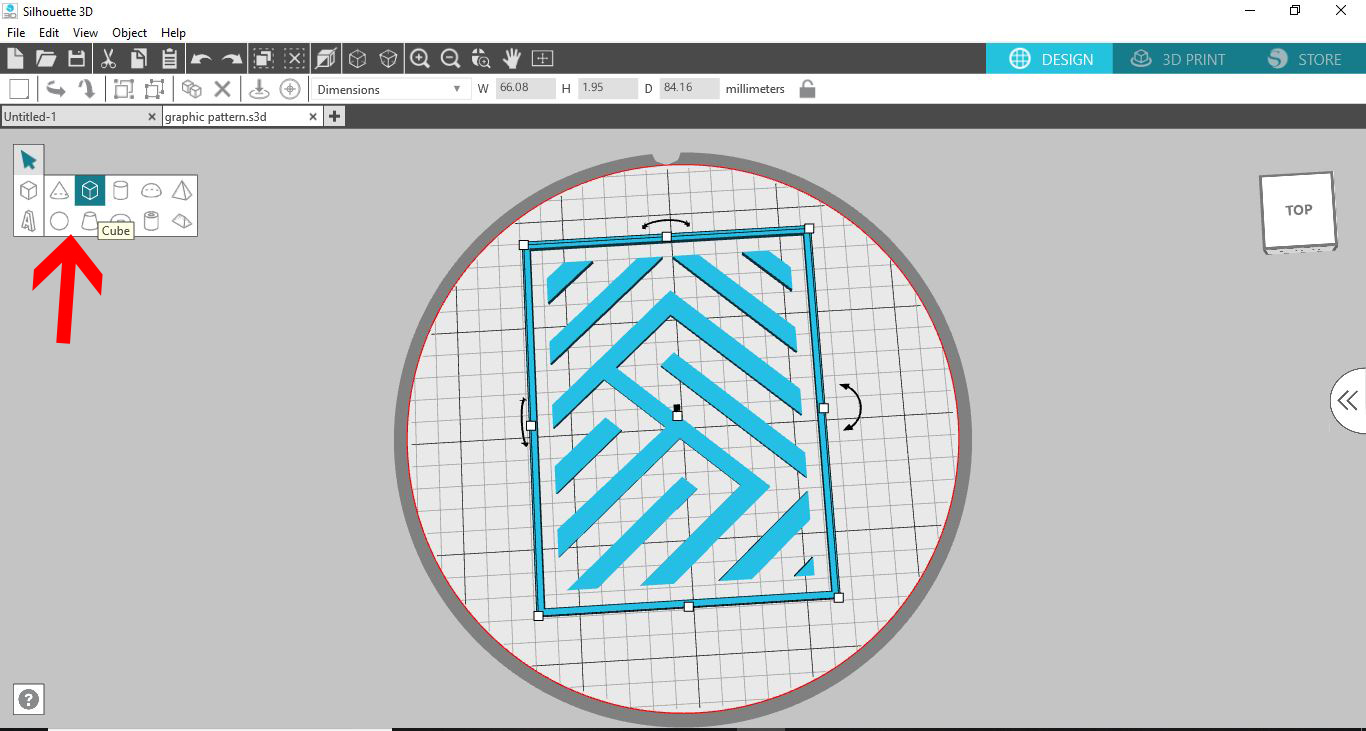
8- Flatten the cube to the same height as the stencil.
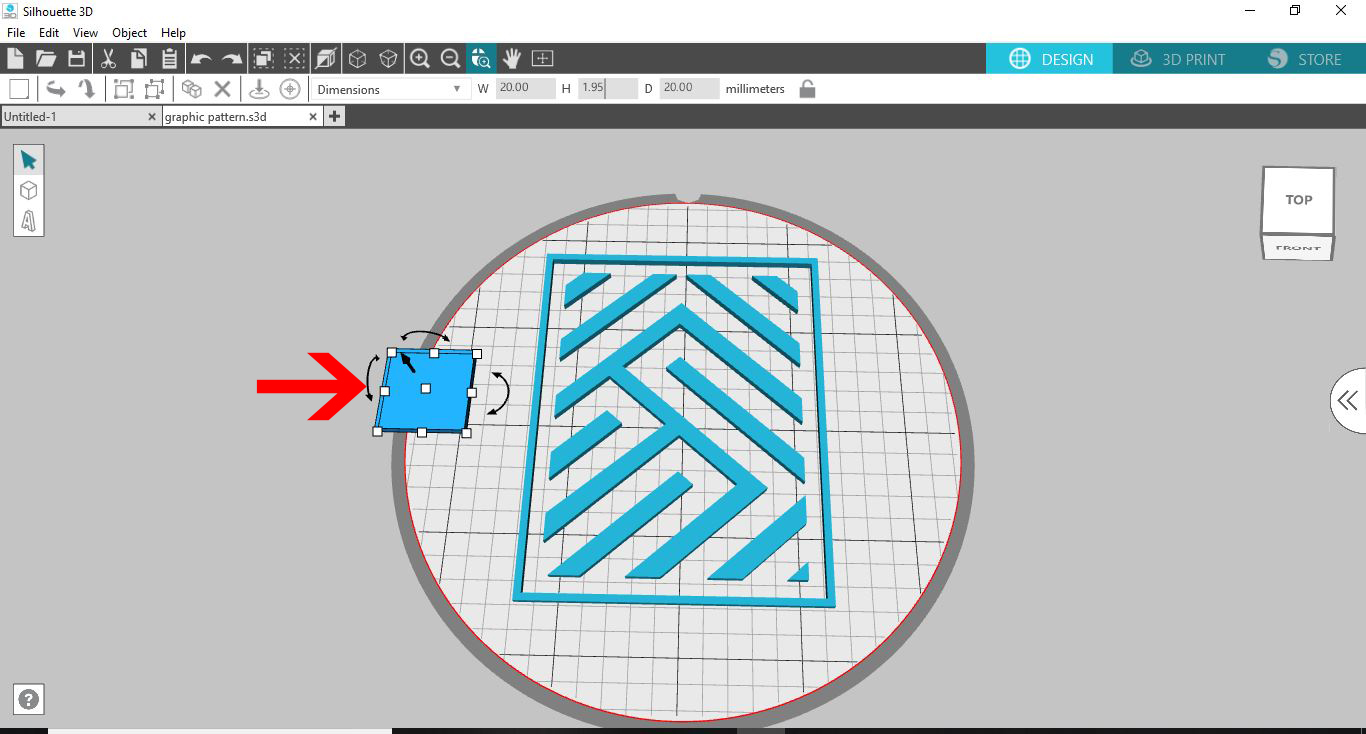
9- Resize the flattened cube to a long thin rectangle. Place on the edge of your stencil to join the middle of the design to the edge.
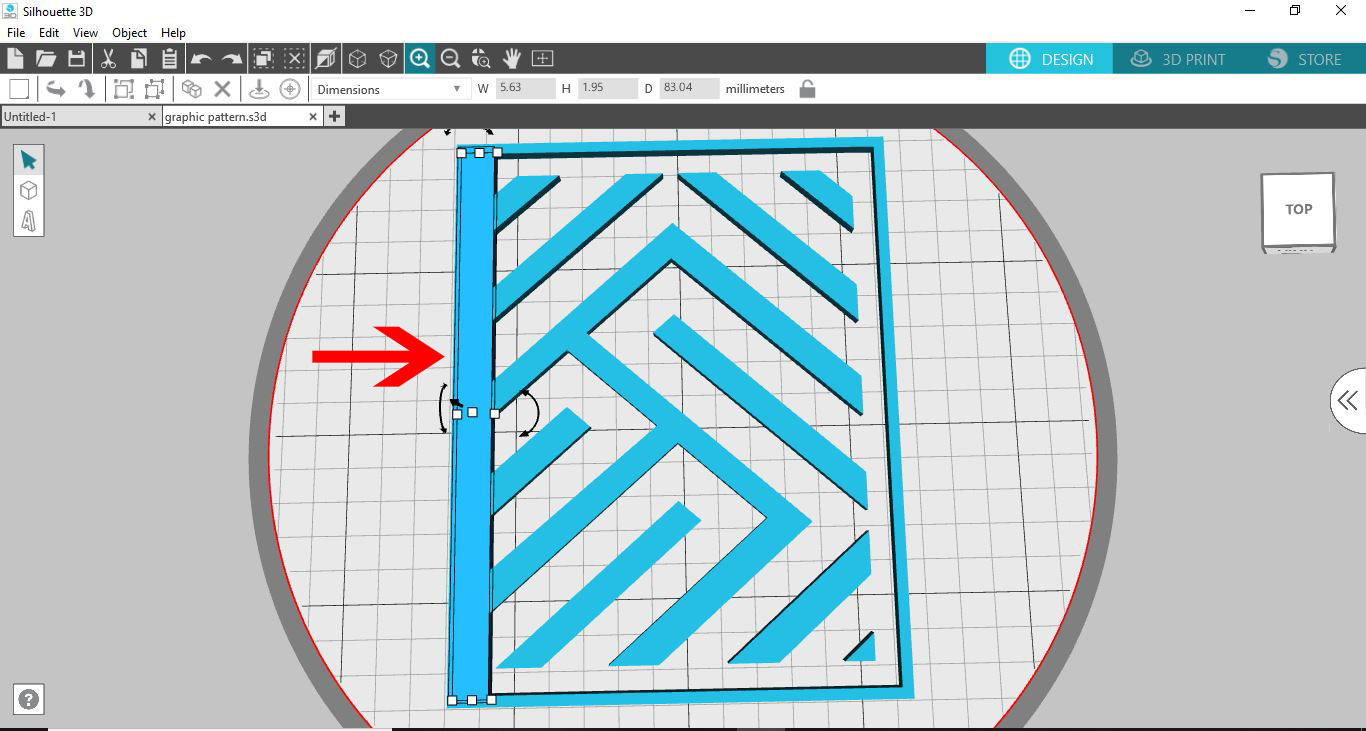
10- Right click on the rectangle and duplicate.
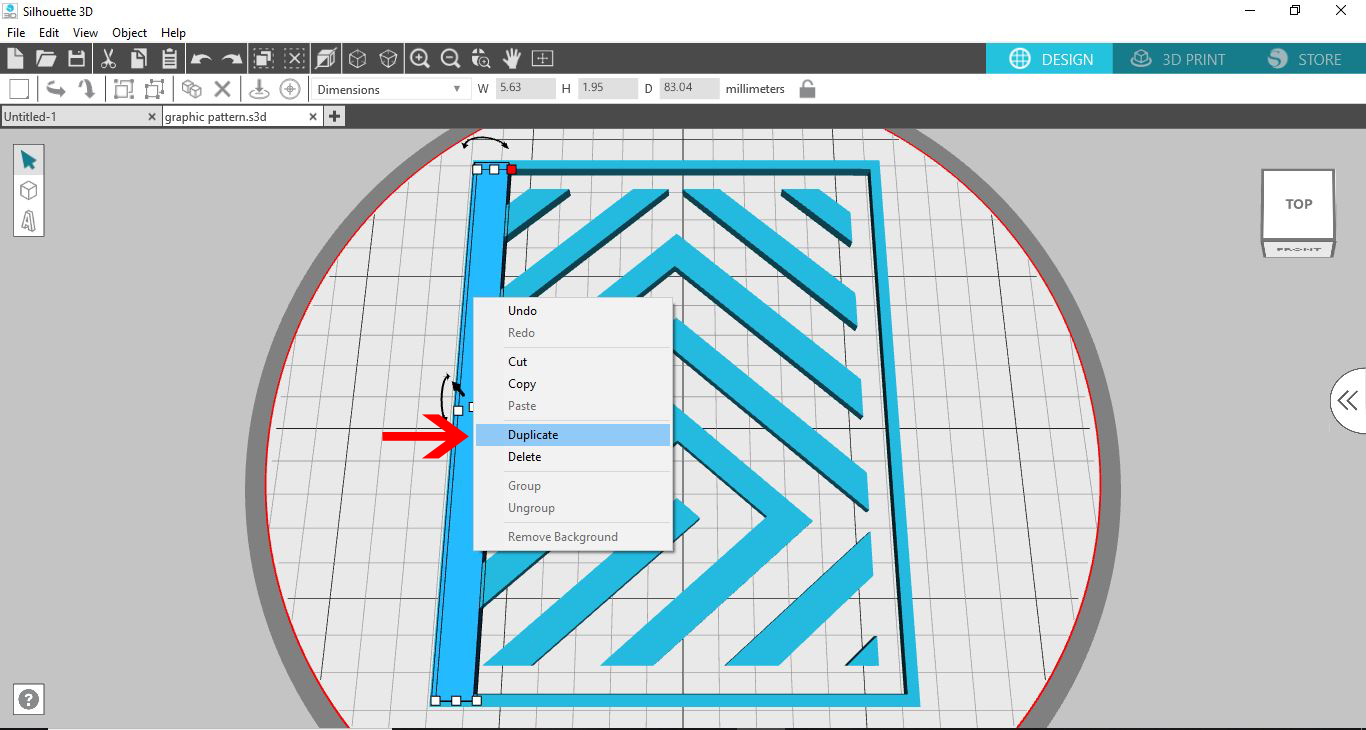
11- Move the duplicated rectangle to the right joining the middle to the edge.
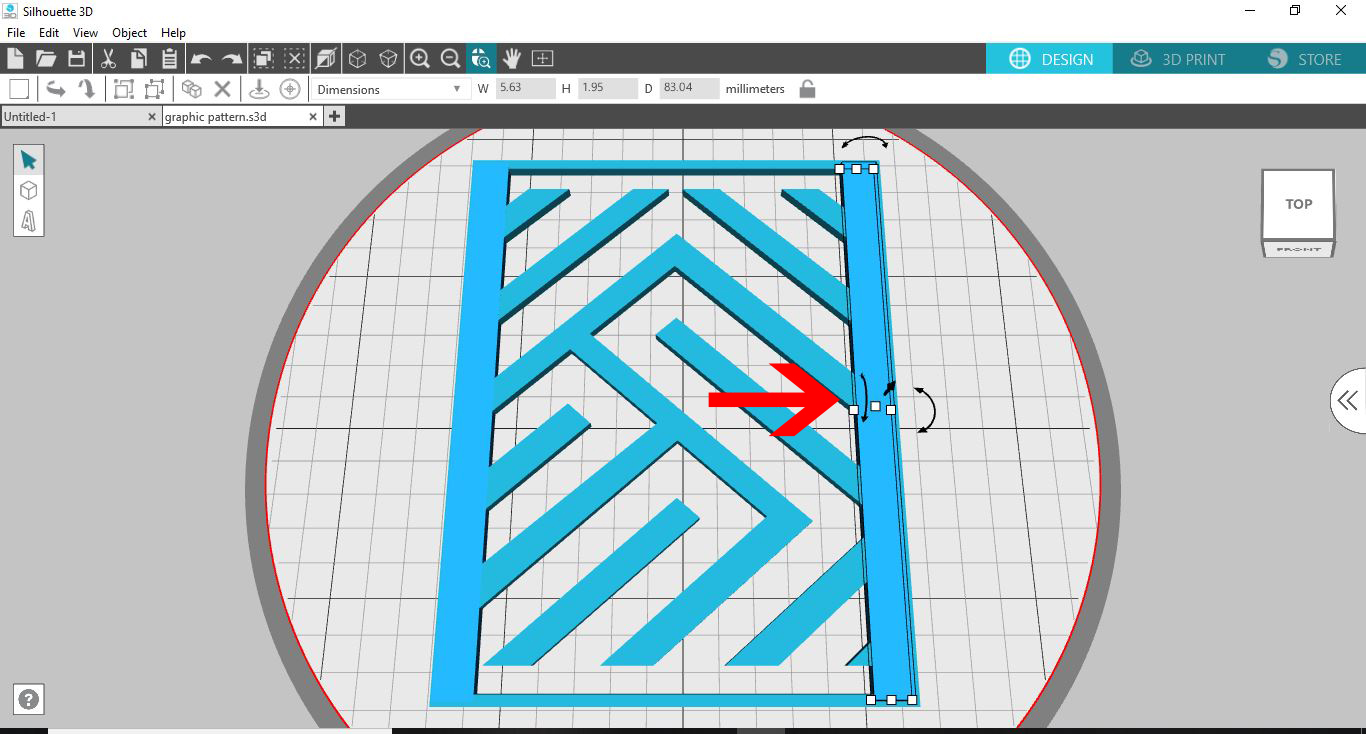
12- Right click and duplicate again.
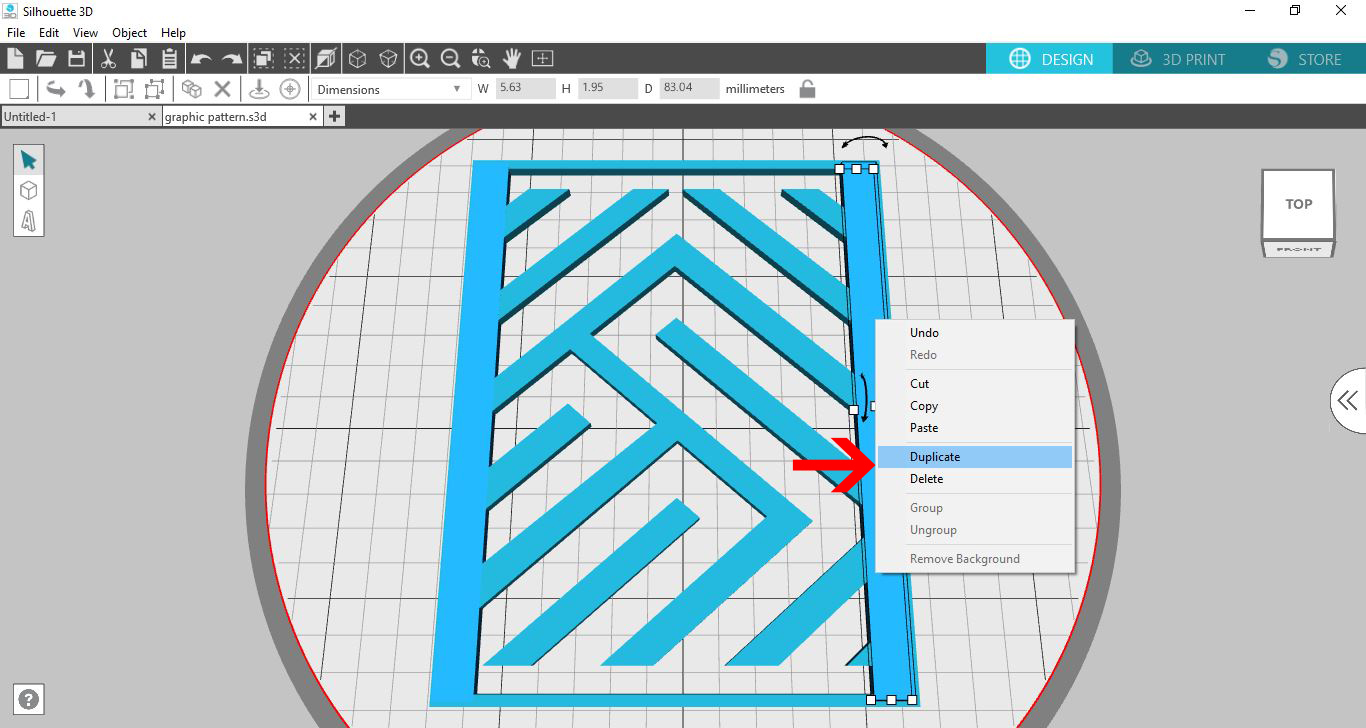
13- Rotate then shorten and place across the top of the stencil to join the edge with the middle stencil design.
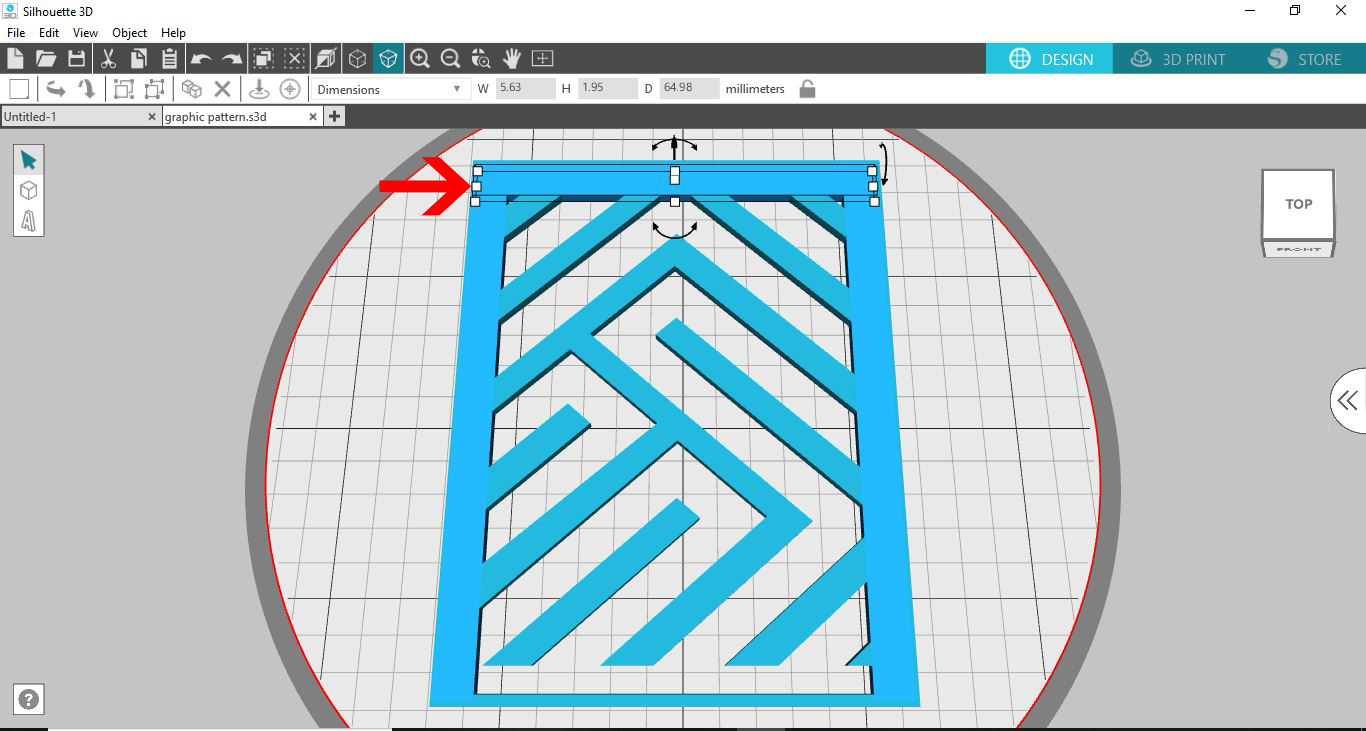
14- Repeat again to the bottom of your design. then click on the select all icon.
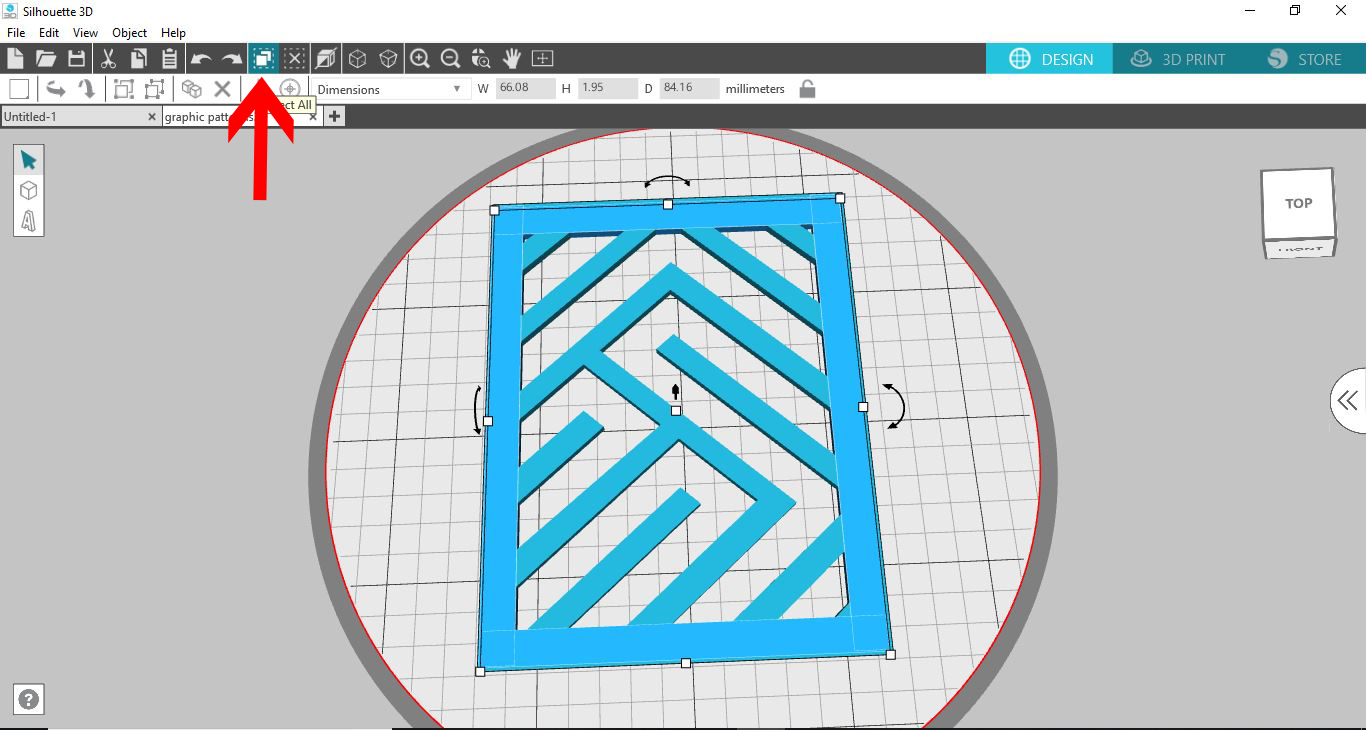
15- Right click and group. By grouping the pieces the printer will print as one design not several separate small ones.
16- Click on 3D print and then select your print options and print.
17- Your finished design can now be used as a stencil with paint or spray. You can also use these stencils through a manual die cutting machine to dry emboss patterns.
Related Tutorials
Silhouette Tutorials
How to Create a Basic Stencil Box in Silhouette Alta
Silhouette Tutorials
How to Create a Basic Cookie Cutter in Silhouette Alta 3D Printer
Silhouette Tutorials
How to Create a Basic Pencil Holder in Silhouette Alta
Silhouette Tutorials
Using Silhouette Studio to Create Text for the Silhouette Alta 3D Printer Software
Silhouette Tutorials
How to Make a Basic Jewelry Box in Silhouette Alta
Silhouette Tutorials
Create a Stencil Edge Card in Silhouette Studio
Bring your greeting cards to a new level with a stencil edge, or sometimes called a card cover.