By Design Bundles
How to Create Vinyl Stickers in Silhouette Curio
If you have ever wanted to create vinyl stickers with your SIlhouette Curio, then check this tutorial out. In this quick guide, you will learn how to set up Silhouette Studio to cut vinyl stickers. So let’s get started!
Any cut file of your choice will work but you are welcome to browse the selection of Cute SVG Quotes on Design Bundles.
Step 1 - Adjust the Page Setup
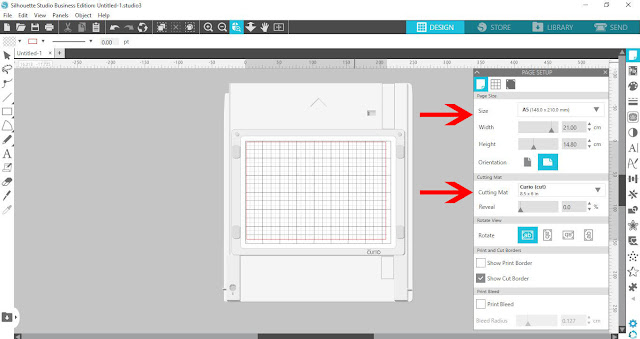
Once you have opened Silhouette Studio, we need to adjust the cutting mat for the Curio. Click on the Page Setup icon at the top right toolbar. Under Page Size or Machine (depending on your version), change the size to Curio.
The cutting mat should change to match but if not, click the drop down menu and select Curio.
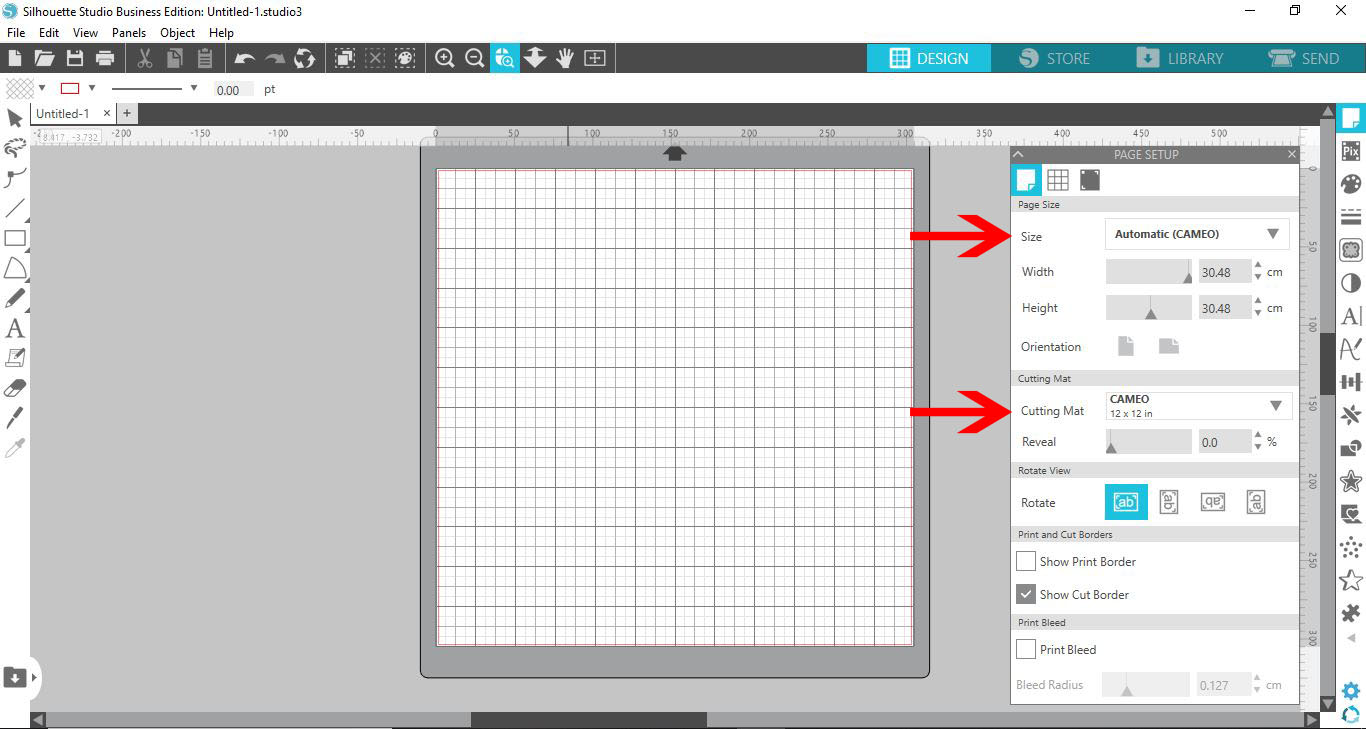
You will see that the mat on the screen has changed to the Curio mat.
Step 2 - Add your Design
Open your design by going to FIle > Open, then select the SVG file. You can also drag and drop the design into Silhouette Studio.

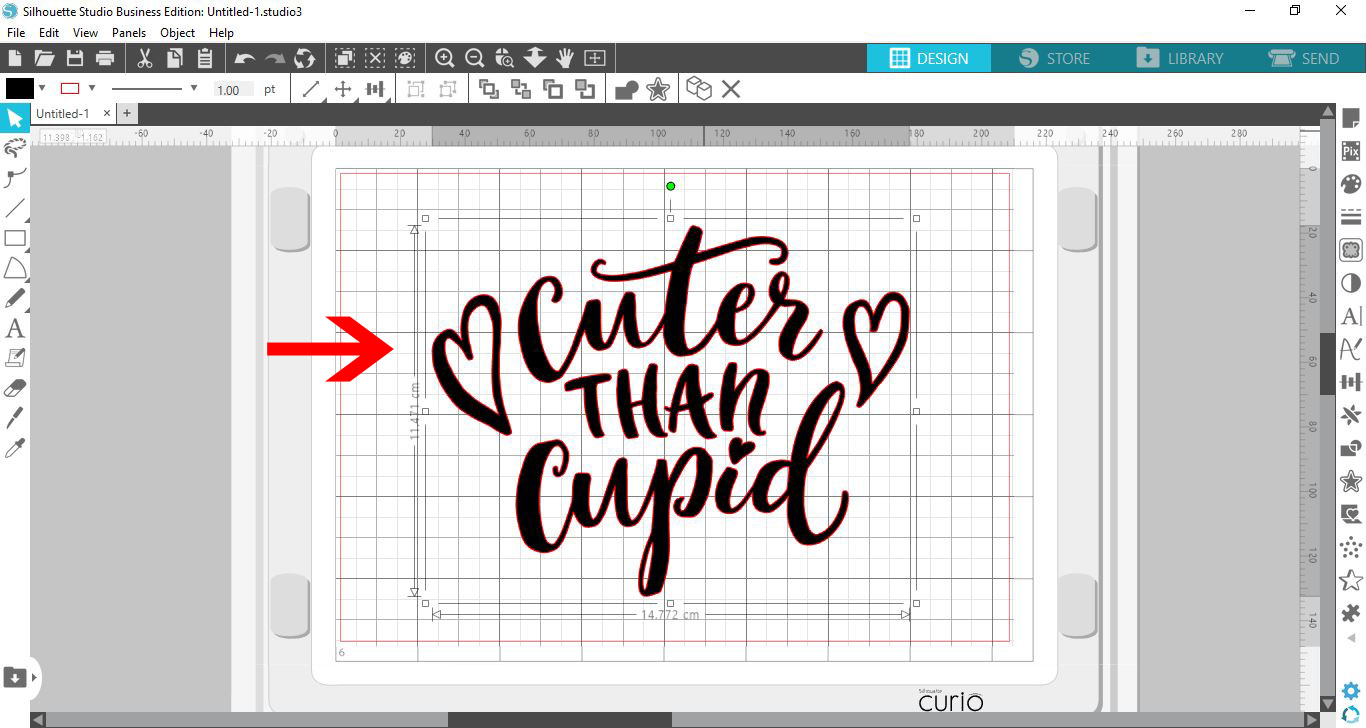
Your design will appear on your mat. You may need to resize the design to fit on the mat. To do this, click + drag a corner box inwards.
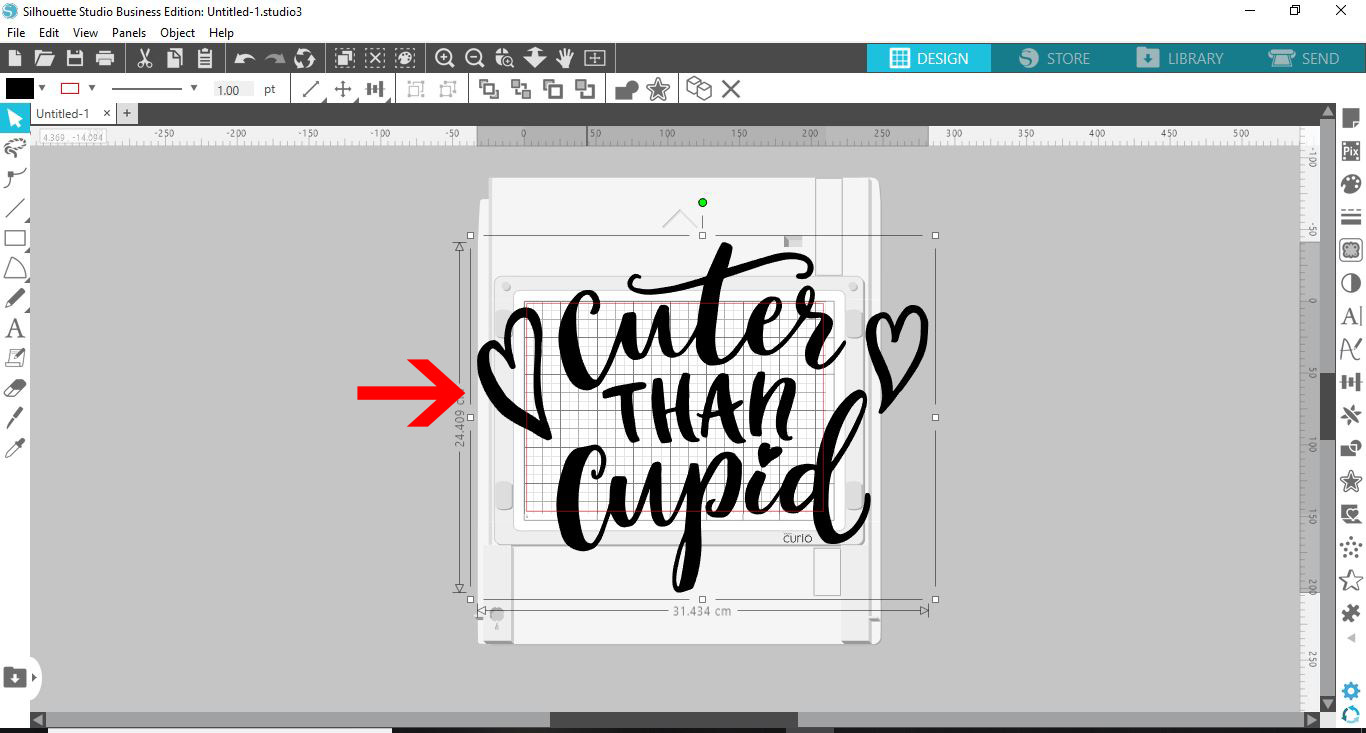
If you don’t see cut lines, go to the Line Style panel on the right side toolbar. This is the fourth icon from the top. Then click on the second icon Line Color and change to red.
Step 3 - Change the Cut Settings
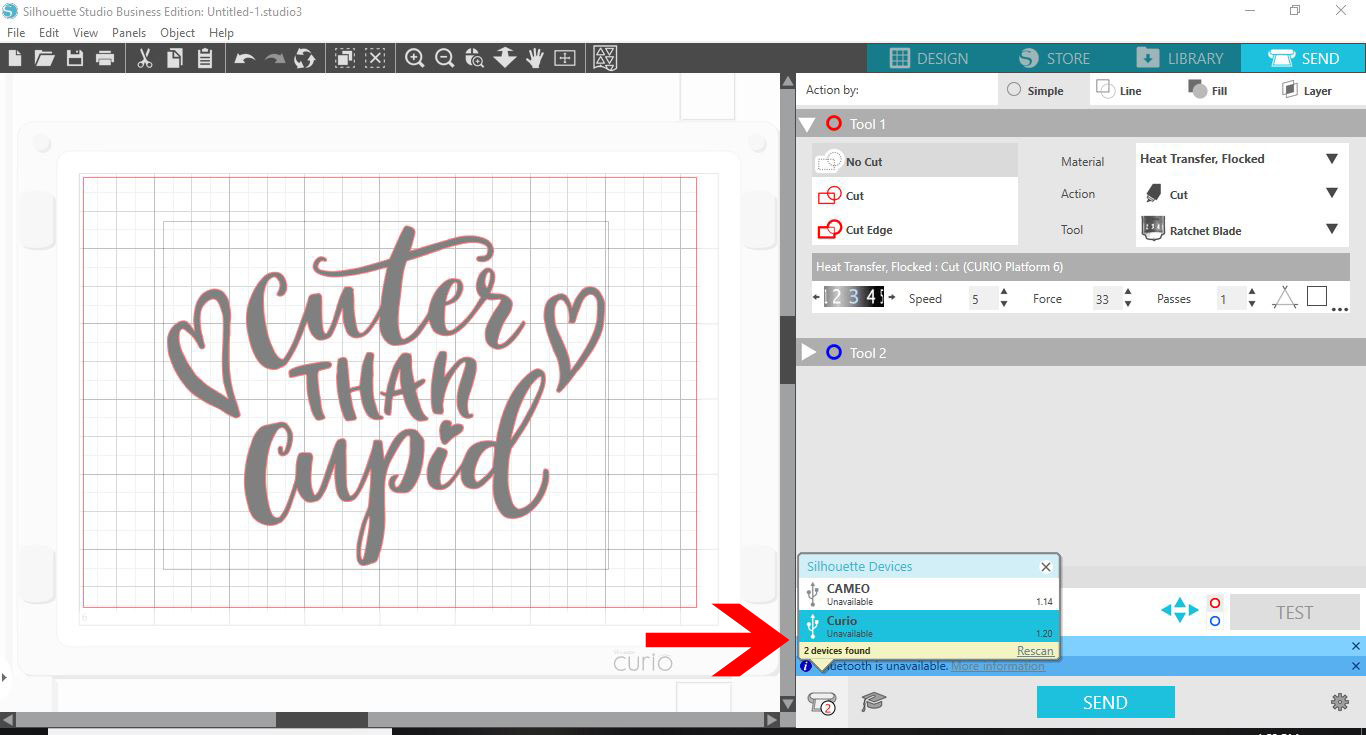
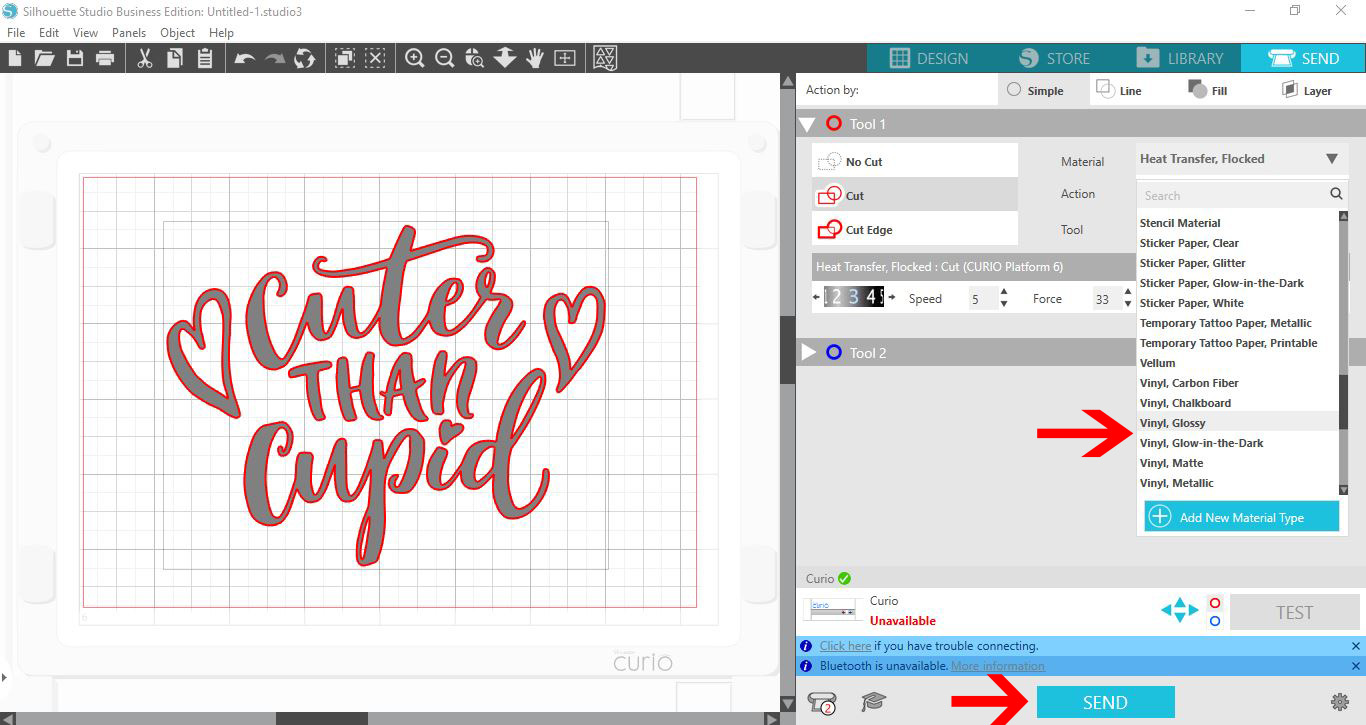
Click on the Send panel to open the cut settings. At the bottom click on the machine icon and select the Curio.
To see the cut lines, make sure to select the design first. Then, click on the Cut option.
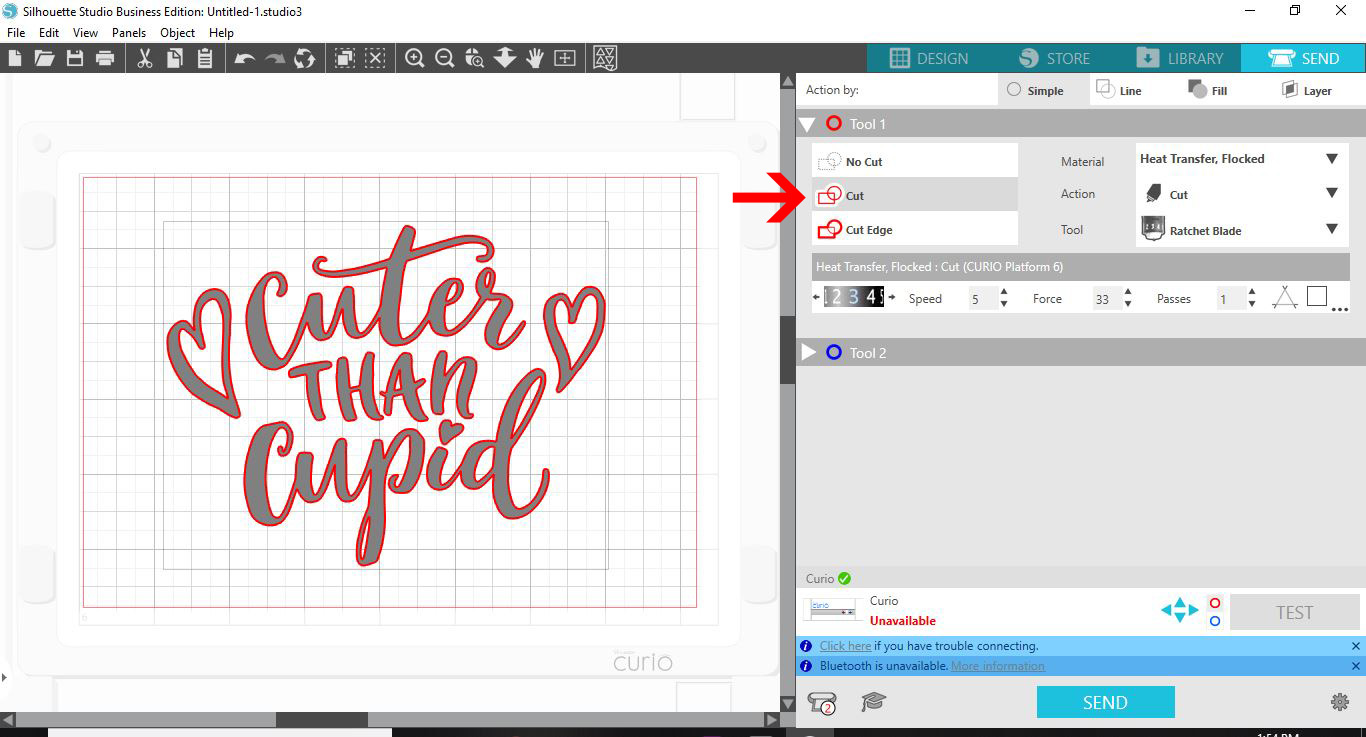
In the Material drop down menu, select the vinyl you are using. It’s always good practice to do a Test cut in case you need to adjust your settings.
When you are happy with your settings, click on the Send icon bottom of the screen.
As quick as that you have created and cut your vinyl stickers using your Silhouette Curio. Add stickers to customer orders as a thank you, create decals and much more. We hope that you enjoyed following this tutorial and found it helpful.