By Design Bundles
How to Mirror an Image in Silhouette
In Silhouette Studio, you have a super easy option that allows you to mirror your image. You would want to mirror an image when using HTV and for certain types of projects. An example could be adding a decal to the inside of a window. We will show you three ways you can mirror an image in Silhouette Studio.
During this tutorial, we will use a messy bun svg with a zodiac theme created by Digital Rainbow Shop. If you would like to use another design we have an extensive range of Clipart to choose from.
Let us begin by opening Silhouette Studio.
Step 1 - Import the image
We are going to import our image then make any adjustments needed before mirroring. Mirroring will depend on what your design contains. Words are the main reason designs are mirrored but you may prefer the design to look a certain way.
Once you are in Silhouette Studio, you can import your image by going to File > Open. You can also drag and drop it onto your canvas.

You can adjust the size, change the spacing between each element and change the color. For HTV or other materials that don’t involve printing, the color won’t matter. You would only change the color, add patterns and so on for sublimation when using designs that require mirroring.
When you are done with editing your design, select all of the elements, right click > Group.
Step 2 - Mirror the image
In this step we will discuss the three options for mirroring. Remembering to mirror your design is essential for projects that contain words.
Use the Replicate Panel
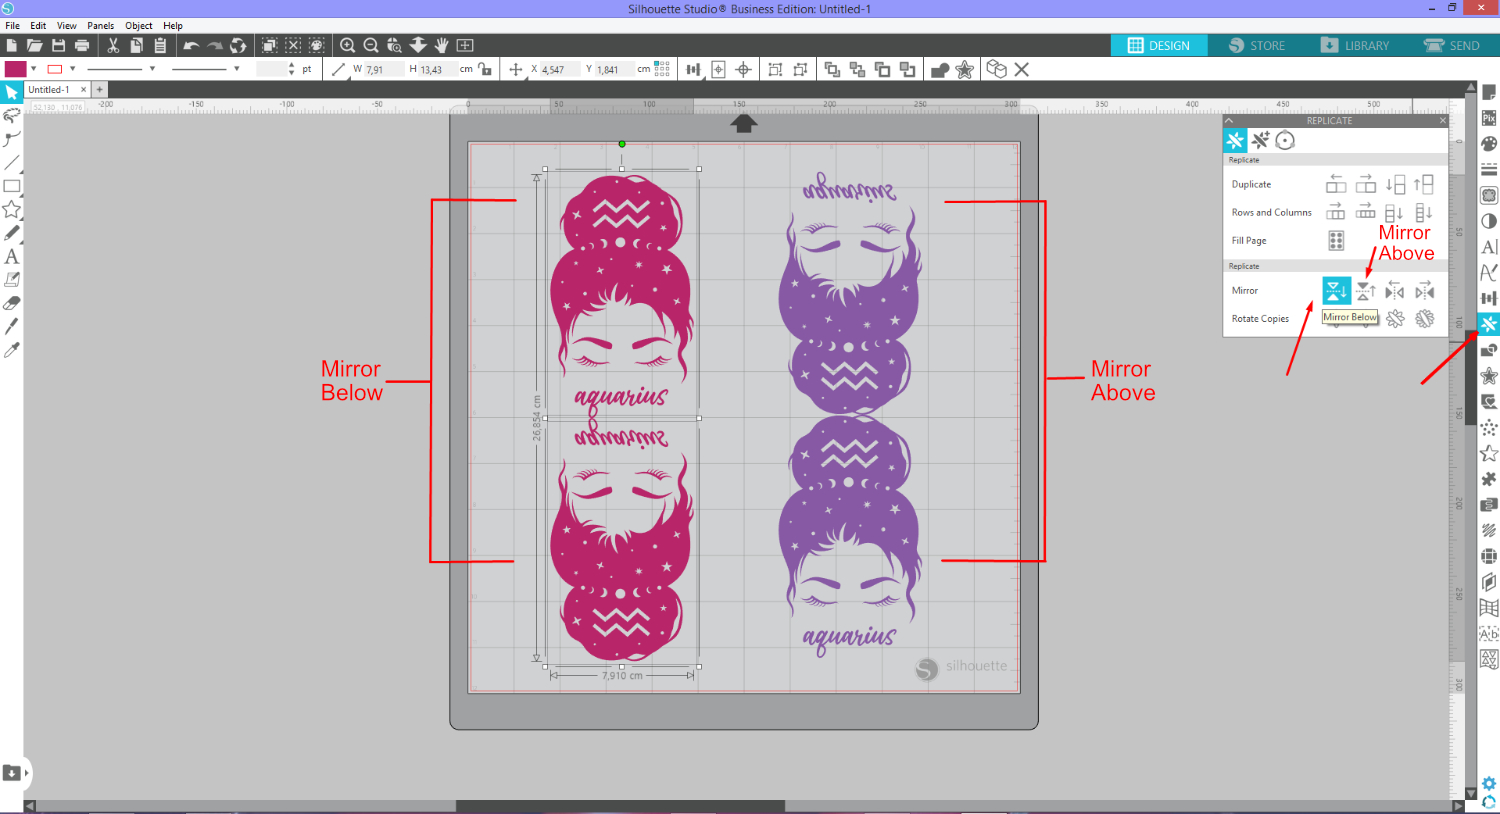
The Replicate panel can be found on the right side toolbar. In this panel the Mirror option is near the bottom under the first menu. With the design selected, click on the first Mirror option, Mirror Below. The mirrored image will be placed beneath the original design.
Next, click on Mirror Above. Now the mirrored image is placed above the original.
The third icon, Mirror Left, will place the mirrored image to the left of the original. Mirror Right places it to the right of the image.
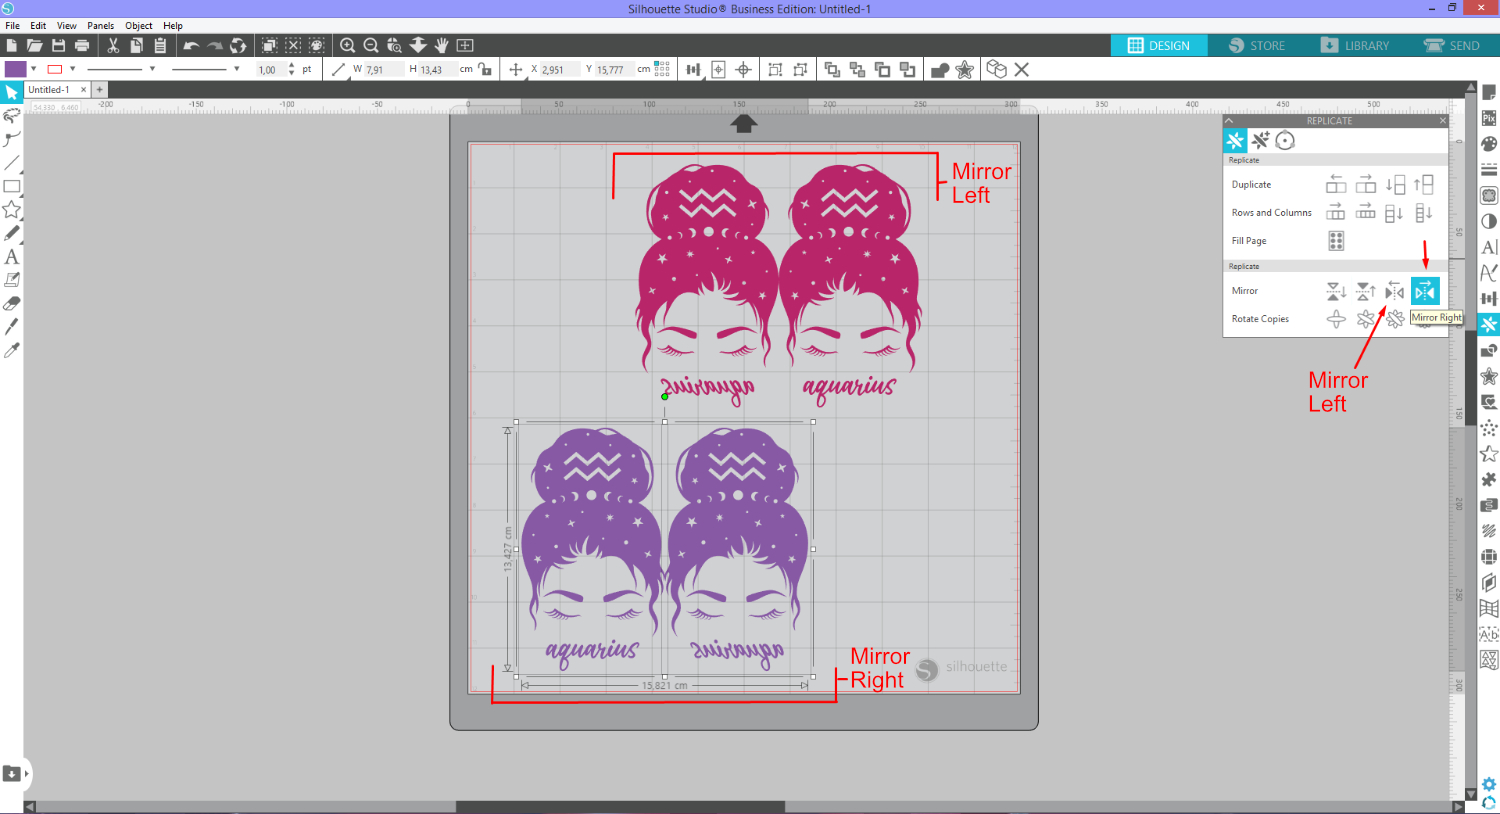
After you have mirrored the image, you can delete the original if you no longer need it.
Flip the image Horizontally
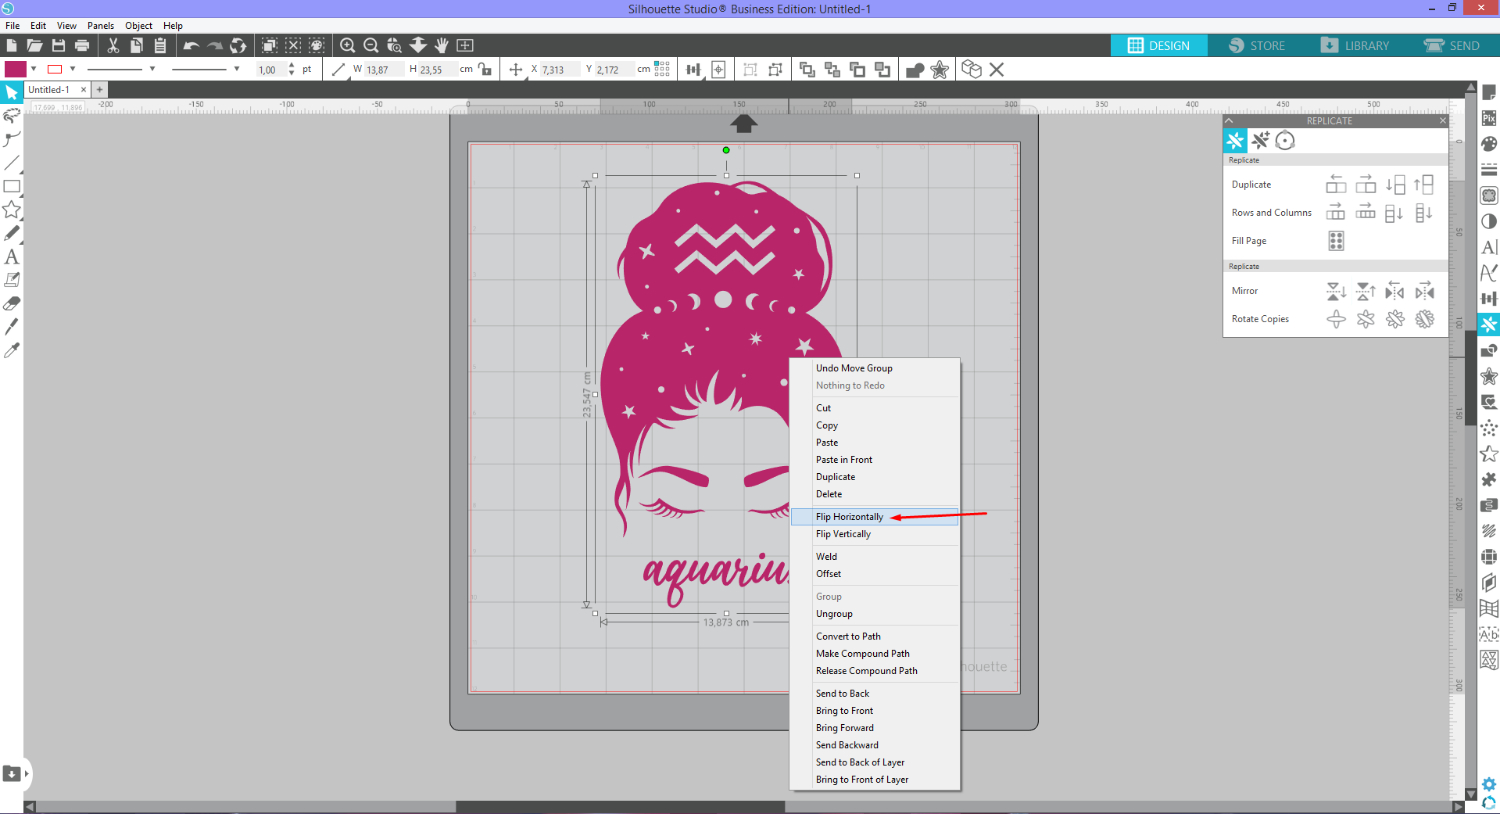
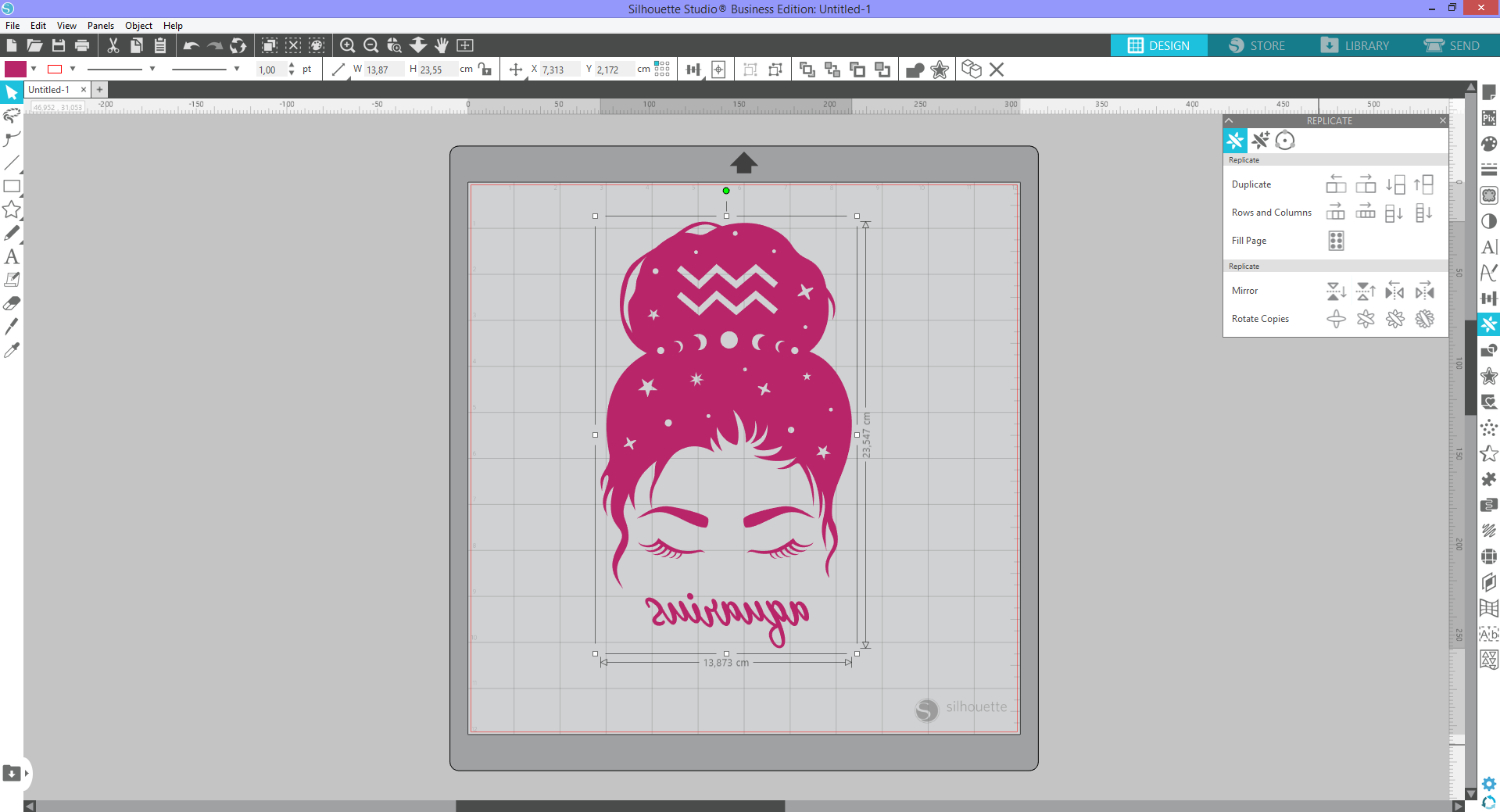
A quick and simple way of mirroring is by flipping your image. It’s basically the same as Mirroring, except that you don’t have an extra copy. Click on the image to select then right click > Flip Horizontally. This won’t mirror the image but actually flip the original image horizontally.
The image below is what your flipped image will look like.
Mirror in Send Panel
In the Send Panel, Silhouette Studio won’t know if your image has been flipped or mirrored. When you have selected your settings and clicked on Send, a warning will show. Silhouette will ask if you want to mirror the item or send as shown on the screen.
In this instance, as we have already mirrored or flipped the design, we clicked Send As-Is.

Now, while this option may come in handy as a reminder, it can have a few issues. Silhouette Studio’s option to mirror in the Send panel won’t just mirror the design. It will mirror the entire canvas or cutting mat.
This may not be a problem if your vinyl is the size of your cutting mat. It does become a problem if your cutting material is the size of the design you want to cut.

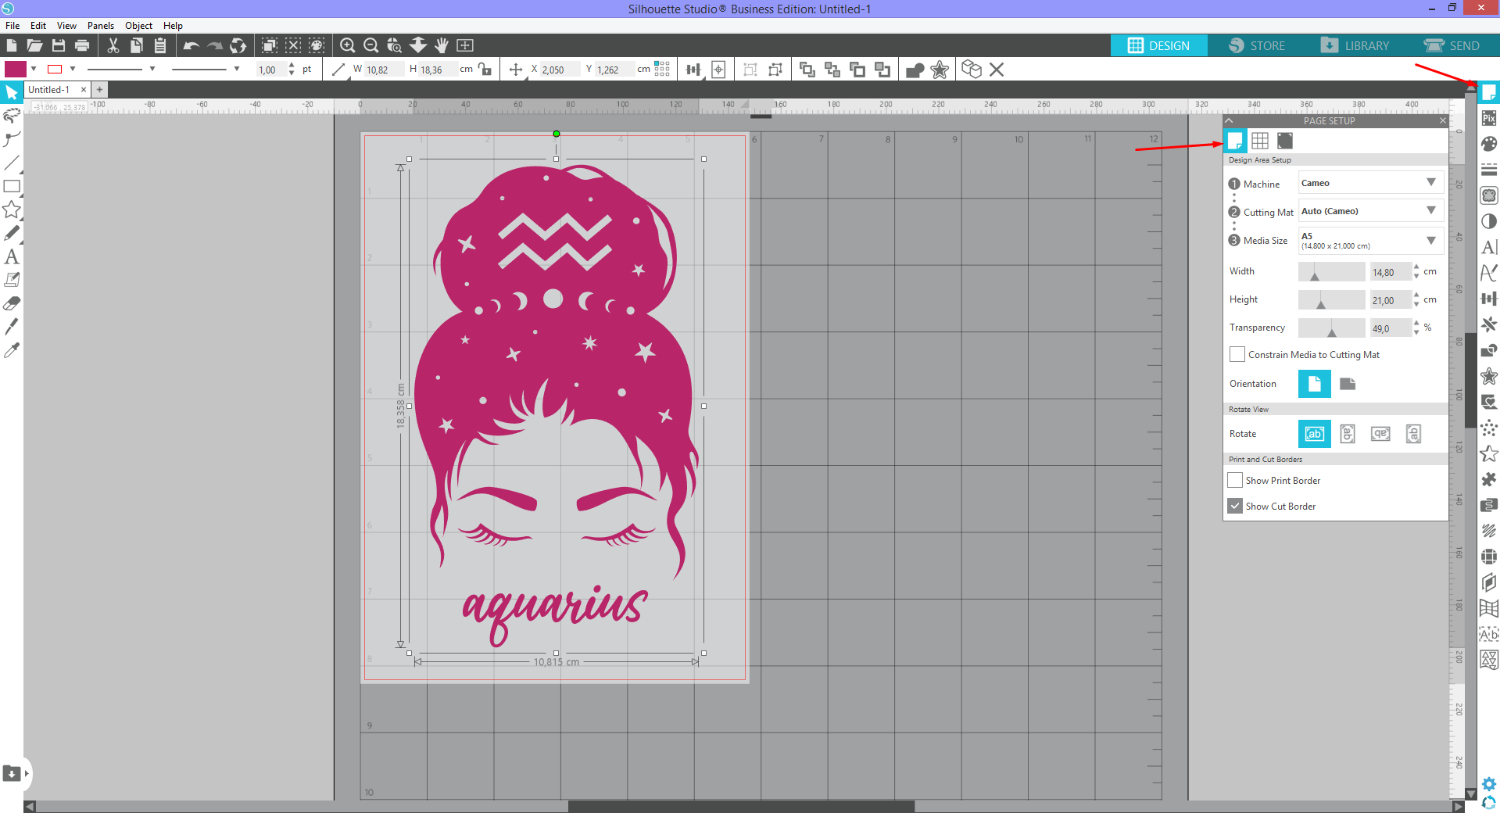
There is a workaround for this. Set your cutting mat size to match the size of the material you are loading. You can do this under the Page Setup Panel on the right side toolbar.
The Mirror warning in the Send Panel is a great way to remind you to mirror. You can then go back and mirror the image yourself.
You may also find from time to time, when changing from HTV, that the Mirror warning appears. It doesn’t always do this but it can stick in the workflow so you may get the warning when cutting card stock.
For beginners this can be confusing. But if you keep in mind mirroring is used mostly for HTV and vinyl then you are good to go. Simply click Send As-Is.
Next, learn how to make a split monogram and import patterns into your library in Silhouette Studio.