By Design Bundles
How to thicken foil lines in Silhouette Studio with the Foil Quill
The Foil Quill works with heat activated foil to add a touch of magic to your designs. Designs can be filled or single line designs used for many creative projects. When working with basic lines, these lines can be thickened for more impact. In this tutorial we will show you how to thicken foil lines in Silhouette Studio.
The Medium Foil Quill tip will be used along witha cute foil quill SVG. We also have a great selection of single line designs if you prefer another kind of design.
Step 1 - Select your design and edit
Our chosen design needs to be imported into Silhouette Studio. The design comes bundled as a set of characters and elements. So we will need to take out the elements that we want.Click on the File menu and select Open then choose your design.

Select the design you want to foil with thicker lines. You can choose to remove the other designs or save to a new document. Keep in mind that when deleting other objects, it's best to save as a new document. It will prevent you overwriting the original.
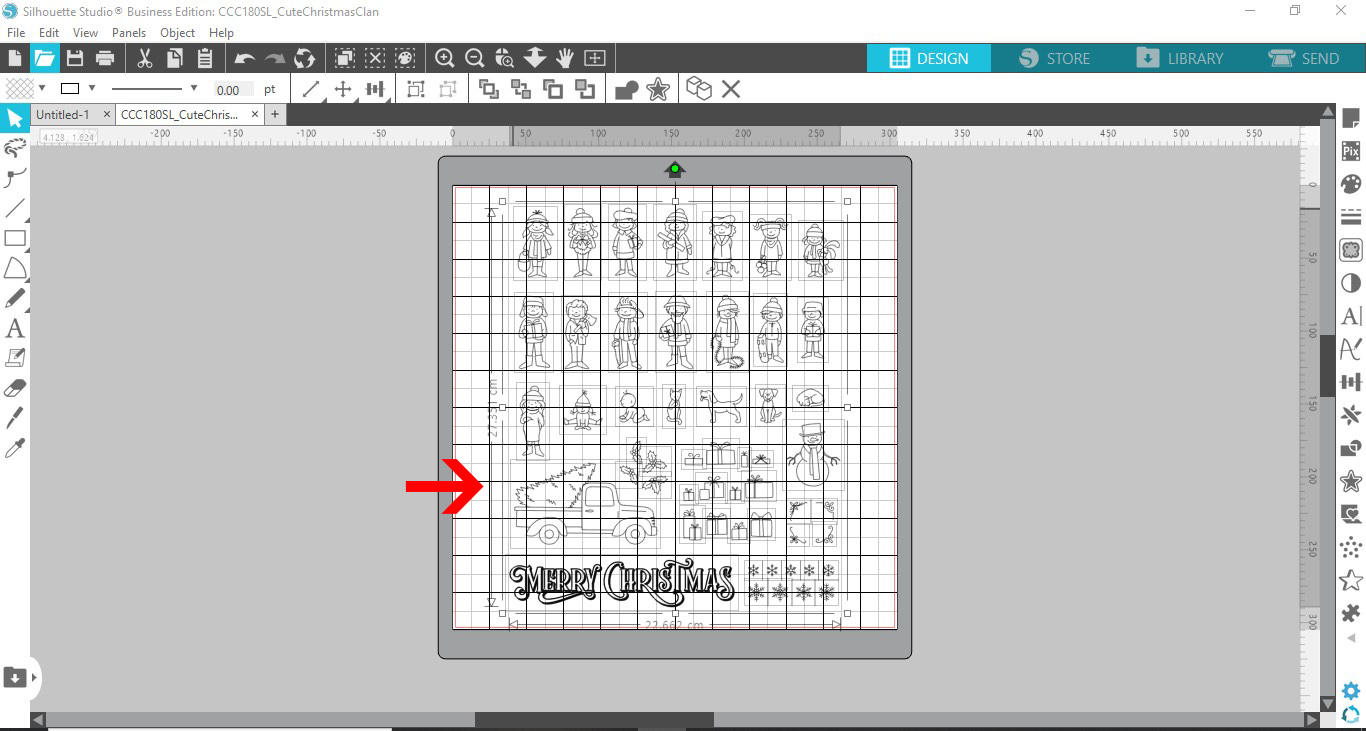
Resize and reposition your design on the Silhouette Studio mat.

Step 2 - Add an Offset to the design
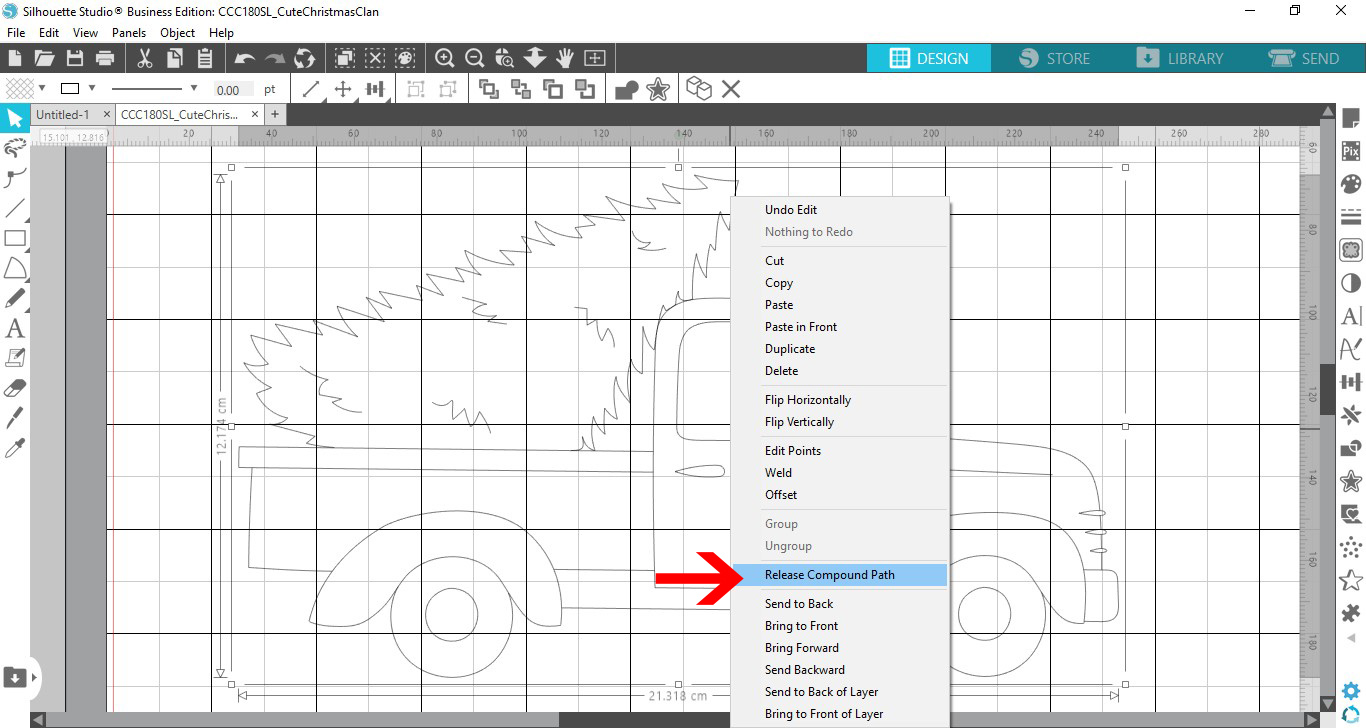
To create thicker lines we will be adding an Offset. With your design selected, right click and Ungroup your design. If you are unable to ungroup, then choose Release Compound Path.
With all the parts still selected, click on the Offset tool on the right hand side.
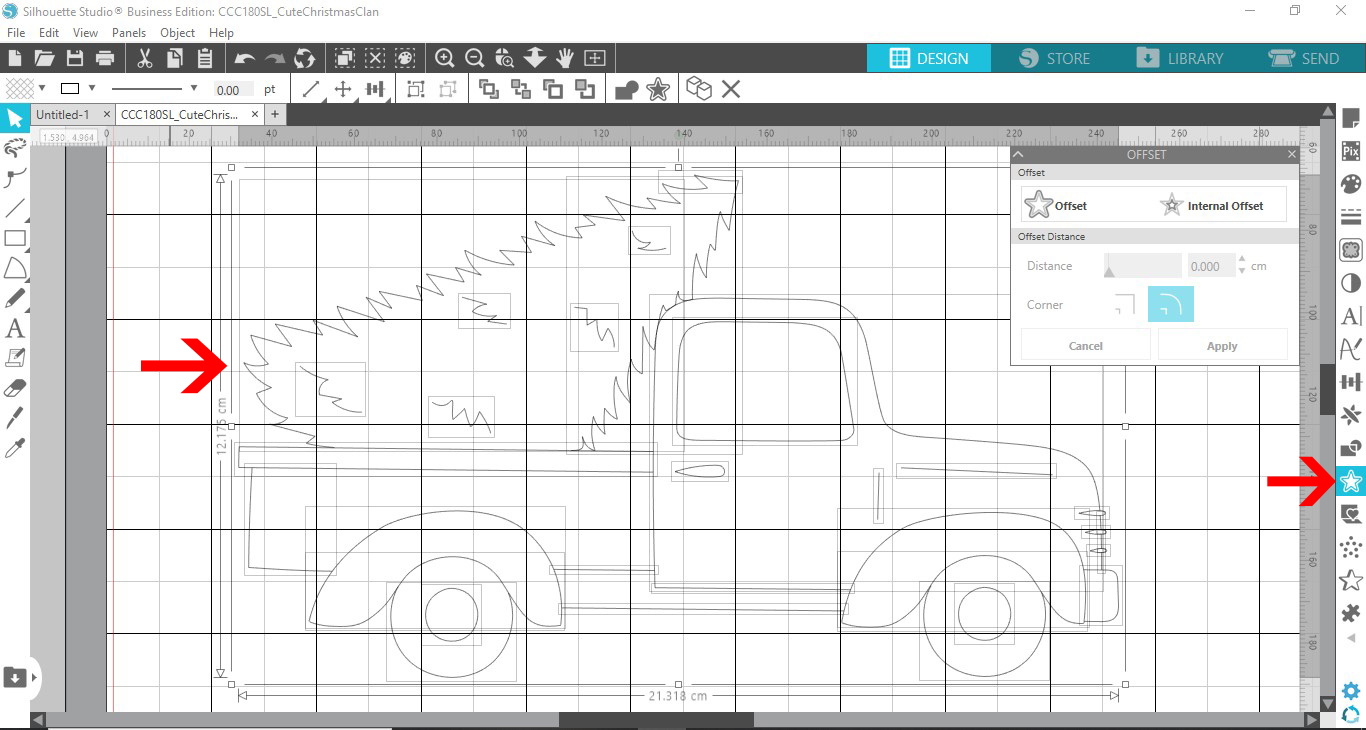
In the panel, click on Offset to create an external offset. You will see it be applied to the entire design.
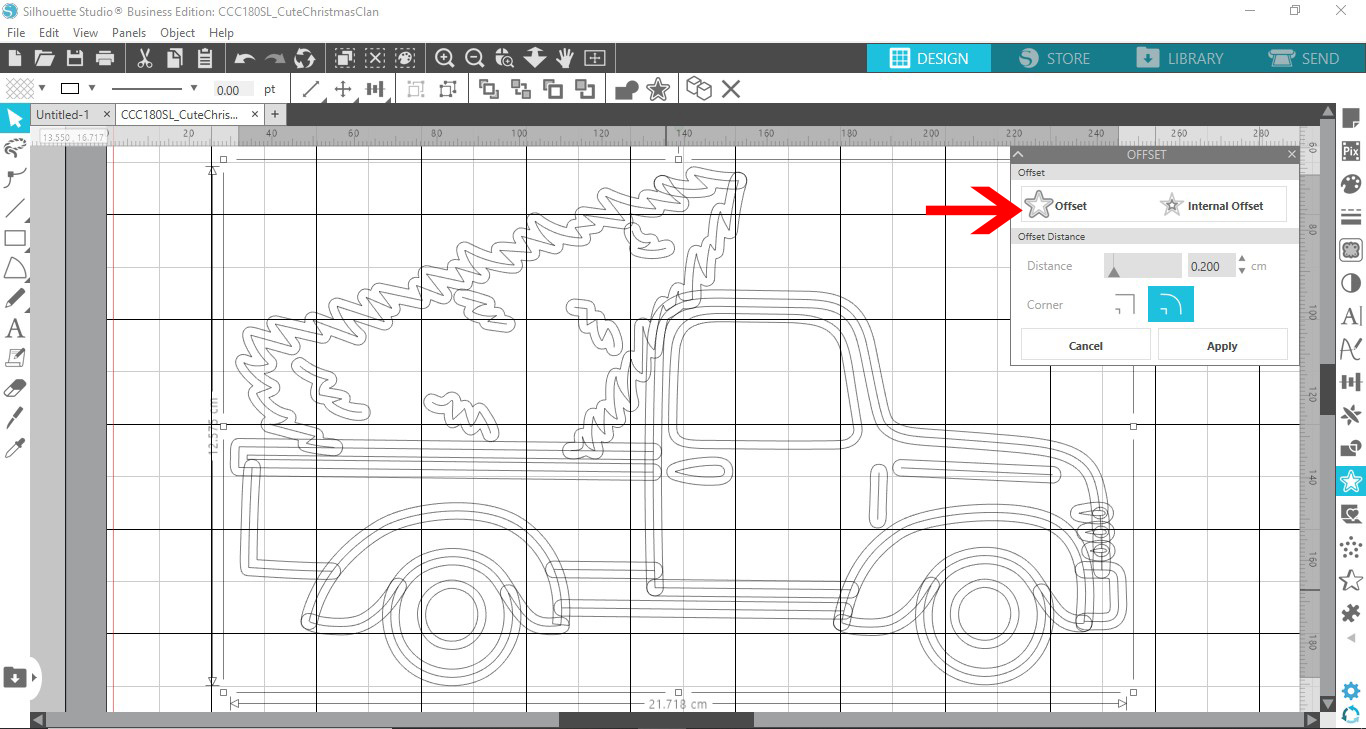
Adjust theDistance so the offset is almost on top of the original lines. Do this by decreasing the number and then click Apply.
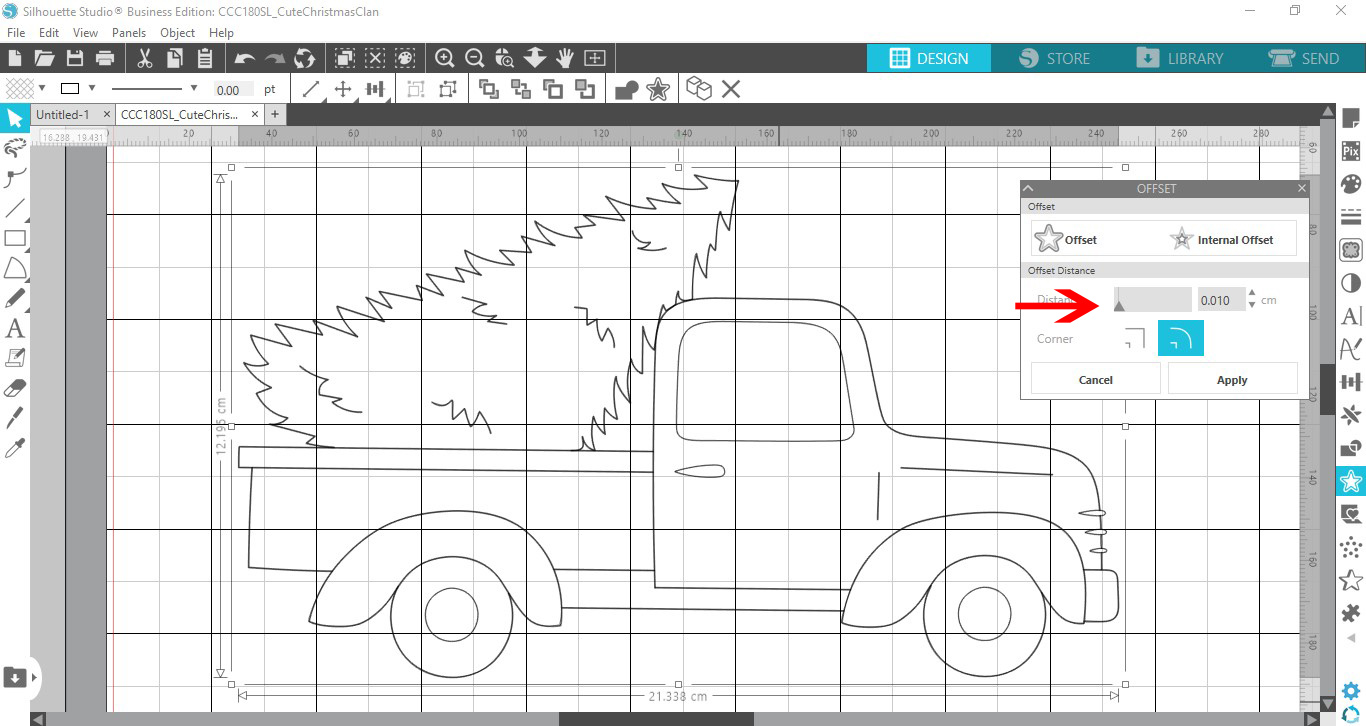
Step 3 - Add a second Offset to the design
With the new offset still selected, clickon Offset again. A second offset will be applied. Once again adjust this second offset so it almost touches the original design lines.

You can repeat the above technique to make the line as thick as you would like. Once you are happy, select everything then right click and Group.

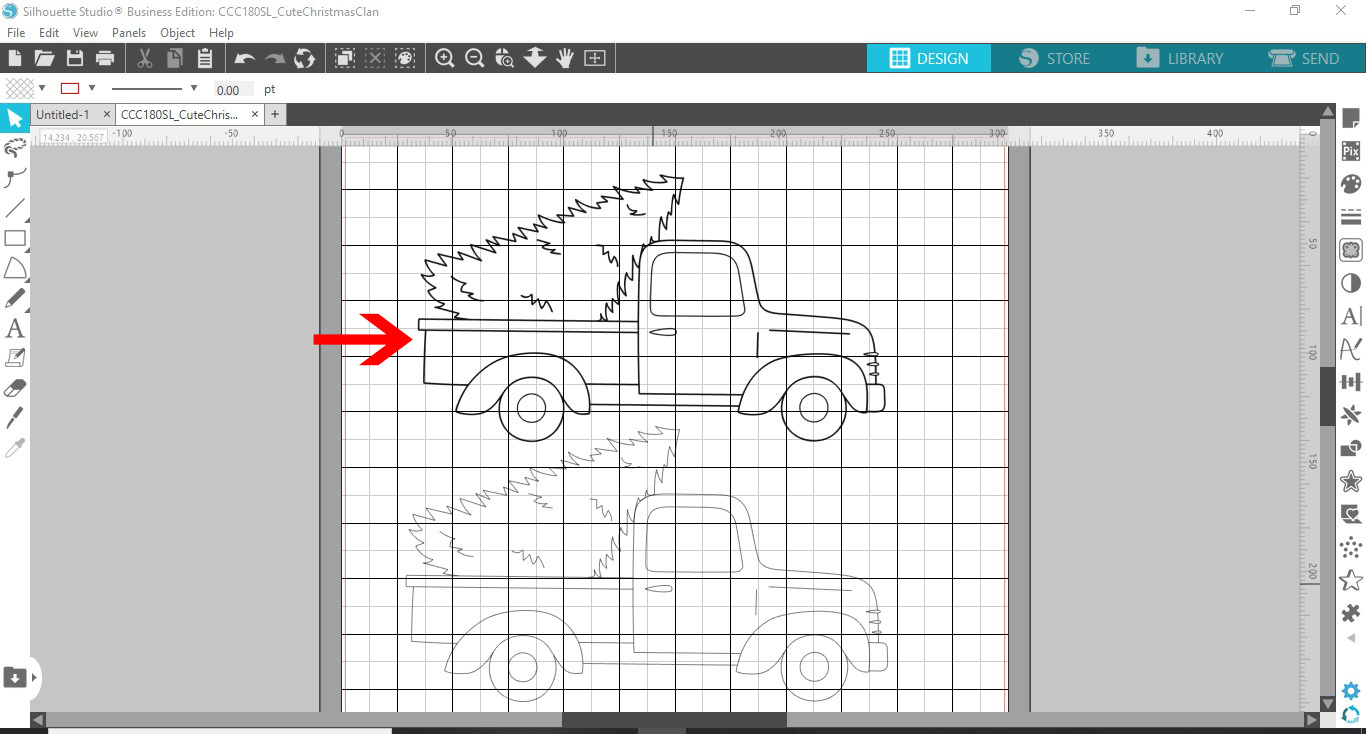
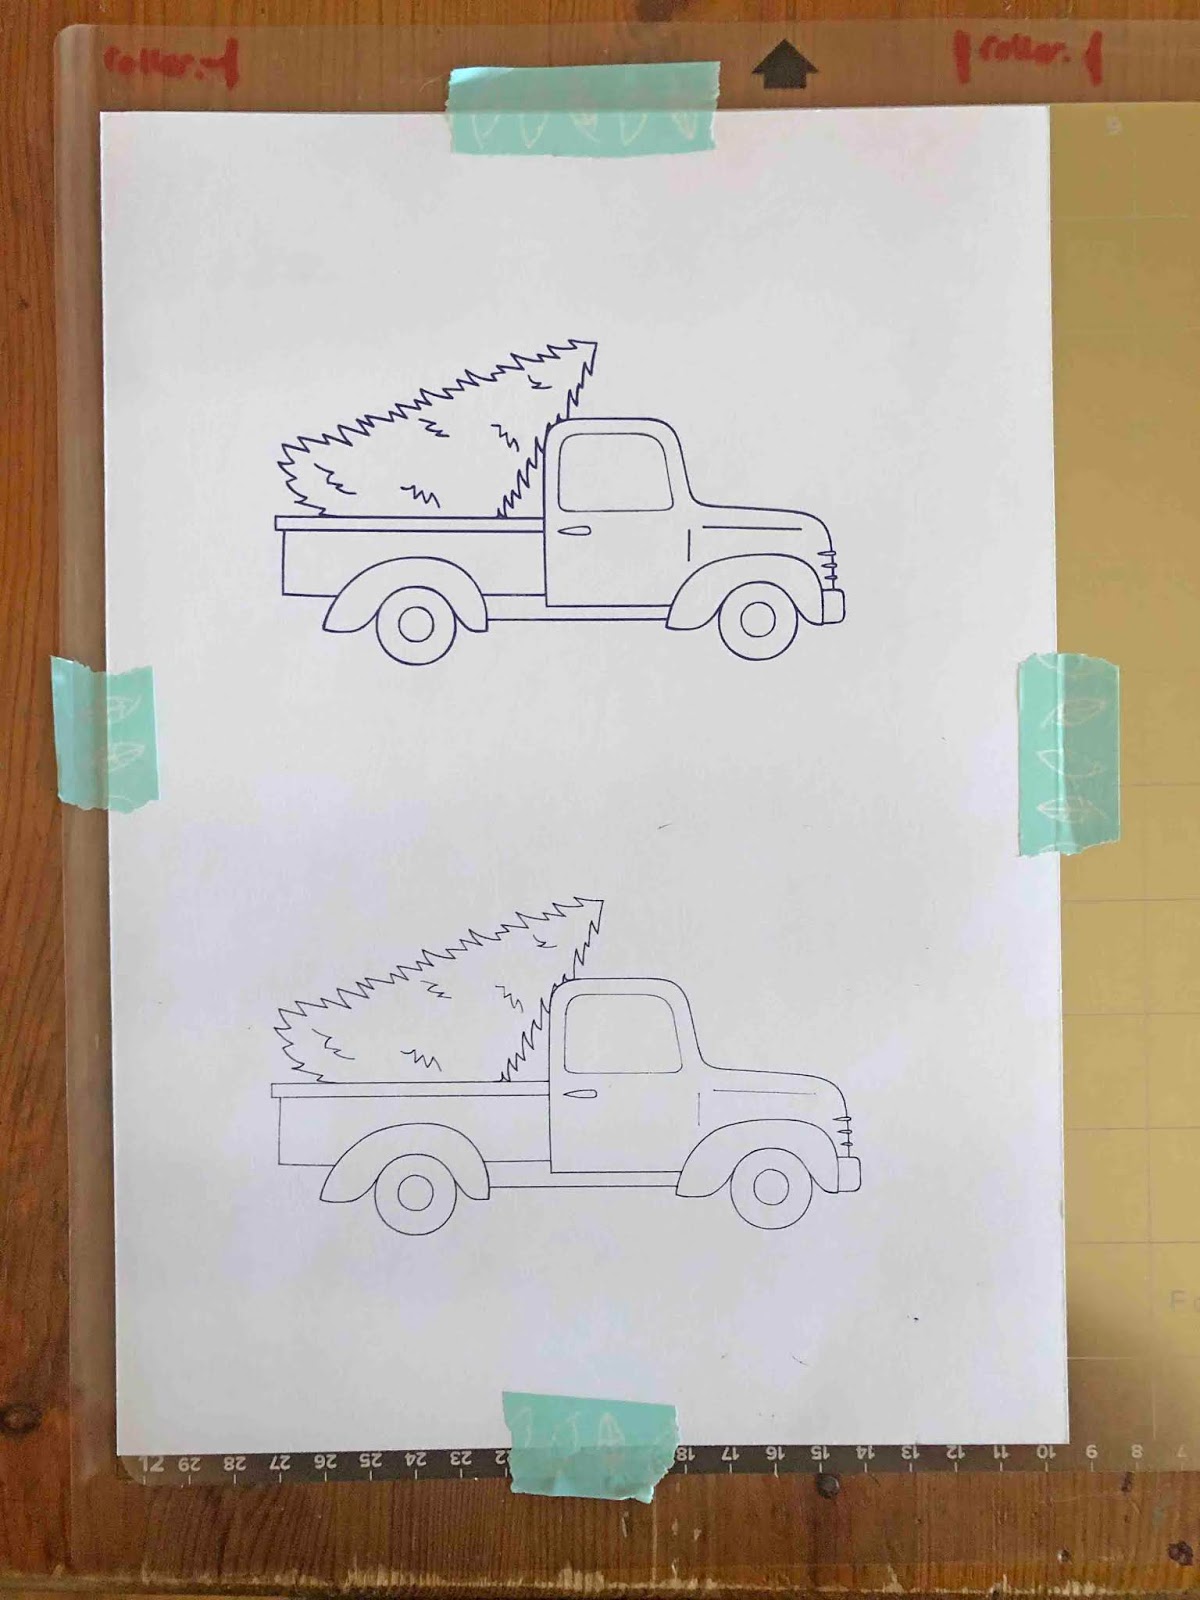
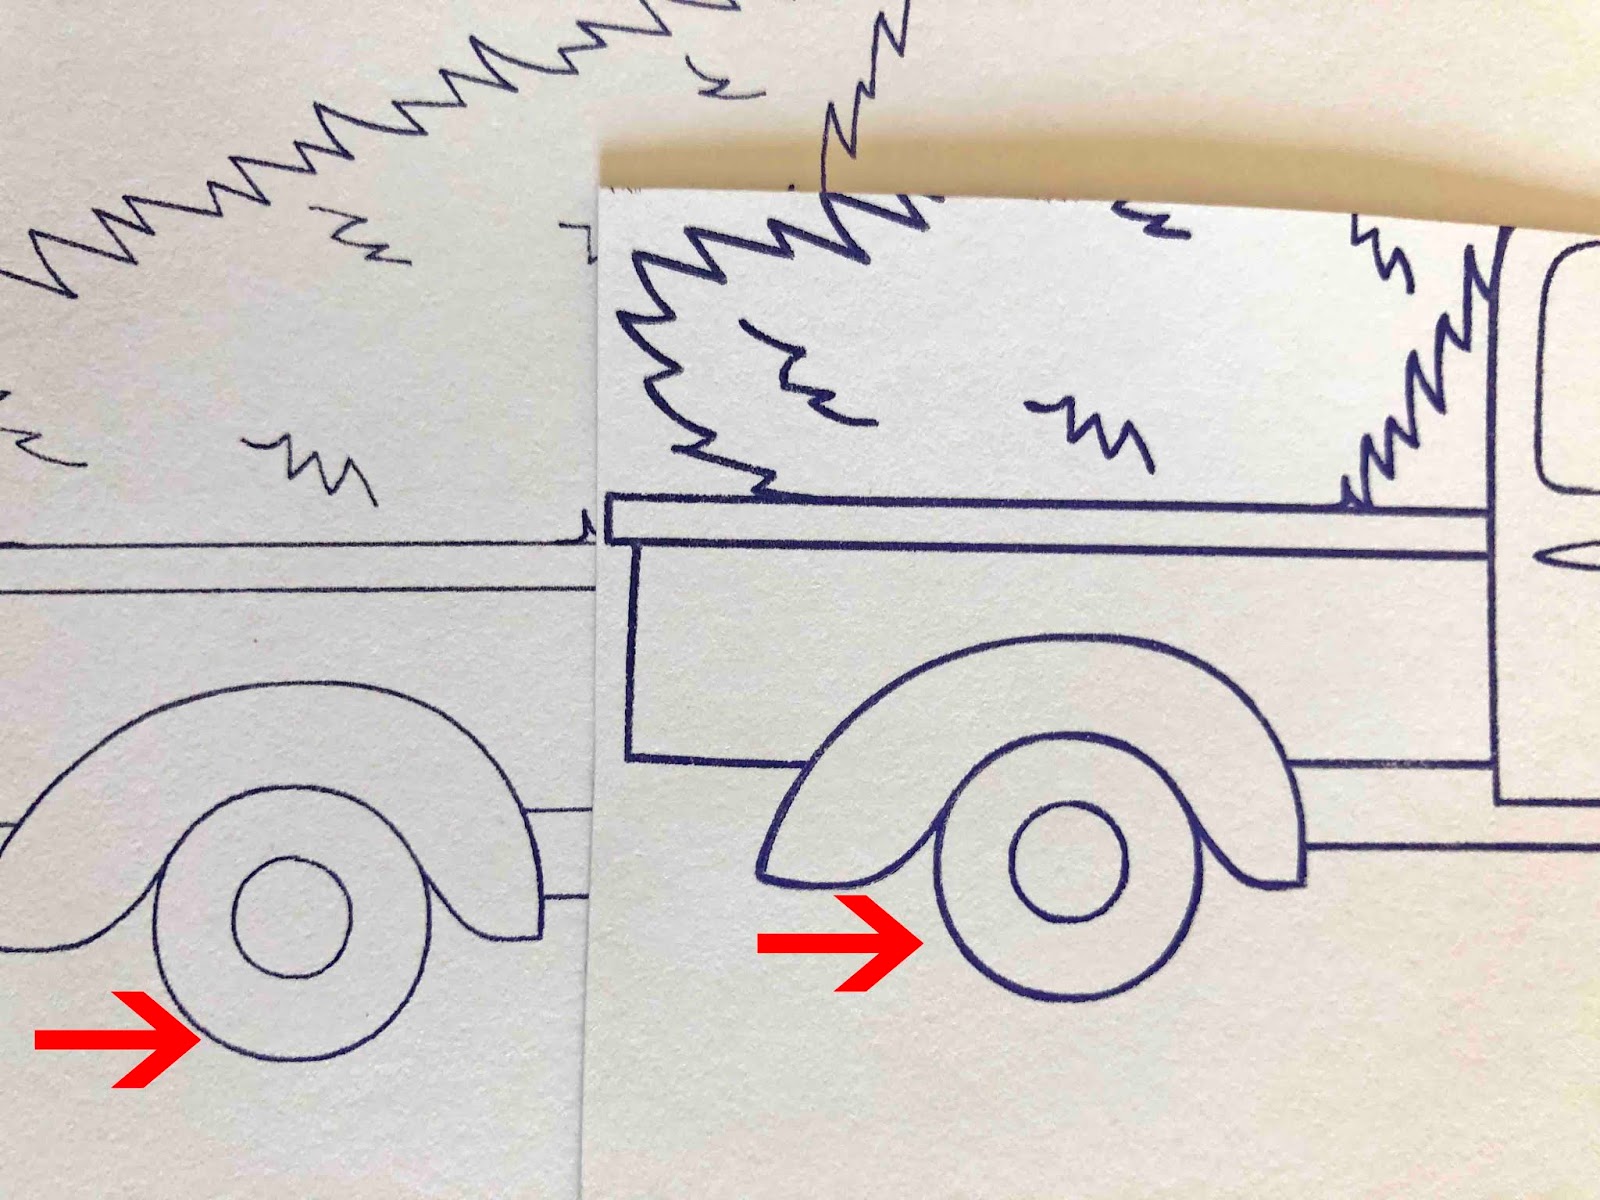
In the image below we have a comparison. The top image has multiple offsets applied while the bottom is the original design. The offsets have created a thicker design line.
Step 4 - Send design to be foiled
Now that your design is ready,click the Send button top right. Choose your media from the list then adjust the speed and force as needed. For the Action and Tool, make sure the Sketch Pen or Pen is selected.
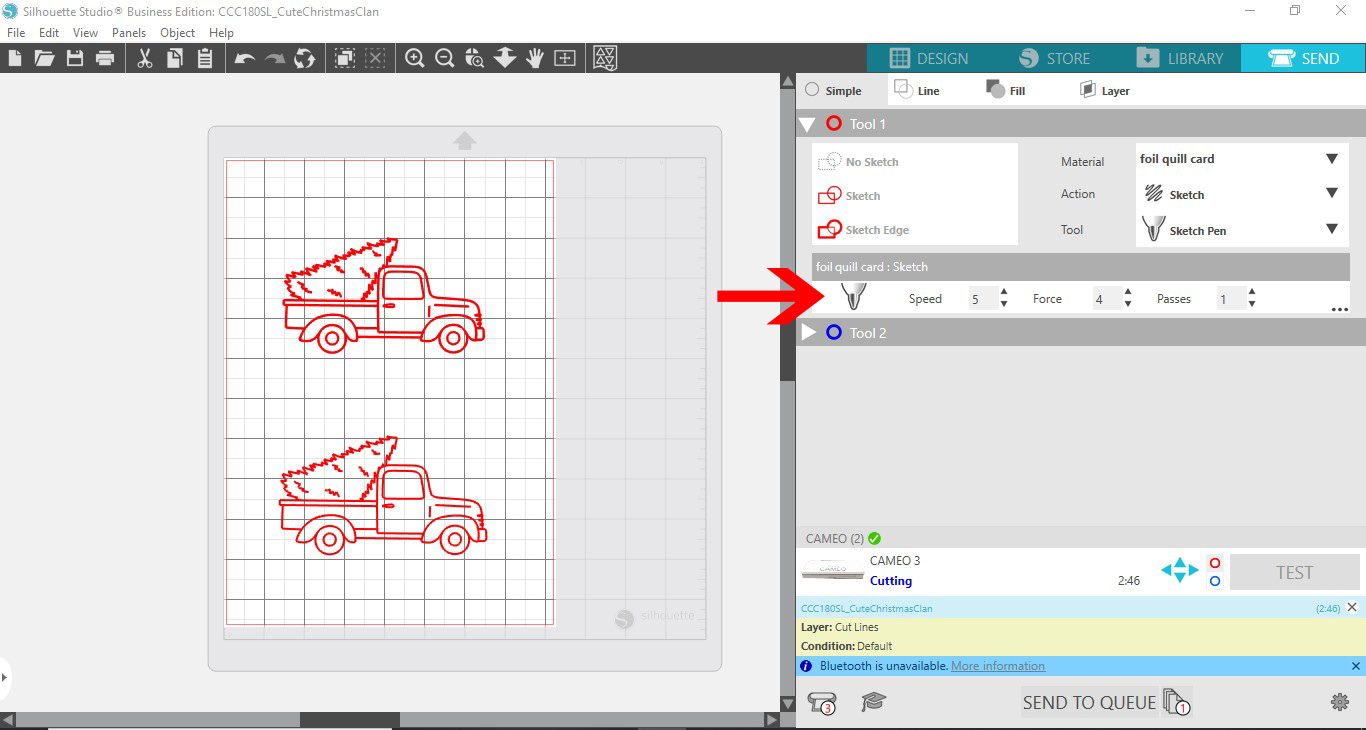
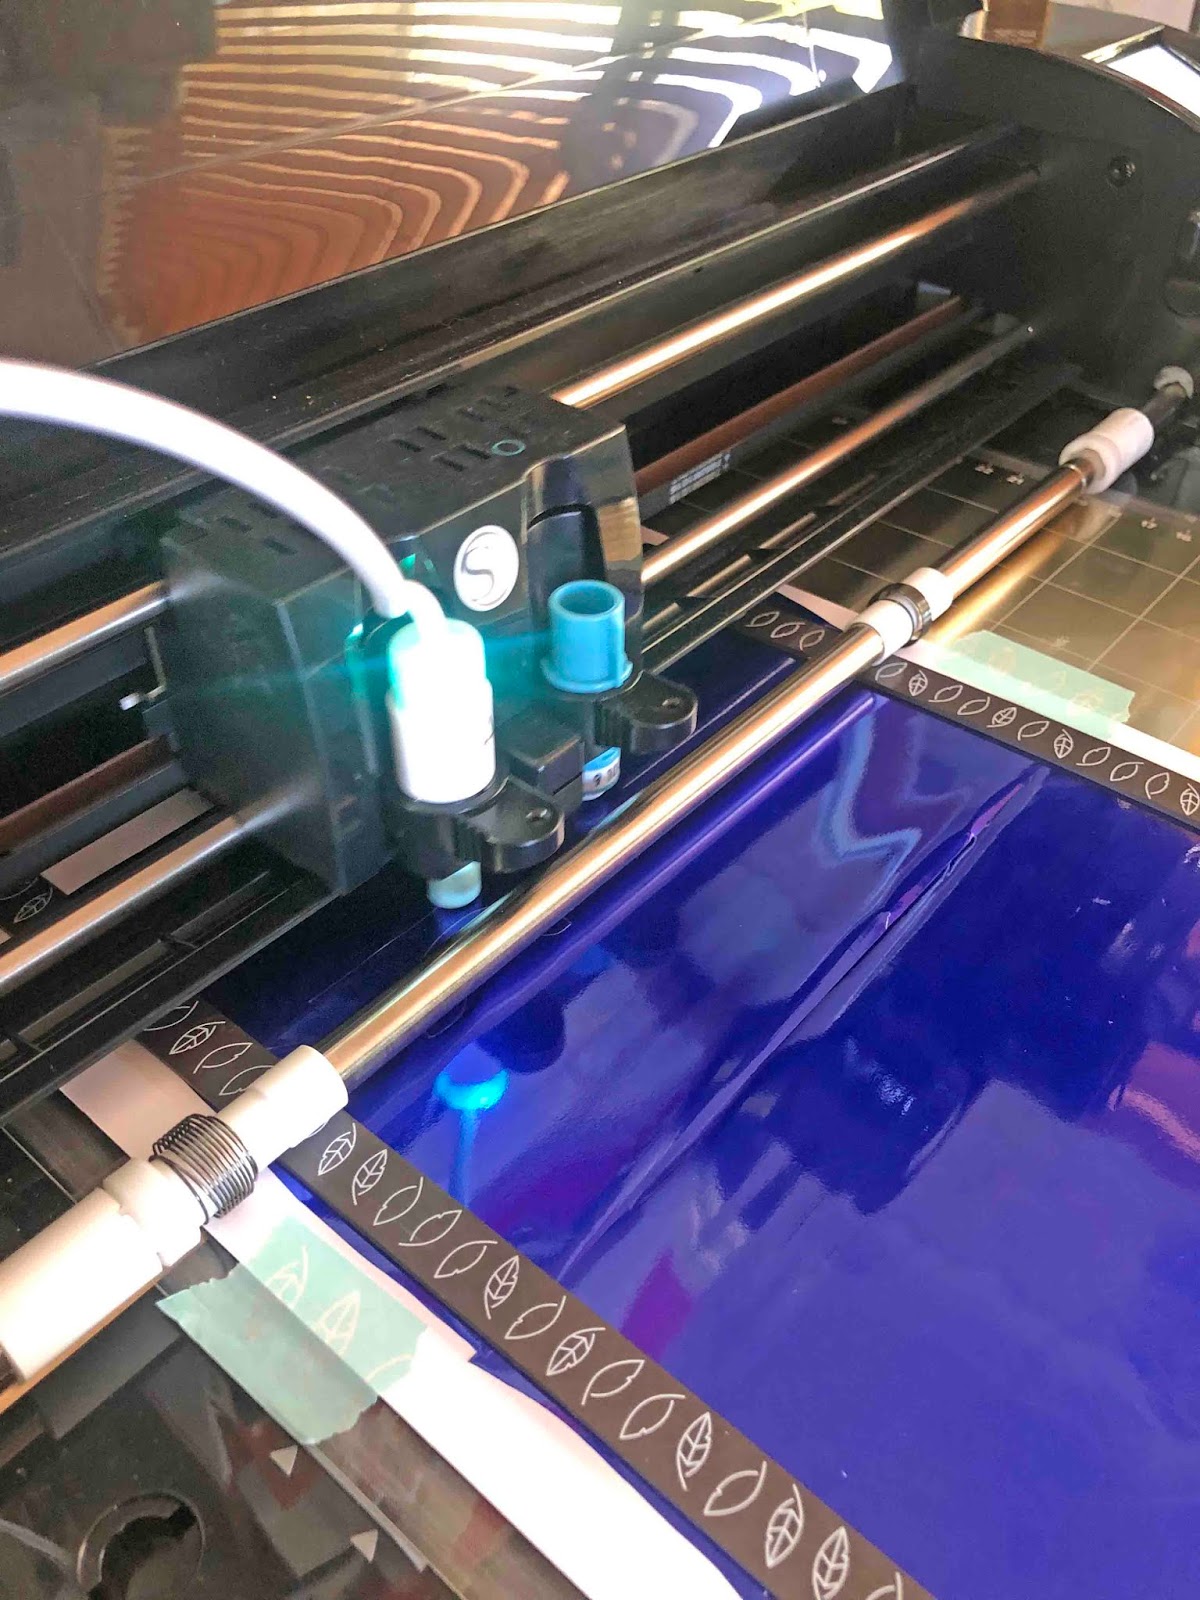
Attach your media to the mat and place the foil down as seen below. Use tape to secure the foil or use a magnetic mat. Make sure the Foil Quill has heated up according to instructions and take safety precautions.
Place the Foil Quill in the carriage that corresponds with the one on your screen. Check your settings then click the blue Send button at the bottom.
The result below shows the top design as having thicker lines than the original.
A close up of the designs.
If you enjoyed this tutorial be sure to check out how to foil vinyland using SVG files with the Foil Quill and Silhouette Studio.