By Design Bundles
How to Use Flexi shapes in Silhouette Studio
Flexi Shapes are pre-loaded shapes available in Silhouette Studio Designer Plus and higher. They are simple shapesthat can help you get started with your designs. The Flexi Shapes selection will usually show the last shape used. When hover your mouse over this selection,you get the full list of shapes. In this tutorial we will show you how to use Flexi Shapes in Silhouette Studio.
Step 1 - Access the Flexi Shapes icon
Flexi Shapes are found on the left side toolbar. It will show the last shape used and when hovering over the description will show Draw an Arc.
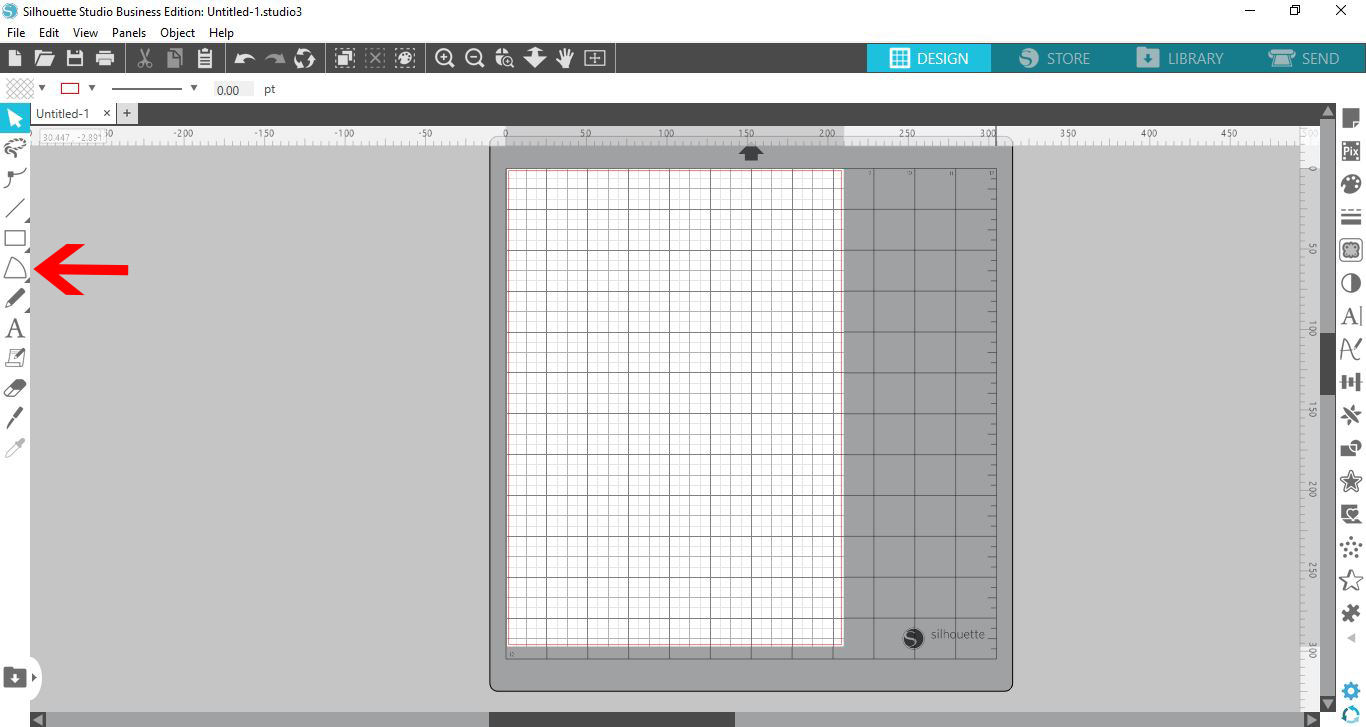
When you click on the icon a new pop up window will appear. You now have a large choice of Flexi Shapes to pick from.Choose a shape that you want to use.
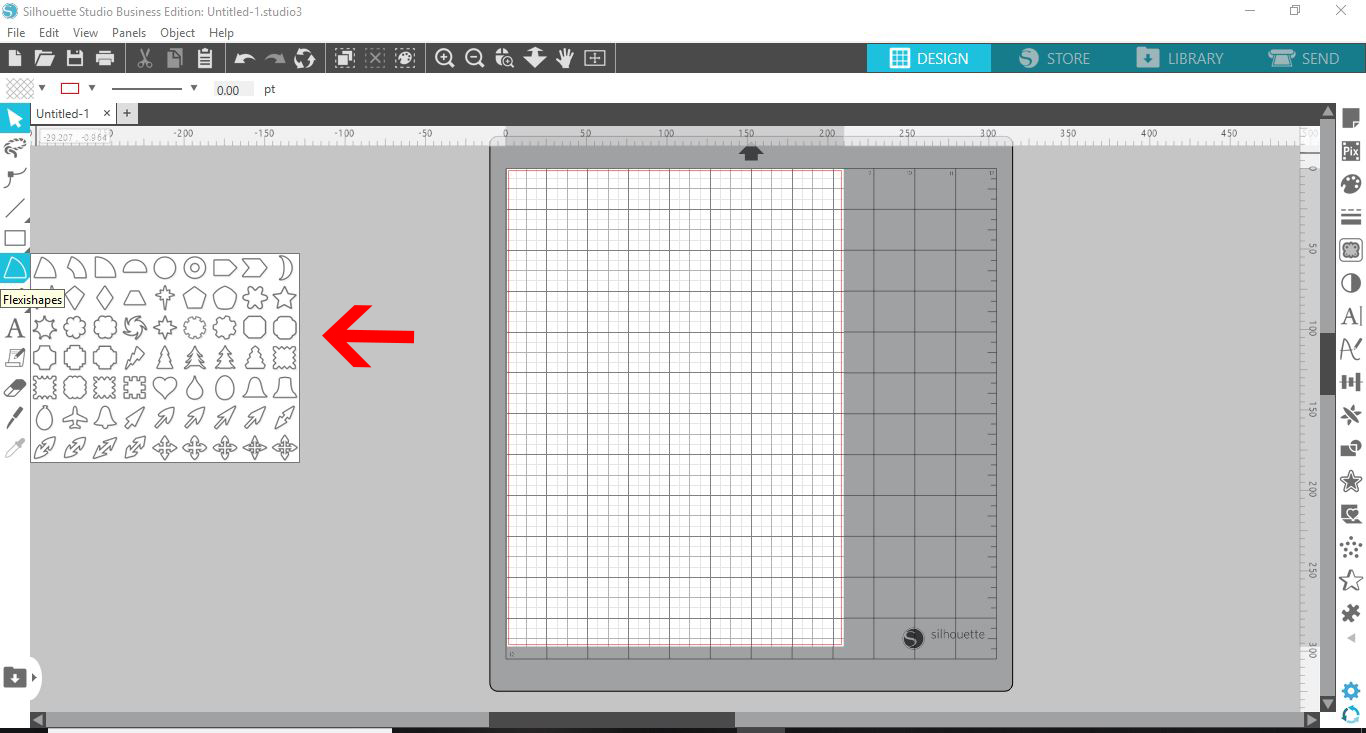
Once selected, go to yourcanvasthen click + dragout the shape.
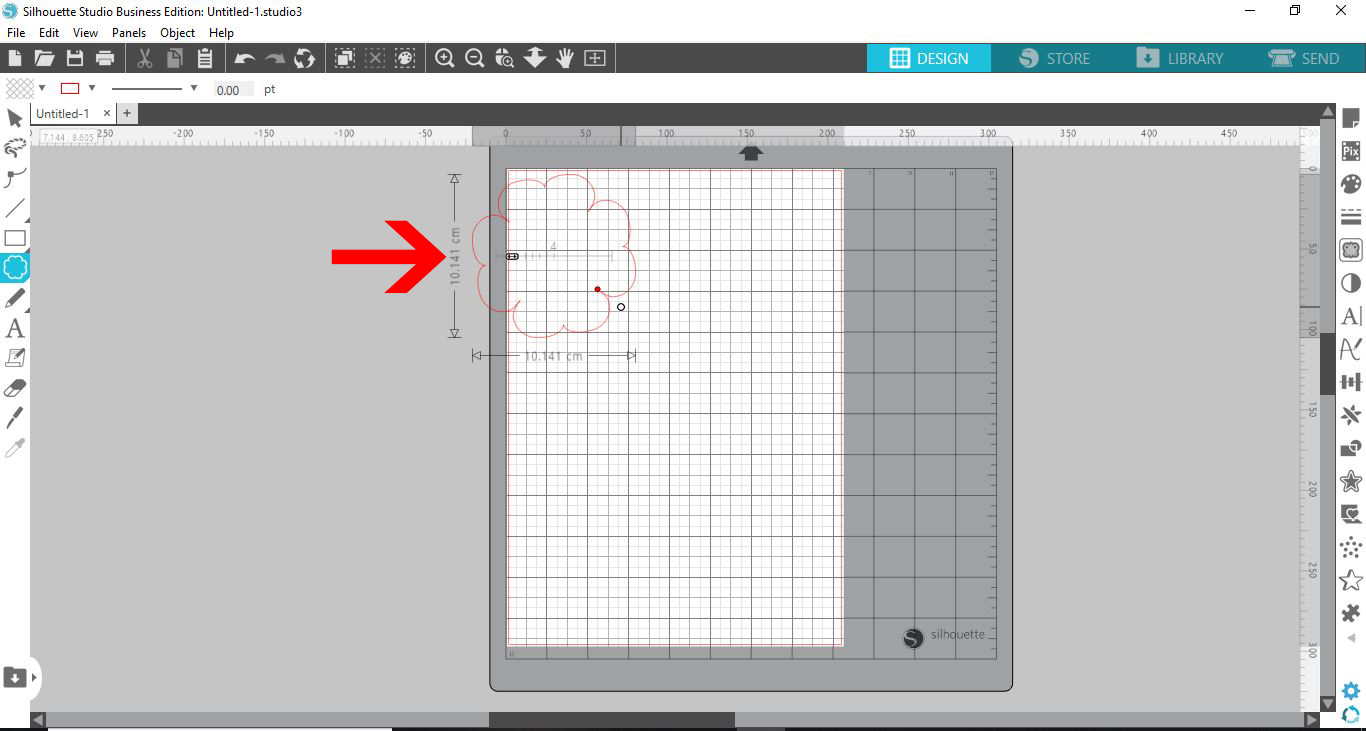
Step 2 - Adjust the Flexi Shape properties
After you have drawn out the shape, you will notice a slider in the middle.Toggle this from left to right. It will adjust the number of petals/points/edges on your design.
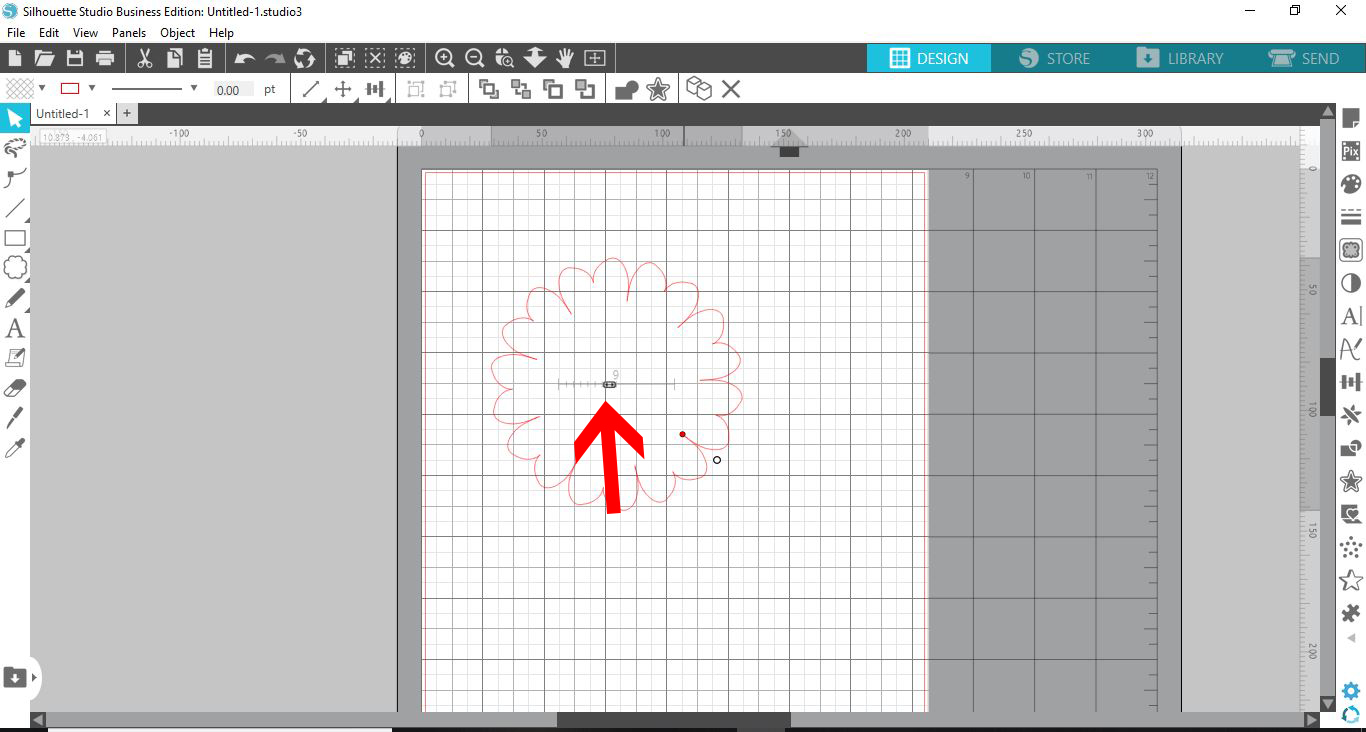
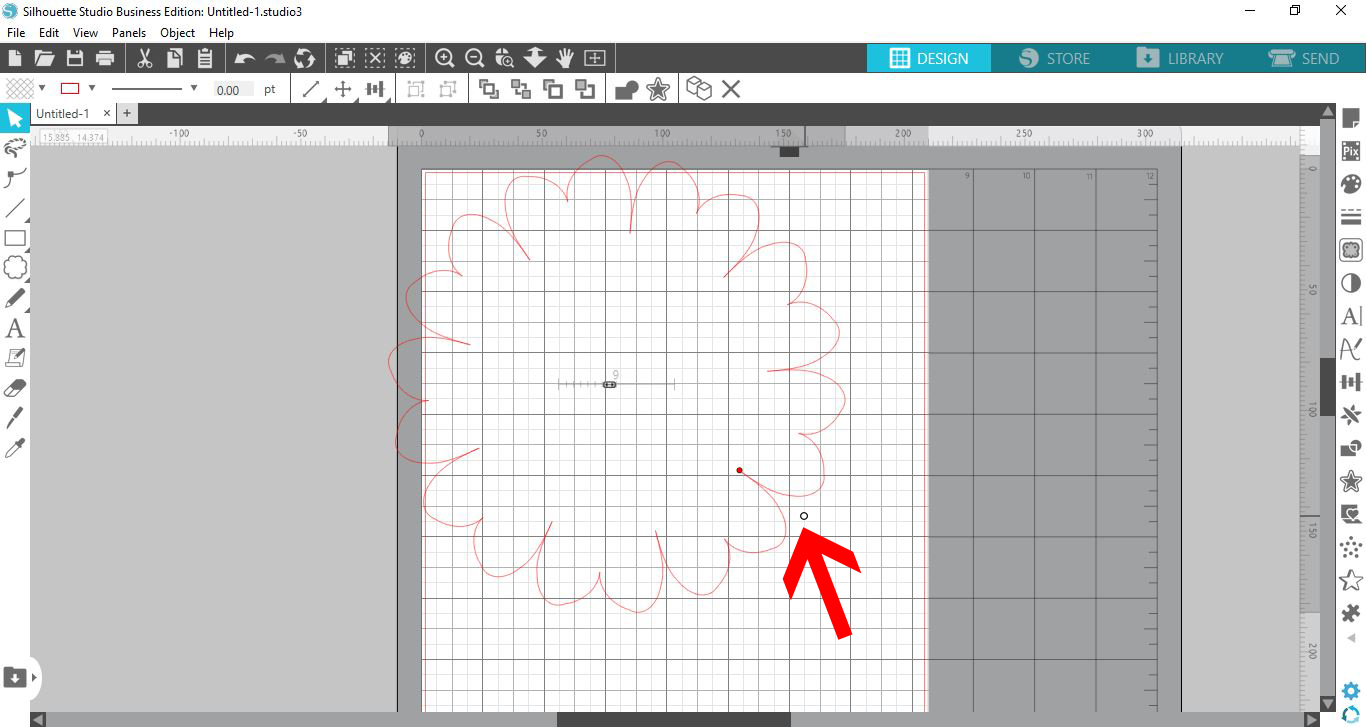
At the corner you will see a small circle or white dot. If you click and drag on this, you can change the size of your Flexi Shape. Clicking + dragging out will increase the size, while dragging inward will decrease the size of the Flexi Shape. You can also rotate the shape within the selection box.
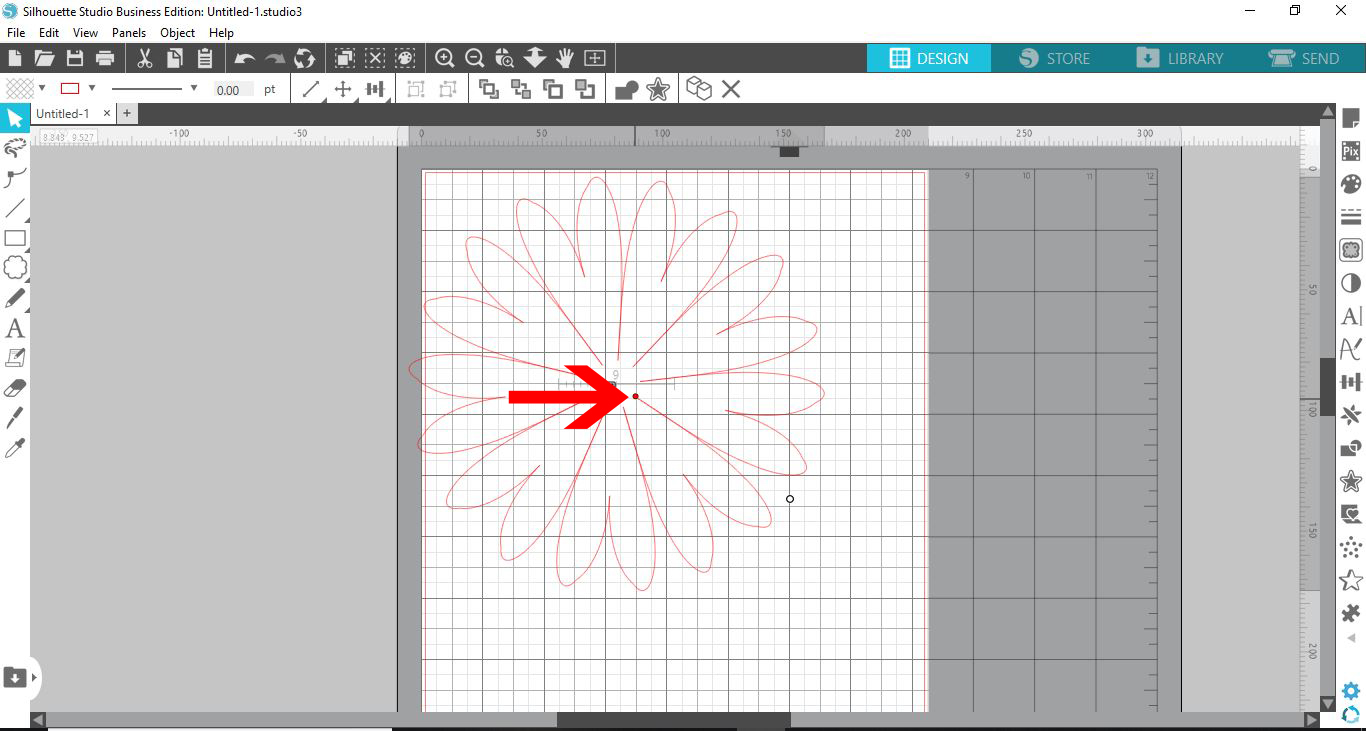
Further inward you will see a red dot. If you click on this you can change the length of the petals/points/edges. You can make them shorter or longer. Experiment with the shape properties to get different results.
Once happy with your design clickaway from it to deselect. You can still make further adjustments by clicking back on the design. The design will remain editable until you convert to a path.
If you have enjoyed this tutorial, be sure to check out our other tutorials such as removing unwanted cut linesand using the eraser tool in Silhouette Studio.