By Design Bundles
Silhouette Tutorials5 min
How to Use Mock Ups in Silhouette Studio
*Business edition used.
1- Open Silhouette Studio. Click on the open icon.
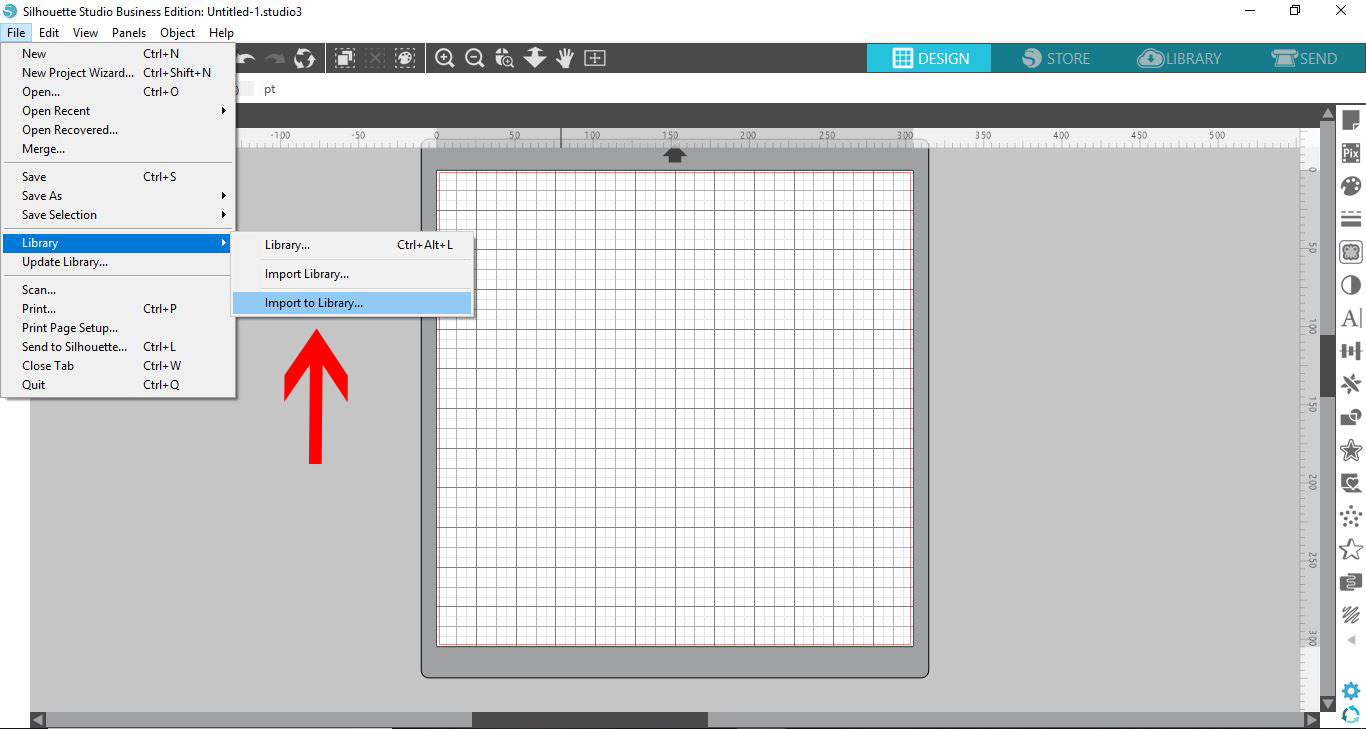
2- We need to import the blank mock up into silhouette studio. Go the library then import to library.
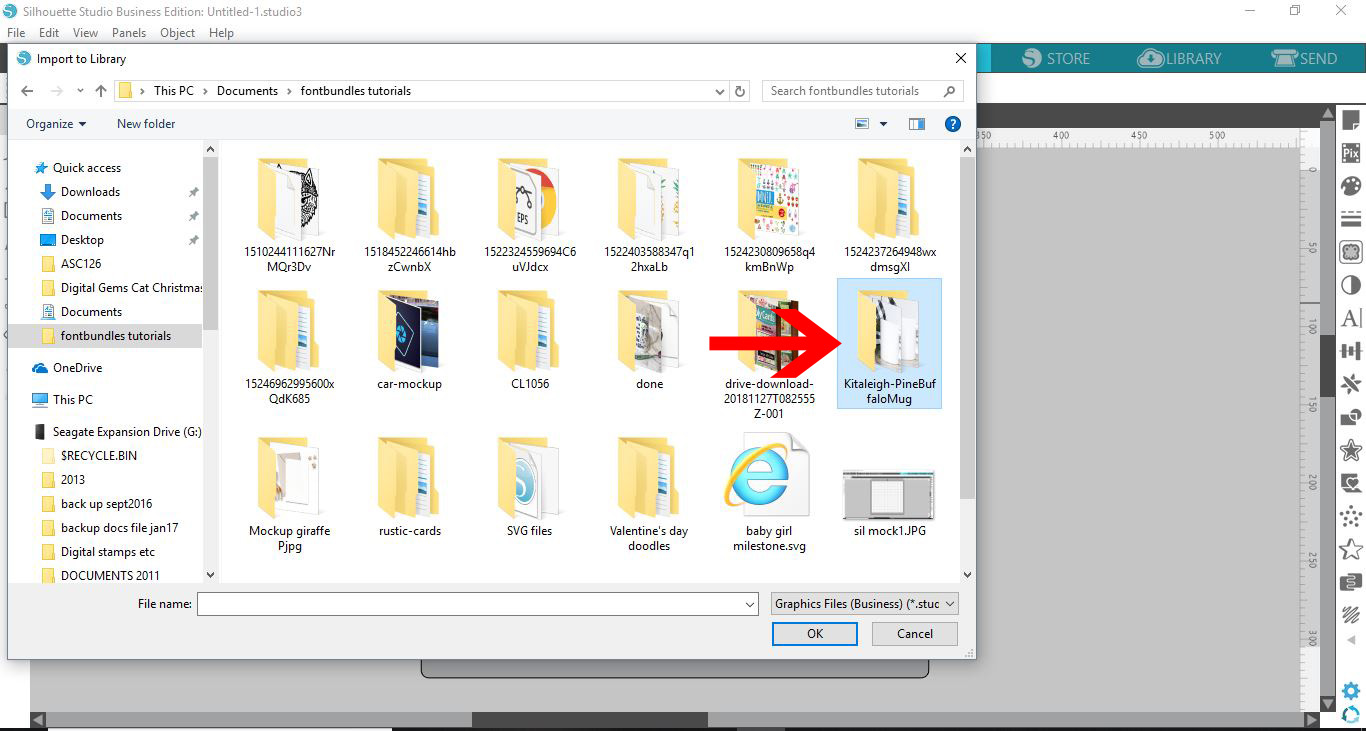
3- Find your mock up and open.
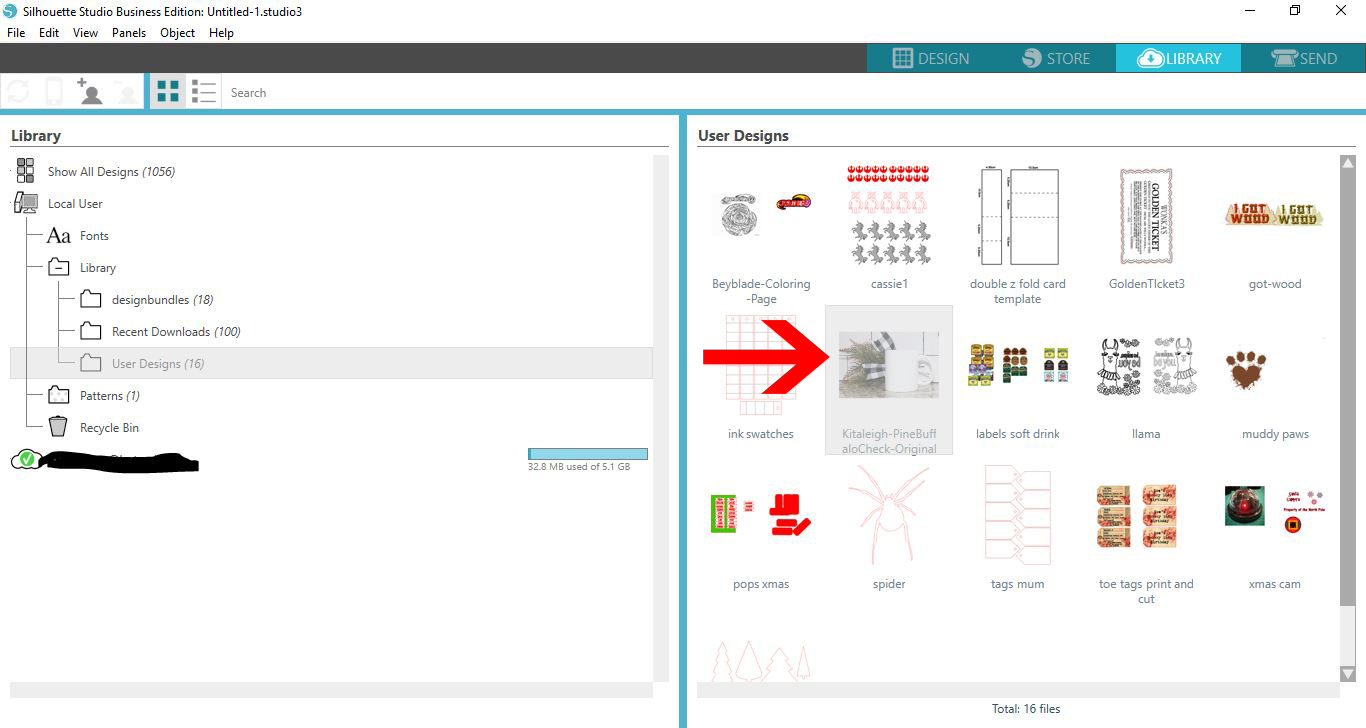
4- The mock up will appear in your library. double click on it.
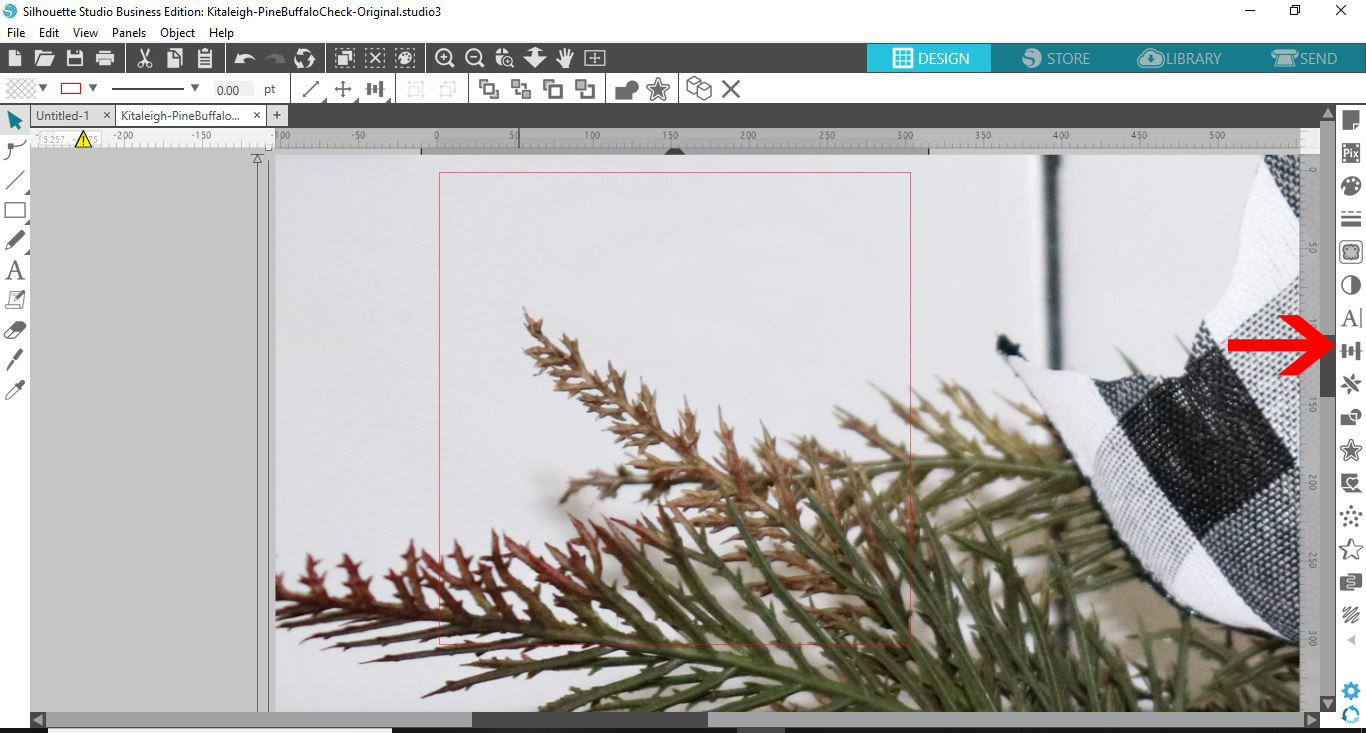
5- If your mock up is too large for the design space click on the transform panel.
6- Reduce the size. I used 33%
7- Once centered on the design space you can then adjust the size with the handles.
I am using Pine with buffalo check mock up from Design Bundles.
8- Add your design for the mock up. I am using text. Type your text.
9- Select the text option. Select your font. I will be using Glorydays from Font Bundles.
10- Select the text.
11-Adjust the line spacing.
12- With the text selected, right click and weld.
13- With text still selected, right click again and make a compound path.
14- Move the text onto your mock up.
15- Change the text fill colour to suit your needs.
16- Change the line colour to match the fill colour.
17- Once you are happy select everything and right click - group.
18- It is time to save your mock up as a jpeg. If you are running on the free version of Silhouette studio you will need to use a clipping tool to take a screenshot of the design. The first thing you will need to do is remove the grid lines. Go to page set up and uncheck grids.
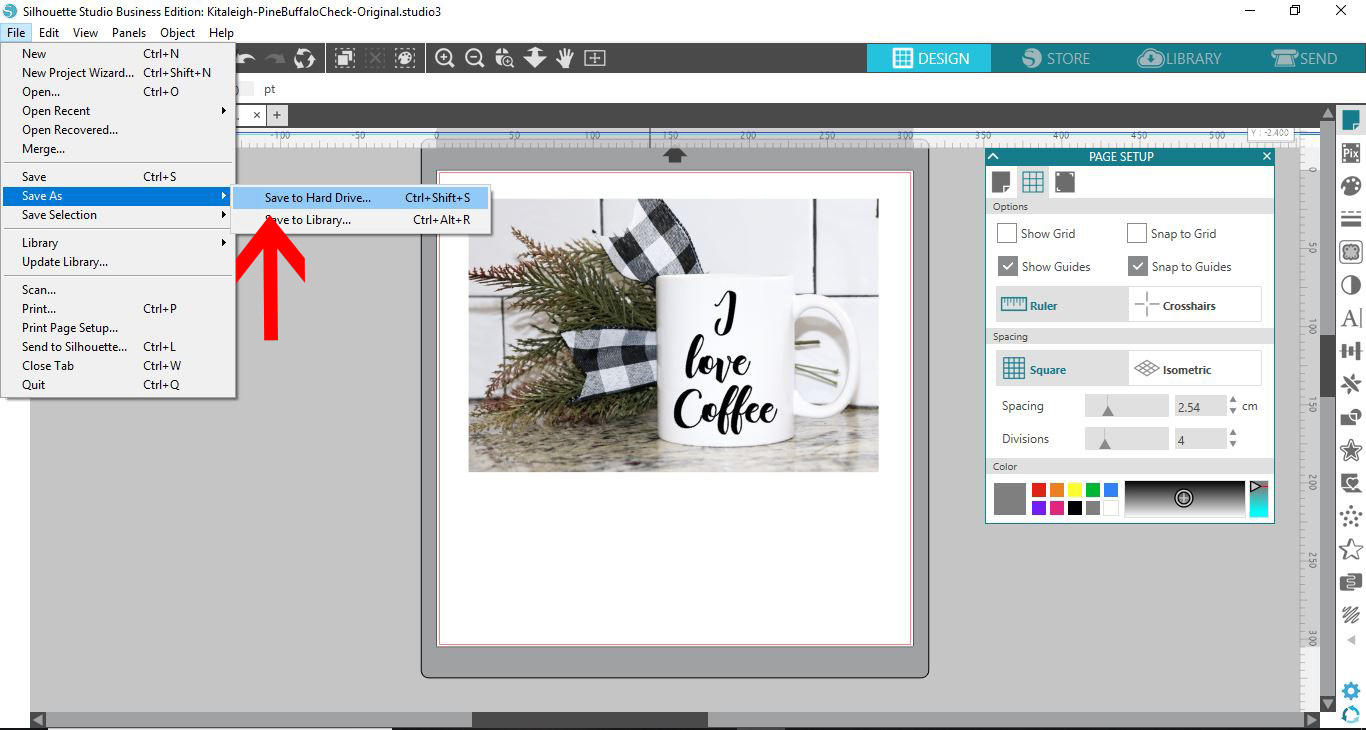
19- If you have the business edition, you can save the design. go to file - save as - save to hard drive.
20- Name your design and select jpeg. Save.
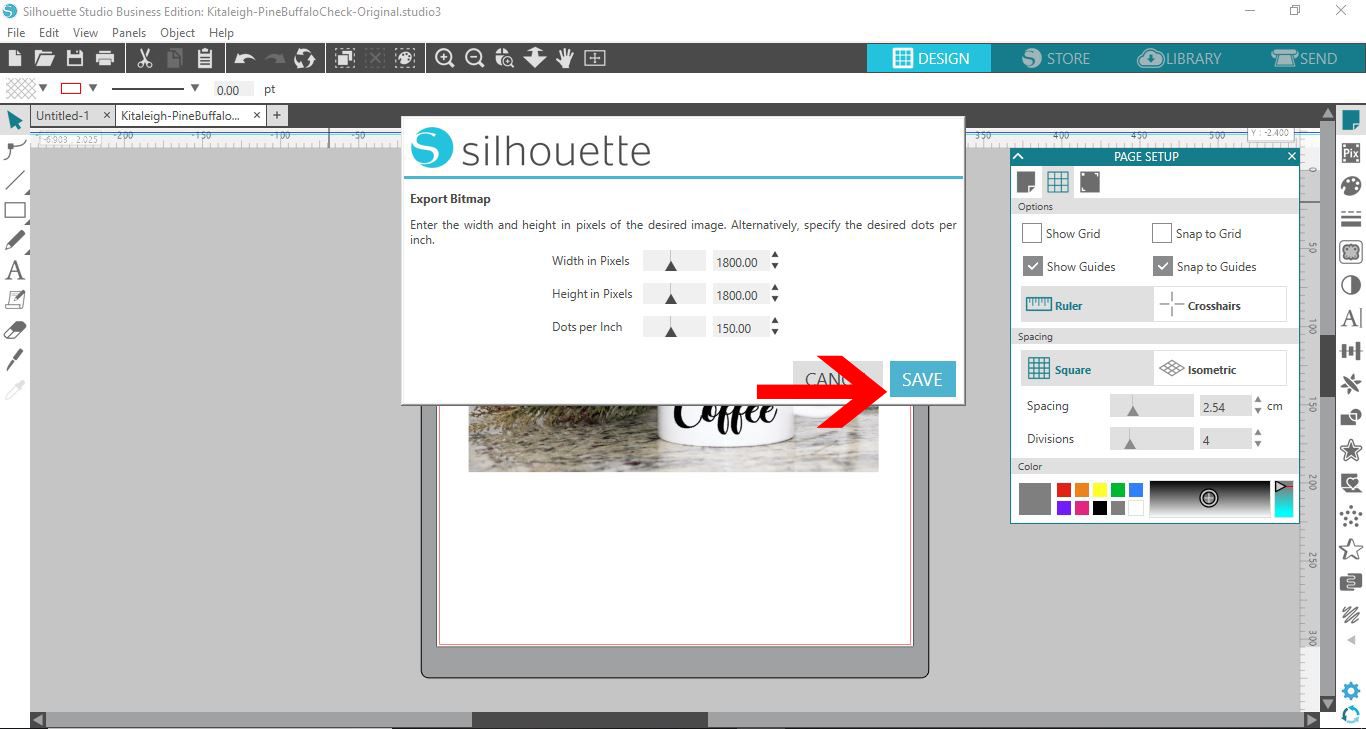
21- In the export window click on save.
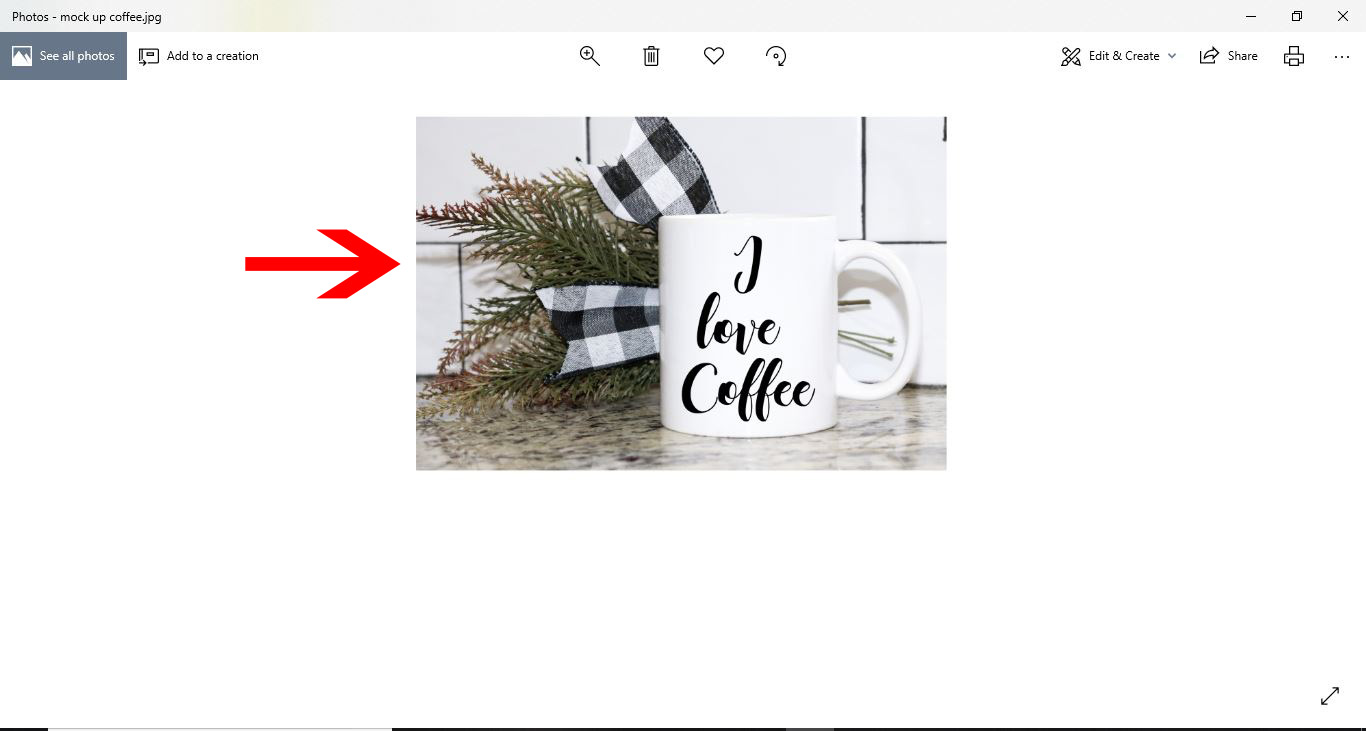
22- Once saved you will now have a jpeg of your mock up.
1- Open Silhouette Studio. Click on the open icon.
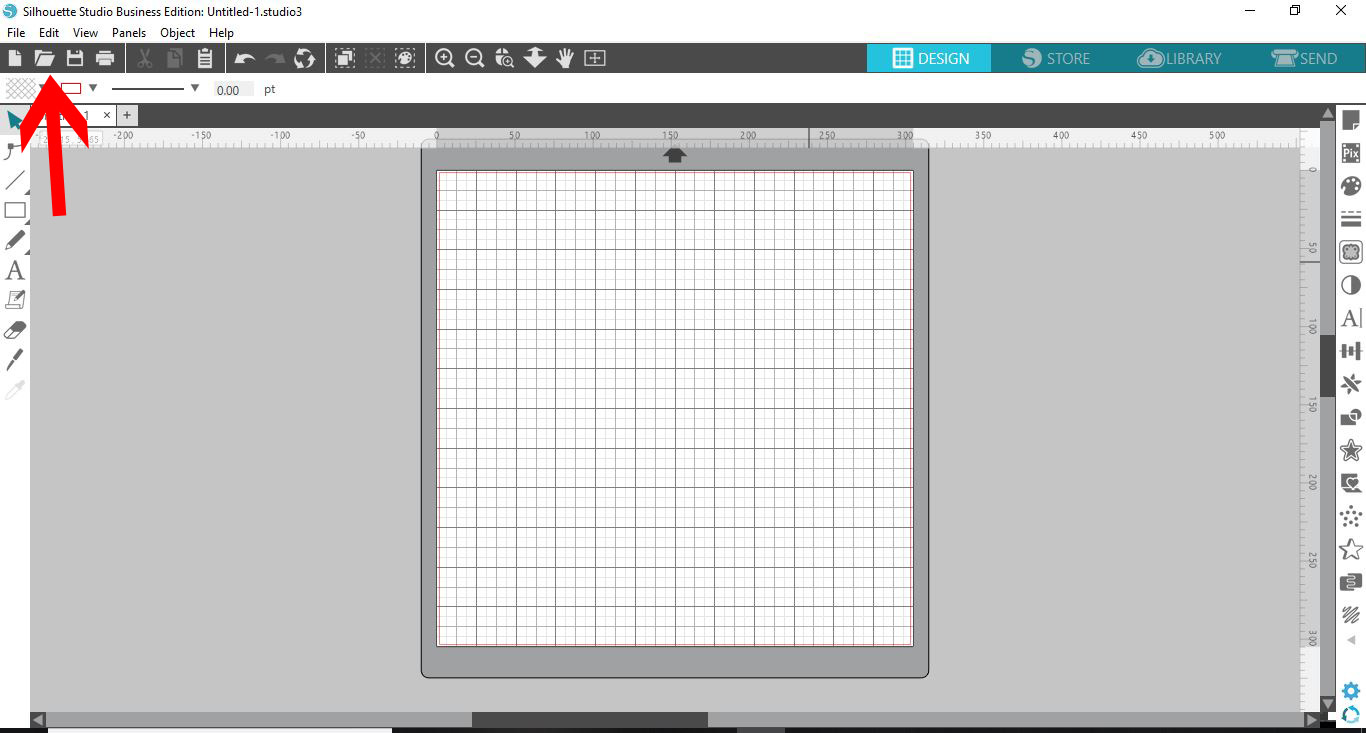
2- We need to import the blank mock up into silhouette studio. Go the library then import to library.
3- Find your mock up and open.
4- The mock up will appear in your library. double click on it.
5- If your mock up is too large for the design space click on the transform panel.
6- Reduce the size. I used 33%
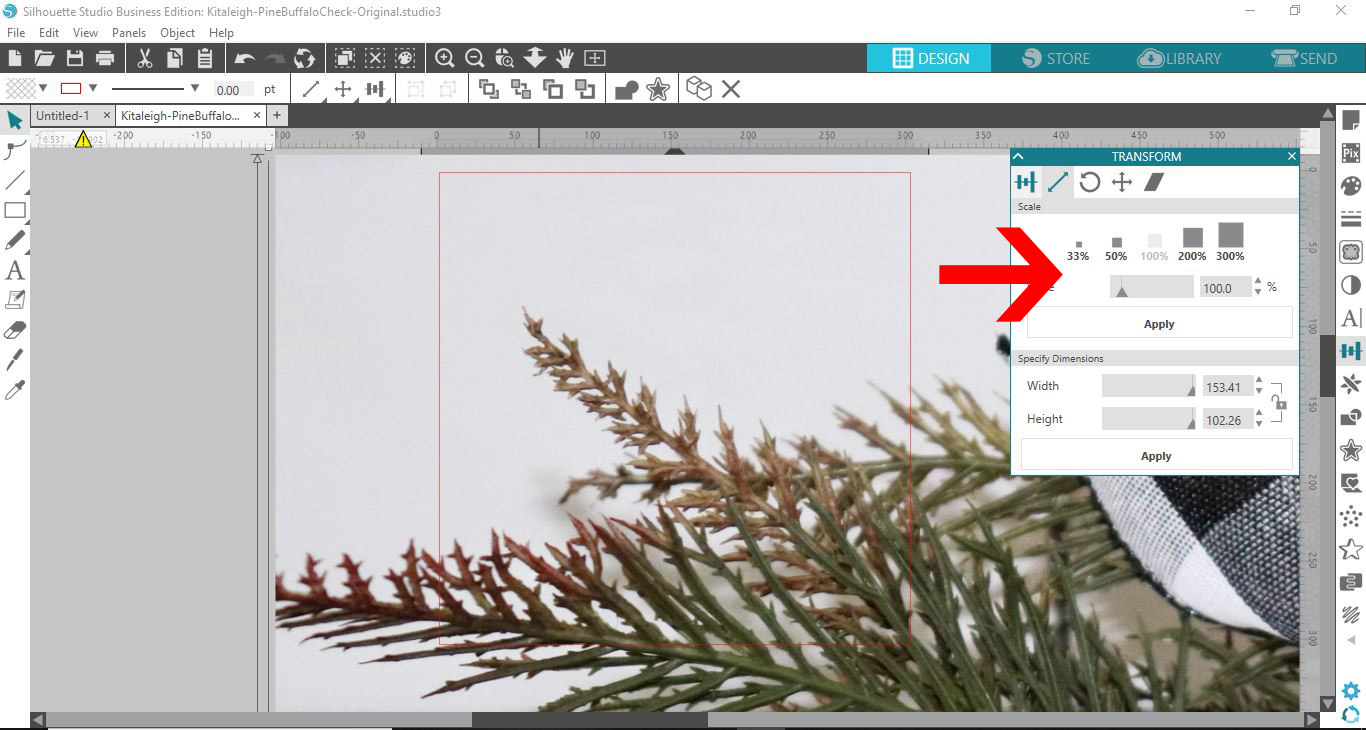
7- Once centered on the design space you can then adjust the size with the handles.
I am using Pine with buffalo check mock up from Design Bundles.
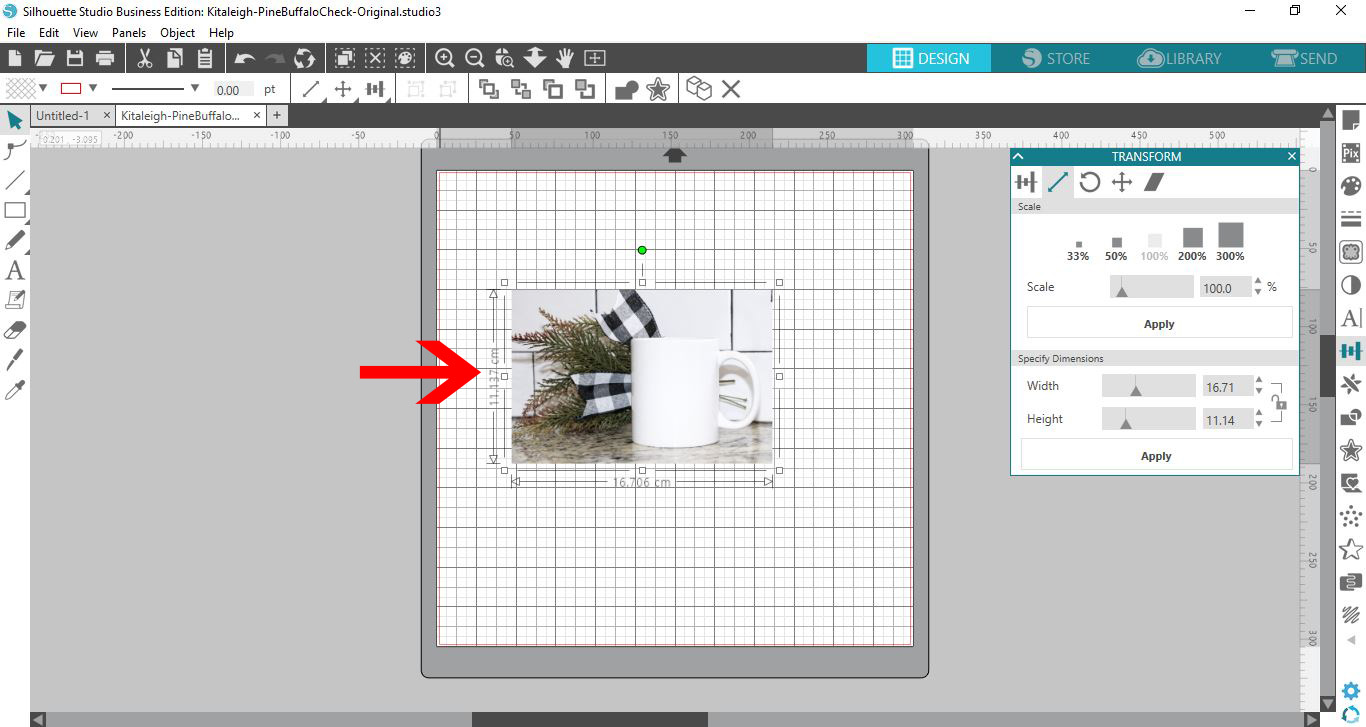
8- Add your design for the mock up. I am using text. Type your text.
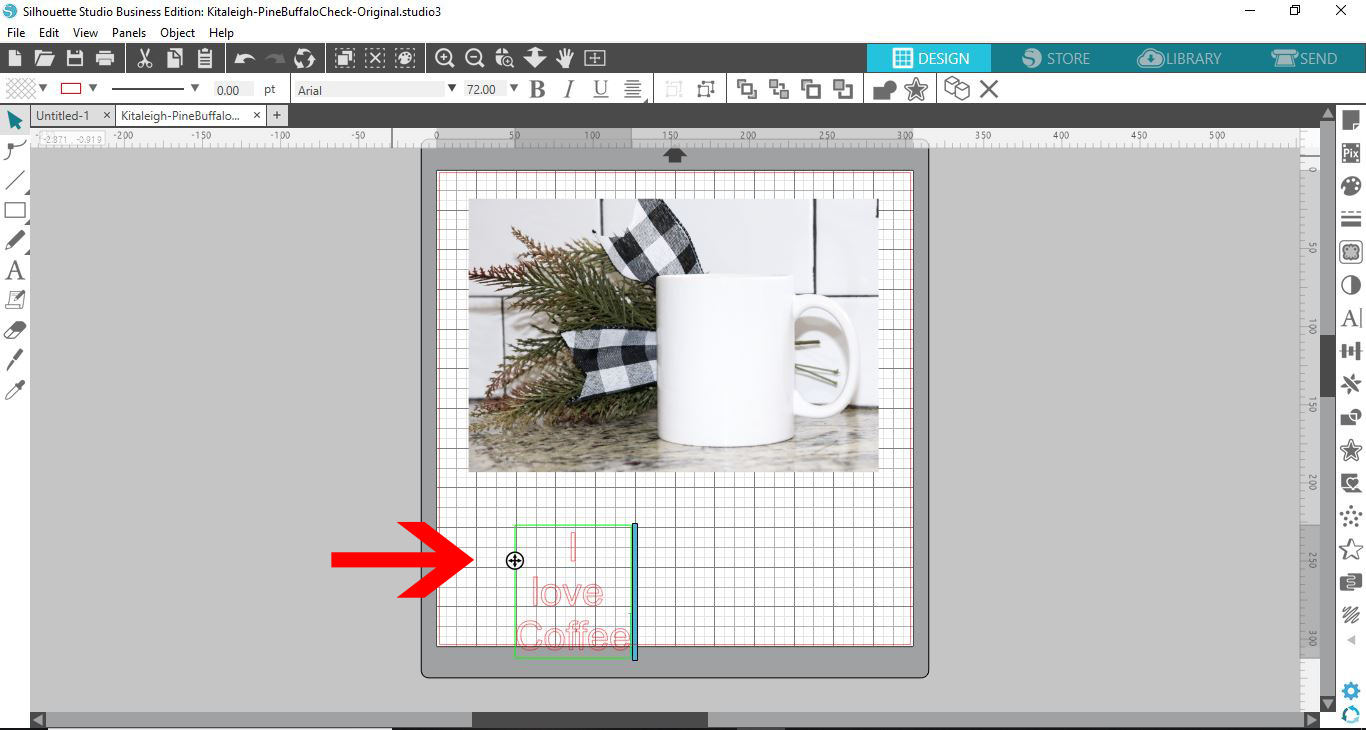
9- Select the text option. Select your font. I will be using Glorydays from Font Bundles.
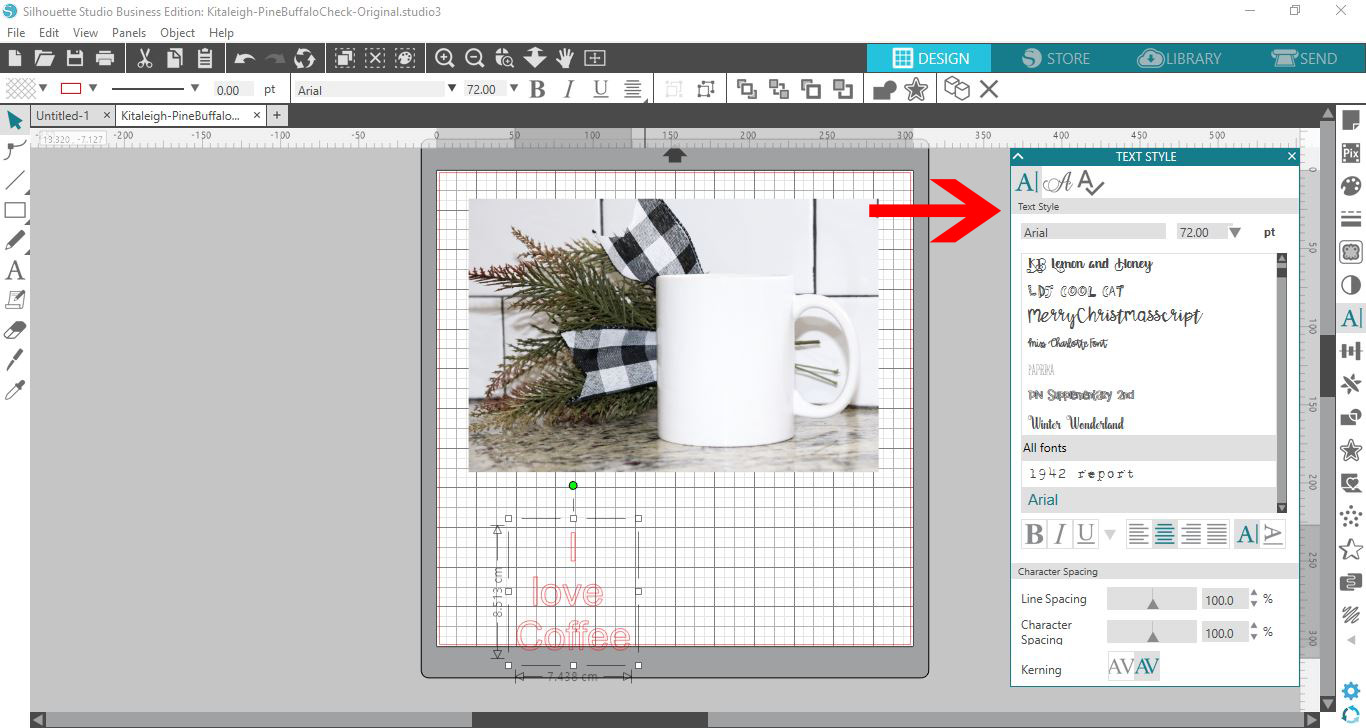
10- Select the text.
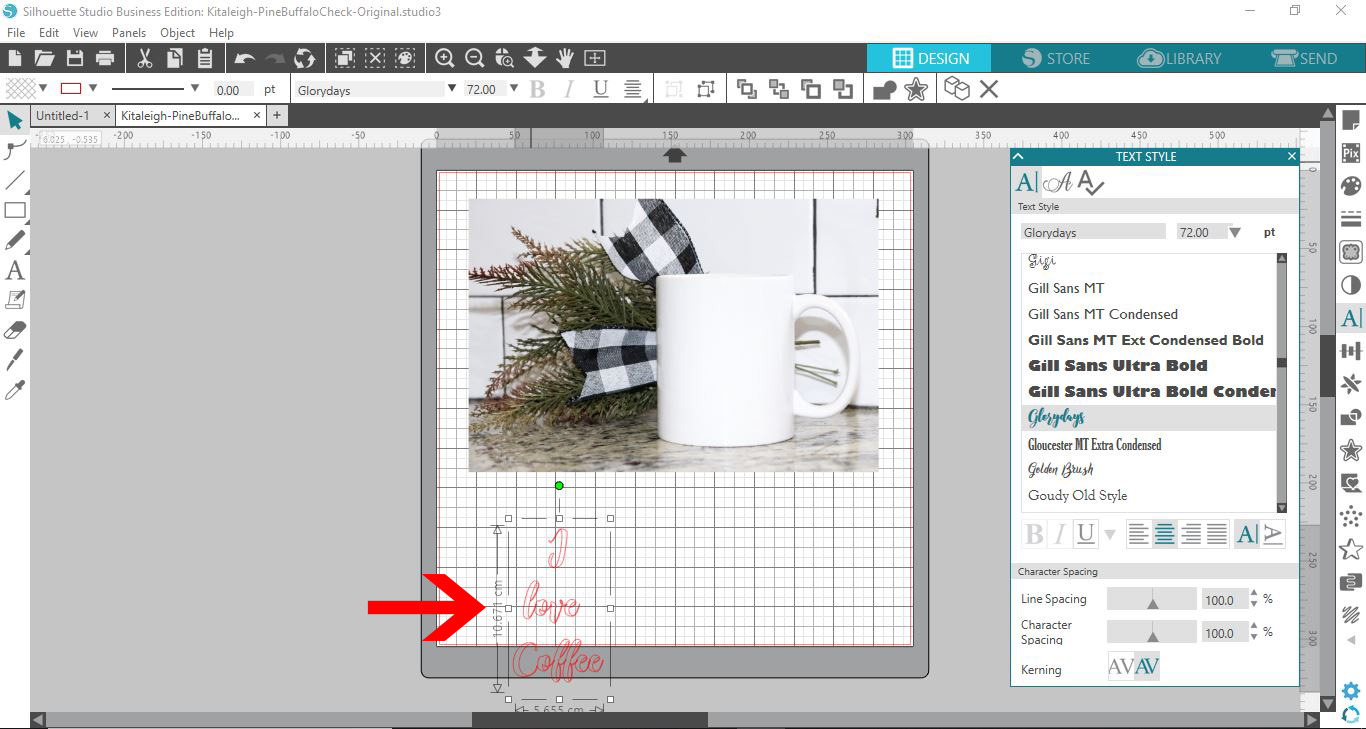
11-Adjust the line spacing.
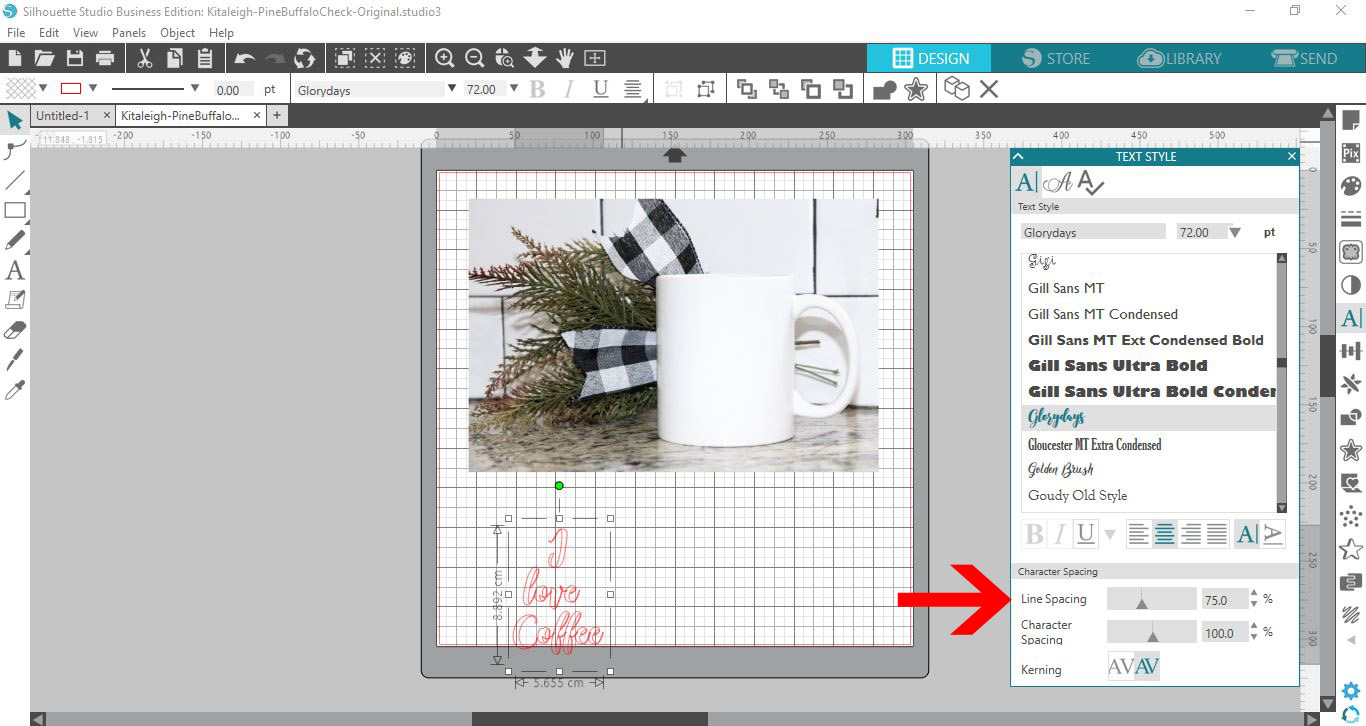
12- With the text selected, right click and weld.
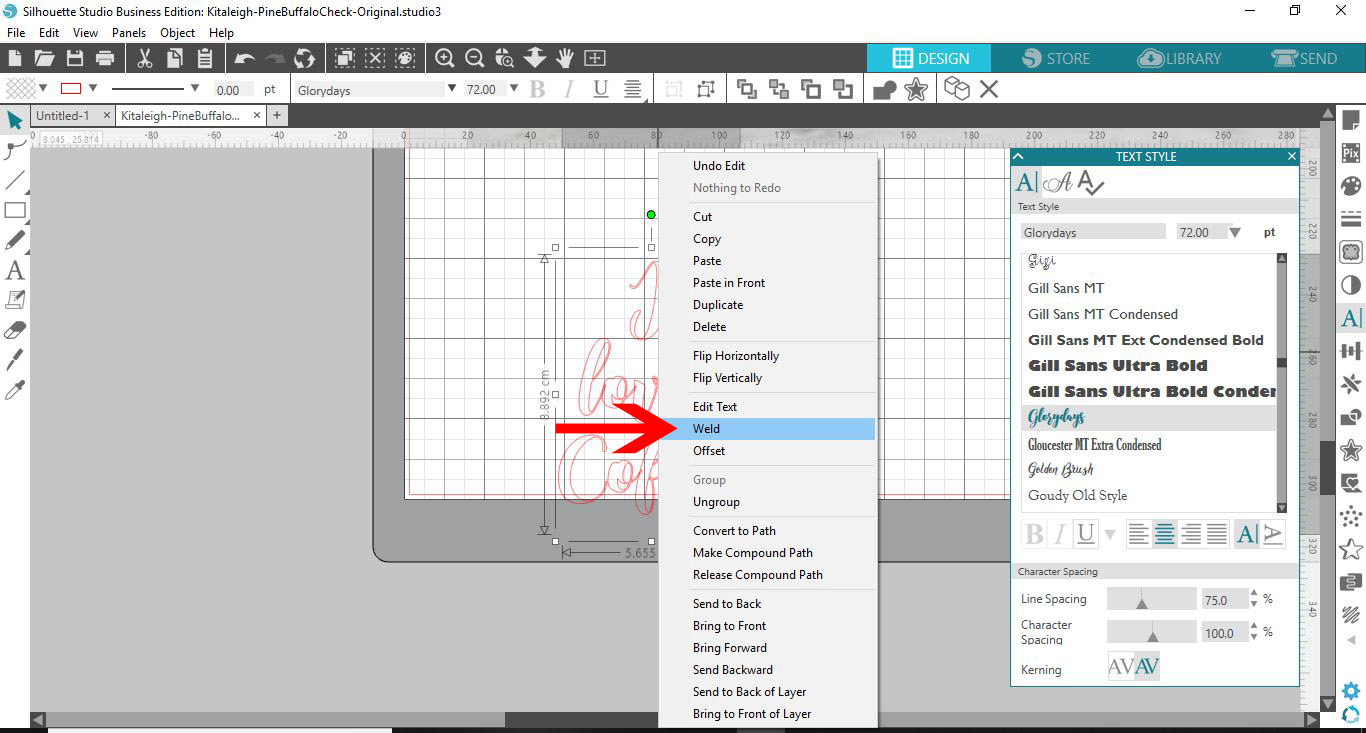
13- With text still selected, right click again and make a compound path.

14- Move the text onto your mock up.
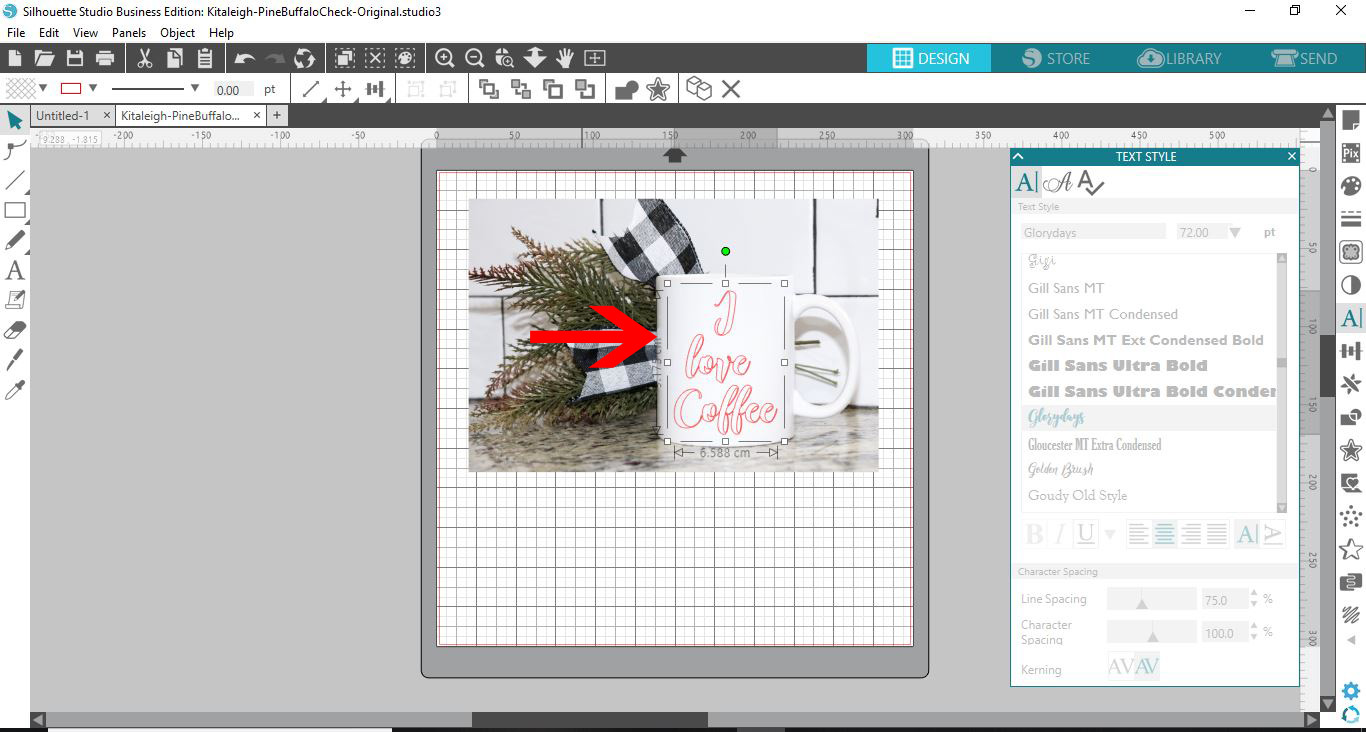
15- Change the text fill colour to suit your needs.
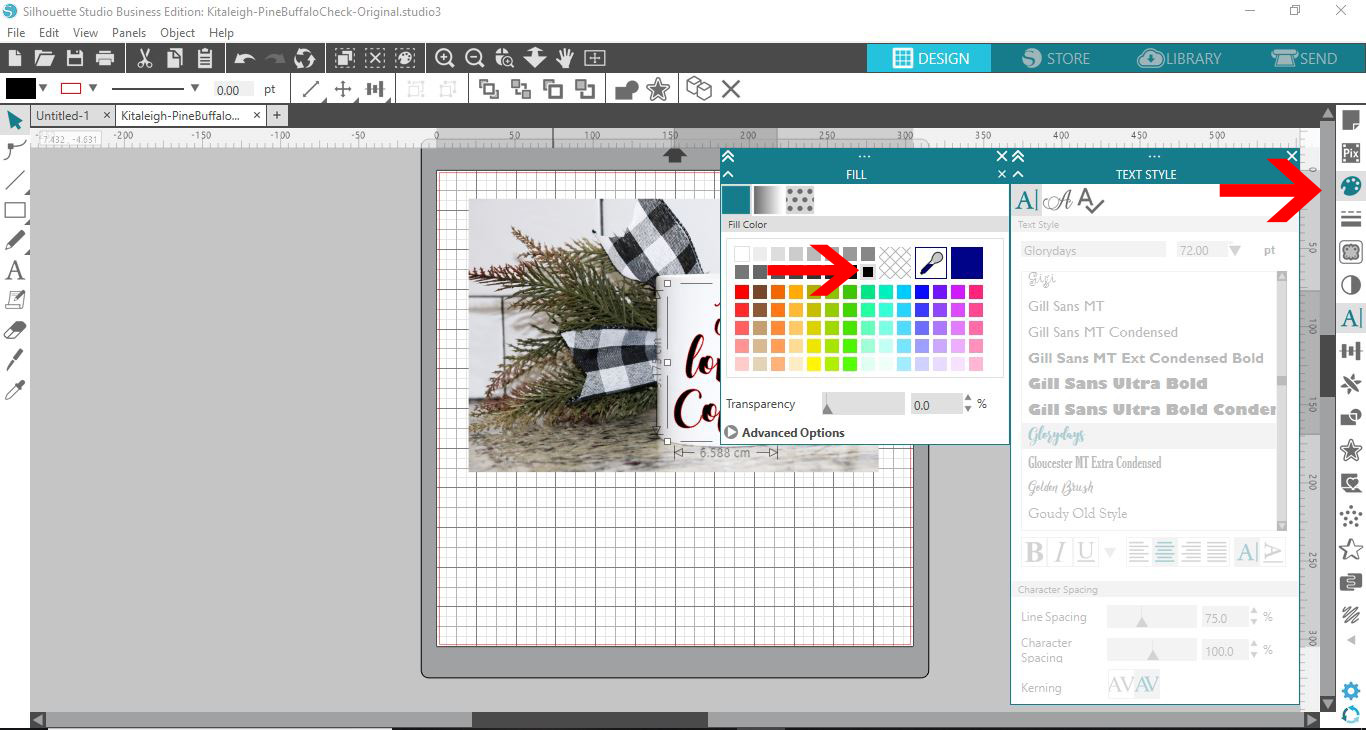
16- Change the line colour to match the fill colour.

17- Once you are happy select everything and right click - group.
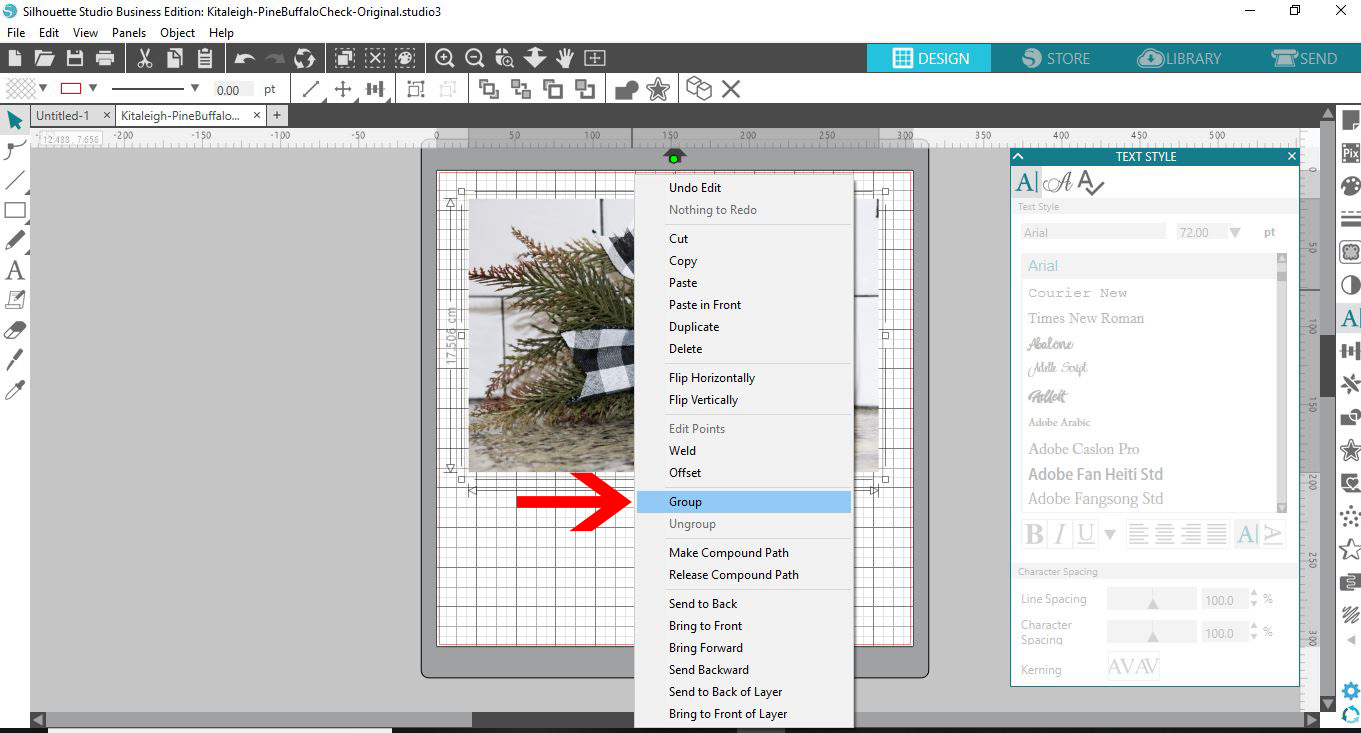
18- It is time to save your mock up as a jpeg. If you are running on the free version of Silhouette studio you will need to use a clipping tool to take a screenshot of the design. The first thing you will need to do is remove the grid lines. Go to page set up and uncheck grids.

19- If you have the business edition, you can save the design. go to file - save as - save to hard drive.
20- Name your design and select jpeg. Save.
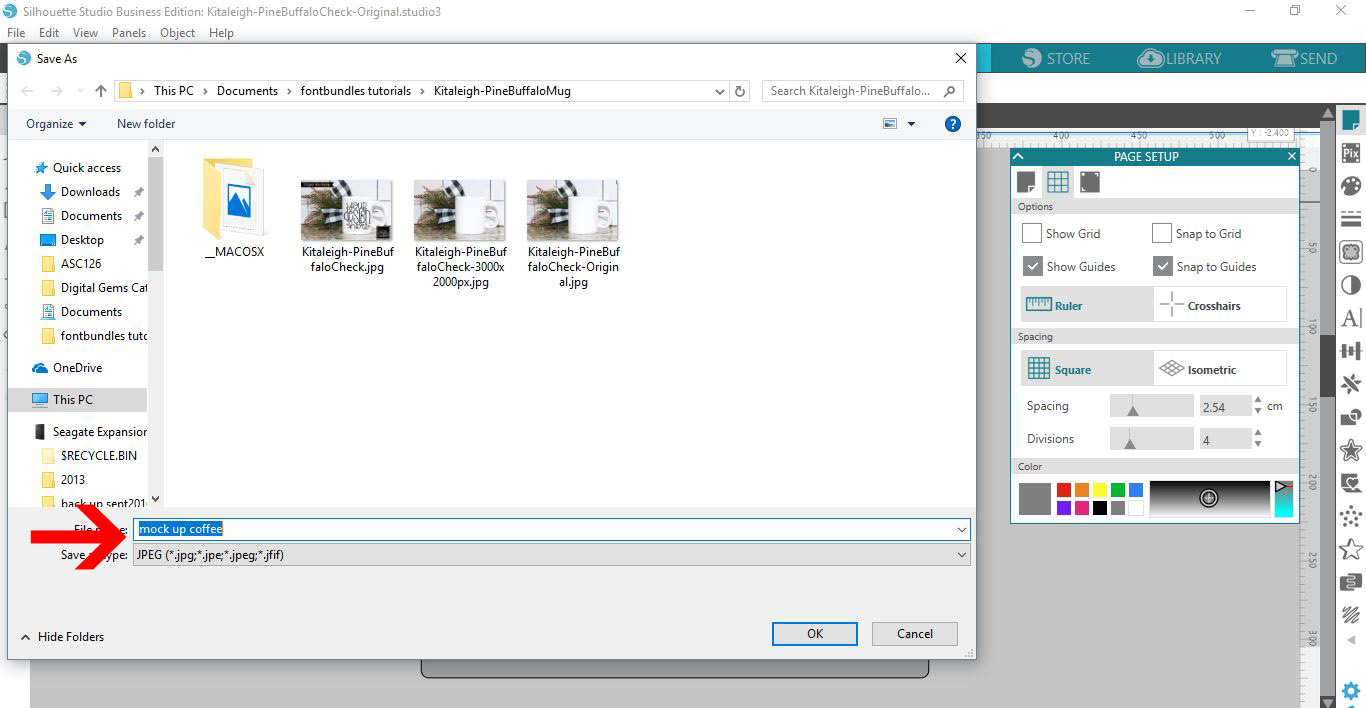
21- In the export window click on save.
22- Once saved you will now have a jpeg of your mock up.
Related Tutorials
Canva Tutorials
How To Use Mock Ups in Canva
Learn how to use mockups in Canva in just four easy steps.
Affinity Tutorials
How To Use Mock Ups In Affinity Designer
In this tutorial we will show you how to use both JPG and PSD Mockups in Affinity Designer.
Silhouette Tutorials
How to Use Advanced Color Settings in Silhouette Studio
Discover the Advanced Color Settings in Silhouette Studio!
Silhouette Tutorials
How to Use Your Silhouette Studio Library on More Than One Computer
Learn how to access your Silhouette Studio Design Edition library on up to 3 different devices!
Silhouette Tutorials
How to Use Point Editing in Silhouette Studio
Silhouette Tutorials