
By Design Bundles
Nesting Feature in Silhouette V4.1
The Nesting feature in Silhouette Studio helps to minimize space and material wastage. It’s a great way to get the most out of your time and material. The Nesting feature is available in Designer Edition and higher. Even if you haven’t upgraded yet, this tutorial will show you how great this feature is.
We will be discussing the Nesting Feature in Version 4.1 of Silhouette Studio. We also have a visual guide showing other cool ways to use the Nesting Feature.
Step 1 - Open your Design or Create Shapes
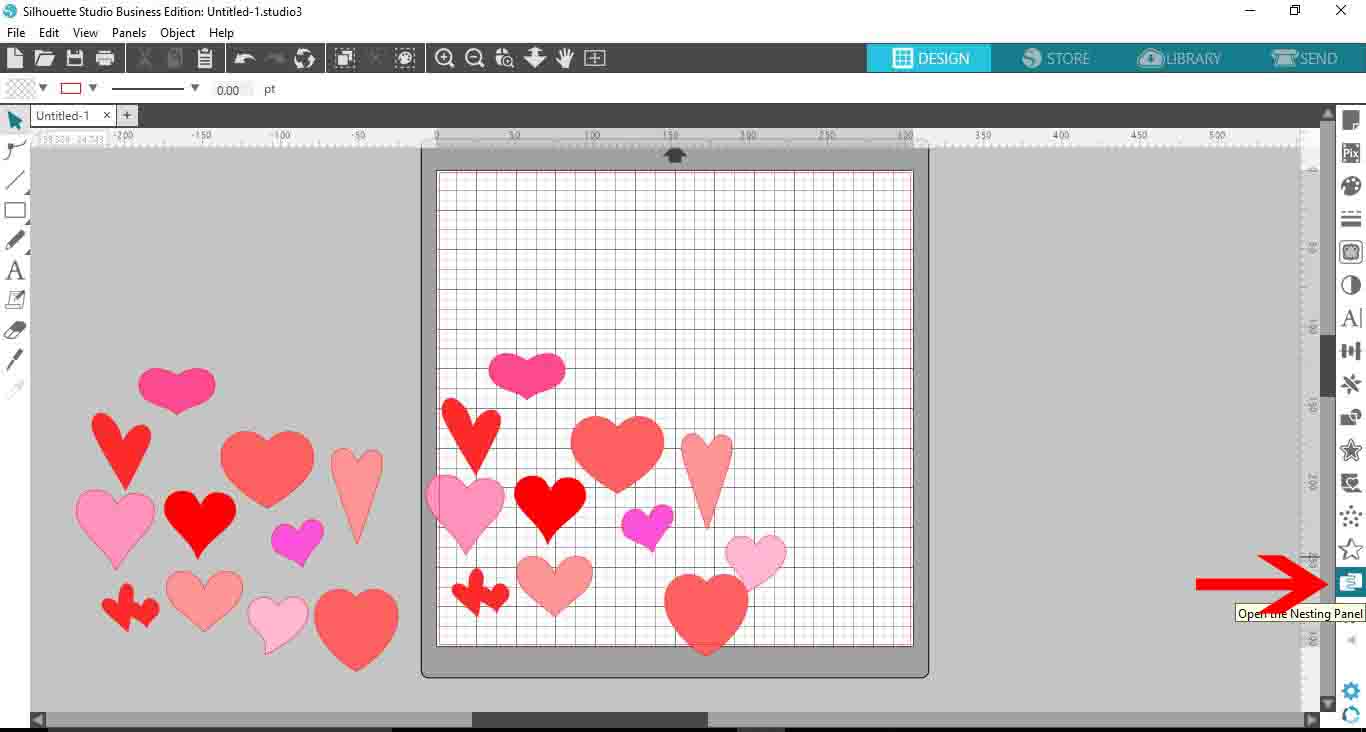
Open Silhouette Studio. You can open your designs by dragging + dropping or going to File > Open. We chose to use heart Flexi Shapes in Silhouette Studio.
Once you have your designs ready, click on the Nesting icon on the right side toolbar.
Step 2 - Nesting Window Options
In the Design Page Nesting window we have a few options. Let’s start with the settings that are automatically selected.
Nest Designs in Cut Area
The option for Use Cut Area will automatically be selected. When this is selected and Nest is clicked, all designs within the cut area will be nested.
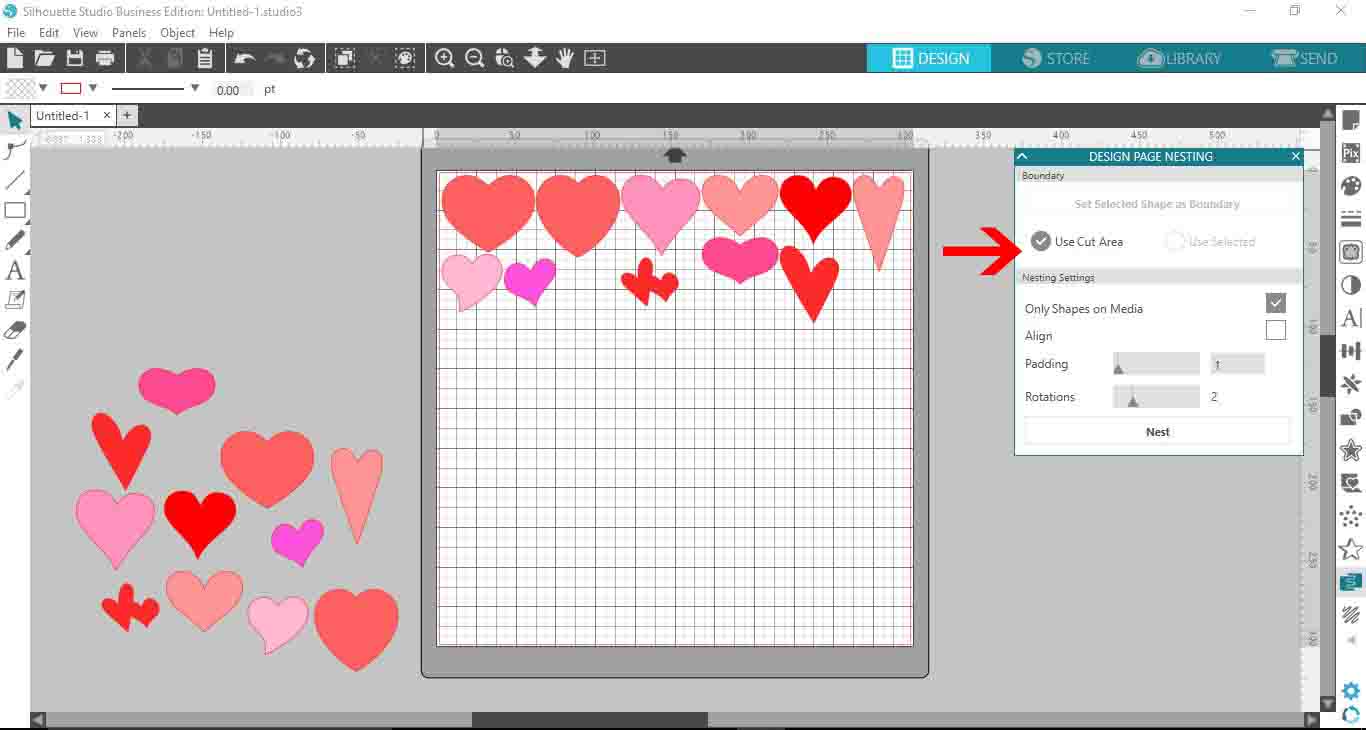
Nesting Settings in Silhouette Studio
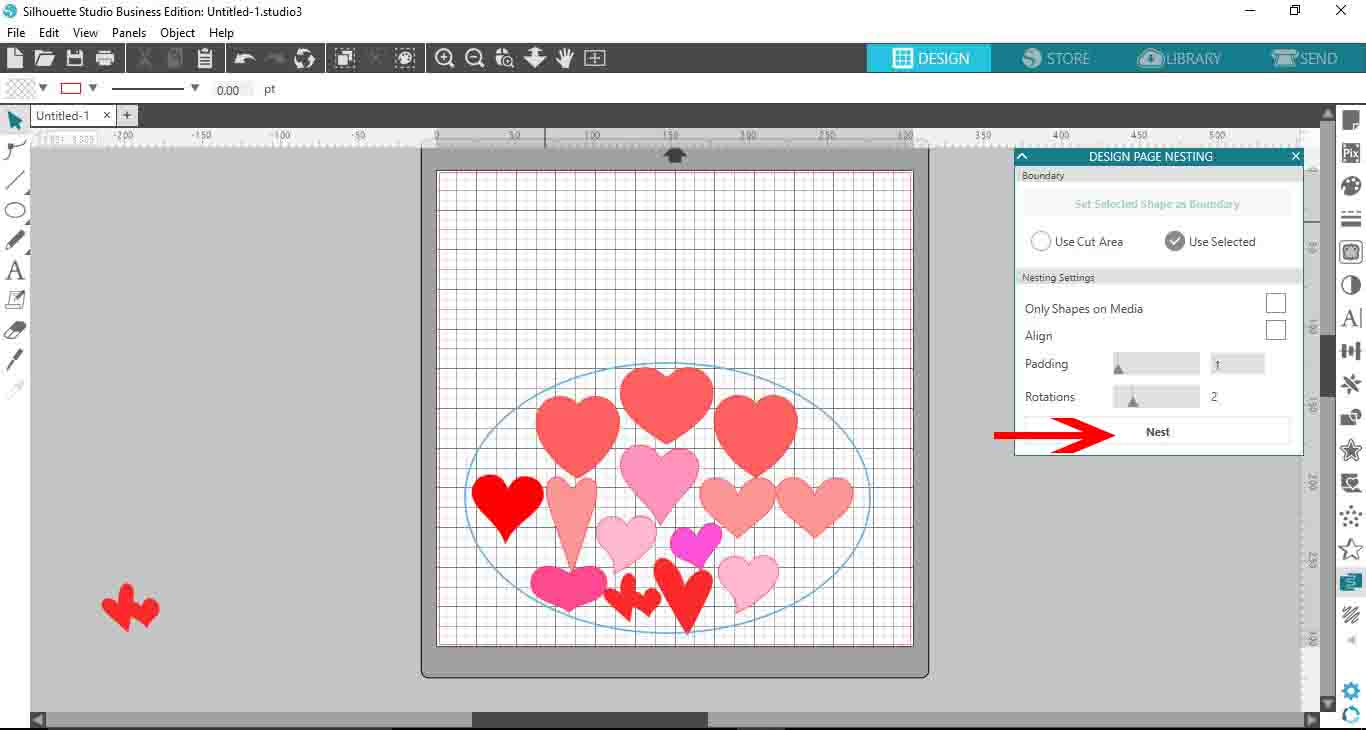
The box for Only Shapes on Media is currently ticked. This means that only the designs within the cut area are nested. If you untick this box, all designs, including outside the cut area, will be nested.
In the image below, the box is un-ticked.

The Align option tends to keep similar objects together as much as possible. This is to create a more efficient cut so tick this box if it benefits your project. You may find this useful when the Nesting feature overlaps designs.

The Padding option is the distance between each design. If you don’t mind them being close, then a Padding of 0 or 1 is a good start.

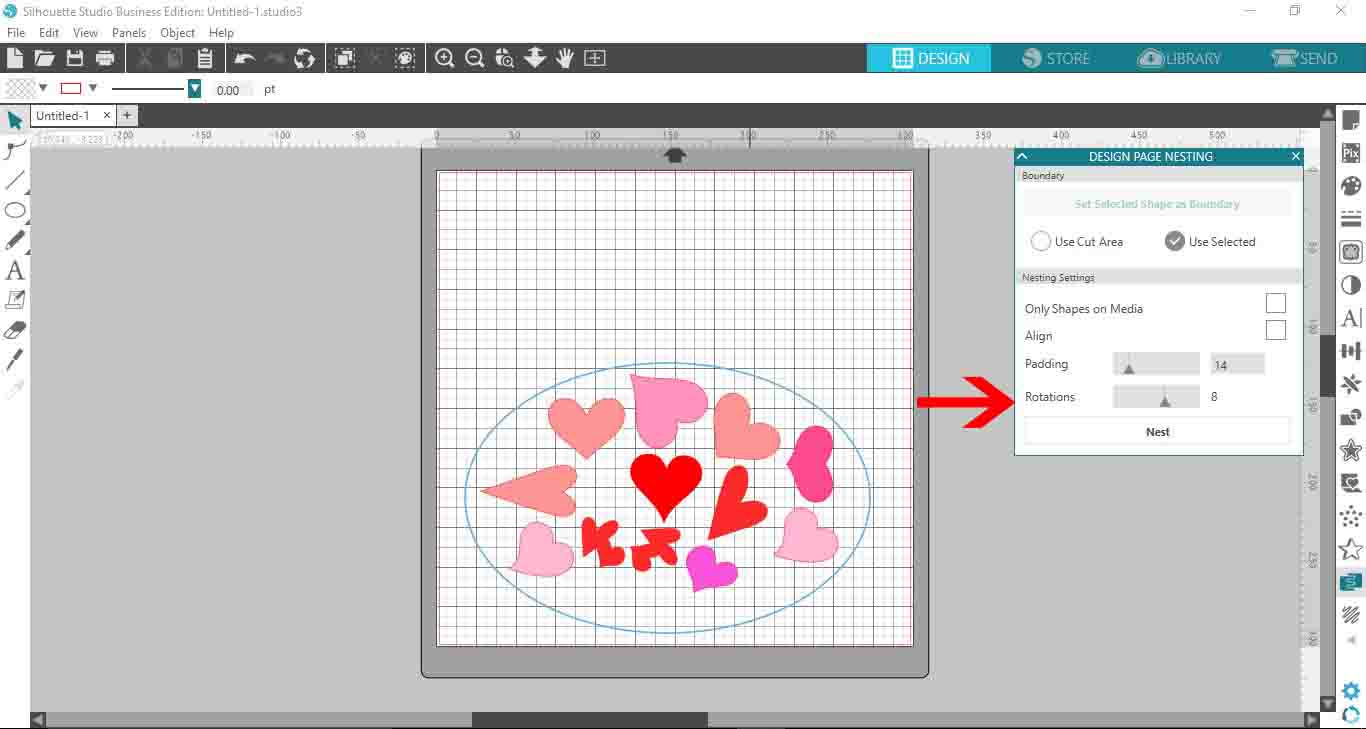
Rotations is the number of times you tell the software it can rotate the design to fit. It won’t necessarily rotate that many times but that is an option if the software needs to.

Step 3 - Use a Nesting Boundary
At the top of the window is Set Selected Shape as Boundary. This option allows you to use a shape as the boundary within which the designs are nested.

Drag out a Flexi shape from the left side toolbar. We chose an Oval. Next, click on the Set Selected Shape as Boundary.
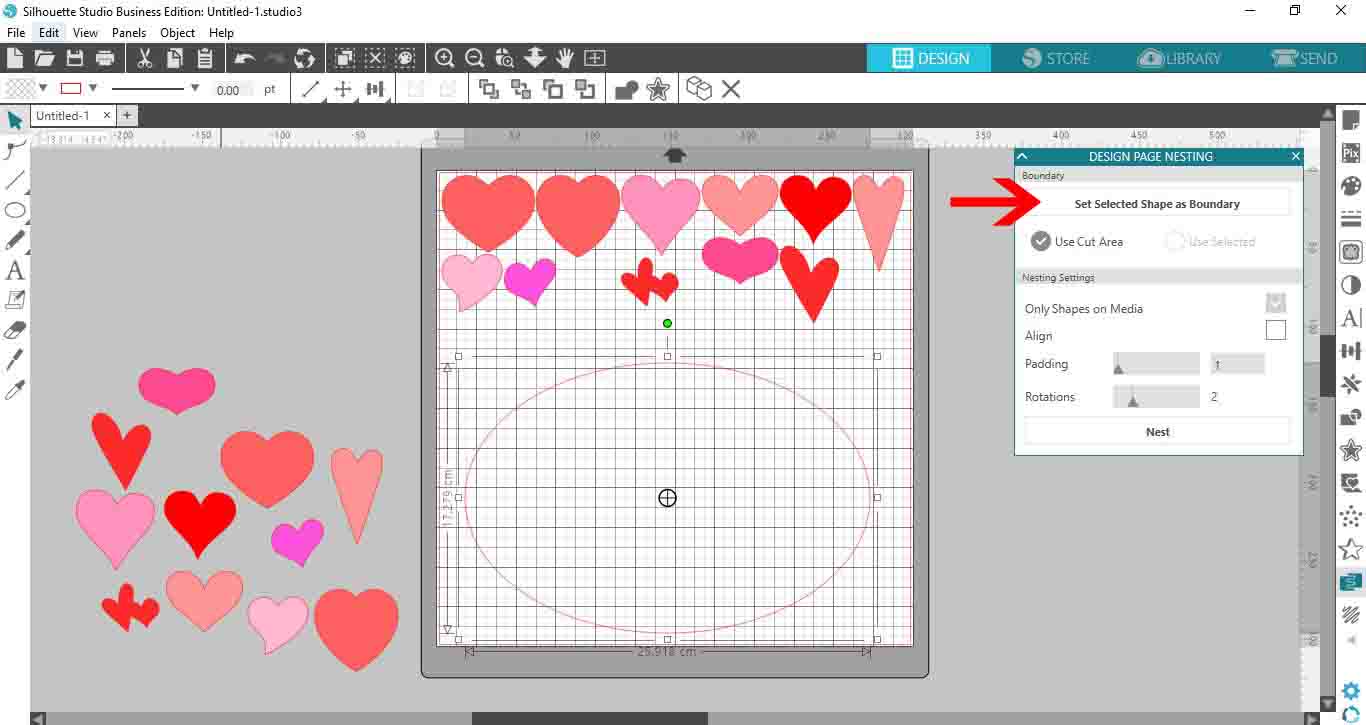
The shape will now change to a blue color indicating a nesting boundary.
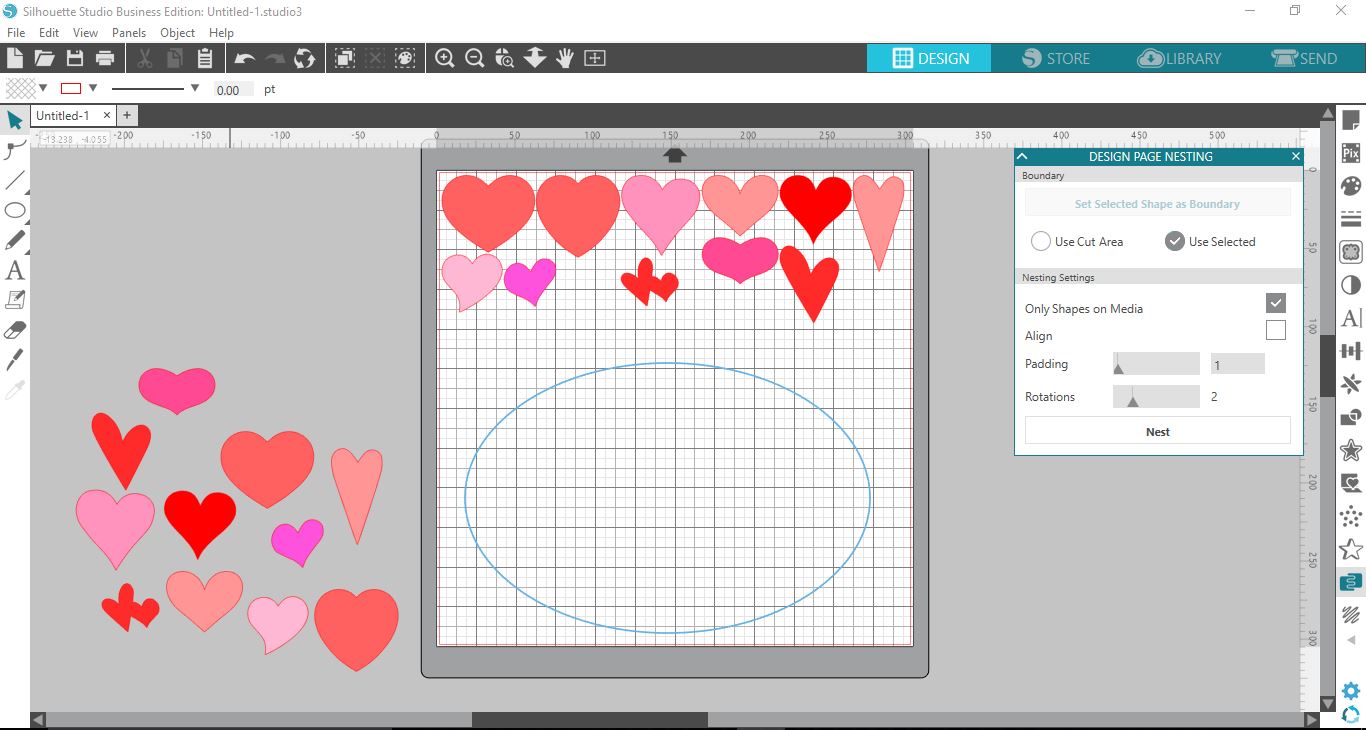
You will also see that the option Use Cut Area changes to Use Selected.

When you click on Nest, the designs will be adjusted into the boundary shape you created.
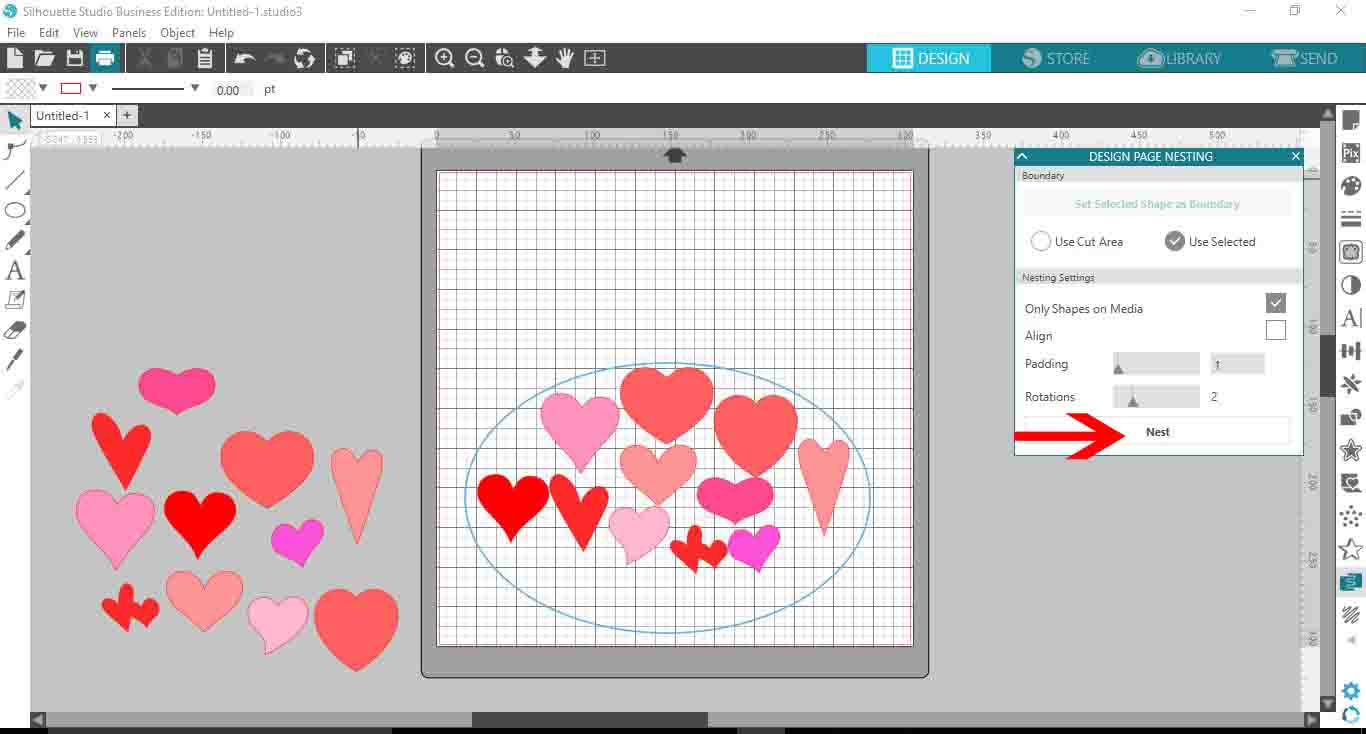
Nest All Media Within Boundary
If you want to nest all media within the boundary, be sure to un-tick the box for Only Shapes On Media. Then click on Nest. Silhouette Studio will determine what shapes can fit into the boundary area.
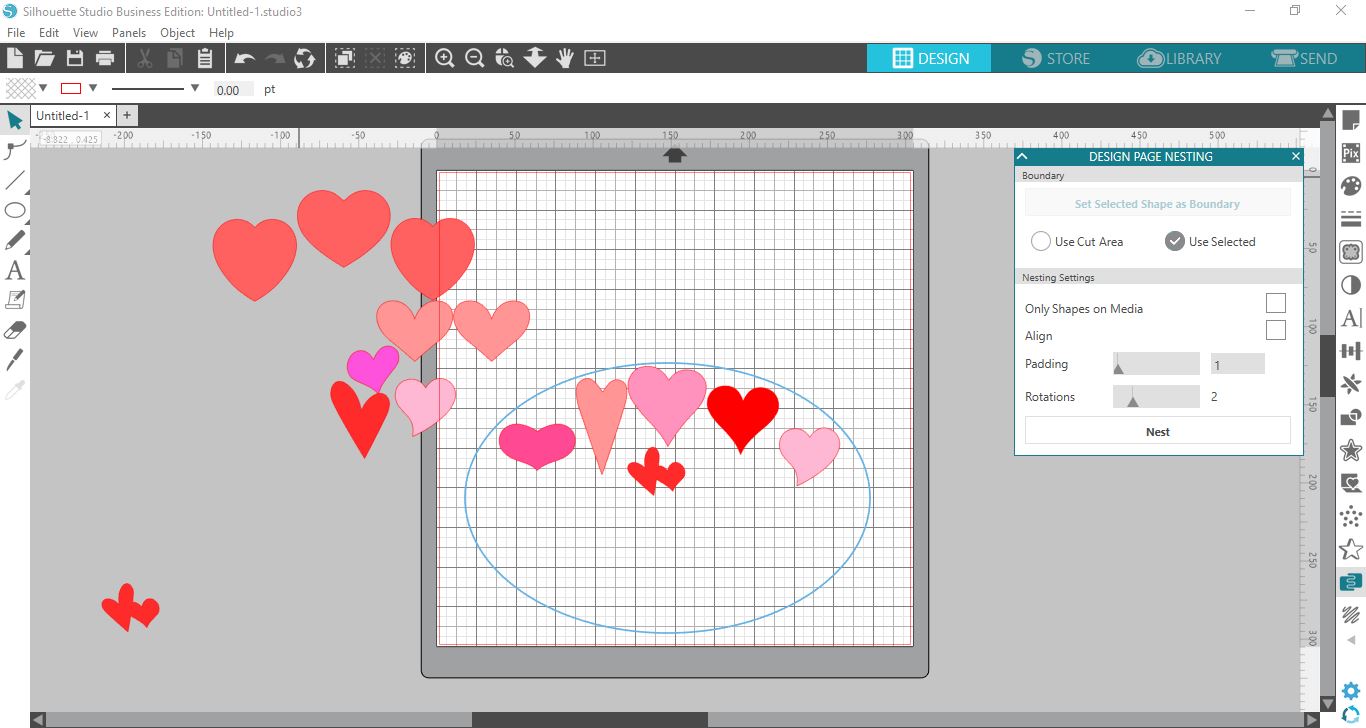
Manually Nest Media Within Boundary
You can also manually select the shapes you would like to nest. Once selected, click on Nest. Only the selected shapes will be nested.
The options for Align, Padding and Rotations also apply here.
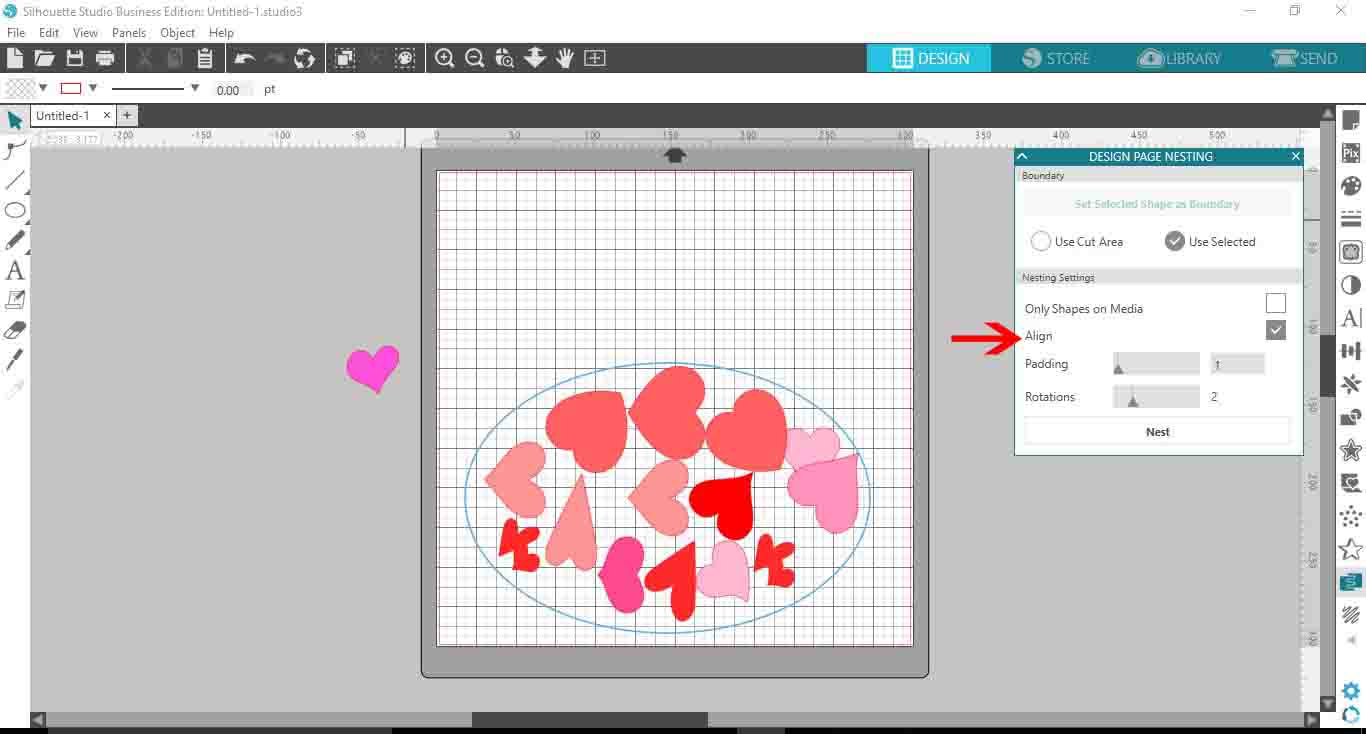
Adjust Padding as needed to fit within the boundary.
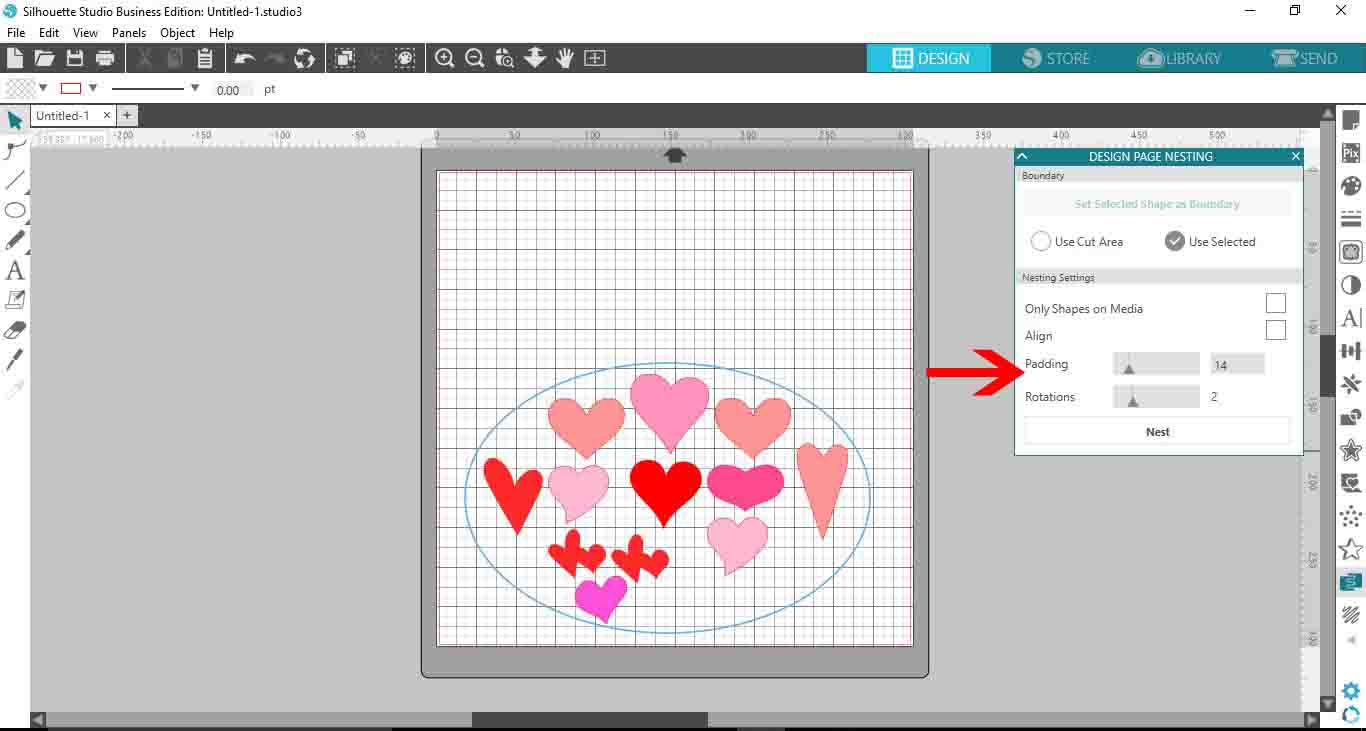
By increasing the rotations, the images will fit better within the boundary.
The Nesting feature in Silhouette Studio can be very beneficial for keeping cut time and costs down. It helps to create a more efficient workflow without the need to work spacing out yourself. We hope this tutorial has helped you to understand and use the Nesting feature with great success.