By Design Bundles
Silhouette Tutorials8 min
Pop Up Card Creator Tutorial for Silhouette V 4.1
The Pop-up card creator can be found in Silhouette version 4.1 and higher. Projects can be turned into a Pop-up design for a fun and unique take on cards. How the tool works may depend on the design used. For this tutorial, we will use a simple Dinosaur design and turn it into a Pop-up card.
If you want, we have a fun range of Dinosaur SVG files on Design Bundles for you to browse through.
The Pop-up creator is where you setup the design as a Pop-up. Once you are in Silhouette Studio, go to the right toolbar. Click on the Pop-up creator that looks like a heart on a folded card.
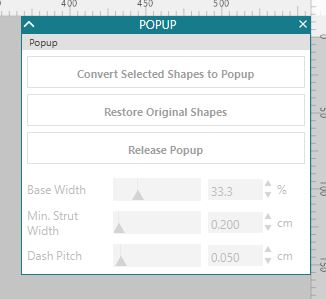
The following panel with options will appear.
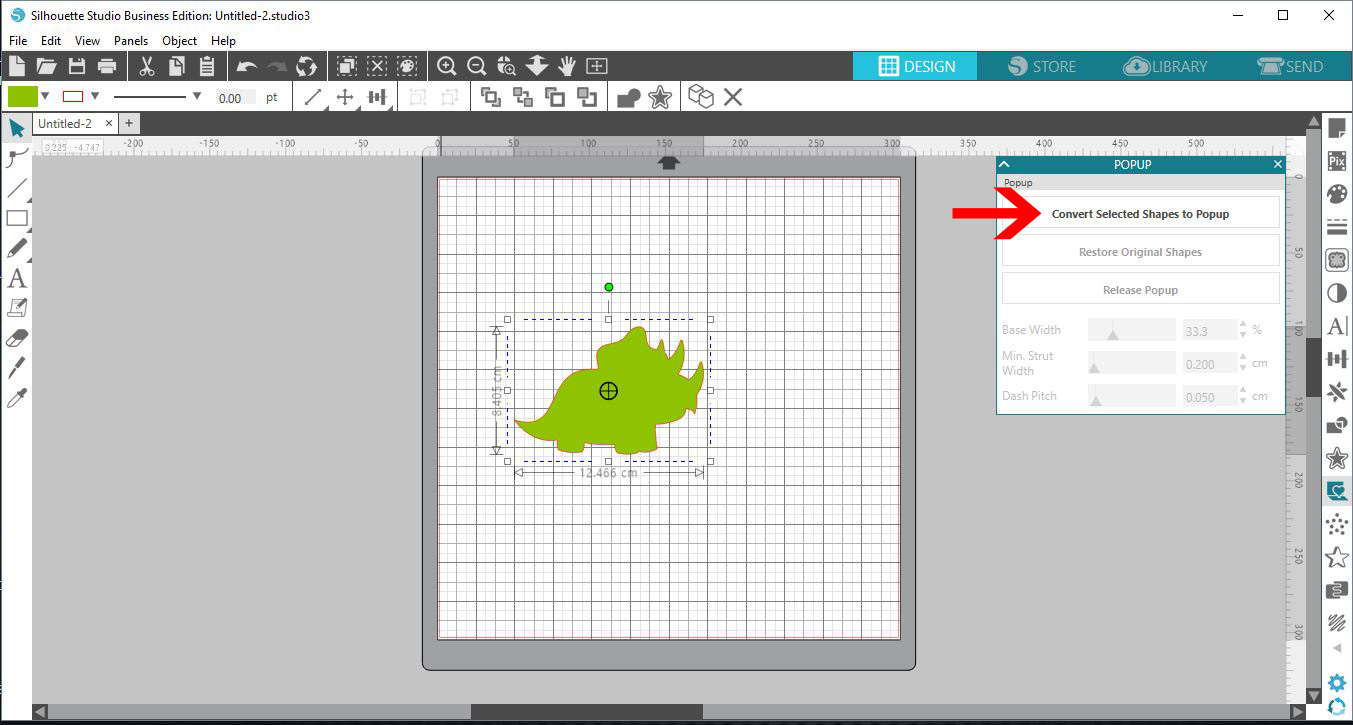
Add the image or text you would like to use as the pop-up design. Do this by going to File>Open. When the shape has been imported, select it and click on Convert selected shapes to Pop up.
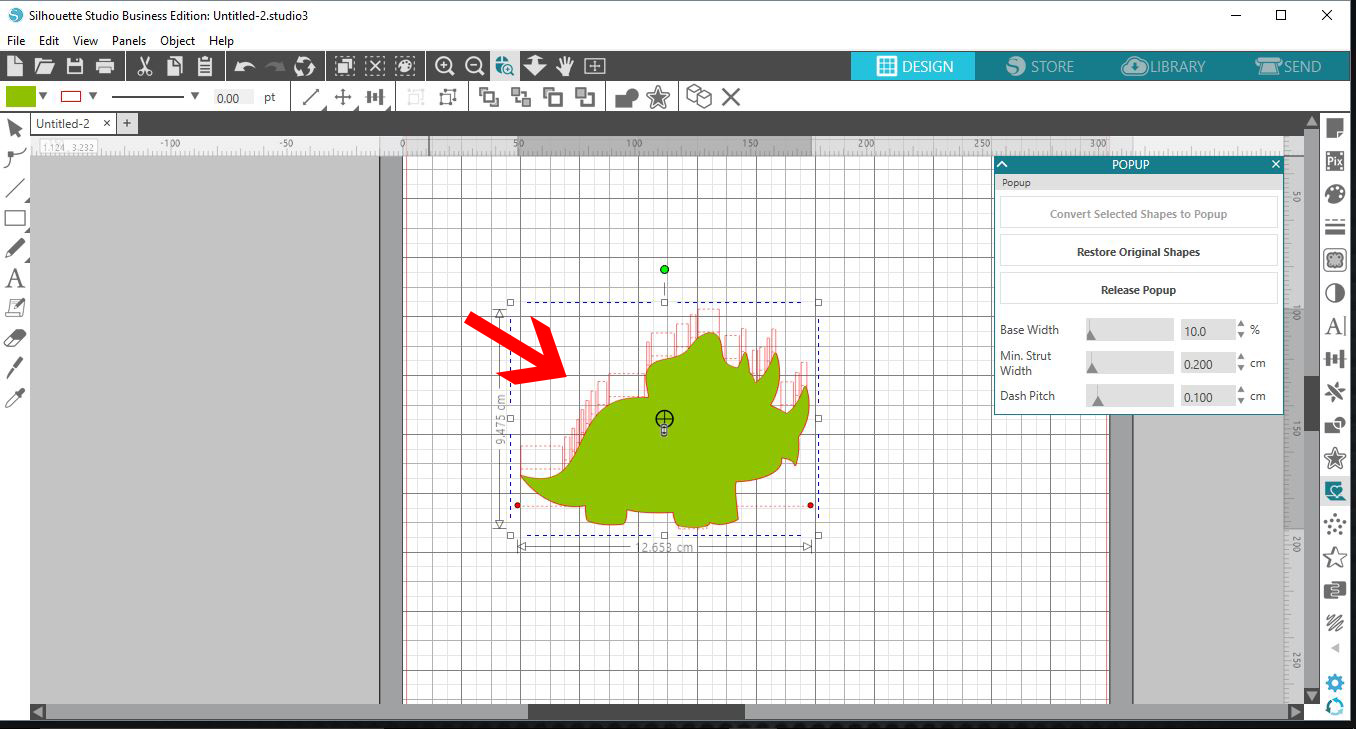
If you look closely the new lines are the cut lines for the pop up card. We now need to add a card base for the program to cut.
Use Draw a Rectangle tool on the left hand side to create a card base shape. Place over the newly made pop up shape.
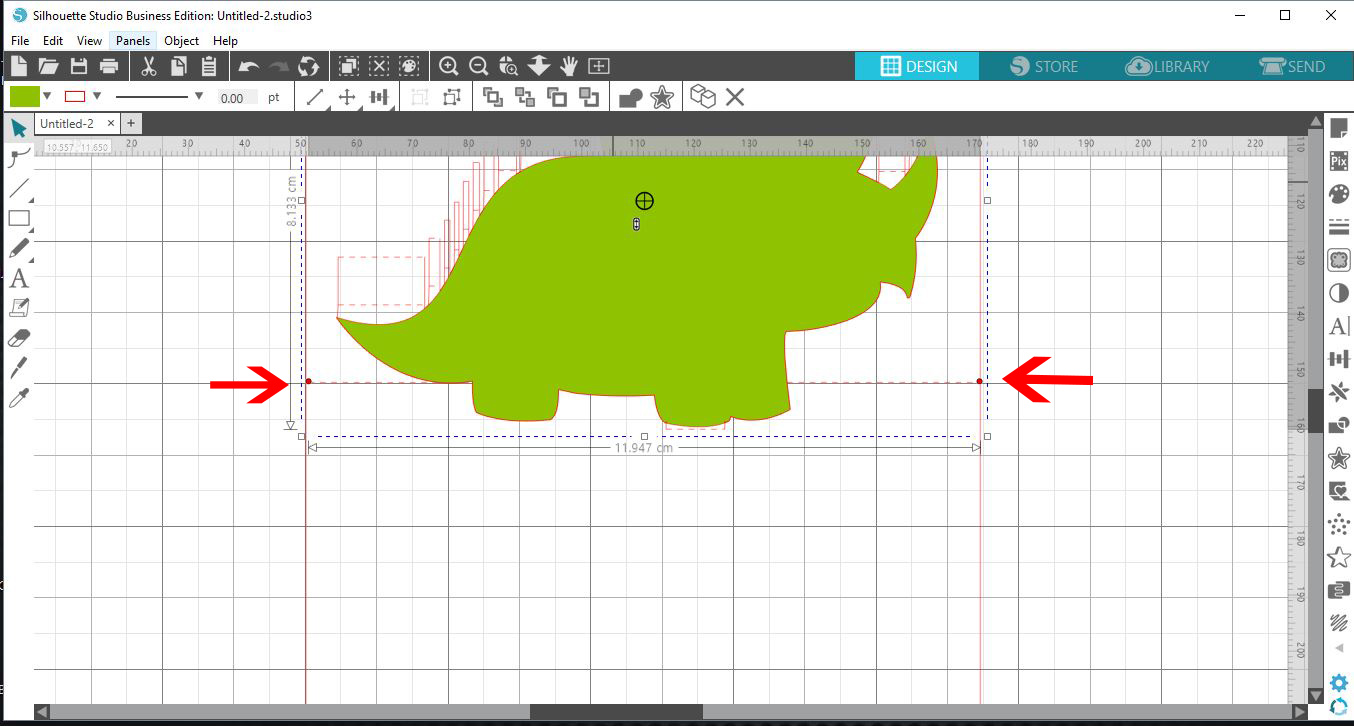
You will find a dashed line with two red dots on either end. This is the fold line for your card. Click on each dot and drag to the edge of the card base you made.
You can adjust how far out the shape pops. Do this by using the grey toggle icon found in the middle of the shape. Dragging down increases the distance while dragging up decreases.
By using the Base Width slider tool (1) you can adjust the width of the base pop up(2).
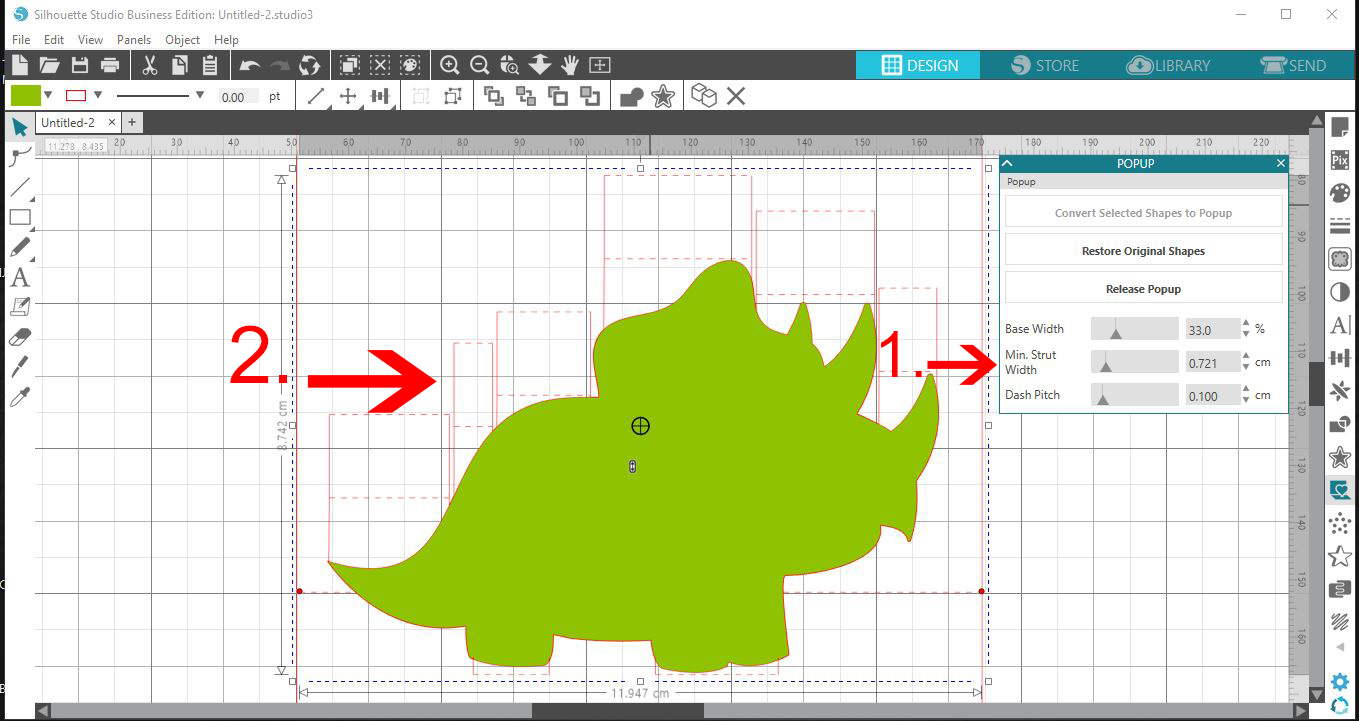
If you adjust the Min. Strut Width(1), you can make the top part of the pop up smaller or wider (2).
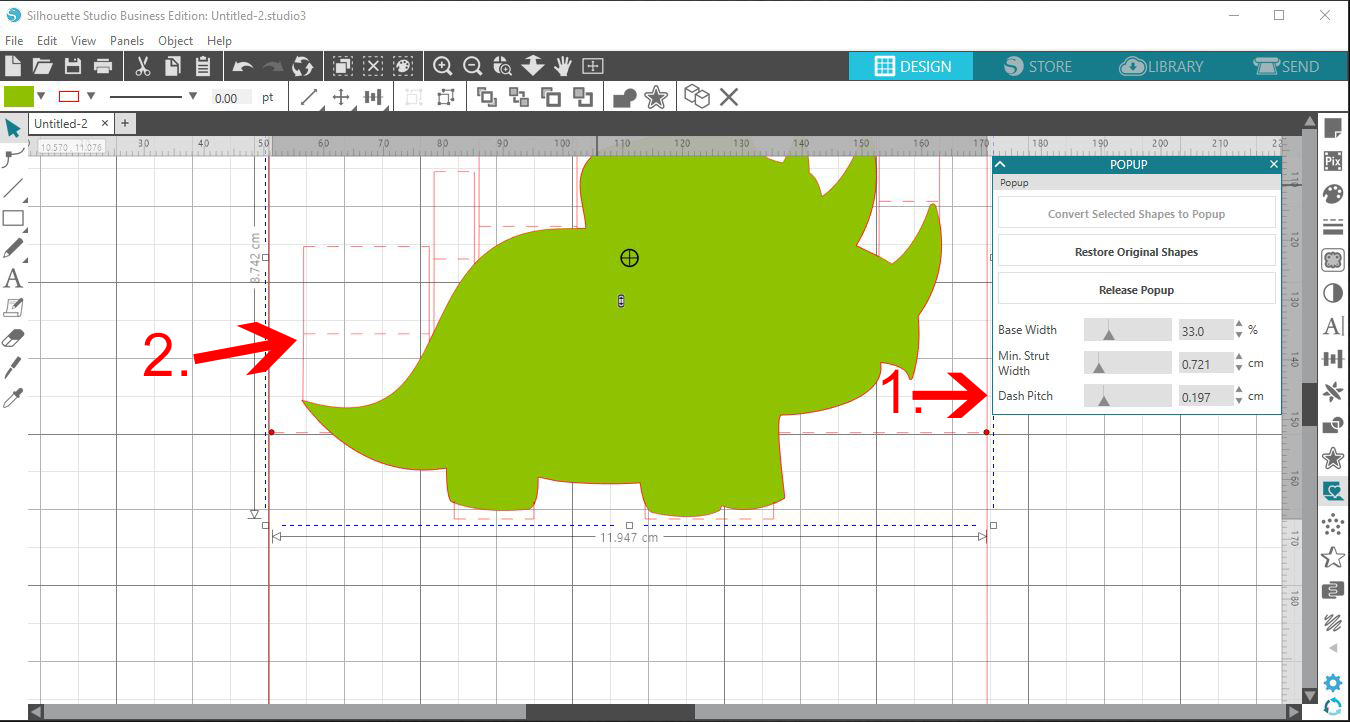
The Dash Pitch(1) will adjust the size of your dash lines where you fold(2).
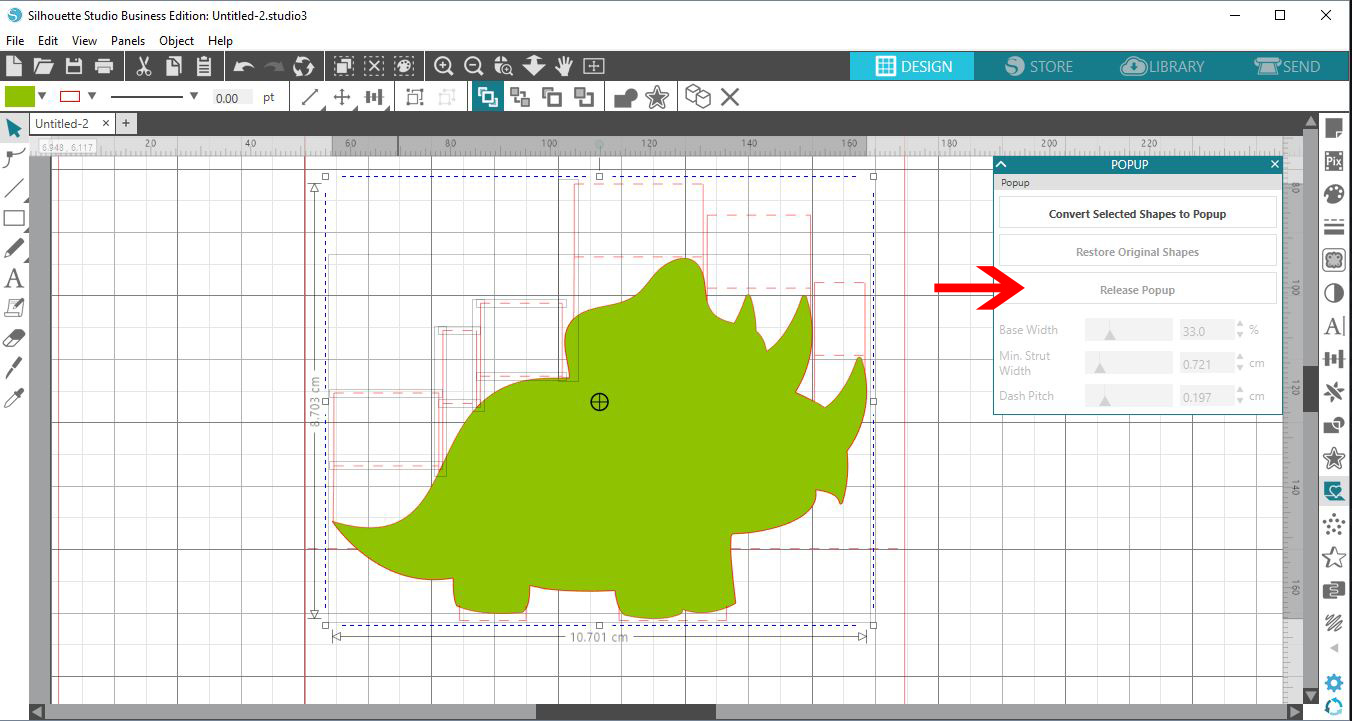
To manually adjust the pop up struts, you can select the Release Pop-up icon. Then you can individually move them to suit your needs.
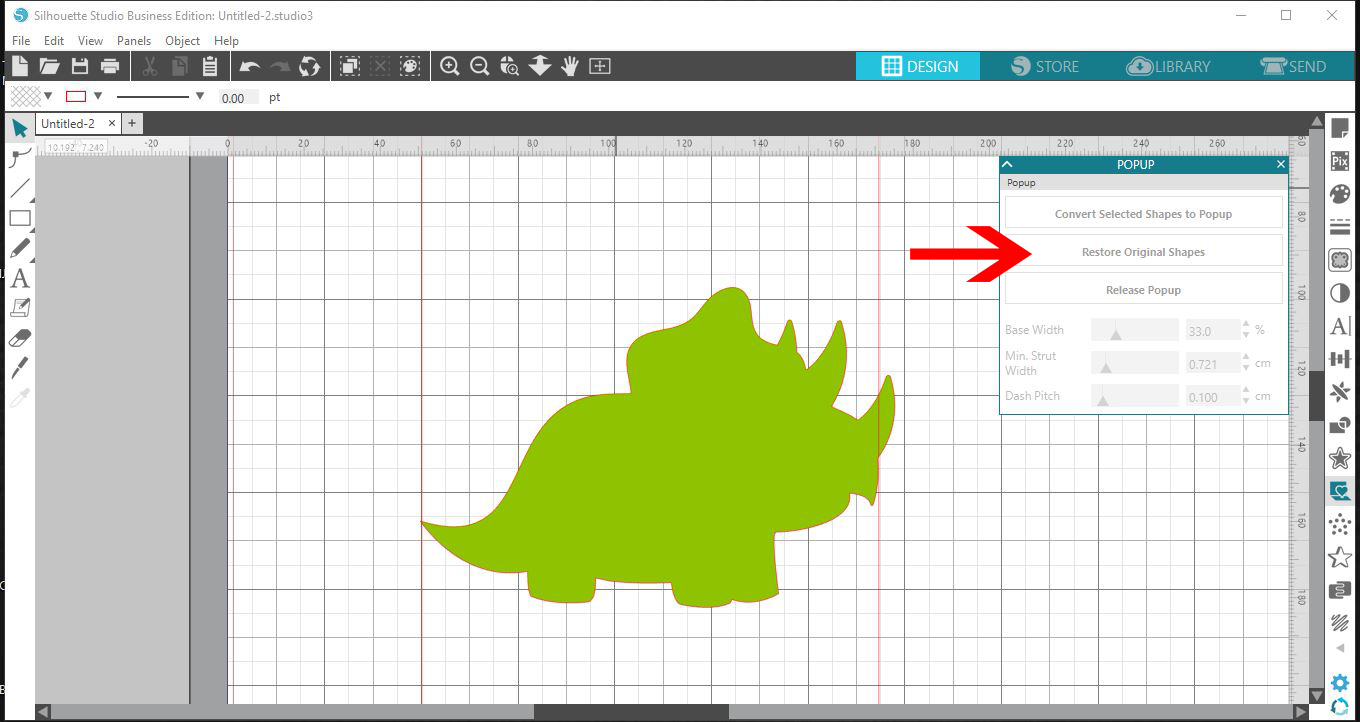
You can easily go back to the original image by clicking Restore Original Shapes. If you are happy with your Pop-up, go to the Send panel. Adjust your settings accordingly and click Send. There you go, you have just created your first Pop-up card.
If you want, we have a fun range of Dinosaur SVG files on Design Bundles for you to browse through.
Step 1 - Locate the Pop-up Creator and import design
The Pop-up creator is where you setup the design as a Pop-up. Once you are in Silhouette Studio, go to the right toolbar. Click on the Pop-up creator that looks like a heart on a folded card.

The following panel with options will appear.
Add the image or text you would like to use as the pop-up design. Do this by going to File>Open. When the shape has been imported, select it and click on Convert selected shapes to Pop up.
The program will start to process the design. When complete, a group of lines will appear.
Step 2 - Create a card base for the Pop-up
If you look closely the new lines are the cut lines for the pop up card. We now need to add a card base for the program to cut.
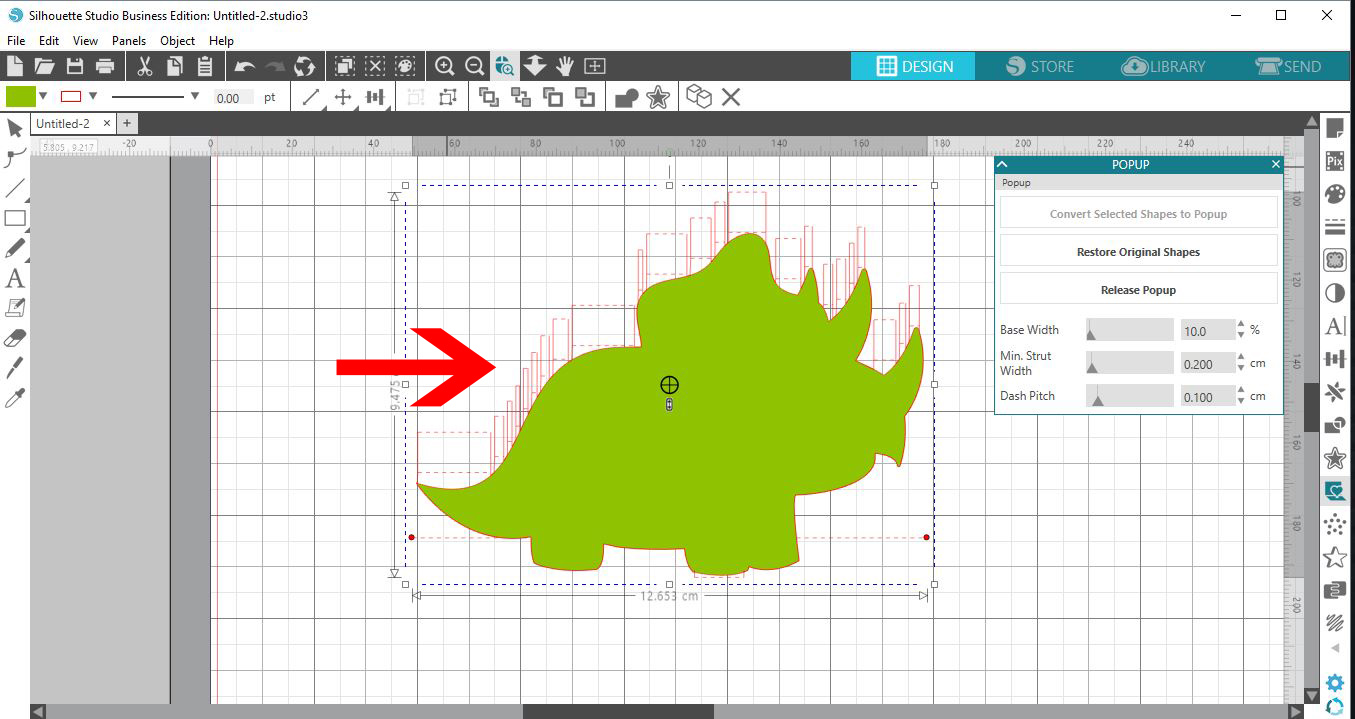
Use Draw a Rectangle tool on the left hand side to create a card base shape. Place over the newly made pop up shape.
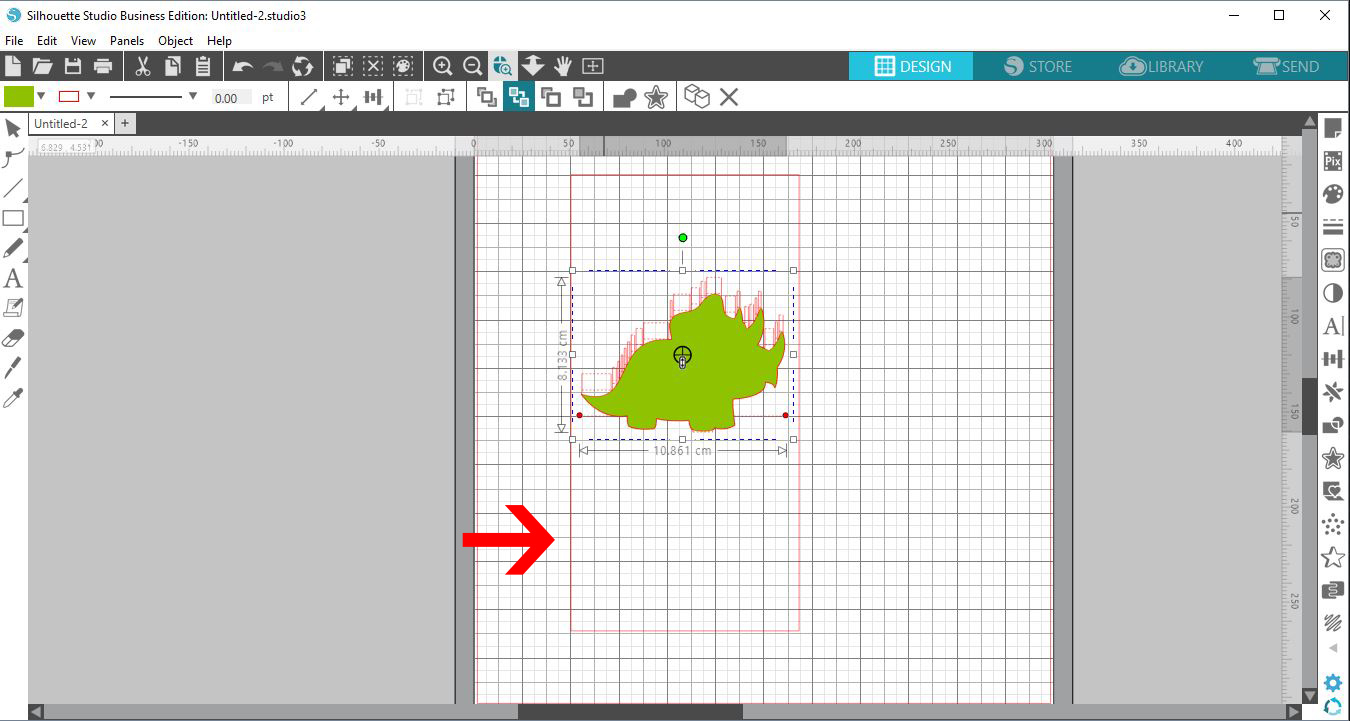
You will find a dashed line with two red dots on either end. This is the fold line for your card. Click on each dot and drag to the edge of the card base you made.
Step 3 - Adjust the Pop-up design
You can adjust how far out the shape pops. Do this by using the grey toggle icon found in the middle of the shape. Dragging down increases the distance while dragging up decreases.
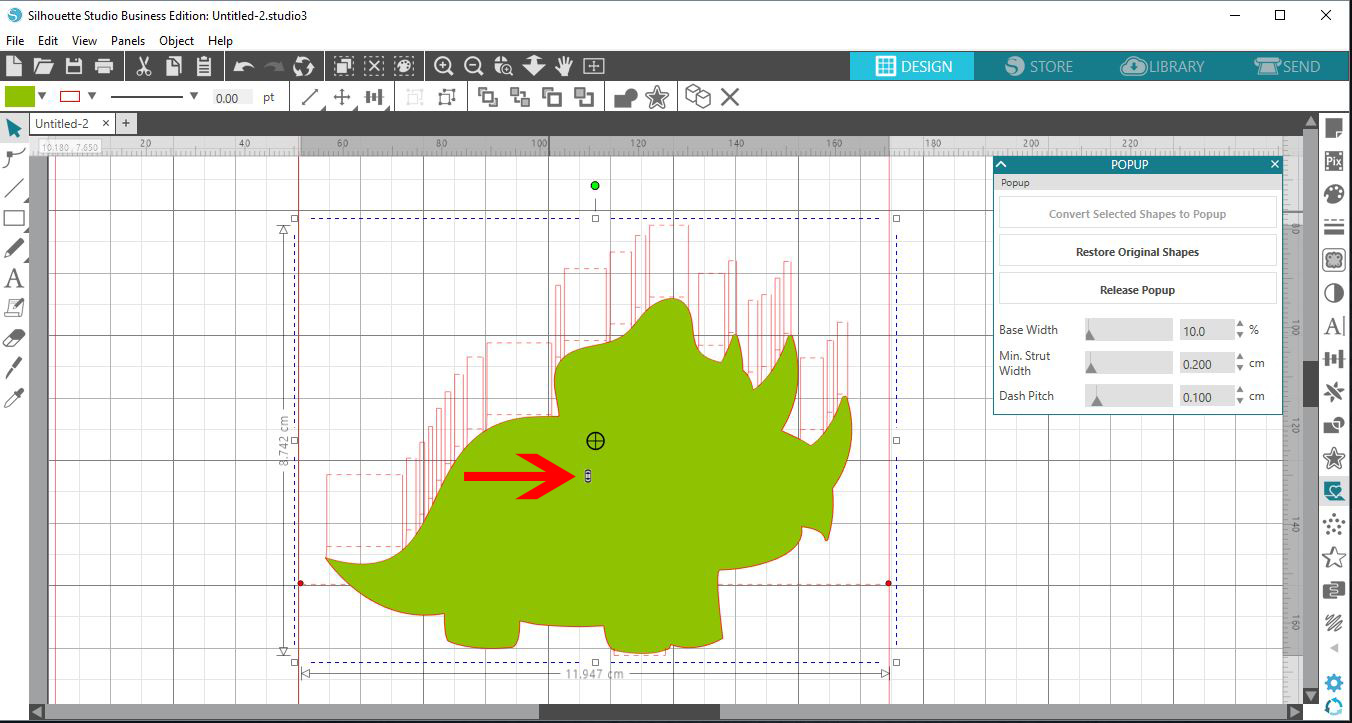
By using the Base Width slider tool (1) you can adjust the width of the base pop up(2).
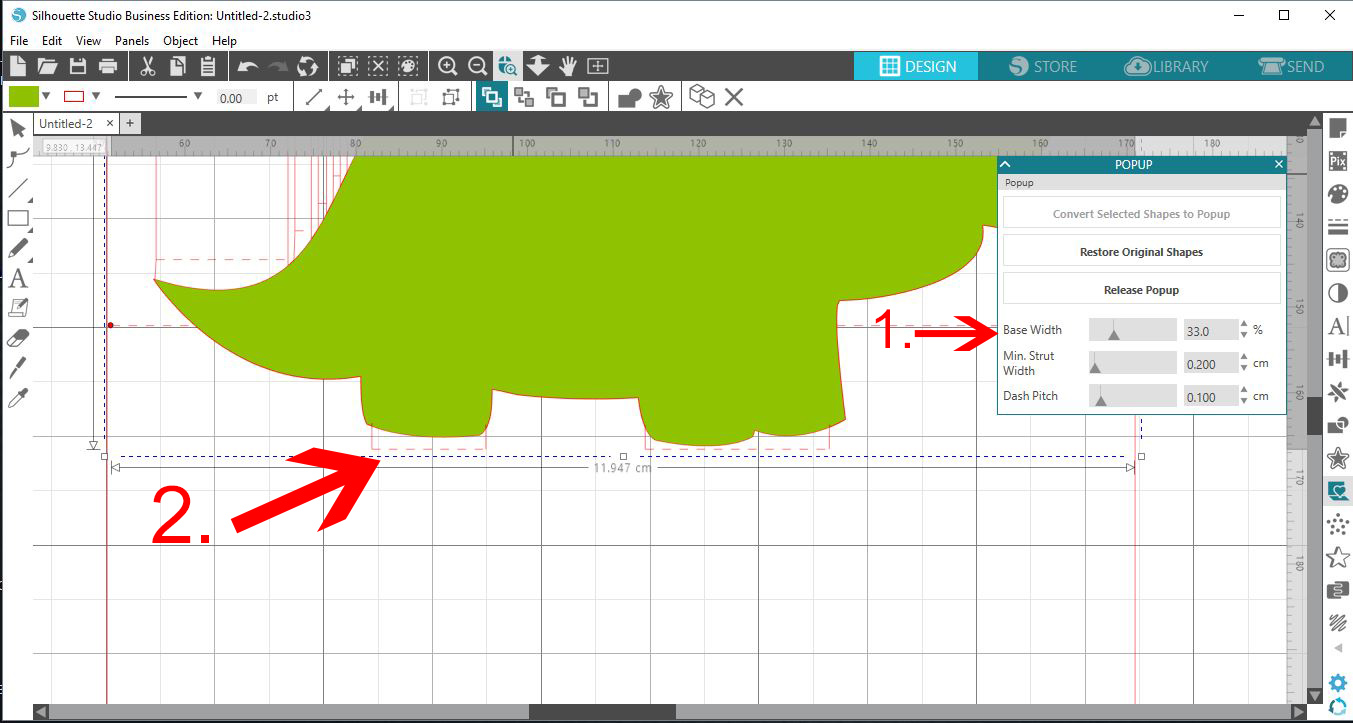
If you adjust the Min. Strut Width(1), you can make the top part of the pop up smaller or wider (2).
The Dash Pitch(1) will adjust the size of your dash lines where you fold(2).
To manually adjust the pop up struts, you can select the Release Pop-up icon. Then you can individually move them to suit your needs.
You can easily go back to the original image by clicking Restore Original Shapes. If you are happy with your Pop-up, go to the Send panel. Adjust your settings accordingly and click Send. There you go, you have just created your first Pop-up card.
If you found this tutorial helpful, be sure to take a look at using the Puzzle Feature and creating a stencil edge card in Silhouette Studio.
Related Tutorials
Scan N Cut Tutorials
How to make a pop up insert for a card in brother scan and cut canvas workspace
Scan N Cut Tutorials
Designing pop up cards in brother scan and cut canvas workspace
Silhouette Tutorials
Using Silhouette Studio V4 Project Wizard and Tutorial Helper
Silhouette Tutorials
How to Activate Your Silhouette Studio Upgrade
In just 2 steps we will show you how to quickly activate your Silhouette Studio upgrade.
Cricut Tutorials
Create a Silhouette Text Card in Cricut Design Space 3
Silhouette Tutorials
Using the Font Creator in Silhouette Studio
Discover how to use the Font Creator in Silhouette Studio to make your own fonts!