


By Design Bundles
Scan N Cut Tutorials3 min
Welding words and frames in brother scan and cut canvas workspace
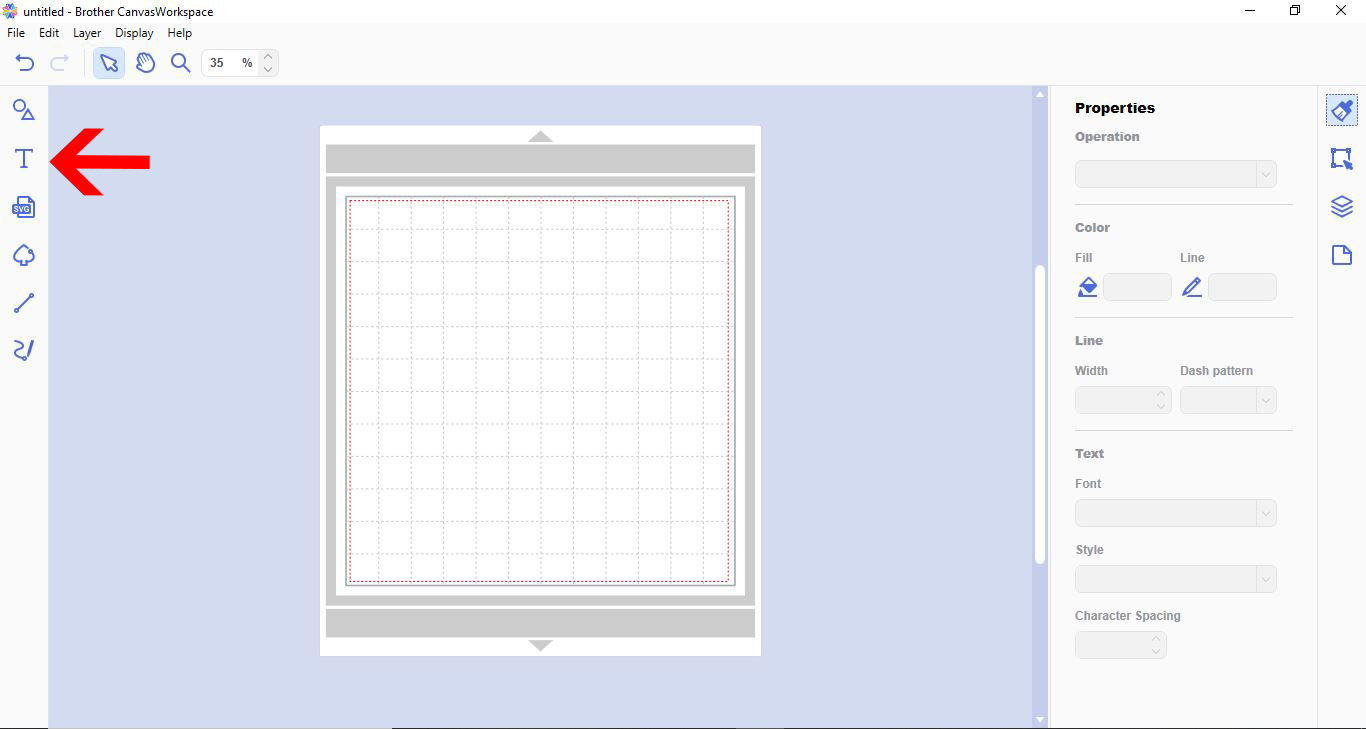
1- Open scan and cut canvas workspace. Click on the text icon.
2- Click on the font drop down box. And select your font. I am using Bobbie script from Font Bundles.
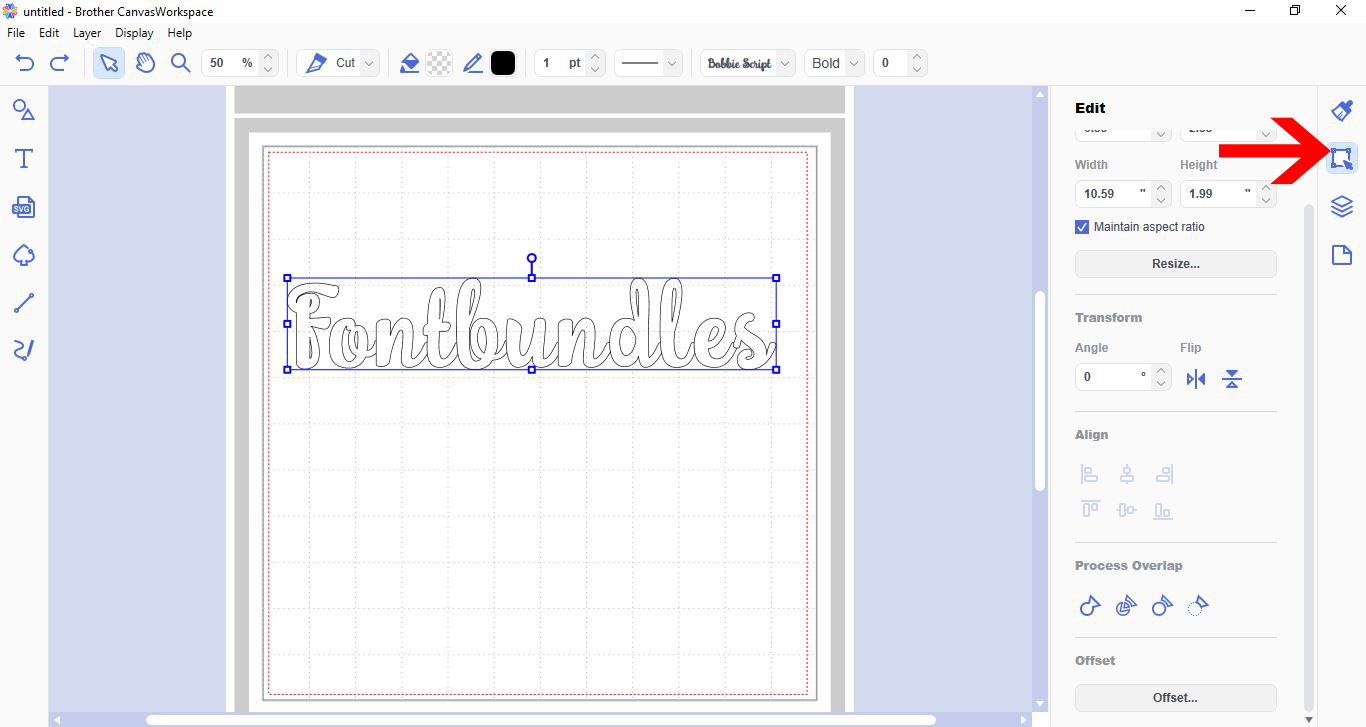
3- Make sure that all your letters are touching. Click on the edit icon.
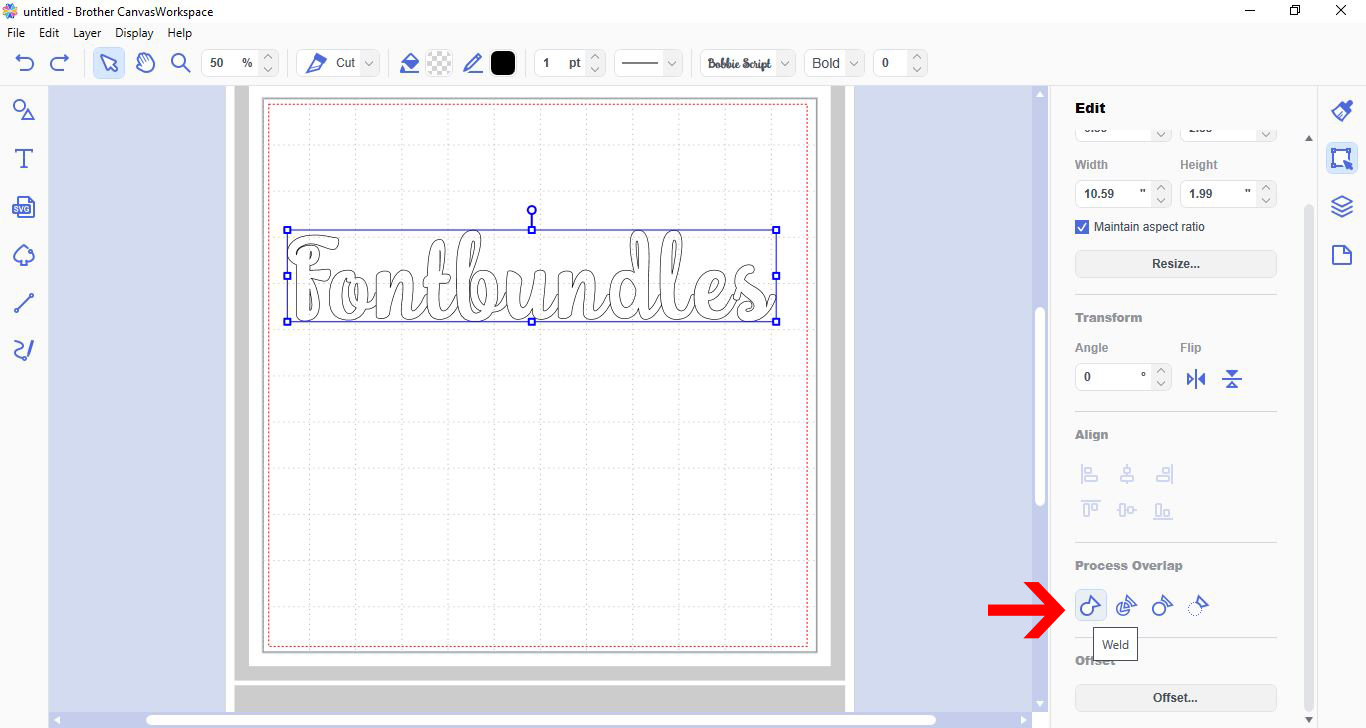
4- Click on the weld icon in the process overlap option.
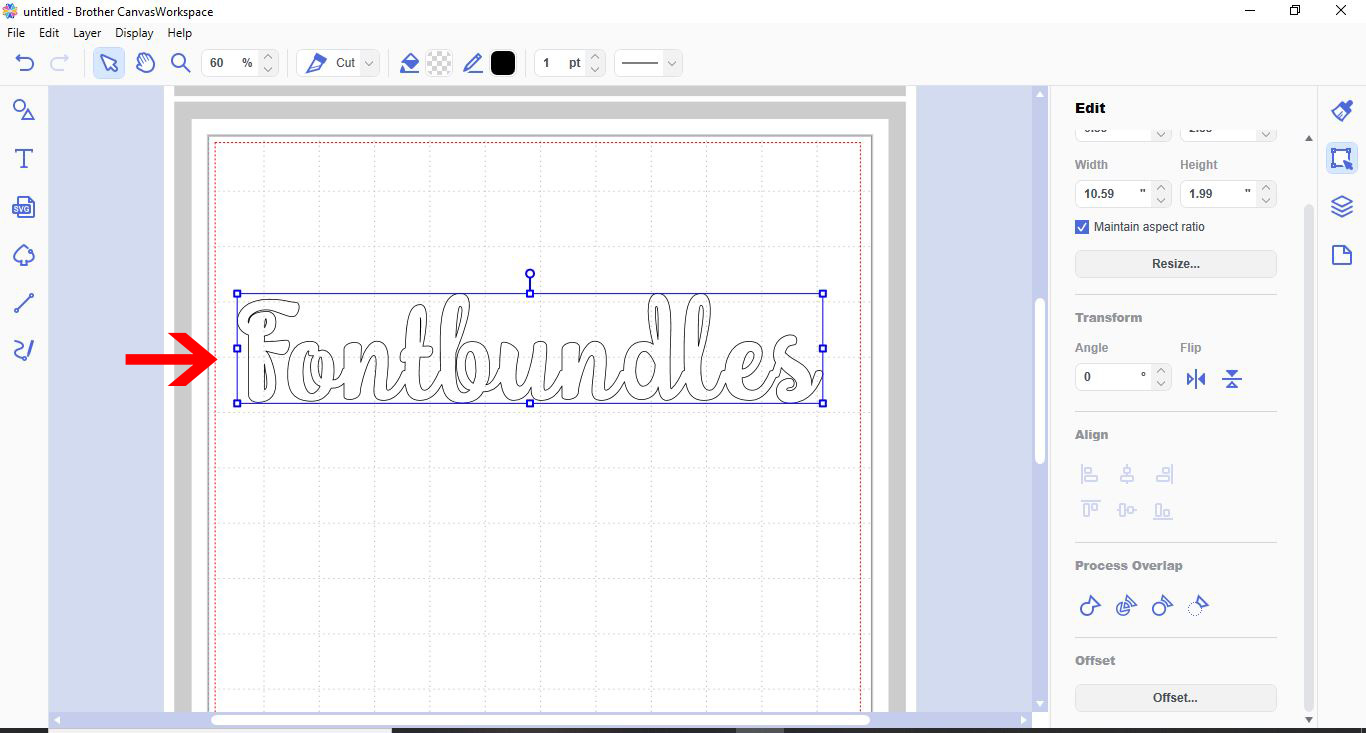
5- Your text will now be welded.
6- To weld your text into a frame, we need to create the frame. Click on the shape tool.
7- Select your shape.
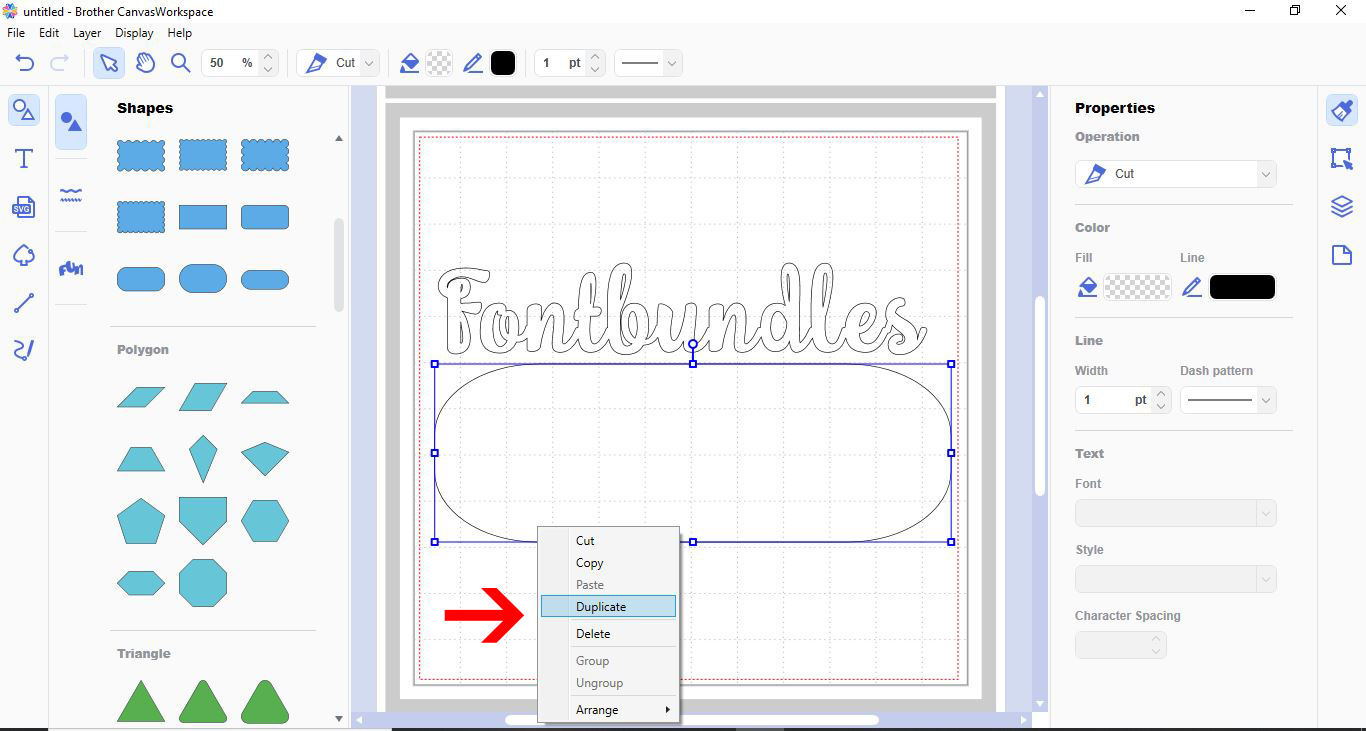
8- With the shape selected, right click and duplicate the shape.
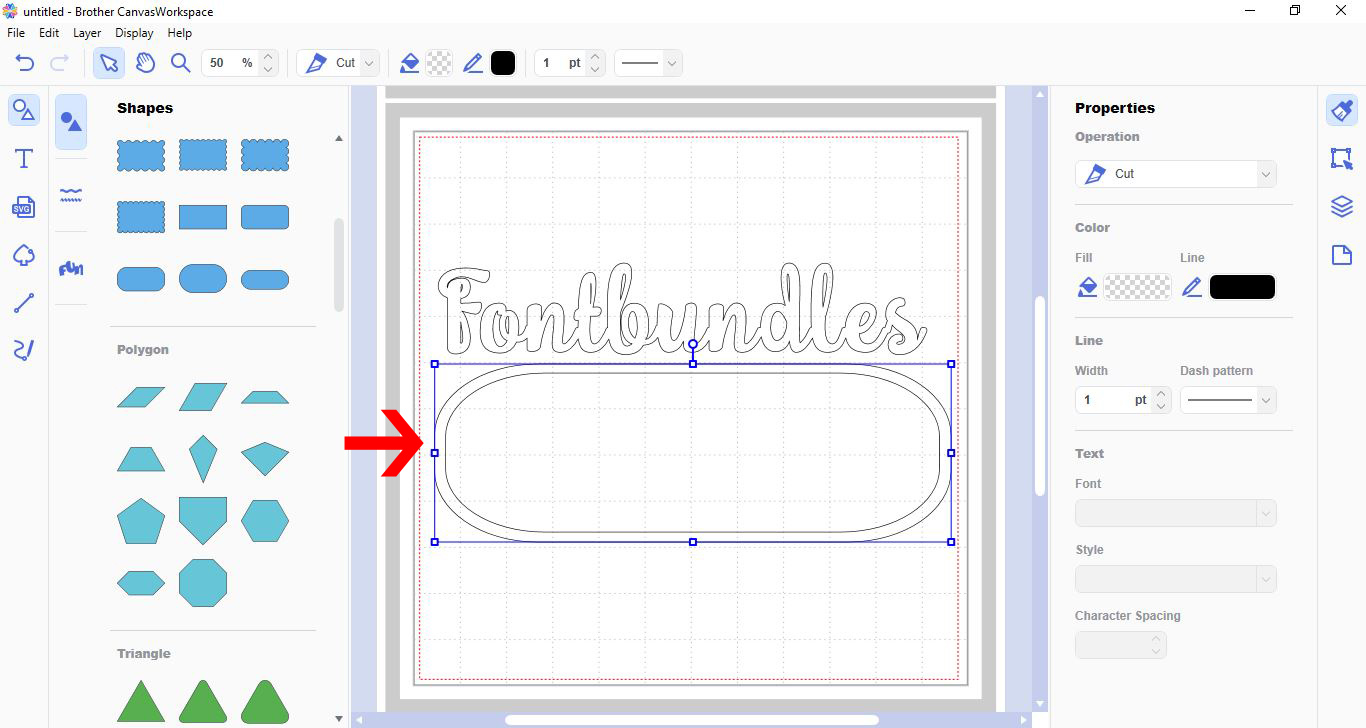
9- Make the duplicate shape slightly smaller inside the original shape to create a frame.
10- with both selected, go to the edit panel, then click on the subtract process overlap. This will make your frame.
11- Place the text inside your frame. Make sure that the ends of the text are overlapping your frame.
Click on weld.
12- Your text will be welded onto your frame to create a single design ready to be cut.
2- Click on the font drop down box. And select your font. I am using Bobbie script from Font Bundles.

3- Make sure that all your letters are touching. Click on the edit icon.
4- Click on the weld icon in the process overlap option.
5- Your text will now be welded.
6- To weld your text into a frame, we need to create the frame. Click on the shape tool.
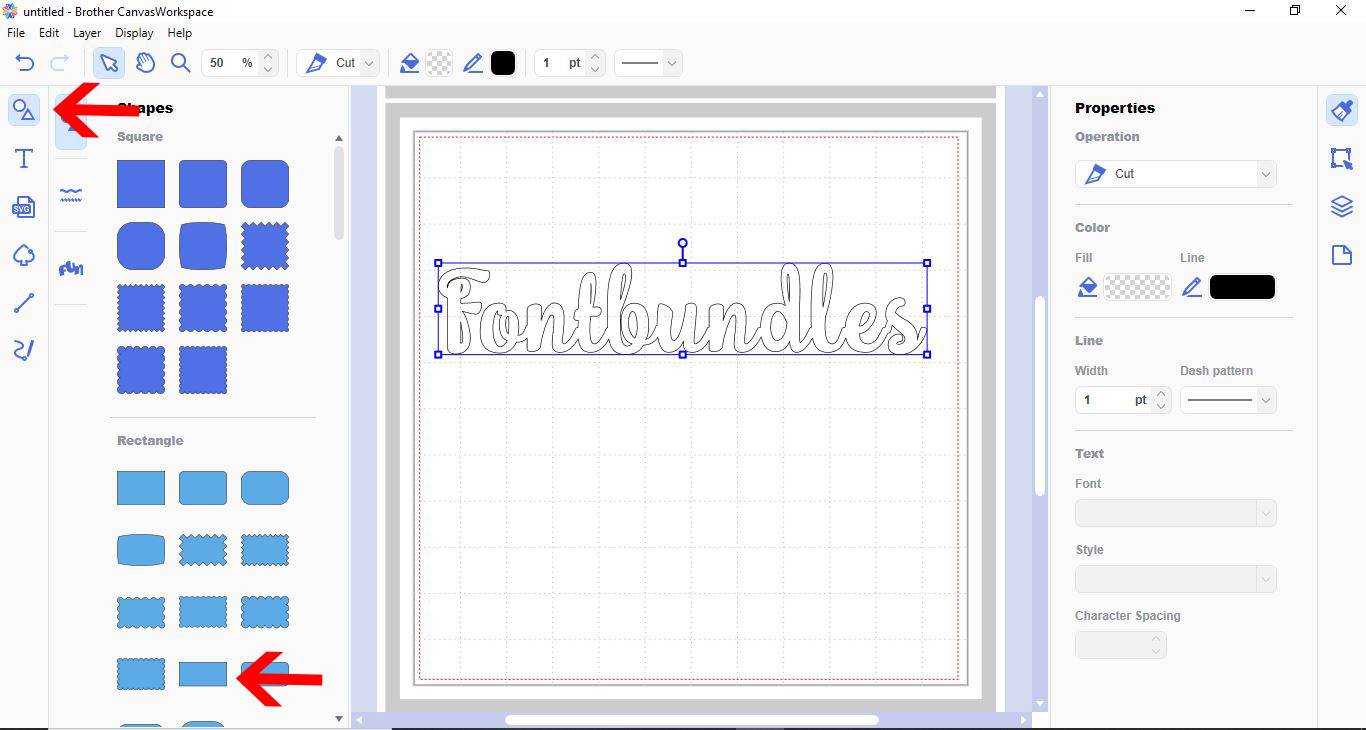
7- Select your shape.
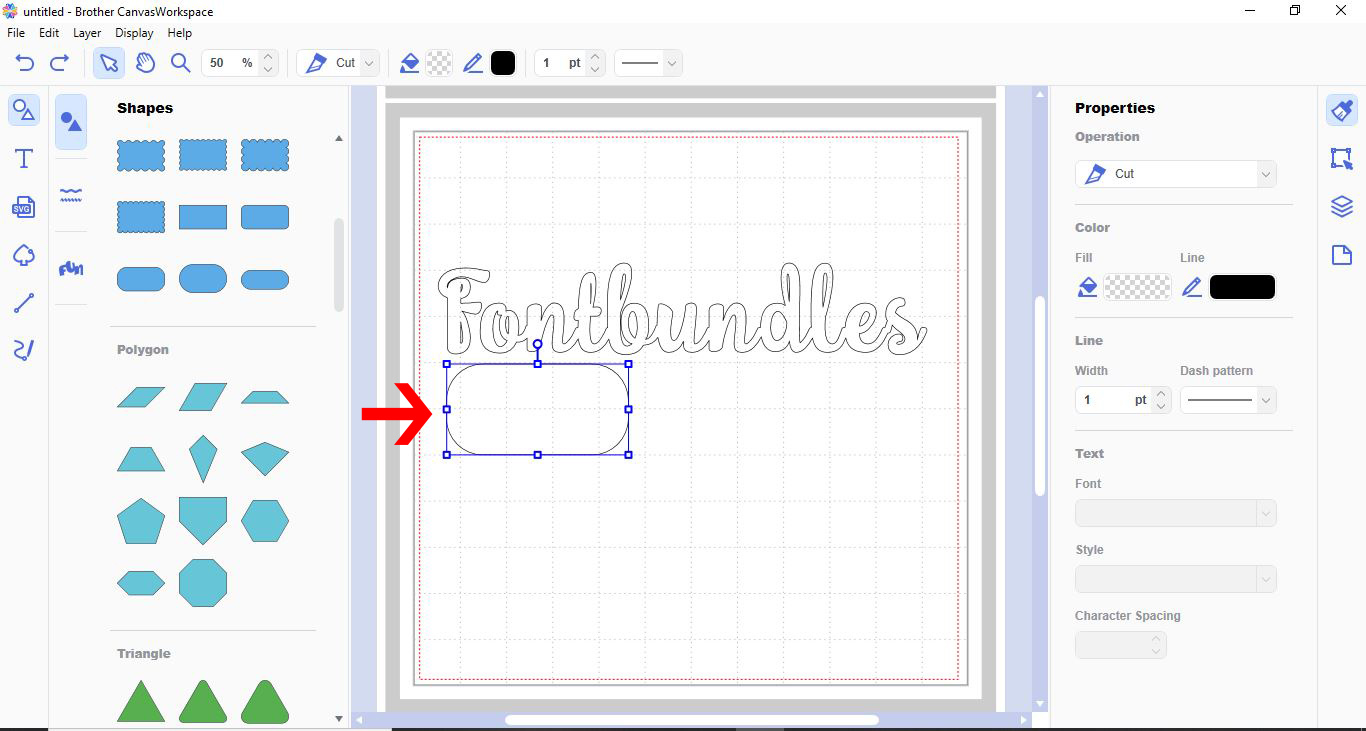
8- With the shape selected, right click and duplicate the shape.
9- Make the duplicate shape slightly smaller inside the original shape to create a frame.
10- with both selected, go to the edit panel, then click on the subtract process overlap. This will make your frame.
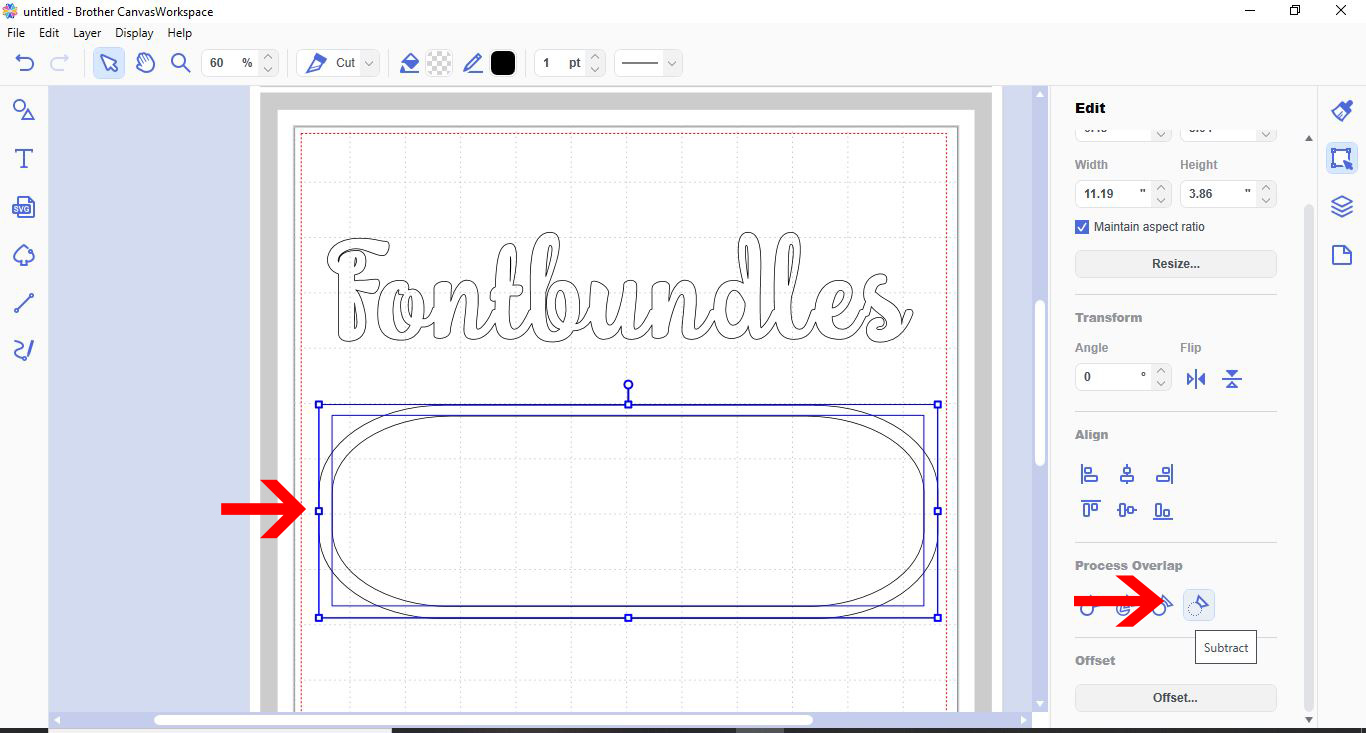
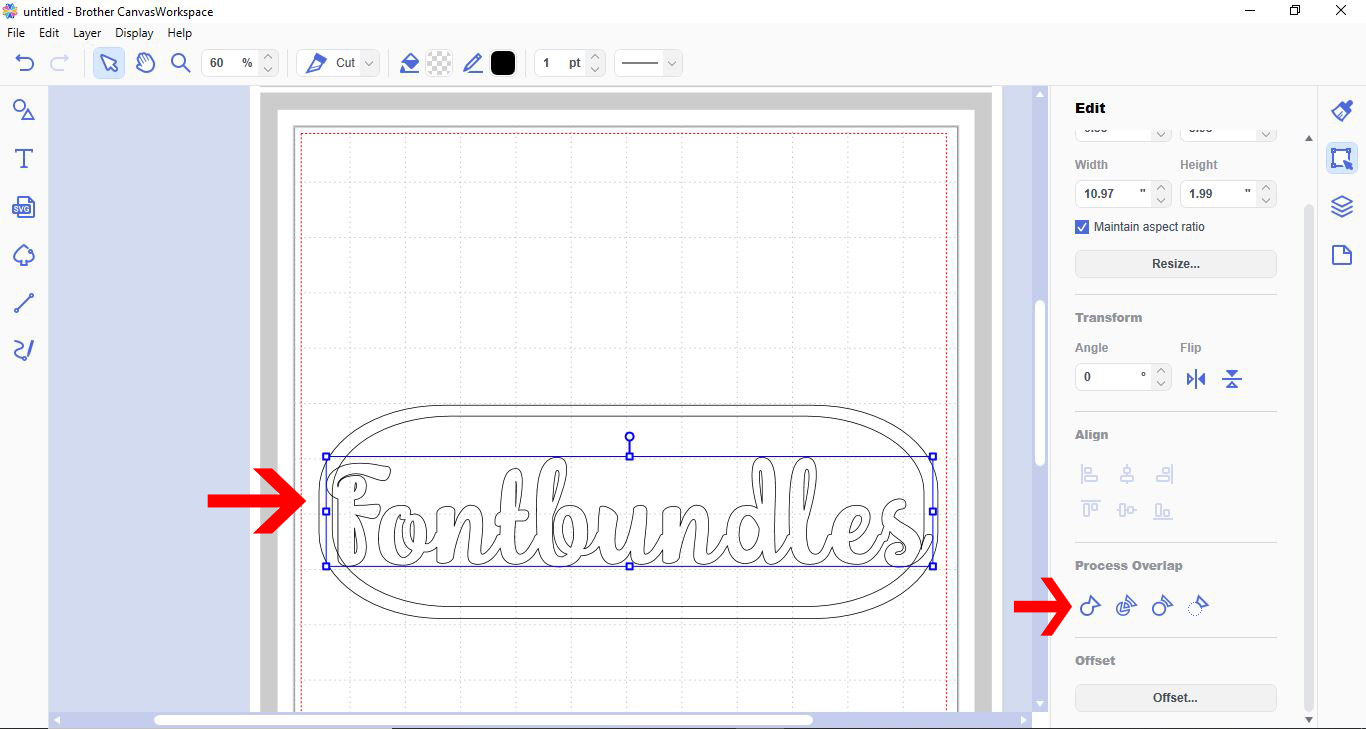
11- Place the text inside your frame. Make sure that the ends of the text are overlapping your frame.
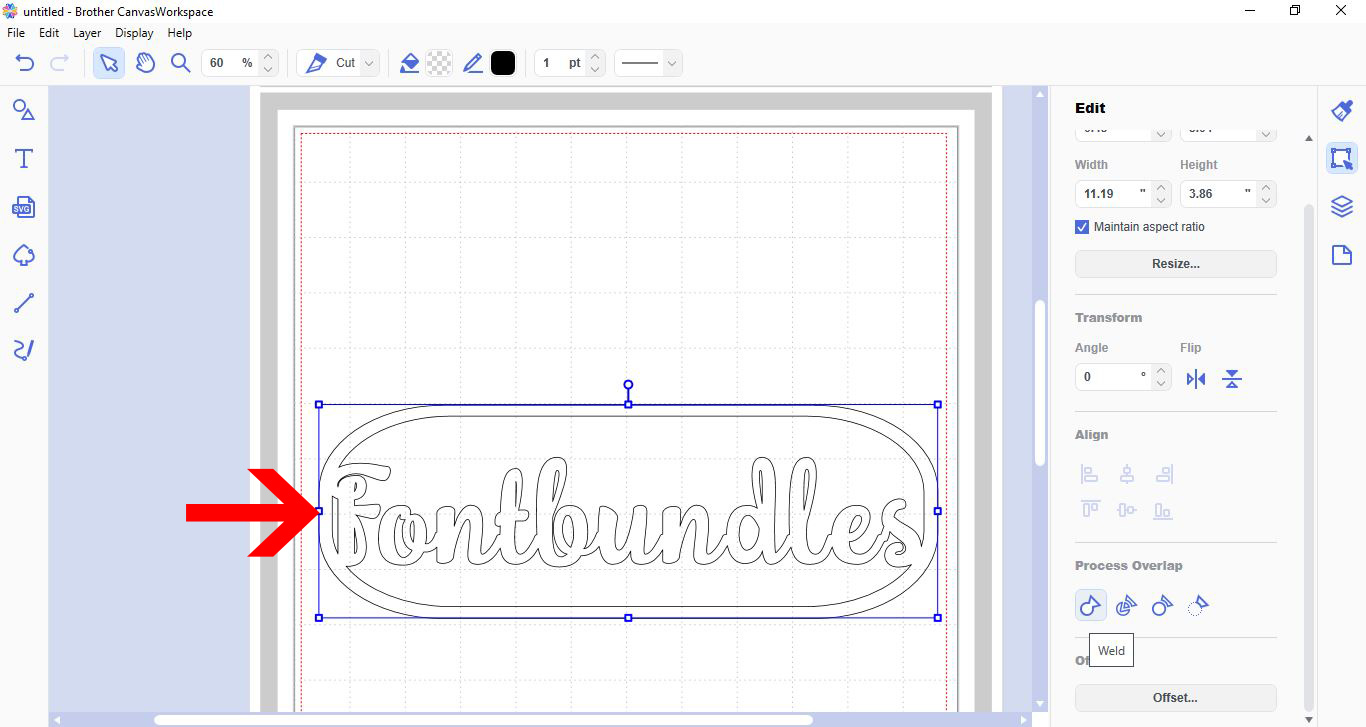
Click on weld.
12- Your text will be welded onto your frame to create a single design ready to be cut.
Related Tutorials
Scan N Cut Tutorials
Creating frames in brother scan and cut canvas workspace
Scan N Cut Tutorials
How to create curved text in brother scan and cut canvas workspace
Learn how to curve text in Brother Scan N Cut
Scan N Cut Tutorials
How to make a image larger than your cutting mat in Brother Scan N Cut canvas workspace
Learn how to cut designs larger than your cutting mat in Brother Scan N Cut canvas.
Scan N Cut Tutorials
Converting SVG to FCM cutting fine in Brother scan and cut canvas workspace
Scan N Cut Tutorials


